
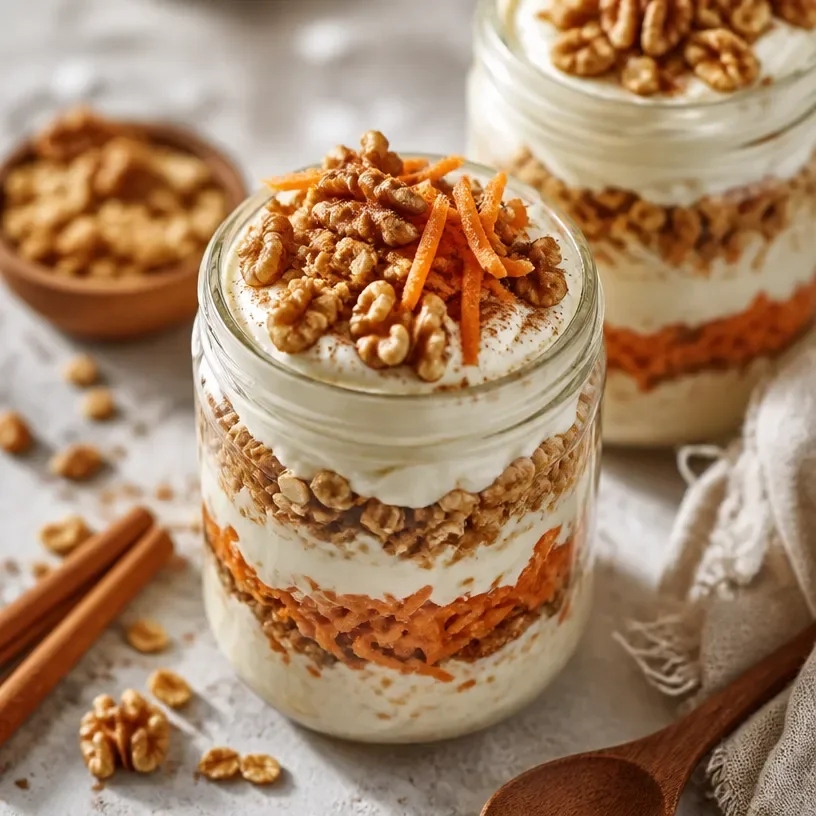
Ingredient Protein Carrot Cake Jars for Meal Prep
Protein Carrot Cake Jar: A Cozy Treat to Satisfy Your Sweet Tooth
Welcome to my kitchen, friends! Today, I’m super excited to share with you a recipe that brings together the nostalgia of my favorite childhood dessert and the modern twist of health-conscious cooking: the Protein Carrot Cake Jar! If you’re like me and can’t resist the delightful scent of warm spices mingling with freshly grated carrots, then you’ll want to stick around. This recipe not only satisfies your sweet tooth but also packs a protein punch in a cute little jar that’s perfect for on-the-go snacking or a cozy dessert at home.
As a home cook who finds joy in every whisk and fold, I understand that life can often get busy, making it hard to whip up those old favorites. That’s why I adore this carrot cake jar; it embraces all the flavor and comforting vibes of traditional carrot cake while being super approachable. Plus, layering it in a jar makes it feel special and a bit fancy, don’t you think? So grab your apron (and maybe some extra spoons) as we dive into this delicious world of Protein Carrot Cake!
A Sweet Slice of Memory
Growing up, my grandmother had a unique talent for making carrot cake. I still remember the way our kitchen filled with the warm scent of cinnamon and nutmeg every time she whipped up a batch. She would bake a four-layer masterpiece, slathered with her infamous cream cheese frosting that was more like dessert in itself. It was a family gathering staple, and of course, the memories of stealing bites of the batter when my back was turned will forever hold a special place in my heart.
I’d often sneak into the kitchen while it was still cooling, eager to snag a piece from the edge of the pan. Those moments of joy, laughter, and sweet indulgence fuel my passion for cooking today. While I’ll always cherish my grandma’s classic carrot cake recipe, my adult self craves a healthier version that satisfies my sweet tooth without the sugar crash. Enter, the Protein Carrot Cake Jar! It’s a scrumptious, simple, and guilt-free way to enjoy this timeless treat and create new memories in the kitchen.
Ingredients
Let’s gather our ingredients! You’ll need:
-
Carrots
Freshly grated carrots provide sweetness and moisture. If you’re short on time, store-bought pre-grated carrots work just as well! -
Protein Powder
For a boost of nutrition. Whey, plant-based, or any kind you prefer will do. Just be mindful that flavored varieties (like vanilla or chocolate) will change the taste of your jar. -
Rolled Oats
They add texture and a wholesome quality. You can swap them for gluten-free oats if needed. -
Greek Yogurt
This ingredient adds creaminess and protein. If you’re vegan, try a non-dairy yogurt alternative. -
Egg
Acts as a binder and adds fluffiness. For an egg-free option, you can use a flax egg (1 tablespoon of flaxseed meal mixed with 2.5 tablespoons of water). -
Maple Syrup or Honey
To sweeten things up. You can use agave syrup for a vegan option. -
Cinnamon
A must for that warm, cozy flavor! You can replace it with pumpkin spice for a twist. -
Nutmeg
Just a pinch enhances the overall flavor. You could swap it out for ginger if you prefer a spicier profile. -
Baking Powder
To help our cake rise! Ensure it’s fresh for the best results. -
Walnuts or Pecans
For a delightful crunch! Feel free to omit them if you’re nut-free. -
Raisins or Dried Cranberries
These add sweetness and chewiness. They’re optional, but they elevate the flavor nicely.
Step-by-Step Instructions
Now, let’s get to the fun part—making our Protein Carrot Cake Jar! Follow these steps, and I promise you’ll be in flavor town in no time.
-
Preheat Your Oven
Preheat your oven to 350°F (175°C). This is crucial because it ensures the cake cooks evenly. While the oven heats up, you can prepare your ingredients! -
Grease the Jars
If you’re using glass jars, lightly grease them with cooking spray or a bit of coconut oil. This prevents the cake from sticking and makes clean-up a breeze. -
Mix Dry Ingredients
In a large mixing bowl, combine the rolled oats, protein powder, cinnamon, nutmeg, and baking powder. Stir them carefully to ensure an even distribution of the spices. Pro tip: mixing dry ingredients first helps distribute the leavening agents evenly, resulting in a fluffier cake. -
Add Wet Ingredients
Create a well in the center of your dry mixture and add in the grated carrots, Greek yogurt, egg (or flax egg), and maple syrup or honey. Fold everything together gently until well combined. If the mixture feels too dry, add a splash of milk or water to loosen it up. -
Incorporate Nuts and Dried Fruit
If you’re using walnuts or raisins, fold them into the mixture now. This step is purely optional, but it adds that lovely crunch and sweetness. Feel free to play with your flavors; chopped apples or coconut can also be delightful additions! -
Layer in Jars
Now comes the fun part! Spoon the mixture into your prepared jars, filling them about two-thirds full to allow space for rising. A handy chef hack: use an ice cream scoop to keep the portions neat and uniform. -
Bake
Place the jars in the oven and bake for 20-25 minutes, or until they’re golden brown and a toothpick inserted in the center comes out clean. Keep an eye on them as the baking time may vary depending on your jar size. -
Cool and Serve
Once out of the oven, let your jars cool for at least 10 minutes. This is where the flavors meld beautifully! If you can wait, let them cool completely. Then, top with a dollop of Greek yogurt or cream cheese frosting (if you’re feeling indulgent).
Serving Suggestions
To serve, simply place a jar on a plate with a sprinkle of cinnamon on top and a drizzle of maple syrup. For those more vibrant moments, add fresh berries or a mint leaf for color. They’re perfect for breakfast, an afternoon snack, or even dessert after dinner!
Recipe Variations
Feel like mixing it up? Here are some creative twists to personalize your Protein Carrot Cake Jar:
- Zucchini Carrot Cake: Substitute half of the carrots with grated zucchini for extra moisture.
- Tropical Twist: Add crushed pineapple and shredded coconut for a sunny flavor profile.
- Spicy Chai: Swap out the cinnamon and nutmeg for chai spices for an exotic kick.
- Chocolate Carrot Cake: Mix in cocoa powder for a chocolatey treat, and top with chocolate chips.
Chef’s Notes
Remember, cooking is a journey! I love how this recipe has evolved over the years. Initially, I crafted it for a post-workout snack, but it quickly became a favorite at family gatherings. I have shared these jars with friends during picnics, brunches, and cozy winter evenings—each time I see my loved ones enjoy them brings such joy!
Don’t be afraid to get creative! On days when I’m feeling wild, I toss in some fresh ginger or even a splash of vanilla extract, and let me tell you, it elevates the taste to a whole new level. Cooking is all about experimenting, so have fun with it!
FAQs and Troubleshooting
1. Why did my jars overflow?
Sometimes the combination of ingredients can create more rise than anticipated. Make sure not to fill your jars more than two-thirds full to allow for expansion.
2. Can I use other nuts?
Absolutely! Feel free to substitute with almonds, hazelnuts, or leave them out completely to cater to your tastes or dietary requirements.
3. The cake seems dense; what happened?
Avoid over-mixing the batter! Too much mixing can lead to dense cakes. Also, ensure your baking powder is fresh and your carrots are finely grated.
4. Can I freeze these jars?
Yes! They freeze beautifully. Just let them cool completely, seal them airtight, and pop them in the freezer. When you’re ready to enjoy, thaw overnight in the fridge and reheat before serving.
Nutritional Info
While I won’t overwhelm you with numbers, each Protein Carrot Cake Jar generally contains a hearty serving of protein alongside vitamins A and C from those gorgeous carrots, fiber from the oats, and healthy fats if you’re adding nuts! It’s a wonderful balance of indulgence and nourishment.
And there you have it—a hearty, delightful journey that ends with a Protein Carrot Cake Jar that puts a smile on your face and warmth in your heart. I can’t wait for you to try this recipe and start creating your own cozy kitchen memories! Happy cooking!
Print
Protein Carrot Cake Jar
- Total Time: 40 minutes
- Yield: 4 servings 1x
- Diet: Vegetarian
Description
A cozy treat that combines the nostalgia of carrot cake with a healthy twist, perfect for on-the-go snacking or a delightful dessert.
Ingredients
- 2 cups freshly grated carrots
- 1 scoop protein powder
- 1 cup rolled oats
- 1 cup Greek yogurt
- 1 egg (or 1 flax egg)
- 1/2 cup maple syrup or honey
- 1 tsp cinnamon
- 1/2 tsp nutmeg
- 1 tsp baking powder
- 1/2 cup walnuts or pecans (optional)
- 1/2 cup raisins or dried cranberries (optional)
Instructions
- Preheat your oven to 350°F (175°C).
- Grease the jars with cooking spray or coconut oil.
- Mix dry ingredients: rolled oats, protein powder, cinnamon, nutmeg, and baking powder in a bowl.
- Add the grated carrots, Greek yogurt, egg (or flax egg), and maple syrup or honey.
- Incorporate nuts and dried fruit if using, and fold gently to combine.
- Layer the mixture into prepared jars, filling them two-thirds full.
- Bake for 20-25 minutes or until golden brown and a toothpick comes out clean.
- Cool for at least 10 minutes before serving.
Notes
Feel free to customize with different nuts or add shredded coconut for a tropical twist.
- Prep Time: 15 minutes
- Cook Time: 25 minutes
- Category: Dessert
- Method: Baking
- Cuisine: American
Nutrition
- Serving Size: 1 jar
- Calories: 350
- Sugar: 15g
- Sodium: 150mg
- Fat: 12g
- Saturated Fat: 3g
- Unsaturated Fat: 9g
- Trans Fat: 0g
- Carbohydrates: 45g
- Fiber: 6g
- Protein: 15g
- Cholesterol: 30mg
Keywords: carrot cake, healthy dessert, protein snacks, easy recipe
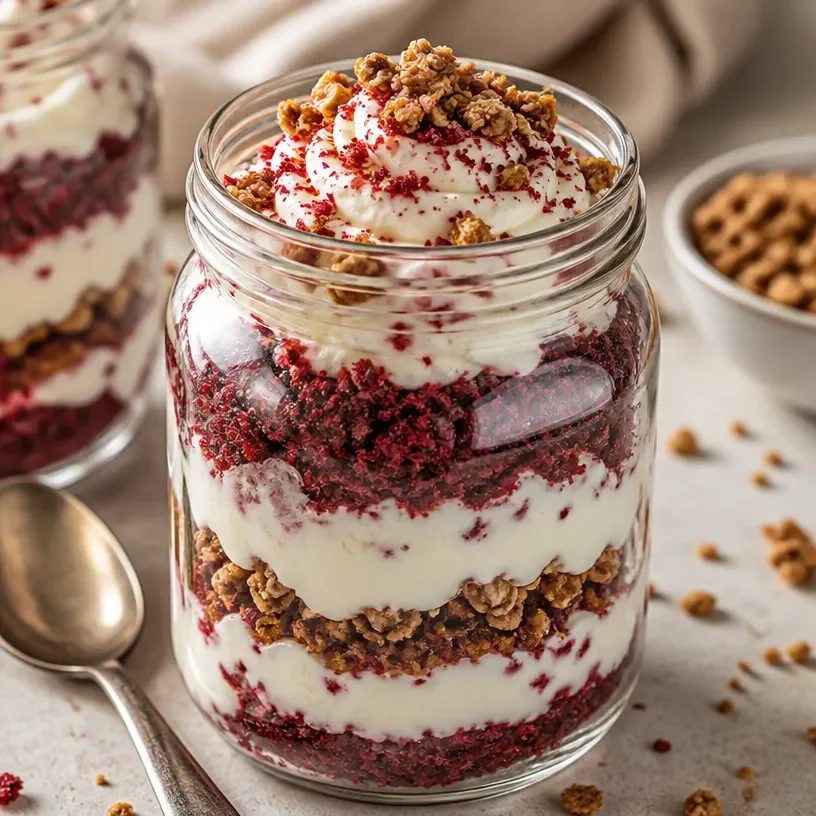
Minute Protein Red Velvet Jar for Meal Prep (No-Bake)
Protein Red Velvet Jar: A Deliciously Healthy Twist on a Classic Dessert
Welcome to my cozy kitchen, food lovers! Today, we’re diving into a delightful dessert that satisfies both your sweet tooth and your nutritional needs: the Protein Red Velvet Jar. Yes, you heard that right—this recipe takes the classic red velvet cake, infuses it with a protein boost, and transforms it into an adorable, portable jar treat that’s perfect for meal prep or a sweet pick-me-up.
Now, if you’re anything like me, you have those moments where a slice of cake calls your name, but then you remember your health goals. Cue the internal tug-of-war! That’s where this fabulous recipe comes in. Not only is it bursting with that rich, tangy flavor you love from red velvet, but it’s also packed with protein to keep you fueled throughout your day. Let’s embark on this culinary adventure together; I promise it’s going to be delicious!
A Sweet Memory
Ah, red velvet… My earliest memory of this delicious dessert takes me back to my grandmother’s kitchen. Every Valentine’s Day, she would whip up her legendary red velvet cake, complete with luscious cream cheese frosting. The vibrant red hue always captivated my young heart, and the smell of cocoa mingling with vanilla made my stomach rumble like thunder. I remember the joyous chaos as my cousins and I scrambled for the first slice, and I can still hear my grandmother’s laugh as she playfully scolded us for sneaking bites before dinner.
Now, decades later, the legacy of the red velvet cake lives on in this protein-packed version, giving a nod to those cherished memories while embracing the opportunity for a healthier twist. The same flavors and textures but made with love, creativity, and a bit of added nutrition!
Ingredients
For our Protein Red Velvet Jar, here’s what you’ll need:
-
Red Velvet Protein Powder (1 scoop)
- This is the star of our show! It provides the signature red velvet flavor while giving you that protein boost. Look for brands with natural ingredients, or you can use a plain vanilla protein powder if that’s what you have on hand.
-
Oat Flour (1/2 cup)
- It’s gluten-free but can also be substituted with all-purpose flour or almond flour for a nutty flavor. Oat flour adds a lovely texture and helps absorb the moisture.
-
Cocoa Powder (1 tablespoon)
- Choose unsweetened cocoa for a rich chocolate flavor. If you want a sweeter alternative, consider using Dutch-processed cocoa, but adjust your sugar levels accordingly.
-
Baking Powder (1 teaspoon)
- This helps our jars rise just a bit, making the texture light and fluffy. Make sure your baking powder is fresh for the best results.
-
Greek Yogurt (1/2 cup)
- This adds moisture and a creamy texture to our jar. Feel free to swap it out for a dairy-free yogurt or apple sauce for a vegan option.
-
Egg (1 large)
- Provides structure and richness. For a vegan alternative, try a flax egg (1 tablespoon of ground flaxseed mixed with 2.5 tablespoons of water).
-
Vanilla Extract (1 teaspoon)
- A flavor booster! Always choose pure vanilla extract for the most authentic taste.
-
Beet Juice or Red Food Coloring
- This is optional but adds that signature red hue. I love using beet juice for its natural coloring and health benefits!
-
Sweetener of choice (Honey, Maple Syrup, or Agave Nectar) (1/4 cup)
- Sweeten to taste! Depending on your preference, use any of these sweeteners or adjust the amount in accordance with your taste buds.
-
Cream Cheese (for frosting)
- Opt for low-fat cream cheese for a lighter option; if you prefer non-dairy, look for vegan cream cheese.
Step-by-Step Instructions
Step 1: Preheat Your Oven
Preheat your oven to 350°F (175°C). This is the perfect time to set the mood—put on your favorite playlist or podcast, and let that cozy kitchen vibe take over!
Step 2: Mixing the Dry Ingredients
In a large mixing bowl, combine the oat flour, red velvet protein powder, cocoa powder, and baking powder. Use a whisk to mix it well—this is a great way to incorporate air and ensure even distribution. Plus, it’s a fun way to play chef! If you’re feeling fancy, dress up your bowl with a little sifting action.
Step 3: Mixing the Wet Ingredients
In another bowl, combine Greek yogurt, egg, vanilla extract, and sweetener. Whisk until everything is blended smoothly. Here’s a little chef’s hack: if your Greek yogurt is too thick, you can add a splash of water or milk of your choice to loosen it up a bit!
Step 4: Combine Wet and Dry
Now, gently fold the wet ingredients into your dry mixture. Make sure not to overmix—it should just come together nicely. If you’re adding beet juice or red food coloring, this is the moment! Fold it in carefully until the reddish hue brightens the batter.
Step 5: Prepare Your Baking Jars
This part is super fun! Take mini glass jars or ramekins and grease them lightly with cooking spray or a dab of melted coconut oil. Ladle the batter into each jar, filling them to about 3/4 full to allow for rising. Arrange them on a baking tray for easy transport to the oven.
Step 6: Bake to Perfection
Slide the jars into your preheated oven and let them bake for approximately 20-25 minutes. You’ll know they’re ready when the tops spring back when touched gently or when a toothpick inserted in the center comes out clean. Keep an eye on them; every oven is a bit different—don’t let them become sad little dryness blobs!
Step 7: Frosting Time!
Once the jars have cooled for about 10-15 minutes, it’s time to frost with delicious cream cheese. Whip together some softened cream cheese with a dash of vanilla and a touch of sweetener until creamy. You can either pipe it on for a professional look or just spread it on with a knife—either way, it’s going to be wonderful!
Step 8: Chill and Serve
If you can resist, let the jars chill in the refrigerator for about half an hour to let those flavors meld beautifully together. Then, serve them up and watch everyone’s faces light up with joy!
Serving Suggestions
I love serving these adorable jars with a sprinkle of crushed nuts or a drizzle of extra honey on top. You can also garnish with fresh berries or a sprig of mint for that extra pop of color. They make a gorgeous centerpiece at any gathering, and who wouldn’t want to dive into these little lovelies?
Recipe Variations
Feel free to experiment with these variations!
- Chocolate Chip Delight: Add small dark chocolate chips into the batter for delicious melty surprises in every bite.
- Coconut Dream: Mix in shredded coconut for a tropical hint that complements the chocolate beautifully.
- Berry Boost: Layer fresh strawberries or raspberries between the layers for a tangy burst of flavor and a beautiful presentation.
- Nutty Twist: Try folding in crushed nuts like walnuts or pecans for added texture and nutty flavor.
- Gluten-Free: Swap out the oat flour for a gluten-free all-purpose blend, and you’ve got a fantastic gluten-free treat!
Chef’s Notes
When I first started making this recipe, I didn’t realize how essential the balance of sweetness would be. The first few attempts were overly sweet or lacked that tangy kick of red velvet! After several rounds of testing—and a bit of kitchen chaos involving over-spills and frosted faces—I finally nailed down a recipe I truly love. It’s turned into a crowd-pleaser at my gatherings, and I often get requests for the "red jar cake" now. It has evolved from a simple treat into a signature dish in my kitchen lore!
FAQs and Troubleshooting
-
Why is my cake too dry?
- It could be overbaked! Bake just until a toothpick comes out clean and remember that residual heat will continue to cook it slightly once it’s out of the oven.
-
Can I use a different type of protein powder?
- Absolutely! Just know that flavors may vary slightly. A flavored protein might intensify sweetness, requiring you to reduce your added sweetener.
-
What if I don’t have beet juice?
- No worries! You can use red food coloring or simply omit it for a more classic chocolate cake look; it will still taste divine.
-
Can these jars be made ahead of time?
- Yes! You can prep and bake these ahead of time; just store them in the refrigerator. Frost them the day you plan to serve for the best texture!
Nutritional Info
For each jar (based on this recipe), you can expect approximately:
- Calories: 250
- Protein: 20g
- Carbohydrates: 30g
- Healthy Fats: 5g
(This is an estimate and may vary based on specific ingredients and brands used.)
So there you have it—the delightful Protein Red Velvet Jar, a delicious nod to nostalgia with a modern twist! I hope this brightens your day and inspires the home chef in you. Get ready to treat yourself (and those you love) to something sweet and healthy! Happy cooking, and remember, every meal is a chance to create memories. Enjoy every bite!
Print
Protein Red Velvet Jar
- Total Time: 40 minutes
- Yield: 4 servings 1x
- Diet: High Protein
Description
A deliciously healthy twist on the classic red velvet dessert, infused with protein for a sweet pick-me-up.
Ingredients
- 1 scoop Red Velvet Protein Powder
- 1/2 cup Oat Flour
- 1 tablespoon Cocoa Powder
- 1 teaspoon Baking Powder
- 1/2 cup Greek Yogurt
- 1 large Egg
- 1 teaspoon Vanilla Extract
- Beet Juice or Red Food Coloring (optional)
- 1/4 cup Sweetener of choice (Honey, Maple Syrup, or Agave Nectar)
- Cream Cheese (for frosting)
Instructions
- Preheat your oven to 350°F (175°C).
- In a large mixing bowl, combine the oat flour, red velvet protein powder, cocoa powder, and baking powder.
- In another bowl, combine Greek yogurt, egg, vanilla extract, and sweetener.
- Fold the wet ingredients into your dry mixture.
- Grease mini glass jars or ramekins and ladle the batter into each jar.
- Bake for approximately 20-25 minutes.
- Frost with softened cream cheese mixed with vanilla and sweetener.
- Chill in the refrigerator for about 30 minutes before serving.
Notes
These jars can be made ahead and stored in the refrigerator. Frost them the day you plan to serve for best texture.
- Prep Time: 15 minutes
- Cook Time: 25 minutes
- Category: Dessert
- Method: Baking
- Cuisine: American
Nutrition
- Serving Size: 1 jar
- Calories: 250
- Sugar: 10g
- Sodium: 120mg
- Fat: 5g
- Saturated Fat: 2g
- Unsaturated Fat: 3g
- Trans Fat: 0g
- Carbohydrates: 30g
- Fiber: 2g
- Protein: 20g
- Cholesterol: 70mg
Keywords: red velvet, protein dessert, healthy dessert, baking, meal prep
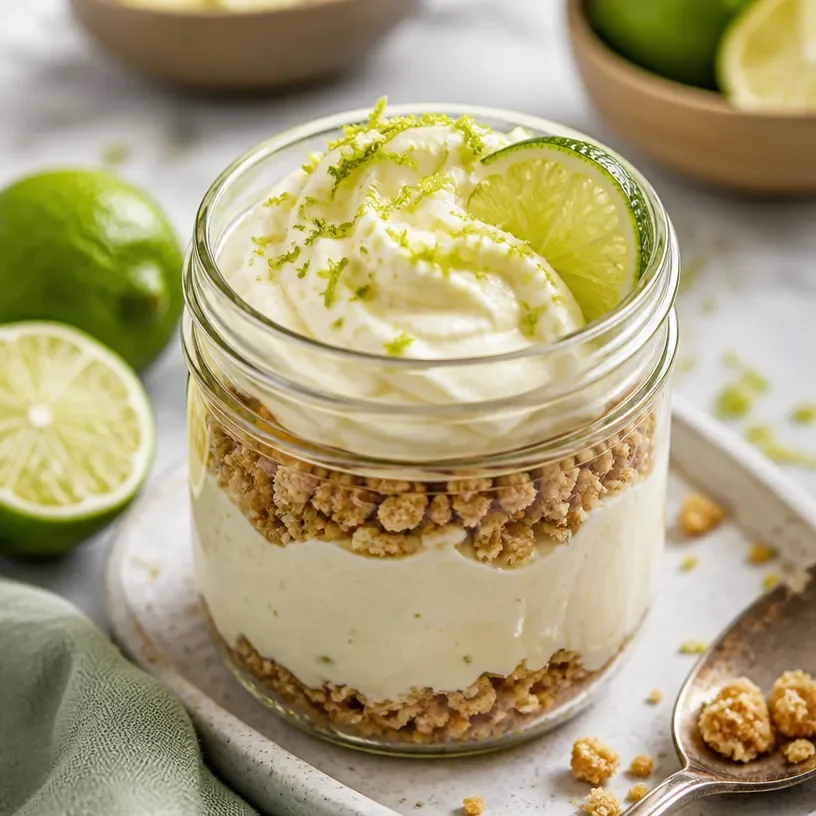
Protein Key Lime Pie Jar
Ultimate Protein Key Lime Pie Jars: A Healthy Twist on a Classic Treat
Welcome to my kitchen, friends! If you’re as enchanted by the tart, creamy goodness of Key Lime Pie as I am, then brace yourself for a treat that combines nostalgia and nutrition into a deliciously satisfying creation: Protein Key Lime Pie Jars. 🎉
The aroma of zesty lime mixed with a hint of buttery crust can transport you straight to sunny Florida beaches, even on a drizzly day. But who says we can’t enjoy this classic dessert while staying healthy? That’s exactly what I’m here to show you! Not only is this recipe bursting with flavor, but it also brings a generous protein punch, making it perfect for a post-workout snack or a guilt-free dessert after dinner.
I’ve discovered over the years that cooking is so much more than just following a recipe; it’s about sharing moments and making memories. The best part about this dessert is that it’s a no-bake wonder, so you can whip it up in a jiffy. Whether you’re entertaining guests or indulging in some “me-time,” these jars are sure to impress everyone.
So, roll up those sleeves, throw on your favorite apron (messy is the new chic, after all), and let’s dive into this delightful journey of creamy, zesty goodness!
A Nostalgic Twist: My Childhood Love for Key Lime Pie
Growing up, my summers were filled with trips to the coast, where the warm sun kissed my skin and the salty air filled my lungs. Each year, we’d stop by a quaint little beachside shack that served the best Key Lime Pie I’ve ever tasted. The moment I took my first bite, I was hooked. The sweet, tangy filling paired with that crumbly crust created a symphony of flavors that danced on my palate.
That little shack became a summer tradition, and I would always beg my parents to let me have a second slice. The joy of sharing that pie with family and friends while telling stories and laughing is something I cherish. As I grew older and became more conscious of nutrition, I realized I didn’t want to let go of that beloved dessert. Instead, I decided to reinvent it into something healthier, without compromising the flavors I adored. And thus, the Protein Key Lime Pie Jar was born!
Ingredients to Whip Up Some Magic!
Now that you’re feeling inspired, let’s gather the ingredients! By the end of this list, you’ll be diving right into the preparation like a pro.
-
Greek Yogurt (1 cup)
This creamy delight is the star of our filling. Packed with protein and probiotics, it adds a luscious texture while keeping it light. For a dairy-free alternative, opt for coconut yogurt! -
Key Lime Juice (1/2 cup)
The essential ingredient for that iconic tang! You can find bottled Key lime juice, but if you’re feeling adventurous, freshly squeezed limes are unbeatable. -
Honey or Maple Syrup (1/4 cup)
A natural sweetener to balance the tartness. If you’re looking to cut calories, you can use a sugar substitute like stevia or monk fruit sweetener. -
Coconut Cream (1/2 cup)
Adds that rich flavor and creaminess. For a lighter version, you can use low-fat whipped cream. Just keep in mind the flavor might differ slightly. -
Vanilla Extract (1 tsp)
A must-have for depth of flavor! If you want to get fancy, try swapping for almond extract for a unique twist. -
Graham Cracker Crumbs (1 cup)
These are for our crust! If you want a gluten-free option, use almond flour mixed with a bit of melted coconut oil. -
Butter or Coconut Oil (1/4 cup)
This ingredient binds the crumbs together. For the vegan option, coconut oil works perfectly! -
Protein Powder (Optional: 1/2 cup)
Boost your protein content by adding your favorite flavor. Vanilla or unflavored protein powder blends seamlessly!
Step-by-Step Instructions: Let’s Get Cooking!
Ready to make your jars? Follow these detailed steps, and don’t forget to check out my chef hacks along the way!
-
Prepare Your Crust
In a mixing bowl, combine 1 cup of graham cracker crumbs and 1/4 cup of melted butter (or coconut oil). Mix until all crumbs are fully coated.
Chef Hack: If you like your crust extra crunchy, bake it in a preheated oven at 350°F (175°C) for 5–7 minutes until lightly golden. -
Create the Filling
In another bowl, whisk together 1 cup of Greek yogurt, 1/2 cup of Key lime juice, 1/4 cup of honey or maple syrup, and 1/2 cup of coconut cream. Make sure everything is well incorporated.
Tip: Taste your mixture before adding more sweetener. Adjust to your preference! -
Incorporate the Protein Powder
If you’re using protein powder, gently mix it into your filling until it’s fully blended. This helps keep the texture creamy rather than chalky.
Chef Insight: I usually opt for a plant-based protein for a more balanced, lighter flavor. -
Assemble the Jars
Grab your cute jars (or bowls, no judgment here!) and start layering. Begin with a spoonful of the crust at the bottom, followed by a generous layer of the Key lime filling, then repeat until you reach the top.
Pro Tip: Leave a little space at the top for garnishes! -
Chill for Perfection
Cover your jars and pop them in the refrigerator for at least 2 hours (or overnight, if you can resist!). This helps the flavors meld together beautifully.
Funny Story: I once made these for a gathering and forgot to chill them! I served them warm, and while they weren’t what I intended, they turned out to be a hit anyway!
Serving Suggestions: Presentation Matters!
When it comes to serving, the beauty is in the simplicity of presentation. You can garnish your Protein Key Lime Pie Jars with a dollop of whipped cream, a sprinkle of graham crumbs, and a slice of lime on top. Serve them on a colorful platter for a pop of color, and watch your friends’ faces light up!
Recipe Variations: Get Creative!
Looking to switch things up? Here are a few fun variations to elevate your Protein Key Lime Pie Jars:
- Berry Bliss Version: Mix in some fresh raspberries or blueberries into the filling for an added fruity twist.
- Coconut Lime Combo: Fold in shredded coconut into your filling for that tropical zing!
- Choco Key Lime Delight: Add cocoa powder to the crust for a chocolatey flavor that perfectly complements the lime.
- Vegan Option: Substitute Greek yogurt with silken tofu blended until smooth and use maple syrup as a sweetener.
Chef’s Notes: A Touch of Reflection
Looking back, I have made this recipe countless times for friends and family, and it never fails to spark joy and laughter. It’s an evolution of my childhood memories, wrapped up in a healthier package. One time, I accidentally mistook lime juice for lemon juice and ended up creating a brand new favorite! Life in the kitchen is all about experimenting and having fun.
Whenever you’re whipping up a treat, remember that mistakes can often lead to the most delicious discoveries. Keep your spirits high, and don’t be afraid to get creative!
FAQs and Troubleshooting: Let’s Clear Up the Confusion
1. Why is my filling too runny?
If your filling is too thin, try adding more Greek yogurt or chilling the jars for a little longer so it can firm up.
2. Can I make this recipe dairy-free?
Absolutely! Substitute Greek yogurt with coconut yogurt and use vegan alternatives for cream and sweeteners. The flavor will still shine through wonderfully!
3. How do I store leftovers?
These treats can last in the fridge for up to 3 days if kept covered. Just make sure to add any toppings (like whipped cream) just before serving to keep it fresh!
4. What if I can’t find Key limes?
Regular limes work just fine! The flavor might be slightly different but still delicious—just remember to adjust the sweetness if they’re more tart than Key limes.
Nutritional Info (Optional)
While this recipe is designed to be a healthier take on a classic dessert, here’s a rough estimate per serving (1 jar):
- Calories: 250-300
- Protein: 15-20g
- Carbohydrates: 30g
- Fats: 12g
- Fiber: 3-4g
Now, there you have it, my friends! Whether needed for a summer gathering or a cozy dessert to savor in silence, these Protein Key Lime Pie Jars are a fun, creative, and healthy way to enjoy a beloved classic. Now it’s your turn to head into the kitchen, whip these up, and make some delicious memories of your own! Happy cooking! 🍋✨
Print
Ultimate Protein Key Lime Pie Jars
- Total Time: 120 minutes
- Yield: 4 servings 1x
- Diet: Healthy, High Protein
Description
A healthy twist on a classic Key Lime Pie, packed with protein and perfect for a post-workout snack or guilt-free dessert.
Ingredients
- 1 cup Greek Yogurt
- 1/2 cup Key Lime Juice
- 1/4 cup Honey or Maple Syrup
- 1/2 cup Coconut Cream
- 1 tsp Vanilla Extract
- 1 cup Graham Cracker Crumbs
- 1/4 cup Butter or Coconut Oil
- Optional: 1/2 cup Protein Powder
Instructions
- Prepare your crust by combining 1 cup of graham cracker crumbs and 1/4 cup of melted butter (or coconut oil) in a mixing bowl. Mix until all crumbs are coated.
- Create the filling by whisking together 1 cup of Greek yogurt, 1/2 cup of Key lime juice, 1/4 cup of honey or maple syrup, and 1/2 cup of coconut cream in another bowl.
- Incorporate the protein powder, if using, into your filling until fully blended.
- Assemble the jars by layering the crust and filling until filled.
- Chill the jars for at least 2 hours in the refrigerator.
Notes
Garnish with whipped cream, graham crumbs, and a slice of lime before serving. You can also switch up ingredients for different variations.
- Prep Time: 15 minutes
- Cook Time: 0 minutes
- Category: Dessert
- Method: No-Bake
- Cuisine: American
Nutrition
- Serving Size: 1 jar
- Calories: 300
- Sugar: 20g
- Sodium: 150mg
- Fat: 12g
- Saturated Fat: 7g
- Unsaturated Fat: 5g
- Trans Fat: 0g
- Carbohydrates: 30g
- Fiber: 3g
- Protein: 20g
- Cholesterol: 30mg
Keywords: Key Lime Pie, Healthy Dessert, Protein Snack
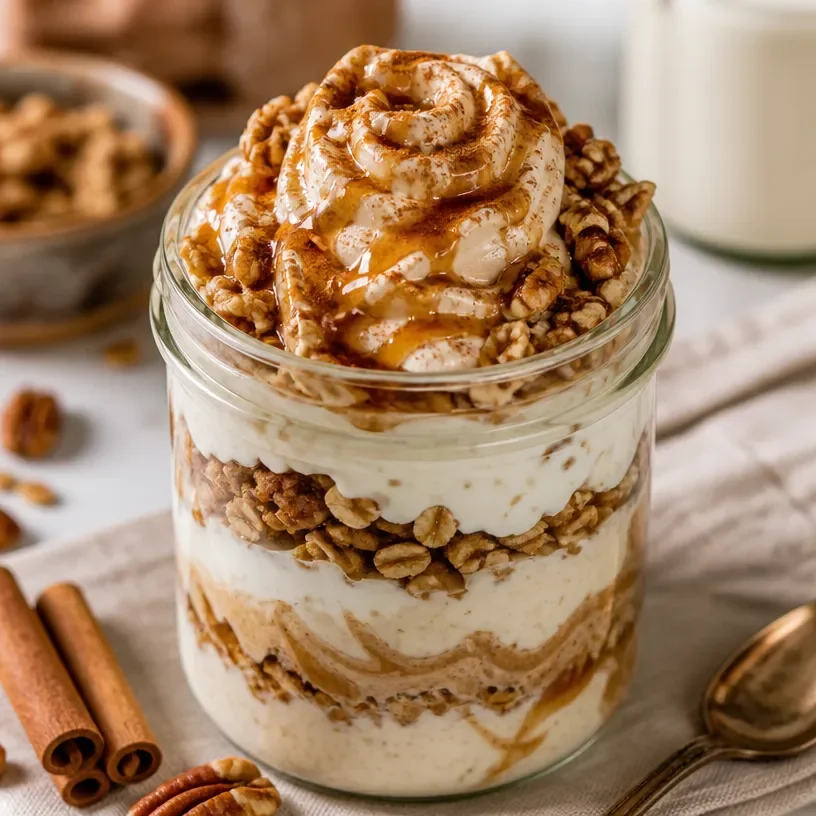
Protein Cinnamon Roll Jar
The Cozy Delight of Protein Cinnamon Roll Jars
Welcome to my kitchen, fellow foodies! Today, we’re diving into a recipe that’s nothing short of magical — Protein Cinnamon Roll Jars! If you’re looking for a way to satisfy that sweet tooth while boosting your protein intake, you’ve hit the jackpot. These little jars encapsulate all the joy of a freshly baked cinnamon roll, minus the guilt. Whether you’re prepping for a busy week or just want a tasty treat that’s nutritious too, you’re in the right place!
Imagine this: it’s a chilly Sunday morning, and the smell of warm, buttery cinnamon rolls wafts through the air. You can almost taste the cream cheese frosting melting in your mouth! Ahh, that cozy feeling wrapped in a warm blanket with a cup of coffee. But let’s be real — sometimes, we don’t have the luxury of hours in the kitchen, nor do we want to roll and bake dough from scratch. This is where my Protein Cinnamon Roll Jars come in, combining ease and flavor into one delightful dish.
Picture this: you wake up, and instead of reaching for sugary cereals or grabbing a quick muffin from the store, you can visit your fridge and find a colorful, layered jar of deliciousness waiting for you. Not only is this recipe a fabulous breakfast or snack, but it can also serve as dessert. Who wouldn’t want a guilt-free way to hit the sugar cravings while squeezing in some protein?
I can’t wait to share this fantastic recipe with you. Let’s roll into the delightful journey of flavors, textures, and good vibes!
A Sweet Memory Wrapped in Cinnamon
Growing up, Sunday mornings felt like a mini-holiday in our household. My mom had a special ritual — she’d whip up a batch of cinnamon rolls from scratch while we kids sprawled out on the couch, still in our pajamas. The sound of the flour hitting the counter, the rich aroma of melting butter, and the sweet warmth of cinnamon drifted throughout the house. It was pure magic!
One particular Sunday, when I was about ten, my little brother decided he’d help mom. But instead of sprinkling the cinnamon evenly, he dumped it all in one spot, creating a mini volcano of sweet spices. I’ll never forget the look on my mom’s face when she opened the oven door to find one giant cinnamon roll that had bubbled and burst over the sides. We laughed until our bellies hurt and ended up with a delicious mess that turned into a family favorite.
That memory stuck with me, igniting my passion for cooking and baking. It reminded me that food brings joy and community, and that creativity can lead to delightful surprises! Now, I’ve reimagined that nostalgic experience into these Protein Cinnamon Roll Jars. Trust me; they may not be a spontaneous volcano of dough, but each jar is filled with layers of cinnamon joy, yogurt, and a protein punch!
Ingredients
Here’s what you’ll need to create your Protein Cinnamon Roll Jars. Don’t fret if you’re missing an ingredient or two; I’ve got tips for substitutions!
-
Rolled Oats: The base of our jars! They provide fiber and a hearty texture. Swap with quick oats if you’re in a hurry — they will soften faster.
-
Vanilla Greek Yogurt: We’re using this for creaminess and protein! If you can’t find Greek yogurt, regular yogurt works well, or you can substitute with dairy-free yogurt for a vegan option.
-
Cinnamon: The star of this dish! Use Ceylon cinnamon for a sweeter, more delicate flavor. You can also mix in a pinch of nutmeg for an extra spice kick.
-
Maple Syrup or Honey: Sweetens our mixture naturally. If you’re avoiding sugar, opt for a sugar-free alternative like monk fruit or stevia.
-
Protein Powder: This boosts the nutritional value! Any flavor works, but vanilla is a classic choice. If you prefer plant-based, ensure it’s vegan-friendly protein powder.
-
Milk (or Nut Milk): This adds moisture to the layers. Any type works, so use dairy, almond, oat, or whichever you enjoy.
-
Chopped Nuts (Optional): Think walnuts or pecans for a crunchy texture. Skip them if you’re going nut-free!
-
Cream Cheese (Optional): A layer of cream cheese frosting makes it feel like a decadent treat! Use a low-fat version or a vegan cream cheese if needed.
Step-by-Step Instructions
Now that we’ve gathered our ingredients, let’s get cooking! Here’s how to assemble your Protein Cinnamon Roll Jars.
1. Prepare the Oat Mixture
In a mixing bowl, combine:
- 1 cup of rolled oats
- ½ cup of protein powder
- 1 tsp of cinnamon
Chef Tip: Mix the dry ingredients well to ensure even distribution of flavors without lumps. If you’re using quick oats, keep in mind they will absorb moisture faster!
2. Add the Wet Ingredients
Gradually stir in:
- 1 cup of vanilla Greek yogurt
- ½ cup of milk (or nut milk)
- 3 tbsp of maple syrup or honey
Commentary: This part gets a little sticky, but that’s okay! The idea is to create a somewhat thick batter. If it’s too thick, add a splash more milk until it coalesces nicely.
3. Layer It Up!
Grab your jars (or any glass containers) and start layering:
- Begin with a layer of the oat mixture (about 1/4 of the total), followed by a sprinkle of chopped nuts (if using).
- Repeat the layers until you fill the jar — aim for about three to four layers.
Chef Hack: If you’re feeling adventurous, swirl in some extra cinnamon and a drizzle of honey between layers for an unexpected surprise!
4. Chill Out
Cover the jars with lids or plastic wrap. Refrigerate for at least 1 hour (or overnight if you want to prep ahead!). This allows the oats to soften and absorb the flavors, leading to a creamy delight.
5. Top It Off
Just before serving, top with a dollop of cream cheese or Greek yogurt to mimic that frosting from traditional cinnamon rolls. You can even sprinkle a little additional cinnamon for a finishing touch.
6. Enjoy!
Dig in with a spoon and savor those layers of cozy, cinnamon goodness. Each bite should transport you to those sweet Sunday mornings of my childhood!
Serving Suggestions
These Protein Cinnamon Roll Jars are versatile! Serve them straight from the jar for an effortless breakfast or snack. If you have guests, create a mini “breakfast bar” — lay out toppings like fresh fruit, nuts, or an array of sweet yogurt. It’s a fun way to make everyone feel involved in their breakfast creation!
Recipe Variations
Feel free to get creative! Here are some fun ways to switch things up:
- Choco-Cinnamon Roll: Add a scoop of cocoa powder to the oatmeal layer for a chocolaty twist.
- Berry Bliss: Layer in fresh or frozen berries to give your jars a fruity flavor.
- Spicy Autumn: Add pumpkin spice to the mixture during fall for that cozy pumpkin roll experience!
- Nutty Delight: Introduce almond or peanut butter in layers for a nutty hint — yum!
- Vegan Version: Use plant-based yogurt, protein powder, and a dairy-free milk.
Chef’s Notes
The beauty of the Protein Cinnamon Roll Jar is its adaptability. What started as a whimsical blend of oats and Greek yogurt has transformed into a personalized experience for everyone who tries it. I still cherish those Sunday mornings of cinnamon rolls, but now I can enjoy that taste without all the hassle! Plus, the best part? You can make a batch ahead of time and eat them for breakfast all week!
I’ve had some friends swap in leftover mashed bananas in place of yogurt, and it turned out fab! Cooking is all about experimentation and delight. So, embrace the mess in the kitchen and let creativity lead you.
FAQs and Troubleshooting
1. My mixture is too thick; what can I do?
Simply add a splash of milk or nut milk until you achieve your desired consistency. The oats will soak up moisture, so finding that perfect blend is key!
2. Can I make these ahead of time?
Absolutely! They can last in the fridge for up to 5 days. Just remember to add toppings like yogurt or nuts just before serving to keep them fresh.
3. What if I don’t have protein powder?
No stress! You can omit it, but I recommend adding a little extra oats or yogurt to maintain a good texture and nutritional content.
4. Are these jars travel-friendly?
Of course! They’re super portable. Just pack them with a lid on and enjoy them on the go. Great for breakfast at the office or a post-workout snack!
Nutritional Info (Optional)
Depending on the protein powder and optional ingredients you use, each jar typically contains:
- Calories: around 300-400
- Protein: 20g+
- Carbohydrates: 40g
- Fiber: 6g
- Sugar: 8g (with honey or syrup)
Remember, nutritional values can vary based on specific brands and ingredient choices.
So there you have it: a delicious, cozy way to enjoy a classic treat with a healthy twist! I hope these Protein Cinnamon Roll Jars inspire you, just like my childhood memories of cinnamon rolls did for me. Now, grab your apron and get mixing — your breakfasts are about to get a whole lot cozier! Happy cooking!
Print
Protein Cinnamon Roll Jars
- Total Time: 60 minutes
- Yield: 4 servings 1x
- Diet: Vegetarian
Description
Delicious and nutritious Protein Cinnamon Roll Jars that combine the joy of cinnamon rolls with a healthy twist, perfect for breakfast or a snack.
Ingredients
- 1 cup rolled oats
- ½ cup protein powder
- 1 tsp cinnamon
- 1 cup vanilla Greek yogurt
- ½ cup milk (or nut milk)
- 3 tbsp maple syrup or honey
- Chopped nuts (optional)
- Cream cheese (optional)
Instructions
- Prepare the oat mixture: In a mixing bowl, combine rolled oats, protein powder, and cinnamon.
- Add the wet ingredients: Gradually stir in Greek yogurt, milk, and maple syrup or honey.
- Layer it up: In jars, start with a layer of the oat mixture followed by chopped nuts (if using); repeat until filled.
- Chill out: Cover jars and refrigerate for at least 1 hour.
- Top it off: Before serving, add a dollop of cream cheese or Greek yogurt.
- Enjoy your cozy, cinnamon-filled jars!
Notes
These jars can last in the fridge for up to 5 days. Feel free to substitute ingredients as needed.
- Prep Time: 15 minutes
- Cook Time: 0 minutes
- Category: Breakfast
- Method: Chilling
- Cuisine: American
Nutrition
- Serving Size: 1 jar
- Calories: 350
- Sugar: 8g
- Sodium: 150mg
- Fat: 8g
- Saturated Fat: 3g
- Unsaturated Fat: 5g
- Trans Fat: 0g
- Carbohydrates: 40g
- Fiber: 6g
- Protein: 20g
- Cholesterol: 10mg
Keywords: protein, cinnamon roll, breakfast, healthy snacks, dessert
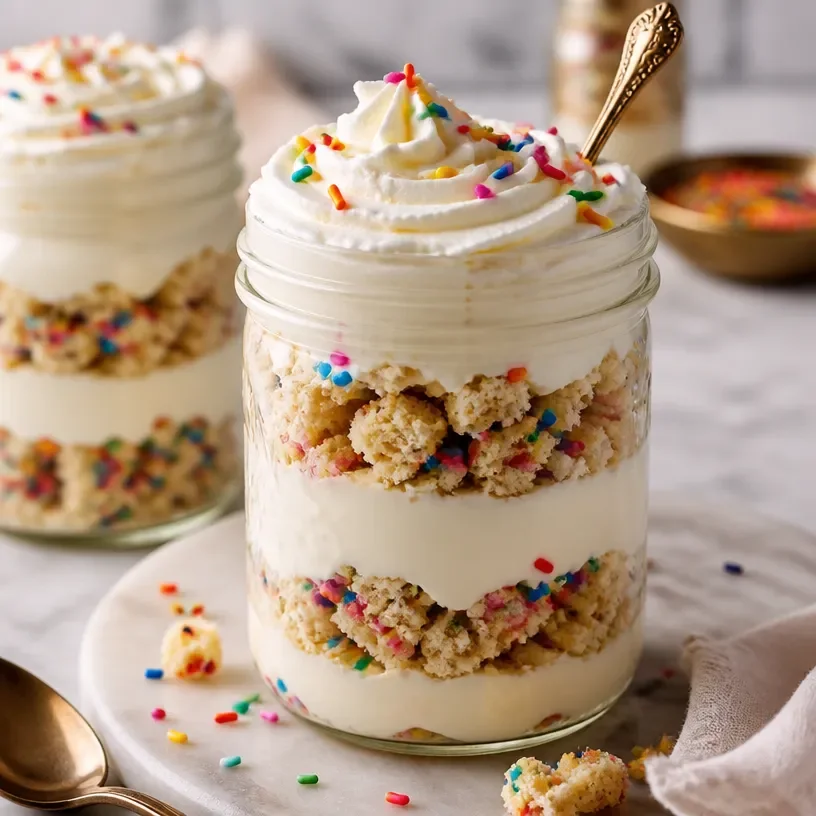
High-Protein Birthday Cake Jars: No-Bake Dessert in a Jar
Celebrate in Style with a Protein Birthday Cake Jar
Welcome back to my kitchen, friends! Today, we’re making a fun and festive treat: a Protein Birthday Cake Jar! Wondering what makes this dessert special? Not only is it a delicious way to celebrate a special occasion, but it’s packed with protein, making it a delightful treat that satisfies your sweet tooth while nourishing your body.
As someone who thrives on creating memories through food, this dessert holds a special place in my heart. Birthdays are always a big deal in my family, and over the years, I’ve learned to turn traditional sweets into healthier versions without sacrificing flavor. The Protein Birthday Cake Jar was born from the desire to indulge in a slice of birthday cake while feeling good about what I’m eating. Plus, layering it in a jar makes it feel extra special and allows you to showcase all those vibrant colors and textures!
Trust me when I say that you’ll want to whip these up for the next birthday party, whether it’s your own or a loved one’s. Let’s gather those ingredients and get started!
A Trip Down Memory Lane
One of my favorite birthday memories is from my eighth birthday party. I remember my mom baking a chocolate cake that filled our house with warmth and that familiar sweet aroma. It was the centerpiece of our celebration, adorned with rainbow sprinkles and surrounded by laughter as my friends and family sang “Happy Birthday.”
As a child, I was mesmerized by how, with just a few simple ingredients, my mom could create pure magic. Fast forward to today, and those memories inspire me to recreate that joyful feeling in my own kitchen. However, I wanted to give it a twist—a protein-packed twist! This way, we can still enjoy the nostalgia of a birthday cake while being mindful of our nutrition. Sweet memories and healthy choices? Sign me up!
Ingredients
Here’s what you’ll need to gather for our Protein Birthday Cake Jar:
-
Protein Powder: (vanilla or cake batter flavor works great)
- This is the star player, providing the protein you’re after! If you have a favorite brand, use that. Just be cautious about flavors, as they can change the taste of your cake.
-
Almond Flour:
- A fantastic gluten-free alternative to all-purpose flour, almond flour adds moisture and a lovely nuttiness. You can substitute with coconut flour, but be sure to adjust the amount, as it’s more absorbent.
-
Baking Powder:
- We need this to help our cake rise. If you’re out, a bit of baking soda combined with some vinegar can create a similar effect!
-
Eggs:
- They bind everything together and add moisture. If you’re vegan or egg-free, mash up a banana or use flaxseeds as a substitute (1 tablespoon ground flaxseed mixed with 2.5 tablespoons water).
-
Unsweetened Applesauce:
- This acts as a natural sweetener and keeps our cake moist without all the added sugars. For a sweeter jar, you can replace it with Greek yogurt.
-
Honey or Maple Syrup:
- Just a drizzle adds sweetness! If you’re looking to cut the sugars down, you can skip this or use a sugar substitute like stevia.
-
Vanilla Extract:
- A splash of vanilla elevates the flavors. If you don’t have any, almond extract can be a great alternative but use it sparingly, as it’s strong!
-
Sprinkles:
- Birthday cakes aren’t complete without sprinkles! Go for the colorful ones to brighten up your jars. If you want to keep it healthy, check for natural sprinkles or omit them entirely.
With these ingredients in hand, let’s dive into the steps. You might want to keep your apron handy—we’re about to have some fun!
Step-by-Step Instructions
-
Preheat the Oven:
Start by preheating your oven to 350°F (175°C). This is crucial, as you want your cake to bake evenly. -
Mix Dry Ingredients:
In a large mixing bowl, whisk together your almond flour, protein powder, and baking powder until well combined. This will help ensure that your cake has a nice, even texture. -
Combine Wet Ingredients:
In another bowl, mix your eggs, unsweetened applesauce, honey/maple syrup, and vanilla extract. Use a fork to whisk them together until smooth. This is where the magic starts to happen—combine those flavors! -
Combine Both Mixtures:
Slowly add the wet ingredients into the bowl of dry ingredients, stirring just until combined. Avoid overmixing to keep your cake light and fluffy. If you’d like to get creative, you can add a tablespoon of sprinkles into the batter at this stage for a fun surprise when they bite into it! -
Bake:
Pour your batter into a greased 9-inch round cake pan. Bake for approximately 20–25 minutes or until a toothpick inserted in the center comes out clean. Remember, every oven is different, so keep an eye on it! -
Cool:
Once baked, let it cool completely in the pan for about 10 minutes, then transfer it to a wire rack. This step is super important—no one likes a soggy bottom! -
Create the Layered Jar:
Now, here’s the fun part! Once your cake has cooled, crumble it into pieces. Grab your mason jars (or any clear jar) and layer in the crumbled cake followed by a layer of Greek yogurt or whipped cream, then another crumbled layer, and repeat until you reach the top! Don’t forget to finish it off with a sprinkle of your colorful sprinkles.
With your Protein Birthday Cake Jar ready, we’re almost at the finish line!
Serving Suggestions
To serve, pop a festive lid on those mason jars and tie a cute ribbon around the top for a personal touch. If you’re looking to impress, consider placing them on a beautifully arranged dessert table or serving them during a birthday brunch. Your guests will absolutely love the layered presentation!
Recipe Variations
Looking to switch things up? Here are a few delicious variations you can try:
-
Chocolate Chip: Mix in mini chocolate chips to the cake batter for an added burst of sweetness! Chocolate and vanilla are a match made in heaven.
-
Nut Butter Swirl: Before baking, add a swirl of your favorite nut butter (like almond or peanut butter) throughout the batter for a nutty flavor explosion.
-
Fruit Layering: Add some fresh berries or banana slices in between the layers for a fresh and fruity twist. Pecans or walnuts can add an extra crunch!
-
Dairy-Free: Opt for coconut yogurt or cashew cream instead of Greek yogurt to keep it dairy-free.
-
Festive Toppings: After layering, top your jars with whipped coconut cream or a dollop of chocolate ganache for an extra treat!
Chef’s Notes
Oh, the stories this recipe could tell! I’ve experimented with so many variations—from gluten-free to different flavors of protein powder. It’s a delightful journey to see how a simple recipe can evolve over time. One time, I forgot to add the eggs and tossed the mixture into the oven anyway. To my surprise, it turned out to be a unique grainy cake that we all enjoyed—though I’m not sure I’d recommend it as a regular occurrence!
Every time someone takes a bite of these jars, I’m reminded of my childhood birthday memories. I can’t help but smile as I think about how food has the power to bring us together and create unforgettable moments.
FAQs and Troubleshooting
1. Why is my Protein Birthday Cake dense?
- Overmixing the batter can lead to a dense cake since it develops gluten. Mix just until combined for a lighter texture!
2. Can I make this ahead of time?
- Absolutely! You can prepare the cake a day in advance and layer the jars just before serving for the freshest taste.
3. How long do these jars last?
- If sealed tightly, they can last up to 3–5 days in the fridge. The yogurt or whipped cream may separate slightly, so give it a little stir before serving.
4. What should I do if my cake sticks to the pan?
- Be sure to grease your pan well before adding the batter. If it does stick, run a knife around the edges gently and try turning it upside down on a cooling rack.
Nutritional Info
While the nutritional info can vary based on the exact ingredients you use, here’s a rough estimate for one serving (one jar):
- Calories: Approximately 230
- Protein: 21g
- Carbs: 30g
- Fats: 8g
Remember, friends, this Protein Birthday Cake Jar is more than just a dessert; it’s an experience, a celebration, and a way to create sweet memories in the kitchen. So go ahead, gather your loved ones, and let them indulge guilt-free—a symphony of flavors in every spoonful! Happy baking! 🥳
Print
Protein Birthday Cake Jar
- Total Time: 40 minutes
- Yield: 4 servings 1x
- Diet: High Protein
Description
A fun and festive protein-packed dessert that celebrates special occasions while satisfying your sweet tooth.
Ingredients
- 1 cup Protein Powder (vanilla or cake batter flavor)
- 1 cup Almond Flour
- 1 tsp Baking Powder
- 2 Eggs (or egg substitute)
- 1/2 cup Unsweetened Applesauce
- 2 tbsp Honey or Maple Syrup
- 1 tsp Vanilla Extract
- Sprinkles (for topping)
Instructions
- Preheat the oven to 350°F (175°C).
- Mix the almond flour, protein powder, and baking powder in a large mixing bowl.
- Combine the eggs, applesauce, honey (or maple syrup), and vanilla extract in another bowl.
- Add the wet ingredients to the dry ingredients and stir until just combined.
- Pour the batter into a greased 9-inch round cake pan and bake for 20–25 minutes.
- Cool the cake for 10 minutes in the pan, then transfer to a wire rack.
- Create layers in a jar by crumbling the cake and adding layers of yogurt or whipped cream.
- Top with colorful sprinkles before serving.
Notes
You can make this ahead of time and layer the jars just before serving for the freshest taste.
- Prep Time: 15 minutes
- Cook Time: 25 minutes
- Category: Dessert
- Method: Baking
- Cuisine: American
Nutrition
- Serving Size: 1 jar
- Calories: 230
- Sugar: 10g
- Sodium: 100mg
- Fat: 8g
- Saturated Fat: 1g
- Unsaturated Fat: 7g
- Trans Fat: 0g
- Carbohydrates: 30g
- Fiber: 3g
- Protein: 21g
- Cholesterol: 70mg
Keywords: birthday cake, protein dessert, healthy dessert, cake jar, festive treat
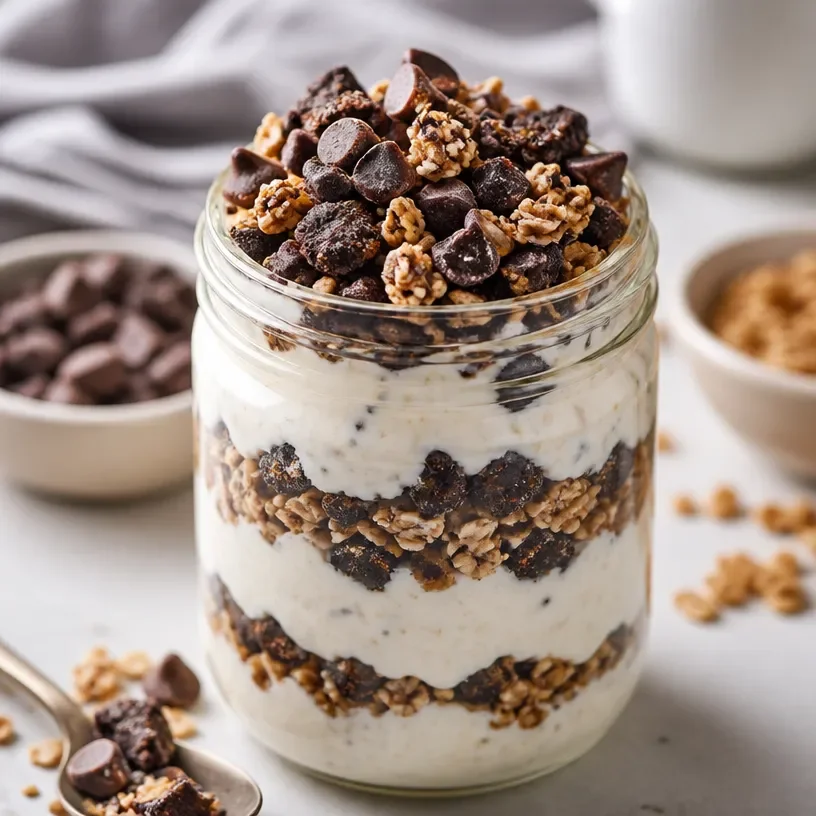
No-Bake High-Protein Cookies & Cream Jar (5-Min Prep)
Satisfy Your Sweet Tooth: Protein Cookies & Cream Jar Recipe
Welcome to my kitchen, friends! I’m super excited to dive into a scrumptious treat that merges the indulgent delight of cookies and cream with a nutritious protein boost — Protein Cookies & Cream Jars. If you’re like me and love to snack without the guilt, you’re in for a treat! This recipe is perfect for a post-workout pick-me-up, an afternoon snack, or a delightful addition to your meal prep lineup.
Imagine rich chocolate cookies mingling with creamy protein-infused goodness, topped with whipped cream and vibrant sprinkles. Sounds delicious, right? But what I truly adore about this dessert is not only its flavor but the versatility it brings. You can create a jar that’s unique to your taste and needs. Whether you’re looking for a quick treat or a more health-conscious option, I’ll walk you through every step of making this decadent delight.
Why a jar, you ask? Aesthetically pleasing and effortlessly portable, these jars make for fantastic snacks you can grab on the go! Plus, they add a whimsical touch to your kitchen countertop or picnic table. So, let’s roll up our sleeves, put on our favorite apron, and get started!
A Flavorful Memory to Share
I first discovered the idea of protein jars during my college days. Like many students, I was juggling late-night study sessions with a desire to eat healthier—an eternal struggle! I remember wandering into a quaint café, drawn in by the sweetness of fresh cookies and a chalkboard proclaiming “Protein Power.” Curiosity piqued, I ordered a cookies and cream protein jar and was instantly hooked!
Each spoonful had the comforting flavors of cookies and cream, surrounded by silky vanilla yogurt that practically melted in my mouth. It felt as if I was treating myself while still sticking to my health goals. That little café became my go-to spot, and I spent countless afternoons studying there, often crafting my own version of that delightful treat in my tiny dorm kitchen. Now, years later, I still find joy in creating and sharing this recipe with you all.
Ingredients You’ll Need
Here’s what you’ll need to whip up these delectable protein cookies & cream jars:
-
Protein Powder:
- Use your favorite flavor (vanilla, cookies & cream, or chocolate). For a vegan version, opt for plant-based protein.
- If you’re looking for a quick substitution, some people use Greek yogurt, but you’ll want to adjust the liquid accordingly.
-
Greek Yogurt:
- The base of our creamy filling, packed with protein and good bacteria.
- You can swap it with dairy-free yogurt if you’re lactose intolerant or vegan.
-
Milk (Dairy or Plant-Based):
- For blending and achieving the right consistency in your yogurt mix.
- Almond, soy, or oat milk works great if you’re following dairy-free guidelines.
-
Crushed Chocolate Sandwich Cookies:
- These provide the “cookies” part of the cookies and cream.
- You can substitute with crushed gluten-free cookies to make this recipe gluten-free.
-
Whipped Cream:
- A light and fluffy topper that elevates your jar to dessert status!
- You can use coconut whipped cream for a vegan alternative.
-
Sprinkles:
- Just for fun! These add color and whimsy to the jars.
- Consider using dark chocolate shavings for a more mature palate.
-
Optional Mix-ins (like chopped nuts or seeds):
- These give added crunch and can elevate the nutritional profile.
- Add some chia seeds or flaxseeds for a fiber boost.
Step-by-Step Instructions
Now let’s get to the good part: making these amazing jars!
-
Start with the Base:
- In a medium mixing bowl, combine 1 cup of Greek yogurt with 1 scoop of your chosen protein powder. The combination should be creamy and smooth.
- Chef’s Tip: If you want this mixture a bit thinner, gradually add your milk, one tablespoon at a time.
-
Blend to Perfection:
- Use a whisk or spatula to thoroughly mix until there are no clumps.
- You want a silky-smooth texture, which will be the perfect contrast to the crunchy cookie pieces!
-
Create the Cookie Crumble:
- Take your chocolate sandwich cookies and place them in a plastic bag. Using a rolling pin or your hands, crush the cookies into fine pieces. Somehow, the sound of crunching cookies feels like a mini therapy session!
- Chef’s Hack: If you want more fun, involve your kids—this is an easy task for little hands.
-
Layer it Up:
- Grab your favorite jar (or glass). Start with a layer of the creamy yogurt combination at the bottom.
- Then, sprinkle a layer of crushed cookies over the yogurt.
- Repeat these layers until you reach the top of your jar, finishing with a generous dollop of whipped cream.
-
Time to Garnish:
- Sprinkle colorful sprinkles on top, or get creative with your toppings! A sprinkle of cocoa powder or chocolate shavings works wonders here.
- Chef’s Insight: If you’re feeling adventurous, use a drizzle of chocolate or caramel sauce to take your jar over the top!
-
Chill or Serve:
- For the best experience, let the jars chill in the fridge for about 30 minutes (if you have the patience).
- If not, dig in right away! You deserve it!
Serving Suggestions
When it comes to serving these Protein Cookies & Cream Jars, keep it simple! You can enjoy them straight from the jar for a convenient snack, or pour them into a bowl if you’re feeling a little fancy. I love adding a sprinkle of cocoa powder or extra cookie crumbs on top right before serving for that perfect finishing touch!
You can also present these jars at a gathering, each one a delightful little reminder that indulgence can be guilt-free. Set them out with some fresh berries for a colorful spread that will have everyone reaching for seconds!
Recipe Variations
-
Nutty Delight: Add chopped nuts or nut butter to the yogurt mixture for an extra crunch and a boost in healthy fats!
-
Fruit Fusion: Layer in a fresh fruit layer between the yogurt and cookie crumble—think bananas or strawberries, making this a delightful breakfast option too.
-
Cookie Swap: Use different flavored cookies — try mint chocolate, vanilla wafers, or even gluten-free options for an interesting twist.
-
Vegan Version: Stick with plant-based drops for yogurt and protein powder, and use almond or coconut milk to keep it deliciously dairy-free.
-
Choco-Berry: Add chocolate-covered freeze-dried strawberries for a sweet and crunchy surprise!
Chef’s Notes
Every time I make these jars, it reminds me of how food serves as a canvas for creativity. You can build a recipe from the basics and turn it into something uniquely yours. When I initially created this recipe, it was all about ease. But over time, it evolved. I began incorporating different flavors, experimenting, and writing down tips that helped my friends and family feel more adventurous in the kitchen.
Don’t be afraid to make messes or get flour on your apron! Kitchen magic flourishes in chaos. Plus, there’s nothing quite like the feeling of diving into a jar you created with love and intention!
FAQs and Troubleshooting
-
Can I make these jars ahead of time?
- Absolutely! You can make these jars up to 3 days in advance. Just keep them covered tightly in the fridge to maintain freshness.
-
What do I do if my yogurt mixture is too thick?
- No worries! Just gradually mix in a little more milk until you reach your desired consistency.
-
Can I use non-dairy protein powder?
- Yes! Feel free to use any plant-based protein powder. Just note the flavors might vary, so you might want to try different combinations!
-
How do I keep these from getting too soggy?
- Layer your ingredients strategically! Start with yogurt, then cookies, then keep the whipped cream on top to act as a barrier.
Enjoy your time making these delightful Protein Cookies & Cream Jars! They are sure to bring a smile to your face and a delicious burst of flavor to your day. Happy cooking!
Print
Protein Cookies & Cream Jars
- Total Time: 10 minutes
- Yield: 2 servings 1x
- Diet: Vegetarian
Description
A delicious and nutritious treat blending cookies and cream with a protein boost, perfect for post-workout or snack time.
Ingredients
- 1 cup Greek yogurt
- 1 scoop protein powder (vanilla, cookies & cream, or chocolate)
- 1/4 cup milk (dairy or plant-based)
- 1 cup crushed chocolate sandwich cookies
- 1/2 cup whipped cream
- Sprinkles for garnish
- Optional mix-ins (chopped nuts, seeds)
Instructions
- Combine Greek yogurt with protein powder in a mixing bowl until smooth.
- Add milk gradually if a thinner consistency is desired.
- Mix until no clumps remain for a silky texture.
- Crush chocolate sandwich cookies in a bag until fine.
- Layer yogurt mixture and cookie crumbles in a jar, finishing with whipped cream.
- Garnish with sprinkles or toppings of your choice.
- Chill the jars in the fridge for 30 minutes or serve immediately.
Notes
These jars can be made up to 3 days in advance. Adjust milk for desired yogurt consistency.
- Prep Time: 10 minutes
- Cook Time: 0 minutes
- Category: Dessert
- Method: No-Bake
- Cuisine: American
Nutrition
- Serving Size: 1 jar
- Calories: 300
- Sugar: 20g
- Sodium: 150mg
- Fat: 15g
- Saturated Fat: 7g
- Unsaturated Fat: 8g
- Trans Fat: 0g
- Carbohydrates: 30g
- Fiber: 2g
- Protein: 15g
- Cholesterol: 40mg
Keywords: protein, cookies and cream, dessert, healthy snack, no-bake recipe
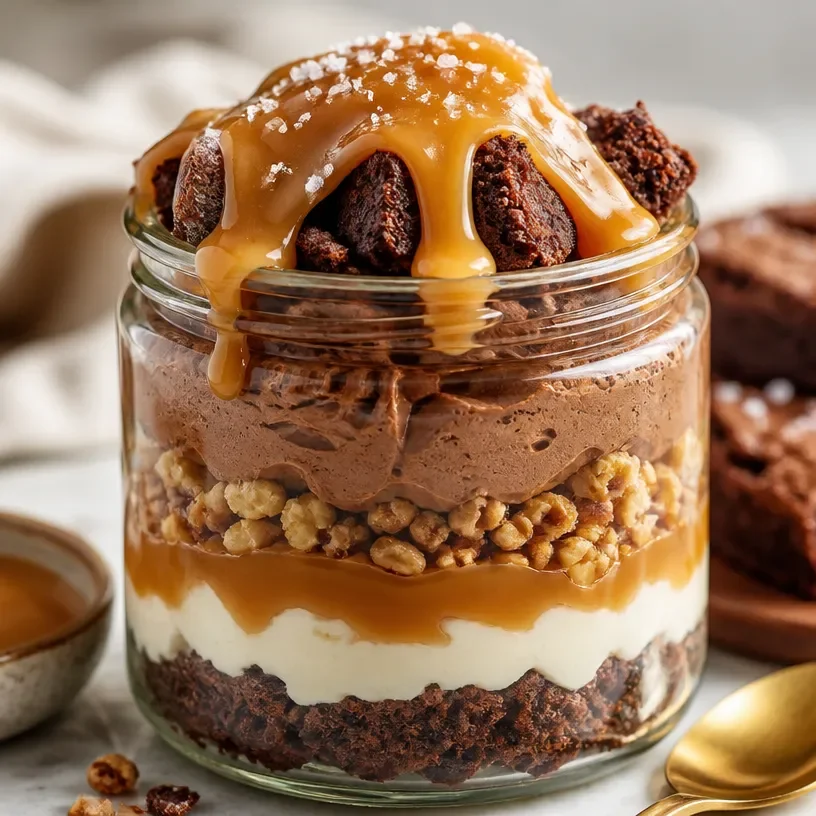
High-Protein Salted Caramel Brownie Jar (Meal-Prep Friendly)
Indulge in Decadence: Protein Salted Caramel Brownie Jar
Welcome to my kitchen, dear foodies! Today, we’re diving into something utterly delicious: Protein Salted Caramel Brownie Jars. Imagine rich, fudgy brownies layered with a creamy salted caramel and topped off with a sprinkle of sea salt. These little jars of joy are not just delightful to eat but also packed with protein, making them a perfect guilt-free indulgence. Whether you’re a fitness enthusiast looking for a post-workout treat or simply someone who loves a good dessert (guilty as charged!), this recipe has got your name written all over it.
You know, there’s just something about brownies that sparks joy in so many of us. The warm, chocolatey aroma wafting through the kitchen, the anticipation as they bake, and the joy of devouring a rich, gooey square of brownie — are we feeling this, or what? This recipe takes the goodness of brownies and elevates it into a layered dessert that can be prepped in advance and enjoyed whenever the sweet tooth strikes.
Why jars, you might ask? Well, besides being super cute and portable, they also make for perfect portion control! Plus, there’s something inherently satisfying about digging into layers of harmony, don’t you think? So, grab your spoons and let’s get into it!
A Nostalgic Sweet Reminder
When I was a kid, my mom would whip up a batch of her famous brownies every Sunday afternoon. The whole house would fill with the mouth-watering scent of chocolate as we anticipated the warm squares topped with a generous scoop of vanilla ice cream. She had this way of turning simple moments into cherished memories, and for me, those brownies were always the highlight.
One day, my little brother got creative and decided to experiment by drizzling some leftover caramel sauce from another dessert all over the brownies fresh out of the oven. The combination was pure magic! We all dove in, and I remember giggling about how we’d discovered a new favorite.
Years later, I wanted to reinvent that nostalgic flavor into something a bit healthier and find a way to enjoy it daily without the guilt. Hence, the Protein Salted Caramel Brownie Jar was born! It’s a way to keep that warm family memory alive while nourishing my body at the same time.
Ingredients
Here’s what you’ll need to make your own decadent Protein Salted Caramel Brownie Jars:
-
Nuts (Walnuts or Pecans): These add a nice crunch. Chef Tip: Don’t have nuts? You can totally leave them out or swap them for seeds like pumpkin or sunflower seeds for a nut-free version!
-
Unsweetened Cocoa Powder: This is where the rich chocolate flavor comes from. Substitution: You can use carob powder for a caffeine-free option.
-
Protein Powder (Chocolate Flavor): This gives our brownies an extra boost. Substitution: If you’re not a fan of chocolate protein, vanilla works nicely too.
-
Almond or Peanut Butter: Smooth and creamy, these add richness. Note: You can also use sunflower seed butter for a nut-free treat!
-
Maple Syrup or Honey: A hint of natural sweetness. Chef Insight: If you are vegan, go with maple syrup; it’s totally plant-based!
-
Eggs: Just regular ol’ eggs will help bind everything together. Aquafaba (the liquid from chickpeas) can be a fantastic substitute for a vegan option—3 tablespoons equals one egg!
-
Salt: To balance the sweetness. Tip: Use a good quality sea salt for that perfect touch.
-
Caramel Sauce: Look for a protein-packed version or make your own! Tip: Adding a pinch of sea salt to your caramel can elevate the flavor to heavenly status—trust me on this!
-
Greek Yogurt: Creates a creamy layer when you jar it up. Alternative: Use dairy-free yogurt if you’re going plant-based!
-
Sea Salt Flakes: To finish it off with a crunch. Just a light sprinkle really does the trick!
Step-by-Step Instructions
Now that we’ve gathered our ingredients, let’s get to the fun part — cooking!
-
Preheat Your Oven to 350°F (175°C): It’s always so delightful to feel the warmth as the oven does its magic. Your kitchen is about to smell heavenly!
-
Combine the Dry Ingredients: In a mixing bowl, stir together the cocoa powder, protein powder, chopped nuts, and a pinch of salt. This step sets the chocolatey foundation for our brownies.
-
Mix the Wet Ingredients: In a separate bowl, whisk together the almond or peanut butter, maple syrup (or honey), and eggs until smooth. If you’re using any nut-free alternatives, this is a good time to mix them in.
-
Combine Wet and Dry: Now, pour the wet mixture into the dry ingredients and mix until well combined. Don’t overwork it; just aim for that fudgy consistency!
-
Prepare Your Baking Dish: Grease an 8×8-inch baking pan with a bit of olive oil or line it with parchment paper. This will ensure your brownies come out without a hitch.
-
Pour and Bake: Spread the brownie mix evenly into the prepared pan and pop it into the preheated oven for about 20–25 minutes. The goal is to bake them until the edges are set, but the center is still a little gooey. Trust your instincts here!
-
Cool and Layer: Once baked, let the brownies cool in the pan. Once cooled, cut them into squares and layer them in your jars. Start with a layer of brownie, followed by a layer of Greek yogurt, a drizzle of caramel, and repeat. It’s like layering flavors of joy!
-
Finishing Touch: Top with a sprinkle of sea salt flakes just before serving. This step adds that delightful contrast of sweet and salty!
Serving Suggestions
When it comes to serving, the presentation can make a world of difference! Serve your Protein Salted Caramel Brownie Jars chilled or slightly warmed, depending on your mood. For a more aesthetically pleasing option, consider garnishing them with a sprig of mint or topping with fresh berries for a pop of color. These jars also make for an impressive treat to bring to gatherings—you’ll be the star of the show!
Recipe Variations
Want to switch things up? Here are a few creative twists you can try:
-
Mint Chocolate: Add a drop or two of peppermint extract to the brownie mix for a refreshing minty flavor. Think about pairing it with a chocolate mint yogurt for those layers!
-
Nut-Free Option: Swap out the walnuts for oats—just a 1/2 cup of rolled oats will provide that delightful texture without nuts.
-
Vegan Version: Use flax eggs instead of regular eggs and a dairy-free yogurt. Your taste buds won’t even realize the difference!
-
Peanut Butter Swirl: Drop spoonfuls of peanut butter into the brownie batter before baking for delightful peanut butter pockets.
-
Spiced Twist: Sprinkle in some cinnamon or nutmeg into your layers for a cozy autumn vibe.
Chef’s Notes
Every recipe tells a story, and this one is close to my heart. The Protein Salted Caramel Brownie Jar has evolved over time through numerous trials of balancing flavors and healthiness, but the nostalgic memory of those Sunday brownies will always linger in my mind. I fondly remember the laughter shared with my family around the table, and now, I bring this joy into my kitchen whenever I whip up these jars.
And let’s be real, things can get messy—there’s been flour on my face and chocolate spread all over my kitchen counter during testing (oops!), but those ‘oops’ moments only add to the joy of cooking. So, don’t stress if things get a little chaotic in your kitchen; embrace it! Cooking is as much about the journey as it is about the final dish.
FAQs and Troubleshooting
1. My brownies seem dry or crumbly—what went wrong?
Most likely, they were overbaked. Keep an eye on them! The center should look a bit underdone when you pull them out. Remember, they will continue to cook as they cool.
2. Can I make these jars in advance?
Absolutely! They store beautifully in the fridge for about 4–5 days. Just make sure to top them with the sea salt flakes right before serving for freshness.
3. What if I don’t have Greek yogurt?
No worries! Regular yogurt or any dairy-free substitute will do just fine. The texture will change a bit, but they’ll still taste delicious!
4. How do I ensure my layers look pretty in the jar?
Take your time layering! Using a piping bag for the yogurt can help keep those layers clean and neat for a beautiful presentation.
Nutritional Info
Each jar is uniquely satisfying, and here’s a rough nutritional breakdown:
- Calories: Around 300-400 (depending on ingredients used)
- Protein: 20g (thanks to your protein powder and Greek yogurt)
- Fats: 15g (mostly healthy fats from nuts and nut butter)
- Carbohydrates: 45g (mostly from the brownie and natural sweeteners)
So, whether you’re making these delightful jars for yourself or to impress family and friends, I hope they bring as much joy to your kitchen as they’ve brought to mine. Here’s to more sweet memories filled with laughter, love, and deliciousness! Enjoy!
Print
Protein Salted Caramel Brownie Jar
- Total Time: 40 minutes
- Yield: 4 servings 1x
- Diet: High Protein
Description
Delicious layered brownies with creamy salted caramel, packed with protein for a guilt-free indulgence.
Ingredients
- 1 cup Nuts (Walnuts or Pecans), chopped
- 1/2 cup Unsweetened Cocoa Powder
- 1 scoop Protein Powder (Chocolate Flavor)
- 1/2 cup Almond or Peanut Butter
- 1/3 cup Maple Syrup or Honey
- 2 Eggs
- 1/4 teaspoon Salt
- 1/2 cup Caramel Sauce
- 1 cup Greek Yogurt
- Sea Salt Flakes, for topping
Instructions
- Preheat your oven to 350°F (175°C).
- Combine the dry ingredients: cocoa powder, protein powder, chopped nuts, and a pinch of salt.
- Mix the wet ingredients: almond or peanut butter, maple syrup (or honey), and eggs until smooth.
- Combine the wet mixture into the dry ingredients and mix until just combined.
- Prepare an 8×8-inch baking pan, greasing it or lining it with parchment paper.
- Pour the brownie mix into the pan and bake for about 20-25 minutes.
- Cool brownies in the pan; cut into squares and layer in jars with yogurt and caramel.
- Top with a sprinkle of sea salt flakes before serving.
Notes
These jars can be prepped in advance and stored in the fridge for 4-5 days. Top with sea salt just before serving for best taste.
- Prep Time: 15 minutes
- Cook Time: 25 minutes
- Category: Dessert
- Method: Baking
- Cuisine: American
Nutrition
- Serving Size: 1 jar
- Calories: 350
- Sugar: 12g
- Sodium: 200mg
- Fat: 15g
- Saturated Fat: 4g
- Unsaturated Fat: 8g
- Trans Fat: 0g
- Carbohydrates: 45g
- Fiber: 5g
- Protein: 20g
- Cholesterol: 70mg
Keywords: brownie jar, salted caramel, protein dessert, healthy dessert, indulgent recipe
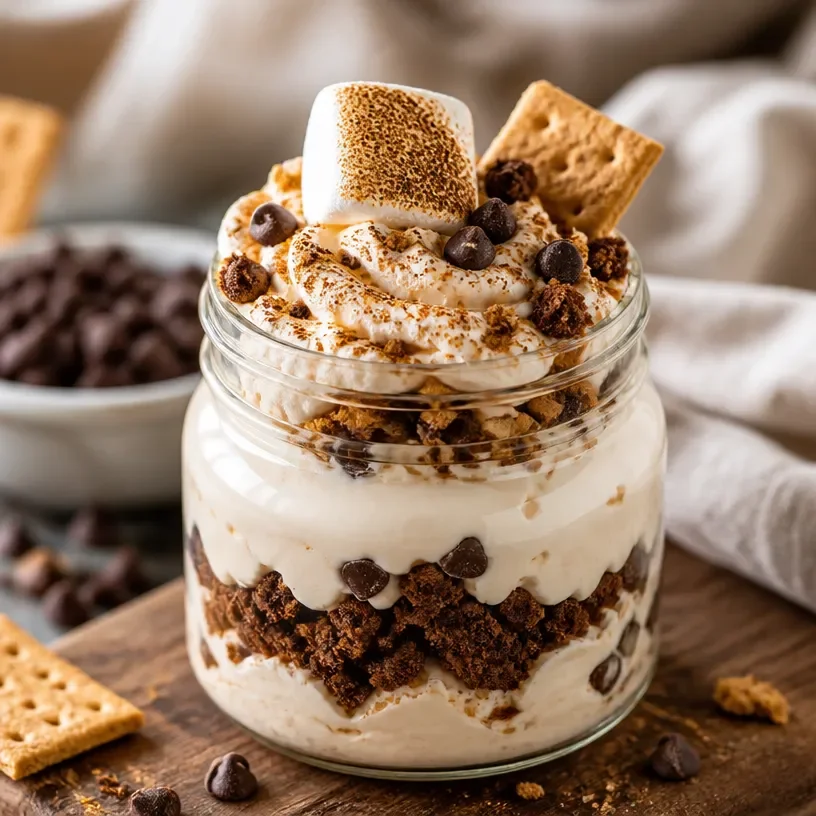
No-Bake Protein S’mores Jar (5-Minute High-Protein Snack)
Protein S’mores Jar: A Delicious, Wholesome Twist on a Classic Treat
Welcome to my cozy kitchen, food lovers! I’m Olivia Bennett, and today, I’m beyond excited to share with you a recipe that puts a delightful spin on a timeless favorite: the classic s’more. Introducing the Protein S’mores Jar! Imagine scooping into glass jars filled with layers of graham cracker crumbs, rich chocolate, fluffy marshmallow, and a hefty dose of protein! It’s an indulgent dessert that not only satisfies your sweet tooth but also fuels your body. Whether you’re looking for a post-workout treat, a snack for the kiddos, or just something sweet to enjoy at home, this Protein S’mores Jar is the answer.
This recipe encapsulates the essence of comfort food—sweet, gooey, and oh-so-fun to eat. Plus, it brings back warm memories of campfires, laughter, and roasting marshmallows under the stars. Let’s dive into how we can recreate that nostalgic magic with a twist that will leave you feeling good about indulging!
A Sticky, Sweet Memory
As a little girl, I spent countless summer nights camping in the woods with my family. I can still hear the crackling fire and the sounds of crickets chirping as my dad expertly toasted marshmallows on the end of a long stick. There was something so magical about the whole experience—the family together, laughter echoing in the trees, and those first bites of a hot, gooey s’more.
But oh, did I make a mess! Chocolate smeared all over my face, and sticky fingers covered in marshmallow were the norm. However, it was those messy, sweet moments that taught me the importance of creating memories through food. Fast forward to today, and while I’ve got a few more cooking skills under my belt, I still cherish that joy of making food that brings people together. This Protein S’mores Jar not only captures that magic but allows us to enjoy it without the campfire.
Ingredients
Here’s what you’ll need to create these delightful Protein S’mores Jars:
-
Graham cracker crumbs (1 cup): The backbone of a s’more! If you’re looking for a gluten-free option, try crushed gluten-free graham crackers or almond flour for a nutty twist.
-
Chocolate protein powder (1/2 cup): A great way to add a protein boost! If you’re not into protein powder, feel free to use cocoa powder mixed with a little sweetener.
-
Unsweetened cocoa powder (2 tablespoons): This adds rich chocolate flavor without all the added sugar. You can swap it with carob powder if you prefer a healthier option.
-
Nut butter (1/2 cup): This is your gooey filling! Almond butter offers a subtle sweetness, while peanut butter adds a familiar flavor. Cashew butter is also a delightful alternative if you’re looking for something creamier.
-
Mini marshmallows (1 cup): Nothing beats the fluffiness! If you want a healthier option, use coconut whipped cream or homemade marshmallow fluff.
-
Milk (or dairy-free alternative, 1/2 cup): Dairy or nut milk will do just fine. Almond milk or oat milk can be substituted for a lactose-free variation.
-
Honey or maple syrup (1/4 cup): For sweetness and that lovely sticky texture to bind everything together. For a vegan option, maple syrup is the perfect choice.
Step-by-Step Instructions
Now, let’s get cooking! Follow these steps to create your Protein S’mores Jar.
-
Preheat Your Oven: If you want to elevate your graham cracker layer, preheat your oven to 350°F (175°C). Spread the crumbs on a baking sheet and lightly toast them for 5-7 minutes for that authentic toasted flavor. But if you want to skip this step, that’s totally okay too!
-
Prepare Your Ingredients: In a mixing bowl, combine the graham cracker crumbs and cocoa powder. Stir them together until well blended. This combination provides that delightful s’mores flavor we all adore.
-
Mix Protein Batter: In another bowl, mix together the chocolate protein powder, nut butter, and milk until you achieve a smooth, creamy consistency. If you feel it’s too thick, add a splash more milk—don’t hesitate to adjust based on your desired texture.
-
Sweeten the Mix: Add in honey or maple syrup to your protein mix, stirring until fully combined. The sweetness will balance out the richness of the nut butter and protein powder, creating a delightful combination.
-
Layering the Jars: Grab your jars (or bowls). Start by adding a layer of the toasted graham cracker crumbs at the bottom, about 2 tablespoons is perfect. Press it down gently with the back of a spoon.
-
Add the Protein Mix: Spoon a layer (about 2-3 tablespoons) of your protein batter over the graham cracker layer. Use a spatula to smooth it out and make sure it reaches the edges.
-
Marshmallow Time: Add a layer of mini marshmallows on top of the protein mix—go as wild as you like! They’ll provide that classic s’more feel.
-
Repeat Layers: Repeat the layers until you fill your jars or bowls. The last layer can be marshmallows if you want a lovely topping that will melt on contact.
-
Chill Out: For optimum enjoyment, place your jars in the refrigerator for at least an hour. This allows everything to set and meld together beautifully.
-
Serve and Enjoy: Once chilled, you can dig in as is, or take it up a notch by using a kitchen torch to toast the marshmallows just like you would over a campfire. Just be careful to keep it moving so they don’t burn!
Serving Suggestions
Pack your Protein S’mores Jars with a spoon and a few extra marshmallows on the side for a fun, interactive treat. They make for an adorable dessert for gatherings or personal night-in treat. Plus, they can be enjoyed straight from the jar!
Recipe Variations
Feeling adventurous? Here are some delicious twists to consider:
-
Peanut Butter Cup: Use peanut butter protein powder and top with crushed peanut butter cups.
-
Minty Fresh: Add a drop of peppermint extract to your mix for a refreshing mint chocolate flavor.
-
Fruit Fusion: Add sliced strawberries or bananas in between the layers for a fruity twist.
-
Spicy Treat: Try adding a dash of cayenne pepper to the protein mix for a hint of heat that pairs fabulously with chocolate.
Chef’s Notes
Ah, the joy of creating recipes! This Protein S’mores Jar evolved from my search for a healthier snack that still felt like a treat. I love experimenting with different ingredients—sometimes I even throw in a scoop of cookie dough protein powder for fun!
Oh, and don’t be surprised if your friends start asking you to make these for every gathering! I once made them for a potluck, and they vanished in minutes!
FAQs and Troubleshooting
-
Can I make this recipe vegan?
Absolutely! Use plant-based protein powder, almond or oat milk, and maple syrup in place of honey. For marshmallows, check for vegan options or use coconut whipped cream. -
Why did my protein mix get too thick?
No worries! If your mixture is thick, just add a little more milk—up to 1 tablespoon at a time—until you reach your desired consistency. -
How long can I store these jars?
Keep them in the fridge for up to 3 days. Just remember to let them sit out for a few minutes before digging in so they soften up a bit. -
Can I freeze these?
Yes! These jars freeze well, just pull them out a few hours before you plan on enjoying them to thaw.
Nutritional Info
While I won’t provide exact nutritional info since it can vary based on the brands of ingredients you use, I can tell you that each jar is filled with protein, healthy fats, and the sweet joy of nostalgia!
I hope this Protein S’mores Jar recipe brings a bit of warmth and deliciousness into your life. Remember, cooking is all about having fun, experimenting, and making memories. Let me know how your jars turn out, and feel free to get creative with them! Happy cooking, fellow foodies!
Print
Protein S’mores Jar
- Total Time: 25 minutes
- Yield: 4 servings 1x
- Diet: Vegetarian
Description
A delightful twist on the classic s’more, these Protein S’mores Jars are layered with graham cracker crumbs, rich chocolate, fluffy marshmallows, and a protein boost for a wholesome treat.
Ingredients
- 1 cup graham cracker crumbs
- 1/2 cup chocolate protein powder
- 2 tablespoons unsweetened cocoa powder
- 1/2 cup nut butter
- 1 cup mini marshmallows
- 1/2 cup milk or dairy-free alternative
- 1/4 cup honey or maple syrup
Instructions
- Preheat your oven to 350°F (175°C) and toast the graham cracker crumbs for 5-7 minutes if desired.
- Combine the graham cracker crumbs and cocoa powder in a mixing bowl.
- Mix the chocolate protein powder, nut butter, and milk in another bowl until smooth.
- Add honey or maple syrup to the protein mix and stir well.
- Layer about 2 tablespoons of the toasted graham cracker crumbs at the bottom of your jars.
- Spoon a layer of your protein batter over the graham cracker layer.
- Add a layer of mini marshmallows on top of the protein mix.
- Repeat layers until the jars are filled, finishing with marshmallows on top.
- Chill your jars in the refrigerator for at least an hour.
- Serve and enjoy, optionally toasting the marshmallows with a kitchen torch.
Notes
These jars can be made vegan by using plant-based protein powder, almond or oat milk, and maple syrup instead of honey. They can keep in the fridge for up to 3 days.
- Prep Time: 15 minutes
- Cook Time: 10 minutes
- Category: Dessert
- Method: No Bake
- Cuisine: American
Nutrition
- Serving Size: 1 jar
- Calories: 320
- Sugar: 15g
- Sodium: 150mg
- Fat: 14g
- Saturated Fat: 2g
- Unsaturated Fat: 10g
- Trans Fat: 0g
- Carbohydrates: 40g
- Fiber: 3g
- Protein: 10g
- Cholesterol: 0mg
Keywords: s'mores, dessert, protein, healthy, no-bake
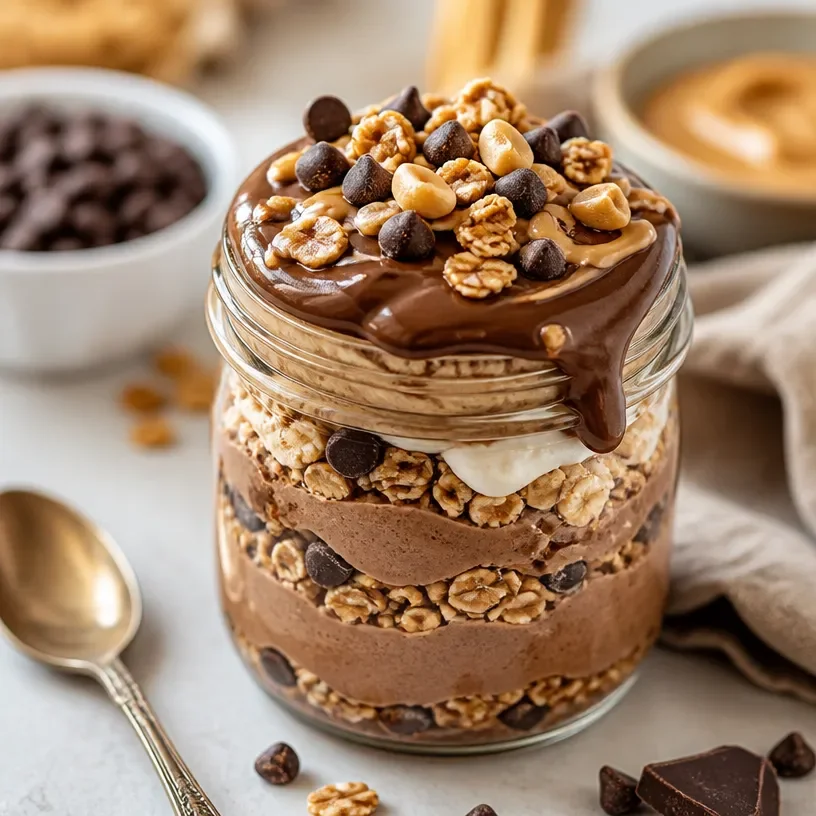
Protein Chocolate Peanut Butter Jar: 5-Minute No-Bake Snack
Deliciously Decadent: Protein Chocolate Peanut Butter Jar
Welcome to my kitchen, food lovers! Today, I have a special treat that balances the line between indulgence and nourishment: the Protein Chocolate Peanut Butter Jar. This delightful concoction is not only delicious but also packed with protein to keep you fueled throughout your day, whether you’re hitting the gym or just enjoying a sweet spoonful after a long day. As we dive into this recipe, you’ll find out just how simple it can be to create something extraordinary in your own kitchen!
There’s something magical about peanut butter, isn’t there? Its rich, nutty flavor and smooth texture can transform the simplest of snacks into something truly satisfying. When combined with chocolate, it becomes a match made in heaven! But wait—what if I told you we could take that classic combo and amp it up with protein to make it even more nourishing? That’s where this recipe shines, making it perfect for those late-night cravings or post-workout snacks.
In this blog post, you’ll find my tried-and-true recipe for the Protein Chocolate Peanut Butter Jar, along with fun anecdotes, ingredient insights, and my favorite serving suggestions. So grab your apron, and let’s make some magic together!
A Walk Down Memory Lane
Let me take you back to the kitchen of my childhood. I was about ten years old, and I still remember the weekends spent with my grandmother, who had an uncanny ability to turn a few basic ingredients into something truly special. One of our favorite kitchen projects was whipping up delicious snacks—especially anything with peanut butter.
I can still picture her standing at the counter, mixing together peanut butter, sugar, and the inevitable sprinkle of cocoa powder that she swore was the secret ingredient. We would sit there with a spoon in one hand and a bowl in the other, savoring the gooey goodness before it made its way into a dessert. Those moments of laughter, sticky fingers, and an overabundance of chocolate were the foundation of my love for cozy cooking.
Fast forward to the present, and I’ve taken the essence of those sweet afternoons and created this Protein Chocolate Peanut Butter Jar recipe. It brings back those cherished memories while giving a much-needed boost to my daily routine. I hope this recipe will inspire you just as those moments inspired me!
Ingredients
To create your very own Protein Chocolate Peanut Butter Jar, you’ll need the following ingredients:
- Natural Peanut Butter: Look for varieties with just peanuts (and maybe salt!). If you’re allergic, try sunflower seed butter or almond butter instead.
- Cocoa Powder: Use unsweetened cocoa powder for a rich chocolate flavor. For a milder taste, you can swap in carob powder if you’re looking for a caffeine-free option.
- Powdered Protein (Chocolate or Vanilla): This adds the delightful protein boost. I usually go for whey protein, but plant-based options work great, too!
- Honey or Maple Syrup: Both sweeteners pair beautifully with the nutty and chocolate flavors. If you’re vegan, opt for maple syrup for a lovely caramel-like sweetness.
- Milk (Dairy or Plant-based): This helps achieve that creamy texture. Almond, oat, or coconut milk are fabulous choices.
- Vanilla Extract: A splash of vanilla elevates the flavor, but feel free to switch it up with almond extract for a unique twist.
- Sea Salt: Just a pinch enhances all the flavors. Don’t skip this—it’s a game-changer!
Step-by-Step Instructions
Now that you have your ingredients ready, it’s time to get cooking! Follow these simple steps to create your Protein Chocolate Peanut Butter Jar.
-
Combine Peanut Butter and Cocoa: In a mixing bowl, start by scooping out 1 cup of natural peanut butter and add 1/3 cup of unsweetened cocoa powder. Stir them together until fully combined. This is where the magic begins — the nutty aroma of peanut butter plus the deep chocolatey goodness makes my heart sing!
Chef Tip: If your peanut butter is cold from the fridge, it might be a little hard to mix. Let it sit at room temperature for about 15-20 minutes for easier mixing.
-
Add Protein Powder: Next, sprinkle in 1 cup of your chosen protein powder. This will bulk up the mix and make it oh-so-tasty! A quick tip: if your protein powder has a sweetener, you may want to adjust the honey or maple syrup accordingly.
Chef Hack: Use a whisk to break up any clumps in the protein powder before adding it to avoid lumpy bits in your final mixture.
-
Sweeten It Up: Gradually add 1/3 cup of honey or maple syrup to the mix. Stir it in until everything is well combined. Remember, sweetness is subjective! Taste and adjust as needed until you find that sweet spot.
-
Incorporate Milk: It’s time to add about 2-4 tablespoons of milk. Start with less and add more as needed to achieve your desired consistency. You want it to be thick but still spoonable. This step is crucial—don’t rush it!
Note: If you’re looking for a slightly thinner texture, you can also try adding a tablespoon of coconut oil or melted butter for richness.
-
Flavor It Up: Add a teaspoon of vanilla extract along with a pinch of sea salt. These little additions elevate the flavor profile, making your jar irresistible.
Fun Fact: A pinch of salt complements sweetness beautifully! It balances the flavors and enhances the overall taste.
-
Jar It Up: Once your mixture is creamy and smooth, it’s time to transfer it to a clean jar. You can use any container you have—Mason jars are always a favorite of mine! Just scoop it in, seal it up, and voilà!
-
Chill: Ideally, let it sit in the fridge for at least 30 minutes to firm up a bit. However, I won’t blame you if you dive in right away—this stuff is incredibly tempting!
Serving Suggestions
To serve your Protein Chocolate Peanut Butter Jar, I recommend enjoying it in a variety of delicious ways! You can spread it on whole-grain toast or rice cakes for a hearty snack, dollop it on top of pancakes or waffles for a decadent breakfast, or simply grab a spoon and indulge! Garnish with sliced bananas or a sprinkle of chia seeds for an extra pop of flavor and texture.
Recipe Variations
Feeling adventurous? Here are a few variations to consider:
- Nutty Overload: Mix in some chopped nuts or seeds such as almonds, walnuts, or pumpkin seeds for a delightful crunch.
- Satisfy the Sweet Tooth: Add chocolate chips or mini marshmallows to the mixture for a sweeter treat.
- Spiced Up: Incorporate a pinch of cinnamon or a drop of peppermint extract for a holiday twist.
- Fruity Fun: Swirl in your favorite jam or fruit puree for a burst of natural sweetness.
Chef’s Notes
This recipe holds a special place in my heart—it’s one I’ve fine-tuned over the years. Initially, I experimented with different types of sweeteners and proteins until I discovered the perfect balance with honey and plant-based protein. I’ve shared it with friends and family, and they rave about how versatile it is!
One funny kitchen mishap I recall: I forgot to add the protein powder and ended up with a wickedly thick chocolate-peanut mixture. While it wasn’t what I intended, it turned into an experimental brownie batter that later graced our dessert table!
FAQs and Troubleshooting
Q: What can I substitute if I need a nut-free option?
A: Try sunflower seed butter instead of peanut butter! It provides a similar creamy texture and nutty flavor without the allergens.
Q: The mixture is too thick. What do I do?
A: If your mixture is way too thick, simply add more milk (or a splash of water) a tablespoon at a time until you reach the desired consistency.
Q: How should I store my Protein Chocolate Peanut Butter Jar?
A: Store it in an airtight container in the fridge, where it will keep for up to two weeks. But trust me, it won’t last that long!
Q: Can I freeze this recipe?
A: Absolutely! You can freeze the jar for up to three months! Thaw it in the fridge overnight when you’re ready to enjoy.
Nutritional Info
While the nutritional content can vary based on the specific ingredients and brands you choose, here’s a general breakdown per serving:
- Calories: ~200
- Protein: ~10g
- Fat: ~12g
- Carbs: ~15g
- Fiber: ~3g
Please check the individual ingredients for their nutritional info based on your specific brands.
And there you have it! Your very own Protein Chocolate Peanut Butter Jar—a tasty treat that’s perfect for fueling your day. I hope this recipe brings you as much joy making it as it brings savoring it. Happy cooking, my fellow foodies!
Print
Protein Chocolate Peanut Butter Jar
- Total Time: 40 minutes
- Yield: 4 servings 1x
- Diet: Vegetarian
Description
A delicious and nourishing chocolate peanut butter spread packed with protein, perfect for snacks or post-workout fuel.
Ingredients
- 1 cup Natural Peanut Butter
- 1/3 cup Cocoa Powder
- 1 cup Powdered Protein (Chocolate or Vanilla)
- 1/3 cup Honey or Maple Syrup
- 2–4 tablespoons Milk (Dairy or Plant-based)
- 1 teaspoon Vanilla Extract
- Pinch of Sea Salt
Instructions
- Combine Peanut Butter and Cocoa in a mixing bowl, stirring until fully combined.
- Add the protein powder, breaking up any clumps.
- Sweeten the mix by gradually adding honey or maple syrup.
- Incorporate milk to achieve the desired consistency.
- Flavor it up with vanilla extract and sea salt.
- Jar the mixture into a clean container.
- Chill in the fridge for at least 30 minutes before enjoying.
Notes
Store in an airtight container in the fridge for up to two weeks, or freeze for up to three months.
- Prep Time: 10 minutes
- Cook Time: 30 minutes
- Category: Snack
- Method: Mixing
- Cuisine: American
Nutrition
- Serving Size: 1 serving
- Calories: 200
- Sugar: 12g
- Sodium: 50mg
- Fat: 12g
- Saturated Fat: 2g
- Unsaturated Fat: 9g
- Trans Fat: 0g
- Carbohydrates: 15g
- Fiber: 3g
- Protein: 10g
- Cholesterol: 0mg
Keywords: peanut butter, protein, chocolate, snack, healthy dessert
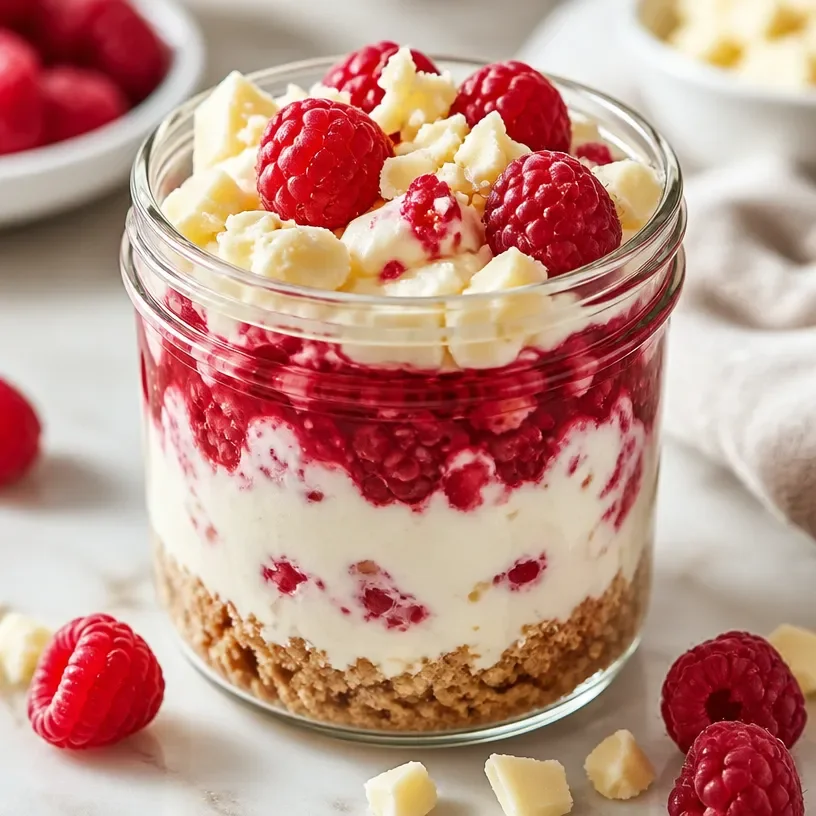
No-Bake Protein Raspberry White Chocolate Jar (15-Min Snack)
Welcome to the Sweet Haven: Protein Raspberry White Chocolate Jars
Hey there, fellow foodies! I’m thrilled to have you in my cozy kitchen today, where the air is filled with delicious aromas and the promise of something truly delightful. If you’re like me and absolutely love indulging in sweet treats that are both nutritious and satisfying, then you are in for a treat! Today, I’m going to share with you an incredible recipe for Protein Raspberry White Chocolate Jars—a dessert that not only makes your taste buds dance but also packs a nutritious punch.
Imagine this: velvety layers of creamy protein goodness mingling with fresh, vibrant raspberries and the sweet elegance of white chocolate. Sounds heavenly, right? Well, not only does this treat look stunning in a jar, but it also serves as a perfect balance of health and indulgence.
But before we dive into this delightful recipe, let me take you on a little trip down memory lane. There’s something about sweet treats that effortlessly brings us back to nostalgic moments in our lives. For me, that sweet nostalgia revolves around summer afternoons spent in my grandmother’s kitchen.
A Sweet Memory
I can still recall those golden days when the sun streamed through the window while my grandmother whipped up her famous raspberry desserts. She had this incredible talent for transforming the simplest ingredients into masterpieces. I’d watch her mix, taste, and laugh as we prepared her signature raspberry parfaits together. The joy on her face when presenting the layers of sweetened cream and fresh berries was contagious, and it instilled in me a love for creating unforgettable experiences through food.
The raspberry flavor has always held a special place in my heart, representing love, warmth, and happy gatherings. It only felt natural to create a healthier version of those memories. So, as I whipped up this Protein Raspberry White Chocolate Jar recipe, I couldn’t help but channel those cherished moments and bring a taste of home to you!
Ingredients
Let’s get to the goodies! Here’s what you need to whip up your own Protein Raspberry White Chocolate Jar:
-
1 cup low-fat Greek yogurt
- A fantastic source of protein and probiotics! You can substitute it with non-dairy yogurt if you’re vegan.
-
½ cup fresh raspberries
- These little gems add brightness and sweetness! Frozen raspberries work too. Just thaw them before using.
-
¼ cup white chocolate chips
- Add that melty, sweet flavor! You can opt for sugar-free or dairy-free chocolate as a swap.
-
2 tablespoons honey or maple syrup
- For added sweetness! Agave syrup is also a fantastic substitute if you’re looking for a vegan option.
-
1 scoop vanilla protein powder
- A great way to add a protein boost! You can choose whey or plant-based protein based on your dietary preference.
-
½ teaspoon vanilla extract
- It enhances the flavor beautifully. You can use almond extract for a different twist.
-
Optional toppings: crushed nuts, coconut flakes, or more berries
- Get creative! You can skip toppings if you want a simple treat.
These ingredients come together to create a delightful dessert that feels indulgent but is packed with nutrients. Now, let’s dive into the steps to create this gorgeous treat!
Step-by-Step Instructions
Alright, my kitchen pals, let’s get cooking! Follow these simple steps, and soon enough, you’ll have your delightful jars ready to impress.
-
Prepare Your Ingredients
- Get everything out and ready: Greek yogurt, raspberries, white chocolate chips, protein powder, honey, and vanilla. It makes the cooking process smoother and helps you stay organized.
-
Mix the Yogurt Base
- In a medium-sized bowl, combine the Greek yogurt, honey (or maple syrup), vanilla extract, and protein powder.
- Chef Tip: Use a whisk to incorporate everything well. The better mixed, the creamier your layer will be!
-
Melt the White Chocolate
- In a microwave-safe bowl, heat the white chocolate chips in 20-second intervals until just melted. Stir in between each interval to prevent burning.
- Little Hack: If the chocolate starts to firm up, a couple of teaspoons of coconut oil can help maintain that luscious texture.
-
Combine Two Mixtures
- Once the chocolate is melted, fold it gently into the yogurt mixture. Take care not to overmix; you want those lovely swirls!
- Chef Insight: The warm chocolate creates a lovely marbled effect that makes each jar unique and visually appealing.
-
Layer the Ingredients
- Grab your jars (they can be fancy glass jars or simple containers—whatever you have on hand!).
- Start with a layer of the yogurt mixture, then add a layer of fresh raspberries. Repeat until the jars are filled, finishing with a few berries on top.
- Serving Tip: This layering is not just for looks; it creates that beautiful flavor combination in each bite.
-
Add Optional Toppings
- Feel free to sprinkle your choice of nuts, coconut flakes, or additional crushed berries on top for an extra crunch and flavor.
- Fun Note: You can get the kiddos involved here; let them sprinkle their favorite toppings!
-
Chill and Serve
- Cover the jars and place them in the refrigerator for 30 minutes to an hour. This allows all the flavors to meld together and gives the yogurt a lovely, creamier texture.
- Quick Tip: These jars can be made ahead of time and stored in the fridge for up to three days. Perfect for meal prep!
Serving Suggestions
To serve, simply take the jars out of the fridge, give them a little shake if needed, and enjoy! You can also serve these jars on a lovely wooden board, drizzling with a little extra honey or adding a sprig of mint for a pop of color.
Whether you have a cozy breakfast for yourself or a delightful dessert for a dinner party, these jars make everything feel special!
Recipe Variations
Now let’s shake things up a bit! Here are some creative variations to try on your Protein Raspberry White Chocolate Jars:
-
Berry Medley: Swap out the raspberries for your favorite berries—blueberries, strawberries, or blackberries. Each will give a different flavor profile!
-
Nutty Delight: Incorporate almond butter into the yogurt mix for an added creaminess and nutty flavor.
-
Chocolate Lovers: Use dark chocolate chips instead of white for a richer taste and add a sprinkle of sea salt on top for that sweet-salty combo.
-
Veggie Boost: Add a tablespoon of chia seeds or hemp seeds to the yogurt mix for some added fiber and nutrition.
-
Coconut Infusion: Use coconut yogurt and sprinkle toasted coconut flakes to amplify the tropical vibes!
Chef’s Notes
As I developed this recipe, I remembered so many joyful moments spent in that charismatic kitchen with my grandmother. Each layer in this jar tells a story, combining health with love and nostalgia. It’s amazing how food can remind us of wonderful relationships and cherished times.
I embraced the idea of contrast in flavors and textures, and I think that’s what truly makes this recipe shine. Plus, I love how easy it is to customize! The balance of protein, freshness, and indulgence makes this treat feel both rewarding and guilt-free.
Oh, and a funny kitchen story: the first time I made this, I got so excited blending everything that I accidentally knocked a bowl of yogurt over. My apron was covered, and I was scrambling to salvage my masterpiece—remember to always have a towel nearby!
FAQs and Troubleshooting
-
Can I use frozen raspberries?
- Absolutely! Just make sure to thaw them out before layering. They’ll add a beautiful, juicy texture to your jars.
-
What if I don’t have Greek yogurt?
- You can use any yogurt you love, but Greek yogurt is recommended for its creamy consistency and higher protein content.
-
How can I make this vegan?
- Substitute the yogurt with a non-dairy alternative, use maple syrup instead of honey, and choose dairy-free chocolate chips.
-
How long do these jars last?
- They can be stored in the refrigerator for up to three days. But I bet they won’t last that long—they’re just too delicious to resist!
Nutritional Info
While it’s always good to focus on the delightful flavors, here’s a rough nutritional breakdown per serving for our Protein Raspberry White Chocolate Jar (without optional toppings):
- Calories: 250
- Protein: 22g
- Fat: 8g
- Carbohydrates: 24g
- Fiber: 3g
And there you have it! A simple yet luxurious Protein Raspberry White Chocolate Jar that’s sure to become a household favorite. Remember, the kitchen is a space for creativity, joy, and delicious memories, and I hope this recipe not only satisfies your sweet tooth but also inspires you to share moments with your loved ones.
Happy cooking, my friends! Let’s make those beautiful memories, one layer at a time!
Print
Protein Raspberry White Chocolate Jars
- Total Time: 25 minutes
- Yield: 4 servings 1x
- Diet: Vegetarian
Description
Delight in nutritious layers of creamy protein goodness, fresh raspberries, and white chocolate in this indulgent yet healthy dessert.
Ingredients
- 1 cup low-fat Greek yogurt
- ½ cup fresh raspberries
- ¼ cup white chocolate chips
- 2 tablespoons honey or maple syrup
- 1 scoop vanilla protein powder
- ½ teaspoon vanilla extract
- Optional toppings: crushed nuts, coconut flakes, or more berries
Instructions
- Prepare Your Ingredients: Get everything out and ready: Greek yogurt, raspberries, white chocolate chips, protein powder, honey, and vanilla.
- Mix the Yogurt Base: In a medium-sized bowl, combine the Greek yogurt, honey (or maple syrup), vanilla extract, and protein powder.
- Melt the White Chocolate: In a microwave-safe bowl, heat the white chocolate chips in 20-second intervals until just melted.
- Combine Two Mixtures: Once the chocolate is melted, fold it gently into the yogurt mixture.
- Layer the Ingredients: Grab your jars and start with a layer of the yogurt mixture, then add a layer of fresh raspberries. Repeat until the jars are filled.
- Add Optional Toppings: Sprinkle your choice of nuts, coconut flakes, or additional crushed berries on top.
- Chill and Serve: Cover the jars and place them in the refrigerator for 30 minutes to an hour.
Notes
These jars can be made ahead of time and stored in the fridge for up to three days. Perfect for meal prep!
- Prep Time: 15 minutes
- Cook Time: 10 minutes
- Category: Dessert
- Method: No-Cook
- Cuisine: American
Nutrition
- Serving Size: 1 serving
- Calories: 250
- Sugar: 12g
- Sodium: 75mg
- Fat: 8g
- Saturated Fat: 4g
- Unsaturated Fat: 3g
- Trans Fat: 0g
- Carbohydrates: 24g
- Fiber: 3g
- Protein: 22g
- Cholesterol: 5mg
Keywords: protein dessert, raspberry dessert, healthy jars, sweet treat, yogurt parfait




