
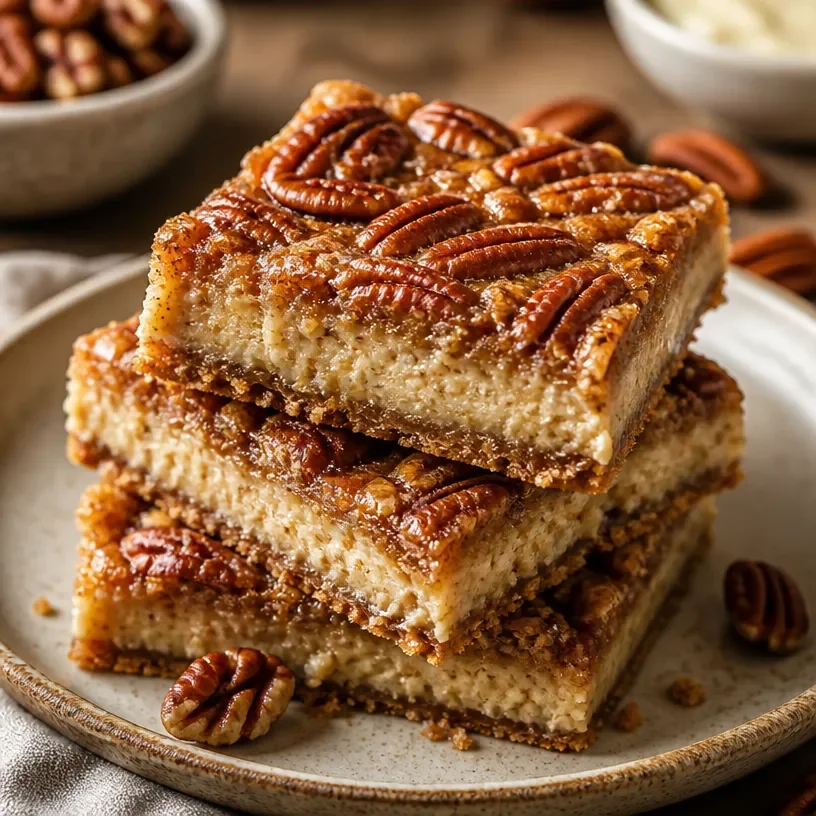
Protein Cottage Cheese Pecan Pie Bars
Protein-Packed Cottage Cheese Pecan Pie Bars: A Sweet Treat with a Twist!
Welcome to my kitchen, where the aroma of something sweet and nutty dances through the air! Today, we’re diving into a delicious recipe that marries nostalgia with health: Protein Cottage Cheese Pecan Pie Bars. Now, I know what you’re thinking—cottage cheese in dessert? Trust me on this one; it’s a game changer. These bars capture the essence of classic pecan pie while giving you a protein boost and a more nutritious twist!
Growing up, I fondly remember the Thanksgiving holidays spent at my grandmother’s house. The kitchen was filled with the warm smell of pie baking, and the family chatter was blended with laughter and love. My grandmother’s pecan pie was legendary; it was the centerpiece of our feasts, and I’d sneak bites of the filling before it even made it to the table! Fast forward to today, as a home cook who loves experimenting with flavors and healthier options, I set out to recreate that comforting experience with a twist that fits my lifestyle and tastes.
These Protein Cottage Cheese Pecan Pie Bars are perfect for those cozy evenings or as a sweet pick-me-up throughout the week. They are packed with protein, have just the right amount of sweetness, and are absolutely delicious! Let’s get started on this recipe that is sure to be a hit at your next gathering or a delightful snack you can enjoy any time of day!
Personal Story
I’ll never forget the moment I tried adding cottage cheese to a dessert for the first time. It was a spark of inspiration after I had come across a health blog promoting high-protein recipes! I thought, why not try it in one of my all-time favorites, pecan pie? I fondly remember sitting in my kitchen, curious and slightly nervous. Would it work? Would it taste good? As the scent of butter and sugar wafted from the oven, I felt my heart race with excitement! The moment I took that first bite, my fears melted away; it was creamy, sweet, and packed with flavor. I tasted the joy of my grandmother’s baking intertwined with my modern twist. Since then, these bars have become a beloved treat for my family, especially during the holidays, and I can’t wait to share them with you.
Ingredients
Let’s gather everything you need to make these delightful bars. Here’s what you’ll need:
-
Graham Cracker Crust:
- Graham Crackers (1 ½ cups crushed): A classic base that adds a sweet, slightly nutty flavor. If you want a gluten-free option, consider using crushed gluten-free graham crackers or almond flour.
- Unsalted Butter (1/4 cup, melted): This helps bind the crust together. Coconut oil is a great substitute if you want something dairy-free!
-
Cottage Cheese (1 cup): This is our secret ingredient! It adds a creamy texture and a protein punch. If you’re not a fan of cottage cheese, Greek yogurt can be an alternative, though it’ll change the flavor slightly.
-
Eggs (2 large): The binding agents for our filling—an essential ingredient for structure. Flax eggs (1 tablespoon of ground flaxseed mixed with 2.5 tablespoons of water, let it sit for 5 minutes) can be used as a vegan substitute.
-
Maple Syrup (1/2 cup): Adds natural sweetness and depth. Honey or agave syrup can be a good substitute if maple syrup is not available.
-
Pecans (1 cup, chopped): The star of the show! They bring crunch and flavor. If you’re not a pecan fan, walnuts or almonds can work too!
-
Brown Sugar (1/4 cup): For that caramel-like sweetness. Coconut sugar is a nice alternative if you want to keep it unrefined.
-
Vanilla Extract (1 teaspoon): Adds flavor complexity. Feel free to experiment with almond extract for a different twist!
-
Cinnamon (1 teaspoon): A warm spice that enhances the flavor profile. Nutmeg can be a delightful alternative!
-
Salt (1/4 teaspoon): A hint of salt to balance the sweetness.
Step-by-Step Instructions
It’s time to transform these ingredients into something magical! Follow these step-by-step instructions, and feel free to sprinkle in your own flair:
-
Preheat Your Oven: Preheat your oven to 350°F (175°C). This is a crucial step that ensures your bars bake evenly and achieve that perfect golden-brown crust.
-
Prepare the Graham Cracker Crust: In a medium bowl, combine the crushed graham crackers and melted butter. Stir until the crumbs are evenly coated. It should resemble wet sand! Press this mixture firmly into the bottom of a greased 9×9-inch baking pan. Use a flat-bottomed glass or measuring cup to create an even layer.
-
Bake the Crust: Bake the crust in the preheated oven for about 10 minutes until it’s lightly golden and fragrant. This step helps the crust hold together once you add the filling.
-
Mix the Filling: In a large mixing bowl, add the cottage cheese, eggs, maple syrup, brown sugar, vanilla extract, cinnamon, and salt. Blend those ingredients together using a hand mixer or a food processor until smooth and creamy. This is where the magic happens! You want a velvety texture without lumps, so mix well.
-
Fold in the Pecans: Once your filling is creamy, gently fold in the chopped pecans, ensuring they are evenly distributed throughout the mixture. I love the crunch that these pecans add; it reminds me of the classic pecan pie!
-
Pour the Filling Over the Crust: Carefully pour the cottage cheese mixture over the pre-baked graham cracker crust, spreading it evenly. Take a moment to enjoy the beautiful colors and textures—this is the fun part!
-
Bake Again: Pop the baking dish back into the oven and bake for an additional 25-30 minutes, or until the filling has set and the top slightly browns. You can give it a little shake; if it wobbles a little in the center but is firm around the edges, it’s ready!
-
Cool and Cut: Once out of the oven, allow the bars to cool at room temperature for at least 30 minutes before transferring to the refrigerator to set completely (about 2 hours). Once set, slice into squares, and prepare for the delight ahead!
Serving Suggestions
To serve these delicious Protein Cottage Cheese Pecan Pie Bars, place a square on a colorful dessert plate and top with a dollop of whipped cream or Greek yogurt for added creaminess. A light drizzle of maple syrup over the top can elevate the flavors even more! You can also sprinkle some extra chopped pecans for that beautiful presentation. These bars are perfect for a cozy dessert at home or as a delightful contribution to a gathering.
Recipe Variations
Want to switch things up? Here are some fun variations to consider:
- Chocolate Chips: Add a half cup of chocolate chips to the filling for a decadent twist.
- Fruit Infusion: Swap half of the pecans for dried cranberries or chopped apples for a fruity flair!
- Spiced Up: Add a pinch of nutmeg or cardamom for an aromatic flavor sensation.
- Nut-Free: Replace the pecans with sunflower seeds or pumpkin seeds for a delicious allergy-friendly option.
- Coconut Crust: Use shredded coconut mixed with almond flour for an exotic coconut base!
Chef’s Notes
These bars have truly evolved in my kitchen over the years. I added protein-rich cottage cheese after realizing how much I missed the creamy filling of pecan pie but also wanted a healthier option. The first few attempts were a little wobbly—sticking to the pan and falling apart—but after some tweaks, I’ve nailed the perfect balance! Funny enough, my family didn’t even notice that I swapped in cottage cheese; they just kept asking for seconds!
Honestly, some of the best recipes come from a little experimentation. Remember, the kitchen is a playground, and I encourage you to make this recipe your own. You never know what delightful surprises await!
FAQs and Troubleshooting
1. Why did my bars fall apart?
This could happen if the mixture was not mixed thoroughly or if it didn’t bake long enough. Make sure to blend until smooth and check the center before removing it from the oven.
2. Can I use low-fat cottage cheese?
Absolutely! Low-fat cottage cheese works fine, though it may alter the creaminess slightly. Feel free to experiment at your convenience.
3. How should I store the leftover bars?
Store any leftovers in an airtight container in the refrigerator for up to a week. You can also freeze them for up to three months. Just be sure to thaw them overnight in the fridge before enjoying!
4. Can I cut the sugar?
Yes! If you’d like it less sweet, you can reduce the maple syrup or brown sugar, but I recommend starting with less and adjusting according to your taste as you mix!
Nutritional Info
While I can’t provide exact nutritional information, the Protein Cottage Cheese Pecan Pie Bars offer a lovely mix of protein from cottage cheese, healthy fats from pecans, and carbohydrates from graham crackers, making them a balanced treat.
There you have it—your guide to creating the most delightful Protein Cottage Cheese Pecan Pie Bars! I hope you enjoy making (and eating) these bars as much as I do. Remember, cooking is all about having fun, so don’t hesitate to get creative. Happy baking! 🍰
Print
Protein-Packed Cottage Cheese Pecan Pie Bars
- Total Time: 55 minutes
- Yield: 12 servings
- Diet: Vegetarian
Description
A healthier twist on classic pecan pie bars, packed with protein and flavor!
Ingredients
- Graham Crackers (1 ½ cups, crushed)
- Unsalted Butter (1/4 cup, melted)
- Cottage Cheese (1 cup)
- Eggs (2 large)
- Maple Syrup (1/2 cup)
- Pecans (1 cup, chopped)
- Brown Sugar (1/4 cup)
- Vanilla Extract (1 teaspoon)
- Cinnamon (1 teaspoon)
- Salt (1/4 teaspoon)
Instructions
- Preheat your oven to 350°F (175°C).
- Prepare the graham cracker crust by combining the crushed graham crackers and melted butter in a bowl. Press firmly into a greased 9×9-inch baking pan.
- Bake the crust for about 10 minutes until lightly golden.
- Mix the filling ingredients: cottage cheese, eggs, maple syrup, brown sugar, vanilla extract, cinnamon, and salt until smooth.
- Fold in the chopped pecans.
- Pour the cottage cheese mixture over the crust.
- Bake for 25-30 minutes until the filling is set.
- Cool for at least 30 minutes before refrigerating for 2 hours. Slice into squares.
Notes
Serve with whipped cream or Greek yogurt on top for a delicious dessert.
- Prep Time: 15 minutes
- Cook Time: 40 minutes
- Category: Dessert
- Method: Baking
- Cuisine: American
Nutrition
- Serving Size: 1 bar
- Calories: 220
- Sugar: 12g
- Sodium: 150mg
- Fat: 10g
- Saturated Fat: 4g
- Unsaturated Fat: 6g
- Trans Fat: 0g
- Carbohydrates: 30g
- Fiber: 2g
- Protein: 6g
- Cholesterol: 35mg
Keywords: pecan pie bars, cottage cheese dessert, healthy desserts, protein bars
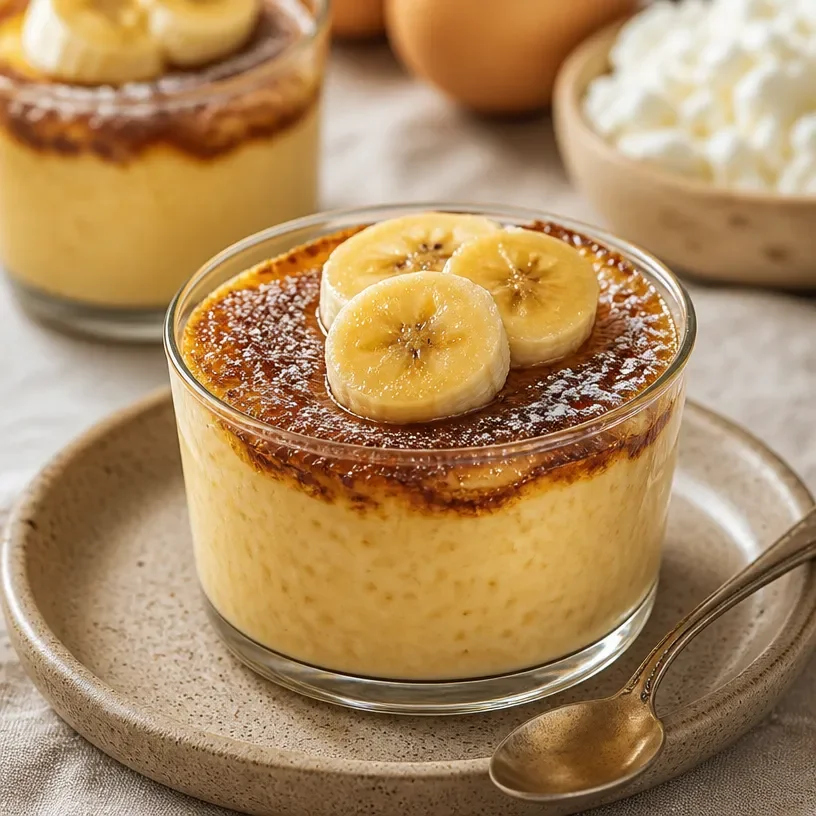
Ingredient High-Protein Banana Cottage Cheese Pudding Cups
Protein Cottage Cheese Banana Pudding Cups
Welcome to my kitchen, dear food lovers! Today, we’re diving into a delightful treat that’s as cozy as it is wholesome: Protein Cottage Cheese Banana Pudding Cups. Now, I know what you might be thinking—cottage cheese in a dessert? Hold your horses! Just hear me out. This recipe transforms simple ingredients into a creamy, dreamy dessert that’s not only guilt-free but loaded with protein to keep your energy high and your cravings at bay.
Picture this: the sun streams through my kitchen window as I blend together luscious bananas and rich cottage cheese for a treat that almost tastes like a banana cream pie but is light and nutritious enough to enjoy any time of day. These pudding cups are perfect for breakfast, an afternoon snack, or even as a light dessert after dinner. Plus, they’re quick and easy to whip up—ideal for busy moms, students, or anyone who loves delicious food without spending hours in the kitchen.
There’s something magical about a dessert that’s easy to prepare yet makes you feel like you’ve just stepped into a gourmet café. These Protein Cottage Cheese Banana Pudding Cups not only satisfy your sweet tooth but also pack a nutritional punch, thanks to the cottage cheese offering a hefty dose of protein. So grab your spoons, pull on that favorite apron, and let’s embark on this flavor journey together!
My Personal Story
Growing up, my grandmother had this incredible knack for turning the simplest of ingredients into something extraordinary. One summer afternoon, while I was visiting her, I stumbled upon her blending cottage cheese with ripe bananas. At first, I was skeptical. Cottage cheese? In dessert? But that first taste was a revelation. It was creamy, sweet, and refreshing! She added a touch of vanilla and a sprinkle of cinnamon, and suddenly, every scoop felt like a warm hug.
That day, we sat at her kitchen table — the sunlight glinting off her tiny collection of spoons — chatting and laughing while enjoying our delightful treat. It was a blissful moment that highlighted how cooking and sharing food can bring people together. Ever since, I’ve carried that memory into my own kitchen, blending rich flavors and recreating my grandmother’s spirit while also putting my own twist on this nostalgic treat. So, when I decided to share this recipe with all of you, it felt like bringing my grandma’s warmth to the digital table!
Ingredients
Here’s what you’ll need to create these delightful Protein Cottage Cheese Banana Pudding Cups:
-
1 cup cottage cheese: This creamy base is rich in protein and provides a smooth texture. For a dairy-free option, try silken tofu.
-
2 ripe bananas: The riper, the better! Overripe bananas are sweeter and more flavorful. If bananas aren’t your thing, substitute with blended mango for a tropical twist.
-
2 tablespoons honey or maple syrup: This adds natural sweetness. You can adjust to taste or omit if you’re watching your sugar intake.
-
1 teaspoon vanilla extract: A dash of vanilla enhances the flavor and adds warmth. Choose pure vanilla extract for the best taste; imitation can work in a pinch too.
-
1/4 teaspoon ground cinnamon: This aromatic spice complements the bananas beautifully. Feel free to swap it for nutmeg or omit if you’re not a fan.
-
Pinch of salt: Just a tiny sprinkle to enhance all the flavors.
-
Optional toppings: Crushed nuts, granola, or dark chocolate chips make great garnishes for added texture and flavor.
By selecting the right ingredients and understanding their roles in this dish, you can effortlessly create a dessert that will impress your friends and family!
Step-by-Step Instructions
Now, let’s get cooking! Here’s how to whip up these Protein Cottage Cheese Banana Pudding Cups step by step:
-
Prepare the Ingredients:
Start by gathering all your ingredients. Having everything at your fingertips makes the process smoother and more enjoyable. Plus, you can toss on your favorite playlist while you’re at it! -
Blend the Base:
In a blender or food processor, combine the cottage cheese, ripe bananas, honey (or maple syrup), vanilla extract, ground cinnamon, and that pinch of salt. Blend on high for about 30 seconds. You want a creamy consistency, with no chunks of banana left. If you want to make it extra creamy, blend a little longer! -
Taste Test:
Now for the fun part—taste the mixture! This is where you can adjust the sweetness if needed. If it’s not sweet enough, a tad more honey or syrup will do the trick. Blend again briefly to incorporate. -
Chill:
Transfer your creamy mixture into small cups or bowls. If you don’t have individual serving cups, a large bowl works just fine! Cover them with plastic wrap or a lid and chill in the refrigerator for at least an hour. This step is crucial—it allows the flavors to meld beautifully. -
Serve and Enjoy:
Once chilled, it’s time to serve! Scoop out the pudding into your fancy dessert cups, and this is where you can really taste the chef within you. Layer it with some crushed nuts, granola, or sprinkle the top with dark chocolate chips. Not only does it make for a beautiful presentation, but it also adds varied textures to each delightful bite. -
Savor the Moment:
Dig in, enjoy each creamy spoonful, and relish the fact that you just made a treat that’s as nourishing as it is delectable!
Serving Suggestions
For serving, I like to layer the pudding in clear glasses or small mason jars. This showcases the lovely creamy texture and any toppings you choose to add. Imagine a beautiful, rustic table set for brunch with these cups perfectly arranged atop with a sprinkle of nuts or colorful fruit. Each cup is not just a dessert; it’s a centerpiece that sparks conversation and brings back memories.
Recipe Variations
Feel free to get creative with this recipe! Here are a few fun twists to consider:
-
Chocolate Lover’s Delight: Add a tablespoon of cocoa powder to the blended mixture for a chocolatey version of this treat. You can also top with chocolate shavings!
-
Peanut Butter Banana: Mix in a tablespoon of natural peanut butter before blending for a nutty flavor and additional protein. This version is a hit among kids!
-
Berry Bliss: Swap out half the banana for berries like strawberries or raspberries. This adds a refreshing zing and a pop of color!
-
Coconut Dream: Fold in some shredded coconut either into the pudding mixture or use it as a topping for a tropical vibe.
Chef’s Notes
This recipe has certainly evolved over time! I started experimenting with different bases before settling on cottage cheese—it’s the secret weapon in the kitchen for lighter options! My friends often chuckle when they see me with my favorite kitchen gadget, the blender, whipping up new creations. One time, I accidentally dropped a banana in the middle of blending, and I ended up with banana pudding on my ceiling! But that little mishap just made for a great laugh and a memorable kitchen story.
FAQs and Troubleshooting
1. Can I use non-dairy alternatives?
Absolutely! Silken tofu or a dairy-free yogurt can be great substitutes for cottage cheese.
2. What if I don’t have ripe bananas?
While ripe bananas bring sweetness and flavor, you can use fresh bananas, though you might want to add a bit more sweetener.
3. How do I make it dairy-free?
As mentioned, swap cottage cheese for silken tofu or a dairy-free yogurt, and you’re set!
4. Can I freeze these cups?
While they can be frozen, the texture may change once thawed. It’s best enjoyed freshly made or stored in the fridge for a few days.
Nutritional Info
This is just an estimate, but each serving of Protein Cottage Cheese Banana Pudding Cups offers:
- Calories: 150
- Protein: 11 grams
- Carbohydrates: 25 grams
- Fat: 3 grams
And there you have it! A delightful, nutritious treat that’s sure to whisk you away to your cozy kitchen moments. I hope you find joy in making and sharing these Protein Cottage Cheese Banana Pudding Cups as much as I do! Happy cooking!
Print
Protein Cottage Cheese Banana Pudding Cups
- Total Time: 70 minutes
- Yield: 4 servings 1x
- Diet: Vegetarian
Description
A creamy, nutritious dessert made with cottage cheese and ripe bananas, perfect for breakfast or a light snack.
Ingredients
- 1 cup cottage cheese
- 2 ripe bananas
- 2 tablespoons honey or maple syrup
- 1 teaspoon vanilla extract
- 1/4 teaspoon ground cinnamon
- Pinch of salt
- Optional toppings: crushed nuts, granola, or dark chocolate chips
Instructions
- Prepare the ingredients by gathering everything you need.
- Blend the cottage cheese, bananas, honey, vanilla extract, cinnamon, and salt in a blender until creamy.
- Taste the mixture and adjust sweetness if necessary.
- Chill the mixture in individual cups or a large bowl in the refrigerator for at least an hour.
- Serve the chilled pudding in dessert cups and add optional toppings if desired.
- Savor each delicious spoonful of your homemade pudding cups!
Notes
Feel free to get creative with the pudding by adding cocoa powder, peanut butter, or berries.
- Prep Time: 10 minutes
- Cook Time: 0 minutes
- Category: Dessert
- Method: Blending
- Cuisine: American
Nutrition
- Serving Size: 1 serving
- Calories: 150
- Sugar: 10g
- Sodium: 200mg
- Fat: 3g
- Saturated Fat: 1g
- Unsaturated Fat: 1g
- Trans Fat: 0g
- Carbohydrates: 25g
- Fiber: 2g
- Protein: 11g
- Cholesterol: 5mg
Keywords: cottage cheese, banana pudding, healthy dessert, protein dessert, easy recipe
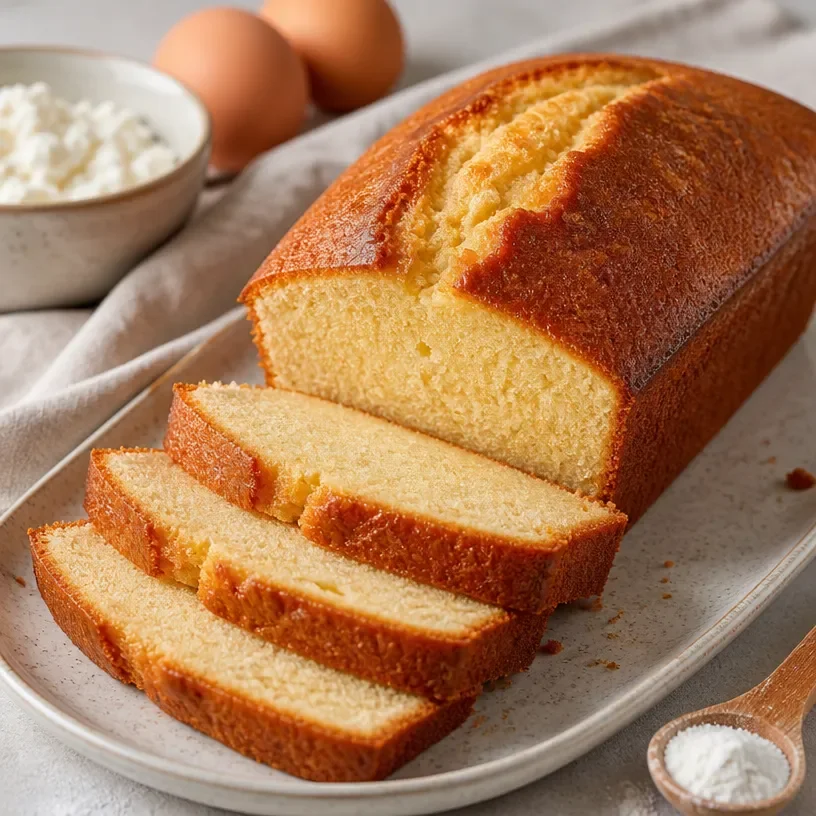
High-Protein Cottage Cheese Vanilla Pound Cake (Meal Prep)
The Ultimate Protein Cottage Cheese Vanilla Pound Cake: A Cozy Baking Adventure
Welcome to my kitchen, my wonderful foodie friends! Today, we’re diving into the delicious world of baking with a recipe that’s simultaneously cozy and nutritious: Protein Cottage Cheese Vanilla Pound Cake. As the scent of vanilla wafts through your home, you’ll feel like you’re wrapped in a warm blanket on a chilly day. This cake is not just any ordinary pound cake; it’s a delightful creation that marries the rich flavors of vanilla with the unique texture of cottage cheese, making it a protein-packed treat you can feel good about.
Let’s Get Personal
I remember the first time I stumbled upon the idea of using cottage cheese in a cake. It was late on a Sunday afternoon, and I was flipping through an old family recipe book I found tucked away in my grandmother’s kitchen. As a child, I loved the smell of cakes baking in her oven, and I could still picture her flour-covered apron as she whipped up delicious delights for our family get-togethers. When I saw that charming little recipe for a cottage cheese cake, curiosity got the best of me. I decided to give it a modern twist, incorporating protein-rich cottage cheese while maintaining the essence of that comforting, nostalgic treat.
With every slice, you’ll experience a little bit of that cozy family legacy—perfect for brunch gatherings, afternoon tea, or even a late-night treat that says, “Yes, you absolutely deserve this!” Now let’s get moving and whip up this delightful dessert together.
Gather Your Ingredients
Here’s what you’ll need to recreate this sweet masterpiece:
-
1 cup cottage cheese
The star of our cake! Cottage cheese adds moisture and richness without all the fat of traditional butter. If you’re looking for a dairy-free alternative, consider using silken tofu as a substitute. It will give you a creamy texture with added protein. -
1 cup granulated sugar
Classic sugar makes the cake sweet and helps with its structure. If you want to cut down on sugar, feel free to use a sugar alternative like erythritol, but be sure to check the conversion ratio—it can vary! -
4 large eggs
Eggs help bind the ingredients together and provide a fluffy texture. For a vegan option, you can use flax eggs; just mix 1 tablespoon of ground flaxseed with 2.5 tablespoons of water for each egg! -
1 teaspoon vanilla extract
Vanilla gives our cake its warm flavor. Make sure to use pure vanilla extract for the best aroma! If you’re feeling adventurous, add in some almond extract for a surprising twist. -
2 cups all-purpose flour
This is the backbone of our cake. You could experiment with whole wheat flour for a healthier twist, though it may alter the texture slightly. If you’re gluten-free, try using almond flour or a gluten-free flour blend. -
1 teaspoon baking powder
This little agent helps our cake rise! If you’re out of baking powder, you can mix 1/4 teaspoon of baking soda with 1/2 teaspoon of vinegar instead. -
1/4 teaspoon salt
Salt enhances the sweetness and balances the flavors. Never skip this one, even in desserts! -
Optional: 1/2 cup chocolate chips or nuts
Add these for texture and extra flavor. Walnuts or pecans work beautifully, or for a chocolate fix, mini chocolate chips add a delightful surprise!
Time to Bake: Step-by-Step Instructions
-
Preheat Your Oven: Start by preheating your oven to 350°F (175°C). This step is crucial because it ensures an evenly baked cake. While that’s warming up, you can prepare your ingredients and tools.
-
Prep Your Baking Pan: Grease and flour a 9×5 inch loaf pan. This might seem tedious, but trust me, it’s essential for ensuring that your cake slides out effortlessly once baked.
-
Mix Cottage Cheese: In a mixing bowl, combine the cottage cheese and granulated sugar. Use a fork or whisk to break down the curds slightly while blending, creating a creamy base. This is one of my favorite parts; you get to feel the creamy goodness!
-
Add in the Eggs and Vanilla: Crack in those lovely eggs and pour in the vanilla extract. Blend everything until smooth—this process makes the eggs integrate fully, giving the cake its signature fluffiness.
-
Sift Your Dry Ingredients: In a separate bowl, whisk together the flour, baking powder, and salt. Instead of just tossing them in, you want to aerate the mixture, which will help the cake rise beautifully.
-
Combine Wet and Dry Ingredients: Gradually add the dry mixture to the wet mixture, stirring gently with a spatula or wooden spoon until just combined. Pro tip: don’t overmix! A few flour streaks are okay here. Over mixing can lead to a dense cake, and we want it to be light and airy!
-
Incorporate Add-Ins: If you’re using chocolate chips or nuts, fold them in gently at this stage. (Fun sidebar: You might want to taste a few chocolate chips just to make sure they are fresh—totally necessary!)
-
Pour and Spread: Transfer your batter to the prepared loaf pan, smoothing the top with your spatula. Aim for even distribution for uniform baking.
-
Bake to Perfection: Place your pan in the oven and bake for 50-60 minutes. Here’s a little chef’s secret: set a timer for 50 minutes and then keep a close eye on it. Poke the cake with a toothpick; if it comes out clean, it’s done. If there’s batter on it, give it a few more minutes.
-
Cool Down: Once baked, let it cool in the pan for 10-15 minutes. Then, gently run a knife around the edges and carefully invert the cake onto a wire rack to cool completely. Resist the urge to slice it too early; the flavors develop as it cools!
Serving Suggestions
Once your Protein Cottage Cheese Vanilla Pound Cake has cooled, slice it into generous pieces. It’s perfect as-is, but for a little surprise, serve it with a dollop of Greek yogurt or a drizzle of honey. Fresh berries on the side add a splash of color and a sweet-tart contrast that takes the experience over the top!
Recipe Variations
Feel like switching it up? Here are a few creative variations to excite your taste buds:
- Zesty Lemon Twist: Swap out the vanilla extract for lemon extract, and add the zest of one lemon for a refreshing citrus flavor.
- Cinnamon Swirl: Add a teaspoon of ground cinnamon to the dry ingredients and swirl in a mixture of cinnamon and a few tablespoons of brown sugar before baking.
- Berry Delight: Incorporate half a cup of fresh or frozen berries into the batter for a fruity flavor. Blueberries or raspberries work great!
- Chocolate Chip Surprise: Add mini chocolate chips into the batter for a chocolaty indulgence that’s perfect for dessert.
- Nutty Banana: Mash in a banana for added moisture and a delicious flavor contrast—that banana-cottage cheese combination is fantastic!
Chef’s Notes
This recipe has come a long way from its humble beginnings! I started making it with regular cottage cheese, but then I experimented and found that different brands can yield different textures. I love using whipped cottage cheese now; it creates an extra fluffy cake. I also added protein powder to the mix for an extra boost, especially for post-workout treats. The beauty of this recipe is how adaptable it is—every baker can make it their own!
FAQs and Troubleshooting
-
Q: My cake turned out dense! What did I do wrong?
A: A dense cake usually means you overmixed the batter. Remember to mix just until combined and avoid overworking the flour! -
Q: Why didn’t my cake rise?
A: Ensure your baking powder is fresh. Expired baking powder won’t give your cake the lift it needs. Also, make sure you’re measuring accurately—too much flour can weigh it down. -
Q: Can I freeze this cake?
A: Absolutely! Wrap slices in plastic wrap and then in foil for an extra layer of protection. It’ll freeze beautifully for up to three months. -
Q: How do I store the leftover cake?
A: Store your cake in an airtight container in the fridge for up to a week. For an even cozier treat, warm up a slice in the microwave for a few seconds!
Nutritional Info (Optional)
While I love sharing the joy of cooking and eating, I know that many health-conscious foodies like to keep an eye on nutrition. Here’s a rough estimate of the nutritional info per slice (about 1/12 of the cake):
- Calories: 180
- Protein: 8g
- Carbohydrates: 22g
- Dietary Fiber: 1g
- Sugars: 10g
- Fats: 6g
(Actual values may vary depending on specific ingredients used.)
Closing Thoughts
There you have it, friends—a delightful Protein Cottage Cheese Vanilla Pound Cake that’s sure to lift your spirits and brighten your day. Remember to savor the little things in the kitchen, like the smells, the laughter, and the satisfaction of creating something special. I’m so excited for you to try this at home! Happy baking, and don’t forget to share your photos and stories; I love seeing your culinary creations!
Print
Protein Cottage Cheese Vanilla Pound Cake
- Total Time: 75 minutes
- Yield: 12 servings 1x
- Diet: Healthy
Description
A delightful and nutritious pound cake that combines the rich flavors of vanilla with the unique texture of cottage cheese, packed with protein.
Ingredients
- 1 cup cottage cheese
- 1 cup granulated sugar
- 4 large eggs
- 1 teaspoon vanilla extract
- 2 cups all-purpose flour
- 1 teaspoon baking powder
- 1/4 teaspoon salt
- Optional: 1/2 cup chocolate chips or nuts
Instructions
- Preheat your oven to 350°F (175°C).
- Grease and flour a 9×5 inch loaf pan.
- Mix cottage cheese and granulated sugar in a mixing bowl.
- Add in the eggs and vanilla extract, blending until smooth.
- Sift together the flour, baking powder, and salt in a separate bowl.
- Combine wet and dry ingredients, mixing gently.
- Incorporate any optional chocolate chips or nuts.
- Pour the batter into the prepared loaf pan.
- Bake for 50-60 minutes, checking with a toothpick.
- Cool in the pan for 10-15 minutes before inverting onto a wire rack.
Notes
For variations, consider adding lemon zest, cinnamon, or fresh berries for a twist on flavor.
- Prep Time: 15 minutes
- Cook Time: 60 minutes
- Category: Dessert
- Method: Baking
- Cuisine: American
Nutrition
- Serving Size: 1 slice
- Calories: 180
- Sugar: 10g
- Sodium: 300mg
- Fat: 6g
- Saturated Fat: 2g
- Unsaturated Fat: 4g
- Trans Fat: 0g
- Carbohydrates: 22g
- Fiber: 1g
- Protein: 8g
- Cholesterol: 60mg
Keywords: pound cake, cottage cheese, vanilla cake, healthy dessert, protein cake
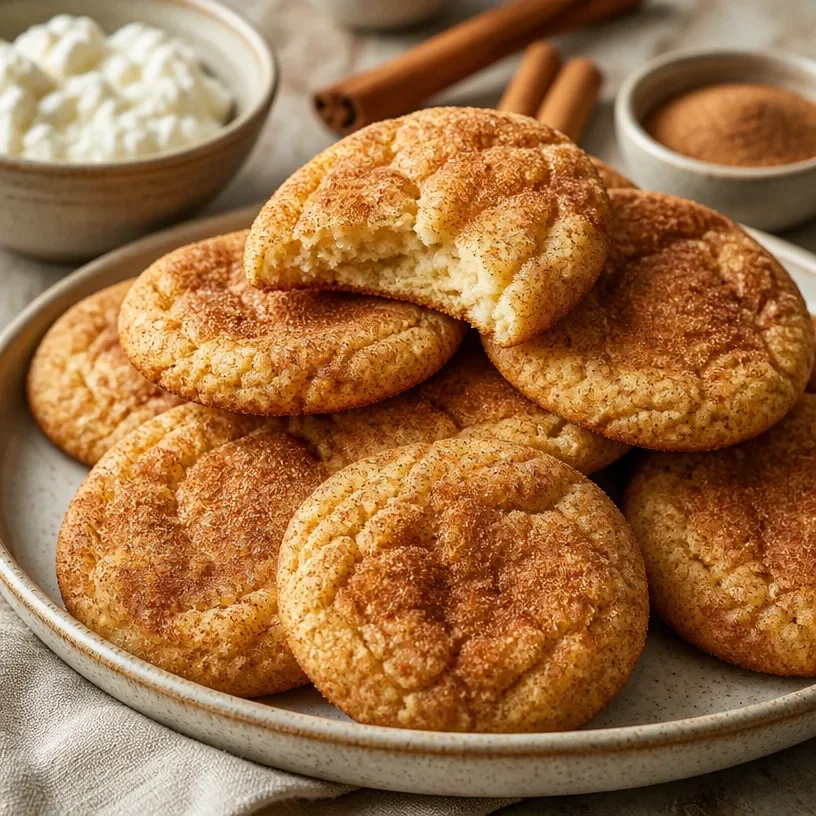
High-Protein Cottage Cheese Snickerdoodles: 15-Minute Bake
Protein Cottage Cheese Snickerdoodles: A Cozy Twist on a Classic Favorite
Welcome back, fellow foodies! Today, I’m thrilled to share a recipe that will not only satisfy your sweet tooth but also give a protein-packed twist to a classic treat — Protein Cottage Cheese Snickerdoodles. If you’ve ever lingered in a bakery, mesmerized by the delightful aroma of freshly baked cookies, you know there’s something magical about the combination of cinnamon and sugar.
Cottage cheese might not be the first ingredient that springs to mind when you think of cookies, but trust me, it adds a creamy richness and a boost of protein that will make these cookies your new favorite snack. Plus, they’re super easy to make and perfect for sharing with loved ones — or keeping all to yourself, no judgment here!
So, roll up those sleeves and let’s dive into this delectable recipe that will have your home smelling like a cozy café.
A Whiff of Nostalgia: My Cookie-Making Adventures
Growing up, my grandmother’s kitchen was my playground. I can still hear her laughter as we sifted flour, messily dusting the countertops in our quest to make the perfect cookie. Snickerdoodles were always a staple at our family gatherings, their delightful aroma wafting through the air as they baked to golden perfection.
I vividly remember one particular winter afternoon when my grandma decided to experiment. We were running low on ingredients, and she had just discovered a tub of cottage cheese lurking in the fridge. Instead of a disaster, we ended up creating an unforgettable hybrid of our beloved snickerdoodles, and those cookies became a hit – crunchy on the outside, soft and chewy on the inside, and a little bit healthier, too! It’s a fond memory that always brings a smile to my face, and now I’m excited to pass on that legacy with a modern twist.
Ingredients
Here’s what you’ll need to create these delightful Protein Cottage Cheese Snickerdoodles:
-
1 cup cottage cheese
Provides moisture and protein. Opt for low-fat or regular cottage cheese depending on your preference. For a dairy-free version, try a nut-based yogurt. -
1/2 cup coconut oil or unsalted butter
Adds richness and helps with texture. Coconut oil will lend a subtle flavor, while butter offers that classic taste. If you’re looking for a vegan option, use a plant-based butter. -
1/2 cup brown sugar
Offers sweetness and a hint of caramel flavor. You can substitute with coconut sugar for a less refined option, or use a sugar replacement if you’re cutting back on sugar. -
1/4 cup granulated sugar
This adds a crystal-like surface when rolling the cookies. For a less sweet version, reduce the granulated sugar slightly. -
1 large egg
Acts as a binding agent. For a vegan swap, try a flax egg (1 tablespoon flaxseed meal + 2.5 tablespoons water) instead! -
2 cups all-purpose flour
The base of our cookie. For a healthier twist, use whole wheat flour or even almond flour for a gluten-free option, but be aware it might change the texture. -
1 teaspoon baking powder
Helps the cookies rise! If you’re out of baking powder, you can make a substitute by mixing 1/2 teaspoon cream of tartar with 1/4 teaspoon baking soda. -
1 teaspoon baking soda
Enhances the texture and helps the cookies spread. If baking soda is unavailable, use an equal amount of baking powder. -
1 tablespoon ground cinnamon
The star of the snickerdoodle flavor. Add a pinch of extra cinnamon into the dough for additional flavor! -
1/2 teaspoon salt
Balances the sweetness and enhances the flavors. If you’re using salted butter, you can omit this entirely.
Now that we have our ingredients set, let’s move on to the fun part — the cooking!
Step-by-Step Instructions
-
Preheat Your Oven
Begin by preheating your oven to 350°F (175°C). As it heats up, the anticipation of fresh cookies filling your home is absolutely mouthwatering! -
Blend the Cottage Cheese
In a medium bowl, place your cottage cheese and give it a quick whirl with a fork or, for creamier results, blend it in a food processor until smooth. This step is crucial as it helps evenly distribute the cottage cheese into your cookie dough. -
Cream the Fats and Sugars
In a separate large mixing bowl, beat together the coconut oil (or butter) and both sugars until light and fluffy. This should take about 2-3 minutes. The fluffiness you achieve here will contribute to a chewy and soft cookie. -
Add in the Egg
Crack in your egg and mix until well incorporated. If you’re using a flax egg, make sure to let it sit for a minute to thicken before adding it in. -
Incorporate the Cottage Cheese
Next, fold in your blended cottage cheese mixture into the wet ingredients. At this point, your batter might look a bit lumpy; that’s normal! We want that cottage cheese to shine through. -
Combine Dry Ingredients
In another bowl, whisk together the flour, baking powder, baking soda, cinnamon, and salt. Gradually add this dry mix into your wet mixture, stirring gently until just combined. Don’t overmix; a few lumps are perfectly okay! -
Shape the Cookies
Here comes the fun part! Use a spoon or a cookie scoop to form balls of dough (about 1-2 tablespoons each). Roll them in a mixture of granulated sugar and extra cinnamon for that signature snickerdoodle finish. -
Bake the Cookies
Arrange the dough balls on a baking sheet lined with parchment paper, leaving enough space between them (about 2 inches). Pop them into the preheated oven and bake for 10-12 minutes, or until the edges are lightly golden. They might look soft in the center, but they’ll firm up as they cool. -
Cool and Enjoy
Let your cookies cool on the baking sheet for about 5 minutes before transferring them to a wire rack to cool completely. Trust me, the aroma wafting through your home is worth the wait!
And just like that, you’ve whipped up a batch of Protein Cottage Cheese Snickerdoodles that are sure to become a staple in your kitchen!
Serving Suggestions
You can serve these snickerdoodles warm with a glass of cold milk or a cup of your favorite tea or coffee. For an extra indulgent treat, consider pairing them with a scoop of vanilla ice cream or drizzling with a simple homemade glaze made from powdered sugar and milk.
Recipe Variations
- Nutty Option: Add 1/2 cup of chopped pecans or walnuts for a delightful crunch.
- Chocolate Chip Delight: Fold in 1/2 cup of mini chocolate chips for a chocolatey twist.
- Pumpkin Spice Snickerdoodles: Substitute 1/2 cup of cottage cheese with pumpkin puree and add pumpkin spice for a fall-inspired flavor.
- Gluten-Free Version: Swap out the all-purpose flour for a gluten-free 1:1 baking flour mix to enjoy the same great flavor without the gluten.
- Vegan Delight: Substitute the egg and butter with flax eggs and coconut oil for a completely vegan option.
Chef’s Notes
These Protein Cottage Cheese Snickerdoodles have a special place in my heart. Over the years, my recipe has evolved, but the key elements – comfort and nostalgia – remain the same. There’s something incredibly rewarding about seeing friends and family light up as they take their first bite. It’s a reminder that cooking is all about creating memories and connecting with those we love.
Oh, and let’s talk about that time my dog, Charlie, made a surprise appearance while I was mixing the dough. He managed to knock over a bag of flour, sending it flying everywhere! It turned into a mini snowstorm in my kitchen, and we both ended up a bit floury but laughing. Just another reminder to embrace the chaos of the kitchen!
FAQs and Troubleshooting
-
Why are my cookies flat?
Flat cookies can result from overmixing the dough or not having enough flour. Make sure to gently fold in the dry ingredients and measure your flour correctly for the best results. -
Can I freeze these cookies?
Absolutely! You can freeze them before or after baking. Just ensure you place them in an airtight container. They’ll last for about a month in the freezer. -
What if I don’t have cottage cheese?
If you’re fresh out of cottage cheese, you can substitute with Greek yogurt or ricotta cheese. Both will provide a similar texture and flavor! -
How do I store the leftover cookies?
Keep your cookies in an airtight container at room temperature for up to a week. If you like them a bit chewy, store them with a slice of bread to keep moisture in.
Nutritional Info (Optional)
While the exact nutritional info can vary based on specific ingredients, here’s a rough breakdown per cookie (assuming 24 cookies total):
- Calories: 95
- Protein: 2.6g
- Fat: 4g
- Carbohydrates: 12.1g
- Fiber: 0.5g
- Sugar: 6g
There you have it! A delightful healthier take on a classic cookies that are sure to be a hit with everyone. I hope you try this recipe out and create delicious memories in your kitchen. Remember, cooking is all about love and joy — so embrace the process and enjoy every bite! Happy baking, everyone!
Print
Protein Cottage Cheese Snickerdoodles
- Total Time: 27 minutes
- Yield: 24 cookies 1x
- Diet: Vegetarian
Description
A protein-packed twist on classic snickerdoodle cookies featuring creamy cottage cheese for added richness.
Ingredients
- 1 cup cottage cheese
- 1/2 cup coconut oil or unsalted butter
- 1/2 cup brown sugar
- 1/4 cup granulated sugar
- 1 large egg
- 2 cups all-purpose flour
- 1 teaspoon baking powder
- 1 teaspoon baking soda
- 1 tablespoon ground cinnamon
- 1/2 teaspoon salt
Instructions
- Preheat your oven to 350°F (175°C).
- Blend the cottage cheese until smooth.
- Cream the coconut oil (or butter) and both sugars until light and fluffy.
- Add in the egg and mix until well incorporated.
- Incorporate the blended cottage cheese mixture into the wet ingredients.
- Combine the flour, baking powder, baking soda, cinnamon, and salt in another bowl.
- Gradually add the dry mix to the wet mixture, stirring gently.
- Shape the dough into balls and roll in a mixture of granulated sugar and cinnamon.
- Bake for 10-12 minutes or until the edges are lightly golden.
- Cool the cookies on a wire rack.
Notes
For a vegan option, substitute the egg with a flax egg and use plant-based butter.
- Prep Time: 15 minutes
- Cook Time: 12 minutes
- Category: Dessert
- Method: Baking
- Cuisine: American
Nutrition
- Serving Size: 1 cookie
- Calories: 95
- Sugar: 6g
- Sodium: 100mg
- Fat: 4g
- Saturated Fat: 3g
- Unsaturated Fat: 1g
- Trans Fat: 0g
- Carbohydrates: 12g
- Fiber: 0.5g
- Protein: 2.6g
- Cholesterol: 30mg
Keywords: snickerdoodles, cookies, protein cookies, cottage cheese cookies, dessert
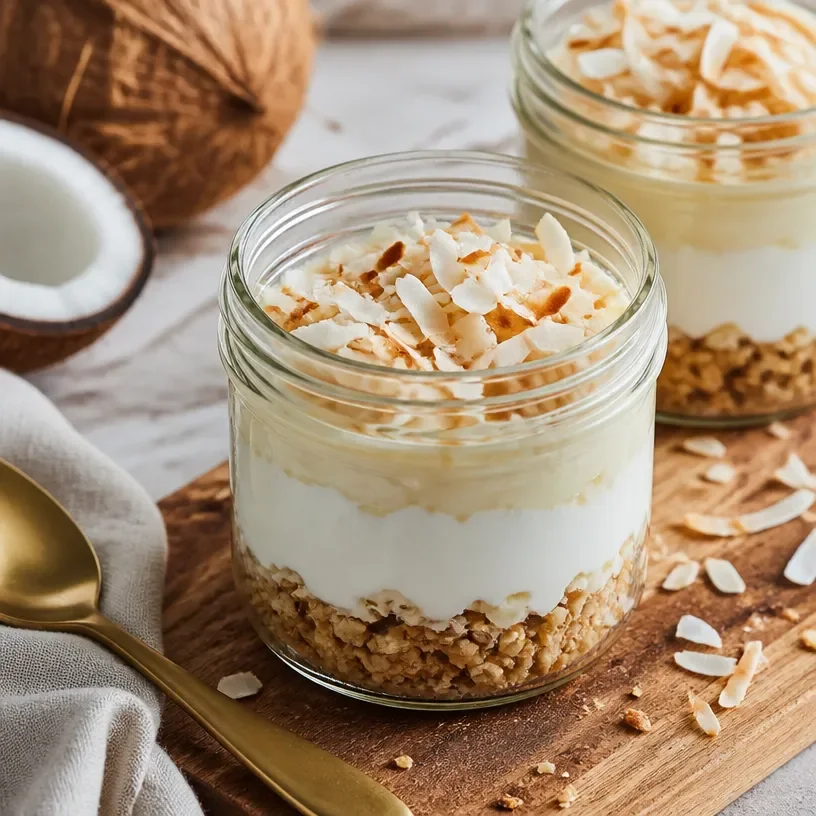
High-Protein Coconut Cream Pie Jars (No-Bake & Quick)
Indulge in a Decadent Protein Coconut Cream Pie Jar
Welcome to my kitchen! I’m Olivia Bennett, your friendly culinary guide on a journey through delightful flavors and cozy moments. Today, we’re diving into a special treat that marries nutrition with deliciousness: the Protein Coconut Cream Pie Jar. Imagine this: a delightful blend of creamy coconut, a hint of vanilla, and a protein-packed punch all layered in a cute jar. It’s the perfect addition to your meal prep lineup or a sweet indulgence to satisfy those dessert cravings while keeping your health goals in check.
You might be wondering, "What makes this pie so special?" Well, it’s not just about the taste (although, trust me, it’s heavenly!). This recipe is all about balance. Packed with protein and rich in healthy fats, this treat allows you to feel good while enjoying something sweet. Whether you’re looking for a post-workout snack, a guilt-free dessert, or simply a delightful way to treat yourself, I guarantee you’ll feel a spark of joy with each spoonful.
Now, picture yourself diving into a jar filled with velvety layers, coconut crunch, and just the right amount of sweetness. If you’re like me and believe that food should be as nourishing for the soul as it is for the body, you’ll want to keep reading. Let’s whip up this delicious Protein Coconut Cream Pie Jar and make some kitchen magic together!
A Sweet Reminder of Home
Growing up, I spent countless afternoons in my grandmother’s kitchen, captivated by the sweet aroma that wafted through the air whenever she baked her famous coconut cream pie. The dishes were always overflowing with laughter, love, and the joyful chatter of family. One specific summer day, I remember her inviting me to join her in whipping up this dessert. It was a sacred ritual, one that flew by as we combined ingredients, whisked them into submission, and bantered over cupcakes filled with frosting just for taste-testing.
Those days weren’t just about baking—they were about connection. As I helped her layer the silky custard into a crust of my childhood dreams, I could feel my heart swell with the simple joy of sharing that moment with her. Even now, every bite of coconut cream pie harks back to that joyful summer, inspiring this Protein Coconut Cream Pie Jar recipe as a modern twist on her beloved creation. It’s my way of bringing some of that nostalgia into my busy life while keeping myself fueled and happy.
Ingredients
Here’s what you’ll need to create this summery pie in a jar:
-
Coconut Milk (1 can, full-fat)
Rich in flavor and healthy fats, coconut milk brings that creamy texture. You can substitute light coconut milk if you’re looking for fewer calories, but it may be a bit thinner. -
Protein Powder (1-2 scoops, vanilla flavored)
This is where the magic happens! Choose your favorite protein powder. Vegan or whey works perfectly here. If you want a plant-based option, a pea protein will do the trick! -
Unsweetened Shredded Coconut (1 cup)
This adds fabulous texture and coconut flavor. If you’re not a fan of shredded coconut, feel free to omit it or swap it for graham cracker crumbs for a bit of crunch. -
Maple Syrup or Honey (to taste)
A touch of natural sweetness brings harmony to our flavors. If you’re looking for a low-sugar option, try a sugar-free syrup to maintain that sweet satisfaction. -
Vanilla Extract (1 teaspoon)
For warmth and depth, don’t skip on this! If you have almond extract on hand, you can use that for a different flavor profile. -
Gelatin or Agar-Agar (1 tablespoon)
This gives our treat stability without compromising texture. If you’re vegetarian or vegan, agar-agar is a great gelatin alternative that works wonderfully! -
Graham Cracker Crust (1-2 cups, crushed)
This is optional, but who can resist a buttery crumb crust? For a gluten-free option, use gluten-free graham crackers or almond flour blended with butter.
Step-by-Step Instructions
Ready to get cooking? Here’s your step-by-step guide to whipping up these delightful jars:
-
Prepare the Base Layer:
Start by mixing your crushed graham crackers with melted butter in a bowl. You want a nice crumbly texture that holds together when pressed into the bottom of your jars. For an even more delightful crunch, add a sprinkle of cinnamon for warmth. -
Blend the Creamy Filling:
In a blender or mixing bowl, combine the coconut milk, protein powder, maple syrup, and vanilla extract. Blend until thoroughly combined and creamy. This is where that beautiful smooth texture comes to life. If you find it too thick, add a tablespoon or two of coconut water or almond milk to loosen it up. -
Add the Gelatin:
If you’re using gelatin, sprinkle it over a few tablespoons of warm water until it blooms (gets all spongy). Then mix it into the coconut mixture until it’s well combined. If using Agar-Agar, follow the package instructions—most need to be heated to activate. -
Layer It Up:
Now for the fun part! Spoon a layer of the graham cracker mixture into the bottom of your jars, packing it down gently. Next, add a layer of the creamy coconut filling followed by a sprinkle of shredded coconut. Repeat these layers until the jars are full, finishing off with a nice dollop of the creamy filling. -
Chill and Set:
Pop your jars in the fridge for at least 2 hours (or overnight, if you can wait). This helps the filling firm up a bit, thanks to the gelatin, creating that perfect creamy consistency.
Serving Suggestions
To serve your Protein Coconut Cream Pie Jar, simply remove it from the fridge, give it a gentle shake, and top with a sprinkle of additional shredded coconut and whipped cream for a touch of indulgence. Feel free to unleash your creativity! You can garnish with fresh berries or a few slices of banana for a delicious twist.
Recipe Variations
Want to mix things up? Here are a few creative variations you can try:
-
Chocolate Coconut Pie Jar:
Add a couple of tablespoons of cocoa powder to the creamy filling for a chocolate twist. You can also use chocolate protein powder! -
Tropical Paradise:
Incorporate some diced pineapple or mango into the layers for a burst of tropical flavor. -
Nutty Surprise:
Fold in some crushed nuts or nut butter into the filling for added texture and protein. -
Spiced Delight:
Add a teaspoon of cinnamon or nutmeg to the crust or filling for a warm, spicy kick. -
Coffee Coconut Layer:
For a caffeine boost, mix a small amount of instant coffee or espresso powder into the filling.
Chef’s Notes
This recipe has evolved over the years as I’ve experimented with various ingredients and textures. My grandmother’s original pie was lovely, with its flaky crust and silky filling, but it didn’t pack much in terms of protein. I love being able to enjoy that same nostalgic flavor while fueling my body with something beneficial. Cooking is all about exploring, so feel free to adapt this recipe to suit your taste preferences—get messy, have fun, and enjoy every bite!
FAQs and Troubleshooting
1. Can I make these jars ahead of time?
Absolutely! In fact, they’re perfect for meal prep. Keep them in the refrigerator for up to a week. Just make sure to till them with whipped cream or toppings when you’re ready to serve!
2. My filling isn’t thickening—what did I do wrong?
Make sure you adequately bloomed your gelatin or followed the instructions for the agar-agar. They both need to dissolve fully to set properly!
3. Is it possible to make this recipe vegan?
Yes! Substitute the gelatin with agar-agar and use plant-based protein powder. You can also swap the honey for agave syrup or another vegan sweetener.
4. How do I store leftovers?
Keep any leftovers in airtight jars in the fridge. Just be aware that the filling may become slightly thicker as it sits.
Nutritional Info
If you’re curious about the nutrition facts, this delightful little jar typically provides:
- Calories: 250-300 per jar (depending on the protein powder and sweeteners used)
- Protein: 20g (varies with your protein powder)
- Carbohydrates: 30g
- Fats: 15g
This Pumpkin Coconut Cream Pie Jar is not only a delicious treat but also a great way to fuel your body and spoil your taste buds. So whip up some fun, stir up some joy, and indulge in this sweet memory from my kitchen to yours! Enjoy every bite!
Print
Protein Coconut Cream Pie Jar
- Total Time: 120 minutes
- Yield: 4 servings
- Diet: Vegetarian
Description
A delightful blend of creamy coconut and protein for a sweet indulgence.
Ingredients
- Coconut Milk (1 can, full-fat)
- Protein Powder (1-2 scoops, vanilla flavored)
- Unsweetened Shredded Coconut (1 cup)
- Maple Syrup or Honey (to taste)
- Vanilla Extract (1 teaspoon)
- Gelatin or Agar-Agar (1 tablespoon)
- Graham Cracker Crust (1-2 cups, crushed, optional)
Instructions
- Prepare the Base Layer: Mix your crushed graham crackers with melted butter in a bowl until crumbly.
- Blend the Creamy Filling: Combine coconut milk, protein powder, maple syrup, and vanilla extract in a blender until creamy.
- Add the Gelatin: If using gelatin, bloom it in warm water, then mix into the coconut mixture. If using agar-agar, follow package instructions.
- Layer It Up: Spoon layers into jars, starting with the graham cracker mixture, followed by the creamy filling and shredded coconut.
- Chill and Set: Refrigerate jars for at least 2 hours or overnight to firm up.
Notes
These jars can be made ahead of time and stored in the refrigerator for up to a week. Top with whipped cream or fresh fruit before serving.
- Prep Time: 15 minutes
- Cook Time: 0 minutes
- Category: Dessert
- Method: Chilling
- Cuisine: American
Nutrition
- Serving Size: 1 jar
- Calories: 250
- Sugar: 8g
- Sodium: 200mg
- Fat: 15g
- Saturated Fat: 12g
- Unsaturated Fat: 3g
- Trans Fat: 0g
- Carbohydrates: 30g
- Fiber: 5g
- Protein: 20g
- Cholesterol: 0mg
Keywords: protein, coconut, dessert, healthy, meal prep
High-Protein Birthday Cake Jars: No-Bake Dessert in a Jar
Celebrate in Style with a Protein Birthday Cake Jar
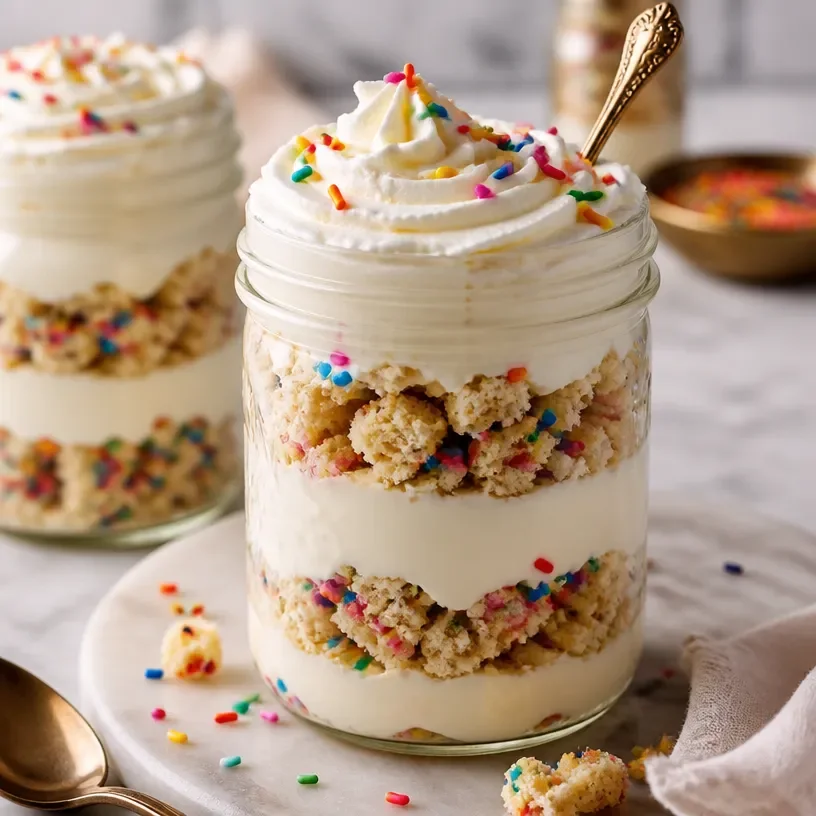
Welcome back to my kitchen, friends! Today, we’re making a fun and festive treat: a Protein Birthday Cake Jar! Wondering what makes this dessert special? Not only is it a delicious way to celebrate a special occasion, but it’s packed with protein, making it a delightful treat that satisfies your sweet tooth while nourishing your body.
As someone who thrives on creating memories through food, this dessert holds a special place in my heart. Birthdays are always a big deal in my family, and over the years, I’ve learned to turn traditional sweets into healthier versions without sacrificing flavor. The Protein Birthday Cake Jar was born from the desire to indulge in a slice of birthday cake while feeling good about what I’m eating. Plus, layering it in a jar makes it feel extra special and allows you to showcase all those vibrant colors and textures!
Trust me when I say that you’ll want to whip these up for the next birthday party, whether it’s your own or a loved one’s. Let’s gather those ingredients and get started!
A Trip Down Memory Lane
One of my favorite birthday memories is from my eighth birthday party. I remember my mom baking a chocolate cake that filled our house with warmth and that familiar sweet aroma. It was the centerpiece of our celebration, adorned with rainbow sprinkles and surrounded by laughter as my friends and family sang “Happy Birthday.”
As a child, I was mesmerized by how, with just a few simple ingredients, my mom could create pure magic. Fast forward to today, and those memories inspire me to recreate that joyful feeling in my own kitchen. However, I wanted to give it a twist—a protein-packed twist! This way, we can still enjoy the nostalgia of a birthday cake while being mindful of our nutrition. Sweet memories and healthy choices? Sign me up!
Ingredients
Here’s what you’ll need to gather for our Protein Birthday Cake Jar:
-
Protein Powder: (vanilla or cake batter flavor works great)
- This is the star player, providing the protein you’re after! If you have a favorite brand, use that. Just be cautious about flavors, as they can change the taste of your cake.
-
Almond Flour:
- A fantastic gluten-free alternative to all-purpose flour, almond flour adds moisture and a lovely nuttiness. You can substitute with coconut flour, but be sure to adjust the amount, as it’s more absorbent.
-
Baking Powder:
- We need this to help our cake rise. If you’re out, a bit of baking soda combined with some vinegar can create a similar effect!
-
Eggs:
- They bind everything together and add moisture. If you’re vegan or egg-free, mash up a banana or use flaxseeds as a substitute (1 tablespoon ground flaxseed mixed with 2.5 tablespoons water).
-
Unsweetened Applesauce:
- This acts as a natural sweetener and keeps our cake moist without all the added sugars. For a sweeter jar, you can replace it with Greek yogurt.
-
Honey or Maple Syrup:
- Just a drizzle adds sweetness! If you’re looking to cut the sugars down, you can skip this or use a sugar substitute like stevia.
-
Vanilla Extract:
- A splash of vanilla elevates the flavors. If you don’t have any, almond extract can be a great alternative but use it sparingly, as it’s strong!
-
Sprinkles:
- Birthday cakes aren’t complete without sprinkles! Go for the colorful ones to brighten up your jars. If you want to keep it healthy, check for natural sprinkles or omit them entirely.
With these ingredients in hand, let’s dive into the steps. You might want to keep your apron handy—we’re about to have some fun!
Step-by-Step Instructions
-
Preheat the Oven:
Start by preheating your oven to 350°F (175°C). This is crucial, as you want your cake to bake evenly. -
Mix Dry Ingredients:
In a large mixing bowl, whisk together your almond flour, protein powder, and baking powder until well combined. This will help ensure that your cake has a nice, even texture. -
Combine Wet Ingredients:
In another bowl, mix your eggs, unsweetened applesauce, honey/maple syrup, and vanilla extract. Use a fork to whisk them together until smooth. This is where the magic starts to happen—combine those flavors! -
Combine Both Mixtures:
Slowly add the wet ingredients into the bowl of dry ingredients, stirring just until combined. Avoid overmixing to keep your cake light and fluffy. If you’d like to get creative, you can add a tablespoon of sprinkles into the batter at this stage for a fun surprise when they bite into it! -
Bake:
Pour your batter into a greased 9-inch round cake pan. Bake for approximately 20–25 minutes or until a toothpick inserted in the center comes out clean. Remember, every oven is different, so keep an eye on it! -
Cool:
Once baked, let it cool completely in the pan for about 10 minutes, then transfer it to a wire rack. This step is super important—no one likes a soggy bottom! -
Create the Layered Jar:
Now, here’s the fun part! Once your cake has cooled, crumble it into pieces. Grab your mason jars (or any clear jar) and layer in the crumbled cake followed by a layer of Greek yogurt or whipped cream, then another crumbled layer, and repeat until you reach the top! Don’t forget to finish it off with a sprinkle of your colorful sprinkles.
With your Protein Birthday Cake Jar ready, we’re almost at the finish line!
Serving Suggestions
To serve, pop a festive lid on those mason jars and tie a cute ribbon around the top for a personal touch. If you’re looking to impress, consider placing them on a beautifully arranged dessert table or serving them during a birthday brunch. Your guests will absolutely love the layered presentation!
Recipe Variations
Looking to switch things up? Here are a few delicious variations you can try:
-
Chocolate Chip: Mix in mini chocolate chips to the cake batter for an added burst of sweetness! Chocolate and vanilla are a match made in heaven.
-
Nut Butter Swirl: Before baking, add a swirl of your favorite nut butter (like almond or peanut butter) throughout the batter for a nutty flavor explosion.
-
Fruit Layering: Add some fresh berries or banana slices in between the layers for a fresh and fruity twist. Pecans or walnuts can add an extra crunch!
-
Dairy-Free: Opt for coconut yogurt or cashew cream instead of Greek yogurt to keep it dairy-free.
-
Festive Toppings: After layering, top your jars with whipped coconut cream or a dollop of chocolate ganache for an extra treat!
Chef’s Notes
Oh, the stories this recipe could tell! I’ve experimented with so many variations—from gluten-free to different flavors of protein powder. It’s a delightful journey to see how a simple recipe can evolve over time. One time, I forgot to add the eggs and tossed the mixture into the oven anyway. To my surprise, it turned out to be a unique grainy cake that we all enjoyed—though I’m not sure I’d recommend it as a regular occurrence!
Every time someone takes a bite of these jars, I’m reminded of my childhood birthday memories. I can’t help but smile as I think about how food has the power to bring us together and create unforgettable moments.
FAQs and Troubleshooting
1. Why is my Protein Birthday Cake dense?
- Overmixing the batter can lead to a dense cake since it develops gluten. Mix just until combined for a lighter texture!
2. Can I make this ahead of time?
- Absolutely! You can prepare the cake a day in advance and layer the jars just before serving for the freshest taste.
3. How long do these jars last?
- If sealed tightly, they can last up to 3–5 days in the fridge. The yogurt or whipped cream may separate slightly, so give it a little stir before serving.
4. What should I do if my cake sticks to the pan?
- Be sure to grease your pan well before adding the batter. If it does stick, run a knife around the edges gently and try turning it upside down on a cooling rack.
Nutritional Info
While the nutritional info can vary based on the exact ingredients you use, here’s a rough estimate for one serving (one jar):
- Calories: Approximately 230
- Protein: 21g
- Carbs: 30g
- Fats: 8g
Remember, friends, this Protein Birthday Cake Jar is more than just a dessert; it’s an experience, a celebration, and a way to create sweet memories in the kitchen. So go ahead, gather your loved ones, and let them indulge guilt-free—a symphony of flavors in every spoonful! Happy baking! 🥳
Print
Protein Birthday Cake Jar
- Total Time: 40 minutes
- Yield: 4 servings 1x
- Diet: High Protein
Description
A fun and festive protein-packed dessert that celebrates special occasions while satisfying your sweet tooth.
Ingredients
- 1 cup Protein Powder (vanilla or cake batter flavor)
- 1 cup Almond Flour
- 1 tsp Baking Powder
- 2 Eggs (or egg substitute)
- 1/2 cup Unsweetened Applesauce
- 2 tbsp Honey or Maple Syrup
- 1 tsp Vanilla Extract
- Sprinkles (for topping)
Instructions
- Preheat the oven to 350°F (175°C).
- Mix the almond flour, protein powder, and baking powder in a large mixing bowl.
- Combine the eggs, applesauce, honey (or maple syrup), and vanilla extract in another bowl.
- Add the wet ingredients to the dry ingredients and stir until just combined.
- Pour the batter into a greased 9-inch round cake pan and bake for 20–25 minutes.
- Cool the cake for 10 minutes in the pan, then transfer to a wire rack.
- Create layers in a jar by crumbling the cake and adding layers of yogurt or whipped cream.
- Top with colorful sprinkles before serving.
Notes
You can make this ahead of time and layer the jars just before serving for the freshest taste.
- Prep Time: 15 minutes
- Cook Time: 25 minutes
- Category: Dessert
- Method: Baking
- Cuisine: American
Nutrition
- Serving Size: 1 jar
- Calories: 230
- Sugar: 10g
- Sodium: 100mg
- Fat: 8g
- Saturated Fat: 1g
- Unsaturated Fat: 7g
- Trans Fat: 0g
- Carbohydrates: 30g
- Fiber: 3g
- Protein: 21g
- Cholesterol: 70mg
Keywords: birthday cake, protein dessert, healthy dessert, cake jar, festive treat
High-Protein Salted Caramel Brownie Jar (Meal-Prep Friendly)
Indulge in Decadence: Protein Salted Caramel Brownie Jar
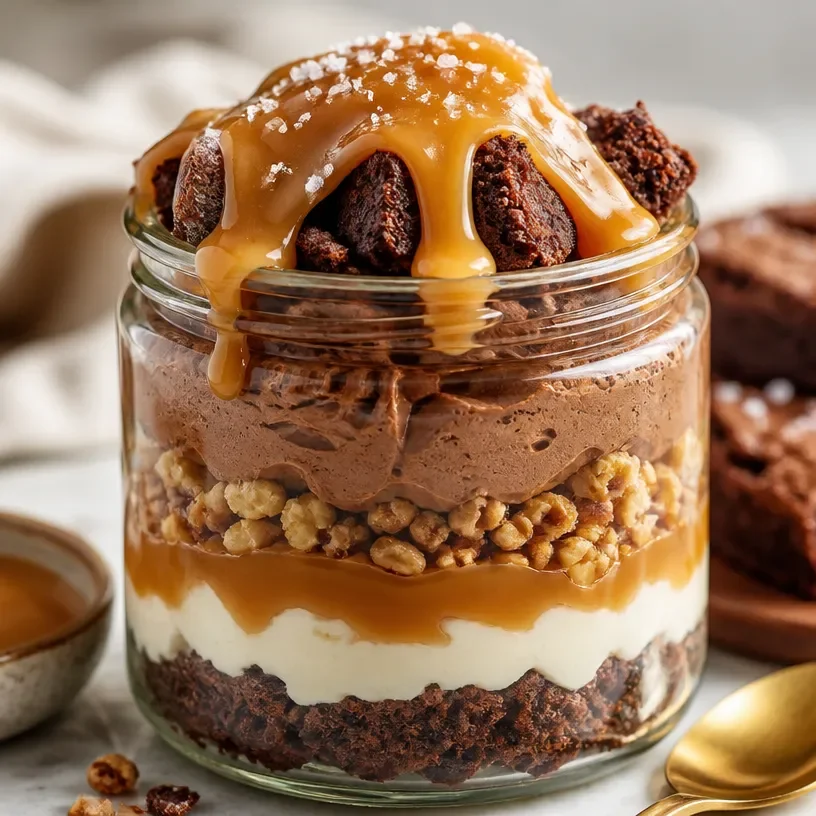
Welcome to my kitchen, dear foodies! Today, we’re diving into something utterly delicious: Protein Salted Caramel Brownie Jars. Imagine rich, fudgy brownies layered with a creamy salted caramel and topped off with a sprinkle of sea salt. These little jars of joy are not just delightful to eat but also packed with protein, making them a perfect guilt-free indulgence. Whether you’re a fitness enthusiast looking for a post-workout treat or simply someone who loves a good dessert (guilty as charged!), this recipe has got your name written all over it.
You know, there’s just something about brownies that sparks joy in so many of us. The warm, chocolatey aroma wafting through the kitchen, the anticipation as they bake, and the joy of devouring a rich, gooey square of brownie — are we feeling this, or what? This recipe takes the goodness of brownies and elevates it into a layered dessert that can be prepped in advance and enjoyed whenever the sweet tooth strikes.
Why jars, you might ask? Well, besides being super cute and portable, they also make for perfect portion control! Plus, there’s something inherently satisfying about digging into layers of harmony, don’t you think? So, grab your spoons and let’s get into it!
A Nostalgic Sweet Reminder
When I was a kid, my mom would whip up a batch of her famous brownies every Sunday afternoon. The whole house would fill with the mouth-watering scent of chocolate as we anticipated the warm squares topped with a generous scoop of vanilla ice cream. She had this way of turning simple moments into cherished memories, and for me, those brownies were always the highlight.
One day, my little brother got creative and decided to experiment by drizzling some leftover caramel sauce from another dessert all over the brownies fresh out of the oven. The combination was pure magic! We all dove in, and I remember giggling about how we’d discovered a new favorite.
Years later, I wanted to reinvent that nostalgic flavor into something a bit healthier and find a way to enjoy it daily without the guilt. Hence, the Protein Salted Caramel Brownie Jar was born! It’s a way to keep that warm family memory alive while nourishing my body at the same time.
Ingredients
Here’s what you’ll need to make your own decadent Protein Salted Caramel Brownie Jars:
-
Nuts (Walnuts or Pecans): These add a nice crunch. Chef Tip: Don’t have nuts? You can totally leave them out or swap them for seeds like pumpkin or sunflower seeds for a nut-free version!
-
Unsweetened Cocoa Powder: This is where the rich chocolate flavor comes from. Substitution: You can use carob powder for a caffeine-free option.
-
Protein Powder (Chocolate Flavor): This gives our brownies an extra boost. Substitution: If you’re not a fan of chocolate protein, vanilla works nicely too.
-
Almond or Peanut Butter: Smooth and creamy, these add richness. Note: You can also use sunflower seed butter for a nut-free treat!
-
Maple Syrup or Honey: A hint of natural sweetness. Chef Insight: If you are vegan, go with maple syrup; it’s totally plant-based!
-
Eggs: Just regular ol’ eggs will help bind everything together. Aquafaba (the liquid from chickpeas) can be a fantastic substitute for a vegan option—3 tablespoons equals one egg!
-
Salt: To balance the sweetness. Tip: Use a good quality sea salt for that perfect touch.
-
Caramel Sauce: Look for a protein-packed version or make your own! Tip: Adding a pinch of sea salt to your caramel can elevate the flavor to heavenly status—trust me on this!
-
Greek Yogurt: Creates a creamy layer when you jar it up. Alternative: Use dairy-free yogurt if you’re going plant-based!
-
Sea Salt Flakes: To finish it off with a crunch. Just a light sprinkle really does the trick!
Step-by-Step Instructions
Now that we’ve gathered our ingredients, let’s get to the fun part — cooking!
-
Preheat Your Oven to 350°F (175°C): It’s always so delightful to feel the warmth as the oven does its magic. Your kitchen is about to smell heavenly!
-
Combine the Dry Ingredients: In a mixing bowl, stir together the cocoa powder, protein powder, chopped nuts, and a pinch of salt. This step sets the chocolatey foundation for our brownies.
-
Mix the Wet Ingredients: In a separate bowl, whisk together the almond or peanut butter, maple syrup (or honey), and eggs until smooth. If you’re using any nut-free alternatives, this is a good time to mix them in.
-
Combine Wet and Dry: Now, pour the wet mixture into the dry ingredients and mix until well combined. Don’t overwork it; just aim for that fudgy consistency!
-
Prepare Your Baking Dish: Grease an 8×8-inch baking pan with a bit of olive oil or line it with parchment paper. This will ensure your brownies come out without a hitch.
-
Pour and Bake: Spread the brownie mix evenly into the prepared pan and pop it into the preheated oven for about 20–25 minutes. The goal is to bake them until the edges are set, but the center is still a little gooey. Trust your instincts here!
-
Cool and Layer: Once baked, let the brownies cool in the pan. Once cooled, cut them into squares and layer them in your jars. Start with a layer of brownie, followed by a layer of Greek yogurt, a drizzle of caramel, and repeat. It’s like layering flavors of joy!
-
Finishing Touch: Top with a sprinkle of sea salt flakes just before serving. This step adds that delightful contrast of sweet and salty!
Serving Suggestions
When it comes to serving, the presentation can make a world of difference! Serve your Protein Salted Caramel Brownie Jars chilled or slightly warmed, depending on your mood. For a more aesthetically pleasing option, consider garnishing them with a sprig of mint or topping with fresh berries for a pop of color. These jars also make for an impressive treat to bring to gatherings—you’ll be the star of the show!
Recipe Variations
Want to switch things up? Here are a few creative twists you can try:
-
Mint Chocolate: Add a drop or two of peppermint extract to the brownie mix for a refreshing minty flavor. Think about pairing it with a chocolate mint yogurt for those layers!
-
Nut-Free Option: Swap out the walnuts for oats—just a 1/2 cup of rolled oats will provide that delightful texture without nuts.
-
Vegan Version: Use flax eggs instead of regular eggs and a dairy-free yogurt. Your taste buds won’t even realize the difference!
-
Peanut Butter Swirl: Drop spoonfuls of peanut butter into the brownie batter before baking for delightful peanut butter pockets.
-
Spiced Twist: Sprinkle in some cinnamon or nutmeg into your layers for a cozy autumn vibe.
Chef’s Notes
Every recipe tells a story, and this one is close to my heart. The Protein Salted Caramel Brownie Jar has evolved over time through numerous trials of balancing flavors and healthiness, but the nostalgic memory of those Sunday brownies will always linger in my mind. I fondly remember the laughter shared with my family around the table, and now, I bring this joy into my kitchen whenever I whip up these jars.
And let’s be real, things can get messy—there’s been flour on my face and chocolate spread all over my kitchen counter during testing (oops!), but those ‘oops’ moments only add to the joy of cooking. So, don’t stress if things get a little chaotic in your kitchen; embrace it! Cooking is as much about the journey as it is about the final dish.
FAQs and Troubleshooting
1. My brownies seem dry or crumbly—what went wrong?
Most likely, they were overbaked. Keep an eye on them! The center should look a bit underdone when you pull them out. Remember, they will continue to cook as they cool.
2. Can I make these jars in advance?
Absolutely! They store beautifully in the fridge for about 4–5 days. Just make sure to top them with the sea salt flakes right before serving for freshness.
3. What if I don’t have Greek yogurt?
No worries! Regular yogurt or any dairy-free substitute will do just fine. The texture will change a bit, but they’ll still taste delicious!
4. How do I ensure my layers look pretty in the jar?
Take your time layering! Using a piping bag for the yogurt can help keep those layers clean and neat for a beautiful presentation.
Nutritional Info
Each jar is uniquely satisfying, and here’s a rough nutritional breakdown:
- Calories: Around 300-400 (depending on ingredients used)
- Protein: 20g (thanks to your protein powder and Greek yogurt)
- Fats: 15g (mostly healthy fats from nuts and nut butter)
- Carbohydrates: 45g (mostly from the brownie and natural sweeteners)
So, whether you’re making these delightful jars for yourself or to impress family and friends, I hope they bring as much joy to your kitchen as they’ve brought to mine. Here’s to more sweet memories filled with laughter, love, and deliciousness! Enjoy!
Print
Protein Salted Caramel Brownie Jar
- Total Time: 40 minutes
- Yield: 4 servings 1x
- Diet: High Protein
Description
Delicious layered brownies with creamy salted caramel, packed with protein for a guilt-free indulgence.
Ingredients
- 1 cup Nuts (Walnuts or Pecans), chopped
- 1/2 cup Unsweetened Cocoa Powder
- 1 scoop Protein Powder (Chocolate Flavor)
- 1/2 cup Almond or Peanut Butter
- 1/3 cup Maple Syrup or Honey
- 2 Eggs
- 1/4 teaspoon Salt
- 1/2 cup Caramel Sauce
- 1 cup Greek Yogurt
- Sea Salt Flakes, for topping
Instructions
- Preheat your oven to 350°F (175°C).
- Combine the dry ingredients: cocoa powder, protein powder, chopped nuts, and a pinch of salt.
- Mix the wet ingredients: almond or peanut butter, maple syrup (or honey), and eggs until smooth.
- Combine the wet mixture into the dry ingredients and mix until just combined.
- Prepare an 8×8-inch baking pan, greasing it or lining it with parchment paper.
- Pour the brownie mix into the pan and bake for about 20-25 minutes.
- Cool brownies in the pan; cut into squares and layer in jars with yogurt and caramel.
- Top with a sprinkle of sea salt flakes before serving.
Notes
These jars can be prepped in advance and stored in the fridge for 4-5 days. Top with sea salt just before serving for best taste.
- Prep Time: 15 minutes
- Cook Time: 25 minutes
- Category: Dessert
- Method: Baking
- Cuisine: American
Nutrition
- Serving Size: 1 jar
- Calories: 350
- Sugar: 12g
- Sodium: 200mg
- Fat: 15g
- Saturated Fat: 4g
- Unsaturated Fat: 8g
- Trans Fat: 0g
- Carbohydrates: 45g
- Fiber: 5g
- Protein: 20g
- Cholesterol: 70mg
Keywords: brownie jar, salted caramel, protein dessert, healthy dessert, indulgent recipe
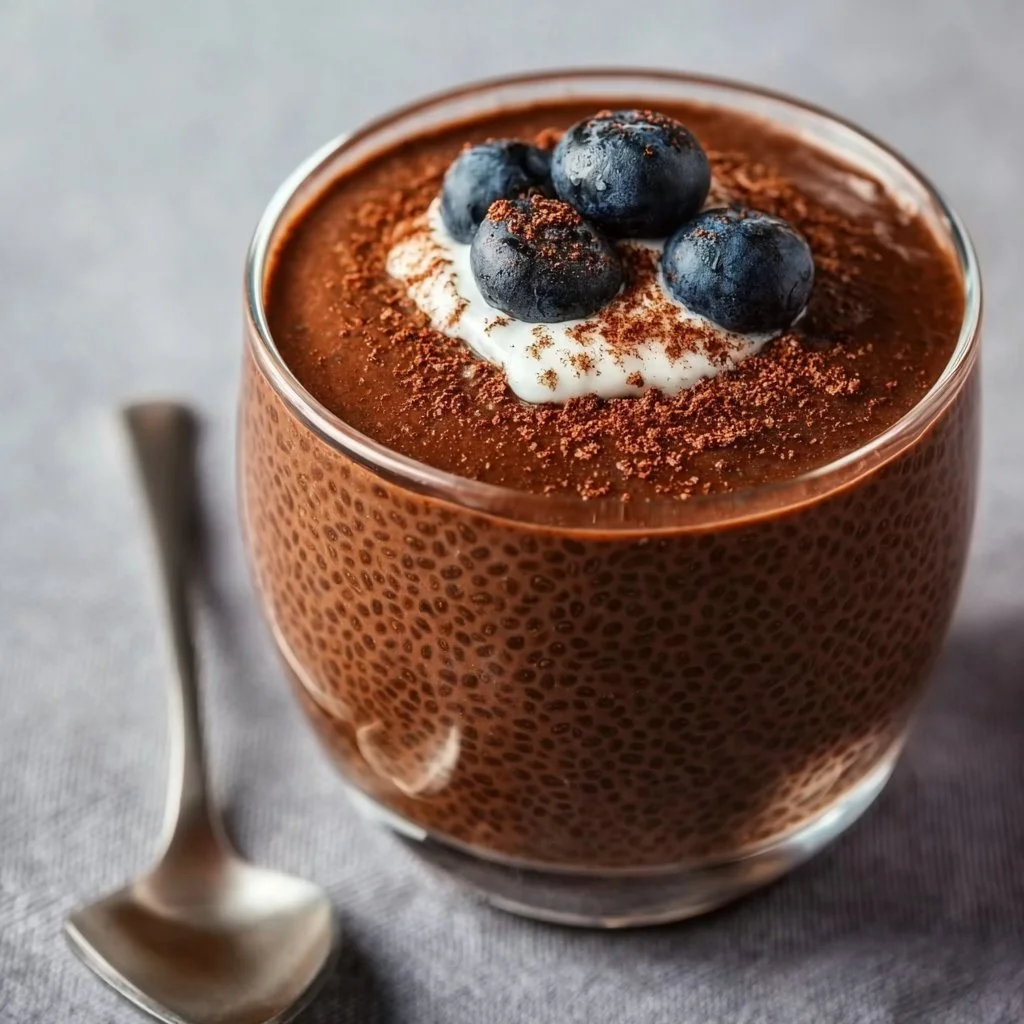
High Protein Chocolate Chia Seed Pudding
# High Protein Chocolate Chia Seed Pudding: Your New Favorite Snack

Hey there, food lovers! I’m Beau Collier, and today we’re diving into a recipe that’s not only nourishing but also satisfying and downright delicious. If you’re on the lookout for a pick-me-up that feels indulgent but keeps you on track with your health goals, I've got just the treat for you: high-protein chocolate chia seed pudding! This delightful dish is packed with all the goodness you need to fuel your day without sacrificing flavor.

## Introduction

Picture this: It’s a sunny afternoon, and you’ve just come back from a long walk—perhaps enjoying a bit of nature, feeling the sun on your face. Like many of us, you might be craving something sweet-yet-nourishing, something that feels luxurious but fits right into your healthy eating routine. That's where my chocolate chia seed pudding comes in!

This isn’t just any pudding; it’s a bowl of magic that you can whip up in no time. Packed with protein, fiber, and Omega-3 fatty acids, chia seeds are nutrition powerhouses. When we mix these tiny seeds with rich almond milk and a touch of chocolate, we create a velvety dessert that balances indulgence and health. And the best part? It’s as easy as pie!

Oh, have I mentioned that it’s also vegan? Yep! So whether you’re looking for a post-workout snack, a sweet breakfast, or a midnight treat, this pudding fits all occasions like your favorite cozy sweater. So, let's mix it up and embark on a delightful journey of flavors, creativity, and a sprinkle of nostalgia!

## Personal Story

I’ll never forget the first time I stumbled upon chia seeds. It was during a cozy brunch with my sister at a trendy café. Puddings were all the rage, and of course, I had to try the chocolate chia pudding. As soon as I took that first spoonful, it was love at first bite! The rich chocolate flavor combined with the delightful texture of the chia seeds was a gamechanger for me.

Years later, I decided to make my version at home. With a few tweaks and a whole lot of love, I crafted this high-protein chocolate chia pudding. It instantly became a staple in my kitchen—my go-to when I wanted something sweet that also filled me up. Every spoonful still reminds me of that brunch—the laughter, the warmth, and the joyful vibes. I hope this recipe does the same for you!

## Ingredients

Let’s gather the stars of our show! Here’s what you’ll need to make this high-protein chocolate chia seed pudding:

- **1/4 cup chia seeds**
  These tiny seeds are loaded with fiber, protein, and Omega-3 fatty acids. You can swap them for flaxseeds if you’re in a pinch—just ensure they’re ground for a similar texture.

- **2 cups almond milk (or any plant-based milk)**
  Almond milk gives this pudding a nutty flavor, but feel free to use coconut milk for creaminess or oat milk for a sweeter twist.

- **2 tablespoons chocolate protein powder**
  This not only amps up the chocolate flavor but also boosts the protein content. If you’re looking for a dairy-free option, make sure your protein powder is vegan!

- **2 tablespoons maple syrup (or to taste)**
  A natural sweetener that enhances the flavors beautifully! You can substitute with agave syrup or even a few drops of stevia if you’re watching your sugar intake.

- **1 teaspoon vanilla extract**
  Vanilla elevates the taste by adding depth and warmth. A splash of almond extract can also impart a lovely flavor if you want to get creative!

- **Pinch of salt**
  A little salt balances the sweetness and intensifies the chocolate flavor. Trust me on this—a tiny pinch goes a long way!

### Totaling it Up
Now that we’ve got our ingredients, you’re well on your way to creating a comforting, satisfying pudding that’ll make your tastebuds dance with joy!

## Step-by-Step Instructions

Ready to get cooking? Let’s roll up our sleeves and make this delectable chocolate chia seed pudding together!

### Step 1: Combine the Ingredients
In a medium mixing bowl, combine the chia seeds and almond milk. Whisk it together until well blended. Make sure there aren't any clumps of seeds!

**Chef’s Tip:** If you're using cocoa powder instead of chocolate protein powder, mix it with a bit of almond milk first to prevent clumps before adding it to the rest.

### Step 2: Sweeten It Up
Stir in the chocolate protein powder, maple syrup, vanilla extract, and that delightful pinch of salt. Get whisking until everything is smooth and coated.

**Hacks:** Taste it—don’t be shy! Depending on your sweet tooth, you might want to add more maple syrup or even a touch of cocoa for extra richness.

### Step 3: Let It Chill
Cover the bowl with plastic wrap or a lid and pop it in the fridge for at least 2 hours, or even better, overnight. This step is crucial; it allows the chia seeds to soak up the liquid and thicken into a divine pudding.

**Chef’s Note:** I prefer making this pudding at night. It gives me a delicious breakfast or snack option ready to go in the morning!

### Step 4: Serve It Up!
Once your pudding has set, give it a good stir! You’ll notice that it has transformed into a thick, luscious concoction.

**Pro Tip:** If you find it too thick, you can add a splash of almond milk to loosen it up!

### Step 5: Enjoy!
Now it’s time to dig in! Serve the pudding in your favorite bowls or jars, and feel free to top it with your favorite goodies.

## Serving Suggestions

Presentation makes everything just a bit more exciting, don’t you think? Here are some fun ways to serve your chocolate chia seed pudding:

- **Top with Fresh Berries**: Strawberries, raspberries, or blueberries add a delightful burst of freshness and a pop of color.

- **A Sprinkle of Nuts**: Add some chopped nuts for a crunch—almonds or walnuts work brilliantly here!

- **Coconut Flakes**: Unsweetened coconut flakes will add a tropical touch to your dessert, enhancing the sweetness beautifully.

- **Drizzle of Nut Butter**: Almond or peanut butter can be an exquisite finishing touch, bringing creaminess and healthy fats to the party.

### Creativity Hour
If you're feeling creative, you can layer your pudding with crunchy granola or even other fruits for a parfait vibe. The options are endless!

## Recipe Variations

Who doesn’t love some variety in the kitchen? Here are a few fun twists you can try with this recipe:

1. **Mint Chocolate**: Add a few drops of peppermint extract for a refreshing mint chocolate experience!

2. **Spicy Chocolate**: Give it a little kick! A dash of cayenne pepper can elevate the chocolate flavors and create an exciting sweet heat.

3. **Matcha Infusion**: Combine chocolate protein powder with a touch of matcha for a unique flavor combo and an antioxidant boost!

4. **Fruit-Infused**: Blend in some banana or avocado before adding to the chia, adding creaminess and sweetness naturally!

5. **Coffee Boost**: Swap some almond milk with cold brew coffee for a mocha-flavored pudding that’s perfect for your morning fix!

## Chef’s Notes

In my kitchen, recipes evolve over time. This chocolate chia seed pudding is a prime example! It was once just simple and basic, but through experimentation and tastes (often late-night cravings), I turned it into a high-protein delight that satisfies my chocolate cravings. I often find myself brown-bagging this pudding for road trips or having it as a late-night treat.

And hey, don’t worry if things don’t turn out perfect on your first try! A little practice makes for a better pudding every time—plus, it’s hard to mess this up!

## FAQs and Troubleshooting

- **Q: Why did my pudding not thicken?**
  A: If your pudding didn’t thicken, it might need more chia seeds next time! Or sometimes, it just needs longer to sit in the fridge.

- **Q: Can I store leftovers?**
  A: Absolutely! Just store them in an airtight container in the fridge for 3-4 days. The flavors develop beautifully as it sits!

- **Q: Can I use different sweeteners?**
  A: Yes! Feel free to use honey, agave, or a sugar substitute based on your preference.

- **Q: My pudding is too thick; what can I do?**
  A: No problem! Just stir in a little almond milk until it reaches your desired consistency.

## Nutritional Info

This high-protein chocolate chia seed pudding isn’t just delicious; it’s also packed with nutrients! Here’s a rough breakdown (per serving):

- **Calories**: Approximately 250
- **Protein**: 15g (varies with protein powder)
- **Fats**: 9g (mostly healthy fats from chia seeds)
- **Carbohydrates**: 29g
- **Fiber**: 10g
- **Sugar**: 7g (varies with sweetener)

This pudding makes a great option for breakfast, a snack, or dessert, keeping you full and satisfied while giving you that sweet fix!

## Final Thoughts

There you have it, food friends! A beautifully simple, high-protein chocolate chia seed pudding that ticks all the boxes of delicious, healthy, and oh-so-easy to make. This recipe is all about creating joy in the kitchen, and I hope it brings you as much happiness as it brings me!

Feeling inspired? Grab those ingredients and start whisking away! Share your versions with me, and let’s celebrate our love for cooking and community through this sumptuous pudding experience. Remember to keep it simple, stay soulful, and always make room for dessert!

Until next time, happy cooking! 🍽️
High Protein Chocolate Chia Seed Pudding
- Total Time: 120 minutes
- Yield: 4 servings 1x
- Diet: Vegan, Vegetarian
Description
A delicious and nutritious high-protein chocolate chia seed pudding that’s perfect for post-workout snacks, breakfasts, or midnight treats.
Ingredients
- 1/4 cup chia seeds
- 2 cups almond milk (or any plant-based milk)
- 2 tablespoons chocolate protein powder
- 2 tablespoons maple syrup (or to taste)
- 1 teaspoon vanilla extract
- Pinch of salt
Instructions
- Combine the chia seeds and almond milk in a medium mixing bowl, whisk until well blended.
- Stir in the chocolate protein powder, maple syrup, vanilla extract, and salt until smooth.
- Cover the bowl and refrigerate for at least 2 hours or overnight.
- Stir the pudding once it has set to ensure a smooth texture.
- Serve the pudding in bowls or jars and top with your favorite toppings.
Notes
For added flavor, consider topping with fresh berries, nuts, or a drizzle of nut butter. Experiment with different sweeteners to suit your taste.
- Prep Time: 10 minutes
- Cook Time: 0 minutes
- Category: Dessert
- Method: Refrigeration
- Cuisine: Vegan
Nutrition
- Serving Size: 1 serving
- Calories: 250
- Sugar: 7g
- Sodium: 200mg
- Fat: 9g
- Saturated Fat: 1g
- Unsaturated Fat: 8g
- Trans Fat: 0g
- Carbohydrates: 29g
- Fiber: 10g
- Protein: 15g
- Cholesterol: 0mg
Keywords: chocolate pudding, vegan dessert, high protein snack, chia seeds, healthy dessert




