

High-Protein Cottage Cheese Snickerdoodles: 15-Minute Bake
Protein Cottage Cheese Snickerdoodles: A Cozy Twist on a Classic Favorite
Welcome back, fellow foodies! Today, I’m thrilled to share a recipe that will not only satisfy your sweet tooth but also give a protein-packed twist to a classic treat — Protein Cottage Cheese Snickerdoodles. If you’ve ever lingered in a bakery, mesmerized by the delightful aroma of freshly baked cookies, you know there’s something magical about the combination of cinnamon and sugar.
Cottage cheese might not be the first ingredient that springs to mind when you think of cookies, but trust me, it adds a creamy richness and a boost of protein that will make these cookies your new favorite snack. Plus, they’re super easy to make and perfect for sharing with loved ones — or keeping all to yourself, no judgment here!
So, roll up those sleeves and let’s dive into this delectable recipe that will have your home smelling like a cozy café.
A Whiff of Nostalgia: My Cookie-Making Adventures
Growing up, my grandmother’s kitchen was my playground. I can still hear her laughter as we sifted flour, messily dusting the countertops in our quest to make the perfect cookie. Snickerdoodles were always a staple at our family gatherings, their delightful aroma wafting through the air as they baked to golden perfection.
I vividly remember one particular winter afternoon when my grandma decided to experiment. We were running low on ingredients, and she had just discovered a tub of cottage cheese lurking in the fridge. Instead of a disaster, we ended up creating an unforgettable hybrid of our beloved snickerdoodles, and those cookies became a hit – crunchy on the outside, soft and chewy on the inside, and a little bit healthier, too! It’s a fond memory that always brings a smile to my face, and now I’m excited to pass on that legacy with a modern twist.
Ingredients
Here’s what you’ll need to create these delightful Protein Cottage Cheese Snickerdoodles:
-
1 cup cottage cheese
Provides moisture and protein. Opt for low-fat or regular cottage cheese depending on your preference. For a dairy-free version, try a nut-based yogurt. -
1/2 cup coconut oil or unsalted butter
Adds richness and helps with texture. Coconut oil will lend a subtle flavor, while butter offers that classic taste. If you’re looking for a vegan option, use a plant-based butter. -
1/2 cup brown sugar
Offers sweetness and a hint of caramel flavor. You can substitute with coconut sugar for a less refined option, or use a sugar replacement if you’re cutting back on sugar. -
1/4 cup granulated sugar
This adds a crystal-like surface when rolling the cookies. For a less sweet version, reduce the granulated sugar slightly. -
1 large egg
Acts as a binding agent. For a vegan swap, try a flax egg (1 tablespoon flaxseed meal + 2.5 tablespoons water) instead! -
2 cups all-purpose flour
The base of our cookie. For a healthier twist, use whole wheat flour or even almond flour for a gluten-free option, but be aware it might change the texture. -
1 teaspoon baking powder
Helps the cookies rise! If you’re out of baking powder, you can make a substitute by mixing 1/2 teaspoon cream of tartar with 1/4 teaspoon baking soda. -
1 teaspoon baking soda
Enhances the texture and helps the cookies spread. If baking soda is unavailable, use an equal amount of baking powder. -
1 tablespoon ground cinnamon
The star of the snickerdoodle flavor. Add a pinch of extra cinnamon into the dough for additional flavor! -
1/2 teaspoon salt
Balances the sweetness and enhances the flavors. If you’re using salted butter, you can omit this entirely.
Now that we have our ingredients set, let’s move on to the fun part — the cooking!
Step-by-Step Instructions
-
Preheat Your Oven
Begin by preheating your oven to 350°F (175°C). As it heats up, the anticipation of fresh cookies filling your home is absolutely mouthwatering! -
Blend the Cottage Cheese
In a medium bowl, place your cottage cheese and give it a quick whirl with a fork or, for creamier results, blend it in a food processor until smooth. This step is crucial as it helps evenly distribute the cottage cheese into your cookie dough. -
Cream the Fats and Sugars
In a separate large mixing bowl, beat together the coconut oil (or butter) and both sugars until light and fluffy. This should take about 2-3 minutes. The fluffiness you achieve here will contribute to a chewy and soft cookie. -
Add in the Egg
Crack in your egg and mix until well incorporated. If you’re using a flax egg, make sure to let it sit for a minute to thicken before adding it in. -
Incorporate the Cottage Cheese
Next, fold in your blended cottage cheese mixture into the wet ingredients. At this point, your batter might look a bit lumpy; that’s normal! We want that cottage cheese to shine through. -
Combine Dry Ingredients
In another bowl, whisk together the flour, baking powder, baking soda, cinnamon, and salt. Gradually add this dry mix into your wet mixture, stirring gently until just combined. Don’t overmix; a few lumps are perfectly okay! -
Shape the Cookies
Here comes the fun part! Use a spoon or a cookie scoop to form balls of dough (about 1-2 tablespoons each). Roll them in a mixture of granulated sugar and extra cinnamon for that signature snickerdoodle finish. -
Bake the Cookies
Arrange the dough balls on a baking sheet lined with parchment paper, leaving enough space between them (about 2 inches). Pop them into the preheated oven and bake for 10-12 minutes, or until the edges are lightly golden. They might look soft in the center, but they’ll firm up as they cool. -
Cool and Enjoy
Let your cookies cool on the baking sheet for about 5 minutes before transferring them to a wire rack to cool completely. Trust me, the aroma wafting through your home is worth the wait!
And just like that, you’ve whipped up a batch of Protein Cottage Cheese Snickerdoodles that are sure to become a staple in your kitchen!
Serving Suggestions
You can serve these snickerdoodles warm with a glass of cold milk or a cup of your favorite tea or coffee. For an extra indulgent treat, consider pairing them with a scoop of vanilla ice cream or drizzling with a simple homemade glaze made from powdered sugar and milk.
Recipe Variations
- Nutty Option: Add 1/2 cup of chopped pecans or walnuts for a delightful crunch.
- Chocolate Chip Delight: Fold in 1/2 cup of mini chocolate chips for a chocolatey twist.
- Pumpkin Spice Snickerdoodles: Substitute 1/2 cup of cottage cheese with pumpkin puree and add pumpkin spice for a fall-inspired flavor.
- Gluten-Free Version: Swap out the all-purpose flour for a gluten-free 1:1 baking flour mix to enjoy the same great flavor without the gluten.
- Vegan Delight: Substitute the egg and butter with flax eggs and coconut oil for a completely vegan option.
Chef’s Notes
These Protein Cottage Cheese Snickerdoodles have a special place in my heart. Over the years, my recipe has evolved, but the key elements – comfort and nostalgia – remain the same. There’s something incredibly rewarding about seeing friends and family light up as they take their first bite. It’s a reminder that cooking is all about creating memories and connecting with those we love.
Oh, and let’s talk about that time my dog, Charlie, made a surprise appearance while I was mixing the dough. He managed to knock over a bag of flour, sending it flying everywhere! It turned into a mini snowstorm in my kitchen, and we both ended up a bit floury but laughing. Just another reminder to embrace the chaos of the kitchen!
FAQs and Troubleshooting
-
Why are my cookies flat?
Flat cookies can result from overmixing the dough or not having enough flour. Make sure to gently fold in the dry ingredients and measure your flour correctly for the best results. -
Can I freeze these cookies?
Absolutely! You can freeze them before or after baking. Just ensure you place them in an airtight container. They’ll last for about a month in the freezer. -
What if I don’t have cottage cheese?
If you’re fresh out of cottage cheese, you can substitute with Greek yogurt or ricotta cheese. Both will provide a similar texture and flavor! -
How do I store the leftover cookies?
Keep your cookies in an airtight container at room temperature for up to a week. If you like them a bit chewy, store them with a slice of bread to keep moisture in.
Nutritional Info (Optional)
While the exact nutritional info can vary based on specific ingredients, here’s a rough breakdown per cookie (assuming 24 cookies total):
- Calories: 95
- Protein: 2.6g
- Fat: 4g
- Carbohydrates: 12.1g
- Fiber: 0.5g
- Sugar: 6g
There you have it! A delightful healthier take on a classic cookies that are sure to be a hit with everyone. I hope you try this recipe out and create delicious memories in your kitchen. Remember, cooking is all about love and joy — so embrace the process and enjoy every bite! Happy baking, everyone!
Print
Protein Cottage Cheese Snickerdoodles
- Total Time: 27 minutes
- Yield: 24 cookies 1x
- Diet: Vegetarian
Description
A protein-packed twist on classic snickerdoodle cookies featuring creamy cottage cheese for added richness.
Ingredients
- 1 cup cottage cheese
- 1/2 cup coconut oil or unsalted butter
- 1/2 cup brown sugar
- 1/4 cup granulated sugar
- 1 large egg
- 2 cups all-purpose flour
- 1 teaspoon baking powder
- 1 teaspoon baking soda
- 1 tablespoon ground cinnamon
- 1/2 teaspoon salt
Instructions
- Preheat your oven to 350°F (175°C).
- Blend the cottage cheese until smooth.
- Cream the coconut oil (or butter) and both sugars until light and fluffy.
- Add in the egg and mix until well incorporated.
- Incorporate the blended cottage cheese mixture into the wet ingredients.
- Combine the flour, baking powder, baking soda, cinnamon, and salt in another bowl.
- Gradually add the dry mix to the wet mixture, stirring gently.
- Shape the dough into balls and roll in a mixture of granulated sugar and cinnamon.
- Bake for 10-12 minutes or until the edges are lightly golden.
- Cool the cookies on a wire rack.
Notes
For a vegan option, substitute the egg with a flax egg and use plant-based butter.
- Prep Time: 15 minutes
- Cook Time: 12 minutes
- Category: Dessert
- Method: Baking
- Cuisine: American
Nutrition
- Serving Size: 1 cookie
- Calories: 95
- Sugar: 6g
- Sodium: 100mg
- Fat: 4g
- Saturated Fat: 3g
- Unsaturated Fat: 1g
- Trans Fat: 0g
- Carbohydrates: 12g
- Fiber: 0.5g
- Protein: 2.6g
- Cholesterol: 30mg
Keywords: snickerdoodles, cookies, protein cookies, cottage cheese cookies, dessert
Protein Brown Butter Cookies: Make-Ahead Jar Snacks
The Ultimate Protein Brown Butter Cookie Jar Recipe: Cozy Comfort in Every Bite!
Welcome to my kitchen, my fellow food enthusiasts! I’m so excited you’ve decided to spend some time here with me today. From the moment I started this blog, my goal was to inspire you to embrace the joy of cooking with all its delicious possibilities. And what better way to do that than with a comforting, indulgent recipe that packs a punch of flavor while still keeping your nutritional goals in check?
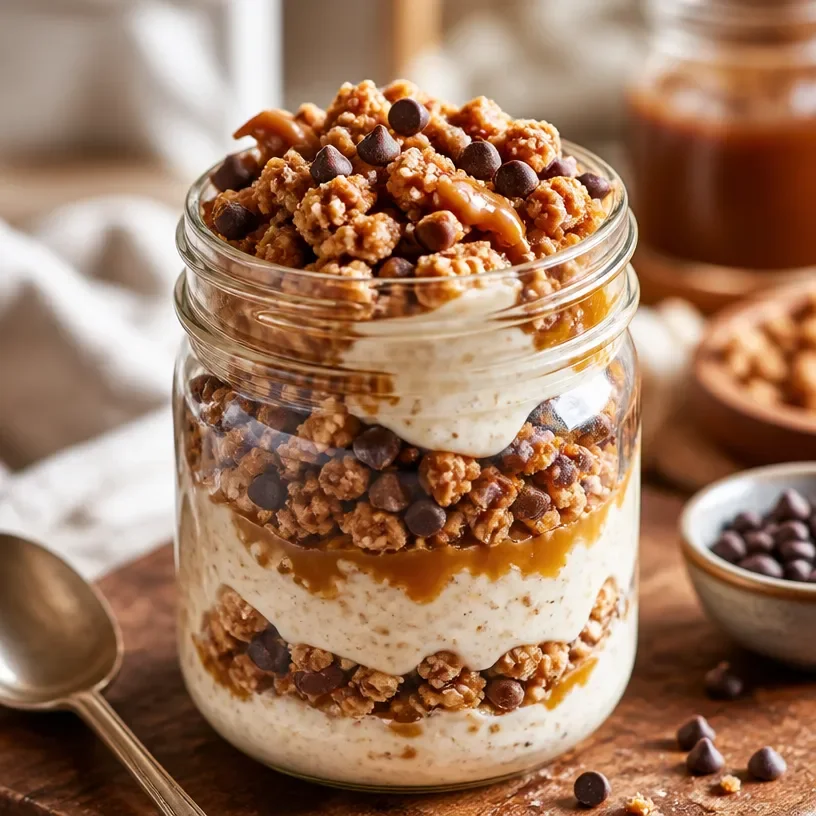
Today, I’m sharing a recipe that has quickly become one of my go-to favorites: Protein Brown Butter Cookie Jar! Yes, you read that correctly—a cookie jar filled with the delightful aromas of freshly baked cookies, but with a healthier twist that won’t leave you feeling guilty about enjoying a sweet treat. These cookies are made with brown butter for that nutty, caramelized flavor that will make your taste buds dance. Plus, they’re protein-packed to give you that extra boost you need whether you’re heading to the gym or simply powering through your day.
Picture this: a rainy afternoon spent in the comfort of your warm kitchen, the scent of browning butter wafting through the air. Your favorite tunes softly playing in the background. Kids (or even your fur babies) eagerly waiting for hot cookies straight from the oven. It’s moments like these that create lasting memories, and I’m thrilled to help you turn your kitchen into a cozy haven with my Protein Brown Butter Cookie Jar.
So grab your apron, and let’s dive into this delightful recipe that’s perfect for sharing (or for enjoying all by yourself—no judgment here)!
A Delicious Memory: The Origin of My Brown Butter Cookies
I still remember the first time I experimented with brown butter. It was a sunny Sunday, and I had invited some friends over for brunch. I decided to whip up a batch of cookies to accompany the homemade mimosas I was serving. As the butter turned from golden to a rich, deep brown, I was captivated by the nutty aroma that filled my kitchen. Little did I know, that would set off a cookie-making adventure that would become a staple in my home!
The cookies emerged from the oven, perfectly crisp on the edges and chewy in the center. The first bite was mind-blowing; my friends couldn’t get enough! As laughter filled the room, we indulged in those brown butter cookies while sharing stories and making memories. From that day on, I knew I had created something special.
Fast forward to now, and I’ve perfected this recipe by adding protein to the mix, making these cookies not only a tasty treat but also a source of energizing goodness. Every time I whip up a batch, I’m transported back to that sunny Sunday surrounded by friends, laughter, and, of course, cookies!
Ingredients You’ll Need
Here’s a quick rundown of everything you’ll need to make your Protein Brown Butter Cookie Jar:
Ingredients:
- 1 cup unsalted butter
- Chef Insight: Unsalted butter allows you to control the sweetness and saltiness in your cookies; brown it to add depth of flavor!
- 1 cup brown sugar
- Substitution Tip: You can use coconut sugar for a lower glycemic index alternative without sacrificing flavor.
- 1/2 cup granulated sugar
- Quick Insight: Mixing sugars adds a nice balance of sweetness and texture to your cookies.
- 2 large eggs
- Substitution Tip: For a vegan option, try using flax eggs (1 tablespoon of flaxseed meal mixed with 2.5 tablespoons of water per egg).
- 1 teaspoon vanilla extract
- Pro Tip: Use pure vanilla extract for the best flavor; it makes a world of difference!
- 2 cups all-purpose flour
- Substitution Tip: Whole wheat flour can be used for a wholesome twist that still maintains the cookie texture.
- 1 teaspoon baking soda
- Chef Insight: This leavening agent ensures your cookies rise perfectly while keeping them chewy.
- 1/2 teaspoon salt
- Quick Insight: A touch of salt enhances all the flavors; don’t skip this ingredient!
- 1 cup protein powder (vanilla or chocolate)
- Substitution Tip: If you prefer plant-based protein, pea protein works wonderfully as well.
- 1 cup chocolate chips (dark, milk, or your favorite variety)
- Pro Tip: A mix of chocolate chips and nuts adds a delightful crunch to each cookie.
Step-by-Step Instructions
Ready to bake? Let’s get to it! Here are the detailed steps to make your delicious Protein Brown Butter Cookies:
Step 1: Brown the Butter
Start by placing your unsalted butter in a saucepan over medium heat. Stir it occasionally, and watch closely as it begins to foam. After a few minutes, the foam will subside, and you’ll notice the butter turning a beautiful golden brown color with a nutty aroma. This step is crucial—it’s where the magic begins! Once browned, remove it from heat and let it cool slightly.
Step 2: Mix the Sugars
In a large mixing bowl, combine the browned butter (you can pour it in while it’s still warm) with brown sugar and granulated sugar. Whisk together until it’s well combined and the mixture is smooth. This will create a rich, caramel-like base for your cookies.
Step 3: Add the Eggs and Vanilla
Crack the eggs into your sugar mixture, and add the vanilla extract. Whisk until everything is nicely incorporated. You want to see a nice glossy texture—this means delicious cookies await!
Step 4: Combine the Dry Ingredients
In a separate bowl, whisk together the all-purpose flour, baking soda, protein powder, and salt. Gradually add the dry mixture to the wet ingredients, stirring until just combined. Be careful not to overmix; we want those cookies tender!
Step 5: Fold in the Chocolate Chips
Now comes the fun part—fold in your chocolate chips! This is where you can get creative. If you want extra sweetness and crunch, throw in some chopped nuts or even a handful of dried fruit!
Step 6: Chill the Dough
Cover the dough with plastic wrap and chill it in the refrigerator for at least 30 minutes. Chilling helps flavors meld and improves the cookies’ texture, resulting in a chewier bite.
Step 7: Preheat and Prepare
Preheat your oven to 350°F (175°C) and line a baking sheet with parchment paper. This is a chef’s best friend—no sticky mess when it’s time to remove the cookies.
Step 8: Scoop and Bake
Once your dough is chilled, use a cookie scoop or a tablespoon to portion your cookie dough onto the prepared baking sheet, leaving some space between each cookie (they’ll spread out a bit). Bake them in the preheated oven for 10-12 minutes or until the edges are golden brown and the centers look slightly soft.
Step 9: Cool and Enjoy
Let the cookies cool on the baking sheet for about 5 minutes before transferring them to a wire rack to cool completely. This allows the cookies to firm up and makes snacking on them easier.
And there you have it—a batch of Protein Brown Butter Cookies that are ready to be devoured! Just try to resist the temptation to eat them all at once—though I won’t judge if you do!
Serving Suggestions
For an extra touch of coziness, serve these cookies warm with a glass of cold milk or a cup of herbal tea. If you’re feeling adventurous, add a scoop of vanilla ice cream on top for a mouthwatering cookie sundae. Place your cookies in a pretty jar on your kitchen counter, and watch them disappear as family and friends gather around!
Recipe Variations
Here are a few creative twists you can try with this recipe for a fun change:
- Nutty Protein Cookies: Add in 1/2 cup of chopped walnuts or pecans for a delicious crunch.
- Coconut Delight: Incorporate 1/2 cup of shredded coconut for a tropical flair that pairs beautifully with chocolate.
- Oatmeal Chocolate Chip Protein Cookies: Swap out 1 cup of flour for 1 cup of rolled oats to give your cookies a wholesome chewiness.
- Peanut Butter Swirls: Before baking, create swirls of your favorite nut butter on top of the cookie dough for an irresistible flavor combo.
- Spice It Up: Add a teaspoon of cinnamon or pumpkin spice for a warm, comforting flavor that’s perfect for autumn.
Chef’s Notes
This recipe has evolved over time as I’ve experimented with different ingredients and flavor profiles. I remember a time when I tried to sneak in some zucchini for extra moisture—it didn’t quite work as intended, but it sure made for a hilarious kitchen story!
What I love most about these Protein Brown Butter Cookies is their versatility. They’re delightful as is, but you can also tailor them to fit your own preferences, making each batch unique. Plus, they’re a wonderful way to share deliciousness with others—nothing says love quite like a homemade gift!
FAQs and Troubleshooting
Q: My cookies turned out too dry. What went wrong?
A: This could be due to overbaking or too much flour. Next time, make sure to measure your flour correctly (scooping can compact it!).
Q: Can I substitute the protein powder?
A: Absolutely! You can swap it out for a different flavor of protein powder or omit it entirely. Just adjust the flour ratio slightly for the perfect texture.
Q: How long can I store these cookies?
A: They can be stored in an airtight container at room temperature for about a week—if they last that long! You can also freeze them for up to three months.
Q: Can I make these cookies gluten-free?
A: You bet! Substitute all-purpose flour with a gluten-free flour blend, and you’ll have a delicious cookie without the gluten.
Nutritional Info
While I don’t usually share the nutritional breakdown, I will say this: these cookies strike a lovely balance between indulgence and nutrition, packing protein into every bite while still satisfying that sweet craving. Plus, customizing them means you can adapt the recipe to fit your dietary needs!
Final Thoughts
So there you have it—my cherished Protein Brown Butter Cookie Jar recipe that brings a sense of warmth and joy into the kitchen with every bite. I hope you enjoy making these cookies as much as I do, and I’d love to hear about your own kitchen adventures! Share your stories, twists, and variations with me, and let’s celebrate the magic of cooking together. Happy baking!
Print
Protein Brown Butter Cookie Jar
- Total Time: 45 minutes
- Yield: 24 cookies 1x
- Diet: Vegetarian
Description
Indulgent protein-packed cookies made with brown butter for a nutty, caramelized flavor.
Ingredients
- 1 cup unsalted butter
- 1 cup brown sugar
- 1/2 cup granulated sugar
- 2 large eggs
- 1 teaspoon vanilla extract
- 2 cups all-purpose flour
- 1 teaspoon baking soda
- 1/2 teaspoon salt
- 1 cup protein powder (vanilla or chocolate)
- 1 cup chocolate chips (dark, milk, or your favorite variety)
Instructions
- Brown the butter in a saucepan over medium heat until golden brown with a nutty aroma.
- Mix the browned butter with brown sugar and granulated sugar until smooth.
- Add the eggs and vanilla extract, whisking until incorporated.
- Combine the flour, baking soda, protein powder, and salt in another bowl, then gradually add to the wet ingredients.
- Fold in the chocolate chips.
- Chill the dough in the refrigerator for at least 30 minutes.
- Preheat the oven to 350°F (175°C) and line a baking sheet with parchment paper.
- Scoop the cookie dough onto the baking sheet, spacing them apart.
- Bake for 10-12 minutes or until edges are golden brown.
- Cool on the baking sheet for 5 minutes, then transfer to a wire rack.
Notes
For extra flavor, try adding nuts or dried fruit. Store in an airtight container for up to a week.
- Prep Time: 15 minutes
- Cook Time: 12 minutes
- Category: Dessert
- Method: Baking
- Cuisine: American
Nutrition
- Serving Size: 1 cookie
- Calories: 150
- Sugar: 10g
- Sodium: 100mg
- Fat: 7g
- Saturated Fat: 4g
- Unsaturated Fat: 2g
- Trans Fat: 0g
- Carbohydrates: 18g
- Fiber: 1g
- Protein: 3g
- Cholesterol: 30mg
Keywords: brown butter cookies, protein cookies, dessert, baking, healthy cookies
Healthy Raspberry Oatmeal Cookies: Quick Meal-Prep Treats
Healthy Raspberry Oatmeal Cookies: A Sweet Treat for Every Occasion
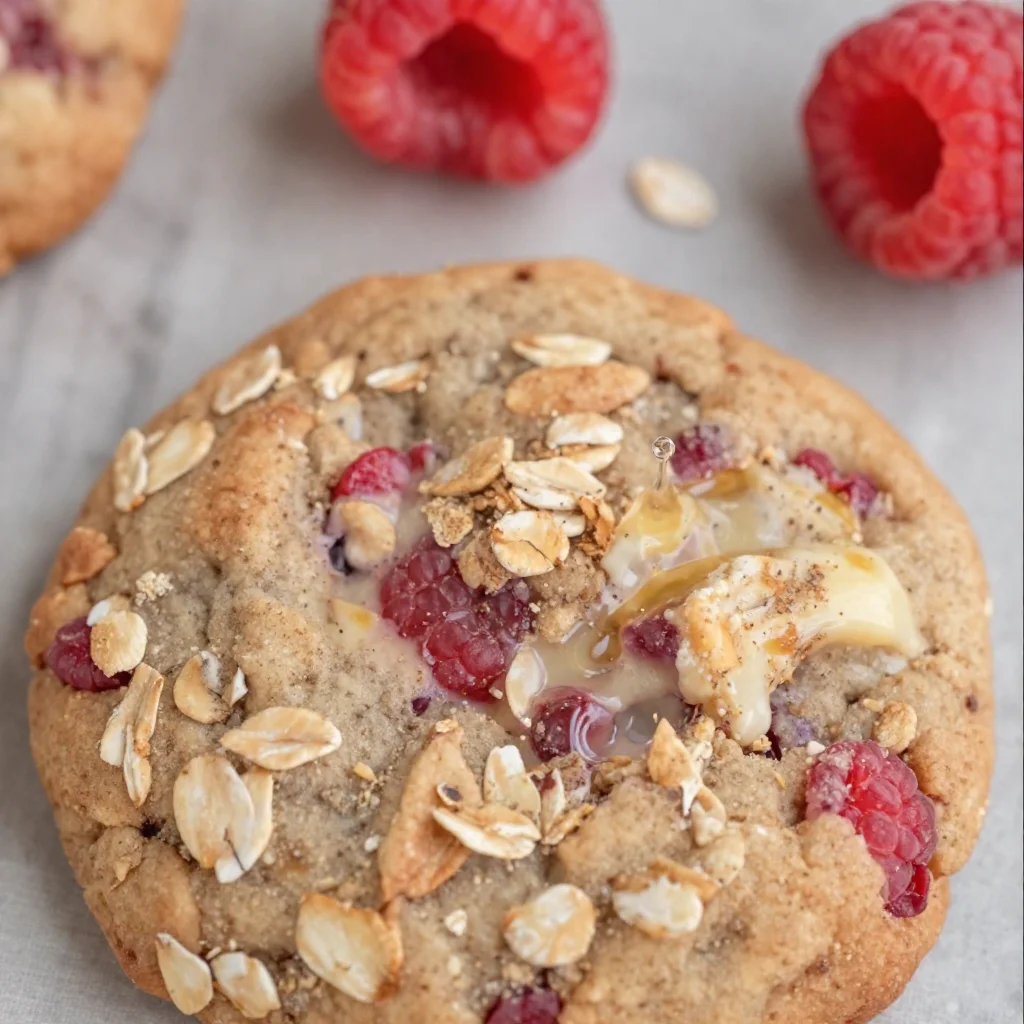
Welcome to my cozy corner of the kitchen! I’m Olivia Bennett, and I’m so glad you’re here. Today, we’re diving into a delightful treat that balances healthy ingredients with the kind of sweetness that warms your heart: healthy raspberry oatmeal cookies. Whether you’re looking for a nutritious snack to power through your afternoon slump or a wholesome dessert to satisfy your sweet tooth, these cookies are your answer.
There’s something incredibly satisfying about baking cookies. The aroma of warm oats and sweet berries wafting through the kitchen feels like a hug on a chilly day, doesn’t it? I remember the first time I made oatmeal cookies with my grandma. Every Saturday, after a long week of school, we would whip up a batch in her little green kitchen. Flour would fly, laughter would echo, and countless anecdotes flowed like the batter we mixed. Raspberry was always her favorite addition, and now it’s become one of mine. The tartness of the berries perfectly complements the wholesome oats, creating a cookie that’s not just tasty but also nourishing.
These cookies are so easy to whip up and truly customizable. Let’s get started on making your new favorite healthy snack!
Ingredients
Here’s what you’ll need for these scrumptious cookies:
-
1 cup rolled oats
Oats provide a hearty base and are full of fiber. You can swap them with quick oats if that’s what you have on hand, but rolled oats give that perfect chewy texture. -
½ cup whole wheat flour
Whole wheat flour adds nutrition and a slight nuttiness. If you want to be gluten-free, feel free to use almond flour or a gluten-free all-purpose blend. -
½ teaspoon baking soda
This helps our cookies rise a little and gives them that soft texture. If you don’t have baking soda, you can use baking powder, but the texture may vary slightly. -
½ teaspoon salt
A little salt helps balance the sweetness. You can add less if you’re watching your sodium intake. -
¼ cup honey or maple syrup
This natural sweetener keeps the cookies moist. If you’re looking for a vegan option, go for maple syrup. For low-calorie sweetness, a sugar substitute like stevia works too—just adjust according to your brand’s instructions! -
¼ cup coconut oil or unsalted butter, melted
Both are great for binding the ingredients. Coconut oil adds a subtle tropical flavor, while butter gives that rich cookie essence. Use applesauce for a lower-fat alternative! -
1 tablespoon vanilla extract
This is a must-have for flavor! Feel free to experiment with almond extract for a different twist. -
¾ cup fresh raspberries
These juicy gems are the star of our cookies! If fresh raspberries are out of season, frozen ones work too; just be sure to thaw and drain them first. -
¼ cup dark chocolate chips (optional)
Because who can resist chocolate? You can easily swap this with any nut or leave it out entirely for a simpler cookie.
Step-by-Step Instructions
Now that we have our ingredients lined up, let’s roll up our sleeves and get baking!
-
Preheat the Oven
Preheat your oven to 350°F (175°C). This ensures your cookies bake evenly. While it’s heating, you can prep everything else. -
Mix Dry Ingredients
In a large bowl, combine the rolled oats, whole wheat flour, baking soda, and salt. Whisk it together to make sure there’s an even distribution of dry ingredients. This prevents pockets of flour or baking soda in your batter. -
Combine Wet Ingredients
In a separate bowl, mix the melted coconut oil (or butter), honey (or maple syrup), and vanilla extract. If your oil has cooled down and solidified slightly, you can pop it in the microwave for a few seconds to melt it again. A well-mixed wet combination gives the cookies a lovely, even texture. -
Blend Wet and Dry Mixtures
Pour the wet ingredients into the dry mixture and stir until just combined. Over-mixing can lead to tough cookies, so don’t be afraid to leave some lumps—it’s all part of the charm! -
Gently Fold in Raspberries
Using a spatula or wooden spoon, carefully fold in the fresh raspberries and chocolate chips (if using). This step is important! You want to integrate the berries without smashing them too much. You want those beautiful bursts of color and flavor in every bite. -
Scoop the Dough
Using a cookie scoop or a tablespoon, drop the dough onto a parchment-lined baking sheet, leaving about 2 inches between each cookie. This gives them room to spread. -
Bake
Pop the baking sheet in the oven and bake for 12-15 minutes, or until the cookies are golden brown around the edges and still soft in the center. Trust your nose; the aroma will be a heavenly hint that they’re almost ready! -
Cool and Enjoy
Let the cookies cool on the baking sheet for about 5 minutes before transferring them to a wire rack. This helps them set as they cool down. If you try to move them too soon, they may fall apart. Patience, my friend!
Serving Suggestions
Once your cookies are completely cool, stack them on a cute plate, or for a cozy breakfast treat, serve them warm alongside a hot cup of tea or coffee. Crumble one over some Greek yogurt with a sprinkle of granola for a delicious breakfast bowl. They’re perfect for sharing too—line them up in mason jars for thoughtful gifts!
Recipe Variations
Looking to mix things up? Here are a few ideas for you to get creative with:
- Nutty Raspberry Cookies: Add ¼ cup of chopped nuts, like walnuts or almonds, for an extra crunch.
- Cinnamon Twist: Sprinkle in some ground cinnamon (about ½ teaspoon) for a warm, cozy flavor.
- Lemon Zing: Grate some lemon zest into the dough for a refreshing citrus burst. This pairs beautifully with raspberries.
- Peanut Butter Bliss: Incorporate 2 tablespoons of your favorite nut butter into the wet ingredients for added creaminess and flavor.
Chef’s Notes
Oh, the stories my kitchen holds! One time, I had a bunch of overripe bananas about to meet their fate in the compost bin, so I decided to mash them into this dough. My raspberry oatmeal cookies transformed into a delightful banana-raspberry combo, and let me tell you, they were a hit! It just goes to show you how versatile this recipe is. If you find yourself with ingredients that need using up, don’t hesitate to experiment—there’s always something delicious waiting to be discovered!
FAQs and Troubleshooting
1. My cookies are too dry. What went wrong?
This usually means that there was too much flour or a lack of moisture in your dough. Make sure to measure your ingredients accurately. If your dough looks a bit dry before baking, try adding another tablespoon of coconut oil or a splash of milk.
2. How can I store these cookies?
These cookies can be stored in an airtight container at room temperature for up to a week. You can freeze them as well! Just wrap each cookie in plastic wrap or place them in a freezer bag for up to 3 months.
3. Can I use frozen raspberries?
Absolutely! Just remember to thaw and drain them before adding them to the dough. You might want to reduce the number slightly, as frozen berries can be juicier.
4. What’s the secret to chewy cookies?
The key is not to overbake! When you pull these cookies out of the oven, they might look a bit underbaked in the center—that’s okay! Let them cool. They will continue to cook on the baking sheet and become deliciously chewy.
Nutritional Info
While the nutritional info can vary based on your specific ingredients and portion sizes, these cookies are generally low in sugar and high in fiber, thanks to the oats and raspberries. Each cookie (with the recipe yielding about 12-15 cookies) contains approximately:
- Calories: 120
- Protein: 2g
- Fat: 5g
- Carbohydrates: 18g
- Fiber: 3g
Feel free to adjust elements based on your dietary needs or to create different variations!
Thank you so much for joining me in the kitchen today! I hope these healthy raspberry oatmeal cookies become a delightful addition to your baking repertoire. Remember, cooking is all about joy, love, and a little bit of mess. Now, go bake, share, and enjoy! Bon Appétit!
Print
Healthy Raspberry Oatmeal Cookies
- Total Time: 25 minutes
- Yield: 12-15 cookies 1x
- Diet: Vegetarian
Description
Deliciously wholesome raspberry oatmeal cookies, perfect for a nutritious snack or dessert.
Ingredients
- 1 cup rolled oats
- ½ cup whole wheat flour
- ½ teaspoon baking soda
- ½ teaspoon salt
- ¼ cup honey or maple syrup
- ¼ cup coconut oil or unsalted butter, melted
- 1 tablespoon vanilla extract
- ¾ cup fresh raspberries
- ¼ cup dark chocolate chips (optional)
Instructions
- Preheat your oven to 350°F (175°C).
- Mix the rolled oats, whole wheat flour, baking soda, and salt in a large bowl.
- Combine the melted coconut oil (or butter), honey (or maple syrup), and vanilla extract in a separate bowl.
- Blend the wet ingredients into the dry mixture and stir until just combined.
- Gently fold in the fresh raspberries and chocolate chips (if using).
- Scoop the dough onto a parchment-lined baking sheet, leaving about 2 inches between each cookie.
- Bake for 12-15 minutes, until golden brown around the edges.
- Cool on the baking sheet for about 5 minutes before transferring to a wire rack.
Notes
These cookies can be stored in an airtight container for up to a week and can be frozen for up to 3 months.
- Prep Time: 10 minutes
- Cook Time: 15 minutes
- Category: Dessert
- Method: Baking
- Cuisine: American
Nutrition
- Serving Size: 1 cookie
- Calories: 120
- Sugar: 5g
- Sodium: 60mg
- Fat: 5g
- Saturated Fat: 3g
- Unsaturated Fat: 2g
- Trans Fat: 0g
- Carbohydrates: 18g
- Fiber: 3g
- Protein: 2g
- Cholesterol: 10mg
Keywords: raspberry, oatmeal, cookies, healthy baking, vegetarian dessert
Healthy Carrot Cake Oatmeal Cookies
Healthy Carrot Cake Oatmeal Cookies: The Perfect Blend of Comfort and Wholesome Goodness
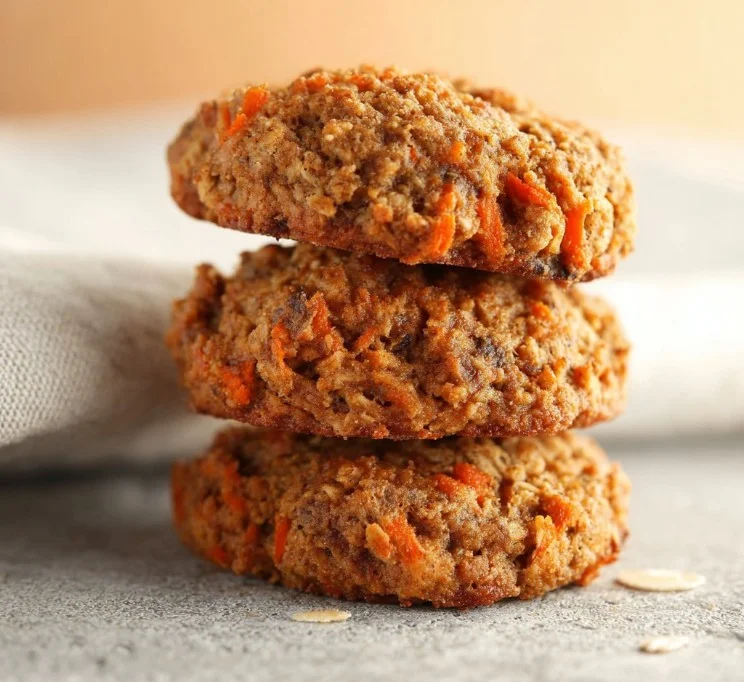
Welcome back to my cozy corner of the kitchen! I’m Olivia Bennett, here to whisk you away on a delightful baking adventure. Today, we’re making healthy carrot cake oatmeal cookies—yes, you heard that right! Imagine biting into a soft, chewy cookie infused with the flavors of traditional carrot cake yet packed with wholesome ingredients. These cookies are perfect for breakfast or a sweet snack, and trust me; you won’t be able to stop at just one!
Now, why carrot cake cookies, you might ask? Well, let me take you down memory lane for a moment. Growing up, my grandma had this magical touch in the kitchen. Her carrot cake was a family favorite, gracing every birthday and holiday table. The warm spices mingled beautifully with the sweet, tender carrots, creating a comforting aroma that filled our home. But as much as I adored that classic cake, let’s be real: it isn’t the healthiest treat.
So, I set out to recreate that beloved flavor but in a format that lets me indulge without the guilt. These healthy carrot cake oatmeal cookies are jam-packed with fiber, healthy fats, and naturally sweetened with honey and ripe bananas. They’re not only a healthier alternative, but they also bridge the gap between nostalgic flavors and the need for nutritious food. Whether you’re a health nut or just looking for a delicious treat, this recipe hits all the right notes. Let’s dive in and throw on those aprons—it’s time to bake some magic!
Personal Story
Whenever I think back to my childhood, I can’t help but smile at the memory of those sunny afternoons spent in my grandma’s kitchen. She would often put me in charge of grating carrots while she mixed up the batter for her famous carrot cake. I remember the feel of that wooden box grater, the scent of fresh carrots filling the air, and the gentle laughter we shared over spilled flour and a mischievous cat trying to steal a taste.
Those moments inspired my love for cooking, and the joy of baking with her still warms my heart. It wasn’t just about the cake; it was about the time spent together, the stories we shared, and the sweet sense of accomplishment once we pulled that golden cake from the oven. Recreating her delicious carrot cake in a healthier form is my way of not only honoring those memories but also carrying them into my modern family.
So every time I bake these healthy carrot cake oatmeal cookies, I feel like I’m channeling my grandma’s spirit. I invite you to join me in this delicious tribute to the past while savoring the delightful present. After all, food is best when it brings love and memory to the table!
Ingredients
To whip up these nutritionally charming cookies, gather the following ingredients:
-
Rolled Oats: The star of our cookies! Oats help create a chewy texture and are packed with fiber. For gluten-free options, choose certified gluten-free oats!
-
Whole Wheat Flour: This gives the cookies substance, adding more fiber and nutrients than all-purpose flour. You can substitute with almond flour or oats ground into flour for gluten-free versions.
-
Grated Carrots: Fresh, sweet, and full of vitamins. Grating the carrots ensures they blend well into the dough. If you’re short on time, pre-grated carrots work fine too.
-
Mashed Banana: This acts as a natural sweetener while also providing moisture. You can substitute with unsweetened applesauce if desired.
-
Honey or Maple Syrup: A natural sweetener that enhances the flavor. If you prefer lower sugar, use a sugar alternative like stevia or monk fruit syrup.
-
Cinnamon and Nutmeg: These spices bring warmth and depth, mimicking the flavors found in carrot cake. Feel free to adjust amounts based on your spice preference.
-
Chopped Nuts (like walnuts or pecans): These add a delightful crunch and healthy fats. If you’re nut-free, try using seeds like sunflower or pumpkin.
-
Raisins or Dried Cranberries: For a little sweetness and chewiness, these fruits are optional but highly recommended. You can also use dark chocolate chips, as who wouldn’t want some chocolate with a cookie?
-
Baking Soda & Baking Powder: These leavening agents help your cookies rise and become light and fluffy.
Now that we’ve gathered our ingredients, let’s get those spatulas ready!
Step-by-Step Instructions
1. Preheat the Oven
Start by preheating your oven to 350°F (175°C). This little step ensures an even baking temperature and that your cookies will turn out perfectly golden brown.
2. Prepare Your Baking Sheet
Line a baking sheet with parchment paper. This prevents sticking and makes cleanup a breeze—an essential hack for every home cook!
3. Mix the Dry Ingredients
In a large bowl, combine your rolled oats, whole wheat flour, baking soda, baking powder, cinnamon, nutmeg, and a pinch of salt. Give it a good stir and set aside. This mix is where the magic begins!
4. Mash Those Bananas
In another bowl, mash your ripe bananas until smooth. The riper, the better! Bananas with a few brown spots are perfect for baking as they provide natural sweetness.
5. Combine Wet Ingredients
To the mashed bananas, add honey (or maple syrup) and mix well. Then fold in the grated carrots. You’ll notice how vibrant the mixture becomes; it’s a feast for the eyes!
6. Blend Wet and Dry Ingredients
Create a well in the dry ingredients bowl and pour the banana-carrot mixture right in! Gently stir until just combined. Overmixing can make your cookies tough, so be gentle!
7. Mix in Nuts and Dried Fruits
Now, add in your chopped nuts and raisins/dried cranberries. Feel free to taste test here—nothing like sneaking a few chocolate chips into the batter if that’s your jam!
8. Scoop the Dough
Using a generous tablespoon or cookie scoop, drop heaping mounds of dough onto your prepared baking sheet. Leave some space between each cookie; they will spread slightly while baking.
9. Bake to Perfection
Pop those cookies into the oven and bake for 12-15 minutes, or until they become a light golden brown. Your kitchen will soon be filled with the most delightful aroma!
10. Cool and Enjoy
Once baked, let the cookies cool on the sheet for 5 minutes before transferring them to a wire rack to cool completely. This little wait ensures they firm up nicely without falling apart.
Serving Suggestions
To serve your incredible healthy carrot cake oatmeal cookies, plate them on a colorful dish, maybe with a sprig of mint for a pop of color. Pair them with a warm cup of tea or coffee for a lovely afternoon treat. These cookies are also great for lunchboxes or as a quick breakfast grab-and-go item. Trust me, your friends and family will be begging for more!
Recipe Variations
- Add Coconut Flakes: For a tropical twist, fold in unsweetened shredded coconut.
- Spiced Carrot Cake: Add a dash of ginger or cardamom to amp up the spice profile.
- Vegan Swap: Use flax eggs (1 tablespoon flaxseed meal+ 2.5 tablespoons water) instead of eggs and replace honey with maple syrup to make them vegan-friendly.
- Peanut Butter or Almond Butter: Swapping some of the banana with nut butter can introduce a creamy decadence!
- Chocolate-Dipped Cookies: Drizzle or dip the cooled cookies in melted dark chocolate for a decadent finish.
Chef’s Notes
These healthy carrot cake cookies have evolved significantly since my first attempt. Initially, they were just basic oatmeal cookies. But with all the taste tests and experiments, I finally hit the jackpot with this version!
I recall one baking adventure where I added too much grated carrot—my family was skeptical, but I was determined. I ended up with mini ‘carrot cakes’ that were dense yet delightful! It became a hit after that, proving that sometimes, kitchen mishaps can lead to the best surprises.
FAQs and Troubleshooting
Q: Can I make these cookies gluten-free?
Absolutely! Just substitute the whole wheat flour with a gluten-free flour blend or almond flour. Ensure your oats are certified gluten-free as well.
Q: My cookies turned out dry. What happened?
This could be due to overbaking or too much flour. Make sure you’re measuring your ingredients accurately and adjust the baking time based on your oven, as they can vary.
Q: Can I freeze these cookies?
Yes! These cookies freeze beautifully. Just place them in a single layer on a baking sheet until frozen solid, then transfer to an airtight container separated by parchment paper. Thaw them in the fridge or microwave as needed.
Q: How do I store these cookies?
Store your healthy carrot cake oatmeal cookies in an airtight container at room temperature for 3-4 days or in the fridge for up to a week. They also taste wonderful cold!
Nutritional Info
Each cookie (based on the recipe making 24 cookies) has approximately:
- Calories: 100
- Protein: 2g
- Fat: 2.5g
- Carbohydrates: 17g
- Fiber: 2g
- Sugar: 5g
Now that you have everything you need to whip up these delicious healthy carrot cake oatmeal cookies, it’s time to get back into the kitchen! Let’s celebrate the flavors that bring us joy, indulge in some healthy sweetness, and create lasting memories with those we love. Happy baking, friends! 🍪✨
Print
Healthy Carrot Cake Oatmeal Cookies
- Total Time: 30 minutes
- Yield: 24 cookies 1x
- Diet: Vegetarian
Description
These healthy carrot cake oatmeal cookies are a delicious and nutritious treat, combining the flavors of traditional carrot cake with wholesome ingredients for a guilt-free indulgence.
Ingredients
- 1 cup rolled oats
- 1 cup whole wheat flour
- 1 cup grated carrots
- 2 ripe bananas, mashed
- 1/3 cup honey or maple syrup
- 1 teaspoon cinnamon
- 1/2 teaspoon nutmeg
- 1/2 cup chopped nuts (walnuts or pecans)
- 1/2 cup raisins or dried cranberries
- 1 teaspoon baking soda
- 1 teaspoon baking powder
- Pinch of salt
Instructions
- Preheat the oven to 350°F (175°C).
- Prepare a baking sheet lined with parchment paper.
- Mix the rolled oats, flour, baking soda, baking powder, cinnamon, nutmeg, and salt in a large bowl.
- Mash the ripe bananas until smooth.
- Combine the mashed bananas with honey (or maple syrup) and fold in the grated carrots.
- Blend the banana-carrot mixture with the dry ingredients until just combined.
- Mix in chopped nuts and raisins/dried cranberries.
- Scoop mounds of dough onto the prepared baking sheet, leaving space between each cookie.
- Bake for 12-15 minutes until golden brown.
- Cool on the baking sheet for 5 minutes before transferring to a wire rack.
Notes
These cookies can be made gluten-free by using gluten-free flour and certified gluten-free oats. They can also be frozen for later enjoyment.
- Prep Time: 15 minutes
- Cook Time: 15 minutes
- Category: Snack
- Method: Baking
- Cuisine: American
Nutrition
- Serving Size: 1 cookie
- Calories: 100
- Sugar: 5g
- Sodium: 50mg
- Fat: 2.5g
- Saturated Fat: 0g
- Unsaturated Fat: 2g
- Trans Fat: 0g
- Carbohydrates: 17g
- Fiber: 2g
- Protein: 2g
- Cholesterol: 0mg
Keywords: carrot cake, oatmeal cookies, healthy cookies, vegetarian snacks, wholesome dessert
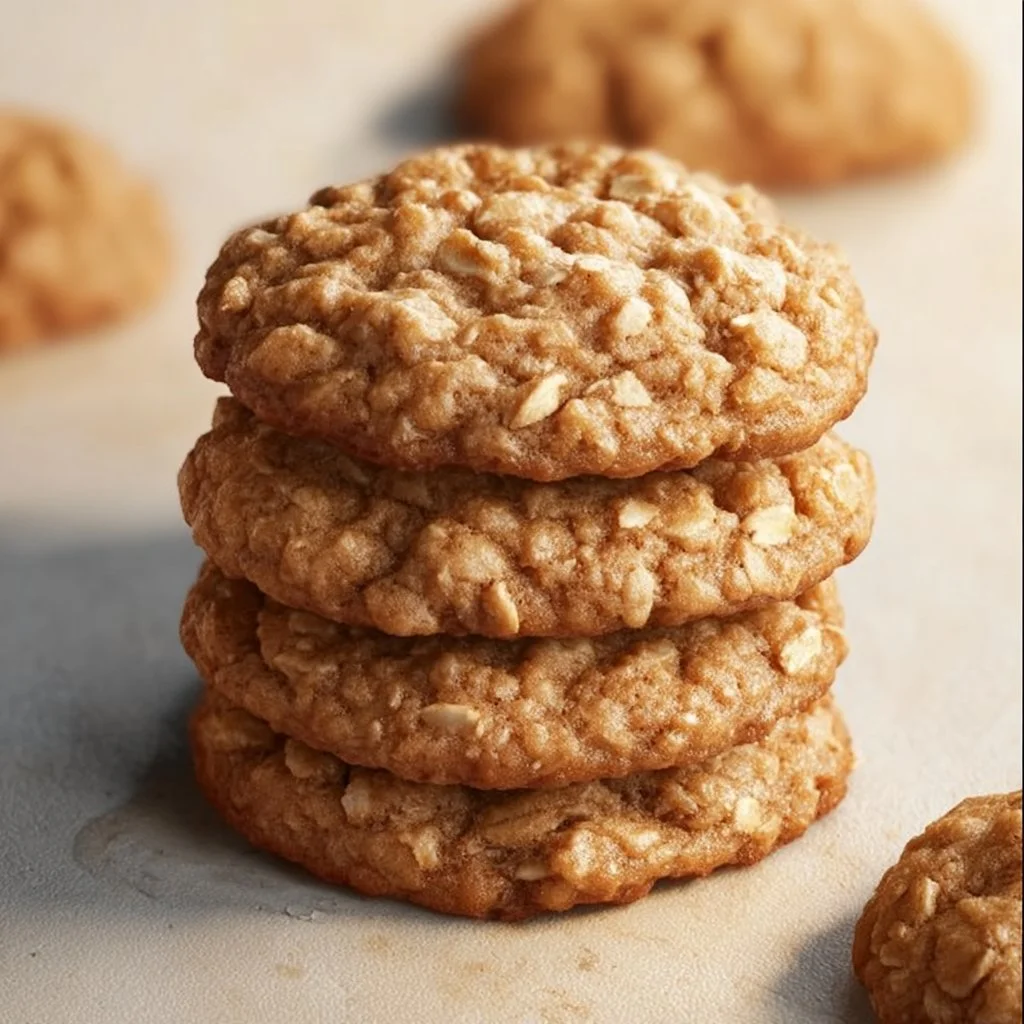
Low Sugar Applesauce Oatmeal Cookies
Low Sugar Applesauce Oatmeal Cookies: A Sweet Treat Without the Guilt
Hey there, cookie lovers! Welcome back to my cozy kitchen, where the aroma of baked goods mingles with heartfelt memories and mouthwatering flavors! Today, I’m super excited to share a recipe that has a special place in my heart — Low Sugar Applesauce Oatmeal Cookies. These little delights are not only delicious but also a healthier twist on a classic favorite!
You might be wondering, “Why low sugar?” Well, it’s no secret that I cherish the art of baking, but I also believe in nourishing our bodies with the foods we enjoy. One beautiful autumn afternoon, I was baking up a storm in my kitchen, whipping up my grandmother’s famous oatmeal cookies. As the warm spices filled my home, I couldn’t help but reminisce about the countless cookies we’ve baked together, bonding over the mixing bowl, laughing until our bellies hurt.
That day, I had a jar of homemade applesauce sitting in my fridge, practically begging to be incorporated into something magical. At that moment, inspiration struck! Why not infuse those classic oatmeal cookies with that fruity goodness and dial back on the sugar? The result is a sweet, chewy treat that will have you coming back for more, minus the sugar crash.
So, roll up your sleeves and grab that apron — let’s dive into this delicious, heartwarming recipe that’s perfect for baking on a rainy day, after school snacks, or even your next coffee date with friends. I promise, once you try these cookies, they’ll become a staple in your baking repertoire!
Personal Story
As I stood in my kitchen, piecing together the ingredients for my Low Sugar Applesauce Oatmeal Cookies, a wave of nostalgia washed over me. I had always loved spending time in the kitchen with my grandma, watching her create magic with simple ingredients. She had this old, worn-out recipe book that was yellowed with age and sprinkled with flour smudges — a true testament to all the love she poured into her dishes.
One of my favorite memories was helping her make cookies for our school bake sale. I can still hear her gentle laughter as she playfully scolded me for sneaking spoonfuls of the cookie dough. “Just wait for the cookies to bake, sweet pea!” she’d say. Little did I know, those moments would shape my passion for cooking and baking, and lead me to create my own recipes filled with warmth and love.
Now, as I began my adventure creating these oatmeal cookies, I couldn’t help but think of my grandma’s teachings — the importance of using whole ingredients, making adjustments for flavor, and most importantly, sharing the love of food with family and friends. These cookies are a nod to those cherished memories, a blend of nostalgia and innovation, and I can’t wait for you to experience the joy they bring!
Ingredients
Before we get cooking, let’s gather our ingredients! Below is a list of what you’ll need for these scrumptious cookies, along with some helpful tips:
-
Old-Fashioned Rolled Oats:
- Why: These oats provide the chewy texture we all crave in oatmeal cookies.
- Tip: Use gluten-free oats if you have dietary restrictions, or swap them for quick oats if you prefer a softer bite.
-
Whole Wheat Flour:
- Why: A great source of fiber and adds a nutty flavor.
- Tip: All-purpose flour works too if you’re looking for a lighter texture.
-
Unsweetened Applesauce:
- Why: This substitutes for added sugar and fat, bringing natural sweetness and moisture.
- Tip: You can also use homemade applesauce for a fresh flavor, or swap it with mashed bananas for a different twist.
-
Cinnamon:
- Why: This warm spice elevates the flavor profile of the cookies.
- Tip: Feel free to experiment with nutmeg or pumpkin spice for a seasonally festive touch!
-
Baking Soda:
- Why: It helps the cookies rise and achieve that perfect texture.
- Tip: Make sure your baking soda is fresh; old baking soda won’t fluff up your cookies properly.
-
Vanilla Extract:
- Why: Adds a lovely aroma and enhances the sweetness of the cookies.
- Tip: A splash of almond extract can offer a delicious twist if you’re feeling adventurous!
-
Salt:
- Why: Balances sweetness and enhances all the flavors.
- Tip: Use sea salt for a slightly different flavor profile, or even a touch of Himalayan salt for a unique spin.
-
Chopped Nuts (walnuts or pecans):
- Why: They add a delightful crunch and a dose of healthy fats.
- Tip: You can omit nuts or switch them out for seeds if you prefer, making it nut-free!
-
Raisins or Chocolate Chips (optional):
- Why: They provide bursts of sweetness that complement the oatmeal.
- Tip: Dried cranberries or dark chocolate chips are great alternatives for a fruity or decadent flair!
Step-by-Step Instructions
Ready to bake? Let’s get started on making these Low Sugar Applesauce Oatmeal Cookies! Follow these steps, and don’t worry if you get a bit messy — that’s part of the fun!
-
Preheat the Oven:
- Preheat your oven to 350°F (175°C). This ensures that your cookies bake evenly and become perfectly chewy.
-
Prepare the Baking Sheet:
- Line a baking sheet with parchment paper. This step prevents sticking and makes cleanup a breeze! (Trust me, I’ve learned this the hard way!)
-
Mix the Dry Ingredients:
- In a large mixing bowl, combine 1 cup of whole wheat flour, 1 ½ cups of rolled oats, ½ teaspoon of baking soda, ½ teaspoon of cinnamon, and a pinch of salt.
- Chef Hack: Whisk these together to aerate the flour and evenly distribute the baking soda and spices. Mixing dry ingredients first helps avoid clumps!
-
Combine Wet Ingredients:
- In another bowl, mix together 1 cup of unsweetened applesauce, 1 teaspoon of vanilla extract, and any added sweeteners if desired (like a dash of maple syrup).
- Tip: If you love extra flavor, consider adding a splash of milk or a tablespoon of melted coconut oil!
-
Mix It Up:
- Pour the wet ingredients into the dry ingredients and stir until just combined. It’s okay if it’s a little lumpy — that’s what keeps these cookies chewy and delicious!
- For an extra crunch, fold in ½ cup of chopped nuts and ½ cup of raisins or chocolate chips.
-
Scoop the Cookies:
- Using a cookie scoop or spoon, drop tablespoon-sized mounds of cookie dough onto the prepared baking sheet. Leave some space between each mound to allow room for spreading.
- Chef Insight: For even-sized cookies, use a scoop! This will ensure they bake evenly and look great on the plate.
-
Bake:
- Pop the cookies in the oven and let them bake for about 12-15 minutes, or until the edges are golden brown but the centers are still soft.
- Tip: Remember that cookies will continue to cook on the baking sheet after being removed from the oven, so don’t overbake!
-
Cool Down:
- Allow the cookies to cool on the baking sheet for around 5 minutes before transferring them to a wire rack to cool completely.
- Chef Hack: Don’t munch on them right away — they’re super soft when they first come out! Giving them a bit of time lets them firm up for that perfect bite.
Serving Suggestions
Once your cookies have cooled to perfection, it’s time to enjoy them! Serve these delightful Low Sugar Applesauce Oatmeal Cookies on a rustic wooden platter, paired with a steaming cup of tea or a glass of almond milk. I love to stack them up high and sprinkle a little extra cinnamon on top for presentation — it’s all about those cozy vibes!
Recipe Variations
Feeling adventurous? Here are some creative twists you can try with this cookie recipe:
-
Spiced Pumpkin: Substitute ½ cup of applesauce with pure pumpkin puree for a seasonal flair. Add pumpkin spice, and you’ve got a fall favorite!
-
Nut-Free Zone: Omit the nuts and toss in dried fruit like cranberries or apples for added chewiness and a pop of flavor.
-
Chocolate Lover’s Delight: Add a cup of dark chocolate chunks instead of raisins and sprinkle with sea salt for a salty-sweet combination.
-
Coconut Bliss: Stir in shredded coconut for a tropical twist! This adds a chewy texture and enhances the flavor.
-
Berry Goodness: Incorporate fresh blueberries or raspberries for a fruity burst, perfect for summer baking.
Chef’s Notes
As I’ve gone through my baking journey, this recipe has evolved into what it is today — a delightful blend of nostalgia, health, and happiness. Whenever I bake these cookies, I’m reminded of my grandma’s kitchen filled with love and laughter. I often challenge myself to make small adjustments to the recipe based on what I have on hand or the season.
Just a word of advice: don’t skip out on the cooling time! The joy of a cookie lies in that chewy center, and patience is key. And for those moments when the cookie dough is too tempting to resist, I hear a little bit of raw dough is totally okay — just remember to enjoy every crumb guilt-free!
FAQs and Troubleshooting
-
Why are my cookies flat?
- If your cookies spread too much, make sure you’re using enough flour and that your baking soda is fresh. Also, try chilling the dough for a bit before baking!
-
Can I use quick oats instead of rolled oats?
- Yes! Quick oats can work here, but the texture will be slightly different. They will create a softer cookie rather than a chewy one.
-
How can I store my cookies?
- Keep your cookies in an airtight container at room temperature for up to a week. They also freeze beautifully for up to 3 months — just layer them between parchment paper and seal them in a freezer bag!
-
What do I do if the dough is too sticky?
- If your dough is too sticky to handle, sprinkle in a little more flour to reach your desired consistency. Just make sure not to add too much!
Nutritional Info
These Low Sugar Applesauce Oatmeal Cookies are not only tasty but also a better choice for any sweet tooth! Each cookie offers a nutritious punch while keeping added sugars at bay. A rough estimate (based on a standard cookie size) would be approximately:
- Calories: 90
- Fat: 3g
- Carbohydrates: 15g
- Fiber: 2g
- Protein: 2g
- Sugar: 2g (from applesauce)
So, there you have it! Delicious, heartwarming cookies that nurture nostalgia while being kinder to your body. Can’t wait to hear how yours turn out — happy baking! 🍪❤️
Print
Low Sugar Applesauce Oatmeal Cookies
- Total Time: 25 minutes
- Yield: 12 servings 1x
- Diet: Vegetarian
Description
Delicious, chewy oatmeal cookies enhanced with applesauce for a low sugar delight.
Ingredients
- 1 cup whole wheat flour
- 1 ½ cups old-fashioned rolled oats
- ½ teaspoon baking soda
- ½ teaspoon cinnamon
- Pinch of salt
- 1 cup unsweetened applesauce
- 1 teaspoon vanilla extract
- ½ cup chopped nuts (walnuts or pecans, optional)
- ½ cup raisins or chocolate chips (optional)
Instructions
- Preheat your oven to 350°F (175°C).
- Line a baking sheet with parchment paper.
- Combine the dry ingredients in a bowl: flour, oats, baking soda, cinnamon, and salt.
- Mix together the wet ingredients in another bowl: applesauce, vanilla extract, and any added sweeteners.
- Pour the wet ingredients into the dry ingredients and stir until just combined.
- Scoop tablespoon-sized mounds of cookie dough onto the prepared baking sheet.
- Bake for about 12-15 minutes, or until edges are golden brown.
- Cool for around 5 minutes on the baking sheet before transferring to a wire rack.
Notes
Let the cookies firm up for the perfect chewy texture. For a unique flavor, consider using different spices or adding coconut.
- Prep Time: 10 minutes
- Cook Time: 15 minutes
- Category: Dessert
- Method: Baking
- Cuisine: American
Nutrition
- Serving Size: 1 cookie
- Calories: 90
- Sugar: 2g
- Sodium: 50mg
- Fat: 3g
- Saturated Fat: 0.5g
- Unsaturated Fat: 2g
- Trans Fat: 0g
- Carbohydrates: 15g
- Fiber: 2g
- Protein: 2g
- Cholesterol: 0mg
Keywords: cookies, oatmeal cookies, low sugar, healthy cookies, baking, desserts




