
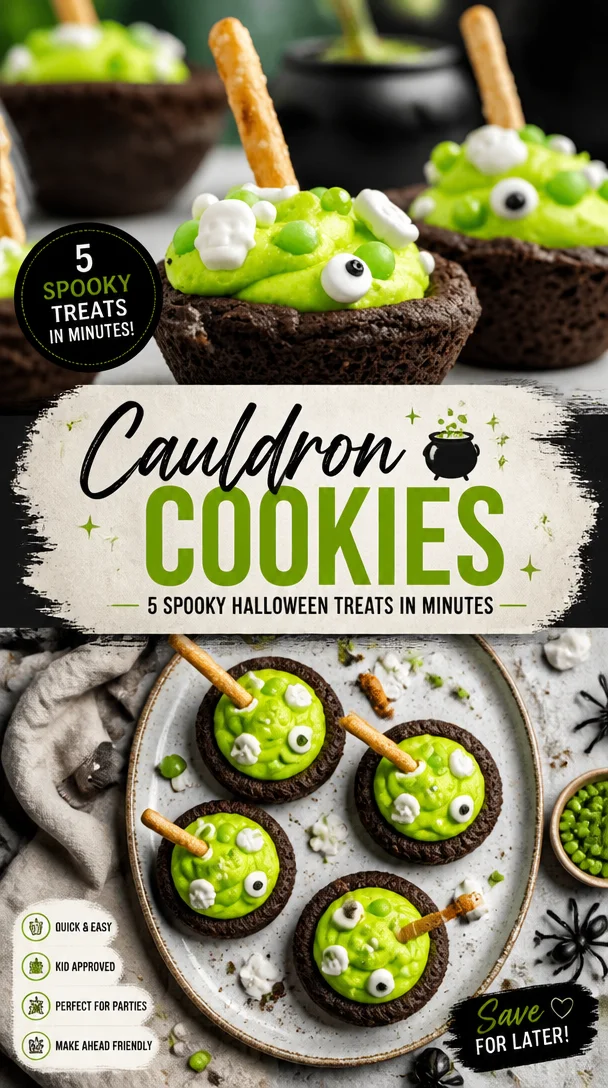
Cauldron Cookies: 5 Spooky Halloween Treats in Minutes
Get Ready to Indulge: Cauldron Cookies That Enchant Your Taste Buds!
Welcome to my kitchen, where the aromas of baking and the spirit of cozy cooking swirl together in perfect harmony! Today, I’m excited to share a family recipe that holds a special place in my heart: Cauldron Cookies. These delightful bites bring a sense of magic with every crunch and chew, perfect for all those who seek comforting flavors and fun memories.
Picture this: the first crisp days of autumn drift in, and there’s a certain magic in the air. It’s that time of year again when Halloween decorations start to pop up, pumpkins sit proudly on doorsteps, and the leaves transform into vibrant shades of orange and gold. This is the same season that my late grandmother, a formidable wizard in the kitchen, would bring out her legendary cookie cauldron. Picture a giant dungeon-like pot bubbling with molten chocolate, gooey marshmallows, and a sprinkle of enchanting spices — those Cauldron Cookies paired with a warm glass of milk were a staple in our household.
As a child, I’d race home from school with the sweet anticipation of indulging in these precious treats. The kitchen would be filled with laughter, and we would get our hands sticky as we rolled out the dough and added ingredients to our cauldron. It wasn’t just about the cookies; it was about the joy of creation and the bonds formed over mixing, baking, and—let’s be honest—sampling all the delicious bits that didn’t quite make it into the oven.
The beauty of these cookies is that they can easily become a tradition in your own home. They’re perfect for sharing, too, whether you’re welcoming friends over for a cozy autumn evening or simply treating yourself to an after-dinner delight. Let’s dive into the magical world of Cauldron Cookies, shall we?
Ingredients to Create Cookie Magic
To conjure up a batch of these delightful Cauldron Cookies, you’ll need the following ingredients. Each of them has a role in crafting the perfect cookie experience:
-
1 cup unsalted butter: The base of any good cookie. Don’t have unsalted butter? No problem! You can use salted butter; just watch the added salt in the recipe.
-
1 cup brown sugar: This adds that rich, caramel-like depth. Dark brown sugar is a great substitute for more molasses flavor, while white sugar can be used if you’re in a pinch.
-
1 cup granulated sugar: Balances the flavors for that perfect sweet spot. If you want to reduce the sugar, consider using half the amount or substituting with coconut sugar.
-
2 large eggs: Bind the ingredients together. If you’re looking for an egg-free option, you can use flax eggs (1 tablespoon ground flaxseed mixed with 2.5 tablespoons water per egg) to keep that texture.
-
2 teaspoons vanilla extract: Adds a warm, nostalgic flavor. Feel free to use almond extract for a twist!
-
2.5 cups all-purpose flour: This is the structure of your cookies. You could swap some or all of it for whole wheat flour for a nutty flavor.
-
1 teaspoon baking soda: This is your leavening agent, giving the cookies that soft, fluffy texture. Baking powder can be used as a substitute but will alter the final texture slightly.
-
1/2 teaspoon salt: Balances the sweetness wonderfully. Skip it if using salted butter.
-
1 cup chocolate chips (or any mix, like butterscotch or white chocolate): Chocolate chips are the star of the show! Mix and match with your favorite kinds for an exciting flavor twist.
-
1 cup mini marshmallows: These give a delightful gooey texture. If you’re not a marshmallow fan, you can replace them with dried fruit or nuts for added chewiness.
-
1 cup crushed pretzels (optional): For a delightful crunch! If gluten-free, swap with gluten-free pretzels or skip entirely.
Gather these ingredients, and let the magic begin!
Step-by-Step Instructions to Conjure Up Your Cookies
-
Preheat the oven: Set your oven to 350°F (175°C). Preheating ensures that your cookies bake evenly.
-
Cream the butter and sugars: In a large mixing bowl, beat the unsalted butter, brown sugar, and granulated sugar together until light and fluffy—about 2-3 minutes. This process incorporates air into the mixture, contributing to a nice chewy texture.
-
Add eggs and vanilla: Crack the eggs into the bowl, followed by the vanilla extract. Mix until fully integrated; don’t worry if it looks a bit curdled!
-
Combine dry ingredients: In a separate bowl, whisk together the all-purpose flour, baking soda, and salt. This helps to evenly distribute the leavening agent and ensures no lumps in your cookies.
-
Slowly introduce dry to wet: Gradually add the dry ingredients to the wet mixture. Mix until just combined; be careful not to overwork the dough! If you prefer, you can use a spatula here for a gentle fold.
-
Stir in the goodies: Gently fold in the chocolate chips, mini marshmallows, and crushed pretzels (if using). This is where the cookie’s magic happens! Those little chunks of joy will melt and create pockets of goodness in every bite.
-
Scoop the dough: Use a cookie scoop or tablespoon to portion the dough onto a parchment-lined baking sheet. Make sure to leave enough space between them as they will spread!
-
Bake: Pop those cookie-filled trays in the oven and bake for 10-12 minutes or until the edges are lightly golden. The secret? Take them out when they still look a bit soft; they’ll continue to set as they cool.
-
Cool down: Let the cookies rest on the baking sheet for about 5 minutes before transferring them to a wire rack. This helps to enhance their chewy texture.
-
Dive In: Once they’ve cooled (if you can resist!), indulge in a warm Cauldron Cookie and enjoy those unbeatable flavors!
Serving Suggestions to Make Your Cookies Shine
These Cauldron Cookies are absolutely divine on their own, but to elevate your cookie experience, I recommend serving them warm alongside a tall glass of milk or a cozy cup of hot cocoa. For a fun twist, pair them with a scoop of vanilla ice cream for an unforgettable dessert treat that will impress every guest! You could also try drizzling some melted chocolate or caramel over the top for an extra touch of sweetness.
Recipe Variations: Switch Up the Magic
Feeling adventurous? Here are a few fun twists to make this recipe uniquely yours:
-
Nutty Considerations: Add chopped nuts like pecans or walnuts for an extra crunch and nutty flavor.
-
Spiced Up: Incorporate a teaspoon of cinnamon or pumpkin spice for a cozy fall twist that enhances the overall flavor.
-
Fruit Fusion: Swap the chocolate chips for dried cherries, cranberries, or apricots for a fruity variation.
-
Buttercream Delight: Use frosting as a dip! Make a simple frosting with cream cheese and powdered sugar to pair alongside your cookies.
-
Dairy-Free Option: Substitute all butter with coconut oil and make sure to use dairy-free chocolate chips for a fantastic dairy-free treat.
Chef’s Notes: A Cookie Journey
Every recipe has its story, and the evolution of these Cauldron Cookies is no exception. I remember experimenting with all kinds of mix-ins, from M&M’s to leftover Halloween candies. Each variation brought something new to the table, and I can still hear my family laughing as we created our own version of the recipe together.
What started as a simple butter and sugar base has now metamorphosed into a gooey, textured treat with depths of flavor and an array of textures, thanks to the added bits I’ve discovered along the way. This recipe has become a symbol of togetherness in my home—an excuse to gather around the kitchen and share stories over warm cookies!
FAQs and Troubleshooting: Common Cookie Conundrums
Q: My cookies spread too much during baking. What happened?
A: This could be due to the butter being too warm or if the dough was not chilled before baking. A quick fix? Chill the dough for 30 minutes before scooping it onto the baking sheet.
Q: Why are my cookies hard?
A: Overbaking or overmixing the dough can lead to tough cookies. One way to ensure they’re soft is to take them out of the oven while they’re still slightly underbaked—remember, they will continue cooking as they cool.
Q: Can I freeze these cookies?
A: Absolutely! You can freeze the baked cookies in an airtight container for up to three months. To reheat, pop them in the oven for about 5 minutes at 350°F (175°C).
Q: How can I make these cookies gluten-free?
A: Substituting all-purpose flour with your favorite gluten-free flour blend should work well! Just make sure that it includes xanthan gum to maintain the cookie’s structure.
Nutritional Info (Optional)
Feel free to calculate the nutritional values based on your ingredient modifications, but keep in mind, these cookies are best enjoyed in moderation as a sweet treat to delight your taste buds!
And there you have it—a complete journey into the world of Cauldron Cookies! I hope you enjoy making these treats as much as I love sharing them with you. Whether you’re creating new family memories or indulging in a little self-care with a sweet, warm cookie, I wish you all the delicious joy these cookies bring. Happy baking!
Print
Cauldron Cookies
- Total Time: 27 minutes
- Yield: 24 servings 1x
- Diet: Vegetarian
Description
Delightful Cauldron Cookies that bring magical flavors with every bite, perfect for an autumn treat.
Ingredients
- 1 cup unsalted butter
- 1 cup brown sugar
- 1 cup granulated sugar
- 2 large eggs
- 2 teaspoons vanilla extract
- 2.5 cups all-purpose flour
- 1 teaspoon baking soda
- 1/2 teaspoon salt
- 1 cup chocolate chips
- 1 cup mini marshmallows
- 1 cup crushed pretzels (optional)
Instructions
- Preheat the oven: Set your oven to 350°F (175°C).
- Cream the butter and sugars: In a large mixing bowl, beat the unsalted butter, brown sugar, and granulated sugar together until light and fluffy—about 2-3 minutes.
- Add eggs and vanilla: Crack the eggs into the bowl, followed by the vanilla extract. Mix until fully integrated.
- Combine dry ingredients: In a separate bowl, whisk together the all-purpose flour, baking soda, and salt.
- Slowly introduce dry to wet: Gradually add the dry ingredients to the wet mixture. Mix until just combined.
- Stir in the goodies: Gently fold in the chocolate chips, mini marshmallows, and crushed pretzels (if using).
- Scoop the dough: Use a cookie scoop or tablespoon to portion the dough onto a parchment-lined baking sheet.
- Bake: Bake for 10-12 minutes or until the edges are lightly golden.
- Cool down: Let the cookies rest on the baking sheet for about 5 minutes before transferring them to a wire rack.
- Dive In: Enjoy a warm Cauldron Cookie!
Notes
These cookies are best enjoyed warm, ideally served with milk or hot cocoa. Consider adding nuts or spices for variations.
- Prep Time: 15 minutes
- Cook Time: 12 minutes
- Category: Dessert
- Method: Baking
- Cuisine: American
Nutrition
- Serving Size: 1 cookie
- Calories: 150
- Sugar: 10g
- Sodium: 100mg
- Fat: 7g
- Saturated Fat: 4g
- Unsaturated Fat: 2g
- Trans Fat: 0g
- Carbohydrates: 20g
- Fiber: 0g
- Protein: 2g
- Cholesterol: 30mg
Keywords: cookies, Halloween, baking, dessert
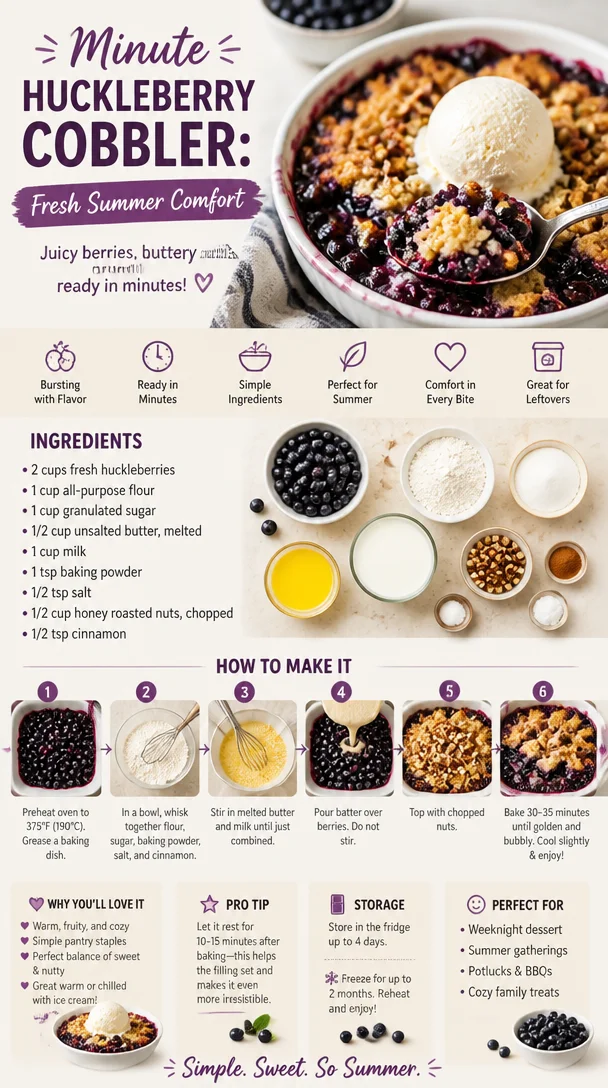
Minute Huckleberry Cobbler: Fresh Summer Comfort
Easy Fresh Huckleberry Cobbler: A Sweet Slice of Nostalgia
Welcome to my cozy corner of the kitchen, where we’re embracing the delightful world of home-cooked treats! Today, I’m over the moon to share one of my absolute favorite desserts: Easy Fresh Huckleberry Cobbler. Trust me, this recipe is like a warm hug on a plate, perfect for gatherings, family dinners, or just those moments when you need a little sweetness in your life.
Huckleberries are truly special – those vibrant little gems burst with flavor and nostalgia. Growing up, we had a patch of wild huckleberries near our family cabin. Every summer, my family would trek into the woods, buckets in hand, on a little adventure to gather these sweet treats. The excitement of picking those plump berries, the chatter among my siblings, and the joy of creating something delicious with them brings back such fond memories. It’s not just about the berries; it’s about the times spent together – the sun warming our backs, the sweet scent of the forest, and the laughter shared over a simple, homemade dessert.
This Easy Fresh Huckleberry Cobbler is my go-to recipe for those cherished moments. The combination of the juicy, tart berries with a luscious, buttery topping creates a symphony of flavors that’s sure to dazzle and bring smiles around the table. Plus, it’s wonderfully straightforward; even novice bakers can whip up this delightful dish without breaking a sweat!
So, grab your apron and let’s dive into making this enchanting huckleberry cobbler that will not only taste amazing but also fill your kitchen with sweet, comforting aromas.
Ingredients
-
Fresh Huckleberries (4 cups)
These beautiful berries are the stars of the show! Their tangy flavor adds depth to the cobbler. If you can’t find huckleberries, blueberries or blackberries make excellent substitutes. -
Granulated Sugar (1 cup)
Sweeten the deal with sugar! It balances the tartness of the huckleberries. For a lower-calorie option, consider using honey or coconut sugar. -
All-Purpose Flour (1 cup)
The backbone of your cobbler topping! It creates the delightful, fluffy layer. Need a gluten-free option? Swap it with almond flour or a gluten-free baking blend. -
Baking Powder (2 teaspoons)
This key ingredient helps the cobbler rise, giving it a light and fluffy texture. Always check the expiration date for best results! -
Salt (½ teaspoon)
A pinch of salt enhances sweetness and balances flavors. You can use sea salt or kosher salt for a slightly different taste. -
Whole Milk (1 cup)
Adds richness to the cobbler topping. If you’re looking for a dairy-free alternative, any plant-based milk like almond or oat milk works just fine. -
Butter (½ cup, melted)
Butter adds moisture and flavor to our topping, creating that sought-after buttery crust. For a vegan option, try melted coconut oil or vegan butter.
Step-by-Step Instructions
-
Preheat the Oven
Preheat your oven to 350°F (175°C). This ensures a consistent bake, giving your cobbler that perfect golden crust right from the get-go. Sticking with this step creates the perfect environment for our cobbler magic! -
Prepare the Huckleberries
Rinse the huckleberries gently under cold water and pat them dry. In a large mixing bowl, combine the huckleberries with ½ cup of granulated sugar. Let them sit for about 10 minutes. This step allows the berries to release their natural juices, creating a delightful syrup that will soak into the cobbler. -
Make the Topping
In another large bowl, whisk together the flour, baking powder, salt, and remaining ½ cup of sugar. Add the melted butter and milk, stirring until the mixture is just combined. Don’t overmix; a few lumps are perfectly fine. This will keep our topping light and airy! -
Combine and Layer
Pour the huckleberries into a greased 9×13-inch baking dish, spreading them out evenly. Spoon the batter over the huckleberries, carefully trying to cover as much of the berries as possible. Don’t worry about perfect coverage – rustic is the name of the game here! -
Bake to Perfection
Pop the dish into the preheated oven and bake for 40-45 minutes, or until the topping is golden brown and a toothpick inserted into the center comes out clean. Around the halfway point, you’ll start to smell an incredible aroma wafting through your kitchen. That’s the magic of baking! -
Cool and Serve
Once out of the oven, let the cobbler cool for about 10-15 minutes. This allows the juices to settle, making it easier to serve. If you can wait, that is! It’ll be a challenge, I get it.
Serving Suggestions
To plate your Easy Fresh Huckleberry Cobbler, scoop a generous portion into a bowl or on a plate. Serve it warm with a scoop of vanilla ice cream or a dollop of freshly whipped cream on top for delightful contrast. Drizzle a bit of the huckleberry juices over the ice cream for a sweet touch. Trust me, this combination is simply heavenly!
Recipe Variations
- Mixed Berry Cobbler: Swap out some of the huckleberries for strawberries, raspberries, or blackberries for a berry medley.
- Nutty Addition: Add ½ cup of chopped pecans or walnuts to the topping mixture for a crunchy texture.
- Spiced Up: Sprinkle in some cinnamon or nutmeg to the dry ingredients for a warming spice that compliments the berries beautifully.
- Lemon Zest: Mix in a teaspoon of lemon zest to the batter for a refreshing zing that brightens the flavor profile.
- Chia Seed Jam: Toss in a tablespoon of chia seeds with the huckleberries for added texture and healthy benefits!
Chef’s Notes
This huckleberry cobbler recipe holds a special place in my heart. Over the years, I’ve made countless variations, swapping berries and adding different spices based on what I had on hand, but the classic version always brings me back to those childhood days chasing after huckleberries in the woods. The laughter, the mess, and sometimes even the berry-stained smiles remind me of what cooking is all about: celebrating the moments that bring us together.
FAQs and Troubleshooting
1. What if my cobbler is too runny?
If your cobbler turns out a bit too runny, it might be due to excessive juice from the berries. Make sure to let it cool for a bit before serving; the juices will thicken as it sits. You can also add a tablespoon of cornstarch to the berries before baking to help thicken them up.
2. Can I use frozen huckleberries?
Absolutely! If using frozen, there’s no need to thaw them beforehand. Just toss them in the sugar and follow the recipe as instructed. You may need to add an extra 5-10 minutes to the baking time since they’ll release more moisture.
3. How do I store leftovers?
Store any leftover cobbler in an airtight container in the refrigerator for up to 3 days. You can also reheat individual portions in the microwave or pop them back in the oven to warm through.
4. Can I double this recipe?
Totally! To double the recipe, use a larger baking dish and adjust the baking time accordingly. Keep an eye on it, and test for doneness with a toothpick.
Nutritional Info
(Per serving, based on 8 servings)
- Calories: 250
- Protein: 3g
- Carbohydrates: 42g
- Fat: 10g
- Fiber: 2g
- Sugar: 15g
So there you have it, my friends! An Easy Fresh Huckleberry Cobbler that’s not just delicious but also comes with a side of beautiful memories and the promise of new stories to create in your own kitchen. Give it a try and share the love! I can’t wait to hear about your experiences baking this delightful dish. Happy cooking!
Print
Easy Fresh Huckleberry Cobbler
- Total Time: 60 minutes
- Yield: 8 servings
- Diet: Vegetarian
Description
A delightful dessert featuring juicy huckleberries and a buttery topping, perfect for gatherings and sweet moments.
Ingredients
- Fresh Huckleberries (4 cups)
- Granulated Sugar (1 cup)
- All-Purpose Flour (1 cup)
- Baking Powder (2 teaspoons)
- Salt (½ teaspoon)
- Whole Milk (1 cup)
- Butter (½ cup, melted)
Instructions
- Preheat the oven to 350°F (175°C).
- Rinse the huckleberries gently under cold water and pat them dry.
- Combine the huckleberries with ½ cup of granulated sugar in a large mixing bowl and let sit for about 10 minutes.
- Whisk together flour, baking powder, salt, and remaining ½ cup of sugar in another large bowl.
- Add melted butter and milk, stirring until just combined.
- Pour the huckleberries into a greased 9×13-inch baking dish and spoon the batter over them.
- Bake for 40-45 minutes or until golden brown.
- Let cool for about 10-15 minutes before serving.
Notes
Serve warm with vanilla ice cream or whipped cream for extra delight.
- Prep Time: 15 minutes
- Cook Time: 45 minutes
- Category: Dessert
- Method: Baking
- Cuisine: American
Nutrition
- Serving Size: 1 serving
- Calories: 250
- Sugar: 15g
- Sodium: 200mg
- Fat: 10g
- Saturated Fat: 6g
- Unsaturated Fat: 3g
- Trans Fat: 0g
- Carbohydrates: 42g
- Fiber: 2g
- Protein: 3g
- Cholesterol: 20mg
Keywords: cobbler, huckleberry, dessert, easy recipe, baking
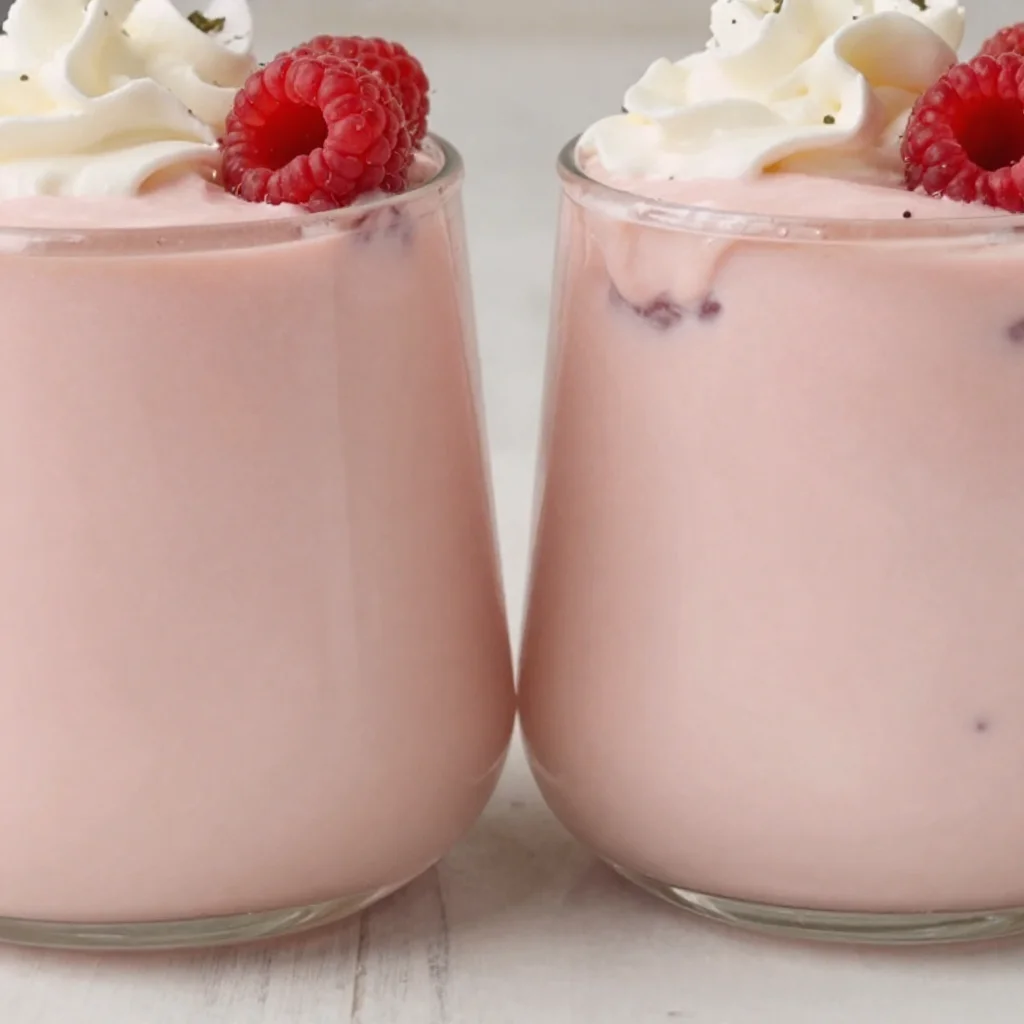
No-Bake Raspberry Mousse: Light, Creamy Dessert in Minutes
A Creamy Delight: Raspberry Mousse Recipe to Indulge Your Sweet Tooth
Welcome to my kitchen! Today, I’m excited to share a recipe that’s as delightful to eat as it is to make: Raspberry Mousse! This is one of those desserts that effortlessly elevates any occasion, making it feel extra special. Every spoonful of this sweet, airy mousse is bursting with fresh raspberry flavor that can turn an ordinary moment into a celebration. If you love creamy, dreamy desserts that transport your taste buds to blissful heights, you’ve landed in the right place!
Why Raspberry Mousse?
Raspberry mousse holds a special place in my heart. The vibrant color and the combination of sweet and tart flavors always remind me of my childhood summers spent in my grandmother’s garden, surrounded by blossoming raspberry bushes. She would gather the ripest berries in a basket, and I would watch in awe as she magically transformed them into this velvety dessert, a treat she reserved for special family gatherings. The sheer joy of whipping up something fresh and delightful was infectious and has stayed with me ever since.
Not only is raspberry mousse a stunning centerpiece on your table, but it’s also a light dessert that allows you to indulge without feeling heavy afterward. Whether it’s for an anniversary, a dinner party, or simply a sweet treat for yourself, this raspberry mousse will wow your guests—and yourself too!
So, let’s get started on this foolproof recipe that promises to infuse your day with a burst of fruity goodness!
Ingredients
Here’s what you’ll need to whip up this luscious raspberry mousse:
-
Fresh Raspberries (2 cups)
- These juicy gems are the star of our show! If fresh berries aren’t available, you can use frozen ones, but remember to thaw and drain any excess liquid for the best flavor.
-
Granulated Sugar (1/2 cup)
- This sweetener balances the tartness of the raspberries. You can substitute with honey or maple syrup for a more natural sweetener, just adjust the quantity to taste.
-
Heavy Cream (1 cup)
- The heavy cream gives the mousse its silky texture. If you’re looking for a lighter option, use whipped coconut cream, although it will alter the flavor slightly.
-
Egg Whites (2 large eggs)
- These contribute to the airy lightness of the mousse. If you’re avoiding raw eggs, use pasteurized egg whites or look for aquafaba, the liquid from chickpeas, beaten until fluffy.
-
Vanilla Extract (1 teaspoon)
- This adds a hint of warmth that complements the raspberries perfectly. Authentic vanilla extract is key, but if you want a twist, try almond extract instead!
-
Lemon Juice (1 tablespoon)
- A touch of acidity to elevate the flavors. Feel free to experiment with lime juice for a tropical twist.
Step-by-Step Instructions
Let’s break down the process of making raspberry mousse into simple, easy-to-follow steps. Trust me, it’ll be worth every minute!
Step 1: Prepare the Raspberries
Start by washing and gently drying your fresh raspberries. Reserve a few for garnish later, as a beautiful presentation adds to the allure of this dessert! In a small saucepan, combine the raspberries and half of the granulated sugar, cooking over medium heat until the raspberries break down, about 5-7 minutes. Stir gently to avoid splashing, and do enjoy the aroma!
Chef Tip: If you want a smoother mousse, strain the mixture through a fine mesh sieve to remove the seeds. This step is optional but makes a creamier mouthfeel.
Step 2: Whip Heavy Cream
In a separate bowl, use an electric mixer to whip the heavy cream until soft peaks form. This means the cream should gently hold its shape when you lift the whisk. Be careful not to over-whip, as it can turn into butter!
Chef Hack: For extra stability, you can add a tablespoon of powdered sugar to the cream while whipping—it helps keep everything fluffy longer!
Step 3: Beat the Egg Whites
In another clean bowl, beat the egg whites until they become frothy. Gradually add the remaining sugar while continuing to beat until stiff peaks form. This is where the magic happens, and your mousse gets its delightful airiness.
Chef Insight: If you’re using aquafaba instead of egg whites, whip it until it forms stiff peaks just like you would with egg whites—it’s a fantastic vegan alternative!
Step 4: Combine It All
Gently fold the raspberry mixture into the whipped cream. Use a spatula and a light hand; you don’t want to deflate the cream too much. Once it’s incorporated, fold in the beaten egg whites, creating a light and fluffy texture. This should be beautifully swirled, with pretty pinks from the raspberries combined with the cream.
Step 5: Chill
Spoon the mousse into individual serving dishes or a large bowl, and refrigerate for at least 2 hours, or until set. The waiting can be tough, but it’s so worth it!
Step 6: Serve
When ready to serve, top with more fresh raspberries and perhaps a dollop of whipped cream for that extra luxurious touch. Enjoy immediately for the best experience!
Serving Suggestions
When it comes to serving raspberry mousse, presentation is key. Consider serving it in elegant glass cups or bowls to show off the beautiful, swirled colors. A sprinkle of crushed graham crackers or cocoa nibs on top provides a delightful crunch against the softness of the mousse. Serve each portion with a fresh mint leaf for a pop of color and a refreshing scent!
Recipe Variations
Looking to shake things up? Here are a few fun variations of raspberry mousse:
- Chocolate Raspberry Mousse: Gently fold in melted dark chocolate for a rich, decadent version.
- Citrus Twist: Incorporate orange or lime zest into the raspberry mixture for a zesty zing.
- Nutty Delight: Add almond or hazelnut extract for an extra layer of flavor.
- Berry Medley: Replace half the raspberries with strawberries or blueberries for a mixed berry mousse.
Chef’s Notes
This raspberry mousse recipe has evolved over the years, and I can’t help but smile reminiscing about the trial and error involved. I once ended up with a soup-like dessert because I didn’t give the mousse enough time to chill! Now, I make sure to emphasize chilling time in this recipe so you won’t run into the same sticky situation. Don’t let this happen to you!
I also learned that while fresh raspberries are delightful, the mood can change with the seasons. In the winter, I like to play around with warming spices like cardamom or nutmeg in the mousse—who says you can’t enjoy raspberry flavor all year round?!
FAQs and Troubleshooting
1. My mousse didn’t set properly. What did I do wrong?
- If your mousse hasn’t set, it often means it didn’t get enough chill time. Patience is a virtue here! Make sure to allow it at least 2 hours to firm up in the fridge.
2. Can I make this mousse vegan?
- Absolutely! Use aquafaba in place of the egg whites and coconut cream or a non-dairy whipped topping in place of heavy cream for a delightful vegan version.
3. How do I store leftover mousse?
- Store any leftover mousse in an airtight container in the refrigerator for up to 3 days. Enjoy it as an afternoon pick-me-up!
4. What can I do with leftover raspberry puree?
- The leftover raspberry puree (if you choose to strain it) can be used as a topping for pancakes, waffles, or yogurt. Waste not, want not!
Nutritional Info
While I usually focus on flavor, here’s a quick rundown of the nutritional breakdown per serving:
- Calories: 220
- Fat: 15g
- Carbohydrates: 20g
- Protein: 3g
- Sugars: 12g
Feel free to add or adjust based on your dietary preferences!
That’s a wrap on my beloved raspberry mousse recipe! I hope you take this delicious dessert and make it your own—adding your little touches and enjoying each bite. After all, cooking is about creating memories, and I can’t wait for you to create yours. Happy cooking, my fellow foodies!
Print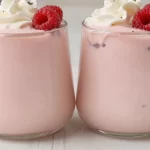
Raspberry Mousse
- Total Time: 135 minutes
- Yield: 4 servings
- Diet: Vegetarian
Description
A light and airy raspberry mousse that offers a sweet and tart flavor, perfect for any occasion.
Ingredients
- Fresh Raspberries (2 cups)
- Granulated Sugar (1/2 cup)
- Heavy Cream (1 cup)
- Egg Whites (2 large eggs)
- Vanilla Extract (1 teaspoon)
- Lemon Juice (1 tablespoon)
Instructions
- Prepare the Raspberries: Wash and dry raspberries, combine with half the sugar in a saucepan, and cook over medium heat for 5-7 minutes.
- Whip Heavy Cream: Whip heavy cream in a bowl until soft peaks form.
- Beat the Egg Whites: Beat egg whites until frothy, gradually add sugar, and continue beating to stiff peaks.
- Combine It All: Fold raspberry mixture into whipped cream, then fold in the beaten egg whites.
- Chill: Spoon into serving dishes and refrigerate for at least 2 hours to set.
- Serve: Top with fresh raspberries and whipped cream before serving.
Notes
Consider serving in elegant glass cups for a beautiful presentation. Experiment with different extracts for unique flavors.
- Prep Time: 15 minutes
- Cook Time: 7 minutes
- Category: Dessert
- Method: Chilling
- Cuisine: French
Nutrition
- Serving Size: 1 serving
- Calories: 220
- Sugar: 12g
- Sodium: 50mg
- Fat: 15g
- Saturated Fat: 9g
- Unsaturated Fat: 6g
- Trans Fat: 0g
- Carbohydrates: 20g
- Fiber: 1g
- Protein: 3g
- Cholesterol: 70mg
Keywords: raspberry mousse, dessert, light dessert, creamy dessert, easy recipes
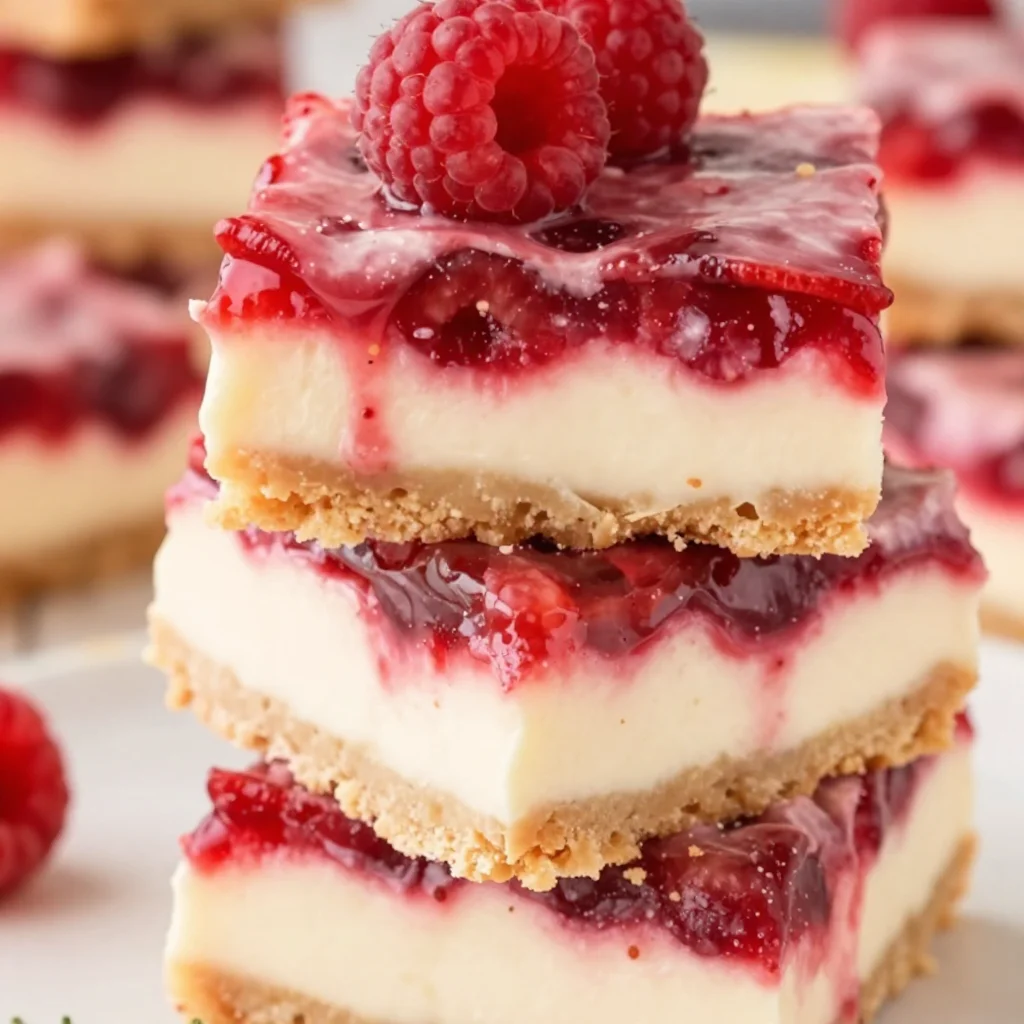
Beginner-Friendly Raspberry Cheesecake Bars: Simple & Creamy
Raspberry Cheesecake Bars: A Sweet Slice of Nostalgia
Welcome, friends! Gather around as we dive into the delightful world of Raspberry Cheesecake Bars. Picture this: you’re in your kitchen, the sun is gently streaming through the window, and the sweet scent of creamy cheesecake mixed with tart, juicy raspberries wafts through the air. It’s a slice of bliss that not only satisfies your sweet tooth but also warms your heart. As someone who believes that food is a way to connect and create memories, these bars hold a special place in my heart.
Growing up, my family had a tradition of gathering every Sunday for a big dinner. We would sit around the table, sharing stories, laughter, and, of course, delicious food. One Sunday, my Aunt Lily surprised us all with her famous raspberry cheesecake bars. They were the highlight of our meal! As we enjoyed the creamy, tangy treats, I saw how one dish could spark joy and bring folks together. It was in that moment I realized that cooking is about so much more than just flavors; it’s about the connections we make and the memories we create.
Now, I’m excited to share this recipe with you! Whether you’re planning a summer picnic, a cozy dinner party, or just a sweet treat for yourself, these Raspberry Cheesecake Bars are sure to impress. So grab your apron, and let’s get cooking!
Personal Story: A Family Tradition
One of my fondest memories of raspberry cheesecake bars goes back to those cherished Sunday dinners at Aunt Lily’s house. She was the quintessential gathering queen, whipping up magical recipes that had everyone lining up for seconds. When she made these bars, it was like a sweet, comforting hug from the inside. The way she would delicately layer the creamy cheesecake filling on top of the buttery crust, and then swirl that vibrant raspberry puree—oh, it was pure artistry!
I remember the anticipation building as we waited for the bars to cool. After dinner, the moment finally arrived: the first slice! As I took my first bite, the rich, creamy cheesecake blended beautifully with that pop of tartness from the raspberries. Each bite danced on my taste buds, leaving me craving more. Now, I often find myself recreating that memory in my own kitchen, hoping to inspire the same joy in my family and friends that Aunt Lily did for us.
Ingredients
Here’s what you’ll need to bring these raspberry cheesecake bars to life:
-
For the Crust:
- 1 ½ cups graham cracker crumbs
- Feel free to substitute with crushed Oreo cookies for a chocolatey twist!
- ½ cup granulated sugar
- For a less sweet crust, reduce sugar to 1/3 cup.
- ½ cup unsalted butter, melted
- Coconut oil can be a great dairy-free alternative here.
- 1 ½ cups graham cracker crumbs
-
For the Cheesecake Filling:
- 16 ounces cream cheese, softened
- Neufchâtel cheese works if you want a lighter option.
- 1 cup granulated sugar
- Replace with coconut sugar for a touch of caramel flavor!
- 1 teaspoon vanilla extract
- Always use pure vanilla for the best aroma and taste.
- 3 large eggs
- Replace with 1 cup of unsweetened applesauce for a vegan version.
- ½ cup sour cream
- Greek yogurt works well to add that creamy texture with less fat.
- 16 ounces cream cheese, softened
-
For the Raspberry Swirl:
- 1 cup fresh raspberries (or frozen, thawed and drained)
- You can substitute half the raspberries with blueberries for a mixed berry treat.
- 2 tablespoons sugar
- Switch to honey or maple syrup if you prefer a more natural sweetener.
- 1 tablespoon lemon juice
- A splash of orange juice can also work wonderfully!
- 1 cup fresh raspberries (or frozen, thawed and drained)
Step-by-Step Instructions
Step 1: Preheat and Prepare the Pan
Begin by preheating your oven to 325°F (160°C). While that’s warming up, grab a 9×13 inch baking pan and line it with parchment paper, leaving some overhang. This will help you lift the bars out later—trust me, it’s a game-changer!
Step 2: Make the Crust
In a medium bowl, mix together the graham cracker crumbs, sugar, and melted butter until it resembles damp sand. If it feels dry, add a touch more melted butter. Press this mixture firmly into the bottom of your prepared baking pan, creating an even layer. Pop it into the oven for 10 minutes until slightly golden.
Step 3: Prepare the Cheesecake Filling
While the crust is baking, let’s whip up that luscious cheesecake filling! In a large mixing bowl, beat the softened cream cheese until smooth. Gradually add in the sugar and beat until fluffy, about 2-3 minutes. Then, mix in the vanilla extract. Now, add the eggs one at a time, mixing well after each addition. Finally, blend in the sour cream until creamy and delicious-looking.
Step 4: Create the Raspberry Swirl
In a small saucepan over medium heat, combine the raspberries, sugar, and lemon juice. Stir gently until the raspberries break down and the mixture becomes syrupy (about 3-5 minutes). If you like chunks, leave some berries whole! Set it aside to cool slightly.
Step 5: Combine and Bake
Pour the cheesecake mixture over the pre-baked crust, spreading it evenly. Now, drizzle the raspberry puree across the top and use a knife or toothpick to swirl it gently—this is where the magic happens! 🎨
Bake in the oven for 45-50 minutes, or until the edges are set but the center still jiggles slightly. Remove from the oven and let it cool at room temperature for about an hour. Then refrigerate for at least 4 hours (or overnight if you can wait!).
Step 6: Serving
Once chilled, lift the cheesecake bars out of the pan using the parchment paper. Cut them into squares, and serve them on a pretty platter. Garnish with fresh raspberries and a dusting of powdered sugar for that elegant touch!
Serving Suggestions
These raspberry cheesecake bars are fantastic on their own, but if you want to elevate your serving game, consider pairing them with a dollop of whipped cream or a scoop of vanilla ice cream. A sprig of mint on the side adds a pop of color and freshness that looks so appealing on the plate. For a brunch or tea party, serve them alongside a cup of iced tea or a sparkling lemonade; they make the perfect refreshing treat!
Recipe Variations
Ready to get creative? Here are some fun variations to try:
- Chocolate Raspberry Cheesecake Bars: Incorporate ½ cup melted dark chocolate into the cheesecake mixture for a rich, decadent twist.
- Lemon Raspberry Bars: Add 1-2 tablespoons of lemon zest to the filling for a zesty kick.
- Nutty Graham Cracker Crust: Use crushed almonds or hazelnuts in the crust for added flavor and crunch.
- Swap the Berries: Try using blackberries, strawberries, or cherries to mix things up!
- Vegan Version: Substitute all dairy ingredients with plant-based alternatives and replace eggs with silken tofu blended until smooth.
Chef’s Notes
Over the years, I’ve experimented with this recipe, tweaking ingredients and adding my little spin. One time, I misjudged my raspberry supply and ended up turning it into a mixed berry cheesecake! That accidental innovation ended up being a total hit at a family gathering. So remember, cooking is all about experimenting and making it your own! If you find you prefer more raspberry flavor, don’t be shy; feel free to add an extra cup of berries to the mix!
FAQs and Troubleshooting
1. Why are my cheesecake bars cracking?
A common issue! This often happens if the filling is overcooked or if it cools too quickly. To avoid this, bake your bars slowly and allow them to cool gradually in the oven with the door cracked open.
2. Can I use frozen raspberries instead of fresh?
Absolutely! Just make sure they’re thawed and well-drained. They may add more liquid, so it’s a good idea to strain them before using.
3. How do I store leftovers?
These bars can be stored in an airtight container in the refrigerator for up to a week. Just make sure to separate layers with parchment paper to prevent sticking!
4. Can I freeze the cheesecake bars?
Yes, you can! Wrap them tightly in plastic wrap and foil before freezing. When you’re ready to enjoy them, thaw them in the refrigerator overnight.
Nutritional Info
While I don’t usually dwell on the numbers too much, it’s helpful to know:
- Calories: Approximately 250 per bar
- Fat: 16g
- Carbohydrates: 25g
- Protein: 4g
These values can vary based on your ingredient choices, so make adjustments as needed!
And there you have it! Raspberry cheesecake bars that are not just a dessert but a tasty tradition and a sweet celebration of life. I hope this recipe inspires you to create your own beautiful memories in the kitchen. Happy baking, friends! 🍰
Print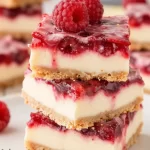
Raspberry Cheesecake Bars
- Total Time: 4 hours 10 minutes
- Yield: 12 servings 1x
- Diet: Vegetarian
Description
Delicious raspberry cheesecake bars that blend creamy cheesecake with a tart raspberry swirl, perfect for gatherings and sweet treats.
Ingredients
- 1 ½ cups graham cracker crumbs
- ½ cup granulated sugar
- ½ cup unsalted butter, melted
- 16 ounces cream cheese, softened
- 1 cup granulated sugar
- 1 teaspoon vanilla extract
- 3 large eggs
- ½ cup sour cream
- 1 cup fresh raspberries (or frozen, thawed and drained)
- 2 tablespoons sugar
- 1 tablespoon lemon juice
Instructions
- Preheat your oven to 325°F (160°C) and prepare a 9×13 inch baking pan with parchment paper.
- Mix together graham cracker crumbs, sugar, and melted butter in a bowl until it resembles damp sand. Press into the bottom of the baking pan and bake for 10 minutes.
- Beat the softened cream cheese in a large bowl until smooth. Gradually add sugar and beat until fluffy, then mix in vanilla extract, followed by eggs one at a time. Finally, blend in sour cream.
- Combine raspberries, sugar, and lemon juice in a saucepan over medium heat. Stir until syrupy, about 3-5 minutes.
- Pour the cheesecake mixture over the pre-baked crust, drizzle raspberry puree on top and swirl gently with a knife. Bake for 45-50 minutes.
- Cool at room temperature for an hour, then refrigerate for at least 4 hours before cutting into squares and serving.
Notes
For serving, consider adding whipped cream, a scoop of vanilla ice cream, or fresh raspberries on top.
- Prep Time: 20 minutes
- Cook Time: 50 minutes
- Category: Dessert
- Method: Baking
- Cuisine: American
Nutrition
- Serving Size: 1 bar
- Calories: 250
- Sugar: 20g
- Sodium: 350mg
- Fat: 16g
- Saturated Fat: 9g
- Unsaturated Fat: 6g
- Trans Fat: 0g
- Carbohydrates: 25g
- Fiber: 1g
- Protein: 4g
- Cholesterol: 65mg
Keywords: dessert, cheesecake, raspberry, bars, sweet treat

Budget-Friendly 3-Ingredient Chocolate Zucchini Cake
Indulge Your Sweet Tooth with a 3-Ingredient Chocolate Zucchini Cake
Welcome to my cozy kitchen, where the aroma of freshly baked goods dances in the air! I’m thrilled you’ve chosen to join me as we whip up something truly special today: a delicious 3-Ingredient Chocolate Zucchini Cake. Yes, you heard that right! Only three ingredients! But don’t let the simplicity fool you; this dessert is rich, moist, and oh-so-chocolatey. It’s the perfect treat for those who cherish flavors without a lengthy shopping list or complicated techniques.
You know, when I first stumbled upon this recipe, I was both skeptical and intrigued. Could something so easy really taste this good? Spoiler alert: It does! I can remember the delightful surprise on my friends’ faces when I brought this cake to a gathering. They couldn’t believe that zucchini, of all things, could create such a rich and scrumptious dessert. It’s a testament to the magic that happens when you combine the right ingredients with a pinch of love and a dash of creativity.
The beauty of this cake extends beyond its fantastic flavor; it also embodies the spirit of cooking. It’s about experimenting, about taking something you have on hand and turning it into a delightful meal or treat. So grab your apron and let’s dive into this sweet adventure together! Your kitchen is about to fill with warmth, laughter, and the irresistible scent of chocolate baking—trust me, it’s worth it!
A Sweet Memory
As a young girl, my baking adventures often began with my grandmother by my side. I can still picture her in her sunny kitchen, the golden afternoon light casting warm shadows on her worn wooden table. She was always filled with wisdom and a twinkle in her eye, encouraging me to experiment and create with whatever we had at hand. One summer, we had an abundance of zucchini from her garden, and instead of letting it go to waste, she decided to bake.
“Let’s make a cake!” she proclaimed. My little mind was racing. A cake made with zucchini? But she assured me that the secret was to let the flavors meld and that the moisture from the zucchini would create the most delightful dessert! It was a simple, no-fuss cake that we tossed together in mere minutes. The rich chocolate flavor won us both over, and we couldn’t stop stealing bites as it cooled on the counter.
Fast forward years later, and this nostalgic memory inspires me as I share my very own version—a simple recipe that invites everyone to gather and share joy over a piece of cake. Whether you’re baking for a birthday, a casual weekend treat, or just because you can, this 3-Ingredient Chocolate Zucchini Cake brings a slice of warmth right from my kitchen to yours.
Ingredients
Here are the three magical ingredients we’ll use for our delightful cake. Trust me; each plays a vital role, and I’ll share some tips along the way!
-
Zucchini (about 1 cup, grated)
- This wonderfully versatile vegetable adds moisture and nutrition to our cake without altering the flavor. You can substitute it with shredded carrots for a different twist, or if you’re feeling adventurous, try blending in some canned pumpkin!
-
Chocolate cake mix (1 box, about 15.25 oz)
- You can’t go wrong with chocolate cake mix—it’s the shortcut to a rich, chocolatey flavor! You can opt for a gluten-free mix if dietary restrictions are a concern, or even a vanilla cake mix for a different take.
-
Unsweetened applesauce (1 cup)
- Applesauce brings added moisture and sweetness while cutting down on some oils or butter you’d typically find in traditional recipes. You could also use mashed bananas or yogurt if you want to switch it up!
Step-by-Step Instructions
Now, let’s get our hands dirty! Follow these steps, and I promise you’ll create a cake that’s as delightful to make as it is to eat.
-
Preheat the Oven
- Start by preheating your oven to 350°F (175°C). This way, it will be ready for our delicious creation! It’s often the step that many people forget, but don’t be one of them! An adequately heated oven ensures an even bake.
-
Prep the Zucchini
- Grate your zucchini finely with a box grater or a food processor. No need to peel it; the skin adds color and nutrients. After grating, place the zucchini on a clean dish towel and gently squeeze out any excess moisture. This step is crucial as it helps our cake maintain the perfect texture.
-
Mix the Ingredients
- In a large mixing bowl, combine the chocolate cake mix, grated zucchini, and unsweetened applesauce. Stir until everything is well-incorporated. The batter may be somewhat thick—don’t worry! This is expected, as the zucchini brings a lot of moisture once it bakes.
-
Prepare Your Baking Pan
- Grease a 9×13-inch baking pan or line it with parchment paper for easy removal. If you’re feeling fancy, use a bundt pan for a more dramatic presentation! The parchment paper trick is a chef’s best-kept secret; it makes cleaning up a breeze and prevents sticking.
-
Pour and Spread
- Pour the batter into your prepared pan, smoothing it out evenly with a spatula. Don’t worry if it looks a little lumpy; that’s part of its charm! Plus, we’re on a flavorful adventure here, remember?
-
Bake Away!
- Place your cake in the preheated oven and bake for about 25-30 minutes. Start checking for doneness around the 25-minute mark by inserting a toothpick into the center. If it comes out clean or with just a few crumbs attached, it’s ready to come out!
-
Cool and Serve
- Allow the cake to cool in the pan for about 10 minutes before transferring it to a wire rack to cool completely. I know it’s tempting to cut into it right away, but patience pays off! Letting it cool ensures better texture and helps the flavors settle.
Serving Suggestions
When it comes to serving your 3-Ingredient Chocolate Zucchini Cake, the options are limitless! Slice it up and place it on a pretty plate—maybe dust it with a sprinkle of powdered sugar for a touch of elegance. If you’re feeling indulgent, serve it warm with a scoop of vanilla ice cream or a dollop of whipped cream. For a hint of freshness, a sprinkle of fresh berries on the side can add a delightful burst of flavor and color to your plate!
Recipe Variations
Feeling adventurous? Here are some creative variations to shake things up with this recipe:
- Nutty Chocolate Delight: Add a handful of chopped walnuts or pecans to the batter for an extra crunch.
- Spicy Twist: Incorporate a teaspoon of cinnamon or a pinch of nutmeg to warm up the flavor profile—perfect for fall!
- Minty Fresh: Fold in some peppermint extract for a refreshing chocolate mint cake that brings a delightful twist to the classic.
- Vegan Option: Use a vegan chocolate cake mix and swap applesauce for a flaxseed meal mixed with water to create an egg substitute.
- Frosted Fantasy: For a rich finish, top with a cream cheese frosting or chocolate ganache after cooling.
Chef’s Notes
One of my favorite things about this recipe is its ability to evolve! I remember the first time I made this cake; I was hesitant about adding zucchini to a dessert. However, watching my friends’ surprised faces as they enjoyed slice after slice was pure magic. Over time, I experimented with adding nut butter and various spices, making it a staple in my baking repertoire. Each time I bake it, I’m reminded that cooking is as much about the memories as it is about the food!
Oh, and a little tip: if you’ve got leftover zucchini after making the cake, toss it into a stir-fry or sauté it with garlic and olive oil for a delightful side dish!
FAQs and Troubleshooting
1. My cake didn’t rise! What happened?
- Ensure your baking powder is fresh. An expired cake mix can lead to a dense cake. Make sure to follow the baking time closely too!
2. Can I use frozen zucchini?
- Definitely! Make sure to thaw and squeeze out excess moisture before mixing it into your batter.
3. My cake is too wet—what went wrong?
- If your zucchini was very watery, try squeezing out more moisture next time. Also, make sure you’re measuring your ingredients accurately.
4. How can I store leftovers?
- Store any leftover cake in an airtight container at room temperature for up to three days. If it lasts that long! You can also refrigerate it to extend its freshness.
Nutritional Info
While I don’t focus too heavily on nutritional information (because indulging in a slice of happiness is more important!), here’s a simple breakdown for reference:
- Calories per slice: Approximately 180
- Fat: Varies based on the cake mix used
- Fiber: Thanks to the zucchini!
Remember, everyone deserves a little treat now and then!
Thank you for joining me on this baking adventure—I hope your kitchen fills with the wonderful scent of chocolate and warm memories just like mine. As you gather around the table, savor every bite, and share laughter with friends or family. Happy baking, and can’t wait to see you back here for more culinary creations!
Print
3-Ingredient Chocolate Zucchini Cake
- Total Time: 40 minutes
- Yield: 8 servings 1x
- Diet: Vegetarian
Description
A simple, rich, and moist chocolate zucchini cake made with just three ingredients.
Ingredients
- 1 cup Zucchini, grated
- 1 box (15.25 oz) Chocolate cake mix
- 1 cup Unsweetened applesauce
Instructions
- Preheat the oven to 350°F (175°C).
- Grate the zucchini and squeeze out excess moisture.
- Mix the chocolate cake mix, grated zucchini, and applesauce in a large bowl until well combined.
- Prepare a 9×13-inch baking pan by greasing it or lining it with parchment paper.
- Pour the batter into the pan and spread evenly.
- Bake in the preheated oven for 25-30 minutes, checking for doneness with a toothpick.
- Cool the cake in the pan for 10 minutes before transferring it to a wire rack to cool completely.
Notes
Serve dusted with powdered sugar or with a scoop of ice cream.
- Prep Time: 10 minutes
- Cook Time: 30 minutes
- Category: Dessert
- Method: Baking
- Cuisine: American
Nutrition
- Serving Size: 1 slice
- Calories: 180
- Sugar: 12g
- Sodium: 400mg
- Fat: 6g
- Saturated Fat: 1g
- Unsaturated Fat: 5g
- Trans Fat: 0g
- Carbohydrates: 30g
- Fiber: 2g
- Protein: 2g
- Cholesterol: 0mg
Keywords: chocolate cake, zucchini cake, easy dessert, 3-ingredient cake, baking
One-Bowl Moist Chocolate Zucchini Cake: Quick & Easy
Indulge in Happiness with Super Moist Chocolate Zucchini Cake!
Welcome to my cozy corner of the kitchen! I’m Olivia Bennett, your enthusiastic guide to all things delicious and comforting. Today, I’m excited to share with you a recipe that is so delightful, it might just become your new favorite: Super Moist Chocolate Zucchini Cake! Nothing brings people together like the smell of something sweet baking wafting through the air, and this cake is no exception. Crafted with rich cocoa, tender zucchini, and a sprinkle of love, it’s a wonderful way to sneak in some veggies while satisfying your sweet tooth.
You might wonder, “Why zucchini in a dessert?” Let me tell you, this magical green vegetable transforms into something extraordinary when baked. It provides moisture and a subtle sweetness, making each bite incredibly soft and fluffy. Trust me when I say, nobody will ever guess there’s zucchini hiding in there! Not only is it a treat for the taste buds, but it’s also a fun way to make your dessert a little healthier—who doesn’t love that?
In this blog post, I’ll walk you through the complete process of making this cake, from selecting the perfect ingredients to sharing my best baking tips. Whether you’re tempting your friends with a dessert they won’t forget or indulging in a sweet treat just for yourself, this chocolate zucchini cake will surely deliver. So, grab your apron, and let’s get our hands a little messy in the kitchen!
A Slice of Nostalgia
Let me take you back to a sunny afternoon at my grandmother’s house when I was a little girl. It was the perfect day for baking, and the kitchen was alive with the sweet scent of vanilla and chocolate. My grandmother had a magical way of turning simple ingredients into smiles and laughter, and one of her signature delights was her chocolate zucchini cake. I still remember the first time I tasted it—a forkful of gooey chocolate paired with that unexpected hint of zest from the zucchini. My young mind was blown!
We would spend the afternoon grating zucchini and mixing the batter together, all while she shared stories of her childhood, filled with laughter and fun. Those moments in the kitchen were special; they bonded us and sparked my lifelong love for cooking. Every time I whip up this cake, I think back to those carefree days, filled with laughter, love, and the joy of baking together. It’s a recipe that not only fills the belly but also warms the heart.
Ingredients
Here’s what you’ll need to whip up this delectable treat:
-
2 cups grated zucchini
The star of the show! Choose medium-sized zucchinis; they provide moisture without overwhelming the flavor. If you’re short on zucchini, you can substitute with an equal amount of shredded carrots for a different twist. -
1 ¾ cups all-purpose flour
All-purpose flour gives the right structure to our cake, ensuring it’s fluffy and moist. For a gluten-free version, you can use a 1:1 gluten-free flour blend. -
¾ cup cocoa powder
This rich cocoa powder adds the chocolatey goodness we crave. Use unsweetened cocoa for the best results—dark cocoa powder can also deepen the flavor if you want a bolder taste. -
1 teaspoon baking soda
This leavening agent helps our cake rise and stay airy. Always make sure it’s fresh for the best effect! -
1 teaspoon baking powder
Pairing this with baking soda gives our cake a perfect lift, keeping it light and moist. -
½ teaspoon salt
A pinch of salt enhances all the flavors in the cake and balances the sweetness. Don’t skip this! -
1 cup granulated sugar
Sugar sweetens without overpowering. You can try using coconut sugar or a sugar substitute for a lower-calorie option. -
½ cup brown sugar
Brown sugar contributes moisture and a deeper flavor. You can use all granulated sugar if you’re out of brown sugar, but you’ll miss out on that lovely caramel hint! -
1 cup vegetable oil
This adds richness and helps maintain the moisture. You can substitute with melted coconut oil or applesauce for a lighter version. -
3 large eggs
Eggs bind the ingredients together. For a vegan option, consider using flax eggs or a commercial egg replacer. -
2 teaspoons vanilla extract
Vanilla rounds out the flavors beautifully! A quality pure vanilla extract is worth the investment here. -
½ cup chocolate chips (optional)
Because why not? Chocolate chips add an extra layer of indulgence! Feel free to replace them with nuts or dried fruit if you prefer.
Step-by-Step Instructions
Alright, let’s dive into the fun part: baking! Follow these steps to create your Super Moist Chocolate Zucchini Cake:
-
Prep Your Zucchini:
Start by washing your zucchinis thoroughly (who knows what’s lurking on those veggies!). Grate them using a box grater or food processor. Once grated, gather the zucchini in a clean kitchen towel or cheesecloth and squeeze out excess moisture. You want it moist but not soggy to ensure the best texture for your cake. -
Preheat the Oven:
Preheat your oven to 350°F (175°C). Grease and flour a 9×13 inch baking pan or two round cake pans, depending on how you want to serve it. You can also line the bottom with parchment paper for easier removal. -
Combine the Dry Ingredients:
In a large bowl, whisk together the flour, cocoa powder, baking soda, baking powder, and salt. This aerates the flour and ensures that all your leavening agents are evenly distributed throughout the mixture. -
Mix in the Sugars:
Add the granulated sugar and brown sugar to the dry mixture and combine well. This step is essential for achieving that rich sweetness throughout the cake. -
Add the Wet Ingredients:
Create a well in the center of your dry ingredients and pour in the vegetable oil, eggs, and vanilla extract. Mix until just combined—be careful not to overmix, as this can lead to a denser cake. -
Fold in the Zucchini:
Add the grated zucchini and, if you’re using them, the chocolate chips. Gently fold them in with a spatula until fully incorporated. The zucchini should be evenly distributed throughout your batter. -
Bake the Cake:
Pour the batter into your prepared pan(s) and spread it evenly. Bake for 25-30 minutes for round cakes or about 35-40 minutes for a sheet cake, or until a toothpick inserted into the center comes out clean. -
Cool It Down:
Once baked, allow your cake to cool in the pan for about 10-15 minutes before transferring it to a wire rack to cool completely. This will help keep the crumbs intact! -
Serve and Enjoy:
Slice up your cake and serve it plain or with a dusting of powdered sugar or a generous dollop of whipped cream. You could also frost it with cream cheese frosting for an extra decadent treat!
Serving Suggestions
To plate your Super Moist Chocolate Zucchini Cake, consider a simple presentation. A nice slice on a warm dessert plate, dusted with powdered sugar, creates an inviting look. Adding seasonal fruits like berries can enhance the appeal and add a burst of color. If you’re feeling fancy, a scoop of vanilla or mint ice cream on the side will elevate the experience to another level!
Recipe Variations
Now that you’ve mastered the basic version of this delicious cake, here are some fun variations to try:
- Chocolate Orange Zucchini Cake: Add the zest of one orange to the batter for a fresh, citrusy twist.
- Spicy Choco-Zucchini Cake: Toss in a teaspoon of cinnamon and a pinch of cayenne pepper for a surprising kick.
- Nutty Chocolate Zucchini Cake: Fold in some chopped walnuts or pecans for added texture and crunch.
- Vegan Chocolate Zucchini Cake: Substitute eggs with flax eggs and use almond or coconut milk instead of vegetable oil for a lighter vegan option.
- Mint Chocolate Zucchini Cake: Add crushed mint candies or peppermint extract for a refreshing flavor.
Chef’s Notes
This recipe has been my go-to for birthdays and potlucks alike! I often get it busy in the kitchen, and let me tell you the stories that my friends share about my “mysterious” cake—it always brings smiles! Over the years, I’ve experimented with different add-ins, cakes, and even frostings. Each twist has its charm, and I love sharing these from my kitchen with others. The best part is how versatile this cake is—you can dress it up or down depending on the occasion!
FAQs and Troubleshooting
-
Why did my cake turn out dry?
Make sure you’re measuring your flour correctly! Spoon and level it for accuracy. Also, be aware of the baking time; no one likes a dried-out cake! -
Can I use unpeeled zucchini?
Absolutely! If you’re using young, tender zucchini, the skin is perfectly edible and adds a bit of fiber. Just make sure to wash it well. -
Will the zucchini make my cake taste vegetable-y?
Not at all! The cocoa and sugars mask the zucchini flavor beautifully. You’ll get a moist and rich chocolate cake without the garden taste. -
Can I freeze this cake?
You sure can! Wrap slices tightly in plastic wrap and then place them in an airtight container. They’ll be good in the freezer for up to 3 months. Just thaw at room temperature before enjoying.
Nutritional Info
While baking is about indulgence, this cake delivers a bit of nutritional punch thanks to the zucchini! On average, a slice (about 1/12th of the cake) has:
- Calories: 280
- Total Fat: 12g
- Saturated Fat: 2g
- Carbohydrates: 40g
- Fiber: 2g
- Sugars: 22g
- Protein: 4g
Now that you have the complete lowdown to create your own Super Moist Chocolate Zucchini Cake, I hope you’re excited to dive into a world of flavors! This recipe isn’t just about baking; it’s a chance to create memories, share goodies with loved ones, and most importantly, enjoy yourself in the kitchen. Happy baking, my friends! 💕
Print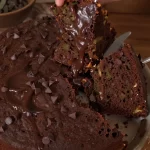
Super Moist Chocolate Zucchini Cake
- Total Time: 45 minutes
- Yield: 12 servings 1x
- Diet: Vegetarian
Description
A delightful chocolate zucchini cake that is moist and fluffy, perfect for satisfying your sweet tooth while sneaking in some veggies!
Ingredients
- 2 cups grated zucchini
- 1 ¾ cups all-purpose flour
- ¾ cup cocoa powder
- 1 teaspoon baking soda
- 1 teaspoon baking powder
- ½ teaspoon salt
- 1 cup granulated sugar
- ½ cup brown sugar
- 1 cup vegetable oil
- 3 large eggs
- 2 teaspoons vanilla extract
- ½ cup chocolate chips (optional)
Instructions
- Prep your zucchini: Wash your zucchinis thoroughly and grate them. Squeeze out excess moisture with a clean towel.
- Preheat the oven: Preheat your oven to 350°F (175°C) and prepare your baking pan.
- Combine the dry ingredients: In a large bowl, whisk together the flour, cocoa powder, baking soda, baking powder, and salt.
- Mix in the sugars: Add the granulated and brown sugar to the dry mixture and mix well.
- Add the wet ingredients: Create a well in the center of the dry ingredients and pour in the oil, eggs, and vanilla extract. Mix until just combined.
- Fold in the zucchini: Gently fold in the grated zucchini and chocolate chips until incorporated.
- Bake the cake: Pour the batter into your prepared pan(s) and bake for 25-30 minutes for round cakes or 35-40 minutes for a sheet cake.
- Cool it down: Let the cake cool in the pan for 10-15 minutes before transferring to a wire rack.
- Serve and enjoy: Slice the cake and enjoy it plain or with toppings!
Notes
This cake can be served with powdered sugar, whipped cream, or cream cheese frosting. Perfect for birthdays or potlucks!
- Prep Time: 15 minutes
- Cook Time: 30 minutes
- Category: Dessert
- Method: Baking
- Cuisine: American
Nutrition
- Serving Size: 1 slice
- Calories: 280
- Sugar: 22g
- Sodium: 400mg
- Fat: 12g
- Saturated Fat: 2g
- Unsaturated Fat: 8g
- Trans Fat: 0g
- Carbohydrates: 40g
- Fiber: 2g
- Protein: 4g
- Cholesterol: 80mg
Keywords: chocolate cake, zucchini cake, dessert, baking, vegetarian
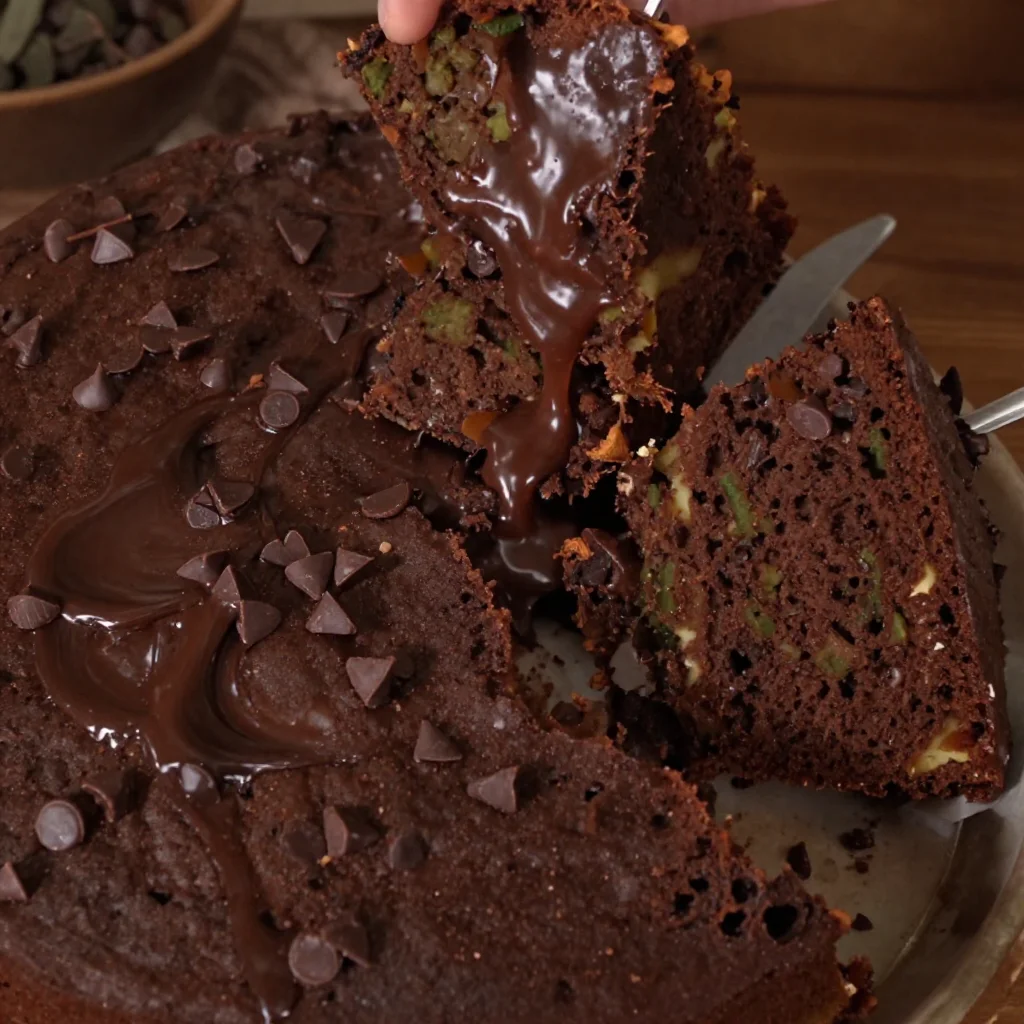
Decadent Chocolate Zucchini Cake: Beginner-Friendly Recipe
Death by Chocolate Zucchini Cake: A Slice of Heaven
Welcome to my kitchen! Today, we’re diving into a dessert that’s going to be the ultimate treat for any chocolate lover out there: Death by Chocolate Zucchini Cake! Before you raise an eyebrow at the idea of zucchini sneaking its way into a chocolate cake, let me assure you — this cake is going to be your new obsession. It’s moist, rich, and just the right amount of chocolatey. And the best part? You won’t even notice there’s zucchini in it!
I remember the first time I made this delectable cake. It was a rainy Saturday afternoon, and I was feeling a bit adventurous. We had a few zucchinis from our garden, and I thought, why not combine them with my all-time favorite ingredient—chocolate? As the cake baked, the kitchen filled with the most intoxicating aroma, and I couldn’t wait to try it. When I finally took that first bite, I was transported to a cocoa wonderland. The zucchini lent a subtle sweetness and moistness, making it a cake like no other. Ever since then, this recipe has been a household staple, always bringing smiles (and forks) to the table.
Now, I’m excited to share it with you! So, let’s grab our aprons and get ready to make this incredible Death by Chocolate Zucchini Cake!
Personal Story
Growing up, my grandmother had a way of making any dish feel special. Her secret? A dash of love and a sprinkle of nostalgia, which worked wonders in the kitchen. One summer, I remember visiting her, and herbs were blooming like crazy in her garden. As we walked through the rows of tomatoes and cucumbers, she suddenly exclaimed, “Olivia, let’s make something chocolatey!” And there it was—the first time I tasted chocolate zucchini cake.
We enthusiastically grated zucchinis and measured out cocoa powder, sharing stories and laughing as the cake came together. I can still hear her voice, urging me to always embrace unconventional ingredients — they can bring a delightful surprise. That day, I learned that magic isn’t just in the recipe, it’s in the love and memories that turn a simple cake into something unforgettable. Since then, this cake has become my go-to for gatherings, instantly creating joy for everyone around the table.
Ingredients
Here’s what you’ll need to bring this chocolatey delight to life:
-
Zucchini (2 cups, grated)
Fresh zucchini adds moisture and a subtle sweetness without being overpowering. If you don’t have zucchini, you could substitute finely grated carrots for a similar texture and flavor! -
All-purpose flour (1 ¾ cups)
This is the backbone of the cake, providing structure. If you’re looking for a gluten-free option, almond flour works remarkably well, but be mindful of the cake’s texture. -
Unsweetened cocoa powder (½ cup)
Use high-quality cocoa powder for the richest chocolate flavor. If you’re feeling adventurous, try dark cocoa powder for an intense taste. -
Granulated sugar (1 cup)
This sweetens the deal! If you prefer a less sugary cake, you can swap half of the sugar for a natural sweetener like coconut sugar or honey (just adjust the liquids accordingly). -
Brown sugar (½ cup)
For a hint of molasses flavor and added moisture. You could also use maple sugar here for a unique twist! -
Baking soda (1 tsp)
Essential for leavening! Make sure it’s fresh for a good rise. -
Baking powder (½ tsp)
This works alongside the baking soda to help your cake rise beautifully. -
Salt (½ tsp)
A pinch of salt enhances the flavors and balances the sweetness. -
Eggs (2 large)
These bring everything together and add richness. For an egg-free option, try using two flax eggs (2 tablespoons of flaxseed meal mixed with 6 tablespoons of water) instead! -
Vegetable oil (½ cup)
The oil keeps the cake moist. You can use melted coconut oil or unsweetened applesauce for a healthier option. -
Vanilla extract (1 tsp)
Pure vanilla extract adds warmth and depth to the flavor. Always opt for pure over artificial! -
Chocolate chips (1 cup, optional)
Because who can resist more chocolate? Use semisweet or dark chocolate chips for an extra gooey texture.
Step-by-Step Instructions
-
Preheat Your Oven
Start by preheating your oven to 350°F (175°C). This step is crucial! A hot oven ensures that your cake rises properly and sets well. -
Prepare the Pan
Grease a 9×13 inch baking pan with non-stick spray or line it with parchment paper. This will prevent your cake from sticking and makes for easier cleanup. Plus, who doesn’t love a clean kitchen? -
Grate the Zucchini
Grate your fresh zucchini using a box grater or a food processor. You don’t need to peel it – the skin adds a lovely color and nutrients! Once grated, squeeze out any excess moisture using a clean kitchen towel. This prevents your cake from being too wet. -
Mix Dry Ingredients
In a large mixing bowl, whisk together the flour, cocoa powder, baking soda, baking powder, and salt. This helps evenly distribute the leavening agents and ensures your cake rises evenly. -
Combine Wet Ingredients
In another bowl, combine the granulated sugar, brown sugar, vegetable oil, eggs, and vanilla extract. Whisk well until everything is fully incorporated and the mixture is slightly frothy. This is where the magic begins, as the sugars and fats combine to create a rich base. -
Combine Wet and Dry Mixtures
Gently fold your wet ingredients into the dry ingredients using a spatula. Be careful not to over-mix! This can lead to tough cake. You want to combine them just until the flour is no longer visible. -
Add Zucchini and Chocolate Chips
Now, fold in the grated zucchini and chocolate chips! This is the exciting part — you can already start to envision how decadent this cake is going to be. Don’t be shy; mix until just combined. -
Pour into the Pan
Pour the batter into the prepared baking pan and use a spatula to smooth the top for an even bake. Don’t worry if the batter looks a little thick; that’s perfectly normal! -
Bake
Place in the oven and bake for 30-35 minutes, or until a toothpick inserted in the center comes out clean. Your kitchen will smell heavenly — a definite winner in the aroma department! -
Cool the Cake
Once baked, remove the cake from the oven and let it cool in the pan for about 15 minutes. Then, transfer the cake to a wire rack to cool completely. Trust me; letting the cake cool will make for a better texture! -
Frost if Desired
If you like (and why wouldn’t you?), frost your cooled cake with a chocolate ganache or your favorite chocolate frosting. For an extra touch, top it with additional chocolate chips or chopped nuts!
Serving Suggestions
When it comes to serving this decadent Death by Chocolate Zucchini Cake, presentation is key! Slice into generous pieces and dust with powdered sugar or drizzle with a rich chocolate ganache. For a delightful contrast, serve it alongside a scoop of vanilla bean ice cream, or fresh berries to add a burst of color and freshness. Your guests will swoon with delight!
Recipe Variations
-
Nutty Addition: Fold in some chopped walnuts or pecans for a crunchy texture that complements the softness of the cake.
-
Spiced Up: Add a teaspoon of cinnamon or espresso powder to enhance the chocolate flavor and give the cake a warm undertone.
-
Vegan Twist: Substitute eggs with flax eggs and use plant-based milk in place of regular milk in your frosting for a vegan-friendly version.
-
Fruit Fusion: Experiment by adding ½ cup of mashed bananas or applesauce in place of part of the oil for a fruity sweetness.
Chef’s Notes
This recipe was born from a beautiful combination of heritage and creativity in the kitchen. I love how quick it is to prepare — perfect for those evenings when you need to whip up something sweet but satisfying. Over the years, I’ve passed on this recipe to friends and family, each adding their twists. I remember my sister once added a hint of peppermint extract for a special holiday treat, and it was a game changer! Ultimately, I find the most joy is in those sweet moments shared around the table — with laughter, stories, and, of course, a bit of cake.
FAQs and Troubleshooting
Q: What if my cake comes out too dry?
A: Overbaking can lead to a dry cake. Make sure to check the cake a few minutes before the recommended time. Insert a toothpick, and if it comes out with a few moist crumbs, it’s done!
Q: Can I make this cake ahead of time?
A: Absolutely! This cake actually tastes better the next day as the flavors meld. Just keep it covered at room temperature.
Q: How do I store leftovers?
A: Store any leftover cake in an airtight container at room temperature for up to three days. It will stay moist and delicious!
Q: My cake didn’t rise, what happened?
A: This could be due to expired baking powder or baking soda. Always check the freshness of your leavening agents before baking to ensure the perfect rise.
Nutritional Info
While I typically steer away from counting calories, for those of you keeping track, a slice typically contains around 250 calories, depending on the ingredients used and portion sizes. It’s a comforting treat, so enjoy every bite!
So, are you ready to bring this delightful Death by Chocolate Zucchini Cake into your kitchen? I can’t wait for you to experience the magic of this recipe! Remember, cooking is all about having fun, being adventurous, and making wonderful memories. Happy baking!
Print
Death by Chocolate Zucchini Cake
- Total Time: 50 minutes
- Yield: 12 servings 1x
- Diet: Vegetarian
Description
A rich and moist chocolate cake that cleverly incorporates zucchini for added sweetness and moisture, perfect for chocolate lovers.
Ingredients
- 2 cups Zucchini, grated
- 1 ¾ cups All-purpose flour
- ½ cup Unsweetened cocoa powder
- 1 cup Granulated sugar
- ½ cup Brown sugar
- 1 tsp Baking soda
- ½ tsp Baking powder
- ½ tsp Salt
- 2 large Eggs
- ½ cup Vegetable oil
- 1 tsp Vanilla extract
- 1 cup Chocolate chips (optional)
Instructions
- Preheat your oven to 350°F (175°C).
- Prepare a 9×13 inch baking pan by greasing it or lining it with parchment paper.
- Grate the fresh zucchini and squeeze out excess moisture.
- Mix the dry ingredients in a large bowl: flour, cocoa powder, baking soda, baking powder, and salt.
- Combine the wet ingredients in another bowl: granulated sugar, brown sugar, vegetable oil, eggs, and vanilla extract.
- Fold the wet mixture into the dry mixture until just combined.
- Add the grated zucchini and chocolate chips to the batter and mix until incorporated.
- Pour the batter into the prepared baking pan, smoothing the top.
- Bake for 30-35 minutes or until a toothpick comes out clean.
- Cool the cake in the pan for 15 minutes, then transfer to a wire rack to cool completely.
- Frost with chocolate ganache or frosting if desired.
Notes
For a healthier option, substitute vegetable oil with applesauce or melted coconut oil. You can also experiment by adding nuts or spices to the batter.
- Prep Time: 15 minutes
- Cook Time: 35 minutes
- Category: Dessert
- Method: Baking
- Cuisine: American
Nutrition
- Serving Size: 1 slice
- Calories: 250
- Sugar: 20g
- Sodium: 200mg
- Fat: 10g
- Saturated Fat: 2g
- Unsaturated Fat: 8g
- Trans Fat: 0g
- Carbohydrates: 35g
- Fiber: 2g
- Protein: 4g
- Cholesterol: 50mg
Keywords: chocolate cake, zucchini cake, dessert, baking, chocolate lover
Minute Red Velvet Cupcakes for Busy Weeknights
The Ultimate Red Velvet Cupcakes: A Sweet Journey You’ll Love
Welcome to my cozy kitchen! Today, we’re diving into the world of Red Velvet Cupcakes, those scrumptious little bites that blend sophistication with pure nostalgia. Not only are these vibrant treats a feast for the eyes, but they also pack a flavor punch that will leave you craving more. Picture this: you take a bite, and the soft, moist cake melts in your mouth, perfectly complemented by the rich cream cheese frosting. Nothing says “special occasion” quite like the beautiful red hue of these cupcakes, beautifully topped and ready to impress your friends and family.
Growing up, Red Velvet was a staple at our family gatherings. My grandma made the most amazing version, and every holiday felt incomplete without her coveted cupcakes. She had a special touch with flavors and a secret ingredient that made them extra memorable—her love for baking. Being in the kitchen with her was always a delight, and I often found myself stealing spoonfuls of frosting when she wasn’t looking. Those sweet moments inspired me to create this blog and share my culinary adventures with all of you!
So, whether you’re celebrating a birthday, hosting a tea party, or just indulging yourself on a cozy evening, these cupcakes are sure to bring joy to your table. Let’s roll up our sleeves, preheat that oven, and get baking!
A Fond Memory with Red Velvet
I still remember that one summer afternoon when my grandma decided to teach me how to make her legendary Red Velvet Cupcakes. I was around ten years old, my blonde curls bouncing as I dashed in and out of the kitchen, excited yet a bit clumsy. I was on cupcake duty while she whipped up her famous cream cheese frosting. I was tasked with sifting the flour and cocoa powder—I’ll admit that a cloud of cocoa ended up decorating my face rather than the mixing bowl!
As we mixed the ingredients, my grandma shared stories of how she first learned to bake from her own mother in the south, where Red Velvet had earned its iconic status. This was about more than just baking; it was about love and tradition. Those cupcakes became our special project, a blend of sweet flavors and fun-filled moments. They not only filled our tummies but also warmed our hearts. And that, dear friends, is the true essence of cooking!
Let me take you through this delightful journey, and together we’ll create Red Velvet Cupcakes that will make you feel all the warm fuzzies.
Ingredients for Red Velvet Cupcakes
-
1 and 1/2 cups all-purpose flour
The base of these cupcakes. You can substitute with gluten-free flour if needed! -
1 cup granulated sugar
This adds sweetness and moisture. For a healthier twist, use coconut sugar. -
1 teaspoon baking soda
Helps these babies rise beautifully. Make sure it’s fresh for the best results! -
1 teaspoon baking powder
It works in tandem with baking soda for that perfect fluffy texture. -
1/2 teaspoon salt
Balances the sweetness. -
1 tablespoon cocoa powder
This gives that signature red velvet flavor. Dutch-processed cocoa works well too. -
1 cup vegetable oil
Oil keeps the cupcakes moist. You can use melted coconut oil for a more tropical twist! -
1 cup buttermilk, room temperature
Buttermilk makes these cupcakes incredibly tender. Don’t have it? Mix a cup of milk with 1 tablespoon of vinegar for a quick substitute. -
2 large eggs, room temperature
Helps bind the ingredients and create a fluffy texture. -
2 tablespoons red food coloring
This is where the magic happens! You can opt for natural food coloring, but the shade of red may vary. -
1 teaspoon vanilla extract
Adds depth to the flavor. Nothing beats the pure vanilla extract! -
1 teaspoon white vinegar
This reacts with the baking soda to help the cupcakes rise. -
Cream Cheese Frosting (for topping)
- 8 oz cream cheese, softened
- 1/2 cup unsalted butter, softened
- 4 cups powdered sugar
- 1 teaspoon vanilla extract
Step-by-Step Instructions
Step 1: Preheat Your Oven
Preheat your oven to 350°F (175°C). As the oven warms up, line a cupcake pan with paper liners. This small preparation step might seem simple, but it sets the stage for baking success!
Step 2: Combine Dry Ingredients
In a large mixing bowl, whisk together the flour, sugar, baking powder, baking soda, salt, and cocoa powder until well combined. This not only helps blend the flavors evenly but also aerates the dry ingredients for fluffier cupcakes. Trust me, this is a game-changer!
Step 3: Mix Wet Ingredients
In another bowl, combine the vegetable oil, buttermilk, eggs, red food coloring, vanilla extract, and white vinegar. Whisk them together until you have a smooth mixture. The vibrant color should stir your excitement as you see it come together. Feel free to use a hand mixer here for an extra fluffy mixture.
Step 4: Combine Both Mixtures
Gently pour the wet mixture into the dry ingredients. Use a spatula to fold the mixtures together until just combined. Be careful not to overmix—this is a light and airy cupcake we’re aiming for, not a dense brick! A few floury streaks are okay.
Step 5: Fill the Cupcake Liners
Using an ice cream scoop or a ladle, fill each cupcake liner about two-thirds full. This ensures they have room to rise without overflowing. It’s okay to get a bit messy; you’re in your kitchen, and that’s part of the fun!
Step 6: Bake!
Place the filled cupcake pan in the preheated oven and bake for about 18-20 minutes, or until a toothpick inserted into the center comes out clean. The sweet smell of red velvet wafting through your kitchen will be heavenly—try not to sneak a taste too soon!
Step 7: Cool Down
Once baked, remove the cupcakes from the oven and let them cool in the pan for about 5 minutes. Then carefully transfer them to a wire rack to cool completely. Patience is key here; you don’t want to frost warm cupcakes!
Step 8: Prepare the Cream Cheese Frosting
While the cupcakes cool, let’s whip up the frosting! In a large bowl, beat the softened cream cheese and unsalted butter until smooth. Gradually add the powdered sugar, then mix in the vanilla extract until everything is fully blended and fluffy.
Step 9: Frost the Cupcakes
Once the cupcakes have completely cooled, it’s time to frost them! Use a piping bag for a professional look, or simply spread the frosting with a knife for a rustic charm. Don’t be shy; pile on that cream cheese goodness!
Step 10: Decorate and Serve
For a little flair, sprinkle some red velvet cake crumbs or chocolate shavings on top of the frosting. Place them onto a pretty platter and watch your guests’ eyes light up!
Serving Suggestions
These Red Velvet Cupcakes are perfect for any occasion. Serve them on a beautiful dessert stand at a party, or arrange them on a rustic wooden platter for that homey feel. You could also pair them with a scoop of vanilla ice cream for an indulgent dessert that will leave your taste buds dancing!
Recipe Variations
- Mini Red Velvet Cupcakes: Use a mini cupcake pan for bite-sized versions of these treats!
- Red Velvet Whoopie Pies: Sandwich cream cheese frosting between two red velvet cookies for a fun twist.
- Gluten-Free Option: Substitute all-purpose flour with a gluten-free blend to enjoy these cupcakes without the wheat.
- Alternative Frosting: Try a vanilla buttercream or chocolate ganache instead of cream cheese frosting for a different flavor profile.
- Add Nuts: Mix in chopped walnuts or pecans for an added crunch in the batter.
Chef’s Notes
These Red Velvet Cupcakes have a rich history tied to Southern traditions and celebrations. I’ve experimented with this recipe over the years, and I love how people put their unique twist on it. Once, I added a hint of orange zest, and it was surprisingly delightful! The frosting was a disaster one time (don’t ask!), but I now have perfected a no-fail cream cheese recipe to ensure a smooth frosting experience. Remember, cooking is all about fun and embracing the mess!
FAQs and Troubleshooting
Q: Why did my cupcakes sink in the middle?
A: This could happen if the oven temperature was too low or if the cupcakes were underbaked. Make sure to reach the right temperature and test with a toothpick.
Q: Can I make these cupcakes ahead of time?
A: Absolutely! You can bake them a day in advance and store them in an airtight container. Frost them when you’re ready to serve.
Q: How can I store leftover cupcakes?
A: Keep them in an airtight container in the fridge for up to 3 days. You can also freeze them without frosting for up to 3 months—just thaw them in the fridge overnight when you’re ready to indulge!
Q: Can I use other types of food coloring?
A: Yes, you can experiment with different colors! Just remember that the flavor might slightly change with natural food coloring.
Nutritional Info
(Per Cupcake)
- Calories: 250
- Fat: 12g
- Carbohydrates: 35g
- Protein: 2g
I hope you enjoyed this journey into making Red Velvet Cupcakes! Whether you’re a seasoned pro or a first-time baker, these treats are sure to fill your kitchen with warmth and happiness. Remember, the most important ingredient is always love—so get in there and bake with joy! Happy baking, everyone!
Print
Ultimate Red Velvet Cupcakes
- Total Time: 40 minutes
- Yield: 12 servings 1x
- Diet: Vegetarian
Description
These Red Velvet Cupcakes are soft, moist, and topped with rich cream cheese frosting, perfect for any occasion.
Ingredients
- 1 and 1/2 cups all-purpose flour
- 1 cup granulated sugar
- 1 teaspoon baking soda
- 1 teaspoon baking powder
- 1/2 teaspoon salt
- 1 tablespoon cocoa powder
- 1 cup vegetable oil
- 1 cup buttermilk, room temperature
- 2 large eggs, room temperature
- 2 tablespoons red food coloring
- 1 teaspoon vanilla extract
- 1 teaspoon white vinegar
- 8 oz cream cheese, softened (for frosting)
- 1/2 cup unsalted butter, softened (for frosting)
- 4 cups powdered sugar (for frosting)
- 1 teaspoon vanilla extract (for frosting)
Instructions
- Preheat your oven to 350°F (175°C) and line a cupcake pan with paper liners.
- Combine the flour, sugar, baking powder, baking soda, salt, and cocoa powder in a large mixing bowl.
- Mix the vegetable oil, buttermilk, eggs, red food coloring, vanilla extract, and white vinegar in another bowl.
- Combine the wet mixture into the dry ingredients and gently fold until just combined.
- Fill each cupcake liner about two-thirds full using an ice cream scoop or ladle.
- Bake for about 18-20 minutes, or until a toothpick comes out clean.
- Cool in the pan for 5 minutes, then transfer to a wire rack to cool completely.
- Prepare the frosting by beating the cream cheese and butter until smooth, then gradually mix in the powdered sugar and vanilla extract.
- Frost the cooled cupcakes with the cream cheese frosting.
- Decorate with red velvet cake crumbs or chocolate shavings, and serve.
Notes
For a healthier twist, substitute granulated sugar with coconut sugar. You may also use a gluten-free flour blend to cater to dietary preferences.
- Prep Time: 20 minutes
- Cook Time: 20 minutes
- Category: Dessert
- Method: Baking
- Cuisine: American
Nutrition
- Serving Size: 1 cupcake
- Calories: 250
- Sugar: 20g
- Sodium: 200mg
- Fat: 12g
- Saturated Fat: 6g
- Unsaturated Fat: 4g
- Trans Fat: 0g
- Carbohydrates: 35g
- Fiber: 1g
- Protein: 2g
- Cholesterol: 30mg
Keywords: Red Velvet, Cupcakes, Desserts, Baking, Cream Cheese Frosting

Baked Yogurt
The Creamy Delight of Baked Yogurt: A Recipe to Warm Your Heart
Welcome to my cozy little corner of the culinary universe! Today, I’m excited to share a recipe that’s near and dear to my heart: Baked Yogurt. If you’ve never tried this delightful dish before, you’re in for a treat! Imagine a creamy, rich base made from yogurt, gently baked until it transforms into a luscious custard-like texture, all while maintaining that tangy goodness. Perfect as a light dessert or a comforting snack, this dish wraps you in warmth and nostalgia, just like your favorite blanket on a chilly day.
Growing up in a home filled with the aromas of baking and the chatter of family, I often found myself in the kitchen, helping my mom whip up simple yet satisfying dishes. One of my fondest memories revolves around the first time I tasted baked yogurt — it was creamy, airy, and oh-so-delicious! Mom would surprise us by transforming plain yogurt into something magical with just a few ingredients and a little love. This dish represents everything I adore about cooking: the ability to take humble ingredients and transform them into something extraordinary that brings people together.
So, whether you’re looking for a new dessert to impress or simply want to indulge your creamy yogurt cravings, let’s dive into this delicious recipe together!
The Memories Behind Baked Yogurt
I still remember the warm glow of our kitchen on those lazy Sunday afternoons when the scent of baked yogurt wafted through the air. It was my mom’s go-to when we had family gatherings or when she wanted to treat us after a long week. She’d line up small ramekins on the kitchen counter and fill them with a luscious blend of yogurt, sugar, and vanilla extract, sending us running to the oven, eagerly anticipating the sweet satisfaction to come.
After the magical transformation in the oven, she would top each serving with a sprinkle of cinnamon and a handful of fresh berries, and we would gather around the table, giggles echoing as we dug into our tiny bowls of joy. It wasn’t just the taste that made it special; it was the feeling of togetherness that accompanied each scoop, the joy of sharing homemade goodness, and the warmth of family bonds strengthened over sweet bites.
Now, I’m thrilled to bring this beloved recipe to your kitchen, filled with love and a pinch of nostalgia.
Ingredients
Gathering ingredients is half the fun! Here’s what you’ll need to whip up this creamy baked yogurt:
-
2 cups plain yogurt
Choose a good quality, thick yogurt for the best results. Greek yogurt works beautifully here too! If you’re dairy-free, opt for coconut yogurt or almond yogurt, but just ensure it’s thick enough to hold its shape. -
1/2 cup sugar
Adjust the sweetness to your taste! You can use coconut sugar, honey, or maple syrup for a more natural option. Just keep in mind the flavor change. -
1 teaspoon vanilla extract
This adds a lovely depth of flavor. Feel free to use vanilla bean paste for an even richer experience or substitute with almond extract for a different twist. -
3 large eggs
Eggs help bind everything together and provide that custard-like consistency. For a vegan option, try using flax eggs (1 tablespoon ground flaxseed mixed with 2.5 tablespoons water per egg). -
Pinch of salt
A little hint of salt balances the sweetness and enhances the overall flavor. Don’t skip on this! -
Toppings (optional)
Fresh fruits, nuts, honey, or even a drizzle of caramel sauce can take this dish to the next level! Customize your toppings to suit your mood or what you have on hand.
Step-by-Step Instructions
Now that you have all your ingredients, let’s get cooking! Here’s how to make the most delightful baked yogurt:
Step 1: Preheat the Oven
Preheat your oven to 350°F (175°C). This is key! The goal is to slowly bake the yogurt mixture to achieve that creamy texture without curdling. Make sure it’s nice and hot before you pop in your dish.
Step 2: Prepare Your Ramekins
Lightly grease your ramekins or a baking dish with a touch of butter or non-stick spray. This ensures your baked yogurt won’t stick, making serving a breeze. If you’re feeling fancy, you could even sprinkle a bit of sugar inside to create a lovely caramelized crust.
Step 3: Whisk the Yogurt Mixture
In a mixing bowl, combine the yogurt, sugar, and vanilla extract. Use a whisk to blend them until smooth and creamy. Here’s where the fun begins! Feel free to sneak a taste; it’s delicious!
Step 4: Add the Eggs
Crack the eggs into the bowl, one at a time, whisking gently until fully combined. Don’t overmix — just enough to incorporate them. This will help achieve that dreamy custard effect!
Step 5: A Dash of Salt
Don’t forget the pinch of salt! It’s a tiny addition but makes a world of difference. Just a little sprinkle will help heighten the flavors and tie everything together.
Step 6: Pour and Bake
Now, carefully pour the mixture into your prepared ramekins or baking dish. If you’re using multiple ramekins, place them in a large baking pan filled with about an inch of hot water. This water bath ensures even baking and prevents the edges from getting too brown.
Bake for about 30-35 minutes or until the edges are set but the center gently jiggles. Keep an eye on them — every oven is a little different!
Step 7: Cool Down
Once they’re done, remove them from the oven and the water bath. Allow them to cool for about 10-15 minutes at room temperature. Then, transfer them to the refrigerator to chill for at least an hour. The chilling time helps achieve that perfect creamy texture we’re looking for.
Step 8: Serve it Up
When you’re ready to serve, it’s time to get creative! Top each portion with your favorite fruits, a sprinkle of cinnamon, or a drizzle of honey. The contrast of the cool yogurt with warm toppings is absolute bliss!
Serving Suggestions
Baked yogurt can be served warm or cold, depending on your preference. A beautiful way to present it is in individual ramekins, garnished with a vibrant medley of berries, a sprinkle of chopped nuts, or a drizzle of honey or caramel sauce. Remember, food is not just about taste — it’s also about aesthetics!
Recipe Variations
Looking to switch things up? Here are a few delicious variations to consider:
-
Scented Spices: Add a pinch of cardamom or nutmeg to the yogurt mixture for an aromatic twist.
-
Citrus Zest: Infuse some zest from lemons, limes, or oranges into the mixture for a refreshing zing.
-
Chocolate Delight: Fold in a few tablespoons of cocoa powder for a chocolate version that’s absolute heaven!
-
Nutty Crunch: Incorporate finely chopped nuts into the mixture before baking, creating added texture.
-
Fruit Fusion: Swirl in fresh or frozen fruit puree (like raspberry or mango) into the yogurt before baking for a fruity kick!
Chef’s Notes
I must confess, this baked yogurt has evolved a bit since my early kitchen adventures! Initially, I relied heavily on my mom’s recipe, but as I grew comfortable with different flavors, I began experimenting. I vividly remember one instance where I reached into the pantry and added a scoop of peanut butter to the yogurt mixture — absolute flavor explosion!
It’s these delightful kitchen experiments that make cooking so rewarding. Don’t be afraid to play around with flavors and have fun in your kitchen!
FAQs and Troubleshooting
Q1: My baked yogurt cracked. What went wrong?
Cracking generally happens if the oven temperature is too high. Ensuring a gentle baking environment using a water bath can help prevent this.
Q2: Why is my yogurt watery?
You may have used a yogurt with too much liquid. Opt for a thicker yogurt or strain your yogurt for a bit before using it.
Q3: How can I sweeten it without sugar?
You can easily substitute with honey, maple syrup, or agave syrup. Just adjust the quantities to your taste as they might require different measurements than granulated sugar.
Q4: Can I make it ahead of time?
Absolutely! Baked yogurt can be made a day in advance. Just keep it covered in the refrigerator until you’re ready to serve.
Nutritional Info (per serving)
- Calories: Approximately 150
- Protein: 8g
- Fat: 6g
- Carbohydrates: 20g
- Sugars: 12g
- Fiber: 1g
So there you have it! A simple, comforting baked yogurt recipe that’s sure to fill your home with warmth and love. Cooking should be an adventure, and I hope this recipe ignites your passion for creating cozy, flavorful dishes! Happy cooking, and remember: every great recipe starts with a pinch of love!
Print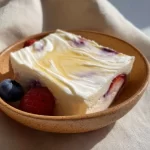
Baked Yogurt
- Total Time: 50 minutes
- Yield: 4 servings 1x
- Diet: Vegetarian
Description
A creamy and delightful baked yogurt recipe that transforms plain yogurt into a luscious custard-like dessert.
Ingredients
- 2 cups plain yogurt
- 1/2 cup sugar
- 1 teaspoon vanilla extract
- 3 large eggs
- Pinch of salt
- Toppings (optional): Fresh fruits, nuts, honey, or caramel sauce
Instructions
- Preheat your oven to 350°F (175°C).
- Prepare your ramekins by greasing them lightly.
- Whisk the yogurt, sugar, and vanilla extract until smooth.
- Add the eggs one at a time, whisking gently.
- Include a pinch of salt.
- Pour the mixture into prepared ramekins and place in a water bath.
- Bake for about 30-35 minutes until set but jiggly in the center.
- Cool for 10-15 minutes at room temperature, then chill in the refrigerator for at least an hour.
- Serve topped with your favorite additions.
Notes
You can make this ahead of time and store it in the refrigerator until ready to serve. Experiment with various toppings for added flavor.
- Prep Time: 15 minutes
- Cook Time: 35 minutes
- Category: Dessert
- Method: Baking
- Cuisine: Global
Nutrition
- Serving Size: 1 serving
- Calories: 150
- Sugar: 12g
- Sodium: 50mg
- Fat: 6g
- Saturated Fat: 3g
- Unsaturated Fat: 3g
- Trans Fat: 0g
- Carbohydrates: 20g
- Fiber: 1g
- Protein: 8g
- Cholesterol: 185mg
Keywords: baked yogurt, dessert, creamy dessert, yogurt recipes, comfort food


