Raspberry Chocolate Brownies: Gooey, 30-Minute Bowl Recipe
Raspberry Chocolate Brownies: A Match Made in Heaven
Welcome, fellow foodies! Today, we’re diving into the delicious world of desserts with a recipe that is truly special—Raspberry Chocolate Brownies! Picture this: a rich, fudgy brownie infused with dark chocolate and swirled with tart, juicy raspberries. It’s a flavor explosion that’s not just a feast for the taste buds but also for the eyes! Honestly, these brownies are the perfect dessert for any occasion, whether you’re celebrating a birthday, indulging after dinner, or just treating yourself on a cozy weekend.
Raspberry and chocolate have always been a perfect pairing in my kitchen. There’s something magical about the sweetness of chocolate blending so beautifully with the tanginess of fresh raspberries. They create a symphony of flavors that takes your palate on a delightful journey. If you can relate to the joy of biting into a warm brownie and discovering the sweet burst of raspberry flavor, you’re going to love this recipe.
You’ll find that this brownie recipe invites creativity and personal touch. Whether you’re a baking newbie or a seasoned pro, whipping up these brownies doesn’t require fancy skills—just some basic ingredients, a bit of love, and a pinch of excitement! So grab your apron, and let’s bring some joy to your kitchen with these luscious Raspberry Chocolate Brownies!
A Sweet Trip Down Memory Lane
I can still remember the first time I made brownies on my own. I was about 12 years old and eager to impress my family with my newfound culinary skills. The kitchen smelled like heaven that day, with chocolate melting in the microwave and the warmth of cookies on the countertop. My mom had just come home with a container of fresh raspberries, and I thought, "Why not?"
I chopped those little gems up and folded them into the brownie batter, thinking that it would be a delightful twist to the classic recipe. I remember the joy on my family’s faces when they tried my creation. Those brownies were a hit! We shared them with neighbors, friends, and even took a batch to a potluck. Every crumb vanished, leaving behind glowing compliments that fueled my passion for baking.
Fast forward to today, and I still find that same magic whenever I make Raspberry Chocolate Brownies. This recipe embodies nostalgia and joy, and I can’t wait for you to create your unique memories in the kitchen!
Ingredients You’ll Need
-
Dark Chocolate (60-70% cocoa): The heart of our brownies! Dark chocolate brings a deep, rich flavor. If you prefer a sweeter taste, feel free to use semi-sweet chocolate or even milk chocolate.
-
Unsalted Butter: Adds moisture and richness. You can substitute with coconut oil or vegetable oil for a dairy-free option.
-
Granulated Sugar: Sweetens the brownies! Brown sugar can be used for a hint of caramel flavor, or coconut sugar for a healthier twist.
-
Large Eggs: Essential for binding the ingredients together. If you need a vegan option, use flaxseed or chia eggs (1 tablespoon ground flaxseed or chia mixed with 3 tablespoons of water per egg).
-
All-Purpose Flour: This gives the brownies structure. Gluten-free flour blends work well, too, for those avoiding gluten.
-
Fresh Raspberries: The star of the show! Use frozen raspberries if fresh ones aren’t available, just be sure to adjust your baking time as they may introduce extra moisture.
-
Vanilla Extract: A hint of vanilla enhances the chocolate flavor. You can substitute with almond extract for a different twist.
-
Salt: Just a pinch enhances all the flavors and balances the sweetness.
Step-by-Step Instructions
Step 1: Melt the Chocolate and Butter
Begin by preheating your oven to 350°F (175°C). Grab a medium saucepan and add the chopped dark chocolate and unsalted butter. Place it over low heat, stirring gently until melted and smooth. This can also be done using a microwave—just heat in short bursts of 20 seconds, stirring in between.
Chef Tip: Don’t overheat the chocolate; it’ll become grainy. Aim for a glossy consistency!
Step 2: Mix the Sugar and Eggs
In a large mixing bowl, whisk together the granulated sugar and eggs. You want to incorporate air into the mixture for a lighter texture. Keep whisking until it’s pale and fluffy (about 2-3 minutes).
Step 3: Combine Chocolate and Sugar Mix
Once your chocolate and butter mix is smooth, pour it into the bowl with your sugar and egg mixture. Stir gently until combined, but be careful not to over-mix!
Step 4: Add Dry Ingredients
In a separate bowl, combine all-purpose flour and salt. Gradually add this dry mix into your wet ingredients. Fold gently until you see no more flour streaks. Over-mixing can lead to tough brownies, and we want them to be ultra-fudgy and soft!
Step 5: Fold in the Raspberries
Now for the fun part! Gently fold in the fresh raspberries. If you’re using frozen raspberries, add them in straight from the freezer. This will help prevent them from breaking down too much in the batter.
Chef Hack: Reserve a few raspberries to place on top for that gorgeous, bakery-style look!
Step 6: Pour into the Baking Pan
Line an 8×8 inch baking pan with parchment paper for easy removal, and pour the brownie batter into the pan. Level it out with a spatula and sprinkle those reserved raspberries on top.
Step 7: Bake to Perfection
Pop the brownies into the preheated oven and bake for about 25-30 minutes. They should look set on the edges but still slightly gooey in the middle. You can check for doneness by inserting a toothpick—it should come out with a few moist crumbs.
Step 8: Cool and Serve
Once they’re done, remove the brownies from the oven and let them cool in the pan for about 15 minutes. Then, lift them out by the parchment paper and cool completely on a wire rack.
Serving Suggestion: Cut into squares and dust with powdered sugar for an elegant presentation. Serve them warm with a scoop of vanilla ice cream or a dollop of whipped cream for a truly decadent treat!
Recipe Variations
- Nutty Surprise: Add a half-cup of chopped walnuts or almonds for a delightful crunch.
- Minty Fresh: Incorporate a few drops of peppermint extract to give an exciting twist when serving during the holidays!
- Spicy Kick: Add a pinch of cayenne pepper or chili powder to the batter for a surprising heat that pairs beautifully with chocolate.
- Cream Cheese Swirl: For a tangy twist, prepare a simple cream cheese mixture and swirl it into the batter before baking.
- Double Berry Delight: Toss in some chopped strawberries along with the raspberries for a vibrant berry mix!
Chef’s Notes
These Raspberry Chocolate Brownies have come a long way since my early baking days. Every time I make them, I’m reminded of my family’s smiles and that sense of accomplishment that comes from feeding loved ones. I’ve experimented over the years with different ingredients, such as switching out the dark chocolate for blondie bases or exploring seasonal fruit varieties.
Whenever I have extra brownie batter, I pour it into muffin tins, creating brownie bites that bake up perfectly! They’re a wonderful solution for when you can’t decide between brownies or cake.
FAQs and Troubleshooting
Q1: Why are my brownies too cakey?
To achieve that fudgy texture, make sure not to overmix the batter, and avoid baking them for too long. They should be slightly under-baked in the center!
Q2: Can I use frozen raspberries?
Absolutely! Just be aware that they may release more moisture, so you might need to adjust the baking time slightly.
Q3: The brownies are crumbling—what went wrong?
This could be due to overbaking or not enough fat added to the recipe. Make sure you’re following the measurements precisely and keep an eye on them while baking.
Q4: How do I store leftover brownies?
Store them in an airtight container at room temperature for up to 4 days or in the fridge for a week. You can also freeze them for up to three months—just make sure they’re wrapped tightly!
Nutritional Info
(Per Brownie – approx. 1/16 of the batch)
- Calories: 180
- Protein: 3g
- Carbohydrates: 25g
- Fat: 8g
- Fiber: 2g
- Sugar: 12g
And there you have it—your guide to making delectable Raspberry Chocolate Brownies! May your baking adventures bring you joy and delicious moments shared with loved ones. Enjoy every bite, and remember, the kitchen is where love and flavors come together! Happy baking!
Print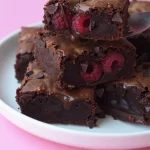
Raspberry Chocolate Brownies
- Total Time: 45 minutes
- Yield: 16 servings 1x
- Diet: Vegetarian
Description
Rich, fudgy brownies infused with dark chocolate and swirled with tart raspberries, perfect for any occasion.
Ingredients
- 8 oz Dark Chocolate (60-70% cocoa)
- 1/2 cup Unsalted Butter
- 1 cup Granulated Sugar
- 3 Large Eggs
- 1 cup All-Purpose Flour
- 1 cup Fresh Raspberries
- 1 tsp Vanilla Extract
- 1/4 tsp Salt
Instructions
- Preheat your oven to 350°F (175°C). In a medium saucepan, add the chopped dark chocolate and unsalted butter over low heat. Stir until melted and smooth.
- Whisk together the granulated sugar and eggs in a large mixing bowl until pale and fluffy.
- Add the melted chocolate and butter mixture to the sugar and egg mixture. Stir until combined.
- Combine all-purpose flour and salt in a separate bowl, then gradually add it to the wet ingredients while folding gently.
- Fold in the fresh raspberries gently.
- Pour the brownie batter into a lined 8×8 inch baking pan and level it out.
- Bake for about 25-30 minutes, or until set on the edges but still slightly gooey in the center.
- Cool for about 15 minutes, then lift out and cool completely on a wire rack.
Notes
For a nutty surprise, add chopped walnuts or almonds. You can also experiment with flavors like mint or a cream cheese swirl.
- Prep Time: 15 minutes
- Cook Time: 30 minutes
- Category: Dessert
- Method: Baking
- Cuisine: American
Nutrition
- Serving Size: 1 brownie
- Calories: 180
- Sugar: 12g
- Sodium: 100mg
- Fat: 8g
- Saturated Fat: 5g
- Unsaturated Fat: 2g
- Trans Fat: 0g
- Carbohydrates: 25g
- Fiber: 2g
- Protein: 3g
- Cholesterol: 70mg
Keywords: brownies, dessert, chocolate, raspberries, baking
Easy Chocolate Raspberry Tart
Easy Chocolate Raspberry Tart: A Delightful Indulgence
Welcome to my kitchen, friends! Today, I’m bursting with excitement to share a dessert that never fails to dazzle—my Easy Chocolate Raspberry Tart. You know, the kind of treat that can make a regular Tuesday evening feel like a special occasion. Imagine this: a buttery, flaky crust cradling a rich chocolate ganache, topped with vibrant, juicy raspberries. It’s a dessert that’s not just about flavor; it’s about creating beautiful memories in the kitchen and around the table.
When I first made this tart, it was a labor of love and a delightful way to impress my friends at a little potluck dinner. The anticipation as it cooled on the counter, the aroma of chocolate sinking into my skin, and the thrill of cutting into that shiny ganache are moments etched in my memory. I’ve served it for birthdays, anniversaries, and even casual get-togethers with a glass of red wine. It’s the kind of dessert that always brings smiles and often leads to second helpings—which, let’s be honest, is the best kind of feedback!
So, whether you’re an experienced home cook or just starting your culinary journey, this Easy Chocolate Raspberry Tart is a recipe you’ll want to try. It’s simple yet impressive, and while chocolate and raspberries may seem fancy, I promise you’ll feel like a star chef whipping it up in your cozy kitchen. Let’s dive into the delicious details!
Personal Story: The First Time I Made This Tart
I still remember the day I first attempted this chocolate raspberry tart. It was a chilly evening, and my friend Sarah invited me over for a cozy dinner, encouraging me to bring dessert. Now, I can’t resist a challenge—especially when it comes to impressing friends with something delicious!
Armed with a desire to create magic, I rummaged through my recipe collection and found this tart. Learning to make the buttery crust was a bit like a dance, and let me tell you, I had my fair share of mishaps, flour everywhere and giggles aplenty. But when I pulled the tart from the oven, the sight of that glossy ganache and the vibrant raspberries made all the chaos worthwhile. As I sliced into the tart, the decadent chocolate filling flowed as if it had a heartbeat of its own, and the first bite was pure bliss.
That evening turned into a sweet success story—everybody at the table was asking for seconds. It became a cherished recipe in my repertoire, not just for its rich flavors, but for the memories of laughter and joy that filled that dinner. I hope this tart brings the same warmth and happiness into your home.
Ingredients
Here’s what you’ll need to whip up this delicious tart:
-
1 ½ cups all-purpose flour: The base of our pastry. To make it gluten-free, substitute with a gluten-free 1:1 baking flour blend.
-
½ cup unsalted butter: Freshness is key! For a dairy-free option, try using coconut oil or a non-dairy butter substitute.
-
¼ cup sugar: Sweetens the crust perfectly. For a healthier alternative, coconut sugar does a lovely job too.
-
1 large egg yolk: Adds richness to the crust. If you need an egg-free version, try 3 tablespoons of applesauce or a flax egg (mix 1 tablespoon of flaxseed meal with 2.5 tablespoons of water).
-
1 cup heavy cream: Essential for the ganache’s silky texture. You can use full-fat coconut milk for a dairy-free option.
-
8 ounces dark chocolate (70% cacao or more): This is where the magic happens! Feel free to substitute with semi-sweet chocolate if that’s more your style.
-
1 cup fresh raspberries: They add a gorgeous pop of color and a tangy flavor. If raspberries aren’t in season, you can use frozen, just thaw and drain them beforehand!
-
Powdered sugar (for dusting): This is optional but adds a touch of elegance. You can leave it off if you prefer.
Step-by-Step Instructions
Let’s get started on this delightful tart!
-
Preheat Your Oven: First things first, preheat your oven to 350°F (175°C). This is essential for a perfectly baked crust!
-
Make the Tart Crust: In a mixing bowl, combine 1 ½ cups of all-purpose flour, ¼ cup of sugar, and a pinch of salt. Add the diced cold unsalted butter and use your fingers or a pastry cutter to blend until it resembles coarse crumbs with some pea-sized bits of butter remaining (this is what gives us that flaky texture!).
-
Add Egg Yolk and Form Dough: Mix in 1 large egg yolk and a tablespoon of ice water. Combine until the dough clings together. If it’s too crumbly, add a bit more water, just a teaspoon at a time.
-
Chill Before Rolling: Wrap the dough in plastic wrap and chill it in the refrigerator for about 30 minutes. This step is crucial for keeping the crust from shrinking while baking.
-
Roll Out the Dough: Once chilled, lightly flour your work surface and roll out the dough to about ¼ inch thick. Carefully transfer it to a 9-inch tart pan. Press it gently to fit the bottom and sides. Trim off any excess dough hanging over the edges.
-
Blind Bake the Crust: Prick the bottom of the crust with a fork (to prevent bubbling), cover it with parchment paper, and fill it with pie weights or dried beans. Bake for 20 minutes. After that, remove the weights and parchment, and bake for an additional 10 minutes until golden. Let it cool.
-
Prepare the Ganache: While the crust is cooling, heat 1 cup of heavy cream in a saucepan over medium heat until steaming—not boiling! Remove from heat, then add 8 ounces of chopped dark chocolate. Let it sit for a minute, then stir until smooth and glossy.
-
Assemble the Tart: Pour the chocolate ganache into the cooled tart crust, spreading it evenly. Allow it to set at room temperature for about 30 minutes.
-
Add the Raspberries: Once the ganache is slightly firmed up, artfully arrange 1 cup of fresh raspberries on top. You can go for a loose, casual look or a more structured design—it’s entirely up to you!
-
Chill and Serve: Place the tart in the fridge for at least 2 hours before serving. This allows the ganache to fully set and makes slicing much easier.
Serving Suggestions
When it’s time to serve, grab a sharp knife and cut the tart into wedges. You can simply arrange the slices on beautiful plates or serve it right from the tart pan for a rustic feel. A light dusting of powdered sugar on top brings a whimsical touch. For an extra indulgence, pair it with a dollop of fresh whipped cream or a scoop of vanilla ice cream.
Recipe Variations
Feeling adventurous? Here are a few variations to try:
-
Nutty Crust: Swap out ½ cup of the all-purpose flour for finely ground almonds or hazelnuts for a nutty flavor that combines beautifully with chocolate.
-
Mint Chocolate: Add a few drops of peppermint extract to the ganache for a refreshing minty twist.
-
Different Fruits: Replace the raspberries with strawberries, blueberries, or even a mix of seasonal fruits for a colorful explosion!
-
Spicy Chocolate: Add a pinch of cayenne pepper to your ganache for a subtle kick that pairs perfectly with the sweetness of the tart.
-
Extra Crunch: Fold in crushed cookies or nuts into the ganache for a delightful texture contrast.
Chef’s Notes
I absolutely adore how versatile this tart is; it feels like a blank canvas waiting for your personality to shine through! What I find particularly endearing is how each occasion brings its flavor—whether it’s the laughter of friends or a quiet moment of indulgence at home, this tart always seems to fit right in.
Over the years, I’ve experimented with countless variations, and while I’ve settled on this classic recipe as my go-to, each time I make it, I discover something new about the joy of cooking. Don’t be afraid to get a little messy and experiment in your own kitchen. Who knows? You might just come up with the next big twist on this beloved dessert!
FAQs and Troubleshooting
-
Why did my tart crust shrink?
A common issue! Make sure to chill your dough sufficiently before baking. Blind baking with weights can also help minimize shrinking. -
My ganache didn’t set! What did I do wrong?
If your ganache is too runny, it might not have cooled long enough after mixing. Be patient and let it sit until slightly thickened before pouring into the tart shell. -
Can I make this tart ahead of time?
Absolutely! You can bake the crust and prepare the ganache a day in advance. Just assemble it with the raspberries the day you plan to serve it. -
What if I don’t have a tart pan?
No worries! You can use a pie dish or even a square baking pan—your tart will still be delicious regardless of its shape!
Nutritional Info
While I always encourage baking in moderation and enjoying treats, it’s worth noting that this tart is indulgent! Each slice offers a delightful balance of rich flavors and textures. As a rough estimate (per slice based on an 8-slice tart), expect around 300-400 calories with carbs, fats, and sugars playing a significant role.
So grab your apron, gather your ingredients, and let’s make some kitchen magic together! I can’t wait for you to taste this Easy Chocolate Raspberry Tart and create your cozy moments filled with joy, laughter, and, of course, chocolate! Happy baking!
Print
Easy Chocolate Raspberry Tart
- Total Time: 45 minutes
- Yield: 8 servings 1x
- Diet: Vegetarian
Description
A delightful indulgence featuring a buttery crust, rich chocolate ganache, and vibrant raspberries.
Ingredients
- 1 ½ cups all-purpose flour
- ½ cup unsalted butter
- ¼ cup sugar
- 1 large egg yolk
- 1 cup heavy cream
- 8 ounces dark chocolate (70% cacao or more)
- 1 cup fresh raspberries
- Powdered sugar (for dusting, optional)
Instructions
- Preheat your oven to 350°F (175°C).
- Combine 1 ½ cups of all-purpose flour, ¼ cup of sugar, and a pinch of salt in a mixing bowl. Add the diced cold unsalted butter and blend until it resembles coarse crumbs.
- Mix in 1 large egg yolk and a tablespoon of ice water until the dough clings together.
- Wrap the dough in plastic wrap and chill in the refrigerator for about 30 minutes.
- Roll out the chilled dough to about ¼ inch thick and transfer it to a 9-inch tart pan.
- Prick the bottom of the crust with a fork, cover with parchment paper, and fill with pie weights. Bake for 20 minutes, then remove weights and bake for an additional 10 minutes until golden.
- Heat 1 cup of heavy cream in a saucepan until steaming, then remove from heat and add 8 ounces of chopped dark chocolate. Stir until smooth.
- Pour the chocolate ganache into the cooled tart crust and spread evenly. Allow to set for about 30 minutes.
- Arrange 1 cup of fresh raspberries on top of the ganache.
- Chill the tart in the fridge for at least 2 hours before serving.
Notes
For added flair, dust with powdered sugar before serving. This tart is versatile; feel free to experiment with different fruits or flavorings.
- Prep Time: 15 minutes
- Cook Time: 30 minutes
- Category: Dessert
- Method: Baking
- Cuisine: French
Nutrition
- Serving Size: 1 slice
- Calories: 350
- Sugar: 20g
- Sodium: 150mg
- Fat: 25g
- Saturated Fat: 15g
- Unsaturated Fat: 8g
- Trans Fat: 0g
- Carbohydrates: 30g
- Fiber: 3g
- Protein: 5g
- Cholesterol: 30mg
Keywords: chocolate tart, raspberry tart, dessert recipe, easy dessert, baking
Minute Chocolate Zucchini Cake (One-Bowl Recipe)
The Ultimate Chocolate Zucchini Cake Recipe: A Slice of Heaven!
Welcome to my kitchen! I’m so excited to share one of my absolute favorite recipes with you today: Chocolate Zucchini Cake! If you’re anything like me, you know that the best cakes are the ones that balance rich chocolatey goodness with hidden veggies. Yep, you heard that right! This luscious cake does just that while bringing joy to anyone who takes a bite. Whether you’re hosting a dinner party, celebrating a birthday, or simply treating yourself on a quiet afternoon, this cake will definitely steal the show!
Now, let’s be honest—zucchini in a cake may sound a little quirky at first. But trust me, it adds moisture and a beautiful texture to your cake without a trace of that green wonder lurking beneath the rich cocoa. There’s an added benefit—this cake is a great way to sneak some veggies into your diet without even noticing! It’s perfect for kids and adults alike. I remember the first time I made this cake; my nephews were doubtful when they saw me adding zucchini into the mix, but their faces lit up with delight once they tried a slice (or two!).
Baking this Chocolate Zucchini Cake is not only about creating a delicious dessert; it’s also a journey filled with delightful aromas, joyous moments in the kitchen, and a chance to connect with loved ones over something scrumptious. So, grab your measuring cups and let’s dive into this recipe that’s sweet, moist, and oh-so-satisfying.
A Trip Down Memory Lane
Growing up, my mom was a master of transforming simple ingredients into fantastic meals. One recipe that became a family favorite was her Chocolate Zucchini Cake. I remember the first time she made it; it was during the summer when our garden was overflowing with zucchini. Every time we had an abundance of the veggie, my mom would whip up her beloved cake, and it didn’t take long for us to fall head over heels for it.
One day, I eagerly helped her grate the zucchini, but I kept sneaking bites of the chocolate batter when she wasn’t looking (I mean, who can resist that?). The combination of the rich chocolate and the whisper of cinnamon filled our kitchen with an aroma that was nothing short of heavenly. Once it was out of the oven, I couldn’t help but devour an enormous slice, and I loved that I could justify it because, hey, there were veggies in there, right? Every bite felt like a warm hug, and to this day, that nostalgic memory inspires me to share this cake with everyone I know.
Ingredients: What You’ll Need
Here’s a breakdown of what goes into this delightful Chocolate Zucchini Cake:
-
Zucchini (2 cups, grated): The star ingredient! This veggie adds moisture and makes the cake super tender. You can use green zucchini or even yellow squash if you prefer.
-
Granulated Sugar (1 cup): Sweetness galore! You can swap in brown sugar for a deeper flavor and a bit more moisture.
-
Brown Sugar (1/2 cup): Adds a hint of caramel flavor, but feel free to use all granulated sugar if you want a lighter cake.
-
All-Purpose Flour (1 ½ cups): Standard flour gives the cake its structure. For a gluten-free option, consider using a 1:1 gluten-free flour blend.
-
Unsweetened Cocoa Powder (¾ cup): This is what gives the cake its rich chocolate flavor. Make sure to use unsweetened for the best results!
-
Baking Soda (1 tsp): Helps the cake to rise beautifully. Always check the expiration date—old baking soda can lead to flat cakes!
-
Baking Powder (1 tsp): Works in tandem with baking soda to create that perfect fluffiness.
-
Salt (½ tsp): Just a pinch to enhance all the flavors.
-
Ground Cinnamon (1 tsp): A warm touch of spice marries perfectly with chocolate. If you want to kick it up a notch, try adding a bit of chili powder for heat!
-
Eggs (2 large): Binds everything together! For an egg-free version, substitute with flax eggs (1 tablespoon flaxseed meal mixed with 2.5 tablespoons water per egg).
-
Vegetable Oil (½ cup): Keeps the cake moist and adds richness. Melted coconut oil is a fantastic alternative if you want a hint of tropical flavor.
-
Vanilla Extract (1 tsp): Use pure vanilla extract for an extra flavor boost. Consider experimenting with almond extract for a different twist!
-
Chocolate Chips (optional, ½ cup): Because who doesn’t love a little extra chocolate? Dark, semi-sweet, or even white chocolate chips work beautifully here.
Step-by-Step Instructions
Alright, here we go! Let’s make some chocolate magic together:
-
Preheat the Oven: Start by preheating your oven to 350°F (175°C). This ensures your cake bakes evenly from the moment you put it in!
-
Prepare Your Pans: Grease and flour two 9-inch round cake pans (or a 9×13 rectangular pan if you prefer). You can also line them with parchment paper for easy removal.
-
Grate Your Zucchini: Grab that gorgeous zucchini and give it a good wash. Then, using a box grater or food processor, grate it finely. You don’t even need to peel it; the skin is where the nutrients hide! Pat the grated zucchini with a paper towel to remove some excess moisture (but don’t dry it out completely!).
-
Mix Dry Ingredients: In a large mixing bowl, whisk together the all-purpose flour, cocoa powder, baking soda, baking powder, salt, and cinnamon. This helps combine everything evenly so you don’t get those pesky clumps.
-
Blend Sugars: In another bowl, beat together the granulated sugar, brown sugar, and eggs. Use a hand mixer or a whisk for about two minutes until it’s light and fluffy. This step introduces air into the mixture for a lovely rise!
-
Add the Wet Ingredients: Stir in the vegetable oil and vanilla extract into the sugar-egg mixture. Give it a good mix! The batter should start to look glossy and thick.
-
Combine Wet and Dry: Gradually mix the dry ingredients into the wet ingredients. Use a spatula to gently fold the flour mixture until you can barely see the flour. There’s no need to overmix; lumps are totally okay!
-
Add Zucchini and Chocolate Chips: Now, fold in the grated zucchini and chocolate chips (if using). The batter will be thick and beautifully speckled with green shreds and chocolate bits.
-
Pour and Bake: Divide the batter evenly between your prepared pans (or pour it all into the rectangular pan). Bake in the preheated oven for 25-30 minutes. Keep an eye on them! The cakes are done when a toothpick inserted in the center comes out clean.
-
Cool and Frost: Once baked, let the cakes cool in the pans for about 10 minutes before transferring them to wire racks to cool completely. If you want, frost them with your favorite chocolate frosting or simply dust with powdered sugar for a more rustic look.
Pro Tips:
- Always let the cake cool completely before frosting to avoid melting the frosting off!
- For an added layer of moistness, brush the layers with a simple syrup made from equal parts sugar and water while they’re still warm.
Serving Suggestions
When it comes to serving this decadent Chocolate Zucchini Cake, presentation can elevate the experience. To plate, slice generous pieces and arrange them on a beautiful cake stand or platter. Add a dollop of whipped cream or a scoop of vanilla ice cream on the side for that heavenly touch. Decorate with grated chocolate or fresh berries for an elegant finish. Your friends and family won’t be able to resist a second slice!
Recipe Variations
The beauty of this Chocolate Zucchini Cake is how easily it can adapt to your taste buds or dietary needs! Here are a few fun variations to jazz things up:
- Nutty Delight: Toss in a handful of chopped walnuts or pecans for a crunchy texture.
- Spicy Chocolate: Add a pinch of cayenne or chili powder to the batter for a surprising kick that pairs beautifully with chocolate.
- Gluten-Free Option: Substitute the all-purpose flour with almond flour or a gluten-free baking blend to make it gluten-free.
- Boozy Twist: Drizzle a bit of Baileys or coffee liqueur into the batter for a grown-up dessert!
- Fruit Fusion: Swap out some of the zucchini for grated carrots or even finely chopped apples for an exciting flavor twist.
Chef’s Notes
This Chocolate Zucchini Cake holds a special place in my heart—and my recipe box! Each time I bake it, it brings me back to sunny summer days spent in my mom’s kitchen. Over the years, I’ve played around with different flours and sugars, trying to find the perfect balance that keeps everyone begging for the recipe. I love how the humble zucchini, often dismissed, can transform a simple chocolate cake into something magical. And if you ever find yourself too busy to bake, I’ve whipped this up with just 10 minutes of prep time—so you really can indulge in that sweet chocolate craving anytime!
FAQs and Troubleshooting
-
Why is my cake dense?
If your cake turned out dense, it’s likely due to overmixing the batter. When incorporating dry ingredients, mix only until combined. Also, check your baking powder and soda expiration dates—they can lose potency over time. -
Can I use frozen zucchini?
Absolutely! Just make sure to thaw it and drain off any excess moisture. Frozen zucchini works beautifully in this recipe, especially since the texture will blend seamlessly into the cake. -
How do I store leftovers?
Store any leftover cake in an airtight container at room temperature for 2-3 days. You can also refrigerate it for up to a week. If you want to freeze it, wrap each slice tightly in plastic wrap and place it in a freezer-safe bag. -
Why is my frosting sliding off?
If your frosting slips off the cake, it might be because the cake is still warm, or it may not have cooled properly. Ensure the cake layers are completely cool before frosting them. A chilled cake also helps the frosting stay in place!
Nutritional Info
While I don’t typically dive into the numbers too much, a serving of this cake can roughly provide you with about 300 calories, depending on the frosting and portion size. It also packs in some fiber thanks to the zucchini, making it a tad more nutritious than your average dessert!
Now that you’ve got all the details, it’s time to take to your kitchen and create your very own Chocolate Zucchini Cake! I can’t wait to hear how it turns out. Happy baking, friends!
Print
The Ultimate Chocolate Zucchini Cake
- Total Time: 40 minutes
- Yield: 8 servings 1x
- Diet: Vegetarian
Description
A delightful Chocolate Zucchini Cake that combines rich chocolate flavor with hidden zucchini for a moist and tender dessert.
Ingredients
- 2 cups grated Zucchini
- 1 cup Granulated Sugar
- ½ cup Brown Sugar
- 1½ cups All-Purpose Flour
- ¾ cup Unsweetened Cocoa Powder
- 1 tsp Baking Soda
- 1 tsp Baking Powder
- ½ tsp Salt
- 1 tsp Ground Cinnamon
- 2 large Eggs
- ½ cup Vegetable Oil
- 1 tsp Vanilla Extract
- ½ cup Chocolate Chips (optional)
Instructions
- Preheat the oven to 350°F (175°C).
- Prepare your pans by greasing and flouring two 9-inch round cake pans or a 9×13 rectangular pan.
- Grate the zucchini and pat it with a paper towel to remove some excess moisture.
- Mix dry ingredients in a large mixing bowl: flour, cocoa powder, baking soda, baking powder, salt, and cinnamon.
- Blend sugars and eggs in another bowl until light and fluffy.
- Add the vegetable oil and vanilla extract to the sugar-egg mixture and mix until glossy.
- Combine the dry ingredients with the wet ingredients gently until just incorporated.
- Fold in the grated zucchini and chocolate chips if using.
- Pour the batter into the prepared pans and bake for 25-30 minutes.
- Cool the cakes in the pans for 10 minutes then transfer to wire racks to cool completely.
Notes
For an added layer of moistness, brush the cake layers with simple syrup while still warm.
- Prep Time: 10 minutes
- Cook Time: 30 minutes
- Category: Dessert
- Method: Baking
- Cuisine: American
Nutrition
- Serving Size: 1 slice
- Calories: 300
- Sugar: 25g
- Sodium: 200mg
- Fat: 10g
- Saturated Fat: 1.5g
- Unsaturated Fat: 8.5g
- Trans Fat: 0g
- Carbohydrates: 45g
- Fiber: 3g
- Protein: 5g
- Cholesterol: 50mg
Keywords: chocolate cake, zucchini cake, dessert, baking, moist cake
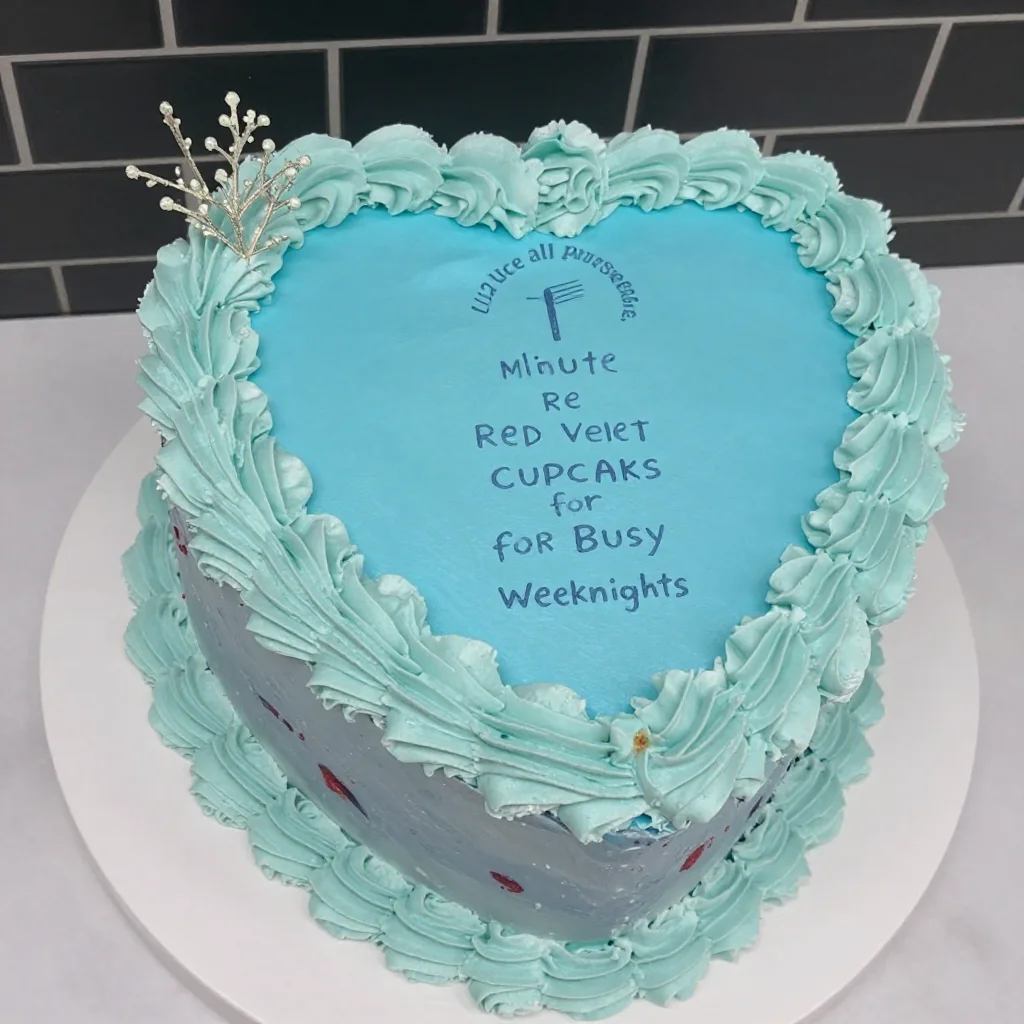
Minute Red Velvet Cupcakes for Busy Weeknights
The Ultimate Red Velvet Cupcakes: A Sweet Journey You’ll Love
Welcome to my cozy kitchen! Today, we’re diving into the world of Red Velvet Cupcakes, those scrumptious little bites that blend sophistication with pure nostalgia. Not only are these vibrant treats a feast for the eyes, but they also pack a flavor punch that will leave you craving more. Picture this: you take a bite, and the soft, moist cake melts in your mouth, perfectly complemented by the rich cream cheese frosting. Nothing says “special occasion” quite like the beautiful red hue of these cupcakes, beautifully topped and ready to impress your friends and family.
Growing up, Red Velvet was a staple at our family gatherings. My grandma made the most amazing version, and every holiday felt incomplete without her coveted cupcakes. She had a special touch with flavors and a secret ingredient that made them extra memorable—her love for baking. Being in the kitchen with her was always a delight, and I often found myself stealing spoonfuls of frosting when she wasn’t looking. Those sweet moments inspired me to create this blog and share my culinary adventures with all of you!
So, whether you’re celebrating a birthday, hosting a tea party, or just indulging yourself on a cozy evening, these cupcakes are sure to bring joy to your table. Let’s roll up our sleeves, preheat that oven, and get baking!
A Fond Memory with Red Velvet
I still remember that one summer afternoon when my grandma decided to teach me how to make her legendary Red Velvet Cupcakes. I was around ten years old, my blonde curls bouncing as I dashed in and out of the kitchen, excited yet a bit clumsy. I was on cupcake duty while she whipped up her famous cream cheese frosting. I was tasked with sifting the flour and cocoa powder—I’ll admit that a cloud of cocoa ended up decorating my face rather than the mixing bowl!
As we mixed the ingredients, my grandma shared stories of how she first learned to bake from her own mother in the south, where Red Velvet had earned its iconic status. This was about more than just baking; it was about love and tradition. Those cupcakes became our special project, a blend of sweet flavors and fun-filled moments. They not only filled our tummies but also warmed our hearts. And that, dear friends, is the true essence of cooking!
Let me take you through this delightful journey, and together we’ll create Red Velvet Cupcakes that will make you feel all the warm fuzzies.
Ingredients for Red Velvet Cupcakes
-
1 and 1/2 cups all-purpose flour
The base of these cupcakes. You can substitute with gluten-free flour if needed! -
1 cup granulated sugar
This adds sweetness and moisture. For a healthier twist, use coconut sugar. -
1 teaspoon baking soda
Helps these babies rise beautifully. Make sure it’s fresh for the best results! -
1 teaspoon baking powder
It works in tandem with baking soda for that perfect fluffy texture. -
1/2 teaspoon salt
Balances the sweetness. -
1 tablespoon cocoa powder
This gives that signature red velvet flavor. Dutch-processed cocoa works well too. -
1 cup vegetable oil
Oil keeps the cupcakes moist. You can use melted coconut oil for a more tropical twist! -
1 cup buttermilk, room temperature
Buttermilk makes these cupcakes incredibly tender. Don’t have it? Mix a cup of milk with 1 tablespoon of vinegar for a quick substitute. -
2 large eggs, room temperature
Helps bind the ingredients and create a fluffy texture. -
2 tablespoons red food coloring
This is where the magic happens! You can opt for natural food coloring, but the shade of red may vary. -
1 teaspoon vanilla extract
Adds depth to the flavor. Nothing beats the pure vanilla extract! -
1 teaspoon white vinegar
This reacts with the baking soda to help the cupcakes rise. -
Cream Cheese Frosting (for topping)
- 8 oz cream cheese, softened
- 1/2 cup unsalted butter, softened
- 4 cups powdered sugar
- 1 teaspoon vanilla extract
Step-by-Step Instructions
Step 1: Preheat Your Oven
Preheat your oven to 350°F (175°C). As the oven warms up, line a cupcake pan with paper liners. This small preparation step might seem simple, but it sets the stage for baking success!
Step 2: Combine Dry Ingredients
In a large mixing bowl, whisk together the flour, sugar, baking powder, baking soda, salt, and cocoa powder until well combined. This not only helps blend the flavors evenly but also aerates the dry ingredients for fluffier cupcakes. Trust me, this is a game-changer!
Step 3: Mix Wet Ingredients
In another bowl, combine the vegetable oil, buttermilk, eggs, red food coloring, vanilla extract, and white vinegar. Whisk them together until you have a smooth mixture. The vibrant color should stir your excitement as you see it come together. Feel free to use a hand mixer here for an extra fluffy mixture.
Step 4: Combine Both Mixtures
Gently pour the wet mixture into the dry ingredients. Use a spatula to fold the mixtures together until just combined. Be careful not to overmix—this is a light and airy cupcake we’re aiming for, not a dense brick! A few floury streaks are okay.
Step 5: Fill the Cupcake Liners
Using an ice cream scoop or a ladle, fill each cupcake liner about two-thirds full. This ensures they have room to rise without overflowing. It’s okay to get a bit messy; you’re in your kitchen, and that’s part of the fun!
Step 6: Bake!
Place the filled cupcake pan in the preheated oven and bake for about 18-20 minutes, or until a toothpick inserted into the center comes out clean. The sweet smell of red velvet wafting through your kitchen will be heavenly—try not to sneak a taste too soon!
Step 7: Cool Down
Once baked, remove the cupcakes from the oven and let them cool in the pan for about 5 minutes. Then carefully transfer them to a wire rack to cool completely. Patience is key here; you don’t want to frost warm cupcakes!
Step 8: Prepare the Cream Cheese Frosting
While the cupcakes cool, let’s whip up the frosting! In a large bowl, beat the softened cream cheese and unsalted butter until smooth. Gradually add the powdered sugar, then mix in the vanilla extract until everything is fully blended and fluffy.
Step 9: Frost the Cupcakes
Once the cupcakes have completely cooled, it’s time to frost them! Use a piping bag for a professional look, or simply spread the frosting with a knife for a rustic charm. Don’t be shy; pile on that cream cheese goodness!
Step 10: Decorate and Serve
For a little flair, sprinkle some red velvet cake crumbs or chocolate shavings on top of the frosting. Place them onto a pretty platter and watch your guests’ eyes light up!
Serving Suggestions
These Red Velvet Cupcakes are perfect for any occasion. Serve them on a beautiful dessert stand at a party, or arrange them on a rustic wooden platter for that homey feel. You could also pair them with a scoop of vanilla ice cream for an indulgent dessert that will leave your taste buds dancing!
Recipe Variations
- Mini Red Velvet Cupcakes: Use a mini cupcake pan for bite-sized versions of these treats!
- Red Velvet Whoopie Pies: Sandwich cream cheese frosting between two red velvet cookies for a fun twist.
- Gluten-Free Option: Substitute all-purpose flour with a gluten-free blend to enjoy these cupcakes without the wheat.
- Alternative Frosting: Try a vanilla buttercream or chocolate ganache instead of cream cheese frosting for a different flavor profile.
- Add Nuts: Mix in chopped walnuts or pecans for an added crunch in the batter.
Chef’s Notes
These Red Velvet Cupcakes have a rich history tied to Southern traditions and celebrations. I’ve experimented with this recipe over the years, and I love how people put their unique twist on it. Once, I added a hint of orange zest, and it was surprisingly delightful! The frosting was a disaster one time (don’t ask!), but I now have perfected a no-fail cream cheese recipe to ensure a smooth frosting experience. Remember, cooking is all about fun and embracing the mess!
FAQs and Troubleshooting
Q: Why did my cupcakes sink in the middle?
A: This could happen if the oven temperature was too low or if the cupcakes were underbaked. Make sure to reach the right temperature and test with a toothpick.
Q: Can I make these cupcakes ahead of time?
A: Absolutely! You can bake them a day in advance and store them in an airtight container. Frost them when you’re ready to serve.
Q: How can I store leftover cupcakes?
A: Keep them in an airtight container in the fridge for up to 3 days. You can also freeze them without frosting for up to 3 months—just thaw them in the fridge overnight when you’re ready to indulge!
Q: Can I use other types of food coloring?
A: Yes, you can experiment with different colors! Just remember that the flavor might slightly change with natural food coloring.
Nutritional Info
(Per Cupcake)
- Calories: 250
- Fat: 12g
- Carbohydrates: 35g
- Protein: 2g
I hope you enjoyed this journey into making Red Velvet Cupcakes! Whether you’re a seasoned pro or a first-time baker, these treats are sure to fill your kitchen with warmth and happiness. Remember, the most important ingredient is always love—so get in there and bake with joy! Happy baking, everyone!
Print
Ultimate Red Velvet Cupcakes
- Total Time: 40 minutes
- Yield: 12 servings 1x
- Diet: Vegetarian
Description
These Red Velvet Cupcakes are soft, moist, and topped with rich cream cheese frosting, perfect for any occasion.
Ingredients
- 1 and 1/2 cups all-purpose flour
- 1 cup granulated sugar
- 1 teaspoon baking soda
- 1 teaspoon baking powder
- 1/2 teaspoon salt
- 1 tablespoon cocoa powder
- 1 cup vegetable oil
- 1 cup buttermilk, room temperature
- 2 large eggs, room temperature
- 2 tablespoons red food coloring
- 1 teaspoon vanilla extract
- 1 teaspoon white vinegar
- 8 oz cream cheese, softened (for frosting)
- 1/2 cup unsalted butter, softened (for frosting)
- 4 cups powdered sugar (for frosting)
- 1 teaspoon vanilla extract (for frosting)
Instructions
- Preheat your oven to 350°F (175°C) and line a cupcake pan with paper liners.
- Combine the flour, sugar, baking powder, baking soda, salt, and cocoa powder in a large mixing bowl.
- Mix the vegetable oil, buttermilk, eggs, red food coloring, vanilla extract, and white vinegar in another bowl.
- Combine the wet mixture into the dry ingredients and gently fold until just combined.
- Fill each cupcake liner about two-thirds full using an ice cream scoop or ladle.
- Bake for about 18-20 minutes, or until a toothpick comes out clean.
- Cool in the pan for 5 minutes, then transfer to a wire rack to cool completely.
- Prepare the frosting by beating the cream cheese and butter until smooth, then gradually mix in the powdered sugar and vanilla extract.
- Frost the cooled cupcakes with the cream cheese frosting.
- Decorate with red velvet cake crumbs or chocolate shavings, and serve.
Notes
For a healthier twist, substitute granulated sugar with coconut sugar. You may also use a gluten-free flour blend to cater to dietary preferences.
- Prep Time: 20 minutes
- Cook Time: 20 minutes
- Category: Dessert
- Method: Baking
- Cuisine: American
Nutrition
- Serving Size: 1 cupcake
- Calories: 250
- Sugar: 20g
- Sodium: 200mg
- Fat: 12g
- Saturated Fat: 6g
- Unsaturated Fat: 4g
- Trans Fat: 0g
- Carbohydrates: 35g
- Fiber: 1g
- Protein: 2g
- Cholesterol: 30mg
Keywords: Red Velvet, Cupcakes, Desserts, Baking, Cream Cheese Frosting

No Fat Brownies
Delightfully Decadent No Fat Brownies: Indulge Without Guilt!
Welcome to my cozy corner of the kitchen! I’m Olivia Bennett, your friendly home cook and flavor enthusiast, here to whip up something truly delightful today—No Fat Brownies! Now, before you raise an eyebrow and let the skepticism set in, let me assure you that these brownies are nothing short of delicious. They’re rich, fudgy, and utterly satisfying, proving that you can indulge without the added fat. You can thank me later!
Introduction
Let’s be honest, brownies have an almost magical ability to transform any day into something special. Their rich aroma wafting through the kitchen, the moment you pop them into the oven, and the sheer delight on the faces of anyone who gets to enjoy a warm square of chocolate-y goodness—every moment is a celebration of life! But you might be wondering, how can we recreate that magic without the fat? Fear not, my friend! These No Fat Brownies are here to show you how.
By using applesauce and other wholesome ingredients, we’ll craft a treat that doesn’t skimp on flavor but is kinder to your waistline. You see, cooking is all about creativity and making it fun, like a dance party where flavors come together! Today, we’ll dive deep into a delightful recipe that not only caters to your cravings but also invites everyone—whether they they’re health-conscious or simply looking for a guilt-free treat—to join the brownie movement!
But before we whisk our way into the kitchen, let’s embrace the moments and memories associated with these satisfying squares.
Personal Story
Ah, brownies! They remind me of Sundays spent in my grandma’s kitchen, the heart of our family home. I remember one particular afternoon; it was stormy outside, the skies dark gray, and the perfect excuse for a bake-off! Grandma and I decided to turn the gloomy day into a cozy masterpiece.
She pulled out her old, well-loved cookbook, and I still can’t forget how her eyes lit up the moment we landed on the brownie recipe. But, there was a twist. Instead of the usual oil and butter that traditionally graced the recipe, Grandma suggested we use her prized applesauce. I was skeptical—“But Grandma, brownies need fat!”—I argued. Little did I know, she was about to open my eyes to a whole new world of flavor and texture.
As we mixed the ingredients, I couldn’t shake my doubts but decided to have faith—and oh boy, what a treat they turned out to be! Fudgy, delicious, and with a whimsical note of sweetness from the applesauce, those brownies made my giggles echo throughout the house. They taught me that food, like life, is all about experimenting, embracing new ideas, and creating beautiful memories.
And now, it’s your turn to create your own best memories in the kitchen with these delightful No Fat Brownies!
Ingredients
Let’s gather our ingredients! This recipe is all about straightforward, wholesome components. Here’s what you’ll need:
-
1 cup unsweetened applesauce
Talk about my secret weapon! It adds moisture and sweetness, making these brownies incredibly fudgy without any fat. You can substitute it with mashed bananas or pumpkin puree for a different flavor profile. -
1 cup granulated sugar
Sweetness is key! Feel free to swap this out for coconut sugar or a sugar substitute like Stevia for a lower-calorie option. Just keep in mind that it might alter the texture slightly. -
2 teaspoons vanilla extract
A sprinkle of flavor! This elevates the overall taste and provides that familiar sweetness. Try almond extract for a unique twist! -
1 cup all-purpose flour
The foundation of our brownies! For a gluten-free version, use almond flour or a gluten-free flour blend to ensure that you can still enjoy this decadent treat. -
1/2 cup unsweetened cocoa powder
This is what gives brownies that rich chocolatey goodness. You can use dark cocoa powder for a more intense flavor or even carob powder if you’re exploring new tastes! -
1 teaspoon baking powder
A little boost for those brownies! This helps them rise while keeping that delicious fudgy texture. You can also substitute baking soda, but keep an eye on the measurements! -
1/4 teaspoon salt
A pinch of salt helps balance out the sweetness. It brings out the flavors in cocoa and makes everything taste that much better! -
1/2 cup chocolate chips (optional)
Because sometimes you just need that extra chocolatey goodness! You can use dark chocolate, dairy-free chips, or even white chocolate for a fun contrast.
Step-by-Step Instructions
Let’s get to the fun part—baking! Follow these step-by-step instructions, and you’ll be on your way to brownie bliss in no time.
-
Preheat Your Oven
Preheat your oven to 350°F (175°C). This is the magic number for perfect baking. You want your brownies to rise and become that lovely fudgy texture, so don’t skip this step! -
Get Your Mixing Bowl Ready
Grab a large mixing bowl and add the applesauce and sugar. Whisk these together until well combined. This step is like creating a bond; the sugars blend beautifully with the applesauce, paving the way for deliciousness. -
Introduce Vanilla Extract
Pour in the vanilla extract and continue whisking. Feel free to dance around your kitchen while you whisk because why shouldn’t we have a little fun while baking? -
Dry Ingredients Time!
In a separate bowl, sift together the flour, cocoa powder, baking powder, and salt. Sifting is essential; it breaks up clumps and aerates your flour, helping your brownies to be lighter and fluffier. -
Combine Wet and Dry
Gradually fold the dry ingredients into the wet mixture. Use a spatula for this so that you don’t overmix—this is key for achieving that fudgy brownie goodness. Mix just until combined, and don’t worry if there are a few lumps; they’ll smooth out during baking. -
Chocolate Chips Add-Ins (optional)
If you’re going the chocoholic route, fold in your chocolate chips now. It’s not a step to skip if you want chocolatey explosions in every bite! -
Grease Your Baking Pan
Grab an 8×8 inch baking pan or a 9×9 inch for thinner brownies. Lightly grease it or line it with parchment paper for easy removal after baking. Nobody likes brownies that stick! -
Pour and Spread
Pour the batter into your greased pan and spread it evenly. Don’t worry about being perfect; rustic is the name of the game when it comes to homemade goodies! -
Bake Time
Pop the tray into your preheated oven and bake for 25-30 minutes. You can check for doneness by inserting a toothpick into the center. If it comes out with a few moist crumbs (not wet batter), they’re ready! -
Cool and Cut
Remove the brownies from the oven and allow them to cool in the pan for at least 15 minutes. Once cool, use a sharp knife to cut them into squares. It doesn’t matter if they’re perfectly even; what matters is the love baked into each piece!
Serving Suggestions
Now, how do we serve these glorious No Fat Brownies? You can plate them up on a colorful platter with a dusting of powdered sugar for a charming touch. Feeling fancy? Scoop a generous dollop of unsweetened whipped coconut cream or serve them alongside a scoop of your favorite low-calorie ice cream! Need something extra? A drizzle of homemade chocolate sauce or a handful of fresh berries on the side elevates your dessert game to new heights.
Recipe Variations
Feeling adventurous? Here are some creative twists to try with your No Fat Brownies:
- Nutty Brownies: Add a 1/2 cup of chopped nuts, like walnuts or pecans, to give an added crunch and flavor.
- Mint Fudge: Stir in peppermint extract for a refreshing minty brownie experience—perfect for a festive treat!
- Spicy Chocolate: Add a pinch of cayenne pepper or a dash of cinnamon to the batter for a cozy, spicy kick.
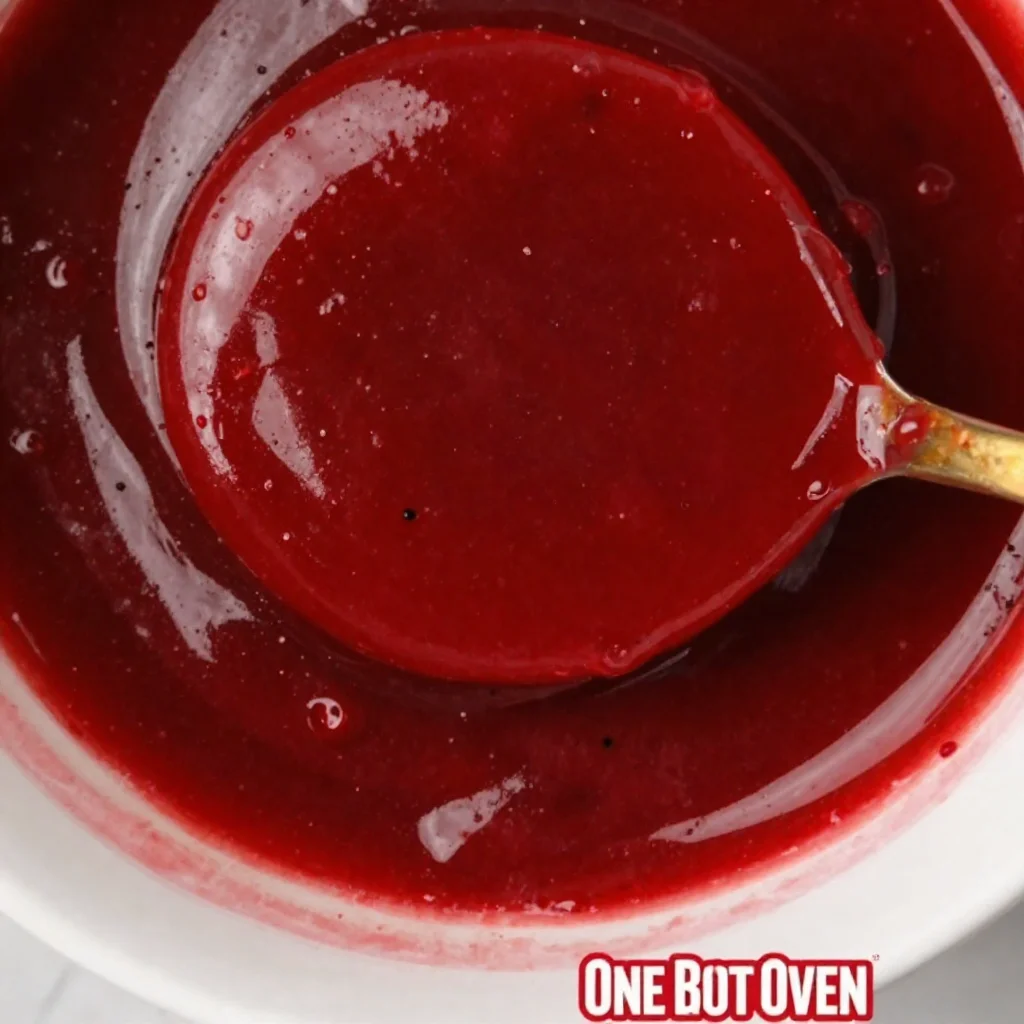
- Fruit Swirl: Drop a few spoonfuls of fruit puree, such as raspberry or cherry, on top of the brownie batter before baking, then swirl it in lightly for a marbled effect.
- Vegan Delight: Substitute the sugar with coconut palm sugar or maple syrup and choose dairy-free chocolate chips to make it completely vegan!
Chef’s Notes
These brownies have evolved over time, and I’ve made countless variations—sometimes even throwing in a little bit of leftover coffee to amplify that chocolate flavor! Each iteration brings back the sweet memories of baking with Grandma, who always encouraged me to experiment and have fun in the kitchen. I can’t tell you how many times I’ve turned an “oops” into an “oh wow!”—like the time I forgot the baking powder but added another cup of chocolate chips instead. You live, you learn, and you bake!
FAQs and Troubleshooting
1. My brownies came out too dry. What happened?
That could be due to overbaking! Check them a few minutes early next time. We love that fudgy texture, so if there are moist crumbs on the toothpick, you’re golden!
2. Why did my brownies sink in the middle?
This can happen from too much mixing after adding the flour or not enough baking time. Make sure to fold gently and keep an eye on that timer!
3. Can I use gluten-free flour?
Absolutely! Using a gluten-free flour blend works beautifully here. Just remember, some brands may absorb more liquid, so keep an eye on the batter’s consistency.
4. How do I store the brownies?
In an airtight container at room temperature, they’ll keep for about 3-4 days. Or, you can freeze them for up to three months! Just slice them into squares and wrap them individually in plastic wrap before placing them in a freezer bag.
Getting creative in the kitchen should never come with a ton of stress. Cooking binds us all together, and every batch of brownies we whip up is another chance to share some love. I hope you enjoy making these No Fat Brownies as much as I enjoyed sharing this journey with you. So grab that mixing bowl, throw on that apron, and let’s indulge in a little guilt-free decadence! Happy baking!
Print
Delightfully Decadent No Fat Brownies
- Total Time: 40 minutes
- Yield: 16 servings 1x
- Diet: Vegetarian
Description
Indulge in these rich, fudgy No Fat Brownies made with applesauce for a delicious guilt-free treat.
Ingredients
- 1 cup unsweetened applesauce
- 1 cup granulated sugar
- 2 teaspoons vanilla extract
- 1 cup all-purpose flour
- 1/2 cup unsweetened cocoa powder
- 1 teaspoon baking powder
- 1/4 teaspoon salt
- 1/2 cup chocolate chips (optional)
Instructions
- Preheat your oven to 350°F (175°C).
- Grab a large mixing bowl and add the applesauce and sugar. Whisk until well combined.
- Pour in the vanilla extract and continue whisking.
- In a separate bowl, sift together the flour, cocoa powder, baking powder, and salt.
- Gradually fold the dry ingredients into the wet mixture.
- If using, fold in the chocolate chips now.
- Grab an 8×8 inch or 9×9 inch baking pan and grease it.
- Pour the batter into your greased pan and spread it evenly.
- Pop the tray into your preheated oven and bake for 25-30 minutes.
- Remove the brownies from the oven and let them cool in the pan for at least 15 minutes before cutting into squares.
Notes
For a gluten-free version, use gluten-free flour. Experiment with adding nuts or different extracts for a personalized touch.
- Prep Time: 10 minutes
- Cook Time: 30 minutes
- Category: Dessert
- Method: Baking
- Cuisine: American
Nutrition
- Serving Size: 1 brownie
- Calories: 200
- Sugar: 15g
- Sodium: 50mg
- Fat: 1g
- Saturated Fat: 0g
- Unsaturated Fat: 1g
- Trans Fat: 0g
- Carbohydrates: 45g
- Fiber: 2g
- Protein: 2g
- Cholesterol: 0mg
Keywords: brownies, no fat brownies, healthy desserts, guilt-free treats
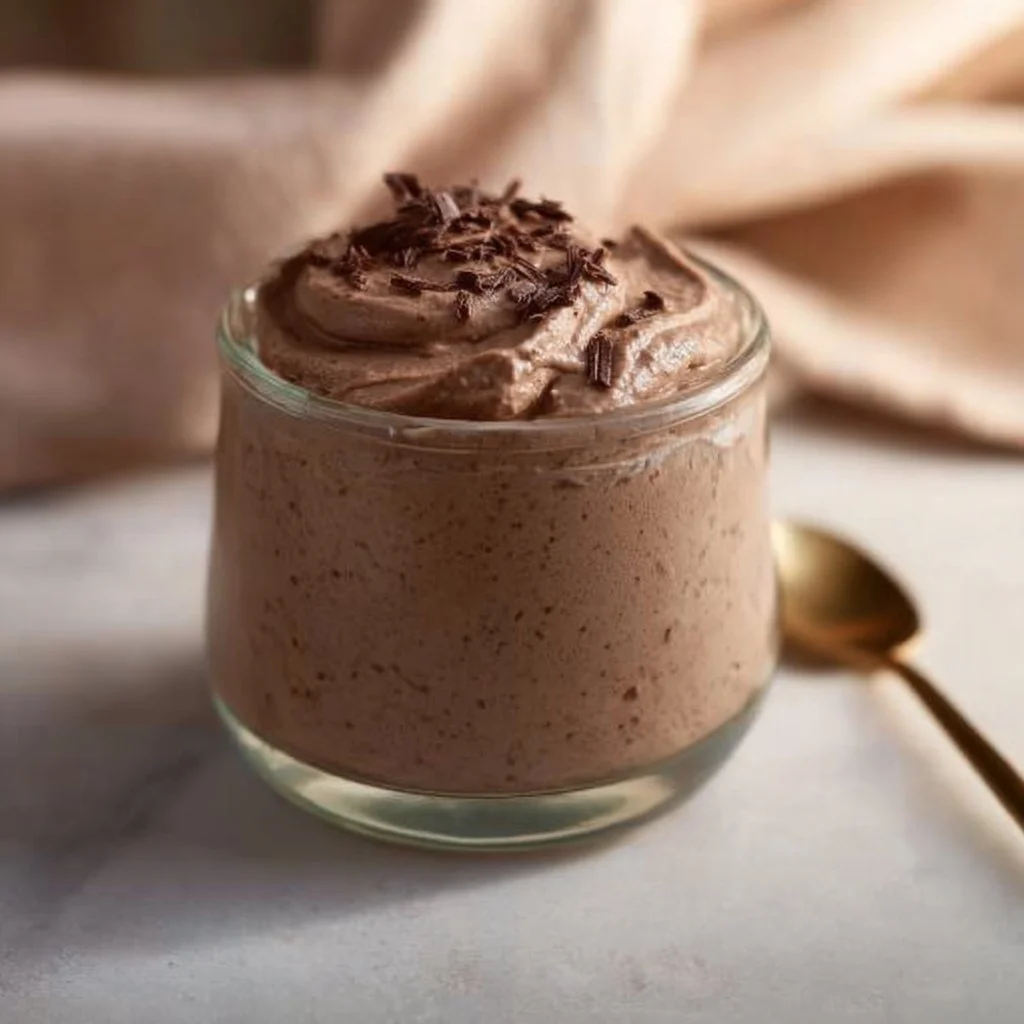
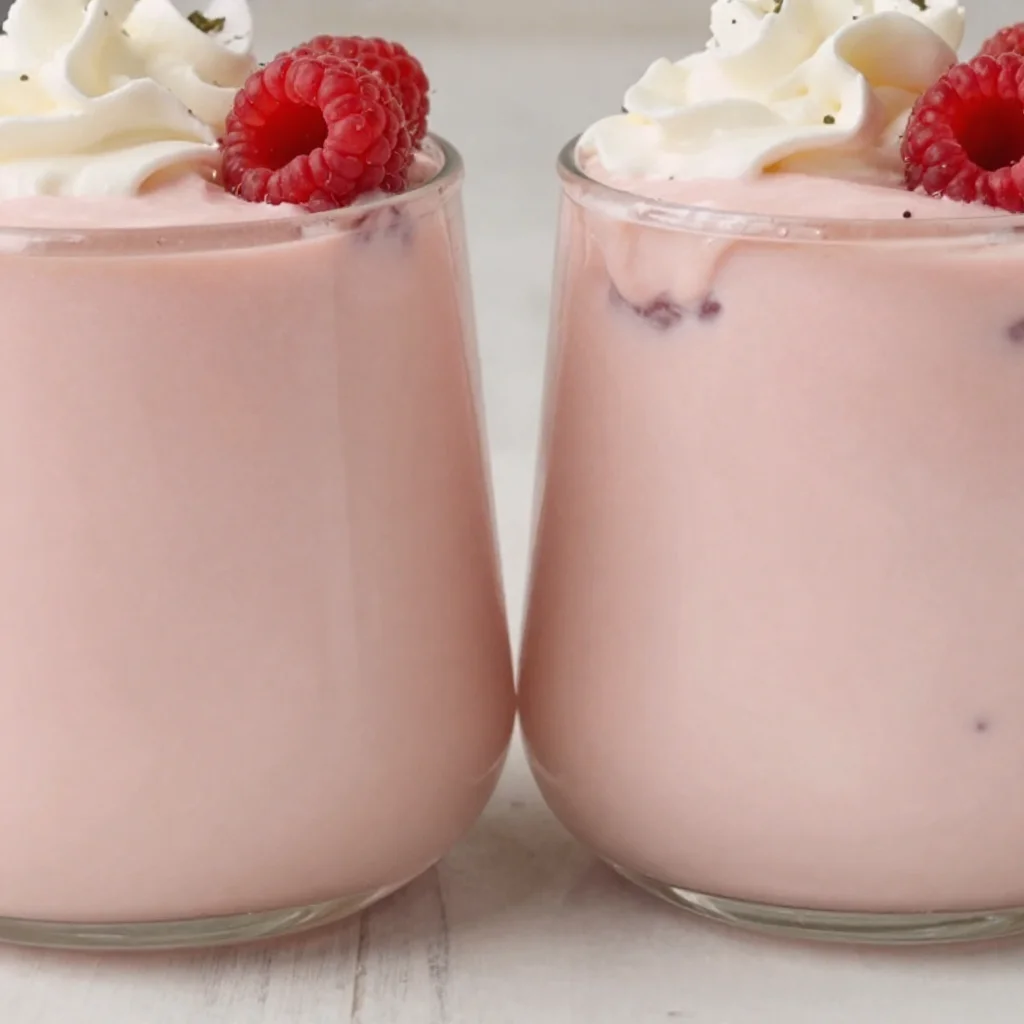
Chocolate Greek Yogurt Mousse
Indulge in Decadence: Chocolate Greek Yogurt Mousse Recipe
Welcome back to my kitchen, dear foodies! Today, we’re diving into a luscious and incredibly satisfying dessert that combines the rich, creamy goodness of chocolate with the tangy freshness of Greek yogurt: Chocolate Greek Yogurt Mousse. Trust me; this delightful treat will not only satisfy your sweet tooth but also add a dash of sophistication to your dessert table.
Now, I understand that when you think of mousse, you might picture something that requires intricate techniques or fancy equipment. Spoiler alert: that’s not the case here! This mousse is wonderfully simple to make, perfect for both beginners and seasoned chefs who crave a quick yet decadent dessert.
As someone who has spent countless hours in the kitchen (and who has probably eaten their weight in chocolate!), I can assure you that this mousse is a game changer. It’s light, fluffy, and has a deep chocolate flavor that will have everyone coming back for seconds. Plus, with Greek yogurt as a base, it’s a healthier alternative to traditional mousse, meaning you can indulge a little more guilt-free.
So, whether you’re prepping for a dinner party, a cozy night in, or just need a sweet pick-me-up, this Chocolate Greek Yogurt Mousse is your answer. Grab your spatula, let’s create magic in the kitchen!
Personal Story
Let me take you back a few years to a bustling kitchen filled with laughter, chatting, and, yes, the sweet smell of chocolate wafting through the air. It was my best friend Jamie’s birthday, and we decided to host a surprise dinner party to celebrate. We planned every detail, from the appetizers to the entrée, but dessert had us both stumped.
Then, I remembered a recipe I had seen for a chocolate mousse made with yogurt instead of heavy cream. Being the adventurous cooks that we are, we decided to give it a shot. As we mixed and whipped, we giggled like schoolgirls, sneaking spoonfuls of the luscious chocolate mixture.
Little did we know that our improvised dessert would become the star of the evening! Our guests raved about the mousse’s rich texture, and Jamie even declared it the best birthday dessert she’d ever had. That night solidified our love for this recipe, and it’s become a staple at our gatherings ever since.
Now, every time I make this Chocolate Greek Yogurt Mousse, I’m transported back to that joyous night, surrounded by friends and laughter. I hope this recipe brings you as much happiness as it has brought me!
Ingredients
To whip up this delightful mousse, you’ll need the following ingredients:
-
Greek Yogurt (2 cups)
Greek yogurt provides a creamy base that keeps this mousse light yet decadent. If you’re looking for a dairy-free option, try using coconut yogurt for a similar texture and a hint of tropical flavor. -
Semi-sweet Chocolate (1 cup)
Semi-sweet chocolate gives the mousse that luscious, rich flavor. You can substitute with dark chocolate for a more intense taste, but remember that it can be slightly less sweet. -
Cocoa Powder (2 tablespoons)
This adds an extra depth of chocolate flavor and enhances the richness of the dish. For a unique twist, try using a flavored cocoa powder — like dark chocolate or spicy chili chocolate. -
Honey or Maple Syrup (3 tablespoons)
This natural sweetener balances the tang of the yogurt. If you prefer to avoid sweeteners, you can substitute with a few drops of stevia or another sugar alternative to taste. -
Vanilla Extract (1 teaspoon)
A splash of vanilla elevates the flavor, giving the mousse a warm, inviting aroma. You could even toss in a pinch of espresso powder for a mocha twist! -
Salt (a pinch)
Don’t forget this essential ingredient! A tiny pinch of salt brings all the flavors together. If you’re feeling fancy, consider using flaky sea salt to sprinkle on top before serving.
Step-by-Step Instructions
Now that we have our ingredients ready, let’s get started on making this velvety mousse!
Step 1: Melt the Chocolate
Begin by breaking your semi-sweet chocolate into small pieces and placing them in a microwave-safe bowl. Heat in the microwave in 20-second intervals, stirring between each, until the chocolate is smooth and completely melted. Make sure not to overheat; burned chocolate is a sad, sad fate! If you prefer the stovetop, you can melt it in a double boiler instead. Keep it aside to cool slightly.
Step 2: Mix Greek Yogurt and Sweetener
In a large mixing bowl, combine the Greek yogurt and your choice of honey or maple syrup. Use a whisk or electric mixer to blend these two ingredients until smooth and creamy. Taste the mixture and adjust the sweetness as desired — you want it pleasantly sweet, just enough to balance the yogurt’s tang.
Step 3: Incorporate the Chocolate
Once the chocolate has cooled down a bit (safety first, friends!), pour half of it into the Greek yogurt mixture. Use a spatula to gently fold the chocolate into the yogurt until it’s well combined. Then, pour in the rest of the melted chocolate and continue folding until the mixture is a uniform color and texture. Remember, be gentle! You want to keep that airiness in the mousse.
Step 4: Add the Remaining Ingredients
Sprinkle in the cocoa powder, vanilla extract, and that pinch of salt. Continue to fold until everything is combined and silky-smooth. This is the perfect moment to taste your creation again — don’t hold back! Adjust sweetness or flavor if you feel inspired.
Step 5: Chill
Transfer the mousse into individual serving cups or a large bowl if you prefer to scoop your servings. Cover with plastic wrap and refrigerate for at least 1 hour. Chilling helps the mousse set up and enhances the flavors.
Step 6: Serve and Enjoy!
When your mousse is ready, serve it chilled. You can top it with whipped cream, fresh berries, or shaved chocolate for added elegance. Don’t forget to snap that Instagram-worthy photo!
Serving Suggestions
When it comes to serving this Chocolate Greek Yogurt Mousse, presentation is key! A simple yet sophisticated touch is to layer the mousse in clear dessert glasses, allowing the beautiful, creamy layers to be visible. Add a dollop of whipped cream on top, sprinkle with chocolate shavings, and a few fresh raspberries or mint leaves for a splash of color. Voila! You have a stunning dessert that would impress even the toughest critics!
Recipe Variations
Now, let’s make this mousse even more exciting with a few clever twists:
- Nutty Delight: Stir in crushed nuts (like almonds or hazelnuts) for a delightful added crunch.
- Berry Swirl: Before refrigerating, fold in some fresh berry puree to create a beautiful marbled effect.
- Spicy Chocolate: Add a pinch of cayenne pepper or cinnamon for a warm, spicy flavor that’s unexpected and delicious!
- Peanut Butter Chocolate Mousse: Swirl in some natural peanut butter for a creamy, nutty taste that takes it to another level of indulgence.
- Vegan Option: Use a plant-based yogurt and agave syrup instead of honey to make this dessert completely vegan-friendly.
Chef’s Notes
This recipe is one of those delightful creations that evolved with experimentation in my kitchen. The initial idea came from a traditional chocolate mousse recipe loaded with heavy cream and sugar. While I love a classic, I always strive for a balance between indulgence and health. This chocolate mousse struck that magical chord!
One of my favorite kitchen mishaps occurred while perfecting this recipe. I once accidentally grabbed a bottle of balsamic glaze instead of chocolate syrup when sweetening the yogurt. After the shock subsided, I tasted the result and surprisingly loved the tanginess with the chocolate! It’s never a waste of time to play around with ingredients and see what happens.
FAQs and Troubleshooting
Q: My mousse didn’t turn out fluffy. What went wrong?
A: The key to making your mousse fluffy lies in folding the ingredients together gently. Overmixing can result in a dense mousse, so take it easy on that spatula!
Q: Can I make this ahead of time?
A: Absolutely! This mousse actually tastes even better after sitting in the fridge overnight, allowing the flavors to meld beautifully.
Q: What if my mousse is too sweet?
A: No worries! If you find it too sweet, try stirring in a little more Greek yogurt until it reaches your desired taste. The tartness will help balance it out.
Q: Can I freeze the leftovers?
A: While I highly doubt you’ll have any leftovers, if you do, you can freeze the mousse. Just store it in an airtight container for up to a month. Thaw in the fridge before serving!
Nutritional Info
If you are wondering about the nutritional breakdown, here’s a general idea per serving (based on 6 servings):
- Calories: 150
- Protein: 6g
- Carbohydrates: 18g
- Fat: 6g
- Saturated Fat: 3g
- Sugar: 10g
This mousse is a light and satisfying treat that won’t leave you feeling guilty.
So, there you have it, my wonderful food lovers! Your very own Chocolate Greek Yogurt Mousse to whip up and share — or not! After all, it is deliciously tempting. Enjoy making it, savoring it, and, most importantly, sharing it with the people you love. Happy cooking!
Print
Chocolate Greek Yogurt Mousse
- Total Time: 120 minutes
- Yield: 6 servings 1x
- Diet: Vegetarian
Description
A rich and creamy chocolate mousse made healthier with Greek yogurt, perfect for satisfying your sweet tooth guilt-free.
Ingredients
- 2 cups Greek Yogurt
- 1 cup Semi-sweet Chocolate
- 2 tablespoons Cocoa Powder
- 3 tablespoons Honey or Maple Syrup
- 1 teaspoon Vanilla Extract
- a pinch of Salt
Instructions
- Melt the chocolate by breaking it into pieces and microwaving in intervals until smooth.
- Mix Greek yogurt and sweetener until smooth and creamy.
- Incorporate half of the melted chocolate into the yogurt mixture, folding gently.
- Add the remaining chocolate along with cocoa powder, vanilla, and salt, folding until smooth.
- Chill the mousse in serving cups for at least 1 hour.
- Serve chilled and enjoy!
Notes
For a vegan option, use plant-based yogurt and agave syrup instead of honey. Chilling overnight enhances flavor.
- Prep Time: 15 minutes
- Cook Time: 5 minutes
- Category: Dessert
- Method: Chilling
- Cuisine: Mediterranean
Nutrition
- Serving Size: 1 serving
- Calories: 150
- Sugar: 10g
- Sodium: 50mg
- Fat: 6g
- Saturated Fat: 3g
- Unsaturated Fat: 3g
- Trans Fat: 0g
- Carbohydrates: 18g
- Fiber: 1g
- Protein: 6g
- Cholesterol: 5mg
Keywords: chocolate mousse, Greek yogurt dessert, healthy dessert, easy chocolate mousse, fluffy mousse