
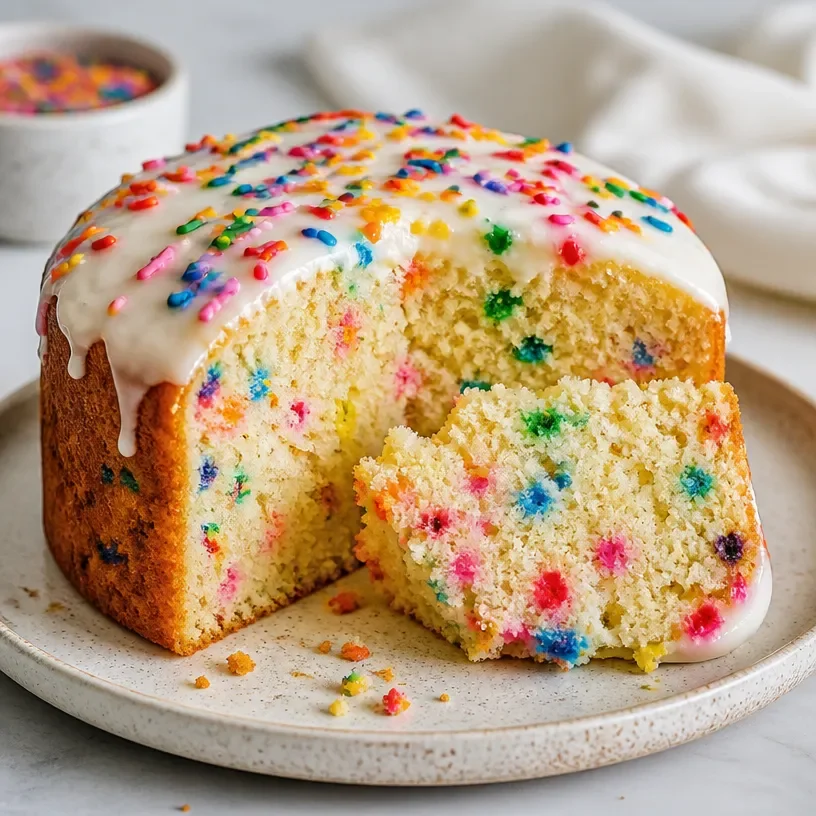
Minute High-Protein Cottage Cheese Funfetti Cake
The Joy of Baking: Protein Cottage Cheese Funfetti Cake
Welcome to my kitchen! I’m so thrilled to have you here today. If you’re new to my little corner of the internet, let me introduce myself. I’m Olivia Bennett — just a passionate home cook tangled up in a love affair with flavors, cozy vibes, and of course, homemade treats. There’s something magical about baking that fills the air with warmth and brings back the sweetest of memories, don’t you think? And that’s exactly what this recipe for Protein Cottage Cheese Funfetti Cake is all about: joy, nostalgia, and maybe just a little bit of sprinkles!
When I think about cake, the first thing that comes to mind is celebration. Birthdays, family get-togethers, or just those days that call for a little extra sweetness. As a kid, my birthday cake of choice was always layered with colorful sprinkles, the type that sparkled like confetti. My mom would bake those cakes from scratch, and as soon as the smell of vanilla hit the air, I’d find myself pacing around the kitchen, waiting with eager hands to help with the frosting. Those moments made cooking feel like magic, like we were crafting happiness from flour and sugar.
Ah, but let’s fast forward to the present! Nowadays, I’m all about making indulgent goodies a touch healthier without sacrificing flavor. Enter the Protein Cottage Cheese Funfetti Cake—a delightful hybrid of nostalgia and nutrition! This cake is not only super moist and bursting with flavor; it also sneaks in some extra protein thanks to cottage cheese. Trust me, it’s a game-changer! It hits the spot whether you want to treat yourself after a long day or impress friends with something unique. So, let’s dive into this fun recipe together!
A Slice of My Childhood
Growing up, weekends meant two things: family gatherings and baking marathons in my mom’s kitchen. I remember one particular birthday party where my mom baked me a rainbow sprinkle cake, complete with layers of fluffy vanilla frosting. As friends and family gathered, we crushed through a piñata, laughter filling the air like sweet melody. But the best part? That first bite of cake—light, moist, and exploding with colors and flavors!
Little did I know then that those cozy kitchen afternoons would pave the way for my culinary passion. Today, I recreate that joyful spirit with my Protein Cottage Cheese Funfetti Cake. It’s a nod to my childhood, perfect for celebrating everything from birthdays to ordinary weeknight dinners. So grab your apron, and let’s whisk up some memories!
Ingredients: What You’ll Need
Here’s a simple list of the ingredients to whip up this delightful cake, complete with a few handy tips and substitutions along the way.
-
Cottage Cheese (1 cup): The star of our show! It not only adds moisture but also ups the protein content. If you’re not a fan of cottage cheese, you can substitute it with Greek yogurt for a similar texture and protein boost.
-
All-Purpose Flour (1 ½ cups): This cake needs a solid foundation. You can swap it for whole wheat flour if you’re looking for more fiber or a gluten-free blend if you’re gluten-sensitive.
-
Granulated Sugar (1 cup): Sweetness is the name of the game! You can use coconut sugar or a sugar substitute if you’re looking for a healthier alternative.
-
Baking Powder (2 tsp): This is what helps our cake rise and become fluffy. Don’t forget to check the expiration date; expired baking powder can lead to a dense cake!
-
Salt (½ tsp): A pinch of salt enhances all the flavors. You can use sea salt or even Himalayan salt for a touch of uniqueness.
-
Eggs (2): They act as a binder for all the ingredients. If you’re vegan or egg-free, try using flax eggs (1 tablespoon of ground flaxseed mixed with 3 tablespoons of water = 1 egg) as a substitute.
-
Vanilla Extract (1 tsp): The essence of warmth and flavor. Feel free to use almond extract for a different twist.
-
Rainbow Sprinkles (½ cup): Because what’s a funfetti cake without sprinkles? You can swap these out for any color-themed sprinkles to suit any occasion!
-
Milk (½ cup): Use any type of milk you prefer—dairy, almond, or oat milk all work beautifully here.
-
Optional Frosting: A simple cream cheese frosting or a light whipped cream complements the cake perfectly.
Step-by-Step Instructions
Alright, let’s roll up our sleeves and get baking! Here’s how we bring this Protein Cottage Cheese Funfetti Cake to life:
Step 1: Preheat the Oven
Preheat your oven to 350°F (175°C). It’s an essential first step to ensure your cake bakes evenly. While it heats, you can prepare your cake batter!
Step 2: Prepare Your Baking Pan
Grease and flour a 9-inch round cake pan—or two if you’re looking for layers! My favorite method is using a bit of butter to grease the pan, then adding a sprinkle of flour. This helps the cake slide out easily once baked.
Step 3: Mix the Dry Ingredients
In a large mixing bowl, whisk together the all-purpose flour, baking powder, and salt. This helps to evenly distribute the leavening agent, ensuring a light cake!
Step 4: Blend the Wet Ingredients
In another bowl, combine the cottage cheese, sugar, eggs, and vanilla extract. If you’re using a blender or food processor, this is the perfect time to blend until the mixture is smooth. The cottage cheese should be undetectable in texture!
Step 5: Combine and Sprinkle
Slowly pour the wet mixture into the dry ingredients and mix until just combined. Be careful not to overmix to keep that fluffy texture. Now’s the fun part—fold in those vibrant rainbow sprinkles!
Step 6: Bake
Pour the batter into your prepared cake pan and smooth the top with a spatula. Bake in your preheated oven for 25–30 minutes, or until a toothpick inserted in the center comes out clean. The delightful smell should start wafting through your kitchen right about now!
Step 7: Cool and Frost
Once baked, allow your cake to cool in the pan for about 10 minutes, then transfer it to a wire rack. This step prevents sogginess. Once cooled, you can frost it with cream cheese frosting or simply sprinkle some powdered sugar on top for an easy finish.
Step 8: Serve
Cut yourself a generous slice and dig in! Don’t forget to snap a picture—this cake is just begging to be ‘grammed.
Serving Suggestions
Serve your Protein Cottage Cheese Funfetti Cake on a colorful plate, perhaps alongside fresh berries or a scoop of vanilla ice cream for that ultimate treat experience. Drizzle with a bit of chocolate sauce or adorn with additional sprinkles for a dedicated dessert table showstopper!
Recipe Variations
Feeling adventurous? Here are a few fun variations to try out:
-
Chocolate Funfetti Cake: Replace a third of the flour with cocoa powder to give your cake a delightful chocolate twist.
-
Mixed Fruit Funfetti: Toss in some finely chopped strawberries or cherries along with your sprinkles for a delicious fruity explosion.
-
Vegan Funfetti Cake: Substitute cottage cheese with a plant-based yogurt and use flax eggs to make your cake completely vegan yet delicious!
-
Zesty Lemon: Add lemon zest for a refreshing citrus zing that pairs beautifully with the sweetness of the cake.
Chef’s Notes
This recipe has evolved over the years from a traditional sprinkles cake into something healthier before my eyes. I remember the first time I tried to swap in cottage cheese—it felt like a dare, but boy did it pay off! Each bite brings me back to those happy childhood moments.
You know what else is hilarious? The first cake I made for my partner used half a cup of salt instead of sugar. Imagine an epic ‘salty surprise’ moment! We learned that day, always read the labels twice!
FAQs and Troubleshooting
Q: Why did my cake sink in the middle?
A: A sinkhole cake usually happens because of overmixing the batter or not baking it long enough. Make sure to gently combine your ingredients and check on your cake a few minutes before the timer!
Q: Can I freeze this cake?
A: Absolutely! You can wrap slices tightly in plastic wrap and store them in an airtight container for up to three months. Just thaw them overnight in the fridge when you’re ready for a treat.
Q: How can I make this cake lower in sugar?
A: You can cut down on sugar by up to a third without affecting the taste too much. Alternatively, try a sugar substitute like monk fruit or erythritol.
Q: I don’t have rainbow sprinkles — now what?
A: No worries! You can use chocolate chips, nuts, or dried fruits for a different texture and flavor.
Nutritional Info
(If applicable, provide details such as calories, fat, protein, etc.)
There you have it, friends! A delightful, wholesome, and delicious Protein Cottage Cheese Funfetti Cake, crafted with love right in your own kitchen. I hope you find as much joy in making and serving this cake as I do. Until next time, happy baking!
Don’t forget to share your cake adventures in the comments below—I love hearing from fellow foodies!
Print
Protein Cottage Cheese Funfetti Cake
- Total Time: 40 minutes
- Yield: 8 servings 1x
- Diet: Vegetarian
Description
A delightful and healthier twist on traditional funfetti cake, loaded with protein from cottage cheese and colorful sprinkles.
Ingredients
- 1 cup Cottage Cheese
- 1 ½ cups All-Purpose Flour
- 1 cup Granulated Sugar
- 2 tsp Baking Powder
- ½ tsp Salt
- 2 Eggs
- 1 tsp Vanilla Extract
- ½ cup Rainbow Sprinkles
- ½ cup Milk
- Optional: Cream Cheese Frosting
Instructions
- Preheat your oven to 350°F (175°C).
- Grease and flour a 9-inch round cake pan.
- Whisk together the all-purpose flour, baking powder, and salt in a bowl.
- Combine cottage cheese, sugar, eggs, and vanilla in another bowl.
- Pour the wet mixture into the dry ingredients and mix until just combined.
- Fold in the rainbow sprinkles.
- Pour the batter into the prepared pan and smooth the top.
- Bake for 25–30 minutes or until a toothpick comes out clean.
- Cool in the pan for 10 minutes, then transfer to a wire rack.
- Frost with cream cheese frosting or powdered sugar if desired.
- Serve and enjoy!
Notes
For a vegan version, substitute cottage cheese with a plant-based yogurt and use flax eggs. You can also experiment with flavors by adding lemon zest or using cocoa powder for a chocolate version.
- Prep Time: 10 minutes
- Cook Time: 30 minutes
- Category: Dessert
- Method: Baking
- Cuisine: American
Nutrition
- Serving Size: 1 slice
- Calories: 300
- Sugar: 20g
- Sodium: 200mg
- Fat: 10g
- Saturated Fat: 4g
- Unsaturated Fat: 6g
- Trans Fat: 0g
- Carbohydrates: 35g
- Fiber: 1g
- Protein: 10g
- Cholesterol: 70mg
Keywords: funfetti, cake, protein, cottage cheese, dessert
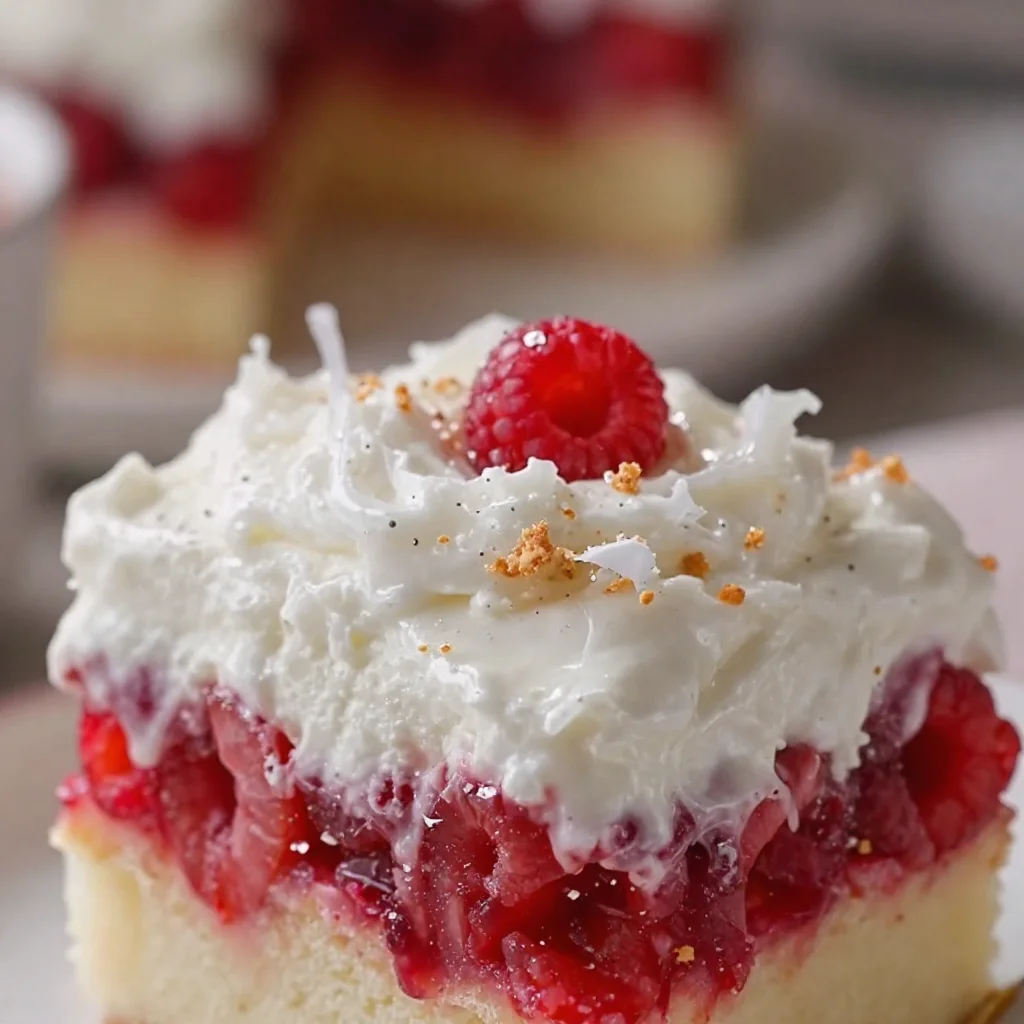
Beginner-Friendly Raspberry Zinger Poke Cake (No-Bake)
Delicious Raspberry Zinger Poke Cake
Introduction
Welcome, fellow food lovers! Today, I’m beyond excited to share a recipe that has been a lingering favorite in my kitchen—the mouthwatering Raspberry Zinger Poke Cake! 🍰 This delightful dessert is not only a feast for the eyes but also a symphony of flavors. Imagine a soft, fluffy cake drenched in raspberry goodness, topped with a creamy layer that’ll make your taste buds dance. It’s perfect for any occasion, whether you’re hosting a cozy get-together or simply satisfying a sweet craving after a long day.
There’s something particularly special about poke cakes—they’re easy to make, often use simple ingredients, and offer a surprising burst of flavor with each slice. This Raspberry Zinger version is inspired by the classic raspberry zinger cakes that some of us might remember from childhood, with a fun twist that adds a modern touch. A cake that brings back fond memories while introducing new flavors? Now that’s what I call a winner!
As we delve into this recipe, I’ll guide you step-by-step, sharing tips, tricks, and a sprinkle of love along the way. By the end, you’ll not only have a stunning cake to share with friends and family but also the confidence to whip it up any time the mood strikes. So, aprons on, let’s get baking and make some Raspberry Zinger magic happen!
Personal Story
Growing up, my family had this tradition of gathering every Sunday for a big dinner, complete with laughter, stories, and of course, dessert. One particular Sunday, I remember my grandmother brought over her famous raspberry zinger cake. The kitchen filled with the sweet, tangy scent of raspberries, and I could hardly wait to sink my fork into that fluffy goodness. It was like a warm hug in cake form!
I remember watching her carefully poke holes into the cake, the anticipation bubbling up inside me. "This will make it even more delicious," she said with a twinkle in her eye. The cake was always a hit, bringing everyone to the dinner table with gleeful smiles.
Years later, as I started my cooking journey, I realized how much those moments meant to me—they were filled with love, connection, and of course, delicious food. This Raspberry Zinger Poke Cake not only represents those cherished memories but also reminds me to carry that warmth and joy into my own kitchen today. Let’s recreate that nostalgic feeling together!
Ingredients
Here are the ingredients you’ll need to make this scrumptious Raspberry Zinger Poke Cake:
-
1 box of yellow cake mix
This is the base of our cake. Using a yellow cake mix results in a light, fluffy texture. Feel free to substitute with a homemade vanilla cake mix if you’re feeling adventurous! -
3 large eggs
Eggs add richness and moisture to the cake. You can use flax eggs as a vegan alternative or substitute with applesauce (1/4 cup per egg). -
1 cup of water
Water helps to bind the mix together. If you want to elevate the flavor, substitute with milk or raspberry juice for an extra zing! -
1 cup of raspberry preserves
This is the star of the show! Raspberry preserves provide sweetness and tartness. You can swap this with strawberry or blueberry preserves if you want to play with flavors. -
1 box of instant vanilla pudding mix
This adds creaminess and depth to our cake’s topping. You can also experiment with other flavors like coconut or lemon. -
2 cups of cold milk
You’ll need this to prepare the pudding mix. Almond milk or coconut milk works perfectly for a dairy-free option. -
8 oz of whipped topping (like Cool Whip)
This gives our cake its light and fluffy texture. If you prefer homemade, feel free to whip some cream with a bit of sugar! -
Fresh raspberries (for garnish)
Fresh fruit is a must for a delightful presentation and added flavor. You can also use strawberries or blueberries. -
Optional: Shredded coconut
If you’re feeling adventurous and want that tropical twist, coconut is a fabulous addition to the top of the cake for added texture!
Step-by-Step Instructions
-
Preheat the Oven
Start by preheating your oven to 350°F (175°C). This step is crucial, so make sure it’s nice and hot before you pop the cake in! -
Prepare the Cake Mix
In a large mixing bowl, combine the yellow cake mix, eggs, and water. Use an electric mixer to beat the mixture until it’s smooth and combined—about 2 minutes. Tip: Be careful not to overmix; just until combined is perfect! -
Bake the Cake
Grease a 9×13-inch baking dish or pan (you want this baby to slide right out later). Pour in the batter and spread it evenly. Bake for 25 to 30 minutes until the cake is golden and a toothpick comes out clean. Don’t forget to let it cool in the pan for about 10 minutes before transferring it to a wire rack to cool completely! -
Poke the Holes
Once the cake has cooled completely (trust me, you don’t want a hot cake for this part), take a fork or skewer and poke holes all over the top of the cake. Make sure to poke deep enough for the raspberry preserves to seep in—this is where the magic happens! -
Add the Raspberry Preserves
In a small bowl, slightly warm the raspberry preserves in the microwave for about 10-15 seconds—just enough to make it easier to pour. Then, pour the preserves evenly over the cake, ensuring it seeps into all those lovely holes. -
Prepare the Pudding Topping
In another bowl, whisk together the instant vanilla pudding mix and cold milk. Beat it for about 2 minutes until it thickens up nicely. It should have a smooth, creamy consistency that’ll top our cake perfectly! -
Combine with Whipped Topping
Gently fold in the whipped topping into your pudding mixture. This will create a light, fluffy layer that’s going to sit atop your poke cake beautifully. It’s like a cloud of sweetness! -
Spread the Pudding Mixture
Carefully spread the pudding and whipped topping mixture over the raspberry-soaked cake. Make sure to cover all areas so every slice has that creamy delight. -
Chill the Cake
Cover the cake with plastic wrap and place it in the fridge for at least 2 hours. I know it feels like waiting forever, but this step allows the flavors to meld together beautifully! -
Serve and Enjoy
Just before serving, garnish your Raspberry Zinger Poke Cake with fresh raspberries and a sprinkle of shredded coconut if you’re using it. Take a moment to appreciate your masterpiece before slicing. Serve with a generous dollop of whipped cream on the side if desired!
Serving Suggestions
This Raspberry Zinger Poke Cake is not just a feast for the taste buds but also a visual delight! For a simple yet elegant presentation, serve it on a lovely platter garnished with fresh raspberries and mint leaves. You can cut the cake into squares and serve on individual dessert plates with a scoop of vanilla ice cream for an indulgent treat. Trust me, your guests will be impressed!
Recipe Variations
- Chocolate Raspberry Zinger: Swap out a chocolate cake mix for the yellow cake to create a rich, decadent version of this dessert.
- Vegan Delight: Use a vegan cake mix, substitute the eggs with flaxseed or applesauce, and whip up some coconut cream instead of whipped topping for a guilt-free treat.
- Nutty Surprise: Add chopped nuts (like almonds or walnuts) to the topping for an added crunch and depth of flavor.
- Lemon Twist: Incorporate a lemon pudding mix instead of vanilla for a refreshing citrusy-sweet flavor that pairs beautifully with raspberries.
- Berry Medley: Mix in other berries, like blueberries or strawberries, with the raspberry preserves for a colorful, fruit-packed cake!
Chef’s Notes
Do you know the beautiful part about baking? It’s ever-evolving! This Raspberry Zinger Poke Cake has seen many transformations in my kitchen. There were times when I added orange zest for a refreshing tang, or even a splash of almond extract for warmth. Each batch brings a bit of nostalgia but also the excitement of trying something new. And let’s not forget those delightful kitchen disasters—like the time I accidentally mixed up salt with sugar! 😅 It turned into a funny memory rather than a dessert disaster, all in the spirit of home cooking and experimenting.
Remember, cooking is always about having fun and making it your own!
FAQs and Troubleshooting
Q: Why is my cake sinking in the middle?
A: A common reason for cake sinking is opening the oven door too soon, which can disrupt the rising process. Make sure to wait until the minimum baking time is up before peeking!
Q: Can I make this a day in advance?
A: Absolutely! In fact, making it a day ahead allows the flavors to meld beautifully. Just ensure it’s well covered to keep it fresh.
Q: How do I store leftovers?
A: Store any leftover cake in the fridge, covered tightly with plastic wrap. It should last for about 3-4 days, although I doubt it’ll last that long!
Q: Can I freeze this cake?
A: Yes! However, I recommend freezing it before adding the pudding layer. Wrap the cooled cake well in plastic and aluminum foil, and it will keep in the freezer for up to 2 months. When you’re ready to enjoy it, thaw it in the fridge, add your layers, and dig in!
Nutritional Info (optional)
While it’s important to enjoy your desserts, it’s also good to know what you’re indulging in! This Raspberry Zinger Poke Cake serves about 12 and each serving contains approximately 300 calories, 6g of fat, 54g of carbohydrates, and 3g of protein. Always remember to balance your sweet treats with wholesome meals!
And there you have it—your guide to making an outstanding Raspberry Zinger Poke Cake! I hope you find joy in every bite and every moment spent in the kitchen. Happy baking and enjoy every slice with your loved ones! 🍰❤️
Print
Delicious Raspberry Zinger Poke Cake
- Total Time: 50 minutes
- Yield: 12 servings 1x
- Diet: Vegetarian
Description
A delightful Raspberry Zinger Poke Cake that combines fluffy yellow cake with raspberry preserves and a creamy topping, perfect for any occasion.
Ingredients
- 1 box of yellow cake mix
- 3 large eggs
- 1 cup of water
- 1 cup of raspberry preserves
- 1 box of instant vanilla pudding mix
- 2 cups of cold milk
- 8 oz of whipped topping (like Cool Whip)
- Fresh raspberries (for garnish)
- Optional: Shredded coconut
Instructions
- Preheat your oven to 350°F (175°C).
- Combine the yellow cake mix, eggs, and water in a large mixing bowl and mix until smooth.
- Bake the batter in greased 9×13-inch pan for 25 to 30 minutes.
- Poke holes all over the cooled cake using a fork or skewer.
- Warm the raspberry preserves in the microwave and pour over the cake.
- Whisk together instant vanilla pudding mix and cold milk until thickened.
- Fold in whipped topping to the pudding mixture.
- Spread the pudding mixture over the raspberry-soaked cake.
- Chill the cake in the fridge for at least 2 hours.
- Garnish with fresh raspberries and optional shredded coconut before serving.
Notes
For variations, try using different flavors of pudding or cake mix, or add nuts for extra texture!
- Prep Time: 20 minutes
- Cook Time: 30 minutes
- Category: Dessert
- Method: Baking
- Cuisine: American
Nutrition
- Serving Size: 1 slice
- Calories: 300
- Sugar: 25g
- Sodium: 200mg
- Fat: 6g
- Saturated Fat: 3g
- Unsaturated Fat: 2g
- Trans Fat: 0g
- Carbohydrates: 54g
- Fiber: 1g
- Protein: 3g
- Cholesterol: 50mg
Keywords: Raspberry, Cake, Dessert, Poke Cake, Easy Dessert
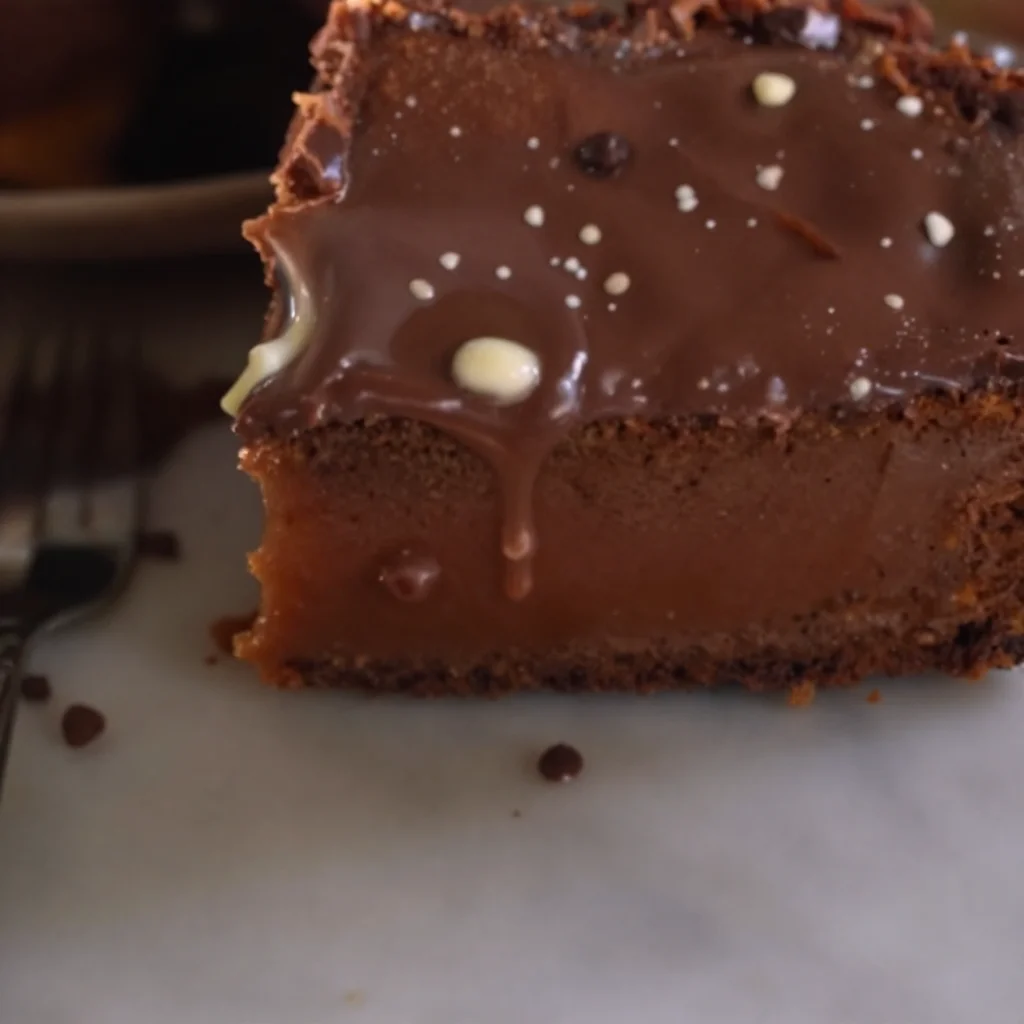
Minute Chocolate Zucchini Cake (One-Bowl Recipe)
The Ultimate Chocolate Zucchini Cake Recipe: A Slice of Heaven!
Welcome to my kitchen! I’m so excited to share one of my absolute favorite recipes with you today: Chocolate Zucchini Cake! If you’re anything like me, you know that the best cakes are the ones that balance rich chocolatey goodness with hidden veggies. Yep, you heard that right! This luscious cake does just that while bringing joy to anyone who takes a bite. Whether you’re hosting a dinner party, celebrating a birthday, or simply treating yourself on a quiet afternoon, this cake will definitely steal the show!
Now, let’s be honest—zucchini in a cake may sound a little quirky at first. But trust me, it adds moisture and a beautiful texture to your cake without a trace of that green wonder lurking beneath the rich cocoa. There’s an added benefit—this cake is a great way to sneak some veggies into your diet without even noticing! It’s perfect for kids and adults alike. I remember the first time I made this cake; my nephews were doubtful when they saw me adding zucchini into the mix, but their faces lit up with delight once they tried a slice (or two!).
Baking this Chocolate Zucchini Cake is not only about creating a delicious dessert; it’s also a journey filled with delightful aromas, joyous moments in the kitchen, and a chance to connect with loved ones over something scrumptious. So, grab your measuring cups and let’s dive into this recipe that’s sweet, moist, and oh-so-satisfying.
A Trip Down Memory Lane
Growing up, my mom was a master of transforming simple ingredients into fantastic meals. One recipe that became a family favorite was her Chocolate Zucchini Cake. I remember the first time she made it; it was during the summer when our garden was overflowing with zucchini. Every time we had an abundance of the veggie, my mom would whip up her beloved cake, and it didn’t take long for us to fall head over heels for it.
One day, I eagerly helped her grate the zucchini, but I kept sneaking bites of the chocolate batter when she wasn’t looking (I mean, who can resist that?). The combination of the rich chocolate and the whisper of cinnamon filled our kitchen with an aroma that was nothing short of heavenly. Once it was out of the oven, I couldn’t help but devour an enormous slice, and I loved that I could justify it because, hey, there were veggies in there, right? Every bite felt like a warm hug, and to this day, that nostalgic memory inspires me to share this cake with everyone I know.
Ingredients: What You’ll Need
Here’s a breakdown of what goes into this delightful Chocolate Zucchini Cake:
-
Zucchini (2 cups, grated): The star ingredient! This veggie adds moisture and makes the cake super tender. You can use green zucchini or even yellow squash if you prefer.
-
Granulated Sugar (1 cup): Sweetness galore! You can swap in brown sugar for a deeper flavor and a bit more moisture.
-
Brown Sugar (1/2 cup): Adds a hint of caramel flavor, but feel free to use all granulated sugar if you want a lighter cake.
-
All-Purpose Flour (1 ½ cups): Standard flour gives the cake its structure. For a gluten-free option, consider using a 1:1 gluten-free flour blend.
-
Unsweetened Cocoa Powder (¾ cup): This is what gives the cake its rich chocolate flavor. Make sure to use unsweetened for the best results!
-
Baking Soda (1 tsp): Helps the cake to rise beautifully. Always check the expiration date—old baking soda can lead to flat cakes!
-
Baking Powder (1 tsp): Works in tandem with baking soda to create that perfect fluffiness.
-
Salt (½ tsp): Just a pinch to enhance all the flavors.
-
Ground Cinnamon (1 tsp): A warm touch of spice marries perfectly with chocolate. If you want to kick it up a notch, try adding a bit of chili powder for heat!
-
Eggs (2 large): Binds everything together! For an egg-free version, substitute with flax eggs (1 tablespoon flaxseed meal mixed with 2.5 tablespoons water per egg).
-
Vegetable Oil (½ cup): Keeps the cake moist and adds richness. Melted coconut oil is a fantastic alternative if you want a hint of tropical flavor.
-
Vanilla Extract (1 tsp): Use pure vanilla extract for an extra flavor boost. Consider experimenting with almond extract for a different twist!
-
Chocolate Chips (optional, ½ cup): Because who doesn’t love a little extra chocolate? Dark, semi-sweet, or even white chocolate chips work beautifully here.
Step-by-Step Instructions
Alright, here we go! Let’s make some chocolate magic together:
-
Preheat the Oven: Start by preheating your oven to 350°F (175°C). This ensures your cake bakes evenly from the moment you put it in!
-
Prepare Your Pans: Grease and flour two 9-inch round cake pans (or a 9×13 rectangular pan if you prefer). You can also line them with parchment paper for easy removal.
-
Grate Your Zucchini: Grab that gorgeous zucchini and give it a good wash. Then, using a box grater or food processor, grate it finely. You don’t even need to peel it; the skin is where the nutrients hide! Pat the grated zucchini with a paper towel to remove some excess moisture (but don’t dry it out completely!).
-
Mix Dry Ingredients: In a large mixing bowl, whisk together the all-purpose flour, cocoa powder, baking soda, baking powder, salt, and cinnamon. This helps combine everything evenly so you don’t get those pesky clumps.
-
Blend Sugars: In another bowl, beat together the granulated sugar, brown sugar, and eggs. Use a hand mixer or a whisk for about two minutes until it’s light and fluffy. This step introduces air into the mixture for a lovely rise!
-
Add the Wet Ingredients: Stir in the vegetable oil and vanilla extract into the sugar-egg mixture. Give it a good mix! The batter should start to look glossy and thick.
-
Combine Wet and Dry: Gradually mix the dry ingredients into the wet ingredients. Use a spatula to gently fold the flour mixture until you can barely see the flour. There’s no need to overmix; lumps are totally okay!
-
Add Zucchini and Chocolate Chips: Now, fold in the grated zucchini and chocolate chips (if using). The batter will be thick and beautifully speckled with green shreds and chocolate bits.
-
Pour and Bake: Divide the batter evenly between your prepared pans (or pour it all into the rectangular pan). Bake in the preheated oven for 25-30 minutes. Keep an eye on them! The cakes are done when a toothpick inserted in the center comes out clean.
-
Cool and Frost: Once baked, let the cakes cool in the pans for about 10 minutes before transferring them to wire racks to cool completely. If you want, frost them with your favorite chocolate frosting or simply dust with powdered sugar for a more rustic look.
Pro Tips:
- Always let the cake cool completely before frosting to avoid melting the frosting off!
- For an added layer of moistness, brush the layers with a simple syrup made from equal parts sugar and water while they’re still warm.
Serving Suggestions
When it comes to serving this decadent Chocolate Zucchini Cake, presentation can elevate the experience. To plate, slice generous pieces and arrange them on a beautiful cake stand or platter. Add a dollop of whipped cream or a scoop of vanilla ice cream on the side for that heavenly touch. Decorate with grated chocolate or fresh berries for an elegant finish. Your friends and family won’t be able to resist a second slice!
Recipe Variations
The beauty of this Chocolate Zucchini Cake is how easily it can adapt to your taste buds or dietary needs! Here are a few fun variations to jazz things up:
- Nutty Delight: Toss in a handful of chopped walnuts or pecans for a crunchy texture.
- Spicy Chocolate: Add a pinch of cayenne or chili powder to the batter for a surprising kick that pairs beautifully with chocolate.
- Gluten-Free Option: Substitute the all-purpose flour with almond flour or a gluten-free baking blend to make it gluten-free.
- Boozy Twist: Drizzle a bit of Baileys or coffee liqueur into the batter for a grown-up dessert!
- Fruit Fusion: Swap out some of the zucchini for grated carrots or even finely chopped apples for an exciting flavor twist.
Chef’s Notes
This Chocolate Zucchini Cake holds a special place in my heart—and my recipe box! Each time I bake it, it brings me back to sunny summer days spent in my mom’s kitchen. Over the years, I’ve played around with different flours and sugars, trying to find the perfect balance that keeps everyone begging for the recipe. I love how the humble zucchini, often dismissed, can transform a simple chocolate cake into something magical. And if you ever find yourself too busy to bake, I’ve whipped this up with just 10 minutes of prep time—so you really can indulge in that sweet chocolate craving anytime!
FAQs and Troubleshooting
-
Why is my cake dense?
If your cake turned out dense, it’s likely due to overmixing the batter. When incorporating dry ingredients, mix only until combined. Also, check your baking powder and soda expiration dates—they can lose potency over time. -
Can I use frozen zucchini?
Absolutely! Just make sure to thaw it and drain off any excess moisture. Frozen zucchini works beautifully in this recipe, especially since the texture will blend seamlessly into the cake. -
How do I store leftovers?
Store any leftover cake in an airtight container at room temperature for 2-3 days. You can also refrigerate it for up to a week. If you want to freeze it, wrap each slice tightly in plastic wrap and place it in a freezer-safe bag. -
Why is my frosting sliding off?
If your frosting slips off the cake, it might be because the cake is still warm, or it may not have cooled properly. Ensure the cake layers are completely cool before frosting them. A chilled cake also helps the frosting stay in place!
Nutritional Info
While I don’t typically dive into the numbers too much, a serving of this cake can roughly provide you with about 300 calories, depending on the frosting and portion size. It also packs in some fiber thanks to the zucchini, making it a tad more nutritious than your average dessert!
Now that you’ve got all the details, it’s time to take to your kitchen and create your very own Chocolate Zucchini Cake! I can’t wait to hear how it turns out. Happy baking, friends!
Print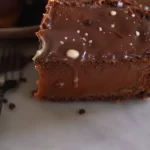
The Ultimate Chocolate Zucchini Cake
- Total Time: 40 minutes
- Yield: 8 servings 1x
- Diet: Vegetarian
Description
A delightful Chocolate Zucchini Cake that combines rich chocolate flavor with hidden zucchini for a moist and tender dessert.
Ingredients
- 2 cups grated Zucchini
- 1 cup Granulated Sugar
- ½ cup Brown Sugar
- 1½ cups All-Purpose Flour
- ¾ cup Unsweetened Cocoa Powder
- 1 tsp Baking Soda
- 1 tsp Baking Powder
- ½ tsp Salt
- 1 tsp Ground Cinnamon
- 2 large Eggs
- ½ cup Vegetable Oil
- 1 tsp Vanilla Extract
- ½ cup Chocolate Chips (optional)
Instructions
- Preheat the oven to 350°F (175°C).
- Prepare your pans by greasing and flouring two 9-inch round cake pans or a 9×13 rectangular pan.
- Grate the zucchini and pat it with a paper towel to remove some excess moisture.
- Mix dry ingredients in a large mixing bowl: flour, cocoa powder, baking soda, baking powder, salt, and cinnamon.
- Blend sugars and eggs in another bowl until light and fluffy.
- Add the vegetable oil and vanilla extract to the sugar-egg mixture and mix until glossy.
- Combine the dry ingredients with the wet ingredients gently until just incorporated.
- Fold in the grated zucchini and chocolate chips if using.
- Pour the batter into the prepared pans and bake for 25-30 minutes.
- Cool the cakes in the pans for 10 minutes then transfer to wire racks to cool completely.
Notes
For an added layer of moistness, brush the cake layers with simple syrup while still warm.
- Prep Time: 10 minutes
- Cook Time: 30 minutes
- Category: Dessert
- Method: Baking
- Cuisine: American
Nutrition
- Serving Size: 1 slice
- Calories: 300
- Sugar: 25g
- Sodium: 200mg
- Fat: 10g
- Saturated Fat: 1.5g
- Unsaturated Fat: 8.5g
- Trans Fat: 0g
- Carbohydrates: 45g
- Fiber: 3g
- Protein: 5g
- Cholesterol: 50mg
Keywords: chocolate cake, zucchini cake, dessert, baking, moist cake




