
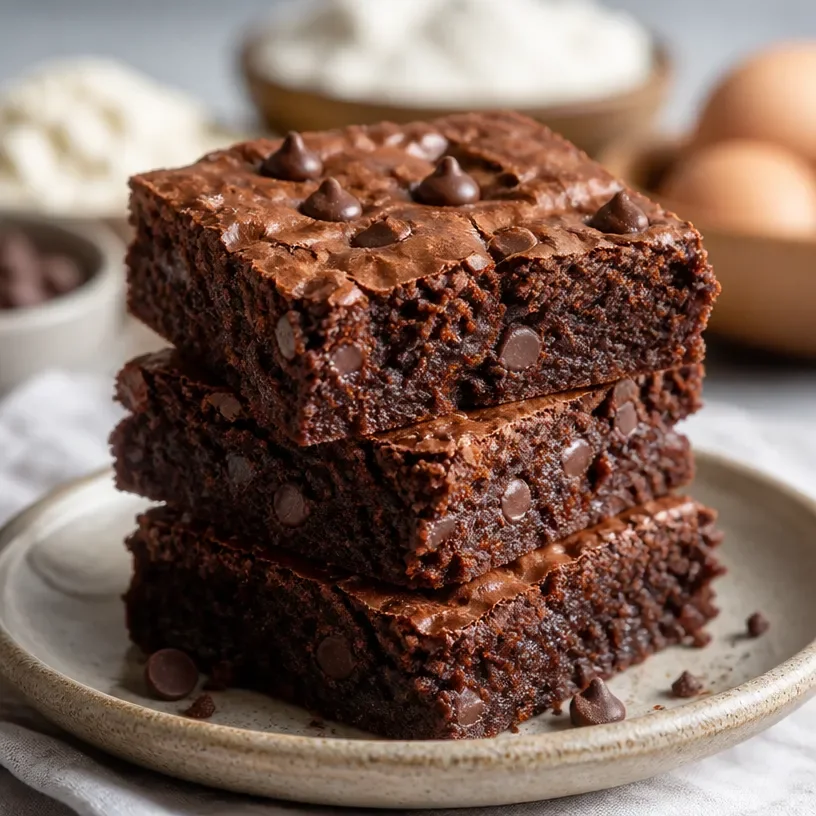
Protein-Packed Cottage Cheese Brownies (Meal-Prep Friendly)
Indulging Guilt-Free: Protein Cottage Cheese Brownies
Welcome to my cozy kitchen, dear friends! I’m Olivia Bennett, and today, I’m thrilled to share a delightful recipe that absolutely ticks all the boxes: Protein Cottage Cheese Brownies. Now, I know what you might be thinking: brownies and healthy cooking seem worlds apart. But let me assure you, these fudgy delights are here to redefine your dessert game! They’re profoundly satisfying, oh-so-chocolatey, and filled with the kind of goodness that leaves you feeling both indulgent and nourished.
Baking has always been my happy place—a way to unwind, create memories, and connect with the people I love. These Protein Cottage Cheese Brownies have become a staple in my home largely due to the warm occasions they inspire: movie nights with friends, cozy afternoons with a good book, or even the celebratory moments following a tough workout. Yes, you can relish dessert while also nourishing your body, and that’s what these brownies encapsulate!
Imagine taking your first bite, the rich chocolate melting in your mouth while knowing you’re also getting a boost of protein. These brownies are not only a hit with my friends and family, but they also appeal to all those health-conscious foodies out there! Together, we’ll whip up a batch of these delectable brownies, and I promise it’ll become one of your go-to recipes. Are you ready? Let’s dive in!
A Sweet Memory
When I first developed this recipe, I recall a fun cooking session I had with my younger brother. We were both on a health kick, trying to replace some of our favorite treats with nutritious versions. One rainy afternoon, we rummaged through the fridge, finding a tub of cottage cheese in the back—I had just used it in a savory dish, never thinking about its potential as a baking ingredient. I dared to explore, blending it into a chocolate batter. The laughter and joy we shared, trying to create something healthy yet tasty, made it one of my fondest kitchen memories.
We braced ourselves for the first bite; to our surprise, the brownies turned out utterly delicious! Our guilty pleasure became a wholesome treat that sparked many delightful conversations about healthier choices. That day, I learned that you need to embrace spontaneity in the kitchen because you never know where creativity might take you!
Ingredients
Here’s what you’ll need to make these scrumptious Protein Cottage Cheese Brownies:
- 1 cup cottage cheese: This is the star ingredient! It adds creaminess and protein to the brownies. If you’re looking for a dairy-free option, try using silken tofu or a plant-based cottage cheese alternative.
- 1/2 cup unsweetened cocoa powder: For that rich chocolate flavor! Unsweetened cocoa keeps the brownies from being overly sweet. If you prefer a sweeter touch, use Dutch-processed cocoa, which will give a smoother flavor.
- 1/2 cup honey or maple syrup: These natural sweeteners not only impart sweetness but also maintain moisture. If you prefer a lower glycemic option, agave syrup works well too.
- 1/4 cup almond flour: Adds a nutty flavor while also keeping the brownies nice and tender. You can swap it out for oat flour if you want a gluten-free variation.
- 2 large eggs: Help bind the brownies together. If you’re looking for a vegan alternative, use flaxseed meal mixed with water (1 tablespoon flaxseed + 2.5 tablespoons water per egg).
- 1 tsp vanilla extract: This delightful flavor brings everything together. Don’t skip it! For a twist, use almond extract for a unique aroma.
- 1/2 tsp baking powder: Gives the brownies that light, fluffy texture. Ensure it’s fresh for the best results!
- 1/4 tsp sea salt: Enhances the flavors magically. You could even use a flavored salt, like smoked salt, for an unexpected touch!
Step-by-Step Instructions
Now let’s get to baking these dreamy brownies! Follow these detailed steps to a perfect treat:
-
Preheat Your Oven: First things first—preheat your oven to 350°F (175°C). This ensures even baking, creating that lovely chewy texture you want in brownies.
-
Blend the Cottage Cheese: In a mixing bowl, add your cottage cheese and blend it using an immersion blender or food processor until it’s smooth and creamy. This is where the magic happens! Smooth cottage cheese means no lumps in your delicious brownies. A quick tip: If you prefer a slightly lighter texture, you can whip some air into it by blending a bit longer.
-
Mix in the Wet Ingredients: To your blended cottage cheese, add in the honey (or maple syrup) and vanilla extract. Mix until well combined. The sweet aroma starts here! Remember, blending everything helps the flavors marry beautifully.
-
Combine Dry Ingredients: In a separate bowl, whisk together cocoa powder, almond flour, baking powder, and sea salt. Make sure there are no dry clumps of cocoa; we want a beautifully mixed batter. Chef Hack: Sifting your dry ingredients can help break up clumps and incorporate air for fluffier brownies!
-
Combine Everything: Pour the dry mix into the wet mixture and thoroughly combine until you see no dry streaks. It’s okay if the batter is thick—that’s exactly what we want! If you’re feeling adventurous, fold in some chocolate chips or chopped nuts for extra texture.
-
Prepare Your Baking Dish: Line an 8×8 inch square baking dish with parchment paper or grease it lightly with coconut oil. This helps in easy removal, plus it adds a lovely hint of coconut flavor if you’re into that!
-
Pour and Spread: Spoon your brownie batter into the prepared dish, smoothing it out evenly with a spatula. Don’t forget to lick the spatula—chef’s privilege!
-
Bake: Pop your dish in the preheated oven and bake for 20-25 minutes. Keep an eye on them; you want them to be set but still fudgy in the middle. A toothpick inserted should come out with a few moist crumbs.
-
Cool and Slice: Once they’ve cooled for about 10-15 minutes, lift them out using the parchment paper and slice into squares. Enjoy the warm, chocolatey ribbons of joy!
Serving Suggestions
These brownies are delicious on their own, but you can elevate the experience with a scoop of your favorite ice cream or a dollop of Greek yogurt. For a little touch of elegance, dust with powdered sugar or drizzle melted dark chocolate on top. Serve with fresh berries for a perfect contrast—frooty, fancy, and fabulous!
Recipe Variations
Here are some fun ways to switch up this recipe:
- Nutty Cocoa Crunch: Add 1/2 cup of chopped nuts (like walnuts or pecans) to the batter for a delightful crunch.
- Mint Chocolate Dream: Stir in a few drops of peppermint extract right into the batter for a refreshing twist!
- Caramel Swirl: Drizzle in some salted caramel before baking for a sweet surprise.
- Mocha Magic: Mix in a tablespoon of instant coffee granules for that delightful coffee-chocolate combo.
- Dairy-Free Delight: Replace dairy ingredients with plant-based alternatives to create a vegan version.
Chef’s Notes
Throughout my kitchen adventures, I’ve learned that experimenting is half the fun! At first, I was skeptical about using cottage cheese in a brownie, but that first bite changed everything. It has not only become a hit among my health-conscious friends, but also at gatherings where everyone is left wondering what the secret ingredient is! The ooey-gooey texture and rich flavor have since led to many kitchen experiments—each better than the last. So don’t hesitate to play around with it; the kitchen is your playground!
FAQs and Troubleshooting
1. Why are my brownies dry?
If your brownies are dry, it may have been overbaked or the oven may have been too hot. Always keep an eye on them and do the toothpick test to check for doneness.
2. Can I store these brownies?
Absolutely! Store them in an airtight container at room temperature for up to 3 days. For longer storage, chill in the fridge or wrap them tightly in foil and freeze for up to a month.
3. Can I use a different sweetener?
Yes, you can use coconut sugar, stevia, or monk fruit sweetener. Just keep in mind that the sweetness level may vary, so adjust according to taste!
4. What if I don’t have almond flour?
No worries! You can easily substitute with whole wheat flour, or ground oats, keeping in mind that this may change the texture slightly.
Nutritional Info
While I usually focus on flavor and nutrition rather than strict numbers, these brownies are loaded with protein and cut down on sugar—making them a sweet treat you can feel good about. A standard square (when cut into 16 servings) has approximately 100 calories and provides around 5-6 grams of protein, thanks to the cottage cheese!
There you have it—a celebratory recipe that not only satisfies your chocolate cravings but also fits your wellness goals! I hope this fills your kitchen with as much joy as it brought me. Happy baking, my foodie friends! Remember, in the kitchen, the only limit is your creativity. Enjoy those brownies!
Print
Protein Cottage Cheese Brownies
- Total Time: 35 minutes
- Yield: 16 servings 1x
- Diet: Healthy
Description
Deliciously fudgy brownies made with cottage cheese, boasting a rich chocolate flavor and packed with protein for a guilt-free treat.
Ingredients
- 1 cup cottage cheese
- 1/2 cup unsweetened cocoa powder
- 1/2 cup honey or maple syrup
- 1/4 cup almond flour
- 2 large eggs
- 1 tsp vanilla extract
- 1/2 tsp baking powder
- 1/4 tsp sea salt
Instructions
- Preheat your oven to 350°F (175°C).
- Blend the cottage cheese until smooth and creamy.
- Mix in the honey (or maple syrup) and vanilla extract until well combined.
- Combine the cocoa powder, almond flour, baking powder, and sea salt in a separate bowl.
- Pour the dry mix into the wet mixture and stir until fully combined.
- Prepare an 8×8 inch baking dish by lining it with parchment paper or greasing it.
- Pour the batter into the prepared dish and spread it evenly.
- Bake for 20-25 minutes until set but fudgy.
- Cool for 10-15 minutes before slicing into squares.
Notes
Serve with a scoop of ice cream or a dollop of Greek yogurt for added indulgence.
- Prep Time: 10 minutes
- Cook Time: 25 minutes
- Category: Dessert
- Method: Baking
- Cuisine: American
Nutrition
- Serving Size: 1 brownie
- Calories: 100
- Sugar: 8g
- Sodium: 150mg
- Fat: 4g
- Saturated Fat: 1g
- Unsaturated Fat: 3g
- Trans Fat: 0g
- Carbohydrates: 12g
- Fiber: 2g
- Protein: 6g
- Cholesterol: 30mg
Keywords: brownies, healthy dessert, protein baked goods

Mummy Brownies
Mummy Brownies: A Spooktacular Treat for Halloween!
Welcome to my kitchen, fellow food lovers! I’m Olivia Bennett, your go-to home cook who believes that every meal can create a memory and every dessert tells a story. As Halloween creeps around the corner, it’s time to unleash your inner culinary ghoul and whip up something delightfully spooky. Today, I’m sharing my beloved Mummy Brownies that are ooey-gooey, chocolatey, and just the right amount of festive. Whether you’re hosting a Halloween party, need a fun treat for your kids’ school, or just want to spice up your snack table, these brownies will bring out the joy of the season.
What I love most about these Mummy Brownies is not just their captivating appearance but the warmth they bring to gatherings. Imagine your guests oohing and aahing as they spot these adorable mummies nestled among other treats. Plus, who can resist a rich brownie topped with a ghostly drizzle? So grab your spatula, put on your apron (preferably one that’s messy like mine!), and let’s get baking!
A Memory to Cherish
Let me take you back to the first Halloween I made these Mummy Brownies. My daughter, Mia, was just eight years old and was bursting with excitement to decorate our front porch with cobwebs and jack-o’-lanterns. With Halloween approaching, we decided to make something special together for her school’s spooky celebration. It was one of those beautiful fall afternoons where the crisp air and rustling leaves set the perfect backdrop for baking.
We turned on some fun Halloween tunes, gathered our ingredients, and dove head-first into our culinary adventure. As we mixed, poured, and decorated, giggles mixed with the rich scent of melting chocolate. Mia’s playful side came out as she attempted to create the mummies’ faces, each one more whimsical than the last. The moment she placed the first brownie on a plate and drizzled the white chocolate with absolute concentration, I knew I had to document this recipe for future Halloweens.
That year, the kids loved the brownies so much that they declared Mia a “Mummy Brownie Queen.” The laughter, the collaboration, and the sweet mess we created together have stayed with us as one of our favorite Halloween traditions. Now, it’s your turn to create those magical moments in your kitchen!
Ingredients: What You’ll Need
Here’s a quick rundown of the ingredients that make these Mummy Brownies so delightful:
-
1 cup unsalted butter: The foundation of every great brownie. Use for richness and moisture. If you’re in a pinch, you can substitute with margarine or coconut oil, but the flavor will differ slightly.
-
2 cups granulated sugar: Sweetness is key! This balances the richness of the butter and chocolate. If you prefer, you could use brown sugar for a deeper molasses flavor.
-
4 large eggs: Eggs add structure and richness. If you’re looking for an egg-free version, you can use flaxseed meal (1 tablespoon mixed with 2.5 tablespoons of water per egg) or applesauce.
-
1 teaspoon vanilla extract: The aromatic boost that brings everything together. You can use almond extract for a twist or even a dash of espresso for depth.
-
1 cup all-purpose flour: This gives the brownies a chewy texture. Gluten-free flour blends work great as a substitute for a gluten-free version.
-
1 cup unsweetened cocoa powder: The star ingredient for that rich chocolate flavor! Dutch-processed cocoa will give a more robust chocolate taste, while natural cocoa powder will make it lighter.
-
1 teaspoon baking powder: It helps the brownies rise and get fluffy. If you’re out, replace it with baking soda, though the texture may vary slightly.
-
1/2 teaspoon salt: Enhances the sweetness and balances the flavors. Don’t skip this one!
-
1 cup white chocolate chips: For the mummy’s bandages. If you’d like a dairy-free version, sub with dairy-free white chocolate or melted coconut butter.
-
Candy eyes: These tiny decorations bring the mummies to life! You can use any edible eyeball candy or chocolate chips for a simpler version.
Gather these pantry staples, and let’s create some spooky magic!
Step-by-Step Instructions
-
Preheat the Oven: Start by preheating your oven to 350°F (175°C). This is a crucial step because the brownies need to bake evenly. While the oven warms up, I like to line a 9×13-inch baking pan with parchment paper, leaving some overhang. This makes it super easy to lift the brownies out later!
-
Melt the Butter: In a microwave-safe bowl, melt the unsalted butter until it’s just melted but not boiling. A good tip here is to microwave it in short bursts of 30 seconds to prevent it from splattering everywhere. You want it smooth and silken!
-
Mix the Sugars: In a large mixing bowl, combine the melted butter with granulated sugar. Whisk until it’s light and fluffy. This step is essential for incorporation and will help create that lovely, chewy brownie texture!
-
Add Eggs and Vanilla: Next, whisk in the eggs one at a time, ensuring each is fully incorporated before adding the next. Don’t forget the vanilla extract! This adds a wonderful aroma and flavor.
-
Combine Dry Ingredients: In another bowl, sift together the flour, cocoa powder, baking powder, and salt. This sifting step is often overlooked, but it helps prevent clumps of cocoa and ensures that your brownies have a smooth consistency.
-
Combine Wet and Dry Mixtures: Gradually fold the dry ingredients into the wet ingredients using a spatula. Be gentle here—overmixing can lead to dense brownies! Just mix until no more dry flour is visible.
-
Add Delicious Bits: At this point, feel free to fold in chocolate chips or nuts if you want to add a little extra texture. But since we’re going for a mummy look, let’s keep it simple!
-
Bake: Pour the brownie batter into your prepared baking pan and spread evenly. Bake in the preheated oven for about 25-30 minutes. Keep an eye on them; you want the edges set while the center is still slightly fudgy. A toothpick should come out with a few moist crumbs.
-
Cool and Cut: Once those brownies are out of the oven, let them cool in the pan for about 10 minutes. Carefully lift them out (using the parchment paper) and allow them to cool completely on a wire rack before cutting them into squares.
-
Decorate Your Mummies: Now for the fun part! In a microwave-safe bowl, melt the white chocolate chips until smooth. Drizzle the melted chocolate over each brownie to create “bandages.” Place two candy eyes on each brownie, and voila! You’ve assembled your adorable mummy brownies!
Serving Suggestions
These Mummy Brownies are perfect for any Halloween gathering! To create a spooktacular presentation, you might consider serving them on a rustic wooden board with other Halloween-themed treats like pumpkin spice cupcakes or ghostly marshmallow pops. You could also sprinkle some edible glitter or serve them alongside a scoop of vanilla ice cream for a deliciously witchy dessert!
Recipe Variations
Feeling adventurous? Here are a few variations you can try to personalize your Mummy Brownies:
-
Chocolate Mint Mummies: Add a few drops of peppermint extract to the brownie batter for a refreshing twist. Top with crushed mint chocolate candies instead of eyes for a festive touch.
-
Nutty Brownies: Add 1/2 cup of chopped nuts (like walnuts or pecans) to the batter for extra crunch and richness. Make sure to adjust your brownie structure slightly with a touch more flour if needed.
-
Pumpkin Spice Mummies: Substituting half of the cocoa powder with pumpkin puree (not the spiced kind) can give a delicious pumpkin flavor while still keeping the chocolatey essence. Add 1 teaspoon of pumpkin spice, and that’s a seasonal winner!
-
Caramel Stuffed: Place small dollops of caramel sauce on top of the brownie batter before baking for gooey surprises in every bite!
-
Peanut Butter Swirl: Drizzle peanut butter on top of the brownie before baking and use a knife to create a beautiful swirl. This classic combo will transport you straight to dessert heaven!
Chef’s Notes
With every recipe I share, I find that there’s a story evolving from my initial attempts. The Mummy Brownies have been a hit at countless family gatherings, evolving from simple chocolate treats to an annual tradition. One year, while making these, I accidentally mixed up my baking soda for salt! But instead of tossing them out, we tasted them and found they added a strangely delightful flavor! It just goes to show that the kitchen is often a place for happy accidents.
So, don’t stress if things don’t go according to plan; embrace the creativity and spontaneity of cooking! Each batch of Mummy Brownies has a little piece of love and laughter embedded in them, and now it’s your turn to add your unique touch!
FAQs and Troubleshooting
Q: My brownies turned out cakey instead of fudgy. What happened?
A: If your brownies are cakey, it might be due to overmixing the batter or baking them too long. Try to fold just until the dry ingredients disappear and keep a close watch while they bake.
Q: How do I store leftover brownies?
A: Store them in an airtight container at room temperature for up to 3 days or in the fridge for up to a week. You can also freeze individual servings wrapped in plastic wrap for a quick treat later!
Q: Can I use a different type of chocolate?
A: Of course! While the original recipe calls for unsweetened cocoa powder and white chocolate for decoration, feel free to experiment with dark chocolate or milk chocolate according to your taste preferences.
Q: What can I do if I don’t have candy eyes?
A: No worries! You can make “eyes” with small chocolate chips, mini marshmallows, or even use icing to draw pupils on a white chocolate base. The charm is all in the creativity!
Nutritional Info
If you’re curious about the nutritional info, a standard serving of these Mummy Brownies (one brownie) roughly has:
- Calories: 180
- Total Fat: 9g
- Saturated Fat: 5g
- Cholesterol: 40mg
- Sodium: 100mg
- Total Carbohydrates: 24g
- Dietary Fiber: 1g
- Sugars: 15g
- Protein: 2g
(Please note that these values can vary based on specific brands and ingredient variations!)
So there you have it! A fun, festive, and foolproof recipe for Mummy Brownies that will delight both young and old this Halloween season. Remember, cooking is about creating memories, so let your personality shine through each step. Enjoy baking, and don’t forget to have fun—after all, that’s what it’s all about in my cozy little kitchen! Happy haunting!
Print
Mummy Brownies
- Total Time: 50 minutes
- Yield: 12 servings 1x
- Diet: Vegetarian
Description
Delightfully spooky Mummy Brownies perfect for Halloween gatherings, combining rich chocolatey flavor with festive decoration.
Ingredients
- 1 cup unsalted butter
- 2 cups granulated sugar
- 4 large eggs
- 1 teaspoon vanilla extract
- 1 cup all-purpose flour
- 1 cup unsweetened cocoa powder
- 1 teaspoon baking powder
- 1/2 teaspoon salt
- 1 cup white chocolate chips
- Candy eyes for decoration
Instructions
- Preheat the oven to 350°F (175°C) and line a 9×13-inch baking pan with parchment paper.
- Melt the unsalted butter in a microwave-safe bowl until just melted.
- Mix the melted butter with granulated sugar until light and fluffy.
- Add eggs one at a time, mixing in vanilla extract.
- Combine flour, cocoa powder, baking powder, and salt in another bowl.
- Fold the dry ingredients into the wet ingredients gently until no dry flour is visible.
- Pour the brownie batter into the prepared baking pan and spread evenly.
- Bake for 25-30 minutes until edges are set and center is slightly fudgy.
- Cool in the pan for 10 minutes, then lift out and allow to cool completely on a wire rack.
- Decorate with melted white chocolate chips to create “bandages” and place two candy eyes on each brownie.
Notes
Store leftover brownies in an airtight container at room temperature for up to 3 days or in the fridge for up to a week.
- Prep Time: 20 minutes
- Cook Time: 30 minutes
- Category: Dessert
- Method: Baking
- Cuisine: American
Nutrition
- Serving Size: 1 brownie
- Calories: 180
- Sugar: 15g
- Sodium: 100mg
- Fat: 9g
- Saturated Fat: 5g
- Unsaturated Fat: 4g
- Trans Fat: 0g
- Carbohydrates: 24g
- Fiber: 1g
- Protein: 2g
- Cholesterol: 40mg
Keywords: Mummy Brownies, Halloween treats, chocolate brownies, festive desserts
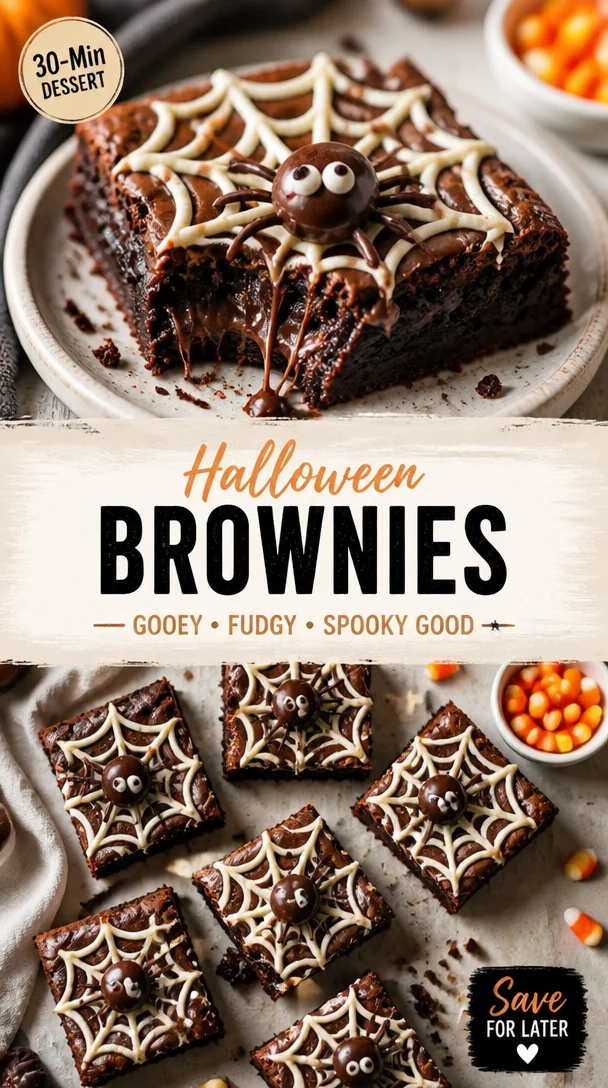
Halloween Brownies Recipe: Gooey Spider Web Swirls
Halloween Brownies: A Spooktacular Delight
Welcome, fellow foodies! It’s that enchanting time of year when the air gets cool, the leaves change colors, and spooky decorations adorn our homes. Yes, it’s Halloween season! 🎃 While candy corn and ghost-shaped gummies are sure to charm any trick-or-treater, I believe that the highlight of any Halloween gathering deserves to be something decadent, gooey, and rich—my Halloween brownies! These aren’t just any brownies; they’re delightfully chocolatey and topped with festive sprinkles that can make even the spookiest night feel warm and inviting.
Imagine it: the intoxicating aroma of warm chocolate wafts through your kitchen as you prepare these brownies, and the anticipation builds as friends and family gather around, eager to dig in. Today, I’m excited to share not just the recipe, but also little tidbits and stories that’ll help you create the most memorable Halloween treat. So grab your favorite apron (and maybe a little pumpkin spice latte), and let’s get baking!
A Nostalgic Halloween Memory
Growing up, Halloween was one of my favorite holidays—not just for the candy, but for the family traditions we created around it. Every year, my mom would set up a "haunted kitchen" where the sweet smell of baking filled the air, and I’d help her whip up a batch of brownies. I remember one year, we decided to add a spooky twist: we dropped candy eyes into the batter before baking. When they came out of the oven, those little eyes peeking up at us transformed ordinary brownies into an eerie treat that had us giggling.
That night, we invited our neighborhood friends for a spooky movie marathon, and those brownies were the main event. We devoured them while watching classic Halloween flicks, and each bite was a reminder—sweet treats can create unforgettable memories. It’s this same magic I hope to bring to your kitchen with this recipe.
Ingredients
To make these Halloween brownies truly special, we’ll need the following ingredients:
-
1 cup unsalted butter
Tip: Using unsalted butter gives you control over the salt in your recipe. If you only have salted butter, reduce the added salt in the recipe. -
2 cups granulated sugar
This adds the sweetness that offsets the rich cocoa flavor. You can substitute half with brown sugar for a richer taste! -
4 large eggs
Eggs help bind everything together and give your brownies that chewy texture we love. An egg substitute for vegans would be 1/4 cup applesauce per egg. -
1 teaspoon vanilla extract
Vanilla is key to enhancing the chocolate flavor. Choose pure vanilla extract for the best taste! -
1 cup all-purpose flour
It’s important to measure your flour correctly to avoid dry brownies. Scoop and level with a knife! -
1 cup cocoa powder
Go for unsweetened cocoa powder to really let the chocolate shine through! A dark cocoa powder can elevate the richness. -
1/2 teaspoon baking powder
This ensures our brownies rise just enough to create a fluffy center. -
1/2 teaspoon salt
Salt enhances the sweetness and balances the flavors beautifully. -
1 cup chocolate chips (optional)
For extra gooeyness, mix in semi-sweet or dark chocolate chips! White chocolate chips can be a fun variation. -
Halloween-themed sprinkles
These are the crowning glory! Use any mix of spooky sprinkles like bats, ghosts, or pumpkin shapes to make it festive.
Step-by-Step Instructions
Now that we’ve got our spooky ingredients ready, let’s dive into making these Halloween brownies! Here’s how to whip them up, step by step.
-
Preheat Your Oven:
Start by preheating your oven to 350°F (175°C). This allows for even baking and ensures our brownies have that delicious crust on top! -
Prepare Your Baking Dish:
Grease a 9×13 inch baking pan and line it with parchment paper. This will make it much easier to lift the brownies out later for cutting. Plus, who doesn’t love a clean release? -
Melt the Butter:
In a medium saucepan, melt the unsalted butter over low heat. As it’s melting, stir it a bit to help it along. You can also do this in the microwave. Just melt in 30-second bursts and stir in between to avoid splattering! -
Mix Sugar and Butter:
Remove the melted butter from heat and whisk in the granulated sugar until well combined. This process helps dissolve the sugar, which leads to beautifully fudgy brownies. -
Add in Eggs and Vanilla:
Quickly whisk in the eggs, one at a time, followed by the vanilla extract. Mixing these in thoroughly gives your brownies that luscious texture. Don’t be afraid to give it a good whisk here! -
Combine Dry Ingredients:
In a separate bowl, whisk together the flour, cocoa powder, baking powder, and salt. Gradually add this dry mix to the wet ingredients, stirring gently until just combined. Be careful not to overmix—lumps are okay! -
Incorporate Chocolate Chips:
If you’re using chocolate chips or other add-ins, fold them into the batter now. This is where your brownies get that delightful melt-in-your-mouth texture! -
Bake the Brownies:
Pour the brownie batter into your prepared baking dish, using a spatula to spread it evenly. Bake for 20-25 minutes or until a toothpick inserted into the center comes out with a few moist crumbs. -
Cool and Decorate:
After baking, let your brownies cool in the pan for a few minutes before lifting them out using the parchment paper. Once they’re completely cool, it’s time to decorate with your favorite Halloween sprinkles! -
Cut and Enjoy:
Use a sharp knife to cut into squares (or spooky shapes if you’re feeling extra). Serve them up and watch the smiles light up!
Serving Suggestions
To make your Halloween brownies extra festive, consider serving them on a platter adorned with mini pumpkins or spider decorations. You could even pair them with a scoop of vanilla ice cream—with a drizzle of warm caramel sauce for a haunt-worthy dessert. For a true spooky effect, you might want to dust some powdered sugar on top, creating a ghostly appearance!
Recipe Variations
Feel free to have fun with this brownie recipe! Here are a few variations to consider:
-
Peppermint Bark Swirl: Fold in crushed peppermint candies and swirl some melted white chocolate into the brownie batter before baking for a festive minty kick.
-
Nutty Surprise: Add a cup of chopped nuts like walnuts or pecans for an extra layer of texture. Toast them beforehand for a deeper flavor!
-
Vegan Version: Substitute with vegan butter and replace eggs with flaxseed meal mixed with water (1 tablespoon flaxseed mixed with 3 tablespoons water = 1 egg).
-
Gluten-Free Brownies: Use a 1:1 gluten-free baking flour in place of all-purpose flour for a gluten-free treat that everyone can enjoy.
-
Caramel Drizzle: Drizzle melted caramel over the top before serving for a gooey upgrade that’s to die for!
Chef’s Notes
As I reflect on my kitchen adventures, I can assure you that experimentation is the name of the game. The first time I made these Halloween brownies, I forgot to add the baking powder. They ended up like a deliciously dense chocolate fudge rather than brownies! Instead of being upset, I leaned in and started calling them "fudge brownies." Sometimes the best moments in the kitchen come from mistakes—the key is to have fun and not take yourself too seriously. So, even if your brownies don’t turn out as planned, they’ll still end up tasting amazing!
FAQs and Troubleshooting
-
Why are my brownies dry?
Overbaking could be the culprit! Keep an eye on them, and try to remove them once a toothpick comes out with a few moist crumbs, not dry. -
My brownies didn’t rise! What went wrong?
Ensure your baking powder is fresh. If it’s expired, your brownies won’t rise properly. Also, check that you mixed your wet and dry ingredients just enough—overmixing can lead to tough brownies! -
Can I freeze brownies?
Absolutely! Cut your brownies into squares, wrap them individually in plastic wrap, and place them in an airtight container. They’ll last for a few months in the freezer! -
How do I get clean cuts on brownies?
Run your knife under hot water, wipe it dry, and then cut. The heat will help make cleaner cuts through the fudgy brownies!
Nutritional Info
While we focus on flavors and fun, here’s a quick overview of some nutritional information per serving (based on a 2-inch square cut):
- Calories: 250
- Total Fat: 12g
- Saturated Fat: 7g
- Cholesterol: 70mg
- Sodium: 80mg
- Total Carbohydrates: 35g
- Dietary Fiber: 2g
- Sugars: 20g
- Protein: 3g
Making these Halloween brownies is more than just whipping up a treat; it’s about creating memories filled with joy and laughter with friends and family. I hope these brownies spark joy in your kitchen as they have in mine. So roll up those sleeves, get messy, and embrace the spirit of Halloween! Happy baking!
Print
Halloween Brownies: A Spooktacular Delight
- Total Time: 40 minutes
- Yield: 16 servings 1x
- Diet: Vegetarian
Description
Delightfully chocolatey brownies topped with festive sprinkles, perfect for Halloween gatherings.
Ingredients
- 1 cup unsalted butter
- 2 cups granulated sugar
- 4 large eggs
- 1 teaspoon vanilla extract
- 1 cup all-purpose flour
- 1 cup cocoa powder
- 1/2 teaspoon baking powder
- 1/2 teaspoon salt
- 1 cup chocolate chips (optional)
- Halloween-themed sprinkles
Instructions
- Preheat your oven to 350°F (175°C).
- Prepare a 9×13 inch baking pan by greasing and lining it with parchment paper.
- Melt the unsalted butter in a medium saucepan over low heat.
- Mix the melted butter with the granulated sugar until well combined.
- Add in the eggs, one at a time, followed by the vanilla extract.
- Combine the dry ingredients: flour, cocoa powder, baking powder, and salt in a separate bowl.
- Incorporate the dry ingredients into the wet mixture, stirring gently until just combined.
- Fold in the chocolate chips, if using.
- Pour the batter into the prepared baking dish and spread it evenly.
- Bake for 20-25 minutes, until a toothpick comes out with a few moist crumbs.
- Cool and decorate with Halloween sprinkles.
- Cut into squares and enjoy!
Notes
These brownies can also be topped with mini pumpkins or served with vanilla ice cream and caramel sauce for extra festivity.
- Prep Time: 15 minutes
- Cook Time: 25 minutes
- Category: Dessert
- Method: Baking
- Cuisine: American
Nutrition
- Serving Size: 1 square
- Calories: 250
- Sugar: 20g
- Sodium: 80mg
- Fat: 12g
- Saturated Fat: 7g
- Unsaturated Fat: 3g
- Trans Fat: 0g
- Carbohydrates: 35g
- Fiber: 2g
- Protein: 3g
- Cholesterol: 70mg
Keywords: Halloween, brownies, dessert, baking, festive treats
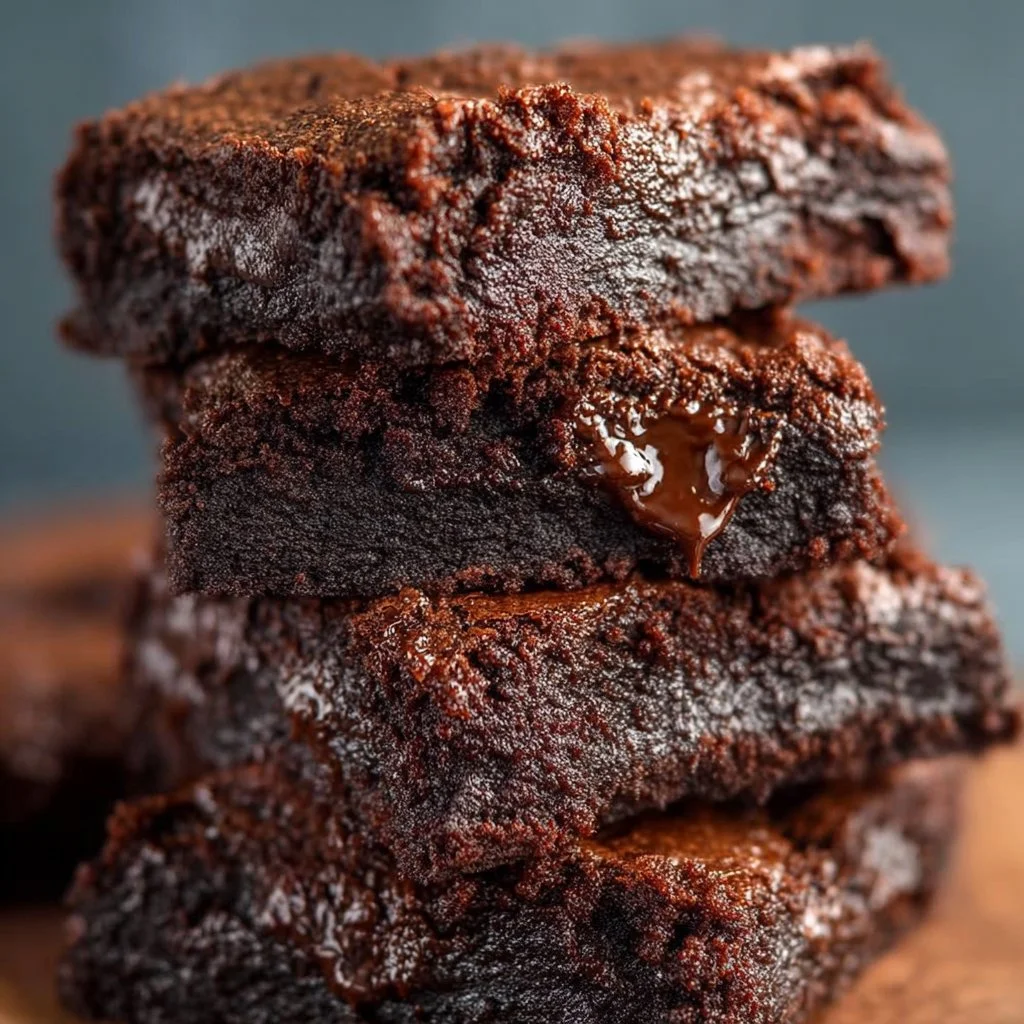
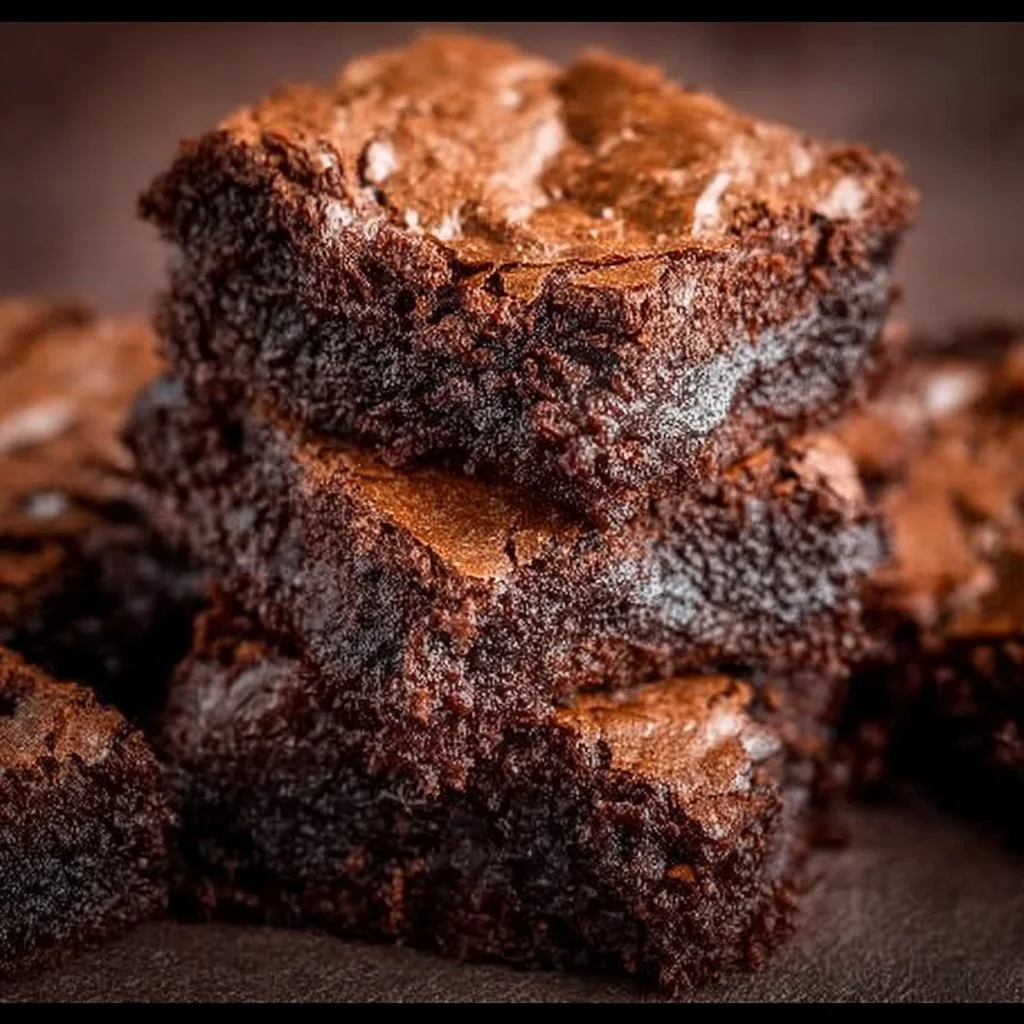
Low Calorie Greek Yogurt Brownies
Indulge in Guilt-Free Delight: Low-Calorie Greek Yogurt Brownies
Hey there, fellow food lovers! I’m Olivia Bennett, and today, I’m inviting you into my cozy kitchen to whip up something that’s as delicious as it is guilt-free: Low-Calorie Greek Yogurt Brownies! I mean, who doesn’t love a rich, fudgy brownie? But what if I told you that you could indulge without the usual calorie splurge? Sounds too good to be true, right? But trust me, these brownies are here to reshape your dessert experience!
Picture this: It’s a rainy afternoon, the kind that begs for something sweet. The smell of cocoa fills the air as you mix up a bowl of ingredients that promise chocolaty bliss. We all have those days where a box of brownies can just whisk away the blues, but often those decadent treats come with a hefty price tag on our waistlines and energy levels. Enter Greek yogurt—our hero ingredient! Not only does it add delightful moisture and texture, but it also dials down the calories while keeping the flavor cranked up to eleven!
Whether you’re baking for your family, friends, or that special someone who loves chocolate as much as you do, these brownies will bring everyone together. They are perfect for any occasion, from cozy movie nights to summertime picnics, and they’re super easy to make, even for beginner bakers. So, roll up those sleeves, preheat that oven, and let’s dive into our delicious journey of Low-Calorie Greek Yogurt Brownies!
Personal Story
I can’t help but smile when I think about the first time I created these Greek Yogurt brownies. It was a chilly winter evening, and my best friend Sarah had dropped by for a girl’s night. We had a crazy week and decided to indulge in a bake-off challenge! But with both of us trying to eat healthier, we needed a recipe that wouldn’t derail our efforts. So, we put on our creative hats and started experimenting.
The kitchen was a whirl of laughter, flour, and enthusiastic tasting spoons as we swapped ideas and flavors. After a bit of trial (and a few “oops” moments—yikes!) we emerged victorious with a batch of brownies that were rich, fudgy, and totally satisfying. Each bite was a reminder that we didn’t have to sacrifice flavor for health, and that evening bonded us even more. Those brownies became a staple at our gatherings, and every time I bake these, they bring back those warm, nostalgic memories of friendship, laughter, and a shared love for sweet treats.
Ingredients
Here’s what you’ll need to bring these Low-Calorie Greek Yogurt Brownies to life:
-
1 cup unsweetened cocoa powder: This is the heart of your brownies! Using unsweetened cocoa ensures rich flavor without adding too much sugar. If you want, you can use Dutch-processed cocoa for a smoother taste.
-
1 cup whole wheat flour: A wonderful alternative to all-purpose flour that adds fiber and nutrients. You can substitute it with almond flour for a gluten-free version, but you might need to adjust the liquid slightly.
-
1 cup Greek yogurt (plain, non-fat): The magic ingredient that keeps these brownies moist and delicious while cutting down on fat. You can swap it with regular yogurt, but I recommend sticking with Greek for that creamy texture.
-
1/2 cup honey or maple syrup: Both sweeteners provide natural sweetness while keeping calories low. Honey will give a richer taste, whereas maple syrup adds a slight caramel flavor—choose according to your preference!
-
2 large eggs: Essential for binding and moisture. If you’re looking for a vegan option, you can replace each egg with a 1/4 cup of unsweetened applesauce.
-
1 teaspoon vanilla extract: A must for enhancing flavors! Always use pure vanilla extract for the best taste. If you’re running low, a pinch of almond extract can add a lovely touch.
-
1/2 teaspoon baking powder: This helps your brownies rise just a bit. If you’re using self-rising flour instead of whole wheat, you can omit this ingredient.
-
1/4 teaspoon sea salt: A tad of salt enhances all the flavors. If you like a touch of sweetness, try adding a sprinkle of flaky sea salt on top of the brownies before baking!
Step-by-Step Instructions
Let’s roll up our sleeves and get cooking! Here’s a detailed guide to making your Low-Calorie Greek Yogurt Brownies:
-
Preheat the Oven: Set that oven to 350°F (175°C). This is a crucial first step because a preheated oven ensures even baking. The brownies will rise perfectly and get that nice outer crust.
-
Prepare Your Pan: Grab an 8×8-inch baking dish and line it with parchment paper. Trust me, this will help you lift the brownies out later and ensure they don’t stick. A little cooking spray on the pan also goes a long way!
-
Mix the Wet Ingredients: In a large mixing bowl, whisk together the Greek yogurt, eggs, honey (or maple syrup), and vanilla extract until smooth. This is such a great chance to channel your inner chef! Feel free to sing while you mix—it makes everything more fun!
-
Combine Dry Ingredients: In another bowl, sift together the cocoa powder, whole wheat flour, baking powder, and salt. Sifting the cocoa powder helps to avoid lumps and ensures an even distribution of the dry ingredients. Plus, it’s a great workout for your arms!
-
Combine Wet and Dry: Gradually add the dry mixture into the wet mixture, folding it gently. Use a spatula to combine—don’t overmix, but make sure no dry pockets are left behind. You want the batter to be thick and luscious!
-
Fold in Chocolate Chips (Optional): If you’re feeling indulgent, fold in about a half cup of dark chocolate chips. These add lovely melty pockets of chocolate, taking your brownies to the next level. Just be mindful of your sweet tooth!
-
Pour into Prepared Pan: Transfer the brownie batter into your lined baking dish, smoothing the top with your spatula. You can even tap the pan gently on the counter to release any air bubbles.
-
Bake: Slide your brownies into the preheated oven and bake for about 20-25 minutes. The edges will start to pull away from the pan, and a toothpick inserted into the center should come out with a few moist crumbs—not completely clean. Remember, they’ll continue to cook slightly after you take them out!
-
Cool and Slice: Allow the brownies to cool in the pan for about 10-15 minutes. Use the parchment paper to lift them out and transfer them to a wire rack. Let them cool completely before slicing. I know, waiting is the hardest part, but it’s worth it!
-
Enjoy! Now it’s time to enjoy your heavenly Greek yogurt brownies! Serve them as is or with a dollop of Greek yogurt on top for added creaminess.
Serving Suggestions
As you slice into these fudgy beauties, consider serving them warm with a scoop of vanilla Greek yogurt or a sprinkle of crushed nuts for a delightful contrast in texture. You can also pair them with a rich berry compote to add a fresh burst of flavor. And if you want to make it like a dessert sundae — layer a slice of brownie with a scoop of your favorite ice cream. Yum!
Recipe Variations
Here are a few fun ideas to change things up:
- Nutty Brownies: Stir in chopped walnuts or pecans for that added crunch and healthy fats.
- Mint Chocolate Brownies: Add a drop of peppermint extract to the batter to make delicious mint-flavored brownies perfect for the holidays.
- Peanut Butter Swirl: Add a dollop of natural peanut butter and swirl it through the batter before baking for a PB & chocolate combination that’s simply irresistible.
- Spicy Kick: Toss in a pinch of cayenne pepper or chili powder for a surprising kick that complements the chocolate beautifully.
- Fruit Fusion: Fold in fresh raspberries or chopped strawberries right before baking for a fruity twist!
Chef’s Notes
As with any recipe, these Greek Yogurt Brownies have seen their fair share of evolution. The original recipe started as just your classic brownie, but over the years, I’ve had my fair share of mishaps and successes (like the time I accidently used baking soda instead of baking powder. Oh boy, was that a fluffy disaster!). Each time I made tweaks, I learned something new about balancing flavors and textures. Now, these brownies are a staple in my home, showing that healthy doesn’t have to be boring.
Here’s a fun fact: I like to double the batch and freeze half for those late-night chocolate cravings. Just wrap them well in plastic wrap, and they’ll last up to three months. When you need a treat, pop them in the microwave for a few seconds, and you’re golden!
FAQs and Troubleshooting
1. Can I use other flours instead of whole wheat?
Absolutely! You can experiment with almond flour or coconut flour, but keep in mind that the texture might change slightly. Coconut flour absorbs more moisture, so adjust the wet ingredients accordingly!
2. The brownies turned out too dry; where did I go wrong?
Overbaking is usually the culprit! Make sure to adjust the baking time based on your oven and check the brownies a few minutes earlier. Remember, they’ll continue to cook even after they’re out of the oven!
3. What’s a good substitute for honey?
You can use agave syrup, maple syrup, or even a sugar substitute like Stevia if you’re looking to further lower the calories. Just keep in mind that this might slightly alter the flavor.
4. How can I tell when my brownies are done?
Check for moist crumbs on your toothpick when inserted into the center—this is your sign for fudgy perfection. If it comes out clean, they might be overdone, unless you love a cakey brownie!
Nutritional Info
Per brownie (based on 16 servings):
- Calories: ~90
- Protein: 4g
- Fat: 3g
- Carbohydrates: 14g
- Fiber: 2g
- Sugar: 6g (depending on sweetener)
And there you have it—heavenly Low-Calorie Greek Yogurt Brownies that are sure to impress without the guilt! I hope you enjoyed this little journey through my kitchen, and I can’t wait for you to try these out. Remember, cooking is all about having fun and experimenting! Happy baking, my friends! 🍫💖
Print
Low-Calorie Greek Yogurt Brownies
- Total Time: 40 minutes
- Yield: 16 servings 1x
- Diet: Vegetarian
Description
Indulge in these guilt-free brownies made with Greek yogurt for a moist and delicious treat without the calorie splurge.
Ingredients
- 1 cup unsweetened cocoa powder
- 1 cup whole wheat flour
- 1 cup Greek yogurt (plain, non-fat)
- 1/2 cup honey or maple syrup
- 2 large eggs
- 1 teaspoon vanilla extract
- 1/2 teaspoon baking powder
- 1/4 teaspoon sea salt
Instructions
- Preheat the oven to 350°F (175°C).
- Prepare your 8×8-inch baking dish with parchment paper.
- Mix the wet ingredients: Greek yogurt, eggs, honey (or maple syrup), and vanilla extract in a large bowl.
- Combine the dry ingredients: sift together cocoa powder, whole wheat flour, baking powder, and salt in another bowl.
- Combine the wet and dry mixtures, folding gently until no dry pockets remain.
- Fold in chocolate chips if using.
- Pour the batter into the prepared pan, smoothing the top.
- Bake for 20-25 minutes until edges pull away and a toothpick comes out with a few moist crumbs.
- Cool in the pan for 10-15 minutes, then transfer to a wire rack.
- Enjoy as is or with a dollop of Greek yogurt on top!
Notes
Consider serving with vanilla Greek yogurt or crushed nuts. These brownies can also be frozen for late-night cravings!
- Prep Time: 15 minutes
- Cook Time: 25 minutes
- Category: Dessert
- Method: Baking
- Cuisine: American
Nutrition
- Serving Size: 1 brownie
- Calories: 90
- Sugar: 6g
- Sodium: 50mg
- Fat: 3g
- Saturated Fat: 1g
- Unsaturated Fat: 2g
- Trans Fat: 0g
- Carbohydrates: 14g
- Fiber: 2g
- Protein: 4g
- Cholesterol: 50mg
Keywords: brownies, low-calorie, healthy dessert, Greek yogurt, baking
Healthier Brownies
Healthier Brownies: A Decadent Delight You Can Feel Good About!
Welcome to my kitchen! I’m Olivia, your friendly guide through the world of delicious, wholesome cooking! Today, we’re diving into a recipe that is near and dear to my heart: Healthier Brownies. Imagine biting into a fudgy, chocolatey brownie that not only satisfies your sweet tooth but also carries a handful of wholesome ingredients. It’s like enjoying your favorite treat while keeping a warm hug of health around you!
Introduction: A Brownie Revelation
There’s something magical about brownies. The way they warm up the kitchen with their rich aroma, the way they can bring people together, and let’s not forget that moment when you take a bite and everything melts away — joy at its finest! But let’s face it: it’s easy to feel guilty after indulging in a batch of traditional brownies packed with sugar and butter.
That’s where my healthier brownie recipe comes in! It allows you to enjoy the deliciousness of brownies without compromising your health goals. This recipe is crafted with love and care, using wholesome substitutes that can turn a decadent dessert into a nourishing treat. Trust me, your taste buds won’t even know they’re indulging in something healthier!
When I first started experimenting with healthier baking, I had my doubts. Could ingredients like almond flour and applesauce truly deliver that rich brownie experience? But the answer is a resounding yes! This recipe has been refined over many kitchens and countless taste tests (I may have overdone the tasting part). Each bite is moist, chocolaty, and sure to impress those you share them with.
So, if you’re ready to embark on this healthier brownie adventure, grab your apron, and let’s get baking!
Personal Story: A Childhood Classic
Growing up, my kitchen was always the heart of our home. Some of my fondest memories are wrapped around the weekend brownie-making escapades with my mom. We would whip up a batch and enjoy them while still warm, with gooey chocolate melting over vanilla ice cream—absolute bliss!
One day, I recall discovering my mom stashing a few health-conscious substitutes in her baking stash. I was skeptical—how could anything “healthier” compete with our classic family recipe? But being true to our kitchen motto of "always trying new things," we decided to give it a whirl. The results were surprisingly delightful! That day marked the beginning of my love for transforming traditional recipes into healthier versions without sacrificing flavor.
Fast forward to today, I’ve not only preserved those childhood memories but added to them by creating my own healthier brownie recipe. It’s now my favorite go-to for gatherings, family dinners, and even cozy Netflix nights. The joy of sharing a guilt-free dessert is something truly special!
Ingredients: What You’ll Need
Before we dive into the baking magic, let’s gather our superstars. Here’s what you’ll need for these healthier brownies:
-
Almond Flour
A fantastic gluten-free option that adds moisture and a subtle nuttiness to your brownies. If almond flour isn’t available, feel free to substitute with oat flour or whole wheat flour. Just keep in mind that the texture may vary slightly! -
Cocoa Powder
For that rich chocolate flavor! Opt for unsweetened cocoa powder to keep the sugar content low. If you prefer a lighter flavor, you could use carob powder. -
Unsweetened Applesauce
This is our secret ingredient! It provides natural sweetness and moisture and replaces oil or butter in traditional recipes. If you’re not a fan of applesauce, pureed banana is a great alternative. -
Maple Syrup or Honey
A touch of natural sweetness to balance everything out. Substitute with agave nectar or a sugar-free syrup if you’re looking to reduce sugar further. -
Eggs
They act as a binder, helping to create that fudgy consistency. For a vegan option, try using flax eggs (1 tablespoon of flaxseed meal mixed with 2.5 tablespoons of water per egg) for similar binding results. -
Vanilla Extract
A splash adds depth to the flavor. Feel free to enhance the flavor profile by using almond extract instead! -
Baking Powder
A little leavening agent that helps our brownies rise and become fluffy. Just a pinch will do! -
Dark Chocolate Chips
Because we all need a chocolatey explosion in our brownies! Pick a high-quality dark chocolate to keep the recipe healthy. Alternatively, try using dark chocolate chunks or dairy-free chocolate chips for a vegan bake.
Step-by-Step Instructions: Let’s Get Baking!
Now that we’ve gathered all our ingredients, it’s time to bring these brownies to life! Follow these simple steps, and you’ll have a batch of healthier brownies in no time!
-
Preheat Your Oven
Start by preheating your oven to 350°F (175°C). This helps your brownies cook evenly and develop that perfect crumb. -
Prepare Your Baking Pan
Grab an 8×8 inch baking pan and line it with parchment paper. This ensures easy removal and clean-up. If you’re feeling extra (I always am), lightly grease the paper with a bit of coconut oil or cooking spray! -
Mix Dry Ingredients
In a medium bowl, combine the almond flour, cocoa powder, baking powder, and a pinch of salt. Whisk them together until blended. This step helps to ensure all the dry ingredients are well distributed, preventing clumps in your batter! -
Whisk Wet Ingredients
In another bowl, combine the applesauce, maple syrup (or honey), eggs, and vanilla extract. Whisk these together until smooth and well combined. If using flax eggs, let the mixture sit for a few minutes to thicken. -
Combine Dry and Wet Ingredients
Gradually add the dry ingredients into the wet mixture, stirring gently until just combined. Be careful not to overmix, as this can make your brownies tough! A few lumps are perfectly okay. -
Fold in Chocolate Chips
Gently fold in the dark chocolate chips until they are evenly dispersed throughout the batter. This part is heaven—those melted chip pockets are what brownie dreams are made of! -
Pour Batter into Pan
Transfer the brownie batter into your prepared baking pan, smoothing it out into an even layer. Feel free to sprinkle a few extra chocolate chips on top for an extra pinch of temptations! -
Bake
Bake in the preheated oven for about 25-30 minutes, or until a toothpick inserted into the center comes out with a few moist crumbs (not wet batter!). Remember, these brownies will firm up a bit as they cool, so don’t overbake! -
Cool and Slice
Once baked, remove the brownies from the oven and let them cool entirely in the pan on a wire rack (if you have one). Once cool, lift them out by the parchment paper, slice them into squares, and indulge!
Serving Suggestions: How to Serve Them Up!
When it comes to serving these healthier brownies, the sky’s the limit! You can enjoy them warm, straight out of the pan, or let them cool for a firmer texture. For an extra touch, serve them with a dollop of Greek yogurt or coconut whipped cream for a creamy contrast. A dusting of powdered sugar or a drizzle of melted dark chocolate can elevate their presentation and flavor!
Recipe Variations: Get Creative!
Ready to mix things up? Here are some creative variations to make these brownies truly your own:
-
Nutty Brownies: Fold in walnuts, pecans, or hazelnuts for added crunch and healthy fats.
-
Mint Chocolate Brownies: Add a couple of drops of peppermint extract to the wet mixture for a refreshing twist.
-
Spiced Brownies: Add a pinch of cinnamon or espresso powder to enhance the chocolate flavor.
-
Fruit-Infused Brownies: Incorporate a handful of chopped strawberries or raspberries for a fruity zing.
-
Blondie Variation: Swap cocoa powder with almond flour and add butterscotch chips for a delicious blondie version!
Chef’s Notes: A Bit of Kitchen Wisdom
As a self-proclaimed brownie aficionado, I can fondly recall a moment where I used a bit less cocoa powder one day—resulting in a mishap that led to a delightful discovery. Instead of being chocolaty, those brownies turned out to have a rich coffee flavor that also wowed everyone! This experience taught me that experimentation is key in the kitchen. Don’t be afraid to swap ingredients or add your flair!
Over time, this healthier brownie recipe has evolved through insights, taste-testing from friends and family, and my own passion for suited flavors. It’s a living creation that mirrors my culinary journey!
FAQs and Troubleshooting
Q: My brownies came out too dry. What happened?
A: Overbaking might be the culprit. Keep an eye on the timer, and remember, the brownies continue to bake a few minutes after being pulled from the oven.
Q: Can I make these brownies vegan?
A: Absolutely! Use a flax egg in place of the regular egg and ensure your chocolate chips are dairy-free!
Q: How do I store leftovers?
A: Store any leftovers in an airtight container in the refrigerator for up to a week. You can also freeze them for indulgent treats later!
Q: Can I double the recipe?
A: Yes, just adjust the baking time—using a larger pan might mean a longer bake time!
Nutritional Info (Optional)
- Calories: Approximately 150 per brownie (if sliced into 16 pieces)
- Fat: 8g (mostly healthy fats from almond flour and dark chocolate)
- Carbohydrates: 15g
- Fiber: 3g
- Protein: 4g
And there you have it, my delightful friend! A healthier brownie recipe that brings smiles and comfort without skipping a beat on taste. The best part? You can feel good about savoring every bite. I can’t wait to hear how yours turn out and the little touches you decide to add. Happy baking, and remember, a little love goes a long way in the kitchen!
Print
Healthier Brownies
- Total Time: 45 minutes
- Yield: 16 brownies 1x
- Diet: Gluten-Free
Description
Decadent and fudgy brownies made healthier with wholesome ingredients like almond flour and applesauce.
Ingredients
- 1 cup almond flour
- 1/2 cup cocoa powder
- 1/2 cup unsweetened applesauce
- 1/4 cup maple syrup or honey
- 2 large eggs
- 1 tsp vanilla extract
- 1/2 tsp baking powder
- 1/2 cup dark chocolate chips
Instructions
- Preheat your oven to 350°F (175°C).
- Prepare an 8×8 inch baking pan and line it with parchment paper.
- Mix the almond flour, cocoa powder, baking powder, and a pinch of salt in a medium bowl.
- Whisk together the applesauce, maple syrup (or honey), eggs, and vanilla extract in another bowl.
- Combine the dry ingredients into the wet mixture and stir gently until just combined.
- Fold in the dark chocolate chips until evenly dispersed.
- Pour the batter into the prepared baking pan and smooth it out.
- Bake for about 25-30 minutes, or until a toothpick inserted comes out with a few moist crumbs.
- Cool completely in the pan before slicing into squares.
Notes
Serve warm or allow to cool for a firmer texture. Try pairing with Greek yogurt or a drizzle of dark chocolate for extra indulgence.
- Prep Time: 15 minutes
- Cook Time: 30 minutes
- Category: Dessert
- Method: Baking
- Cuisine: American
Nutrition
- Serving Size: 1 brownie
- Calories: 150
- Sugar: 8g
- Sodium: 50mg
- Fat: 8g
- Saturated Fat: 2g
- Unsaturated Fat: 6g
- Trans Fat: 0g
- Carbohydrates: 15g
- Fiber: 3g
- Protein: 4g
- Cholesterol: 30mg
Keywords: brownies, healthy dessert, gluten-free brownies, chocolate, easy baking
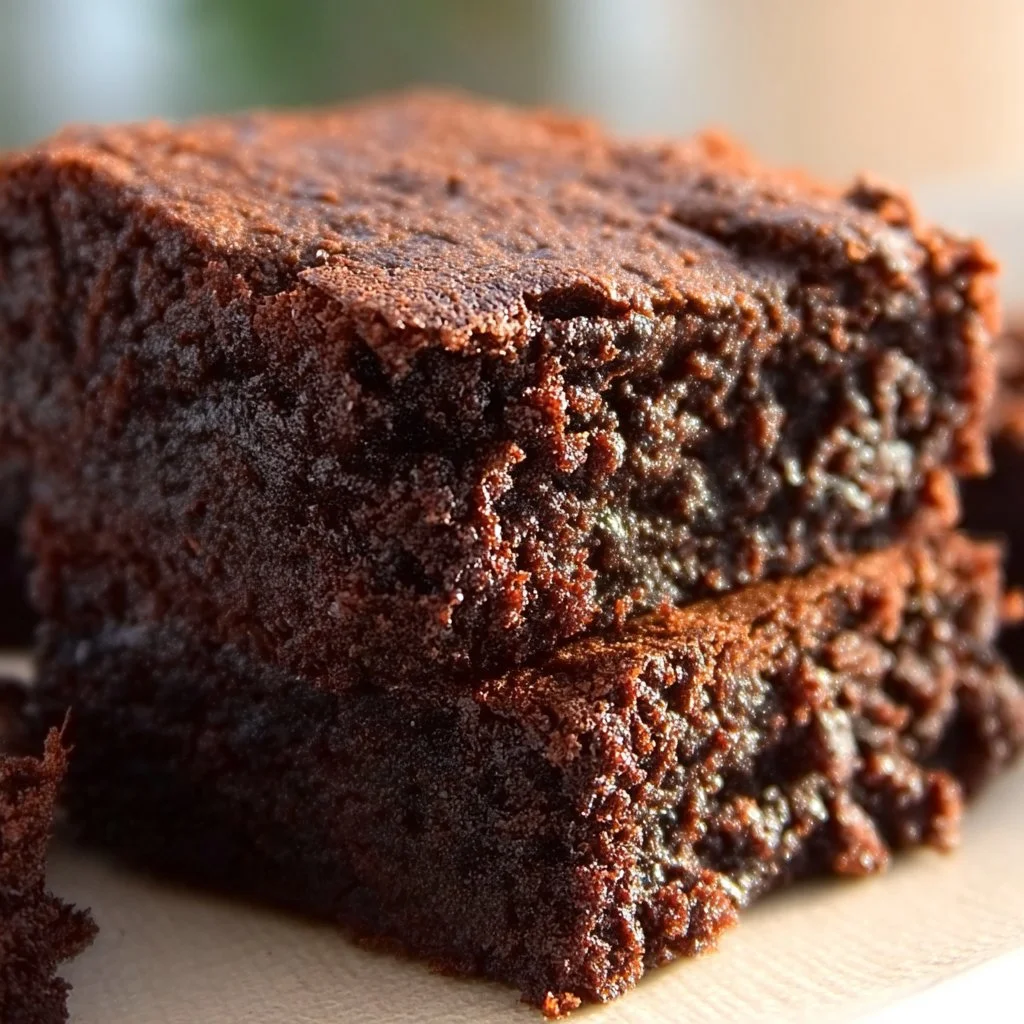
No Fat Brownies
Delightfully Decadent No Fat Brownies: Indulge Without Guilt!
Welcome to my cozy corner of the kitchen! I’m Olivia Bennett, your friendly home cook and flavor enthusiast, here to whip up something truly delightful today—No Fat Brownies! Now, before you raise an eyebrow and let the skepticism set in, let me assure you that these brownies are nothing short of delicious. They’re rich, fudgy, and utterly satisfying, proving that you can indulge without the added fat. You can thank me later!
Introduction
Let’s be honest, brownies have an almost magical ability to transform any day into something special. Their rich aroma wafting through the kitchen, the moment you pop them into the oven, and the sheer delight on the faces of anyone who gets to enjoy a warm square of chocolate-y goodness—every moment is a celebration of life! But you might be wondering, how can we recreate that magic without the fat? Fear not, my friend! These No Fat Brownies are here to show you how.
By using applesauce and other wholesome ingredients, we’ll craft a treat that doesn’t skimp on flavor but is kinder to your waistline. You see, cooking is all about creativity and making it fun, like a dance party where flavors come together! Today, we’ll dive deep into a delightful recipe that not only caters to your cravings but also invites everyone—whether they they’re health-conscious or simply looking for a guilt-free treat—to join the brownie movement!
But before we whisk our way into the kitchen, let’s embrace the moments and memories associated with these satisfying squares.
Personal Story
Ah, brownies! They remind me of Sundays spent in my grandma’s kitchen, the heart of our family home. I remember one particular afternoon; it was stormy outside, the skies dark gray, and the perfect excuse for a bake-off! Grandma and I decided to turn the gloomy day into a cozy masterpiece.
She pulled out her old, well-loved cookbook, and I still can’t forget how her eyes lit up the moment we landed on the brownie recipe. But, there was a twist. Instead of the usual oil and butter that traditionally graced the recipe, Grandma suggested we use her prized applesauce. I was skeptical—“But Grandma, brownies need fat!”—I argued. Little did I know, she was about to open my eyes to a whole new world of flavor and texture.
As we mixed the ingredients, I couldn’t shake my doubts but decided to have faith—and oh boy, what a treat they turned out to be! Fudgy, delicious, and with a whimsical note of sweetness from the applesauce, those brownies made my giggles echo throughout the house. They taught me that food, like life, is all about experimenting, embracing new ideas, and creating beautiful memories.
And now, it’s your turn to create your own best memories in the kitchen with these delightful No Fat Brownies!
Ingredients
Let’s gather our ingredients! This recipe is all about straightforward, wholesome components. Here’s what you’ll need:
-
1 cup unsweetened applesauce
Talk about my secret weapon! It adds moisture and sweetness, making these brownies incredibly fudgy without any fat. You can substitute it with mashed bananas or pumpkin puree for a different flavor profile. -
1 cup granulated sugar
Sweetness is key! Feel free to swap this out for coconut sugar or a sugar substitute like Stevia for a lower-calorie option. Just keep in mind that it might alter the texture slightly. -
2 teaspoons vanilla extract
A sprinkle of flavor! This elevates the overall taste and provides that familiar sweetness. Try almond extract for a unique twist! -
1 cup all-purpose flour
The foundation of our brownies! For a gluten-free version, use almond flour or a gluten-free flour blend to ensure that you can still enjoy this decadent treat. -
1/2 cup unsweetened cocoa powder
This is what gives brownies that rich chocolatey goodness. You can use dark cocoa powder for a more intense flavor or even carob powder if you’re exploring new tastes! -
1 teaspoon baking powder
A little boost for those brownies! This helps them rise while keeping that delicious fudgy texture. You can also substitute baking soda, but keep an eye on the measurements! -
1/4 teaspoon salt
A pinch of salt helps balance out the sweetness. It brings out the flavors in cocoa and makes everything taste that much better! -
1/2 cup chocolate chips (optional)
Because sometimes you just need that extra chocolatey goodness! You can use dark chocolate, dairy-free chips, or even white chocolate for a fun contrast.
Step-by-Step Instructions
Let’s get to the fun part—baking! Follow these step-by-step instructions, and you’ll be on your way to brownie bliss in no time.
-
Preheat Your Oven
Preheat your oven to 350°F (175°C). This is the magic number for perfect baking. You want your brownies to rise and become that lovely fudgy texture, so don’t skip this step! -
Get Your Mixing Bowl Ready
Grab a large mixing bowl and add the applesauce and sugar. Whisk these together until well combined. This step is like creating a bond; the sugars blend beautifully with the applesauce, paving the way for deliciousness. -
Introduce Vanilla Extract
Pour in the vanilla extract and continue whisking. Feel free to dance around your kitchen while you whisk because why shouldn’t we have a little fun while baking? -
Dry Ingredients Time!
In a separate bowl, sift together the flour, cocoa powder, baking powder, and salt. Sifting is essential; it breaks up clumps and aerates your flour, helping your brownies to be lighter and fluffier. -
Combine Wet and Dry
Gradually fold the dry ingredients into the wet mixture. Use a spatula for this so that you don’t overmix—this is key for achieving that fudgy brownie goodness. Mix just until combined, and don’t worry if there are a few lumps; they’ll smooth out during baking. -
Chocolate Chips Add-Ins (optional)
If you’re going the chocoholic route, fold in your chocolate chips now. It’s not a step to skip if you want chocolatey explosions in every bite! -
Grease Your Baking Pan
Grab an 8×8 inch baking pan or a 9×9 inch for thinner brownies. Lightly grease it or line it with parchment paper for easy removal after baking. Nobody likes brownies that stick! -
Pour and Spread
Pour the batter into your greased pan and spread it evenly. Don’t worry about being perfect; rustic is the name of the game when it comes to homemade goodies! -
Bake Time
Pop the tray into your preheated oven and bake for 25-30 minutes. You can check for doneness by inserting a toothpick into the center. If it comes out with a few moist crumbs (not wet batter), they’re ready! -
Cool and Cut
Remove the brownies from the oven and allow them to cool in the pan for at least 15 minutes. Once cool, use a sharp knife to cut them into squares. It doesn’t matter if they’re perfectly even; what matters is the love baked into each piece!
Serving Suggestions
Now, how do we serve these glorious No Fat Brownies? You can plate them up on a colorful platter with a dusting of powdered sugar for a charming touch. Feeling fancy? Scoop a generous dollop of unsweetened whipped coconut cream or serve them alongside a scoop of your favorite low-calorie ice cream! Need something extra? A drizzle of homemade chocolate sauce or a handful of fresh berries on the side elevates your dessert game to new heights.
Recipe Variations
Feeling adventurous? Here are some creative twists to try with your No Fat Brownies:
- Nutty Brownies: Add a 1/2 cup of chopped nuts, like walnuts or pecans, to give an added crunch and flavor.
- Mint Fudge: Stir in peppermint extract for a refreshing minty brownie experience—perfect for a festive treat!
- Spicy Chocolate: Add a pinch of cayenne pepper or a dash of cinnamon to the batter for a cozy, spicy kick.
- Fruit Swirl: Drop a few spoonfuls of fruit puree, such as raspberry or cherry, on top of the brownie batter before baking, then swirl it in lightly for a marbled effect.
- Vegan Delight: Substitute the sugar with coconut palm sugar or maple syrup and choose dairy-free chocolate chips to make it completely vegan!
Chef’s Notes
These brownies have evolved over time, and I’ve made countless variations—sometimes even throwing in a little bit of leftover coffee to amplify that chocolate flavor! Each iteration brings back the sweet memories of baking with Grandma, who always encouraged me to experiment and have fun in the kitchen. I can’t tell you how many times I’ve turned an “oops” into an “oh wow!”—like the time I forgot the baking powder but added another cup of chocolate chips instead. You live, you learn, and you bake!
FAQs and Troubleshooting
1. My brownies came out too dry. What happened?
That could be due to overbaking! Check them a few minutes early next time. We love that fudgy texture, so if there are moist crumbs on the toothpick, you’re golden!
2. Why did my brownies sink in the middle?
This can happen from too much mixing after adding the flour or not enough baking time. Make sure to fold gently and keep an eye on that timer!
3. Can I use gluten-free flour?
Absolutely! Using a gluten-free flour blend works beautifully here. Just remember, some brands may absorb more liquid, so keep an eye on the batter’s consistency.
4. How do I store the brownies?
In an airtight container at room temperature, they’ll keep for about 3-4 days. Or, you can freeze them for up to three months! Just slice them into squares and wrap them individually in plastic wrap before placing them in a freezer bag.
Getting creative in the kitchen should never come with a ton of stress. Cooking binds us all together, and every batch of brownies we whip up is another chance to share some love. I hope you enjoy making these No Fat Brownies as much as I enjoyed sharing this journey with you. So grab that mixing bowl, throw on that apron, and let’s indulge in a little guilt-free decadence! Happy baking!
Print
Delightfully Decadent No Fat Brownies
- Total Time: 40 minutes
- Yield: 16 servings 1x
- Diet: Vegetarian
Description
Indulge in these rich, fudgy No Fat Brownies made with applesauce for a delicious guilt-free treat.
Ingredients
- 1 cup unsweetened applesauce
- 1 cup granulated sugar
- 2 teaspoons vanilla extract
- 1 cup all-purpose flour
- 1/2 cup unsweetened cocoa powder
- 1 teaspoon baking powder
- 1/4 teaspoon salt
- 1/2 cup chocolate chips (optional)
Instructions
- Preheat your oven to 350°F (175°C).
- Grab a large mixing bowl and add the applesauce and sugar. Whisk until well combined.
- Pour in the vanilla extract and continue whisking.
- In a separate bowl, sift together the flour, cocoa powder, baking powder, and salt.
- Gradually fold the dry ingredients into the wet mixture.
- If using, fold in the chocolate chips now.
- Grab an 8×8 inch or 9×9 inch baking pan and grease it.
- Pour the batter into your greased pan and spread it evenly.
- Pop the tray into your preheated oven and bake for 25-30 minutes.
- Remove the brownies from the oven and let them cool in the pan for at least 15 minutes before cutting into squares.
Notes
For a gluten-free version, use gluten-free flour. Experiment with adding nuts or different extracts for a personalized touch.
- Prep Time: 10 minutes
- Cook Time: 30 minutes
- Category: Dessert
- Method: Baking
- Cuisine: American
Nutrition
- Serving Size: 1 brownie
- Calories: 200
- Sugar: 15g
- Sodium: 50mg
- Fat: 1g
- Saturated Fat: 0g
- Unsaturated Fat: 1g
- Trans Fat: 0g
- Carbohydrates: 45g
- Fiber: 2g
- Protein: 2g
- Cholesterol: 0mg
Keywords: brownies, no fat brownies, healthy desserts, guilt-free treats
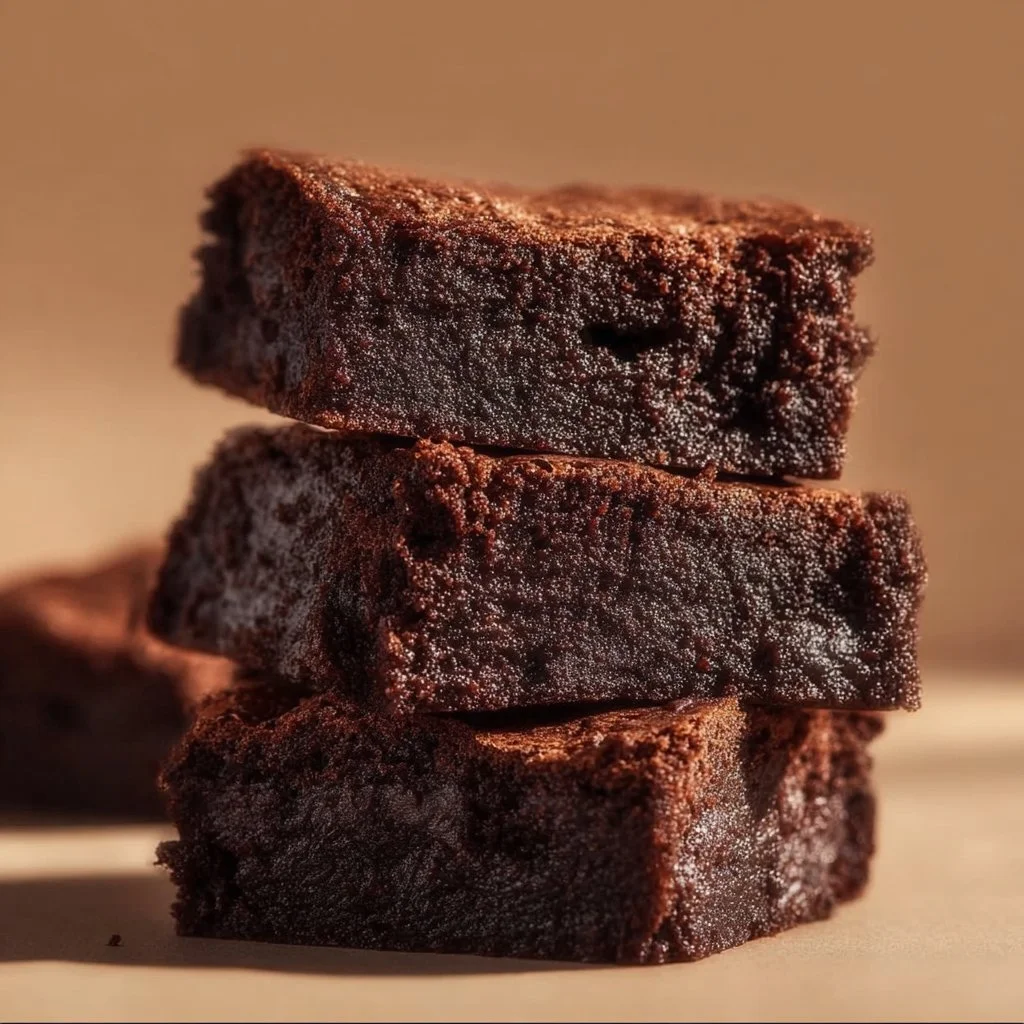
High-Protein Brownies
High-Protein Brownies that Pack a Punch: A Delightful Blend of Indulgence and Nutrition
Hello, fellow food lovers! I’m Olivia Bennett, and today I’m bubbling over with excitement to share a recipe that marries indulgence with nutrition: High-Protein Brownies! These delightful treats are perfect for satisfying your chocolate cravings while giving your body a healthy boost. I mean, who doesn’t love a good brownie? Soft, fudgy, and rich with chocolatey goodness, these brownies also happen to be packed with protein. So, whether you’re a busy professional craving a post-work snack, a fitness enthusiast looking for a healthy treat, or a parent wanting to sneak in some goodness for the kids, this recipe is your new best friend.
Picture this: It’s a rainy Sunday afternoon, and you’re cozied up in the kitchen, a warm cup of coffee on hand, and the sweet aroma of chocolate wafting through the air. You don’t just want to bake; you want to indulge without the guilt, right? By incorporating high-protein ingredients, these brownies not only satisfy your sweet tooth but also offer a nutritious boost, making it easier to stick to your health goals—all while enjoying one of life’s most delightful treats.
Now, I know what you might be thinking: “Healthy brownies? Will they really taste good?” Trust me, my friends, these beauties are an absolute game-changer! They deliver the decadence you crave while also being a smart choice for your snack repertoire. So grab your apron, turn on your favorite tunes, and let’s get whisking!
Personal Story
Let me take you back to a warm summer evening that’s forever etched in my memory. It was my best friend’s birthday, and she had invited a small group of us over for a backyard celebration. Just as golden hour began to paint the sky with shades of pink and orange, her mom—or should I say, my second mom—brought out a tray of warm brownies. Oh, the enchanting aroma that danced through the air! Each brownie was rich and fudgy, melting luxuriously in your mouth.
Now, the magic wasn’t just in the taste; it was in the laughter and stories we shared while devouring those treats. We spent the evening reminiscing about our childhood, laughing at our goofy moments, and making new memories. Those brownies became a symbol of the love and warmth that filled our homes and hearts. That day, I made a promise to myself: I would one day make a brownie recipe that’s just as memorable, but with a healthy twist that everyone could enjoy. Fast-forward years later, and here we are, ready to whip up a batch of High-Protein Brownies that will create their own beautiful memories!
Ingredients
Here’s what you’ll need to create these delightful High-Protein Brownies:
- 1 cup black beans (drained and rinsed): These powerhouses pack a protein punch while keeping the brownies moist. If you’re not a fan of black beans, you can substitute them with pureed chickpeas or a can of pumpkin—yes, I said pumpkin!
- 2 ripe bananas: These provide natural sweetness and help bind everything together. Can’t find ripe bananas? Use applesauce or even a cup of mashed avocado for an extra creamy texture!
- 1/2 cup cocoa powder: Use unsweetened cocoa for that rich chocolate flavor. If you prefer a sweeter taste, opt for Dutch-processed cocoa, as it tends to be milder.
- 1/4 cup protein powder (your choice, plant-based or whey): This is the star ingredient that elevates these brownies. If you want to keep it nut-free, look for a pea protein.
- 1/4 cup honey or maple syrup: Natural sweeteners add a touch of sweetness without refined sugars. For a vegan option, maple syrup is the way to go!
- 1/4 cup almond butter (or any nut/seed butter): This creamy goodness increases the brownie’s protein content and adds a lovely texture. Run out of almond butter? Peanut butter or sunflower seed butter work perfectly too.
- 1 teaspoon vanilla extract: Vanilla enhances the flavors beautifully. For a unique twist, try adding a splash of almond extract!
- 1/2 teaspoon baking soda: This helps our brownies rise ever so slightly and keeps them light. Make sure it’s fresh, or your brownies might bite the dust!
- A pinch of salt: A little salt enhances the chocolate flavor, so don’t skip it, even if you’re on a low-sodium diet!
Step-by-Step Instructions
Alright, let’s get down to business and bring these High-Protein Brownies to life!
-
Preheat the Oven: Begin by preheating your oven to 350°F (175°C). This step is crucial to ensure that your brownies bake evenly and become perfectly fudgy.
-
Blend the Ingredients: In a food processor or high-speed blender, combine the black beans, ripe bananas, cocoa powder, protein powder, honey (or maple syrup), almond butter, vanilla extract, baking soda, and a pinch of salt. Blend until you achieve a smooth, velvety batter. Trust me, you’ll want to taste this batter. It’s divine!
Chef Tip: If you’re using a blender, pause occasionally to scrape down the sides. You want everything fully incorporated for that dreamy, fudgy texture.
-
Prepare the Baking Pan: Lightly grease an 8×8-inch baking pan or line it with parchment paper for easy removal. I find that using parchment paper prolongs the freshness!
-
Pour the Batter: Transfer the brownie batter to your prepared pan, smoothing it out evenly.
Chef Hack: For a more decadent brownie, fold in some dark chocolate chips or chopped nuts at this stage. The melty chocolate bits make each bite extra special!
-
Bake: Place the pan in the preheated oven and bake for 20-25 minutes. You want the edges to look set while the center remains slightly soft.
Chef Tip: To test for doneness, insert a toothpick in the center. If it comes out with a few moist crumbs, you’re golden! If it’s wet and gooey, it needs a few more minutes.
-
Cool: Once baked, remove the brownies from the oven and let them cool in the pan for about 10-15 minutes. After that, you can transfer them to a wire rack to cool completely. Patience is key for perfect brownies!
-
Slice and Serve: Once cooled, slice into squares or rectangles—whichever shape makes your heart flutter!
Chef Tips: Running a knife through warm water before slicing makes for neat, clean edges. And who doesn’t love aesthetics, right?
Serving Suggestions
These High-Protein Brownies are delicious on their own, but they can also be dressed up a little! Try serving them warm with a scoop of vanilla or chocolate ice cream on top for a decadent dessert experience. Drizzle some melted dark chocolate or peanut butter over them for an extra special treat. And don’t forget a dusting of powdered sugar or a sprinkle of sea salt to finish!
Recipe Variations
Feeling adventurous? Here are some fun twists and turns you can take with this recipe:
-
Mint Chocolate Chip: Add a few drops of peppermint extract to the batter and fold in chocolate mint chips for a refreshing twist.
-
Nutty Banana Swirl: Top the batter with sliced bananas and a drizzle of almond butter before baking for a delightful flavor explosion.
-
Fudge-like Brownies: Reduce the baking time slightly for ultra-fudgy brownies. Just keep an eye on them to avoid overcooking!
-
Coconut Delight: Stir in unsweetened shredded coconut for a tropical vibe—hello, coconut brownie paradise!
-
Peanut Butter Heaven: Substitute half of the almond butter with peanut butter for a nutty and delightful flavor combo.
Chef’s Notes
I can’t tell you how many iterations it took to find the perfect balance of moisture, flavor, and protein in these brownies. The first few attempts were… let’s just say, they weren’t my finest culinary moments! But every mishap turned into a learning opportunity—I experimented with different beans, grains, and sweeteners trying to find that sweet spot.
The moment these came out of the oven just right, I was over the moon! And trust me, the smiles on my friends’ faces each time I serve them are worth every moment I spent tinkering in the kitchen. The evolution of this recipe has become a testament to the beauty of cooking—it’s not just about food; it’s about sharing joy and health!
FAQs and Troubleshooting
Q: What if my brownies turn out too dry?
A: Resist the urge to bake them longer! Remember, they’ll continue to cook slightly as they cool. If they’re dry, it might be a sign you overbaked them. Try reducing the baking time next time.
Q: Can I use a different type of flour?
A: Absolutely! If you’re looking for a gluten-free option, try almond flour or a gluten-free flour blend. Just make sure to adjust the quantity as needed.
Q: How can I make these vegan?
A: Swap the honey for maple syrup and use your favorite plant-based protein powder. Ensure you’re using a nut/seed butter that’s dairy-free too!
Q: Can I freeze these brownies?
A: Yes! They freeze wonderfully. Just place them in an airtight container, and they’ll stay fresh for up to three months.
Nutritional Info
While I always encourage enjoying treats in moderation, here’s a quick breakdown per brownie (assuming you get 12 brownies from the batch):
- Calories: ~120
- Protein: ~5g
- Carbohydrates: ~15g
- Fats: ~5g
- Fiber: ~3g
With these stats, you can enjoy a rich brownie without straying too far from your nutritional goals!
And there you have it—High-Protein Brownies that not only satisfy your cravings but also make you feel good about your choices. I can’t wait to hear how yours turn out! Share your thoughts in the comments and let’s keep this cozy kitchen vibe going. Remember, cooking is all about love, experimentation, and connection. Keep bonding over brownies, and until next time, happy cooking!
Print
High-Protein Brownies
- Total Time: 35 minutes
- Yield: 12 servings 1x
- Diet: Vegetarian
Description
Delightful High-Protein Brownies that marry indulgence with nutrition, perfect for satisfying chocolate cravings while boosting health.
Ingredients
- 1 cup black beans (drained and rinsed)
- 2 ripe bananas
- 1/2 cup cocoa powder
- 1/4 cup protein powder
- 1/4 cup honey or maple syrup
- 1/4 cup almond butter
- 1 teaspoon vanilla extract
- 1/2 teaspoon baking soda
- A pinch of salt
Instructions
- Preheat the oven to 350°F (175°C).
- Blend the black beans, ripe bananas, cocoa powder, protein powder, honey (or maple syrup), almond butter, vanilla extract, baking soda, and salt until smooth.
- Prepare an 8×8-inch baking pan by lightly greasing it or lining it with parchment paper.
- Pour the batter into the prepared pan, smoothing it out evenly.
- Bake for 20-25 minutes, until edges look set and center is slightly soft.
- Cool the brownies in the pan for 10-15 minutes before transferring to a wire rack.
- Slice into squares or rectangles.
Notes
For added richness, fold in chocolate chips or nuts. Serve warm with ice cream or a drizzle of chocolate.
- Prep Time: 10 minutes
- Cook Time: 25 minutes
- Category: Dessert
- Method: Baking
- Cuisine: American
Nutrition
- Serving Size: 1 brownie
- Calories: 120
- Sugar: 8g
- Sodium: 180mg
- Fat: 5g
- Saturated Fat: 1g
- Unsaturated Fat: 4g
- Trans Fat: 0g
- Carbohydrates: 15g
- Fiber: 3g
- Protein: 5g
- Cholesterol: 0mg
Keywords: high-protein, brownies, healthy dessert, chocolate, nutrition, indulgence




