
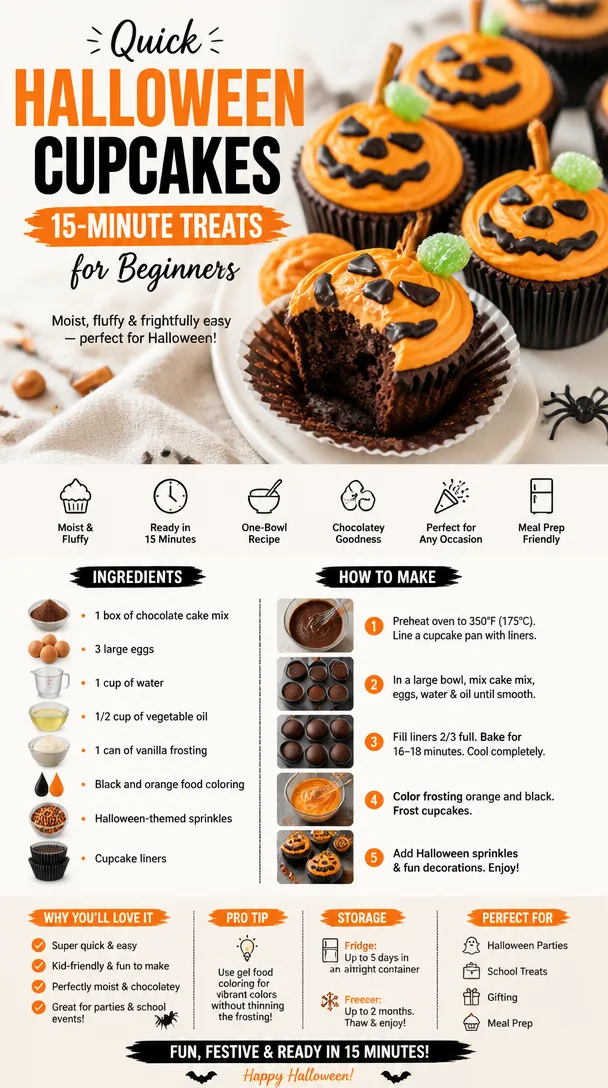
Quick Halloween Cupcakes: 15-Minute Treats for Beginners
Easy Halloween Cupcakes: Spooktacularly Delicious Treats!
Welcome to my cozy kitchen, friends! Halloween is just around the corner, and you know what that means—it’s time to whip up some ghoulish goodies that will delight trick-or-treaters and party guests alike. These easy Halloween cupcakes are not only adorable, but they also pack a punch of flavor that will leave everyone asking for seconds (or thirds!).
Imagine a group of friends gathered around a table, laughter filling the air, as you unveil your batch of these spooktacular cupcakes. The aroma of freshly baked treats wafts through the room, and the anticipation builds as everyone eyes the spooky decorations. Whether you’re an experienced baker or just getting started, this recipe is designed to make you feel confident and excited as you create something fun and festive.
In today’s post, I’ll be guiding you through every step of the process, sharing not just the recipe but also some personal stories and tips to make your Halloween baking a blast! So, grab your apron, preheat that oven, and let’s get started!
A Sweet Blast From the Past
When I think of Halloween, I can’t help but reminisce about my childhood. Growing up, our neighborhood transformed into a whimsical wonderland filled with pumpkins, spooky decorations, and the promise of sweet treats at every door. But one of my fondest memories is from the time I decided to bake my very first batch of Halloween cupcakes for my school’s Halloween party.
Armed with a bright orange apron and a head full of ideas, I eagerly gathered my ingredients. However, my ambitious plans faced a tiny challenge—my kitchen turned into a flour-dusted battleground! With the oven timer ticking away, I hurriedly mixed the batter, trying to avoid the mess while also managing to keep my little brother from "helping" too much (he had a knack for creating chaos).
The cupcakes turned out delightfully; they were frosted with swirls of orange and black icing and topped with candy corn. The pride I felt when my classmates devoured them was immeasurable. It sparked a love for baking in me, especially during the holiday season. Now, I’m thrilled to pass on that love to you with this easy Halloween cupcake recipe!
Ingredients
Here’s what you’ll need for these festive cupcakes:
-
1 ½ cups all-purpose flour
- The foundation of your cupcakes! You can substitute with whole wheat flour for a nutty flavor or gluten-free flour for a gluten-friendly option.
-
1 cup granulated sugar
- This is what gives your cupcakes that sweet, irresistible taste! Brown sugar can be used for a deeper caramel flavor.
-
½ cup unsweetened cocoa powder
- For those who love a rich, chocolatey flavor! If chocolate isn’t your thing, you can omit it and add an extra ½ cup of flour for vanilla cupcakes.
-
2 tsp baking powder
- This helps your cupcakes rise and become fluffy! Be sure to check the expiration date; old baking powder can lead to flat cupcakes.
-
½ tsp baking soda
- Another leavening agent that adds to the fluffiness. If you’re out, you can use an extra teaspoon of baking powder.
-
½ tsp salt
- A pinch of salt intensifies all the other flavors! Sea salt or pink Himalayan salt works wonderfully too for a different hint of flavor.
-
2 large eggs
- The binding agents! If you’re looking for an egg-free option, you can use ½ banana or 1/4 cup of unsweetened applesauce for each egg.
-
½ cup milk
- For moistness and richness. Any milk alternative (like almond or oat milk) will also work here.
-
1/3 cup vegetable oil
- This keeps your cupcakes moist. You can swap this for melted coconut oil for a twist.
-
1 tsp vanilla extract
- The secret ingredient for deepening the flavor! You can also try almond extract for a different flavor profile.
-
Colored frosting (orange, purple, and green)
- Get creative with colors! You can make your own buttercream or grab pre-made frosting for convenience.
-
Halloween-themed sprinkles and candy decorations
- These add that festive touch! Gummy worms, candy corn, or chocolate spiders all work great.
Step-by-Step Instructions
Now, let’s get cooking! Follow these steps to create your spooktacular Halloween cupcakes:
-
Preheat the Oven
Preheat your oven to 350°F (175°C). This is crucial—starting with a hot oven ensures that your cupcakes rise beautifully! -
Prepare Your Cupcake Liners
Line a muffin tin with cute Halloween-themed cupcake liners. This is where the fun begins—pick ones with ghosts, pumpkins, or spooky designs! -
Mix Dry Ingredients
In a large mixing bowl, whisk together the flour, sugar, cocoa powder, baking powder, baking soda, and salt until well combined. This helps to aerate the flour, ensuring a lighter texture. -
Combine Wet Ingredients
In another bowl, whisk together the eggs, milk, oil, and vanilla extract until smooth. You can even use a hand mixer for extra fluff! -
Blend the Mixtures
Pour the wet ingredients into the dry ingredients and mix until just combined. Avoid over-mixing; a few lumps are perfectly fine! Over-mixing can lead to tough cupcakes. -
Fill the Liners
Using a spoon or ice cream scoop, fill each cupcake liner about two-thirds full. This allows room for the cupcakes to rise without overflowing. -
Bake the Cupcakes
Carefully place the muffin tin in the preheated oven and bake for about 18-20 minutes. To check if they’re done, insert a toothpick into the center—if it comes out clean or with a few crumbs, they’re ready! -
Cool Down Time
Once done, remove them from the oven and allow them to cool in the tin for about 5 minutes. Then, transfer them to a wire rack to cool completely. Don’t rush this step; frosting warm cupcakes usually leads to melty messes! -
Frost Away
Once your cupcakes are completely cool, it’s time to unleash your creativity! Use a piping bag to frost your cupcakes with swirling colors. Try a mix of orange, purple, and green for that spooky aesthetic. -
Decorate
Finish off with a sprinkle of your favorite Halloween-themed toppings! The more colorful and fun, the better!
Serving Suggestions
Arrange your Halloween cupcakes on a festive platter, and for an extra spooky touch, consider adding decorative elements like spooky candles or mini pumpkins. You can also place them in whimsical cupcake holders to create a fun centerpiece for your Halloween party. Set out a variety of toppings on the side so everyone can customize their cupcake—who wouldn’t love that?
Recipe Variations
Feeling adventurous? Here are some creative twists to try for your Halloween cupcakes:
- Pumpkin Spice Cupcakes: Swap out the cocoa powder for 1 cup of pumpkin puree and add 1 tsp of pumpkin spice. Perfect for a cozy fall flavor!
- Ghostly Coconut: Top with coconut-flavored frosting and edible googly eyes to create adorable ghost cupcakes.
- Spiced Apple Cupcakes: Add finely chopped apples and cinnamon for a delightful twist on the traditional flavor.
- Vegan Version: Substitute eggs with flaxseed meal (1 tbsp ground flaxseed + 3 tbsp water = 1 egg) and use almond milk and coconut oil to create delicious vegan-friendly treats.
- Chocolate Peanut Butter: Fill the centers with peanut butter and top with chocolate frosting for a rich surprise bite!
Chef’s Notes
Baking is a journey, and every recipe carries personal touches. Over the years, I’ve experimented with countless variations of these Halloween cupcakes. At one point, I even hosted a “decorate your cupcake” night with friends, and the creativity that flowed was astounding! Some made spooky faces while others went for elegant autumn designs.
It’s incredible how something as simple as a cupcake can spark joy, laughter, and connection with friends and family. Plus, don’t be surprised if you find yourself enjoying the leftover frosting straight from the bowl—hey, it happens to the best of us!
FAQs and Troubleshooting
What should I do if my cupcakes sink in the middle?
This can happen for a couple of reasons, such as over-mixing the batter or not baking them long enough. Make sure to mix just until combined and check for doneness using the toothpick method.
How can I ensure my cupcakes are moist?
Using vegetable oil instead of butter can lead to a moister cupcake. Additionally, don’t overbake them—keeping an eye on the time will make a big difference.
Can I make these cupcakes ahead of time?
Absolutely! You can bake and cool them a day in advance. Just store them in an airtight container and frost them the day of your celebration for best results.
What if I don’t have cupcake liners?
You can bake directly in a greased muffin tin; just be sure to really grease them well to avoid sticking.
Nutritional Info (if applicable)
One cupcake (without frosting) typically contains around 200 calories, 8g fat, and 30g carbohydrates. Adjust the calculations based on the frosting and additional toppings you use!
So there you have it! You’re now ready to create your very own batch of easy Halloween cupcakes that not only taste delicious but also look spooktacular. I can’t wait to hear about your baking adventures and all the creative decorations you come up with. Happy Halloween baking—let’s make some magical memories in the kitchen! 🎃🧁
Print
Easy Halloween Cupcakes
- Total Time: 35 minutes
- Yield: 12 servings 1x
- Diet: Vegetarian
Description
Spooktacularly delicious Halloween cupcakes that are easy to make and perfect for festive gatherings.
Ingredients
- 1 ½ cups all-purpose flour
- 1 cup granulated sugar
- ½ cup unsweetened cocoa powder
- 2 tsp baking powder
- ½ tsp baking soda
- ½ tsp salt
- 2 large eggs
- ½ cup milk
- 1/3 cup vegetable oil
- 1 tsp vanilla extract
- Colored frosting (orange, purple, and green)
- Halloween-themed sprinkles and candy decorations
Instructions
- Preheat your oven to 350°F (175°C).
- Line a muffin tin with Halloween-themed cupcake liners.
- Whisk together dry ingredients: flour, sugar, cocoa powder, baking powder, baking soda, and salt.
- Whisk together wet ingredients: eggs, milk, oil, and vanilla extract until smooth.
- Pour the wet ingredients into the dry ingredients and mix until just combined.
- Fill each cupcake liner about two-thirds full.
- Bake for about 18-20 minutes, or until a toothpick comes out clean.
- Allow cooling in the tin for 5 minutes, then transfer to a wire rack to cool completely.
- Frost the cooled cupcakes with creative colored frosting.
- Decorate with Halloween-themed sprinkles and candy.
Notes
Feel free to explore variations such as pumpkin spice or vegan options for a different flavor experience.
- Prep Time: 15 minutes
- Cook Time: 20 minutes
- Category: Dessert
- Method: Baking
- Cuisine: American
Nutrition
- Serving Size: 1 cupcake
- Calories: 200
- Sugar: 15g
- Sodium: 150mg
- Fat: 8g
- Saturated Fat: 1g
- Unsaturated Fat: 7g
- Trans Fat: 0g
- Carbohydrates: 30g
- Fiber: 1g
- Protein: 3g
- Cholesterol: 40mg
Keywords: Halloween, cupcakes, baking, desserts, festive treats
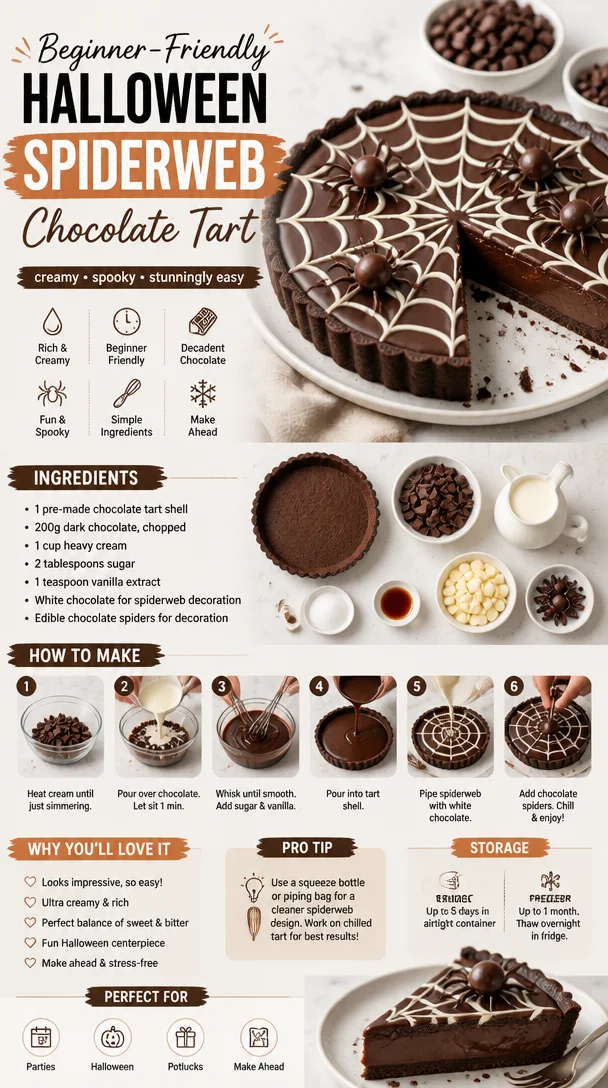
Beginner-Friendly Halloween Spiderweb Chocolate Tart
The Irresistible Spiderweb Chocolate Tart: A Sweet Journey
Welcome to my kitchen, dear friend! Today, we’re diving into a delightful treat that is as decadent as it is stunning: the Spiderweb Chocolate Tart. Picture this: a rich and velvety chocolate filling nestled in a crumbly crust, adorned with a whimsical spiderweb design that’s just begging to be shared. This tart is perfect for gatherings, special occasions, or a cozy evening in with your loved ones.
What makes this dessert even more special is the memories associated with it. Every time I prepare this Spiderweb Chocolate Tart, I’m transported back to my grandma’s kitchen, where I spent countless afternoons experimenting with ingredients and flavors. I remember the thrill of helping her create mouthwatering desserts, all while indulging in her stories of family gatherings and celebrations. Chocolate was always the star of our sweet escapades, and the tart became a staple at our family’s holiday feasts.
Ready to bring a little magic to your kitchen and create something unforgettable? Let’s whip up this showstopper dessert together!
A Sweet Memory of Family and Flavor
Every food enthusiast has that cherished memory that ignites their passion for cooking. Mine undeniably ties back to those cozy afternoons with my grandma. She would invite me into her kitchen, where flour dust danced in the afternoon sunlight and the rich aroma of chocolate filled the air. One afternoon, as the two of us set to work on our favorite dessert—chocolate cake—she suddenly had an idea. “Let’s turn it into a tart,” she said with a smile, and the Spiderweb Chocolate Tart was born!
I watched in awe as she expertly crafted the crust—crumbling flour and butter together until it resembled sand and then filling it with a luscious chocolate mixture. The pièce de résistance? The spiderweb design made with white chocolate. I felt like a little artist in the kitchen, thrilled to create something that was not only delicious but visually stunning. That day sparked a love for tarts and the joy of sharing them with family. Now, as I continue to explore this recipe, each time I bake it, I feel her spirit guiding me. Trust me when I say this chocolate tart is just as magical as it sounds!
Ingredients
Here’s a list of everything you’ll need to whip up this incredible Spiderweb Chocolate Tart. Each ingredient plays a key role in bringing this dish to life.
-
For the crust:
- 1 ½ cups all-purpose flour: The foundation of our tart! It provides structure. For a gluten-free option, you can use almond flour.
- ½ cup unsweetened cocoa powder: This gives the crust its rich chocolate flavor. Dutch-processed cocoa works great here for a deeper color and flavor.
- ½ cup powdered sugar: Sweetness is key! It helps balance the bitterness of the cocoa.
- ½ cup cold unsalted butter, cubed: Butter keeps our crust flaky. If dairy-free, coconut oil can be a lighter substitute.
- 1 large egg yolk: This adds richness. If you want a vegan version, use a flax egg (1 tablespoon ground flaxseed mixed with 2.5 tablespoons water).
-
For the filling:
- 1 cup heavy cream: We’ll use this for making a ganache. For a lighter alternative, use coconut cream.
- 8 ounces semisweet chocolate, chopped: The star of our filling! You can experiment with dark chocolate for a more intense flavor.
- 2 tablespoons sugar: Just a bit more sweetness goes a long way. Adjust based on your chocolate’s sweetness level.
- 1 teaspoon vanilla extract: This adds depth to the flavor. If you’re feeling adventurous, try hazelnut or almond extract instead.
-
For the spiderweb:
- 4 ounces white chocolate, chopped: This will create our beautiful spiderweb. You could substitute with white chocolate chips if that’s all you have!
Step-by-Step Instructions
Now that you’ve gathered all your ingredients, let’s get cooking! Follow these steps, and I promise you’ll have a showstopper dessert that will impress anyone.
1. Prepare the crust.
- Combine dry ingredients: In a large bowl, whisk together the flour, cocoa powder, and powdered sugar until there are no lumps—this is crucial for a smooth crust.
- Incorporate the butter: Add the cold cubed butter. Using your fingertips or a pastry cutter, work the butter into the dry mixture until it resembles coarse crumbs. You can channel your inner child here—messy hands are welcome!
- Add the egg yolk: Mix in the egg yolk using a fork until just combined. If the mixture feels too dry, add a teaspoon of ice water at a time until it holds together but isn’t sticky.
- Chill: Shape the dough into a disk, wrap it in plastic wrap, and refrigerate for about 30 minutes. This step is essential for a flaky crust.
2. Bake the crust.
- Preheat your oven to 350°F (175°C) while the dough chills.
- Roll out the dough: Dust your work surface with flour and roll out the chilled dough into a circle about 1/8-inch thick. Carefully transfer it to a 9-inch tart pan, pressing it gently into the edges. Use a fork to poke holes in the bottom to prevent bubbling.
- Pre-bake: Place parchment paper on top of the crust and fill it with pie weights or dried beans. Bake for 15 minutes, then remove the weights and parchment. Return to the oven for an additional 5–7 minutes until the crust is set. Allow it to cool completely.
3. Make the filling.
- Heat the cream: In a small saucepan, heat the heavy cream over medium heat until it just starts to simmer—don’t let it boil or it’ll spoil our ganache!
- Melt the chocolate: Place the chopped semisweet chocolate in a heatproof bowl. Pour the hot cream over the chocolate and let it sit for about 2 minutes.
- Stir: Gently stir the mixture with a spatula until smooth and glossy. If you need to, put it back over low heat for a minute to help it melt fully. Stir in the sugar and vanilla extract.
4. Assemble the tart.
- Fill the crust: Pour the ganache into the cooled tart shell, gently spreading it into an even layer.
- Chill: Place the tart in the refrigerator for at least 2 hours, or until the filling is set.
Serving Suggestions
Once your Spiderweb Chocolate Tart is set and ready, it’s time to serve! When plating, slice the tart into wedges—presentation is key! Follow these tips:
- Add a dollop of whipped cream on each slice for that extra touch of creaminess.
- Garnish with fresh berries or mint leaves to add a pop of color and freshness.
- Drizzle with a bit of melted white chocolate before serving to accentuate the spiderweb—it’s just as delicious as it sounds!
Recipe Variations
Feel free to get creative with this recipe! Here are a few fun variations:
- Nutty Crunch: Add a layer of crushed nuts (like hazelnuts or almonds) in the ganache for extra texture.
- Mint Chocolate: Incorporate a few drops of peppermint extract into the ganache for a refreshing twist.
- Superfood Boost: Mix in a tablespoon of matcha powder for an earthy flavor and a pop of color.
- Fruit-Infused: Swirl in raspberry puree into the ganache before it sets for a tangy contrast.
Chef’s Notes
As with any recipe, this Spiderweb Chocolate Tart has evolved over the years. I initially started with a simple ganache, but the addition of that creamy white chocolate spiderweb has made it a true masterpiece! And guess what? Every time I bake it, friends and family gather around, engaging in animated conversations about their favorite desserts. It’s not just a tart—it’s a conversation starter, a way to share love, laughter, and those pivotal moments that keep our spirits high! Oh, and if I ever drop some chocolate on the floor, I remind myself to embrace the mess; it’s just part of the kitchen fun!
FAQs and Troubleshooting
1. My ganache didn’t set properly! What went wrong?
This can happen if the chocolate isn’t melted evenly or if there’s too much cream. Ensure the cream is just simmering when you pour it over the chocolate, and if your ganache does seem too runny, you can always gently reheat it and add more chopped chocolate until it thickens.
2. Can I make this tart ahead of time?
Absolutely! This tart can be made a day in advance and refrigerated. Just make sure to cover it well to prevent it from absorbing odors from your fridge.
3. What if I don’t have a tart pan?
No worries! You can use a round cake pan or even a square dish. Just adjust the cooking time as needed. The presentation may differ slightly, but the flavor will be just as divine!
4. Can I use milk chocolate instead of semisweet?
You can! Just remember that it will be sweeter, so you might want to reduce the amount of sugar in the ganache to suit your palate.
Nutritional Info
(Displayed if applicable)
A slice of this Spiderweb Chocolate Tart is a heavenly indulgence, and while it’s rich, each bite brings joy—sometimes that’s just what we need. So, next time you’re looking to impress or share a sweet moment with loved ones, remember this magical recipe. Give it a try, and join the ranks of joyful bakers creating lasting memories, one slice at a time. Happy baking!
Print
Spiderweb Chocolate Tart
- Total Time: 55 minutes
- Yield: 8 servings 1x
- Diet: Vegetarian
Description
A decadent Spiderweb Chocolate Tart with a rich chocolate filling and a whimsical white chocolate design, perfect for any occasion.
Ingredients
- 1 ½ cups all-purpose flour
- ½ cup unsweetened cocoa powder
- ½ cup powdered sugar
- ½ cup cold unsalted butter, cubed
- 1 large egg yolk
- 1 cup heavy cream
- 8 ounces semisweet chocolate, chopped
- 2 tablespoons sugar
- 1 teaspoon vanilla extract
- 4 ounces white chocolate, chopped
Instructions
- Prepare the crust.
- Combine dry ingredients: In a large bowl, whisk together the flour, cocoa powder, and powdered sugar until there are no lumps.
- Incorporate the butter: Add the cold cubed butter and work it into the dry mixture until it resembles coarse crumbs.
- Add the egg yolk: Mix in using a fork until just combined.
- Chill: Shape the dough into a disk, wrap it, and refrigerate for about 30 minutes.
- Bake the crust: Preheat your oven to 350°F (175°C).
- Roll out the dough into a circle about 1/8-inch thick and transfer it to a tart pan.
- Pre-bake: Cover with parchment paper and fill with weights, bake for 15 minutes, then remove weights and bake for an additional 5-7 minutes.
- Make the filling: In a saucepan, heat the heavy cream until it simmers.
- Melt the chocolate: Pour the hot cream over the chopped chocolate and let sit for 2 minutes.
- Stir until smooth, then add sugar and vanilla extract.
- Assemble the tart: Pour the ganache into the cooled crust and chill for at least 2 hours.
Notes
Serve with whipped cream, fresh berries, or a drizzle of melted white chocolate.
- Prep Time: 30 minutes
- Cook Time: 25 minutes
- Category: Dessert
- Method: Baking
- Cuisine: American
Nutrition
- Serving Size: 1 slice
- Calories: 450
- Sugar: 22g
- Sodium: 130mg
- Fat: 28g
- Saturated Fat: 16g
- Unsaturated Fat: 10g
- Trans Fat: 0g
- Carbohydrates: 47g
- Fiber: 3g
- Protein: 6g
- Cholesterol: 40mg
Keywords: chocolate, tart, dessert, holiday, family
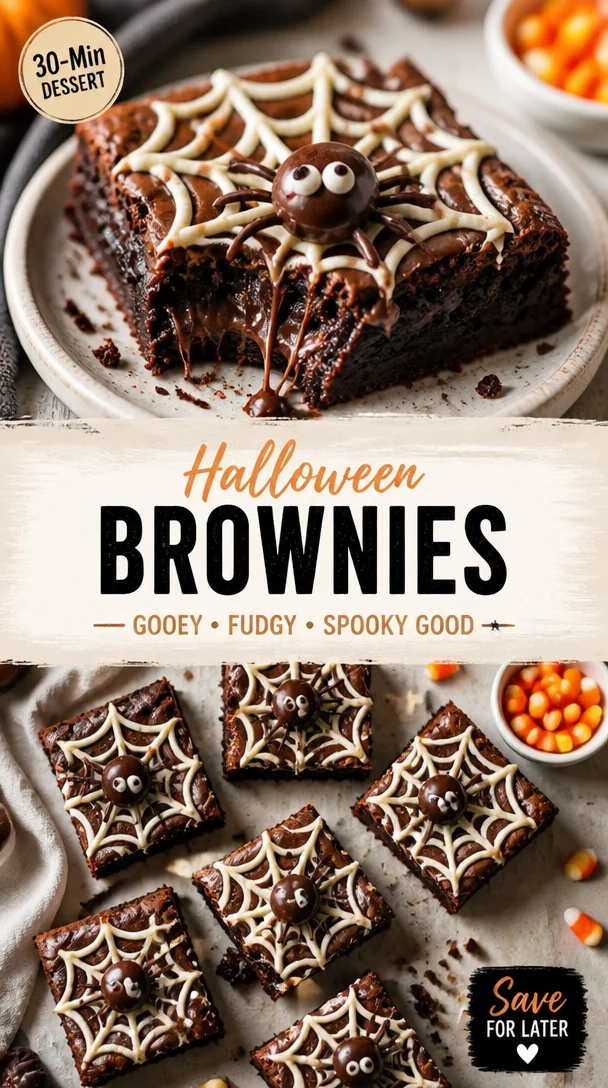
Halloween Brownies Recipe: Gooey Spider Web Swirls
Halloween Brownies: A Spooktacular Delight
Welcome, fellow foodies! It’s that enchanting time of year when the air gets cool, the leaves change colors, and spooky decorations adorn our homes. Yes, it’s Halloween season! 🎃 While candy corn and ghost-shaped gummies are sure to charm any trick-or-treater, I believe that the highlight of any Halloween gathering deserves to be something decadent, gooey, and rich—my Halloween brownies! These aren’t just any brownies; they’re delightfully chocolatey and topped with festive sprinkles that can make even the spookiest night feel warm and inviting.
Imagine it: the intoxicating aroma of warm chocolate wafts through your kitchen as you prepare these brownies, and the anticipation builds as friends and family gather around, eager to dig in. Today, I’m excited to share not just the recipe, but also little tidbits and stories that’ll help you create the most memorable Halloween treat. So grab your favorite apron (and maybe a little pumpkin spice latte), and let’s get baking!
A Nostalgic Halloween Memory
Growing up, Halloween was one of my favorite holidays—not just for the candy, but for the family traditions we created around it. Every year, my mom would set up a "haunted kitchen" where the sweet smell of baking filled the air, and I’d help her whip up a batch of brownies. I remember one year, we decided to add a spooky twist: we dropped candy eyes into the batter before baking. When they came out of the oven, those little eyes peeking up at us transformed ordinary brownies into an eerie treat that had us giggling.
That night, we invited our neighborhood friends for a spooky movie marathon, and those brownies were the main event. We devoured them while watching classic Halloween flicks, and each bite was a reminder—sweet treats can create unforgettable memories. It’s this same magic I hope to bring to your kitchen with this recipe.
Ingredients
To make these Halloween brownies truly special, we’ll need the following ingredients:
-
1 cup unsalted butter
Tip: Using unsalted butter gives you control over the salt in your recipe. If you only have salted butter, reduce the added salt in the recipe. -
2 cups granulated sugar
This adds the sweetness that offsets the rich cocoa flavor. You can substitute half with brown sugar for a richer taste! -
4 large eggs
Eggs help bind everything together and give your brownies that chewy texture we love. An egg substitute for vegans would be 1/4 cup applesauce per egg. -
1 teaspoon vanilla extract
Vanilla is key to enhancing the chocolate flavor. Choose pure vanilla extract for the best taste! -
1 cup all-purpose flour
It’s important to measure your flour correctly to avoid dry brownies. Scoop and level with a knife! -
1 cup cocoa powder
Go for unsweetened cocoa powder to really let the chocolate shine through! A dark cocoa powder can elevate the richness. -
1/2 teaspoon baking powder
This ensures our brownies rise just enough to create a fluffy center. -
1/2 teaspoon salt
Salt enhances the sweetness and balances the flavors beautifully. -
1 cup chocolate chips (optional)
For extra gooeyness, mix in semi-sweet or dark chocolate chips! White chocolate chips can be a fun variation. -
Halloween-themed sprinkles
These are the crowning glory! Use any mix of spooky sprinkles like bats, ghosts, or pumpkin shapes to make it festive.
Step-by-Step Instructions
Now that we’ve got our spooky ingredients ready, let’s dive into making these Halloween brownies! Here’s how to whip them up, step by step.
-
Preheat Your Oven:
Start by preheating your oven to 350°F (175°C). This allows for even baking and ensures our brownies have that delicious crust on top! -
Prepare Your Baking Dish:
Grease a 9×13 inch baking pan and line it with parchment paper. This will make it much easier to lift the brownies out later for cutting. Plus, who doesn’t love a clean release? -
Melt the Butter:
In a medium saucepan, melt the unsalted butter over low heat. As it’s melting, stir it a bit to help it along. You can also do this in the microwave. Just melt in 30-second bursts and stir in between to avoid splattering! -
Mix Sugar and Butter:
Remove the melted butter from heat and whisk in the granulated sugar until well combined. This process helps dissolve the sugar, which leads to beautifully fudgy brownies. -
Add in Eggs and Vanilla:
Quickly whisk in the eggs, one at a time, followed by the vanilla extract. Mixing these in thoroughly gives your brownies that luscious texture. Don’t be afraid to give it a good whisk here! -
Combine Dry Ingredients:
In a separate bowl, whisk together the flour, cocoa powder, baking powder, and salt. Gradually add this dry mix to the wet ingredients, stirring gently until just combined. Be careful not to overmix—lumps are okay! -
Incorporate Chocolate Chips:
If you’re using chocolate chips or other add-ins, fold them into the batter now. This is where your brownies get that delightful melt-in-your-mouth texture! -
Bake the Brownies:
Pour the brownie batter into your prepared baking dish, using a spatula to spread it evenly. Bake for 20-25 minutes or until a toothpick inserted into the center comes out with a few moist crumbs. -
Cool and Decorate:
After baking, let your brownies cool in the pan for a few minutes before lifting them out using the parchment paper. Once they’re completely cool, it’s time to decorate with your favorite Halloween sprinkles! -
Cut and Enjoy:
Use a sharp knife to cut into squares (or spooky shapes if you’re feeling extra). Serve them up and watch the smiles light up!
Serving Suggestions
To make your Halloween brownies extra festive, consider serving them on a platter adorned with mini pumpkins or spider decorations. You could even pair them with a scoop of vanilla ice cream—with a drizzle of warm caramel sauce for a haunt-worthy dessert. For a true spooky effect, you might want to dust some powdered sugar on top, creating a ghostly appearance!
Recipe Variations
Feel free to have fun with this brownie recipe! Here are a few variations to consider:
-
Peppermint Bark Swirl: Fold in crushed peppermint candies and swirl some melted white chocolate into the brownie batter before baking for a festive minty kick.
-
Nutty Surprise: Add a cup of chopped nuts like walnuts or pecans for an extra layer of texture. Toast them beforehand for a deeper flavor!
-
Vegan Version: Substitute with vegan butter and replace eggs with flaxseed meal mixed with water (1 tablespoon flaxseed mixed with 3 tablespoons water = 1 egg).
-
Gluten-Free Brownies: Use a 1:1 gluten-free baking flour in place of all-purpose flour for a gluten-free treat that everyone can enjoy.
-
Caramel Drizzle: Drizzle melted caramel over the top before serving for a gooey upgrade that’s to die for!
Chef’s Notes
As I reflect on my kitchen adventures, I can assure you that experimentation is the name of the game. The first time I made these Halloween brownies, I forgot to add the baking powder. They ended up like a deliciously dense chocolate fudge rather than brownies! Instead of being upset, I leaned in and started calling them "fudge brownies." Sometimes the best moments in the kitchen come from mistakes—the key is to have fun and not take yourself too seriously. So, even if your brownies don’t turn out as planned, they’ll still end up tasting amazing!
FAQs and Troubleshooting
-
Why are my brownies dry?
Overbaking could be the culprit! Keep an eye on them, and try to remove them once a toothpick comes out with a few moist crumbs, not dry. -
My brownies didn’t rise! What went wrong?
Ensure your baking powder is fresh. If it’s expired, your brownies won’t rise properly. Also, check that you mixed your wet and dry ingredients just enough—overmixing can lead to tough brownies! -
Can I freeze brownies?
Absolutely! Cut your brownies into squares, wrap them individually in plastic wrap, and place them in an airtight container. They’ll last for a few months in the freezer! -
How do I get clean cuts on brownies?
Run your knife under hot water, wipe it dry, and then cut. The heat will help make cleaner cuts through the fudgy brownies!
Nutritional Info
While we focus on flavors and fun, here’s a quick overview of some nutritional information per serving (based on a 2-inch square cut):
- Calories: 250
- Total Fat: 12g
- Saturated Fat: 7g
- Cholesterol: 70mg
- Sodium: 80mg
- Total Carbohydrates: 35g
- Dietary Fiber: 2g
- Sugars: 20g
- Protein: 3g
Making these Halloween brownies is more than just whipping up a treat; it’s about creating memories filled with joy and laughter with friends and family. I hope these brownies spark joy in your kitchen as they have in mine. So roll up those sleeves, get messy, and embrace the spirit of Halloween! Happy baking!
Print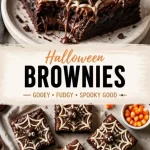
Halloween Brownies: A Spooktacular Delight
- Total Time: 40 minutes
- Yield: 16 servings 1x
- Diet: Vegetarian
Description
Delightfully chocolatey brownies topped with festive sprinkles, perfect for Halloween gatherings.
Ingredients
- 1 cup unsalted butter
- 2 cups granulated sugar
- 4 large eggs
- 1 teaspoon vanilla extract
- 1 cup all-purpose flour
- 1 cup cocoa powder
- 1/2 teaspoon baking powder
- 1/2 teaspoon salt
- 1 cup chocolate chips (optional)
- Halloween-themed sprinkles
Instructions
- Preheat your oven to 350°F (175°C).
- Prepare a 9×13 inch baking pan by greasing and lining it with parchment paper.
- Melt the unsalted butter in a medium saucepan over low heat.
- Mix the melted butter with the granulated sugar until well combined.
- Add in the eggs, one at a time, followed by the vanilla extract.
- Combine the dry ingredients: flour, cocoa powder, baking powder, and salt in a separate bowl.
- Incorporate the dry ingredients into the wet mixture, stirring gently until just combined.
- Fold in the chocolate chips, if using.
- Pour the batter into the prepared baking dish and spread it evenly.
- Bake for 20-25 minutes, until a toothpick comes out with a few moist crumbs.
- Cool and decorate with Halloween sprinkles.
- Cut into squares and enjoy!
Notes
These brownies can also be topped with mini pumpkins or served with vanilla ice cream and caramel sauce for extra festivity.
- Prep Time: 15 minutes
- Cook Time: 25 minutes
- Category: Dessert
- Method: Baking
- Cuisine: American
Nutrition
- Serving Size: 1 square
- Calories: 250
- Sugar: 20g
- Sodium: 80mg
- Fat: 12g
- Saturated Fat: 7g
- Unsaturated Fat: 3g
- Trans Fat: 0g
- Carbohydrates: 35g
- Fiber: 2g
- Protein: 3g
- Cholesterol: 70mg
Keywords: Halloween, brownies, dessert, baking, festive treats
Ces gâteaux d’Halloween faciles mais horriblement bons – Elle à Table
Spooktacular Halloween Treats: Delightfully Easy Yet Horribly Delicious Cakes
Welcome to the most spine-chilling, yet utterly delightful celebration of the year—Halloween! As the leaves turn crisp and the air grows colder, my love for baking kicks into high gear. There’s just something magical about this time of year: the scent of caramel apples, the crunch of fallen leaves, and of course, the delightful thrill of creating eerie yet scrumptious treats to share. If you’re ready to add a dash of creativity and a pinch of spookiness to your baking, you’re in for a treat (pun intended!).
In today’s post, we’re diving into the world of Halloween cakes. These are not just any cakes—they’re hauntingly good, easy to whip up, and perfect for all ages! Whether you’re hosting a monster mash or simply want to scare up some fun at home, these cakes will enchant your family and friends, offering both flavors that delight and decorations that astonish.
Baking during Halloween is always a blast! I remember the first time I made Halloween-themed treats with my mother. We donned our aprons, popped on some spooky tunes, and transformed our kitchen into a playful lab of fright with flour flying and sprinkles everywhere. The anticipation in the air was electric as we waited for our delicious creations to emerge from the oven—each one transforming into a ghoul or goblin before our eyes, all while filling our abode with delightful aromas. Those moments of giggling and creating are still some of my fondest memories, and I hope this recipe will bring a dash of joy to your kitchen as well!
So let’s conjure up some magic and get started. Ready your spatulas, and let’s bake some cakes that even the bravest of souls will adore.
Ingredient List
To whip up these ghoulishly delightful cakes, you’ll need a simple lineup of ingredients. Here’s what you’ll need for one of the classic Halloween cake recipes, along with some tips to help you along the way:
-
All-purpose flour (2 cups)
The backbone of your cake. For a gluten-free option, you can substitute with a 1:1 gluten-free baking blend, which works beautifully! -
Granulated sugar (1 ½ cups)
This brings sweetness to your treats. If you want to cut down on sugar, try using coconut sugar for a lower glycemic index sweetness. -
Unsweetened cocoa powder (¾ cup)
This is what gives our cake that deep chocolate flavor. If you’re not a chocolate fan, you can use vanilla extract or simple vanilla cake mix instead! -
Baking powder (2 tsp)
The magic leavening agent! Always fresh ensures you get the best rise; if yours is older than six months, it’s time to replace it. -
Baking soda (1 tsp)
Another leavening agent that works wonders alongside baking powder for that perfect fluffy texture. -
Salt (½ tsp)
A crucial ingredient that makes the flavors pop. Don’t skip it, or your cake might taste flat! -
Eggs (2 large)
They provide moisture and richness. For a plant-based option, try substituting with a "flax egg" (1 tablespoon ground flaxseed + 2.5 tablespoons water). Let it sit for a few minutes to thicken! -
Whole milk (1 cup)
Adds moisture and creaminess to the cake. You can swap it with almond milk or any unsweetened dairy alternative for a lighter version. -
Vegetable oil (½ cup)
This keeps the cake moist. You can use melted coconut oil for a different flavor profile! -
Vanilla extract (1 tsp)
It elevates all the flavors in baking. Use pure vanilla for the best results! -
Meringue powder (optional, for frosting)
If you’re feeling adventurous and want a firmer frosting, a pinch of meringue powder will help achieve that.
Step-by-Step Instructions
Now that we’ve gathered our ingredients, let’s get to the fun part: baking our Halloween cakes! Follow these detailed steps to ensure your treats come out perfect.
-
Preheat the Oven
First and foremost, preheat your oven to 350°F (175°C). This is super important because it sets the stage for a beautifully risen cake. While that’s heating up, you can grease and flour your cake pans (I suggest two 9-inch round pans) or line them with parchment paper. -
Mix the Dry Ingredients
In a big bowl, whisk together the all-purpose flour, granulated sugar, cocoa powder, baking powder, baking soda, and salt. This step is crucial because it ensures even distribution of your leavening agents throughout the cake.Chef Tip: Use a fine-mesh sieve to shift your cocoa powder; it’ll reduce clumps and keep your cake silky smooth.
-
Combine the Wet Ingredients
In another bowl, mix together the eggs, whole milk, vegetable oil, and vanilla extract until well combined.Tip: For a fun twist, toss in a hint of almond extract for an eerily delightful flavor!
-
Combine Wet and Dry Ingredients
Pour the wet mixture into the dry ingredients. Gently stir with a spatula or a wooden spoon until just combined. Don’t over-mix—lumps are okay! Over-mixing can lead to a dense cake, and we want light and fluffy goodness here. -
Bake the Cakes
Divide the batter evenly between your prepared pans and pop them in the oven. Bake for about 30-35 minutes, or until a toothpick inserted in the center comes out clean.Chef Hack: Check for doneness at the 25-minute mark, as oven temperatures may vary!
-
Cool the Cakes
Once baked, remove them from the oven and let them cool in the pans for about 10 minutes. Then, carefully transfer them to a wire rack to cool completely.Tip: If you’re feeling extra spooky, consider carving out little sections once they’re cool to create “cavern” spaces for fillings or treats!
-
Frost and Decorate
Here comes the fun part—decorating! You can use a simple buttercream frosting, heavy cream, or even a hauntingly green tinted glaze. Go wild with sprinkles, edible glitter, or even candy eyes to give an (un)earthly touch!Note: If you want a super smooth finish, consider chilling your cakes before applying the frosting.
Serving Suggestions
Serve your Halloween cakes on a festive platter adorned with creepy décor like plastic spiders or fake cobwebs. Slice them into triangular pieces and sprinkle edible glitter to mimic stardust or spooky dust. For a refreshing twist, throw in a dollop of whipped cream or serve alongside a scoop of vanilla ice cream—everyone loves that combo!
Recipe Variations
-
Vegan Cake: Use plant-based milk, flax eggs, and apple sauce instead of oil for a vegan version that’s still indulgent.
-
Pumpkin Chocolate Hybrid: Replace half the cocoa powder with pumpkin puree for a moist, spiced twist on the classic chocolate cake!
-
Ghostly Vanilla Cake: Switch to a vanilla base instead of chocolate and top with white frosting for a ghostly look.
-
Layered Cakes: Make it a showstopper by creating a tiered cake, alternating between the chocolate and a vibrant green or orange vanilla layer!
-
Gluten-Free Option: Use almond or coconut flour instead of all-purpose flour, or go for a 1:1 gluten-free flour mix.
Chef’s Notes
Baking these Halloween cakes has always been a blast for me! My fondest moment was when I made these with my kids for their school parties—their eyes lit up when they saw the finished product. We laughed about the time the frosting turned an unintentional shade of green because we decided to “experiment.” It didn’t matter; we just called it “monster frosting!” It’s moments like these that make cooking a shared adventure. Each time I bake these cakes, they evolve a little. Sometimes I toss in leftover Halloween candies or go for different color schemes depending on what’s in my pantry.
FAQs and Troubleshooting
Q1: My cakes sunk in the middle. What went wrong?
This usually means they might have been undercooked or the oven temperature was too low. Always check for doneness, and trust your oven thermometer!
Q2: My frosting is too runny. How do I fix it?
Add more powdered sugar until you achieve the desired consistency. If you’re working with cream cheese frosting, chilling it for about 20 minutes can help thicken it up.
Q3: Can I bake this as a sheet cake?
Absolutely! Simply adjust the baking time to around 25-30 minutes for a 9×13-inch sheet pan.
Q4: Is it okay to freeze the cake?
Yes! Bake the cakes, let them cool completely, then wrap them in plastic wrap before freezing. Thaw in the fridge overnight when you’re ready to frost and serve.
Nutritional Info
For those curious about the figures behind these spooky treats, a standard slice of the chocolate Halloween cake tends to be around 250 calories, with approximately 12g of fat, 34g of carbs, and 3g of protein. Keep in mind that toppings and frostings will add to these values, so feel free to adjust as necessary for your dietary needs.
There you have it, my friends! A delightful, easy-to-make Halloween cake recipe that promises to bring joy and a sprinkle of spookiness to your kitchen. So put on your chef’s hat, grab your favorite cookie cutters, and get ready to bake up something memorable this Halloween season! Happy Cooking!
Print
Spooktacular Halloween Treats: Delightfully Easy Yet Horribly Delicious Cakes
- Total Time: 50 minutes
- Yield: 8 servings 1x
- Diet: Vegetarian
Description
These hauntingly good Halloween cakes are easy to whip up and perfect for all ages, combining delightful flavors and spooky decorations.
Ingredients
- 2 cups all-purpose flour
- 1 ½ cups granulated sugar
- ¾ cup unsweetened cocoa powder
- 2 tsp baking powder
- 1 tsp baking soda
- ½ tsp salt
- 2 large eggs
- 1 cup whole milk
- ½ cup vegetable oil
- 1 tsp vanilla extract
- Optional: Meringue powder (for frosting)
Instructions
- Preheat the oven to 350°F (175°C) and prepare your cake pans.
- Mix the dry ingredients in a bowl until well combined.
- Combine the wet ingredients in another bowl.
- Pour the wet mixture into the dry ingredients and gently stir until just combined.
- Divide the batter between the prepared pans and bake for 30-35 minutes.
- Cool the cakes in the pans for 10 minutes, then transfer to a wire rack.
- Frost and decorate your cakes as desired!
Notes
For a moist cake, avoid over-mixing. Use fun decorations for a spooky effect!
- Prep Time: 15 minutes
- Cook Time: 35 minutes
- Category: Dessert
- Method: Baking
- Cuisine: American
Nutrition
- Serving Size: 1 slice
- Calories: 250
- Sugar: 22g
- Sodium: 400mg
- Fat: 12g
- Saturated Fat: 2g
- Unsaturated Fat: 5g
- Trans Fat: 0g
- Carbohydrates: 34g
- Fiber: 3g
- Protein: 3g
- Cholesterol: 30mg
Keywords: Halloween, cakes, baking, spooky treats, easy recipes




