
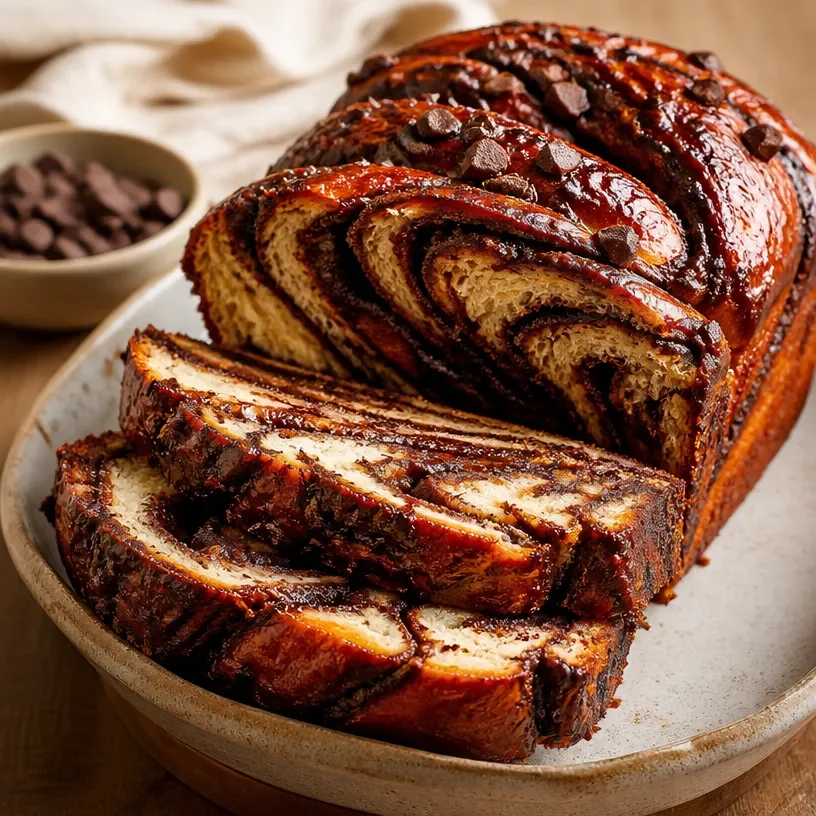
High-Protein Cottage Cheese Chocolate Babka (Easy Bake)
The Sweet Rise of Protein Cottage Cheese Chocolate Babka
Welcome to my cozy kitchen, food enthusiasts! Today, I’m excited to share a delightful recipe that combines the comfort of childhood memories with the power of protein: Protein Cottage Cheese Chocolate Babka. If you’ve never experienced the joy of making a beautiful, braided babka, you’re in for a treat—both in the baking process and the delicious outcome. This recipe is not just about satisfying your sweet tooth; it’s packed with protein from cottage cheese, making it a superb option for breakfast, a snack, or even dessert!
Imagine the irresistible aroma wafting through your home—warm bread mingling with rich, melty chocolate. It’s the kind of smell that makes even the most hectic day seem a little more relaxed. Babka is a labor of love, but trust me, once you pull that golden-brown beauty from the oven, you’ll forget any extra time spent in the kitchen. It truly is a recipe that brings people together, whether you’re sharing it with family at breakfast or gifting it to a friend as a sweet surprise.
The best part about this protein cottage cheese chocolate babka? It’s a perfect example of turning humble ingredients into something extraordinary. Plus, the addition of cottage cheese not only boosts the protein content but also adds a delightful moisture that makes every bite oh-so-tender. So, grab your apron, roll up your sleeves, and let’s embark on this baking adventure together!
A Sweet Slice of Nostalgia
Growing up, my weekends were swirled in the delightful chaos of my family kitchen. My grandmother used to whip up all sorts of treats, but there was something particularly special about her babka. She had a knack for making the dough dance with flavors, often adding her unique twists like marzipan or fruits. I remember her patiently guiding my little hands as I helped roll and twist the dough, giggling as it turned into a messy masterpiece.
To this day, the memories of kneading the dough with her, the flour-dusted counters, and the joyful anticipation of what would come out of the oven bring a smile to my face. When I created this protein cottage cheese chocolate babka, it felt like a loving tribute to those weekends we spent together. This version not only honors that nostalgia but also fits into the modern-day emphasis on healthy eating—a little balance that lets us indulge without guilt. So let’s get into it and turn your kitchen into a place of warmth and sweetness like those lovely Saturdays of my childhood!
Ingredients
Here’s what you’ll need for this delicious protein cottage cheese chocolate babka:
-
2 cups all-purpose flour
- The heart of our dough! You can substitute with a gluten-free blend if desired, but be sure to check the moisture content based on the specific blend.
-
1/4 cup granulated sugar
- Adds sweetness to the dough. Coconut sugar or a sugar substitute can work too if you’re looking to lower the calorie count.
-
1/2 teaspoon salt
- Essential for balancing flavors. Don’t skip it!
-
1/2 teaspoon instant yeast
- The magic worker! Instant yeast saves time and helps our dough rise beautifully.
-
1/3 cup milk (warm)
- This helps activate the yeast. Almond or oat milk can be used if you’re avoiding dairy.
-
1/2 cup cottage cheese (smooth)
- This adds protein and moisture! If you want a dairy-free option, use a silken tofu blended until smooth.
-
1/4 cup unsalted butter (melted)
- For flavor and richness. You can swap this for a non-dairy butter or coconut oil if needed.
-
1/2 cup semi-sweet chocolate chips
- This is where the magic happens! You can use dark chocolate for a richer flavor or even nut butter chips for a different twist.
-
1 teaspoon vanilla extract
- A must-have for flavor depth—go for pure vanilla extract for the best results.
-
1 egg (for egg wash)
- This creates that lovely golden crust. You can skip this for a vegan version or use a splash of almond milk just for shine.
Step-by-Step Instructions
Step 1: Mix Your Dry Ingredients
Start by combining the flour, sugar, salt, and instant yeast in a large mixing bowl. Give it a gentle stir to incorporate everything well. This step is crucial for an even rise—no one wants blobs of sugar hiding in their dough!
Step 2: Form the Dough
In another bowl, mix the warm milk and cottage cheese until smooth. Then slowly pour this mixture into your dry ingredients, followed by the melted butter and vanilla extract. Mix it until a shaggy dough forms. Don’t worry about achieving perfection here; it’s all about combining the ingredients.
Step 3: Knead, Knead, Knead
Turn the dough onto a floured surface and knead it for about 5-7 minutes. This is where the magic happens! Kneading activates the gluten, giving our babka its structure. It should feel elastic and smooth when ready. Pro tip: if the dough feels too sticky, sprinkle a little extra flour, but be careful not to overdo it!
Step 4: Let It Rise
Place your kneaded dough into a lightly greased bowl, cover it with a clean kitchen towel, and let it rise in a warm spot until doubled in size—this should take about an hour.
Step 5: Prepare the Filling
While your dough is rising, melt the chocolate chips in the microwave or over a double boiler. Mix in a spoonful of cottage cheese for added texture and creaminess, giving your filling a luscious consistency.
Step 6: Shape the Babka
Once your dough has risen, punch it down gently to release the air—this is the best part! Then roll it out on a floured surface into a rectangle, about 1/4 inch thick. Spread the chocolate filling evenly over the dough, leaving a small border around the edges. Roll the dough tightly from one long side to the other, creating a log.
Step 7: Create the Braids
Now comes the fun part—braiding! Using a sharp knife, slice the rolled dough in half lengthwise. This will expose the swirled filling. Hold one half in each hand, and carefully twist them together to form a braid, pinching the ends to seal. If you’re feeling fancy, form the braided dough into a coil, tucking the ends underneath for a beautiful presentation.
Step 8: Second Rise
Place your braided babka into a greased (or lined) loaf pan. Cover it again and let it rise for another 30 minutes. This extra proofing time enhances the flavors and gives it a fluffy texture.
Step 9: Brush and Bake
Preheat your oven to 350°F (175°C). While your oven is heating, brush the top of the babka with the egg wash to help it achieve that golden brown color. Bake for about 30-35 minutes or until it’s a beautiful golden hue. You can also check doneness by inserting a toothpick—it should come out clean!
Step 10: Cool and Enjoy!
Once baked, let your babka cool in the pan for about 10 minutes before transferring it to a cooling rack. This might be the toughest moment; the aroma is practically irresistible! Allow it to cool slightly before slicing and serving.
Serving Suggestions
This Protein Cottage Cheese Chocolate Babka can be enjoyed in numerous ways! Slice it up while it’s slightly warm and serve it with a dollop of whipped cream or a sprinkle of powdered sugar for a touch of sweetness. Paired with a cup of coffee or cocoa, it can transform your breakfast into a cozy gathering or a leisurely afternoon treat. For a fun twist, try toasting slices with a little butter or cream cheese for an extraordinary treat!
Recipe Variations
- Nutty Delight: Add chopped walnuts or pecans to your chocolate filling for an added crunch.
- Fruit Fusion: Mix in dried fruits like cranberries or cherries with the chocolate for a fruity twist.
- Spice It Up: Add a pinch of cinnamon or nutmeg to the dough for warmth and extra flavor.
- Caramel Surprise: Drizzle some caramel sauce between the layers for a sweet surprise in each bite.
- Vegan Version: Use plant-based butter, a non-dairy milk, and a substitute for the egg wash.
Chef’s Notes
As I stand here, remembering the many attempts at perfecting my babka, the kitchen is filled with laughter and flour flying everywhere! I once accidentally swapped the sugar with salt during a baking session—thankfully, my friends found it more hilarious than disastrous. Over the years, my babka has transformed, and this combination of cottage cheese and chocolate is hands down my favorite!
This recipe has evolved through generations in my family, blending the traditional with modern twists for today’s health-conscious eaters. Each time I bake it, I’m reminded of the joy it brings, not just in flavor but in memories shared with the people I care about.
FAQs and Troubleshooting
1. My dough didn’t rise. What went wrong?
This could be due to inactive yeast. Ensure your yeast is fresh by checking expiration dates, and remember, warm (not hot) milk is key to activating it!
2. Can I freeze this babka?
Absolutely! Once completely cooled, wrap tightly in plastic wrap and then foil. It can be frozen for up to a month! Just remember to let it thaw at room temperature before serving and enjoy.
3. What if my filling is too thick?
If your chocolate mixture feels too thick to spread, add a splash of milk or a little more melted butter to loosen it up. You want it to be spreadable yet still gooey.
4. How can I make my babka extra chocolaty?
To enhance the chocolate flavor, consider adding cocoa powder to the dough itself or drizzle melted chocolate over the top once it cools.
Nutritional Info
This protein cottage cheese chocolate babka packs a nutritious punch with the balance of protein from cottage cheese and healthy fats from nuts or chocolate. Estimating per slice, it brings approximately:
- Calories: 245
- Protein: 8g
- Carbohydrates: 30g
- Fat: 10g
The actual values will vary, so adjust based on ingredient changes.
That’s it, my fellow foodies! I hope you enjoy baking and sharing this Protein Cottage Cheese Chocolate Babka as much as I do. It’s a recipe steeped in nostalgia, yet perfect for today’s health-focused lifestyle. Happy baking!
Print
Protein Cottage Cheese Chocolate Babka
- Total Time: 50 minutes
- Yield: 8 servings 1x
- Diet: Vegetarian
Description
Delightful protein-packed babka made with cottage cheese and rich chocolate, perfect for breakfast, snacks, or dessert.
Ingredients
- 2 cups all-purpose flour
- 1/4 cup granulated sugar
- 1/2 teaspoon salt
- 1/2 teaspoon instant yeast
- 1/3 cup warm milk
- 1/2 cup smooth cottage cheese
- 1/4 cup unsalted butter, melted
- 1/2 cup semi-sweet chocolate chips
- 1 teaspoon vanilla extract
- 1 egg (for egg wash)
Instructions
- Mix your dry ingredients: Combine the flour, sugar, salt, and yeast in a large mixing bowl.
- Form the dough: In another bowl, mix warm milk and cottage cheese until smooth, then combine with dry ingredients.
- Knead the dough: Turn onto a floured surface and knead for about 5-7 minutes.
- Let it rise: Place in a greased bowl, cover, and let rise until doubled in size (about 1 hour).
- Prepare the filling: Melt chocolate chips and mix in a spoonful of cottage cheese.
- Shape the babka: Roll out dough, spread filling, roll it into a log, and braid.
- Second rise: Place braided dough in a greased loaf pan and let rise for another 30 minutes.
- Brush and bake: Preheat oven to 350°F (175°C), brush with egg wash, and bake for 30-35 minutes.
- Cool and enjoy: Let cool for 10 minutes before transferring to a rack.
Notes
For a vegan version, use plant-based butter, non-dairy milk, and a substitute for the egg wash.
- Prep Time: 15 minutes
- Cook Time: 35 minutes
- Category: Dessert
- Method: Baking
- Cuisine: Jewish
Nutrition
- Serving Size: 1 slice
- Calories: 245
- Sugar: 5g
- Sodium: 200mg
- Fat: 10g
- Saturated Fat: 4g
- Unsaturated Fat: 5g
- Trans Fat: 0g
- Carbohydrates: 30g
- Fiber: 2g
- Protein: 8g
- Cholesterol: 30mg
Keywords: babka, chocolate, protein, cottage cheese, dessert, baking
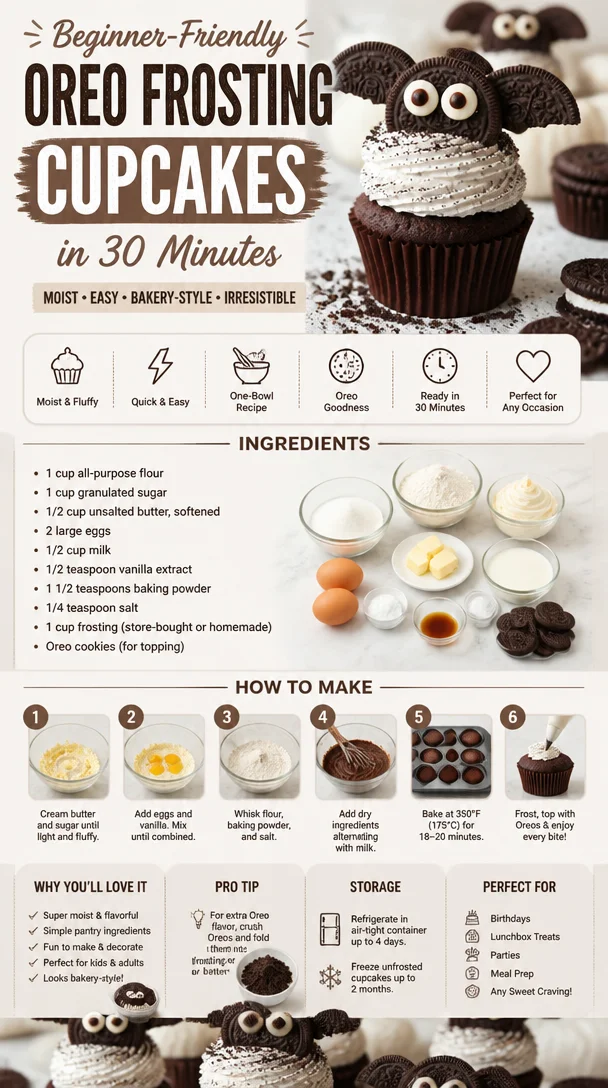
Beginner-Friendly Oreo Frosting Cupcakes in 30 Minutes
Delightfully Decadent Cupcakes with Oreo Frosting
Welcome to my kitchen! Today, we’re diving into a delightful world of sweetness with a recipe that’s as nostalgic as it is indulgent: Cupcakes with Oreo Frosting. If you’ve ever experienced that moment of pure joy when biting into a soft, fluffy cupcake topped with creamy, dreamy frosting, you know just how special this treat can be. Whether you’re celebrating a birthday, an anniversary, or just a Tuesday, these cupcakes are bound to bring smiles and happy dance moves all around!
A Sweet Memory
I still remember the first time I made cupcakes with Oreo frosting. It was a rainy Saturday afternoon, and my younger brother had invited a few of his friends over for a movie marathon. In preparation for their laughter and excitement, I decided to whip up a batch of cupcakes to make the day even sweeter. The kitchen filled with the sweet scent of vanilla and chocolate as I scooped the batter into the cupcake liners, and soon enough, the delightful aroma of freshly baked cupcakes wafted through our home.
Once they were out of the oven and cooled down, I hastily slathered on the Oreo frosting and topped each one with a crushed cookie. My brother and his friends erupted in cheers when they took their first bites—chocolatey bliss paired with the creamy crunch of Oreos. As I watched them relish each sweet morsel, I knew I had not only created a tasty treat but also a cherished memory. Since that day, these cupcakes have become a staple in my kitchen, a tasty reminder of the happiness that comes from baking.
Ingredients
Here’s what you’ll need to get started on these delightful cupcakes:
-
1 ½ cups all-purpose flour
The backbone of our cupcakes! If you need gluten-free options, you can use a 1:1 gluten-free flour substitute. -
1 cup granulated sugar
Sweetness is key! For a bit of a twist, you can opt for brown sugar to enrich the flavor. -
½ cup unsweetened cocoa powder
Cocoa adds that rich chocolate flavor. You could swap it with carob powder if you’re looking for a caffeine-free option. -
1 teaspoon baking powder
This helps our cupcakes rise to fluffy perfection. If you’re out of baking powder, 1/4 teaspoon of baking soda combined with 1/2 teaspoon of cream of tartar can work! -
½ teaspoon baking soda
This contributes to that lovely lift! -
½ teaspoon salt
A little salt enhances all the flavors. Don’t skip it, or your cupcakes might taste a bit flat. -
2 large eggs
These bind the ingredients together and add moisture. Aquafaba (the liquid from a can of chickpeas) can be used as an egg substitute for a vegan version—3 tablespoons per egg. -
½ cup vegetable oil
This will keep your cupcakes moist! You can substitute with melted coconut oil or applesauce for a healthier spin. -
½ cup buttermilk
Buttermilk adds a wonderful tang and enhances the moistness. If you don’t have any, combine regular milk with a teaspoon of vinegar and let it sit for 5 minutes. -
1 teaspoon pure vanilla extract
The secret weapon for flavor! Substitute with almond extract for a nutty twist. -
1 cup crème fraîche or cream cheese (for frosting)
This will allow for a rich base for our Oreo frosting. You can also use mascarpone for an even creamier texture. -
1 cup powdered sugar
To sweeten the frosting. If you’re looking to reduce sugar, you can use a sugar substitute. -
6-8 Oreo cookies (for frosting and decoration)
The star of the show! For a gluten-free version, use gluten-free Oreos.
Step-by-Step Instructions
Let’s get baking! Follow these steps to whip up a batch of delightful cupcakes:
-
Preheat Your Oven
Start by preheating your oven to 350°F (175°C). This is crucial for ensuring your cupcakes bake evenly. -
Prepare Your Pan
Line a 12-cup cupcake pan with fun and vibrant cupcake liners. I always love to mix it up with different colors—it just makes baking even more fun! -
Mix Dry Ingredients
In a large mixing bowl, whisk together the flour, sugar, cocoa powder, baking powder, baking soda, and salt until well combined. This step is important to ensure even flavor distribution throughout your cupcakes. -
Combine Wet Ingredients
In another bowl, beat the eggs, then add in the oil, buttermilk, and vanilla extract. Whisk everything together until smooth. When you pour this into the dry mix, the magic truly begins! -
Combine the Mixtures
Gradually pour the wet mixture into the dry ingredients, stirring gently until just combined. Make sure not to overmix; a few lumps are perfectly okay! -
Scoop and Bake
Using an ice cream scoop or a ladle, fill each cupcake liner about two-thirds full with batter. This gives them just the right amount of space to rise. Bake in the preheated oven for 18–20 minutes, or until a toothpick inserted in the center comes out clean. -
Cool Completely
Once baked, let the cupcakes cool in the pan for about 5 minutes, then transfer them to a wire rack to cool completamente. This is essential before frosting—no one wants melted frosting! -
Frost it Up!
To prepare the Oreo frosting, beat together the crème fraîche (or cream cheese), powdered sugar, and crushed Oreos until smooth and creamy. Again, the key is not to overbeat—just enough to combine perfectly! -
Decorate Your Cupcakes
Once the cupcakes are completely cool, use a piping bag (or a ziplock bag with a corner snipped off) to pipe the Oreo frosting onto each cupcake. Top them off with additional crushed Oreos for that great crunch!
Serving Suggestions
These cupcakes are perfect for parties, family gatherings, or simply enjoyed with a cozy cup of coffee on a quiet afternoon. Serve them on a cute platter—perhaps with a few extra Oreos on the side. A scoop of vanilla ice cream would also make a delightful companion!
Recipe Variations
- Chocolate Chip Surprise: Add mini chocolate chips into the batter for an extra gooey treat.
- Nutty Twist: Fold in crushed almonds or hazelnuts into the batter before baking.
- Vegan Delight: Substitute eggs with flaxseed meal and use a plant-based milk for a vegan-friendly version.
- Mini Cupcakes: Make these cupcakes in mini sizes for bite-sized goodness—just adjust the baking time accordingly.
- Fruity Fun: Add some raspberry or strawberry jam in the center before baking for a fruity explosion!
Chef’s Notes
The beauty of this recipe is its simplicity, which allows for so much personalization and creativity! I remember my first few batches, where I got a bit too adventurous and tossed in a handful of chocolate chips—great idea turned heavenly outcome! Over the years, I’ve experimented, and I still find pleasure in introducing new flavors. Who knew a humble cupcake could bring so much joy? Oh, and if you find frosting everywhere when you’re finished, don’t worry; it’s just a sign of a happy kitchen!
FAQs and Troubleshooting
-
Why are my cupcakes dense?
Dense cupcakes can often be a result of overmixing the batter. Mix until just combined for a lighter texture. -
How can I avoid overbaking?
Keep an eye on your cupcakes during the last few minutes of baking. When a toothpick comes out with just a few moist crumbs, they’re perfect! -
What can I do if my frosting is too runny?
If your frosting is too runny, try adding in a bit more powdered sugar until you reach the desired consistency. -
Can I make these ahead of time?
Absolutely! Bake the cupcakes ahead of time and store them in an airtight container at room temperature for up to 2 days before frosting them.
Nutritional Info (Optional)
For those curious about the nutrition breakdown, here’s a general overview per cupcake (without frosting):
- Calories: Approximately 200
- Total Fat: 8g
- Saturated Fat: 1.5g
- Carbohydrates: 30g
- Sugars: 15g
- Protein: 2g
And there you have it—a delightful recipe for cupcakes with delectable Oreo frosting! I hope this sparks joy in your kitchen as much as it did in mine. Happy baking, fellow foodies!
Print
Delightfully Decadent Cupcakes with Oreo Frosting
- Total Time: 40 minutes
- Yield: 12 servings 1x
- Diet: Vegetarian
Description
Indulge in soft, fluffy cupcakes topped with creamy Oreo frosting for a delightful treat perfect for any occasion.
Ingredients
- 1 ½ cups all-purpose flour
- 1 cup granulated sugar
- ½ cup unsweetened cocoa powder
- 1 teaspoon baking powder
- ½ teaspoon baking soda
- ½ teaspoon salt
- 2 large eggs
- ½ cup vegetable oil
- ½ cup buttermilk
- 1 teaspoon pure vanilla extract
- 1 cup crème fraîche or cream cheese (for frosting)
- 1 cup powdered sugar
- 6–8 Oreo cookies (for frosting and decoration)
Instructions
- Preheat your oven to 350°F (175°C).
- Prepare a 12-cup cupcake pan with cupcake liners.
- Mix together the flour, sugar, cocoa powder, baking powder, baking soda, and salt in a large mixing bowl.
- Combine the eggs, oil, buttermilk, and vanilla in another bowl and whisk until smooth.
- Pour the wet ingredients into the dry ingredients and stir gently until just combined.
- Scoop the batter into the cupcake liners, filling each about two-thirds full.
- Bake for 18–20 minutes, or until a toothpick inserted comes out clean.
- Cool completely on a wire rack before frosting.
- Frost with a mixture of crème fraîche (or cream cheese), powdered sugar, and crushed Oreos.
- Decorate with additional crushed Oreos on top.
Notes
Feel free to experiment with ingredients and toppings for personalized variations!
- Prep Time: 20 minutes
- Cook Time: 20 minutes
- Category: Dessert
- Method: Baking
- Cuisine: American
Nutrition
- Serving Size: 1 cupcake
- Calories: 200
- Sugar: 15g
- Sodium: 210mg
- Fat: 8g
- Saturated Fat: 1.5g
- Unsaturated Fat: 6g
- Trans Fat: 0g
- Carbohydrates: 30g
- Fiber: 1g
- Protein: 2g
- Cholesterol: 30mg
Keywords: cupcakes, Oreo, frosting, dessert, baking
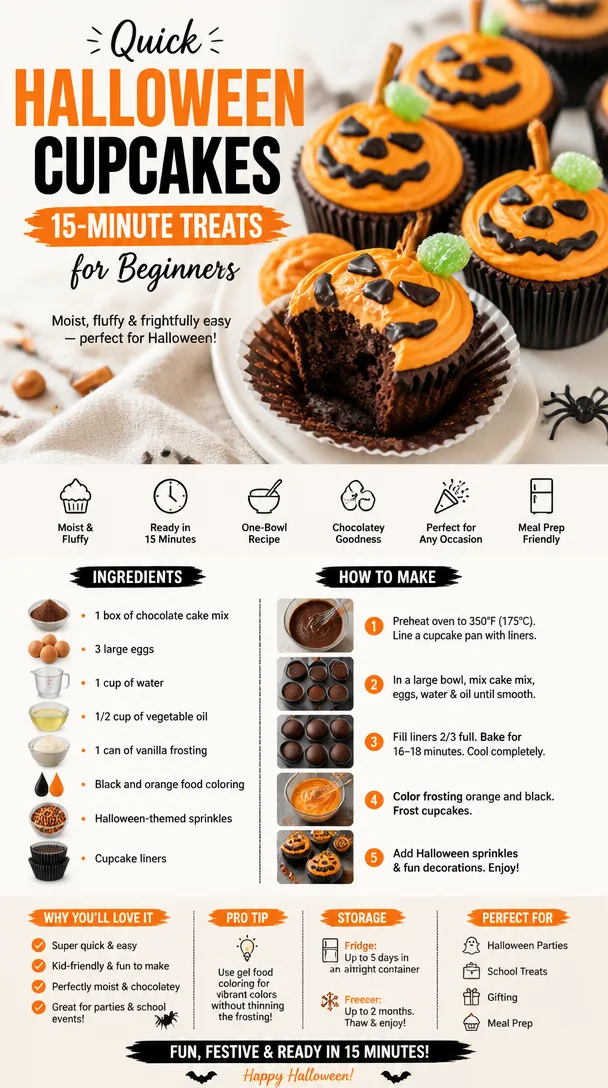
Quick Halloween Cupcakes: 15-Minute Treats for Beginners
Easy Halloween Cupcakes: Spooktacularly Delicious Treats!
Welcome to my cozy kitchen, friends! Halloween is just around the corner, and you know what that means—it’s time to whip up some ghoulish goodies that will delight trick-or-treaters and party guests alike. These easy Halloween cupcakes are not only adorable, but they also pack a punch of flavor that will leave everyone asking for seconds (or thirds!).
Imagine a group of friends gathered around a table, laughter filling the air, as you unveil your batch of these spooktacular cupcakes. The aroma of freshly baked treats wafts through the room, and the anticipation builds as everyone eyes the spooky decorations. Whether you’re an experienced baker or just getting started, this recipe is designed to make you feel confident and excited as you create something fun and festive.
In today’s post, I’ll be guiding you through every step of the process, sharing not just the recipe but also some personal stories and tips to make your Halloween baking a blast! So, grab your apron, preheat that oven, and let’s get started!
A Sweet Blast From the Past
When I think of Halloween, I can’t help but reminisce about my childhood. Growing up, our neighborhood transformed into a whimsical wonderland filled with pumpkins, spooky decorations, and the promise of sweet treats at every door. But one of my fondest memories is from the time I decided to bake my very first batch of Halloween cupcakes for my school’s Halloween party.
Armed with a bright orange apron and a head full of ideas, I eagerly gathered my ingredients. However, my ambitious plans faced a tiny challenge—my kitchen turned into a flour-dusted battleground! With the oven timer ticking away, I hurriedly mixed the batter, trying to avoid the mess while also managing to keep my little brother from "helping" too much (he had a knack for creating chaos).
The cupcakes turned out delightfully; they were frosted with swirls of orange and black icing and topped with candy corn. The pride I felt when my classmates devoured them was immeasurable. It sparked a love for baking in me, especially during the holiday season. Now, I’m thrilled to pass on that love to you with this easy Halloween cupcake recipe!
Ingredients
Here’s what you’ll need for these festive cupcakes:
-
1 ½ cups all-purpose flour
- The foundation of your cupcakes! You can substitute with whole wheat flour for a nutty flavor or gluten-free flour for a gluten-friendly option.
-
1 cup granulated sugar
- This is what gives your cupcakes that sweet, irresistible taste! Brown sugar can be used for a deeper caramel flavor.
-
½ cup unsweetened cocoa powder
- For those who love a rich, chocolatey flavor! If chocolate isn’t your thing, you can omit it and add an extra ½ cup of flour for vanilla cupcakes.
-
2 tsp baking powder
- This helps your cupcakes rise and become fluffy! Be sure to check the expiration date; old baking powder can lead to flat cupcakes.
-
½ tsp baking soda
- Another leavening agent that adds to the fluffiness. If you’re out, you can use an extra teaspoon of baking powder.
-
½ tsp salt
- A pinch of salt intensifies all the other flavors! Sea salt or pink Himalayan salt works wonderfully too for a different hint of flavor.
-
2 large eggs
- The binding agents! If you’re looking for an egg-free option, you can use ½ banana or 1/4 cup of unsweetened applesauce for each egg.
-
½ cup milk
- For moistness and richness. Any milk alternative (like almond or oat milk) will also work here.
-
1/3 cup vegetable oil
- This keeps your cupcakes moist. You can swap this for melted coconut oil for a twist.
-
1 tsp vanilla extract
- The secret ingredient for deepening the flavor! You can also try almond extract for a different flavor profile.
-
Colored frosting (orange, purple, and green)
- Get creative with colors! You can make your own buttercream or grab pre-made frosting for convenience.
-
Halloween-themed sprinkles and candy decorations
- These add that festive touch! Gummy worms, candy corn, or chocolate spiders all work great.
Step-by-Step Instructions
Now, let’s get cooking! Follow these steps to create your spooktacular Halloween cupcakes:
-
Preheat the Oven
Preheat your oven to 350°F (175°C). This is crucial—starting with a hot oven ensures that your cupcakes rise beautifully! -
Prepare Your Cupcake Liners
Line a muffin tin with cute Halloween-themed cupcake liners. This is where the fun begins—pick ones with ghosts, pumpkins, or spooky designs! -
Mix Dry Ingredients
In a large mixing bowl, whisk together the flour, sugar, cocoa powder, baking powder, baking soda, and salt until well combined. This helps to aerate the flour, ensuring a lighter texture. -
Combine Wet Ingredients
In another bowl, whisk together the eggs, milk, oil, and vanilla extract until smooth. You can even use a hand mixer for extra fluff! -
Blend the Mixtures
Pour the wet ingredients into the dry ingredients and mix until just combined. Avoid over-mixing; a few lumps are perfectly fine! Over-mixing can lead to tough cupcakes. -
Fill the Liners
Using a spoon or ice cream scoop, fill each cupcake liner about two-thirds full. This allows room for the cupcakes to rise without overflowing. -
Bake the Cupcakes
Carefully place the muffin tin in the preheated oven and bake for about 18-20 minutes. To check if they’re done, insert a toothpick into the center—if it comes out clean or with a few crumbs, they’re ready! -
Cool Down Time
Once done, remove them from the oven and allow them to cool in the tin for about 5 minutes. Then, transfer them to a wire rack to cool completely. Don’t rush this step; frosting warm cupcakes usually leads to melty messes! -
Frost Away
Once your cupcakes are completely cool, it’s time to unleash your creativity! Use a piping bag to frost your cupcakes with swirling colors. Try a mix of orange, purple, and green for that spooky aesthetic. -
Decorate
Finish off with a sprinkle of your favorite Halloween-themed toppings! The more colorful and fun, the better!
Serving Suggestions
Arrange your Halloween cupcakes on a festive platter, and for an extra spooky touch, consider adding decorative elements like spooky candles or mini pumpkins. You can also place them in whimsical cupcake holders to create a fun centerpiece for your Halloween party. Set out a variety of toppings on the side so everyone can customize their cupcake—who wouldn’t love that?
Recipe Variations
Feeling adventurous? Here are some creative twists to try for your Halloween cupcakes:
- Pumpkin Spice Cupcakes: Swap out the cocoa powder for 1 cup of pumpkin puree and add 1 tsp of pumpkin spice. Perfect for a cozy fall flavor!
- Ghostly Coconut: Top with coconut-flavored frosting and edible googly eyes to create adorable ghost cupcakes.
- Spiced Apple Cupcakes: Add finely chopped apples and cinnamon for a delightful twist on the traditional flavor.
- Vegan Version: Substitute eggs with flaxseed meal (1 tbsp ground flaxseed + 3 tbsp water = 1 egg) and use almond milk and coconut oil to create delicious vegan-friendly treats.
- Chocolate Peanut Butter: Fill the centers with peanut butter and top with chocolate frosting for a rich surprise bite!
Chef’s Notes
Baking is a journey, and every recipe carries personal touches. Over the years, I’ve experimented with countless variations of these Halloween cupcakes. At one point, I even hosted a “decorate your cupcake” night with friends, and the creativity that flowed was astounding! Some made spooky faces while others went for elegant autumn designs.
It’s incredible how something as simple as a cupcake can spark joy, laughter, and connection with friends and family. Plus, don’t be surprised if you find yourself enjoying the leftover frosting straight from the bowl—hey, it happens to the best of us!
FAQs and Troubleshooting
What should I do if my cupcakes sink in the middle?
This can happen for a couple of reasons, such as over-mixing the batter or not baking them long enough. Make sure to mix just until combined and check for doneness using the toothpick method.
How can I ensure my cupcakes are moist?
Using vegetable oil instead of butter can lead to a moister cupcake. Additionally, don’t overbake them—keeping an eye on the time will make a big difference.
Can I make these cupcakes ahead of time?
Absolutely! You can bake and cool them a day in advance. Just store them in an airtight container and frost them the day of your celebration for best results.
What if I don’t have cupcake liners?
You can bake directly in a greased muffin tin; just be sure to really grease them well to avoid sticking.
Nutritional Info (if applicable)
One cupcake (without frosting) typically contains around 200 calories, 8g fat, and 30g carbohydrates. Adjust the calculations based on the frosting and additional toppings you use!
So there you have it! You’re now ready to create your very own batch of easy Halloween cupcakes that not only taste delicious but also look spooktacular. I can’t wait to hear about your baking adventures and all the creative decorations you come up with. Happy Halloween baking—let’s make some magical memories in the kitchen! 🎃🧁
Print
Easy Halloween Cupcakes
- Total Time: 35 minutes
- Yield: 12 servings 1x
- Diet: Vegetarian
Description
Spooktacularly delicious Halloween cupcakes that are easy to make and perfect for festive gatherings.
Ingredients
- 1 ½ cups all-purpose flour
- 1 cup granulated sugar
- ½ cup unsweetened cocoa powder
- 2 tsp baking powder
- ½ tsp baking soda
- ½ tsp salt
- 2 large eggs
- ½ cup milk
- 1/3 cup vegetable oil
- 1 tsp vanilla extract
- Colored frosting (orange, purple, and green)
- Halloween-themed sprinkles and candy decorations
Instructions
- Preheat your oven to 350°F (175°C).
- Line a muffin tin with Halloween-themed cupcake liners.
- Whisk together dry ingredients: flour, sugar, cocoa powder, baking powder, baking soda, and salt.
- Whisk together wet ingredients: eggs, milk, oil, and vanilla extract until smooth.
- Pour the wet ingredients into the dry ingredients and mix until just combined.
- Fill each cupcake liner about two-thirds full.
- Bake for about 18-20 minutes, or until a toothpick comes out clean.
- Allow cooling in the tin for 5 minutes, then transfer to a wire rack to cool completely.
- Frost the cooled cupcakes with creative colored frosting.
- Decorate with Halloween-themed sprinkles and candy.
Notes
Feel free to explore variations such as pumpkin spice or vegan options for a different flavor experience.
- Prep Time: 15 minutes
- Cook Time: 20 minutes
- Category: Dessert
- Method: Baking
- Cuisine: American
Nutrition
- Serving Size: 1 cupcake
- Calories: 200
- Sugar: 15g
- Sodium: 150mg
- Fat: 8g
- Saturated Fat: 1g
- Unsaturated Fat: 7g
- Trans Fat: 0g
- Carbohydrates: 30g
- Fiber: 1g
- Protein: 3g
- Cholesterol: 40mg
Keywords: Halloween, cupcakes, baking, desserts, festive treats
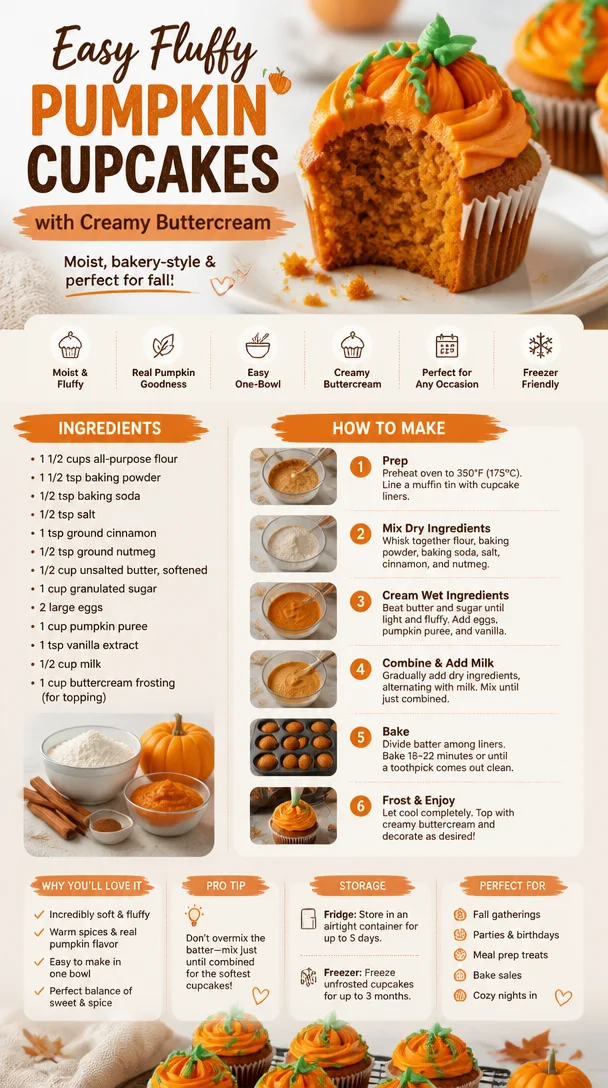
Easy Fluffy Pumpkin Cupcakes with Creamy Buttercream
The Best Buttercream Pumpkin Cupcakes: A Cozy Fall Treat
Welcome to my kitchen, fellow food enthusiasts! Today, we’re diving deep into the cozy world of sweet treats with a recipe that will warm your heart and tantalize your taste buds — Buttercream Pumpkin Cupcakes! These adorable cupcakes are the perfect embodiment of fall, wrapped up in soft, moist cake and topped with a luscious buttercream frosting that’s as dreamy as it is delicious. Whether you’re hosting a gathering, celebrating a birthday, or simply trying to bring a little cheer to a dull day, these cupcakes are here to make everything better.
Fall has a magical way of making us crave those warm flavors and comforting aromas that evoke memories of family gatherings and cozy nights in. With the scent of cinnamon, nutmeg, and of course, pumpkin wafting through the air, you can’t help but feel excited for what’s to come! Like most of my recipes, these cupcakes are not just about the end result but the joy of cooking and sharing with those you love. So, grab your apron, and let’s get whisking!
Imagine walking through a pumpkin patch, the crisp air dancing on your skin, leaves crunching underfoot, and the vibrant orange pumpkins competing with the beautiful fall foliage. One particular memory that warms my heart is when my grandmother would take me to pick pumpkins every October. We’d come home with armfuls of pumpkins, and she would whip up her famous pumpkin bread, filling the kitchen with delightful aromas. It was a time of laughter, warmth, and love, where nothing else mattered except the joy of baking together. Inspired by those moments, I created these Buttercream Pumpkin Cupcakes to recapture that same magic and ensure you create new, delicious memories with your loved ones.
Ingredients
Here’s your shopping list for these delightful Buttercream Pumpkin Cupcakes. Each ingredient plays a key role in creating that scrumptious flavor and texture.
- All-purpose flour (2 cups): The foundation of our cupcakes. For a gluten-free option, you can use a 1:1 gluten-free flour blend.
- Granulated sugar (1 cup): Sweetness is crucial! For a lower-calorie alternative, try coconut sugar or a sugar substitute like Stevia.
- Brown sugar (1/2 cup): Adds depth and moisture. If you’re out of brown sugar, you can make your own by mixing white sugar with a bit of molasses.
- Baking powder (1 teaspoon): This gives our cupcakes a nice rise. Ensure it’s fresh for the best results!
- Baking soda (1 teaspoon): Works hand-in-hand with baking powder for a fluffy texture.
- Salt (1/2 teaspoon): Balances sweetness and enhances flavors.
- Ground cinnamon (1 teaspoon): The aromatic spice that screams fall! Substitute with pumpkin pie spice for an all-in-one approach.
- Ground nutmeg (1/4 teaspoon): Adds warmth; fresh nutmeg is even more potent if you can find it!
- Pumpkin puree (1 cup): The star of the show! Avoid pumpkin pie filling as it contains sugar and spices. You can also use homemade pumpkin puree if you’re feeling adventurous.
- Eggs (2 large): Provides structure and moisture. For a vegan option, use flax eggs (1 tbsp ground flaxseeds + 3 tbsp water per egg).
- Vanilla extract (1 teaspoon): For a lovely fragrance. When possible, opt for pure vanilla extract over imitation.
- Vegetable oil (1/2 cup): Ensures moisture; for a lighter option, you can substitute unsweetened applesauce or Greek yogurt.
Buttercream Frosting Ingredients
- Unsalted butter (1 cup, softened): The base of our frosting. It’s best to allow it to come to room temperature for easy whipping.
- Powdered sugar (3–4 cups): Provides sweetness and gives our frosting the perfect consistency. Sift it for a smooth texture.
- Heavy cream (2 tablespoons): Keeps the frosting creamy. You can substitute with milk, but it won’t be as rich.
- Vanilla extract (1 teaspoon): Again, choose pure for the best flavor.
Step-by-Step Instructions
Let’s transform these ingredients into something magical! Follow along as we navigate through the cupcake process.
Step 1: Preheat and Prep
Preheat your oven to 350°F (175°C). Line a standard muffin pan with cupcake liners — choose festive colors if you like! A little bit of flair never hurt anyone!
Step 2: Mix Dry Ingredients
In a medium bowl, whisk together the flour, granulated sugar, brown sugar, baking powder, baking soda, salt, cinnamon, and nutmeg. Whisking helps combine the ingredients and aerates the mixture. This step can make a difference in the fluffiness of your cupcakes, so don’t skip it!
Step 3: Combine Liquid Ingredients
In a large bowl, combine the pumpkin puree, eggs, vegetable oil, and vanilla extract. Use a hand mixer or whisk vigorously until smooth. If you’re using a stand mixer, this is when you would switch to the paddle attachment!
Step 4: Mix Together
Gradually add the dry ingredients to the wet mixture, mixing just until combined. Overmixing can lead to dense cupcakes — we want light and fluffy! The batter might be a little thick, and that’s perfectly fine.
Step 5: Bake
Spoon the batter into the lined muffin pan, filling each cup about two-thirds full. This allows room for the cupcakes to rise without spilling over. Bake in the preheated oven for about 18–20 minutes or until a toothpick inserted in the center comes out clean. The aroma wafting through your kitchen will be absolutely heavenly!
Step 6: Cool
Remove the cupcakes from the oven and allow them to cool in the pan for about 5 minutes. Then, carefully transfer them to a wire rack to cool completely. It’s tough waiting, but frost on warm cupcakes can lead to a melty mess — and we want that buttercream to shine!
Step 7: Make the Buttercream Frosting
While the cupcakes cool, let’s make the frosting. In a medium bowl, beat the softened unsalted butter on medium speed until creamy, about 2–3 minutes. Gradually add powdered sugar one cup at a time, beating well after each addition. Mix in the heavy cream and vanilla, then increase the mixer speed to high and beat until the frosting is light and fluffy, about 3 minutes.
Step 8: Frosting Time!
Once the cupcakes are completely cool, it’s time for the fun part! Use a piping bag fitted with your desired tip (or a simple spatula) to generously frost each cupcake. No need to be perfect — a little rustic charm makes it even cozier!
Serving Suggestions
These Buttercream Pumpkin Cupcakes are delightful on their own, but you can elevate your presentation even further! Consider arranging them on a pretty platter dusted with a sprinkle of cinnamon or garnished with small pieces of caramel or chopped pecans for that extra nod to fall flavors. Pair them with a warm beverage like chai tea or spiced apple cider for a perfect cozy treat!
Recipe Variations
Feeling adventurous? Here are a few variations to mix things up:
- Chocolate Chip Surprise: Fold in mini chocolate chips into the batter before baking for a gooey, sweet addition.
- Cream Cheese Frosting: Swap the buttercream for a tangy cream cheese frosting for a decadent twist.
- Spice it Up: Add a pinch of cayenne pepper or ginger to your batter for a spicy kick.
- Nutty Crunch: Top the frosting with toasted walnuts or pecans for added texture.
- Vegan Version: Use flax eggs and coconut oil to make this recipe vegan-friendly while keeping the delicious taste!
Chef’s Notes
Oh, I have so many fond memories tied to these cupcakes! The first time I made them, I ended up with flour on my face and a puppy at my feet, eagerly waiting for crumbs. The kitchen was an absolute mess, but it was one of the most joyful experiences. My friends came over for a small gathering, and within minutes, the cupcakes were gone! It’s turned into a tradition, often requested at parties and potlucks. Every time I make them, I feel like I’m honoring the spirit of my grandmother and all the love she instilled in our kitchen.
FAQs and Troubleshooting
1. Why are my cupcakes dense?
Overmixing the batter after adding the dry ingredients can lead to dense cupcakes. Mix until just combined for the best texture.
2. How do I store leftover cupcakes?
Store them in an airtight container at room temperature for up to 3 days or in the fridge for about a week. Just be sure to keep them well-covered!
3. Can I freeze these cupcakes?
Absolutely! Make sure they’re cool, then freeze them in an airtight container. To enjoy, thaw them in the fridge overnight and frost when ready.
4. My frosting is too runny. What should I do?
If your frosting is too runny, gradually add more powdered sugar until you reach your desired consistency. If it’s too thick, a little splash of heavy cream can smooth it out.
Nutritional Info (Optional)
For those curious about the nutritional details, one Buttercream Pumpkin Cupcake (without added decorations) contains approximately 320 calories, with a nice balance of carbs, fats, and proteins to indulge in a delightful treat.
And there you have it — Buttercream Pumpkin Cupcakes that not only taste delicious but also carry a story and warmth of the season! I hope you find joy in making and sharing these delightful treats with your loved ones. Don’t forget to share your own twists and stories as we continue to create mouth-watering memories together! Happy baking! 🍂🧁
Print
Buttercream Pumpkin Cupcakes
- Total Time: 40 minutes
- Yield: 12 servings 1x
- Diet: Vegetarian
Description
Delightful Buttercream Pumpkin Cupcakes that capture the essence of fall with warm flavors and comforting aromas.
Ingredients
- 2 cups All-purpose flour
- 1 cup Granulated sugar
- 1/2 cup Brown sugar
- 1 teaspoon Baking powder
- 1 teaspoon Baking soda
- 1/2 teaspoon Salt
- 1 teaspoon Ground cinnamon
- 1/4 teaspoon Ground nutmeg
- 1 cup Pumpkin puree
- 2 large Eggs
- 1 teaspoon Vanilla extract
- 1/2 cup Vegetable oil
- 1 cup Unsalted butter, softened (for frosting)
- 3–4 cups Powdered sugar (for frosting)
- 2 tablespoons Heavy cream (for frosting)
- 1 teaspoon Vanilla extract (for frosting)
Instructions
- Preheat your oven to 350°F (175°C) and line a standard muffin pan with cupcake liners.
- Whisk together the flour, granulated sugar, brown sugar, baking powder, baking soda, salt, cinnamon, and nutmeg in a medium bowl.
- Combine the pumpkin puree, eggs, vegetable oil, and vanilla extract in a large bowl and mix until smooth.
- Add the dry ingredients to the wet mixture gradually, mixing until just combined.
- Spoon the batter into the lined muffin pan, filling each cup about two-thirds full.
- Bake for about 18–20 minutes or until a toothpick inserted comes out clean.
- Cool the cupcakes in the pan for 5 minutes, then transfer to a wire rack to cool completely.
- Beat the softened butter until creamy, then gradually add powdered sugar, heavy cream, and vanilla extract, beating until fluffy.
- Frost the cooled cupcakes with the buttercream frosting using a piping bag or spatula.
Notes
For variations, consider adding mini chocolate chips, using cream cheese frosting, or adding spices like cayenne pepper for a kick.
- Prep Time: 20 minutes
- Cook Time: 20 minutes
- Category: Dessert
- Method: Baking
- Cuisine: American
Nutrition
- Serving Size: 1 cupcake
- Calories: 350
- Sugar: 30g
- Sodium: 200mg
- Fat: 15g
- Saturated Fat: 8g
- Unsaturated Fat: 5g
- Trans Fat: 0g
- Carbohydrates: 45g
- Fiber: 1g
- Protein: 3g
- Cholesterol: 40mg
Keywords: pumpkin cupcakes, buttercream frosting, fall dessert, cozy treat, baking
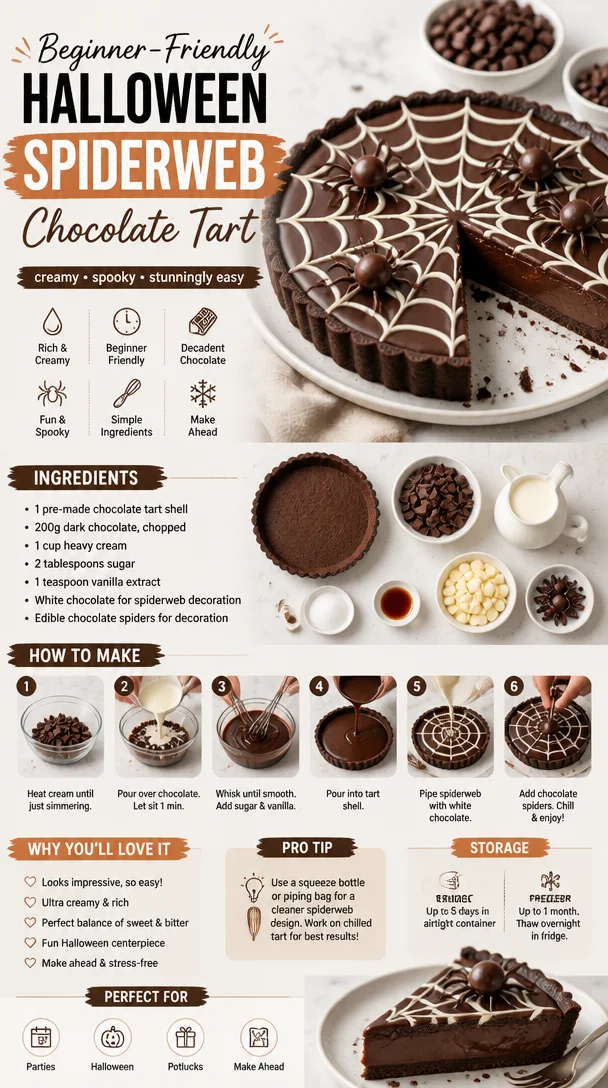
Beginner-Friendly Halloween Spiderweb Chocolate Tart
The Irresistible Spiderweb Chocolate Tart: A Sweet Journey
Welcome to my kitchen, dear friend! Today, we’re diving into a delightful treat that is as decadent as it is stunning: the Spiderweb Chocolate Tart. Picture this: a rich and velvety chocolate filling nestled in a crumbly crust, adorned with a whimsical spiderweb design that’s just begging to be shared. This tart is perfect for gatherings, special occasions, or a cozy evening in with your loved ones.
What makes this dessert even more special is the memories associated with it. Every time I prepare this Spiderweb Chocolate Tart, I’m transported back to my grandma’s kitchen, where I spent countless afternoons experimenting with ingredients and flavors. I remember the thrill of helping her create mouthwatering desserts, all while indulging in her stories of family gatherings and celebrations. Chocolate was always the star of our sweet escapades, and the tart became a staple at our family’s holiday feasts.
Ready to bring a little magic to your kitchen and create something unforgettable? Let’s whip up this showstopper dessert together!
A Sweet Memory of Family and Flavor
Every food enthusiast has that cherished memory that ignites their passion for cooking. Mine undeniably ties back to those cozy afternoons with my grandma. She would invite me into her kitchen, where flour dust danced in the afternoon sunlight and the rich aroma of chocolate filled the air. One afternoon, as the two of us set to work on our favorite dessert—chocolate cake—she suddenly had an idea. “Let’s turn it into a tart,” she said with a smile, and the Spiderweb Chocolate Tart was born!
I watched in awe as she expertly crafted the crust—crumbling flour and butter together until it resembled sand and then filling it with a luscious chocolate mixture. The pièce de résistance? The spiderweb design made with white chocolate. I felt like a little artist in the kitchen, thrilled to create something that was not only delicious but visually stunning. That day sparked a love for tarts and the joy of sharing them with family. Now, as I continue to explore this recipe, each time I bake it, I feel her spirit guiding me. Trust me when I say this chocolate tart is just as magical as it sounds!
Ingredients
Here’s a list of everything you’ll need to whip up this incredible Spiderweb Chocolate Tart. Each ingredient plays a key role in bringing this dish to life.
-
For the crust:
- 1 ½ cups all-purpose flour: The foundation of our tart! It provides structure. For a gluten-free option, you can use almond flour.
- ½ cup unsweetened cocoa powder: This gives the crust its rich chocolate flavor. Dutch-processed cocoa works great here for a deeper color and flavor.
- ½ cup powdered sugar: Sweetness is key! It helps balance the bitterness of the cocoa.
- ½ cup cold unsalted butter, cubed: Butter keeps our crust flaky. If dairy-free, coconut oil can be a lighter substitute.
- 1 large egg yolk: This adds richness. If you want a vegan version, use a flax egg (1 tablespoon ground flaxseed mixed with 2.5 tablespoons water).
-
For the filling:
- 1 cup heavy cream: We’ll use this for making a ganache. For a lighter alternative, use coconut cream.
- 8 ounces semisweet chocolate, chopped: The star of our filling! You can experiment with dark chocolate for a more intense flavor.
- 2 tablespoons sugar: Just a bit more sweetness goes a long way. Adjust based on your chocolate’s sweetness level.
- 1 teaspoon vanilla extract: This adds depth to the flavor. If you’re feeling adventurous, try hazelnut or almond extract instead.
-
For the spiderweb:
- 4 ounces white chocolate, chopped: This will create our beautiful spiderweb. You could substitute with white chocolate chips if that’s all you have!
Step-by-Step Instructions
Now that you’ve gathered all your ingredients, let’s get cooking! Follow these steps, and I promise you’ll have a showstopper dessert that will impress anyone.
1. Prepare the crust.
- Combine dry ingredients: In a large bowl, whisk together the flour, cocoa powder, and powdered sugar until there are no lumps—this is crucial for a smooth crust.
- Incorporate the butter: Add the cold cubed butter. Using your fingertips or a pastry cutter, work the butter into the dry mixture until it resembles coarse crumbs. You can channel your inner child here—messy hands are welcome!
- Add the egg yolk: Mix in the egg yolk using a fork until just combined. If the mixture feels too dry, add a teaspoon of ice water at a time until it holds together but isn’t sticky.
- Chill: Shape the dough into a disk, wrap it in plastic wrap, and refrigerate for about 30 minutes. This step is essential for a flaky crust.
2. Bake the crust.
- Preheat your oven to 350°F (175°C) while the dough chills.
- Roll out the dough: Dust your work surface with flour and roll out the chilled dough into a circle about 1/8-inch thick. Carefully transfer it to a 9-inch tart pan, pressing it gently into the edges. Use a fork to poke holes in the bottom to prevent bubbling.
- Pre-bake: Place parchment paper on top of the crust and fill it with pie weights or dried beans. Bake for 15 minutes, then remove the weights and parchment. Return to the oven for an additional 5–7 minutes until the crust is set. Allow it to cool completely.
3. Make the filling.
- Heat the cream: In a small saucepan, heat the heavy cream over medium heat until it just starts to simmer—don’t let it boil or it’ll spoil our ganache!
- Melt the chocolate: Place the chopped semisweet chocolate in a heatproof bowl. Pour the hot cream over the chocolate and let it sit for about 2 minutes.
- Stir: Gently stir the mixture with a spatula until smooth and glossy. If you need to, put it back over low heat for a minute to help it melt fully. Stir in the sugar and vanilla extract.
4. Assemble the tart.
- Fill the crust: Pour the ganache into the cooled tart shell, gently spreading it into an even layer.
- Chill: Place the tart in the refrigerator for at least 2 hours, or until the filling is set.
Serving Suggestions
Once your Spiderweb Chocolate Tart is set and ready, it’s time to serve! When plating, slice the tart into wedges—presentation is key! Follow these tips:
- Add a dollop of whipped cream on each slice for that extra touch of creaminess.
- Garnish with fresh berries or mint leaves to add a pop of color and freshness.
- Drizzle with a bit of melted white chocolate before serving to accentuate the spiderweb—it’s just as delicious as it sounds!
Recipe Variations
Feel free to get creative with this recipe! Here are a few fun variations:
- Nutty Crunch: Add a layer of crushed nuts (like hazelnuts or almonds) in the ganache for extra texture.
- Mint Chocolate: Incorporate a few drops of peppermint extract into the ganache for a refreshing twist.
- Superfood Boost: Mix in a tablespoon of matcha powder for an earthy flavor and a pop of color.
- Fruit-Infused: Swirl in raspberry puree into the ganache before it sets for a tangy contrast.
Chef’s Notes
As with any recipe, this Spiderweb Chocolate Tart has evolved over the years. I initially started with a simple ganache, but the addition of that creamy white chocolate spiderweb has made it a true masterpiece! And guess what? Every time I bake it, friends and family gather around, engaging in animated conversations about their favorite desserts. It’s not just a tart—it’s a conversation starter, a way to share love, laughter, and those pivotal moments that keep our spirits high! Oh, and if I ever drop some chocolate on the floor, I remind myself to embrace the mess; it’s just part of the kitchen fun!
FAQs and Troubleshooting
1. My ganache didn’t set properly! What went wrong?
This can happen if the chocolate isn’t melted evenly or if there’s too much cream. Ensure the cream is just simmering when you pour it over the chocolate, and if your ganache does seem too runny, you can always gently reheat it and add more chopped chocolate until it thickens.
2. Can I make this tart ahead of time?
Absolutely! This tart can be made a day in advance and refrigerated. Just make sure to cover it well to prevent it from absorbing odors from your fridge.
3. What if I don’t have a tart pan?
No worries! You can use a round cake pan or even a square dish. Just adjust the cooking time as needed. The presentation may differ slightly, but the flavor will be just as divine!
4. Can I use milk chocolate instead of semisweet?
You can! Just remember that it will be sweeter, so you might want to reduce the amount of sugar in the ganache to suit your palate.
Nutritional Info
(Displayed if applicable)
A slice of this Spiderweb Chocolate Tart is a heavenly indulgence, and while it’s rich, each bite brings joy—sometimes that’s just what we need. So, next time you’re looking to impress or share a sweet moment with loved ones, remember this magical recipe. Give it a try, and join the ranks of joyful bakers creating lasting memories, one slice at a time. Happy baking!
Print
Spiderweb Chocolate Tart
- Total Time: 55 minutes
- Yield: 8 servings 1x
- Diet: Vegetarian
Description
A decadent Spiderweb Chocolate Tart with a rich chocolate filling and a whimsical white chocolate design, perfect for any occasion.
Ingredients
- 1 ½ cups all-purpose flour
- ½ cup unsweetened cocoa powder
- ½ cup powdered sugar
- ½ cup cold unsalted butter, cubed
- 1 large egg yolk
- 1 cup heavy cream
- 8 ounces semisweet chocolate, chopped
- 2 tablespoons sugar
- 1 teaspoon vanilla extract
- 4 ounces white chocolate, chopped
Instructions
- Prepare the crust.
- Combine dry ingredients: In a large bowl, whisk together the flour, cocoa powder, and powdered sugar until there are no lumps.
- Incorporate the butter: Add the cold cubed butter and work it into the dry mixture until it resembles coarse crumbs.
- Add the egg yolk: Mix in using a fork until just combined.
- Chill: Shape the dough into a disk, wrap it, and refrigerate for about 30 minutes.
- Bake the crust: Preheat your oven to 350°F (175°C).
- Roll out the dough into a circle about 1/8-inch thick and transfer it to a tart pan.
- Pre-bake: Cover with parchment paper and fill with weights, bake for 15 minutes, then remove weights and bake for an additional 5-7 minutes.
- Make the filling: In a saucepan, heat the heavy cream until it simmers.
- Melt the chocolate: Pour the hot cream over the chopped chocolate and let sit for 2 minutes.
- Stir until smooth, then add sugar and vanilla extract.
- Assemble the tart: Pour the ganache into the cooled crust and chill for at least 2 hours.
Notes
Serve with whipped cream, fresh berries, or a drizzle of melted white chocolate.
- Prep Time: 30 minutes
- Cook Time: 25 minutes
- Category: Dessert
- Method: Baking
- Cuisine: American
Nutrition
- Serving Size: 1 slice
- Calories: 450
- Sugar: 22g
- Sodium: 130mg
- Fat: 28g
- Saturated Fat: 16g
- Unsaturated Fat: 10g
- Trans Fat: 0g
- Carbohydrates: 47g
- Fiber: 3g
- Protein: 6g
- Cholesterol: 40mg
Keywords: chocolate, tart, dessert, holiday, family
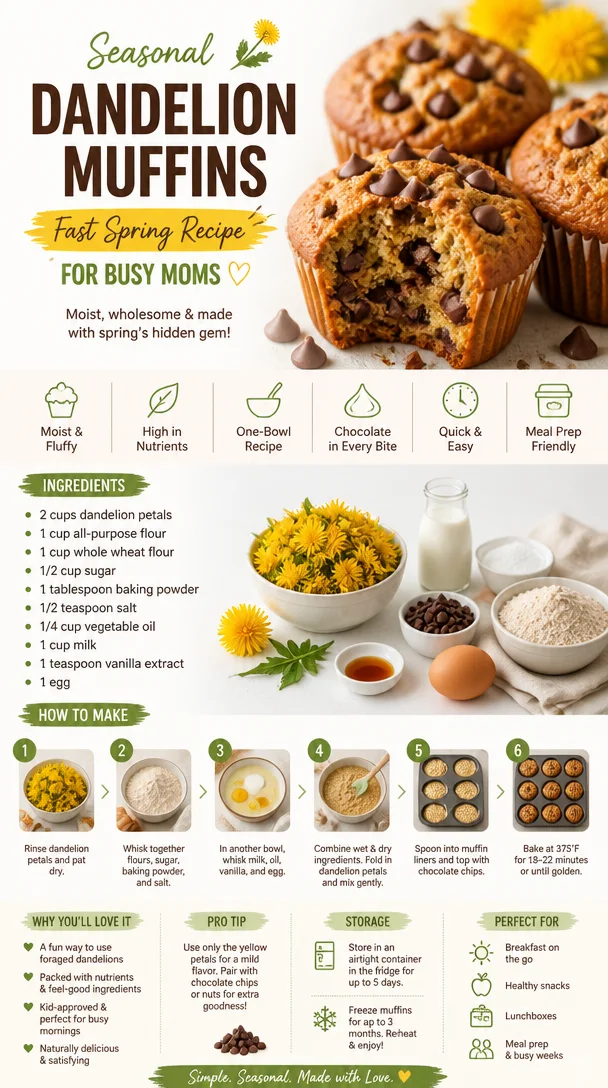
Seasonal Dandelion Muffins: Fast Spring Recipe for Busy Moms
Dandelion Muffins: A Blossoming Delight from My Kitchen to Yours
Welcome to my kitchen, fellow foodies! Today, I’m excited to share one of my favorite springtime recipes: Dandelion Muffins! You might be thinking: “Dandelions? In my muffins?” But trust me, these little golden blooms will add an incredible burst of flavor, a hint of earthiness, and a beautiful touch to your breakfast table. Plus, using edible flowers makes this recipe not only delicious but also a fun way to connect with the seasonal bounty right outside your window.
Speaking of which, let me set the scene. Picture this: A sunny Saturday morning in early April, the birds are chirping, and the air is filled with the joyful promise of warmer days ahead. My kitchen is alive with the smell of something wonderful baking. I can’t help but smile as I sift flour, measure honey, and gather the star of the show—the dandelion petals. As a kid, I remember my grandmother showing me how to pick these sunny little flowers from our backyard. They were lovely in a simple salad, but it was her muffin recipe that stole my heart—and now, I can’t wait to share it with you!
These Dandelion Muffins are not just a great way to celebrate the arrival of spring; they also provide an opportunity to connect with nature and appreciate the simple, beautiful things in life. This recipe is made to be easy, comforting, and fun, making it perfect for both seasoned chefs and new home cooks. So roll up those sleeves, throw on your favorite apron (mine is usually covered in a bit of flour), and let’s get baking!
Personal Story
Let me take you back to those cherished childhood moments spent with my grandmother in her cozy kitchen. Armed with only flour-covered hands and an insatiable curiosity, I would watch her pull off culinary magic. One sunny afternoon, she introduced me to the beauty of dandelions—those cheerful yellow flowers that often get a bad rap! She would guide me as we wandered through her garden, picking them carefully, showing me how they could be transformed into something delicious.
With a twinkle in her eye, she would laugh, proudly proclaiming that those little flowers were like sunshine in the kitchen. We’d mix them into her light and fluffy muffins, and I’d watch as they turned from ordinary to extraordinary! Years later, those muffins still evoke warmth and nostalgia. They remind me that cooking is not just about the food; it’s about the connections we share, the memories we make, and the love we pour into every dish.
Ingredients
Here’s what you’ll need for these delightful Dandelion Muffins:
-
2 cups all-purpose flour: The base of your muffins. For a healthier option, you can use whole wheat or a gluten-free blend!
-
1 cup sugar: Gives sweetness to balance out the slight bitterness of the dandelion petals. Feel free to substitute with coconut sugar or honey if you prefer.
-
1 tablespoon baking powder: This will help your muffins rise beautifully. Always check the expiration date for best results.
-
1/2 teaspoon baking soda: A little addition to help with leavening— plus, it enhances the muffins’ texture.
-
1/2 teaspoon salt: Enhances all the flavors. Don’t skip this important ingredient!
-
1/2 cup unsalted butter, melted: Adds richness and moisture. You can swap this for applesauce or coconut oil for a lighter touch.
-
2 large eggs: Helps bind the ingredients together. For an egg-free alternative, try using flax eggs (1 tablespoon ground flaxseed mixed with 3 tablespoons water).
-
1 cup milk: Your choice of dairy or plant-based milk works well here—almond, oat, or soy milk will do beautifully!
-
1 cup dandelion petals (washed and chopped): The star of the show! Make sure to pick dandelions that haven’t been treated with chemicals, and avoid plants near roadsides or potentially polluted areas.
-
1 teaspoon vanilla extract: A dash of pure vanilla adds warmth and depth to the muffins.
Quick Chef Insight:
When picking dandelions, look for the freshest blossoms—bright yellow and fully open are best for taste, while ensuring they haven’t been exposed to pesticides. Always give them a good rinse before incorporating them into your recipe!
Step-by-Step Instructions
Now that you have all your ingredients ready, let’s dive into the cooking process!
Step 1: Preheat the Oven
Start by preheating your oven to 350°F (175°C). This ensures that your muffins rise perfectly in that toasty warmth.
Step 2: Prepare Your Muffin Pan
Grease a 12-cup muffin tin with cooking spray or line it with muffin liners. This prevents sticking and makes cleanup a breeze!
Step 3: Mix the Dry Ingredients
In a large mixing bowl, combine the all-purpose flour, sugar, baking powder, baking soda, and salt. Use a whisk to blend everything together evenly. This step is key! It aerates the flour, helping your muffins become fluffy and light.
Step 4: Combine the Wet Ingredients
In a separate bowl, whisk together the melted butter, eggs, milk, and vanilla extract until well combined. You want a smooth, uniform mixture— no lumps allowed here, folks!
Step 5: Blend Wet and Dry Ingredients
Pour the wet ingredients into the dry ingredients. Gently fold with a spatula or wooden spoon—this is where you want to be cautious! Overmixing can lead to dense muffins. You’re aiming for a pretty and slightly lumpy batter; a few flour streaks are okay.
Step 6: Add the Dandelion Petals
Now comes the exciting part—add the washed and chopped dandelion petals to your batter! Gently fold them in until they’re evenly distributed. The vibrant yellow petals will add a lovely color and a hint of floral flavor.
Step 7: Fill the Muffin Cups
Using a scoop or a spoon, fill each muffin cup about 3/4 full. This allows room for the muffins to rise without overflowing.
Step 8: Bake
Pop your muffin tray into the oven and let the muffins bake for about 15-20 minutes or until they are golden brown on top and a toothpick inserted into the center comes out clean.
Step 9: Cool & Enjoy!
Once they’re done, take the muffins out of the oven and let them cool in the pan for about 5 minutes. Transfer to a wire rack to cool completely. Trust me, the aroma wafting through your kitchen will have you counting the minutes until you can dig in!
Serving Suggestions
These Dandelion Muffins can be enjoyed warm, straight from the oven, topped with a pat of butter, or served alongside a smear of cream cheese and a drizzle of honey. They’re perfect for breakfast on the go, a delightful snack for your afternoon tea, or a lovely addition to a springtime brunch spread.
Recipe Variations
Feeling a bit adventurous? Here are some fun ways to shake things up:
-
Add Chocolate Chips: Who doesn’t love a surprise burst of chocolate in their muffins? Toss in a handful of semi-sweet or dark chocolate chips!
-
Citrus Zest: Brighten up your muffins with the zest of an orange or lemon added to the batter for that extra zing!
-
Nuts or Seeds: For added crunch, mix in chopped walnuts or sunflower seeds. They will give your muffins a fantastic texture.
-
Herbal Infusion: Try adding a hint of fresh herbs like lavender or mint—these blooms pair well with dandelions and add a sophisticated twist.
Chef’s Notes
These muffins have come a long way in my kitchen! What started as my grandmother’s simple recipe has evolved with my own experiments over the years. I love playing with ingredients based on what’s available and in season. Each batch tells a story and brings back a cherished memory of making them with her.
Oh, and here’s a little kitchen story: One spring, I was so excited to share these with friends that I invited them over for an impromptu brunch. While I was prepping, I accidentally mistook salt for sugar! The gagging faces were priceless—but those muffins brought lots of laughter and good-natured ribbing. It’s a mistake I’ve never made again, and we turned that mishap into a lovely memory!
FAQs and Troubleshooting
1. Why didn’t my muffins rise?
Check if your baking powder and baking soda are still fresh! These leavening agents are key to helping your muffins rise. Stale ingredients can lead to flat muffins.
2. Can I use dried dandelions instead?
Absolutely! If you’re using dried dandelion petals, remember to hydrate them in warm water for about 10 minutes before incorporating them into the batter.
3. How do I store leftover muffins?
Store your muffins in an airtight container at room temperature for up to 3 days. You can also freeze them for longer-lasting enjoyment—simply thaw them at room temperature when you’re ready to munch!
4. What can I do if the muffins end up too dense?
Dense muffins can result from overmixing the batter. Be gentle when combining wet and dry ingredients, and stop mixing once everything is just incorporated.
Nutritional Info (Optional)
Each Dandelion Muffin (without any added toppings) contains approximately:
- Calories: 150
- Carbs: 22g
- Protein: 3g
- Fat: 6g
- Fiber: 1g
- Sugar: 6g
Enjoy these muffins as a moment of seasonal joy and tasty delight! I hope you love making them just as much as I do. Happy baking, and may your kitchen always be filled with warmth and laughter!
Print
Dandelion Muffins
- Total Time: 35 minutes
- Yield: 12 servings 1x
- Diet: Vegetarian
Description
Delightful muffins made with fresh dandelion petals, perfect for springtime breakfasts.
Ingredients
- 2 cups all-purpose flour
- 1 cup sugar
- 1 tablespoon baking powder
- 1/2 teaspoon baking soda
- 1/2 teaspoon salt
- 1/2 cup unsalted butter, melted
- 2 large eggs
- 1 cup milk
- 1 cup dandelion petals (washed and chopped)
- 1 teaspoon vanilla extract
Instructions
- Preheat the oven to 350°F (175°C).
- Prepare a 12-cup muffin tin with cooking spray or liners.
- Mix the flour, sugar, baking powder, baking soda, and salt in a large bowl.
- Combine the melted butter, eggs, milk, and vanilla in a separate bowl.
- Pour the wet ingredients into the dry ingredients and gently fold together.
- Add the washed and chopped dandelion petals, folding them in gently.
- Fill each muffin cup about 3/4 full.
- Bake for 15-20 minutes or until golden brown.
- Cool in the pan for 5 minutes, then transfer to a wire rack.
Notes
For healthier options, substitute whole wheat flour or use applesauce in place of butter.
- Prep Time: 15 minutes
- Cook Time: 20 minutes
- Category: Breakfast
- Method: Baking
- Cuisine: American
Nutrition
- Serving Size: 1 muffin
- Calories: 150
- Sugar: 6g
- Sodium: 190mg
- Fat: 6g
- Saturated Fat: 4g
- Unsaturated Fat: 2g
- Trans Fat: 0g
- Carbohydrates: 22g
- Fiber: 1g
- Protein: 3g
- Cholesterol: 30mg
Keywords: Dandelion Muffins, Spring Recipes, Edible Flowers, Healthy Muffins, Breakfast Ideas
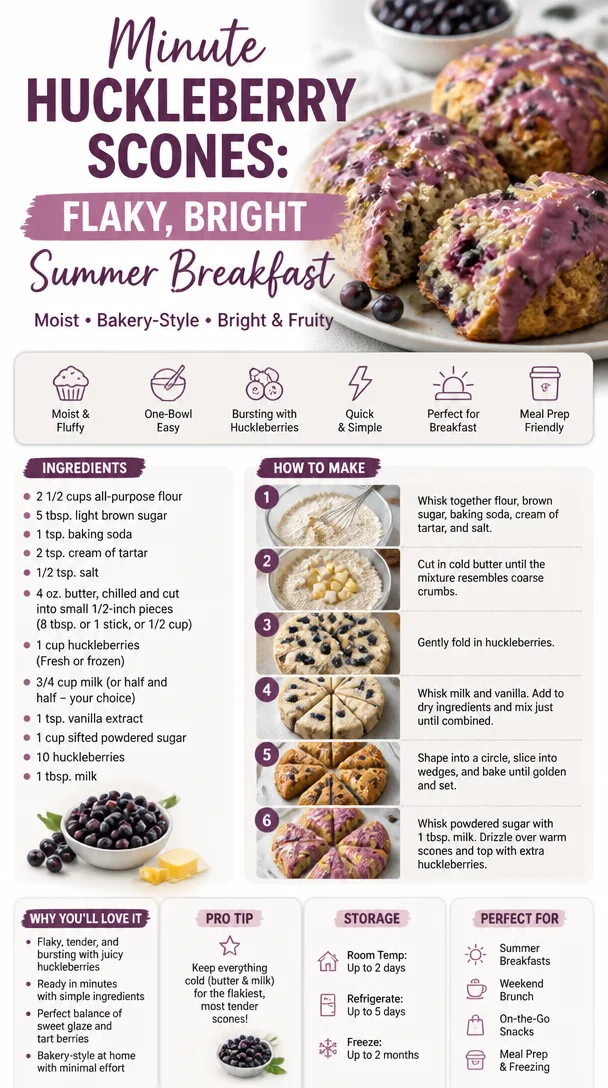
Minute Huckleberry Scones: Flaky, Bright Summer Breakfast
Huckleberry Scones: A Cozy Culinary Adventure
Welcome to my kitchen, dear friends! Today, we’re diving into the delightful world of huckleberry scones—a treat that perfectly embodies everything I love about home cooking. Picture this: the aroma of freshly baked goods wafting through the air, the cozy ambiance of your kitchen, and the warmth that comes from sharing something delicious with the people you adore. If you’re anything like me, just the thought of biting into a warm, fluffy scone bursting with juicy huckleberries is enough to make your heart do a little happy dance.
Huckleberries are those little gems of the berry world—sweet, tart, and oh-so-full of flavor. They grow in the wild and have a charm and character that makes them a fantastic addition to baked goods. When you incorporate them into a scone, you’re not just adding flavor; you’re adding a piece of nature’s artistry. Whether you’re whipping up a batch for breakfast, tea time, or just because you want something cozy to nibble on, huckleberry scones are sure to impress.
And don’t worry if you’ve never made scones before! This recipe is approachable, and I promise you’ll walk away feeling like a baking superstar. So roll up your sleeves, put on that apron (trust me, you’ll need it), and let’s bake some magic together!
The Memory That Inspired These Scones
As I sit here reminiscing about what inspired me to create these huckleberry scones, I can’t help but think back to my childhood summers spent in the mountains of Idaho. My family would head out to the hills every July, armed with buckets and a whole lot of enthusiasm. The wild huckleberries were ripe for the picking, and there was nothing quite like the joy of foraging with loved ones, laughing and chatting as we searched for those elusive little berries.
One afternoon, after our scavenger hunt, my grandmother gathered us in her cozy kitchen, the walls lined with cherished family photos and the scent of something magical in the air. She was whipping up her famous huckleberry scones! I still remember the way the dough looked—so buttery and rich, speckled with those vibrant purple berries. We savored every bite, blissfully unaware that we were creating memories that would last a lifetime.
That day taught me that food isn’t just about sustenance; it’s about the connections we create and the love we share. Whenever I make huckleberry scones, I’m reminded of those precious moments, and I hope to share that same warmth and joy with you.
Ingredients You’ll Need
Now that we’re all warmed up and ready to bake, let’s gather our ingredients! Here’s what you’ll need:
-
2 cups all-purpose flour
The backbone of the scone, it gives structure. You can also use a gluten-free flour blend if you’re looking for a gluten-free option. -
1/3 cup granulated sugar
Adds sweetness and helps achieve that delightful golden crust. For a healthier option, you can substitute coconut sugar. -
1 tablespoon baking powder
This is what gives our scones that lovely lift! Make sure it’s fresh for the best results. -
1/2 teaspoon salt
A little pinch of salt enhances the sweetness and brings all the flavors together. -
1/2 cup unsalted butter, cold and cubed
Cold butter is crucial for flaky scones. Make sure to keep it chilled until you mix it in. (Pro tip: you can freeze it for easier grating!) -
2/3 cup buttermilk
This adds moisture and gives our scones a tender crumb. You can easily make a substitute by adding a tablespoon of vinegar or lemon juice to regular milk and letting it sit for 5 minutes. -
1 cup fresh or frozen huckleberries
The star of the show! If huckleberries aren’t available, blueberries make a great substitute. -
1 teaspoon vanilla extract
Boosts the flavor deliciously! If you want to get really creative, you can swap it out for almond extract. -
1 egg (optional, for egg wash)
Gives the scones a beautiful golden finish. You can omit this if you’re keeping it vegan.
Each ingredient in this recipe is chosen with care, and while I’ve provided some substitution insights, remember that cooking is all about experimentation and making it your own!
Step-by-Step Instructions
Alright, it’s time to roll up our sleeves and get baking! Follow these simple steps, and I promise you’ll end up with scones that are flaky, buttery, and bursting with berry goodness.
-
Preheat Your Oven
Preheat your oven to 400°F (200°C). This will ensure your scones bake evenly and thoroughly. While the oven is warming up, prep your baking sheet by lining it with parchment paper. This step saves you from a sticky situation! -
Mix Dry Ingredients
In a large mixing bowl, whisk together the flour, sugar, baking powder, and salt. Combine these ingredients well to ensure that everything is evenly distributed. This step is vital for achieving uniformity in flavor and texture. -
Cut in the Butter
Now, let’s introduce the cold, cubed butter. Using a pastry cutter or your fingers (your hands will work beautifully here!), cut the butter into the dry ingredients until the mixture resembles coarse crumbs. You don’t want the butter completely blended; small pea-sized chunks are perfect. This step is key to achieving a flaky texture! -
Stir in the Huckleberries
Gently fold in the huckleberries into the butter-flour mixture. If you’re using frozen huckleberries, don’t thaw them beforehand, as this can make the dough too wet. Just fold them in gently to avoid smashing them! -
Add Wet Ingredients
In a separate bowl, mix together the buttermilk and vanilla extract. Pour this mixture into the dry ingredients, using a spatula to fold everything together until just combined. Be careful not to overmix; we want tender scones, not hockey pucks! -
Form the Dough
Turn the dough out onto a lightly floured surface. With floured hands, gently knead the dough a couple of times until it comes together. Shape it into a 1-inch thick disk. Don’t worry if it looks a little rustic; that’s part of the charm! -
Cut Your Scones
Using a sharp knife or a pizza cutter, slice the disk into 8 equal wedges. Alternatively, you can use a round biscuit cutter for perfectly shaped scones. Just remember to avoid twisting the cutter, as that can seal the edges and prevent them from rising properly! -
Prepare for Baking
Place the scones on the prepared baking sheet, spacing them a few inches apart. If you want that gorgeous golden look, brush the tops with a beaten egg. This step is optional but highly recommended for presentation. -
Bake to Perfection
Pop those beauties into the preheated oven and bake for about 15-20 minutes, or until they are lightly golden on top. The aroma wafting through your kitchen will be pure bliss! -
Cool and Enjoy
Remove the scones from the oven and let them cool for a few minutes on a wire rack before serving. Trust me, the wait will be worth it as the buttery goodness and the sweet-tart huckleberries meld together in perfect harmony.
Serving Suggestions
Now that your huckleberry scones are baked to perfection, let’s talk about how to serve them! They’re delightful on their own, but why not elevate the experience a notch? Grab a plate, slice the scones in half, and spread a generous dollop of clotted cream or a smear of butter on each half. For an extra touch, drizzle a bit of honey or sprinkle some powdered sugar on top for sweetness and presentation. Don’t forget your favorite cup of tea or a rich coffee to pair alongside!
Recipe Variations
Looking to switch things up and get creative in the kitchen? Here are a few fun variations to try:
-
Lemon Zest: Add the zest of one lemon to the dough for a bright citrusy twist that pairs beautifully with the huckleberries.
-
Oatmeal Huckleberry Scones: Substitute 1/2 cup of the flour for rolled oats for a heartier scone.
-
Nutty Crunch: Add 1/3 cup chopped walnuts or pecans for a delightful crunch.
-
Chocolate Chip: Mix in dark chocolate chips with the huckleberries for a delicious sweet and tart combo.
-
Vegan Version: Replace the butter with coconut oil and the buttermilk with a plant-based milk combined with a tablespoon of vinegar for a dairy-free treat.
Feel free to mix and match these ideas to create your very own signature scone recipe!
Chef’s Notes
I love how versatile this huckleberry scone recipe is! It’s one of those base recipes that I’ve tinkered with over the years. From adding different flavors to experimenting with presentation, each batch brings back fond memories of baking with family. My sister even started a tradition of making “scone Sundays” after she learned how to whip these up, and now it’s a staple in her home!
One of my funniest kitchen mishaps occurred during one of those Sundays. I mistook baking soda for baking powder and watched in horror as my scones erupted like little volcanic craters in the oven! While the result was comical, it taught me the importance of measuring ingredients accurately. Now, I always have a little note on my fridge: "Check for baking powder first!"
FAQs and Troubleshooting
Q: My scones didn’t rise! What went wrong?
A: The most common culprits here are old baking powder or overmixing the dough. Ensure your baking powder is fresh and remember to mix gently.
Q: Can I freeze the dough?
A: Absolutely! You can freeze the unbaked scones. Just freeze them individually on a baking sheet, then transfer to a freezer bag. When you’re ready to bake, no need to thaw—just pop them in the oven and add an extra few minutes to the baking time.
Q: Why are my scones tough?
A: This usually happens when the dough is overmixed. Gentle hands are key! Remember, the less you handle the dough, the crumbly, tender your scones will be.
Q: Can I make these with frozen huckleberries?
A: Yes! Just fold them in straight from the freezer without thawing, and you’ll still get a delicious result.
Whether you’re a seasoned baker or a budding home cook, I hope you give these huckleberry scones a try. Each bite is filled with joy, nostalgia, and the love of sharing good food. So gather your friends and family, make a pot of coffee or tea, and enjoy a slice of cozy goodness from my kitchen to yours! Happy baking!
Print
Huckleberry Scones
- Total Time: 35 minutes
- Yield: 8 servings 1x
- Diet: Vegetarian
Description
Delightful huckleberry scones that are flaky, buttery, and bursting with berry goodness, perfect for breakfast or tea time.
Ingredients
- 2 cups all-purpose flour
- 1/3 cup granulated sugar
- 1 tablespoon baking powder
- 1/2 teaspoon salt
- 1/2 cup unsalted butter, cold and cubed
- 2/3 cup buttermilk
- 1 cup fresh or frozen huckleberries
- 1 teaspoon vanilla extract
- 1 egg (optional, for egg wash)
Instructions
- Preheat your oven to 400°F (200°C) and line a baking sheet with parchment paper.
- Mix dry ingredients: In a large mixing bowl, whisk together flour, sugar, baking powder, and salt.
- Cut in the cold, cubed butter until the mixture resembles coarse crumbs.
- Stir in the huckleberries gently without smashing them.
- Add wet ingredients: In a separate bowl, mix buttermilk and vanilla, then pour into dry ingredients and fold until just combined.
- Form the dough into a 1-inch thick disk on a floured surface.
- Cut the disk into 8 equal wedges or use a biscuit cutter.
- Prepare for baking by placing scones on the baking sheet and optionally brushing the tops with beaten egg.
- Bake for 15-20 minutes, or until lightly golden.
- Cool on a wire rack before serving.
Notes
Serve with clotted cream or butter, and pair with tea or coffee for a perfect treat.
- Prep Time: 15 minutes
- Cook Time: 20 minutes
- Category: Breakfast
- Method: Baking
- Cuisine: American
Nutrition
- Serving Size: 1 scone
- Calories: 250
- Sugar: 10g
- Sodium: 200mg
- Fat: 10g
- Saturated Fat: 6g
- Unsaturated Fat: 4g
- Trans Fat: 0g
- Carbohydrates: 34g
- Fiber: 1g
- Protein: 4g
- Cholesterol: 30mg
Keywords: scones, huckleberry, breakfast, baking, cozy, berry desserts
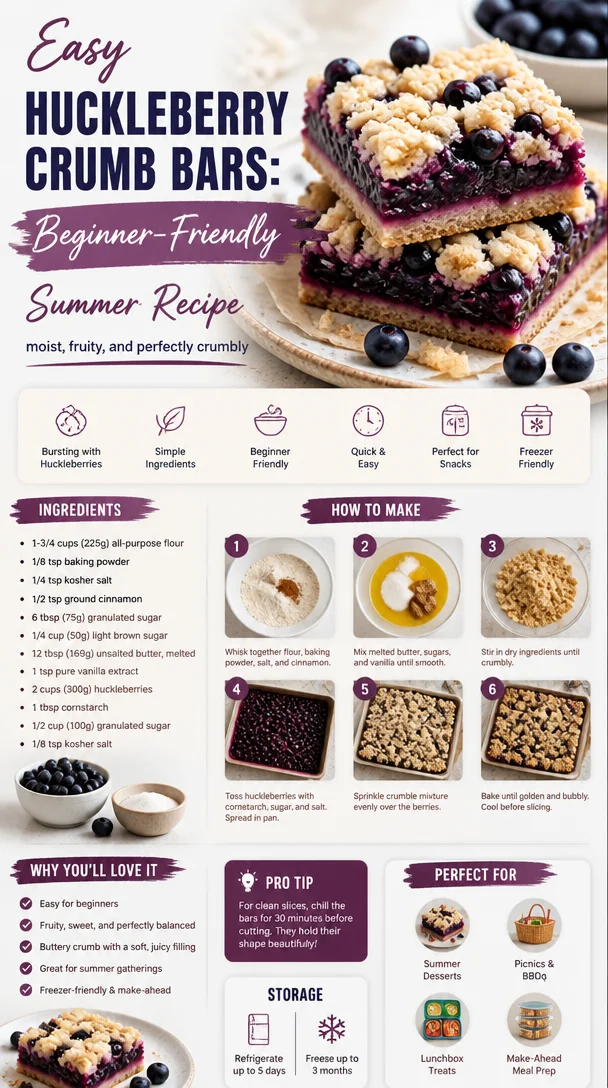
Easy Huckleberry Crumb Bars: Beginner-Friendly Summer Recipe
Huckleberry Crumb Bars: A Sweet Slice of Summer
Welcome to my kitchen, dear friend! I’m thrilled to have you here today as we embark on a delicious journey into the world of huckleberry crumb bars. There’s something special about summer and the way it lends itself to vibrant, juicy fruits. And for me, huckleberries have always been a star ingredient that dances between sweet and tart, making any dish sing!
Imagine this: the sun shining brightly, a gentle breeze coaxing the fragrant aroma of baked goods from an open window, and the laughter of friends and family filling the air. That’s the essence of culinary magic — taking a handful of simple ingredients and transforming them into something extraordinary. Today’s recipe is not only a delightful treat for your taste buds but also a reminder of cherished summertime memories spent gathering huckleberries in the wild.
Whether you’re new to baking or a seasoned pro, these huckleberry crumb bars are easy to whip up and even easier to enjoy. Perfect for picnics, potlucks, or quiet mornings with a cup of coffee, they’re bound to become a go-to recipe in your culinary arsenal. So, grab your apron and let’s dive into the scrumptious world of huckleberry crumb bars!
A Sweet Memory in the Kitchen
As I sit down to write about these delightful huckleberry crumb bars, my mind drifts back to a cherished childhood memory. Every summer, my family would venture into the woods behind our house, armed with nothing but buckets, snacks, and a healthy dose of excitement. The mission? To gather huckleberries!
Those escapades were filled with laughter, the sweet scent of pine, and the thrill of spotting those plump, purple berries glimmering in the sunlight. My siblings and I raced to see who could fill their bucket first, but the real joy was in the simple act of foraging together. Upon returning home, my mom would often turn our haul into heavenly huckleberry pies or cobblers, filling the kitchen with sweet warmth and delightful aromas.
Huckleberry crumb bars became a staple in our summer baking sessions, too — an easy, crowd-pleasing dessert that was equally at home on a picnic blanket or at a family gathering. This recipe brings back those joyful memories, and I hope it inspires you to create your own kitchen adventures filled with love and laughter.
Ingredients
Gathering ingredients for our huckleberry crumb bars is part of the fun! Here’s what you’ll need:
-
2 cups fresh huckleberries
These little gems have a unique flavor that balances sweetness with a hint of tartness. If you can’t find fresh huckleberries, you can substitute them with blueberries or blackberries, though the flavor will slightly differ. -
1 cup all-purpose flour
The backbone of our crumb bars. To make it gluten-free, you can swap in an all-purpose gluten-free blend. -
1 cup rolled oats
These provide a wonderful chewiness. If you prefer a nutty flavor, feel free to use almond flour instead for a unique twist! -
1/2 cup brown sugar
Brown sugar adds moisture and a hint of caramel flavor. If you’re looking to reduce sugar, coconut sugar is a great alternative. -
1/2 cup granulated sugar
This helps balance the tartness of the huckleberries. You can substitute with monk fruit sweetener for a lower-calorie option. -
1/2 cup unsalted butter, melted
Butter adds richness and flavor. If you’re dairy-free, coconut oil works well too! -
1 tsp vanilla extract
Vanilla enhances the sweetness of the huckleberries. You can also use almond extract for a different flavor profile. -
1 tsp baking powder
This gives our crumb bars a little lift. If you’re using self-rising flour, you can omit this ingredient. -
1/2 tsp salt
Balancing the sweetness with a touch of salt is essential! For a flavorful twist, try using sea salt instead.
Step-by-Step Instructions
Ready to bring these delicious huckleberry crumb bars to life? Here’s how to create them, step by step:
-
Preheat the Oven
Preheat your oven to 350°F (175°C). This is the first step in creating that warm, inviting environment that makes the kitchen feel alive with the scent of baking! -
Prepare Your Baking Dish
Line an 8×8-inch baking dish with parchment paper, leaving an overhang on the sides. This makes it super easy to remove the bars later. Grease the parchment with a little butter or cooking spray to ensure no sticky situations arise! -
Mix the Dry Ingredients
In a large bowl, combine the flour, rolled oats, brown sugar, granulated sugar, baking powder, and salt. Giving these ingredients a good mix ensures that your crumb base has an even distribution of flavors. -
Add the Butter and Vanilla
Pour in the melted butter and vanilla extract. Stir everything together until the mixture resembles wet sand. Don’t worry if it seems crumbly; that’s exactly what we want for that perfect crumb topping! -
Press the Mixture into the Pan
Take about 2/3 of the mixture and press it firmly into the bottom of your prepared baking dish. This creates a solid base for our huckleberry filling. Use your hands or the back of a spatula to help pack it down nicely. -
Prepare the Huckleberry Filling
In a medium bowl, combine your fresh huckleberries with a sprinkle of granulated sugar (about 2 tablespoons) and a dash of flour (1 tablespoon), gently tossing to coat the berries. This helps create a delicious filling that won’t be too runny. -
Spread the Huckleberry Mixture
Evenly spread the huckleberry mixture over the oat base in your baking dish. -
Crumble the Remaining Mixture on Top
Sprinkle the remaining crumb mixture over the huckleberries, making sure to cover them as much as possible. Those crumbs are going to crisp up beautifully in the oven! -
Bake to Perfection
Place the dish in the preheated oven and bake for about 30-35 minutes, or until the top is golden brown and the huckleberries are bubbling. Your kitchen will fill with heavenly aromas, and trust me, you’ll have a hard time waiting! -
Cool and Slice
Once baked, remove the crumb bars from the oven and let them cool in the pan for about 20 minutes. Use the parchment overhang to lift them out onto a cutting board. Let them cool completely before slicing into squares.
Serving Suggestions
These huckleberry crumb bars are as delightful to look at as they are to eat! For an elegant touch, serve them warm with a scoop of vanilla ice cream or a dollop of whipped cream on the side. Dust them with powdered sugar for an extra sprinkle of sweetness, and you’ve got an eye-catching dessert perfect for any occasion.
Recipe Variations
Feeling adventurous? Here are a few fun variations to try:
- Nutty Twist: Add chopped walnuts or pecans to the crumb mixture for an added crunch.
- Citrus Zing: Incorporate lemon or orange zest into the filling for a bright citrus flavor.
- Spiced Up: Mix in a half teaspoon of cinnamon or nutmeg to the crumbs for a cozy, spiced vibe.
- Oatmeal Bars: Use the same mixture and spread it into a larger baking pan for oatmeal bars to have on-the-go!
Chef’s Notes
As I worked on perfecting this recipe over the years, I discovered that huckleberries aren’t just found in the wild; they symbolize the joyous moments of connecting with nature and embracing simplicity. These crumb bars have evolved from being just a family treat to a recipe I share with friends, curated with love and memories, always reminding us to slow down, savor, and celebrate life’s delicious moments.
Speaking of memories, I once left my huckleberry bars in the oven a tad too long. Instead of tossing them out, I served the crispy edges as "baker’s treats!" You’d be surprised at what surprises the kitchen can throw at you!
FAQs and Troubleshooting
1. Can I use frozen huckleberries?
Absolutely! Frozen huckleberries work well; just be mindful that they might be a bit juicier, so consider adding an extra tablespoon of flour to the filling.
2. Why are my crumb bars too crumbly?
If your crumb bars turned out too crumbly, it could be due to not enough butter or overmixing the crumb mixture. For a sure result, make sure to measure carefully!
3. How do I store leftover bars?
Keep any leftovers in an airtight container at room temperature for up to three days or in the fridge for about a week. They can also be frozen for up to three months — just be sure to wrap them tightly!
4. What can I do if the bottom of the bars is too soggy?
If you noticed a soggy bottom, try pressing the crumb mixture down more firmly before adding the huckleberries. You can also bake them a few minutes longer if they seem undercooked, but keep an eye on them to avoid overbaking.
Nutritional Info
If you’re curious about the nutritional breakdown, a typical serving of these huckleberry crumb bars comes in at around 200 calories, with 8g of fat, 30g of carbs, and 2g of protein — a sweet treat that’s balanced and satisfying without overdoing it!
So there you have it, a slice of summer captured in these huckleberry crumb bars! I can’t wait for you to try this recipe and create your own beautiful memories in the kitchen. Happy baking, my friends!
Print
Huckleberry Crumb Bars
- Total Time: 50 minutes
- Yield: 12 servings 1x
- Diet: Vegetarian
Description
Delicious huckleberry crumb bars that bring the flavors of summer into your kitchen, perfect for sharing with friends and family.
Ingredients
- 2 cups fresh huckleberries
- 1 cup all-purpose flour
- 1 cup rolled oats
- 1/2 cup brown sugar
- 1/2 cup granulated sugar
- 1/2 cup unsalted butter, melted
- 1 tsp vanilla extract
- 1 tsp baking powder
- 1/2 tsp salt
Instructions
- Preheat your oven to 350°F (175°C).
- Line an 8×8-inch baking dish with parchment paper, leaving an overhang on the sides.
- In a large bowl, combine the flour, rolled oats, brown sugar, granulated sugar, baking powder, and salt.
- Pour in the melted butter and vanilla extract.
- Take about 2/3 of the mixture and press it firmly into the bottom of your prepared baking dish.
- In a medium bowl, combine your fresh huckleberries with a sprinkle of granulated sugar and a dash of flour.
- Evenly spread the huckleberry mixture over the oat base in your baking dish.
- Sprinkle the remaining crumb mixture over the huckleberries.
- Place the dish in the preheated oven and bake for about 30-35 minutes.
- Once baked, remove from the oven and let cool in the pan for about 20 minutes.
- Lift them out using the parchment overhang and allow to cool completely before slicing.
Notes
For a twist, add chopped nuts or citrus zest to the mixture. Serve warm with ice cream.
- Prep Time: 15 minutes
- Cook Time: 35 minutes
- Category: Dessert
- Method: Baking
- Cuisine: American
Nutrition
- Serving Size: 1 bar
- Calories: 200
- Sugar: 8g
- Sodium: 80mg
- Fat: 8g
- Saturated Fat: 4g
- Unsaturated Fat: 4g
- Trans Fat: 0g
- Carbohydrates: 30g
- Fiber: 2g
- Protein: 2g
- Cholesterol: 30mg
Keywords: huckleberry, dessert, summer, crumb bars, baking, easy recipe
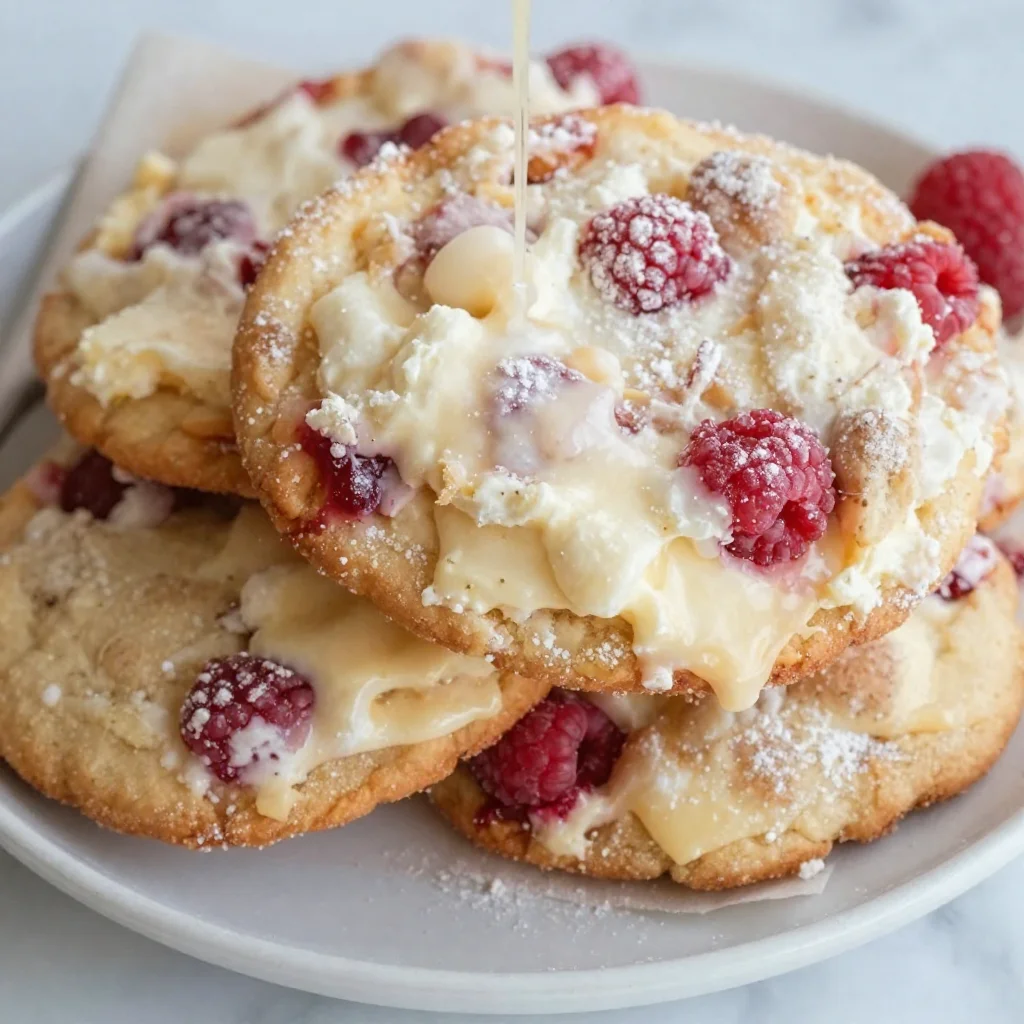
Minute Raspberry Cheesecake Cookies (Beginner-Friendly)
Raspberry Cheesecake Cookies: A Sweet Treat to Delight the Senses
Welcome to my cozy corner of the kitchen! Today, I’m thrilled to share a recipe that’s very close to my heart: Raspberry Cheesecake Cookies. If you love the tartness of fresh raspberries melded perfectly with creamy cheesecake flavors, this recipe will be your new go-to for any occasion. Whether you’re hosting a gathering or just treating yourself to something sweet, these cookies are sure to impress. So grab your apron and let’s dive into this delicious journey together!
A Sweet Memory
Growing up, my family had a tradition of baking together every Sunday afternoon. One of our favorite recipes was a classic cheesecake, but with only so much time in the day, we often decided to get creative. One sunny Sunday, my younger brother, Max, suggested we turn our beloved cheesecake into cookies—because who doesn’t love a good cookie? We spent the afternoon mixing, laughing, and throwing in raspberries that we later picked from our backyard. The moment those cookies came out of the oven, we couldn’t resist their creamy aroma. Each bite was a little piece of heaven. These Raspberry Cheesecake Cookies remind me of those warm Sundays filled with joy, laughter, and the sweet smell of home-baked goodness.
Ingredients
For this delightful Raspberry Cheesecake Cookies recipe, gather the following ingredients:
-
1 cup unsalted butter, softened
Butter is essential for creating the perfect creamy texture. You can substitute it with margarine, but keep in mind that the flavor won’t be as rich. -
1 cup granulated sugar
Sugar is the key to sweetness and helps the cookies spread. For a healthier option, consider using coconut sugar or a sugar alternative, adjusting measurements as needed. -
1 cup cream cheese, softened
The cream cheese gives these cookies their cheesecake-like flavor. Neufchâtel cheese is a great lower-fat substitute if you’re looking for a lighter option. -
1 large egg
Eggs bind the ingredients together. If you’re looking for an egg-free version, try using a flax egg (1 tablespoon ground flaxseed mixed with 2.5 tablespoons water) for similar binding properties. -
2 teaspoons vanilla extract
This adds a lovely depth of flavor. If you’re out of vanilla, try almond or coconut extract for a different twist. -
2 1/2 cups all-purpose flour
Flour provides the structure. You can swap for gluten-free flour, but be sure to check the packaging for specific recommendations on how to substitute. -
1 teaspoon baking powder
Baking powder ensures our cookies rise to fluffiness. Be careful not to confuse it with baking soda, as they are not interchangeable. -
1/2 teaspoon salt
Salt enhances the sweetness and balances flavors. It’s crucial, so don’t skip it! -
1 cup fresh raspberries (or frozen)
Raspberries give these cookies their signature tartness. If you can’t find fresh, thawed frozen berries will work perfectly—but be sure to pat them dry to avoid excess moisture. -
Powdered sugar (for dusting)
The final touch, a sprinkle of powdered sugar, adds a sweet elegance to your cookies.
Step-by-Step Instructions
Let’s get our hands doughy! Follow these steps for scrumptious Raspberry Cheesecake Cookies:
-
Preheat Your Oven
Preheat your oven to 350°F (175°C). This step is essential for getting that perfect bake! -
Cream Butter and Sugar
In a large mixing bowl, cream together the softened butter and granulated sugar until the mixture is light and fluffy, about 3-4 minutes. This process introduces air into the mixture, giving your cookies a delightful texture. If you’ve got a stand mixer, give it a whirl — otherwise, a hand mixer works just fine. -
Add the Cream Cheese
Next, add the softened cream cheese to the butter mixture. Beat until fully combined, scraping down the sides of the bowl as needed. You’ll want it to be smooth — think velvety rather than chunky! -
Incorporate the Egg and Vanilla
Add the egg and vanilla extract. Continue mixing until the batter is smooth. This is where that creamy, cheesecake flavor starts to shine! -
Combine Dry Ingredients
In another bowl, whisk together flour, baking powder, and salt. Slowly add this dry mixture to your wet ingredients, mixing on a low speed until just combined. Be careful not to over-mix, or you’ll end up with tough cookies instead of soft and chewy ones. -
Fold in the Raspberries
Gently fold in the fresh or frozen raspberries using a spatula. This is my favorite part — those bursts of berry goodness will make every cookie a delightful surprise! -
Scoop and Shape
Drop heaping tablespoons of cookie dough onto a lined baking sheet, about 2 inches apart. Flatten them slightly since they won’t spread too much as they bake. -
Bake
Bake the cookies in your preheated oven for 10-12 minutes, or until the edges are lightly golden. Keep an eye on them — you want them to look set and ever-so-slightly underbaked in the middle for that chewy center. -
Cool Down
Once out of the oven, let the cookies cool on the baking sheet for about 5 minutes before transferring them to a wire rack to cool completely. This helps them firm up a little more and allows those delicious flavors to meld. -
Dust with Powdered Sugar
Finally, before serving, dust your cookies with some powdered sugar for that wow factor!
Serving Suggestions
These Raspberry Cheesecake Cookies can be enjoyed warm, right out of the oven, or at room temperature. They look divine arranged on a beautiful platter, dusted with powdered sugar. Serve them alongside a cup of coffee or a glass of cold milk for a nostalgic treat. For a fun twist, try stacking a few with a dollop of whipped cream in between for a mini cheesecake sandwich!
Recipe Variations
Looking to mix things up? Here are some fun variations to consider:
-
Chocolate Swirl Cookies: Melt some dark chocolate and swirl it into the dough for a rich, chocolatey twist.
-
Nutty Addition: Add 1/2 cup of chopped walnuts or pecans for a crunch that contrasts beautifully with the soft texture.
-
Citrus Infusion: Add a teaspoon of lemon or orange zest into the dough for a bright, zesty flavor that pairs wonderfully with raspberries.
-
Oatmeal Twist: Substitute half of the flour with rolled oats for a chewy oatmeal raspberry treat.
-
Berry Medley: Swap raspberries for blueberries or strawberries, or use a combination of berries for a colorful, fruity delight!
Chef’s Notes
I have to admit, I’ve had my fair share of kitchen mishaps. One time, I was so eager to bake these cookies that I mistakenly added salt instead of sugar. Let’s just say the batch got relegated to the compost bin! What I’ve learned over time is patience and paying attention to details always pays off. These cookies have become a staple in my home and have evolved into a family favorite—especially when they’re fresh out of the oven and still warm. Enjoy every batch; they are as much about the process as they are about the end product!
FAQs and Troubleshooting
Q: Why are my cookies flat?
A: Cookies can flatten if the butter isn’t properly creamed or if the dough is too warm. Make sure your butter is softened, not melted. If your dough feels too soft, pop it in the fridge for 15-30 minutes before baking.
Q: Can I freeze the dough?
A: Absolutely! You can freeze the cookie dough in balls and bake them fresh, straight from the freezer. Just add an extra minute or two to your baking time.
Q: How can I store the cookies?
A: Store the cooled cookies in an airtight container at room temperature for up to a week. They can also be frozen if you want to save some for later!
Q: What’s the best way to prevent sogginess with raspberries?
A: Pat your raspberries dry with a paper towel before adding them to the dough. Excess moisture can lead to sogginess, so take a moment to ensure they’re nice and dry.
Nutritional Info
Calories per cookie (estimated): 120
Total Fat: 7g (Saturated Fat: 4g)
Cholesterol: 30mg
Sodium: 75mg
Total Carbohydrates: 14g (Dietary Fiber: 0.5g, Sugars: 8g)
Protein: 1.5g
There you have it—my cherished Raspberry Cheesecake Cookies recipe! I hope it evokes as many warm memories for you as it does for me. Share your kitchen stories with me or post a picture of your baked wonders on social media. Happy baking, and remember to savor each moment in the kitchen!
Print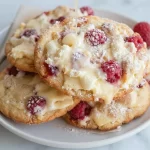
Raspberry Cheesecake Cookies
- Total Time: 27 minutes
- Yield: 24 cookies 1x
- Diet: Vegetarian
Description
Delightful cookies that combine the tartness of fresh raspberries with creamy cheesecake flavors.
Ingredients
- 1 cup unsalted butter, softened
- 1 cup granulated sugar
- 1 cup cream cheese, softened
- 1 large egg
- 2 teaspoons vanilla extract
- 2 1/2 cups all-purpose flour
- 1 teaspoon baking powder
- 1/2 teaspoon salt
- 1 cup fresh raspberries (or frozen)
- Powdered sugar (for dusting)
Instructions
- Preheat your oven to 350°F (175°C).
- Cream together the softened butter and granulated sugar until light and fluffy.
- Add the softened cream cheese to the mixture and beat until smooth.
- Incorporate the egg and vanilla extract, mixing until smooth.
- Combine flour, baking powder, and salt in another bowl, then add to the wet ingredients.
- Fold in the raspberries gently.
- Scoop heaping tablespoons of cookie dough onto a lined baking sheet.
- Bake for 10-12 minutes until the edges are lightly golden.
- Cool on the baking sheet for 5 minutes, then transfer to a wire rack.
- Dust with powdered sugar before serving.
Notes
For a healthier option, consider using coconut sugar in place of granulated sugar.
- Prep Time: 15 minutes
- Cook Time: 12 minutes
- Category: Dessert
- Method: Baking
- Cuisine: American
Nutrition
- Serving Size: 2 cookies
- Calories: 120
- Sugar: 8g
- Sodium: 75mg
- Fat: 7g
- Saturated Fat: 4g
- Unsaturated Fat: 3g
- Trans Fat: 0g
- Carbohydrates: 14g
- Fiber: 0.5g
- Protein: 1.5g
- Cholesterol: 30mg
Keywords: raspberry cookies, cheesecake cookies, dessert recipes
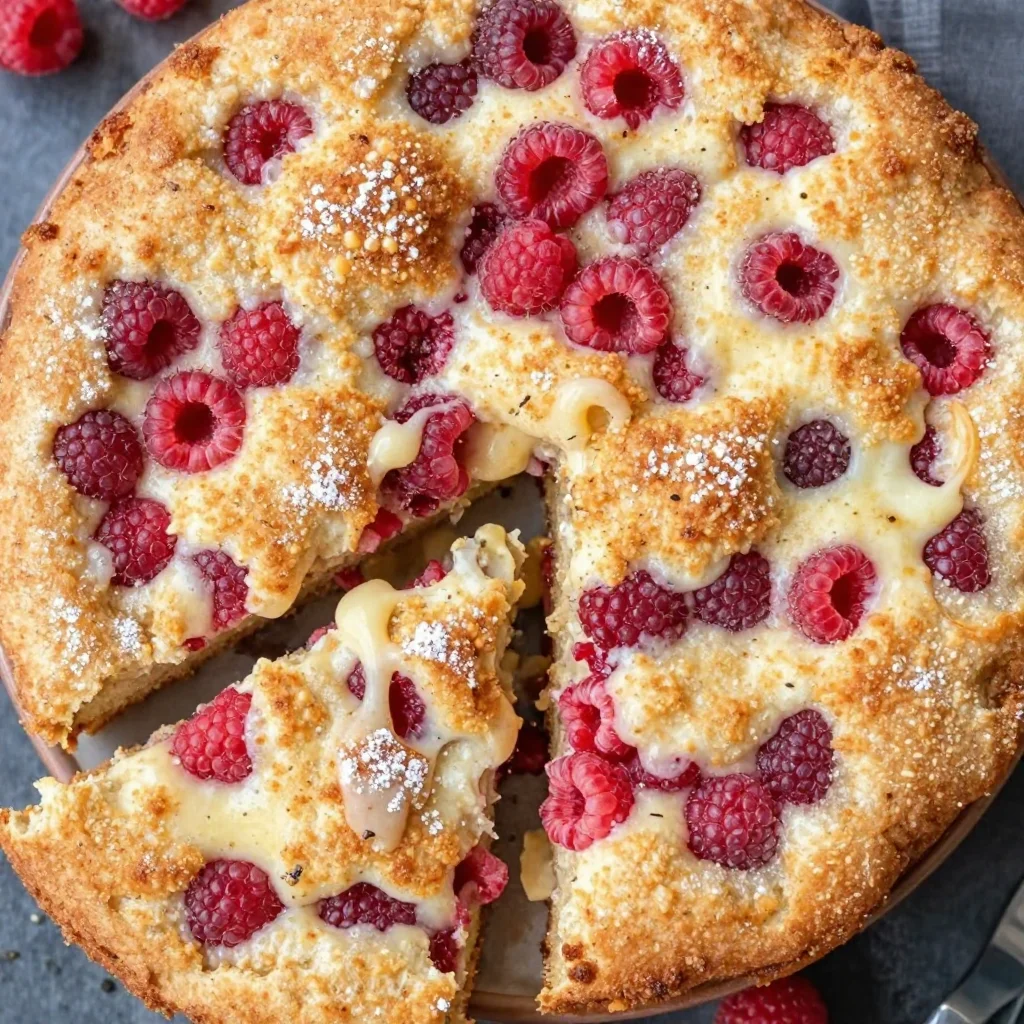
Beginner-Friendly Raspberry Coffee Cake in 30 Minutes
Raspberry Coffee Cake: A Sweet Slice of Nostalgia
Welcome to my kitchen! Today, we’re diving into a recipe that’s not only a personal favorite of mine but also a delightful treat that’s perfect for any occasion—Raspberry Coffee Cake! Imagine a warm slice fresh out of the oven, the sweet scent of raspberries mingling with a hint of vanilla, all while the coffee brews its rich aroma in the background. This cake isn’t just dessert; it’s an experience, a moment to share with loved ones, and a slice of happiness in our busy lives.
I love making this coffee cake for brunches, cozy afternoon get-togethers, or even as a delightful ending to dinner with friends. The balance of tart raspberries and sweet, buttery cake creates a symphony of flavors that makes it hard not to go back for seconds (or thirds!). Plus, what’s better than sharing a homemade treat that warms the soul?
You don’t need to be a master chef to whip up this beautiful, delicious cake. With simple ingredients and straightforward steps, you’ll feel like a baking rockstar in no time. Let’s get started on this delightful journey through flavor, nostalgia, and a whole lot of love!
A Sweet Memory
Ah, raspberry coffee cake! This dish always brings back memories of my childhood, spending lazy Sunday mornings in the kitchen with my grandmother. She was a kitchen magician, transforming the simplest ingredients into scrumptious treats that my family still talks about today. I was her little sous chef, standing on a stool with a wooden spoon in one hand and a bowl of fresh-picked raspberries in the other.
We would pick the juiciest berries from the garden, their vibrant red color promising sweetness. I’ll never forget the moment we poured the batter into the pan, scattering the raspberries joyfully on top. It was more than just a baking session; it was a lesson in love, patience, and the joy of creating something together. My grandmother taught me that cooking is an adventure—one that should be shared and savored.
Today, as I whip up this Raspberry Coffee Cake, I can still hear her laughter and feel her guiding hand in the process. It’s more than just a recipe; it’s a way to connect with my past and create new memories in the present.
Ingredients
Here’s what you’ll need for this scrumptious Raspberry Coffee Cake:
-
2 cups all-purpose flour
The base of our cake! If you need a gluten-free option, feel free to substitute with a 1:1 gluten-free flour blend. -
1 cup granulated sugar
This adds just the right amount of sweetness. For a healthier twist, use coconut sugar, which has a lovely caramel flavor. -
1 tablespoon baking powder
This is our leavening agent that’ll make the cake rise beautifully. Make sure it’s fresh for the best results! -
1/2 teaspoon salt
Just a pinch enhances all the flavors in the cake. -
1/2 cup unsalted butter, softened
Butter makes everything better! You can swap this with vegetable oil if you want a lighter texture. -
2 large eggs
Eggs add richness and moisture. For a vegan alternative, use flax eggs (1 tablespoon of flaxseeds mixed with 2.5 tablespoons of water per egg, let sit until gelatinous). -
1 teaspoon vanilla extract
This little gem adds warmth and depth. Feel free to use almond extract for a unique flavor twist! -
3/4 cup milk
Whole milk works best for a moist crumb, but feel free to use any plant-based milk if you’re dairy-free. -
2 cups fresh or frozen raspberries
Fresh raspberries are the star here! If using frozen, make sure to toss them in a little flour to prevent sinking. -
1 teaspoon lemon zest
This adds a zesty brightness! If you’re in a pinch, use pre-made lemon juice—just a few drops will do.
Step-by-Step Instructions
-
Preheat the Oven
Begin by preheating your oven to 350°F (175°C). Prep your 9-inch round cake pan by greasing it or lining it with parchment paper for easy removal. -
Mix the Dry Ingredients
In a medium bowl, whisk together the flour, sugar, baking powder, and salt. This is the foundation of your cake, and whisking helps to aerate the flour, making for a lighter texture. -
Cream the Butter and Sugar
In a large mixing bowl, beat the softened butter with the sugar until light and fluffy. This step is crucial as it incorporates air, giving your cake the desired rise. An electric mixer works wonders here! -
Incorporate the Eggs and Vanilla
Add the eggs, one at a time, beating well after each addition. Stir in the vanilla extract to create that cozy aroma. Don’t skip this step! It connects all the flavors beautifully. -
Combine the Mixtures
Gradually add the dry ingredients to the wet mixture, alternating with the milk. Start and end with the flour mixture to keep the batter smooth. Don’t overmix; just stir until everything is combined! -
Fold in the Raspberries
Gently fold in the raspberries, being careful not to crush them. This is where you get that delicious burst of flavor in every bite. Resist the urge to overmix; those beautiful berries need to stay whole! -
Transfer to Pan and Bake
Pour the batter into the prepared cake pan, smoothing out the top. Pop it in the oven and bake for 40-45 minutes or until a toothpick inserted in the center comes out clean. You want that delicious aroma wafting through your kitchen! -
Cool and Serve
Once baked, let the cake cool in the pan for about 10 minutes before transferring it to a wire rack to cool completely. It’s incredibly tempting, but resist the urge to cut into it while it’s hot!
Serving Suggestions
Once your Raspberry Coffee Cake has cooled, it’s time to serve it up! Plate individual slices on pretty dessert plates, dust them with confectioners’ sugar, and maybe even add a dollop of freshly whipped cream or a scoop of vanilla ice cream on the side. A sprinkle of extra berries on top adds a beautiful pop of color and elevates the presentation—perfect for impressing guests or just treating yourself!
Recipe Variations
Feeling adventurous? Here are some fun twists to try with your Raspberry Coffee Cake:
-
Berry Mix-Up: Swap out raspberries for blueberries, blackberries, or even a mixed berry blend for a different fruity flavor.
-
Nutty Delight: Stir in 1/2 cup of walnuts or pecans for some crunch and depth.
-
Citrus Burst: Add in the zest of an orange or lime for a vibrant citrusy twist.
-
Swirl It Up: Create a cream cheese or streusel swirl by mixing softened cream cheese with a bit of sugar and cinnamon, then swirling it through the batter before baking.
-
Spice It Up: Incorporate a teaspoon of cinnamon or even a pinch of nutmeg into the batter for a warm, spiced flavor profile.
Chef’s Notes
As I pour my heart into this recipe, I can’t help but think about how it has evolved over the years. Initially, I was all about just the cake itself, but I quickly learned the beauty of adding different fruits and spices to elevate it further. The joy of baking is that it can be both a science and an art!
When I bake this coffee cake now, it often takes me back to those sweet mornings with my grandmother. Her laughter lingers in my memory like the smell of baked goods wafting through the house. Every slice tells a story, and each time I share it, I feel her spirit in the room, uniting friends and family once again.
FAQs and Troubleshooting
Q: My cake sank in the middle. What did I do wrong?
A: A sinking cake is often due to underbaking. Ensure it’s fully cooked through, and always have your oven temperature calibrated. If you find your cakes frequently sink, consider investing in an oven thermometer!
Q: Can I use frozen raspberries?
A: Absolutely! Just toss them in a bit of flour before folding into the batter to prevent them from sinking. They will add a lovely burst of flavor to your cake!
Q: How do I know when my cake is done?
A: The cake should be golden brown and a toothpick inserted in the center should come out clean or with just a few crumbs attached.
Q: Can I make this recipe ahead of time?
A: Yes! The cake can be made a day in advance. Just store it covered at room temperature. It also freezes well—just wrap it tightly and it’ll be a delicious treat ready to thaw when you need it.
Nutritional Info (Optional)
While I believe in enjoying every bite of our favorite treats, knowing the caloric content can be beneficial. A slice of Raspberry Coffee Cake (based on 12 servings) contains approximately 275 calories, 10g fat, 40g carbohydrates, and 3g protein. Enjoy your treats in moderation, and indulge in flavor without guilt!
Thank you for joining me in my kitchen today! I hope you feel inspired to bake this heartfelt Raspberry Coffee Cake! Whether you’re sharing it with friends or indulging all by yourself (no judgment here!), it’s sure to create memorable moments. Happy baking, my foodie friends!
Print
Raspberry Coffee Cake
- Total Time: 60 minutes
- Yield: 12 servings 1x
- Diet: Vegetarian
Description
A delightful Raspberry Coffee Cake perfect for brunches, cozy get-togethers, or as a sweet ending to dinner.
Ingredients
- 2 cups all-purpose flour
- 1 cup granulated sugar
- 1 tablespoon baking powder
- 1/2 teaspoon salt
- 1/2 cup unsalted butter, softened
- 2 large eggs
- 1 teaspoon vanilla extract
- 3/4 cup milk
- 2 cups fresh or frozen raspberries
- 1 teaspoon lemon zest
Instructions
- Preheat the oven to 350°F (175°C) and prep your 9-inch round cake pan.
- Mix the flour, sugar, baking powder, and salt in a medium bowl.
- Cream the softened butter with the sugar until light and fluffy.
- Incorporate the eggs one at a time, beating well after each addition, and stir in the vanilla extract.
- Combine the dry ingredients with the wet mixture, alternating with the milk.
- Fold in the raspberries gently to avoid crushing them.
- Transfer the batter to the prepared cake pan and bake for 40-45 minutes.
- Cool the cake in the pan for about 10 minutes before transferring it to a wire rack.
Notes
Serve with a dusting of confectioners’ sugar and a dollop of whipped cream or a scoop of vanilla ice cream for extra indulgence.
- Prep Time: 15 minutes
- Cook Time: 45 minutes
- Category: Dessert
- Method: Baking
- Cuisine: American
Nutrition
- Serving Size: 1 slice
- Calories: 275
- Sugar: 23g
- Sodium: 200mg
- Fat: 10g
- Saturated Fat: 6g
- Unsaturated Fat: 4g
- Trans Fat: 0g
- Carbohydrates: 40g
- Fiber: 2g
- Protein: 3g
- Cholesterol: 40mg
Keywords: raspberry coffee cake, brunch dessert, easy cake recipe, baking


