

Strawberry Banana Smoothie
Refreshingly Delicious: How to Make the Perfect Strawberry Banana Smoothie
Welcome to my kitchen, my fellow food lovers! Today, we’re diving into one of my all-time favorite recipes: the Strawberry Banana Smoothie. If you’re anything like me, the moment you hear the blender whirring, you can’t help but smile. This delightful drink isn’t just refreshing; it’s packed with all the goodness of satisfying fruits, making it the perfect way to kickstart your day or enjoy a quick afternoon pick-me-up.
I remember the first time I had a Strawberry Banana Smoothie. I was a kid, and my mom used to whip these up on lazy summer mornings. The refrigerator was filled with fresh strawberries, and I used to watch in awe as she blended everything together. Not only did it taste divine, but the vibrant pink color had me convinced that I was drinking something magical. Now, so many years later, I still find that same joy in making this smoothie!
As an added bonus, this smoothie recipe is super versatile! You can easily customize it to suit your tastes or dietary needs while keeping that signature creamy texture and fruity flavor. So grab your blender, and let’s create something unforgettable together!
A Sip of Nostalgia
Every time I make a Strawberry Banana Smoothie, I’m transported back to my childhood kitchen, where the air would be perfumed with the sweet scent of strawberries. My mom would have a big glass waiting for me as I woke up, bright and happy, after a long night of dreaming about all kinds of summer adventures. There was something so special about that smoothie, not just in its taste but in the love that went into making it. We would sit together, savoring the creamy deliciousness, chatting about our plans for the day, and laughing over our silly stories.
What I love most about this smoothie is how simple yet special it is. No fancy equipment or outrageous ingredients are needed—just fresh fruit and a bit of love. I still make this smoothie for myself and my friends, and every time, I’m reminded of those cherished moments spent with my mom. It’s incredible how food can connect us to memories and emotions. So, let’s blend today and create some new memories!
Ingredients
Here’s what you’ll need to make this Strawberry Banana Smoothie shine:
-
Fresh Strawberries (1 cup): The star of our show! Strawberries are not only delicious but are also loaded with antioxidants. If you can’t find fresh strawberries, feel free to substitute with frozen ones; just note that your smoothie will be even thicker.
-
Ripe Banana (1): This adds a creamy consistency and natural sweetness. Look for bananas with a few brown spots for optimal sweetness. If you’re not a banana lover, consider swapping it out with a small avocado for an extra creamy texture.
-
Greek Yogurt (1/2 cup): It adds protein and a creamy tang. If you want a dairy-free version, use a coconut yogurt or almond yogurt instead.
-
Milk (or Dairy-Free Milk) (1/2 cup): This helps blend everything together smoothly. You can use any type of milk—dairy, almond, oat, or soy. Sweetened or unsweetened, it’s your choice!
-
Honey or Maple Syrup (1-2 tablespoons): This is an optional ingredient for added sweetness. Use agave syrup or stevia as substitutes for a healthier version.
-
Ice Cubes (optional): If you prefer a chilled, frosty smoothie, toss in a few ice cubes. You can skip this if you’re using frozen fruit.
Quick Chef Insight
Always taste as you go! Once it’s blended, give it a quick sip before serving; you can adjust sweetness or add more milk if it’s too thick. Happy blending!
Step-by-Step Instructions
-
Prepare Your Ingredients: Gather all your ingredients and wash the strawberries thoroughly. If you’re using frozen strawberries, there’s no need to thaw them first—just toss them in frozen!
-
Slice the Strawberries: Hull the strawberries and slice them in half. This helps them blend more easily and allows for better flavor release. Plus, they look super cute!
-
Peel the Banana: Grab your ripe banana, peel it, and break it into smaller pieces. This allows for even blending and ensures no large banana chunks swimming around.
-
Add to the Blender: In your blender, first, add the Greek yogurt—this helps to weigh down the lighter ingredients. Then, toss in the sliced strawberries and banana pieces.
-
Pour in the Milk: Add your milk of choice to the blender. This is where the magic starts to happen as the fruits integrate beautifully! If you’re going for extra thickness or creaminess, feel free to add in more yogurt as needed.
-
Sweeten the Deal: If using, drizzle in honey or maple syrup. This will elevate the flavors and make your smoothie sweetly irresistible!
-
Blend It Up: Secure the lid onto your blender and blend on high for 30 seconds to a minute until everything is smooth. If you prefer a chunkier texture, just blend for a few seconds less.
-
Adjust Consistency: Check the consistency of your smoothie. If it’s too thick, add a splash more milk; if it’s too thin, toss in a bit more yogurt or some ice cubes for a frosty finish. Blend to your desired consistency.
-
Taste and Adjust: Give it a taste test! Adjust sweetness if needed. It’s all about personal preference, and you’re the chef in your kitchen!
-
Serve Your Smoothie: Grab your favorite glass, pour in your smoothie, and feel free to garnish it with extra strawberry slices or a banana wheel on the rim.
Pro Tip
For a fun twist, consider adding a handful of spinach or kale for a boost of nutrients without compromising the flavor. It’s a fantastic way to sneak in some greens!
Serving Suggestions
Enjoy your Strawberry Banana Smoothie right away for the freshest taste! It makes a perfect breakfast on the go, a post-workout refresher, or a delicious afternoon snack. Serve it in a tall glass, topped with a slice of fresh fruit or a sprinkle of granola for some crunch. If you’re feeling fancy, why not drizzle a bit of chocolate syrup in the glass before pouring the smoothie for a gorgeous presentation?
Recipe Variations
- Tropical Twist: Swap out the strawberries with mangoes or pineapple for a refreshing tropical vibe.
- Nutty Delight: Add a tablespoon of peanut butter or almond butter for a nutty flavor and extra protein.
- Berry Blast: Combine strawberries with blueberries or raspberries for a mixed berry smoothie.
- Choco-Banana: Toss in a tablespoon of cocoa powder or chocolate protein powder for the chocolate lovers out there!
- Dairy-Free Oasis: Use coconut milk and coconut yogurt for a delicious dairy-free alternative!
Chef’s Notes
This recipe has evolved over the years as I’ve played with it and made it my own. While the classic version is a tried-and-true favorite, experimenting with various fruits and add-ins keeps it exciting! I often reflect on those sunny mornings in my mom’s kitchen, blending away and dreaming about new recipes. Sometimes the little things, like the perfect smoothie, remind us of cherished moments.
And let’s be real—smoothie spills happen, and they aren’t always pretty. The best way to handle a spill? Laugh it off! A little mess in the kitchen is a sign of creativity in progress, right?
FAQs and Troubleshooting
-
What if the smoothie is too thick?
Simply add more milk, one tablespoon at a time, and blend until it reaches your desired consistency. -
Can I prepare this smoothie ahead of time?
While it’s best enjoyed fresh, you can make it the night before and store it in an airtight container in the fridge. Just give it a good shake before enjoying! -
How can I make this more nutritious?
Adding a scoop of protein powder, chia seeds, or flaxseeds can boost the nutritional value without compromising flavor. -
Can I use other fruits?
Absolutely! Try any of your favorite fruits for hybrid and creative smoothie combinations. Just keep in mind that some fruits may alter the flavor slightly.
Nutritional Info
For a single serving of this delightful Strawberry Banana Smoothie (using the basic ingredients listed above), you can expect approximately:
- Calories: 250
- Protein: 10g
- Carbs: 45g
- Total Fat: 5g
- Fiber: 4g
(Note: Nutritional values may vary based on exact ingredients used and serving sizes.)
With that, friends, I hope you’re inspired to blend up your own delicious Strawberry Banana Smoothie! Remember, there’s no one right way to create it. The best ingredient? A sprinkle of joy and love. Happy blending, and I can’t wait to hear your stories!
Print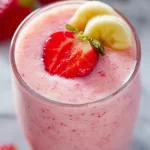
Strawberry Banana Smoothie
- Total Time: 10 minutes
- Yield: 1 serving 1x
- Diet: Vegetarian
Description
A refreshing and delicious Strawberry Banana Smoothie packed with satisfying fruits, perfect for breakfast or an afternoon pick-me-up.
Ingredients
- 1 cup Fresh Strawberries
- 1 Ripe Banana
- 1/2 cup Greek Yogurt
- 1/2 cup Milk (or Dairy-Free Milk)
- 1–2 tablespoons Honey or Maple Syrup (optional)
- Ice Cubes (optional)
Instructions
- Prepare your ingredients: Gather all your ingredients and wash the strawberries thoroughly. If you’re using frozen strawberries, there’s no need to thaw them first—just toss them in frozen!
- Slice the strawberries: Hull the strawberries and slice them in half.
- Peel the banana: Grab your ripe banana, peel it, and break it into smaller pieces.
- Add to the blender: In your blender, first, add the Greek yogurt, then toss in the sliced strawberries and banana pieces.
- Pour in the milk: Add your milk of choice to the blender.
- Sweeten the deal: If using, drizzle in honey or maple syrup.
- Blend it up: Secure the lid and blend on high for 30 seconds to a minute until smooth.
- Adjust consistency: Check the smoothie; add more milk if too thick, or more yogurt/ice if too thin.
- Taste and adjust: Give it a taste test! Adjust sweetness if needed.
- Serve your smoothie: Pour into your favorite glass and garnish as desired.
Notes
For a fun twist, consider adding spinach or kale for extra nutrients without changing the flavor.
- Prep Time: 10 minutes
- Cook Time: 0 minutes
- Category: Beverage
- Method: Blending
- Cuisine: American
Nutrition
- Serving Size: 1 serving
- Calories: 250
- Sugar: 30g
- Sodium: 100mg
- Fat: 5g
- Saturated Fat: 2g
- Unsaturated Fat: 3g
- Trans Fat: 0g
- Carbohydrates: 45g
- Fiber: 4g
- Protein: 10g
- Cholesterol: 10mg
Keywords: smoothie, strawberry banana, healthy drink, refreshing beverage, breakfast idea

Healthier Brownies
Healthier Brownies: A Decadent Delight You Can Feel Good About!
Welcome to my kitchen! I’m Olivia, your friendly guide through the world of delicious, wholesome cooking! Today, we’re diving into a recipe that is near and dear to my heart: Healthier Brownies. Imagine biting into a fudgy, chocolatey brownie that not only satisfies your sweet tooth but also carries a handful of wholesome ingredients. It’s like enjoying your favorite treat while keeping a warm hug of health around you!
Introduction: A Brownie Revelation
There’s something magical about brownies. The way they warm up the kitchen with their rich aroma, the way they can bring people together, and let’s not forget that moment when you take a bite and everything melts away — joy at its finest! But let’s face it: it’s easy to feel guilty after indulging in a batch of traditional brownies packed with sugar and butter.
That’s where my healthier brownie recipe comes in! It allows you to enjoy the deliciousness of brownies without compromising your health goals. This recipe is crafted with love and care, using wholesome substitutes that can turn a decadent dessert into a nourishing treat. Trust me, your taste buds won’t even know they’re indulging in something healthier!
When I first started experimenting with healthier baking, I had my doubts. Could ingredients like almond flour and applesauce truly deliver that rich brownie experience? But the answer is a resounding yes! This recipe has been refined over many kitchens and countless taste tests (I may have overdone the tasting part). Each bite is moist, chocolaty, and sure to impress those you share them with.
So, if you’re ready to embark on this healthier brownie adventure, grab your apron, and let’s get baking!
Personal Story: A Childhood Classic
Growing up, my kitchen was always the heart of our home. Some of my fondest memories are wrapped around the weekend brownie-making escapades with my mom. We would whip up a batch and enjoy them while still warm, with gooey chocolate melting over vanilla ice cream—absolute bliss!
One day, I recall discovering my mom stashing a few health-conscious substitutes in her baking stash. I was skeptical—how could anything “healthier” compete with our classic family recipe? But being true to our kitchen motto of "always trying new things," we decided to give it a whirl. The results were surprisingly delightful! That day marked the beginning of my love for transforming traditional recipes into healthier versions without sacrificing flavor.
Fast forward to today, I’ve not only preserved those childhood memories but added to them by creating my own healthier brownie recipe. It’s now my favorite go-to for gatherings, family dinners, and even cozy Netflix nights. The joy of sharing a guilt-free dessert is something truly special!
Ingredients: What You’ll Need
Before we dive into the baking magic, let’s gather our superstars. Here’s what you’ll need for these healthier brownies:
-
Almond Flour
A fantastic gluten-free option that adds moisture and a subtle nuttiness to your brownies. If almond flour isn’t available, feel free to substitute with oat flour or whole wheat flour. Just keep in mind that the texture may vary slightly! -
Cocoa Powder
For that rich chocolate flavor! Opt for unsweetened cocoa powder to keep the sugar content low. If you prefer a lighter flavor, you could use carob powder. -
Unsweetened Applesauce
This is our secret ingredient! It provides natural sweetness and moisture and replaces oil or butter in traditional recipes. If you’re not a fan of applesauce, pureed banana is a great alternative. -
Maple Syrup or Honey
A touch of natural sweetness to balance everything out. Substitute with agave nectar or a sugar-free syrup if you’re looking to reduce sugar further. -
Eggs
They act as a binder, helping to create that fudgy consistency. For a vegan option, try using flax eggs (1 tablespoon of flaxseed meal mixed with 2.5 tablespoons of water per egg) for similar binding results. -
Vanilla Extract
A splash adds depth to the flavor. Feel free to enhance the flavor profile by using almond extract instead! -
Baking Powder
A little leavening agent that helps our brownies rise and become fluffy. Just a pinch will do! -
Dark Chocolate Chips
Because we all need a chocolatey explosion in our brownies! Pick a high-quality dark chocolate to keep the recipe healthy. Alternatively, try using dark chocolate chunks or dairy-free chocolate chips for a vegan bake.
Step-by-Step Instructions: Let’s Get Baking!
Now that we’ve gathered all our ingredients, it’s time to bring these brownies to life! Follow these simple steps, and you’ll have a batch of healthier brownies in no time!
-
Preheat Your Oven
Start by preheating your oven to 350°F (175°C). This helps your brownies cook evenly and develop that perfect crumb. -
Prepare Your Baking Pan
Grab an 8×8 inch baking pan and line it with parchment paper. This ensures easy removal and clean-up. If you’re feeling extra (I always am), lightly grease the paper with a bit of coconut oil or cooking spray! -
Mix Dry Ingredients
In a medium bowl, combine the almond flour, cocoa powder, baking powder, and a pinch of salt. Whisk them together until blended. This step helps to ensure all the dry ingredients are well distributed, preventing clumps in your batter! -
Whisk Wet Ingredients
In another bowl, combine the applesauce, maple syrup (or honey), eggs, and vanilla extract. Whisk these together until smooth and well combined. If using flax eggs, let the mixture sit for a few minutes to thicken. -
Combine Dry and Wet Ingredients
Gradually add the dry ingredients into the wet mixture, stirring gently until just combined. Be careful not to overmix, as this can make your brownies tough! A few lumps are perfectly okay. -
Fold in Chocolate Chips
Gently fold in the dark chocolate chips until they are evenly dispersed throughout the batter. This part is heaven—those melted chip pockets are what brownie dreams are made of! -
Pour Batter into Pan
Transfer the brownie batter into your prepared baking pan, smoothing it out into an even layer. Feel free to sprinkle a few extra chocolate chips on top for an extra pinch of temptations! -
Bake
Bake in the preheated oven for about 25-30 minutes, or until a toothpick inserted into the center comes out with a few moist crumbs (not wet batter!). Remember, these brownies will firm up a bit as they cool, so don’t overbake! -
Cool and Slice
Once baked, remove the brownies from the oven and let them cool entirely in the pan on a wire rack (if you have one). Once cool, lift them out by the parchment paper, slice them into squares, and indulge!
Serving Suggestions: How to Serve Them Up!
When it comes to serving these healthier brownies, the sky’s the limit! You can enjoy them warm, straight out of the pan, or let them cool for a firmer texture. For an extra touch, serve them with a dollop of Greek yogurt or coconut whipped cream for a creamy contrast. A dusting of powdered sugar or a drizzle of melted dark chocolate can elevate their presentation and flavor!
Recipe Variations: Get Creative!
Ready to mix things up? Here are some creative variations to make these brownies truly your own:
-
Nutty Brownies: Fold in walnuts, pecans, or hazelnuts for added crunch and healthy fats.
-
Mint Chocolate Brownies: Add a couple of drops of peppermint extract to the wet mixture for a refreshing twist.
-
Spiced Brownies: Add a pinch of cinnamon or espresso powder to enhance the chocolate flavor.
-
Fruit-Infused Brownies: Incorporate a handful of chopped strawberries or raspberries for a fruity zing.
-
Blondie Variation: Swap cocoa powder with almond flour and add butterscotch chips for a delicious blondie version!
Chef’s Notes: A Bit of Kitchen Wisdom
As a self-proclaimed brownie aficionado, I can fondly recall a moment where I used a bit less cocoa powder one day—resulting in a mishap that led to a delightful discovery. Instead of being chocolaty, those brownies turned out to have a rich coffee flavor that also wowed everyone! This experience taught me that experimentation is key in the kitchen. Don’t be afraid to swap ingredients or add your flair!
Over time, this healthier brownie recipe has evolved through insights, taste-testing from friends and family, and my own passion for suited flavors. It’s a living creation that mirrors my culinary journey!
FAQs and Troubleshooting
Q: My brownies came out too dry. What happened?
A: Overbaking might be the culprit. Keep an eye on the timer, and remember, the brownies continue to bake a few minutes after being pulled from the oven.
Q: Can I make these brownies vegan?
A: Absolutely! Use a flax egg in place of the regular egg and ensure your chocolate chips are dairy-free!
Q: How do I store leftovers?
A: Store any leftovers in an airtight container in the refrigerator for up to a week. You can also freeze them for indulgent treats later!
Q: Can I double the recipe?
A: Yes, just adjust the baking time—using a larger pan might mean a longer bake time!
Nutritional Info (Optional)
- Calories: Approximately 150 per brownie (if sliced into 16 pieces)
- Fat: 8g (mostly healthy fats from almond flour and dark chocolate)
- Carbohydrates: 15g
- Fiber: 3g
- Protein: 4g
And there you have it, my delightful friend! A healthier brownie recipe that brings smiles and comfort without skipping a beat on taste. The best part? You can feel good about savoring every bite. I can’t wait to hear how yours turn out and the little touches you decide to add. Happy baking, and remember, a little love goes a long way in the kitchen!
Print
Healthier Brownies
- Total Time: 45 minutes
- Yield: 16 brownies 1x
- Diet: Gluten-Free
Description
Decadent and fudgy brownies made healthier with wholesome ingredients like almond flour and applesauce.
Ingredients
- 1 cup almond flour
- 1/2 cup cocoa powder
- 1/2 cup unsweetened applesauce
- 1/4 cup maple syrup or honey
- 2 large eggs
- 1 tsp vanilla extract
- 1/2 tsp baking powder
- 1/2 cup dark chocolate chips
Instructions
- Preheat your oven to 350°F (175°C).
- Prepare an 8×8 inch baking pan and line it with parchment paper.
- Mix the almond flour, cocoa powder, baking powder, and a pinch of salt in a medium bowl.
- Whisk together the applesauce, maple syrup (or honey), eggs, and vanilla extract in another bowl.
- Combine the dry ingredients into the wet mixture and stir gently until just combined.
- Fold in the dark chocolate chips until evenly dispersed.
- Pour the batter into the prepared baking pan and smooth it out.
- Bake for about 25-30 minutes, or until a toothpick inserted comes out with a few moist crumbs.
- Cool completely in the pan before slicing into squares.
Notes
Serve warm or allow to cool for a firmer texture. Try pairing with Greek yogurt or a drizzle of dark chocolate for extra indulgence.
- Prep Time: 15 minutes
- Cook Time: 30 minutes
- Category: Dessert
- Method: Baking
- Cuisine: American
Nutrition
- Serving Size: 1 brownie
- Calories: 150
- Sugar: 8g
- Sodium: 50mg
- Fat: 8g
- Saturated Fat: 2g
- Unsaturated Fat: 6g
- Trans Fat: 0g
- Carbohydrates: 15g
- Fiber: 3g
- Protein: 4g
- Cholesterol: 30mg
Keywords: brownies, healthy dessert, gluten-free brownies, chocolate, easy baking


