
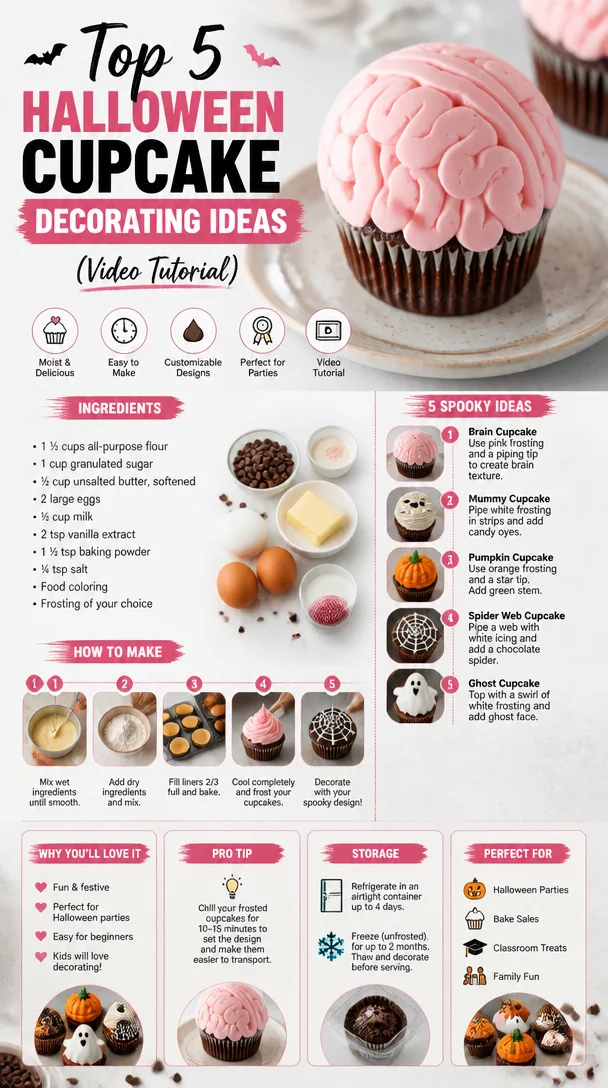
Top 5 Halloween Cupcake Decorating Ideas (Video Tutorial)
Spook-tacular Halloween Cupcake Decorating Ideas: 5 Fan Favorites from Last Year
Welcome to the haunted side of baking, my fellow food lovers! As the autumn leaves start to turn and the days get shorter, there’s a special thrill in the air. Halloween is upon us, and what better way to celebrate than by creating some wickedly delightful cupcakes? This year, I want to share five of my most popular Halloween cupcake designs from last year that’ll enchant both the young and the young-at-heart. Whether you’re hosting a ghoulish gathering, attending a spooky soirée, or just looking to brighten up your month with some festive baking, keep reading for mouthwatering flavors, fun decorating tips, and plenty of memories!
Cupcakes have that magical ability to bring people together. I reminisce about the time my best friend Jess and I baked our first batch of Halloween cupcakes during high school. Armed with silly costumes, a stack of food coloring, and the thrill of creativity, we spent hours transforming simple vanilla cupcakes into a spooky graveyard scene. We had more fun giggling and decorating than I ever thought possible! Those cupcakes became a cherished memory, a reminder of how cooking can create lasting friendships and joyous moments. Now, I want to instill that same festive spirit in you as we dive into this delectable journey!
Ingredients
Let’s gather our supplies! Here’s what you’ll need for each of these tempting cupcake designs. Don’t worry if you can’t find something; I’ve included substitution tips that will help keep your baking on track!
For the Basic Vanilla Cupcake
-
All-Purpose Flour (2 cups)
The backbone of your cupcakes. If you need a gluten-free option, use a 1:1 gluten-free flour blend! -
Granulated Sugar (1 ½ cups)
Adds sweetness and helps with moisture. For a healthier twist, you can replace half with coconut sugar. -
Butter (1 cup, softened)
Richness in flavor! If you want to lighten it up, swap in applesauce (1/2 cup) or use vegan butter. -
Baking Powder (1 tablespoon)
The magic leavening agent! Make sure it’s fresh—check the expiration date. Otherwise, swap with baking soda (use 1 teaspoon instead). -
Large Eggs (3)
They provide structure and moisture. For an egg-free option, swap with flaxseed meal mixed with water (1 tablespoon flax + 3 tablespoons water equals 1 egg). -
Vanilla Extract (2 teaspoons)
Enhances the sweetness. Homemade vanilla extract can take your cupcakes to the next level! -
Milk (1 cup)
Keeps the batter moist. You can use any type of milk you have on hand, including almond or oat milk.
Step-by-Step Instructions
Let’s bring these spooky delights to life! Here’s a detailed guide on how to make your cupcakes and bring your Halloween dreams to fruition.
-
Preheat the Oven:
Set your oven to 350°F (175°C). This is a crucial first step—an oven that’s set right from the start ensures even baking. -
Prepare Your Muffin Tin:
Line your muffin tin with Halloween-themed paper liners for that festive touch! You can find spooky designs like skeletons, ghosts, and pumpkins that can elevate your cupcakes. -
Mix the Dry Ingredients:
In a large bowl, whisk together the flour, sugar, baking powder, and a pinch of salt. This helps evenly distribute the baking powder for perfect rising every time! -
Cream the Butter:
In a separate bowl, beat the softened butter until it’s fluffy (about 2-3 minutes). A little trick? Let the butter sit out at room temperature beforehand to soften evenly. -
Add the Eggs and Vanilla:
Gradually add in the eggs, one at a time, mixing well after each addition. Then add the vanilla extract and stir until combined. Your mixture should be smooth and creamy—just like a spooky potion! -
Blend in the Dry Ingredients and Milk:
Alternate adding the flour mixture and milk to the butter mixture. Start and finish with the flour mixture for best results! Mix until just combined—overmixing can result in dense cupcakes, and we want light and fluffy! -
Fill and Bake:
Spoon the batter into your cupcake liners, filling them about two-thirds full. Bake for 18-20 minutes, or until a toothpick inserted in the center comes out clean. Pro tip: Rotate the pan halfway through baking for even results! -
Let Cool:
Once out of the oven, let the cupcakes cool in the pan for about 5 minutes, then transfer them to a wire rack to cool completely. This step is crucial to keep the frosting from melting when it’s time to decorate!
Serving Suggestions
Now that you have perfectly baked vanilla cupcakes, it’s time to channel your inner artist. Each cupcake can be a canvas for a spine-chilling masterpiece! Here are my five popular Halloween designs to inspire your creativity:
-
Ghostly Cupcakes: Top your cupcakes with white buttercream frosting, using a piping bag fitted with a round tip. Add mini chocolate chips for eyes—instant ghostly charm!
-
Pumpkin Patch Cupcakes: Using orange-tinted buttercream, swirl it on top and finish with a cute green fondant leaf. Feeling ambitious? You can even create mini edible pumpkins for an added effect!
-
Spider Web Treats: Frost your cupcakes with a base layer of white icing, then pipe black icing in a web pattern. Add a plastic spider on top, and watch your guests shriek with delight!
-
Witch’s Hat Wonders: Create a cone out of chocolate wafer cookies and place it upside down on a frosted cupcake, then add a ribbon of icing around the bottom.
-
Graveyard Cupcakes: Crumble up chocolate cookies to create “dirt” on top of your cupcakes, then insert gummy worms and mini tombstone cookies for that creepy vibe!
Recipe Variations
Looking to shake things up? Here are some creative twists on these Halloween cupcakes:
- Flavor Options: Consider infusing your cupcakes with spices like cinnamon or nutmeg to create a pumpkin or spice cake flavor that resonates with the season.
- Healthier Swaps: Swap out the all-purpose flour for almond flour or whole wheat flour for a nutritious spin.
- Vegan Fun: Replace eggs with flaxseed meal and butter with coconut oil or any plant-based option to make delicious, vegan-friendly cupcakes!
- Different Frosting Styles: Try cream cheese frosting for a tangy twist or chocolate ganache to give a rich, devilish finish.
Chef’s Notes
These Halloween cupcakes hold a special place in my heart—not just for the flavor but for the tradition they’ve become! The act of decorating each one sparks joy and creativity that is boundless. I remember once, during a friend’s Halloween party, I made cupcakes until 2 AM, fueled by sugar and enthusiasm. Though I had a light scare when the frosting exploded everywhere, they turned out to be the hit of the night! Each year, I find new ways to make them more whimsical and spooky.
FAQs and Troubleshooting
You might be wondering a few things as you embark on your cupcake journey. Here are some common questions and answers:
-
Why are my cupcakes flat?
This could be because your baking powder is old, your oven wasn’t at the right temperature, or you didn’t fill the liners enough. Make sure to check those factors! -
How do I keep my cupcakes moist?
Don’t overmix your batter, and try to enjoy them fresh. If they cool too long, consider placing them in an airtight container to lock in moisture. -
What can I do if my frosting is too runny?
If your frosting is too thin, add more powdered sugar to thicken it. You could also chill it in the fridge for a bit to firm it up. -
Can I make these cupcakes ahead of time?
Absolutely! You can bake them a day in advance and store them in an airtight container. Frost them just before serving to keep that fresh look!
Nutritional Info (Optional)
While I won’t dive too deep into the nutritional sea, each cupcake is made to be enjoyed in moderation. You can estimate that each basic vanilla cupcake (without extravagant toppings) is around 200 calories—perfect for a little treat during the chilly October nights.
I hope this guide inspires you to dive into the world of Halloween cupcake decorating! Remember, cooking is all about having fun, getting a little messy, and creating lasting memories. So grab those ingredients and utensils, and customize your spooky masterpieces. Happy Halloween baking, friends! 🎃
Print
Spook-tacular Halloween Cupcakes
- Total Time: 35 minutes
- Yield: 12 servings 1x
- Diet: Vegetarian
Description
Delightful Halloween-themed vanilla cupcakes that are sure to enchant everyone at your spooky gathering.
Ingredients
- 2 cups All-Purpose Flour
- 1 ½ cups Granulated Sugar
- 1 cup Butter, softened
- 1 tablespoon Baking Powder
- 3 Large Eggs
- 2 teaspoons Vanilla Extract
- 1 cup Milk
Instructions
- Preheat the oven to 350°F (175°C).
- Prepare your muffin tin with Halloween-themed paper liners.
- Mix the flour, sugar, baking powder, and a pinch of salt in a large bowl.
- Cream the softened butter until fluffy in a separate bowl.
- Add the eggs and vanilla, mixing until smooth.
- Blend in the dry ingredients and milk alternately.
- Fill the cupcake liners two-thirds full and bake for 18-20 minutes.
- Let cool in the pan for 5 minutes, then transfer to wire racks.
Notes
Feel free to customize your cupcakes with various toppings and frosting styles to add a spooky touch!
- Prep Time: 15 minutes
- Cook Time: 20 minutes
- Category: Dessert
- Method: Baking
- Cuisine: American
Nutrition
- Serving Size: 1 cupcake
- Calories: 200
- Sugar: 15g
- Sodium: 200mg
- Fat: 10g
- Saturated Fat: 6g
- Unsaturated Fat: 3g
- Trans Fat: 0g
- Carbohydrates: 25g
- Fiber: 1g
- Protein: 3g
- Cholesterol: 50mg
Keywords: Halloween cupcakes, spooky desserts, festive baking, vanilla cupcakes, cupcake decorating
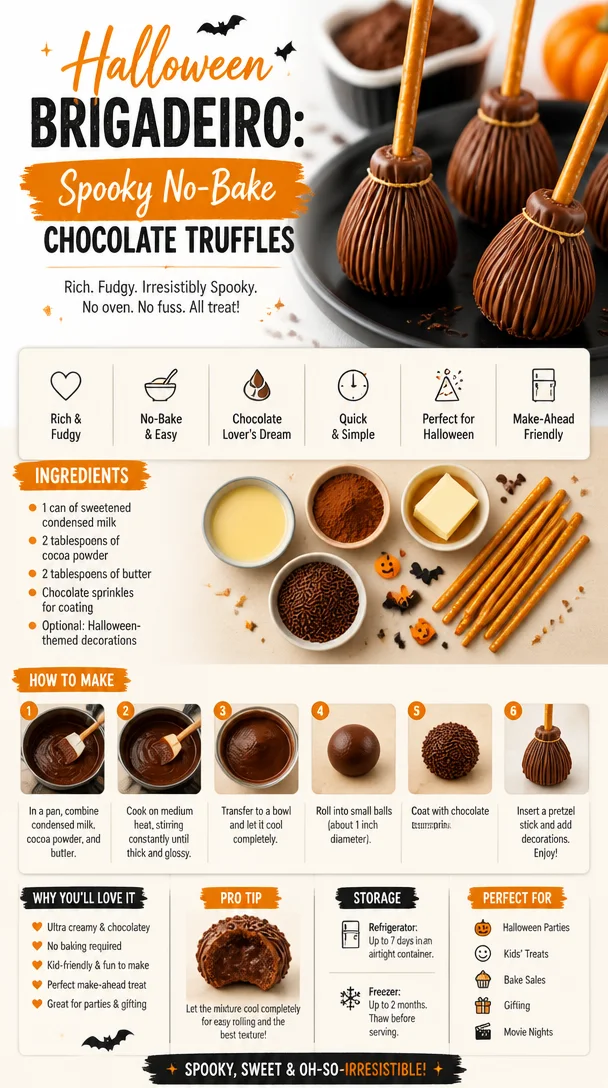
Halloween Brigadeiro: Spooky No-Bake Chocolate Truffles
The Sweet Magic of Chocolate Brigadeiro: A Halloween Treat to Remember
Welcome back to my kitchen! As the leaves turn golden and the crisp autumn air ushers in the season of treats, I can’t help but get excited for Halloween! It’s not just about spooky costumes and haunted houses; it’s also a glorious excuse to indulge in sweet and delectable confections. Speaking of which, have you ever tried Brigadeiro? This delightful Brazilian treat is a chocolate truffle that’s rich, fudgy, and downright addictive. Join me as we turn this classic dessert into the perfect Halloween treat!
Now, picture this – the Halloween season is in full swing, and I recall how vibrant it always was in my childhood home. We would transform our house into a Haunted Mansion, complete with cobwebs, flickering lights, and of course, an over-the-top candy display! I remember the joy of running through the neighborhood in my favorite costume, collecting candies and goodies with my friends, all while my mom would be quietly prepping delicious desserts for the evening. One year, I was lucky enough to have Brigadeiro featured on our kitchen table alongside the candy corn and chocolate bars. Little did I know, these little chocolate balls would forever hold a special place in my heart. Each bite was a joyous explosion of chocolatey goodness, and they were always the first to disappear!
Brigadeiro is easy to make, requires minimal ingredients, and can be shaped into little pumpkin or spider forms for some Halloween flair. There’s something magical about creating these treats and watching your friends and family light up with excitement. I promise you; once you make Brigadeiros, you’ll be swept away by the rhythm of rolling, dipping, and decorating. So, let’s roll up our sleeves and dive into this Halloween-inspired delight!
Ingredients
Before we get started, let’s gather our ingredients. Here’s what you’ll need for these scrumptious Brigadeiros:
-
Sweetened Condensed Milk: The star ingredient! It’s the base for the Brigadeiro, giving it a luscious and creamy texture. If you’re looking for a dairy-free version, coconut condensed milk can be a great alternative!
-
Unsweetened Cocoa Powder: Adds that rich chocolate flavor that we all crave. Unsweetened is key here, as we’ll be sweetening it with the condensed milk. For a fun twist, you could use dark cocoa powder for a deeper chocolatey taste.
-
Unsalted Butter: Just a hint of butter elevates the Brigadeiro and adds a silky mouthfeel. If you’re dairy-free, you can substitute with coconut oil or vegan butter.
-
Chocolate Sprinkles: These will be used to coat your Brigadeiros for that magical finish! You could also consider crushed nuts or edible glitter for a festive touch.
-
A Pinch of Sea Salt: A small amount of salt will enhance the sweetness and richness of the chocolate. If you’re on a low-sodium diet, feel free to skip this step, but don’t underestimate its importance!
Step-by-Step Instructions
-
Prepare Your Ingredients: Before we commence, make sure all ingredients are at hand. Trust me, this makes the cooking process much smoother!
-
Combine Ingredients: In a medium saucepan over medium heat, combine the sweetened condensed milk, cocoa powder, and butter. Stir until everything is mixed nicely. This is where the chocolate magic begins!
-
Cook the Mixture: Stir continuously to prevent sticking. Keep an eye on the mixture as it bubbles away – it should take about 10 minutes to reach a thick, fudgy consistency. You’ll know it’s ready when it pulls away from the sides of the pan, and you can see the bottom when you run your spatula through it.
-
Cooling Time: Once ready, pour the mixture into a buttered dish or a parchment-lined pan and allow it to cool to room temperature. This part is crucial, so you don’t burn your hands while rolling!
-
Roll Into Balls: Once cooled, butter your hands slightly and grab a tablespoon of the chocolate mixture. Roll it into a ball—aim for about the size of a cherry. Keep your hands buttered to make this process easier!
-
Coat Your Brigadeiros: Now comes the fun part! Roll the chocolate balls in chocolate sprinkles until they’re coated all around. If you want to add additional toppings, this is your time to shine!
-
Let Them Set: Place your coated Brigadeiros onto a tray lined with parchment paper and let them set for at least 30 minutes. This step allows them to firm up nicely.
Serving Suggestions
When it comes to serving these Brigadeiros, I love presenting them on a festive plate adorned with Halloween décor—think mini pumpkins, spooky napkins, and maybe even a few flickering LED candles. You can arrange them in a cute pumpkin-shaped bowl for extra charm or leave them on the table for your friends to help themselves. Either way, these gems are bound to steal the show!
Recipe Variations
Looking to get creative with your Brigadeiros? Here are a few ideas to give these treats a spin:
-
Pumpkin Spice Brigadeiros: Mix in some pumpkin puree and a dash of cinnamon into the chocolate mixture for a fall twist.
-
Peanut Butter Brigadeiros: Incorporate creamy peanut butter into the base mixture for a delightful combo.
-
Matcha Brigadeiros: Swap out some cocoa powder for matcha to create a beautiful and unique flavor.
-
Spicy Brigadeiros: Add a pinch of cayenne pepper or chili powder for a sweet and spicy kick.
-
Vegan Delight: Use coconut condensed milk and vegan butter for a dairy-free version everyone can enjoy!
Chef’s Notes
Brigadeiros have evolved since their inception in Brazil in the 1940s. While traditional Brigadeiros are simply chocolate, the versatility of this treat lets your imagination run wild! I fondly remember my first attempt, which resulted in a delightful mess—not only did I end up with chocolate all over my hands, but the entire kitchen looked like a sweet explosion! Embrace those messy moments; they often lead to the best memories and even better food.
FAQs and Troubleshooting
-
Why did my Brigadeiros not firm up? If your Brigadeiro mixture hasn’t thickened enough, it may not have cooked long enough. Just return it to the heat and keep stirring until it reaches the right consistency.
-
How do I keep Brigadeiros from sticking to my hands? Simply keep your hands greased with a bit of butter, and they will roll much more easily.
-
Can I make these ahead of time? Absolutely! Brigadeiros can be made a few days in advance and stored in an airtight container in the fridge.
-
What if I don’t have chocolate sprinkles? No worries! You can roll them in shredded coconut, crushed nuts, or even edible glitter for a festive vibe.
Nutritional Info (if applicable)
While indulgent treats like Brigadeiros are not typically low-calorie, they can be enjoyed in moderation. Each Brigadeiro (approx. 15g) contains around 70 calories, depending on the ingredients used. Remember to enjoy with friends and share the joy!
Happy Halloween, my fellow foodies! As you whip up this delightful Brigadeiro recipe, remember that the magic lies not only in the ingredients but in the love you add. So, whether you’re treating yourself or throwing a Halloween party, I hope these treats bring smiles and sweet memories to your table. Get ready for a fun, tasty adventure—you’re going to love every bite!
Print
Chocolate Brigadeiro
- Total Time: 20 minutes
- Yield: 20 servings 1x
- Diet: Vegetarian
Description
A delightful Brazilian chocolate truffle, perfect for Halloween celebrations.
Ingredients
- 1 can sweetened condensed milk
- 4 tablespoons unsweetened cocoa powder
- 2 tablespoons unsalted butter
- Chocolate sprinkles for coating
- A pinch of sea salt
Instructions
- Prepare your ingredients: Gather all ingredients.
- Combine the sweetened condensed milk, cocoa powder, and butter in a medium saucepan over medium heat.
- Cook the mixture while stirring continuously for about 10 minutes until thick and fudgy.
- Pour the mixture into a buttered dish and let it cool to room temperature.
- Roll the mixture into balls, about the size of a cherry.
- Coat your Brigadeiros in chocolate sprinkles.
- Let them set on a parchment-lined tray for at least 30 minutes.
Notes
Brigadeiros can be made a few days in advance and stored in an airtight container in the fridge.
- Prep Time: 10 minutes
- Cook Time: 10 minutes
- Category: Dessert
- Method: Stovetop
- Cuisine: Brazilian
Nutrition
- Serving Size: 1 Brigadeiro
- Calories: 70
- Sugar: 10g
- Sodium: 40mg
- Fat: 3g
- Saturated Fat: 2g
- Unsaturated Fat: 1g
- Trans Fat: 0g
- Carbohydrates: 9g
- Fiber: 0g
- Protein: 1g
- Cholesterol: 5mg
Keywords: Brigadeiro, Halloween treat, chocolate truffle, Brazilian dessert, easy dessert
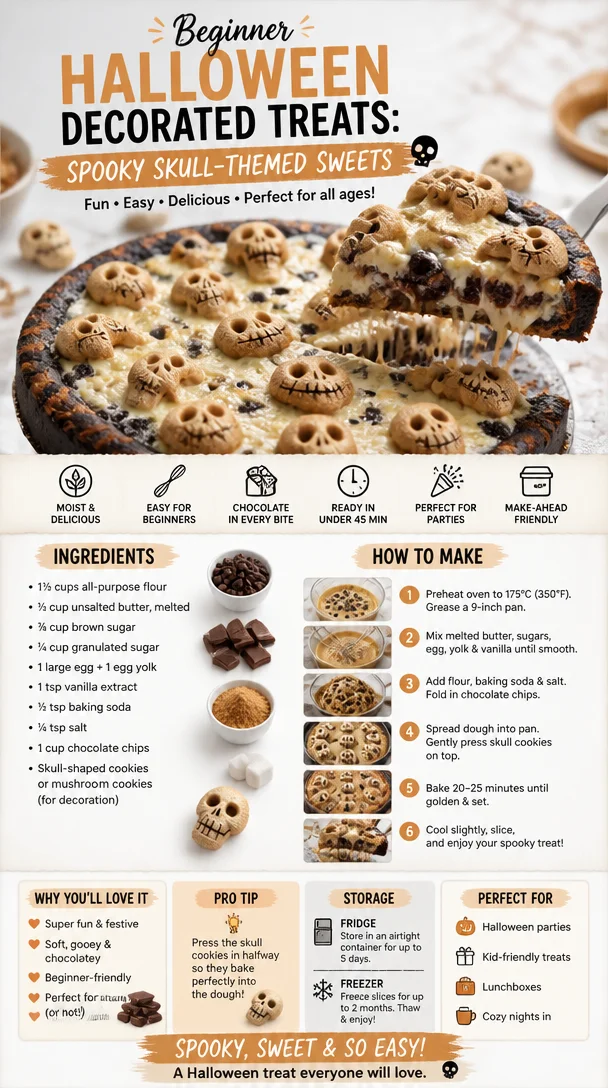
Beginner Halloween Decorated Treats: Spooky Skull-Themed Sweets
Halloween Delights: Skullhead Biscuits for a Spook-tacular Celebration
Welcome to my cozy kitchen, dear friends! As the air turns crisp and the leaves begin to tumble down, I can’t help but feel a sense of excitement for one of the most whimsical times of the year—Halloween! 🎃👻 When I think of this spook-tacular celebration, my heart fills with nostalgia and joy. Halloween isn’t just about scary costumes; it’s also about delicious treats that bring friends and family together. Today, I’m thrilled to share a recipe that not only tastes fantastic but also adds a fun twist to any Halloween gathering: Skullhead Biscuits!
These delightful treats are not just your standard cookies; they are charmingly decorated biscuits shaped like skulls that are perfect for parties, trick-or-treaters, or just indulging your sweet tooth. The blend of buttery biscuits with a hint of sweetness is like a warm hug on a chilly October evening. As you conjure these cute little skulls in your own kitchen, the delightful aroma of freshly baked biscuits will transform your home into a hauntingly beautiful bakery!
In this post, I’ll guide you through each step of making these Skullhead Biscuits, share delightful stories from my kitchen, and sprinkle in tips and tricks that might come in handy. Whether you’re baking with little ones or surprising your friends with a unique treat, these biscuits are sure to be a hit! So grab your apron, and let’s get this Halloween baking party started!
A Halloween Memory Worth Sharing 🍂
Before I delve into the nitty-gritty of the recipe, I want to share a little story that always warms my heart. Growing up, Halloween at my house was a big deal. My siblings and I often spent weeks planning our costumes while secretly plotting the best ways to trick our friends for extra candy! But what I cherished most was the post-trick-or-treat feast my mom prepared—a spread of delightful spooky treats!
One October evening, my mom decided to bake skull-shaped cookies, but they were unlike any I’ve seen before. She gave each skull a unique expression, from goofy grins to spooky frowns. We gathered around the table, giggling and decorating them with colorful icing and sprinkles. As we savored the warm biscuits fresh from the oven, it was not just about their taste but about the love poured into each bite.
This memory inspires me to recreate those joyous feelings—combining creativity, laughter, and deliciousness into my baking. So grab your loved ones, and let’s create memories together while whipping up these delightful Skullhead Biscuits!
Ingredients
Here’s what you’ll need to bring these spooky delights to life:
-
2 ½ cups all-purpose flour
The base of our biscuits! If you’re looking for a gluten-free option, you can substitute this with a 1:1 gluten-free flour blend. -
1 cup unsalted butter, softened
This is essential for that rich, buttery flavor. Make sure it’s at room temperature for best results—nobody wants cold butter in their dough! -
½ cup granulated sugar
Adds sweetness! You could replace half of this with brown sugar for a more caramel-like flavor. -
1 large egg
Acts as a binder. If you’re vegan, you can use a flax egg (1 tablespoon flaxseed meal mixed with 2.5 tablespoons water). -
1 tsp vanilla extract
Brings a warm aroma. Feel free to use almond extract for a unique twist! -
2 tsp baking powder
Helps our skulls rise just enough. Don’t substitute with baking soda; they work differently! -
½ tsp salt
A tiny pinch to balance the sweetness. -
Food coloring
Optional, but fun! Add to your icing for colorful decorations. -
Candy eyes or edible decorations
For that spooky flair! Get creative with other toppings like edible glitter or sprinkles.
This combination of ingredients will yield delightful biscuits that are easy to customize and decorate according to your Halloween whimsy!
Step-by-Step Instructions
Ready to bake? Here’s a step-by-step guide to whipping up those Skullhead Biscuits!
-
Preheat your oven to 350°F (175°C). This step is crucial! You want the oven hot and ready to give those biscuits a perfect bake.
-
In a large mixing bowl, whisk together the flour, baking powder, and salt. This will ensure even distribution of the leavening agent.
-
In another bowl, cream together the softened butter and sugar until it’s light and fluffy—about 3-5 minutes. This aeration is vital for that melt-in-your-mouth texture!
-
Add the egg and vanilla extract into the butter mixture, and beat until well combined. If you’re using a stand mixer, use the paddle attachment; it makes everything easier!
-
Gradually add the dry mixture to the wet ingredients. Mix on low until just combined; overmixing can lead to tough biscuits, and we don’t want that!
-
Chill the dough in the refrigerator for at least 30 minutes. This will make it easier to roll out and help the biscuits to retain their shape during baking.
-
Lightly flour your working surface. Roll out the chilled dough to about ¼-inch thick. Use a skull-shaped cookie cutter to cut out your biscuits.
-
Place the cutouts on a parchment-lined baking sheet. Don’t forget to leave some space between them!
-
Bake in the preheated oven for 10-12 minutes or until the edges are lightly golden. The center should still seem a bit soft, as they’ll continue to firm up outside the oven.
-
Cool the biscuits on the baking sheet for 5 minutes before transferring them to a wire rack to cool completely. Patience is key; warm biscuits are easier to decorate but can be fragile!
-
Decorate with icing and edible decorations once they’re completely cool. Turn on your spooktacular creativity here; go wild with colors and expressions!
Serving Suggestions
When it comes to serving your Skullhead Biscuits, presentation is key! Arrange them on a spooky-themed platter—perhaps with faux spider web decorations or surrounded by mini pumpkins. A sprinkle of powdered sugar can create a “ghostly” touch, or you can serve them alongside a warm cup of cider or hot cocoa to make it extra cozy. Don’t forget to take pictures; these biscuits are as much about fun as they are about taste!
Recipe Variations
Get creative with these skulls! Here are a few ideas to twist this recipe:
-
Chocolate Skullheads: Substitute 1/2 cup of flour with unsweetened cocoa powder for a chocolate version. Yum!
-
Spicy Skullheads: Add a pinch of cinnamon or ginger to the dough for a cozy autumn flavor.
-
Nutty Twist: Mix in some finely chopped nuts or use almond flour for a nutty flavor profile.
-
Gluten-Free Adventure: Use almond flour or a gluten-free baking blend for gluten-free biscuits.
-
Vegan Twist: Swap the egg for a flax egg and use coconut oil for a dairy-free version!
Chef’s Notes
As you embark on this baking adventure, don’t forget that every recipe has a life of its own! Over the years, my Skullhead Biscuit recipe has evolved from simple butter and sugar cookies to these fun, festive treats. I started decorating them with whatever I had at hand—sprinkles, chocolate chips, you name it. One year, I experimented with spooky ghost designs using whipped cream—trust me, it didn’t last long! Cooking should always be playful and adaptable.
My kitchen often reflects the joys of seasonal changes, and each Halloween reminds me to embrace the magic of creativity. So, don’t be afraid to let your imagination run wild, keeping your taste buds in mind!
FAQs and Troubleshooting
1. Why did my biscuits spread too much?
This could be due to the butter being too warm or not enough chilling time. Make sure your dough is chilled well before cutting out shapes.
2. My biscuits turned out tough! What went wrong?
Overmixing the dough is usually the culprit. Mix until just combined, and handle the dough as little as possible.
3. How can I make my icing vibrant for decorating?
Use gel food coloring instead of liquid for more concentrated color without altering the icing’s consistency.
4. Can I freeze the dough?
Absolutely! You can freeze the dough for up to three months. Wrap tightly in plastic wrap and thaw overnight in the fridge before rolling out.
Nutritional Info (if applicable)
Each Skullhead Biscuit contains approximately 150 calories, 7g of fat, 20g of carbohydrates, and 2g of protein. This may vary based on decorations and variations you choose!
Baking these Skullhead Biscuits is a fun-filled journey that not only satisfies your sweet tooth but also creates memories to cherish. So gather your loved ones, decorate to your heart’s delight, and most importantly—enjoy every moment in the kitchen! Happy Halloween, my fellow foodies! 🎃🖤
Print
Skullhead Biscuits
- Total Time: 45 minutes
- Yield: 24 servings 1x
- Diet: Vegetarian
Description
Delightful biscuits shaped like skulls, perfect for Halloween parties and trick-or-treaters.
Ingredients
- 2 ½ cups all-purpose flour
- 1 cup unsalted butter, softened
- ½ cup granulated sugar
- 1 large egg
- 1 tsp vanilla extract
- 2 tsp baking powder
- ½ tsp salt
- Food coloring (optional)
- Candy eyes or edible decorations
Instructions
- Preheat your oven to 350°F (175°C).
- Whisk together the flour, baking powder, and salt in a large mixing bowl.
- Cream together the softened butter and sugar until light and fluffy—about 3-5 minutes.
- Add the egg and vanilla extract into the butter mixture, and beat until well combined.
- Gradually add the dry mixture to the wet ingredients; mix on low until just combined.
- Chill the dough in the refrigerator for at least 30 minutes.
- Roll out the chilled dough to about ¼-inch thick and cut out biscuits using a skull-shaped cookie cutter.
- Place the cutouts on a parchment-lined baking sheet, leaving space between them.
- Bake for 10-12 minutes or until edges are lightly golden.
- Cool the biscuits on the baking sheet for 5 minutes before transferring them to a wire rack.
- Decorate with icing and edible decorations once completely cool.
Notes
You can customize biscuits with various icings and decorations for a unique Halloween touch.
- Prep Time: 15 minutes
- Cook Time: 12 minutes
- Category: Dessert
- Method: Baking
- Cuisine: American
Nutrition
- Serving Size: 1 biscuit
- Calories: 150
- Sugar: 6g
- Sodium: 100mg
- Fat: 7g
- Saturated Fat: 4g
- Unsaturated Fat: 2g
- Trans Fat: 0g
- Carbohydrates: 20g
- Fiber: 0g
- Protein: 2g
- Cholesterol: 30mg
Keywords: Halloween, biscuits, cookies, spooky treats, baking
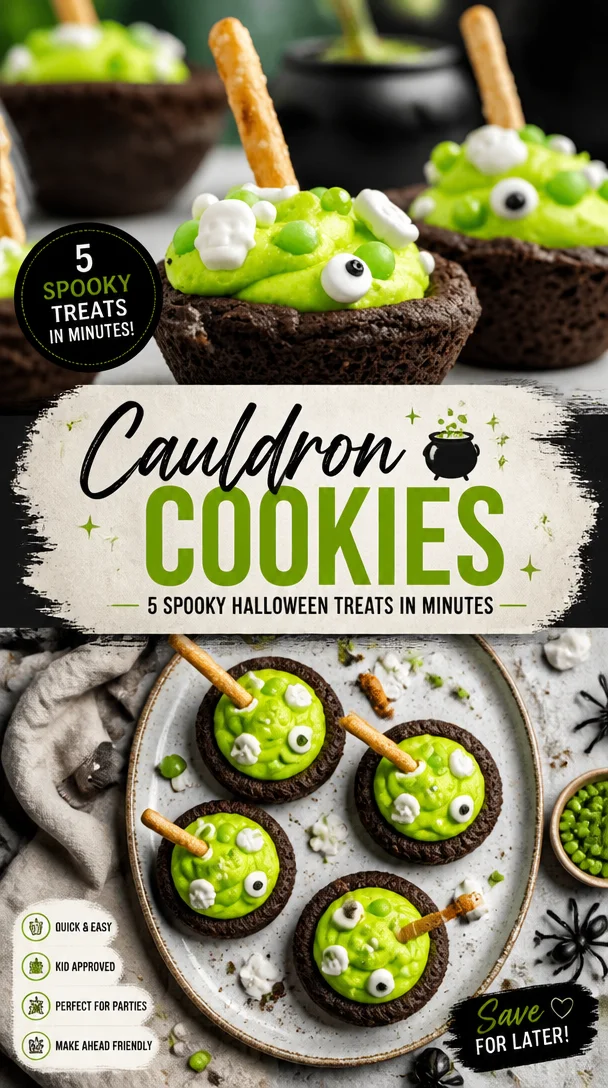
Cauldron Cookies: 5 Spooky Halloween Treats in Minutes
Get Ready to Indulge: Cauldron Cookies That Enchant Your Taste Buds!
Welcome to my kitchen, where the aromas of baking and the spirit of cozy cooking swirl together in perfect harmony! Today, I’m excited to share a family recipe that holds a special place in my heart: Cauldron Cookies. These delightful bites bring a sense of magic with every crunch and chew, perfect for all those who seek comforting flavors and fun memories.
Picture this: the first crisp days of autumn drift in, and there’s a certain magic in the air. It’s that time of year again when Halloween decorations start to pop up, pumpkins sit proudly on doorsteps, and the leaves transform into vibrant shades of orange and gold. This is the same season that my late grandmother, a formidable wizard in the kitchen, would bring out her legendary cookie cauldron. Picture a giant dungeon-like pot bubbling with molten chocolate, gooey marshmallows, and a sprinkle of enchanting spices — those Cauldron Cookies paired with a warm glass of milk were a staple in our household.
As a child, I’d race home from school with the sweet anticipation of indulging in these precious treats. The kitchen would be filled with laughter, and we would get our hands sticky as we rolled out the dough and added ingredients to our cauldron. It wasn’t just about the cookies; it was about the joy of creation and the bonds formed over mixing, baking, and—let’s be honest—sampling all the delicious bits that didn’t quite make it into the oven.
The beauty of these cookies is that they can easily become a tradition in your own home. They’re perfect for sharing, too, whether you’re welcoming friends over for a cozy autumn evening or simply treating yourself to an after-dinner delight. Let’s dive into the magical world of Cauldron Cookies, shall we?
Ingredients to Create Cookie Magic
To conjure up a batch of these delightful Cauldron Cookies, you’ll need the following ingredients. Each of them has a role in crafting the perfect cookie experience:
-
1 cup unsalted butter: The base of any good cookie. Don’t have unsalted butter? No problem! You can use salted butter; just watch the added salt in the recipe.
-
1 cup brown sugar: This adds that rich, caramel-like depth. Dark brown sugar is a great substitute for more molasses flavor, while white sugar can be used if you’re in a pinch.
-
1 cup granulated sugar: Balances the flavors for that perfect sweet spot. If you want to reduce the sugar, consider using half the amount or substituting with coconut sugar.
-
2 large eggs: Bind the ingredients together. If you’re looking for an egg-free option, you can use flax eggs (1 tablespoon ground flaxseed mixed with 2.5 tablespoons water per egg) to keep that texture.
-
2 teaspoons vanilla extract: Adds a warm, nostalgic flavor. Feel free to use almond extract for a twist!
-
2.5 cups all-purpose flour: This is the structure of your cookies. You could swap some or all of it for whole wheat flour for a nutty flavor.
-
1 teaspoon baking soda: This is your leavening agent, giving the cookies that soft, fluffy texture. Baking powder can be used as a substitute but will alter the final texture slightly.
-
1/2 teaspoon salt: Balances the sweetness wonderfully. Skip it if using salted butter.
-
1 cup chocolate chips (or any mix, like butterscotch or white chocolate): Chocolate chips are the star of the show! Mix and match with your favorite kinds for an exciting flavor twist.
-
1 cup mini marshmallows: These give a delightful gooey texture. If you’re not a marshmallow fan, you can replace them with dried fruit or nuts for added chewiness.
-
1 cup crushed pretzels (optional): For a delightful crunch! If gluten-free, swap with gluten-free pretzels or skip entirely.
Gather these ingredients, and let the magic begin!
Step-by-Step Instructions to Conjure Up Your Cookies
-
Preheat the oven: Set your oven to 350°F (175°C). Preheating ensures that your cookies bake evenly.
-
Cream the butter and sugars: In a large mixing bowl, beat the unsalted butter, brown sugar, and granulated sugar together until light and fluffy—about 2-3 minutes. This process incorporates air into the mixture, contributing to a nice chewy texture.
-
Add eggs and vanilla: Crack the eggs into the bowl, followed by the vanilla extract. Mix until fully integrated; don’t worry if it looks a bit curdled!
-
Combine dry ingredients: In a separate bowl, whisk together the all-purpose flour, baking soda, and salt. This helps to evenly distribute the leavening agent and ensures no lumps in your cookies.
-
Slowly introduce dry to wet: Gradually add the dry ingredients to the wet mixture. Mix until just combined; be careful not to overwork the dough! If you prefer, you can use a spatula here for a gentle fold.
-
Stir in the goodies: Gently fold in the chocolate chips, mini marshmallows, and crushed pretzels (if using). This is where the cookie’s magic happens! Those little chunks of joy will melt and create pockets of goodness in every bite.
-
Scoop the dough: Use a cookie scoop or tablespoon to portion the dough onto a parchment-lined baking sheet. Make sure to leave enough space between them as they will spread!
-
Bake: Pop those cookie-filled trays in the oven and bake for 10-12 minutes or until the edges are lightly golden. The secret? Take them out when they still look a bit soft; they’ll continue to set as they cool.
-
Cool down: Let the cookies rest on the baking sheet for about 5 minutes before transferring them to a wire rack. This helps to enhance their chewy texture.
-
Dive In: Once they’ve cooled (if you can resist!), indulge in a warm Cauldron Cookie and enjoy those unbeatable flavors!
Serving Suggestions to Make Your Cookies Shine
These Cauldron Cookies are absolutely divine on their own, but to elevate your cookie experience, I recommend serving them warm alongside a tall glass of milk or a cozy cup of hot cocoa. For a fun twist, pair them with a scoop of vanilla ice cream for an unforgettable dessert treat that will impress every guest! You could also try drizzling some melted chocolate or caramel over the top for an extra touch of sweetness.
Recipe Variations: Switch Up the Magic
Feeling adventurous? Here are a few fun twists to make this recipe uniquely yours:
-
Nutty Considerations: Add chopped nuts like pecans or walnuts for an extra crunch and nutty flavor.
-
Spiced Up: Incorporate a teaspoon of cinnamon or pumpkin spice for a cozy fall twist that enhances the overall flavor.
-
Fruit Fusion: Swap the chocolate chips for dried cherries, cranberries, or apricots for a fruity variation.
-
Buttercream Delight: Use frosting as a dip! Make a simple frosting with cream cheese and powdered sugar to pair alongside your cookies.
-
Dairy-Free Option: Substitute all butter with coconut oil and make sure to use dairy-free chocolate chips for a fantastic dairy-free treat.
Chef’s Notes: A Cookie Journey
Every recipe has its story, and the evolution of these Cauldron Cookies is no exception. I remember experimenting with all kinds of mix-ins, from M&M’s to leftover Halloween candies. Each variation brought something new to the table, and I can still hear my family laughing as we created our own version of the recipe together.
What started as a simple butter and sugar base has now metamorphosed into a gooey, textured treat with depths of flavor and an array of textures, thanks to the added bits I’ve discovered along the way. This recipe has become a symbol of togetherness in my home—an excuse to gather around the kitchen and share stories over warm cookies!
FAQs and Troubleshooting: Common Cookie Conundrums
Q: My cookies spread too much during baking. What happened?
A: This could be due to the butter being too warm or if the dough was not chilled before baking. A quick fix? Chill the dough for 30 minutes before scooping it onto the baking sheet.
Q: Why are my cookies hard?
A: Overbaking or overmixing the dough can lead to tough cookies. One way to ensure they’re soft is to take them out of the oven while they’re still slightly underbaked—remember, they will continue cooking as they cool.
Q: Can I freeze these cookies?
A: Absolutely! You can freeze the baked cookies in an airtight container for up to three months. To reheat, pop them in the oven for about 5 minutes at 350°F (175°C).
Q: How can I make these cookies gluten-free?
A: Substituting all-purpose flour with your favorite gluten-free flour blend should work well! Just make sure that it includes xanthan gum to maintain the cookie’s structure.
Nutritional Info (Optional)
Feel free to calculate the nutritional values based on your ingredient modifications, but keep in mind, these cookies are best enjoyed in moderation as a sweet treat to delight your taste buds!
And there you have it—a complete journey into the world of Cauldron Cookies! I hope you enjoy making these treats as much as I love sharing them with you. Whether you’re creating new family memories or indulging in a little self-care with a sweet, warm cookie, I wish you all the delicious joy these cookies bring. Happy baking!
Print
Cauldron Cookies
- Total Time: 27 minutes
- Yield: 24 servings 1x
- Diet: Vegetarian
Description
Delightful Cauldron Cookies that bring magical flavors with every bite, perfect for an autumn treat.
Ingredients
- 1 cup unsalted butter
- 1 cup brown sugar
- 1 cup granulated sugar
- 2 large eggs
- 2 teaspoons vanilla extract
- 2.5 cups all-purpose flour
- 1 teaspoon baking soda
- 1/2 teaspoon salt
- 1 cup chocolate chips
- 1 cup mini marshmallows
- 1 cup crushed pretzels (optional)
Instructions
- Preheat the oven: Set your oven to 350°F (175°C).
- Cream the butter and sugars: In a large mixing bowl, beat the unsalted butter, brown sugar, and granulated sugar together until light and fluffy—about 2-3 minutes.
- Add eggs and vanilla: Crack the eggs into the bowl, followed by the vanilla extract. Mix until fully integrated.
- Combine dry ingredients: In a separate bowl, whisk together the all-purpose flour, baking soda, and salt.
- Slowly introduce dry to wet: Gradually add the dry ingredients to the wet mixture. Mix until just combined.
- Stir in the goodies: Gently fold in the chocolate chips, mini marshmallows, and crushed pretzels (if using).
- Scoop the dough: Use a cookie scoop or tablespoon to portion the dough onto a parchment-lined baking sheet.
- Bake: Bake for 10-12 minutes or until the edges are lightly golden.
- Cool down: Let the cookies rest on the baking sheet for about 5 minutes before transferring them to a wire rack.
- Dive In: Enjoy a warm Cauldron Cookie!
Notes
These cookies are best enjoyed warm, ideally served with milk or hot cocoa. Consider adding nuts or spices for variations.
- Prep Time: 15 minutes
- Cook Time: 12 minutes
- Category: Dessert
- Method: Baking
- Cuisine: American
Nutrition
- Serving Size: 1 cookie
- Calories: 150
- Sugar: 10g
- Sodium: 100mg
- Fat: 7g
- Saturated Fat: 4g
- Unsaturated Fat: 2g
- Trans Fat: 0g
- Carbohydrates: 20g
- Fiber: 0g
- Protein: 2g
- Cholesterol: 30mg
Keywords: cookies, Halloween, baking, dessert

Mummy Brownies
Mummy Brownies: A Spooktacular Treat for Halloween!
Welcome to my kitchen, fellow food lovers! I’m Olivia Bennett, your go-to home cook who believes that every meal can create a memory and every dessert tells a story. As Halloween creeps around the corner, it’s time to unleash your inner culinary ghoul and whip up something delightfully spooky. Today, I’m sharing my beloved Mummy Brownies that are ooey-gooey, chocolatey, and just the right amount of festive. Whether you’re hosting a Halloween party, need a fun treat for your kids’ school, or just want to spice up your snack table, these brownies will bring out the joy of the season.
What I love most about these Mummy Brownies is not just their captivating appearance but the warmth they bring to gatherings. Imagine your guests oohing and aahing as they spot these adorable mummies nestled among other treats. Plus, who can resist a rich brownie topped with a ghostly drizzle? So grab your spatula, put on your apron (preferably one that’s messy like mine!), and let’s get baking!
A Memory to Cherish
Let me take you back to the first Halloween I made these Mummy Brownies. My daughter, Mia, was just eight years old and was bursting with excitement to decorate our front porch with cobwebs and jack-o’-lanterns. With Halloween approaching, we decided to make something special together for her school’s spooky celebration. It was one of those beautiful fall afternoons where the crisp air and rustling leaves set the perfect backdrop for baking.
We turned on some fun Halloween tunes, gathered our ingredients, and dove head-first into our culinary adventure. As we mixed, poured, and decorated, giggles mixed with the rich scent of melting chocolate. Mia’s playful side came out as she attempted to create the mummies’ faces, each one more whimsical than the last. The moment she placed the first brownie on a plate and drizzled the white chocolate with absolute concentration, I knew I had to document this recipe for future Halloweens.
That year, the kids loved the brownies so much that they declared Mia a “Mummy Brownie Queen.” The laughter, the collaboration, and the sweet mess we created together have stayed with us as one of our favorite Halloween traditions. Now, it’s your turn to create those magical moments in your kitchen!
Ingredients: What You’ll Need
Here’s a quick rundown of the ingredients that make these Mummy Brownies so delightful:
-
1 cup unsalted butter: The foundation of every great brownie. Use for richness and moisture. If you’re in a pinch, you can substitute with margarine or coconut oil, but the flavor will differ slightly.
-
2 cups granulated sugar: Sweetness is key! This balances the richness of the butter and chocolate. If you prefer, you could use brown sugar for a deeper molasses flavor.
-
4 large eggs: Eggs add structure and richness. If you’re looking for an egg-free version, you can use flaxseed meal (1 tablespoon mixed with 2.5 tablespoons of water per egg) or applesauce.
-
1 teaspoon vanilla extract: The aromatic boost that brings everything together. You can use almond extract for a twist or even a dash of espresso for depth.
-
1 cup all-purpose flour: This gives the brownies a chewy texture. Gluten-free flour blends work great as a substitute for a gluten-free version.
-
1 cup unsweetened cocoa powder: The star ingredient for that rich chocolate flavor! Dutch-processed cocoa will give a more robust chocolate taste, while natural cocoa powder will make it lighter.
-
1 teaspoon baking powder: It helps the brownies rise and get fluffy. If you’re out, replace it with baking soda, though the texture may vary slightly.
-
1/2 teaspoon salt: Enhances the sweetness and balances the flavors. Don’t skip this one!
-
1 cup white chocolate chips: For the mummy’s bandages. If you’d like a dairy-free version, sub with dairy-free white chocolate or melted coconut butter.
-
Candy eyes: These tiny decorations bring the mummies to life! You can use any edible eyeball candy or chocolate chips for a simpler version.
Gather these pantry staples, and let’s create some spooky magic!
Step-by-Step Instructions
-
Preheat the Oven: Start by preheating your oven to 350°F (175°C). This is a crucial step because the brownies need to bake evenly. While the oven warms up, I like to line a 9×13-inch baking pan with parchment paper, leaving some overhang. This makes it super easy to lift the brownies out later!
-
Melt the Butter: In a microwave-safe bowl, melt the unsalted butter until it’s just melted but not boiling. A good tip here is to microwave it in short bursts of 30 seconds to prevent it from splattering everywhere. You want it smooth and silken!
-
Mix the Sugars: In a large mixing bowl, combine the melted butter with granulated sugar. Whisk until it’s light and fluffy. This step is essential for incorporation and will help create that lovely, chewy brownie texture!
-
Add Eggs and Vanilla: Next, whisk in the eggs one at a time, ensuring each is fully incorporated before adding the next. Don’t forget the vanilla extract! This adds a wonderful aroma and flavor.
-
Combine Dry Ingredients: In another bowl, sift together the flour, cocoa powder, baking powder, and salt. This sifting step is often overlooked, but it helps prevent clumps of cocoa and ensures that your brownies have a smooth consistency.
-
Combine Wet and Dry Mixtures: Gradually fold the dry ingredients into the wet ingredients using a spatula. Be gentle here—overmixing can lead to dense brownies! Just mix until no more dry flour is visible.
-
Add Delicious Bits: At this point, feel free to fold in chocolate chips or nuts if you want to add a little extra texture. But since we’re going for a mummy look, let’s keep it simple!
-
Bake: Pour the brownie batter into your prepared baking pan and spread evenly. Bake in the preheated oven for about 25-30 minutes. Keep an eye on them; you want the edges set while the center is still slightly fudgy. A toothpick should come out with a few moist crumbs.
-
Cool and Cut: Once those brownies are out of the oven, let them cool in the pan for about 10 minutes. Carefully lift them out (using the parchment paper) and allow them to cool completely on a wire rack before cutting them into squares.
-
Decorate Your Mummies: Now for the fun part! In a microwave-safe bowl, melt the white chocolate chips until smooth. Drizzle the melted chocolate over each brownie to create “bandages.” Place two candy eyes on each brownie, and voila! You’ve assembled your adorable mummy brownies!
Serving Suggestions
These Mummy Brownies are perfect for any Halloween gathering! To create a spooktacular presentation, you might consider serving them on a rustic wooden board with other Halloween-themed treats like pumpkin spice cupcakes or ghostly marshmallow pops. You could also sprinkle some edible glitter or serve them alongside a scoop of vanilla ice cream for a deliciously witchy dessert!
Recipe Variations
Feeling adventurous? Here are a few variations you can try to personalize your Mummy Brownies:
-
Chocolate Mint Mummies: Add a few drops of peppermint extract to the brownie batter for a refreshing twist. Top with crushed mint chocolate candies instead of eyes for a festive touch.
-
Nutty Brownies: Add 1/2 cup of chopped nuts (like walnuts or pecans) to the batter for extra crunch and richness. Make sure to adjust your brownie structure slightly with a touch more flour if needed.
-
Pumpkin Spice Mummies: Substituting half of the cocoa powder with pumpkin puree (not the spiced kind) can give a delicious pumpkin flavor while still keeping the chocolatey essence. Add 1 teaspoon of pumpkin spice, and that’s a seasonal winner!
-
Caramel Stuffed: Place small dollops of caramel sauce on top of the brownie batter before baking for gooey surprises in every bite!
-
Peanut Butter Swirl: Drizzle peanut butter on top of the brownie before baking and use a knife to create a beautiful swirl. This classic combo will transport you straight to dessert heaven!
Chef’s Notes
With every recipe I share, I find that there’s a story evolving from my initial attempts. The Mummy Brownies have been a hit at countless family gatherings, evolving from simple chocolate treats to an annual tradition. One year, while making these, I accidentally mixed up my baking soda for salt! But instead of tossing them out, we tasted them and found they added a strangely delightful flavor! It just goes to show that the kitchen is often a place for happy accidents.
So, don’t stress if things don’t go according to plan; embrace the creativity and spontaneity of cooking! Each batch of Mummy Brownies has a little piece of love and laughter embedded in them, and now it’s your turn to add your unique touch!
FAQs and Troubleshooting
Q: My brownies turned out cakey instead of fudgy. What happened?
A: If your brownies are cakey, it might be due to overmixing the batter or baking them too long. Try to fold just until the dry ingredients disappear and keep a close watch while they bake.
Q: How do I store leftover brownies?
A: Store them in an airtight container at room temperature for up to 3 days or in the fridge for up to a week. You can also freeze individual servings wrapped in plastic wrap for a quick treat later!
Q: Can I use a different type of chocolate?
A: Of course! While the original recipe calls for unsweetened cocoa powder and white chocolate for decoration, feel free to experiment with dark chocolate or milk chocolate according to your taste preferences.
Q: What can I do if I don’t have candy eyes?
A: No worries! You can make “eyes” with small chocolate chips, mini marshmallows, or even use icing to draw pupils on a white chocolate base. The charm is all in the creativity!
Nutritional Info
If you’re curious about the nutritional info, a standard serving of these Mummy Brownies (one brownie) roughly has:
- Calories: 180
- Total Fat: 9g
- Saturated Fat: 5g
- Cholesterol: 40mg
- Sodium: 100mg
- Total Carbohydrates: 24g
- Dietary Fiber: 1g
- Sugars: 15g
- Protein: 2g
(Please note that these values can vary based on specific brands and ingredient variations!)
So there you have it! A fun, festive, and foolproof recipe for Mummy Brownies that will delight both young and old this Halloween season. Remember, cooking is about creating memories, so let your personality shine through each step. Enjoy baking, and don’t forget to have fun—after all, that’s what it’s all about in my cozy little kitchen! Happy haunting!
Print
Mummy Brownies
- Total Time: 50 minutes
- Yield: 12 servings 1x
- Diet: Vegetarian
Description
Delightfully spooky Mummy Brownies perfect for Halloween gatherings, combining rich chocolatey flavor with festive decoration.
Ingredients
- 1 cup unsalted butter
- 2 cups granulated sugar
- 4 large eggs
- 1 teaspoon vanilla extract
- 1 cup all-purpose flour
- 1 cup unsweetened cocoa powder
- 1 teaspoon baking powder
- 1/2 teaspoon salt
- 1 cup white chocolate chips
- Candy eyes for decoration
Instructions
- Preheat the oven to 350°F (175°C) and line a 9×13-inch baking pan with parchment paper.
- Melt the unsalted butter in a microwave-safe bowl until just melted.
- Mix the melted butter with granulated sugar until light and fluffy.
- Add eggs one at a time, mixing in vanilla extract.
- Combine flour, cocoa powder, baking powder, and salt in another bowl.
- Fold the dry ingredients into the wet ingredients gently until no dry flour is visible.
- Pour the brownie batter into the prepared baking pan and spread evenly.
- Bake for 25-30 minutes until edges are set and center is slightly fudgy.
- Cool in the pan for 10 minutes, then lift out and allow to cool completely on a wire rack.
- Decorate with melted white chocolate chips to create “bandages” and place two candy eyes on each brownie.
Notes
Store leftover brownies in an airtight container at room temperature for up to 3 days or in the fridge for up to a week.
- Prep Time: 20 minutes
- Cook Time: 30 minutes
- Category: Dessert
- Method: Baking
- Cuisine: American
Nutrition
- Serving Size: 1 brownie
- Calories: 180
- Sugar: 15g
- Sodium: 100mg
- Fat: 9g
- Saturated Fat: 5g
- Unsaturated Fat: 4g
- Trans Fat: 0g
- Carbohydrates: 24g
- Fiber: 1g
- Protein: 2g
- Cholesterol: 40mg
Keywords: Mummy Brownies, Halloween treats, chocolate brownies, festive desserts
Minute No-Bake Halloween Treats for Busy Families
Easy No-Bake Halloween Treats
Welcome to my kitchen, fellow food lovers! I’m thrilled you’re here, especially as we dive into the delightful world of Halloween treats that require absolutely no baking. That’s right! With just some simple ingredients and a sprinkle of creativity, we’ll whip up spooky, sweet delights perfect for any Halloween gathering or cozy night in.
As the leaves begin to fall and the air turns crisp, I can’t help but feel excited about all the festive possibilities this season brings. There’s something so magical about Halloween—the costumes, the decorations, the hauntingly fun parties—and of course, the treat-making! It’s the one time of year when indulgence is not just appreciated, but expected. Whether you’re planning a party, treating your little ghouls and goblins, or simply looking to satisfy your own sweet tooth, these easy no-bake treats will be the star of the show.
Join me as we create some treats that will not only impress your friends but also be a blast to make. Let’s roll up our sleeves, don those aprons (messy ones are the best!), and get ready for some kitchen fun!
A Personal Halloween Tale
One Halloween, I vividly recall a night spent with my childhood best friend, Emma. Armed with a handful of colorful sprinkles and an assortment of chocolate, we decided to create our own concoctions for our classmates. After sneaking pieces of candy from our trick-or-treat bags, we huddled over the kitchen counter, giggling, mixing, and crafting what we thought were the ultimate Halloween treats.
We melted chocolate (which we promptly dropped on the floor—oops!), layered gummy worms, and even tried to create spooky faces with candy corn. The end result? A chaotic, colorful assortment that looked like a Halloween explosion. While my mom may have needed to clean the kitchen afterward, our concoctions were a hit! Even now, thinking back on that night fills me with warmth and nostalgia. It’s this feeling I want to share with you through easy, no-bake Halloween recipes. Let’s create some wonderful memories, just like Emma and I did!
Ingredients
Let’s gather our Halloween spirit and get our ingredients ready! Here’s what you’ll need for our fabulous easy no-bake treats:
-
Chocolate Chips (1 cup): Perfect for melting and drizzling. You can use semi-sweet or milk chocolate depending on your preference. If you’re looking for a healthier option, dark chocolate works great too!
-
Cereal (3 cups): A classic base for our treats. Crisped rice or corn flakes are popular choices, but feel free to substitute with gluten-free cereal if needed.
-
Peanut Butter (1/2 cup): Creamy or crunchy works! If allergies are a concern, almond butter or sunflower seed butter are fantastic alternatives that still add that nutty goodness.
-
Marshmallows (2 cups): Mini marshmallows are perfect for adding a chewy texture. If you want to go vegan, check out plant-based marshmallows.
-
Sprinkles (1/2 cup): For decoration! Use Halloween-themed sprinkles or any colorful mix you fancy. Swap with nuts or dried fruit for a healthier twist.
-
Candy Corn (for topping): Classic and iconic, candy corn screams Halloween! If you’re not a fan, consider gummy worms or chocolate-covered raisins instead.
-
Vanilla Extract (1 tsp): This will add depth to our flavors. Replace it with almond extract for an interesting twist.
Now that we have our ingredients, let’s get that spooky creativity flowing!
Step-by-Step Instructions
Step 1: Prepare Your Workspace
First things first! Clean and set up your kitchen counter or workspace. Lay out the parchment paper where we’ll form our treats. I like to have all ingredients within reach—it makes the process smoother and way more enjoyable.
Step 2: Melt the Chocolate
In a microwave-safe bowl, add your chocolate chips. Heat them in 30-second intervals, stirring in between, until they are completely melted and smooth. (This is the time to sneak a taste. I won’t tell!)
Step 3: Mix in Peanut Butter
Once the chocolate is melted, stir in the peanut butter until well combined. The mixture should become glossy and irresistible. If you like a bit of crunch, add some crushed nuts at this stage—they give an amazing texture!
Step 4: Add Cereal and Marshmallows
Gently fold in your cereal and marshmallows, ensuring everything is coated in that beautiful chocolate-peanut butter mixture. This is where it gets fun—seeing how it all comes together!
Step 5: Shape the Treats
Using a spatula (or your hands, if you’re feeling adventurous), scoop out portions of the mixture and form them into small bars or clusters on your parchment-covered surface. Don’t worry about making them perfect; the delightful irregular shapes add character!
Step 6: Decorate
Here comes the fun part! Before the mixture sets, add sprinkles on top of each treat. Get creative—use candy corn, gummy worms, or whatever you like. Make it festive and fun!
Step 7: Chill and Set
Place your tray in the refrigerator for about 30 minutes to let everything set properly. While you wait, you can clean up your workspace, or sneak another taste of those melted chocolate remnants!
Step 8: Serve
Once set, take them out of the fridge and cut or break them into pieces. These treats are great served on a colorful platter for a Halloween party or wrapped in cellophane for handouts.
Serving Suggestions
To serve your delightful no-bake Halloween treats, place them on a spooky-themed platter adorned with faux cobwebs or miniature pumpkins for that extra flair. You can also package them up in cellophane bags tied with colorful ribbons for a charming gift. Trust me, these will be the treats everyone remembers!
Recipe Variations
Feeling adventurous? Here are some creative spins on our basic no-bake treats:
-
Pumpkin Spice Treats: Add a teaspoon of pumpkin spice to the chocolate-peanut butter mixture for a seasonal twist.
-
S’mores Bars: Swap out the cereal for crushed graham crackers and add mini marshmallows for a campfire-inspired treat.
-
Nut-Free Delight: Replace peanut butter with sunflower seed butter and use dairy-free chocolate for an allergen-friendly option.
-
Crispy Caramel Treats: Drizzle caramel sauce over your formed bars for an extra layer of sweetness.
-
Vegan Halloween Treats: Use dark chocolate, coconut cream, and nut butter to make a completely vegan-friendly version.
Chef’s Notes
These no-bake Halloween treats have evolved from that messy kitchen night with Emma into a favorite family tradition. Over the years, I’ve played with flavors, textures, and decorations. One year, I poured extra melted chocolate over the top and sprinkled crushed pretzels for a sweet-and-salty combo!
I’ll never forget the laughter that fills the kitchen when I make these with my own kids. They have their own quirky ideas of how to decorate, and it’s such a joy to see their creativity blossom. It’s recipes like this—simple, adaptable, and fun—that create lasting memories.
FAQs and Troubleshooting
1. Why are my treats falling apart?
If your treats are crumbling, it’s likely that the mixture wasn’t pressed together tightly enough. Next time, try compressing it more firmly into your chosen shape.
2. How do I store these treats?
Store them in an airtight container at room temperature for up to a week. If you live in a particularly warm area, keeping them in the fridge might be a good idea to keep the chocolate from melting.
3. What can I use instead of chocolate chips?
You can use white chocolate, carob chips, or even yogurt-covered raisins for a different flavor profile!
4. Are these treats gluten-free?
Yes, as long as you use gluten-free cereal, these treats can easily cater to gluten-sensitive diets. Always check the labels to be sure!
Nutritional Info (Optional)
While I’ve focused on the fun and creativity behind these treats, it’s always good to be mindful of indulgence. Each treat, depending on size, can range around 150 calories but provides a delightful combo of textures and flavors that make the occasional treat totally worth it.
So there you have it: Easy no-bake Halloween treats that are sure to bring a smile to anyone who tries them. Grab your ingredients, get ready to unleash your creativity, and most importantly, enjoy the process! Happy Halloween, and may your kitchen always be filled with love and laughter.
Print
Easy No-Bake Halloween Treats
- Total Time: 45 minutes
- Yield: 12 servings 1x
- Diet: Vegetarian
Description
Delightful no-bake Halloween treats perfect for any gathering, made with simple ingredients and a sprinkle of creativity.
Ingredients
- 1 cup Chocolate Chips
- 3 cups Cereal (Crisped rice or corn flakes)
- 1/2 cup Peanut Butter
- 2 cups Mini Marshmallows
- 1/2 cup Sprinkles (Halloween-themed)
- Candy Corn (for topping)
- 1 tsp Vanilla Extract
Instructions
- Prepare Your Workspace: Clean and set up your counter with parchment paper.
- Melt the Chocolate: Heat chocolate chips in intervals until melted.
- Mix in Peanut Butter: Stir until glossy and well combined.
- Add Cereal and Marshmallows: Fold in until coated.
- Shape the Treats: Scoop and form into small bars or clusters.
- Decorate: Add sprinkles and toppings before setting.
- Chill and Set: Refrigerate for about 30 minutes.
- Serve: Cut into pieces and present on a festive platter.
Notes
Store in an airtight container for up to a week. Can be made gluten-free with the right cereal.
- Prep Time: 15 minutes
- Cook Time: 0 minutes
- Category: Dessert
- Method: No-Bake
- Cuisine: American
Nutrition
- Serving Size: 1 piece
- Calories: 150
- Sugar: 20g
- Sodium: 75mg
- Fat: 8g
- Saturated Fat: 3g
- Unsaturated Fat: 5g
- Trans Fat: 0g
- Carbohydrates: 14g
- Fiber: 1g
- Protein: 2g
- Cholesterol: 0mg
Keywords: Halloween treats, no-bake dessert, easy recipes, festive snacks

Spooky Halloween Desserts for Quick Party Prep Ideas
75 Best Halloween Desserts: A Spooktacular Guide to Sweet Treats
Welcome to my kitchen, my fellow food lovers! I’m Olivia Bennett, your enthusiastic guide to everything cozy, delicious, and a bit spooky this Halloween season. If you’re like me, the crisp autumn air and the scent of cinnamon and nutmeg signal it’s time for some fun in the kitchen. Halloween is not just about costumes and trick-or-treating; it’s a fantastic occasion for whipping up some delightful desserts that will impress friends and family, and create sweet memories that will last a lifetime.
In today’s blog post, we’re diving into a treasure trove of 75 Halloween desserts that are fun to make, stunning to look at, and absolutely delectable to taste! Whether you’re hosting a haunted gathering, heading to a costume party, or just looking to bring some festive cheer to your kitchen, I’ve got homemade treats that are sure to be the highlight of the season.
Personal Story
Growing up, Halloween was always my favorite time of the year, and it wasn’t just about the candy. I have vivid memories of my mom and I spending the weekend before Halloween in our cozy kitchen. We’d put on our favorite fall music, roll up our sleeves, and dive into an array of spooky baking projects. One year, we decided to create our very own pumpkin patch with cake pops that looked like little pumpkins, complete with green frosting tendrils. Each tiny creation came with its own charm, and the kitchen was filled with laughter and the kind of sweet scent only freshly baked goods can bring.
That experience laid the foundation for my love of seasonal baking. Today, nothing excites me more than sharing spooky treats that will brighten your gathering or create a little magic in your home. Trust me; your friends will be talking about these sweets long after the last piece has been devoured!
Ingredients
Before we roll up our sleeves and get baking, let’s gather the staples you’ll need for these spooky desserts. While we’ll touch on some specific treats, here’s a handy list of common ingredients you’ll find across many Halloween delights:
- All-Purpose Flour: The backbone of most sweets. You can substitute with a gluten-free blend if needed.
- Granulated Sugar: This sweetener is used in nearly every dessert. For a darker flavor, consider using brown sugar.
- Eggs: They provide structure and moisture. If you’re baking vegan treats, applesauce or flaxseed meal can work as substitutes.
- Butter: This adds richness and creaminess. Try using coconut oil for a dairy-free option.
- Baking Powder and Baking Soda: These leavening agents help our sweets rise.
- Vanilla Extract: Always a great flavor enhancer! You can also use almond extract for a different twist.
- Cocoa Powder: Essential for chocolatey treats. If you’re looking for extra depth, try using Dutch-processed cocoa.
- Pumpkin Puree: The star of many autumn recipes—great for flavor and moisture!
- Candy Corn, Sprinkles, or Edible Glitter: For that Halloween flair. They’re also perfect for decorating!
Each ingredient plays a vital role in creating the sweet masterpieces we’ll whip up. Remember, experimenting can lead to some of the best flavors—don’t hesitate to get creative and swap ingredients based on your taste and dietary needs.
Step-by-Step Instructions
Now that we’ve gathered our ingredients, let’s dig into making some fabulous Halloween desserts! Here’s how to whip up my crowd-pleasing Pumpkin Spice Cupcakes (one of many fantastic options among our 75 treats):
1. Preheat the Oven
- Preheat your oven to 350°F (175°C). This ensures a perfectly baked cupcake. Remember, a hot oven helps in achieving that coveted dome shape!
2. Prepare the Pan
- Line a cupcake pan with fun Halloween-themed liners. You can’t have Halloween without themed decorations, right? If you don’t have liners, just grease the pan well!
3. Mix the Dry Ingredients
- In a large bowl, whisk together 1 ½ cups of all-purpose flour, 1 cup of granulated sugar, 1 tsp of baking powder, ½ tsp of baking soda, ½ tsp of salt, and 1 tbsp of pumpkin pie spice. This blend will create a flavorful base for your cupcakes.
4. Combine the Wet Ingredients
- In another bowl, whisk together ½ cup of melted butter, 2 large eggs, and 1 cup of pumpkin puree. Tip: use room temperature eggs to ensure a smoother batter!
5. Mix It All Together
- Gradually add your wet ingredients to the dry mixture. Stir until just combined. Overmixing can lead to dense cupcakes—nobody wants that!
6. Fill the Liners
- Fill each cupcake liner about ¾ full with the batter. Use a cookie scoop for even portions and less mess!
7. Bake
- Pop the pan in the preheated oven and bake for 18-20 minutes, or until you can poke a toothpick in the center and it comes out clean. Let them cool in the pan for a few minutes before transferring them to a wire rack. Pro Tip: The aroma will be irresistible—try not to eat them all!
8. Decorate
- Once cooled, top your cupcakes with cream cheese frosting (and maybe a sprinkle of orange and black sprinkles for that Halloween flair). You can even pipe little pumpkin faces on them—get creative!
This recipe is a delightful representation of the many charming desserts you can make during the spooky season. The process is simple and allows for creativity and joy, much like my childhood baking adventures.
Serving Suggestions
When serving your Halloween desserts, presentation is everything! Arrange your cupcakes on a spooky platter, and feel free to add little decorations like plastic spiders or faux cobwebs. Beautifully decorated cupcakes deserve to be on full display, making them the centerpiece of your Halloween table.
Recipe Variations
- Gingerbread Cookies: Switch it up with a gingerbread cookie recipe, perfect for spooky decor.
- Spooky Brownies: Top brownies with green buttercream skulls for a ghoulish twist.
- Ghost Meringues: Use egg whites and sugar to whip up light and airy ghost-shaped meringues.
- Witch Hat Cupcakes: Place a cookie on top of a frosted cupcake to resemble a witch’s hat!
- Vegan Pumpkin Bars: Swap ingredients for a vegan-friendly version using almond milk and flax eggs.
Chef’s Notes
The beauty of Halloween desserts is their versatility! I remember one year, a friend brought over her take on spider web cookies using melted chocolate and a bit of white frosting. We had a blast creating our spooky masterpieces, and it sparked endless fun ideas for our next baking sessions. Halloween is the perfect excuse to let your imagination run wild, and what better way to do that than by baking together?
FAQs and Troubleshooting
1. My cupcakes didn’t rise. What happened?
- This can happen if your baking soda or powder is old. Always check the freshness before using, and remember to preheat your oven!
2. How do I store my Halloween desserts?
- Keep them in an airtight container at room temperature for about 2-3 days or refrigerate for longer freshness.
3. Can I freeze these desserts?
- Absolutely! Most treats can be frozen. Just make sure they’re in an airtight container or freezer bag. They’ll be great for last-minute festivities.
4. What if I overmix my batter?
- Don’t worry too much—while it may be denser than intended, it’ll still taste delightful! Next time, just mix until combined.
Nutritional Info (Optional)
If you’re looking for nutritional information, here’s a quick reference for our Pumpkin Spice Cupcakes (per cupcake):
- Calories: 200
- Fat: 8g
- Carbohydrates: 30g
- Protein: 2g
(Note: Nutritional values can vary based on specific ingredients used and portion sizes.)
So there you have it, a spooktacular guide to making delightful Halloween desserts! I hope you feel inspired to dive into your kitchen this season. Remember, the best part about baking is not only the treats you’ll create but the memories you’ll make along the way. Happy Halloween baking!
Print
Pumpkin Spice Cupcakes
- Total Time: 35 minutes
- Yield: 12 servings 1x
- Diet: Vegetarian
Description
Deliciously spiced pumpkin cupcakes, perfect for Halloween festivities.
Ingredients
- 1 ½ cups all-purpose flour
- 1 cup granulated sugar
- 1 tsp baking powder
- ½ tsp baking soda
- ½ tsp salt
- 1 tbsp pumpkin pie spice
- ½ cup melted butter
- 2 large eggs
- 1 cup pumpkin puree
- Cream cheese frosting
- Orange and black sprinkles (for decoration)
Instructions
- Preheat the oven to 350°F (175°C).
- Prepare the pan by lining it with Halloween-themed cupcake liners.
- Mix the dry ingredients in a large bowl: flour, sugar, baking powder, baking soda, salt, and pumpkin pie spice.
- Combine the wet ingredients in another bowl: melted butter, eggs, and pumpkin puree.
- Mix the wet ingredients into the dry ingredients until just combined.
- Fill each cupcake liner about ¾ full with batter.
- Bake for 18-20 minutes, until a toothpick comes out clean.
- Decorate the cooled cupcakes with cream cheese frosting and sprinkles.
Notes
Feel free to get creative with decorations and flavors! Consider adding different types of frosting or toppings.
- Prep Time: 15 minutes
- Cook Time: 20 minutes
- Category: Dessert
- Method: Baking
- Cuisine: American
Nutrition
- Serving Size: 1 cupcake
- Calories: 200
- Sugar: 12g
- Sodium: 200mg
- Fat: 8g
- Saturated Fat: 5g
- Unsaturated Fat: 3g
- Trans Fat: 0g
- Carbohydrates: 30g
- Fiber: 1g
- Protein: 2g
- Cholesterol: 30mg
Keywords: Halloween, cupcakes, pumpkin spice, dessert, festive baking
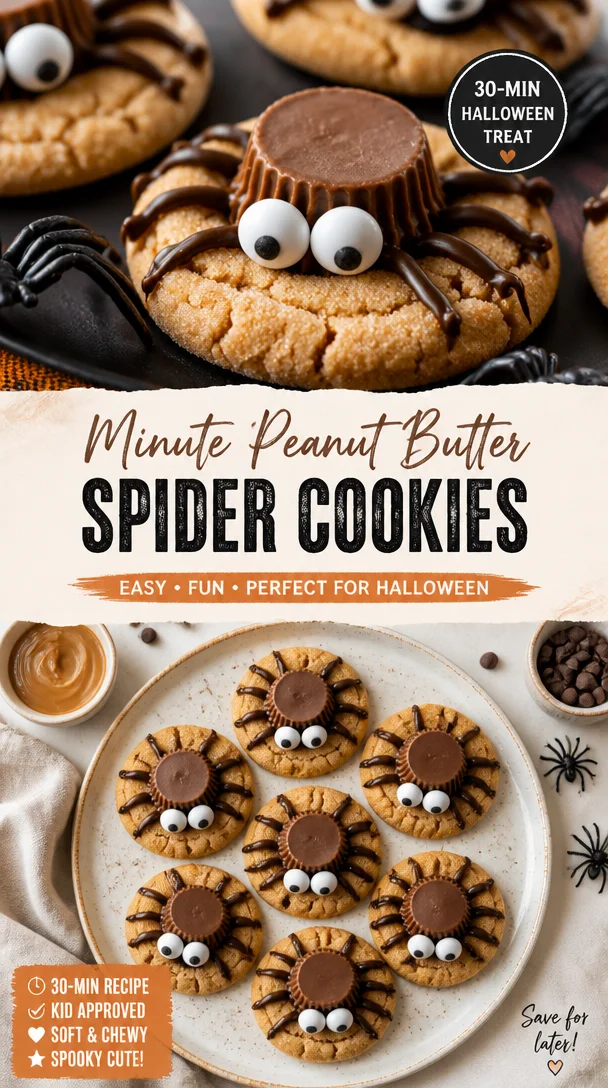
Minute Peanut Butter Spider Cookies for Halloween Treats
Peanut Butter Spider Cookies: A Spooktacular Delight
Welcome back to my kitchen, friends! Today, we’re diving into a recipe that’s perfect for Halloween gatherings or anytime you want to add a touch of whimsy to your baking. Picture this: soft, chewy peanut butter cookies adorned with chocolate “spiders” that are as cute as they are delicious. These Peanut Butter Spider Cookies are sure to bring a smile to your face—whether you’re a kid, or just a kid at heart!
What I love about these cookies is their nostalgia. Growing up, Halloween was a big deal in our household. My family’s kitchen transformed into a bakery of sorts, filled with the delicious aromas of spices, sugar, and, of course, peanut butter! We would whip up all sorts of treats to share with friends and neighbors. One of my fondest memories is of my mom and me spending the afternoon shaping dough and crafting the cutest little spider cookies, complete with chocolate legs sticking out. It was an activity filled with laughter, a bit of mess, and a lot of love.
Baking these cookies is not just about satisfying your sweet tooth; it’s about sharing joy and creativity. So roll your sleeves up and grab that apron—it’s time to create something wonderful!
Personal Story
One Halloween afternoon, my mom and I set out to create the most epic dessert for our neighborhood party. We had the typical classics lined up: pumpkin pies, caramel apples, and of course, peanut butter cookies, because, well, they were my favorite! While we were making our plans, I caught a glimpse of a quirky recipe in an old magazine featuring spider cookies. My mom’s eyes lit up, and just like that, we decided to transform our usual peanut butter cookies into something special.
I remember us laughing as we formed the cookies into spider shapes, adding eight chocolate legs made from chocolate-covered pretzels. As they cooled, we giggled about how they might scare some little goblins at the party! The moment of delight on our neighbors’ faces when they saw our "creepy" creations made all the chaos of the kitchen worthwhile. That year, our spooky cookies became a neighborhood hit, and I’ve been making them every Halloween since.
Ingredients
Here’s what you’ll need to whip up these Peanut Butter Spider Cookies:
-
1 cup creamy peanut butter: The star of the show! Creamy peanut butter gives a smooth texture and rich flavor. If you’re feeling adventurous, swap it for crunchy peanut butter for a bit of extra texture.
-
1 cup granulated sugar: Sweetness is essential to balance the saltiness of the peanut butter. You can also use coconut sugar for a deeper flavor if you’re looking for a healthier twist!
-
1 egg: This binds everything together. In case of an egg allergy, you can use a flaxseed egg (1 tablespoon ground flaxseed mixed with 2.5 tablespoons water) as a substitute.
-
1 teaspoon vanilla extract: This lovely ingredient enhances the flavor of our cookies. Choose pure vanilla extract for a more authentic taste.
-
1 teaspoon baking powder: This little agent is what makes our cookies puff up beautifully in the oven. Baking soda can be used instead, but you may need to adjust the amounts slightly.
-
Chocolate-covered pretzels: These are our "spider legs," combining a delightful crunch with chocolatey sweetness. You can use chocolate malt balls or even cookie dough bites if you want to mix it up!
-
Chocolate chips or M&M’s for the spiders’ bodies: Feel free to get creative! Dark chocolate chips add a rich flavor, while M&Ms come in all those vibrant colors—perfect for Halloween fun!
Step-by-Step Instructions
Let’s dive into the delicious process of creating these fantastic cookies.
Step 1: Preheat the Oven
Preheat your oven to 350°F (175°C). Preheating properly helps the cookies cook evenly. Set a timer for a quick ten minutes once you start mixing things up!
Step 2: Mix the Peanut Butter and Sugar
In a large mixing bowl, combine the peanut butter and granulated sugar. Use a hand mixer or a sturdy wooden spoon to blend them until smooth and fluffy. This step is crucial; the more air you incorporate, the softer and tender the cookies will be!
Step 3: Add the Egg and Vanilla
Crack in the egg and pour in the vanilla extract. Mix until everything is well combined. At this point, take a moment to smell that divine peanut buttery goodness—it’s one of the highlights of cooking, wouldn’t you agree?
Step 4: In with the Dry Ingredients
Now, gently fold in the baking powder. If you’re using any optional ingredients, this is the time to introduce them, like a sprinkle of cinnamon or nutmeg for an extra flavor kick!
Step 5: Scoop the Dough
Using a cookie scoop or a tablespoon, scoop out equal portions of dough onto a lined baking sheet. Make sure they’re spaced about 2 inches apart, as they will spread while baking.
Step 6: Bake
Pop your tray in the preheated oven and bake for about 8-10 minutes. Watch closely! You want them to be slightly underbaked as they will continue to firm up as they cool. Once done, remove them from the oven and let them sit on the tray for 5 minutes before transferring them onto a cooling rack.
Step 7: Create the Spiders
Once the cookies have cooled, it’s time for the fun part! Place two chocolate-covered pretzels on each cookie for legs. Then, top each spider with a chocolate chip or M&M for its body. Get creative with their positioning—they can be whimsical or a bit spooky!
Step 8: Enjoy!
Gather your family or friends around and share these delicious treats! You might want to snap a few pictures first; these little creatures are Instagram-ready!
Serving Suggestions
To serve these delightful cookies, place them on a festive platter lined with parchment paper for a charming touch. For an extra whimsical effect, use a Halloween-themed tablecloth and serve them alongside pumpkin spice lattes or a warm glass of apple cider. Your friends will be talking about these cookies long after the last bite is gone!
Recipe Variations
Here are some creative twists you can try with your Peanut Butter Spider Cookies:
- Pumpkin Spice Variation: Add a teaspoon of pumpkin pie spice to the cookie dough for a fall-inspired flavor.
- Nut Allergies: Swap out the peanut butter for sun butter (made from sunflower seeds) for a nut-free version.
- Vegan Version: Use a flaxseed egg in place of the egg, and for a vegan-friendly chocolate option, search for dairy-free chocolate chips.
- Add-Ins: Toss in some chopped nuts or shredded coconut to the dough before baking for added elements of surprise.
Chef’s Notes
These Peanut Butter Spider Cookies have a special place in my heart. Over the years, I’ve experimented with flavors, occasionally swapping out ingredients based on what I had in my pantry. I once added crushed Oreos to the mix—it created a deliciously unique texture that everyone loved! Ultimately, these cookies became a tradition that sparked creativity and brought joy to our table.
And, oh! Speaking of chaos, let me tell you about the time I accidentally grabbed the salt instead of the sugar. Let’s just say that batch did not make it to the neighborhood party! Now I triple-check everything.
FAQs and Troubleshooting
1. My cookies turned out too flat! How can I prevent that?
This can happen if your dough is too warm or if you didn’t add enough flour. Ensure your butter and peanut butter are at room temperature, and chill the dough for 30 minutes before baking.
2. How should I store my peanut butter spider cookies?
Keep them in an airtight container at room temperature for up to a week. If you want to freeze them, layer them between parchment in a container and freeze for up to three months.
3. Can I use natural peanut butter?
Yes, but be cautious! Natural peanut butter is often less sweet and can affect the texture of the cookies. You might need to adjust the sugar or add a bit more flour to get the desired consistency.
4. How do I make these cookies gluten-free?
Simply replace all-purpose flour with a gluten-free flour mix that has a binding agent, like almond or coconut flour!
With these tips, you’re all set for a successful batch of Peanut Butter Spider Cookies!
Now that you have all the details, invite your friends over and create some unforgettable kitchen magic! Happy baking!
Print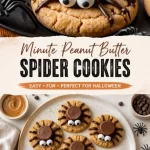
Peanut Butter Spider Cookies
- Total Time: 25 minutes
- Yield: 24 cookies 1x
- Diet: Vegetarian
Description
Soft, chewy peanut butter cookies adorned with chocolate “spiders” that add a whimsical touch to your Halloween gatherings.
Ingredients
- 1 cup creamy peanut butter
- 1 cup granulated sugar
- 1 egg
- 1 teaspoon vanilla extract
- 1 teaspoon baking powder
- Chocolate-covered pretzels
- Chocolate chips or M&Ms
Instructions
- Preheat your oven to 350°F (175°C).
- Mix the peanut butter and granulated sugar in a large mixing bowl until smooth and fluffy.
- Add the egg and vanilla extract, mixing until well combined.
- Fold in the baking powder and any optional ingredients like cinnamon or nutmeg.
- Scoop equal portions of dough onto a lined baking sheet, spaced about 2 inches apart.
- Bake for 8-10 minutes until slightly underbaked, then let cool for 5 minutes on the tray before transferring to a cooling rack.
- Create spiders by placing two chocolate-covered pretzels on each cookie and topping with a chocolate chip or M&M.
- Enjoy! Share these delightful treats with family and friends!
Notes
For variations, try adding pumpkin pie spice for fall flavor, or swap peanut butter for sun butter for nut-free cookies.
- Prep Time: 15 minutes
- Cook Time: 10 minutes
- Category: Dessert
- Method: Baking
- Cuisine: American
Nutrition
- Serving Size: 1 cookie
- Calories: 180
- Sugar: 10g
- Sodium: 50mg
- Fat: 8g
- Saturated Fat: 1g
- Unsaturated Fat: 5g
- Trans Fat: 0g
- Carbohydrates: 24g
- Fiber: 1g
- Protein: 3g
- Cholesterol: 20mg
Keywords: Halloween cookies, peanut butter cookies, spider cookies, festive baking
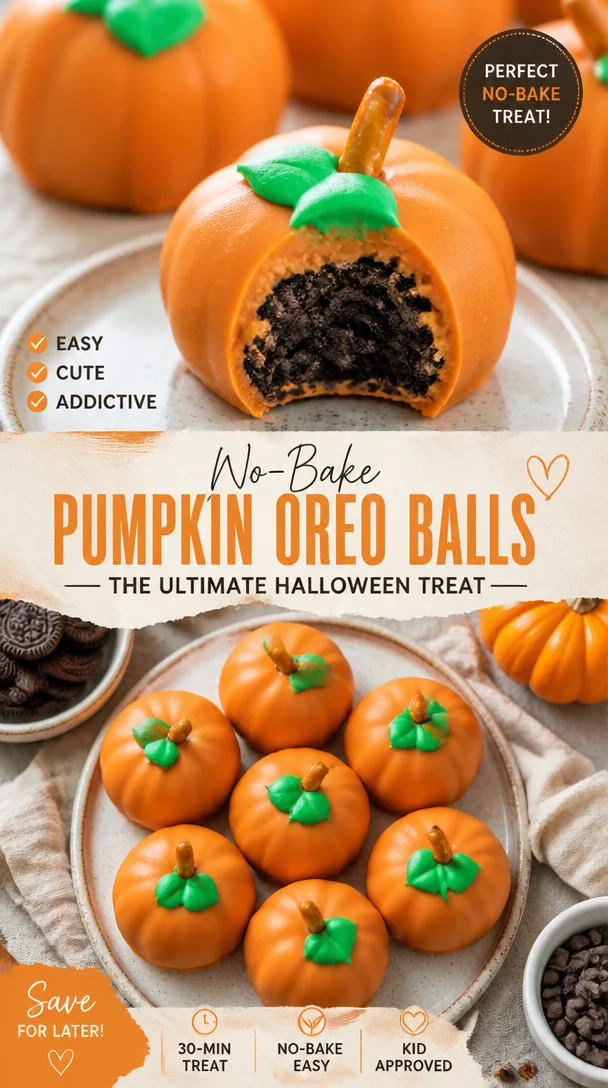
Ingredient No-Bake Pumpkin Oreo Balls for Halloween
No-Bake Pumpkin Shaped Oreo Balls: A Cozy Halloween Treat
Welcome to my kitchen! It’s that magical time of year when the leaves turn golden, the air turns crisp, and every corner of the world is filled with the pumpkin-spiced goodness that makes our hearts sing. Today, I’m sharing a delightfully easy and mouthwatering recipe for No-Bake Pumpkin Shaped Oreo Balls that will elevate your fall festivities. Whether you’re throwing a Halloween party, looking for a cozy treat to enjoy with a warm cup of cider, or simply indulging your sweet tooth, these adorable pumpkin creations are a must-try.
I don’t know about you, but there’s something special about treats that come together without the need for an oven. This recipe is not only a breeze to whip up but can also be a fun activity to share with friends or the little ones in your life. Imagine rolling those Oreo balls and shaping them into little pumpkins—it’s as delightful as it sounds!
So, grab your favorite apron, cue the upbeat music, and let’s get started on this pumpkin-shaped adventure!
A Sweet Memory with a Twist
Growing up, my family made baking a weekend tradition. I can vividly remember the warmth of the kitchen, the sound of laughter, and the scent of freshly baked goodies wafting through the air. One particular Halloween, my mom decided to shake things up by trying a new recipe that used Oreos—my all-time favorite cookie! We dubbed them “Oreo ghosts” as they were rolled into ghost shapes with white chocolate coating. That lovely experience inspired me to create a pumpkin version, which became a hit at our family gatherings.
Every bite of these No-Bake Pumpkin Shaped Oreo Balls reminds me of those sweet childhood memories spent in the kitchen. I loved the way my family would gather around the table, excited to decorate our treats with colorful sprinkles and edible eyes. Now, whenever I make these pumpkin balls, I think back to that sunny Halloween, filled with laughter and chocolate smudges on our cheeks.
Ingredients
Here’s what you’ll need to create these adorable pumpkin Oreo balls:
-
Oreo Cookies (36 cookies)
- Chef Insight: Classic Oreos work best for this recipe, but feel free to experiment with other flavored varieties. Mint Oreos add a surprising twist!
-
Cream Cheese (8 oz)
- Substitution Tip: If you’re looking for a lighter option, you can use reduced-fat cream cheese. Just make sure it’s softened for easier mixing.
-
Orange Candy Melts (1 cup)
- Chef Hack: If you can’t find orange candy melts, you can mix white and yellow candy melts in equal parts to create an orange hue.
-
Green Sprinkles or Candy (for decoration)
- Quick Insight: You can use mini chocolate chips or green M&Ms instead of sprinkles for a fun pop of color.
-
Gel Food Coloring (optional)
- Recommendation: For the perfect shade of orange, use gel food coloring to tint your white chocolate if you prefer a homemade touch.
-
Styrofoam (or similar) block for shaping
- Chef Note: This is optional, but it makes it much easier to shape and display the pumpkin balls while they set!
Step-by-Step Instructions
-
Crush the Oreos: Place the Oreo cookies in a food processor and pulse until finely crushed. If you don’t have a food processor, you can also place them in a zip-top bag and crush them with a rolling pin. This part is a great way to get the kids involved!
-
Mix in the Cream Cheese: In a large bowl, combine the crushed Oreos with the softened cream cheese. Use a spatula or your hands to mix until the mixture is well combined and forms a dough. This is the perfect time to get your hands a little dirty—trust me, it’s worth it!
-
Chill the Mixture: Cover the mixture and refrigerate for about 30 minutes. Chilling helps the mixture firm up, making it easier to shape the balls.
-
Shape the Pumpkin Balls: Once chilled, take small portions of the mixture and roll them into about 1-inch balls. Place them onto a baking sheet lined with parchment paper. If you want to make them more pumpkin-like, gently press the top of each ball to form a slight indentation.
-
Melt the Orange Candy Coating: Following the package instructions, melt the orange candy melts in a microwave-safe bowl, stirring every 30 seconds to avoid burning. If you’re using food coloring, this is where you’d add it!
-
Coat the Pumpkin Balls: Dip each ball in the melted orange coating. Let any excess chocolate drip off, and then transfer it back onto the baking sheet.
-
Add the Green Toppers: While the orange coating is still wet, place a green sprinkle or candy on the top to serve as the pumpkin stem.
-
Let Them Set: Allow the no-bake pumpkin balls to cool until the candy coating has hardened. You can speed this process up by placing them in the refrigerator.
Serving Suggestions
Once your No-Bake Pumpkin Shaped Oreo Balls are set, it’s time to serve! You can arrange them on a festive platter, perhaps sprinkled with a few autumn-themed decorations like faux leaves or mini pumpkins. Don’t forget to leave some room for little hands to come in and grab their favorites!
For an extra touch, you could place each pumpkin ball on a lollipop stick to create fun pumpkin pops that are easy to grab and enjoy.
Recipe Variations
Here are a few creative twists on my No-Bake Pumpkin Shaped Oreo Balls:
-
Spiced Pumpkin Flavor: Add a teaspoon of pumpkin pie spice to the Oreo mixture for an extra layer of fall flavor.
-
Chocolate Drizzle: After the orange coating has set, drizzle some melted dark or white chocolate over them for a decorative touch.
-
Nut Butter Swirl: Mix a tablespoon of almond or peanut butter into the Oreo and cream cheese dough for a unique, nutty flavor.
-
Different Shapes: Instead of pumpkins, you can shape these into ghosts or acorns. Just adjust the decoration accordingly!
Chef’s Notes
As someone who cherishes cozy moments in the kitchen, I’ve experimented a lot with these pumpkin Oreo balls over the years. They started as just a fun Halloween treat, but they’ve evolved into a go-to recipe for family gatherings, holiday parties, and even cozy game nights. I love how versatile they are—you can dress them up, or keep it simple!
I also remember one time forgetting to add the green decorations, and they still turned out delicious! It reminded me that perfection isn’t necessary in cooking; what truly matters is the love and joy shared around the meal.
FAQs and Troubleshooting
Q: My chocolate coating is too thick. What can I do?
A: If your candy melts feel thick, try adding a small teaspoon of vegetable oil to thin it out. This will make it easier to dip and create a nice even coating.
Q: Can I use regular cream cheese?
A: Absolutely! Just ensure that it’s softened so that it mixes well with the Oreo crumbs.
Q: How long will these last?
A: Properly stored in an airtight container in the fridge, these treats should last about a week. They’re perfect to make ahead for parties!
Q: What do I do if the pumpkin balls fall apart?
A: If your balls are too crumbly, try adding a little more cream cheese to the mixture. If they feel too soft, a spell in the refrigerator will help firm them up.
Now it’s time to gather your ingredients and bring the magic of fall into your kitchen. I can’t wait to hear how you enjoy these No-Bake Pumpkin Shaped Oreo Balls! Happy cooking and happy memories!
Print
No-Bake Pumpkin Shaped Oreo Balls
- Total Time: 45 minutes
- Yield: 24 balls 1x
- Diet: Vegetarian
Description
Delightfully easy No-Bake Pumpkin Shaped Oreo Balls, perfect for Halloween parties and cozy treats.
Ingredients
- 36 Oreo Cookies
- 8 oz Cream Cheese, softened
- 1 cup Orange Candy Melts
- Green Sprinkles or Candy (for decoration)
- Gel Food Coloring (optional)
- Styrofoam block for shaping (optional)
Instructions
- Crush the Oreos: Place the Oreo cookies in a food processor and pulse until finely crushed.
- Mix in the Cream Cheese: In a large bowl, combine the crushed Oreos with the softened cream cheese.
- Chill the Mixture: Cover the mixture and refrigerate for about 30 minutes.
- Shape the Pumpkin Balls: Once chilled, take small portions of the mixture and roll them into about 1-inch balls.
- Melt the Orange Candy Coating: Melt the orange candy melts in a microwave-safe bowl.
- Coat the Pumpkin Balls: Dip each ball in the melted orange coating and let any excess drip off.
- Add the Green Toppers: While the orange coating is still wet, place a green sprinkle or candy on the top.
- Let Them Set: Allow the no-bake pumpkin balls to cool until the candy coating has hardened.
Notes
These pumpkin Oreo balls can be decorated in various ways, and can also be shaped into other festive shapes like ghosts or acorns.
- Prep Time: 15 minutes
- Cook Time: 30 minutes
- Category: Dessert
- Method: No-Bake
- Cuisine: American
Nutrition
- Serving Size: 1 ball
- Calories: 120
- Sugar: 15g
- Sodium: 70mg
- Fat: 7g
- Saturated Fat: 4g
- Unsaturated Fat: 2g
- Trans Fat: 0g
- Carbohydrates: 14g
- Fiber: 0g
- Protein: 1g
- Cholesterol: 15mg
Keywords: no-bake, pumpkin dessert, Halloween treats, Oreo balls
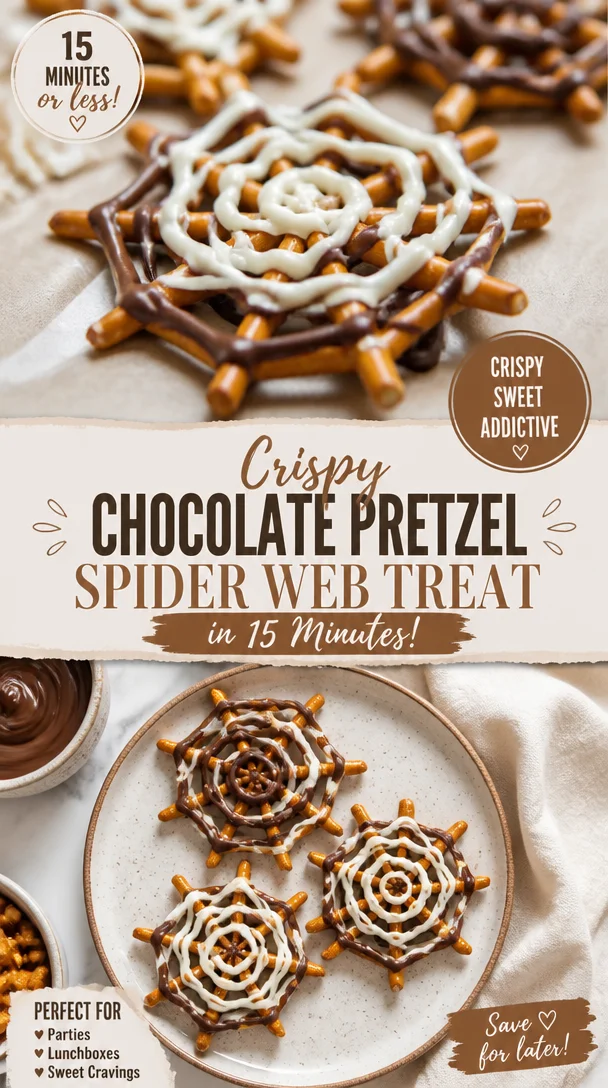
Crispy Chocolate Pretzel Spider Web Treat in 15 Minutes
Chocolate Pretzel Spider Webs: A Fun and Spooky Treat!
Welcome to my kitchen! I’m so excited to share a delightful and spooky treat that’s perfect for your next gathering or Halloween celebration: Chocolate Pretzel Spider Webs! These fun snacks blend sweet and salty flavors, and best of all, they’re super simple to make. Whether you’re hosting a Halloween party, looking for creative snacks for the kids, or just want to indulge your taste buds, this recipe is bound to become a favorite in your home.
There’s something inherently magical about this chocolate pretzel combination. The crunchy twists of the pretzel, the smooth velvety chocolate, and that hint of whimsy from the spider web design bring together everything that I love about cooking at home—creativity, comfort, and a little bit of nostalgia. Each bite cradles cozy moments and great conversations.
In this blog post, I’ll take you through a journey of crafting these sweet and salty delights, alongside stories from my own kitchen adventures. Together, we’ll whip up a batch of Chocolate Pretzel Spider Webs that’ll have you and your guests squealing in delight!
A Trip Down Memory Lane
One Halloween, I remember going to a local pumpkin patch to pick out the best gourds and apples to bake into pies. Among the stalls, there was a quaint little table run by a friendly family who would always have a selection of homemade baked goods. As kids, my sister and I were always drawn to their table, not just for the cookies but for the creative snacks they showcased. It was on that day I first had something like these chocolate pretzel webs – but instead of spiders, they showcased cute little ghosts made of marshmallows!
We each grabbed one and for some reason, the combination of the crunch and sweetness sent my taste buds into overdrive! That memory has stuck with me, and when I created my version of these spooky pretzel webs, I couldn’t help but reminisce about that Halloween day long ago. It’s funny how food weaves its way into our memories and becomes a thread in our life story, isn’t it?
Ingredients
To get started, here’s what you’ll need for your Chocolate Pretzel Spider Webs:
-
Pretzel Sticks
The foundation of your web! Crunchy and salty, they provide the perfect base. Don’t have pretzel sticks? Use regular pretzels or even breadsticks as a substitute. -
Chocolate Chips (Milk or Dark)
Choose your favorite chocolate—milk for a sweeter touch or dark for a more intense flavor. If you’re feeling adventurous, white chocolate also makes a great base for coloring! -
Black Candy Melts
These will give the perfect look to your spider web. If candy melts aren’t available, you can use chocolate mixed with a little vegetable oil to achieve a similar consistency. -
Confectioners Sugar
Just a sprinkle for sweetness! If you need a sugar-free option, you can find alternative sweeteners that work well, too. -
Edible Eyes
To bring your spiders to life! You can buy edible candy eyes from any baking supply store or make your own with small dollops of icing. -
Parchment Paper
Not an ingredient per se, but crucial for setting your webs and keeping everything tidy!
Step-by-Step Instructions
Let’s dive into crafting these delightful treats! Follow along as we build these Chocolate Pretzel Spider Webs step-by-step.
-
Prepare Your Workspace:
Start by lining a baking sheet with parchment paper. This will be where your completed spider webs will rest and harden. -
Melt the Chocolate:
In a microwave-safe bowl, add your chocolate chips. Heat them in 30-second intervals, stirring in between until completely melted and smooth. This should take about 1-2 minutes depending on your microwave power. Pro tip: Avoid overheating the chocolate, as it can seize up. If that happens, simply stir in a teaspoon of vegetable oil to salvage it. -
Dip the Pretzel Sticks:
Take your pretzel sticks and dip them halfway into the melted chocolate. Let the excess drip off and place them on the parchment paper. I love to make a bunch of these at once—perfect for sharing with family! -
Create the Spider Web:
Using a piping bag or a plastic sandwich bag with the corner snipped off, draw circles and lines over the chocolate-covered pretzel sticks to create the web effect. Start from the center and move outward—this is where creativity shines! Don’t worry if it’s not perfect; your webs will turn out adorable regardless! -
Add the Spiders:
While the chocolate is still soft, place two edible eyes on top of each pretzel stick to make them resemble spiders. The kids will love helping with this part! -
Let It Set:
Place the baking sheet in the refrigerator for about 30 minutes or until the chocolate has completely hardened. You can also leave them out at room temperature for a couple of hours if you prefer. -
Serve and Enjoy:
Once the chocolate is set, gently peel the pretzel webs off the parchment paper. They’re now ready to be devoured!
Serving Suggestions
When serving your Chocolate Pretzel Spider Webs, arrange them on a creepy platter surrounded by faux spider decorations or spooky candles for a charming display. You can even place them in a clear jar adorned with festive ribbons for a cute centerpiece. Pair them with some pumpkin spice dip for a deliciously seasonal treat!
Recipe Variations
Feel free to switch things up! Here are some creative twists to keep things fresh:
- Nut Butter Version: Instead of chocolate, use melted peanut butter or almond butter for a unique flavor!
- Add a Crunch: Mix in crushed nuts or sprinkle some chopped toffee on top before the chocolate hardens for an extra crunch.
- Colorful Treats: Use colored candy melts for different holidays or celebrations—think pastel colors for Easter or bright hues for a birthday!
- Gluten-Free: Swap the pretzel sticks for gluten-free options, like rice cakes or gluten-free pretzels.
- Dairy-Free: Use vegan chocolate chips for a dairy-free version that everyone can enjoy!
Chef’s Notes
There’s always room for creativity in the kitchen! Over the years, I’ve experimented with adding different toppings and flavors to this recipe. One of my favorite stories is when I tried to make mini cupcake versions of the spider webs. Let’s just say, they didn’t quite turn out as planned, but they were a delicious, albeit messy, trial!
With each attempt, I learn something new—whether it’s finding the right chocolate to achieve the glossy finish or discovering new designs for the webs. Cooking is a journey, and I cherish every messy moment along the way.
FAQs and Troubleshooting
Q: What if my chocolate seizes?
A: If your chocolate seizes up while melting, try adding a little vegetable oil and stirring it back to a smooth consistency.
Q: Can I make these in advance?
A: Absolutely! You can prepare them a few days ahead and store them in an airtight container to keep them fresh.
Q: How can I make the webs more defined?
A: Use a piping bag with a thin tip for better control, which will create sharper lines and more defined shapes in your chocolate webs!
Q: What can I substitute if I’m allergic to nuts?
A: You can easily swap the chocolate with carob chips or try using sunflower seed butter for that nut-free alternative!
Nutritional Info (if applicable)
While I always encourage you to indulge in these delightful treats, here’s a rough nutritional breakdown per spider web:
- Calories: 130
- Total Fat: 6g
- Saturated Fat: 3g
- Carbohydrates: 17g
- Sugar: 10g
- Protein: 2g
As always, your nutritional needs may vary depending on the brands used and personal dietary choices.
I can’t wait for you to try making these Chocolate Pretzel Spider Webs! They’re more than just a treat; they’re a wonderful way to celebrate creativity and bring people together. Happy cooking, friends, and don’t forget to enjoy every bite!
Print
Chocolate Pretzel Spider Webs
- Total Time: 45 minutes
- Yield: 20 servings
- Diet: Vegetarian
Description
A fun and spooky treat combining sweet and salty flavors, perfect for Halloween gatherings.
Ingredients
- Pretzel Sticks
- Chocolate Chips (Milk or Dark)
- Black Candy Melts
- Confectioners Sugar
- Edible Eyes
- Parchment Paper
Instructions
- Prepare your workspace by lining a baking sheet with parchment paper.
- Melt the chocolate in a microwave-safe bowl, heating in 30-second intervals until smooth.
- Dip the pretzel sticks halfway into the melted chocolate and place on parchment paper.
- Create the spider web using a piping bag or sandwich bag to draw over the chocolate-covered pretzel sticks.
- Add two edible eyes on each pretzel stick while the chocolate is still soft.
- Let the baking sheet sit in the refrigerator for about 30 minutes until the chocolate hardens.
- Serve and enjoy by gently peeling the pretzel webs off the parchment paper.
Notes
Feel free to get creative with toppings and variations, such as using nut butter or gluten-free pretzels.
- Prep Time: 15 minutes
- Cook Time: 30 minutes
- Category: Snacks
- Method: No-Bake
- Cuisine: American
Nutrition
- Serving Size: 1 spider web
- Calories: 130
- Sugar: 10g
- Sodium: 0mg
- Fat: 6g
- Saturated Fat: 3g
- Unsaturated Fat: 2g
- Trans Fat: 0g
- Carbohydrates: 17g
- Fiber: 0g
- Protein: 2g
- Cholesterol: 0mg
Keywords: Halloween treats, chocolate pretzels, spooky snacks, fun desserts




