
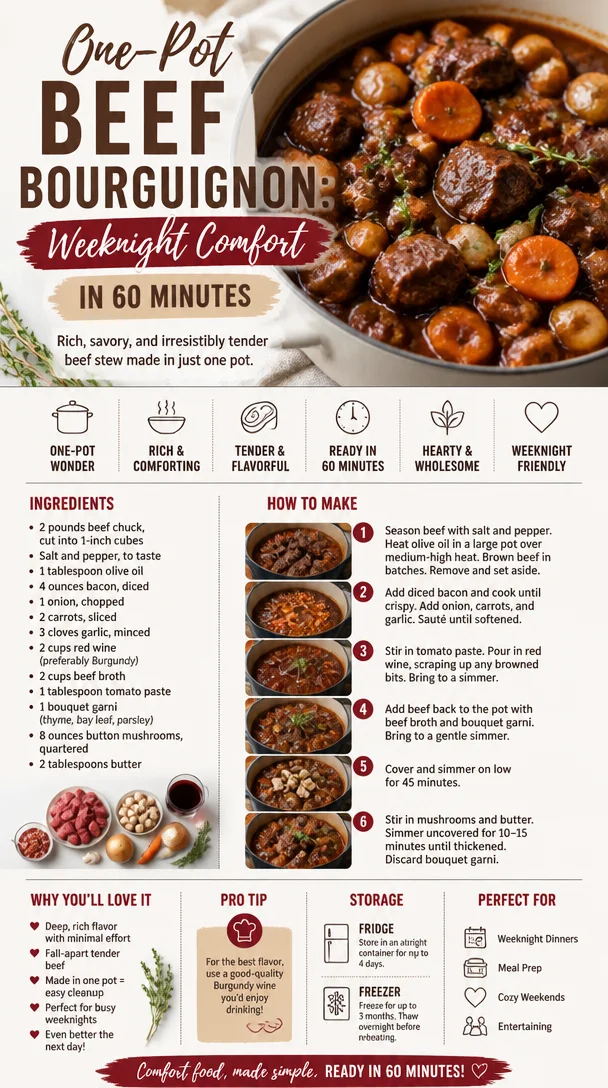
One-Pot Beef Bourguignon: Weeknight Comfort in 60 Minutes
The Ultimate Beef Bourguignon Recipe: A Cozy Culinary Classic
Welcome to my kitchen! I’m thrilled to share a recipe that warms not just the stomach, but the heart: Beef Bourguignon. This French classic is not just a dish; it’s a celebration of flavor, an embrace of comfort, and a nod to slow cooking at its finest. Nothing beats the aroma of tender beef simmering in a rich, red wine sauce, evoking memories of rustic French kitchens and hearty family gatherings. Whether you’re a seasoned chef or a curious beginner, I promise you that making Beef Bourguignon is more achievable than you might think. So grab your apron and let’s dive in!
The magic of Beef Bourguignon lies in its ability to turn simple, humble ingredients into an unforgettable feast. The blend of succulent beef, earthy mushrooms, sweet carrots, and aromatic herbs all coming together in a luscious sauce creates a symphony of flavors that dances on your palate. It’s a dish that brings people together—perfect for cozy dinners, holiday gatherings, or simply a weekend project that fills your kitchen with deliciousness.
As we embark on this culinary adventure, you’ll learn not only how to prepare this dish but also why it’s so special. You’ll hear stories, discover substitutions and variations, and get tips that even the pros use! So, get ready to create some kitchen magic.
A Cozy Memory of Beef Bourguignon
I have a vivid memory that dances in my mind every time I think of Beef Bourguignon. It was a chilly autumn evening, the kind that makes you crave something hearty and warm. My grandmother, an amazing home cook, had invited the whole family over. The kitchen was already filled with the tantalizing scent of beef braising away in red wine, garlic, and herbs.
As I watched her stir the pot, she shared stories of her own grandmother cooking in a tiny Parisian apartment, using whatever was fresh and in season. With each ingredient she added, she reminded me that cooking was not just about the food; it was about love, history, and tradition. I can still hear her gentle laughter mixing with the clinking of pots and the sizzling of onions sautéing away. That evening, we gathered around the table, plates piled high with beef bourguignon, toasted with warm, crusty bread, laughter spilling over just like the wine.
Those moments fueled my passion for cooking, and that’s what I hope to inspire in you too. Let’s create our own memories in the kitchen, one amazing recipe at a time!
Ingredients
Here’s what you’ll need to make this delicious Beef Bourguignon:
-
2-2.5 lbs beef chuck
A cut that benefits from slow cooking, resulting in tender, flavorful morsels. If you can’t find chuck, you can substitute with brisket or round. -
1 bottle (750 ml) red wine
A dry red wine like Pinot Noir or Cabernet Sauvignon works best. If you prefer to cook without alcohol, you can substitute with beef broth mixed with a splash of vinegar for acidity. -
4 cups beef broth
This will add depth to the sauce. Low-sodium broth allows you to control the salt in the dish. -
3 tablespoons vegetable oil
For searing the beef. Olive oil is a great substitute, but vegetable oil can withstand higher cooking temperatures. -
1 large onion, diced
Onions are the foundation of flavor in this dish. If you want a milder flavor, use shallots instead. -
2-3 cloves garlic, minced
Garlic adds a lovely aroma and depth. Fresh is best, but jarred garlic can be used in a pinch. -
4-6 strips of bacon, chopped
Bacon adds smokiness and richness. If you’re looking for a healthier option, turkey bacon can work, or omit it entirely for a lighter dish. -
4 large carrots, chopped
Sweet carrots balance the dish. For a twist, try parsnips or even bell peppers. -
8 ounces cremini mushrooms, halved
Earthy mushrooms soak up the savory sauce, enhancing the dish. Button mushrooms are a good alternative if cremini isn’t available. -
2 tablespoons flour
This thickens the sauce. For a gluten-free option, use a cornstarch slurry instead. -
2-3 sprigs fresh thyme
Thyme brings out the earthiness of the beef. Dried thyme can be used instead; just remember to adjust the amount, as it’s more concentrated. -
1-2 bay leaves
Bay leaves add a subtle aromatic flavor. Be sure to discard them before serving! -
Salt and pepper to taste
Seasoning is everything! Usher in the flavors by adjusting to your palate.
Step-by-Step Instructions
Now, let’s get our hands in the mix and whip up this fabulous Beef Bourguignon! Follow these steps for success in your kitchen:
-
Preparation: Start by patting the beef dry with paper towels and cutting it into 1.5-inch cubes. Dry beef browns better, so be sure not to skip this step! Season generously with salt and pepper.
-
Sear the beef: In a large Dutch oven or heavy pot, heat 2 tablespoons of vegetable oil over medium-high heat. Once the oil is hot, sear the beef in batches until browned on all sides (about 3-4 minutes per side). Remove beef and set aside. This step creates a flavorful crust!
-
Cook the bacon: In the same pot, add the chopped bacon and cook until crispy (about 5 minutes). The drippings will add a wonderful depth of flavor.
-
Sauté the aromatics: Add the chopped onions to the pot with any leftover fat from the bacon. Cook, stirring occasionally, until softened (about 5-7 minutes). Then toss in the garlic and cook for another minute until fragrant.
-
Build the sauce: Sprinkle flour over the onion mixture and stir for about 2 minutes, allowing the flour to cook a bit. This will help thicken your sauce. Gradually pour in the red wine while scraping up any browned bits from the bottom of the pot (this is where the flavor is!).
-
Add the rest: Return the beef to the pot, then add the beef broth, chopped carrots, mushrooms, thyme, bay leaves, and some more salt and pepper. Give it a good stir!
-
Simmer low and slow: Bring the mixture to a gentle boil. Once boiling, cover and reduce the heat, allowing it to simmer for about 2-3 hours. The longer it cooks, the more tender the beef becomes. Stir it occasionally and make sure it doesn’t stick.
-
Finishing touches: After a few hours, remove the lid and allow the sauce to reduce for about 30 minutes, until it thickens to your liking. Check for seasoning and adjust as necessary. Remove the bay leaves and thyme stems before serving.
Serving Suggestions
Beef Bourguignon is perfect when served over creamy mashed potatoes, buttery egg noodles, or even a hearty crusty baguette to soak up that delicious gravy. Garnish with fresh parsley for a pop of color and a hint of freshness. A glass of the same red wine you used in cooking pairs beautifully with this dish, making the meal cohesive and even more enjoyable!
Recipe Variations
- Vegetarian Twist: Try replacing beef with hearty mushrooms or jackfruit for a plant-based alternative that still delivers on flavor.
- Herbacious Addition: Add a splash of red wine vinegar at the end for an unexpected zing.
- Spicy Kick: Incorporate diced jalapeños or a splash of hot sauce for a spicy version!
- Different Wines: Experiment with different red wines, such as Merlot or Zinfandel, to discover new flavor profiles.
Chef’s Notes
The beauty of Beef Bourguignon is its versatility and ability to evolve. I remember experimenting with adding a splash of orange juice once, inspired by the winter season—and it was a delightful twist that brightened the flavors! Don’t be afraid to let your creativity flourish in the kitchen. Your version might just become a new family favorite!
Cooking can be messy, and let’s face it, life happens. I’ve spilled red wine more times than I care to admit! Embrace your kitchen mishaps—they often lead to happy accidents (and hilarious stories).
FAQs and Troubleshooting
Q: My sauce came out too thin. What can I do?
A: If your sauce isn’t thick enough, make a slurry with cornstarch and water, slowly add it while simmering until you reach your desired consistency.
Q: Can I make Beef Bourguignon in advance?
A: Absolutely! In fact, it tastes even better the next day after the flavors meld together. Just store it in an airtight container and reheat gently.
Q: What can I serve with Beef Bourguignon?
A: Aside from mashed potatoes or crusty bread, consider a fresh green salad or roasted vegetables to balance the richness of the dish.
Q: Can I freeze leftovers?
A: Yes! Beef Bourguignon freezes beautifully. Just allow it to cool completely, then transfer it to labeled freezer-safe containers. Reheat on low on the stovetop or in the microwave.
Nutritional Info
While pleases of comfort food can vary greatly, a standard serving of Beef Bourguignon typically contains approximately 500-600 calories. However, it’s rich in protein and delicious satisfaction!
There you have it – an invitation to create a dish that’s more than just a meal; it’s a connection to family, tradition, and those cozy moments in the kitchen. I can’t wait to hear your stories about making this Beef Bourguignon. Happy cooking!
Print
Beef Bourguignon
- Total Time: 195 minutes
- Yield: 6 servings 1x
- Diet: None
Description
A cozy culinary classic that combines tender beef, earthy mushrooms, and rich red wine sauce, perfect for hearty dinners and family gatherings.
Ingredients
- 2–2.5 lbs beef chuck
- 1 bottle (750 ml) dry red wine (e.g., Pinot Noir or Cabernet Sauvignon)
- 4 cups beef broth
- 3 tablespoons vegetable oil
- 1 large onion, diced
- 2–3 cloves garlic, minced
- 4–6 strips of bacon, chopped
- 4 large carrots, chopped
- 8 ounces cremini mushrooms, halved
- 2 tablespoons flour
- 2–3 sprigs fresh thyme
- 1–2 bay leaves
- Salt and pepper to taste
Instructions
- Preparation: Start by patting the beef dry with paper towels and cutting it into 1.5-inch cubes. Season generously with salt and pepper.
- Sear: In a large Dutch oven, heat 2 tablespoons of vegetable oil over medium-high heat. Sear the beef in batches until browned (about 3-4 minutes per side) and remove.
- Cook: In the same pot, add the chopped bacon and cook until crispy (about 5 minutes).
- Sauté: Add the onions to the pot and cook until softened (about 5-7 minutes). Then add the garlic and cook for another minute.
- Build: Sprinkle flour over the onion mixture and stir for about 2 minutes. Gradually pour in the red wine, scraping the browned bits from the bottom.
- Add: Return the beef to the pot with broth, carrots, mushrooms, thyme, bay leaves, and more salt and pepper. Stir well.
- Simmer: Bring to a gentle boil, then cover and reduce heat to simmer for 2-3 hours.
- Finishing: After 2-3 hours, remove the lid and let the sauce reduce for about 30 minutes. Adjust seasoning and remove bay leaves.
Notes
Beef Bourguignon tastes even better the next day. Can be frozen for later use.
- Prep Time: 15 minutes
- Cook Time: 180 minutes
- Category: Main Course
- Method: Braised
- Cuisine: French
Nutrition
- Serving Size: 1 serving
- Calories: 600
- Sugar: 6g
- Sodium: 700mg
- Fat: 25g
- Saturated Fat: 10g
- Unsaturated Fat: 10g
- Trans Fat: 0g
- Carbohydrates: 45g
- Fiber: 4g
- Protein: 40g
- Cholesterol: 90mg
Keywords: Beef Bourguignon, French cuisine, cozy dinner, comfort food
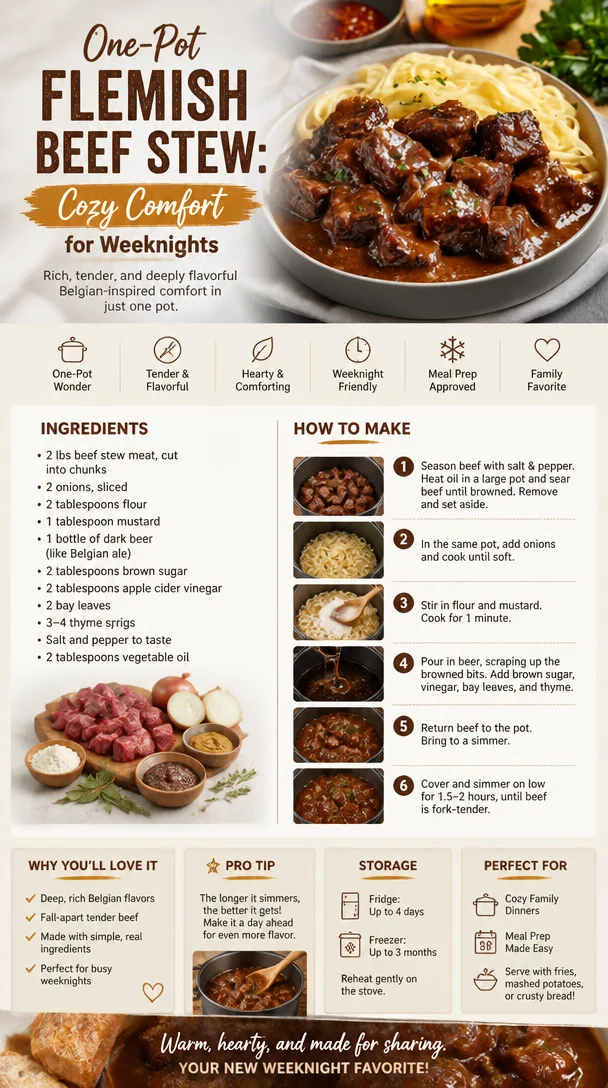
One-Pot Flemish Beef Stew: Cozy Comfort for Weeknights
La Carbonade Flamande: A Cozy Hug in a Bowl
Welcome to my kitchen, dear foodies! Today, we’re diving into the delectable world of La Carbonade Flamande, a classic Belgian beef stew that’s as rich in history as it is in flavor. Picture this: the fragrant aroma of tender beef simmering in a hearty sauce of onions, beer, and subtle spices wafts through the air, and you can’t help but smile. This dish is all about comfort and warmth—a true cozy hug in a bowl that beckons you to gather around the table with family and friends.
When I first tasted La Carbonade Flamande years ago during a chilly autumn trip to Belgium, I was instantly smitten. I remember walking into a quaint little bistro in Bruges, where the atmosphere was charmingly rustic, complete with flickering candlelight and the inviting scent of something delicious brooding away in the kitchen. I ordered the Carbonade Flamande out of curiosity, and as soon as I took that first bite, I felt a wave of warmth. It was a beautiful marriage of rich, savory, and slightly sweet flavors that danced on my palate! I knew in that moment that I had to recreate this comforting dish back at home.
The beauty of La Carbonade Flamande lies not just in its straightforward ingredients but in the love and patience that goes into making it. It’s a dish that tells a story, one that’s meant to be savored and shared. With this recipe, you don’t need to be a culinary wizard to bring this masterpiece to your dinner table; all you need is a little time, the right ingredients, and a sprinkle of enthusiasm. Let’s roll up our sleeves and get cooking!
Personal Story
I vividly recall the first time I attempted to make La Carbonade Flamande in my own kitchen. It was a rainy Sunday afternoon, and I was determined to bring a taste of Belgium to my little home in the suburbs. Armed with my favorite Dutch oven and a recipe I found online, I set out on this stewing adventure.
The scent of onions sizzling in butter filled my kitchen, and I couldn’t help but feel nostalgic, as it reminded me of the grand kitchen at my grandmother’s house. It felt like the universe was conspiring to create an atmosphere of warmth and joy. As the beef browned and the beer simmered, my kitchen transformed into a cozy haven. I invited some friends over, and together we dived into delightful conversation as the Carbonade Flamande braised to perfection. That day wasn’t just about food—it was about connection, laughter, and creating new memories together.
Now, let’s explore how to make this delightful dish right at home. You’ll be amazed at how simple it is to whip up such a masterpiece!
Ingredients
Here’s what you’ll need to create your own La Carbonade Flamande:
- 2 lbs beef chuck roast: Look for well-marbled meat for superior tenderness. If you can’t find chuck, brisket is a nice alternative.
- 2 large onions, thinly sliced: Sweet onions work beautifully, but you can use yellow onions if that’s what you have on hand.
- 3 cloves garlic, minced: Fresh garlic adds a lovely depth of flavor. If you’re in a pinch, garlic powder will work, too—just use about 1 teaspoon.
- 2 cups Belgian ale: A dark ale or a Dubbel works wonders, but any good-quality beer you enjoy drinking will do!
- 2 tablespoons brown sugar: This helps balance the bitterness of the beer. If you prefer, you can substitute honey.
- 2 tablespoons Dijon mustard: This traditional ingredient adds a delightful tang and depth; you can swap it for whole-grain mustard for a different texture.
- 1 teaspoon dried thyme: If fresh thyme is on hand, use about 1 tablespoon for a brighter flavor.
- 2 bay leaves: These add aromatic undertones; just remember to remove them before serving!
- Salt and pepper, to taste: Always essential! You can also experiment with smoked paprika for added depth.
- 2 tablespoons vegetable oil: For searing the beef. You could use olive oil for a richer flavor, but it has a lower smoke point, so keep an eye on it.
- Fresh parsley, for garnish (optional): Adds a pop of color and freshness. You can substitute with chives or thyme.
With these ingredients in your pantry, you’re well on your way to making La Carbonade Flamande that will have everyone asking for seconds!
Step-by-Step Instructions
Let’s get down to business! Here’s how to craft the perfect Carbonade Flamande:
-
Prep Your Ingredients: Start by gathering all your ingredients together. This makes the cooking process feel seamless and enjoyable. Always, always chop your onions and garlic first—onions tend to bring out the tears, so do yourself a favor!
-
Brown the Beef: Heat the vegetable oil in your Dutch oven over medium-high heat. Generously season the beef with salt and pepper. Once the oil is shimmering, add the beef to the pot in batches, making sure not to overcrowd it. Sear each piece until it develops a lovely brown crust on all sides—about 4–5 minutes per side. This caramelization is key; it adds deep flavor to the stew! Once browned, remove the beef from the pot and set it aside.
-
Sauté the Onions: In the same pot, add the sliced onions and a pinch of salt. Reduce the heat to medium and allow the onions to cook slowly until they are soft and golden brown—about 10-15 minutes. This process will enhance their sweetness and provide a fantastic base for the stew. Stir occasionally to avoid sticking.
-
Add Garlic and Deglaze: Once the onions have caramelized, add the minced garlic and sauté for an additional minute until fragrant. Then, pour in the Belgian ale. This is where the magic happens! Use a wooden spoon to scrape up any flavorful little bits stuck to the bottom of the pot—this is called deglazing and really enhances the dish.
-
Combine Ingredients: Add the browned beef back into the pot, along with the brown sugar, Dijon mustard, thyme, bay leaves, and additional salt and pepper to taste. Stir everything together, ensuring the beef is well-coated in that delightful mixture.
-
Simmer: Bring the stew to a gentle boil, then reduce the heat to low, cover with a lid, and let it simmer for about 2–2½ hours. The long, slow cook will tenderize the beef and blend the flavors beautifully!
-
Check and Adjust Seasoning: About 15-20 minutes before it’s done, taste and adjust any seasoning if needed. I often like to add a touch more mustard for extra zing if I’m feeling adventurous!
-
Serve: Once the beef is fork-tender and the sauce is thickened, it’s time to serve!
Serving Suggestions
La Carbonade Flamande is best served with hearty accompaniments that can soak up all that delicious sauce. Consider pairing it with creamy mashed potatoes, crusty bread, or even soft polenta. Don’t forget to sprinkle a bit of freshly chopped parsley on top for that lovely touch of green—after all, we eat with our eyes first!
Recipe Variations
Feeling adventurous? Here are some fun twists to switch things up a bit:
-
Vegetarian Option: Substitute the beef with hearty mushrooms (like portobello or cremini), and use vegetable broth instead of beer. A splash of balsamic vinegar helps to maintain that deep flavor.
-
Spicy Version: Add crushed red pepper flakes or diced jalapeños to the onions for a spicy kick; just be careful to balance the heat with some extra sugar!
-
Sweet and Savory: Toss in some carrots or parsnips for added sweetness and texture—just chop them up and add them alongside the beef.
-
Smoky Flavor: Try adding smoked sausage or pancetta for a delicious smoky element that pairs wonderfully with the stew’s richness.
-
Herb Infusion: Play with fresh herbs like rosemary or oregano for a fresh flavor twist. Just remember to adjust the amount as these herbs can be more potent.
Chef’s Notes
Over the years, I’ve put my own spin on this classic stew numerous times. One delightful evolution was when I decided to incorporate leftover Guinness from a gathering. By doing so, I discovered a hidden depth that made my Carbonade Flamande stand out at dinner parties! Each time, I cherish how this recipe welcomes experimentation and creativity in the kitchen.
A little kitchen tip: if you have any leftovers (which might be a challenge considering how irresistible this dish is), they get even better after a night in the fridge—just reheat and serve. Trust me, that next-day flavor is worth waiting for!
FAQs and Troubleshooting
1. Can I use a slow cooker for this recipe?
Absolutely! After browning your meat and sautéing the onions, simply add everything to your slow cooker. Cook it on low for 6–8 hours, and you’ll have a luscious stew waiting for you by dinner time!
2. What should I do if my sauce is too thin?
If you find the sauce is too thin, you can thicken it by mixing a tablespoon of cornstarch with a little cold water to create a slurry, and then stir it into the stew. Let it simmer for a few minutes until thickened.
3. Can I freeze La Carbonade Flamande?
Yes! This stew freezes beautifully. Allow it to cool completely, then transfer to airtight containers. It can last in the freezer for about 3 months. Just reheat on low, and it’ll taste fantastic!
4. Why does my dish taste bitter?
If you’re finding bitterness, it might be overcooked onions or beer that’s too bitter. Adjust with a bit more sugar or mustard to balance the flavors. Taste as you go, and remember, cooking is all about love and intuition!
Cooking La Carbonade Flamande may just become one of your new favorite kitchen adventures. As you savor each delicious bite, remember that the true essence of this dish goes beyond mere ingredients—it’s about putting your heart into every step and sharing that passion with others. Enjoy the cozy hug in a bowl and the journeys it creates! Happy cooking!
Print
La Carbonade Flamande
- Total Time: 165 minutes
- Yield: 6 servings 1x
- Diet: None
Description
A classic Belgian beef stew simmered in a hearty sauce of onions, beer, and spices, perfect for cozy gatherings.
Ingredients
- 2 lbs beef chuck roast
- 2 large onions, thinly sliced
- 3 cloves garlic, minced
- 2 cups Belgian ale
- 2 tablespoons brown sugar
- 2 tablespoons Dijon mustard
- 1 teaspoon dried thyme
- 2 bay leaves
- Salt and pepper, to taste
- 2 tablespoons vegetable oil
- Fresh parsley, for garnish (optional)
Instructions
- Prep Your Ingredients: Gather all your ingredients together, chop onions and garlic first.
- Brown the Beef: Heat oil in a Dutch oven, season beef, and sear until brown on all sides.
- Sauté the Onions: Cook sliced onions with a pinch of salt until soft and golden brown.
- Add Garlic and Deglaze: Stir in minced garlic and pour in the Belgian ale, scraping up bits from the pot.
- Combine Ingredients: Return beef to pot, add brown sugar, mustard, thyme, bay leaves, salt, and pepper.
- Simmer: Bring to a boil, then cover and let simmer for 120-150 minutes.
- Check and Adjust Seasoning: Taste and adjust seasoning with more mustard if desired.
- Serve: Enjoy once the beef is fork-tender and sauce thickened.
Notes
Serve with mashed potatoes, crusty bread, or soft polenta, and garnish with parsley.
- Prep Time: 15 minutes
- Cook Time: 150 minutes
- Category: Main Course
- Method: Braising
- Cuisine: Belgian
Nutrition
- Serving Size: 1 serving
- Calories: 460
- Sugar: 6g
- Sodium: 450mg
- Fat: 20g
- Saturated Fat: 7g
- Unsaturated Fat: 10g
- Trans Fat: 0g
- Carbohydrates: 36g
- Fiber: 2g
- Protein: 35g
- Cholesterol: 80mg
Keywords: beef stew, Belgian recipe, comfort food, cozy meal
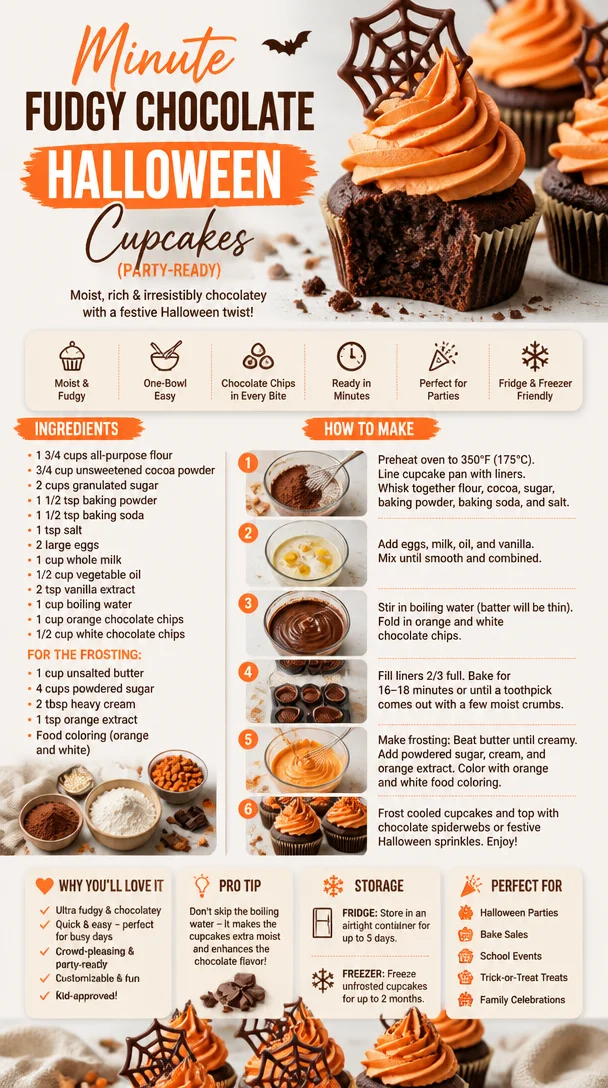
Minute Fudgy Chocolate Halloween Cupcakes (Party-Ready)
The Spooktacular Delight of Chocolate Halloween Cupcakes
Welcome back to my cozy kitchen! As the leaves turn that beautiful shade of amber and the air gets a hint of chill, I can’t help but get excited about one of my favorite holidays—Halloween! It’s a delightful time when we can embrace all things spooky, playful, and, of course, delicious. And what better way to celebrate than with a batch of rich, chocolate Halloween cupcakes? These little treats aren’t just tasty; they’re a canvas for creativity, allowing you to unleash your inner artist and celebrate the season in style.
Picture this: You smell the warm, comforting aroma of chocolate wafting through your home, pulling you into the kitchen like a friendly ghost. You grab your mixing bowl, toss in your ingredients, and dance to your favorite Halloween playlist while whisking it all together. Whether you’re whipping these up for a spooky soirée, a school bake sale, or just to indulge in some festive fun, these cupcakes are perfect for spreading joy and chills alike.
These cupcakes are wonderfully moist and decadent, offering a sumptuous chocolate flavor that’s totally irresistible. Topped with fluffy, orange-tinged frosting and adorned with eerie sprinkles, they not only taste heavenly but also look hauntingly adorable! So, let’s dive into this spooky culinary adventure together and make some memories—because nothing brings people together like a homemade treat (especially one filled with chocolate goodness!). Grab your apron, tie it on, and let’s get baking!
A Sweet Memory from My Childhood
As a young girl, Halloween was always a magical time in our household. I remember eagerly anticipating the moment when my mom would bring out her collection of spooky-themed recipes. The front of our kitchen would transform into a miniature bakery, and I’d often steal bites of cookie dough, doused in semi-sweet chocolate chips, as I helped her prepare for our neighborhood Halloween party.
One year, we decided to host a ‘witches and wizards’ theme, complete with flying broomsticks and floating ghosts hanging from the ceiling. My mom made her famous chocolate cupcakes and turned them into mummies with white frosting and chocolate chip eyes. It was a huge hit, and the joy on the kids’ faces as they devoured the treats is a memory I cherish to this day. That experience sparked my love for baking and the idea that food can ignite joy and connection. Now, every time I make chocolate cupcakes, I’m taken back to those thrilling Halloween nights, excited laughter, and treats that brought us all together.
Ingredients
To create these scrumptious chocolate Halloween cupcakes, you’re going to need the following ingredients:
-
1 cup all-purpose flour
A staple in most desserts! This gives the cupcakes their structure. You can substitute with gluten-free flour if needed. -
1 cup granulated sugar
This lends sweetness and helps the cupcakes rise beautifully. Feel free to use coconut sugar for a less refined option. -
1/2 cup unsweetened cocoa powder
The star of the show! Use the highest quality you can find for rich, chocolatey goodness. Dutch-processed cocoa gives a deeper flavor if you like. -
1 teaspoon baking powder
This helps your cupcakes rise and become fluffy. Ensure it’s fresh for the best results. -
1/2 teaspoon baking soda
Works in conjunction with the baking powder for a perfectly aerated cupcake. -
1/4 teaspoon salt
A pinch of salt enhances the sweetness and balances the chocolate flavor. -
2 large eggs
Eggs add moisture and richness. For a vegan version, try flaxseed eggs (1 tbsp ground flaxseed + 2.5 tbsp water = 1 egg). -
1/2 cup vegetable oil
Keeps the cupcakes moist and flavorful. Substitute with melted coconut oil or applesauce for a lighter version. -
1 teaspoon vanilla extract
Adds a delightful aroma and depth of flavor. Use pure vanilla for the best quality. -
1/2 cup milk
This helps to brighten the chocolate flavor. You can use almond milk or oat milk as a dairy-free alternative. -
1/4 cup boiling water
This may seem odd, but it intensifies the cocoa flavor and creates a moist texture. -
Orange food coloring (optional)
To give your frosting that festive Halloween hue! -
Sprinkles or decorations
Get creative with spooky sprinkles, edible eyes, or gummy worms to top your cupcakes and bring them to life (or death!).
Step-by-Step Instructions
Alright, let’s roll up those sleeves and get mixing! Follow these steps for baking your delectable Halloween cupcakes:
-
Preheat the Oven
First things first—preheat your oven to 350°F (175°C). This ensures your cupcakes bake evenly and rise perfectly. -
Line the Cupcake Tin
Prepare a 12-cup muffin tin by lining it with festive cupcake liners. I often go for orange and black to get into the Halloween spirit! -
Mix the Dry Ingredients
In a large mixing bowl, whisk together the flour, sugar, cocoa powder, baking powder, baking soda, and salt. This blending of dry ingredients ensures an even distribution of those flavors. -
Combine the Wet Ingredients
In a separate bowl, combine the eggs, vegetable oil, milk, and vanilla extract. Whisk them until nice and smooth. This is where you can add a drop or two of orange food coloring for a vibrant splash. -
Create the Batter
Gradually pour the wet mixture into the dry mixture and whisk until well combined. Careful not to overmix! A few lumps are okay—you want those cupcakes to be tender, not tough. -
Boiling Water Magic
Stir in the boiling water slowly. This may make your batter seem more runny, but trust me, it’s going to yield some moist, delectable cupcakes. -
Fill the Liners
Use a spoon or an ice cream scoop to fill each liner about two-thirds full. This helps to give them room to rise without overflowing. -
Bake Away!
Pop your cupcake tin into the preheated oven and bake for 18-20 minutes, or until a toothpick inserted in the center comes out clean. The smell will be incredible—prepare for the “ooohs” and “aaahs” from anyone within sniffing distance! -
Cool Down
Once baked, let the cupcakes cool in the tin for about 5 minutes before transferring them to a wire rack to cool completely. They need to be cool for frosting—otherwise, it’ll melt! -
Frost and Decorate
Now comes the fun part! Use a piping bag to swirl your favorite cupcake frosting on top (I suggest a classic buttercream dyed orange) and finish with spooky decorations. Get creative!
Serving Suggestions
When it comes to serving these delightful treats, presentation is key! Place your frosted Halloween cupcakes on a fun, themed platter—think spiderweb designs or pumpkin motifs. Add some additional decorations to your serving area, perhaps miniature pumpkins or spooky props, to really set the atmosphere. If you’re handing them out as treats, consider placing each cupcake in its own little clear cellophane bag, tied with a cute Halloween ribbon.
Recipe Variations
-
Pumpkin Chocolate Swirl: Add a layer of pumpkin purée to your batter for a delicious swirl and a touch of fall spice.
-
Minty Monster Cupcakes: Swap out the vanilla for peppermint extract in the frosting for a refreshing twist!
-
Spider Web Frosting: Use a piping bag to drizzle white frosting over the orange icing to create a spooky spider web design.
-
Nutty Crunch: Fold in some chopped walnuts or pecans into the batter for a crunchy texture throughout.
-
Gluten-Free Delight: Simply swap the all-purpose flour for a gluten-free blend, and you’re all set for those with gluten sensitivities!
Chef’s Notes
Making these chocolate Halloween cupcakes always feels like an adventure! They’ve evolved from a simple recipe I first learned to a canvas for creativity and seasonal delight. I’ve tried them with various toppings, from edible glitter to more advanced fondant decorations, and each iteration brings back those warm memories of baking in the kitchen with my mom. One of the funniest moments involved our family cat sneaking onto the counter and pawing at the frosting—yes, that didn’t end well! Remember to guard your creations from eager paws or curious hands!
FAQs and Troubleshooting
1. My cupcakes didn’t rise! What went wrong?
This could be due to using expired baking powder or baking soda. Always check the expiration dates—fresh leavening agents are essential for fluffy cupcakes!
2. Why are my cupcakes dry?
Overmixing the batter or baking them for too long can lead to dryness. Be gentle when mixing, and keep an eye on the timer!
3. How can I store leftovers?
Store any uneaten cupcakes in an airtight container at room temperature for up to 3 days. If you want to preserve them longer, freeze them without frosting and thaw when you’re ready to serve.
4. Can I make these ahead of time?
Absolutely! You can bake the cupcakes a day in advance. Just frost them the day of your event to keep the frosting fresh and fluffy.
With this easy-to-follow recipe, you’re ready to bake the most delightful chocolate Halloween cupcakes that will make everyone’s taste buds dance. So gather your ingredients, channel your inner culinary spirit, and let’s create something truly spooktacular together! Happy baking and enjoy every bite!
Print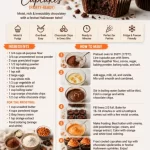
Chocolate Halloween Cupcakes
- Total Time: 40 minutes
- Yield: 12 servings 1x
- Diet: Vegetarian
Description
Delightful and moist chocolate cupcakes topped with fluffy orange frosting, perfect for Halloween celebrations.
Ingredients
- 1 cup all-purpose flour
- 1 cup granulated sugar
- 1/2 cup unsweetened cocoa powder
- 1 teaspoon baking powder
- 1/2 teaspoon baking soda
- 1/4 teaspoon salt
- 2 large eggs
- 1/2 cup vegetable oil
- 1 teaspoon vanilla extract
- 1/2 cup milk
- 1/4 cup boiling water
- Orange food coloring (optional)
- Sprinkles or decorations
Instructions
- Preheat the oven to 350°F (175°C).
- Line a 12-cup muffin tin with festive cupcake liners.
- Mix the flour, sugar, cocoa powder, baking powder, baking soda, and salt in a large mixing bowl.
- Combine the eggs, vegetable oil, milk, and vanilla extract in a separate bowl.
- Create the batter by gradually pouring the wet mixture into the dry mixture and whisk until well combined.
- Stir in the boiling water slowly.
- Fill each liner about two-thirds full with batter.
- Bake for 18-20 minutes, or until a toothpick inserted in the center comes out clean.
- Cool in the tin for about 5 minutes before transferring to a wire rack to cool completely.
- Frost with your favorite cupcake frosting and decorate as desired.
Notes
Enjoy decorating your cupcakes with spooky sprinkles or themed decorations to enhance the Halloween spirit.
- Prep Time: 20 minutes
- Cook Time: 20 minutes
- Category: Dessert
- Method: Baking
- Cuisine: American
Nutrition
- Serving Size: 1 cupcake
- Calories: 280
- Sugar: 22g
- Sodium: 220mg
- Fat: 10g
- Saturated Fat: 1g
- Unsaturated Fat: 8g
- Trans Fat: 0g
- Carbohydrates: 42g
- Fiber: 2g
- Protein: 3g
- Cholesterol: 40mg
Keywords: Halloween, chocolate cupcakes, festive baking, dessert recipes, spooky decorations
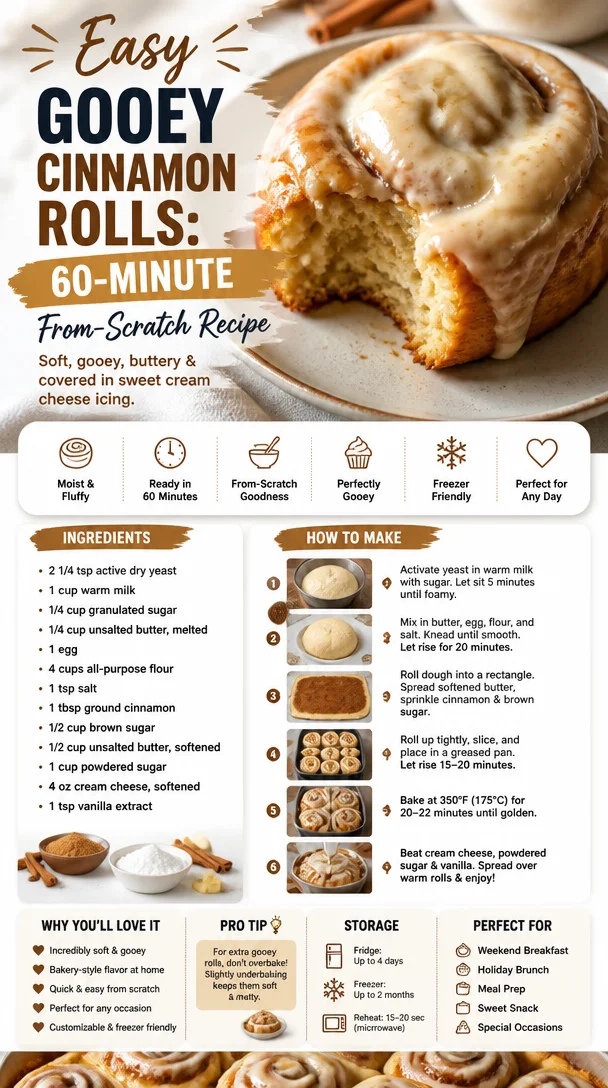
Easy Gooey Cinnamon Rolls: 60-Minute From-Scratch Recipe
Gooey Cinnamon Rolls: The Ultimate Comfort Food
Welcome back to my cozy kitchen! Today, we’re diving into a timeless treat that warms the heart and satisfies the soul—gooey cinnamon rolls! Oh, the smell of sweet cinnamon mingling with freshly baked dough is like a warm hug on a chilly morning. Whether you’re indulging on a lazy Sunday or celebrating a special occasion, these rolls are sure to bring cheer to your table.
There’s something so magical about homemade cinnamon rolls. They remind me of the countless weekends I spent in my grandmother’s kitchen. I can still hear her squeaking wooden chair as she whisked up the dough, her laughter filling the air as she told stories about her youth. The process was a team effort; I would be her little sous-chef, sprinkling cinnamon sugar on the dough with a seriousness only an eight-year-old can muster. We would wait together, peering into the oven, as the sweet aroma enveloped us, making our mouths water in anticipation.
These gooey little delights aren’t just food; they’re a celebration of love, warmth, and togetherness. So roll up your sleeves, put on your favorite apron (yes, the one splattered with flour, just like mine), and let’s get baking! Trust me; you’ll want to save this recipe—it’s guaranteed to become a family favorite.
Personal Story
One crisp autumn morning, with leaves falling outside and a light chill in the air, I decided to recreate my grandmother’s famous cinnamon rolls for our family breakfast. As I kneaded the dough, I felt her presence with me, guiding my hands. The recipe was almost tattooed onto my brain, but there was an element of magic that came with her storytelling and laughter.
As the rolls baked, I set the table and brewed a pot of coffee. The scent wafted through the house, coaxing my loved ones from their cozy corners. When the timer went off, revealing a pan of golden, puffed-up rolls, we all gathered around the kitchen island, eager to dig in. But before we could take a bite, I realized I needed to snap a picture—these gooey beauties took a lot of love to create!
With one bite, we were transported back to that old kitchen, and we shared stories that made us laugh and reminisce. Moments like these are why I love cooking. The joy of feeding those I love and sharing laughter over good food is truly the heart of every gathering.
Ingredients
Here’s what you’ll need for your gooey cinnamon rolls:
-
For the Dough:
- 4 cups all-purpose flour
Tip: For a lighter texture, you can substitute 1 cup of it with bread flour. - 1 packet (2 ¼ tsp) active dry yeast
Chef Insight: Always check the expiration date—active yeast is key to fluffy rolls! - ½ cup granulated sugar
Substitution: Use coconut sugar for a healthier option with caramel notes. - 1 cup whole milk (warm)
Tip: If you’re out of milk, almond or oat milk works too! - ⅓ cup unsalted butter (melted)
Make sure it’s melted but not hot to prevent killing the yeast! - 2 large eggs
Substitution: Ground flaxseed mixed with water (1 tbsp flaxseed + 2.5 tbsp water) makes a great vegan substitute! - 1 teaspoon salt
- 4 cups all-purpose flour
-
For the Filling:
- ¾ cup brown sugar (packed)
Tip: Light brown sugar works, but dark brown gives a richer flavor! - 2 tablespoons ground cinnamon
For a twist, try adding cardamom for an exotic hint! - ⅓ cup unsalted butter (softened)
Don’t melt the butter for spreading; it should be soft enough to spread easily!
- ¾ cup brown sugar (packed)
-
For the Cream Cheese Frosting:
- 4 oz cream cheese (softened)
Tip: For a dairy-free option, try using cashew cream! - ¼ cup unsalted butter (softened)
- 2 cups powdered sugar
For an extra hit of flavor, add a dash of vanilla extract! - 2 tablespoons milk (or plant-based milk)
Adjust the milk quantity for desired consistency!
- 4 oz cream cheese (softened)
Step-by-Step Instructions
Alright, it’s time to turn those ingredients into something truly scrumptious! Here’s how we do it:
-
Activate the Yeast:
- In a small bowl, combine the warm milk with the yeast and a pinch of sugar. Let it sit for about 5-10 minutes until it’s frothy and bubbly. This means your yeast is alive and ready to do its magic!
-
Mix the Dough:
- In a large mixing bowl, combine the flour, sugar, and salt. Create a well in the center, and pour in the melted butter, eggs, and the activated yeast mixture. Stir until a shaggy dough forms, then turn it out onto a floured surface.
-
Knead the Dough:
- Knead the dough for about 8-10 minutes until it’s smooth and elastic. This is a great arm workout, so feel free to take out any stress from the week! If the dough is sticky, sprinkle a little more flour as needed.
-
Let It Rise:
- Place the kneaded dough into a greased bowl, cover it with a kitchen towel, and let it rise in a warm spot (like your kitchen—thank you, oven) for about 1 to 1.5 hours, or until it doubles in size. Patience is key—you want that fluff!
-
Prepare the Filling:
- While the dough is rising, mix together the brown sugar, cinnamon, and softened butter in a medium bowl until well combined—it should resemble a spreadable paste. Set aside.
-
Roll Out the Dough:
- After the dough has risen, punch it down gently (no need to be rough!) and turn it out onto a floured surface. Roll it into a large rectangle about ¼ inch thick.
-
Spread the Filling:
- Evenly spread the cinnamon filling over the dough rectangle, leaving about a ½ inch border at the edges. This is where the goodies will ooze from!
-
Roll It Up:
- Starting from one long edge, roll the dough tightly into a log. Make sure it’s snug but not overly tight—your rolls need room to expand!
-
Cut the Rolls:
- Using a sharp knife or dental floss (yes, you read that right!), slice the log into 12-15 equal pieces, about 1.5 inches thick. Arrange them in a greased baking dish, cut side up, leaving a little space between each for rising.
-
Second Rise:
- Cover the dish with a towel and let the rolls rest for another 30-45 minutes until they’ve puffed up beautifully.
-
Preheat the Oven:
- About 15 minutes before the rolls are ready, preheat your oven to 350°F (175°C).
-
Bake:
- Once the rolls have risen, pop them into the oven and bake for 20-25 minutes until golden brown. If they’re browning too quickly, loosely cover with aluminum foil during the last few minutes.
-
Make the Frosting:
- While the rolls are baking, whip together the softened cream cheese and butter in a mixing bowl until light and fluffy. Gradually add the powdered sugar and mix until smooth, then add milk until you reach the desired consistency.
-
Frost and Serve:
- As soon as the rolls come out of the oven, generously slather them with the cream cheese frosting. Let the frosting melt into the nooks and crannies for maximum gooey goodness.
Serving Suggestions
Ready to serve those tantalizing gooey cinnamon rolls? Place them on a large plate or, for a rustic touch, a wooden board. Drizzle some extra frosting over the top, and sprinkle with chopped nuts or a dusting of powdered sugar for that perfect presentation. Pair them with a steaming cup of coffee or a glass of freshly squeezed orange juice. Your family and friends will be flocking to your kitchen in no time!
Recipe Variations
If you’re feeling adventurous, here are a few fun twists you can try with your cinnamon rolls:
- Nutty Add-In: Fold in some chopped walnuts or pecans for a delicious crunch.
- Fruit-Filled Rolls: Add sliced apples or pears with the cinnamon filling for a fruity surprise!
- Spicy Kick: Mix in a touch of cayenne pepper into the cinnamon filling for a sweet and spicy twist.
- Chocolate Drizzle: After frosting, drizzle some melted chocolate over the rolls for a decadent dessert.
- Pumpkin Spice: Swap some of the sugar for pumpkin puree and add pumpkin spice to the filling for a fall-themed treat!
Chef’s Notes
These gooey cinnamon rolls have been a staple in my kitchen for years, and they continue to evolve. I often play around with the spices, occasionally adding nutmeg or ginger for a seasonal twist. And let’s talk about the frosting—it’s the cherry on top! Some days, I skip the cream cheese for a simple glaze of powdered sugar and milk, while other days I indulge in extra frosting. That’s the beauty of this recipe; you can make it your own!
And let’s not forget those kitchen mishaps—one time, I mistook baking powder for baking soda and ended up with a flat, cookie-like mess! But even then, it turns into a funny story shared over cups of coffee and leftover rolls. Remember, cooking is as much about joy and creativity as it is about precision.
FAQs and Troubleshooting
-
Why are my rolls dense?
- If your rolls didn’t rise properly, it may be due to old yeast or not allowing enough time to rise. Always test your yeast before baking!
-
How do I make my rolls gooey?
- The key to gooeyness lies in the butter and sugar content. Make sure your filling is generous, and fresh out of the oven, slather on that cream cheese frosting!
-
How do I store leftover rolls?
- Store any leftover rolls in an airtight container at room temperature for up to 3 days. You can also freeze them for up to a month; just reheat in the oven for a cozy treat!
-
Can I make the dough ahead of time?
- Absolutely! You can prepare the dough and refrigerate it overnight. Just let it come to room temperature and rise before baking the next day.
Nutritional Info
Here’s a rough estimate per roll (without frosting):
- Calories: 280
- Protein: 4g
- Carbohydrates: 45g
- Fat: 10g
- Fiber: 1g
(Note: Nutrition can vary based on specific brands and measurements used)
Now that you have this deliciously cozy recipe in your hands, go ahead and spread the love—share your newly baked gooey cinnamon rolls with your family and friends. Enjoy the process, embrace the mess, and remember that the best moments happen around the kitchen table. Happy baking, my fellow foodies! 🍽️
Print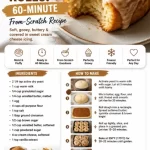
Gooey Cinnamon Rolls
- Total Time: 120 minutes
- Yield: 12 servings 1x
- Diet: Vegetarian
Description
Delicious and cozy gooey cinnamon rolls perfect for any occasion.
Ingredients
- 4 cups all-purpose flour
- 1 packet (2 ¼ tsp) active dry yeast
- ½ cup granulated sugar
- 1 cup whole milk (warm)
- ⅓ cup unsalted butter (melted)
- 2 large eggs
- 1 teaspoon salt
- ¾ cup brown sugar (packed)
- 2 tablespoons ground cinnamon
- ⅓ cup unsalted butter (softened)
- 4 oz cream cheese (softened)
- ¼ cup unsalted butter (softened)
- 2 cups powdered sugar
- 2 tablespoons milk (or plant-based milk)
Instructions
- Activate the yeast: In a small bowl, combine the warm milk with the yeast and a pinch of sugar. Let it sit for about 5-10 minutes until frothy.
- Mix the dough: In a large bowl, combine flour, sugar, and salt. Create a well, then add melted butter, eggs, and activated yeast mixture. Stir until shaggy dough forms.
- Knead the dough: Knead for about 8-10 minutes until smooth and elastic. Sprinkle flour if necessary.
- Let it rise: Place dough in a greased bowl, cover, and let it rise for about 1 to 1.5 hours until doubled in size.
- Prepare the filling: Mix brown sugar, cinnamon, and softened butter until well combined.
- Roll out the dough: Punch down the risen dough, turn it out onto a floured surface, and roll it into a large rectangle about ¼ inch thick.
- Spread the filling: Evenly spread the cinnamon filling over the dough, leaving a ½ inch border.
- Roll it up: Starting from one long edge, roll the dough tightly into a log.
- Cut the rolls: Slice the log into 12-15 equal pieces and arrange in a greased baking dish.
- Second rise: Cover and let the rolls rest for 30-45 minutes until puffed up.
- Preheat the oven: About 15 minutes before the rolls are ready, preheat oven to 350°F (175°C).
- Bake: Once risen, bake for 20-25 minutes until golden brown.
- Make the frosting: Whip together cream cheese and butter, then add powdered sugar and milk until desired consistency.
- Frost and serve: Generously slather the frosting on the rolls as soon as they come out of the oven.
Notes
For a healthier twist, consider using coconut sugar and substituting almond or oat milk for whole milk.
- Prep Time: 15 minutes
- Cook Time: 25 minutes
- Category: Dessert
- Method: Baking
- Cuisine: American
Nutrition
- Serving Size: 1 roll
- Calories: 280
- Sugar: 10g
- Sodium: 200mg
- Fat: 10g
- Saturated Fat: 4g
- Unsaturated Fat: 4g
- Trans Fat: 0g
- Carbohydrates: 45g
- Fiber: 1g
- Protein: 4g
- Cholesterol: 30mg
Keywords: cinnamon rolls, gooey cinnamon rolls, desserts, baking, comfort food
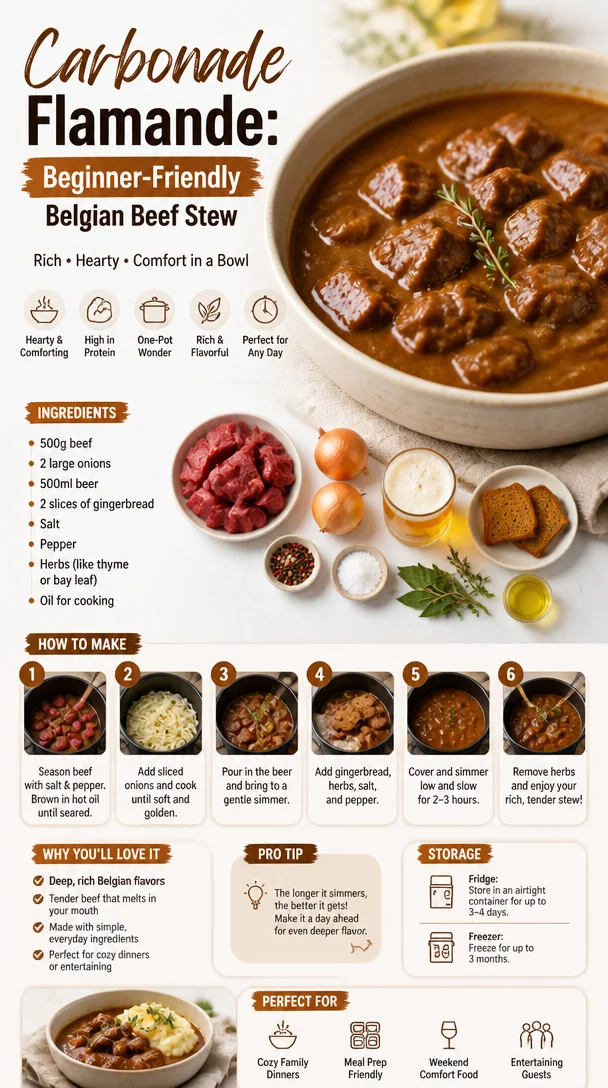
Carbonade Flamande: Beginner-Friendly Belgian Beef Stew
The Heartwarming Tradition of Carbonade Flamande: A Cozy Belgian Stew
Welcome, fellow food lovers! Today, we’re diving into the rich and comforting world of Belgian cuisine with a dish that warms the heart and soul: Carbonade Flamande, also known as Flemish beef stew. I can almost smell the aromatic blend of caramelized onions and robust beer wafting through the air — can you? This traditional stew is not just a meal; it’s a celebration of flavors that have been passed down through generations, perfect for chilly evenings or cozy gatherings.
A Taste of Nostalgia: My Carbonade Flamande Journey
Let me take you on a little stroll down memory lane. The first time I tasted Carbonade Flamande was during a family trip to Bruges. I was just a teenager, and our charming little hotel served it with such pride. As the rich, dark stew arrived at our table, I could hardly contain my excitement. The tender beef seemed to melt in my mouth, beautifully balanced by the slight sweetness of onions and the deep, malty flavor of the beer.
It was more than just a meal; it was an experience. Each bite told a story, each flavor intensified by the laughter and warmth of my family gathered around the table. We swapped stories, teased one another, and created memories that still bring a smile to my face. Ever since that trip, I’ve been on a quest to perfect my own version of this dish, bringing a taste of Belgium into my kitchen. It’s a recipe that not only nourishes the stomach but also the soul, making you feel right at home, no matter where you are.
Ingredients
To create this delightful Carbonade Flamande, you’ll need the following ingredients:
-
2 pounds beef chuck roast (or brisket)
- This cut is perfect for stewing as it’s both flavorful and tender when cooked low and slow. If you’re in a pinch, you can also use round steak or even beef short ribs for a deeper flavor.
-
2 tablespoons olive oil
- For sautéing that beautiful beef and onions. If you prefer, you can also use butter for a richer flavor.
-
3 large onions, sliced
- These bring sweetness and depth to your stew. Yellow onions are your best bet, but feel free to substitute with shallots or even red onions for a different taste.
-
3 cloves garlic, minced
- Garlic adds a punch of flavor. You can also use garlic powder in a pinch, but fresh is always best!
-
2 tablespoons brown sugar
- This is a secret ingredient that enhances the caramelization of the onions. If you’re watching your sugar intake, honey or maple syrup can be a fantastic substitute.
-
2 cups Belgian ale (or stout)
- The star of the dish! A dark beer complements the meat and adds a rich, malty flavor. If you don’t have beer, try beef broth with a splash of vinegar for acidity.
-
1 cup beef broth
- Additional moisture for the stew. Homemade broth is ideal, but store-bought works too.
-
2 tablespoons Dijon mustard
- For a subtle tang. If you’re out of Dijon, spicy brown mustard can do the trick!
-
2 bay leaves
- These add an aromatic depth to the stew. If you don’t have bay leaves, a sprig of fresh thyme can be an excellent alternative.
-
Salt and pepper to taste
- Essential for elevating all those flavors. Feel free to experiment with smoked salt for an extra kick.
Step-by-Step Instructions
Ready to get cooking? Let’s dive into making this comforting stew!
-
Prep the Beef: Start by cutting your beef into 2-inch cubes. Pat them dry with a paper towel — this helps achieve that beautiful brown crust. Season generously with salt and pepper. A well-seasoned beef is the backbone of this dish!
-
Sear the beef: In a large, heavy-bottomed pot (like a Dutch oven), heat the olive oil over medium-high heat. Add the beef in batches, ensuring not to crowd the pot. Brown all sides, which should take about 5-7 minutes. This caramelization is where the flavor magic happens, so don’t rush it!
-
Cook the onions: Once all the beef is browned, remove it from the pot and set it aside. In the same pot, add the sliced onions and a pinch of salt. Lower the heat to medium and stir often, letting the onions soften and caramelize — about 10-15 minutes. If they start to stick, you can deglaze the pan with a splash of beer!
-
Add garlic and sugar: When the onions are beautifully golden, add the minced garlic and brown sugar. Stir well, and let them cook for another 2-3 minutes until the garlic is fragrant and the sugar has dissolved. This is what makes the stew sweet and irresistible!
-
Deglaze the pot: Time to bring it all together! Pour in the Belgian ale, scraping up any brown bits stuck to the bottom of the pot. This adds even more flavor to your stew. Bring it to a simmer.
-
Return the beef: Add the seared beef back into the pot, along with the beef broth, Dijon mustard, bay leaves, and additional salt and pepper if needed. Return to a simmer, then cover and reduce the heat to low. Let it gently bubble away for about 2-3 hours. The longer, the better! Your house will smell incredible.
-
Taste and adjust: Once the beef is fork-tender, taste your stew and adjust any seasonings. Feel free to add more mustard or a sprinkle of fresh herbs for brightness.
-
Serve it up: Remove the bay leaves (they’ve done their job!) and let the stew rest for a few minutes. You can serve Carbonade Flamande over creamy mashed potatoes, egg noodles, or a simple side of crusty bread to soak up all that delicious sauce.
Serving Suggestions
When it’s finally time to serve your Carbonade Flamande, consider presenting it in rustic bowls for a cozy vibe. A sprinkle of freshly chopped parsley adds a delightful pop of color and freshness. For a complete meal, pair it with a side salad tossed in a light vinaigrette to balance out the richness of the stew. And don’t forget a hunk of crusty bread!
Recipe Variations
Now, let’s talk about some fun variations to keep things exciting:
-
Vegetarian Twist: Substitute the beef with hearty mushrooms and root vegetables like carrots and parsnips; use vegetable broth instead of beef broth.
-
Spicy Kick: Add a teaspoon of smoked paprika or a pinch of chili flakes for a delightful heat that contrasts the rich flavors.
-
Herb Infusion: Experiment by adding fresh thyme or rosemary during the cooking process for an aromatic twist.
-
Beer Swap: If you’re not a fan of beer, try a blend of apple cider and beef broth for a slightly sweet and tangy flavor.
-
Comforting Creaminess: Stir in a dollop of sour cream or crème fraîche just before serving for a luxurious finish.
Chef’s Notes
You know, Carbonade Flamande is a dish that gets better with time. I often make a double batch and freeze half for those busy weeks when cooking feels like a chore. I’ve also learned that every cook has their signature touch, and this stew is no exception. I’ve played around with different types of beers and found that each variation brings its own unique twist. It’s a comforting reminder that cooking is all about exploration — take your time and have fun with it!
Oh, and speaking of messes: the first time I made this, I spilled half of the beer on the counter. As frustrating as it was, it turned into a great kitchen laugh with my family – we still joke about it every time we enjoy the dish.
FAQs and Troubleshooting
Q1: Why is my stew tough?
A: If your beef isn’t tender, it’s likely not cooked long enough. Allow it to simmer longer and make sure you’re cooking it on low heat for a good 2-3 hours.
Q2: My stew is too salty! What can I do?
A: If you accidentally oversalt, try adding a peeled potato to the pot while it simmers. It will absorb some of the saltiness. Just remember to remove it before serving!
Q3: Can I make this in a slow cooker?
A: Absolutely! Follow the same steps for browning the beef and onions, then transfer everything to your slow cooker. Cook on low for 6-8 hours.
Q4: What’s the best way to store leftovers?
A: Store any leftovers in an airtight container in the fridge for up to 3 days. It can also be frozen for up to 3 months. Just remember to let it cool before freezing.
Nutritional Info
While I’m all about enjoying the flavors in a dish, here’s a rough breakdown of the nutritional info per serving (assuming a 6 serving yield), which you can adjust based on your ingredients:
- Calories: 450
- Protein: 30g
- Carbohydrates: 22g
- Fat: 25g
- Fiber: 1g
Wrapping It Up
And there you have it! A comforting bowl of Carbonade Flamande, perfect for sharing and bringing warmth to your table. Cooking is a journey, and I hope this recipe inspires you to create your own cozy memories in the kitchen. Remember, it’s not just about the food; it’s about the love and laughter that come with it. Happy cooking, and be sure to stop by again for more kitchen adventures!
Print
Carbonade Flamande
- Total Time: 150 minutes
- Yield: 6 servings 1x
- Diet: none
Description
A rich and comforting Belgian beef stew infused with caramelized onions and Belgian ale, perfect for chilly evenings.
Ingredients
- 2 pounds beef chuck roast (or brisket)
- 2 tablespoons olive oil
- 3 large onions, sliced
- 3 cloves garlic, minced
- 2 tablespoons brown sugar
- 2 cups Belgian ale (or stout)
- 1 cup beef broth
- 2 tablespoons Dijon mustard
- 2 bay leaves
- Salt and pepper to taste
Instructions
- Prep the Beef: Start by cutting your beef into 2-inch cubes. Pat them dry with a paper towel. Season generously with salt and pepper.
- Sear the beef: In a large pot, heat olive oil over medium-high heat. Add the beef in batches and brown all sides, about 5-7 minutes.
- Cook the onions: Remove the beef, add sliced onions and a pinch of salt to the pot. Lower the heat and stir often, caramelizing for 10-15 minutes.
- Add garlic and sugar: Stir in minced garlic and brown sugar. Cook for 2-3 minutes until garlic is fragrant and sugar dissolves.
- Deglaze the pot: Pour in the Belgian ale, scraping any brown bits. Bring to a simmer.
- Return the beef: Add the seared beef, beef broth, Dijon mustard, bay leaves, and more salt and pepper as needed. Simmer, cover, and reduce heat to low. Cook for 2-3 hours.
- Taste and adjust: Once beef is tender, taste and adjust any seasonings.
- Serve it up: Remove bay leaves. Serve Carbonade Flamande over mashed potatoes, egg noodles, or with crusty bread.
Notes
The stew gets better with time; make a double batch and freeze half for busy weeks. Feel free to experiment with different beers for unique flavors.
- Prep Time: 30 minutes
- Cook Time: 120 minutes
- Category: Main Course
- Method: Braising
- Cuisine: Belgian
Nutrition
- Serving Size: 1 serving
- Calories: 450
- Sugar: 7g
- Sodium: 800mg
- Fat: 25g
- Saturated Fat: 10g
- Unsaturated Fat: 15g
- Trans Fat: 0g
- Carbohydrates: 22g
- Fiber: 1g
- Protein: 30g
- Cholesterol: 90mg
Keywords: Belgian stew, comfort food, Carbonade Flamande, beef stew, hearty meal
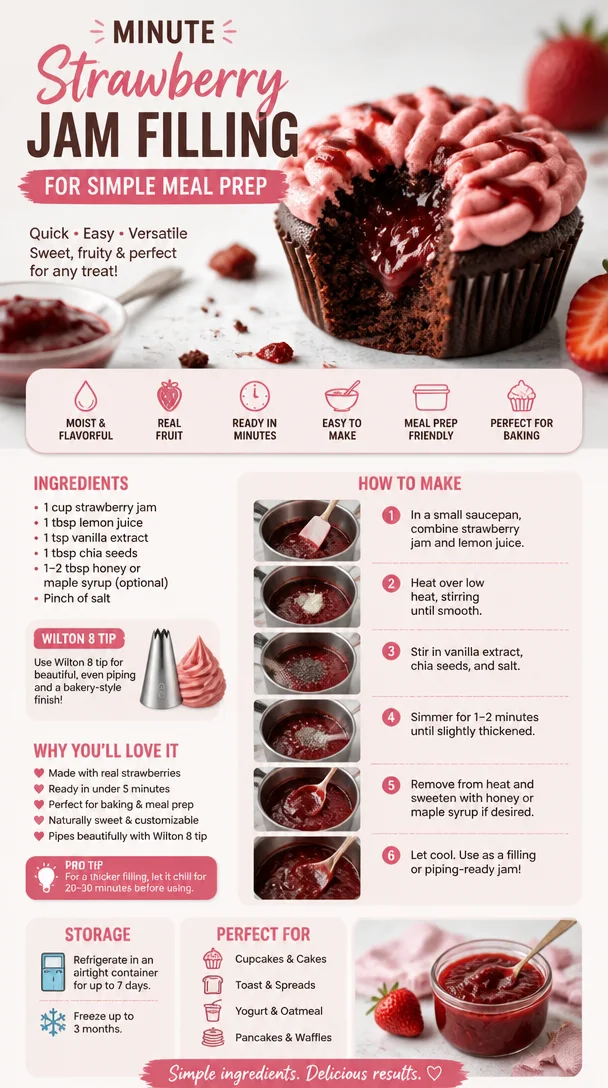
Minute Strawberry Jam Filling for Simple Meal Prep
The Sweetness of Homemade Strawberry Jam Filling: A Heartfelt Guide
Welcome back to my cozy kitchen! It’s Olivia Bennett here, guiding you through a delightful culinary journey that celebrates one of my favorite treats—homemade strawberry jam filling. There’s nothing quite like the joy of spreading freshly made jam on a warm scone, a slice of toasted bread, or even dolloping it atop a luscious cake—yum! Today, we’ll explore not only how to make this delicious filling from scratch but also why it’s a beloved tradition in many homes (including mine).
The scent of strawberries simmering on the stove reminds me of lazy summer afternoons spent in my grandmother’s kitchen. As a child, I would watch her work with a twinkle in her eye, guiding me through each step with love and laughter. "The secret," she would say, "is to use the ripest strawberries you can find. They’re nature’s candy!" The sweet, sticky mixture bubbling away would fill the room with a fragrance that made my mouth water, and I couldn’t wait to taste the final product.
Today, let’s keep that nostalgia alive as we create a vibrant strawberry jam filling that’s sure to become a treasured recipe in your home as well. Not only does it make for a fantastic addition to pastries, desserts, and breakfast items, but it also carries that personal touch that store-bought versions simply can’t compete with. Grab your apron, and let’s get cooking!
A Taste of Nostalgia: My Strawberry Jam Story
Growing up, summer meant strawberry picking with my family. My siblings and I would race each other through the rows of berry-laden plants, eager to fill our baskets with plump, juicy strawberries. It was a tradition that brought us closer, filled our afternoons with sunshine, and rewarded us with the sweetest of treats.
Once we had our bounty, we’d head home, sweaty and giggly, only to dive into my grandmother’s kitchen, where the magic happened. I recall the excitement of watching her cook the strawberries down with sugar, their color deepening into a ruby red as the sweet scent enveloped us. Every spoonful of that warm strawberry jam seemed to hold the essence of our summer adventures, and each jar we sealed was a treasure that would last through the year.
Today, I still make strawberry jam using the same recipe, infused with those delightful memories, and I can’t wait for you to create your own unforgettable experiences with this filling!
Ingredients
Here’s what you’ll need to whip up this luscious strawberry jam filling:
- 2 pounds fresh strawberries: The stars of the show! Look for ripe, sweet strawberries for the best flavor. If strawberries aren’t in season, you can substitute with frozen, thawed strawberries, but ensure they retain some natural sweetness.
- 1 cup granulated sugar: This sweetness balances the tartness of the strawberries. Feel free to use less sugar or sugar substitutes like honey or maple syrup if you prefer.
- 1 tablespoon lemon juice: This adds brightness and helps preserve the color of the strawberries. Freshly squeezed lemon juice is best, but bottled lemon juice works too.
- 1 teaspoon vanilla extract (optional): A touch of vanilla enhances the flavors! You can even use almond extract for a slightly different twist.
- 1 packet fruit pectin: Pectin helps the jam set perfectly. You can use either powdered or liquid based on your preference, and some brands even come low-sugar options.
Step-by-Step Instructions
Step 1: Prepare the Strawberries
Start by washing the strawberries thoroughly under cold water. Remove the green tops and hull the strawberries—this means cutting away the stem and the white part just beneath it. You can slice them in half for quicker cooking, or if you prefer a chunkier texture, leave them intact.
Chef’s Tip: Use a paring knife to hull the strawberries easily, creating a nice, clean cut without wasting fruit!
Step 2: Macerate the Strawberries
Place your cleaned strawberries in a large mixing bowl. Sprinkle the cup of granulated sugar over them, and add the tablespoon of lemon juice. Gently toss the strawberries until they’re all coated in sugar. Let them sit for about 30 minutes. This step draws out the natural juices from the fruit and creates a syrupy mixture that is bursting with flavor!
Chef’s Insight: This process of maceration not only enhances the strawberry flavors but also allows the sugar to dissolve, leading to a smoother jam.
Step 3: Cook the Mixture
Transfer the macerated strawberries into a large saucepan over medium heat. Bring the mixture to a gentle boil, stirring frequently to prevent sticking. Once boiling, add the pectin packet, mixing well to incorporate it into the strawberries effectively.
Chef Hack: If you prefer a smoother consistency, consider using an immersion blender to purée the strawberries to your desired texture!
Step 4: Let it Simmer
Allow the mixture to simmer for about 15-20 minutes, continuing to stir frequently. You’ll notice the mixture thickening and bubbling up like magic. Keep an eye on it to avoid any sticking or burning.
Pro Tip: To check if your jam is ready, place a small amount on a chilled plate. If it holds its shape after a minute, it’s time to turn off the heat!
Step 5: Bottle It Up
Once your jam has reached the desired consistency, carefully ladle it into sterilized jars. Leave a little headspace at the top. Seal the jars with lids while the jam is still hot, and invert them for a few minutes to help create a vacuum seal.
Chef’s Note: Proper sealing will help preserve the freshness of your jam for longer, and these little jars make for lovely gifts!
Step 6: Cool and Store
Let your jars cool completely at room temperature before storing them in the fridge or pantry. Your homemade strawberry jam filling is now ready to shine in all your favorite recipes!
Serving Suggestions
When it comes to serving your homemade strawberry jam filling, the possibilities are endless! Spread it generously on toast, use it as a layer in sponge cakes, or fill pastries for a dessert that will have everyone returning for seconds. You can also swirl it into yogurt or oatmeal for a splash of fruity goodness. If you’re feeling adventurous, try it in savory dishes, like glazing grilled chicken or pork to add a sweet twist!
Recipe Variations
Here are a few fun variations to make your strawberry jam uniquely yours:
- Strawberry Lemon Jam: Add an extra zing by increasing the lemon juice to 2 tablespoons.
- Balsamic Strawberry Jam: Stir in a splash of balsamic vinegar for a sophisticated touch that pairs beautifully with cheese.
- Spiced Strawberry Jam: Infuse with spices like cinnamon or ginger for a warm flavor profile—perfect for fall!
- Strawberry-Basil Jam: Fold in a handful of fresh basil leaves at the end of cooking for a fragrant herbaceous twist.
Chef’s Notes
Every time I make this strawberry jam filling, it’s a warm reminder of love, family, and tradition. Some days, I can hear my grandmother’s voice in my head, guiding me through the steps while I craft this rich blend of flavors. Over the years, I’ve tweaked this recipe to suit my preferences—adding a hint of vanilla one day or tossing in a few raspberries on another for fun.
Cooking is about creativity and exploration, so don’t hesitate to make it your own!Each jar of jam captures not just flavors but also sweet moments, waiting to be shared with those you love.
FAQs and Troubleshooting
-
Why didn’t my jam set?
If your jam is too runny, you may need to cook it a little longer, letting it reach a higher temperature for more evaporation. If using pectin, make sure you followed the quantity correctly! -
Can I use frozen strawberries?
Yes, frozen strawberries are a great option! Just thaw them completely and drain any excess liquid before following the normal steps. -
How long does this jam last?
Properly sealed and stored in a cool place, your homemade strawberry jam can last up to a year in the pantry and a few months in the fridge after opening. -
Is it safe to use jars that don’t seal?
If a jar doesn’t seal, it’s best to refrigerate it and use it within a few weeks. You can also reprocess the jam into a new jar with a new lid for better sealing.
Nutritional Info
Though I haven’t provided specific nutritional information, homemade strawberry jam is generally light and can be enjoyed in moderation. It provides a good dose of vitamin C from the fresh strawberries, with sugar adding sweetness to your meals.
With this guide, you’re now equipped to bring the sweetness of homemade strawberry jam filling into your kitchen. I hope you recreate these cherished memories and make it a family tradition of your own. Happy cooking, my fellow foodies! 🍓💖
Print
Homemade Strawberry Jam Filling
- Total Time: 50 minutes
- Yield: 4 cups 1x
- Diet: Vegetarian
Description
A delightful homemade strawberry jam filling, perfect for spreading on toast or using in desserts, capturing the essence of summer in every jar.
Ingredients
- 2 pounds fresh strawberries
- 1 cup granulated sugar
- 1 tablespoon lemon juice
- 1 teaspoon vanilla extract (optional)
- 1 packet fruit pectin
Instructions
- Prepare the strawberries by washing them and removing the green tops.
- Macerate the strawberries with sugar and lemon juice, then let sit for 30 minutes.
- Cook the strawberries over medium heat until boiling, then add the pectin.
- Let the mixture simmer for 15-20 minutes, stirring frequently.
- Bottle the jam into sterilized jars, leaving headspace.
- Cool the jars at room temperature before storing them.
Notes
For variations, consider adding more lemon juice, balsamic vinegar, or spices for unique flavors.
- Prep Time: 30 minutes
- Cook Time: 20 minutes
- Category: Spread
- Method: Canning
- Cuisine: American
Nutrition
- Serving Size: 2 tablespoons
- Calories: 50
- Sugar: 12g
- Sodium: 1mg
- Fat: 0g
- Saturated Fat: 0g
- Unsaturated Fat: 0g
- Trans Fat: 0g
- Carbohydrates: 13g
- Fiber: 1g
- Protein: 0g
- Cholesterol: 0mg
Keywords: strawberry jam, homemade jam, jam filling, preserves, summer recipes
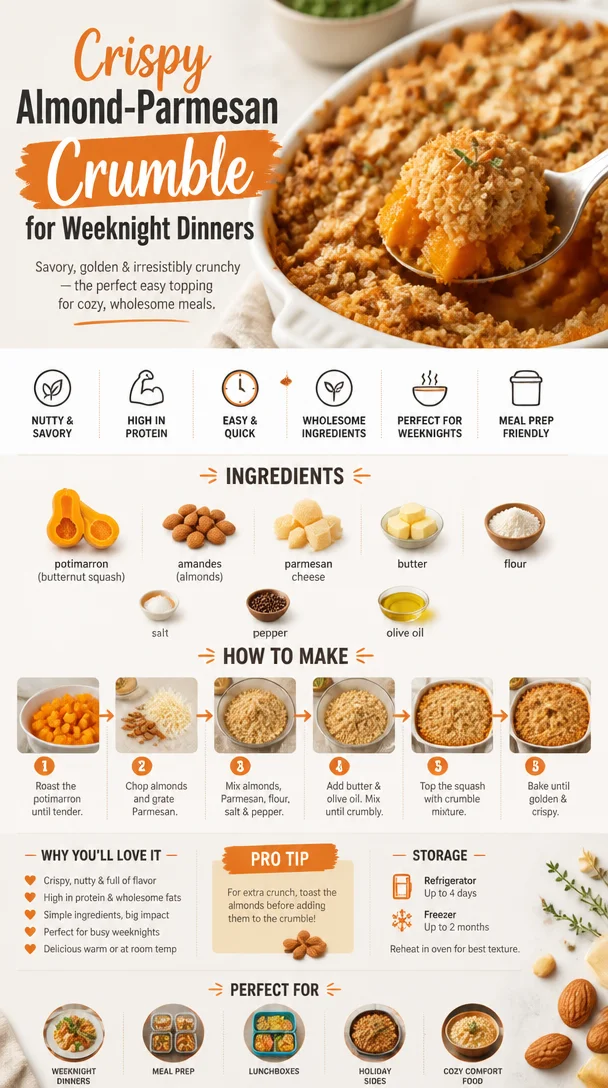
Crispy Almond-Parmesan Crumble for Weeknight Dinners
Discovering the Joy of Crumble aux Amandes et Parmesan
Welcome to my kitchen, friends! Today, I’m excited to take you on a flavor-packed journey that celebrates one of my ultimate comfort foods: Crumble aux Amandes et Parmesan. Imagine a dish that flawlessly marries the nutty crunch of almonds with the rich, umami depth of Parmesan. It’s a delightful creation that transforms a few humble ingredients into a cozy crowd-pleaser, whether served as a side or a main dish.
I’ll never forget the first time I encountered this delightful dish. I was visiting a charming bistro nestled in the heart of Paris—you know, the kind where the tables spill out onto the cobblestone streets and the aroma of baking bread invites you in like a warm hug. I ordered a vegetable crumble topped with the most luxurious almond and Parmesan mixture. When the servers brought it to my table, I could hardly contain my excitement; that golden-brown crust looked like a masterpiece! Just one bite sent me soaring to comfort food heaven—crunchy, creamy, rich, and utterly satisfying.
The beauty of Crumble aux Amandes et Parmesan is that it’s as versatile as it is delicious. It can elevate a classic vegetable medley into something extraordinary, or it can act as a stand-alone dish worthy of a celebratory dinner. Whether you are looking for an impressive side to share or a heartwarming meal to enjoy after a long day, this crumble will fit the bill beautifully. So grab your apron—let’s dive into the recipe and create something unforgettable, just like that day in Paris!
A Cozy Memory in the Kitchen
It was a chilly autumn afternoon, and I was at my grandmother’s house, surrounded by her eclectic collection of cookbooks and the warmth of her well-loved kitchen. She was the queen of bringing family together through food. I remember her teaching me how to make a similar crumble with whatever vegetables were leftover in the fridge. As we chopped carrots, zucchini, and potatoes, she spoke about the importance of not wasting food. That day, she introduced me to the concept of transforming simple ingredients into a delightful dish topped with a crumbly, cheesy mixture.
Her secret? A generous handful of toasted almonds and that magical ingredient, freshly grated Parmesan, layered thick on top. As we pulled our creation from the oven, the aroma wafting through the air was nothing short of magical. I still remember the crunch of that topping paired with the roasted vegetables beneath. That memory has stayed with me, and now I recreate it in my own kitchen, adding touches of my own while keeping that special warmth and love alive in each bite.
Ingredients: What You’ll Need
To create a mouthwatering Crumble aux Amandes et Parmesan, gather these ingredients:
-
Vegetables (about 4 cups mixed):
- Zucchini: A great base vegetable, it adds moisture and a subtle sweet flavor. If you’re out of zucchini, yellow squash or even eggplant work beautifully.
- Carrots: They add a touch of sweetness and vibrant color. Substitute with sweet potatoes for a richer flavor.
- Bell Peppers: Choose any color you like! If you prefer, you can swap them out for leeks for a milder taste.
-
Almonds (1 cup, sliced or slivered):
- Almonds provide a lovely crunch and nutty flavor. No almonds? Go for walnuts or pecans for a different texture and taste.
-
Parmesan cheese (1 cup, grated):
- Parmesan lends a savory umami kick to the crumble. Pecorino Romano can be a fun substitute that offers a tangier flavor profile.
-
Breadcrumbs (1 cup):
- Use plain or seasoned breadcrumbs for added flavor; panko breadcrumbs give extra crunch. For a gluten-free option, try almond flour.
-
Olive oil (1/4 cup):
- Extra virgin olive oil enhances the flavors and helps the crumble reach that golden perfection. For a flavored twist, consider using garlic-infused olive oil.
-
Salt and pepper (to taste):
- Essential seasonings! Always taste as you go to get a perfect balance. You can add herbs like thyme or rosemary for extra warmth.
These ingredients blend together to create a dish that’s not just about flavor but about creativity and making the most of what you have on hand.
Step-by-Step Instructions: Let’s Get Cooking!
Follow this detailed guide to whip up your Crumble aux Amandes et Parmesan:
-
Preheat your oven to 375°F (190°C). This sets the stage for an evenly cooked crumble with that beautifully crispy top.
-
Prepare your vegetables: Chop your zucchini, carrots, and bell peppers into bite-sized pieces. Aim for uniformity so that they cook evenly. If you’re using carrots, consider shaving them into thin ribbons for a tender texture; they’ll soak up the flavors beautifully.
-
Sauté the veggies: In a large skillet, heat about 2 tablespoons of olive oil over medium heat. Toss in your chopped vegetables, seasoning them lightly with salt and pepper. Cook for about 5-7 minutes, just until they start to soften. This step brings out their flavors and prevents the dish from becoming watery.
-
Spread the veggie mixture: Transfer your sautéed vegetables to a greased baking dish. You want them to be in an even layer; it makes for a more beautiful presentation.
-
Prepare the crumble topping: In a separate bowl, combine the sliced almonds, grated Parmesan, breadcrumbs, the remaining olive oil, a pinch of salt, and pepper. Your goal is to create a crumbly mixture that clumps together slightly. If it looks too dry, drizzle in a bit more olive oil.
-
Top it off: Sprinkle the almond and cheese mixture generously over the sautéed vegetables. Make sure it’s evenly distributed for that perfect bake.
-
Bake: Pop the baking dish into the oven and let it bake for 25-30 minutes until the topping is golden brown and the vegetables are bubbling beneath. If you’re feeling adventurous, you can turn on the broiler for a minute or two at the end to get that topping extra crispy—just keep a close eye on it to avoid burning.
-
Cool and serve: Once done, take it out of the oven and let it cool for about 5 minutes before digging in. This allows the flavors to meld.
Chefs Tip: Use this time to set the table or brew a cup of your favorite tea. There’s nothing better than enjoying a warm, home-cooked dish with a cozy beverage!
Serving Suggestions: Time to Plate!
When it’s time to serve your Crumble aux Amandes et Parmesan, consider these delightful presentation tips:
- Use a large spoon to scoop generous portions onto each plate, ensuring everyone gets their fair share of that crunchy topping.
- For a fresh twist, add a squeeze of lemon juice or a sprinkle of fresh herbs like parsley or basil on top before serving. This adds a lovely brightness that complements the rich flavors beautifully.
- Serve it alongside a simple green salad drizzled with balsamic vinaigrette for a well-rounded meal.
Enjoy with your loved ones, and savor the joy of conversation and togetherness that good food brings!
Recipe Variations: Mix It Up!
Get creative with your Crumble aux Amandes et Parmesan! Here are a few variations to consider:
-
Add Protein: Toss in some cooked chicken, turkey, or chickpeas for a heartier dish.
-
Spice It Up: Sprinkle in some red pepper flakes or smoked paprika for a kick.
-
Cheesy Delight: Experiment with different cheeses like goat cheese for a tangy twist, or a mix of cheddar for that super cheesy topping.
-
Seasonal Favorites: Swap out the vegetables based on what’s in season—think roasted squash in the fall or fresh asparagus in the spring!
-
Gluten-Free Option: Substitute breadcrumbs with crushed gluten-free crackers or almond flour to make this dish gluten-free without sacrificing taste.
Chef’s Notes: A Reminder of Love in Cooking
Cooking should always evoke a sense of joy, warmth, and nostalgia. This recipe for Crumble aux Amandes et Parmesan has evolved from my grandmother’s insightful teachings to a dish I can enjoy with my family and friends. Over time, I’ve learned to incorporate newer flavors, like a dash of balsamic vinegar, to create a delightful tang in my vegetable medley. For me, every crumble carries a memory—the laughter shared, the ingredients swapped, and the conversations that flow freely over delicious food.
I hope you create your own cherished memories as you enjoy this delightful dish. The kitchen is a place for love and creativity, so don’t hesitate to put your twist on it!
FAQs and Troubleshooting: Answers to Common Questions
-
What if my topping is too dry?
- If your crumble topping seems too dry, add a touch more olive oil or melted butter to help it clump together. You want that perfect crispy, golden crunch!
-
Can I make this dish ahead of time?
- Absolutely! You can prepare your vegetables and topping in advance, then assemble and bake them when you’re ready. Just add an extra few minutes to the baking time if cooking from a cold state.
-
How can I store leftovers?
- Store any leftovers in an airtight container in the fridge for up to 3 days. Reheat in the oven or microwave until warmed through. The topping may lose a little crunch, but it will still be delicious!
-
What if I don’t have any Parmesan?
- No problem! Feel free to use any hard cheese you have on hand, like aged Gouda or even vegan cheese! Just ensure it has a good flavor to complement the dish.
Nutritional Info (Optional)
While I believe in enjoying food, here’s a rough nutritional breakdown to be mindful:
- Portions: 6
- Calories: 320 per serving
- Protein: 12g
- Carbohydrates: 25g
- Fat: 20g
Nutrition values are approximate and can vary based on exact ingredients used and portion sizes.
As we wrap up this delicious journey together, I hope you feel inspired to whip up your own version of Crumble aux Amandes et Parmesan! It’s more than just a recipe; it’s a celebration of food, memories, and shared experiences. Happy cooking!
Print
Crumble aux Amandes et Parmesan
- Total Time: 45 minutes
- Yield: 6 servings 1x
- Diet: Vegetarian
Description
A comforting dish that combines the nutty crunch of almonds with the rich flavors of Parmesan, transforming simple vegetables into a delightful culinary experience.
Ingredients
- 4 cups mixed vegetables (zucchini, carrots, bell peppers)
- 1 cup sliced or slivered almonds
- 1 cup grated Parmesan cheese
- 1 cup breadcrumbs
- 1/4 cup olive oil
- Salt and pepper to taste
Instructions
- Preheat your oven to 375°F (190°C).
- Prepare your vegetables: Chop zucchini, carrots, and bell peppers into bite-sized pieces.
- Sauté the veggies: Heat 2 tablespoons of olive oil in a large skillet, add chopped vegetables, and season with salt and pepper for about 5-7 minutes.
- Spread the veggie mixture in a greased baking dish in an even layer.
- Prepare the crumble topping: In a bowl, mix sliced almonds, grated Parmesan, breadcrumbs, remaining olive oil, salt, and pepper.
- Top the sautéed vegetables with the almond and cheese mixture.
- Bake for 25-30 minutes until the topping is golden brown and vegetables are bubbling.
- Cool for 5 minutes before serving.
Notes
Experiment with different vegetables or cheeses to create your own variation. For a gluten-free option, use almond flour instead of breadcrumbs.
- Prep Time: 15 minutes
- Cook Time: 30 minutes
- Category: Main Course
- Method: Baking
- Cuisine: French
Nutrition
- Serving Size: 1 serving
- Calories: 320
- Sugar: 5g
- Sodium: 350mg
- Fat: 20g
- Saturated Fat: 4g
- Unsaturated Fat: 12g
- Trans Fat: 0g
- Carbohydrates: 25g
- Fiber: 3g
- Protein: 12g
- Cholesterol: 30mg
Keywords: vegetable crumble, almond, parmesan, comfort food, baking

Air Fryer Butternut Squash Halves: Quick, Crispy Side
Air Fryer Butternut Squash Halves: A Cozy, Flavorful Delight
Welcome to my kitchen, dear friends! Today, we’re diving into the delightful world of butternut squash, specifically in the form of Air Fryer Butternut Squash Halves. If you haven’t experienced the wonder of cooking squash in an air fryer, you’re in for a treat! I can hardly contain my excitement as I think about the sweet, nutty flavor of roasted butternut squash, combined with the ease and convenience of using an air fryer. Whether you’re looking for a simple side dish, a comforting meal, or a nourishing treat, this recipe ticks all the boxes!
But let’s be honest for a moment; cooking doesn’t have to be a wild culinary adventure every time. This recipe is about savoring the simple pleasures of food. The air fryer takes the humble butternut squash to new heights, providing tender, caramelized, and deliciously savory halves in no time at all. Plus, the best part? You can enjoy them on a weeknight or wow your friends at a holiday gathering.
Let’s jump into some kitchen magic! Ready to impress your taste buds and your loved ones with this delicious dish? Buckle up, and let’s get cooking! I promise you, this is not just a recipe; it’s a heartfelt experience.
A Cozy Memory
My love affair with butternut squash started on cool autumn afternoons when my grandma would make her famous roasted squash for Sunday dinners. I can still picture the kitchen filled with the warm aroma of herbs and spices, mingling with laughter and stories shared around the family table. She would slice that squash with such precision, her hands moving like seasoned art. Grandma would always say, “It’s not just about the food; it’s about the love you put into it.”
One day, in her cozy kitchen, while watching her work, I asked her to teach me her secrets. She chuckled and said jokingly, “Oh, dear! There are no secrets in cooking, just a little heart and some kitchen know-how!” That’s exactly what this recipe embodies! It’s about celebrating those nostalgic times, transforming simple ingredients into something heartwarming, and adding your own twist—just like grandma would have wanted.
Ingredients
Here’s what you’ll need to bring this cozy dish to life, along with some helpful tips:
-
1 Medium Butternut Squash
The star of the show! Choose a squash that feels heavy for its size with smooth, unblemished skin. If you can’t find butternut squash, pumpkin or acorn squash is a great substitute. -
2 tablespoons Olive Oil
This adds just the right richness to our squash. If you’re watching your calories, feel free to reduce the amount. You could also use melted coconut oil for a delightful flavor. -
1 teaspoon Salt
Salt enhances the natural sweetness of the squash. If you’re looking for low-sodium options, consider using a pinch of garlic powder or herb seasoning for flavor. -
1/2 teaspoon Black Pepper
Black pepper provides a kick, but if you prefer a milder flavor, you can use white pepper instead. -
1 teaspoon Ground Cinnamon
This is optional, but it adds a warm, sweet note that complements the squash beautifully. For a twist, try nutmeg or allspice instead! -
Fresh Herbs (optional)
Fresh sage or thyme makes for a flavorful herbaceous topping. If you don’t have fresh herbs, dried ones will do!
Step-by-Step Instructions
Let’s get that air fryer humming! Here’s how to make your Air Fryer Butternut Squash Halves step by step:
-
Prepare the Squash
Start by washing and drying your butternut squash. Using a sharp knife, carefully cut it in half lengthwise. If you’re not used to knife work, take it slow and steady; safety first! The flesh is pretty tough, so ensure your knife is sharp. -
Scoop Out the Seeds
Using a spoon, scoop out the seeds and the fibrous strings in the center. This part can be messy, but that’s part of the fun! Save those seeds if you want to roast them later as a crunchy snack. -
Season the Squash
Place the squash halves cut-side up on a large cutting board. Drizzle the olive oil over each half and sprinkle the salt, pepper, and cinnamon. Use your hands to rub the seasoning all over the flesh, ensuring an even coating. This is where the magic begins! Your hands will get a little oily, but that’s just a reminder of the love you’re putting into your dish. -
Air Frying Time
Preheat your air fryer to 370°F (190°C). Once hot, carefully place the butternut squash halves in the air fryer basket, cut-side up. Don’t overcrowd! You want to let the air circulate for that perfect roast. Depending on your air fryer’s capacity, you might need to do this in batches. -
Cook and Check
Air fry the squash for about 25-30 minutes. Halfway through, take a peek and check for tenderness by poking it with a fork. If it glides through easily, you’re all set—if not, let it cook a bit longer. The goal is perfectly tender flesh that’s also caramelized on top. Yum! -
Serving the Squash
Once cooked, carefully remove the squash from the air fryer. Be sure to let it cool for a few minutes before serving. As a finishing touch, sprinkle some fresh herbs on top for a pop of color and extra flavor.
Serving Suggestions
These Air Fryer Butternut Squash Halves are incredibly versatile! You can serve them as a side dish at dinner, stuffed with grains or quinoa for a heartier meal, or simply drizzled with a little balsamic glaze for a touch of sweetness. They pair beautifully with chicken, pork, or even a lovely fall salad.
For a fun presentation, you can place them on a large serving platter alongside some additional sautéed greens or roasted veggies to brighten up the dish.
Recipe Variations
-
Stuffed Squash: After air frying, scoop out some of the flesh and mix it with cooked grains, nuts, cranberries, and spices for a delicious stuffing.
-
Sweet Maple Glaze: Drizzle some maple syrup over the halves in the last few minutes of cooking for a sweet twist.
-
Spicy Kick: Add a sprinkle of cayenne pepper or chili powder for some heat alongside the cinnamon.
-
Cheesy Goodness: Top with crumbled feta or goat cheese before serving for a savory finish.
-
Mediterranean Touch: Blend in sun-dried tomatoes and olives for a unique flavor profile that transports your taste buds straight to the Mediterranean.
Chef’s Notes
Cooking is not just about following a recipe; it’s about experimenting, creating, and making it your own. This Air Fryer Butternut Squash Halves recipe has evolved since I first started making it. Initially, I kept it super simple, but I’ve found that experimenting with spices and toppings allows me to honor the essence of what butternut squash is while adding my own personal flair.
And sometimes, kitchen mishaps become the best stories! One time, I miscalculated the air fryer settings and ended up with a truly caramelized batch of squash—I thought I ruined dinner, but everyone loved the intensified flavor. So don’t sweat it if something doesn’t go precisely as planned; celebrate those "happy accidents!"
FAQs and Troubleshooting
Q1: How do I know when the butternut squash is done cooking?
You’ll want to test the tenderness with a fork. It should slide in easily without resistance. If it feels firm, give it a few more minutes!
Q2: Can I use frozen butternut squash?
Absolutely! Just adjust the cooking time. Frozen squash may need slightly less time, so start checking for doneness at around 20 minutes.
Q3: My squash turned out mushy; what went wrong?
This can happen if the squash was overcooked or if there was too much moisture. Make sure to check it a little earlier next time!
Q4: Can I make this in the oven?
For sure! Preheat your oven to 400°F (200°C) and roast the squash halves for about 40-50 minutes, cut-side up, until tender and caramelized.
Nutritional Info
While I encourage you to enjoy your cooking journey, I know nutrition is important! Butternut squash is loaded with vitamins A and C, high in fiber, and low in calories. It’s the ultimate comforting dish that also provides a nutrient boost—definitely a win-win!
And there you have it! Air Fryer Butternut Squash Halves, bursting with flavor and the warmth of home cooking. I hope this recipe brings as much joy to your kitchen as it does to mine! Whether you whip it up on your own or gather friends and family around, remember to savor each bite and make it your own. Happy cooking, friends!
Print
Air Fryer Butternut Squash Halves
- Total Time: 45 minutes
- Yield: 4 servings 1x
- Diet: Vegetarian
Description
Delight in the sweet, nutty flavors of roasted butternut squash halves, perfectly cooked in an air fryer for a quick and healthy dish.
Ingredients
- 1 Medium Butternut Squash
- 2 tablespoons Olive Oil
- 1 teaspoon Salt
- 1/2 teaspoon Black Pepper
- 1 teaspoon Ground Cinnamon (optional)
- Fresh Herbs (optional, for topping)
Instructions
- Prepare the Squash: Wash and dry your butternut squash. Cut it in half lengthwise with a sharp knife.
- Scoop Out the Seeds: Use a spoon to remove the seeds and fibrous strings in the center.
- Season the Squash: Drizzle olive oil on each half and sprinkle with salt, pepper, and cinnamon. Rub the seasoning over the flesh.
- Air Frying Time: Preheat your air fryer to 370°F (190°C). Place the squash halves cut-side up in the basket.
- Cook and Check: Air fry for about 25-30 minutes, checking for tenderness halfway through.
- Serve the Squash: Remove from the air fryer, let cool, and sprinkle fresh herbs on top before serving.
Notes
Experiment with different spices and toppings like maple syrup, cayenne pepper, or cheese for diverse flavors.
- Prep Time: 15 minutes
- Cook Time: 30 minutes
- Category: Side Dish
- Method: Air Frying
- Cuisine: American
Nutrition
- Serving Size: 1 half
- Calories: 150
- Sugar: 2g
- Sodium: 300mg
- Fat: 10g
- Saturated Fat: 1g
- Unsaturated Fat: 8g
- Trans Fat: 0g
- Carbohydrates: 23g
- Fiber: 4g
- Protein: 3g
- Cholesterol: 0mg
Keywords: butternut squash, air fryer, vegetarian, side dish, healthy cooking
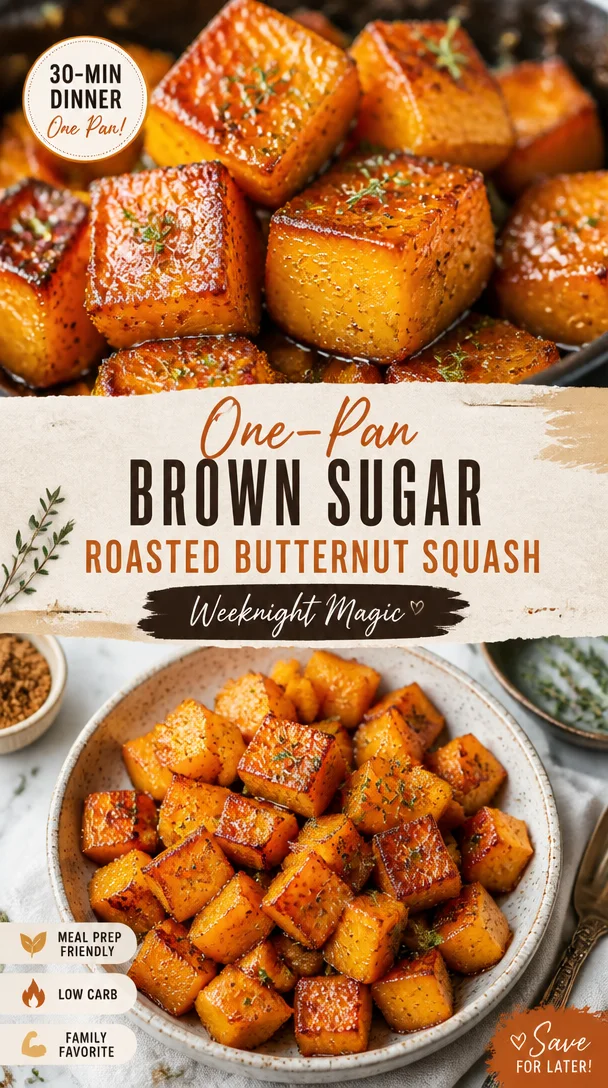
One-Pan Brown Sugar Roasted Butternut Squash (Weeknight)
Brown Sugar Roasted Butternut Squash: A Cozy Kitchen Delight
Welcome to my kitchen! Today, we’re diving into one of my all-time favorite comfort dishes: Brown Sugar Roasted Butternut Squash. As the weather starts cooling down and autumn whispers its arrival, there’s something incredibly special about cozying up with a warm, sweet, and savory dish that feels like a hug in a bowl. This roasted butternut squash recipe is rich, buttery, and kissed with the warm flavors of brown sugar and spices—perfect for adding a touch of fall magic to your dinner table or meal prep.
Imagine the sweet, caramelized aroma filling your kitchen as the squash roasts to golden perfection. Whether served as a side dish at Thanksgiving or enjoyed alongside a hearty grain bowl, this recipe is not only delicious but versatile, too! Plus, it’s so simple to make—if you can chop veggies and set a timer, you’re already halfway there!
So, grab your apron, and let’s embark on this cozy cooking adventure together. Not only will you end up with a delightful dish, but you’ll also find a space to reflect, connect, and enjoy the simple pleasures of cooking!
A Sweet Memory: The First Time I Roasted Squash
The first time I roasted butternut squash, I was a college student trying to impress my friends with my newfound cooking skills. I can still remember the day—it was chilly outside, and the leaves were swirling like dancers in the wind. Armed with my trusty old cookbook, I decided to tackle roasted butternut squash. As I chopped the vibrant orange flesh, the sweet aroma filled my small apartment kitchen, making my roommates flock in like moths to a flame.
With the oven doing its magic, I nervously paced around, waiting for those 30 minutes to pass. When the timer went off, I opened the oven door to find the squash beautifully caramelized, with that irresistible, sweet, and slightly nutty scent wafting through the air. It felt like I had unlocked a culinary treasure! That night, we all gathered around the table, laughter filling the air as we enjoyed our meal. That simple dish ignited my love for cooking and the joy of sharing homemade meals, a tradition I carry on through this blog.
Ingredients You’ll Need
Here’s the rundown of ingredients for this delicious Brown Sugar Roasted Butternut Squash. Each plays a crucial role in creating depth of flavor and that cozy vibe we crave.
-
Butternut Squash (1 medium): The star of the show! Sweet, nutty, and creamy when roasted. You can substitute with acorn or pumpkin if that’s what you have on hand.
-
Brown Sugar (¼ cup): This adds that irresistible caramel-like sweetness. If you want a healthier option, you can use coconut sugar or maple syrup in moderation.
-
Olive Oil (2 tablespoons): This helps in roasting the squash evenly. Feel free to swap it out with melted coconut oil for a different flavor profile.
-
Cinnamon (1 teaspoon): The warm spice perfectly complements the sweetness of the squash. Nutmeg or pumpkin pie spice also works beautifully here.
-
Salt (½ teaspoon): Just a pinch enhances all flavors. Remember, good quality sea salt is a chef’s best friend!
-
Black Pepper (¼ teaspoon): A little kick to offset the sweetness. Try smoked paprika for a more complex flavor twist.
-
Optional Fresh Herbs (½ teaspoon): Such as thyme or rosemary. They add an earthy freshness—perfect if you’re feeling adventurous!
Step-by-Step Instructions
Now, let’s get cooking! Follow these steps closely, and I promise you’ll end up with a stunning dish that will steal the show.
-
Prepare the Squash: Start by preheating your oven to 400°F (200°C). While it heats up, grab your butternut squash. Cutting it can be a bit challenging due to its tough skin. I recommend using a sturdy chef’s knife and being cautious—it’s easy to slip! Cut the squash in half lengthwise, scoop out the seeds with a spoon, and then chop it into bite-sized cubes. If you’re short on time, you can often find pre-cut butternut squash at the grocery store.
-
Mix the Ingredients: In a large mixing bowl, combine the cubed butternut squash, olive oil, brown sugar, cinnamon, salt, and black pepper. Smell that? It’s pure bliss! Toss everything together until the squash is well-coated, ensuring each piece is evenly dressed for roasting. Chef’s tip: Don’t be shy—use your hands for this! You’ll get a better sense of how much oil and sugar is clinging to your squash.
-
Roast, Baby, Roast: Spread the coated squash evenly on a baking sheet lined with parchment paper. This ensures easy cleanup and prevents sticking! Roast in the preheated oven for about 25-30 minutes. Halfway through, give it a good toss with a spatula so every piece gets a chance to caramelize beautifully. The goal is for your squash to be golden brown and fork-tender.
-
Cooling Down: Once ready, take the sheet out of the oven and allow the squash to cool for about 5 minutes. This will allow the flavors to settle in and avoid burning your tongue when you dive in!
-
Serving Time: Transfer the roasted squash to a beautiful serving bowl. Sprinkle with fresh herbs for that extra flair—trust me; your guests will be impressed!
Serving Suggestions
This Brown Sugar Roasted Butternut Squash is fantastic on its own, but let’s get creative! Serve it warm as a side dish alongside roasted chicken or grilled steak, or toss it over a bed of greens for a delicious salad. You can also mix it with quinoa or farro for a hearty, satisfying meal. It’s also incredible nestled into a grain bowl, topped with feta cheese, pumpkin seeds for crunch, and a drizzle of balsamic glaze.
Recipe Variations
Feeling adventurous? Here are a few creative twists to bring to this cozy dish:
-
Maple-Mustard Glaze: Replace the brown sugar with maple syrup and add a teaspoon of Dijon mustard for a sweet and tangy flavor.
-
Spicy Kick: Add a pinch of cayenne or red pepper flakes to the mixture for a delightful and warming heat.
-
Savory Spin: Swap cinnamon with cumin and toss in some chopped garlic. This will transform the squash into a fragrant, savory dish.
-
Herb Infusion: Mix in fresh sage or thyme before roasting to infuse your squash with fragrant herbal notes.
-
Sweet and Tart: Toss in some cranberries or pomegranate seeds after roasting for a burst of color and tartness that pairs perfectly with the sweetness.
Chef’s Notes
Over the years, this recipe has undergone a few transformations in my kitchen. Initially, it started with just olive oil and brown sugar, but as my palate has evolved, I’ve added spices and fresh herbs to enhance the flavors. I’ve even used this roasted squash as a filling in tacos—and let me tell you, it’s a game-changer!
And here’s a little kitchen story for you: One day, I accidentally spilled a whole jar of brown sugar into my bowl. Instead of panicking, I decided to embrace the extra sweetness and ended up with a deliciously caramelized flavor. So don’t be afraid of little accidents—sometimes they turn out to be happy accidents!
FAQs and Troubleshooting
1. My butternut squash didn’t caramelize—what went wrong?
This can happen if your oven isn’t hot enough or if the squash was packed too closely on the baking sheet. Ensure even spacing and that you preheat your oven thoroughly.
2. Can I make this dish ahead of time?
Absolutely! Roast the squash ahead of time and reheat it in the oven or microwave just before serving. It doesn’t lose its charm and flavors even as leftovers!
3. What’s the best way to cut a butternut squash?
Using a sharp knife and a cutting board with a damp towel underneath can help stabilize it. Start by cutting off both ends to create a flat surface for easier handling.
4. How can I store leftovers?
Store any leftover roasted squash in an airtight container in the fridge for up to 3-4 days. Reheat in the oven or the microwave, and enjoy!
Nutritional Information
(Per serving, approximately ½ cup)
- Calories: 150
- Protein: 2g
- Fat: 7g
- Carbohydrates: 25g
- Fiber: 3g
- Sugar: 10g
Isn’t it amazing how something so simple can evoke such joy and warmth? This Brown Sugar Roasted Butternut Squash is more than just a recipe; it’s a reminder to enjoy the little moments in the kitchen and the comfort of good food. Happy cooking, my friends, and may your kitchens always be filled with love and laughter!
Print
Brown Sugar Roasted Butternut Squash
- Total Time: 45 minutes
- Yield: 4 servings 1x
- Diet: Vegetarian
Description
A warm and sweet dish featuring roasted butternut squash caramelized with brown sugar and spices, perfect for fall!
Ingredients
- 1 medium Butternut Squash
- ¼ cup Brown Sugar
- 2 tablespoons Olive Oil
- 1 teaspoon Cinnamon
- ½ teaspoon Salt
- ¼ teaspoon Black Pepper
- ½ teaspoon Optional Fresh Herbs (thyme or rosemary)
Instructions
- Prepare the Squash: Preheat your oven to 400°F (200°C). Cut the squash in half lengthwise, scoop out the seeds, and chop into bite-sized cubes.
- Mix the Ingredients: In a large bowl, combine cubed squash, olive oil, brown sugar, cinnamon, salt, and black pepper. Toss until well-coated.
- Roast: Spread the coated squash on a lined baking sheet. Roast for 25-30 minutes, tossing halfway through, until golden and fork-tender.
- Cooling Down: Allow roasting squash to cool for about 5 minutes.
- Transfer to a serving bowl and sprinkle with fresh herbs if desired.
Notes
This dish can be made ahead of time and reheated before serving.
- Prep Time: 15 minutes
- Cook Time: 30 minutes
- Category: Side Dish
- Method: Roasting
- Cuisine: American
Nutrition
- Serving Size: ½ cup
- Calories: 150
- Sugar: 10g
- Sodium: 300mg
- Fat: 7g
- Saturated Fat: 1g
- Unsaturated Fat: 6g
- Trans Fat: 0g
- Carbohydrates: 25g
- Fiber: 3g
- Protein: 2g
- Cholesterol: 0mg
Keywords: butternut squash, roasted vegetables, fall recipes, vegetarian, cozy meals

Minute Peanut Butter Spider Cookies for Halloween Treats
Peanut Butter Spider Cookies: A Spooktacular Delight
Welcome back to my kitchen, friends! Today, we’re diving into a recipe that’s perfect for Halloween gatherings or anytime you want to add a touch of whimsy to your baking. Picture this: soft, chewy peanut butter cookies adorned with chocolate “spiders” that are as cute as they are delicious. These Peanut Butter Spider Cookies are sure to bring a smile to your face—whether you’re a kid, or just a kid at heart!
What I love about these cookies is their nostalgia. Growing up, Halloween was a big deal in our household. My family’s kitchen transformed into a bakery of sorts, filled with the delicious aromas of spices, sugar, and, of course, peanut butter! We would whip up all sorts of treats to share with friends and neighbors. One of my fondest memories is of my mom and me spending the afternoon shaping dough and crafting the cutest little spider cookies, complete with chocolate legs sticking out. It was an activity filled with laughter, a bit of mess, and a lot of love.
Baking these cookies is not just about satisfying your sweet tooth; it’s about sharing joy and creativity. So roll your sleeves up and grab that apron—it’s time to create something wonderful!
Personal Story
One Halloween afternoon, my mom and I set out to create the most epic dessert for our neighborhood party. We had the typical classics lined up: pumpkin pies, caramel apples, and of course, peanut butter cookies, because, well, they were my favorite! While we were making our plans, I caught a glimpse of a quirky recipe in an old magazine featuring spider cookies. My mom’s eyes lit up, and just like that, we decided to transform our usual peanut butter cookies into something special.
I remember us laughing as we formed the cookies into spider shapes, adding eight chocolate legs made from chocolate-covered pretzels. As they cooled, we giggled about how they might scare some little goblins at the party! The moment of delight on our neighbors’ faces when they saw our "creepy" creations made all the chaos of the kitchen worthwhile. That year, our spooky cookies became a neighborhood hit, and I’ve been making them every Halloween since.
Ingredients
Here’s what you’ll need to whip up these Peanut Butter Spider Cookies:
-
1 cup creamy peanut butter: The star of the show! Creamy peanut butter gives a smooth texture and rich flavor. If you’re feeling adventurous, swap it for crunchy peanut butter for a bit of extra texture.
-
1 cup granulated sugar: Sweetness is essential to balance the saltiness of the peanut butter. You can also use coconut sugar for a deeper flavor if you’re looking for a healthier twist!
-
1 egg: This binds everything together. In case of an egg allergy, you can use a flaxseed egg (1 tablespoon ground flaxseed mixed with 2.5 tablespoons water) as a substitute.
-
1 teaspoon vanilla extract: This lovely ingredient enhances the flavor of our cookies. Choose pure vanilla extract for a more authentic taste.
-
1 teaspoon baking powder: This little agent is what makes our cookies puff up beautifully in the oven. Baking soda can be used instead, but you may need to adjust the amounts slightly.
-
Chocolate-covered pretzels: These are our "spider legs," combining a delightful crunch with chocolatey sweetness. You can use chocolate malt balls or even cookie dough bites if you want to mix it up!
-
Chocolate chips or M&M’s for the spiders’ bodies: Feel free to get creative! Dark chocolate chips add a rich flavor, while M&Ms come in all those vibrant colors—perfect for Halloween fun!
Step-by-Step Instructions
Let’s dive into the delicious process of creating these fantastic cookies.
Step 1: Preheat the Oven
Preheat your oven to 350°F (175°C). Preheating properly helps the cookies cook evenly. Set a timer for a quick ten minutes once you start mixing things up!
Step 2: Mix the Peanut Butter and Sugar
In a large mixing bowl, combine the peanut butter and granulated sugar. Use a hand mixer or a sturdy wooden spoon to blend them until smooth and fluffy. This step is crucial; the more air you incorporate, the softer and tender the cookies will be!
Step 3: Add the Egg and Vanilla
Crack in the egg and pour in the vanilla extract. Mix until everything is well combined. At this point, take a moment to smell that divine peanut buttery goodness—it’s one of the highlights of cooking, wouldn’t you agree?
Step 4: In with the Dry Ingredients
Now, gently fold in the baking powder. If you’re using any optional ingredients, this is the time to introduce them, like a sprinkle of cinnamon or nutmeg for an extra flavor kick!
Step 5: Scoop the Dough
Using a cookie scoop or a tablespoon, scoop out equal portions of dough onto a lined baking sheet. Make sure they’re spaced about 2 inches apart, as they will spread while baking.
Step 6: Bake
Pop your tray in the preheated oven and bake for about 8-10 minutes. Watch closely! You want them to be slightly underbaked as they will continue to firm up as they cool. Once done, remove them from the oven and let them sit on the tray for 5 minutes before transferring them onto a cooling rack.
Step 7: Create the Spiders
Once the cookies have cooled, it’s time for the fun part! Place two chocolate-covered pretzels on each cookie for legs. Then, top each spider with a chocolate chip or M&M for its body. Get creative with their positioning—they can be whimsical or a bit spooky!
Step 8: Enjoy!
Gather your family or friends around and share these delicious treats! You might want to snap a few pictures first; these little creatures are Instagram-ready!
Serving Suggestions
To serve these delightful cookies, place them on a festive platter lined with parchment paper for a charming touch. For an extra whimsical effect, use a Halloween-themed tablecloth and serve them alongside pumpkin spice lattes or a warm glass of apple cider. Your friends will be talking about these cookies long after the last bite is gone!
Recipe Variations
Here are some creative twists you can try with your Peanut Butter Spider Cookies:
- Pumpkin Spice Variation: Add a teaspoon of pumpkin pie spice to the cookie dough for a fall-inspired flavor.
- Nut Allergies: Swap out the peanut butter for sun butter (made from sunflower seeds) for a nut-free version.
- Vegan Version: Use a flaxseed egg in place of the egg, and for a vegan-friendly chocolate option, search for dairy-free chocolate chips.
- Add-Ins: Toss in some chopped nuts or shredded coconut to the dough before baking for added elements of surprise.
Chef’s Notes
These Peanut Butter Spider Cookies have a special place in my heart. Over the years, I’ve experimented with flavors, occasionally swapping out ingredients based on what I had in my pantry. I once added crushed Oreos to the mix—it created a deliciously unique texture that everyone loved! Ultimately, these cookies became a tradition that sparked creativity and brought joy to our table.
And, oh! Speaking of chaos, let me tell you about the time I accidentally grabbed the salt instead of the sugar. Let’s just say that batch did not make it to the neighborhood party! Now I triple-check everything.
FAQs and Troubleshooting
1. My cookies turned out too flat! How can I prevent that?
This can happen if your dough is too warm or if you didn’t add enough flour. Ensure your butter and peanut butter are at room temperature, and chill the dough for 30 minutes before baking.
2. How should I store my peanut butter spider cookies?
Keep them in an airtight container at room temperature for up to a week. If you want to freeze them, layer them between parchment in a container and freeze for up to three months.
3. Can I use natural peanut butter?
Yes, but be cautious! Natural peanut butter is often less sweet and can affect the texture of the cookies. You might need to adjust the sugar or add a bit more flour to get the desired consistency.
4. How do I make these cookies gluten-free?
Simply replace all-purpose flour with a gluten-free flour mix that has a binding agent, like almond or coconut flour!
With these tips, you’re all set for a successful batch of Peanut Butter Spider Cookies!
Now that you have all the details, invite your friends over and create some unforgettable kitchen magic! Happy baking!
Print
Peanut Butter Spider Cookies
- Total Time: 25 minutes
- Yield: 24 cookies 1x
- Diet: Vegetarian
Description
Soft, chewy peanut butter cookies adorned with chocolate “spiders” that add a whimsical touch to your Halloween gatherings.
Ingredients
- 1 cup creamy peanut butter
- 1 cup granulated sugar
- 1 egg
- 1 teaspoon vanilla extract
- 1 teaspoon baking powder
- Chocolate-covered pretzels
- Chocolate chips or M&Ms
Instructions
- Preheat your oven to 350°F (175°C).
- Mix the peanut butter and granulated sugar in a large mixing bowl until smooth and fluffy.
- Add the egg and vanilla extract, mixing until well combined.
- Fold in the baking powder and any optional ingredients like cinnamon or nutmeg.
- Scoop equal portions of dough onto a lined baking sheet, spaced about 2 inches apart.
- Bake for 8-10 minutes until slightly underbaked, then let cool for 5 minutes on the tray before transferring to a cooling rack.
- Create spiders by placing two chocolate-covered pretzels on each cookie and topping with a chocolate chip or M&M.
- Enjoy! Share these delightful treats with family and friends!
Notes
For variations, try adding pumpkin pie spice for fall flavor, or swap peanut butter for sun butter for nut-free cookies.
- Prep Time: 15 minutes
- Cook Time: 10 minutes
- Category: Dessert
- Method: Baking
- Cuisine: American
Nutrition
- Serving Size: 1 cookie
- Calories: 180
- Sugar: 10g
- Sodium: 50mg
- Fat: 8g
- Saturated Fat: 1g
- Unsaturated Fat: 5g
- Trans Fat: 0g
- Carbohydrates: 24g
- Fiber: 1g
- Protein: 3g
- Cholesterol: 20mg
Keywords: Halloween cookies, peanut butter cookies, spider cookies, festive baking


