
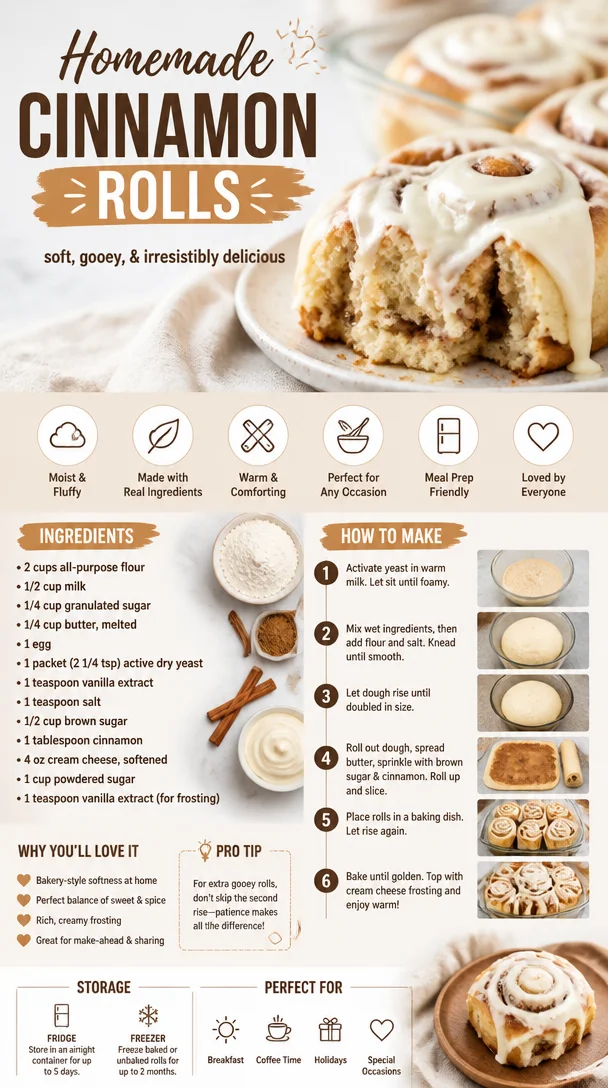
Homemade Cinnamon Rolls
The Ultimate Homemade Cinnamon Rolls Recipe: A Sweet Escape to Comfort
Welcome to my kitchen, my friends! Today, we’re diving into a deliciously cozy world filled with warmth, sweetness, and, yes, the irresistible aroma of homemade cinnamon rolls. There’s something truly magical about the scent of cinnamon swirling through your home, transporting you to a cozy café or a beloved family kitchen. Whether you’re a seasoned baker or just starting out, this recipe is all about inviting that bliss into your life.
Let’s face it, who doesn’t love a warm, gooey cinnamon roll with a cup of coffee in hand? This dish, a glorious combination of fluffy dough, cinnamon, sugar, and buttery goodness, can lift our spirits, spark joyful memories, and create moments we can savor for years to come. And trust me, once you try these homemade beauties, store-bought versions will never be the same!
A Whiff of Nostalgia
Growing up, Saturday mornings were sacred in my household. My siblings and I would eagerly rise, barely remembering to brush our teeth, the tantalizing scent of cinnamon wafting through the halls. My mom had this old, battered recipe book filled with handwritten notes and flour smudges from her many baking adventures. One Saturday, she decided to try her hand at homemade cinnamon rolls. In my young eyes, it was pure magic. The dough was sticky and challenging to work with, but my mom’s infectious enthusiasm turned every mishap into a reason to laugh. I remember eagerly rolling out the dough, pouring the cinnamon-sugar mixture, and attempting to keep my mess to a minimum (spoiler: I failed!).
After what felt like hours of anticipation, the rolls finally emerged from the oven—golden brown and smelling divine. With fingers sticky from frosting, we would devour them still warm, pausing between bites to share stories, laughter, and lots of cream cheese frosting. Those mornings were more than just about the food; they were about connection, family, and joy. Today, as I recreate these rolls in my own kitchen, I carry that memory with me, hoping to create the same sense of love and warmth for you and your loved ones.
Ingredients
To create these stellar cinnamon rolls, you’ll need:
-
All-purpose flour (4 cups)
This is the backbone of your dough! You can substitute with bread flour for extra fluffiness, or even gluten-free flour blends if you’re avoiding gluten. -
Sugar (1/2 cup)
This sweetens the dough and enhances the flavor of the cinnamon. For a healthier twist, consider using coconut sugar or maple sugar. -
Baking powder (1 tablespoon)
This is your leavening hero! Ensure it’s fresh for that perfect rise. You can also use baking soda in a pinch, just remember to adjust other acidic components accordingly. -
Salt (1 teaspoon)
Balances the sweetness and enhances flavors. Experiment with flavored salts (like Himalayan or sea salt) for a gourmet touch. -
Whole milk (1 cup)
Adds richness and moisture to your rolls. For a dairy-free option, try almond or oat milk. Just ensure it’s warm, not hot, when adding yeast. -
Unsalted butter (1/2 cup, melted)
A must for flavor and moisture! You can substitute with coconut oil for a dairy-free version, but keep in mind it may alter the taste slightly. -
Active dry yeast (2 1/4 teaspoons)
This is what makes your dough rise! Make sure your yeast is fresh. If you only have instant yeast, you can use that too without proofing. -
Cinnamon (2 tablespoons)
The star of the show! Use quality ground cinnamon for maximum flavor. Feel free to experiment with other spices like nutmeg or cardamom. -
Brown sugar (1/2 cup)
For that perfect caramelized filling. You can use white sugar if you don’t have brown, though the deeper flavor won’t be quite the same. -
Cream cheese (for frosting; optional)
Adds a tangy twist to your icing. You can switch it with mascarpone for a sweeter version, or even yogurt for lower calories.
Step-by-Step Instructions
Let’s get down to the details! Making homemade cinnamon rolls is all about patience and love. Follow these steps, and you’ll have a batch of divine rolls ready to share (or keep all to yourself—we won’t tell!).
-
Activate the yeast: In a small bowl, mix the warm milk (around 110°F or just above body temperature), sugar, and yeast. Let it sit for about 5-10 minutes until it’s all frothy. This shows that your yeast is active and ready to help your dough rise!
-
Mix the dry ingredients: In a large mixing bowl, combine the flour, baking powder, and salt. Whisk them together until fully combined—this helps to aerate the mixture and ensures even distribution.
-
Combine wet and dry: Pour the activated yeast mixture and melted butter into the flour mix. Stir with a wooden spoon or rubber spatula until a shaggy dough forms. It should be slightly sticky at this point. Don’t worry if it seems too sticky; we’ll fix that!
-
Knead the dough: Turn the dough out onto a floured surface and knead for about 8-10 minutes. You’re looking for a soft, elastic dough that’s not too tacky to the touch. If it’s still sticky, add a bit more flour gradually.
-
First rise: Place the kneaded dough in a greased bowl, cover it with a clean kitchen towel or plastic wrap, and leave it in a warm spot for about 1-2 hours. The dough should double in size—this is the beauty of patience!
-
Prep the filling: In a separate bowl, mix the brown sugar and cinnamon. This heavenly combination is the key to our gooey filling. Set it aside while the dough rises.
-
Roll out the dough: Once risen, punch down the dough to release any air. On a floured surface, roll it out into a rectangle about 1/4-inch thick. Aim for roughly 18×12 inches—don’t stress if it’s not perfect!
-
Spread some love: Brush the rolled-out dough with softened butter (about 3-4 tablespoons), leaving a small margin around the edges. Then, sprinkle the cinnamon-sugar mixture evenly over the buttered surface. Can you smell it already?
-
Roll it up: Starting from one of the long edges, tightly roll the dough towards the other edge to form a log. Pinch the seam together to secure it. Use a sharp knife to slice the dough into 12 even rolls—about an inch thick is perfect.
-
Second rise: Arrange the rolls in a greased baking dish, leaving a little space between them, and cover them again for another 30-45 minutes. This is where they get that delightful fluffiness!
-
Preheat the oven: As the rolls rise, preheat your oven to 350°F (175°C). The perfect warm setting for baking these beauties!
-
Bake: Place the rolls in your preheated oven and bake for 25-30 minutes or until golden brown. Keep an eye on them—if they start browning too quickly, cover with aluminum foil.
-
Make the frosting: While the rolls are baking, whip up a simple frosting. Beat together 1 cup of cream cheese, 1/4 cup of softened butter, 1 cup of powdered sugar, and a dash of vanilla extract until smooth and creamy.
-
Frost and serve: Once the rolls are out of the oven, let them cool for about 10 minutes before generously spreading the frosting over top. The warm rolls will help it melt into every nook and cranny!
Serving Suggestions
Serve those luscious cinnamon rolls warm, right out of the oven, on a rustic wooden platter. Pair them with fresh fruit, a side of crispy bacon, or perhaps a lovely cup of coffee or tea for that perfect breakfast or brunch spread. They also make for an irresistible dessert, so make sure you have a few extra on hand—your guests will definitely be coming back for seconds!
Recipe Variations
- Nutty delight: Add some chopped walnuts or pecans into the filling for a delightful crunch.
- Fruity twist: Incorporate some raisins or dried cranberries for a fruity flavor explosion.
- Chocolate lover: Sprinkle in some mini chocolate chips for an indulgent twist.
- Pumpkin spice: Swap in pumpkin puree for part of the butter and add pumpkin pie spice into the mix during the fall.
- Lemon glaze: Instead of cream cheese frosting, whisk together powdered sugar and lemon juice for a zesty finish.
Chef’s Notes
These cinnamon rolls have been a staple in my kitchen for years, and over time, I’ve played with the recipe to fit my personal tastes. The joy of cooking is in the experimenting—don’t be afraid to make this recipe your own! Once, I even added a touch of bourbon to the frosting for an adult treat; the results were divine. Remember that your kitchen should be a place of joy and creativity, so embrace those happy accidents!
FAQs and Troubleshooting
Q: My dough didn’t rise! What happened?
A: Ensure your yeast is fresh and that your milk was warm—if it’s too hot, it may kill the yeast. A cold kitchen can also slow down rising, so find a warm spot!
Q: My rolls turned out dense. What did I do wrong?
A: This can be a result of overworking the dough or adding too much flour. Aim for a soft, slightly tacky consistency before and after the first rise!
Q: Can I make these ahead of time?
A: Absolutely! You can prep the rolls and place them in the fridge overnight before baking. Just remember to let them come to room temperature and rise again before popping them into the oven.
Q: How do I store leftovers?
A: If there are any leftovers (which is rare!), store them in an airtight container at room temperature for 1-2 days or refrigerate for about a week. You can also freeze them, wrapping tightly in plastic wrap and then in aluminum foil. Just thaw and warm them before serving!
Nutritional Info
Each homemade cinnamon roll (without frosting) contains approximately:
- Calories: 240
- Fat: 8g
- Carbohydrates: 36g
- Protein: 4g
Keep in mind that toppings and fillings will adjust these numbers. For a decadent treat, it’s all worth it in my book!
So there you have it, friends! Your guide to making the best homemade cinnamon rolls that are sure to fill your home with warmth, love, and immense flavor. I can’t wait for you to dive in and create your own memories with these soft, gooey delights. Happy baking!
Print
The Ultimate Homemade Cinnamon Rolls
- Total Time: 90 minutes
- Yield: 12 servings
- Diet: Vegetarian
Description
Delicious homemade cinnamon rolls that fill your kitchen with the irresistible aroma of cinnamon and sweetness, perfect for breakfast or a cozy treat.
Ingredients
- All-purpose flour (4 cups)
- Sugar (1/2 cup)
- Baking powder (1 tablespoon)
- Salt (1 teaspoon)
- Whole milk (1 cup)
- Unsalted butter (1/2 cup, melted)
- Active dry yeast (2 1/4 teaspoons)
- Cinnamon (2 tablespoons)
- Brown sugar (1/2 cup)
- Cream cheese (for frosting; optional)
Instructions
- Activate the yeast: In a small bowl, mix the warm milk, sugar, and yeast. Let it sit for about 5-10 minutes until it’s frothy.
- Mix the dry ingredients: In a large mixing bowl, combine the flour, baking powder, and salt. Whisk them together.
- Combine wet and dry: Pour the activated yeast mixture and melted butter into the flour mix. Stir until a shaggy dough forms.
- Knead the dough: Turn the dough out onto a floured surface and knead for about 8-10 minutes.
- First rise: Place the kneaded dough in a greased bowl, cover, and let it rise in a warm spot for about 1-2 hours.
- Prep the filling: Mix the brown sugar and cinnamon in a separate bowl.
- Roll out the dough: Once risen, punch down the dough and roll it out into a rectangle about 1/4-inch thick.
- Spread some love: Brush the rolled-out dough with softened butter and sprinkle the cinnamon-sugar mixture over it.
- Roll it up: Starting from one edge, tightly roll the dough to form a log and slice into 12 rolls.
- Second rise: Arrange the rolls in a greased baking dish, cover, and let them rise for another 30-45 minutes.
- Preheat the oven to 350°F (175°C).
- Bake: Place the rolls in the oven and bake for 25-30 minutes until golden brown.
- Make the frosting: Beat together cream cheese, softened butter, powdered sugar, and vanilla extract until smooth.
- Frost and serve: Let the rolls cool for 10 minutes before frosting and serving.
Notes
Enjoy warm and serve with coffee or tea. Feel free to incorporate nuts or fruits into the filling for added flavor.
- Prep Time: 30 minutes
- Cook Time: 30 minutes
- Category: Dessert
- Method: Baking
- Cuisine: American
Nutrition
- Serving Size: 1 roll
- Calories: 300
- Sugar: 10g
- Sodium: 200mg
- Fat: 10g
- Saturated Fat: 5g
- Unsaturated Fat: 4g
- Trans Fat: 0g
- Carbohydrates: 45g
- Fiber: 1g
- Protein: 5g
- Cholesterol: 30mg
Keywords: cinnamon rolls, homemade cinnamon rolls, comfort food, baking, dessert
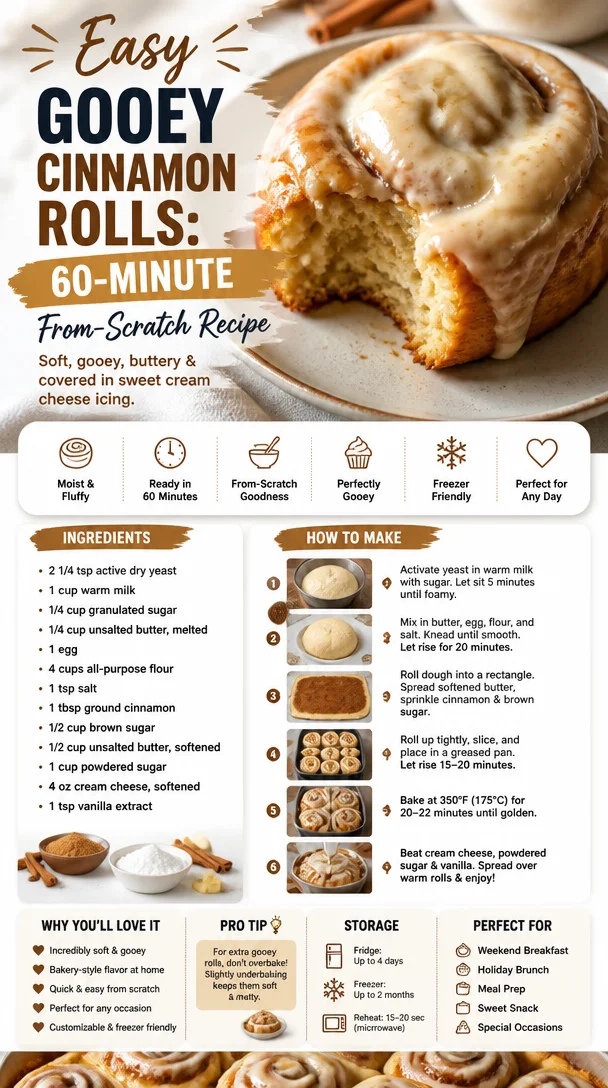
Easy Gooey Cinnamon Rolls: 60-Minute From-Scratch Recipe
Gooey Cinnamon Rolls: The Ultimate Comfort Food
Welcome back to my cozy kitchen! Today, we’re diving into a timeless treat that warms the heart and satisfies the soul—gooey cinnamon rolls! Oh, the smell of sweet cinnamon mingling with freshly baked dough is like a warm hug on a chilly morning. Whether you’re indulging on a lazy Sunday or celebrating a special occasion, these rolls are sure to bring cheer to your table.
There’s something so magical about homemade cinnamon rolls. They remind me of the countless weekends I spent in my grandmother’s kitchen. I can still hear her squeaking wooden chair as she whisked up the dough, her laughter filling the air as she told stories about her youth. The process was a team effort; I would be her little sous-chef, sprinkling cinnamon sugar on the dough with a seriousness only an eight-year-old can muster. We would wait together, peering into the oven, as the sweet aroma enveloped us, making our mouths water in anticipation.
These gooey little delights aren’t just food; they’re a celebration of love, warmth, and togetherness. So roll up your sleeves, put on your favorite apron (yes, the one splattered with flour, just like mine), and let’s get baking! Trust me; you’ll want to save this recipe—it’s guaranteed to become a family favorite.
Personal Story
One crisp autumn morning, with leaves falling outside and a light chill in the air, I decided to recreate my grandmother’s famous cinnamon rolls for our family breakfast. As I kneaded the dough, I felt her presence with me, guiding my hands. The recipe was almost tattooed onto my brain, but there was an element of magic that came with her storytelling and laughter.
As the rolls baked, I set the table and brewed a pot of coffee. The scent wafted through the house, coaxing my loved ones from their cozy corners. When the timer went off, revealing a pan of golden, puffed-up rolls, we all gathered around the kitchen island, eager to dig in. But before we could take a bite, I realized I needed to snap a picture—these gooey beauties took a lot of love to create!
With one bite, we were transported back to that old kitchen, and we shared stories that made us laugh and reminisce. Moments like these are why I love cooking. The joy of feeding those I love and sharing laughter over good food is truly the heart of every gathering.
Ingredients
Here’s what you’ll need for your gooey cinnamon rolls:
-
For the Dough:
- 4 cups all-purpose flour
Tip: For a lighter texture, you can substitute 1 cup of it with bread flour. - 1 packet (2 ¼ tsp) active dry yeast
Chef Insight: Always check the expiration date—active yeast is key to fluffy rolls! - ½ cup granulated sugar
Substitution: Use coconut sugar for a healthier option with caramel notes. - 1 cup whole milk (warm)
Tip: If you’re out of milk, almond or oat milk works too! - ⅓ cup unsalted butter (melted)
Make sure it’s melted but not hot to prevent killing the yeast! - 2 large eggs
Substitution: Ground flaxseed mixed with water (1 tbsp flaxseed + 2.5 tbsp water) makes a great vegan substitute! - 1 teaspoon salt
- 4 cups all-purpose flour
-
For the Filling:
- ¾ cup brown sugar (packed)
Tip: Light brown sugar works, but dark brown gives a richer flavor! - 2 tablespoons ground cinnamon
For a twist, try adding cardamom for an exotic hint! - ⅓ cup unsalted butter (softened)
Don’t melt the butter for spreading; it should be soft enough to spread easily!
- ¾ cup brown sugar (packed)
-
For the Cream Cheese Frosting:
- 4 oz cream cheese (softened)
Tip: For a dairy-free option, try using cashew cream! - ¼ cup unsalted butter (softened)
- 2 cups powdered sugar
For an extra hit of flavor, add a dash of vanilla extract! - 2 tablespoons milk (or plant-based milk)
Adjust the milk quantity for desired consistency!
- 4 oz cream cheese (softened)
Step-by-Step Instructions
Alright, it’s time to turn those ingredients into something truly scrumptious! Here’s how we do it:
-
Activate the Yeast:
- In a small bowl, combine the warm milk with the yeast and a pinch of sugar. Let it sit for about 5-10 minutes until it’s frothy and bubbly. This means your yeast is alive and ready to do its magic!
-
Mix the Dough:
- In a large mixing bowl, combine the flour, sugar, and salt. Create a well in the center, and pour in the melted butter, eggs, and the activated yeast mixture. Stir until a shaggy dough forms, then turn it out onto a floured surface.
-
Knead the Dough:
- Knead the dough for about 8-10 minutes until it’s smooth and elastic. This is a great arm workout, so feel free to take out any stress from the week! If the dough is sticky, sprinkle a little more flour as needed.
-
Let It Rise:
- Place the kneaded dough into a greased bowl, cover it with a kitchen towel, and let it rise in a warm spot (like your kitchen—thank you, oven) for about 1 to 1.5 hours, or until it doubles in size. Patience is key—you want that fluff!
-
Prepare the Filling:
- While the dough is rising, mix together the brown sugar, cinnamon, and softened butter in a medium bowl until well combined—it should resemble a spreadable paste. Set aside.
-
Roll Out the Dough:
- After the dough has risen, punch it down gently (no need to be rough!) and turn it out onto a floured surface. Roll it into a large rectangle about ¼ inch thick.
-
Spread the Filling:
- Evenly spread the cinnamon filling over the dough rectangle, leaving about a ½ inch border at the edges. This is where the goodies will ooze from!
-
Roll It Up:
- Starting from one long edge, roll the dough tightly into a log. Make sure it’s snug but not overly tight—your rolls need room to expand!
-
Cut the Rolls:
- Using a sharp knife or dental floss (yes, you read that right!), slice the log into 12-15 equal pieces, about 1.5 inches thick. Arrange them in a greased baking dish, cut side up, leaving a little space between each for rising.
-
Second Rise:
- Cover the dish with a towel and let the rolls rest for another 30-45 minutes until they’ve puffed up beautifully.
-
Preheat the Oven:
- About 15 minutes before the rolls are ready, preheat your oven to 350°F (175°C).
-
Bake:
- Once the rolls have risen, pop them into the oven and bake for 20-25 minutes until golden brown. If they’re browning too quickly, loosely cover with aluminum foil during the last few minutes.
-
Make the Frosting:
- While the rolls are baking, whip together the softened cream cheese and butter in a mixing bowl until light and fluffy. Gradually add the powdered sugar and mix until smooth, then add milk until you reach the desired consistency.
-
Frost and Serve:
- As soon as the rolls come out of the oven, generously slather them with the cream cheese frosting. Let the frosting melt into the nooks and crannies for maximum gooey goodness.
Serving Suggestions
Ready to serve those tantalizing gooey cinnamon rolls? Place them on a large plate or, for a rustic touch, a wooden board. Drizzle some extra frosting over the top, and sprinkle with chopped nuts or a dusting of powdered sugar for that perfect presentation. Pair them with a steaming cup of coffee or a glass of freshly squeezed orange juice. Your family and friends will be flocking to your kitchen in no time!
Recipe Variations
If you’re feeling adventurous, here are a few fun twists you can try with your cinnamon rolls:
- Nutty Add-In: Fold in some chopped walnuts or pecans for a delicious crunch.
- Fruit-Filled Rolls: Add sliced apples or pears with the cinnamon filling for a fruity surprise!
- Spicy Kick: Mix in a touch of cayenne pepper into the cinnamon filling for a sweet and spicy twist.
- Chocolate Drizzle: After frosting, drizzle some melted chocolate over the rolls for a decadent dessert.
- Pumpkin Spice: Swap some of the sugar for pumpkin puree and add pumpkin spice to the filling for a fall-themed treat!
Chef’s Notes
These gooey cinnamon rolls have been a staple in my kitchen for years, and they continue to evolve. I often play around with the spices, occasionally adding nutmeg or ginger for a seasonal twist. And let’s talk about the frosting—it’s the cherry on top! Some days, I skip the cream cheese for a simple glaze of powdered sugar and milk, while other days I indulge in extra frosting. That’s the beauty of this recipe; you can make it your own!
And let’s not forget those kitchen mishaps—one time, I mistook baking powder for baking soda and ended up with a flat, cookie-like mess! But even then, it turns into a funny story shared over cups of coffee and leftover rolls. Remember, cooking is as much about joy and creativity as it is about precision.
FAQs and Troubleshooting
-
Why are my rolls dense?
- If your rolls didn’t rise properly, it may be due to old yeast or not allowing enough time to rise. Always test your yeast before baking!
-
How do I make my rolls gooey?
- The key to gooeyness lies in the butter and sugar content. Make sure your filling is generous, and fresh out of the oven, slather on that cream cheese frosting!
-
How do I store leftover rolls?
- Store any leftover rolls in an airtight container at room temperature for up to 3 days. You can also freeze them for up to a month; just reheat in the oven for a cozy treat!
-
Can I make the dough ahead of time?
- Absolutely! You can prepare the dough and refrigerate it overnight. Just let it come to room temperature and rise before baking the next day.
Nutritional Info
Here’s a rough estimate per roll (without frosting):
- Calories: 280
- Protein: 4g
- Carbohydrates: 45g
- Fat: 10g
- Fiber: 1g
(Note: Nutrition can vary based on specific brands and measurements used)
Now that you have this deliciously cozy recipe in your hands, go ahead and spread the love—share your newly baked gooey cinnamon rolls with your family and friends. Enjoy the process, embrace the mess, and remember that the best moments happen around the kitchen table. Happy baking, my fellow foodies! 🍽️
Print
Gooey Cinnamon Rolls
- Total Time: 120 minutes
- Yield: 12 servings 1x
- Diet: Vegetarian
Description
Delicious and cozy gooey cinnamon rolls perfect for any occasion.
Ingredients
- 4 cups all-purpose flour
- 1 packet (2 ¼ tsp) active dry yeast
- ½ cup granulated sugar
- 1 cup whole milk (warm)
- ⅓ cup unsalted butter (melted)
- 2 large eggs
- 1 teaspoon salt
- ¾ cup brown sugar (packed)
- 2 tablespoons ground cinnamon
- ⅓ cup unsalted butter (softened)
- 4 oz cream cheese (softened)
- ¼ cup unsalted butter (softened)
- 2 cups powdered sugar
- 2 tablespoons milk (or plant-based milk)
Instructions
- Activate the yeast: In a small bowl, combine the warm milk with the yeast and a pinch of sugar. Let it sit for about 5-10 minutes until frothy.
- Mix the dough: In a large bowl, combine flour, sugar, and salt. Create a well, then add melted butter, eggs, and activated yeast mixture. Stir until shaggy dough forms.
- Knead the dough: Knead for about 8-10 minutes until smooth and elastic. Sprinkle flour if necessary.
- Let it rise: Place dough in a greased bowl, cover, and let it rise for about 1 to 1.5 hours until doubled in size.
- Prepare the filling: Mix brown sugar, cinnamon, and softened butter until well combined.
- Roll out the dough: Punch down the risen dough, turn it out onto a floured surface, and roll it into a large rectangle about ¼ inch thick.
- Spread the filling: Evenly spread the cinnamon filling over the dough, leaving a ½ inch border.
- Roll it up: Starting from one long edge, roll the dough tightly into a log.
- Cut the rolls: Slice the log into 12-15 equal pieces and arrange in a greased baking dish.
- Second rise: Cover and let the rolls rest for 30-45 minutes until puffed up.
- Preheat the oven: About 15 minutes before the rolls are ready, preheat oven to 350°F (175°C).
- Bake: Once risen, bake for 20-25 minutes until golden brown.
- Make the frosting: Whip together cream cheese and butter, then add powdered sugar and milk until desired consistency.
- Frost and serve: Generously slather the frosting on the rolls as soon as they come out of the oven.
Notes
For a healthier twist, consider using coconut sugar and substituting almond or oat milk for whole milk.
- Prep Time: 15 minutes
- Cook Time: 25 minutes
- Category: Dessert
- Method: Baking
- Cuisine: American
Nutrition
- Serving Size: 1 roll
- Calories: 280
- Sugar: 10g
- Sodium: 200mg
- Fat: 10g
- Saturated Fat: 4g
- Unsaturated Fat: 4g
- Trans Fat: 0g
- Carbohydrates: 45g
- Fiber: 1g
- Protein: 4g
- Cholesterol: 30mg
Keywords: cinnamon rolls, gooey cinnamon rolls, desserts, baking, comfort food
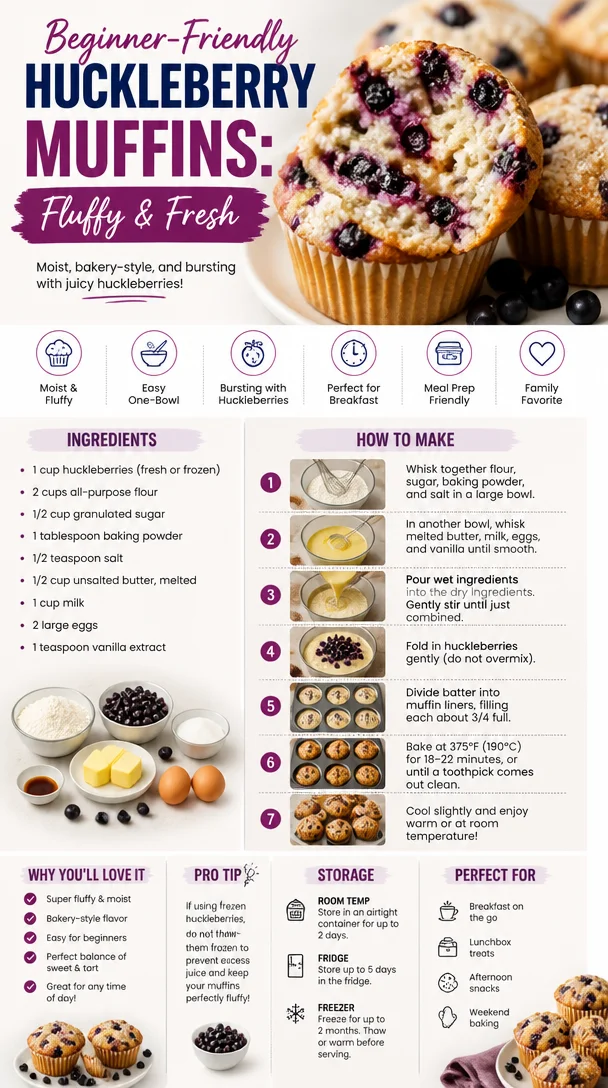
Beginner-Friendly Huckleberry Muffins: Fluffy & Fresh
Huckleberry Muffins: A Taste of Cozy Comfort
Welcome back to my kitchen, food lovers! Today, we’re diving into something absolutely delightful — huckleberry muffins. These little gems are not just baked goods; they’re the essence of a cozy, Sunday morning spent sipping coffee and sharing stories with loved ones. If you’ve never had the pleasure of biting into a warm, fluffy muffin bursting with tangy-sweet huckleberries, you’re in for a real treat!
Huckleberries are these adorable little berries, often found in the wild, that pack a big punch of flavor. Their unique taste lies somewhere between blueberries and cherries, offering that perfect balance of sweet and tart. Whether you are hiking in the mountains, foraging at a local farmer’s market, or simply picking some up from the store, huckleberries bring a special touch to every dish.
But what I truly love about baking huckleberry muffins is the nostalgia that floods back whenever I pull them out of the oven. I remember the first time I made these with my grandma. It was a rainy afternoon, and the smell of butter and sugar wafting through our little kitchen made the whole experience feel magical. We chatted about everything — life, dreams, and of course, her secret tips for making the fluffiest muffins! That’s the beauty of cooking — it’s never just about the food. It’s about the connections, the laughter, and that lovely little nostalgia that warms your heart.
So, whether you’re reminiscing about your childhood or creating new memories, consider inviting huckleberry muffins into your kitchen. Let’s roll up our sleeves and get baking!
Personal Story
I’ll never forget the first summer I went huckleberry picking with my family. We set out on an early Saturday morning, armed with buckets and excitement. The wild bushes were bursting with ripe huckleberries, and the bright sun assisted in turning our picking expedition into a mini-adventure. We laughed and played games, aiming to see who could collect the most berries without munching on too many along the way!
After we returned home, we transformed our haul into what would become a family tradition: huckleberry muffins. My mom’s kitchen danced with warmth and sweet scents, and the table was filled with the chatter of family as we savored those warm muffins slathered in butter. Each bite was a reminder of that sunlit day spent outdoors, an edible memoir of summertime bliss that I cherish to this day. This recipe is my little nod to that beautiful amalgamation of joy, family, and the simple pleasures of life.
Ingredients
Let’s gather our ingredients! Here’s what you need to whip up a batch of these amazing huckleberry muffins:
-
Fresh or Frozen Huckleberries (1 cup): These sweet-tart berries are key! If you can’t find huckleberries, blueberries make a great substitute. Just make sure to adjust the sweetness slightly.
-
All-Purpose Flour (2 cups): The classic baking staple! For a gluten-free option, you can use a 1:1 gluten-free flour blend.
-
Granulated Sugar (¾ cup): This adds sweetness and moisture to the muffins. For a less sugary option, try coconut sugar or maple sugar.
-
Baking Powder (2 teaspoons): This leavening agent will help your muffins rise beautifully! Ensure it’s fresh for the best results.
-
Salt (½ teaspoon): A small but mighty ingredient that enhances all the flavors.
-
Unsalted Butter (½ cup, melted): Butter gives these muffins that rich, comforting flavor. If you’re dairy-free, substitute with coconut oil or a plant-based butter.
-
Milk (¾ cup): Whole milk gives these muffins a moist crumb. Almond milk or any dairy-free alternative works wonderfully too!
-
Egg (1 large): The binding agent! A flax egg (1 tablespoon of flaxseed meal mixed with 2.5 tablespoons of water) can serve as a good vegan substitute.
-
Vanilla Extract (1 teaspoon): Because every good recipe needs a hint of vanilla magic!
Step-by-Step Instructions
Ready to bake? Let’s make some huckleberry muffins! Follow these steps for delightful results:
-
Preheat Your Oven: Set your oven to 375°F (190°C). This will help our muffins rise perfectly. A hot start makes a world of a difference, trust me!
-
Prepare Your Muffin Tin: Grease a 12-cup muffin tin with cooking spray or line it with muffin liners. This will make for easy removal and clean-up later.
-
Mix Dry Ingredients: In a large bowl, combine the flour, sugar, baking powder, and salt. Whisk them together until well combined. This ensures even distribution of the leavening agents, leading to fluffier muffins!
-
Combine Wet Ingredients: In another bowl, whisk together the melted butter, milk, egg, and vanilla extract until everything is blended smoothly. Your butter may clump a bit when mixed with cold milk, but that’s totally fine!
-
Merge the Mixtures: Gradually pour the wet ingredients into the dry, stirring gently until just combined. Don’t overmix — a few lumps are okay! Overmixing can lead to tough muffins, and we want tender bites!
-
Fold in the Huckleberries: Gently fold in the huckleberries, taking care not to mash them. This is the pivotal moment where your mixture transforms into a colorful batter. If using frozen huckleberries, no need to thaw them beforehand.
-
Scoop and Fill: Use a scoop or spoon to divide the batter evenly among the muffin cups, filling each about two-thirds full. This allows room for rising. Princess Muffins come to life in your oven!
-
Bake: Pop those muffins into the preheated oven and bake for about 18-22 minutes, or until the tops are golden and a toothpick inserted into the center comes out clean. Ah, the smell wafting through your kitchen will be heavenly!
-
Cool and Enjoy: Allow the muffins to cool in the tin for about 5 minutes before transferring them to a wire rack to cool completely. If you can resist, I recommend enjoying them fresh out of the oven!
Serving Suggestions
For a beautiful presentation, arrange your huckleberry muffins on a rustic wooden serving platter. Dust them lightly with powdered sugar for a touch of elegance, and serve alongside fresh butter and seasonal fruit for a truly delightful breakfast or brunch spread. Oh, and don’t forget a steaming cup of coffee or herbal tea!
Recipe Variations
Feel free to get creative! Here are a few ideas to switch things up:
- Lemon Zest Huckleberry Muffins: Add zest from one lemon to the batter for a fresh citrus kick.
- Nutty Crunch: Mix in ½ cup of chopped walnuts or pecans for a delightful crunchy texture.
- Coconut Huckleberry Muffins: Substitute half of the flour with coconut flour for a tropical twist.
- Choco-Berry Muffins: Fold in a handful of chocolate chips along with the huckleberries for a decadent treat.
- Gluten-Free Option: Use almond flour or a gluten-free baking mix to cater to gluten-sensitive friends.
Chef’s Notes
These muffins hold a special place in my heart, but they’ve also evolved with each iteration! Originally, my grandma’s recipe called for less butter, but I’ve found that a bit more adds that lovely richness. Plus, my family loves experimenting with different add-ins, so these days, our muffin adventures know no bounds! I often whip up a double batch; they freeze beautifully and make for an effortless breakfast on busy mornings.
Oh, and speaking of kitchen mishaps — once, in my enthusiasm, I mistook baking soda for baking powder and ended up with some curious, albeit edible, huckleberry pancakes! So, always check those labels, my fellow bakers!
FAQs and Troubleshooting
Q1: My muffins are too dry. What went wrong?
A: Overmixing or too much flour can lead to dry muffins. Make sure to measure your flour properly and avoid overworking the batter.
Q2: How can I store leftovers?
A: Once cooled, store your muffins in an airtight container at room temperature for up to 2 days, or freeze them for up to a month. Just thaw at room temperature when you’re ready to indulge!
Q3: What if I can’t find huckleberries?
A: No worries! Blueberries, cranberries, or even diced peaches work well as substitutes. Each will lend its own unique flavor while still keeping the muffin delicious.
Q4: Can I make this recipe vegan?
A: Absolutely! Substitute the egg with a flax egg and use plant-based milk and butter. A little creativity ensures no one feels left out!
Nutritional Info
- Calories: Approximately 200 per muffin
- Protein: 3g
- Fat: 8g
- Carbohydrates: 30g
- Fiber: 1g
- Sugar: 8g
Baking is more than just following a recipe; it’s about enjoyment, exploring flavors, and making memories in the kitchen. I’m so glad to share this huckleberry muffin experience with you! Whether you’re new to baking or a seasoned pro, I hope these muffins fill your kitchen with joy. Happy baking, and don’t forget to savor every bite!
Print
Huckleberry Muffins
- Total Time: 37 minutes
- Yield: 12 muffins 1x
- Diet: Vegetarian
Description
Delightful huckleberry muffins that evoke nostalgia and warmth, perfect for cozy mornings.
Ingredients
- 1 cup Fresh or Frozen Huckleberries
- 2 cups All-Purpose Flour
- ¾ cup Granulated Sugar
- 2 teaspoons Baking Powder
- ½ teaspoon Salt
- ½ cup Unsalted Butter, melted
- ¾ cup Milk
- 1 large Egg
- 1 teaspoon Vanilla Extract
Instructions
- Preheat your oven to 375°F (190°C).
- Prepare a 12-cup muffin tin by greasing or lining with muffin liners.
- Mix the flour, sugar, baking powder, and salt in a large bowl.
- Combine the melted butter, milk, egg, and vanilla in another bowl.
- Merge the wet ingredients into the dry ingredients, stirring gently until just combined.
- Fold in the huckleberries without mashing them.
- Scoop batter into the muffin cups, filling each about two-thirds full.
- Bake for 18-22 minutes or until golden brown and a toothpick comes out clean.
- Cool in the tin for 5 minutes before transferring to a wire rack.
Notes
Dust muffins with powdered sugar for presentation and serve with butter or seasonal fruit.
- Prep Time: 15 minutes
- Cook Time: 22 minutes
- Category: Breakfast
- Method: Baking
- Cuisine: American
Nutrition
- Serving Size: 1 muffin
- Calories: 200
- Sugar: 8g
- Sodium: 200mg
- Fat: 8g
- Saturated Fat: 4g
- Unsaturated Fat: 3g
- Trans Fat: 0g
- Carbohydrates: 30g
- Fiber: 1g
- Protein: 3g
- Cholesterol: 30mg
Keywords: muffins, huckleberry, breakfast, baking, cozy
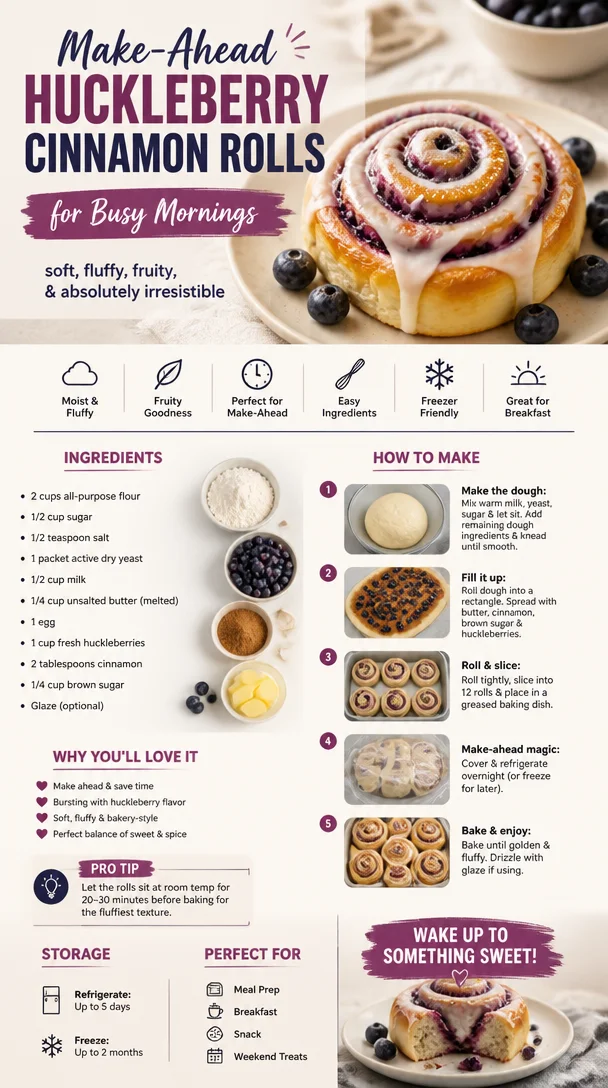
Make-Ahead Huckleberry Cinnamon Rolls for Busy Mornings
Huckleberry Cinnamon Rolls: A Cozy Kitchen Adventure
Welcome to my kitchen! Today, I’m beyond excited to share one of my all-time favorite recipes: huckleberry cinnamon rolls. If you’ve never had the pleasure of sinking your teeth into a warm, gooey cinnamon roll loaded with juicy huckleberries, you’re in for a delightful treat. The combination of sweet, fragrant cinnamon with the tartness of huckleberries creates a symphony of flavors that will have you coming back for seconds (and thirds!).
Now, let’s take a step back for a moment. Picture this: It’s a brisk autumn morning, and the air is crisp. You’ve just come in from a lovely hike in the mountains, your pockets filled with little treasures of huckleberries picked fresh from the wild. You head to the kitchen, and the thought of transforming these beautiful berries into a cozy, warm breakfast fills you with anticipation. The smell of cinnamon wafts through the air, drawing in everyone around you like bees to honey.
I’ll never forget the first time I made huckleberry cinnamon rolls. I was hosting a gathering for friends, and I wanted to whip up something special. With just a few basic ingredients and some creativity, I crafted rolls that not only looked stunning but also tasted like a hug in pastry form. The best part? Watching my friends marvel at the sight of those bubbling rolls and then devour them with smiles on their faces. It was a memory etched in my heart, and I hope to inspire you to create your own delicious moments!
So grab your apron, preheat the oven, and let’s roll up our sleeves to make these scrumptious huckleberry cinnamon rolls together!
Ingredients
Here’s what you’ll need to create these delightful treats:
-
2 cups all-purpose flour: The backbone of our dough. If you’re looking for a gluten-free alternative, consider using a 1:1 gluten-free flour blend.
-
1/2 cup granulated sugar: This adds sweetness to the dough and filling. For a healthier option, substitute with coconut sugar or a sugar alternative like stevia.
-
1 teaspoon instant yeast: This magical ingredient helps our rolls rise beautifully. If using active dry yeast, allow it to bloom in warm water before mixing!
-
1/2 teaspoon salt: A pinch of salt enhances all the flavors in your rolls. Don’t skip it!
-
1/2 cup whole milk: This brings moisture and richness to our dough. Almond milk or oat milk are excellent dairy-free substitutes.
-
1 large egg: Adding an egg enriches the dough. For a vegan twist, use a flax egg (1 tablespoon ground flaxseed mixed with 2.5 tablespoons of water).
-
1/4 cup unsalted butter (melted): This creates a tender roll. Coconut oil or vegan butter can be used if you want a non-dairy option.
-
1 cup huckleberries (fresh or frozen): These little gems are the stars of our show! If you can’t find huckleberries, blueberries can step in as a fantastic substitute.
-
1 tablespoon ground cinnamon: This gives that warm, inviting flavor we all love in cinnamon rolls. Feel free to mix it up with some nutmeg for extra spice!
-
1/4 cup brown sugar: For the filling, this provides that rich sweetness and caramel-like flavor. You can also make a cinnamon-sugar blend using white sugar if you’re out of brown.
-
1/2 cup powdered sugar (optional for icing): This adds a sweet finishing touch if you’re feeling fancy!
Step-by-Step Instructions
Now that we’ve gathered our ingredients, let’s dive into the fun part — making those huckleberry cinnamon rolls!
Step 1: Create the Dough
In a large mixing bowl, combine the flour, granulated sugar, instant yeast, and salt. Mix these dry ingredients together, ensuring everything is evenly distributed. It’s so satisfying to see the flour amalgamating with the sugar. The aroma already starts to hint at the cozy dish to come!
In another bowl, whisk together the whole milk, melted butter, and egg until well combined. Gradually pour this mixture into the dry ingredients, stirring until a dough forms. This is early-stage magic!
Step 2: Knead the Dough
Transfer the dough onto a lightly floured surface and knead it for about 5 to 7 minutes. It should become smooth and elastic. If it feels too sticky, don’t be afraid to sprinkle a little more flour as you knead! Think of this as giving your dough a nice, little workout. It deserves it!
Step 3: Let It Rise
Form the dough into a ball and place it in a greased bowl. Cover it with a clean kitchen towel and let it rise in a warm spot for about an hour, or until it’s doubled in size. This is a great time to catch up on your favorite podcast or prep your coffee!
Step 4: Prepare the Filling
While the dough is rising, let’s make our filling! In a small bowl, mix together the brown sugar and ground cinnamon. When the dough has finished rising, roll it out on a floured surface into a rectangle (about 1/4 inch thick). This is where the fun begins!
Step 5: Spread and Sprinkle
Spread the cinnamon-sugar mixture over the rolled-out dough evenly. Then, sprinkle the huckleberries gently across the surface. You want them to be nestled in the filling but not crowded. It’s all about balance, my friends.
Step 6: Roll It Up
Starting from the long edge, carefully roll the dough into a tight log. You may need to apply a little pressure to make sure those huckleberries don’t escape! Once rolled, pinch the seams to seal.
Step 7: Cut the Rolls
With a sharp knife or a bench scraper, slice the rolled dough into 12 equal pieces. Place these charming little spirals in a greased baking dish or on a parchment-lined tray. If you’ve got some extra huckleberries, feel free to toss them on top for decoration.
Step 8: Second Rise
Cover your rolls with that trusty kitchen towel again and let them rise for another half-hour. This is your time to shine — preheat your oven to 350°F (175°C) while you wait!
Step 9: Bake to Perfection
Once the rolls have risen, pop them in the oven and let them bake for 25-30 minutes or until they’re golden brown and your kitchen is filled with aromas that will make everyone’s mouth water. Don’t rush this part; the smells alone are worth waiting for!
Step 10: Icing and Serve
If you’re feeling extra special, you can whip up a simple icing while they cool for about 10 minutes. Just mix powdered sugar with a tablespoon of milk until you reach your desired consistency. Drizzle it over your cinnamon rolls and watch as they transform into a glorious masterpiece.
Serving Suggestions
To serve, I love to place a piping hot cinnamon roll on a cozy plate, drizzle it with icing, and perhaps add a few fresh huckleberries or a sprinkle of cinnamon on top for that final touch. You can even serve them with a dollop of whipped cream or a scoop of vanilla ice cream on the side — it’s the perfect pairing, especially for brunch gatherings!
Recipe Variations
Feeling creative? Here are some variations to switch things up:
- Cream Cheese Filling: Swap the cinnamon filling for a sweet cream cheese filling and place the huckleberries on top for a tangy twist.
- Lemon Zest: Add a tablespoon of lemon zest to brighten up your filling for a refreshing citrus note.
- Nutty Crunch: Mix in some chopped pecans or walnuts with the huckleberries for added texture and flavor.
- Choco-Huckleberry Rolls: Incorporate mini chocolate chips along with the huckleberries for an indulgent treat!
- Gluten-Free: Use a gluten-free flour blend to cater to dietary needs without sacrificing taste.
Chef’s Notes
I must say, the journey of perfecting my huckleberry cinnamon rolls has been nothing short of memorable. I still remember the first batch that turned out a little too flat because I forgot to give the dough a good second rise! But you know what? Those “flat rolls” still tasted amazing, and my friends devoured them anyway. Cooking is all about experimenting and embracing those little kitchen mishaps.
Over time, I’ve tweaked this recipe to adapt to the seasons, using whatever fresh berries are available or even throwing in some seasonal spices. Every time I make them, it feels like a celebration of flavors and memories, and I hope it brings you the same joy!
FAQs and Troubleshooting
-
Why did my cinnamon rolls turn out dense?
Dense rolls can happen if the dough wasn’t kneaded enough or the yeast wasn’t activated properly. Make sure to knead it until it’s smooth and stretchy. -
Can I make these rolls ahead of time?
Absolutely! You can prepare the rolls up to the second rise stage and then refrigerate them overnight. Just let them come to room temperature for about an hour before baking! -
What if I don’t have huckleberries?
No worries! You can easily swap them for blueberries, raspberries, or even cranberries for a tart twist. -
How do I store leftover rolls?
These cinnamon rolls can be stored in an airtight container for up to three days. If they last that long, you can reheat them in the microwave or oven to bring them back to life!
Nutritional Info
These huckleberry cinnamon rolls are a delightful treat and should be enjoyed in moderation. Each roll contains roughly 200-250 calories, depending on your serving size and if you decide to add icing.
So there you have it! I hope you enjoy making these huckleberry cinnamon rolls as much as I do. There’s truly something magical about the way food brings us together, and I can’t wait for you to experience the joy of sharing these warm, loving treats with your family and friends. Happy baking!
Print
Huckleberry Cinnamon Rolls
- Total Time: 1 hour 30 minutes
- Yield: 12 servings 1x
- Diet: Vegetarian
Description
Delicious huckleberry cinnamon rolls filled with sweet cinnamon sugar and fresh berries, perfect for chilly mornings.
Ingredients
- 2 cups all-purpose flour
- 1/2 cup granulated sugar
- 1 teaspoon instant yeast
- 1/2 teaspoon salt
- 1/2 cup whole milk
- 1 large egg
- 1/4 cup unsalted butter (melted)
- 1 cup huckleberries (fresh or frozen)
- 1 tablespoon ground cinnamon
- 1/4 cup brown sugar
- 1/2 cup powdered sugar (optional for icing)
Instructions
- Combine the flour, granulated sugar, instant yeast, and salt in a bowl.
- Whisk together the milk, melted butter, and egg in another bowl.
- Pour the wet mixture into the dry ingredients, stirring until a dough forms.
- Knead the dough on a lightly floured surface for 5 to 7 minutes until smooth and elastic.
- Form the dough into a ball, place it in a greased bowl, cover with a towel, and let it rise for about 1 hour.
- Mix together the brown sugar and ground cinnamon for the filling.
- Roll the dough into a rectangle and spread the cinnamon-sugar mixture over it.
- Sprinkle the huckleberries evenly across the surface.
- Roll the dough tightly from the long edge to form a log.
- Cut the log into 12 equal pieces and place them in a greased baking dish.
- Let the rolls rise for another half-hour while preheating the oven to 350°F (175°C).
- Bake for 25-30 minutes until golden brown and aromatic.
- Mix powdered sugar with a tablespoon of milk for icing, then drizzle it over the rolls once cooled for 10 minutes.
Notes
These rolls can be prepared ahead of time and refrigerated overnight before baking.
- Prep Time: 30 minutes
- Cook Time: 30 minutes
- Category: Breakfast
- Method: Baking
- Cuisine: American
Nutrition
- Serving Size: 1 roll
- Calories: 250
- Sugar: 8g
- Sodium: 100mg
- Fat: 10g
- Saturated Fat: 6g
- Unsaturated Fat: 4g
- Trans Fat: 0g
- Carbohydrates: 37g
- Fiber: 1g
- Protein: 3g
- Cholesterol: 25mg
Keywords: cinnamon rolls, huckleberry, breakfast, baking, dessert

Fluffy Huckleberry Lemon Sweet Rolls (40-Minute Bake)
Huckleberry Lemon Sweet Rolls: A Cozy Kitchen Delight
Welcome to my favorite corner of the kitchen! I’m so excited to share this delightful recipe for Huckleberry Lemon Sweet Rolls with you. These generously swirled, fluffy rolls are the epitome of comfort and joy—perfect for lazy Sunday mornings or as a sweet treat to impress your loved ones. If you’re anything like me, the thought of warm, sweet dough mingling with zesty lemon and tart huckleberries makes your heart skip a beat! So, let’s dive into this comforting, berry-filled adventure that will surely make your kitchen smell like a cozy café.
I first stumbled upon the idea for these rolls during a memorable summer spent in the Pacific Northwest, surrounded by lush landscapes and wild huckleberry bushes. The air was filled with the tantalizing aroma of baked goods, and I couldn’t resist plucking handfuls of sweet, juicy huckleberries while exploring the winding trails. Every bite was a burst of flavor—the sweet berries perfectly complementing and balancing the tangy lemon. The day I turned those huckleberries into sweet rolls, I found myself transported back to that summer, every bite evoking cherished memories and laughter shared around the kitchen table.
Are you ready to think of your own special memories as we create rolling, gooey deliciousness? Let’s gather our ingredients and roll up our sleeves!
Ingredients
-
For the Dough:
- 4 cups all-purpose flour: A pantry staple, this is the backbone of our sweet rolls. If you want a lighter texture, you can substitute half with bread flour.
- 1/4 cup granulated sugar: This adds sweetness to the dough. If you’re watching your sugar intake, feel free to go for coconut sugar instead.
- 1 packet (2 1/4 teaspoons) instant yeast: The tiny magic workers that help our rolls rise! If you only have active dry yeast, use the same amount but activate it in warm water with a pinch of sugar before adding it to your mixture.
- 1 teaspoon salt: Enhancing flavor, it’s essential for balancing sweetness.
- 1 cup whole milk: For tenderness and moisture. You can swap it with almond or oat milk for a dairy-free version.
- 1/4 cup unsalted butter, melted: This adds richness. You can try using coconut oil if you prefer a vegan option.
- 2 large eggs: They help bind our dough and give it structure. For a vegan alternative, you can use flax eggs (1 tablespoon flaxseed meal + 2.5 tablespoons water per egg).
-
For the Filling:
- 1 cup huckleberries (fresh or frozen): Bursting with flavor and antioxidants, they are an absolute treat. Blueberries can be substituted if huckleberries are hard to find!
- 1/2 cup brown sugar: This will create a wonderfully gooey filling. If you want a lighter option, you could use a blend of maple sugar and a bit of cinnamon for depth.
- 2 tablespoons lemon zest: The zest adds that bright tang we love! Try it with grated orange zest for a different twist.
- 1 tablespoon lemon juice: A splash of acidity to elevate our filling. You can use lime juice as an alternative for a unique flavor!
-
For the Glaze:
- 1 cup powdered sugar: The sweetness and smooth texture that make our glaze enticing.
- 2 tablespoons lemon juice: This will give our glaze a zesty kick. Feel free to add milk for a creamier consistency.
- Lemon zest (for garnish): A little extra zest never hurt!
Step-by-Step Instructions
Now that we have everything gathered, let’s roll up our sleeves and get baking!
-
Making the Dough:
In a large bowl, whisk together the flour, sugar, salt, and instant yeast until well combined. In a saucepan, warm the milk over low heat until it’s just barely warm to the touch (not hot!). Remove it from heat and add in the melted butter. Then, whisk the eggs into the milk-butter mixture. Slowly pour the liquid into the dry ingredients, mixing just until a shaggy dough forms.Chef Tip: Don’t over-mix! A shaggy dough means you’ll have soft, chewy rolls.
-
Kneading:
On a lightly floured surface, knead the dough for about 5-7 minutes until it’s smooth and elastic. Keep your surface floured to prevent sticking!Chef Insight: Perfectly kneaded dough will bounce back when you poke it. If it’s too sticky, add a bit more flour, but resist the urge to add too much.
-
First Rise:
Place the kneaded dough in a greased bowl, cover with a kitchen towel or plastic wrap, and let it rise in a warm place until doubled in size—about 1 hour.Nostalgic Note: While the dough is rising, go ahead and take a quick break. This is a great time to put on some music and dream about how these rolls will smell!
-
Preparing the Filling:
While the dough rises, combine the huckleberries, brown sugar, lemon zest, and lemon juice in a medium bowl. Set aside, allowing the flavors to meld beautifully.Chef Insight: If using frozen huckleberries, let them thaw and drain excess liquid to avoid soggy rolls!
-
Rolling Out the Dough:
After the dough has risen, punch it down gently to release the air. Roll it out on a floured surface into a large rectangle, about 16×12 inches.Pro Tip: Aim for even thickness; this helps the rolls bake uniformly!
-
Filling and Rolling:
Spread the berry filling evenly over the dough, leaving a small border around the edges. Starting from one long side, carefully roll the dough into a tight log.Chef Hack: Use a bench scraper to help lift the dough as you roll to keep the shape intact!
-
Cutting the Rolls:
Using a sharp knife or dental floss (yes, seriously!), slice the log into 12 equal pieces. Place them in a greased baking dish, cut side up.Note: If you want to allow the rolls to rise more, you can cover them and let them sit for another 30 minutes. More fluffiness!
-
Second Rise:
Cover the rolls again with a towel and let them rise until puffed and touching each other, about 30-45 minutes.Chef Tip: Preheat your oven to 350°F (180°C) while they’re rising!
-
Baking:
Bake for 25-30 minutes or until golden brown and the center rolls are cooked through. The kitchen will smell heavenly, trust me!Final Pro Tip: Keep an eye on the rolls to prevent overbaking—nobody wants dry rolls!
-
Making the Glaze:
While the rolls cool slightly, whisk together the powdered sugar and lemon juice until smooth. Drizzle over the warm rolls and let it melt into every crevice.
Nostalgic Note: This glaze is like a lemon hug for your rolls!
Serving Suggestions
Once your Huckleberry Lemon Sweet Rolls are out of the oven and drizzled with glaze, they are ready to be served! For an eye-popping presentation, arrange them on a rustic wooden platter, sprinkle extra lemon zest on top, and garnish with fresh huckleberries or mint leaves.
Served warm, these rolls are perfect with a cup of coffee or tea, making them an inviting centerpiece for brunch or a cozy afternoon snack. Just watching your friends and family gather around, excited to dig in, will warm your heart!
Recipe Variations
- Add Spices: Mix in a teaspoon of cinnamon or nutmeg to the filling for added warmth and spice.
- Explore Flavors: Swap out huckleberries for blueberries, raspberries, or even diced strawberries for a fruity twist!
- Vegan Version: Use plant-based milk, coconut oil for butter, and flax eggs to create a completely vegan sweet roll.
- Stuff It Up: Try adding cream cheese to the filling for extra creaminess or white chocolate chips for a decadent touch!
Chef’s Notes
I can hardly believe how long I’ve been making these delightful rolls—it’s one of those recipes that feels like home. Each batch carries a piece of my heart and countless memories. I remember one particular summer, when a thunderstorm rolled in as I was in the middle of making these. With rain pouring down outside, the smell of lemon and huckleberries wafted through the house, turning a dreary afternoon into a cozy gathering with friends. We huddled around the table, stealing rolls while they were still warm, giggling as sugar dusted our noses.
This recipe is a reminder that food is not just about sustenance; it’s an experience, a memory in the making. Let these rolls inspire you to create your own kitchen stories!
FAQs and Troubleshooting
1. Why did my rolls not rise?
If your rolls didn’t rise, it may be due to expired or inactive yeast. Always check the expiration date, and ensure to proof the yeast in warm water with a pinch of sugar beforehand if using active dry yeast.
2. Can I prepare these rolls the night before?
Absolutely! After assembling the rolls, cover them and place them in the fridge overnight. In the morning, take them out and let them rise at room temperature before baking.
3. My dough is too sticky! What do I do?
If your dough is looking excessively sticky, sprinkle in a bit more flour, one tablespoon at a time, until it’s manageable for kneading.
4. Can I freeze these sweet rolls?
Yes, indeed! You can freeze unbaked rolls after cutting them. Just arrange them on a baking sheet, freeze individually, then transfer to a freezer bag. When ready to bake, place them in the fridge overnight to thaw and rise before baking.
Nutritional Info
While enjoying these sweet rolls, remember to do so in moderation! Each roll may contain approximately:
- Calories: 320
- Total Fat: 8g
- Saturated Fat: 4g
- Cholesterol: 40mg
- Sodium: 150mg
- Total Carbohydrates: 54g
- Dietary Fiber: 2g
- Sugars: 14g
- Protein: 6g
Enjoy these delightful Huckleberry Lemon Sweet Rolls and let them spark joy in your kitchen and your heart. Happy baking, friends!
Print
Huckleberry Lemon Sweet Rolls
- Total Time: 45 minutes
- Yield: 12 servings 1x
- Diet: Vegetarian
Description
Delightful Huckleberry Lemon Sweet Rolls, perfect for lazy mornings and comforting family gatherings.
Ingredients
- 4 cups all-purpose flour
- 1/4 cup granulated sugar
- 1 packet (2 1/4 teaspoons) instant yeast
- 1 teaspoon salt
- 1 cup whole milk
- 1/4 cup unsalted butter, melted
- 2 large eggs
- 1 cup huckleberries (fresh or frozen)
- 1/2 cup brown sugar
- 2 tablespoons lemon zest
- 1 tablespoon lemon juice
- 1 cup powdered sugar
- 2 tablespoons lemon juice (for glaze)
- Lemon zest (for garnish)
Instructions
- Whisk the flour, sugar, salt, and yeast in a large bowl until combined.
- Warm the milk over low heat until just warm to touch. Remove from heat and add melted butter.
- Whisk the eggs into the milk-butter mixture.
- Pour the liquid into the dry ingredients, mixing until a shaggy dough forms.
- Knead the dough on a floured surface for 5-7 minutes until smooth and elastic.
- Place the kneaded dough in a greased bowl, cover, and let it rise until doubled in size (about 1 hour).
- Combine huckleberries, brown sugar, lemon zest, and lemon juice for the filling.
- Roll out the dough into a 16×12 inch rectangle.
- Spread the berry filling evenly over the dough.
- Roll the dough into a tight log and cut into 12 equal pieces.
- Place them in a greased baking dish, cut side up, and let rise for another 30-45 minutes.
- Preheat the oven to 350°F (180°C).
- Bake for 25-30 minutes or until golden brown.
- Whisk powdered sugar and lemon juice together for the glaze and drizzle over warm rolls.
Notes
Try substituting huckleberries with blueberries for a different flavor. Perfect with coffee or tea!
- Prep Time: 15 minutes
- Cook Time: 30 minutes
- Category: Breakfast
- Method: Baking
- Cuisine: American
Nutrition
- Serving Size: 1 roll
- Calories: 320
- Sugar: 14g
- Sodium: 150mg
- Fat: 8g
- Saturated Fat: 4g
- Unsaturated Fat: 0g
- Trans Fat: 0g
- Carbohydrates: 54g
- Fiber: 2g
- Protein: 6g
- Cholesterol: 40mg
Keywords: huckleberry, lemon, sweet rolls, baking, brunch

BananaCoffee Smoothie Recipe
Banana Coffee Smoothie Recipe: A Creamy, Flavorful Boost to Your Day
Welcome to my kitchen, friends! I am so excited to share a recipe that’s become a delightful staple in my morning routine: the Banana Coffee Smoothie. Picture this: it’s early morning, the sun is just peeking through your window, and the aroma of freshly brewed coffee fills the air. Nothing beats that, right? Now, imagine blending that comforting cup of joe with the natural sweetness of ripe bananas, creamy yogurt, and a touch of oats for added nutrition. It’s like breakfast in a glass, and it’s perfect for those busy mornings when you need something nutritious yet delicious.
This smoothie is not just a refreshing drink; it’s a true game-changer. When I discovered this combo, I couldn’t believe how effortlessly a morning pick-me-up could be made. It’s rich in flavor, packed with essential nutrients, and incredibly easy to whip up — just toss everything in the blender, and you’re good to go! Plus, it’s completely customizable based on what you love or have on hand. So, let’s dive in and make this amazing Banana Coffee Smoothie together!
A Personal Story: The Birth of the Banana Coffee Smoothie
Let me take you back to a charming little café where my love for coffee and smoothies blossomed. I vividly remember the morning when I stumbled into a new café with my friend Sarah. The chalkboard sign outside advertised a special: a banana coffee smoothie. My curiosity was piqued! I decided to give it a shot, and I’ll never forget that first sip. The creamy texture, the perfect blend of sweet and bold coffee flavor, it transported me straight to smoothie heaven!
As I sipped, I chatted with Sarah about our upcoming plans, and just like that, we both agreed it was a fantastic way to kickstart our day. Fast forward to now, and I’ve adapted that memorable café drink into my own version, adding personal touches while keeping the comforting flavors alive. Now, I share it with friends and family, turning it into a bonding experience one sip at a time.
Ingredients
Here’s what you need for a delicious Banana Coffee Smoothie:
-
Ripe Bananas (2): Bananas add natural sweetness and creaminess. Choose ones that are speckled for that perfect ripe flavor! You can also freeze bananas for an even thicker smoothie.
-
Brewed Coffee (1 cup): Use your favorite brew! It’s the heart of this drink. For a decaf option, simply use decaffeinated coffee. Cold brew works well for a refreshing twist!
-
Greek Yogurt (½ cup): Adds protein and a creamy texture. Feel free to substitute with dairy-free yogurt for a vegan option or swap it for almond milk if you prefer a lighter smoothie.
-
Oats (¼ cup): They provide fiber and help keep you full longer. Quick oats are perfect; if you don’t have oats on hand, you can leave them out or replace them with chia seeds for a different texture.
-
Honey or Maple Syrup (1-2 tbsp): Sweeten to taste! Both options are fantastic, but if you’re looking for no added sugar, you can skip this or add additional banana.
-
Ice Cubes (optional): For an extra refreshing, frosty smoothie, toss in a few ice cubes. If you like a thicker smoothie, you can use frozen bananas instead of ice to avoid watering it down.
Step-by-Step Instructions
Ready to bring this Banana Coffee Smoothie to life? Let’s do it!
-
Prepare Your Coffee: Brew your coffee. I like to make a strong cup to ensure that the coffee flavor shines through against the sweetness of the banana. If you’re making this for breakfast, brewing it the night before and refrigerating it can save time and keep your smoothie refreshingly cool.
-
Gather Ingredients: Next, gather your ripe bananas, Greek yogurt, oats, sweetener, and any other ingredients you’re including. I love having everything laid out because it makes the blending process feel like a fun little culinary dance.
-
The Blend Begins: In your trusty blender, add the ripe bananas and the brewed coffee. Blend them on high until they’re smooth and creamy. This will be your base, and the aroma that wafts up as you blend is sure to get your taste buds singing.
-
Add the Creamy Elements: Now, add in the Greek yogurt and oats. Blend again until everything is well combined. If you want your smoothie thicker, add a little more yogurt or some ice cubes for that frosty goodness.
-
Sweeten to Perfection: At this point, taste your smoothie. Depending on your bananas’ sweetness, you might want to add a drip of honey or maple syrup. Blend again to incorporate the sweetener thoroughly.
-
Final Touch: Once everything is blended to perfection, take a moment to admire the beautiful, creamy texture before pouring it into your favorite glass. Trust me; it’s hard to resist a little taste at this point, so go ahead and sneak a sip!
Serving Suggestions
Now that your Banana Coffee Smoothie is ready, it’s time to serve! I recommend pouring it into a tall glass and garnishing it with a sprinkle of cinnamon for that extra touch. If you’re feeling fancy, top it off with a dollop of whipped cream or a drizzle of chocolate syrup — because who doesn’t love a little indulgence? For a brunch gathering, you can serve it alongside homemade muffins or a light fruit salad to create a balanced meal.
Recipe Variations
Get creative with this banana coffee goodness! Here are a few twists you might enjoy:
- Nutty Banana Boost: Add a tablespoon of almond or peanut butter for a nutty undertone and an extra dose of protein.
- Chocolate Delight: Toss in a tablespoon of cocoa powder or chocolate protein powder for a chocolatey version that’s sure to satisfy any sweet tooth.
- Spiced Upgrade: A pinch of cinnamon or a sprinkle of nutmeg will elevate the flavor profile and give it a cozy vibe.
- Green Goddess: Add a handful of spinach or kale for some greens; they blend in beautifully and pack an extra nutritional punch without altering the flavor greatly.
- Dairy-Free Dream: Use a plant-based yogurt and almond or coconut milk instead of Greek yogurt for a refreshing vegan smoothie.
Chef’s Notes
The Banana Coffee Smoothie has become a favorite in my household, and believe me, it evolves every time I make it. Some days I’ll throw in a handful of chia seeds for added texture, while other mornings, I might skip the sweetener entirely if my bananas are sweet enough. I once made this for a brunch, and my friends couldn’t get enough — they were amazed that coffee could be so versatile.
And here’s a fun fact: I’ve even served this as a dessert! A little whipped cream and a sprinkle of cocoa powder, and my dessert-loving friends were sold. It’s versatile, and I adore how it brings people together. It’s heartwarming to watch friends and family enjoy something you’ve whipped up with love.
FAQs and Troubleshooting
-
Why is my smoothie too thick?
- If your smoothie turns out too thick, simply add a splash of milk or coffee and blend again until you reach your desired consistency.
-
Can I use instant coffee?
- Absolutely! Just mix your instant coffee with water before adding it to the blender. Adjust the amount based on your preferred coffee strength.
-
What if I don’t like bananas?
- You can swap bananas for a cup of berries or mango, but adjust the sweetener since fruits have various sweetness levels.
-
How can I store leftovers?
- Leftover smoothie can be stored in the fridge for 1-2 days, but keep in mind that it may separate. Just give it a good stir or shake before drinking.
Nutritional Info
(Per serving, approximately)
- Calories: 320
- Protein: 12g
- Fat: 3g
- Carbohydrates: 60g
- Fiber: 6g
- Sugar: 24g
Thanks for joining me in the kitchen today! I hope you enjoy this Banana Coffee Smoothie as much as I do. It’s one of those recipes that might just become a cherished part of your morning routine. So grab your blender, and let’s get sipping! Happy cooking!
Print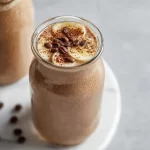
Banana Coffee Smoothie
- Total Time: 5 minutes
- Yield: 1 serving 1x
- Diet: Vegetarian
Description
A creamy and flavorful smoothie that combines ripe bananas, brewed coffee, and Greek yogurt for a nutritious breakfast in a glass.
Ingredients
- 2 Ripe Bananas
- 1 cup Brewed Coffee
- ½ cup Greek Yogurt
- ¼ cup Oats
- 1–2 tbsp Honey or Maple Syrup
- Ice Cubes (optional)
Instructions
- Prepare your coffee.
- Gather your ingredients.
- The blend begins: add bananas and coffee to the blender.
- Add Greek yogurt and oats.
- Sweeten to perfection.
- Final touch: admire and serve.
Notes
Serve with a sprinkle of cinnamon or a dollop of whipped cream for an extra touch. This smoothie is customizable based on your preferences.
- Prep Time: 5 minutes
- Cook Time: 0 minutes
- Category: Breakfast
- Method: Blending
- Cuisine: American
Nutrition
- Serving Size: 1 serving
- Calories: 320
- Sugar: 24g
- Sodium: 50mg
- Fat: 3g
- Saturated Fat: 1g
- Unsaturated Fat: 2g
- Trans Fat: 0g
- Carbohydrates: 60g
- Fiber: 6g
- Protein: 12g
- Cholesterol: 5mg
Keywords: smoothie, banana, coffee, breakfast, healthy

Fresh Strawberry Banana Smoothie – Creamy & Delicious
Fresh Strawberry Banana Smoothie – Creamy & Delicious
Welcome to my kitchen, dear foodies! Today, we’re diving into one of my favorite go-to recipes: the Fresh Strawberry Banana Smoothie. This creamy delight is a fantastic way to kickstart your morning or enjoy as a refreshing afternoon snack. With just a few simple ingredients, you can whip up a wholesome treat that not only tastes incredible but also nourishes your body and brightens your day. Are you ready to blend up some joy? Let’s get started!
A Slice of Nostalgia
Growing up, my kitchen was a constant flurry of activity. My mom had this remarkable talent for turning the ordinary into extraordinary, and it wasn’t uncommon to have a batch of smoothies whirling about in the blender while she juggled a million things at once. One of our family traditions involved Saturday mornings spent lounging in our pajamas, sipping on homemade smoothies while flipping through recipe books, discussing what glorious dishes we’d try next. The strawberry banana smoothie was always a crowd favorite—its vibrant pink hue reflected the sunshine, and the creamy texture made every sip feel indulgent. It wasn’t just about the smoothie; it was a canvas for our laughter and bonding, a celebration of togetherness that I cherish to this day. It brings back warmth and the scent of summer, that perfect reminder that, in life, simple pleasures are often the most delightful.
I can’t wait for you to create your own memories with this recipe, so let’s blend those strawberries and bananas!
Ingredients
Gather these ingredients for a deliciously creamy smoothie:
-
Fresh Strawberries (1 cup)
Strawberries provide sweetness, vibrant color, and a hefty dose of antioxidants. You can use fresh or frozen strawberries depending on the season. If fresh strawberries aren’t available, opt for frozen ones—they’ll make your smoothie extra cold and refreshing! -
Banana (1 ripe)
Bananas offer natural creaminess and a boost of potassium. Look for bananas with a few brown spots; they’re sweeter and perfect for smoothies. No ripe bananas? No worries! You can substitute with a half cup of unsweetened applesauce for a similar texture. -
Greek Yogurt (1/2 cup)
Greek yogurt adds a creamy texture and packs in protein. For a dairy-free option, you can use coconut yogurt or almond yogurt. Just make sure it’s thick to maintain that lush smoothie consistency. -
Almond Milk (1/2 cup)
This nutty milk serves as a lovely base for blending the ingredients. Feel free to switch it out for any milk of your choice—coconut milk, oat milk, or regular cow’s milk all work beautifully. -
Honey or Maple Syrup (1-2 tablespoons, optional)
For those sweet moments! Adjust the sweetness to your liking, but do taste before adding; the fruit often brings enough natural sweetness on its own. Agave syrup or a pitted date can also be good substitutes here. -
Ice Cubes (optional)
If you prefer a chilled smoothie, throw in a handful of ice cubes! This step is especially nice on hot days when you’re craving something refreshing.
Step-by-Step Instructions
Now that we have our ingredients ready, let’s mix it all up into a delightful smoothie!
-
Prep Your Ingredients
Start by washing your fresh strawberries under cool water to remove any dirt or debris. If you’re using frozen strawberries, you can skip this step! Next, peel your banana and slice it into a few chunks; this helps it blend more easily. -
Loading the Blender
In your blender, add the sliced banana first. This helps create a vortex, pulling the other ingredients down for even blending. Next, toss in the fresh strawberries, Greek yogurt, and almond milk. -
Sweeten It Up
If you’re adding honey or maple syrup, do so now. You can always adjust the sweetness later, but starting with a little helps you gauge the flavor. -
Blend It Up!
Secure the blender lid and start blending on low speed for about 30 seconds. Increase to high speed and blend until smooth and creamy, usually around an additional minute. If your smoothie is too thick, add a splash more almond milk until you reach your desired consistency. -
Taste Test
This is where the magic happens! Grab a spoon, dip it into the blender, and taste your creation. If it needs some extra sweetness, this is the perfect time to add more honey or syrup and blend again briefly. -
Add Ice (If Desired)
If you want a colder, frosty smoothie, now is the time to toss in a handful of ice cubes. Blend again until the ice is incorporated, giving your smoothie that refreshing chill. -
Serve and Enjoy!
Pour your creamy strawberry banana smoothie into your favorite glass.
Serving Suggestions
For a little extra flair, consider topping your smoothie with a few slices of fresh strawberries or a sprinkle of granola for that perfect crunch. If you’re feeling adventurous, add a dollop of whipped cream or a swirl of nut butter on top for added richness. A sprig of mint adds a lovely pop of color and aroma. Serve your smoothie immediately with a fun straw for sipping!
Recipe Variations
Feel free to get creative with your smoothie! Here are a few variations to try:
-
Tropical Twist: Swap out the strawberries for pineapple or mango for a juicy tropical vibe. Coconut milk can also enhance that island flavor!
-
Green Goodness: Add a handful of spinach or kale. They blend in beautifully, and you won’t even taste them!
-
Protein Power: Toss in a scoop of your favorite protein powder for a post-workout recovery boost.
-
Nutty Delight: Mix in a tablespoon of almond butter or peanut butter for a rich, nutty flavor and added creaminess.
-
Berry Medley: Substitute strawberries with any mixed berries—blueberries, raspberries, or blackberries for a fun berry explosion!
Chef’s Notes
One thing I love about this strawberry banana smoothie is how customizable it is. Over the years, I’ve played around with different flavors and textures until I found what works best for me. Remember, every ingredient has a purpose: ripe bananas bring creaminess, strawberries add sweetness, and yogurt gives that luxurious texture. If you ever have fruit that’s about to go bad, toss it in the freezer! You can always use it for smoothies, reducing waste while keeping your creations deliciously fresh.
Also, while blending, make sure to scrape down the sides of your blender occasionally so everything incorporates evenly. My early blending adventures often resulted in chunks of banana refusing to go smoothly, which always made for a fun taste test when I found an unblended bit!
FAQs and Troubleshooting
Q: What if my smoothie is too thick?
A: If your smoothie ends up too thick, just add a splash more almond milk and blend again until you reach your desired consistency.
Q: Can I make this smoothie ahead of time?
A: Yes! You can prepare it a few hours ahead and store it in the fridge. Just give it a good shake or stir before drinking, as it might separate a little while sitting.
Q: Can I use frozen fruit?
A: Absolutely! Frozen strawberries and bananas are great alternatives that yield a creamy texture, plus they keep your smoothie nice and cold. You might want to cut back on the ice if you do!
Q: How can I make it vegan?
A: To make this smoothie vegan, simply use a plant-based yogurt and a vegan sweetener like maple syrup or agave.
Nutritional Info
While I typically do not delve deep into nutritional info, it’s always nice to be aware of what we’re enjoying. A serving of this strawberry banana smoothie is roughly:
- Calories: 250
- Protein: 10g
- Healthy Fats: 4g
- Carbohydrates: 45g
- Fiber: 5g
(These values may vary based on the specific brands and ingredients you use.)
Thank you for joining me in my kitchen! I hope you find as much joy in making this Fresh Strawberry Banana Smoothie as I do. Embrace the flavors, have fun experimenting, and remember: the most important ingredient is love. Happy blending!
Print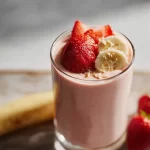
Fresh Strawberry Banana Smoothie
- Total Time: 10 minutes
- Yield: 2 servings 1x
- Diet: Vegetarian
Description
A creamy and delicious smoothie made with fresh strawberries, ripe bananas, and Greek yogurt, perfect for breakfast or a refreshing snack.
Ingredients
- 1 cup Fresh Strawberries
- 1 ripe Banana
- 1/2 cup Greek Yogurt
- 1/2 cup Almond Milk
- 1–2 tablespoons Honey or Maple Syrup (optional)
- Ice Cubes (optional)
Instructions
- Wash your fresh strawberries under cool water to remove any dirt or debris. If using frozen strawberries, skip this step!
- Peel your banana and slice it into chunks; this helps it blend more easily.
- Add the sliced banana to your blender first.
- Toss in the fresh strawberries, Greek yogurt, and almond milk.
- If adding honey or maple syrup, do so now.
- Blend on low speed for about 30 seconds, then increase to high speed and blend until smooth and creamy, usually around another minute.
- Taste your smoothie and add more sweetener if needed.
- If you want a colder smoothie, add ice and blend again.
- Pour your smoothie into a favorite glass and enjoy!
Notes
For added flair, top your smoothie with fresh strawberries, granola, whipped cream, or nut butter. Customize with different fruits or flavors as desired.
- Prep Time: 10 minutes
- Cook Time: 0 minutes
- Category: Drink
- Method: Blending
- Cuisine: American
Nutrition
- Serving Size: 1 serving
- Calories: 250
- Sugar: 20g
- Sodium: 90mg
- Fat: 4g
- Saturated Fat: 1g
- Unsaturated Fat: 2g
- Trans Fat: 0g
- Carbohydrates: 45g
- Fiber: 5g
- Protein: 10g
- Cholesterol: 5mg
Keywords: smoothie, strawberry banana, refreshing drink, healthy, breakfast
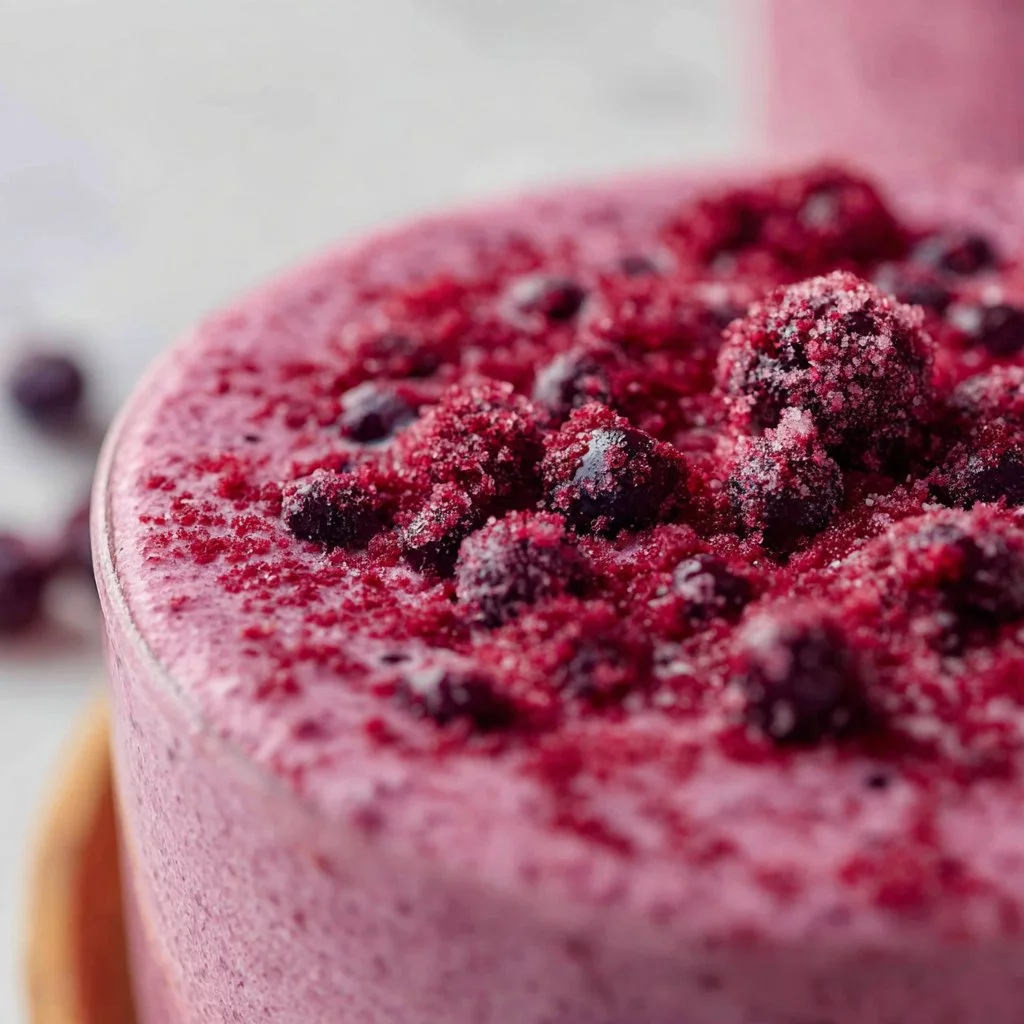
Blueberry Raspberry Smoothie
Refreshing Blueberry Raspberry Smoothie: A Delicious Journey
Welcome to my cozy kitchen! I’m thrilled you’re here, ready to whip up something delightful and nourishing. Today, we’ll be diving into the vibrant world of smoothies, specifically my much-loved Blueberry Raspberry Smoothie. A blend of plump blueberries and sweet, tangy raspberries, this smoothie is not just delicious but also a powerhouse of nutrients. Whether you’re seeking a refreshing breakfast, a post-workout treat, or a healthy afternoon snack, you’ll definitely want to keep this recipe close at hand.
Smoothies are one of those magical creations that can be tailored to everyone’s taste. You can throw in whatever fruits you have on hand, and each blending session feels like a new adventure. Plus, there’s something incredibly satisfying about seeing fresh berries glide effortlessly into a creamy, dreamy blend. It’s a treat for both the eyes and the taste buds!
The beauty of this Blueberry Raspberry Smoothie is not just in its flavor but also in its easy adaptability. It’s quick to make, bursting with color, and guaranteed to brighten your day. So grab your favorite blender, wear that messy apron, and let’s embark on this fruity journey together.
A Taste of Nostalgia
Let me take you back a few years to my grandmother’s kitchen. She was the queen of desserts, always experimenting with what she could mix and match. On summer days, our backyard would be abundant with berries, and we’d spend afternoons picking sun-warmed blueberries and raspberries, our hands stained purple from all the juicy goodness. One special afternoon, Grandma decided to create a smoothie-like delight with our freshly picked berries, a simple blend of yogurt, berries, and just a hint of honey.
The moment I took a sip, I was in heaven. The smooth, creamy texture combined with the tang of the berries transported me to pure bliss. I remember sitting on the back porch with my cousins, giggling over how our fingers looked more like paintings than hands. That memory stuck with me, and as I grew older, the combination of blueberry and raspberry became a nostalgic favorite. This Blueberry Raspberry Smoothie is my homage to that heartwarming summer day, reminding me of the joy of connecting over food, family, and a shared love for the fresh flavors of nature.
Ingredients
Here’s what you’ll need to create this delicious smoothie:
-
1 cup blueberries
- Fresh or frozen both work wonderfully. Blueberries are rich in antioxidants and vitamins. If you have raspberries, mix them in for a complex flavor!
-
1 cup raspberries
- Like blueberries, these bright gems add a beautiful tartness. If they’re out of season, opt for frozen.
-
1 banana
- A natural sweetener that creates creamy smoothness. Feel free to substitute with avocado for a rich texture without the sweetness.
-
1 cup spinach (optional)
- Sneak in some greens! Spinach won’t alter the flavor but will add a nutritional boost.
-
1 cup almond milk (or any milk of choice)
- Use any milk you prefer – cow’s milk, oat milk, or even coconut water for a tropical twist.
-
1 tablespoon honey or maple syrup (optional)
- Adjust the sweetness to taste. If you prefer, replace with agave syrup or skip it entirely if your berries are sweet.
-
1 teaspoon chia seeds (optional)
- These tiny seeds are packed with omega-3s and add texture. If you’re not a fan, feel free to leave them out.
Step-by-Step Instructions
-
Gather and Prep Your Ingredients
- Locate all your ingredients and give them a good rinse (especially the berries!). If you’re using frozen berries, no need to thaw them; they’ll help keep your smoothie cold and refreshing.
-
Add to Blender
- Start by placing the spinach in the bottom of your blender (if using). Then, layer in the berries, banana, and chia seeds. Adding the liquid last helps everything blend more smoothly.
-
Pour in the Milk
- Now, pour in the almond milk (or your milk of choice). If you want a thicker smoothie, add less milk; for a thinner consistency, adjust accordingly. You can always add more if it’s too thick!
-
Sweeten It Up
- If you have a sweet tooth, now’s the time to add honey or maple syrup. Remember, you can always taste before you blend to decide how sweet you want it.
-
Blend Away!
- Secure the blender lid and start blending on low, gradually increasing to high. Blend until everything is smooth and creamy, about 30 to 60 seconds. If needed, pause and scrape down the sides to ensure everything gets blended well.
-
Taste and Adjust
- Here comes the taste test. Sip a little to see if your smoothie needs more sweetness or a touch more milk. Don’t be shy; this is your creation!
-
Serve It Up
- Pour your delicious smoothie into a tall glass or a fancy mason jar. You can garnish with a few extra berries or a sprinkle of chia seeds on top for a decorative touch.
Serving Suggestions
For the ultimate smoothie experience, pair this Blueberry Raspberry Smoothie with a handful of granola for some added texture or a slice of whole-grain toast topped with almond butter. It’s a perfect way to boost your breakfast or a post-workout pick-me-up! And don’t forget a colorful straw; it makes sipping ever so satisfying!
Recipe Variations
- Tropical Twist: Add a half cup of pineapple or mango for a refreshing tropical twist.
- Nutty Delight: Toss in a scoop of nut butter (like almond or peanut) for an extra dose of protein and creaminess.
- Green Goddess: Add an avocado in place of the banana for a creamier texture without the sweetness.
- Berry Burst: Substitute strawberries for either berry for a new flavor profile.
- Protein-Packed: Add a scoop of protein powder—vanilla or berry-flavored works best—for a post-gym treat!
Chef’s Notes
This recipe has been through a few iterations in my kitchen. Initially, I crafted it as a breakfast option but found that it made a killer base for smoothie bowls as well! I once added some spirulina for a nutritional boost during a health kick, and while it turned my smoothie a wild green color, the flavor was still delightful. I love how adaptable this recipe is—it evolves with the seasons and what I have on hand. Feel free to experiment and make it your own!
FAQs and Troubleshooting
Q: What if my smoothie is too thick?
A: No worries! Just add a splash more of your milk or water and blend again. You can always adjust to your desired consistency.
Q: Can I use other fruits?
A: Absolutely! The beauty of smoothies is their versatility. Try swapping in peaches, strawberries, or even a handful of oats!
Q: How do I make this ahead of time?
A: You can prep your ingredients the night before, store them in the fridge or freezer, and blend in the morning. To avoid browning, squeeze a little lemon juice on any cut fruits!
Q: Can I store leftover smoothie?
A: Yes, but it’s best fresh! Store in an airtight container in the fridge for up to 24 hours. Give it a good shake before you drink it again.
Nutritional Info
(If applicable, consider including basic nutritional data such as calories, carbs, protein, and fats. Adjust based on personal needs or dietary specifics.)
And there you have it—a step-by-step guide to crafting the most delightful Blueberry Raspberry Smoothie! I hope you’ve enjoyed this journey through flavor and memory as much as I love sharing it with you. Go ahead, blend it up, and let that sweet, fruity goodness bring a smile to your face. Cheers to delicious moments in the kitchen, my fellow food enthusiasts! 🥤✨
Print
Blueberry Raspberry Smoothie
- Total Time: 10 minutes
- Yield: 2 servings 1x
- Diet: Vegetarian
Description
A refreshing and nutritious smoothie packed with blueberries, raspberries, and banana, perfect for breakfast or a healthy snack.
Ingredients
- 1 cup blueberries
- 1 cup raspberries
- 1 banana
- 1 cup spinach (optional)
- 1 cup almond milk (or any milk of choice)
- 1 tablespoon honey or maple syrup (optional)
- 1 teaspoon chia seeds (optional)
Instructions
- Gather and prep your ingredients.
- Add to the blender, starting with spinach at the bottom (if using).
- Pour in the almond milk.
- Sweeten it up with honey or maple syrup if desired.
- Blend until smooth and creamy, about 30 to 60 seconds.
- Taste and adjust sweetness or consistency as needed.
- Serve in a tall glass and garnish if desired.
Notes
Pair with granola or whole-grain toast for a satisfying meal. This recipe is highly adaptable; feel free to adjust ingredients based on your preference.
- Prep Time: 10 minutes
- Cook Time: 0 minutes
- Category: Breakfast
- Method: Blending
- Cuisine: American
Nutrition
- Serving Size: 1 serving
- Calories: 200
- Sugar: 20g
- Sodium: 150mg
- Fat: 6g
- Saturated Fat: 1g
- Unsaturated Fat: 5g
- Trans Fat: 0g
- Carbohydrates: 36g
- Fiber: 6g
- Protein: 4g
- Cholesterol: 0mg
Keywords: smoothie, blueberry, raspberry, healthy snack, breakfast
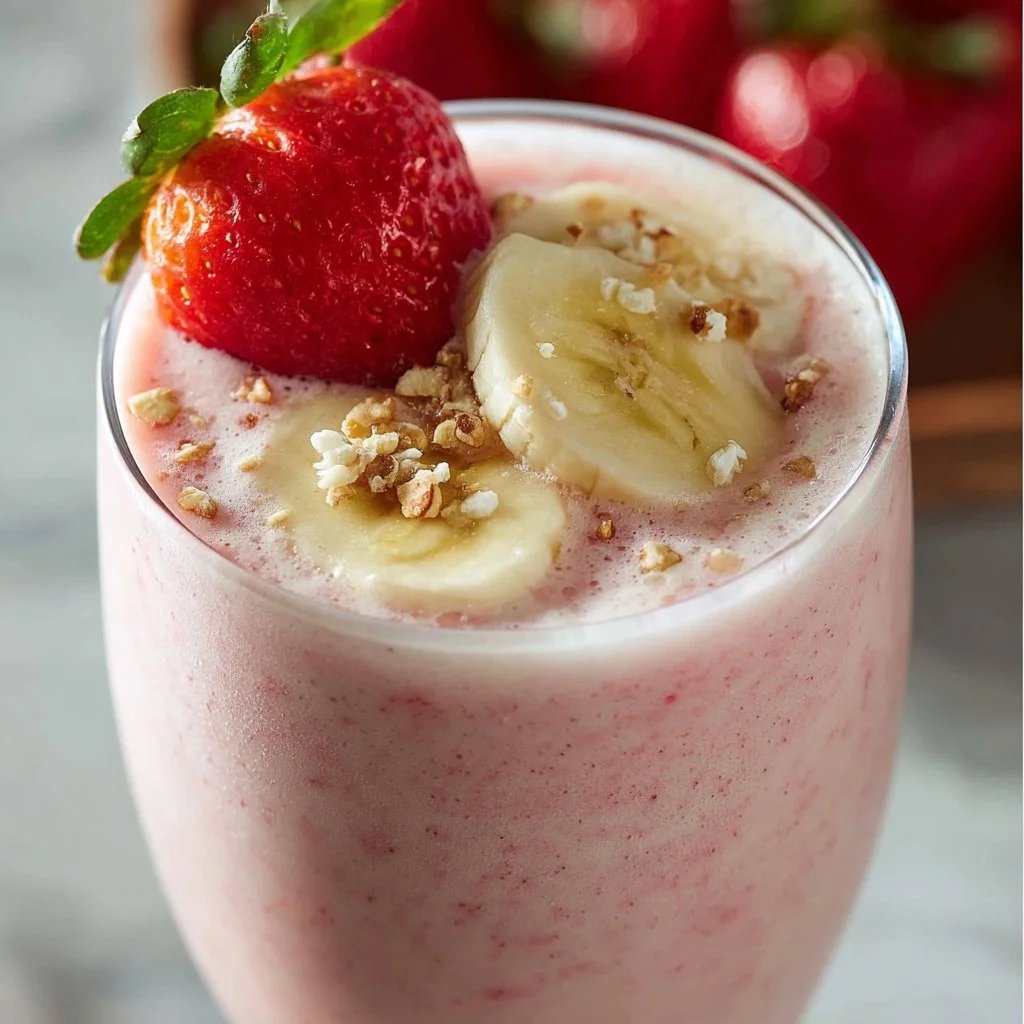
Strawberry Banana Smoothie
Discover the Joy of a Strawberry Banana Smoothie
Welcome back to the cozy confines of my kitchen! Today, we’re diving into a recipe that embodies everything I love about cooking: simplicity, freshness, and joy. That’s right, folks; we’re making a delightful Strawberry Banana Smoothie. This drink is not just a quick and easy treat; it’s a reminder of summer days, family breakfasts, and the countless moments where a delicious blend of flavors brings smiles to faces.
There’s something so invigorating about the vibrant colors of ripe strawberries and bananas. The sweetness of the fruit blends seamlessly with creamy yogurt and a splash of milk or juice, creating a refreshing drink any time of day. Whether you’re kickstarting your morning, seeking a mid-afternoon snack, or winding down after a long day, this smoothie hits just the right spot.
Let’s be real—who among us hasn’t found ourselves standing in front of the refrigerator, puzzled over what to whip up as a healthy, tasty option? This Strawberry Banana Smoothie is here to save the day! Plus, it’s a fantastic way to sneak in some nourishment while enjoying amazing flavors. No fancy equipment or culinary skills are required, just a willingness to enjoy kitchen experimentation!
So, grab your blender, and let’s blend up something delicious together.
A Sweet Strawberry Memory
I’ll never forget the first time I tasted a homemade strawberry banana smoothie. I was around ten years old, and it was a warm summer afternoon. My mom and I had just returned from our weekly trip to the farmer’s market, where we had picked up a basket of the freshest strawberries. The sweet smell of ripe fruit filled our kitchen, mingling with the sunshine filtering through the window.
Mom decided it was the perfect day to whip up a special treat. As she blended the strawberries and bananas, I watched in awe, fascinated by how she transformed simple, humble ingredients into something so beautiful and delicious. When she handed me my first smoothie, I was in love. The cool, creamy texture and the burst of fruit flavor on my tongue instantly delighted me.
That day sparked a vibrant passion for cooking and encouraged me to explore the world of flavors and combinations. Now, every time I make this smoothie, I’m reminded of that sun-soaked afternoon in my childhood kitchen, the laughter, and the warm hugs shared over food. It’s one of those recipes that carries not only flavor but also memories—perfect for sharing with loved ones.
Ingredients You’ll Need
Let’s gather your ingredients so we can whip up this delightful smoothie! Here’s what you’ll need:
-
1 cup fresh strawberries (hulled): Fresh strawberries are the star of our drink! Their natural sweetness and gorgeous color create a vibrant base.
- Substitution tip: You can use frozen strawberries if fresh isn’t available. Just make sure to adjust the milk to achieve your desired consistency.
-
1 ripe banana: Bananas add creaminess and natural sweetness to your smoothie.
- Chef insight: Make sure it’s perfectly ripe (with some brown spots) for maximum sweetness!
-
1 cup yogurt (plain or vanilla): Yogurt adds a creamy texture and packs in some protein.
- Substitution tip: For a dairy-free option, try coconut yogurt or any plant-based yogurt.
-
1/2 cup milk (dairy or plant-based): Milk provides a lovely liquid base to blend everything smoothly.
- Substitution tip: Almond or oat milk works wonderfully if you’re going dairy-free!
-
1 tablespoon honey or maple syrup: A little sweetener to enhance the flavors.
- Substitution tip: You can omit this if your fruit is sweet enough for your taste.
-
Ice cubes (optional): For that extra refreshing chill, especially during hot days.
- Chef hack: Blend in some ice if you’re using fresh fruit to chill it without watering down the flavor.
Step-by-Step Instructions
Alright, let’s get blending! Here’s how to create your scrumptious strawberry banana smoothie in just a few easy steps:
-
Prep the Fruit: Start by hulling the strawberries (removing the green tops) and slicing the banana into smaller pieces. This will make blending a breeze and ensure everything mixes beautifully.
-
Add to Blender: Toss the strawberries and banana into your blender. Follow up with the yogurt, milk, and a drizzle of honey or maple syrup. If you’re using ice cubes, add those as well!
-
Blend it Up: Secure the lid on your blender and blend on high until everything is smooth and creamy. This should take about 30 seconds to 1 minute. Keep an eye on the consistency; you want it thick yet pourable!
-
Taste and Adjust: Give your smoothie a quick taste test! If you find it needs a tad more sweetness, add a little more honey or syrup and blend again for a few seconds. If it’s too thick, add a splash more milk and blend until smooth.
-
Pour and Enjoy: Pour your beautiful smoothie into your favorite glass (I love a classic mason jar), and if you’re feeling fancy, top it off with a slice of strawberry or banana.
Chef Tip: For an extra touch, sprinkle some granola or chia seeds on top for crunch and nutrition.
Serving Suggestions
The beauty of a strawberry banana smoothie is its versatility! You can serve it as a refreshing breakfast, an afternoon snack, or even a healthy dessert. Pour it into fun glasses and enjoy with friends, or create a DIY smoothie bar for a brunch party where guests can add their favorite toppings.
Recipe Variations
Feel like mixing it up? Here are some fun twists you can add to your smoothie:
- Berry Blast: Add a handful of blueberries or raspberries for a mixed berry smoothie.
- Nutty Banana: Toss in a spoonful of almond butter or peanut butter for a nutty twist.
- Greens Galore: Throw in a handful of spinach or kale for an extra nutrient boost—trust me; you won’t taste it.
- Chocolate Indulgence: Add a teaspoon of cocoa powder or a spoonful of chocolate protein powder for a chocolatey treat.
- Tropical Twist: Add mango or pineapple for a tropical vibe.
Chef’s Notes
As I continue to make this strawberry banana smoothie, I can’t help but reflect on how it has changed over the years. What started as a simple recipe made with whatever we had on hand has evolved into a canvas for creativity!
I love how this smoothie embraces seasonal changes. In summer, I go wild with fresh berries, and in winter, I experiment with frozen fruits or add spices like cinnamon or nutmeg. It’s a recipe that can grow with you and your tastes—a true kitchen staple!
FAQs and Troubleshooting
1. My smoothie is too thick. What can I do?
If your smoothie turns out thicker than you’d like, simply add a splash more milk and blend again until it reaches the perfect consistency.
2. What if I don’t have yogurt?
No worries! You can substitute yogurt with additional milk for a lighter version or add in silken tofu for extra creaminess and protein.
3. Can I make this smoothie ahead of time?
I recommend consuming the smoothie fresh for the best flavor and texture. However, if you need to prepare it in advance, store it in an airtight jar in the fridge for up to 24 hours. Just give it a good shake before drinking!
4. Why is my smoothie brownish?
If you’re using overly ripe bananas or blending everything together for too long, the smoothie can take on a brownish hue. It’s not bad; it just means it’s fully blended! For aesthetic purposes, avoid over-mixing.
Nutritional Info
This smoothie provides a nutritious punch with vitamins, minerals, and protein.
- Calories: Approximately 180–220 (varies based on yogurt and milk used)
- Protein: 6–10 grams (depends on yogurt used)
- Fiber: About 3–4 grams, thanks to the fruit!
In conclusion, nothing makes me happier than sharing a bowl (or a glass) of delicious homemade goodness. This strawberry banana smoothie is not just a recipe; it’s a celebration of flavors, memories, and countless cozy kitchen moments.
So, next time you’re looking for something healthy and delicious, remember this smoothie recipe—it’s far more than just a drink; it’s a joyful experience waiting to happen. Happy blending, my foodie friends!
Print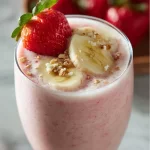
Strawberry Banana Smoothie
- Total Time: 10 minutes
- Yield: 2 servings 1x
- Diet: Vegetarian
Description
A refreshing and creamy strawberry banana smoothie that embodies simplicity and joy, perfect for any time of day.
Ingredients
- 1 cup fresh strawberries (hulled)
- 1 ripe banana
- 1 cup yogurt (plain or vanilla)
- 1/2 cup milk (dairy or plant-based)
- 1 tablespoon honey or maple syrup (optional)
- Ice cubes (optional)
Instructions
- Prep the fruit by hulling the strawberries and slicing the banana.
- Add the strawberries and banana into a blender along with yogurt, milk, and honey or syrup.
- Blend on high until smooth and creamy, about 30 seconds to 1 minute.
- Taste and adjust sweetness or consistency as needed by adding more honey or milk.
- Pour into a glass and top with a slice of strawberry or banana if desired.
Notes
For extra crunch and nutrition, sprinkle granola or chia seeds on top before serving.
- Prep Time: 10 minutes
- Cook Time: 0 minutes
- Category: Beverage
- Method: Blending
- Cuisine: American
Nutrition
- Serving Size: 1 serving
- Calories: 200
- Sugar: 20g
- Sodium: 100mg
- Fat: 2g
- Saturated Fat: 1g
- Unsaturated Fat: 1g
- Trans Fat: 0g
- Carbohydrates: 44g
- Fiber: 4g
- Protein: 8g
- Cholesterol: 5mg
Keywords: smoothie, strawberry, banana, healthy drink, breakfast, snack
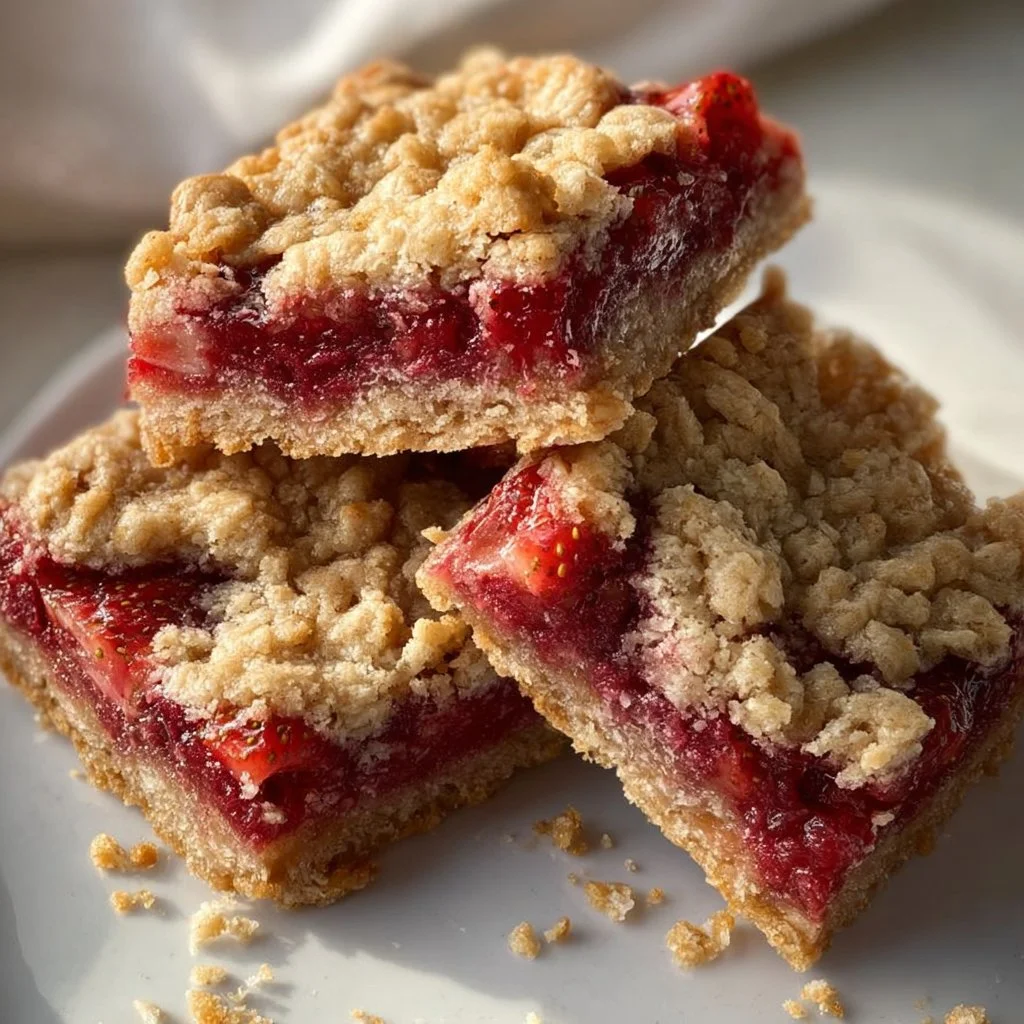
Strawberry Oatmeal Bars
Strawberry Oatmeal Bars: A Cozy Delight for Every Occasion
Welcome back to my kitchen! Today, we’re embarking on a flavor-packed journey where sweet strawberries meet chewy oatmeal — and I couldn’t be more excited to share my cherished recipe for Strawberry Oatmeal Bars. These aren’t just any ordinary bars; they are the perfect blend of sweet and wholesome, ideal for breakfast, snack time, or dessert. Plus, they’re super easy to whip up, making them a favorite for both novice and seasoned cooks alike.
Soon, you’ll be able to pull a tray of these delightful bars from your oven, and the aroma of baked strawberries and toasted oats will have you nostalgic for summer picnics and carefree days. Picture this: a stack of these bars sitting on a picnic blanket, laughter filling the air, and sunshine warming your skin. Doesn’t that sound dreamy? Let’s dive into this delicious recipe!
A Cozy Memory
Every time I make Strawberry Oatmeal Bars, I’m transported back to my childhood summers spent at my grandmother’s house. She had a little garden bursting with strawberries, and I can still picture myself running through the rows, plucking the ripest ones and popping them straight into my mouth. After a morning of berry picking, my grandmother would whip up her famous oatmeal bars. The kitchen would soon fill with the warm scent of butter, oats, and freshly baked strawberries.
Those bars were always a hit, and to this day, I can’t think of summer without picturing those golden treats cooling on the kitchen counter. Her secret? A pinch of love sprinkled into the batter and plenty of juicy strawberries. Inspired by her recipe, I knew I had to create my own version that decks out the goodness of strawberries with the heartiness of oats while keeping that nostalgic flair alive.
Now, whenever I bake these bars, I feel like I’m carrying forward that same love my grandmother shared with me, hoping it brings the same joy to your shared moments.
Ingredients
Let’s gather our ingredients! This recipe is simple, yet it packs a punch in flavor. Here’s what you’ll need:
-
2 cups rolled oats
The heart of our bars! Rolled oats give them a chewy texture. If you need a gluten-free option, use certified gluten-free oats. -
1 cup all-purpose flour
This helps bind everything together. You can substitute with whole wheat flour or almond flour for a nuttier flavor. -
¾ cup brown sugar
Adds moisture and depth of flavor. Coconut sugar or maple syrup can work as alternatives if you’re looking for a healthier option. -
½ cup unsalted butter, melted
Brings richness to the bars. For a vegan option, you might try coconut oil or vegan butter. -
1 teaspoon vanilla extract
This is the magic ingredient that enhances sweetness. Feel free to experiment with almond extract for a different flavor profile! -
½ teaspoon baking powder
This helps give the bars some rise. If you’re out of baking powder, baking soda can be used—just remember to balance it with an acid, like vinegar or lemon juice! -
¼ teaspoon salt
Enhances all the flavors. You won’t even notice it, but it’s essential for that tasty balance. -
2 cups fresh strawberries (sliced)
The star of the show! Use ripe, juicy strawberries for the best flavor. Frozen berries can work too; just be sure to thaw and drain them first.
Step-by-Step Instructions
Let’s get cooking! Follow these steps, and soon you’ll have your own tray of scrumptious Strawberry Oatmeal Bars.
-
Preheat the Oven
Begin by preheating your oven to 350°F (175°C). Greasing your baking pan beforehand is a must! Use an 8×8 or 9×9-inch pan, lining it with parchment paper for easy removal later. -
Mix the Dry Ingredients
In a large bowl, whisk together the rolled oats, flour, brown sugar, baking powder, and salt until well combined. This ensures that every bite is perfectly balanced. A little chef tip: use the back of the whisk to break up any clumps of brown sugar. -
Incorporate the Butter and Vanilla
Melt your butter and let it cool slightly. Then, add it to the dry ingredient mixture, along with the vanilla extract. Stir with a spatula until everything is well combined and a crumbly dough forms. It should resemble wet sand—this means you’re on the right track! -
Prepare the Strawberry Filling
While mixing the base, slice your strawberries. If you want a little extra sweetness, sprinkle them with a teaspoon of sugar and let them sit for about 10 minutes. This releases their juices and makes for a luscious filling. -
Spread the Base Into the Pan
Now, take half of your oat mixture and press it firmly into the bottom of the greased pan. You want a nice, even layer—this will hold your strawberries. -
Layer the Strawberries
Spoon the strawberries an even layer over the oat base. If you want to get a little adventurous, sprinkle a dash of cinnamon or lemon zest over the strawberries for an added zing! -
Top with Remaining Oat Mixture
Crumble the rest of the oat mixture on top of the strawberries. It doesn’t have to cover every inch—some strawberry peeking through is perfectly fine! It will create that lovely, rustic look. -
Bake
Pop your pan into the oven and let the magic happen. Bake for 25-30 minutes or until the top is golden brown and the strawberries are bubbling slightly. Your kitchen will start to smell divine—trust me! -
Cool and Cut
Once out of the oven, let it cool in the pan for about 10 minutes, then carefully lift it out using the parchment paper. Transfer to a wire rack and let it cool completely before slicing. Patience is key here; you want them perfectly set! -
Serve and Enjoy
Once cool, cut your bars into squares or rectangles. Serve them warm or at room temperature—either way, they’ll be a hit!
Serving Suggestions
These bars can be served in a variety of delightful ways. Dust them with a light sprinkle of powdered sugar for a touch of elegance, or serve them alongside a scoop of vanilla ice cream for a comforting dessert. I also love pairing them with a cup of freshly brewed coffee or tea for a perfect afternoon snack.
They make fantastic additions to a picnic basket or can be wrapped up with a beautiful bow as a thoughtful gift for a friend. Your family and friends will definitely come back asking for more!
Recipe Variations
Getting creative with your Strawberry Oatmeal Bars is all part of the fun! Here are a few variations to consider:
- Berry Medley: Swap out strawberries for blueberries, raspberries, or even a mix of all three for a fruity explosion!
- Nutty Twist: Add ½ cup of chopped nuts—like almonds or walnuts—into the oat mixture for added crunch and flavor.
- Coconut Delight: Mix in shredded coconut for a tropical vibe that pairs perfectly with the strawberries.
- Chocolate Chip Indulgence: Stir in some chocolate chips—because who doesn’t love a little chocolate with fruit?
- Spiced Up: Add a sprinkle of cinnamon or nutmeg to the oat base for a warm, spiced flavor that works beautifully with the fruit.
Chef’s Notes
These Strawberry Oatmeal Bars have evolved over the years to feature all my favorite tweaks and turns. My first attempts were quite different! I didn’t quite figure out the balance of sweetness to tartness, and let me tell you, I had a few kitchen disasters (thank goodness for trash cans!).
But short of some minor mishaps, baking is all about experimentation; each batch teaches you something new and helps refine the technique. I’ll never forget the time I accidentally mistook salt for sugar—it was a salty disaster, but we all laughed over it, and those are the moments that remind us that cooking is about joy, not perfection.
FAQs and Troubleshooting
-
Why did my bars crumble apart when cutting?
This can happen if the bars are not cooled completely before slicing. They need to set to hold together nicely. Try waiting a bit longer next time! -
Can I use frozen strawberries?
Yes! Just make sure to thaw and drain any excess moisture from them to avoid a soggy filling. -
My bars are too sweet. What went wrong?
Sometimes the sweetness can vary based on the specific brand of brown sugar used. If you’re concerned, you can reduce the sugar in future batches. -
Can I make these ahead of time?
Absolutely! They store well in an airtight container for up to a week — just be sure to layer them with parchment if stacking to avoid sticking.
Nutritional Info
Per serving (1 bar, roughly 24 bars total):
- Calories: 180
- Protein: 2g
- Carbohydrates: 27g
- Fat: 7g
- Sugar: 6g
- Fiber: 2g
Now that you have this lovely recipe for Strawberry Oatmeal Bars, it’s time to gather your ingredients and get baking! Whether you’re enjoying them solo or sharing with loved ones, I hope these bars bring you as much joy as they’ve brought me. Happy baking and bon appétit! 🍓
Print
Strawberry Oatmeal Bars
- Total Time: 45 minutes
- Yield: 24 bars 1x
- Diet: Vegetarian
Description
A wholesome blend of sweet strawberries and chewy oatmeal, perfect for breakfast, snack time, or dessert.
Ingredients
- 2 cups rolled oats
- 1 cup all-purpose flour
- ¾ cup brown sugar
- ½ cup unsalted butter, melted
- 1 teaspoon vanilla extract
- ½ teaspoon baking powder
- ¼ teaspoon salt
- 2 cups fresh strawberries, sliced
Instructions
- Preheat the oven to 350°F (175°C) and grease your baking pan.
- Mix the dry ingredients: rolled oats, flour, brown sugar, baking powder, and salt in a large bowl.
- Incorporate the melted butter and vanilla into the dry mixture until crumbly.
- Prepare the strawberries by slicing them and optionally sprinkling with sugar.
- Spread half of the oat mixture into the bottom of the greased pan.
- Layer the sliced strawberries over the oat base.
- Top with the remaining oat mixture in a crumbled layer.
- Bake for 25-30 minutes until golden brown and bubbly.
- Cool in the pan for 10 minutes, then transfer to a wire rack to cool completely before slicing.
- Serve and enjoy warm or at room temperature.
Notes
These bars can be adapted with various fruits, nuts, or spices for different flavors.
- Prep Time: 15 minutes
- Cook Time: 30 minutes
- Category: Dessert
- Method: Baking
- Cuisine: American
Nutrition
- Serving Size: 1 bar
- Calories: 180
- Sugar: 6g
- Sodium: 100mg
- Fat: 7g
- Saturated Fat: 4g
- Unsaturated Fat: 3g
- Trans Fat: 0g
- Carbohydrates: 27g
- Fiber: 2g
- Protein: 2g
- Cholesterol: 15mg
Keywords: strawberry, oatmeal, bars, dessert, baking


