
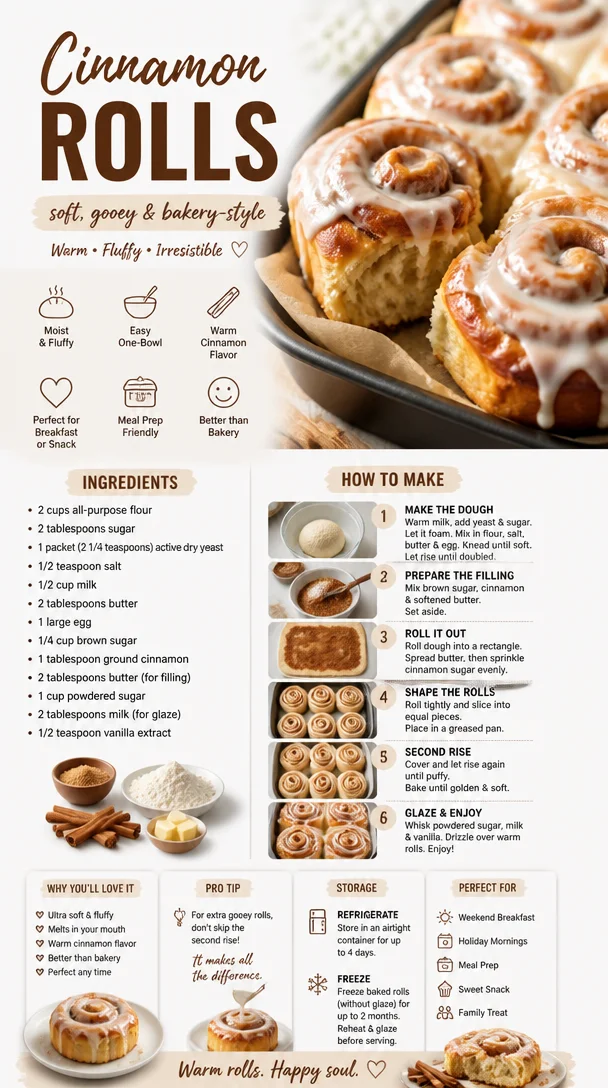
Cinnamon Rolls
The Ultimate Cinnamon Roll Recipe that Will Warm Your Heart
Welcome to my cozy kitchen, where the scent of cinnamon wafts through the air like a warm hug! I’m Olivia Bennett, and today, I’m bursting with excitement to share a cherished recipe that has been a staple in my home for years: my delectable cinnamon rolls. These sweet, fluffy beauties are not just a treat; they’re a delicious memory wrapped in a gooey glaze, ready to bring joy to your family and friends.
There’s something magical about cinnamon rolls. They evoke nostalgia, perhaps because they remind us of lazy Sunday mornings spent lingering over breakfast, the kind that draws everyone to the kitchen with sleepy eyes and hopeful hearts. Picture this: warm coffee brewing, the sun streaming through the window, and the tantalizing aroma of cinnamon swirling through the air. It’s a sensory experience that speaks to the soul, and that’s exactly what I want to recreate for you today.
My love for baking cinnamon rolls started in my childhood, standing on a stool beside my grandmother, who had the knack for creating magic in the kitchen. I remember mixing the dough, sprinkling what felt like an endless mountain of cinnamon sugar, and watching in awe as those rolls blossomed into golden, pillowy clouds in the oven. That anticipation, that sense of warmth and belonging, is what has fueled my passion over the years, and it’s why I’m thrilled to guide you through this journey.
So, grab your apron (and maybe a few extra napkins because things might get sticky), and let’s dive into the world of cinnamon rolls—a place where flour flies, smiles abound, and hearts grow a little fonder with every bite!
A Special Memory: Cinnamon Rolls and Sunday Morning Bliss
Every Sunday during my childhood was carefully marked on the calendar with one simple yet joyous activity: grandma’s cinnamon roll mornings. It wasn’t just about eating; it was an experience filled with laughter, the clink of coffee mugs, and stories that seemed to float through the air like the scent of baking cinnamon.
I vividly recall my grandma’s habit of sneaking a little extra cinnamon and brown sugar into the filling—her secret touch for making them extra special. While we waited for the dough to rise, she would share tales of her own culinary adventures, introducing me to the magic of baking and the happiness it brings.
After what felt like an eternity, the oven timer would ding, a sound that could summon the whole family in an instant. The first bite of those sticky, warm rolls was sheer bliss, a reminder that love is often found in the simplest of pleasures. It was a connection, a way to gather and create memories that have stuck with me through the years.
As I bake these cinnamon rolls today, I channel that same joy and excitement, hoping to share a piece of my past with each person who tries this recipe. Trust me—after just one bite, you’re bound to make your own cherished memories!
Ingredients: What You’ll Need
To make these fluffy cinnamon rolls, gather the following ingredients and let’s create some magic in the kitchen!
-
All-purpose flour (4 cups): This is the base for our dough. It provides structure and fluffiness. If you’re looking for a gluten-free option, you can use a 1:1 gluten-free flour blend.
-
Granulated sugar (½ cup): This sweetens the dough and balances out the spices. For a less sweet option, you can reduce the sugar to ¼ cup.
-
Active dry yeast (2 ¼ teaspoons): This little powerhouse helps the dough rise and become wonderfully fluffy. If you’re using instant yeast, you can use the same amount without needing to activate it in water.
-
Warm milk (1 cup): It activates the yeast and adds richness to the dough. If you’re dairy-free, feel free to use almond milk or oat milk. Just ensure it’s slightly warm, not hot.
-
Unsalted butter (½ cup, melted): Butter brings a lovely flavor and richness to the rolls. You could replace it with coconut oil for a dairy-free version!
-
Large egg (1): This binds the dough together and gives a slight richness. For a vegan alternative, try using a flax egg (1 tablespoon of ground flaxseed mixed with 3 tablespoons of water).
-
Cinnamon (2 tablespoons): The star of our show! It’s warm and aromatic, making these rolls irresistible. If you want a little kick, try adding a pinch of nutmeg or allspice to the mix.
-
Brown sugar (¾ cup): This adds moisture and deep, caramel-like flavor. You can substitute with coconut sugar if preferred.
-
Cream cheese (for frosting): You can’t have cinnamon rolls without icing! Cream cheese gives a tangy sweetness that complements the cinnamon perfectly. For a dairy-free option, try using cashew cream or a non-dairy cream cheese alternative.
Step-by-Step Instructions: How to Make the Perfect Cinnamon Rolls
Ready to roll up those sleeves? Let’s get baking!
Step 1: Prepare the Dough
-
Activate the Yeast: In a small bowl, combine warm milk (about 110°F) with the granulated sugar and yeast. Stir gently and let it sit for about 10 minutes until it’s frothy. This means your yeast is happy and active!
-
Create the Dough: In a large bowl, mix together the flour and a pinch of salt. In a separate bowl, whisk the melted butter, egg, and the bubbly yeast mixture until well combined.
-
Combine Wet and Dry Ingredients: Pour the wet ingredients into the flour mixture, stirring until a shaggy dough forms. Don’t worry about being too precise—this is meant to be a little messy!
Step 2: Knead the Dough
-
Kneading Time: Transfer the dough to a lightly floured surface and knead for about 8-10 minutes. Your dough should be smooth and elastic. If it’s too sticky, sprinkle a little more flour as needed.
-
Let it Rise: Place your kneaded dough in a greased bowl, cover it with a warm towel, and let it rise in a warm spot for about 1-2 hours, or until it has doubled in size. Take this time to sip some coffee and daydream about how amazing these rolls will be!
Step 3: Fill and Roll
-
Prepare your Filling: In a small bowl, mix together the brown sugar and cinnamon. It’s like a sweet spice hug just waiting to be nestled in those rolls!
-
Roll it Out: Once the dough has risen, punch it down gently and turn it out onto a floured surface. Roll it into a rectangle about 1/4-inch thick, aiming for a size of 12×18 inches.
-
Spread the Goodness: Brush the rolled-out dough with melted butter, leaving a small border around the edges. Sprinkle the cinnamon-sugar mixture evenly on top.
Step 4: Shape the Rolls
-
Roll it Up: Starting from the long edge, tightly roll the dough into a log. Pinch the seam to seal it, and keep that delicious filling inside!
-
Slice and Arrange: Cut the log into 12 even slices (you can use dental floss for a clean cut!). Place the rolls in a greased 9×13 inch baking dish, leaving a little space for them to rise, and cover with a towel.
Step 5: Second Rise
- Final Rise: Let those beauties rise for about 30 minutes. Preheat your oven to 350°F (175°C), and take a moment to appreciate the sweet smell wafting through your kitchen.
Step 6: Bake
- Baking Time: After the second rise, pop the rolls in the oven and bake for 20-25 minutes, or until they’re golden brown. Your kitchen will be filled with the irresistible aroma of cinnamon and sweet dough—it’s pure magic!
Step 7: Frost and Enjoy
-
Cream Cheese Frosting: While the rolls are baking, prepare the frosting by mixing softened cream cheese with powdered sugar, a splash of vanilla extract, and a little milk until creamy.
-
Glaze Those Rolls: Once the rolls are out of the oven and slightly cooled, drizzle the creamy frosting over the top. Feel free to go big or go home—there’s no such thing as too much frosting in this house!
Serving Suggestions: The Perfect Way to Enjoy
To serve, simply pull apart the rolls (that’s half the fun!) and place them on a large platter or simply keep them in the baking dish. They’re delicious both warm and at room temperature, so don’t worry if you can’t devour them all at once! And if you’re feeling extra fancy, why not pair them with a steaming cup of coffee or homemade hot chocolate? They’ll elevate your cinnamon roll experience to new heights!
Recipe Variations: Get Creative with Your Rolls
- Nutty Delight: Add chopped nuts (like pecans or walnuts) to the filling for a delicious crunch.
- Fruit-Infused: Incorporate dried fruit, such as raisins or cranberries, for a sweet and tangy twist.
- Spiced Up: Experiment with different spices—try adding cardamom or ginger for a unique flavor profile.
- Dairy-Free: Substitute all dairy products with their non-dairy alternatives to keep things cozy and inclusive.
- Chocolate Chip: Sprinkle chocolate chips into the filling for a gooey, melty treat that’s sure to delight!
Chef’s Notes: Memories and Mischief in the Kitchen
As I bake these cinnamon rolls, I can’t help but recount the times I got a little too eager and accidentally made a flour explosion! It was a mess, but let’s be real—those moments are always the most entertaining. My first batch turned into “cinnamon roll puddles,” but it’s these mishaps that make our kitchen journeys memorable.
Over the years, I’ve tweaked this recipe to perfection, ensuring that every bite is soft, sweet, and gooey. And while I might have thought I was the star chef as a kid, it turns out my grandma was the real genius here!
FAQs and Troubleshooting
Q1: My rolls didn’t rise! What happened?
A: If your yeast is old or the milk was too hot, it might not activate properly. Always check your yeast’s expiration and ensure the milk is just warm to the touch.
Q2: Can I make the dough ahead of time?
A: Absolutely! You can make the dough, let it rise, punch it down, and refrigerate it overnight. Just take it out to warm up before rolling it out.
Q3: How do I store leftovers?
A: Store any leftovers in an airtight container at room temperature for up to 2 days or in the fridge for up to a week. Reheat in the microwave for a few seconds to enjoy that fresh-baked goodness!
Q4: Can I freeze the rolls?
A: Yes! You can freeze unbaked rolls after slicing. Just freeze them on a baking sheet, then transfer to a freezer-safe bag. When you’re ready, let them rise and bake as directed.
Nutritional Information (Optional)
These cinnamon rolls are a delightful treat, but if you’re curious about nutritional content, a single roll (without frosting) contains roughly:
- Calories: 230
- Total Fat: 7g
- Carbohydrates: 36g
- Protein: 4g
Remember, these rolls are about joy, warmth, and sharing, so indulge guilt-free and enjoy every bite!
So there you have it, my dear friends: the ultimate cinnamon roll recipe to fill your kitchen with warmth and your hearts with joy. Whether you’re sharing them with loved ones or savoring them solo, each roll is a little hug that says, “You are loved.” Join me on this delicious journey, and don’t forget to make a few sticky memories along the way! Happy baking!
Print
The Ultimate Cinnamon Roll Recipe that Will Warm Your Heart
- Total Time: 55 minutes
- Yield: 12 servings
- Diet: Vegetarian
Description
Delight in the warmth of homemade cinnamon rolls, filled with sweet, fluffy dough and a gooey glaze, perfect for sharing with family and friends.
Ingredients
- All-purpose flour (4 cups)
- Granulated sugar (½ cup)
- Active dry yeast (2 ¼ teaspoons)
- Warm milk (1 cup)
- Unsalted butter (½ cup, melted)
- Large egg (1)
- Cinnamon (2 tablespoons)
- Brown sugar (¾ cup)
- Cream cheese (for frosting)
Instructions
- Activate the yeast: In a small bowl, combine warm milk with the granulated sugar and yeast. Stir gently and let it sit for about 10 minutes until it’s frothy.
- Create the dough: In a large bowl, mix together the flour and a pinch of salt. In a separate bowl, whisk the melted butter, egg, and the bubbly yeast mixture until well combined.
- Combine wet and dry ingredients: Pour the wet ingredients into the flour mixture, stirring until a shaggy dough forms.
- Knead the dough: Transfer the dough to a lightly floured surface and knead for about 8-10 minutes until smooth and elastic.
- Let it rise: Place your kneaded dough in a greased bowl, cover it with a warm towel, and let it rise for about 1-2 hours until doubled in size.
- Prepare your filling: Mix together the brown sugar and cinnamon in a small bowl.
- Roll it out: Once the dough has risen, punch it down gently and turn it out onto a floured surface. Roll it into a rectangle about 1/4-inch thick.
- Spread the goodness: Brush the rolled-out dough with melted butter and sprinkle the cinnamon-sugar mixture evenly on top.
- Roll it up: Starting from the long edge, tightly roll the dough into a log, pinching the seam to seal it.
- Slice and arrange: Cut the log into 12 even slices and place them in a greased baking dish, covering with a towel.
- Final rise: Let those beauties rise for about 30 minutes and preheat your oven to 350°F.
- Bake: Pop the rolls in the oven and bake for 20-25 minutes until golden brown.
- Prepare the frosting: While the rolls are baking, mix cream cheese with powdered sugar, a splash of vanilla extract, and a little milk until creamy.
- Glaze those rolls: Once baked, drizzle the creamy frosting over the top before serving.
Notes
Feel free to add nuts, dried fruit, or chocolate chips for variation. Make it dairy-free by substituting with non-dairy alternatives.
- Prep Time: 30 minutes
- Cook Time: 25 minutes
- Category: Dessert
- Method: Baking
- Cuisine: American
Nutrition
- Serving Size: 1 roll
- Calories: 350
- Sugar: 10g
- Sodium: 300mg
- Fat: 15g
- Saturated Fat: 8g
- Unsaturated Fat: 5g
- Trans Fat: 0g
- Carbohydrates: 45g
- Fiber: 2g
- Protein: 6g
- Cholesterol: 30mg
Keywords: cinnamon rolls, dessert, baking, sweet rolls, comfort food

Beginner-Friendly One-Bowl Old-Fashioned Spice Cake
The Cozy Charm of Old Fashioned Spice Cake
Welcome back to my cozy kitchen, dear food friends! Today, I’m thrilled to dive into a recipe that warms the heart and brings nostalgia to the forefront — the delightful Old Fashioned Spice Cake. This cake is more than just a sweet treat; it’s a fragrant hug on a plate that dances with the richness of spices and invites you to slow down and savor life’s simple pleasures.
Imagine walking into your home, greeted by the comforting aroma of cinnamon, nutmeg, and cloves wafting through the air. It’s like wrapping yourself in a warm blanket on a chilly autumn day! Spice cake has a way of evoking those memories, transporting us back to family gatherings, holiday festivities, and the cozy corners of our grandparents’ kitchens.
Through this blog, I want to share not only the recipe for this beautiful cake but also the stories and warmth that come with it. Whether you’re baking for a special occasion or simply indulging in a treat for yourself, my goal is to empower you to create delicious food with love and joy in your heart. So, grab your apron, and let’s embark on this baking adventure together!
A Slice of Memory
Let me take you back to my childhood for a moment. Picture this: a crisp fall afternoon, leaves painting the yard in vibrant shades of orange and gold. I was barely tall enough to see over the counter of my grandmother’s kitchen when she pulled out her well-worn cookbook. With flour dusting the tabletop and a teasing sprinkle of sugar in the air, she set out to make her famous spice cake.
As she measured out the fragrant spices, I was enchanted by each unique scent filling the room — cinnamon, cloves, and ginger. “These spices are like warm hugs for your taste buds,” she would say, a twinkle in her eye. I would watch intently, soaking in every detail as she mixed the batter, gently folding in love and laughter along with the ingredients.
When the cake finally emerged from the oven, golden and puffed, we waited (impatiently) for it to cool before drenching it in cream cheese frosting. There was nothing quite like that first slice, a harmonious blend of sweetness and spice that ignited our taste buds and our hearts. That beloved cake became a staple at family gatherings, and each bite was a sweet reminder of the love and joy that filled our kitchen. Today, I hope to share that same delicious nostalgia with you!
Ingredients
Before we dive into baking, let’s gather our ingredients. Here’s what you’ll need to create this old-fashioned gem:
-
All-purpose flour (2 cups)
- The backbone of our cake, providing structure. Feel free to use a gluten-free blend if you’re looking for a gluten-free option!
-
Granulated sugar (1 1/2 cups)
- This will sweeten our cake beautifully. For a lower glycemic index, consider coconut sugar as a substitute.
-
Baking soda (2 teaspoons)
- Our leavening agent, ensuring the cake rises. Make sure it’s fresh for maximum effectiveness!
-
Ground cinnamon (2 teaspoons)
- The star of our spice show! Cinnamon adds warmth and sweetness. If you prefer a bolder flavor, try Vietnamese cinnamon.
-
Ground ginger (1 teaspoon)
- Adding a zesty kick, ginger complements the sweetness. You can replace it with ground cardamom for a different spin.
-
Ground nutmeg (1 teaspoon)
- Just a pinch can elevate the flavor profile! Freshly grated nutmeg is always a lovely touch.
-
Ground cloves (1/2 teaspoon)
- The secret ingredient that gives spice cake depth. Use sparingly, as it can overpower other flavors.
-
Salt (1/2 teaspoon)
- Balances the sweetness; don’t skip this! A pinch of sea salt can enhance the overall taste.
-
Unsalted butter (1 cup, softened)
- This will keep our cake moist and rich. If you prefer an oil-based cake, avocado oil works wonders too.
-
Large eggs (2)
- Essential for binding and richness. For a vegan option, you can replace them with flax eggs (1 tablespoon ground flaxseed mixed with 2.5 tablespoons water per egg).
-
Buttermilk (1 cup)
- Adds moisture and tang. No buttermilk? Mix regular milk with a tablespoon of lemon juice or vinegar and let it sit for a few minutes!
-
Vanilla extract (1 teaspoon)
- Pure vanilla gives a lovely backdrop flavor. Homemade vanilla extract? Even better!
These ingredients combined will turn into a cake that is as comforting as a cup of hot cocoa on a chilly night. Now, let’s get our hands doughy and throw this cake together!
Step-by-Step Instructions
1. Preheat Your Oven
Before anything else, let’s get that oven warming up! Preheat it to 350°F (175°C). This ensures your cake begins baking at the right temperature for perfectly moist results.
2. Prepare Your Cake Pans
Grease and flour two 9-inch round cake pans. This is crucial to ensure the cakes release effortlessly once baked. You can use a bit of butter or cooking spray, and a light dusting of flour will do the trick.
3. Combine Dry Ingredients
In a medium-sized bowl, whisk together the flour, baking soda, salt, cinnamon, ginger, nutmeg, and cloves. This simple step ensures that the spices and leaveners are evenly distributed throughout your cake, which harmonizes the flavor.
4. Mix the Butter and Sugar
In a large mixing bowl, beat the softened butter and granulated sugar together until it’s light and fluffy. This process takes about 3-5 minutes using an electric mixer. The lightness from the butter and sugar helps to create a tender cake.
5. Add the Eggs and Vanilla
Next, add the eggs one at a time, mixing well after each addition. Let the yolks create that velvety texture! Add the vanilla extract and blend until combined. The batter should be smooth and fluffy.
6. Alternate Adding Dry Ingredients and Buttermilk
Begin incorporating the dry mixture into the butter-sugar mixture gradually, alternating with the buttermilk. Start with a third of the dry ingredients, mix until just combined, add half of the buttermilk, and continue this process until all ingredients are combined. This keeps the batter nice and airy.
7. Pour into Pans
Once your batter is ready, it’s time to pour it into the greased pans. Divide it evenly for uniform cakes and smooth the tops with a spatula.
8. Bake Until Done
Pop the cake pans into the preheated oven and let them bake for about 25-30 minutes or until a toothpick inserted in the center comes out clean. The aroma filling your kitchen will be irresistible!
9. Cool the Cakes
Once baked, remove the cakes from the oven and allow them to cool in the pans for about 10 minutes. Then, gently invert them onto a wire rack to cool completely. Cooling completely is important if you want to frost your cakes without melting your icing!
10. Frosting Time!
Let’s make it pretty! While the cakes cool, you can whip up a luscious cream cheese frosting to slather on top. It’s simple — beat together 8 oz of softened cream cheese, 1/2 cup of softened butter, 2 cups of powdered sugar, and 1 tsp of vanilla extract. Once everything is mixed and creamy, frost the layers generously and stack them together.
Serving Suggestions
To serve, slice the cake into generous wedges and plate them with a sprinkle of cinnamon or a few candied nuts on top for that extra touch of elegance. A scoop of vanilla ice cream by the side makes for a perfect contrast to the spiced cake! This is also a lovely dessert for any gathering or a cozy night in, where you can just enjoy every single bite.
Recipe Variations
- Nutty Spice Cake: Add chopped walnuts or pecans to the batter for an added crunch.
- Fruity Twist: Fold in raisins or chopped apples for an extra layer of flavor and texture.
- Chocolate Lovers: Mix in cocoa powder for a chocolate-spice cake that’s rich and decadent!
- Glazed Alternative: Instead of frosting, drizzle with a simple glaze made of powdered sugar and milk for a lighter option.
- Vegan Makeover: Substitute eggs with flax eggs and use plant-based butter and milk to make this cake vegan-friendly — still delicious!
Chef’s Notes
This Old Fashioned Spice Cake holds a special place in my heart, and over the years, I’ve seen it evolve. I love experimenting with additional spices or tweaking the recipe depending on what I have in my pantry. My version has changed with each family gathering, sometimes incorporating seasonal fruits or daring new flavor experiments. It’s the perfect canvas for creativity!
And let me tell you, if you accidentally overmix the batter or forget an ingredient, it still comes out delicious in its own right. The beauty of home cooking is that it’s a perfect reflection of love, patience, and a sprinkle of imperfection.
FAQs and Troubleshooting
Q: My cake didn’t rise. What went wrong?
A: This can happen for a couple of reasons — check the freshness of your baking soda and make sure your oven is at the right temperature.
Q: Can I bake this in a single pan?
A: Absolutely! If you prefer a single-layer cake, just adjust the baking time and keep an eye on it; it may need a little longer to bake through.
Q: How do I store leftovers?
A: Store the cooled cake in an airtight container at room temperature for up to 3 days. If frosted, keep it in the fridge!
Q: What can I do if the cake is too dry?
A: If you accidentally overbake it, don’t fret! A drizzle of milk or a sprinkle of flavored simple syrup over the top can help soften each slice and revive some moisture.
Nutritional Info
(Note: Please adjust based on specific ingredients used.)
- Serving Size: 1 slice (1/12 of the cake)
- Calories: Approximately 350
- Fat: 15g
- Carbohydrates: 49g
- Protein: 4g
- Sugars: 28g
And there you have it, my lovely friends! This Old Fashioned Spice Cake celebrates that cozy essence of home baking and nourishes not just your body but your soul, too. Give yourself permission to indulge in the process — let the kitchen be a therapeutic space where you can unite with the magic of flavors. I can’t wait to hear about your cake adventures! Happy baking!
Print
Old Fashioned Spice Cake
- Total Time: 45 minutes
- Yield: 12 servings 1x
- Diet: Vegetarian
Description
A delightful old-fashioned spice cake that warms the heart with its fragrant blend of cinnamon, nutmeg, and cloves, perfect for any occasion.
Ingredients
- 2 cups all-purpose flour
- 1 1/2 cups granulated sugar
- 2 teaspoons baking soda
- 2 teaspoons ground cinnamon
- 1 teaspoon ground ginger
- 1 teaspoon ground nutmeg
- 1/2 teaspoon ground cloves
- 1/2 teaspoon salt
- 1 cup unsalted butter, softened
- 2 large eggs
- 1 cup buttermilk
- 1 teaspoon vanilla extract
Instructions
- Preheat your oven to 350°F (175°C).
- Prepare two 9-inch round cake pans by greasing and flouring them.
- Combine the flour, baking soda, salt, cinnamon, ginger, nutmeg, and cloves in a medium bowl.
- Mix the softened butter and sugar until light and fluffy.
- Add the eggs one at a time and mix in the vanilla extract.
- Alternate adding the dry ingredients and buttermilk to the butter mixture, starting and ending with the dry ingredients.
- Pour the batter evenly into the prepared cake pans.
- Bake for 25-30 minutes or until a toothpick comes out clean.
- Cool the cakes in the pans for 10 minutes before inverting them onto a wire rack.
- Frost with cream cheese frosting once cooled.
Notes
Serve with a sprinkle of cinnamon or a scoop of vanilla ice cream for an extra special touch.
- Prep Time: 15 minutes
- Cook Time: 30 minutes
- Category: Dessert
- Method: Baking
- Cuisine: American
Nutrition
- Serving Size: 1 slice
- Calories: 350
- Sugar: 28g
- Sodium: 300mg
- Fat: 15g
- Saturated Fat: 9g
- Unsaturated Fat: 5g
- Trans Fat: 0g
- Carbohydrates: 49g
- Fiber: 1g
- Protein: 4g
- Cholesterol: 60mg
Keywords: spice cake, old fashioned cake, baking, dessert, autumn recipes
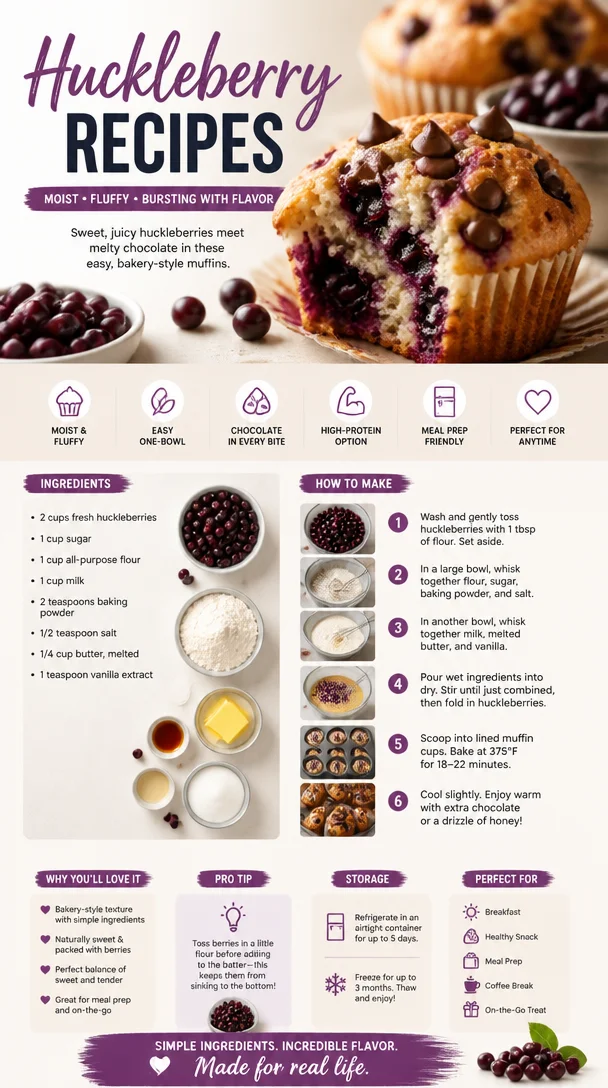
Huckleberry Recipes
Discover the Joy of Cooking with Huckleberries: An Enthusiastic Guide to Flavorful Recipes
Welcome to my cozy little kitchen, dear friends! Today, I’m buzzing with excitement to share one of my all-time favorite ingredients that bursts with flavor and nostalgia: huckleberries! Yes, those tiny, vibrant berries that remind us of summer days spent outdoors, searching for treasures in the wild. If you are a fan of sweet and tart flavors, you’re in for a treat as we dive into the world of huckleberries and whip up some delightful recipes together.
Huckleberries have always had a special place in my heart. It’s not just their wild, adventurous spirit or their brilliant hues; it’s the memories they evoke. Imagine wandering through the woods, the sun filtering through the leaves, and discovering a hidden patch of lush berries, just waiting to be picked. Each bite of a huckleberry is like a tiny explosion of summer—sweet, a bit tart, and full of life. My trusty old huckleberry picking basket is filled with stories of laughter, shared snacks, and a few too many bug bites, but those stories are part of the magic.
In this post, I’ll share my cherished huckleberry recipe that has brought friends and family together at my table time and again. I truly believe in the power of cooking to create bonds and spark joy, so let’s get our aprons on and embark on this delicious journey! Ready? Let’s dive in!
A Taste of Nostalgia: The Huckleberry Magic
Back when I was a little girl, summer meant one thing: huckleberry season! My family would pack a picnic basket with sandwiches, juice boxes, and the promise of sweetness that awaited us in the woods. We’d drive out to our favorite spot and spend hours searching for those elusive berries. My dad was convinced he had an innate talent for finding them, while my mom would point out the more subtle patches as we laughed and picked to our hearts’ content.
One summer, after a long day of picking, we returned home with buckets brimming with our fruity treasures. That evening, my mother transformed our haul into the most incredible huckleberry pie. The kitchen was filled with the sweet aroma of baking crust and bubbling berries, and I can still hear the laughter and chatter while we anxiously awaited the first slice. That pie sparked my love for cooking and the joyous act of sharing a meal with loved ones—a tradition that I carry into my kitchen today.
With this vivid memory in mind, I can’t wait to show you how to create your own huckleberry masterpiece! Whether you grew up foraging for berries or you’re just discovering their goodness, I promise you’ll find joy in every step.
Ingredients: The Heart of the Recipe
To make this scrumptious huckleberry pie, let’s gather everything we need. Here’s what you’ll need to create this delightful dish:
- 2 cups fresh huckleberries: The star of our show! Look for plump, juicy berries. If you can’t find huckleberries, blueberries or even mixed berries could work in a pinch, but they each have their own distinct flavor.
- 1 cup granulated sugar: This sweetener will help balance the tartness of the huckleberries. If you’re watching your sugar intake, consider using coconut sugar or a sugar substitute like Stevia.
- 2 tablespoons cornstarch: This thickener helps give our filling the right texture. You could swap with arrowroot powder for a gluten-free option.
- 1 tablespoon lemon juice: A splash of acidity brightens the flavors beautifully. If you’re out of lemons, lime juice is a great alternative!
- 1 teaspoon vanilla extract: For a touch of warmth and depth, enhancing the fruity flavor. Feel free to use almond extract for a different flavor profile.
- 1 tablespoon butter: My secret touch to enrich the filling. If you prefer, you can try a dairy-free margarine or skip it entirely, although it does add a lovely richness.
- 1 prepared pie crust (store-bought or homemade): If time allows, I encourage you to try making your own crust! It’s really a labor of love, but store-bought is perfectly fine for those busy days.
These ingredients come together to create a beautiful pie that not only tastes amazing but also fills your home with the sweetest aroma. Let’s get a little messy and bring this recipe to life!
Step-by-Step Instructions: Let’s Get Cooking!
Alright, it’s time to roll up our sleeves and get cooking! Here’s how to whip up a mouthwatering huckleberry pie:
-
Preheat your oven to 425°F (220°C): This step prepares our kitchen for the magic to come! A hot oven is essential for a perfectly flaky pie crust.
-
Prepare your pie crust: If you’re making a homemade crust, roll it out on a floured surface until it’s about 1/8 inch thick. Gently place it in your pie pan, trimming any excess around the edges. If you’re using a store-bought crust, make sure it’s thawed.
-
Wash the huckleberries: Rinse your huckleberries gently under cool water, being careful not to bruise them. Pat them dry with a clean towel or paper towel.
-
Mix the filling: In a large mixing bowl, combine the huckleberries, sugar, cornstarch, lemon juice, and vanilla extract. Gently fold everything together until the berries are fully coated. This is where the magic starts!
-
Fill the pie crust: Pour the huckleberry mixture into the prepared crust, spreading it evenly. Dot the top with small pieces of butter (it will melt and create a lovely filling).
-
Cover with a second crust (optional): If you’re feeling fancy, roll out a second pie crust to cover the top! Cut slits for steam to escape or use a lattice technique for a beautiful finish.
-
Bake the pie: Place your pie in the preheated oven and let it bake for 15 minutes. Lower the temperature to 350°F (175°C) and bake for an additional 30-40 minutes, until the filling is bubbly and the crust is golden brown.
-
Cool and serve: Once done, take the pie out of the oven and let it cool for at least 2 hours. This waiting period allows the filling to set and keeps you from burning your tongue—trust me on this one!
Chef’s Tips:
- Avoid bubbling over: To prevent any spills in your oven, place a baking sheet underneath your pie while it bakes.
- Don’t rush the cooling: I know it’s tempting, but cooling is critical. Warm huckleberry pie is delicious, but cooling ensures it holds its shape when you slice into it.
- Pair with ice cream: When serving, a scoop of vanilla ice cream or whipped cream on top takes this pie to the next level!
Serving Suggestions: Bring It to the Table
Once your huckleberry pie has cooled and is ready to serve, you’ll want to present it beautifully! Here’s how you can make it visually appealing:
- Serve it on a rustic wooden board alongside a fresh sprig of mint for that pop of color.
- Cut into generous slices and serve with a scoop of vanilla ice cream or a dollop of whipped cream on top—let it melt slightly for that perfect balance.
- Add a few fresh huckleberries on the side for a garnish. Not only do they look great, but they’re also a tasty addition!
Whatever your styly, this pie is sure to be the star of your dessert table.
Recipe Variations: Put Your Spin on It
While this huckleberry pie is a classic, there’s always room for creativity! Here are some variations to try:
- Mixed Berry Delight: Combine huckleberries with blueberries, raspberries, or blackberries for a beautiful mixed berry pie that’s bursting with flavor.
- Coconut Crust: Switch things up by using a shredded coconut crust for a tropical twist.
- Spiced Up Filling: Add a dash of cinnamon or nutmeg to the filling for a warm, spiced flavor that complements the huckleberries perfectly.
- Vegan Option: Use coconut oil in place of butter and a dairy-free crust to make this pie completely plant-based.
- Huckleberry Crumble: Can’t go without that crispy topping? Instead of a pie, make a crumble by topping the huckleberries with a mixture of oats, brown sugar, and butter, and baking until golden.
Chef’s Notes: More than Just a Recipe
I could regale you with stories for hours about my huckleberry adventures, from spot-hopping secret picking locations to the epic contest of whose pie was the best (spoiler: mine!). My huckleberry pie recipe has evolved over the years, shaped by family traditions, experimentation, and, let’s be honest, a few delightful kitchen disasters.
I learned early on: it’s okay if things don’t go perfectly. The best recipes come from fun mishaps and little surprises, and these moments are what add flavor to our cooking adventures. Every time I make this pie, it serves as a reminder to cherish both the journey and the delicious end result.
FAQs and Troubleshooting: Your Huckleberry Helper
As you step into the world of huckleberry baking, you might have a few questions. Here are some common ones:
-
What if I can’t find huckleberries?
Not to worry! Blueberries make a fantastic substitute. You might need to adjust the sugar level, as they are typically sweeter. -
How can I tell when the pie is done?
Look for a bubbly filling and a golden-brown crust. If you use a top crust, the slits should be slightly puffed. -
Can I make it ahead of time?
Absolutely! You can prepare the pie and refrigerate it before baking, or bake it in advance and store it in the fridge. Just reheat in the oven before serving. -
What if my filling is too runny?
This can happen if the huckleberries are particularly juicy. Next time, you can try adding a bit more cornstarch to help thicken it.
Nutritional Info
(If you are tracking your macros, here’s a quick breakdown based on one slice of huckleberry pie, assuming 8 servings total):
- Calories: 270
- Total Fat: 12g
- Saturated Fat: 5g
- Carbohydrates: 40g
- Fiber: 2g
- Sugar: 18g
- Protein: 2g
Keep in mind that these numbers can vary depending on your specific ingredients, especially if you use substitutes!
Thank you for joining me on this huckleberry adventure! I hope you’re inspired to try your hand at creating something delicious and to share it with the people you love. Happy cooking, and may your kitchen always be filled with laughter!
Print
Huckleberry Pie
- Total Time: 70 minutes
- Yield: 8 servings 1x
- Diet: Vegetarian
Description
A delightful huckleberry pie recipe that brings sweet and tart flavors together, evoking nostalgia and joy.
Ingredients
- 2 cups fresh huckleberries
- 1 cup granulated sugar
- 2 tablespoons cornstarch
- 1 tablespoon lemon juice
- 1 teaspoon vanilla extract
- 1 tablespoon butter
- 1 prepared pie crust
Instructions
- Preheat your oven to 425°F (220°C).
- Prepare your pie crust by rolling it out and placing it in your pie pan.
- Wash the huckleberries gently under cool water.
- Mix the filling by combining huckleberries, sugar, cornstarch, lemon juice, and vanilla extract.
- Fill the pie crust with the huckleberry mixture.
- Cover with a second crust if desired.
- Bake the pie for 15 minutes, then lower the temperature and bake for an additional 30-40 minutes.
- Cool the pie for at least 2 hours before serving.
Notes
For a delicious twist, serve with vanilla ice cream or whipped cream.
- Prep Time: 20 minutes
- Cook Time: 50 minutes
- Category: Dessert
- Method: Baking
- Cuisine: American
Nutrition
- Serving Size: 1 slice
- Calories: 270
- Sugar: 18g
- Sodium: 200mg
- Fat: 12g
- Saturated Fat: 5g
- Unsaturated Fat: 4g
- Trans Fat: 0g
- Carbohydrates: 40g
- Fiber: 2g
- Protein: 2g
- Cholesterol: 30mg
Keywords: huckleberry pie, dessert, summer recipe, nostalgic recipes, baking, fruit pie
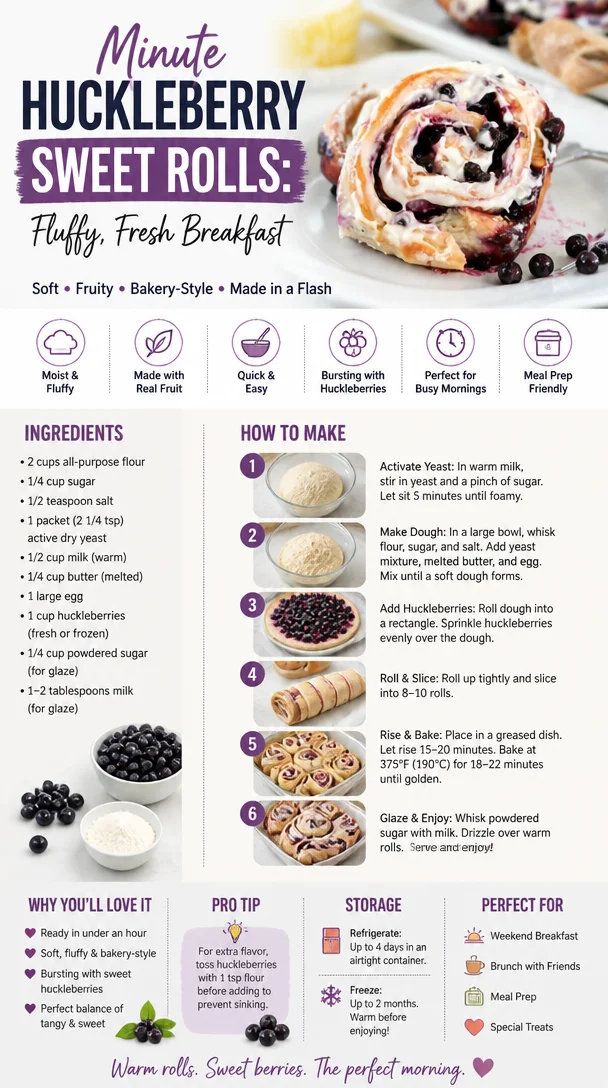
Minute Huckleberry Sweet Rolls: Fluffy, Fresh Breakfast
Huckleberry Sweet Rolls: A Cozy Adventure in Every Bite
Welcome back to my kitchen, dear friends! Today, I’m absolutely thrilled to take you on an exciting flavorful journey with my beloved Huckleberry Sweet Rolls. They might just be the sweetest and coziest addition to your baking repertoire. Imagine fluffy rolls, dripping with fresh huckleberry goodness, each one promising a comforting hug wrapped in dough. Are you drooling yet? I know I am!
Now, if you’ve been following my blog, you know I have a deep passion for creating dishes that not only fill your belly but also warm your heart. Huckleberries remind me of carefree summer days spent hiking in the mountains, the juicy, tart berries staining our fingers as we picked them fresh from the bushes. Those were some magical moments, and each bite of these rolls captures that nostalgia.
Baking these luscious Huckleberry Sweet Rolls is not just about the sweet reward at the end; it’s about the process, the creativity, and above all, the enjoyment of sharing with the people you love. So, if you’re ready to make magic in your kitchen and create aromas that will have everyone wandering in to see what’s cooking, let’s jump right in!
A Sweet Memory in Every Bite
Growing up, my family had a tradition of picking huckleberries every summer in the nearby mountains. My siblings and I would race to see who could fill their buckets up the fastest, with the promise of sweet rewards waiting at home. One year, my grandmother decided to turn our harvest into sweet rolls. I remember the kitchen filled with laughter, flour dusting our noses, and that incredible smell of dough rising.
As we waited for the rolls to bake, the anticipation was almost unbearable. I can still hear my grandma’s gentle voice, teaching me how to knead the dough just right, the sense of community in the kitchen wrapping around us like a warm blanket. Those rolls were the highlight of every summer get-together, served fresh and warm with a drizzle of glaze. To this day, they’re a cherished family tradition that I’ve carried into my adult life, finding joy in recreating those beautiful moments with my loved ones.
Ingredients
To whip up these delightful Huckleberry Sweet Rolls, you’ll need the following ingredients:
-
All-purpose flour
The backbone of any good roll! All-purpose flour works beautifully, but feel free to use bread flour for a chewier texture. -
Active dry yeast
This little magic maker is responsible for making your rolls fluffy. If you want a quicker rise, instant yeast works wonders, too! -
Sugar
A mix of granulated and brown sugar not only sweetens but adds a nice depth of flavor and helps with browning. -
Salt
A pinch of salt is crucial! It enhances the sweetness and balances all the flavors, making it a necessity in any baked good. -
Milk
Whole milk is my go-to, but any milk will do. For a dairy-free version, try almond or oat milk; just ensure it’s unsweetened. -
Butter
We use unsalted butter for optimal control of flavor, and don’t skip melting it—those rolls need all that love! -
Eggs
Eggs help bind everything together and add richness. If you’re going egg-free, you can substitute with flax or chia eggs—just mix 1 tablespoon of ground flaxseed or chia seeds with 2.5 tablespoons of water for each egg. -
Huckleberries
Fresh, frozen, or dried will work! If huckleberries aren’t available, blueberries make a fantastic substitute and will still give you those delightful sweet bursts. -
Powdered sugar
To make a simple glaze to drizzle over the rolls at the end. Feel free to add a splash of vanilla for extra flavor!
Let’s not forget the love and energy you’ll pour into your creation — that’s the vital ingredient that makes everything taste better!
Step-by-Step Instructions
1. Prepare the Dough
In a small bowl, combine 1 cup of warm milk (around 110°F) with 2 tablespoons of sugar and your yeast. Let it sit for 5-10 minutes until it’s bubbly and foamy. This bubbling is your yeast coming to life — it’s like a party in a bowl!
2. Mix the Dry Ingredients
In a large mixing bowl, whisk together 4 cups of all-purpose flour, 1 teaspoon of salt, and the remaining 2 tablespoons of sugar. When you combine them, envision all the deliciousness that’s going to happen next.
3. Combine Wet and Dry
Once your yeast is ready, pour it into the flour mix along with 1 melted stick of butter and 2 beaten eggs. Use a spatula or wooden spoon to combine everything together until it forms a shaggy dough.
4. Knead the Dough
Transfer the dough onto a floured surface and knead for about 8-10 minutes until it’s smooth and elastic. This is where you can let out any frustrations! If you find the dough too sticky, sprinkle on little bits of flour — but be careful not to over-flour.
5. First Rise
Place the dough into a greased bowl, cover it with a kitchen towel, and let it rise in a warm spot for an hour or until it doubles in size. While it’s rising, think about all the scrumptious things you can do with huckleberries — maybe even grab a few for snacking!
6. Prepare the Filling
While the dough is rising, mix together 1 cup of huckleberries, 1/2 cup of brown sugar, and a sprinkling of cinnamon in a bowl for the filling. The sweetness of the sugar complements the tartness of the huckleberries beautifully.
7. Roll It Out
Once the dough has risen, punch it down to release the air. Roll the dough out into a rectangle about 1/4 inch thick. Think of this as your canvas for the flavor masterpiece!
8. Spread the Filling
Spread melted butter over the rolled-out dough, then sprinkle the huckleberry mixture across the top. You want to cover every inch to guarantee each bite is bursting with flavor!
9. Roll and Slice
Starting from the long edge, roll the dough tightly into a log. Pinch the seam to seal it, then slice the log into 12 equal pieces. Place them cut-side up in a greased baking dish, leaving space between them to rise again.
10. Second Rise
Cover the rolls with a kitchen towel and let them rise for another 30-40 minutes until they puff up beautifully. It’s like watching a magic trick unfold right in your kitchen!
11. Bake
Preheat your oven to 350°F (175°C). When they’re all fluffy and cozy, pop those rolls into the oven and bake for 20-25 minutes or until golden brown. Your kitchen is about to fill with that indescribable smell of baking that makes you want to dance!
12. Glaze and Serve!
While the rolls are baking, whip up the glaze by combining 1 cup of powdered sugar and 2 tablespoons of milk. Drizzle it over the warm rolls once they come out of the oven for that extra touch of sweetness that makes them irresistible!
Serving Suggestions
To serve these delightful Huckleberry Sweet Rolls, I recommend plating them on a beautiful serving dish, drizzling extra glaze on top, and garnishing with a few fresh huckleberries or mint leaves. Not only does this make for a stunning presentation, but it also invites everyone to dig in and enjoy a cozy treat. Perfect for breakfast, brunch, or as an afternoon snack with a cup of tea!
Recipe Variations
- Mixed Berry Sweet Rolls: Add a mix of blueberries, raspberries, or blackberries for a berry medley twist!
- Vegan Sweet Rolls: Swap out milk for almond milk, butter for coconut oil, and use flax eggs to make these rolls completely dairy-free.
- Spiced Sweet Rolls: Incorporate some nutmeg or cardamom in the filling for a warming, spiced flavor.
- Chocolate-Huckleberry Rolls: Add chocolate chips to the filling for a decadent treat that combines huckleberries and rich chocolate.
- Savory Version: Try using cream cheese and herbs for a savory roll, perfect for brunch or as a side dish!
Chef’s Notes
Oh, where do I even begin? Baking these Huckleberry Sweet Rolls brings back so many beautiful memories. My grandma always insisted on letting the dough rise in the sun through our kitchen window — it truly felt like we were bringing the warmth of the summer into our hearts! The recipe has evolved with each passing year, and I love experimenting with new flavors and techniques, but the nostalgia remains the same.
I once got a bit too adventurous and tried adding lemon zest to the filling; let me tell you, it was oddly refreshing, but nothing beats the classic huckleberry flavor! Don’t be afraid to embrace your creativity, as every kitchen mistake can lead to something unexpectedly wonderful!
FAQs and Troubleshooting
1. My dough isn’t rising. What did I do wrong?
If your dough isn’t rising, it might be due to inactive yeast. Make sure your yeast is fresh and the liquid was warm, not hot. If you’re unsure, do the “float test” with a little sugar and warm water before starting.
2. Why did my sweet rolls come out dense?
If your rolls are dense, it may be due to overworking the dough or using too much flour. Remember to avoid adding too much flour during kneading; it should be soft and slightly tacky.
3. Can I make the rolls ahead of time?
Absolutely! You can prepare the rolls, place them unbaked in the refrigerator overnight, and then bake them fresh in the morning. Just allow them to come to room temperature before baking.
4. How can I store leftovers?
Store leftover rolls in an airtight container at room temperature for 2-3 days. If you want to keep them longer, pop them in the freezer. Just be sure to wrap them tightly to prevent freezer burn!
Nutritional Info
(Sample nutritional info per roll—adjust based on your specific ingredients)
- Calories: 220
- Total Fat: 9g
- Saturated Fat: 5g
- Cholesterol: 40mg
- Sodium: 150mg
- Carbohydrates: 31g
- Fiber: 2g
- Sugars: 7g
- Protein: 3g
And there you have it, friends! A warm, hearty, and delightful recipe for Huckleberry Sweet Rolls that are sure to steal your heart. They are more than just a recipe; they’re an opportunity to create cherished memories and share love through food. So, gather your loved ones, roll up those sleeves, and let’s bake something beautiful together! Happy cooking!
Print
Huckleberry Sweet Rolls
- Total Time: 70 minutes
- Yield: 12 servings 1x
- Diet: Vegetarian
Description
Fluffy rolls filled with fresh huckleberries, perfect for breakfast or a cozy snack.
Ingredients
- 4 cups all-purpose flour
- 2 tablespoons active dry yeast
- 2 tablespoons granulated sugar
- 1/2 cup brown sugar
- 1 teaspoon salt
- 1 cup whole milk
- 1 stick unsalted butter, melted
- 2 large eggs
- 1 cup huckleberries (fresh, frozen, or dried)
- 1 cup powdered sugar (for glaze)
- 2 tablespoons milk (for glaze)
Instructions
- Prepare the Dough: In a small bowl, combine warm milk with 2 tablespoons of sugar and yeast. Let it sit for 5-10 minutes until bubbly.
- Mix the Dry Ingredients: In a large bowl, whisk together flour, salt, and remaining sugar.
- Combine Wet and Dry: Once yeast is ready, pour it into the flour mix along with melted butter and beaten eggs. Mix until shaggy dough forms.
- Knead the Dough: Transfer dough onto a floured surface, knead for 8-10 minutes until smooth and elastic.
- First Rise: Place dough in a greased bowl, cover, and let it rise for an hour until doubled in size.
- Prepare the Filling: Mix huckleberries, brown sugar, and cinnamon in a bowl.
- Roll It Out: Punch down the dough and roll it out to a rectangle about 1/4 inch thick.
- Spread the Filling: Spread melted butter over the dough, top with huckleberry mixture.
- Roll and Slice: Roll tightly from the long edge, slice into 12 pieces, and place cut-side up in a greased dish.
- Second Rise: Cover rolls and let them rise for another 30-40 minutes.
- Bake: Preheat oven to 350°F (175°C). Bake rolls for 20-25 minutes until golden brown.
- Glaze and Serve: Mix powdered sugar and milk for glaze and drizzle over warm rolls.
Notes
For a vegan option, substitute milk with almond milk and butter with coconut oil.
- Prep Time: 20 minutes
- Cook Time: 25 minutes
- Category: Dessert
- Method: Baking
- Cuisine: American
Nutrition
- Serving Size: 1 roll
- Calories: 220
- Sugar: 7g
- Sodium: 150mg
- Fat: 9g
- Saturated Fat: 5g
- Unsaturated Fat: 4g
- Trans Fat: 0g
- Carbohydrates: 31g
- Fiber: 2g
- Protein: 3g
- Cholesterol: 40mg
Keywords: sweet rolls, huckleberry, dessert, baking, breakfast

Fluffy Huckleberry Lemon Sweet Rolls (40-Minute Bake)
Huckleberry Lemon Sweet Rolls: A Cozy Kitchen Delight
Welcome to my favorite corner of the kitchen! I’m so excited to share this delightful recipe for Huckleberry Lemon Sweet Rolls with you. These generously swirled, fluffy rolls are the epitome of comfort and joy—perfect for lazy Sunday mornings or as a sweet treat to impress your loved ones. If you’re anything like me, the thought of warm, sweet dough mingling with zesty lemon and tart huckleberries makes your heart skip a beat! So, let’s dive into this comforting, berry-filled adventure that will surely make your kitchen smell like a cozy café.
I first stumbled upon the idea for these rolls during a memorable summer spent in the Pacific Northwest, surrounded by lush landscapes and wild huckleberry bushes. The air was filled with the tantalizing aroma of baked goods, and I couldn’t resist plucking handfuls of sweet, juicy huckleberries while exploring the winding trails. Every bite was a burst of flavor—the sweet berries perfectly complementing and balancing the tangy lemon. The day I turned those huckleberries into sweet rolls, I found myself transported back to that summer, every bite evoking cherished memories and laughter shared around the kitchen table.
Are you ready to think of your own special memories as we create rolling, gooey deliciousness? Let’s gather our ingredients and roll up our sleeves!
Ingredients
-
For the Dough:
- 4 cups all-purpose flour: A pantry staple, this is the backbone of our sweet rolls. If you want a lighter texture, you can substitute half with bread flour.
- 1/4 cup granulated sugar: This adds sweetness to the dough. If you’re watching your sugar intake, feel free to go for coconut sugar instead.
- 1 packet (2 1/4 teaspoons) instant yeast: The tiny magic workers that help our rolls rise! If you only have active dry yeast, use the same amount but activate it in warm water with a pinch of sugar before adding it to your mixture.
- 1 teaspoon salt: Enhancing flavor, it’s essential for balancing sweetness.
- 1 cup whole milk: For tenderness and moisture. You can swap it with almond or oat milk for a dairy-free version.
- 1/4 cup unsalted butter, melted: This adds richness. You can try using coconut oil if you prefer a vegan option.
- 2 large eggs: They help bind our dough and give it structure. For a vegan alternative, you can use flax eggs (1 tablespoon flaxseed meal + 2.5 tablespoons water per egg).
-
For the Filling:
- 1 cup huckleberries (fresh or frozen): Bursting with flavor and antioxidants, they are an absolute treat. Blueberries can be substituted if huckleberries are hard to find!
- 1/2 cup brown sugar: This will create a wonderfully gooey filling. If you want a lighter option, you could use a blend of maple sugar and a bit of cinnamon for depth.
- 2 tablespoons lemon zest: The zest adds that bright tang we love! Try it with grated orange zest for a different twist.
- 1 tablespoon lemon juice: A splash of acidity to elevate our filling. You can use lime juice as an alternative for a unique flavor!
-
For the Glaze:
- 1 cup powdered sugar: The sweetness and smooth texture that make our glaze enticing.
- 2 tablespoons lemon juice: This will give our glaze a zesty kick. Feel free to add milk for a creamier consistency.
- Lemon zest (for garnish): A little extra zest never hurt!
Step-by-Step Instructions
Now that we have everything gathered, let’s roll up our sleeves and get baking!
-
Making the Dough:
In a large bowl, whisk together the flour, sugar, salt, and instant yeast until well combined. In a saucepan, warm the milk over low heat until it’s just barely warm to the touch (not hot!). Remove it from heat and add in the melted butter. Then, whisk the eggs into the milk-butter mixture. Slowly pour the liquid into the dry ingredients, mixing just until a shaggy dough forms.Chef Tip: Don’t over-mix! A shaggy dough means you’ll have soft, chewy rolls.
-
Kneading:
On a lightly floured surface, knead the dough for about 5-7 minutes until it’s smooth and elastic. Keep your surface floured to prevent sticking!Chef Insight: Perfectly kneaded dough will bounce back when you poke it. If it’s too sticky, add a bit more flour, but resist the urge to add too much.
-
First Rise:
Place the kneaded dough in a greased bowl, cover with a kitchen towel or plastic wrap, and let it rise in a warm place until doubled in size—about 1 hour.Nostalgic Note: While the dough is rising, go ahead and take a quick break. This is a great time to put on some music and dream about how these rolls will smell!
-
Preparing the Filling:
While the dough rises, combine the huckleberries, brown sugar, lemon zest, and lemon juice in a medium bowl. Set aside, allowing the flavors to meld beautifully.Chef Insight: If using frozen huckleberries, let them thaw and drain excess liquid to avoid soggy rolls!
-
Rolling Out the Dough:
After the dough has risen, punch it down gently to release the air. Roll it out on a floured surface into a large rectangle, about 16×12 inches.Pro Tip: Aim for even thickness; this helps the rolls bake uniformly!
-
Filling and Rolling:
Spread the berry filling evenly over the dough, leaving a small border around the edges. Starting from one long side, carefully roll the dough into a tight log.Chef Hack: Use a bench scraper to help lift the dough as you roll to keep the shape intact!
-
Cutting the Rolls:
Using a sharp knife or dental floss (yes, seriously!), slice the log into 12 equal pieces. Place them in a greased baking dish, cut side up.Note: If you want to allow the rolls to rise more, you can cover them and let them sit for another 30 minutes. More fluffiness!
-
Second Rise:
Cover the rolls again with a towel and let them rise until puffed and touching each other, about 30-45 minutes.Chef Tip: Preheat your oven to 350°F (180°C) while they’re rising!
-
Baking:
Bake for 25-30 minutes or until golden brown and the center rolls are cooked through. The kitchen will smell heavenly, trust me!Final Pro Tip: Keep an eye on the rolls to prevent overbaking—nobody wants dry rolls!
-
Making the Glaze:
While the rolls cool slightly, whisk together the powdered sugar and lemon juice until smooth. Drizzle over the warm rolls and let it melt into every crevice.
Nostalgic Note: This glaze is like a lemon hug for your rolls!
Serving Suggestions
Once your Huckleberry Lemon Sweet Rolls are out of the oven and drizzled with glaze, they are ready to be served! For an eye-popping presentation, arrange them on a rustic wooden platter, sprinkle extra lemon zest on top, and garnish with fresh huckleberries or mint leaves.
Served warm, these rolls are perfect with a cup of coffee or tea, making them an inviting centerpiece for brunch or a cozy afternoon snack. Just watching your friends and family gather around, excited to dig in, will warm your heart!
Recipe Variations
- Add Spices: Mix in a teaspoon of cinnamon or nutmeg to the filling for added warmth and spice.
- Explore Flavors: Swap out huckleberries for blueberries, raspberries, or even diced strawberries for a fruity twist!
- Vegan Version: Use plant-based milk, coconut oil for butter, and flax eggs to create a completely vegan sweet roll.
- Stuff It Up: Try adding cream cheese to the filling for extra creaminess or white chocolate chips for a decadent touch!
Chef’s Notes
I can hardly believe how long I’ve been making these delightful rolls—it’s one of those recipes that feels like home. Each batch carries a piece of my heart and countless memories. I remember one particular summer, when a thunderstorm rolled in as I was in the middle of making these. With rain pouring down outside, the smell of lemon and huckleberries wafted through the house, turning a dreary afternoon into a cozy gathering with friends. We huddled around the table, stealing rolls while they were still warm, giggling as sugar dusted our noses.
This recipe is a reminder that food is not just about sustenance; it’s an experience, a memory in the making. Let these rolls inspire you to create your own kitchen stories!
FAQs and Troubleshooting
1. Why did my rolls not rise?
If your rolls didn’t rise, it may be due to expired or inactive yeast. Always check the expiration date, and ensure to proof the yeast in warm water with a pinch of sugar beforehand if using active dry yeast.
2. Can I prepare these rolls the night before?
Absolutely! After assembling the rolls, cover them and place them in the fridge overnight. In the morning, take them out and let them rise at room temperature before baking.
3. My dough is too sticky! What do I do?
If your dough is looking excessively sticky, sprinkle in a bit more flour, one tablespoon at a time, until it’s manageable for kneading.
4. Can I freeze these sweet rolls?
Yes, indeed! You can freeze unbaked rolls after cutting them. Just arrange them on a baking sheet, freeze individually, then transfer to a freezer bag. When ready to bake, place them in the fridge overnight to thaw and rise before baking.
Nutritional Info
While enjoying these sweet rolls, remember to do so in moderation! Each roll may contain approximately:
- Calories: 320
- Total Fat: 8g
- Saturated Fat: 4g
- Cholesterol: 40mg
- Sodium: 150mg
- Total Carbohydrates: 54g
- Dietary Fiber: 2g
- Sugars: 14g
- Protein: 6g
Enjoy these delightful Huckleberry Lemon Sweet Rolls and let them spark joy in your kitchen and your heart. Happy baking, friends!
Print
Huckleberry Lemon Sweet Rolls
- Total Time: 45 minutes
- Yield: 12 servings 1x
- Diet: Vegetarian
Description
Delightful Huckleberry Lemon Sweet Rolls, perfect for lazy mornings and comforting family gatherings.
Ingredients
- 4 cups all-purpose flour
- 1/4 cup granulated sugar
- 1 packet (2 1/4 teaspoons) instant yeast
- 1 teaspoon salt
- 1 cup whole milk
- 1/4 cup unsalted butter, melted
- 2 large eggs
- 1 cup huckleberries (fresh or frozen)
- 1/2 cup brown sugar
- 2 tablespoons lemon zest
- 1 tablespoon lemon juice
- 1 cup powdered sugar
- 2 tablespoons lemon juice (for glaze)
- Lemon zest (for garnish)
Instructions
- Whisk the flour, sugar, salt, and yeast in a large bowl until combined.
- Warm the milk over low heat until just warm to touch. Remove from heat and add melted butter.
- Whisk the eggs into the milk-butter mixture.
- Pour the liquid into the dry ingredients, mixing until a shaggy dough forms.
- Knead the dough on a floured surface for 5-7 minutes until smooth and elastic.
- Place the kneaded dough in a greased bowl, cover, and let it rise until doubled in size (about 1 hour).
- Combine huckleberries, brown sugar, lemon zest, and lemon juice for the filling.
- Roll out the dough into a 16×12 inch rectangle.
- Spread the berry filling evenly over the dough.
- Roll the dough into a tight log and cut into 12 equal pieces.
- Place them in a greased baking dish, cut side up, and let rise for another 30-45 minutes.
- Preheat the oven to 350°F (180°C).
- Bake for 25-30 minutes or until golden brown.
- Whisk powdered sugar and lemon juice together for the glaze and drizzle over warm rolls.
Notes
Try substituting huckleberries with blueberries for a different flavor. Perfect with coffee or tea!
- Prep Time: 15 minutes
- Cook Time: 30 minutes
- Category: Breakfast
- Method: Baking
- Cuisine: American
Nutrition
- Serving Size: 1 roll
- Calories: 320
- Sugar: 14g
- Sodium: 150mg
- Fat: 8g
- Saturated Fat: 4g
- Unsaturated Fat: 0g
- Trans Fat: 0g
- Carbohydrates: 54g
- Fiber: 2g
- Protein: 6g
- Cholesterol: 40mg
Keywords: huckleberry, lemon, sweet rolls, baking, brunch
Salted Caramel Milkshake
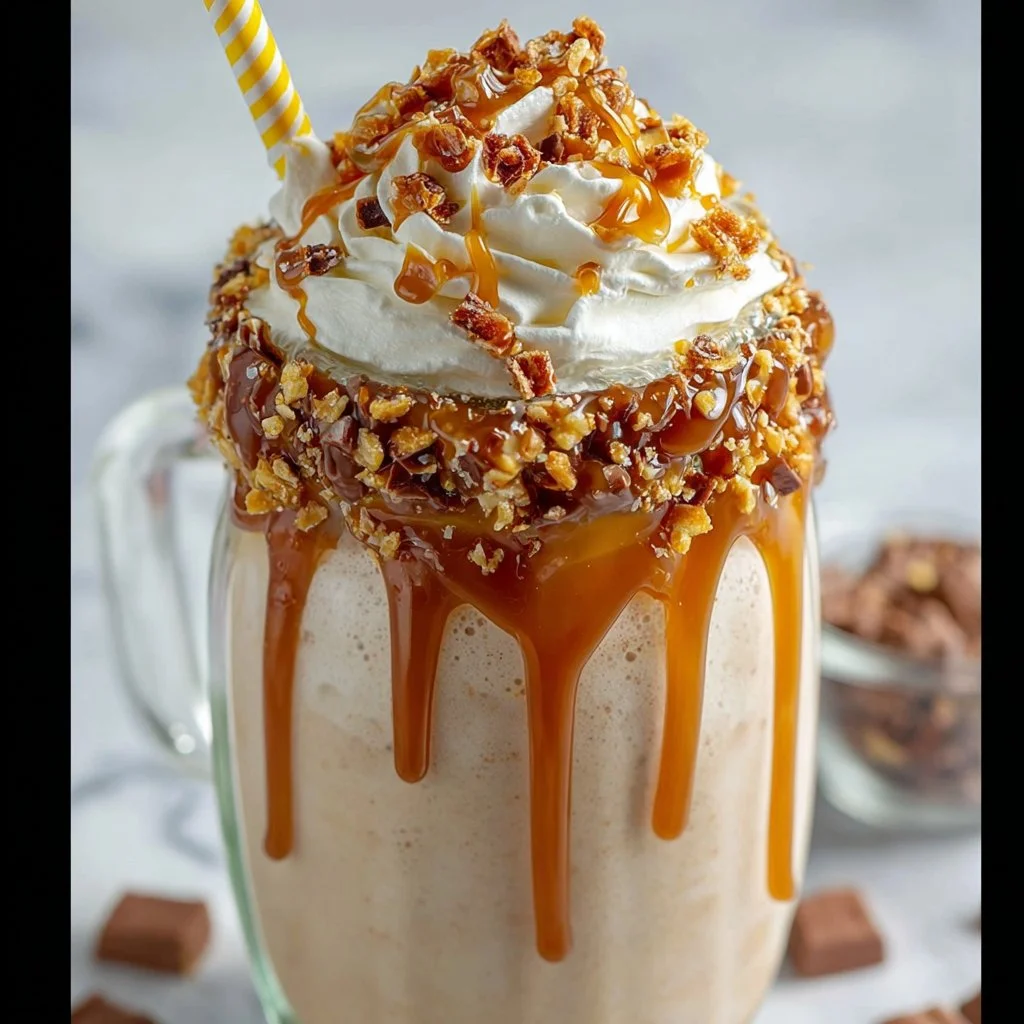
The Ultimate Salted Caramel Milkshake Recipe: A Sweet Journey Through Flavor
Welcome back to my cozy kitchen, friends! Today, I’m beyond excited to take you on a delicious journey through one of my all-time favorite treats: the salted caramel milkshake. Picture this: a creamy, dreamy concoction that’s rich with the goodness of homemade salted caramel, perfectly blended with ice cream, and finished with whipped cream and a sprinkle of crunchy sea salt. Now tell me that doesn’t make your sweet tooth tingle!
Milkshakes have a special place in my heart. They remind me of lazy summer afternoons spent at the local diner, where the clinking of glasses and joyful chatter filled the air. As an enthusiastic home cook, there’s something magical about creating a dessert that instantly transports you back in time. The salted caramel milkshake, in particular, combines the nostalgia of childhood with the sophisticated touch of salty sweetness, making it perfect for any occasion or just a little treat for yourself!
In this post, I’ll walk you through every step of crafting the ideal salted caramel milkshake, complete with my personal stories, tips, and tricks in the kitchen. Whether you’re looking to impress friends at a summer BBQ or indulge your cravings on a cozy night at home, you’re in for a deliciously smooth ride. So grab your apron and let’s get started on making this dreamy milkshake that will, without a doubt, bring a smile to your face!
Personal Story
Growing up, my family had a weekend tradition of going to this delightful little ice cream shop down the street. Every Saturday, without fail, we’d pile into the car and head there, excitement filling the air as we flipped through the vibrant menu filled with flavors, all promising instant joy in a cup. But there was one flavor that always won me over: the salted caramel. The blend of sweet and salty was something I looked forward to every week, a delicious little ritual that sparked laughter and shared stories.
Fast forward to today, and I can’t help but bring those sunny memories into my kitchen. The first time I attempted to recreate that unforgettable salted caramel milkshake at home, I felt a flutter of nostalgia. I whipped up a batch for my friends, and as we sipped our homemade creations, I was flooded with laughter and stories from yesteryears. That day, I realized that cooking is not just about ingredients but about emotions, memories, and shared experiences. That’s the beauty I want to share with you in this recipe!
Ingredients
Before we dive headfirst into this delightful experience, let’s gather our ingredients. Here’s what you’ll need for the ultimate salted caramel milkshake:
-
Ice Cream (4 cups): The foundation of any milkshake! Vanilla ice cream works beautifully here, but you could swap it with salted caramel ice cream for an extra flavor punch! If you’re looking for a healthier option, try using frozen yogurt or dairy-free ice cream.
-
Milk (1 cup): Any milk will do! Whole milk adds creaminess, while almond or oat milk caters to dairy-free needs without sacrificing the flavor. Adjust the quantity based on how thick you like your shakes.
-
Homemade Salted Caramel Sauce (1/2 cup): This is the star of the show! You can either make it from scratch following my easy recipe below or grab a jar at the store if you’re in a pinch. Just be sure to look for one with high-quality ingredients!
-
Whipped Cream (for topping): Who said you can’t go extra? A generous dollop of whipped cream adds sweetness and beauty. Use store-bought or whip up your own fresh cream for that added homemade touch.
-
Sea Salt (a pinch for garnish): The key to bringing out that sweet caramel flavor! Use flaky sea salt for the best crunch and flavor. A sprinkle on top before serving elevates your milkshake to new heights.
-
Optional Add-Ins: Feel free to throw in chocolate chips, crushed pretzels, or even a shot of espresso to amp up the flavor and texture!
Step-by-Step Instructions
So, let’s jump into making this delightful salted caramel milkshake! Follow these steps, and your taste buds will be thanking you.
-
Make the Salted Caramel Sauce: If you’re going for homemade, in a medium saucepan over medium heat, melt 1 cup of granulated sugar, stirring constantly until it turns golden brown. Soon after reaching the desired color, carefully add 1/2 cup of heavy cream (watch out for splattering!). Stir in a pinch of salt and 2 tablespoons of butter until smooth. Let it cool. (Tip: Make extra to drizzle on other desserts!)
-
Blend the Ingredients: In a blender, combine the vanilla ice cream, milk, and 1/2 cup of the cooled salted caramel sauce. (Hint: Start with less milk if you want a thicker shake.) Blend on high until creamy and well combined, stopping to scrape down the sides if necessary. You should be left with a luscious mixture that makes your heart sing!
-
Taste Test: Here comes the fun part! Grab a spoon and taste. Adjust the caramel sauce to suit your sweetness preference. Want it a little sweeter? Add more caramel. Want more saltiness? A tiny pinch of sea salt goes a long way!
-
Prepare to Serve: Grab your favorite glasses (the more whimsical, the better!). Drizzle some of the leftover salted caramel sauce down the insides of each glass so that it coats the sides. This adds visual flair and a flavor bonus with every sip!
-
Pour & Assemble: Pour the blended milkshake into the prepared glasses, filling them about three-quarters full to make room for the whipped cream. Don’t hold back; you deserve this delicious sweet treat!
-
Top It Off: Finish off that lovely milkshake with a generous mountain of whipped cream. Top it off with an extra drizzle of salted caramel and a sprinkle of sea salt. Because, let’s be honest, you can never have too much caramel!
-
Enjoy Every Sip: Grab a straw or a long spoon and dive in with delight. Don’t forget to share (if you want, that is)!
Serving Suggestions
When it comes to serving, presentation is key! I love to place my salted caramel milkshake in tall, frosty glasses to enhance that nostalgic diner vibe. Drizzle extra salted caramel inside each glass before pouring the shake in for a stunning effect. You can accompany this sweet treat with a plate of chocolate chip cookies or mini brownies for a mini dessert spread that your friends (and yourself!) will adore.
Recipe Variations
Every good recipe has room for creativity, and this salted caramel milkshake is no exception! Here are a few fun variations to consider:
-
Nutty Delight: Add a tablespoon of nut butter—like almond or peanut butter—into the mix for a nutty twist that goes beautifully with the caramel flavor.
-
Chocolate Lovers: Incorporate chocolate ice cream instead of vanilla for a decadent chocolate salted caramel shake. You could even blend in some cocoa powder!
-
Dairy-Free Option: Use coconut milk ice cream and almond milk for a smooth, dairy-free alternative. You won’t miss the dairy one bit!
-
Coffee Caramel: For those who love coffee, add a shot of espresso or cold brew to the shake for a sweet pick-me-up!
-
Pumpkin Spice Bliss: Around fall, mix in some pumpkin puree and pumpkin spice for a seasonal twist that’s perfect for cozy vibes.
Chef’s Notes
The salted caramel milkshake has evolved in my kitchen over the years. There was a time I thought I’d never get the caramel sauce right, often ending up with a burnt mess. After a few attempts, I realized that patience is crucial—and so is the alarm on my timer! Now, it’s a go-to recipe that never fails to impress. Plus, I love how it can adapt to the seasons. It feels so fulfilling to share this with friends, reminiscing about simpler times while creating new memories. So, grab your loved ones, and let’s shake up some fun in the kitchen!
FAQs and Troubleshooting
1. My caramel sauce didn’t turn out right. What did I do wrong?
Common issues include not stirring the sugar constantly or cooking it too long. Keep an eye on the color! When it turns amber, it’s ready. If it’s grainy, you may have cooked it too long or added the cream too quickly. Don’t worry, practice makes perfect!
2. Can I use store-bought salted caramel sauce?
Absolutely! While homemade has its charm, store-bought options can save you a lot of time. Just be sure to choose one made with quality ingredients!
3. How can I make this milkshake thicker?
To achieve a thicker consistency, reduce the amount of milk or add more ice cream. You could also throw in some frozen bananas or extra ice to help shape it up.
4. Can I make this milkshake ahead of time?
While best enjoyed fresh, you can blend the ingredients and store them in the refrigerator for a few hours. Just give it a good stir before serving, as it’ll thicken up in the fridge.
Nutritional Info (Optional)
Calories: Approximately 350-450 calories per serving (depending on specific ingredients used).
Fat: 20g
Carbohydrates: 50g
Protein: 8g
Sodium: 150mg
And there you have it, friends! Your very own salted caramel milkshake recipe that’s bound to add a sprinkle of joy to your day. I hope you enjoy making this indulgent treat as much as I do. I can’t wait to hear about your experiences in the kitchen! Happy blending!
Print
The Ultimate Salted Caramel Milkshake
- Total Time: 30 minutes
- Yield: 4 servings 1x
- Diet: Vegetarian
Description
A creamy, dreamy salted caramel milkshake with homemade salted caramel, rich ice cream, and whipped cream.
Ingredients
- 4 cups vanilla ice cream
- 1 cup milk
- 1/2 cup homemade salted caramel sauce
- Whipped cream (for topping)
- A pinch of sea salt (for garnish)
- Optional add-ins: chocolate chips, crushed pretzels, or a shot of espresso
Instructions
- Make the Salted Caramel Sauce: In a medium saucepan over medium heat, melt 1 cup of granulated sugar, stirring constantly until it turns golden brown. Add 1/2 cup of heavy cream carefully, then stir in a pinch of salt and 2 tablespoons of butter until smooth. Let it cool.
- Blend the Ingredients: In a blender, combine the vanilla ice cream, milk, and 1/2 cup of the cooled salted caramel sauce. Blend on high until creamy.
- Taste Test: Adjust the caramel sauce to suit your sweetness preference.
- Prepare to Serve: Drizzle some of the leftover salted caramel sauce down the insides of each glass.
- Pour & Assemble: Pour the blended milkshake into the prepared glasses.
- Top It Off: Finish with whipped cream, an extra drizzle of salted caramel, and a sprinkle of sea salt.
- Enjoy Every Sip: Dive in with delight.
Notes
Consider adding nut butter or using different ice cream flavors for variations.
- Prep Time: 15 minutes
- Cook Time: 15 minutes
- Category: Dessert
- Method: Blending
- Cuisine: American
Nutrition
- Serving Size: 1 serving
- Calories: 400
- Sugar: 40g
- Sodium: 150mg
- Fat: 20g
- Saturated Fat: 10g
- Unsaturated Fat: 8g
- Trans Fat: 0g
- Carbohydrates: 50g
- Fiber: 0g
- Protein: 8g
- Cholesterol: 50mg
Keywords: salted caramel, milkshake, dessert, sweet treat, nostalgia
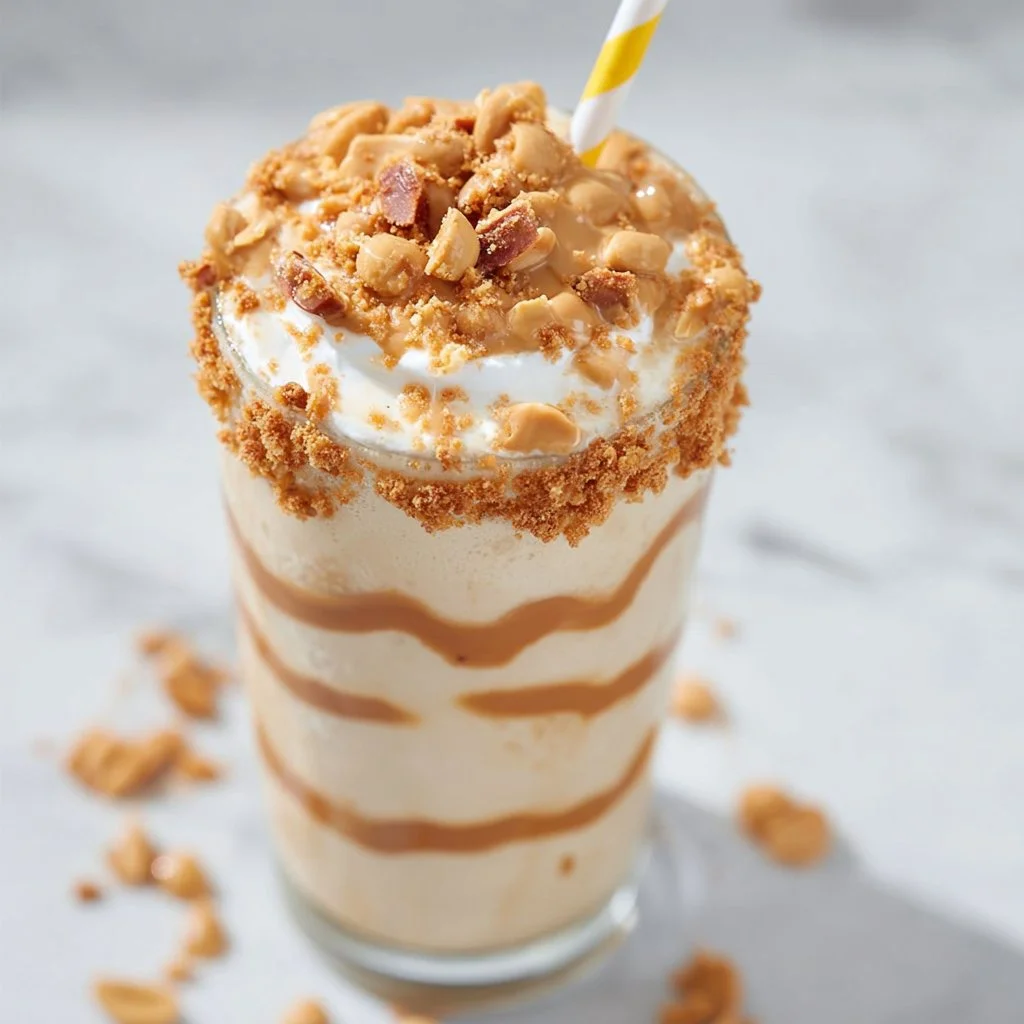
Peanut Butter Milkshake
Peanut Butter Milkshake: A Sweet Hug in a Glass
Welcome, dear friend, to the wonderful world of shakes and flavors! Today, we’re diving into a delightful treat that combines two classic favorites into one creamy, dreamy concoction: the Peanut Butter Milkshake. There’s something absolutely magical about this shake—it’s like a cozy hug on a hot day or a sweet reminder of simpler times spent with family and friends.
Picture this: it’s a balmy summer afternoon, and the sun is casting a warm, golden glow across your kitchen. You’ve just come in from a fun day outdoors, and all you can think about is indulging in something sweet and refreshing. With just a few ingredients (and a dash of love), you’re about to create a drink that takes you straight back to childhood, where joy and laughter bubbled over like the milkshake you’re about to make!
This milkshake hits all the right notes—creamy, nutty, and sweet with just the right amount of richness. It’s perfect for a quick snack, a simple dessert, or even as a fun treat for your next gathering. Plus, it’s a breeze to whip up, so you can satisfy that craving in no time. Trust me, whether you’re a peanut butter lover or just someone looking for a delightful sip, this shake will not disappoint!
In this post, I’ll take you step-by-step through creating this delicious Peanut Butter Milkshake, sharing some fun stories, tips, and even a few creative variations to keep things interesting. So roll up your sleeves, grab those ingredients, and let’s get shaking!
Personal Story
I still remember the first time I had a peanut butter milkshake. I was about seven years old, perched on a barstool at my local diner with my best friend, Lily. It was one of those classic American places with neon lights and checkered tiles, where everything felt like it was draped in nostalgia. We had just finished our cheeseburgers (the ones with all the toppings, of course!) and decided to indulge in a milkshake to top off our meal.
When our shakes arrived, the sight was spectacular—tall, frosty glasses filled to the brim with thick, creamy goodness topped with a generous dollop of whipped cream. I remember watching as the waitress poured a little extra shake into the glass—a surprise I still cherish today! As a curious kid eager to explore flavors, I took my first sip—and my taste buds danced in delight. The creamy richness of the peanut butter mixed with the coldness of the milkshake was heavenly!
From that day on, peanut butter milkshakes became my go-to indulgence, a nostalgic treat that I relished every chance I got. Now, as an adult, I can whip one up anytime I want, and it always brings me back to that sunlit diner, giggling with Lily and savoring simple delights together. That heartfelt memory continues to inspire my passion for cooking, reminding me of the importance of sharing food and love with friends and family.
Ingredients
Let’s gather our ingredients! This Peanut Butter Milkshake is uncomplicated and requires just a handful of pantry staples—a joy for the busy home cook! Here we go:
-
Vanilla Ice Cream (2 cups)
The base of our milkshake! Creamy vanilla provides a wonderful richness. If you’re feeling adventurous, experiment with other flavors like chocolate or caramel. Dairy-free alternatives are also fantastic! -
Milk (1 cup)
Whole milk gives you that creamy texture, but you can swap it for almond milk, oat milk, or any preferred milk alternative if you’re looking for a dairy-free option. -
Peanut Butter (1/2 cup)
The star of our show! Use a natural variety with no added sugar for a more wholesome taste. If you’re allergic or prefer something different, try almond butter or sunflower seed butter for a nut-free option. -
Honey or Sugar (to taste, typically 1-2 tablespoons)
Adds a touch of sweetness to balance the flavors. Feel free to adjust based on your preference, or use maple syrup for a unique twist. -
Whipped Cream (for topping, optional)
It’s not just for decoration; it adds a delightful finish! If dairy-free is your goal, there are excellent coconut cream brands available. -
Chocolate Syrup (for drizzling, optional)
A drizzling of chocolate syrup adds that extra wow factor! If you want an alternate route, consider caramel sauce instead.
Now that you’ve got your ingredients at the ready, let’s dive into the steps to create this sensational shake!
Step-by-Step Instructions
Step 1: Prepare Your Blender
Before we get underway, grab your trusty blender and make sure it’s clean and ready to go! A tip from the kitchen: make sure your blender is on a steady surface to avoid any wobbles while blending. Trust me; there’s nothing worse than a blender making a run for it when you’re just trying to make a delicious shake!
Step 2: Scoop the Ice Cream
Add your two cups of vanilla ice cream to the blender. This is the heart of your milkshake! To make blending easier, allow the ice cream to soften for about 5-10 minutes at room temperature before scooping. You want it to be creamy, not like a brick!
Step 3: Pour the Milk
Next, pour in one cup of milk. If you like a thicker shake, you can dial the milk back a bit. Remember, you can always add more, but it’s tough to thicken it up once it’s blended!
Step 4: Add the Peanut Butter
Now, measure out half a cup of peanut butter and dump it in. Watch out, it might stick to the sides a bit—no worries! It’s all about that delicious flavor. Easy tip: a quick spray of cooking oil on your measuring cup can help it slide right out!
Step 5: Sweeten It Up
Add your honey or sugar to taste. Start small; you can always add more if you like it sweeter! I often adjust this part based on how rich the peanut butter is; sometimes it doesn’t need any extra sweetening!
Step 6: Blend to Perfection
Put the lid on and blend on high until everything is smooth, creamy, and looks like a dream! If you find it’s too thick, just add a splash more milk until it reaches your desired consistency. Take a moment to enjoy that sweet, nutty aroma wafting through your kitchen!
Step 7: Taste Test
Here’s the fun part! Grab a spoon and do a little taste test. Is it perfect? If you think it needs a little something extra, here’s where you can tweak it. More peanut butter? Toss it in! Feeling chocolatey? Maybe stir in a splash of chocolate syrup!
Step 8: Serve it Up
Pour your luscious milkshake into tall glasses. If the foam rises a bit, that’s totally cool! You can always smooth it down with your spoon, or let it flow over like a milkshake fountain.
Step 9: Finish with a Flare
Top it off with whipped cream (if using), and let your artistry shine with some drizzling of chocolate syrup or maybe a sprinkle of crushed peanuts. Feel free to get creative—don’t be shy!
And there you have it—a rich, creamy Peanut Butter Milkshake ready to bring joy and smiles to everyone who experiences it. It’s as simple as that!
Serving Suggestions
Serve your Peanut Butter Milkshake in tall, frosty glasses, and for an extra special touch, why not garnish it with a sprinkle of crushed peanuts or a few chocolate chips? You could even serve alongside a warm chocolate chip cookie for that perfect dunking duo! Whether you’re enjoying this as a quick afternoon treat or making it the star of a dessert party, this drink is sure to bring a smile to every face.
Recipe Variations
- Chocolate Peanut Butter Milkshake: Add a couple of tablespoons of chocolate syrup or blend in some dark cocoa powder for a rich chocolate experience.
- Banana Peanut Butter Milkshake: Toss in one ripe banana for an extra fruity dimension—the creaminess will elevate the shake beautifully.
- Coffee Peanut Butter Milkshake: Blend in a shot of cooled espresso or some coffee for an energizing pick-me-up.
- Healthy Peanut Butter Milkshake: Use unsweetened almond milk, sugar-free peanut butter, and light ice cream for a wholesome version without sacrificing flavor.
Chef’s Notes
As with many recipes, this Peanut Butter Milkshake has evolved over the years. I’ve added oats for a breakfast version, played with flavor combos, and even tried freezing the shake to make creamy sorbet-like treats. The best part? Adapting this shake allows for endless experimentation! And let me tell you: mixing in different ingredients can yield some real kitchen surprises; some of my best discoveries came about when I wasn’t following the rules!
In one delightful twist, I once tried a marshmallow fluff topping instead of whipped cream for a dreamy s’mores-inspired shake, and wow—my friends went wild! The kitchen is a canvas; experiment boldly and create some art!
FAQs and Troubleshooting
Q: What if my shake is too thick?
A: No problem! Just add a bit more milk, a tablespoon at a time, and blend again until it’s just the right consistency. Remember, you want it smooth—just like enjoying your favorite childhood memories!
Q: Can I make this ahead of time?
A: While it’s best fresh, you can blend it and store it in the fridge for about an hour. Just give it a quick stir or a few pulses in the blender before serving to bring it back to life!
Q: How can I make this dairy-free?
A: Simple! Swap out the ice cream for dairy-free ice cream, use almond milk or oat milk in place of regular milk, and pick a nut butter that fits your dietary needs. You’ll have a delicious shake that everyone can enjoy!
Q: Is there a way to cut calories?
A: Absolutely! Use light ice cream or frozen yogurt, almond milk instead of regular milk, and skip the whipped cream or use a lighter version. It’ll still taste wonderful without weighing you down!
Nutritional Info (Optional)
If you’d like to tailor this to your health goals, here’s a rough nutritional breakdown (per serving, based on traditional ingredients):
- Calories: ~400
- Protein: ~12g
- Carbohydrates: ~55g
- Sugars: ~30g
- Fat: ~20g
(Note that this will vary based on specific ingredients used.)
And there you have it! Your very own Peanut Butter Milkshake, bursting with flavor and nostalgia. I hope you find as much joy in making and sipping this delightful treat as I do. Here’s to kitchen adventures and memories made over delicious food! Cheers and happy shaking!
Print
Peanut Butter Milkshake
- Total Time: 10 minutes
- Yield: 2 servings 1x
- Diet: Vegetarian
Description
A creamy and nutty Peanut Butter Milkshake that’s a delightful treat for all ages.
Ingredients
- 2 cups Vanilla Ice Cream
- 1 cup Milk
- 1/2 cup Peanut Butter
- 1–2 tablespoons Honey or Sugar (to taste)
- Whipped Cream (for topping, optional)
- Chocolate Syrup (for drizzling, optional)
Instructions
- Prepare your blender.
- Scoop the ice cream into the blender.
- Pour in the milk.
- Add the peanut butter.
- Sweeten it up with honey or sugar.
- Blend to perfection.
- Taste test and adjust if needed.
- Serve in tall glasses.
- Finish with whipped cream and chocolate syrup.
Notes
Serve with crushed peanuts or alongside chocolate chip cookies for added delight.
- Prep Time: 10 minutes
- Cook Time: 0 minutes
- Category: Dessert
- Method: Blending
- Cuisine: American
Nutrition
- Serving Size: 1 serving
- Calories: 400
- Sugar: 30g
- Sodium: 200mg
- Fat: 20g
- Saturated Fat: 10g
- Unsaturated Fat: 8g
- Trans Fat: 0g
- Carbohydrates: 55g
- Fiber: 2g
- Protein: 12g
- Cholesterol: 50mg
Keywords: milkshake, peanut butter, dessert, summer treat, creamy drink
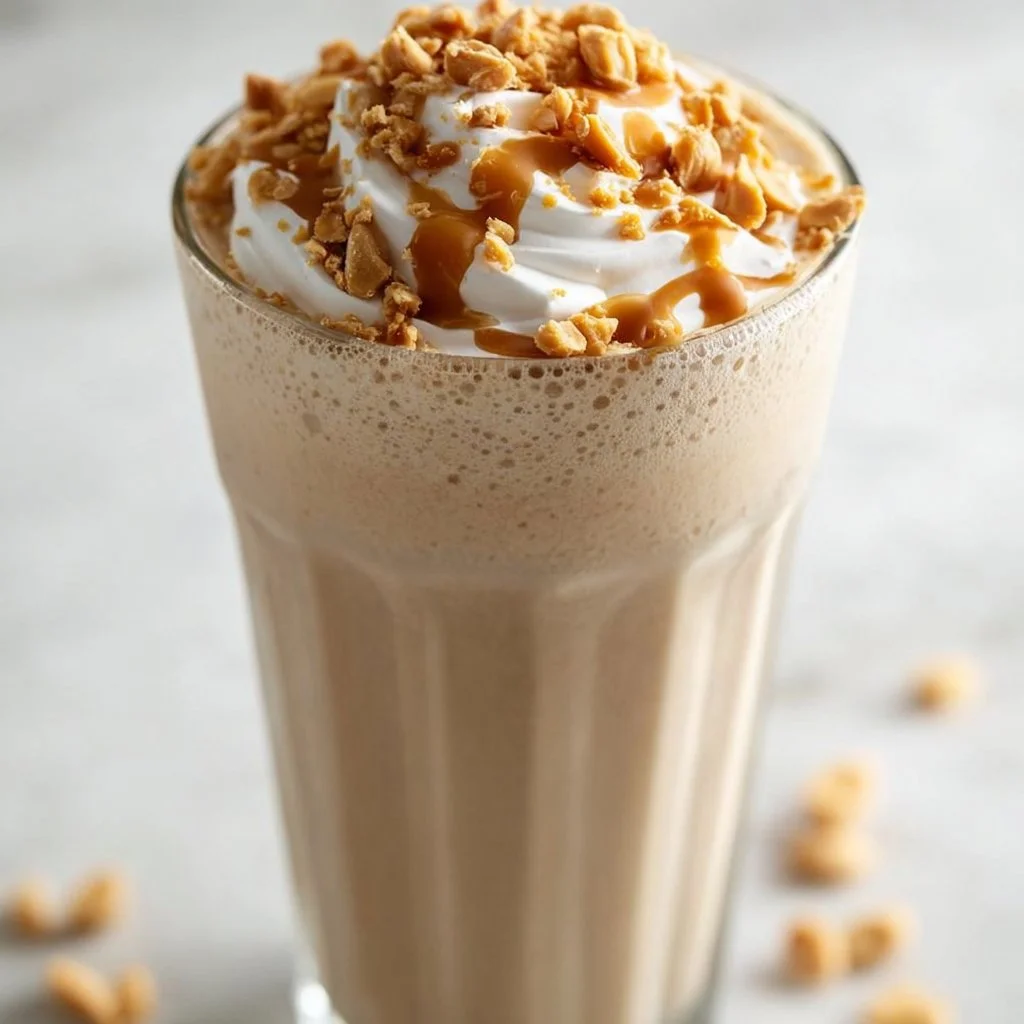
Peanut Butter Milkshake
The Ultimate Peanut Butter Milkshake: A Creamy Dream Come True!
Welcome to my kitchen! If you’re anything like me, you’re someone who can’t resist the rich, nutty aroma of peanut butter wafting through the air. Combine that with the creamy goodness of milk and the sweet kiss of ice cream, and you have a peanut butter milkshake that feels like a warm hug in a glass! Today, I’m excited to share my go-to recipe for this delightful treat, perfect for a hot summer day or just when you need a little pick-me-up.
Imagine standing in your cozy kitchen, the sun shining through the window, and the sounds of laughter filling the air. This isn’t just any ordinary milkshake; it’s a classic that sparks nostalgia and evokes memories of childhood afternoons spent at the local diner, where the milkshakes were thick enough to stand a spoon in.
Peanut butter milkshakes are a celebration of comfort, and they’re very easy to whip up at home. With just a few simple ingredients, you can create something that will impress your friends and family — or just give yourself a special treat after a long day. So, grab your blender (or a trusty mason jar if you’re feeling adventurous), and let’s dive into the deliciousness that is the peanut butter milkshake!
A Nostalgic Journey Through Peanut Butter
Growing up, my weekends were often filled with the delight of baking cookies and indulging in sweet treats. My fondest memories revolve around my late grandmother, who could make the best peanut butter cookies. When she was in the kitchen, it was an aromatic wonderland. I remember standing on a stool, peering over the counter as she mixed ingredients and shared stories about her favorite family recipes.
One day, I caught her making a batch of peanut butter milkshakes for dessert. I’d never seen anyone blend ice cream and peanut butter together before, but I can still recall the pure bliss on her face as she poured thick, creamy goodness into tall glasses. She always topped them off with crushed peanuts and a drizzle of chocolate syrup — and let me tell you, I was in heaven. Every sip was a burst of comfort and happiness.
Now, whenever I make this milkshake, I’m reminded of those beautiful moments and the passion my grandmother had for sharing love through food. It’s a simple drink, but it holds a wealth of love, just like the time spent with family over a delicious meal. And that’s what it’s all about — bringing people together over food that warms the soul!
Ingredients: The Essentials for a Delicious Peanut Butter Milkshake
Before we dive into the preparations, let’s gather our ingredients. Here’s what you’ll need:
-
2 cups vanilla ice cream
- The hero of our milkshake! Use your favorite brand for the creamiest consistency.
-
1 cup milk (whole or almond)
- Whole milk gives a rich texture, but you can swap it for almond milk for a dairy-free option.
-
1/2 cup creamy peanut butter
- Look for natural peanut butter without added sugars. Smooth and creamy works best, but crunchy peanut butter can add some fun texture!
-
2 tablespoons chocolate syrup (optional)
- Who could resist a hint of chocolate? Drizzling some chocolate syrup elevates the flavor and adds visual appeal!
-
Whipped cream for topping
- A must! It adds a fluffy contrast. You can make your own or grab a can from the store for convenience.
-
Crushed peanuts (optional)
- These add a lovely crunch and a fun finishing touch to your milkshake!
Substitution Tips:
- If you’re watching your sugar intake, use a sugar-free ice cream or a healthier alternative for milk and peanut butter.
- Feel free to swap in other flavors of ice cream – chocolate or banana peanut butter shake? Yes, please!
- Experiment with flavor extracts like vanilla or even a pinch of cinnamon for an added twist.
Step-by-Step Instructions: Crafting the Perfect Milkshake
Now that we have everything set, let’s get to blending! Follow these steps for a peanut butter milkshake that’s sure to satisfy:
-
Start with the Ice Cream
Scoop those 2 cups of vanilla ice cream straight into your blender. This is the foundation of your milkshake, so make sure it’s nice and soft — let it sit out for a few minutes if needed. -
Pour in the Milk
Add 1 cup of milk. Depending on your preferred thickness, adjust the milk. Less milk means a thicker shake, and more milk gives you a slightly thinner, sippable delight. -
Add the Peanut Butter
Spoon in your 1/2 cup of creamy peanut butter. This magical ingredient is what gives the shake that sweet, nutty goodness. If you’re a peanut butter lover (like me), feel free to toss in a little extra! -
Blend It Up
Secure the lid on your blender and blend on medium speed for about 30 seconds until your mixture is smooth and creamy. Here’s a little chef hack: Start on lower speed to avoid splatters, and gradually increase to ensure everything combines beautifully. -
Check the Consistency
After blending, stop and give it a taste! This is where you can decide if it’s creamy enough for you. If you want it thicker, add more ice cream. For a thinner shake, add a splash more milk. -
Add Chocolate Syrup (Optional)
If you’re feeling fancy and want to introduce a hint of chocolate, drizzle about 2 tablespoons of chocolate syrup into the blender and give it a quick swirl. You don’t need to blend this completely; some ribbons of chocolate can give you that swirly, café-style finish. -
Serve in Style
Now, pour your shake into tall, chilled glasses. Here’s a pro tip: pre-chill your glasses in the freezer for about 10 minutes before pouring for an extra frosty treat! -
Top and Enjoy
Finish off with a generous dollop of whipped cream on top, a drizzle of chocolate syrup, and a sprinkle of crushed peanuts for that added texture. Grab a straw (or a spoon, no judgment here) and dig in!
Serving Suggestions: Presenting Your Masterpiece
Serving a peanut butter milkshake is all about the presentation! Use tall glasses for that classic diner feel. Feel free to garnish with additional toppings — maybe some chocolate shavings, a cherry on top, or a fun straw that matches your kitchen vibe. If you’re feeling adventurous, serve them alongside some homemade cookies or a slice of your favorite pie for a delightful dessert spread. Trust me, your guests will be impressed!
Recipe Variations: Shake Things Up!
Here are some fun twists to consider for your peanut butter milkshake:
-
Banana Peanut Butter Milkshake: Add 1 ripe banana to the blender for a naturally sweet and creamy twist!
-
Chocolate Peanut Butter Milkshake: Swap in chocolate ice cream for vanilla and add an extra tablespoon of chocolate syrup for that rich chocolatey flavor.
-
Peanut Butter Banana Smoothie: For a healthier option, blend in some spinach for a hidden veggie boost. You can add hemp seeds for protein, too!
-
Nutty Protein Shake: Add a scoop of your favorite protein powder for a post-workout treat. This will keep you energized and fill you up.
-
Dairy-Free Delight: Use coconut milk ice cream and almond milk to create a magical dairy-free version without sacrificing flavor.
Chef’s Notes: Every Milkshake Tells a Story
This recipe has been a staple in my kitchen for years, with little tweaks over time to suit my evolving tastes. One “oops” moment I remember is when I accidentally added too much milk during a late-night milkshake craving. Instead of panicking, I fixed it by adding more ice cream and, voila! A happy accident turned into a new favorite version! So remember, if things don’t quite go as planned in the kitchen, just embrace it. Cooking is all about experimenting and making joyful messes.
FAQs and Troubleshooting: Your Questions Answered
1. Why is my milkshake too thick?
If you find your milkshake too thick, simply add a touch more milk and blend again. Remember, it’s all about finding the perfect consistency that you enjoy!
2. Can I make this dairy-free?
Absolutely! Use dairy-free ice cream and nut milk, such as almond or oat milk, to create a deliciously creamy shake without any dairy.
3. How can I store leftovers?
If you have leftovers (though I doubt it!), store your milkshake in an airtight container for up to 24 hours. However, just keep in mind that the texture might change slightly after freezing, so a quick stir before enjoying again can help.
4. Can I double the recipe?
Yes! This recipe can easily be doubled for parties or gatherings. Just make sure you have a blender large enough to handle the increased volume.
Nutritional Info (Optional)
For a single serving of the classic peanut butter milkshake (using vanilla ice cream and whole milk), you can expect:
- Calories: Approximately 600
- Protein: 15g
- Fat: 25g (primarily from the peanut butter)
- Carbohydrates: 60g
Remember, these can fluctuate based on any variations or substitutions made!
And there you have it — the ultimate peanut butter milkshake, infused with love, memories, and just the right amount of nostalgia. I hope this recipe becomes a beloved addition to your kitchen just as it is in mine. Whether you’re sipping it solo or sharing it with friends, may your days be filled with cozy flavor and sweet memories. Happy blending!
Print
The Ultimate Peanut Butter Milkshake
- Total Time: 5 minutes
- Yield: 2 servings 1x
- Diet: Vegetarian
Description
A creamy peanut butter milkshake that’s perfect for a refreshing treat on a hot day.
Ingredients
- 2 cups vanilla ice cream
- 1 cup milk (whole or almond)
- 1/2 cup creamy peanut butter
- 2 tablespoons chocolate syrup (optional)
- Whipped cream for topping
- Crushed peanuts (optional)
Instructions
- Start with the Ice Cream: Scoop those 2 cups of vanilla ice cream straight into your blender.
- Pour in the Milk: Add 1 cup of milk.
- Add the Peanut Butter: Spoon in your 1/2 cup of creamy peanut butter.
- Blend It Up: Secure the lid on your blender and blend on medium speed for about 30 seconds.
- Check the Consistency: After blending, stop and give it a taste!
- Add Chocolate Syrup (Optional): Drizzle about 2 tablespoons of chocolate syrup into the blender.
- Serve in Style: Pour your shake into tall, chilled glasses.
- Top and Enjoy: Finish off with whipped cream, a drizzle of chocolate, and a sprinkle of crushed peanuts.
Notes
Experiment with other flavors of ice cream and toppings for a unique twist.
- Prep Time: 5 minutes
- Cook Time: 0 minutes
- Category: Dessert
- Method: Blending
- Cuisine: American
Nutrition
- Serving Size: 1 serving
- Calories: 600
- Sugar: 45g
- Sodium: 300mg
- Fat: 25g
- Saturated Fat: 10g
- Unsaturated Fat: 10g
- Trans Fat: 0g
- Carbohydrates: 60g
- Fiber: 3g
- Protein: 15g
- Cholesterol: 60mg
Keywords: peanut butter, milkshake, dessert, creamy, summer treat

Banana Milkshake
The Ultimate Banana Milkshake Recipe: A Creamy Adventure Awaits!
Welcome to my kitchen, where we’re about to embark on a delightful journey that’s creamy, dreamy, and oh-so-banana-y! I’m Olivia Bennett, your friendly guide to all things delicious. Today, we’re diving into the world of smoothies with one of my all-time favorites — the classic Banana Milkshake. It’s a drink that’s not only fun to whip up, but it also brings back some sweet memories for me, and I bet it will do the same for you!
Picture this: it’s a sunny Saturday morning, and I’m back at my grandmother’s cozy cottage, the air thick with the sweet scent of ripe bananas. I remember standing on my tiptoes to reach the blender on the kitchen counter, barely able to contain my excitement. Grandma would laugh as she tightened the blender’s lid, reminding me to “stand back, sweetheart — things might get a little bananas!” Her famous banana milkshake was like a golden ticket to a world of flavor — thick, creamy, and topped with a dollop of whipped cream that crowned the glass like royalty. This treat was our breakfast ritual, a little bit of tradition that made those mornings feel extra special.
Banana milkshakes are not just for kids; they are pure nostalgia in a glass! So grab your blender and let’s create a milkshake that’s perfectly chilled, sweetly fruity, and super easy to make. This recipe is sure to bring a smile to your face (and maybe a little dance in the kitchen, too!).
Ingredients
To whip up your banana milkshake, you’ll need a handful of simple ingredients that come together to create a harmonious blend of flavors:
-
Ripe Bananas: Look for bananas with a few brown spots for the sweetest flavor. You can substitute with frozen bananas for an even creamier shake!
-
Milk: Whole milk will give you a rich and creamy texture, but feel free to swap in almond milk, oat milk, or your favorite dairy alternative if you prefer.
-
Vanilla Ice Cream: The magic ingredient that adds indulgence — you can use dairy-free ice cream or frozen yogurt for a lighter touch.
-
Vanilla Extract: A splash of pure vanilla extract enhances the flavor beautifully; choose quality extract for the best taste.
-
Honey or Maple Syrup: This gives a touch of extra sweetness. You can adjust this based on your taste preferences or leave it out if your bananas are perfectly ripe!
-
Optional Toppings: Whipped cream, chocolate syrup, or a sprinkle of cinnamon for the ultimate finish.
Each ingredient has a role to play in making this banana milkshake utterly delicious, so let’s make sure we choose wisely!
Step-by-Step Instructions
Time to get blending! Here’s how to create the perfect banana milkshake:
-
Choose Your Bananas: Start by peeling and slicing 2 ripe bananas. I prefer medium-sized ones; they’re just the right amount of banana flavor. Slicing them allows them to blend smoother.
Tip: If you have overly ripe bananas, don’t toss them! They’re perfect for this recipe, and you can even freeze them to use later—just peel and pop them in a freezer bag.
-
Add the Milk: Pour 1 cup of milk into your blender. If you’re not sure what milk to use, I’m a fan of whole milk for creaminess, but oat milk adds a nice nutty flavor too.
Chef Insight: If you’re using frozen bananas, reduce the amount of milk slightly, as they’ll thicken the shake more than fresh ones.
-
Ice Cream Time!: Scoop in 2 generous scoops of vanilla ice cream. This is where the indulgence happens! Make sure it’s slightly softened for easier blending.
-
Vanilla Extract: Add 1 teaspoon of pure vanilla extract. It’s a simple addition that lifts the flavor to new heights!
-
Sweeten It Up: Drizzle in 1 tablespoon of honey or maple syrup. Taste as you go, and adjust the sweetness to your liking.
-
Blend It Up: Secure the lid on your blender and blend on high until all the ingredients are smooth and creamy. About 30-45 seconds should do it!
Chef Trick: For an extra frothy milkshake, pulse the blender a few times, then give it a good shake before blending again.
-
Taste Test: Grab a spoon and indulge in a quick taste! If you want it thicker, add more ice cream; if it’s too thick, a splash of milk will do the trick.
-
Serve: Pour your beautifully blended banana milkshake into tall glasses, and don’t skimp on the froth!
Tip: For a fun presentation, dip your glasses in chocolate syrup before pouring in the shake for a decadent twist.
Serving Suggestions
Now, it’s time to present your banana milkshake! Top it with a generous swirl of whipped cream, and drizzle with chocolate syrup for that extra touch of decadence. Sprinkle some crushed graham crackers or a dusting of cinnamon on top, and you’ve got a show-stopping treat! You can even add a slice of banana on the rim or a cute paper straw for that perfect Instagram-worthy finish.
Recipe Variations
Here are some fun twists to keep your banana milkshake game fresh:
-
Chocolate Banana Milkshake: Add 2 tablespoons of unsweetened cocoa powder or chocolate syrup for a chocolatey delight.
-
Nutty Banana Milkshake: Toss in a tablespoon of almond butter or peanut butter for a protein-packed treat.
-
Tropical Twist: Add a handful of frozen pineapple chunks for a fruity explosion that will transport you to a beach resort.
-
Spiced Banana Milkshake: Mix in a dash of nutmeg or pumpkin spice for a cozy, autumnal flavor.
-
Vegan Banana Milkshake: Substitute ice cream with a non-dairy version and use almond milk for a vegan-friendly treat!
Chef’s Notes
Banana milkshakes are a go-to for me, not just because they taste incredible, but also because they remind me of sweet moments spent with family. I’ve whipped up this recipe for birthday parties, lazy Sunday afternoons, and even as an after-school snack for my little niece, who absolutely adores them!
Over the years, I’ve tried countless variations, always excited to experiment with new flavors and toppings. Once, on a whim, I added a pinch of cayenne to a batch I made for friends — and let’s just say their surprised faces were priceless! It’s all about finding joy in the kitchen and making these flavors your own.
FAQs and Troubleshooting
-
Why is my milkshake too thin?
If your milkshake is thinner than you’d like, add more ice cream to thicken it up! Alternatively, reduce the amount of milk next time. -
Can I use frozen bananas?
Absolutely! Frozen bananas will make your milkshake extra creamy. Just use a bit less milk for the right consistency! -
What if my milkshake is too thick?
If it’s too thick to blend, just add a little more milk, one splash at a time, until you reach your desired consistency. -
How do I store leftovers?
Drink it up! But if you have to save any, pour it into an airtight container and place it in the freezer. Just blend it again before serving to restore its creamy texture.
Nutritional Info (Optional)
While I love sharing recipes that make our hearts sing, I also think it’s good to know what we’re nourishing our bodies with! A typical banana milkshake made from the ingredients listed above contains approximately:
- Calories: 350-450 (depending on portion size and added ingredients)
- Protein: 8-10g
- Sugar: 30-40g
- Fat: 12-15g
Remember, these figures can vary based on your ingredients and serving sizes.
Now, go ahead and grab those bananas, fire up the blender, and make some incredible memories with your very own banana milkshake! Whether enjoyed solo or shared with friends, this drink never fails to warm my heart. Enjoy, and remember, every sip is a little moment of joy! Happy blending! 🍌🥤
Print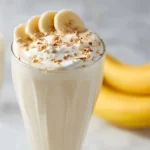
The Ultimate Banana Milkshake
- Total Time: 10 minutes
- Yield: 2 servings 1x
- Diet: Vegetarian
Description
A classic and creamy banana milkshake that brings back sweet memories, perfect for any occasion!
Ingredients
- 2 ripe bananas
- 1 cup whole milk (or almond/oat milk)
- 2 scoops vanilla ice cream (or dairy-free ice cream)
- 1 teaspoon vanilla extract
- 1 tablespoon honey or maple syrup
- Optional toppings: whipped cream, chocolate syrup, cinnamon
Instructions
- Choose your bananas: Peel and slice 2 ripe bananas.
- Add the milk: Pour 1 cup of milk into your blender.
- Scoop in ice cream: Add 2 generous scoops of vanilla ice cream.
- Add vanilla extract: Put in 1 teaspoon of pure vanilla extract.
- Drizzle in honey or maple syrup: Adjust the sweetness to your liking.
- Blend it up: Blend on high until smooth and creamy.
- Taste test: Adjust thickness with more ice cream or milk as needed.
- Serve: Pour into glasses and top with optional toppings.
Notes
For a fun presentation, dip glasses in chocolate syrup before pouring in the shake. Enjoy with a slice of banana on the rim or a cute paper straw!
- Prep Time: 10 minutes
- Cook Time: 0 minutes
- Category: Beverage
- Method: Blending
- Cuisine: American
Nutrition
- Serving Size: 1 serving
- Calories: 400
- Sugar: 30g
- Sodium: 150mg
- Fat: 15g
- Saturated Fat: 8g
- Unsaturated Fat: 5g
- Trans Fat: 0g
- Carbohydrates: 60g
- Fiber: 3g
- Protein: 10g
- Cholesterol: 50mg
Keywords: banana milkshake, creamy drink, easy recipe, smoothie, dessert
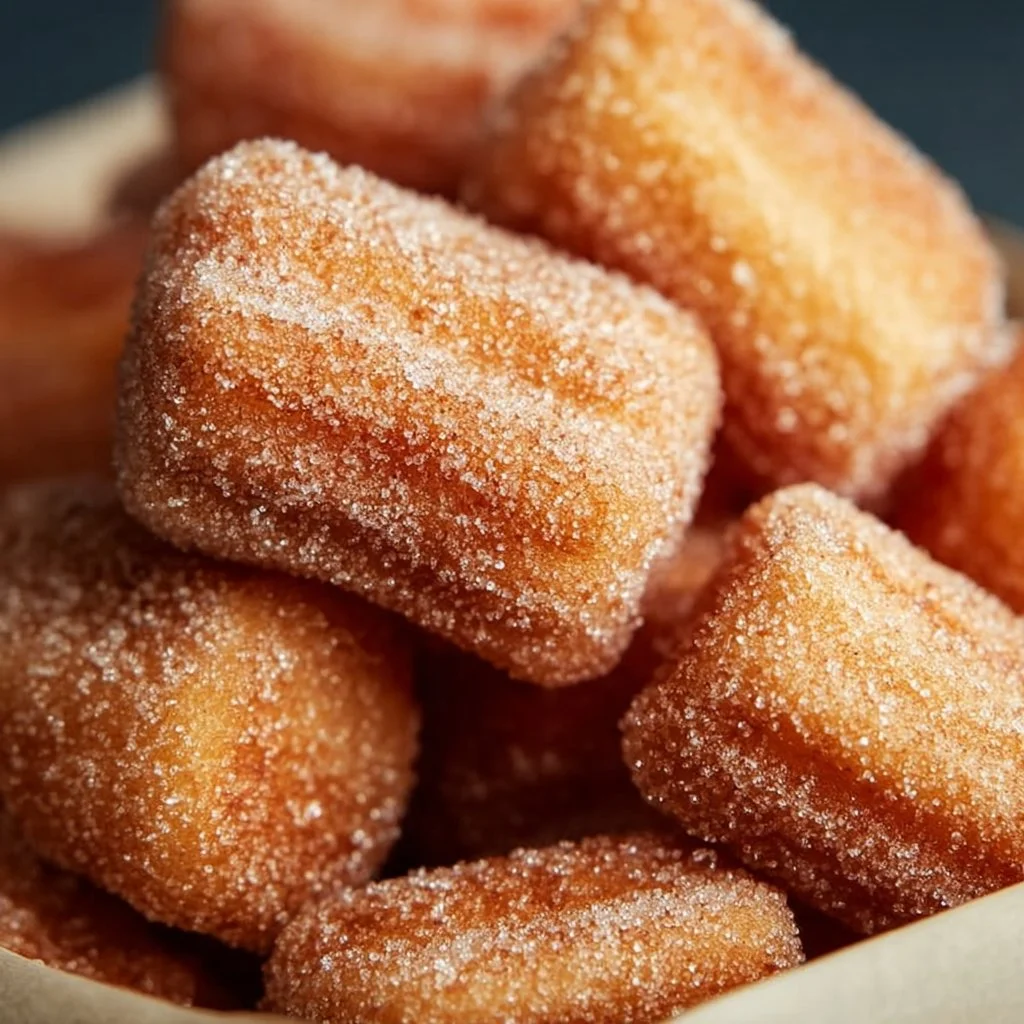
Crispy Air Fryer Churro Bites
Crispy Air Fryer Churro Bites: A Sweet Treat Worth Sharing!
Welcome to my cozy corner of the internet! I’m Olivia Bennett, your friendly guide through the world of delightful flavors and homemade goodness. Today, I’m excited to share a recipe that’ll have you dreaming of carnival nights and sweet indulgence: Crispy Air Fryer Churro Bites! Whether you’re looking to impress your friends or simply satisfy that sweet tooth, this recipe is the perfect combination of ease and deliciousness.
Imagine the warm aroma of cinnamon and sugar wafting through your kitchen, enveloping you in memories of fun fairs and festive events. Whenever I think of churros, I can’t help but smile. There’s something undeniably nostalgic about them; perhaps it’s the crispy exterior giving way to a soft, pillowy inside, or maybe it’s the sheer joy of seeing a little one’s eyes light up as they take their first bite. Whatever it is, churros have that magical ability to transform any ordinary day into a celebration, and today, we’re harnessing that magic in bite-sized form using the air fryer.
Why the air fryer, you ask? Well, I love the crispy texture it offers without the fuss or calories of deep-frying. These churro bites are not only super easy to whip up, but they are also a guilt-free indulgence that lets you and your loved ones enjoy a classic treat in a healthier way. So, roll up your sleeves and let’s dive into the world of crispy, caramelized, cinnamon-sugar happiness. I promise this will be one of the most delightful kitchen adventures you’ve embarked on!
Personal Story
Let me take you back to one of my fondest childhood memories: a summer evening at the carnival. The sun had just dipped below the horizon, painting the sky in delicious cotton-candy hues as the faint sounds of laughter and thrill rode the air like a sweet melody. My family and I would roam from ride to ride, trying our hands at games and cheekily racing each other to try all the food stands. My absolute favorite? The churro cart.
I’ll never forget that crisp first bite as I savored the warm sweetness, the dusting of cinnamon sugar sticking to my fingers. I can still hear my dad’s laughter as I tried to lick the sugar off my fingers before it smudged my face—an impossible task! That simple joy of discovery and laughter made those churros feel like magic. Fast forward to today, and I still crave that experience. With my air fryer, I can replicate those tranquil carnival evenings right at home. So, let’s recreate that magic together!
Ingredients
Here’s what you’ll need to bring these Crispy Air Fryer Churro Bites to life:
-
For the Churro Bites:
- 1 cup all-purpose flour
- This is your base! For a gluten-free option, sub with almond or oat flour; the texture will vary slightly, but they’ll still be delicious.
- 2 tablespoons granulated sugar
- Adds a touch of sweetness to the churro dough. You can use coconut sugar for a more caramel-like flavor.
- 1 teaspoon baking powder
- Helps the churro bites rise and puff up perfectly. Double-check that it’s fresh for the best results!
- 1/2 teaspoon ground cinnamon
- The classic spice that defines churros. Feel free to mix up the spice game with some nutmeg or cardamom if you want a twist!
- 1/4 teaspoon salt
- Balances out the sweetness. Don’t skip this; it’s essential for flavor depth.
- 1/2 cup water
- This will help create the dough. You could also use milk for a richer flavor.
- 2 tablespoons unsalted butter
- Adds richness and flavor. You can substitute with vegan butter if you prefer a dairy-free option.
- 1 cup all-purpose flour
-
For the Cinnamon Sugar Coating:
- 1/4 cup granulated sugar
- This is the main star of the topping. An easy substitute could be a mix of half sugar and half stevia or monk fruit for a low-calorie version.
- 1 tablespoon ground cinnamon
- Essential for that warm churro flavor. You can play with the ratio to suit your taste!
- 1/4 cup granulated sugar
Step-by-Step Instructions
-
Prepare the Dough:
- In a medium saucepan, melt the butter over medium heat. Once melted, whisk in the water, granulated sugar, and salt until combined. Bring the mixture to a boil.
- Tip: Stirring constantly while bringing it to a boil prevents burning and ensures even cooking.
-
Mix in the Dry Ingredients:
- Once boiling, remove it from the heat and add the flour, baking powder, and cinnamon. Using a wooden spoon, quickly stir until a dough forms.
- Chef Hack: Let the dough rest for about 5 minutes after mixing. This allows the flour to hydrate fully and makes it easier to work with.
-
Shape the Churros:
- Transfer the dough into a piping bag fitted with a star tip (or a zip-top bag with the corner snipped off). Pipe small bites onto a piece of parchment paper, about 1-inch long.
- Pro Tip: If you dampen your fingers lightly, it’ll help shape the churro bites without the dough sticking to you.
-
Air Frying Time!
- Preheat your air fryer to 375°F (190°C). Spray the basket with a non-stick cooking spray. Place the churro bites in the basket, ensuring they’re spaced out for even cooking.
- Tip: Don’t overcrowd the basket. You might need to do this in batches depending on the size of your air fryer.
-
Cooking:
- Cook for about 8-10 minutes or until the churros are golden brown and crisp. Shake the basket halfway through for even browning.
- Chef Insight: If you like them extra crispy, add another minute or two, but keep an eye on them!
-
Cinnamon Sugar Coating:
- While the churro bites cool slightly, whisk together the sugar and cinnamon in a small bowl. Toss the warm churro bites in the cinnamon sugar until well coated.
- Tip: Do this step while the churros are warm for maximum adherence of the sugar coating!
Serving Suggestions
Plate these delightful churro bites in a colorful bowl and serve immediately! Pair them with a small dipping dish of chocolate sauce or caramel for an added sweet touch. If you’re feeling especially indulgent, a scoop of ice cream on the side would make for a heavenly treat!
Recipe Variations
Feeling adventurous? Here are a few creative twists to try:
-
Chocolate-Filled Churro Bites:
- Add a small piece of chocolate in the middle of each churro bite before air frying. Gooey chocolate filling will take them to the next level!
-
Pumpkin Spice Churro Bites:
- Substitute 1/4 cup of flour with pumpkin puree and add a pinch of nutmeg to the cinnamon sugar mixture for a fall-inspired treat.
-
Coconut Churro Bites:
- Mix shredded coconut into the dough for a tropical twist, and use coconut sugar for the cinnamon coating for extra flavor.
-
Savory Churro Bites:
- Swap out sugar for shredded cheese in the dough and enjoy as a savory snack; use herbs like rosemary or thyme in the coating. The possibilities are endless!
Chef’s Notes
This recipe has evolved over the years as I experiment with flavors and textures. I started with traditional churros, and after countless frying mishaps (and a few too many oil splatters), the air fryer became my go-to. Now, I can enjoy these crispy bites without feeling guilty on a cozy Sunday afternoon. Feel free to share your own variations with me; I love to see how this recipe sparks creativity in my fellow foodies!
FAQs and Troubleshooting
-
Q: Why are my churro bites not crispy?
- A: Ensure your air fryer is preheated properly. If they’re still not crispy, consider adding a little more time and checking frequently to avoid overcooking.
-
Q: Can I prepare the dough in advance?
- A: Yes! You can make the dough up to a day ahead; just store it covered in the fridge. Before use, let it come to room temperature for easier piping.
-
Q: Can these churros be frozen?
- A: Absolutely! Pipe and freeze the churro bites in a single layer on a baking sheet, then transfer to a zip-top bag once frozen. Air fry from frozen, adding a couple of minutes to the cook time.
-
Q: How do I keep the churros warm for a gathering?
- A: Place the cooked churro bites in a warm oven (around 200°F/90°C) until you’re ready to serve to keep them crispy and warm.
Nutritional Info (Optional)
(Typically optional, but here’s a basic rundown.)
- Serving Size: 5 churro bites
- Calories: Approximately 200
- Carbohydrates: 30g
- Protein: 2g
- Fat: 8g
- Sugar: 10g
With these Crispy Air Fryer Churro Bites, you’ll not only bring a bit of the carnival to your kitchen, but also create joyful memories! Enjoy whipping up these treats and share them with family and friends for a truly unforgettable experience. Happy cooking!
Print
Crispy Air Fryer Churro Bites
- Total Time: 25 minutes
- Yield: 5 servings 1x
- Diet: Vegetarian
Description
These Crispy Air Fryer Churro Bites are a guilt-free indulgence that bring the carnival spirit right into your home.
Ingredients
- 1 cup all-purpose flour
- 2 tablespoons granulated sugar
- 1 teaspoon baking powder
- 1/2 teaspoon ground cinnamon
- 1/4 teaspoon salt
- 1/2 cup water
- 2 tablespoons unsalted butter
- 1/4 cup granulated sugar (for coating)
- 1 tablespoon ground cinnamon (for coating)
Instructions
- Melt the butter in a medium saucepan over medium heat. Once melted, whisk in the water, granulated sugar, and salt until combined. Bring the mixture to a boil.
- Remove from the heat and add flour, baking powder, and cinnamon. Stir until a dough forms.
- Transfer the dough into a piping bag fitted with a star tip. Pipe small bites onto parchment paper, about 1-inch long.
- Preheat your air fryer to 375°F (190°C). Spray the basket with non-stick cooking spray and place churro bites in the basket.
- Cook for about 8-10 minutes until golden brown and crisp, shaking the basket halfway through.
- Whisk together the sugar and cinnamon in a bowl while churro bites cool slightly. Toss the warm churro bites in the cinnamon sugar until well coated.
Notes
Serve with chocolate sauce or caramel for dipping. Enjoy with ice cream for an indulgent treat!
- Prep Time: 15 minutes
- Cook Time: 10 minutes
- Category: Dessert
- Method: Air Frying
- Cuisine: Spanish
Nutrition
- Serving Size: 5 churro bites
- Calories: 200
- Sugar: 10g
- Sodium: 200mg
- Fat: 8g
- Saturated Fat: 4g
- Unsaturated Fat: 3g
- Trans Fat: 0g
- Carbohydrates: 30g
- Fiber: 1g
- Protein: 2g
- Cholesterol: 15mg
Keywords: churros, air fryer, dessert, sweet treats, carnival food


