
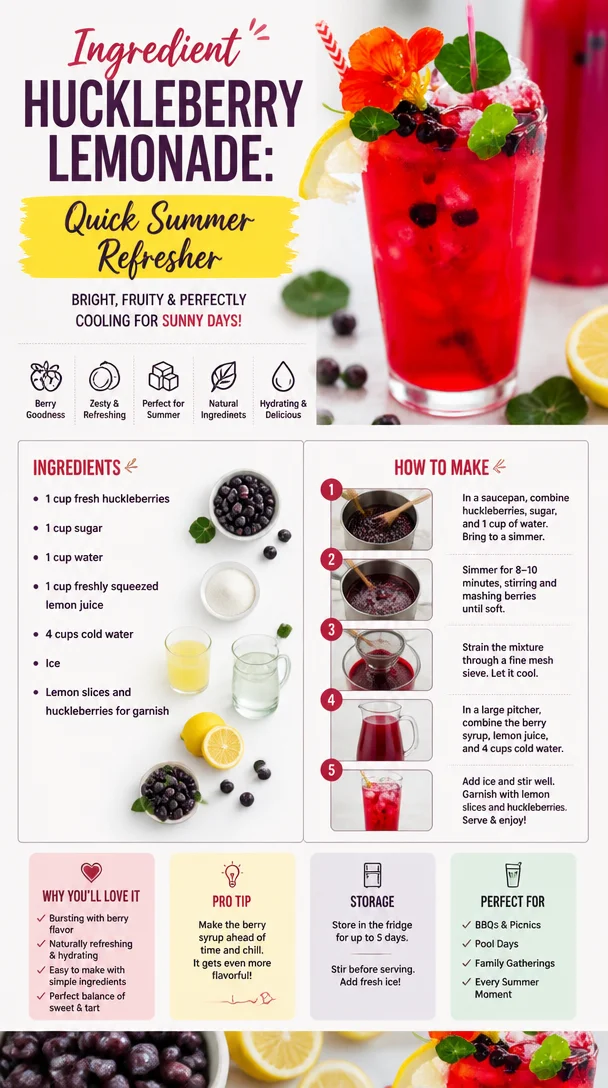
Ingredient Huckleberry Lemonade: Quick Summer Refresher
Huckleberry Lemonade: A Refreshing Summer Delight
Welcome to my kitchen, dear friends! Today, we’re diving into a recipe that just screams summer: Huckleberry Lemonade. Imagine basking in the sun, laughter filling the air, and the tangy sweetness of freshly made lemonade dancing on your taste buds. Huckleberry lemonade is that perfect drink that ties all these beautiful moments together.
Let me take you on a little journey that inspired this delightful drink. It all began on a warm August afternoon, where the air was vibrant, and the sweet scents of nature enveloped me. My family and I would venture out to the nearby hills to forage for huckleberries, those little jewels of the wild. Picking berries together, sun-kissed and carefree, created a tapestry of memories—each one tied to the taste of summer.
After a fruitful day of foraging, we’d return home, hands stained with juice, ready to transform our bounty into something magical. It was this tradition that ignited my love for exploring the flavors of summer, and what could be better than crafting a refreshing lemonade using our foraged treasures? Each sip carried the essence of those sunny days, making every glass feel like a warm hug.
Are you ready to make your very own Huckleberry Lemonade? This thirst-quenching drink is not only vibrant and refreshing but also easy to make! With just a handful of ingredients, you can impress your family and friends—whether it’s for a summer barbecue, a picnic, or just a cozy afternoon at home. With my step-by-step guide and a few chef secrets, you’ll be mixing up this delightful beverage in no time!
A Nostalgic Memory
I still vividly remember that first summer of making huckleberry lemonade. My brother and I ventured into the woods with our small buckets, fueled by excitement and the promise of sweet, juicy berries. The sun streamed through the trees, the smell of wildflowers danced in the air, and our giggles echoed as we raced to find the biggest, ripest huckleberries. Our little hands were soon stained by the purple-blue juices of our harvest.
Once home, my mom gathered us in the kitchen, filling it with warmth and the sound of laughter. As she cooked, the aroma of freshly squeezed lemons mingled with the sweet scent of huckleberries. It was a joyful chaos as we blended the fruits, muddled ice, and guzzled down the vibrant beverage, cooled by the summer breeze.
This recipe comes with a sprinkle of nostalgia and a dash of joy, ready to be shared with loved ones just like it was in my childhood.
Ingredients
Here’s what you need to create your own Huckleberry Lemonade:
-
Fresh Huckleberries (2 cups)
These little gems pack a punch of flavor! They’re sweet, tart, and vibrant. If you can’t find huckleberries, blueberries make a great substitute. -
Fresh Lemons (1 cup, juiced)
Nothing beats fresh lemon juice! It adds that essential tang. If you’re in a pinch, bottled lemon juice can work, but fresh is always best! -
Water (4 cups)
Use filtered water for the best taste! This will dilute the strong flavors and make the drink refreshing. -
Sugar (3/4 cup, adjust to taste)
This balances the tartness from the lemons and huckleberries. For a healthier alternative, you could try using honey, agave syrup, or a sugar substitute. -
Ice (for serving)
A must for a cold, refreshing drink! Don’t forget to add more huckleberries on top for garnish.
Step-by-Step Instructions
Ready to whip up your Huckleberry Lemonade? Let’s get started!
-
Prepare the Huckleberries
In a medium saucepan, add your fresh huckleberries along with 1 cup of water. Bring it to a gentle boil over medium heat, stirring occasionally until the berries break down (about 5 minutes). Tip: This is your moment—smell that beautiful aroma! You can even mash some berries with a fork to release more juice. -
Strain the Mixture
Once the huckleberries have burst and the liquid has turned a beautiful maroon, strain the mixture through a fine mesh sieve into a bowl or pitcher, pressing down to get all the juice out. You should have about 1 cup of huckleberry juice. Chef hack: Save the crushed huckleberries for smoothies or add them to oatmeal! -
Juice the Lemons
While your huckleberry mixture cools, juice those fresh lemons until you have about 1 cup of juice. Be sure to strain out the seeds! Pro tip: Roll the lemons on the countertop before cutting them to maximize juice extraction. -
Combine the Ingredients
In a large pitcher, combine the huckleberry juice, lemon juice, and remaining 3 cups of water. Stir in the sugar until dissolved. Taste and adjust the sweetness as necessary—it should be a nice balance between the tartness of the lemons and the sweetness of the huckleberries. -
Chill and Serve
Refrigerate your lemonade for at least an hour to chill it down. When you’re ready to serve, fill a glass with ice, pour over the lemonade, and garnish with a few fresh huckleberries and a lemon slice. Tip: You can also add some mint for extra freshness and a pop of color!
Serving Suggestions
Serve your Huckleberry Lemonade in clear, tall glasses to showcase that gorgeous color! For a twist, you can rim the glass with sugar or salt before pouring in the lemonade. Pair it with light snacks, like simple appetizers, fresh fruit, or a charcuterie board for a delightful summer gathering.
Recipe Variations
Here are a few fun twists you can try on this classic lemonade:
- Sparkling Huckleberry Lemonade: Substitute half of the water with sparkling water for a fizzy kick!
- Herbal Twist: Infuse your lemonade with herbs like rosemary or basil. Simply muddle a few leaves in the pitcher for a fresh herbal taste.
- Add a Splash of Alcohol: Turn this into a summer cocktail by adding vodka or gin for an adult soirée.
- Huckleberry Lemonade Popsicles: Pour the lemonade into molds and freeze for refreshing popsicles on a hot day.
- Sugar-Free Option: Use a sugar alternative, such as stevia or erythritol, to make a low-calorie version.
Chef’s Notes
This recipe has become a staple in my kitchen, especially when summer rolls around! Over the years, I’ve experimented with different fruits and flavors, but there’s something about huckleberries that holds a special place in my heart. They remind me of childhood, adventure, and good old family time. Plus, they’re a bit of a hidden gem—when I share my huckleberry lemonade with friends, they’re always pleasantly surprised at the unique taste!
One time, I decided to add in some fresh mint, and it transformed the drink into a refreshing herbal lemonade! It’s these little adjustments that keep the cooking journey exciting and vibrant.
FAQs and Troubleshooting
Here are a few common questions and troubleshooting tips for your Huckleberry Lemonade:
-
Q: What if I can’t find huckleberries?
A: Not to worry! Blueberries, blackberries, or even raspberries can work wonderfully in this recipe. -
Q: My lemonade turned out too tart. What can I do?
A: Simply add more sugar or a bit of honey to balance it out! Remember to taste until you reach your perfect sweetness. -
Q: Can I freeze leftover lemonade?
A: Absolutely! It freezes beautifully. Just remember to leave some headspace in the container, as the liquid will expand when frozen. -
Q: How can I store any leftover lemonade?
Store it in an airtight container in the fridge for up to 3 days. It’s best enjoyed fresh, but it will last!
Nutritional Info
While this recipe is more about enjoyment than strict nutritional guidelines, here’s a rough estimate per serving (based on eight servings):
- Calories: 90
- Total Fat: 0g
- Carbohydrates: 22g
- Sugars: 19g
- Protein: 0g
There you have it—a refreshing and nostalgic recipe for Huckleberry Lemonade to enjoy throughout the summer! I hope you make it a tradition to gather your loved ones and create sweet memories around this vibrant drink. Happy cooking, and cheers to summer!
Print
Huckleberry Lemonade
- Total Time: 20 minutes
- Yield: 4 servings
- Diet: Vegetarian
Description
A refreshing and vibrant lemonade made with fresh huckleberries, perfect for summer gatherings.
Ingredients
- Fresh Huckleberries (2 cups)
- Fresh Lemons (1 cup, juiced)
- Water (4 cups)
- Sugar (3/4 cup, adjust to taste)
- Ice (for serving)
Instructions
- Prepare the huckleberries: In a medium saucepan, add your fresh huckleberries along with 1 cup of water. Bring to a gentle boil over medium heat, stirring occasionally until the berries break down (about 5 minutes).
- Strain the mixture: Once the huckleberries have burst and the liquid has turned a beautiful maroon, strain the mixture through a fine mesh sieve into a bowl or pitcher, pressing down to get all the juice out.
- Juice the lemons: While your huckleberry mixture cools, juice those fresh lemons until you have about 1 cup of juice. Be sure to strain out the seeds!
- Combine the ingredients: In a large pitcher, combine the huckleberry juice, lemon juice, and remaining 3 cups of water. Stir in the sugar until dissolved. Adjust sweetness as necessary.
- Chill and serve: Refrigerate your lemonade for at least an hour to chill. Serve in a glass with ice, garnished with fresh huckleberries and a lemon slice.
Notes
Feel free to adjust sugar to taste. You can also experiment with adding mint or using sparkling water for a fizzy version.
- Prep Time: 15 minutes
- Cook Time: 5 minutes
- Category: Beverage
- Method: Mixing
- Cuisine: American
Nutrition
- Serving Size: 1 serving
- Calories: 90
- Sugar: 19g
- Sodium: 0mg
- Fat: 0g
- Saturated Fat: 0g
- Unsaturated Fat: 0g
- Trans Fat: 0g
- Carbohydrates: 22g
- Fiber: 0g
- Protein: 0g
- Cholesterol: 0mg
Keywords: huckleberry, lemonade, summer drink, refreshing beverage, family recipe

Minute Homemade Raspberry Lemonade for Summer Refreshment
Refreshing Homemade Raspberry Lemonade: A Sweet Summer Treat
Welcome to my kitchen, dear friends! Today, I’m excited to share with you one of my all-time favorite summer recipes: homemade raspberry lemonade. Nothing screams warm weather quite like the bright, zesty sweetness of lemonade—especially when it’s complemented by the vibrant flavor of fresh raspberries. There’s just something about this drink that instantly takes me back to lazy afternoons spent outdoors, soaking up the sun, and enjoying the company of friends and family.
Growing up, one of my fondest memories was the annual family reunion held at my grandmother’s house. Every summer, she would prepare a massive pitcher of icy lemonade infused with whatever fruits were in season, and raspberries were always a fan favorite. I remember the excitement as we gathered on her porch, laughter filling the air, as she poured pink lemonade into colorful cups. Those moments, bathed in sunshine and the sweet aroma of berries, are etched in my heart. This homemade raspberry lemonade captures that same essence, and I can’t wait to bring those summer vibes into your kitchen.
The beauty of this homemade raspberry lemonade is in its simplicity. With just a handful of fresh ingredients, you can whip up a beverage that is refreshing, flavorful, and oh-so-impressive. Whether you’re hosting a backyard barbecue, a birthday party, or just treating yourself to a delightful drink on a sunny afternoon, this recipe is sure to be a hit. Let’s invite some sunshine into our lives and get started!
Personal Story
I vividly recall the first time I attempted to make raspberry lemonade on my own. It was a sunny Saturday afternoon, and I had a few friends over. The plan was to relax by the pool, but I felt inspired to contribute something delicious. I rummaged through my kitchen and found a container of ripe raspberries. Nostalgia hit me hard—I could almost hear my grandma’s laughter. I decided, then and there, to channel her spirit and recreate that beloved lemonade.
As I squeezed the fresh lemons and muddled the raspberries, I couldn’t help but laugh at the mess I was making. The kitchen turned into a berry explosion—a vibrant splatter of pink everywhere! My friends arrived just as I was pouring the drink into a pitcher, glasses in hand, and they were instantly captivated by the intoxicating aroma. One sip, and they were hooked. It was a magical moment that reminded me of the power of food: it can transport us back in time, evoke strong emotions, and create wonderful new memories. This homemade raspberry lemonade is more than just a drink; it’s a connection to the past and a celebration of the present.
Ingredients
To make this scrumptious homemade raspberry lemonade, you’ll need the following ingredients:
-
Fresh Raspberries (2 cups)
- Choose ripe, plump raspberries for the best flavor. You can also use frozen raspberries if fresh ones aren’t available—just be sure to thaw them first!
-
Fresh Lemons (1 cup juiced)
- About 4 to 6 lemons, depending on their size. Always go for fresh lemons for a bright, zesty kick. If you’re in a pinch, you can use bottled lemon juice, but it won’t have the same vibrant flavor.
-
Water (4 cups)
- Use filtered water for the best taste. You can swap out part of the water for sparkling water to add a fizzy element to your lemonade.
-
Granulated Sugar (¾ cup)
- Adjust the amount based on your sweetness preference. You can substitute with honey, agave syrup, or a sugar alternative if desired. Just be mindful that different sweeteners have varying levels of sweetness.
-
Mint Leaves (optional)
- Fresh mint can elevate the flavor! Use it as a garnish or muddle it into the mixture for an aromatic twist.
-
Ice (as needed)
- Keep your lemonade refreshingly cold by serving it over ice. You can even freeze some raspberry juice into ice cubes for a fun twist!
Step-by-Step Instructions
-
Prep the Raspberries: Rinse the fresh raspberries gently under cold water to remove any dirt or impurities. Drain them carefully and set aside.
-
Juice the Lemons: Cut your lemons in half and use a citrus juicer to extract the juice. You’ll want about one cup of fresh lemon juice. Don’t forget to remove any seeds that sneak their way in!
-
Make the Raspberry Puree: In a blender, combine the fresh raspberries and half of the sugar (about ⅓ cup). Pulse until smooth — a minute or two should do the trick. If you prefer a smoother drink, strain the mixture through a fine-mesh sieve to remove the seeds.
-
Dissolve the Sugar: In a small saucepan, heat 1 cup of water and the remaining sugar over medium heat. Stir until the sugar is fully dissolved. This creates a simple syrup that will blend beautifully into your lemonade.
-
Combine Ingredients: In a large pitcher, combine the raspberry puree, fresh lemon juice, simple syrup, and the remaining 3 cups of water. Stir well to mix everything together. Taste it—if it needs more sweetness, feel free to add extra sugar, honey, or your sweetener of choice!
-
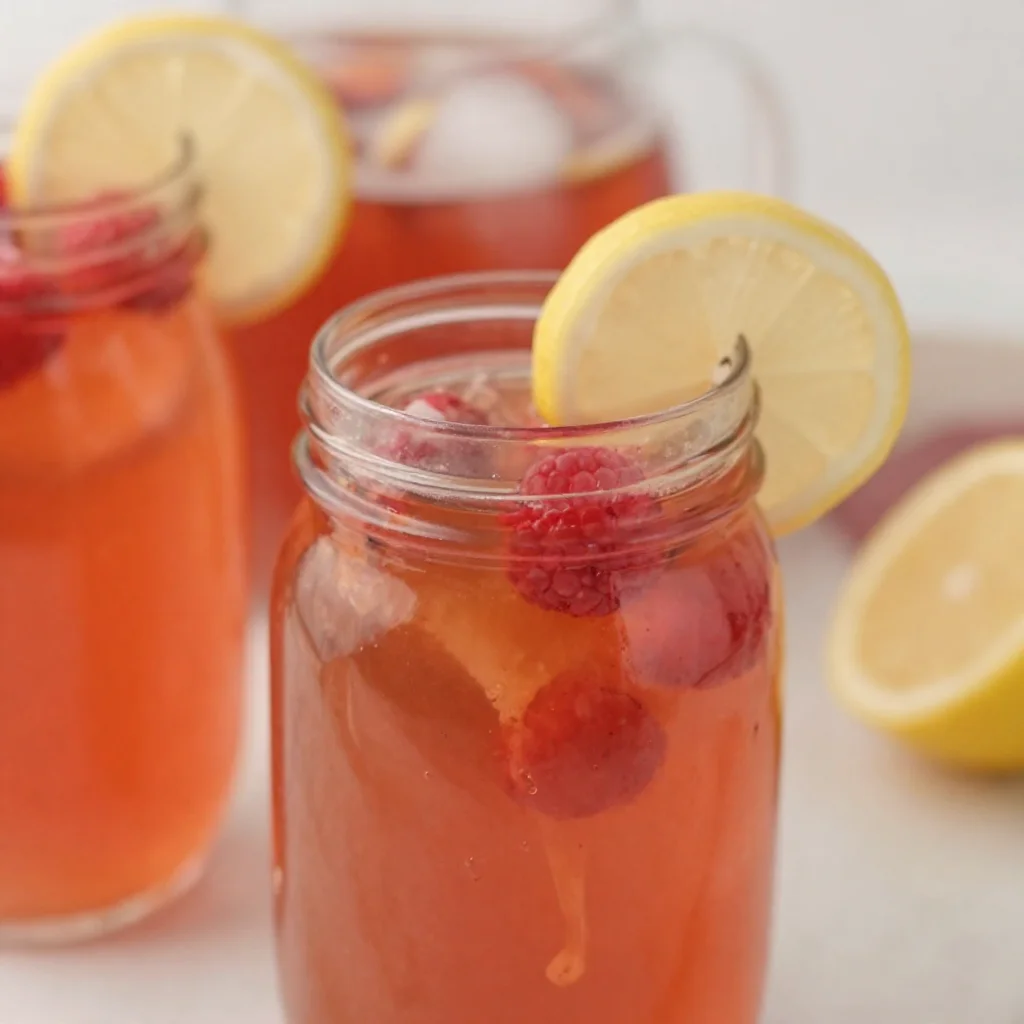
Chill and Serve: Chill your raspberry lemonade in the refrigerator for at least 30 minutes to allow the flavors to meld. When you’re ready to serve, add ice to glasses and pour the lemonade over. Garnish with fresh mint leaves and a few whole raspberries for an eye-catching finish!
-
Enjoy: Grab a seat on the porch, soak in the sunshine, and share a toast with loved ones—this homemade raspberry lemonade is sure to refresh and delight!
Serving Suggestions
When it comes to plating or serving, presentation is everything! Serve your homemade raspberry lemonade in clear glasses to showcase that gorgeous pink hue. Add a sprig of fresh mint and a couple of whole raspberries to each glass for that Instagram-worthy touch. If you’re feeling extra fancy, rim the glasses with sugar for a sweet surprise with every sip. Perfect for picnics, barbecues, or simply enjoying a quiet moment at home!
Recipe Variations
Looking to shake things up? Here are a few creative twists on this delightful recipe:
-
Berry Blend: Mix in strawberries, blueberries, or blackberries to the raspberry puree for a colorful berry medley.
-
Herbal Infusion: Try adding basil or rosemary for a unique herbal note that complements the tartness of the lemonade.
-
Sparkling Splash: Transform your lemonade into a sparkling beverage by substituting part of the water with sparkling water or club soda.
-
Alcoholic Option: Elevate your drink by adding a splash of vodka or gin for a refreshing adult spritzer.
-
Low-Sugar Version: Use an all-natural sweetener like stevia or erythritol for a guilt-free treat that’s still bursting with flavor.
Chef’s Notes
This recipe has evolved over the years and has been a staple at summer gatherings. I remember the first time I tried adding mint, and it instantly became a hit! Every time I make it, I can’t help but smile at the memories associated with it—the laughter shared, the stories told, and the friendships deepened over pitcher after pitcher of icy lemonade.
One of my funniest kitchen moments happened while making this lemonade. I was trying to squeeze the lemons, and one shot right out of my hand, making a perfect arc across the kitchen! I couldn’t help but laugh as I mopped up the juice—it’s a reminder that cooking is meant to be joyful, sometimes messy, and always full of surprises.
FAQs and Troubleshooting
1. My lemonade is too tart! What can I do?
No worries! Just add a bit more sugar or sweetener to balance the tartness. You could also add more water to dilute it to your liking.
2. Can I make this ahead of time?
Absolutely! You can prepare the lemonade a day in advance and store it in the refrigerator. Just give it a good stir before serving, as some of the ingredients may settle.
3. The raspberries are seedy; how can I avoid this?
If you prefer a smoother texture, simply strain the raspberry puree through a fine-mesh sieve to separate the seeds before mixing it with the other ingredients.
4. Can I store leftover lemonade?
Yes! Store any leftover lemonade in a sealed container in the fridge for up to 3 days. Just keep in mind that it may separate; stir well before serving.
Nutritional Info
(For 1 serving, approx. 1 cup)
- Calories: 90
- Protein: 1g
- Carbohydrates: 24g
- Fiber: 1g
- Sugar: 19g
- Fat: 0g
With this recipe in your repertoire, you’ll be ready to sip on something delicious and refreshing all summer long. I hope you enjoy this homemade raspberry lemonade as much as I do—and that it brings a little extra sunshine into your life! Happy cooking, my friends!
Print
Homemade Raspberry Lemonade
- Total Time: 40 minutes
- Yield: 4 servings
- Diet: Vegan
Description
A refreshing summer drink that combines the zesty sweetness of fresh lemons with the vibrant flavor of ripe raspberries.
Ingredients
- Fresh Raspberries (2 cups)
- Fresh Lemons (1 cup juiced, about 4 to 6 lemons)
- Water (4 cups)
- Granulated Sugar (¾ cup)
- Mint Leaves (optional)
- Ice (as needed)
Instructions
- Rinse the fresh raspberries gently under cold water to remove any dirt or impurities. Drain them carefully and set aside.
- Cut your lemons in half and use a citrus juicer to extract the juice, aiming for about one cup of fresh lemon juice. Remove any seeds that sneak in!
- Combine the raspberries and half of the sugar in a blender. Pulse until smooth. Strain if you prefer a smoother drink.
- Heat 1 cup of water in a small saucepan with the remaining sugar over medium heat. Stir until the sugar is fully dissolved.
- Mix the raspberry puree, fresh lemon juice, simple syrup, and the remaining 3 cups of water in a large pitcher. Stir well and taste for sweetness.
- Chill the lemonade in the refrigerator for at least 30 minutes. When ready to serve, add ice to glasses and pour the lemonade over. Garnish with mint leaves and whole raspberries.
- Enjoy your homemade raspberry lemonade on a sunny day with friends and family!
Notes
For additional flavor, you can mix in a variety of berries or herbs, and serve in clear glasses for an eye-catching presentation.
- Prep Time: 10 minutes
- Cook Time: 0 minutes
- Category: Beverage
- Method: Blending
- Cuisine: American
Nutrition
- Serving Size: 1 serving
- Calories: 90
- Sugar: 19g
- Sodium: 0mg
- Fat: 0g
- Saturated Fat: 0g
- Unsaturated Fat: 0g
- Trans Fat: 0g
- Carbohydrates: 24g
- Fiber: 1g
- Protein: 1g
- Cholesterol: 0mg
Keywords: raspberry, lemonade, summer drink, refreshing beverage, homemade lemonade
Minute Raspberry Iced Tea for Summer Refreshment
Refreshing Raspberry Iced Tea: A Summer Delight
Welcome to my kitchen! Today, we’re diving into the vibrant world of Raspberry Iced Tea—a refreshing drink that captures the essence of summer in every sip. Imagine yourself lounging in the sun, a gentle breeze fanning your skin, and this lovely, fruity concoction in your hand. Whether you’re hosting a weekend brunch, enjoying a lazy afternoon, or gearing up for a cookout with friends, this iced tea promises to bring joy and refreshment.
You may be wondering why I’m so passionate about Raspberry Iced Tea. Well, it’s not just about the delightful taste; it’s about the memories and the connection it fosters. I remember the first time I sipped this sweet elixir at a summer picnic with my family. My mom used to brew her iced tea on the stove, and we would pop fresh raspberries in just before serving. It was a simple ritual, but it created an atmosphere of warmth, laughter, and love. Those little moments around the table—sharing stories and enjoying homemade treats—are what truly make the experience special.
So let’s get started! This recipe is not only delicious but also easy and fun to make. You don’t need to be a professional chef or have a ton of time on your hands; you just need a little enthusiasm and a few basic ingredients. Ready to create some delicious memories? Let’s jump into the details!
Ingredients
- Black Tea Bags (4-5): Use your favorite brand for this base. If you don’t like black tea, green tea works beautifully too. Adjust the quantity depending on how strong you like your tea!
- Fresh Raspberries (1 cup): Nothing beats fresh raspberries for flavor. If they’re out of season, frozen raspberries will do just fine—just make sure to thaw them before adding.
- Water (4 cups): Filtered water is always the best choice for clarity and taste. You can also experiment by using sparkling water for a fizzy twist!
- Sugar (or Honey) (½ cup): This sweetener balances the tartness of the raspberries. Feel free to adjust it to your liking, or use a sugar substitute for a healthier option.
- Lemon Juice (2 tablespoons): Fresh lemon juice enhances the flavor profile. If you’re in a pinch, bottled lemon juice can work, but fresh is always best.
- Mint Leaves (for garnish): These add an aromatic touch to your drink. You can also muddle a few leaves in the pitcher for an extra minty kick.
Step-by-Step Instructions
-
Prepare the Tea:
- In a saucepan, bring 4 cups of water to a boil. Once boiling, remove it from the heat and add in your black tea bags. Let them steep for about 5-7 minutes, depending on how strong you like your tea.
- Chef’s Tip: If you’re using green tea, steep it for only 3-5 minutes to avoid bitterness.
-
Sweeten the Tea:
- After steeping, remove the tea bags and add your sugar (or honey). Stir until completely dissolved. If you prefer less sweetness, start with half the amount and adjust according to taste.
- Hearty Note: Remember, you can always add more sugar later, but it’s tricky to take it out once it’s in!
-
Incorporate the Raspberries:
- While the tea is still warm, add in the fresh raspberries. For an extra boost of flavor, lightly muddle them with a spoon to release their juices.
- Chef Hack: If you want a brighter red color, blend the raspberries and strain them before adding to the tea.
-
Cool It Down:
- Transfer the tea mixture to a pitcher and refrigerate it until chilled—about 1-2 hours should do the trick. Don’t rush this step; the chilling enhances the flavors.
- Insight: You can also pour the warm tea over ice if you’re in a hurry, though it may dilute the flavors a bit!
-
Add Lemon Juice:
- Once chilled, stir in the fresh lemon juice. Taste and adjust—if you fancy a more fruity note, add more raspberries!
- Flavor Bomb: Feel free to add a pinch of lemon zest for an extra punch of citrusy aroma.
-
Serve:
- Pour the Raspberry Iced Tea over ice and garnish with mint leaves. For an added touch, drop in a few whole raspberries.
- Cheers! Enjoy your refreshing creation!
Serving Suggestions
When it comes to serving your Raspberry Iced Tea, presentation matters! Use clear glassware to showcase the beautiful ruby color of your drink. You can even rim the glasses with sugar for a fun twist or add lemon slices for a pop of color. Pair it with your favorite summer snacks like grilled chicken, fresh fruit platters, or a light salad to create a lovely afternoon gathering.
Recipe Variations
- Herbal Twist: Replace black tea with herbal tea for a caffeine-free version. Mint or chamomile would pair beautifully with raspberries.
- Berry Medley: Mix in a variety of berries, like strawberries or blueberries, for a splash of different flavors.
- Peachy Iced Tea: Swap raspberries for fresh peaches—talk about a summer dream!
- Sparkling Raspberry Iced Tea: Add tonic or soda water instead of plain water for a refreshing fizz.
- Sweetened with Agave: Use agave syrup instead of sugar for a different sweetness that complements the raspberries nicely.
Chef’s Notes
Raspberry Iced Tea has come a long way since my mom’s simple version. Over the years, I’ve experimented with various flavors and garnishes, and I love how versatile it can be. In fact, I once threw a little summer bash and set up a DIY iced tea bar where guests could mix and match different flavors—such a hit! The memories created around that table still warm my heart, much like this iced tea does on a hot day.
FAQs and Troubleshooting
1. What if my tea is too sweet?
If you accidentally added too much sugar, dilute it with more water or tea. Adding more raspberries can also help balance the sweetness!
2. How can I make this recipe ahead of time?
You can make Raspberry Iced Tea a day in advance and store it in the refrigerator. It tastes even better the next day as the flavors meld together.
3. What can I do with leftover tea?
Leftover tea can be frozen into ice cubes to use in future drinks or smoothies. You can also turn it into a flavorful marinade for meats!
4. How do I get rid of bitterness?
If your tea becomes bitter, avoid steeping too long or using overly hot water. Adding a splash of lemon juice can also help cut the bitterness.
Nutritional Info
While specific nutritional information can vary, this Raspberry Iced Tea recipe is generally low in calories if you use less sugar. Each serving (8 oz) should be around 50-100 calories, depending on your sweetener choices. Plus, it’s rich in antioxidants from the tea and raspberries!
So there you have it! A delightful, refreshing Raspberry Iced Tea recipe that’s bound to become a staple in your summer beverage rotation. Don’t forget to share your creations with friends and family; after all, the best memories are made over good food and drinks. Happy sipping, everyone!
Print
Refreshing Raspberry Iced Tea
- Total Time: 120 minutes
- Yield: 4 servings
- Diet: Vegetarian
Description
A delightful, fruity Raspberry Iced Tea perfect for summer gatherings, rich in flavor and memories.
Ingredients
- Black Tea Bags (4-5)
- Fresh Raspberries (1 cup)
- Water (4 cups)
- Sugar (or Honey) (½ cup)
- Lemon Juice (2 tablespoons)
- Mint Leaves (for garnish)
Instructions
- Prepare the Tea: In a saucepan, bring 4 cups of water to a boil. Once boiling, remove it from the heat and add in your black tea bags. Let them steep for about 5-7 minutes.
- Sweeten the Tea: After steeping, remove the tea bags and add your sugar (or honey). Stir until completely dissolved.
- Incorporate the Raspberries: While the tea is still warm, add in the fresh raspberries. Lightly muddle them with a spoon to release their juices.
- Cool It Down: Transfer the tea mixture to a pitcher and refrigerate it until chilled—about 60-120 minutes.
- Add Lemon Juice: Once chilled, stir in the fresh lemon juice. Taste and adjust.
- Serve: Pour the Raspberry Iced Tea over ice and garnish with mint leaves and a few whole raspberries. Cheers!
Notes
For added flair, rim glasses with sugar or add lemon slices. Serve with summer snacks like grilled chicken or fruit platters.
- Prep Time: 15 minutes
- Cook Time: 10 minutes
- Category: Beverage
- Method: Brewing
- Cuisine: American
Nutrition
- Serving Size: 1 cup
- Calories: 75
- Sugar: 12g
- Sodium: 10mg
- Fat: 0g
- Saturated Fat: 0g
- Unsaturated Fat: 0g
- Trans Fat: 0g
- Carbohydrates: 19g
- Fiber: 1g
- Protein: 0g
- Cholesterol: 0mg
Keywords: Raspberry Iced Tea, Summer Beverage, Refreshing Drink
Minute Sunny Nectarine Smoothie for Busy Mornings
Embrace Summer with a Sunny Nectarine Smoothie
Welcome to my kitchen! Today, I’m all about celebrating the sunshine—both outside and in a glass. If you’re like me, summertime is a golden opportunity to enjoy fresh fruits and vibrant flavors. Enter the Sunny Nectarine Smoothie, a refreshing blend that captures the essence of sun-soaked days and lazy afternoons. This smoothie is not just a treat for your taste buds; it’s a bright and cheerful addition to your morning routine, afternoon pick-me-up, or even a post-workout refresher.
Nectarines are one of those delightful fruits that feel almost like a celebration of summertime. Their sweet, juicy flesh and delicate fragrance bring back memories of summer picnics and lazy days spent in the sun, and they’re packed with vitamins and nutrients, making them the perfect smoothie star. Picture this: A sunny kitchen filled with laughter, the scent of ripe nectarines wafting through the air while you whip together a luscious drink that you can share with friends or savor solo. Sounds blissful, right?
In this blog post, I’ll guide you through making a Sunny Nectarine Smoothie from scratch—a recipe so easy and delicious that even the most novice cook can impress their friends and family. I’ll share a personal story that connects me deeply to this dish, tips to ensure your smoothie comes out perfectly, and ways you can customize it to suit your taste. Trust me, after you blend this up, you’ll find yourself dreaming of summer long after it’s over!
So, grab your blender, and let’s get started on this delicious journey!
A Sweet Nostalgic Memory
When I was little, my grandmother’s backyard was my favorite playground. It was like an enchanted garden bursting with color, where she grew everything from juicy tomatoes to vibrant nectarines. One summer day, while exploring the treasure trove of fruits, I stumbled upon a hidden spot. Climbing the small tree, I found myself surrounded by ripe nectarines, glistening in the sunlight, waiting for someone to pick them. I remember the thrill of snatching a few and running inside to show my grandma.
She would often make this delightful nectarine dessert that we devoured in the shade of that tree. But one particularly warm afternoon, she blended some nectarines with yogurt and a splash of orange juice, creating a refreshing treat she called "nectarine sunshine." That was my first-ever smoothie experience, and I was hooked!
I love to honor that memory every time I blend up a Sunny Nectarine Smoothie. It brings me back to that magical summer, a reminder of how food can create lasting connections and joyful moments. This recipe is more than just a drink; it’s a comforting nod to my childhood, embodying warmth, flavor, and a sprinkle of nostalgia.
Ingredients
Here’s what you’ll need to make a delicious Sunny Nectarine Smoothie. Each ingredient plays an important role in flavor and texture, so let’s dive in:
-
2 ripe nectarines:
Sweet, juicy nectarines are the stars of our smoothie! Look for ones that give slightly when pressed for maximum ripeness. If nectarines aren’t available, peaches can be a great substitute, offering a similar sweetness. -
1 banana:
The banana adds creaminess and natural sweetness. If you prefer a low-sugar option, consider using half a banana or substituting it with avocado for a silky texture without the sweetness. -
1 cup of Greek yogurt or non-dairy yogurt:
This adds a wonderful creaminess and a protein boost. Feel free to swap it with your favorite yogurt style—dairy-free, coconut, or almond-based yogurts work well too! -
1 cup of orange juice:
Freshly squeezed orange juice is best for vibrant flavor, but you can use store-bought varieties. For a twist, try pineapple juice or coconut water for an added tropical flair. -
1 tablespoon of honey or maple syrup (optional):
Depending on your taste preference, you can add a splash of honey or maple syrup for extra sweetness. If you’re aiming for a vegan option, go with agave syrup or simply omit it if you love the natural sweetness of the fruits. -
1 cup of ice:
Ice helps create that frosty, refreshing smoothie texture. Need a creamier blend? Substitute half of the ice with frozen banana slices instead!
Step-by-Step Instructions
Now that we have our ingredients ready, let’s dive into the preparation! I’ll guide you through each step, sprinkling in some handy tips along the way.
-
Prep Your Ingredients:
Start by thoroughly washing the nectarines—they’re often exposed to soil, so a good rinse makes them nice and clean. After washing, slice the nectarines in half, remove the pit, and chop them into chunks. If you’re using peaches instead, follow the same process. Peel the banana and set aside. -
Add the Fruit:
Toss the nectarines, banana, and one cup of yogurt into your blender. As you add them, take a moment to admire the beautiful colors—the vibrant orange and yellow will instantly uplift your mood! -
Pour in the Juice:
Next, add the cup of bright orange juice to the blender. If you’re using freshly squeezed juice, it’s worth the extra effort. The zestiness of fresh juice elevates the flavors remarkably! -
Sweeten It Up:
If you’re using honey or maple syrup, now’s the time to drizzle it in! Adjust according to your taste. Pro tip: If you’re unsure how sweet your smoothie will be, start with a smaller amount of sweetener, and you can always add more later. -
Ice, Ice, Baby!:
Add the ice to the blender for that frosty, refreshing touch. For a creamier version, use frozen banana slices instead of ice. -
Blend Until Smooth:
Cover the blender and blend on high until the mixture is completely smooth and creamy—about 30-60 seconds. If your blender struggles, pause and scrape down the sides to incorporate everything. If the mixture seems too thick, add a splash of water or more juice to help it along. -
Taste & Adjust:
Take a quick taste of your smoothie. If it needs a little more sweetness, feel free to blend in a tad more honey. If you crave more tang, add another splash of orange juice. -
Serve Immediately:
Once you’re satisfied with the flavor and texture, pour the smoothie into your favorite glass or bowl. The vibrant colors are sure to brighten your day!
Serving Suggestions
To make your Sunny Nectarine Smoothie even more delightful, consider garnishing with a sprig of fresh mint or a sprinkle of granola on top. You can also add a thin slice of nectarine for that extra touch of elegance. If you’re feeling adventurous, serve it in a bowl topped with nuts, seeds, and fresh berries for a smoothie bowl vibe!
Recipe Variations
Love to mix things up? Here are a few creative twists you can try with this Sunny Nectarine Smoothie:
-
Tropical Twist: Add a handful of fresh spinach and some frozen pineapple for a tropical vibe that’s as delicious as it is healthy.
-
Nutty Flavor: Add a tablespoon of almond butter or peanut butter for a creamy texture and an extra protein kick.
-
Smoothie Bowl: For a thicker consistency, reduce the juice or yogurt slightly, then pour into a bowl and top with sliced fruits, granola, and coconut flakes.
-
Spice It Up: A sprinkle of ground ginger or cinnamon can bring a warm, spicy note that pairs beautifully with the fruit flavors.
-
Chia Boost: Add a tablespoon of chia seeds for added fiber and omega-3s—a great nutritional boost!
Chef’s Notes
Isn’t it funny how recipes evolve over time? My Sunny Nectarine Smoothie has seen several iterations in my kitchen. Originally, I used to add a scoop of protein powder, but I found that the fruit and yogurt combo was already packed with enough goodness. Over time, I also discovered that experimenting with different fruits and spices keeps the recipe fresh and exciting. Sometimes I throw in a few blueberries or a twist of fresh lime for a zesty kick!
I remember one day hosting a brunch for friends; I decided to serve this smoothie along with homemade muffins and a colorful fruit platter. Everyone loved it, and we ended up creating a smoothie bar where everyone customized their blends. Food has a magical way of bringing people together, don’t you think?
FAQs and Troubleshooting
Here are some common questions you might have while making your Sunny Nectarine Smoothie:
1. What should I do if my smoothie is too thick?
If your smoothie turns out thicker than desired, simply add a splash of juice or water and blend again until it reaches your desired consistency.
2. Can I use frozen nectarines?
Absolutely! Frozen nectarines can work perfectly; they’ll make your smoothie extra cold and refreshing. Just skip the ice, as the frozen fruit will provide enough chill.
3. How can I make it vegan?
To make this smoothie vegan, simply use plant-based yogurt and choose agave syrup or leave out the sweetener altogether if the fruits provide enough sweetness for your taste!
4. What if I don’t like yogurt?
No worries! You can replace yogurt with silken tofu for a similar creaminess or opt for plant-based milk, like almond or oat milk, for a lighter consistency.
Nutritional Info
While I always encourage enjoying food in moderation, it’s nice to be aware of what you’re consuming. This Sunny Nectarine Smoothie typically includes:
- Calories: ~250 per serving (depending on added ingredients and sweeteners)
- Protein: ~10g (if using Greek yogurt)
- Fiber: ~4g
- Vitamin C: High, thanks to fresh fruits and orange juice
Smoothies can be a nutritious way to start your day or refuel in the afternoon. As always, customize based on your dietary needs!
There you have it—a delightfully sunny treat that’s not just refreshing but also a trip down memory lane! I hope this Sunny Nectarine Smoothie inspires you in the kitchen. After all, cooking should always be about joy, connection, and delighting in the flavors of the season. Happy blending!
Print
Sunny Nectarine Smoothie
- Total Time: 10 minutes
- Yield: 2 servings 1x
- Diet: Vegan
Description
A refreshing blend of ripe nectarines and yogurt that captures the essence of summer.
Ingredients
- 2 ripe nectarines
- 1 banana
- 1 cup of Greek yogurt or non-dairy yogurt
- 1 cup of orange juice
- 1 tablespoon of honey or maple syrup (optional)
- 1 cup of ice
Instructions
- Prep your ingredients by washing the nectarines and slicing them.
- Add the nectarines, banana, and yogurt into the blender.
- Pour in the orange juice.
- Sweeten it up with honey or maple syrup if desired.
- Add the ice to your blender.
- Blend until smooth and creamy.
- Taste and adjust sweetness if needed.
- Serve immediately in your favorite glass or bowl.
Notes
Customize by adding fresh mint for garnish or replacing part of the ice with frozen fruit for a creamier texture.
- Prep Time: 10 minutes
- Cook Time: 0 minutes
- Category: Beverage
- Method: Blending
- Cuisine: American
Nutrition
- Serving Size: 1 serving
- Calories: 250
- Sugar: 20g
- Sodium: 50mg
- Fat: 4g
- Saturated Fat: 2g
- Unsaturated Fat: 2g
- Trans Fat: 0g
- Carbohydrates: 45g
- Fiber: 4g
- Protein: 10g
- Cholesterol: 5mg
Keywords: nectarine smoothie, summer drink, healthy smoothie, refreshing smoothie, vegan smoothie

Refreshing Orange Creamsicle Smoothie for Summer
Refreshing Orange Creamsicle Smoothie for Summer
Welcome to my kitchen! I’m thrilled to share one of my absolute favorite summer recipes with you: the Refreshing Orange Creamsicle Smoothie. Picture this: it’s a hot, sun-soaked day, and as you sip on this dreamy, creamy smoothie, you’re transported right back to those carefree childhood afternoons when life was all about ice cream trucks and warm sunshine. This smoothie is not just a drink; it’s a nostalgic trip down memory lane, packed with vibrant flavors and the promise of a fun summer day!
Whether you’re soaking up the sun, unwinding by the pool, or looking for a quick breakfast treat, this Orange Creamsicle Smoothie is as refreshing as a cool breeze! It’s a delightful mashup of sweet, juicy oranges and rich, creamy yogurt, giving you the perfect balance of health and indulgence. It’s quick to whip up, and you probably have most of the ingredients lying around. So slip on your favorite apron, and let’s stir up some sunshine together!
A Sweet Memory
Let me take you back to my childhood—a time filled with the innocent excitement of summer breaks. I vividly remember running into the living room, my cheeks flushed from playing outside, when I caught that famous jingle of the ice cream truck ringing in the air. That sound was pure magic! When I finally made my way to the truck, my heart raced as I scanned the menu—my eyes landing on the iconic orange creamsicle.
Oh, the taste! The sweet and tangy orange flavor combined with that silky vanilla cream took me to cloud nine. It felt like pure joy in every single bite. Years later, while experimenting in my kitchen, I decided to recreate that nostalgic flavor for a healthier twist. What emerged was this Refreshing Orange Creamsicle Smoothie. It’s a tribute to those sunny days of my youth—a vibrant drink that brings joy and brings back memories every time I sip it.
Ingredients
Now, let’s assemble the ingredients! This smoothie is not only delicious but also packed with nutrients. Here’s what you’ll need:
-
2 large oranges
Sweet, juicy oranges are the star here! Look for ones that feel heavy for their size and have smooth skin. If you’re in a pinch, feel free to swap these with orange juice (about 1 cup), but fresh is always best! -
1 banana
A medium-sized ripe banana adds natural sweetness and creaminess. If bananas aren’t your thing, a handful of frozen mango or a scoop of vanilla Greek yogurt can work wonders too. -
1 cup vanilla yogurt
This is where you get that dreamy, creamy texture. Greek yogurt is my favorite for added protein, but plain yogurt or a dairy-free version like coconut yogurt will also do the trick. -
1 tablespoon honey (optional)
If you like things a little sweeter, drizzle in some honey. Adjust it according to your taste. Maple syrup or agave syrup can be great substitutes! -
1 cup ice cubes
To give your smoothie that frosty texture, ice cubes are essential. If you prefer, you can freeze the oranges ahead of time for an extra chill. -
Zest of 1 orange
For a burst of flavor, don’t skip the zest! It brightens the smoothie and adds an aromatic touch. If you don’t have a zester, a grater can work, but be careful not to grate any of the white pith, which is bitter. -
A splash of almond milk (optional)
If you want a thinner consistency, add a splash of almond milk or any milk of your choice. Just be mindful of how much you’re adding; you want your smoothie thick and luscious!
Step-by-Step Instructions
Now that we have our ingredients, let’s dive into the fun part—making the smoothie! Don’t worry; it’s super easy.
-
Prep the oranges: Start by peeling the oranges. Carefully remove the skin and as much of the white pith as you can without losing too much fruit. This makes for a sweeter and smoother smoothie. Also, remove any seeds you come across!
-
Gather and blend: Toss the peeled oranges into your blender along with the banana, vanilla yogurt, and honey if you’re using it. Don’t forget the orange zest—it’s such a game-changer!
-
Ice, ice, baby: Add that crucial cup of ice cubes to the mix. If it helps, you can add a little at a time and adjust based on your desired texture.
-
Blend it up: Secure the lid on the blender and blend until your mixture is smooth and creamy, usually about 30–45 seconds. You might need to stop and scrape down the sides to ensure everything incorporates beautifully.
-
Check the consistency: Give your smoothie a quick taste test! If it’s too thick, add a splash of almond milk and blend again. If it’s not sweet enough, adjust with more honey or perhaps throw in another banana for good measure.
-
Serve and enjoy: Pour the smoothie into tall glasses, and just like that, you’ve created a refreshing orange creamsicle in liquid form! Feel free to garnish with a sprinkle of extra zest or a slice of orange on the rim for that extra touch.
Serving Suggestions
To serve this refreshing smoothie, I love sticking a colorful straw in each glass. It makes sipping so much more fun! You can also rim the glasses with sugar for a fancy touch—just dampen the rim with a little orange juice and dip it in sugar. Plus, pair this smoothie with a light salad or some crunchy granola to elevate your meal.
Recipe Variations
Here are some exciting twists you can try with this Orange Creamsicle Smoothie:
- Tropical Twist: Add a scoop of pineapple for a tropical vibe that screams beach vacation!
- Berry Blast: Toss in a handful of mixed berries like strawberries or blueberries for a beautiful color and added antioxidants.
- Nutty Delight: Blend in a tablespoon of almond or cashew butter for a delightful nutty flavor and a boost of creaminess!
- Vegan Option: Substitute the yogurt with plant-based yogurt or silken tofu for a vegan-friendly version that still packs a creamy punch.
Chef’s Notes
As a self-proclaimed smoothie enthusiast, I’ve whipped up countless variations of this Orange Creamsicle Smoothie. I once experimented with adding ginger to give it a spicy kick, and let me tell you, it was a fun detour! Each time I make it, I find new little tweaks to keep things interesting. It’s incredible how a simple recipe can evolve based on what you have on hand or what mood you’re in. There’s a certain joy in keeping it fresh and playful in the kitchen!
As you dive into the world of smoothies, remember that the best part is making it your own. Don’t be afraid to play around with flavors—your kitchen is your playground!
FAQs and Troubleshooting
1. Can I make this smoothie ahead of time?
Yes! You can prepare the orange and banana mixture and store it in airtight containers in the fridge for up to one day. However, the texture is best when freshly made.
2. My smoothie is too thick. What can I do?
No worries! Just add a splash of your favorite milk (dairy or plant-based), then continue blending until you reach your desired consistency.
3. What if I don’t have oranges?
You can definitely use other fruits! Try substituting with mandarins, tangerines, or even peach slices for a different twist.
4. Can I use frozen fruit?
Absolutely! Using frozen oranges and bananas can create an even thicker smoothie. Just skip the ice cubes or add them as needed.
Nutritional Info
While nutritional info can vary depending on exact ingredients used, here’s a rough estimate per serving (about 1 glass):
- Calories: ~220
- Protein: ~7g
- Fat: ~3g
- Carbohydrates: ~45g
- Fiber: ~4g
- Sugars: ~30g
This Orange Creamsicle Smoothie is not only a delicious treat but a great source of vitamins, minerals, and natural sugars. Perfect for those hot summer days or as a quick breakfast!
So, there you have it! Your very own refreshing Orange Creamsicle Smoothie. It’s a summery delight that’s simple, delicious, and full of nostalgia. Whether you drink it alone or share it with friends, it’s sure to bring smiles all around. Happy blending!
Print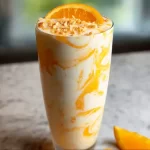
Refreshing Orange Creamsicle Smoothie
- Total Time: 10 minutes
- Yield: 2 servings 1x
- Diet: Vegetarian
Description
A delicious and nostalgic smoothie that combines sweet oranges and creamy yogurt, perfect for summer days.
Ingredients
- 2 large oranges
- 1 banana
- 1 cup vanilla yogurt
- 1 tablespoon honey (optional)
- 1 cup ice cubes
- Zest of 1 orange
- A splash of almond milk (optional)
Instructions
- Prep the oranges: Start by peeling the oranges and removing as much of the white pith as you can.
- Gather and blend: Toss the peeled oranges into your blender with the banana, vanilla yogurt, and honey if using.
- Add that crucial cup of ice cubes to the mix.
- Blend until your mixture is smooth and creamy, about 30–45 seconds.
- Check the consistency and adjust with almond milk or honey as needed.
- Serve the smoothie into tall glasses and garnish if desired.
Notes
You can rim the glasses with sugar or serve with a crunchy granola for a delightful combo.
- Prep Time: 10 minutes
- Cook Time: 0 minutes
- Category: Beverage
- Method: Blending
- Cuisine: American
Nutrition
- Serving Size: 1 serving
- Calories: 220
- Sugar: 30g
- Sodium: 50mg
- Fat: 3g
- Saturated Fat: 1g
- Unsaturated Fat: 2g
- Trans Fat: 0g
- Carbohydrates: 45g
- Fiber: 4g
- Protein: 7g
- Cholesterol: 10mg
Keywords: smoothie, orange, refreshing, summer, healthy

Orange Creamsicle Smoothie
Orange Creamsicle Smoothie: A Refreshing Delight
Welcome to my kitchen, fellow food lovers! Today, I’m thrilled to share one of my absolute favorite recipes: the Orange Creamsicle Smoothie. If you’ve ever indulged in those delightful ice cream treats of your childhood, you know just how nostalgic and delicious they are. Imagine capturing that sweet, creamy goodness in a refreshing smoothie — perfect for breakfast, a midday snack, or even a light dessert on a hot day!
This smoothie brings together the tangy brightness of fresh oranges, the creamy richness of yogurt, and a hint of vanilla that transports you right back to lazy summer afternoons. It’s a drink filled with sunshine, joy, and all those feels that come with a classic creamsicle on a stick. Plus, it’s so easy and quick to whip up! Trust me, whether you’re cooking for yourself or whipping something special for friends and family, this smoothie will delight everyone.
How did I come to love this treat? It takes me straight back to summers spent at my grandmother’s house, where she would whip up wonderful concoctions with whatever fruits were fresh and in season. Nothing was quite as magical as the creamy orange swirls of the popsicles we’d share after a day in the sun, sticky fingers and all. It was more than just a snack; it was a moment of connection, laughter, and childhood bliss. That’s the spirit I want to bring into your kitchen today!
So, grab your blender and let’s get started on this dreamy Orange Creamsicle Smoothie!
Personal Story
Thinking back to those sun-soaked days, one memory shines brightly: the time I tried to recreate my grandmother’s creamsicle pops with my little cousins. We stumbled through the kitchen, splashing orange juice everywhere, giggling uncontrollably as we debated whether to add more vanilla or a touch of honey. The kitchen was a delightful mess, but eventually, we managed to create something that tasted just like summer — sweet and perfectly refreshing!
I still remember the looks on their faces when we took our first sip of our homemade mixture. The smiles lit up the room, and I knew then that food isn’t just about nourishing the body; it’s about creating moments of joy and connection. That’s what I hope to inspire in you as we make this smoothie together.
Ingredients
Gathering the right ingredients is essential for this Orange Creamsicle Smoothie. Here’s what you need:
-
Fresh Oranges (2 large)
The star of our smoothie! Use juicy, sweet oranges for the best flavor. If oranges aren’t in season, feel free to swap with clementines or mandarins for a similar taste. -
Vanilla Yogurt (1 cup)
This adds the creamy texture and that dreamy vanilla flavor. You can use regular, Greek, or even dairy-free yogurt, depending on your preference. -
Milk (1/2 cup)
This helps blend everything together smoothly. Almond milk or coconut milk can also be used for a lighter, dairy-free option. -
Honey or Maple Syrup (1-2 tablespoons)
Sweeten to taste! Honey gives a lovely floral note, while maple syrup provides a rich, earthy sweetness. -
Ice Cubes (1 cup)
Essential for that refreshing chill. You can also freeze some orange juice in ice cube trays for an extra flavorful touch. -
Optional: Vanilla Extract (1 teaspoon)
If you want an extra pop of vanilla, add a splash! It enhances the creamy flavor and ties everything together beautifully.
Step-by-Step Instructions
Now that we have our ingredients ready, let’s get down to the fun part: blending everything together!
-
Prep Your Oranges
Start by peeling your fresh oranges. Make sure to remove any pith (the white part) as it can add bitterness to your smoothie. This step is crucial, especially if you’re using particularly ribbed oranges. You want sweet and juicy, not bitter! -
Blend the Base
In your blender, combine the peeled oranges, vanilla yogurt, and milk. Start with a low setting to mix them gently. You want to ensure all the yogurt is getting blended in smoothly without flying everywhere! A few seconds on low will do the trick. -
Add Sweetness
Now it’s time to add your honey (or maple syrup) — the sweet touch that really takes this smoothie to the next level. Remember, the amount you add will depend on how sweet your oranges are. If you’re unsure, start with one tablespoon, taste, then add more if needed. -
Ice, Ice Baby
Toss in the cup of ice cubes. If you’re using frozen orange juice cubes, this is where they’ll come in handy! Blend until your mixture is completely smooth and creamy. A minute should suffice, but take a peek to ensure it’s all well-blended. -
Final Touch
If you’re going for the optional vanilla extract, now’s the time to sprinkle it in! Give it one last spin in the blender to incorporate. Pour yourself a glass and get ready for a sip of pure nostalgia!
Serving Suggestions
When it comes to serving your Orange Creamsicle Smoothie, the options are endless! For a beautiful presentation, serve it in a tall glass or a fun Mason jar. Garnish with a slice of orange on the rim or a sprinkle of crushed graham crackers on top for that classic creamsicle vibe. You could even throw in a fun straw to complete the look!
This smoothie can be enjoyed right after blending, or you can chill it in the fridge for a bit if you’re prepping it ahead of time. Either way, it’s bound to be a hit at the breakfast table or during a cozy snack time!
Recipe Variations
Want to switch things up a bit? Here are some creative twists you can try:
-
Berry Blast: Add a handful of strawberries or blueberries for a fruity twist and beautiful color.
-
Tropical Vibe: Incorporate some pineapple or mango chunks for a tropical creamsicle experience.
-
Protein Boost: Stir in a scoop of your favorite protein powder for an added nutritional punch, perfect for breakfast!
-
Green Goodness: Sneak in a handful of spinach or kale. Trust me; you won’t even taste it but will gain all those extra nutrients.
-
Nutty Touch: Blend in a tablespoon of almond butter for a nutty flavor and extra creaminess.
Chef’s Notes
This Orange Creamsicle Smoothie has evolved over the years, and I love playing with the flavors based on what’s available. Sometimes I’ll add a tablespoon of chia seeds for a little extra texture and health benefits! As for kitchen stories, I can still hear my cousin’s laughter as we battled over the blender lid, ensuring nothing would escape. Kitchen disasters make for the best stories, don’t you think?
I’ve realized that this smoothie not only satisfies the taste buds but also brings people together. Whether it’s on a cozy winter morning or a bright sunny day, sharing this drink with loved ones is always a treat.
FAQs and Troubleshooting
1. Can I use frozen oranges?
Absolutely! Frozen oranges work just as well. They give your smoothie that extra chill factor while adding a slushy texture. Just make sure to adjust the amount of ice accordingly.
2. What if my smoothie is too thick?
No worries! Simply add a splash more milk to loosen it up, and blend again until you reach your desired thickness.
3. How long will this smoothie keep in the fridge?
This is best enjoyed fresh, but you can store it in the fridge for up to 24 hours. Just give it a good stir before consuming, as it may separate.
4. Can I make this smoothie vegan?
Of course! Just use a plant-based yogurt and milk alternative like almond, oat, or coconut milk. The honey can be swapped for maple syrup.
Nutritional Info
While the nutritional info can vary based on your choice of ingredients, a standard Orange Creamsicle Smoothie (with the ingredients listed) has approximately:
- Calories: 250
- Protein: 6g
- Fat: 4g
- Carbohydrates: 47g
- Fiber: 3g
- Sugars: 30g
Remember, this is just an estimate and might change based on substitutions and specific brands used.
There you have it, my dear friends! A delightful Orange Creamsicle Smoothie that’s not just a treat for your taste buds but a celebration of memories, joy, and love in the kitchen. As you blend up this refreshing delight, may it bring back sweet moments from your own childhood and inspire many more in your kitchen endeavors. So, pour yourself a glass, sit back, and enjoy every sip! Happy blending!
Print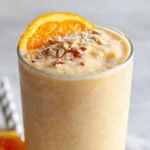
Orange Creamsicle Smoothie
- Total Time: 10 minutes
- Yield: 2 servings
- Diet: Vegetarian
Description
A nostalgic and refreshing smoothie that combines the tangy brightness of fresh oranges with creamy yogurt and a hint of vanilla.
Ingredients
- Fresh Oranges (2 large)
- Vanilla Yogurt (1 cup)
- Milk (1/2 cup)
- Honey or Maple Syrup (1-2 tablespoons)
- Ice Cubes (1 cup)
- Optional: Vanilla Extract (1 teaspoon)
Instructions
- Prep your oranges by peeling them and removing any pith.
- Blend the peeled oranges, vanilla yogurt, and milk in a blender on low until mixed.
- Add honey or maple syrup, adjusting sweetness to taste.
- Toss in the ice cubes and blend until smooth.
- If using, add vanilla extract and blend one last time.
Notes
Serve in a tall glass or Mason jar garnished with an orange slice or crushed graham crackers for a fun presentation.
- Prep Time: 10 minutes
- Cook Time: 0 minutes
- Category: Drink
- Method: Blending
- Cuisine: American
Nutrition
- Serving Size: 1 serving
- Calories: 250
- Sugar: 30g
- Sodium: 100mg
- Fat: 4g
- Saturated Fat: 2g
- Unsaturated Fat: 2g
- Trans Fat: 0g
- Carbohydrates: 47g
- Fiber: 3g
- Protein: 6g
- Cholesterol: 10mg
Keywords: smoothie, orange, creamy, refreshing, breakfast, healthy
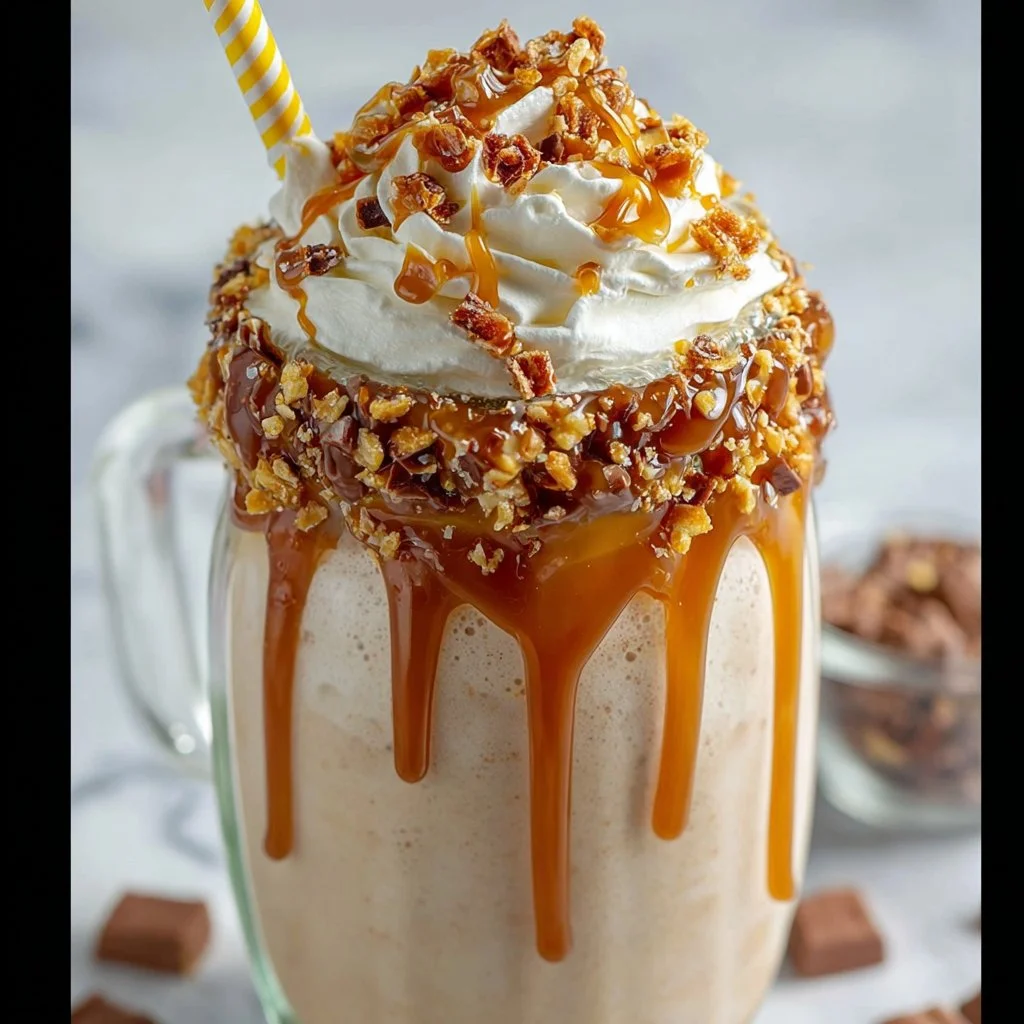
Salted Caramel Milkshake
The Ultimate Salted Caramel Milkshake Recipe: A Sweet Journey Through Flavor
Welcome back to my cozy kitchen, friends! Today, I’m beyond excited to take you on a delicious journey through one of my all-time favorite treats: the salted caramel milkshake. Picture this: a creamy, dreamy concoction that’s rich with the goodness of homemade salted caramel, perfectly blended with ice cream, and finished with whipped cream and a sprinkle of crunchy sea salt. Now tell me that doesn’t make your sweet tooth tingle!
Milkshakes have a special place in my heart. They remind me of lazy summer afternoons spent at the local diner, where the clinking of glasses and joyful chatter filled the air. As an enthusiastic home cook, there’s something magical about creating a dessert that instantly transports you back in time. The salted caramel milkshake, in particular, combines the nostalgia of childhood with the sophisticated touch of salty sweetness, making it perfect for any occasion or just a little treat for yourself!
In this post, I’ll walk you through every step of crafting the ideal salted caramel milkshake, complete with my personal stories, tips, and tricks in the kitchen. Whether you’re looking to impress friends at a summer BBQ or indulge your cravings on a cozy night at home, you’re in for a deliciously smooth ride. So grab your apron and let’s get started on making this dreamy milkshake that will, without a doubt, bring a smile to your face!
Personal Story
Growing up, my family had a weekend tradition of going to this delightful little ice cream shop down the street. Every Saturday, without fail, we’d pile into the car and head there, excitement filling the air as we flipped through the vibrant menu filled with flavors, all promising instant joy in a cup. But there was one flavor that always won me over: the salted caramel. The blend of sweet and salty was something I looked forward to every week, a delicious little ritual that sparked laughter and shared stories.
Fast forward to today, and I can’t help but bring those sunny memories into my kitchen. The first time I attempted to recreate that unforgettable salted caramel milkshake at home, I felt a flutter of nostalgia. I whipped up a batch for my friends, and as we sipped our homemade creations, I was flooded with laughter and stories from yesteryears. That day, I realized that cooking is not just about ingredients but about emotions, memories, and shared experiences. That’s the beauty I want to share with you in this recipe!
Ingredients
Before we dive headfirst into this delightful experience, let’s gather our ingredients. Here’s what you’ll need for the ultimate salted caramel milkshake:
-
Ice Cream (4 cups): The foundation of any milkshake! Vanilla ice cream works beautifully here, but you could swap it with salted caramel ice cream for an extra flavor punch! If you’re looking for a healthier option, try using frozen yogurt or dairy-free ice cream.
-
Milk (1 cup): Any milk will do! Whole milk adds creaminess, while almond or oat milk caters to dairy-free needs without sacrificing the flavor. Adjust the quantity based on how thick you like your shakes.
-
Homemade Salted Caramel Sauce (1/2 cup): This is the star of the show! You can either make it from scratch following my easy recipe below or grab a jar at the store if you’re in a pinch. Just be sure to look for one with high-quality ingredients!
-
Whipped Cream (for topping): Who said you can’t go extra? A generous dollop of whipped cream adds sweetness and beauty. Use store-bought or whip up your own fresh cream for that added homemade touch.
-
Sea Salt (a pinch for garnish): The key to bringing out that sweet caramel flavor! Use flaky sea salt for the best crunch and flavor. A sprinkle on top before serving elevates your milkshake to new heights.
-
Optional Add-Ins: Feel free to throw in chocolate chips, crushed pretzels, or even a shot of espresso to amp up the flavor and texture!
Step-by-Step Instructions
So, let’s jump into making this delightful salted caramel milkshake! Follow these steps, and your taste buds will be thanking you.
-
Make the Salted Caramel Sauce: If you’re going for homemade, in a medium saucepan over medium heat, melt 1 cup of granulated sugar, stirring constantly until it turns golden brown. Soon after reaching the desired color, carefully add 1/2 cup of heavy cream (watch out for splattering!). Stir in a pinch of salt and 2 tablespoons of butter until smooth. Let it cool. (Tip: Make extra to drizzle on other desserts!)
-
Blend the Ingredients: In a blender, combine the vanilla ice cream, milk, and 1/2 cup of the cooled salted caramel sauce. (Hint: Start with less milk if you want a thicker shake.) Blend on high until creamy and well combined, stopping to scrape down the sides if necessary. You should be left with a luscious mixture that makes your heart sing!
-
Taste Test: Here comes the fun part! Grab a spoon and taste. Adjust the caramel sauce to suit your sweetness preference. Want it a little sweeter? Add more caramel. Want more saltiness? A tiny pinch of sea salt goes a long way!
-
Prepare to Serve: Grab your favorite glasses (the more whimsical, the better!). Drizzle some of the leftover salted caramel sauce down the insides of each glass so that it coats the sides. This adds visual flair and a flavor bonus with every sip!
-
Pour & Assemble: Pour the blended milkshake into the prepared glasses, filling them about three-quarters full to make room for the whipped cream. Don’t hold back; you deserve this delicious sweet treat!
-
Top It Off: Finish off that lovely milkshake with a generous mountain of whipped cream. Top it off with an extra drizzle of salted caramel and a sprinkle of sea salt. Because, let’s be honest, you can never have too much caramel!
-
Enjoy Every Sip: Grab a straw or a long spoon and dive in with delight. Don’t forget to share (if you want, that is)!
Serving Suggestions
When it comes to serving, presentation is key! I love to place my salted caramel milkshake in tall, frosty glasses to enhance that nostalgic diner vibe. Drizzle extra salted caramel inside each glass before pouring the shake in for a stunning effect. You can accompany this sweet treat with a plate of chocolate chip cookies or mini brownies for a mini dessert spread that your friends (and yourself!) will adore.
Recipe Variations
Every good recipe has room for creativity, and this salted caramel milkshake is no exception! Here are a few fun variations to consider:
-
Nutty Delight: Add a tablespoon of nut butter—like almond or peanut butter—into the mix for a nutty twist that goes beautifully with the caramel flavor.
-
Chocolate Lovers: Incorporate chocolate ice cream instead of vanilla for a decadent chocolate salted caramel shake. You could even blend in some cocoa powder!
-
Dairy-Free Option: Use coconut milk ice cream and almond milk for a smooth, dairy-free alternative. You won’t miss the dairy one bit!
-
Coffee Caramel: For those who love coffee, add a shot of espresso or cold brew to the shake for a sweet pick-me-up!
-
Pumpkin Spice Bliss: Around fall, mix in some pumpkin puree and pumpkin spice for a seasonal twist that’s perfect for cozy vibes.
Chef’s Notes
The salted caramel milkshake has evolved in my kitchen over the years. There was a time I thought I’d never get the caramel sauce right, often ending up with a burnt mess. After a few attempts, I realized that patience is crucial—and so is the alarm on my timer! Now, it’s a go-to recipe that never fails to impress. Plus, I love how it can adapt to the seasons. It feels so fulfilling to share this with friends, reminiscing about simpler times while creating new memories. So, grab your loved ones, and let’s shake up some fun in the kitchen!
FAQs and Troubleshooting
1. My caramel sauce didn’t turn out right. What did I do wrong?
Common issues include not stirring the sugar constantly or cooking it too long. Keep an eye on the color! When it turns amber, it’s ready. If it’s grainy, you may have cooked it too long or added the cream too quickly. Don’t worry, practice makes perfect!
2. Can I use store-bought salted caramel sauce?
Absolutely! While homemade has its charm, store-bought options can save you a lot of time. Just be sure to choose one made with quality ingredients!
3. How can I make this milkshake thicker?
To achieve a thicker consistency, reduce the amount of milk or add more ice cream. You could also throw in some frozen bananas or extra ice to help shape it up.
4. Can I make this milkshake ahead of time?
While best enjoyed fresh, you can blend the ingredients and store them in the refrigerator for a few hours. Just give it a good stir before serving, as it’ll thicken up in the fridge.
Nutritional Info (Optional)
Calories: Approximately 350-450 calories per serving (depending on specific ingredients used).
Fat: 20g
Carbohydrates: 50g
Protein: 8g
Sodium: 150mg
And there you have it, friends! Your very own salted caramel milkshake recipe that’s bound to add a sprinkle of joy to your day. I hope you enjoy making this indulgent treat as much as I do. I can’t wait to hear about your experiences in the kitchen! Happy blending!
Print
The Ultimate Salted Caramel Milkshake
- Total Time: 30 minutes
- Yield: 4 servings 1x
- Diet: Vegetarian
Description
A creamy, dreamy salted caramel milkshake with homemade salted caramel, rich ice cream, and whipped cream.
Ingredients
- 4 cups vanilla ice cream
- 1 cup milk
- 1/2 cup homemade salted caramel sauce
- Whipped cream (for topping)
- A pinch of sea salt (for garnish)
- Optional add-ins: chocolate chips, crushed pretzels, or a shot of espresso
Instructions
- Make the Salted Caramel Sauce: In a medium saucepan over medium heat, melt 1 cup of granulated sugar, stirring constantly until it turns golden brown. Add 1/2 cup of heavy cream carefully, then stir in a pinch of salt and 2 tablespoons of butter until smooth. Let it cool.
- Blend the Ingredients: In a blender, combine the vanilla ice cream, milk, and 1/2 cup of the cooled salted caramel sauce. Blend on high until creamy.
- Taste Test: Adjust the caramel sauce to suit your sweetness preference.
- Prepare to Serve: Drizzle some of the leftover salted caramel sauce down the insides of each glass.
- Pour & Assemble: Pour the blended milkshake into the prepared glasses.
- Top It Off: Finish with whipped cream, an extra drizzle of salted caramel, and a sprinkle of sea salt.
- Enjoy Every Sip: Dive in with delight.
Notes
Consider adding nut butter or using different ice cream flavors for variations.
- Prep Time: 15 minutes
- Cook Time: 15 minutes
- Category: Dessert
- Method: Blending
- Cuisine: American
Nutrition
- Serving Size: 1 serving
- Calories: 400
- Sugar: 40g
- Sodium: 150mg
- Fat: 20g
- Saturated Fat: 10g
- Unsaturated Fat: 8g
- Trans Fat: 0g
- Carbohydrates: 50g
- Fiber: 0g
- Protein: 8g
- Cholesterol: 50mg
Keywords: salted caramel, milkshake, dessert, sweet treat, nostalgia

Peanut Butter Cup Restore Smoothie: A Bold Blend to Welcome Summer
Peanut Butter Cup Restore Smoothie: A Bold Blend to Welcome Summer
Hey there, fellow foodies! ☀️ Summer is finally here, and that means it’s time to soak up the sun, dive into refreshing flavors, and celebrate everything fresh and vibrant! At the heart of my kitchen is the love for creating delicious recipes that not only taste incredible but also nourish the soul. Today, I’m thrilled to share with you one of my go-to summer delights—the Peanut Butter Cup Restore Smoothie. Trust me, if you’re someone who loves the rich, creamy goodness of peanut butter and the playful sweetness of chocolate, this smoothie is going to be your new best friend!
This isn’t just another smoothie recipe; it’s a celebration of bold flavors and nourishing ingredients that provide a delightful boost to start your day or refuel after a workout. Imagine sipping on a velvety blend of nutritious ingredients, each sip wrapping you in a comforting hug of flavors. Whether you’re lounging by the pool or running out the door in the morning, this smoothie is perfect for crafting those sun-soaked vibes.
Making this smoothie is quick and easy, so no need to stress about fancy techniques or lengthy prep times. With just a handful of wholesome ingredients, you’ll be blending up a delicious treat that’ll have you feeling refreshed and energized. And the best part? You can customize it to suit your cravings! So roll up those sleeves (or just put on that messy apron), and let’s dive into the fantastic world of smoothies!
Personal Story
Ah, the memories my kitchen holds! I’ll always cherish those hot summer afternoons spent sweltering in my childhood kitchen. The faint sounds of the ice cream truck ring in the background as my little brother and I wiped our hands on the nearest towel after finishing a game of tag. Our go-to after-school treat—homemade smoothies, of course! My mom inspired me back then with her endless creativity. She would whip up concoctions of whatever was in the fridge, making it a fun surprise every time. One day, I came home to a smoothie that combined peanut butter and chocolate. My taste buds danced as each sip was smooth and dreamy!
Ever since then, peanut butter and chocolate have been my ultimate comfort pairing, symbolizing warmth and love through the years. Fast forward to today, and I’ve developed my own take on this nostalgic treat. With a few more superfood additions, I’ve transformed it into the Peanut Butter Cup Restore Smoothie—a creation that not only honors my childhood memories but also fuels my summer adventures. Now it’s your turn to add your own twist to this classic delight!
Ingredients
-
Banana: The perfect base for any smoothie! Bananas bring natural sweetness and creaminess. Can’t find ripe bananas? No worries! Frozen bananas work wonders, too!
-
Peanut Butter: The star of the show! Choose your favorite natural peanut butter, whether it’s creamy or crunchy. Just keep an eye on added sugars; you want to keep it as wholesome as possible.
-
Cacao Powder: For that rich chocolatey flavor! Cacao is packed with antioxidants, making it a healthier alternative to regular cocoa powder. If you’re in a pinch, unsweetened cocoa powder will do just fine.
-
Almond Milk (or your favorite milk): A fantastic dairy-free option! The light and nutty flavor of almond milk complements the peanut butter perfectly. If you prefer cow’s milk or oat milk, feel free to swap them in!
-
Greek Yogurt (or dairy-free alternative): Adds a delightful creaminess and boosts the protein content. You can use dairy-free yogurt, like almond or coconut yogurt, if you want a vegan option.
-
Honey (or maple syrup): Sweeten things up! Honey gives a lovely floral note, while maple syrup brings its own unique flavor. You can adjust the sweetness based on your preference.
-
Chia Seeds: A sprinkle of these nutrient-packed seeds adds fiber and omega-3s! If chia isn’t your preference, flax seeds or hemp seeds are great substitutes.
-
Ice: To chill and thicken! A big handful makes this smoothie refreshing and perfect for those hot summer days.
Step-by-Step Instructions
-
Gather Your Ingredients: First things first, gather all your ingredients so you’re ready to blend away! I always find that having everything laid out makes the process smoother and more enjoyable. Plus, it saves you from frantic searches halfway through!
-
Prep the Banana: If you’re using a fresh banana, peel it and break it into chunks. If you happened to go the frozen route, just pop those babies in the blender as is! Bananas add natural sweetness and creaminess that is irresistible.
-
Add the Peanut Butter: Spoon in about 2 tablespoons of peanut butter into your blender. Just a heads up—if you’re using a thicker variety, you may want to let it sit at room temperature for a few minutes to help it mix easily.
-
Mix in the Cacao Powder: Time to add 1–2 tablespoons of cacao powder! Don’t be afraid to taste as you go. Remember, you control the flavor profile, so adjust as needed!
-
Pour in the Almond Milk: Add approximately 1 cup of almond milk for a balanced consistency. If you like it a little thinner, go ahead and add a splash more! This is where your preference shines through.
-
In with the Yogurt: Scoop in half a cup of Greek yogurt to create that rich texture. It makes this smoothie decadent, trust me! For a thicker smoothie, add a bit more yogurt!
-
Sweeten it Up: If you like your smoothie on the sweeter side, drizzle in 1–2 teaspoons of honey or maple syrup. Always taste-test before adding more; you want the sweetness to complement, not overwhelm!
-
Add Chia Seeds and Ice: Toss in a tablespoon of chia seeds and a generous cup of ice. The ice will keep this smoothie refreshing, while the chia seeds bring an added crunch as they soak in all the deliciousness.
-
Blend: Secure the lid on your blender, and blend until smooth. Depending on your blender’s power, this could take 30 seconds to a minute. If it’s struggling or too thick, add a splash more milk—and let the blending magic happen!
-
Taste and Adjust: Here’s the fun part! Give your smoothie a taste. Want it sweeter? Add more honey! Need chocolate? Mix in more cacao! Adjust until it’s the way you love it.
-
Serve and Enjoy: Pour into your favorite glass, maybe top with a sprinkle of cacao or some chopped peanuts, and dive in! You’re officially a smoothie master!
Serving Suggestions
For a delightful presentation, consider serving your Peanut Butter Cup Restore Smoothie in mason jars or your favorite clear glasses. Add a colorful straw and top with a dusting of cacao powder, a few chopped peanuts, or even a dollop of whipped cream for that cozy touch. If you’re feeling extra fancy, garnish with a few banana slices or fresh berries on the side. Enjoy every last sip as you soak in those summer vibes!
Recipe Variations
-
Add Greens: Want to sneak in some nutrients? Toss a handful of spinach or kale into the mix—you won’t even taste it!
-
Protein Boost: Add a scoop of protein powder for extra muscle support after a workout or to keep you full longer.
-
Nut Butter Switch-Up: Swap out peanut butter for almond butter or sunflower seed butter for a twist on flavors while keeping it nutty.
-
Frozen Fruits: Consider adding ½ cup of frozen berries (such as strawberries or blueberries) for a berry-infused smoothie bursting with fresh flavor.
-
A Dash of Spice: Add a pinch of cinnamon or vanilla extract for an extra layer of warmth and depth.
Chef’s Notes
As a food blogger and a home cook, I hold onto these little stories that make cooking so magical. This recipe has evolved through experimentation, bringing together flavors, textures, and health benefits, all while holding on to that nostalgic love for peanut butter and chocolate. The beauty of this smoothie? It’s versatile! Feel free to swap ingredients based on what you have on hand. My own daughter loves it with a sprinkle of protein powder, while my best friend can’t resist tossing in a handful of greens for extra goodness. No matter how you make it, the essence of comfort and nourishment remains!
FAQs and Troubleshooting
Q: What can I use instead of Greek yogurt?
A: You can use any type of yogurt, including dairy-free options like almond or coconut yogurt. Smoothies are flexible!
Q: My smoothie is too thick; what should I do?
A: If your smoothie is thicker than you’d like, simply add a splash of almond milk or water and blend again until you reach your desired consistency.
Q: Can I make this smoothie vegan?
A: Absolutely! Use plant-based yogurt, almond milk, and maple syrup instead of honey for a delicious vegan treat.
Q: Can I store leftovers?
A: It’s best to enjoy this smoothie fresh, but if you have leftovers, store in an airtight container in the fridge for up to 24 hours. Just give it a good shake before enjoying!
Now, you’re armed with all the details to make your very own Peanut Butter Cup Restore Smoothie. I can’t wait for you to create it in your kitchen! Remember, cooking is all about having fun, being creative, and sharing love through food! Cheers to summertime sipping! 🍹🥜❤️
Print
Peanut Butter Cup Restore Smoothie
- Total Time: 10 minutes
- Yield: 2 servings 1x
- Diet: Vegetarian
Description
A rich and creamy smoothie combining peanut butter, chocolate, and nutritious ingredients for a refreshing summer treat.
Ingredients
- 1 Banana (fresh or frozen)
- 2 tablespoons Peanut Butter
- 1–2 tablespoons Cacao Powder
- 1 cup Almond Milk (or your favorite milk)
- 1/2 cup Greek Yogurt (or dairy-free alternative)
- 1–2 teaspoons Honey (or maple syrup)
- 1 tablespoon Chia Seeds
- 1 cup Ice
Instructions
- Gather your ingredients.
- Prep the banana by peeling and breaking it into chunks (or using frozen).
- Add the peanut butter to the blender.
- Mix in the cacao powder.
- Pour in the almond milk.
- In with the yogurt.
- Sweeten it up with honey or maple syrup.
- Add chia seeds and ice.
- Blend until smooth.
- Taste and adjust sweetness or chocolate level if needed.
- Serve in glasses and enjoy.
Notes
Customize with greens, protein powder, or frozen fruits for variations. Store leftovers in the fridge for up to 24 hours.
- Prep Time: 10 minutes
- Cook Time: 0 minutes
- Category: Beverage
- Method: Blending
- Cuisine: American
Nutrition
- Serving Size: 1 serving
- Calories: 300
- Sugar: 15g
- Sodium: 150mg
- Fat: 15g
- Saturated Fat: 4g
- Unsaturated Fat: 8g
- Trans Fat: 0g
- Carbohydrates: 35g
- Fiber: 6g
- Protein: 10g
- Cholesterol: 5mg
Keywords: smoothie, peanut butter, chocolate, summer, healthy

Dairy Queen Banana Milkshake
Dairy Queen Banana Milkshake Recipe: A Cozy, Creamy Delight!
Hey there, fellow food lovers! Welcome back to my kitchen — I’m so glad you’ve joined me today! If you’re anything like me, there’s something about the sweetness of a banana blended with creamy ice cream that just sends your taste buds into orbit. Today, I’m excited to share with you a delightful recipe that captures the essence of one of those cherished childhood treats we all know and love: the legendary Dairy Queen Banana Milkshake!
Ah, the memories of standing in line at Dairy Queen, that enticing aroma of waffle cones wafting through the air, and the joyful anticipation as you watched the friendly staff whip up your favorite milkshake. There’s just something magical about the way a milkshake brings back those sunny, carefree days, filled with laughter and a sprinkle of nostalgia. You can almost taste that creamy, dreamy blend of real bananas, rich ice cream, and a touch of vanilla goodness.
But here’s the thing — you don’t have to dash out to your nearest DQ to satisfy that dairy-filled craving. Nope! I’ve crafted a super easy, delicious banana milkshake recipe that you can whip up right in the comfort of your own home. Grab your blender, dig into those ripe bananas on your counter, and let’s transform those humble ingredients into a delightful treat!
In this blog post, I’ll walk you through every step of the process, share some personal anecdotes, and sprinkle in a few chef tips to ensure you master this creamy concoction. Whether you’re sipping this milkshake after a long day or serving it at a backyard barbecue, trust me — it’s bound to be a crowd-pleaser. Ready to blend? Let’s dive in!
Personal Story
Growing up, my family had a tradition: every Sunday after church, we’d stop by the local Dairy Queen before heading home for the afternoon. My brother always opted for the chocolate fudge sundae, while I eagerly anticipated my favorite banana milkshake. There was something undeniably special about that treat; it wasn’t just a dessert; it was a little bit of joy in a cup!
I remember sitting at our favorite booth, my cheeks smeared with whipped cream as I savored that cold, creamy blend while chatting about my week. The way those flavors danced on my palate — the smoothness of the vanilla ice cream with the sweet, natural flavor of the bananas — was a moment of sheer bliss.
Eventually, as I grew older and began experimenting in my kitchen, I found that making this nostalgic treat at home was not only easy but oh-so-rewarding! It has since turned into one of my go-to recipes for gatherings and quiet evenings alike. Recreating that sensation of joy in a milkshake now feels like a warm hug from my childhood. With that said, let’s gather our ingredients and get blending!
Ingredients
To make the perfect Dairy Queen-style banana milkshake, you’ll need the following ingredients:
-
Ripe Bananas (2 medium)
- Explanation: Bananas that have a few brown spots are perfect because they’re extra sweet and creamy.
- Substitution tips: If you’re not a banana fan (gasp!), try using frozen strawberries or mango for a fruity twist.
-
Vanilla Ice Cream (2 cups)
- Explanation: Using good-quality vanilla ice cream makes a world of difference in flavor.
- Substitution tips: Dairy-free ice cream or frozen yogurt can work if you’re looking for a lighter version.
-
Milk (1/2 cup)
- Explanation: Milk helps create that perfect pourable consistency.
- Substitution tips: Use almond milk or oat milk for a dairy-free version.
-
Vanilla Extract (1 teaspoon)
- Explanation: A splash of vanilla elevates the flavor to delicious new heights.
- Substitution tips: You can omit this if you’re in a pinch, but it really does enhance the banana flavor!
-
Whipped Cream (for serving)
- Explanation: Because what’s a milkshake without a fluffy topping?
- Tip: Feel free to use store-bought or make your own using heavy whipping cream.
-
Optional: A Pinch of Cinnamon
- Explanation: Adding a pinch of cinnamon can introduce a warm spice note that enhances the banana flavor.
Gather these delightful ingredients, and you’re on your way to creating a cool, creamy treat that’s sure to put a smile on your face!
Step-by-Step Instructions
Let’s get to the fun part — blending it all together! Follow these simple steps:
-
Prepare Your Bananas
- Slice your ripe bananas into smaller pieces (about 1-2 inches). This not only makes blending easier but also ensures a smooth consistency. If you like your milkshake extra frosty, you can freeze the banana slices beforehand for a thick delight.
-
Measure Your Ingredients
- In your trusty blender, add the sliced bananas first, followed by the vanilla ice cream. This order typically helps things blend better, especially if you’re using a less powerful blender.
-
Pour in the Milk
- Add 1/2 cup of milk to your blender. You can adjust this later for thickness; start with less if you want a thicker shake.
-
Add Vanilla Extract
- Pour in the teaspoon of vanilla extract to infuse that extra layer of flavor.
-
Blend It Up!
- Secure the blender lid tightly (we don’t want any banana explosions here!). Blend on medium speed until all the ingredients are well-combined and you achieve a smooth and creamy texture—around 30-60 seconds. Stop to scrape down the sides if needed.
-
Check Consistency
- This is the fun part! Stop blending and take a spoon to taste your milkshake. If you prefer it thicker, add a bit more ice cream. For a thinner version, splash in a little more milk.
-
Serve the Shake
- Once you’re happy with the consistency, pour the milkshake into your favorite tall glasses. Don’t be shy — I love to fill mine to the brim!
-
Top with Whipped Cream
- Earn extra style points by generously topping each glass with whipped cream. If you’re feeling fancy, you can drizzle some chocolate syrup on top or even sprinkle a bit of cinnamon for that extra flair.
-
Grab a Straw and Enjoy!
- Now, grab a straw (or a spoon if you prefer) and indulge in your homemade banana milkshake. Sip slowly to relish every delicious drop!
Serving Suggestions
To serve your delectable banana milkshake, choose a tall glass that shows off its lovely swirls of creamy goodness. Add a vibrant straw, perhaps in a fun color, and a generous puff of whipped cream on top. For a charming touch, you might want to garnish with a banana slice or a drizzle of chocolate syrup to make it feel extra special.
Don’t forget, this milkshake pairs perfectly with homemade cookies or a slice of pie, making it a delightful dessert for parties or cozy evenings at home.
Recipe Variations
Want to switch things up a bit? Here are a few creative variations to consider:
-
Chocolate Banana Milkshake: Just add two tablespoons of chocolate syrup or some cocoa powder along with the other ingredients for a delightful chocolatey twist!
-
Peanut Butter Banana Milkshake: Add two tablespoons of creamy peanut butter for a protein boost and a rich, nutty flavor.
-
Nutty Banana Milkshake: Stir in some crushed nuts (like walnuts or almonds) for added texture and nutty flavor.
-
Vegan Option: Swap the vanilla ice cream for a banana-flavored coconut or almond ice cream and use almond milk for a delicious vegan treat.
-
Berry Banana Blend: Throw in a handful of frozen berries (like strawberries or blueberries) for an added fruity burst — yum!
Chef’s Notes
Every time I make this banana milkshake, I think back to those sunny Sundays at Dairy Queen with my family and friends. Whether we were sharing laughs or chatting about life, those moments made the milkshake taste even sweeter.
This recipe has evolved over time in my kitchen. I remember the early days when I attempted to make it, mixing and matching ingredients haphazardly without much success. It’s funny how a simple recipe can turn into something so reliable and beloved!
Every now and then, I’ll experiment with new flavors or toppings, but the classic banana still reigns supreme in my heart. No matter how many twists I try, nothing beats that first sip that reminds me of home.
FAQs and Troubleshooting
1. My milkshake turned out too thick! What should I do?
- If your milkshake is too thick, simply add a little more milk and blend until you reach your desired consistency. You can also add extra banana if you want to keep the flavor strong!
2. Can I use frozen bananas?
- Absolutely! Frozen bananas work great and often create an even thicker texture. Just keep in mind that you may need to adjust your milk amount for blending.
3. What if I don’t have a blender?
- You can use an immersion blender if you have one! Alternatively, mash the bananas well and then mix all the ingredients using a whisk or fork for a chunkier milkshake.
4. How can I prevent the bananas from turning brown?
- To avoid browning, you can squeeze a bit of lemon juice on the banana slices right after cutting them, though this might add a slight tang.
Remember, cooking is all about experimenting and finding what works for you — don’t stress too much, and just enjoy the process!
Nutritional Info (Optional)
While I believe in enjoying delicious treats without guilt, if you’re curious about the nutritional breakdown, here’s a rough estimate for one serving (using the ingredients listed):
- Calories: 400-500
- Protein: 7g
- Fat: 15g
- Carbohydrates: 75g
- Sugars: 65g
Keep in mind that this can vary based on the specific brands you use.
Well, there you have it! A delightful, creamy Dairy Queen-inspired banana milkshake recipe that’s not just delicious but also brings a wave of nostalgia with every sip. Whether it’s a hot summer day or a cozy winter evening, this milkshake is sure to lift your spirits and evoke all those heartwarming memories. So grab your ingredients, invite a friend, and let’s blend some happiness together. Happy cooking, friends! 🍌🥤❤️
Print
Dairy Queen Banana Milkshake
- Total Time: 10 minutes
- Yield: 2 servings 1x
- Diet: Vegetarian
Description
A delightful, creamy banana milkshake inspired by the classic Dairy Queen treat, perfect for any occasion.
Ingredients
- 2 medium ripe bananas
- 2 cups vanilla ice cream
- 1/2 cup milk
- 1 teaspoon vanilla extract
- Whipped cream (for serving)
- A pinch of cinnamon (optional)
Instructions
- Prepare your bananas by slicing them into smaller pieces (about 1-2 inches).
- Measure your ingredients by adding the sliced bananas first into your blender, followed by the vanilla ice cream.
- Pour in the milk, adjusting the quantity for thickness as desired.
- Add the vanilla extract to enhance the flavor.
- Blend on medium speed for 30-60 seconds until smooth and creamy.
- Check the consistency and adjust by adding more ice cream or milk as needed.
- Serve the milkshake in tall glasses, filling them to the brim.
- Top with whipped cream and any optional toppings like chocolate syrup or cinnamon.
- Grab a straw and enjoy your homemade banana milkshake!
Notes
For added flavor variations, consider chocolate syrup, peanut butter, nuts, or using dairy-free alternatives.
- Prep Time: 10 minutes
- Cook Time: 0 minutes
- Category: Dessert
- Method: Blending
- Cuisine: American
Nutrition
- Serving Size: 1 serving
- Calories: 450
- Sugar: 65g
- Sodium: 100mg
- Fat: 15g
- Saturated Fat: 9g
- Unsaturated Fat: 4g
- Trans Fat: 0g
- Carbohydrates: 75g
- Fiber: 3g
- Protein: 7g
- Cholesterol: 50mg
Keywords: banana milkshake, dessert, creamy, Dairy Queen, nostalgic, ice cream
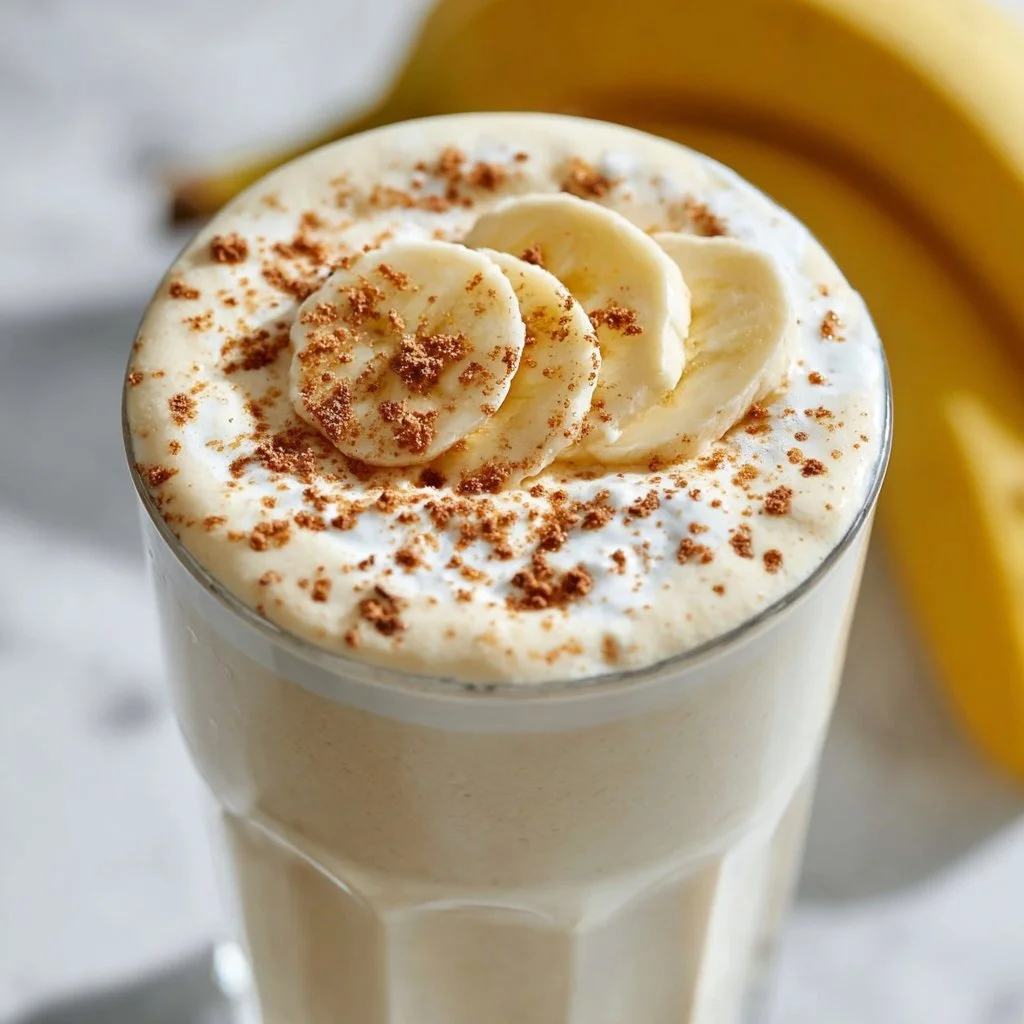
Banana Milkshake
The Creamiest, Dreamiest Banana Milkshake: A Comforting Classic
Welcome to my kitchen, my dear foodies! Today, we’re diving into one of the simplest yet most delightful beverages that has been making taste buds dance for generations: the classic banana milkshake. There’s just something about that creamy blend of fresh bananas, milk, and ice cream that sends me straight back to my childhood, indulging in lazy summer afternoons or celebrating little victories with a sweet treat.
When I think of banana milkshakes, I’m reminded of the first warm sunny day each spring when my family would whip them up in our cramped kitchen, laughter filling the air as we all tried to outshine one another in the craft of milkshake making. Trust me, there’s an art to it! So, whether you’re gracing this blog to relive a childhood memory or to find a refreshing drink for your weekend brunch, stick around because we’re about to blend some magic too!
What I love most about banana milkshakes is how adaptable they are. They take only a few simple ingredients and, with just a bit of creativity, can be transformed into your unique concoction. They are the epitome of versatility—you can whip them up for breakfast, as a post-workout snack, or just because you’re craving something creamy and sweet! So let’s grab our blenders and get to work! You’re going to love how easy and rewarding making a banana milkshake can be.
Personal Story
Now, let me take you back to one of my fondest kitchen memories: It was a sun-drenched afternoon, and the aroma of freshly baked cookies lingered in the air. My mom had just pulled a tray of chocolate chip cookies out of the oven, and I was tasked with blending bananas for our classic milkshakes. In my 10-year-old mind, I imagined myself as a tall, famous chef, thrilled to serve my family this sweet beverage alongside those glorious cookies.
I remember turning the blender on, a bit too hastily, resulting in banana splatters dancing around the kitchen! My little sister burst into giggles as she pointed at the walls where banana bits stuck like modern art. No worries, we cleaned it up together (a wonderful bonding experience), and eventually, we enjoyed our well-deserved banana milkshakes, paired with warm cookies, as we watched our favorite movie. It was moments like these that instilled in me the joy of cooking and the importance of sharing good food with loved ones.
So here I am, years later, inspired by those messy but joyful days to bring banana milkshake magic to your home!
Ingredients
Here’s what you’ll need to whip up the most luxurious banana milkshake you’ll ever taste:
-
Ripe Bananas
Opt for bananas that are speckled with brown spots for optimal sweetness and flavor. Green bananas can be substituted, but they won’t provide that creamy texture and sweetness we want. -
Whole Milk (or Milk of Choice)
Whole milk gives the milkshake a rich, creamy texture, but any milk—almond, soy, oat, or skim—works beautifully! -
Vanilla Ice Cream
Classic vanilla ice cream adds a comforting sweetness. You can replace it with dairy-free ice cream for a vegan option or even Greek yogurt for a healthier twist! -
Vanilla Extract
Just a splash of vanilla extract elevates the flavor profile, adding depth. Feel free to use almond extract if you want a completely different flavor kick. -
Honey or Sugar (optional)
If your bananas aren’t sweet enough for your taste, a drizzle of honey or a tablespoon of sugar can enhance the sweetness. Medjool date syrup can also work well for a natural sweetener! -
Ice Cubes
Ice makes your milkshake refreshing and thick. You can adjust the number based on your preferred texture and chilliness.
The beauty of these ingredients is that they’re easily adaptable based on what you have at home!
Step-by-Step Instructions
Let’s get started with making this banana milkshake that’ll make you feel like a master chef in your own kitchen!
Step 1: Prepare the Bananas
Peel two ripe bananas and slice them into small rounds. This helps them blend easier and makes the milkshake super smooth. Pro tip? If you find yourself with overripe bananas, don’t throw them away! They can be sliced and frozen for these crafty milkshakes.
Step 2: Gather Your Ingredients
In a blender, combine your sliced bananas, 1 cup of whole milk, 2 cups of vanilla ice cream, and 1 teaspoon of vanilla extract. If you’re feeling adventurous and want that extra indulgence, drizzle in honey or sugar—your choice!
Step 3: Blend It Up
Put the lid on your blender and blend your ingredients on high until smooth, about 30-45 seconds. Stop to scrape down the sides with a spatula as needed. If you want a thicker shake, throw in a handful of ice cubes and blend again!
Step 4: Taste-Test and Adjust
This is the fun part! After blending, take a quick taste. Trust me—this is a non-negotiable step! If you want it sweeter, now’s the time to add a touch more honey or sugar. Maybe you want a richer flavor? Splash in a bit more vanilla extract. Blend again for a few seconds after any adjustments.
Step 5: Serve with Flair
Pour your magnificent banana milkshake into tall glasses. You can garnish with whipped cream, a sprinkle of cinnamon, or even some crushed graham crackers or chocolate sprinkles if you’re feeling fancy. Add a straw, and voila—you’re ready to serve!
Step 6: Enjoy!
Sip, savor, and share it with your loved ones! There’s a certain joy that comes with watching someone take their first sip and their eyes widen in delight. Just make sure to save a little for yourself!
Serving Suggestions
Serve your banana milkshake with a side of freshly baked cookies, a stack of pancakes, or a bowl of granola for an indulgent brunch. You could even turn it into a fun milkshake bar, allowing your guests to customize their shakes with add-ins like chocolate chips, peanut butter, or fresh berries!
Recipe Variations
Feeling creative? Here are some exciting twists on the classic banana milkshake you can try:
-
Chocolate Banana Milkshake: Add 2 tablespoons of chocolate syrup or a handful of cocoa powder for that indulgent chocolate flavor.
-
Peanut Butter Banana Milkshake: Toss in 2 tablespoons of creamy peanut butter for a nutty, protein-packed version.
-
Berry Banana Milkshake: Add a handful of fresh or frozen strawberries or blueberries for a fruity burst!
-
Green Banana Milkshake: Blend in a handful of spinach or kale for a nutrient boost—don’t worry, the bananas will still carry the flavor!
-
Coffee Banana Milkshake: Add a shot of espresso or 1 teaspoon of instant coffee for that delightful caffeinated kick!
Chef’s Notes
I have evolved this banana milkshake recipe over the years, experimenting with different creaminess levels and flavors. There was a time when I would just toss everything in without measurements—but now, I have the joy of creating the perfect balance each time. Also, a funny memory comes to mind: I once tried adding in fluffy marshmallows thinking they’d blend well—you can imagine my surprise when they just sat at the bottom! A little trial and error taught me that not everything works—definitely a lesson worth sharing.
Today, this milkshake is a go-to when I need a quick pick-me-up or a delightful dessert to share with friends and family. It’s simple, pure, and oh-so-comforting!
FAQs and Troubleshooting
Why isn’t my milkshake creamy?
If your milkshake isn’t coming out as creamy as expected, it may be due to over-blending or not enough ice cream. For a perfect texture, balance your bananas and ice cream well.
How do I prevent my bananas from browning?
If you’re using fresh bananas, try to make your milkshake right after slicing. If you must store them, a squeeze of lemon juice can help keep them fresh.
Can I make this ahead of time?
While banana milkshakes are best enjoyed fresh, you can freeze the blended mixture in a sealed container. When you’re ready, just let it sit out for a few minutes until it softens, and then blend it again!
What if it’s too thick?
Simply add a splash of extra milk and blend it again until you reach your desired consistency!
Nutritional Info
This information can vary based on your specific ingredients, but a basic estimate per serving (1 shake) using whole milk and vanilla ice cream is approximately:
- Calories: 350
- Total Fat: 14g
- Saturated Fat: 8g
- Cholesterol: 60mg
- Sodium: 150mg
- Total Carbohydrates: 54g
- Dietary Fiber: 2g
- Sugars: 41g
- Protein: 7g
And there you have it, folks! Your guide to the perfect homemade banana milkshake, straight from my cozy kitchen to yours! I hope this recipe fills your heart with joy and your belly with sweetness. Happy shaking! 🍌🥛✨
Print
The Creamiest, Dreamiest Banana Milkshake
- Total Time: 10 minutes
- Yield: 2 servings 1x
- Diet: Vegetarian
Description
A delightful and comforting banana milkshake that’s perfect for any occasion.
Ingredients
- 2 ripe bananas
- 1 cup whole milk (or milk of choice)
- 2 cups vanilla ice cream
- 1 teaspoon vanilla extract
- Honey or sugar (optional)
- Ice cubes
Instructions
- Prepare the bananas by peeling and slicing them into small rounds.
- Gather your ingredients in a blender: bananas, milk, ice cream, and vanilla extract.
- Blend the ingredients on high until smooth, about 30-45 seconds.
- Taste-test the mixture and adjust sweetness or vanilla to your liking.
- Pour the milkshake into glasses and garnish as desired.
- Enjoy your creamy banana milkshake with loved ones!
Notes
Serve with freshly baked cookies or pancakes for an indulgent brunch.
- Prep Time: 10 minutes
- Cook Time: 0 minutes
- Category: Beverage
- Method: Blending
- Cuisine: American
Nutrition
- Serving Size: 1 shake
- Calories: 350
- Sugar: 41g
- Sodium: 150mg
- Fat: 14g
- Saturated Fat: 8g
- Unsaturated Fat: 4g
- Trans Fat: 0g
- Carbohydrates: 54g
- Fiber: 2g
- Protein: 7g
- Cholesterol: 60mg
Keywords: banana, milkshake, dessert, beverage, creamy, summer treat


