

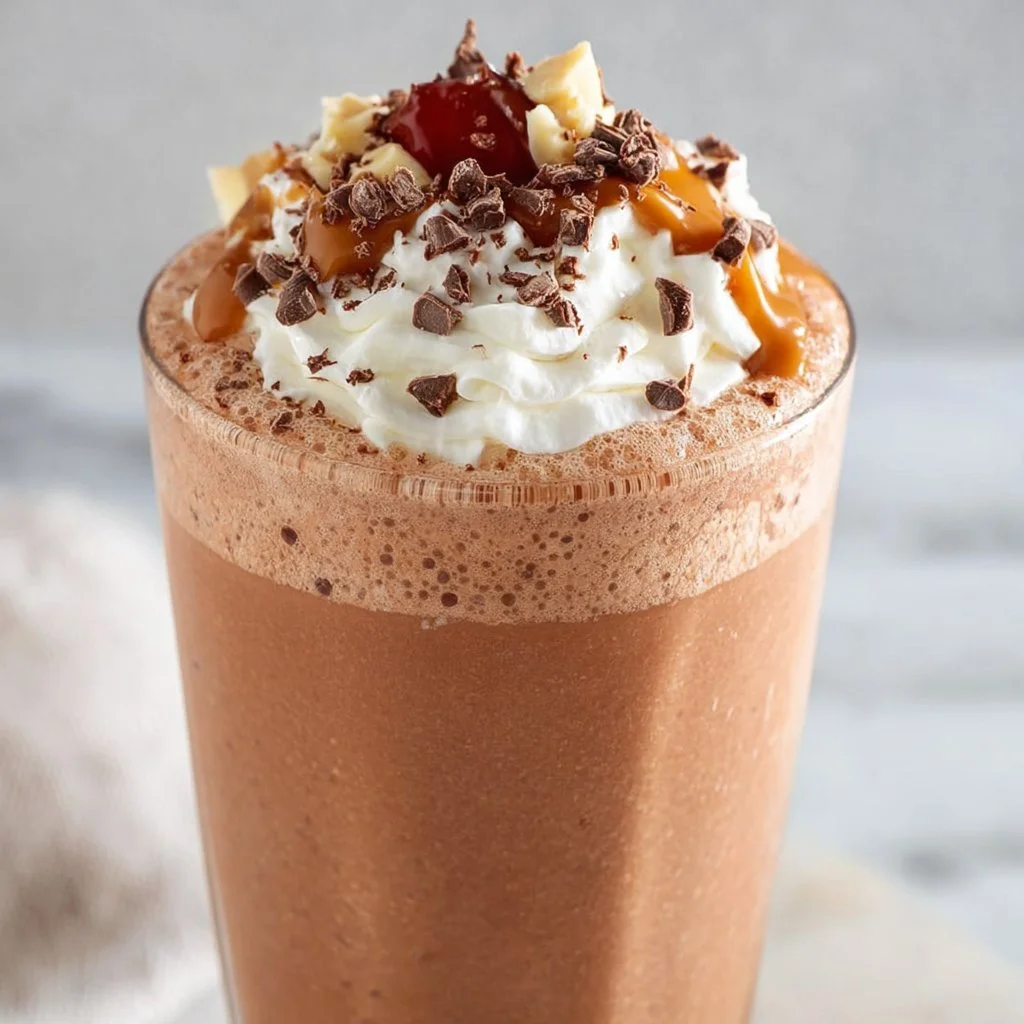
Peanut Butter Chocolate Coffee Smoothie
The Ultimate Peanut Butter Chocolate Coffee Smoothie Recipe
Welcome to my kitchen! I’m so glad you’re here because today, we’re diving into a delightful concoction that’s sure to become your new morning favorite: the Peanut Butter Chocolate Coffee Smoothie. If you’re anything like me, mornings can be chaotic. Amidst the rush of getting ready for the day, we often forget to nourish ourselves properly. But fear not! This smoothie is a tasty, energy-packed solution that whips up in minutes and tastes divine.
Imagine starting your day with a creamy blend of rich peanut butter, vibrant chocolate, and a kick of coffee. Can you smell it? This smoothie is not just a breakfast; it’s a cozy hug in a glass, perfect for those who need a bit of a pick-me-up. Whether you’re hitting the gym, heading to work, or lounging at home on a Sunday, this drink will bring a relaxed and satisfying energy to your morning.
Mixing peanut butter with coffee may sound unconventional, but trust me when I say it’s pure magic! The creaminess of the peanut butter balances the richness of the cacao and the robustness of the coffee, creating a flavor profile that dances on your taste buds. Plus, it’s packed with protein and healthy fats, making it not just delicious but also nourishing.
Grab your blender, and let’s get ready to turn simple ingredients into smoothie perfection. Whether you’re sipping it on your couch or grabbing it to go, this Peanut Butter Chocolate Coffee Smoothie will not only fuel your morning but also bring a smile to your face. Ready? Let’s blend!
A Nostalgic Blend of Flavors
Ah, peanut butter and chocolate—my childhood memories are wrapped in that sweet and nutty embrace! Growing up, I spent countless hours in the kitchen with my grandmother, experimenting with everything from cookies to pies, but her secret weapon was always peanut butter. I remember coming home from school to the smell of something sweet baking, and I’d dash to the kitchen, eager to see what she had whipped up.
One of my fondest memories involves us making peanut butter cookies together. As we mixed the dough, she would always sneak in cocoa powder, explaining that “everything is better with chocolate.” Little did I know at the time, this was just the beginning of my love story with these two flavors. So, many years later, when I discovered my love for coffee, it felt like the universe had perfectly tied together all the flavors I adore.
Now, every time I whip up this Peanut Butter Chocolate Coffee Smoothie, I’m transported back to those sunny afternoons spent laughing and baking with my grandmother. It’s not just a drink; it’s a bridge to my past, filled with warmth and deliciousness. I hope this smoothie brings the same joy and nostalgia to you, allowing you to create your own cherished memories in the kitchen!
Ingredients
To craft this delicious smoothie, gather the following ingredients:
-
1 banana
A great source of natural sweetness and creaminess. If you don’t have a banana on hand, you can use ½ cup of unsweetened applesauce as a substitute or opt for a handful of frozen spinach for a green twist! -
2 tablespoons peanut butter
An excellent source of protein and healthy fats, it lends that rich, nutty flavor. You can swap it out for almond butter or sunflower seed butter for a different take. -
1 tablespoon unsweetened cocoa powder
This is where the chocolatey goodness comes from. If you’re feeling adventurous, try using dark chocolate cocoa powder or cacao nibs for added texture and flavor. -
1 cup brewed coffee (cooled)
A must for that kick of caffeine! If you prefer a caffeine-free option, chicory coffee or a rich herbal tea can also add depth of flavor. -
½ cup almond milk (or milk of choice)
This is your base for creaminess. Feel free to use dairy, oat milk, soy milk, or coconut milk based on your preference. -
1 tablespoon maple syrup or honey (optional)
For extra sweetness! Adjust to your taste; if you like it less sweet, you can skip this altogether. -
A handful of ice
This will chill and thicken your smoothie. If you want an extra creamy texture, use frozen bananas instead of fresh!
These ingredients blend together beautifully, creating a smoothie that is not only delicious but also completely customizable based on what you have in your pantry!
Step-by-Step Instructions
Now, let’s get into the nitty-gritty of whipping up this delightful smoothie!
-
Prepare Your Ingredients
Start by gathering all your ingredients together. If you’re using a fresh banana, peel and slice it so it’s ready to go. It’s a small step, but it creates a mini assembly line that makes blending smoother! -
Brew the Coffee
If you haven’t already made your coffee, brew a cup and let it cool. This is a great time to mention that you can also make a batch of cold brew in advance—perfect for smoothie recipes and warm days! -
Blend the Base
In your blender, add the banana, peanut butter, cocoa powder, brewed coffee, almond milk, and maple syrup (if using). Always add the liquid ingredients first to help with blending. This little trick helps the blender to mix everything smoothly without getting jammed! -
Add the Ice
Toss in your handful of ice. This is what gives your smoothie that frosty, refreshing vibe. If you’re using frozen bananas instead, you can skip the ice! Just remember that frozen bananas will make your smoothie super thick and creamy. -
Blend It Up
Secure the lid on your blender and blend on high until everything is smooth and well combined. This typically takes about 30 seconds to a minute, depending on your blender’s power. If the mixture seems too thick, add a splash more of almond milk to loosen it up. Taste it! This is your chance to adjust sweetness or add a little extra cocoa if you’re feeling chocolatey. -
Pour and Serve
Once it’s all blended to perfection, pour it into a glass (or two—good luck resisting sharing!). If you want to get fancy, you can even top it with a sprinkle of cocoa powder or a dollop of whipped cream for an indulgent touch.
Serving Suggestions
To make your Peanut Butter Chocolate Coffee Smoothie extra special, serve it in a chilled glass with a cute straw on the side—it definitely adds to the experience! You could also create a beautiful smoothie bowl by topping it with sliced bananas, a sprinkle of nuts, or a drizzle of extra peanut butter. Serve it alongside a slice of banana bread or a healthy muffin for a complete breakfast feast.
Recipe Variations
Now, let’s think outside the glass! Here are some creative variations to keep things exciting:
-
Add Protein: If you want an added protein boost, mix in 1 scoop of your favorite protein powder. Vanilla or chocolate flavors work great!
-
Chocoholic Delight: Add in a few dark chocolate chips before blending for a delightful choco-burst with every sip.
-
Nutty Banana Swirl: Include a tablespoon of chia seeds or flax seeds for an added nutritional kick and some extra texture.
-
Spiced Up: Sprinkle a dash of cinnamon or nutmeg while blending for a warm, spiced flavor that complements the chocolate beautifully.
-
Dairy-Free Bliss: For a completely dairy-free version, ensure you’re using plant-based milk and any nut butter of your choice. You can even add a scoop of vegan ice cream for extra creaminess!
Chef’s Notes
I can’t help but chuckle as I recall the time I accidentally added double the amount of cocoa powder while making this smoothie. My blending adventure turned into an experimental dessert, resembling more of a shake than a smoothie! While I had planned for breakfast, my “mistake” ended up being a perfect addition to an afternoon treat topped with whipped cream. Want to hear the best part? My kids loved it! It only took that one little accident for me to claim the infamous "chocolate disaster" as my secret recipe for unconventional indulgence.
This smoothie has certainly evolved for me over the years. It started as a simple breakfast fix but has grown into a family-friendly treat. I frequently experiment with different flavors and ingredients to keep it exciting. Who knows? Perhaps you’ll come up with your own creative spin!
FAQs and Troubleshooting
1. My smoothie is too thick! What can I do?
No worries—smoothies can be finicky! If yours is too thick, simply add a splash more milk or coffee and blend it again until you achieve your desired consistency.
2. Can I make this smoothie in advance?
Absolutely! You can prepare the ingredients the night before and store them in the fridge. Just blend it fresh in the morning for optimum taste and freshness.
3. Is there a way to make this smoothie without coffee?
Sure! If you’d like to skip the coffee, try substituting it with brewed chocolate tea or even cold milk! Just keep an eye on the sweetness levels, as different base liquids may change the flavor.
4. How can I sweeten the smoothie without sugar?
Great question! You can use mashed dates for natural sweetness. Simply blend a couple of pitted dates in with the other ingredients. You can also consider ripe bananas for natural sweetness without reaching for refined sugars.
Nutritional Info
If you’re counting, here’s a rough estimate of the nutritional info for this delightful smoothie (based on the above ingredients):
- Calories: About 400-450 per serving
- Protein: 12-15g
- Fat: 20-25g (mostly healthy fats from peanut butter)
- Carbohydrates: 50-55g (mostly from banana and almond milk)
And there you have it—a delightful, creamy, and soul-satisfying Peanut Butter Chocolate Coffee Smoothie! I can’t wait for you to give it a try and make it your own. Whether you find yourself drinking it in a rush or savoring it slowly, I hope it brings as much joy to your mornings as it does to mine. Happy blending!
Print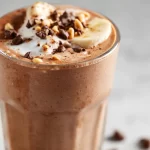
Peanut Butter Chocolate Coffee Smoothie
- Total Time: 5 minutes
- Yield: 1 serving 1x
- Diet: Vegetarian
Description
A creamy, energy-packed smoothie combining peanut butter, chocolate, and coffee, perfect for busy mornings.
Ingredients
- 1 banana
- 2 tablespoons peanut butter
- 1 tablespoon unsweetened cocoa powder
- 1 cup brewed coffee (cooled)
- ½ cup almond milk (or milk of choice)
- 1 tablespoon maple syrup or honey (optional)
- A handful of ice
Instructions
- Prepare your ingredients by organizing everything you need.
- Brew the coffee and let it cool.
- Blend the banana, peanut butter, cocoa powder, brewed coffee, almond milk, and maple syrup in a blender.
- Add the handful of ice to the blender.
- Blend on high until smooth.
- Pour into a glass and enjoy!
Notes
For a thicker texture, use frozen bananas instead of fresh ones. Adjust sweetness to your preference.
- Prep Time: 5 minutes
- Cook Time: 0 minutes
- Category: Breakfast
- Method: Blending
- Cuisine: American
Nutrition
- Serving Size: 1 serving
- Calories: 400
- Sugar: 20g
- Sodium: 150mg
- Fat: 22g
- Saturated Fat: 4g
- Unsaturated Fat: 18g
- Trans Fat: 0g
- Carbohydrates: 55g
- Fiber: 6g
- Protein: 14g
- Cholesterol: 0mg
Keywords: smoothie, peanut butter, chocolate, coffee, breakfast, healthy, drink
Chocolate Peanut Butter Milkshake
The Ultimate Chocolate Peanut Butter Milkshake Recipe
Hey there, fellow food lovers! Welcome back to my cozy kitchen, where I whip up everything from hearty dinners to sweet delights! Today, we’re diving into a dreamy dessert that’s bound to make your taste buds dance: the Chocolate Peanut Butter Milkshake. Picture this: you’re nestled on the couch after a long day, and you crave something sweet, creamy, and utterly indulgent. That’s where this delightful concoction comes in.
This milkshake is not just a beverage; it’s a nostalgic sip of happiness that evokes memories of summer evenings and carefree childhood days. Whether you enjoyed it at a local diner or made it at home with your family, this icy treat has a way of bringing warmth to your heart—even on the chilliest days!
In today’s recipe, I’ll share my favorite methods to create this liquid joy filled with the classic combo of chocolate and peanut butter. Don’t worry if you’re new to the kitchen! I’ll walk you through every step, ensuring you not only make the perfect milkshake but enjoy the experience along the way. Grab your blender and let’s blend our way to milkshake magic!
Personal Story
I still remember the very first time I made a milkshake with my mom. We were having a lazy Sunday afternoon, and she decided to surprise me with a special treat. We gathered the ingredients—scoops of chocolate ice cream, rich peanut butter, and milk. I loved how she blended everything together, the sounds of the blender mixing our laughter, and of course, the rich aroma wafting through the kitchen.
As we poured the thick, creamy shake into tall glasses, I noticed the way Mom added a sprinkle of crushed peanuts on top for that extra crunch. With cherry-red straws and big grins, we annihilated those milkshakes within minutes! It was such a simple thing, yet the joy was unforgettable.
Years later, as I found my passion for cooking and blogging, I never forgot that happiness in a glass. Making this Chocolate Peanut Butter Milkshake has become a ritual—a way to relive those sweet memories and create new ones. So, fill your glass, sit back, and let the nostalgia take over.
Ingredients
Here’s what you’ll need to create this creamy delight:
-
Chocolate Ice Cream (2 cups): The star of our show! Use your favorite brand or homemade; bitter-sweet, dark, or classic chocolate ice cream all work fantastically. If you’re looking for a healthier option, try frozen bananas or yogurt instead.
-
Peanut Butter (¼ cup): The creamy (or chunky) texture adds a delightful richness to your shake! For nut-free versions, sunflower seed butter is a brilliant substitute—just as tasty, with a similar consistency!
-
Milk (1 cup): Choose your milk of choice—whole, skim, almond, or oat milk. For a thicker milkshake, you can reduce the amount a bit or even use heavy cream for added richness.
-
Chocolate Syrup (2 tablespoons): A drizzle will amplify the chocolate flavor and give you that perfect milkshake look! You can use store-bought syrup or homemade, depending on your preference.
-
Whipped Cream (for topping): An optional but highly encouraged topping! Make it homemade for that fluffy texture, or grab some canned whipped cream for convenience.
-
Crushed Peanuts (for garnish): Not mandatory, but they give your shake that extra crunch and blend beautifully with the chocolate and peanut butter flavors.
-
Optional Add-ins: Feeling adventurous? Add a pinch of sea salt to enhance flavors or a scoop of protein powder if you want a post-workout treat!
Step-by-Step Instructions
Alright, let’s get blending! Follow these steps to whipped up your fabulous Chocolate Peanut Butter Milkshake:
-
Gather Your Ingredients: Start by arranging all the ingredients on your countertop. A tidy workspace makes the whole cooking experience smoother and more enjoyable!
-
Blend the Goodies: Toss in the 2 cups of chocolate ice cream, ¼ cup of peanut butter, and 1 cup of milk into your blender. Use more or less milk depending on how thick you like your shakes. The ice cream and peanut butter will give you that wonderfully thick texture!
-
Add Chocolate Syrup: This is where the magic happens! Drizzle in 2 tablespoons of chocolate syrup for that indulgent flavor. If you’re a total chocolate lover like me, feel free to add an extra tablespoon.
-
Blend Away: Secure the lid tightly, and blend on high speed for about 30 seconds. Be sure to occasionally stop the blender to scrape down the sides—this ensures all the ingredients get mixed up beautifully. You want a smooth and creamy texture, so blend as necessary!
-
Tasting Time: Before you pour, give it a quick taste! Adjust the flavors if needed—a touch more peanut butter or an extra scoop of ice cream might just do the trick!
-
Serve It Up: Pour the delicious milkshake into tall glasses. I love using large mason jars for that vintage touch. Memory of that first milkshake floods back as I see those jars filled to the brim!
-
Top It Off: Here’s where you can get a bit fancy. Slather a swirl of whipped cream on top, drizzle more chocolate syrup, and sprinkle the crushed peanuts for some extra flair!
-
Grab a Straw and Enjoy: Finish it off with a colorful straw, take a delightful sip, and savor the flavors! This is where all the hard work pays off, my friend.
Serving Suggestions
Let’s get creative with how you serve this mouthwatering milkshake! Pour your Chocolate Peanut Butter Milkshake into frosty glasses and add a decorative touch with an extra dollop of whipped cream and a drizzle of chocolate syrup on top. For a festive occasion, serve with a side of cookies or brownies for the ultimate indulgence!
If you’re hosting a BBQ or party, consider setting up a milkshake bar with various toppings like crushed cookies, fruit, or even sprinkles. Everyone can customize their shake!
Recipe Variations
Feeling like mixing things up? Here are a few creative twists to elevate your milkshake game:
-
Banana Bliss: Toss in half a ripe banana for a hint of fruity flavor. The banana adds natural sweetness and creaminess.
-
Minty Fresh Twist: Add a few drops of peppermint extract before blending for a refreshing chocolate mint variation that’s reminiscent of your favorite ice cream parlor!
-
Cookie Monster Shake: Crumble some Oreo cookies into the milkshake for a delightful texture and extra chocolate indulgence.
-
Healthy Peanut Butter Version: Use frozen yogurt or the banana trick to create a lower-calorie shake without sacrificing flavor!
-
More Nutty Flavors: Toss in some almond butter or hazelnut spread in place of peanut butter for a different nutty profile!
Chef’s Notes
Oh, let me share a little kitchen side story. Once, I was making this marvel for a group of friends, but I mistakenly grabbed the chili chocolate ice cream instead of the regular chocolate. In a moment of panic, I just ran with it! I blended it up, and it turned out to be a spicy-sweet hit! Who knew experimenting could yield delightful surprises?
This recipe has evolved over time—different variations, experimental ingredients, but the core love for the classic remains. It truly represents the joy of cooking and creating something that speaks to your taste buds!
FAQs and Troubleshooting
1. My milkshake is too thick! What do I do?
Don’t worry! Just add milk a tablespoon at a time while blending until you reach your desired consistency.
2. Can I use frozen milk instead of ice cream?
Absolutely! If you’re looking for a healthier alternative, frozen bananas or yogurt will work perfectly as a base. Just blend them with milk to achieve a creamy texture!
3. Is it possible to make this milkshake dairy-free?
Definitely! Use your preferred non-dairy ice cream and milk (almond, coconut, or oat milk are fantastic options) to make it completely dairy-free!
4. My shake is too sweet; how can I tone it down?
If your shake is overly sweet, add a pinch of salt to balance the flavors. You can also mix in a scoop of plain yogurt to cut through the sweetness!
Nutritional Info (Optional)
- Calories: Approximately 500-600 kcal per serving (depends on specific brands and quantities used)
- Protein: 12-15g
- Fat: 20-25g
- Carbohydrates: 70-80g
Conclusion
And there you have it! Your very own Chocolate Peanut Butter Milkshake! Whether you’re enjoying it solo or sharing it with friends and family, this treat brims with charm and flavor that’ll leave everyone wanting more. Remember, cooking is a journey filled with delicious moments and lovely memories. So don’t hesitate to experiment, share your creations, and most importantly, enjoy every sip!
Thanks for joining me today in my kitchen. Keep that apron on and happy cooking!
Print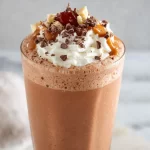
Chocolate Peanut Butter Milkshake
- Total Time: 10 minutes
- Yield: 2 servings 1x
- Diet: Vegetarian
Description
This indulgent Chocolate Peanut Butter Milkshake combines rich chocolate ice cream with creamy peanut butter for a delightful treat.
Ingredients
- 2 cups Chocolate Ice Cream
- ¼ cup Peanut Butter
- 1 cup Milk
- 2 tablespoons Chocolate Syrup
- Whipped Cream (for topping)
- Crushed Peanuts (for garnish)
- Optional Add-ins: pinch of sea salt, scoop of protein powder
Instructions
- Gather Your Ingredients: Start by arranging all the ingredients on your countertop.
- Blend the Goodies: Toss in the chocolate ice cream, peanut butter, and milk into your blender.
- Add Chocolate Syrup: Drizzle in chocolate syrup for that indulgent flavor.
- Blend Away: Secure the lid and blend on high speed for about 30 seconds.
- Tasting Time: Before you pour, give it a quick taste and adjust flavors if needed.
- Serve It Up: Pour the delicious milkshake into tall glasses.
- Top It Off: Slather a swirl of whipped cream on top and sprinkle crushed peanuts.
- Grab a Straw and Enjoy: Finish it off with a straw, take a sip, and savor the flavors!
Notes
For a healthier option, substitute chocolate ice cream with frozen bananas or yogurt. Customize with your favorite toppings!
- Prep Time: 10 minutes
- Cook Time: 0 minutes
- Category: Dessert
- Method: Blending
- Cuisine: American
Nutrition
- Serving Size: 1 serving
- Calories: 550
- Sugar: 60g
- Sodium: 300mg
- Fat: 25g
- Saturated Fat: 10g
- Unsaturated Fat: 12g
- Trans Fat: 0g
- Carbohydrates: 75g
- Fiber: 4g
- Protein: 15g
- Cholesterol: 80mg
Keywords: milkshake, chocolate, peanut butter, dessert, creamy, indulgent
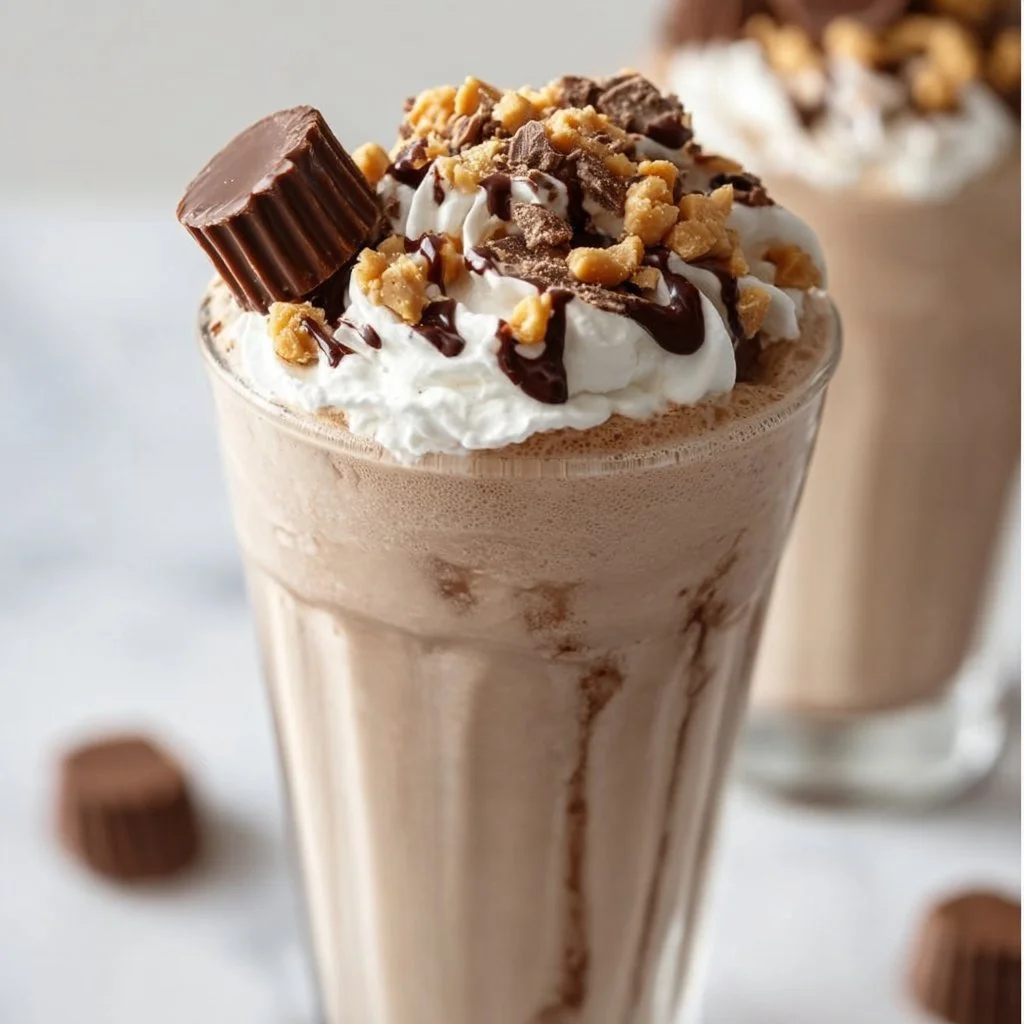
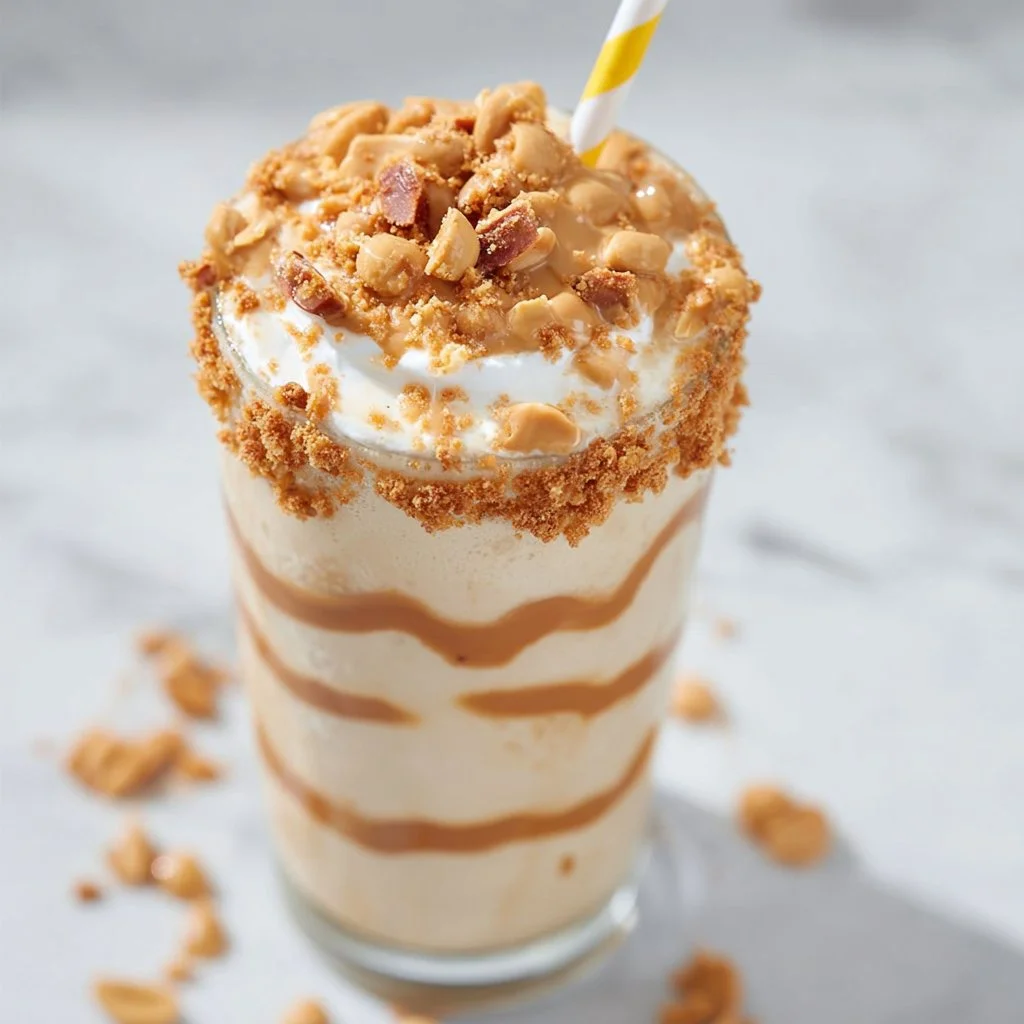
Peanut Butter Cup Milkshake
The Ultimate Peanut Butter Cup Milkshake: A Creamy Dream Come True
Hey there, fellow food enthusiasts! 🎉 I’m Olivia Bennett, your go-to guide for all things delicious and homemade! Today, we’re diving into a sweet treat that takes me straight back to my childhood: the Peanut Butter Cup Milkshake. If you adore the rich flavor of peanut butter mingling with the sweetness of chocolate, this dreamy milkshake is about to become your new favorite indulgence.
Picture this: it’s a hot summer day, and my brothers and I were running around outside, laughter echoing as we played tag on the lawn. Nothing could cool off those sun-kissed moments quite like heading into the kitchen, where my mom would be melting chocolate over low heat. She had a knack for crafting milkshakes that were not just drinks, but blissful experiences that shaped our love for food. One day, she surprised us with what she called a “Peanut Butter Cup” shake, inspired by our beloved candy. I still remember the anticipation as we waited, the kitchen filled with the heavenly scent of creamy peanut butter and rich chocolate. Each sip took us on a delicious ride, leaving us giggling about the peanut butter mustaches we’d inevitably sport.
Fast forward a few years, and I knew I had to recreate that beloved moment. And guess what? I’ve perfected my version, adding a few creative spins to make it even more delightful! This Peanut Butter Cup Milkshake is loaded with flavors that dance together in perfect harmony and promises to transport you back to carefree days while indulging your adult cravings. Whether you’re treating yourself to a midweek pick-me-up or hosting friends for a fun dessert night, this milkshake is sure to impress. So grab your blender and let’s get mixing, shall we?
Personal Story
One afternoon, as I played in the yard, the mouthwatering aroma of chocolate wafting in from the kitchen drew me inside like a magnetic force. Little did I know, my mom was whipping up her famous Peanut Butter Cup Milkshake. My brothers and I huddled at the counter, our eyes wide with excitement as she blended together creamy vanilla ice cream, rich peanut butter, and a generous drizzle of chocolate syrup.
When she handed us those frosty glasses topped with whipped cream, it felt like Christmas! Each sip was pure joy, with the chocolate and peanut butter layers creating a flavor explosion in my mouth. It was our unofficial summer ritual, turning even the most mundane days into something extraordinary. It taught me how food could create memories, spark laughter, and bring people together—all while satiating our sweet tooth. Even now, every time I take a sip of a Peanut Butter Cup Milkshake, I’m reminded of those cherished summer afternoons, laughter echoing while chocolate mustaches were the insignia of our sweet adventures.
Ingredients
Let’s gather our ingredients for this heavenly shake! Here’s what you’ll need:
-
Vanilla Ice Cream: This is the base of your milkshake. Use quality, creamy vanilla for the best flavor. If you want to lighten this up, you can also substitute with frozen yogurt or a dairy-free ice cream!
-
Whole Milk: Adds the perfect creaminess. If you’re looking for a lower-fat option, skim milk works just fine, or try almond milk for a nutty twist!
-
Creamy Peanut Butter: The star ingredient! Smooth peanut butter gives a luscious texture. For a twist, try crunchy peanut butter for added texture, or almond butter for a new flavor.
-
Chocolate Syrup: It adds that rich chocolate flavor we love. You can use store-bought or make your own by mixing cocoa powder with a bit of sugar and water.
-
Reese’s Peanut Butter Cups: Chop these up and add them for that delicious candy crunch. In a pinch, use any other chocolate-peanut butter combination candy.
-
Whipped Cream: For topping! Store-bought is convenient, but homemade is always a classy touch—just whip some heavy cream and sugar until fluffy!
-
Chocolate Shavings (optional): For a gourmet finish! You can make these by shaving a chocolate bar or using mini chocolate chips.
Step-by-Step Instructions
Step 1: Gather Your Ingredients
Before you start, make sure you have all your ingredients measured and ready to go. It helps everything blend together smoothly and quickly—like a pro! 🎉
Step 2: Blend It Up!
Throw the following into your blender:
- 2 cups of vanilla ice cream
- 1 cup of whole milk
- ½ cup of creamy peanut butter
- ¼ cup of chocolate syrup
Blend it on high until everything is perfectly smooth. Chef’s Tip: If your milkshake is too thick, add more milk a tablespoon at a time until desired consistency is reached. If it’s too thin, you can always toss in an extra scoop of ice cream!
Step 3: Add the Crunch
Once your base is beautifully blended, it’s time to fold in the fun part! Add about 1 cup of chopped Reese’s Peanut Butter Cups to the blender, and pulse gently a few times. You want chunks, not mush! This way, you get delightful bites of candy in every sip.
Step 4: Taste Test
Now, this is the most essential step—taste it! Use a spoon and let this luscious concoction pass your lips. Feel free to add a drizzle more of chocolate syrup or peanut butter to elevate it further. Remember, this is your masterpiece!
Step 5: Prep the Glasses
Grab your favorite tall milkshake glasses and drizzle the inside with chocolate syrup for that stunning presentation. You can get creative here! Swirl it around for a marbled effect—your guests will be trying to take pictures before they even take a sip!
Step 6: Pour and Top
Pour your milkshake into the prepared glasses, filling them just to the brim. Go ahead and let some froth spill over—it’s part of the fun! Then, top generously with whipped cream, a sprinkle of chocolate shavings, and maybe even a mini Reese’s on top for good measure!
Step 7: Serve Immediately
Grab some cute straws and get ready to dig in! There’s no waiting around; this milkshake is best enjoyed fresh! Gather around with friends or family and enjoy each sip.
Serving Suggestions
This Peanut Butter Cup Milkshake makes for an irresistibly fun dessert! Serve it alongside hot brownies or a slice of your favorite chocolate cake for a true dessert experience. You can also place the milkshake in a large bowl, add extra toppings (think crushed cookies, sprinkles, or a drizzle of caramel), and hand out spoons for a delightful sharing experience!
Recipe Variations
Feel like mixing things up? Here are some fun twists you could try:
- Banana Peanut Butter Milkshake: Add a ripe banana for a creamy, fruity version that pairs beautifully with chocolate!
- Mint Chocolate Peanut Butter Shake: Add a few drops of peppermint extract for a refreshing green shake.
- Dairy-Free Option: Use coconut milk ice cream and almond milk for a delicious dairy-free version.
- Protein Packed: Add a scoop of your favorite protein powder for a post-workout treat.
- Mocha Peanut Butter Shake: Mix in a tablespoon of instant espresso powder to kick it up a notch with coffee flavor.
Chef’s Notes
Oh, the memories this shake brings back! I’ve experimented a lot over the years with this recipe, from adding different candies to trying out various ice cream bases. I’ve even served this as a sundae at dinner parties, and every time it’s a hit! A funny story: one day during a holiday gathering, I made a huge batch, thinking it would last, but it vanished within ten minutes! This shake has a magical way of making everyone feel like a kid again, and I’ve come to realize the secret sauce is all in sharing it with loved ones.
FAQs and Troubleshooting
1. My milkshake is too thick; what do I do?
Add more milk gradually, blending in between additions until the desired consistency is achieved.
2. What if I don’t have peanut butter?
You can swap in any nut butter or even sun butter for a nut-free option.
3. Can I make this ahead of time?
While best enjoyed fresh, you can make it a few hours in advance, just keep it in the freezer in an airtight container to maintain its thickness.
4. Can I make it lower in sugar?
Absolutely! Use unsweetened almond milk instead of regular milk, and opt for no-added sugar peanut butter or reduce the amount of chocolate syrup in the recipe.
With each delicious sip of this Peanut Butter Cup Milkshake, I hope you feel a connection with those joyful moments and that it inspires laughter and warmth in your kitchen. Happy blending, and may delicious memories abound! 🍦🥳
Print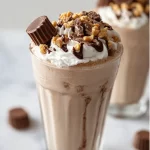
Ultimate Peanut Butter Cup Milkshake
- Total Time: 10 minutes
- Yield: 4 servings 1x
- Diet: Vegetarian
Description
A delightful milkshake blending creamy peanut butter and rich chocolate, reminiscent of childhood summer days.
Ingredients
- 2 cups Vanilla Ice Cream
- 1 cup Whole Milk
- ½ cup Creamy Peanut Butter
- ¼ cup Chocolate Syrup
- 1 cup Reese’s Peanut Butter Cups, chopped
- Whipped Cream, for topping
- Chocolate Shavings (optional)
Instructions
- Gather your ingredients.
- Blend the vanilla ice cream, whole milk, creamy peanut butter, and chocolate syrup on high until smooth.
- Add the chopped Reese’s Peanut Butter Cups and pulse gently a few times.
- Taste the milkshake and adjust sweetness as desired.
- Prep the glasses by drizzling chocolate syrup inside.
- Pour the milkshake into the glasses and top with whipped cream and chocolate shavings.
- Serve immediately with straws.
Notes
For variations, try adding a banana, mint extract, or protein powder for extra nutrition.
- Prep Time: 10 minutes
- Cook Time: 0 minutes
- Category: Dessert
- Method: Blending
- Cuisine: American
Nutrition
- Serving Size: 1 serving
- Calories: 450
- Sugar: 50g
- Sodium: 200mg
- Fat: 20g
- Saturated Fat: 10g
- Unsaturated Fat: 6g
- Trans Fat: 0g
- Carbohydrates: 60g
- Fiber: 3g
- Protein: 12g
- Cholesterol: 30mg
Keywords: milkshake, peanut butter, chocolate, dessert
Peanut Butter Milkshake
Peanut Butter Milkshake: A Sweet Hug in a Glass
Welcome, dear friend, to the wonderful world of shakes and flavors! Today, we’re diving into a delightful treat that combines two classic favorites into one creamy, dreamy concoction: the Peanut Butter Milkshake. There’s something absolutely magical about this shake—it’s like a cozy hug on a hot day or a sweet reminder of simpler times spent with family and friends.
Picture this: it’s a balmy summer afternoon, and the sun is casting a warm, golden glow across your kitchen. You’ve just come in from a fun day outdoors, and all you can think about is indulging in something sweet and refreshing. With just a few ingredients (and a dash of love), you’re about to create a drink that takes you straight back to childhood, where joy and laughter bubbled over like the milkshake you’re about to make!
This milkshake hits all the right notes—creamy, nutty, and sweet with just the right amount of richness. It’s perfect for a quick snack, a simple dessert, or even as a fun treat for your next gathering. Plus, it’s a breeze to whip up, so you can satisfy that craving in no time. Trust me, whether you’re a peanut butter lover or just someone looking for a delightful sip, this shake will not disappoint!
In this post, I’ll take you step-by-step through creating this delicious Peanut Butter Milkshake, sharing some fun stories, tips, and even a few creative variations to keep things interesting. So roll up your sleeves, grab those ingredients, and let’s get shaking!
Personal Story
I still remember the first time I had a peanut butter milkshake. I was about seven years old, perched on a barstool at my local diner with my best friend, Lily. It was one of those classic American places with neon lights and checkered tiles, where everything felt like it was draped in nostalgia. We had just finished our cheeseburgers (the ones with all the toppings, of course!) and decided to indulge in a milkshake to top off our meal.
When our shakes arrived, the sight was spectacular—tall, frosty glasses filled to the brim with thick, creamy goodness topped with a generous dollop of whipped cream. I remember watching as the waitress poured a little extra shake into the glass—a surprise I still cherish today! As a curious kid eager to explore flavors, I took my first sip—and my taste buds danced in delight. The creamy richness of the peanut butter mixed with the coldness of the milkshake was heavenly!
From that day on, peanut butter milkshakes became my go-to indulgence, a nostalgic treat that I relished every chance I got. Now, as an adult, I can whip one up anytime I want, and it always brings me back to that sunlit diner, giggling with Lily and savoring simple delights together. That heartfelt memory continues to inspire my passion for cooking, reminding me of the importance of sharing food and love with friends and family.
Ingredients
Let’s gather our ingredients! This Peanut Butter Milkshake is uncomplicated and requires just a handful of pantry staples—a joy for the busy home cook! Here we go:
-
Vanilla Ice Cream (2 cups)
The base of our milkshake! Creamy vanilla provides a wonderful richness. If you’re feeling adventurous, experiment with other flavors like chocolate or caramel. Dairy-free alternatives are also fantastic! -
Milk (1 cup)
Whole milk gives you that creamy texture, but you can swap it for almond milk, oat milk, or any preferred milk alternative if you’re looking for a dairy-free option. -
Peanut Butter (1/2 cup)
The star of our show! Use a natural variety with no added sugar for a more wholesome taste. If you’re allergic or prefer something different, try almond butter or sunflower seed butter for a nut-free option. -
Honey or Sugar (to taste, typically 1-2 tablespoons)
Adds a touch of sweetness to balance the flavors. Feel free to adjust based on your preference, or use maple syrup for a unique twist. -
Whipped Cream (for topping, optional)
It’s not just for decoration; it adds a delightful finish! If dairy-free is your goal, there are excellent coconut cream brands available. -
Chocolate Syrup (for drizzling, optional)
A drizzling of chocolate syrup adds that extra wow factor! If you want an alternate route, consider caramel sauce instead.
Now that you’ve got your ingredients at the ready, let’s dive into the steps to create this sensational shake!
Step-by-Step Instructions
Step 1: Prepare Your Blender
Before we get underway, grab your trusty blender and make sure it’s clean and ready to go! A tip from the kitchen: make sure your blender is on a steady surface to avoid any wobbles while blending. Trust me; there’s nothing worse than a blender making a run for it when you’re just trying to make a delicious shake!
Step 2: Scoop the Ice Cream
Add your two cups of vanilla ice cream to the blender. This is the heart of your milkshake! To make blending easier, allow the ice cream to soften for about 5-10 minutes at room temperature before scooping. You want it to be creamy, not like a brick!
Step 3: Pour the Milk
Next, pour in one cup of milk. If you like a thicker shake, you can dial the milk back a bit. Remember, you can always add more, but it’s tough to thicken it up once it’s blended!
Step 4: Add the Peanut Butter
Now, measure out half a cup of peanut butter and dump it in. Watch out, it might stick to the sides a bit—no worries! It’s all about that delicious flavor. Easy tip: a quick spray of cooking oil on your measuring cup can help it slide right out!
Step 5: Sweeten It Up
Add your honey or sugar to taste. Start small; you can always add more if you like it sweeter! I often adjust this part based on how rich the peanut butter is; sometimes it doesn’t need any extra sweetening!
Step 6: Blend to Perfection
Put the lid on and blend on high until everything is smooth, creamy, and looks like a dream! If you find it’s too thick, just add a splash more milk until it reaches your desired consistency. Take a moment to enjoy that sweet, nutty aroma wafting through your kitchen!
Step 7: Taste Test
Here’s the fun part! Grab a spoon and do a little taste test. Is it perfect? If you think it needs a little something extra, here’s where you can tweak it. More peanut butter? Toss it in! Feeling chocolatey? Maybe stir in a splash of chocolate syrup!
Step 8: Serve it Up
Pour your luscious milkshake into tall glasses. If the foam rises a bit, that’s totally cool! You can always smooth it down with your spoon, or let it flow over like a milkshake fountain.
Step 9: Finish with a Flare
Top it off with whipped cream (if using), and let your artistry shine with some drizzling of chocolate syrup or maybe a sprinkle of crushed peanuts. Feel free to get creative—don’t be shy!
And there you have it—a rich, creamy Peanut Butter Milkshake ready to bring joy and smiles to everyone who experiences it. It’s as simple as that!
Serving Suggestions
Serve your Peanut Butter Milkshake in tall, frosty glasses, and for an extra special touch, why not garnish it with a sprinkle of crushed peanuts or a few chocolate chips? You could even serve alongside a warm chocolate chip cookie for that perfect dunking duo! Whether you’re enjoying this as a quick afternoon treat or making it the star of a dessert party, this drink is sure to bring a smile to every face.
Recipe Variations
- Chocolate Peanut Butter Milkshake: Add a couple of tablespoons of chocolate syrup or blend in some dark cocoa powder for a rich chocolate experience.
- Banana Peanut Butter Milkshake: Toss in one ripe banana for an extra fruity dimension—the creaminess will elevate the shake beautifully.
- Coffee Peanut Butter Milkshake: Blend in a shot of cooled espresso or some coffee for an energizing pick-me-up.
- Healthy Peanut Butter Milkshake: Use unsweetened almond milk, sugar-free peanut butter, and light ice cream for a wholesome version without sacrificing flavor.
Chef’s Notes
As with many recipes, this Peanut Butter Milkshake has evolved over the years. I’ve added oats for a breakfast version, played with flavor combos, and even tried freezing the shake to make creamy sorbet-like treats. The best part? Adapting this shake allows for endless experimentation! And let me tell you: mixing in different ingredients can yield some real kitchen surprises; some of my best discoveries came about when I wasn’t following the rules!
In one delightful twist, I once tried a marshmallow fluff topping instead of whipped cream for a dreamy s’mores-inspired shake, and wow—my friends went wild! The kitchen is a canvas; experiment boldly and create some art!
FAQs and Troubleshooting
Q: What if my shake is too thick?
A: No problem! Just add a bit more milk, a tablespoon at a time, and blend again until it’s just the right consistency. Remember, you want it smooth—just like enjoying your favorite childhood memories!
Q: Can I make this ahead of time?
A: While it’s best fresh, you can blend it and store it in the fridge for about an hour. Just give it a quick stir or a few pulses in the blender before serving to bring it back to life!
Q: How can I make this dairy-free?
A: Simple! Swap out the ice cream for dairy-free ice cream, use almond milk or oat milk in place of regular milk, and pick a nut butter that fits your dietary needs. You’ll have a delicious shake that everyone can enjoy!
Q: Is there a way to cut calories?
A: Absolutely! Use light ice cream or frozen yogurt, almond milk instead of regular milk, and skip the whipped cream or use a lighter version. It’ll still taste wonderful without weighing you down!
Nutritional Info (Optional)
If you’d like to tailor this to your health goals, here’s a rough nutritional breakdown (per serving, based on traditional ingredients):
- Calories: ~400
- Protein: ~12g
- Carbohydrates: ~55g
- Sugars: ~30g
- Fat: ~20g
(Note that this will vary based on specific ingredients used.)
And there you have it! Your very own Peanut Butter Milkshake, bursting with flavor and nostalgia. I hope you find as much joy in making and sipping this delightful treat as I do. Here’s to kitchen adventures and memories made over delicious food! Cheers and happy shaking!
Print
Peanut Butter Milkshake
- Total Time: 10 minutes
- Yield: 2 servings 1x
- Diet: Vegetarian
Description
A creamy and nutty Peanut Butter Milkshake that’s a delightful treat for all ages.
Ingredients
- 2 cups Vanilla Ice Cream
- 1 cup Milk
- 1/2 cup Peanut Butter
- 1–2 tablespoons Honey or Sugar (to taste)
- Whipped Cream (for topping, optional)
- Chocolate Syrup (for drizzling, optional)
Instructions
- Prepare your blender.
- Scoop the ice cream into the blender.
- Pour in the milk.
- Add the peanut butter.
- Sweeten it up with honey or sugar.
- Blend to perfection.
- Taste test and adjust if needed.
- Serve in tall glasses.
- Finish with whipped cream and chocolate syrup.
Notes
Serve with crushed peanuts or alongside chocolate chip cookies for added delight.
- Prep Time: 10 minutes
- Cook Time: 0 minutes
- Category: Dessert
- Method: Blending
- Cuisine: American
Nutrition
- Serving Size: 1 serving
- Calories: 400
- Sugar: 30g
- Sodium: 200mg
- Fat: 20g
- Saturated Fat: 10g
- Unsaturated Fat: 8g
- Trans Fat: 0g
- Carbohydrates: 55g
- Fiber: 2g
- Protein: 12g
- Cholesterol: 50mg
Keywords: milkshake, peanut butter, dessert, summer treat, creamy drink


