Chocolate Peanut Butter Milkshake
The Ultimate Chocolate Peanut Butter Milkshake Recipe
Hey there, fellow food lovers! Welcome back to my cozy kitchen, where I whip up everything from hearty dinners to sweet delights! Today, we’re diving into a dreamy dessert that’s bound to make your taste buds dance: the Chocolate Peanut Butter Milkshake. Picture this: you’re nestled on the couch after a long day, and you crave something sweet, creamy, and utterly indulgent. That’s where this delightful concoction comes in.
This milkshake is not just a beverage; it’s a nostalgic sip of happiness that evokes memories of summer evenings and carefree childhood days. Whether you enjoyed it at a local diner or made it at home with your family, this icy treat has a way of bringing warmth to your heart—even on the chilliest days!
In today’s recipe, I’ll share my favorite methods to create this liquid joy filled with the classic combo of chocolate and peanut butter. Don’t worry if you’re new to the kitchen! I’ll walk you through every step, ensuring you not only make the perfect milkshake but enjoy the experience along the way. Grab your blender and let’s blend our way to milkshake magic!
Personal Story
I still remember the very first time I made a milkshake with my mom. We were having a lazy Sunday afternoon, and she decided to surprise me with a special treat. We gathered the ingredients—scoops of chocolate ice cream, rich peanut butter, and milk. I loved how she blended everything together, the sounds of the blender mixing our laughter, and of course, the rich aroma wafting through the kitchen.
As we poured the thick, creamy shake into tall glasses, I noticed the way Mom added a sprinkle of crushed peanuts on top for that extra crunch. With cherry-red straws and big grins, we annihilated those milkshakes within minutes! It was such a simple thing, yet the joy was unforgettable.
Years later, as I found my passion for cooking and blogging, I never forgot that happiness in a glass. Making this Chocolate Peanut Butter Milkshake has become a ritual—a way to relive those sweet memories and create new ones. So, fill your glass, sit back, and let the nostalgia take over.
Ingredients
Here’s what you’ll need to create this creamy delight:
-
Chocolate Ice Cream (2 cups): The star of our show! Use your favorite brand or homemade; bitter-sweet, dark, or classic chocolate ice cream all work fantastically. If you’re looking for a healthier option, try frozen bananas or yogurt instead.
-
Peanut Butter (¼ cup): The creamy (or chunky) texture adds a delightful richness to your shake! For nut-free versions, sunflower seed butter is a brilliant substitute—just as tasty, with a similar consistency!
-
Milk (1 cup): Choose your milk of choice—whole, skim, almond, or oat milk. For a thicker milkshake, you can reduce the amount a bit or even use heavy cream for added richness.
-
Chocolate Syrup (2 tablespoons): A drizzle will amplify the chocolate flavor and give you that perfect milkshake look! You can use store-bought syrup or homemade, depending on your preference.
-
Whipped Cream (for topping): An optional but highly encouraged topping! Make it homemade for that fluffy texture, or grab some canned whipped cream for convenience.
-
Crushed Peanuts (for garnish): Not mandatory, but they give your shake that extra crunch and blend beautifully with the chocolate and peanut butter flavors.
-
Optional Add-ins: Feeling adventurous? Add a pinch of sea salt to enhance flavors or a scoop of protein powder if you want a post-workout treat!
Step-by-Step Instructions
Alright, let’s get blending! Follow these steps to whipped up your fabulous Chocolate Peanut Butter Milkshake:
-
Gather Your Ingredients: Start by arranging all the ingredients on your countertop. A tidy workspace makes the whole cooking experience smoother and more enjoyable!
-
Blend the Goodies: Toss in the 2 cups of chocolate ice cream, ¼ cup of peanut butter, and 1 cup of milk into your blender. Use more or less milk depending on how thick you like your shakes. The ice cream and peanut butter will give you that wonderfully thick texture!
-
Add Chocolate Syrup: This is where the magic happens! Drizzle in 2 tablespoons of chocolate syrup for that indulgent flavor. If you’re a total chocolate lover like me, feel free to add an extra tablespoon.
-
Blend Away: Secure the lid tightly, and blend on high speed for about 30 seconds. Be sure to occasionally stop the blender to scrape down the sides—this ensures all the ingredients get mixed up beautifully. You want a smooth and creamy texture, so blend as necessary!
-
Tasting Time: Before you pour, give it a quick taste! Adjust the flavors if needed—a touch more peanut butter or an extra scoop of ice cream might just do the trick!
-
Serve It Up: Pour the delicious milkshake into tall glasses. I love using large mason jars for that vintage touch. Memory of that first milkshake floods back as I see those jars filled to the brim!
-
Top It Off: Here’s where you can get a bit fancy. Slather a swirl of whipped cream on top, drizzle more chocolate syrup, and sprinkle the crushed peanuts for some extra flair!
-
Grab a Straw and Enjoy: Finish it off with a colorful straw, take a delightful sip, and savor the flavors! This is where all the hard work pays off, my friend.
Serving Suggestions
Let’s get creative with how you serve this mouthwatering milkshake! Pour your Chocolate Peanut Butter Milkshake into frosty glasses and add a decorative touch with an extra dollop of whipped cream and a drizzle of chocolate syrup on top. For a festive occasion, serve with a side of cookies or brownies for the ultimate indulgence!
If you’re hosting a BBQ or party, consider setting up a milkshake bar with various toppings like crushed cookies, fruit, or even sprinkles. Everyone can customize their shake!
Recipe Variations
Feeling like mixing things up? Here are a few creative twists to elevate your milkshake game:
-
Banana Bliss: Toss in half a ripe banana for a hint of fruity flavor. The banana adds natural sweetness and creaminess.
-
Minty Fresh Twist: Add a few drops of peppermint extract before blending for a refreshing chocolate mint variation that’s reminiscent of your favorite ice cream parlor!
-
Cookie Monster Shake: Crumble some Oreo cookies into the milkshake for a delightful texture and extra chocolate indulgence.
-
Healthy Peanut Butter Version: Use frozen yogurt or the banana trick to create a lower-calorie shake without sacrificing flavor!
-
More Nutty Flavors: Toss in some almond butter or hazelnut spread in place of peanut butter for a different nutty profile!
Chef’s Notes
Oh, let me share a little kitchen side story. Once, I was making this marvel for a group of friends, but I mistakenly grabbed the chili chocolate ice cream instead of the regular chocolate. In a moment of panic, I just ran with it! I blended it up, and it turned out to be a spicy-sweet hit! Who knew experimenting could yield delightful surprises?
This recipe has evolved over time—different variations, experimental ingredients, but the core love for the classic remains. It truly represents the joy of cooking and creating something that speaks to your taste buds!
FAQs and Troubleshooting
1. My milkshake is too thick! What do I do?
Don’t worry! Just add milk a tablespoon at a time while blending until you reach your desired consistency.
2. Can I use frozen milk instead of ice cream?
Absolutely! If you’re looking for a healthier alternative, frozen bananas or yogurt will work perfectly as a base. Just blend them with milk to achieve a creamy texture!
3. Is it possible to make this milkshake dairy-free?
Definitely! Use your preferred non-dairy ice cream and milk (almond, coconut, or oat milk are fantastic options) to make it completely dairy-free!
4. My shake is too sweet; how can I tone it down?
If your shake is overly sweet, add a pinch of salt to balance the flavors. You can also mix in a scoop of plain yogurt to cut through the sweetness!
Nutritional Info (Optional)
- Calories: Approximately 500-600 kcal per serving (depends on specific brands and quantities used)
- Protein: 12-15g
- Fat: 20-25g
- Carbohydrates: 70-80g
Conclusion
And there you have it! Your very own Chocolate Peanut Butter Milkshake! Whether you’re enjoying it solo or sharing it with friends and family, this treat brims with charm and flavor that’ll leave everyone wanting more. Remember, cooking is a journey filled with delicious moments and lovely memories. So don’t hesitate to experiment, share your creations, and most importantly, enjoy every sip!
Thanks for joining me today in my kitchen. Keep that apron on and happy cooking!
Print
Chocolate Peanut Butter Milkshake
- Total Time: 10 minutes
- Yield: 2 servings 1x
- Diet: Vegetarian
Description
This indulgent Chocolate Peanut Butter Milkshake combines rich chocolate ice cream with creamy peanut butter for a delightful treat.
Ingredients
- 2 cups Chocolate Ice Cream
- ¼ cup Peanut Butter
- 1 cup Milk
- 2 tablespoons Chocolate Syrup
- Whipped Cream (for topping)
- Crushed Peanuts (for garnish)
- Optional Add-ins: pinch of sea salt, scoop of protein powder
Instructions
- Gather Your Ingredients: Start by arranging all the ingredients on your countertop.
- Blend the Goodies: Toss in the chocolate ice cream, peanut butter, and milk into your blender.
- Add Chocolate Syrup: Drizzle in chocolate syrup for that indulgent flavor.
- Blend Away: Secure the lid and blend on high speed for about 30 seconds.
- Tasting Time: Before you pour, give it a quick taste and adjust flavors if needed.
- Serve It Up: Pour the delicious milkshake into tall glasses.
- Top It Off: Slather a swirl of whipped cream on top and sprinkle crushed peanuts.
- Grab a Straw and Enjoy: Finish it off with a straw, take a sip, and savor the flavors!
Notes
For a healthier option, substitute chocolate ice cream with frozen bananas or yogurt. Customize with your favorite toppings!
- Prep Time: 10 minutes
- Cook Time: 0 minutes
- Category: Dessert
- Method: Blending
- Cuisine: American
Nutrition
- Serving Size: 1 serving
- Calories: 550
- Sugar: 60g
- Sodium: 300mg
- Fat: 25g
- Saturated Fat: 10g
- Unsaturated Fat: 12g
- Trans Fat: 0g
- Carbohydrates: 75g
- Fiber: 4g
- Protein: 15g
- Cholesterol: 80mg
Keywords: milkshake, chocolate, peanut butter, dessert, creamy, indulgent
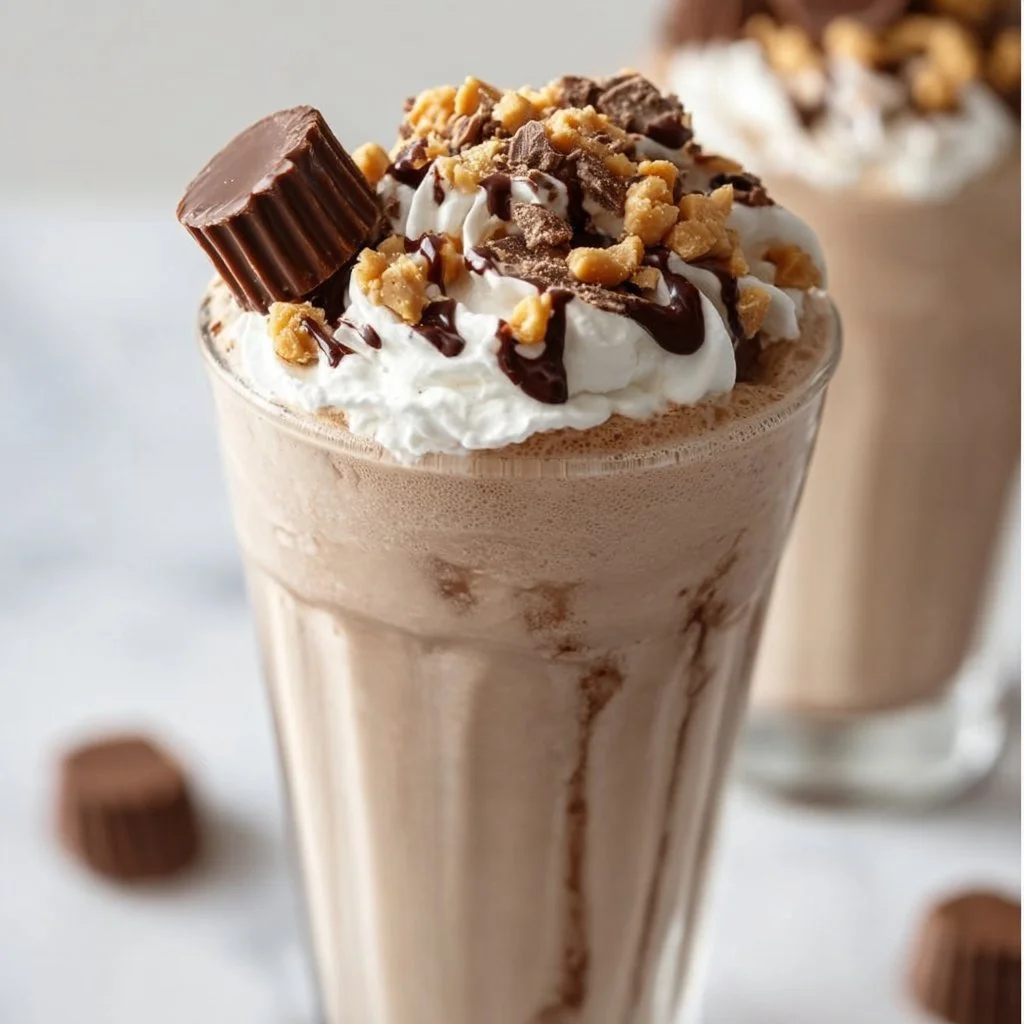
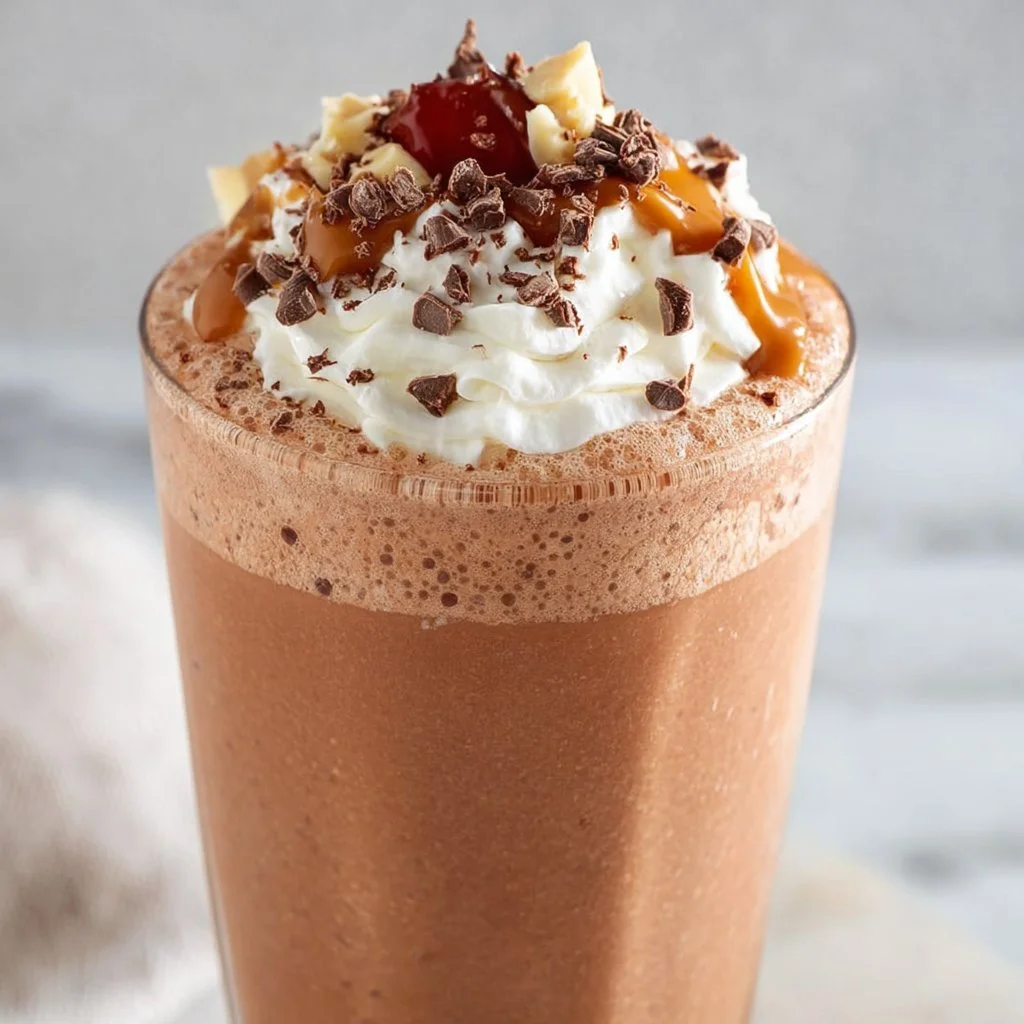
Peanut Butter Cup Milkshake
The Ultimate Peanut Butter Cup Milkshake: A Creamy Dream Come True
Hey there, fellow food enthusiasts! 🎉 I’m Olivia Bennett, your go-to guide for all things delicious and homemade! Today, we’re diving into a sweet treat that takes me straight back to my childhood: the Peanut Butter Cup Milkshake. If you adore the rich flavor of peanut butter mingling with the sweetness of chocolate, this dreamy milkshake is about to become your new favorite indulgence.
Picture this: it’s a hot summer day, and my brothers and I were running around outside, laughter echoing as we played tag on the lawn. Nothing could cool off those sun-kissed moments quite like heading into the kitchen, where my mom would be melting chocolate over low heat. She had a knack for crafting milkshakes that were not just drinks, but blissful experiences that shaped our love for food. One day, she surprised us with what she called a “Peanut Butter Cup” shake, inspired by our beloved candy. I still remember the anticipation as we waited, the kitchen filled with the heavenly scent of creamy peanut butter and rich chocolate. Each sip took us on a delicious ride, leaving us giggling about the peanut butter mustaches we’d inevitably sport.
Fast forward a few years, and I knew I had to recreate that beloved moment. And guess what? I’ve perfected my version, adding a few creative spins to make it even more delightful! This Peanut Butter Cup Milkshake is loaded with flavors that dance together in perfect harmony and promises to transport you back to carefree days while indulging your adult cravings. Whether you’re treating yourself to a midweek pick-me-up or hosting friends for a fun dessert night, this milkshake is sure to impress. So grab your blender and let’s get mixing, shall we?
Personal Story
One afternoon, as I played in the yard, the mouthwatering aroma of chocolate wafting in from the kitchen drew me inside like a magnetic force. Little did I know, my mom was whipping up her famous Peanut Butter Cup Milkshake. My brothers and I huddled at the counter, our eyes wide with excitement as she blended together creamy vanilla ice cream, rich peanut butter, and a generous drizzle of chocolate syrup.
When she handed us those frosty glasses topped with whipped cream, it felt like Christmas! Each sip was pure joy, with the chocolate and peanut butter layers creating a flavor explosion in my mouth. It was our unofficial summer ritual, turning even the most mundane days into something extraordinary. It taught me how food could create memories, spark laughter, and bring people together—all while satiating our sweet tooth. Even now, every time I take a sip of a Peanut Butter Cup Milkshake, I’m reminded of those cherished summer afternoons, laughter echoing while chocolate mustaches were the insignia of our sweet adventures.
Ingredients
Let’s gather our ingredients for this heavenly shake! Here’s what you’ll need:
-
Vanilla Ice Cream: This is the base of your milkshake. Use quality, creamy vanilla for the best flavor. If you want to lighten this up, you can also substitute with frozen yogurt or a dairy-free ice cream!
-
Whole Milk: Adds the perfect creaminess. If you’re looking for a lower-fat option, skim milk works just fine, or try almond milk for a nutty twist!
-
Creamy Peanut Butter: The star ingredient! Smooth peanut butter gives a luscious texture. For a twist, try crunchy peanut butter for added texture, or almond butter for a new flavor.
-
Chocolate Syrup: It adds that rich chocolate flavor we love. You can use store-bought or make your own by mixing cocoa powder with a bit of sugar and water.
-
Reese’s Peanut Butter Cups: Chop these up and add them for that delicious candy crunch. In a pinch, use any other chocolate-peanut butter combination candy.
-
Whipped Cream: For topping! Store-bought is convenient, but homemade is always a classy touch—just whip some heavy cream and sugar until fluffy!
-
Chocolate Shavings (optional): For a gourmet finish! You can make these by shaving a chocolate bar or using mini chocolate chips.
Step-by-Step Instructions
Step 1: Gather Your Ingredients
Before you start, make sure you have all your ingredients measured and ready to go. It helps everything blend together smoothly and quickly—like a pro! 🎉
Step 2: Blend It Up!
Throw the following into your blender:
- 2 cups of vanilla ice cream
- 1 cup of whole milk
- ½ cup of creamy peanut butter
- ¼ cup of chocolate syrup
Blend it on high until everything is perfectly smooth. Chef’s Tip: If your milkshake is too thick, add more milk a tablespoon at a time until desired consistency is reached. If it’s too thin, you can always toss in an extra scoop of ice cream!
Step 3: Add the Crunch
Once your base is beautifully blended, it’s time to fold in the fun part! Add about 1 cup of chopped Reese’s Peanut Butter Cups to the blender, and pulse gently a few times. You want chunks, not mush! This way, you get delightful bites of candy in every sip.
Step 4: Taste Test
Now, this is the most essential step—taste it! Use a spoon and let this luscious concoction pass your lips. Feel free to add a drizzle more of chocolate syrup or peanut butter to elevate it further. Remember, this is your masterpiece!
Step 5: Prep the Glasses
Grab your favorite tall milkshake glasses and drizzle the inside with chocolate syrup for that stunning presentation. You can get creative here! Swirl it around for a marbled effect—your guests will be trying to take pictures before they even take a sip!
Step 6: Pour and Top
Pour your milkshake into the prepared glasses, filling them just to the brim. Go ahead and let some froth spill over—it’s part of the fun! Then, top generously with whipped cream, a sprinkle of chocolate shavings, and maybe even a mini Reese’s on top for good measure!
Step 7: Serve Immediately
Grab some cute straws and get ready to dig in! There’s no waiting around; this milkshake is best enjoyed fresh! Gather around with friends or family and enjoy each sip.
Serving Suggestions
This Peanut Butter Cup Milkshake makes for an irresistibly fun dessert! Serve it alongside hot brownies or a slice of your favorite chocolate cake for a true dessert experience. You can also place the milkshake in a large bowl, add extra toppings (think crushed cookies, sprinkles, or a drizzle of caramel), and hand out spoons for a delightful sharing experience!
Recipe Variations
Feel like mixing things up? Here are some fun twists you could try:
- Banana Peanut Butter Milkshake: Add a ripe banana for a creamy, fruity version that pairs beautifully with chocolate!
- Mint Chocolate Peanut Butter Shake: Add a few drops of peppermint extract for a refreshing green shake.
- Dairy-Free Option: Use coconut milk ice cream and almond milk for a delicious dairy-free version.
- Protein Packed: Add a scoop of your favorite protein powder for a post-workout treat.
- Mocha Peanut Butter Shake: Mix in a tablespoon of instant espresso powder to kick it up a notch with coffee flavor.
Chef’s Notes
Oh, the memories this shake brings back! I’ve experimented a lot over the years with this recipe, from adding different candies to trying out various ice cream bases. I’ve even served this as a sundae at dinner parties, and every time it’s a hit! A funny story: one day during a holiday gathering, I made a huge batch, thinking it would last, but it vanished within ten minutes! This shake has a magical way of making everyone feel like a kid again, and I’ve come to realize the secret sauce is all in sharing it with loved ones.
FAQs and Troubleshooting
1. My milkshake is too thick; what do I do?
Add more milk gradually, blending in between additions until the desired consistency is achieved.
2. What if I don’t have peanut butter?
You can swap in any nut butter or even sun butter for a nut-free option.
3. Can I make this ahead of time?
While best enjoyed fresh, you can make it a few hours in advance, just keep it in the freezer in an airtight container to maintain its thickness.
4. Can I make it lower in sugar?
Absolutely! Use unsweetened almond milk instead of regular milk, and opt for no-added sugar peanut butter or reduce the amount of chocolate syrup in the recipe.
With each delicious sip of this Peanut Butter Cup Milkshake, I hope you feel a connection with those joyful moments and that it inspires laughter and warmth in your kitchen. Happy blending, and may delicious memories abound! 🍦🥳
Print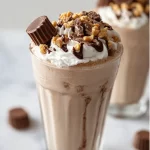
Ultimate Peanut Butter Cup Milkshake
- Total Time: 10 minutes
- Yield: 4 servings 1x
- Diet: Vegetarian
Description
A delightful milkshake blending creamy peanut butter and rich chocolate, reminiscent of childhood summer days.
Ingredients
- 2 cups Vanilla Ice Cream
- 1 cup Whole Milk
- ½ cup Creamy Peanut Butter
- ¼ cup Chocolate Syrup
- 1 cup Reese’s Peanut Butter Cups, chopped
- Whipped Cream, for topping
- Chocolate Shavings (optional)
Instructions
- Gather your ingredients.
- Blend the vanilla ice cream, whole milk, creamy peanut butter, and chocolate syrup on high until smooth.
- Add the chopped Reese’s Peanut Butter Cups and pulse gently a few times.
- Taste the milkshake and adjust sweetness as desired.
- Prep the glasses by drizzling chocolate syrup inside.
- Pour the milkshake into the glasses and top with whipped cream and chocolate shavings.
- Serve immediately with straws.
Notes
For variations, try adding a banana, mint extract, or protein powder for extra nutrition.
- Prep Time: 10 minutes
- Cook Time: 0 minutes
- Category: Dessert
- Method: Blending
- Cuisine: American
Nutrition
- Serving Size: 1 serving
- Calories: 450
- Sugar: 50g
- Sodium: 200mg
- Fat: 20g
- Saturated Fat: 10g
- Unsaturated Fat: 6g
- Trans Fat: 0g
- Carbohydrates: 60g
- Fiber: 3g
- Protein: 12g
- Cholesterol: 30mg
Keywords: milkshake, peanut butter, chocolate, dessert
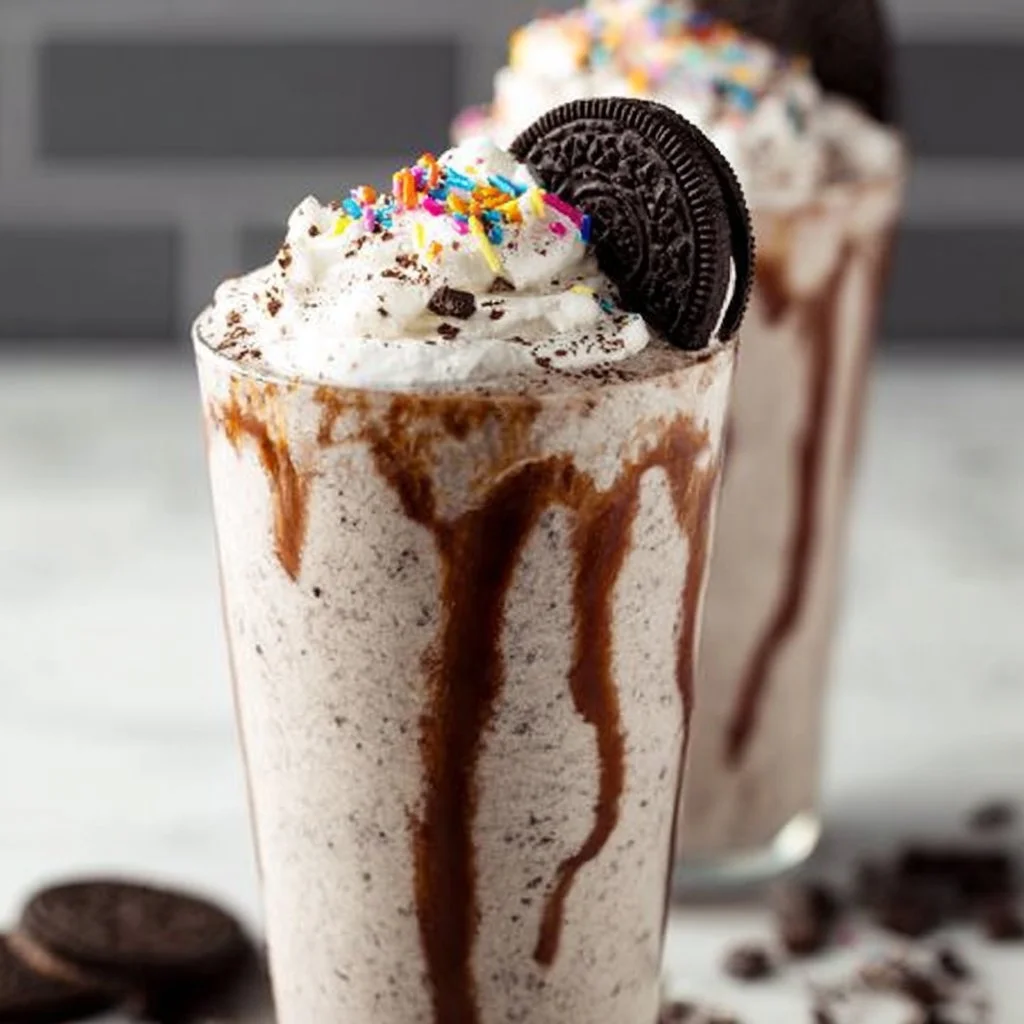
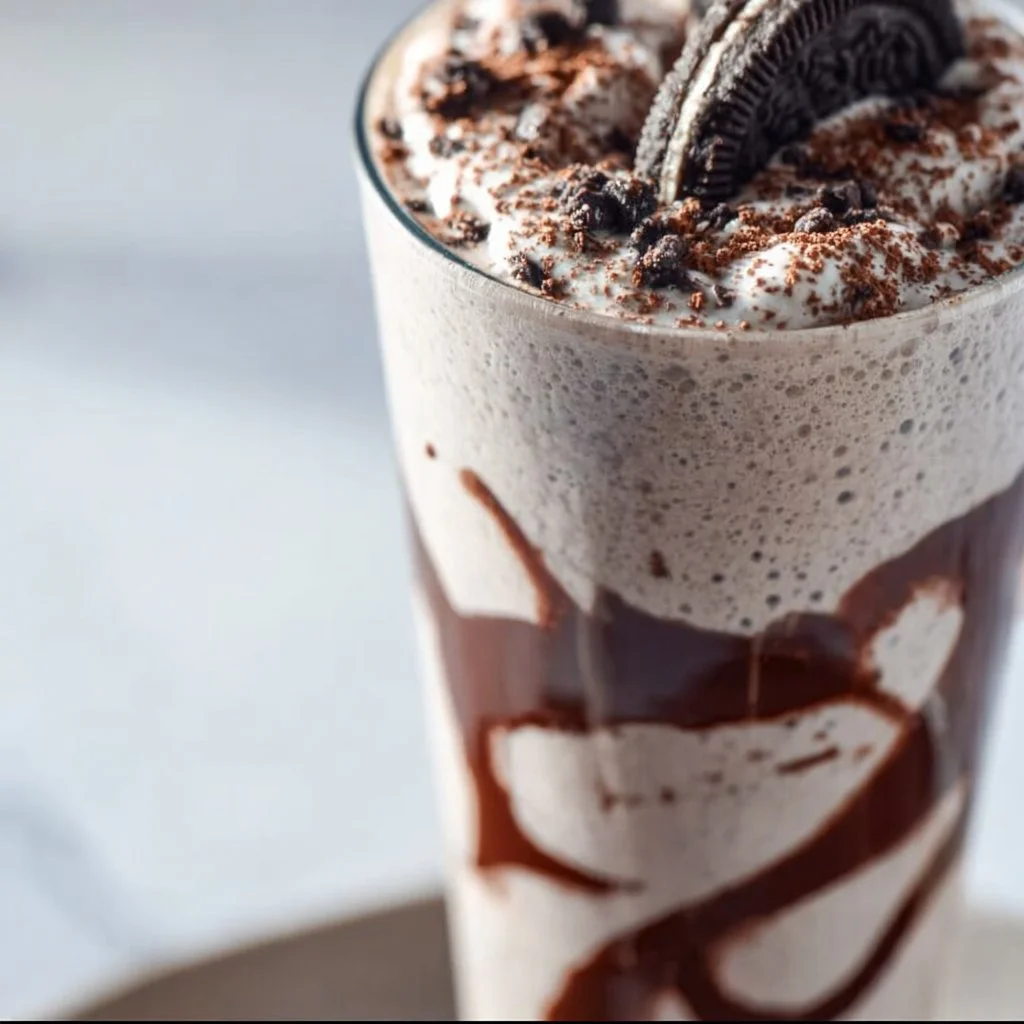
Oreo Milkshake
The Ultimate Oreo Milkshake Recipe: A Deliciously Indulgent Treat!
Ah, the humble milkshake! There’s something about the sound of a blender whirring away, the delightful swirl of ingredients combining, and that moment of anticipation as you pour it into a glass. And if there’s one milkshake that reigns supreme in the world of creamy, dreamy indulgence, it’s the Oreo milkshake! This classic treat isn’t just a drink; it’s a nostalgia-fueled experience that takes you back to carefree summer days spent at the diner, sharing laughs with friends, or enjoying a cozy evening on the couch with a good movie.
In this blog post, we’re diving deep into the world of Oreo milkshakes. I’ll walk you through my favorite recipe, sprinkled with stories, tips, and plenty of friendly advice to make your milkshake-making experience fun and easy! Let’s unlock the secrets to creating a delicious Oreo milkshake that’ll absolutely blow your mind and impress your friends and family.
Personal Story: Memories and Magic
I still remember the first time I tasted an Oreo milkshake. It was a balmy summer evening, and my family had decided to indulge in takeout from our favorite diner. As soon as I took that first sip of the rich, creamy concoction, I felt as if I had discovered pure magic. The blend of rich vanilla ice cream, real milk, and those delightful Oreo cookies created an explosion of flavor that made my taste buds dance with joy.
Years later, I found myself in the kitchen trying to recreate that same deliciousness at home. I was determined to nail the perfect consistency—a balance of creamy ice cream and crunchy cookie bits. After a few failed attempts (let’s just say one batch ended up more like a soup than a shake!), I finally struck gold. The process became a tradition—my friends and I would gather for our mini milkshake parties, experimenting with different toppings, mix-ins, and, of course, other cookies.
Now, each time I make an Oreo milkshake, it brings me back to those fun evenings, laughter, and all the sweet memories associated with it.
Ingredients
Let’s gather our ingredients! Here’s what you’ll need to make a fabulous Oreo milkshake:
-
Oreo cookies (about 6-8)
- These iconic cookies are the stars of our show! You can swap them for any chocolate sandwich cookies you like, but trust me—the classic Oreo flavor is unmatched.
-
Vanilla ice cream (2 cups)
- The creaminess of the vanilla ice cream is essential to achieving that thick milkshake consistency. For a dairy-free option, try coconut or almond milk ice cream.
-
Milk (1 cup)
- Whole milk provides a rich flavor, but feel free to use skim, almond, or oat milk. Adjust the amount for your desired thickness; less milk will yield a thicker shake!
-
Chocolate syrup (2 tablespoons)
- A drizzle of chocolate syrup adds an extra layer of deliciousness. You can substitute with caramel syrup for a fun twist!
-
Whipped cream (for topping)
- Who can resist a dollop of fluffy whipped cream on top? If you’re looking for a lighter option, skip this or use coconut whipped cream!
-
Crushed Oreos (for garnish)
- Using crushed Oreos as a garnish adds a nice touch and gives it that extra crunch. You can even try other crushed cookies or sprinkles!
Each ingredient plays a vital role in creating that oh-so-satisfying Oreo milkshake. If you’re out of something, don’t fret! I’ve shared some substitution tips to spark your culinary creativity.
Step-by-Step Instructions
Now that we have our ingredients, it’s time to make some magic happen! Follow these steps for the ultimate Oreo milkshake:
-
Prep Your Ingredients:
Gather all your ingredients on the counter. If you’re using regular Oreo cookies,, pull out as many as you need—don’t be shy; you may want to add a few more later! -
Blend That Ice Cream:
In a blender, add the vanilla ice cream. Use a spatula to break it up a bit; this will help the blending process go smoother. Throw in the milk, and don’t forget the chocolate syrup for that rich, chocolaty flavor!- Tip: Start with less milk; you can always add more if you want a thinner shake!
-
Crush the Oreos:
Toss in the Oreo cookies (yes, we’re diving in with whole cookies!), and blend on low speed. You want to mix it enough so that you get little cookie bits throughout but not so much that it turns to dust.- Chef Hack: If you want a pretty presentation, reserve some cookie pieces to sprinkle on top later!
-
Check the Consistency:
Give your milkshake a taste test! If it’s too thick, add more milk, one tablespoon at a time, until it reaches your desired consistency. Blend again until fully combined. -
Pour and Top:
Grab your favorite glass (or two), and pour in your milkshake. Take a moment to admire the swirls of cookies and cream. Top it off with whipped cream, a drizzle of chocolate syrup, and a sprinkle of crushed Oreos for that extra flair! -
Enjoy:
Serve with a thick straw or a long spoon, and dive right in! Don’t forget to share—unless you want to keep it all to yourself (I wouldn’t blame you!).
Serving Suggestions
For serving, you can go all out or keep it simple. Here are a couple of my favorite ways to present this irresistible Oreo milkshake:
-
Classic Glass: A tall glass works wonders! Layer the milkshake in the glass and then layer the whipped cream and crushed Oreos on top. Serve with a colorful straw for a nostalgic feel.
-
Milkshake Bar: Set up a fun milkshake station where everyone can customize their shakes with different toppings. Set out whipped cream, sprinkles, extra crushed cookies, or even mini chocolate chips for guests to add their unique twist!
Recipe Variations
Feeling adventurous? Here are a few variations and twists to elevate your Oreo milkshake experience:
-
Mint Oreos: Swap regular Oreos for mint-flavored Oreos for a refreshing twist—think of it as an Oreo meets After Eight experience!
-
Peanut Butter Oreo: Add a couple of tablespoons of peanut butter to the mix for a nutty, indulgent flavor that complements the chocolate cookies perfectly.
-
Pumpkin Spice Oreo: In the fall, use Pumpkin Spice Oreos, and add a sprinkle of cinnamon for a seasonal spin on this classic treat.
-
Coffee Oreo Milkshake: If you’re a coffee lover, toss in a shot of espresso for a delightful caffeinated kick!
-
Vegan Options: Use dairy-free ice cream and almond milk for a creamy, plant-based version—no one will even notice the difference!
Chef’s Notes
Ah, the memories this Oreo milkshake recipe brings! Over the years, I’ve made these shakes for countless family gatherings and movie nights. What started as an experiment in my kitchen has become a staple, with variations that adapt with the seasons. One time, after a particularly long week, I decided to add crushed peppermint candy to the mix, and it turned into a new family favorite!
I love how simple ingredients can come together to elicit such joy. If you ever find yourself with leftover Oreos (is that even possible?), throw them in a milkshake! You can’t go wrong.
FAQs and Troubleshooting
1. My milkshake is too thick! What do I do?
If your milkshake turns out thicker than you’d like, simply add a splash more milk and blend it again until you reach your desired consistency.
2. Can I make this without a blender?
You can certainly mix this in a jar using a milk frother or even a hand mixer if you have one! It may take a bit more elbow grease, but it’s possible!
3. What do I do with leftover milkshake?
Store any leftovers in an airtight container in the freezer for up to a week. You can re-blend it later, but know that the texture may change slightly.
4. Can I use other cookies?
Absolutely! While Oreos are fantastic, feel free to swap them out for any other chocolate sandwich cookies or even different flavors. The key is to create a mix you enjoy!
Nutritional Info
While indulgent treats like this aren’t typically low-calorie, you can definitely enjoy in moderation! A standard serving of this Oreo milkshake packs approximately:
- Calories: 500-600 (depending on ingredients)
- Protein: 10g
- Fat: 25g
- Carbohydrates: 70g
- Sugar: 50g
Keep in mind that using dairy-free ice cream or lower-fat milk options can help reduce calories and fat content!
Now you’re armed with all the secrets to making your very own Oreo milkshake! Whether it’s a treat for yourself or you’re sharing it with friends, this recipe is sure to delight. So grab your ingredients, fire up that blender, and let’s create some cookie-infused memories in the kitchen! Happy shaking!
Print
Ultimate Oreo Milkshake
- Total Time: 10 minutes
- Yield: 2 servings 1x
- Diet: Vegetarian
Description
Indulge in the classic Oreo milkshake that combines rich vanilla ice cream, milk, and crunchy Oreo cookies for a deliciously satisfying treat.
Ingredients
- 6–8 Oreo cookies
- 2 cups vanilla ice cream
- 1 cup milk
- 2 tablespoons chocolate syrup
- Whipped cream (for topping)
- Crushed Oreos (for garnish)
Instructions
- Gather all your ingredients on the counter.
- Add the vanilla ice cream to a blender and break it up slightly.
- Pour in the milk and chocolate syrup.
- Include the Oreo cookies and blend on low speed until combined.
- Taste check the consistency; add more milk if too thick.
- Pour the milkshake into glasses and top with whipped cream and crushed Oreos.
- Serve with a straw or spoon and enjoy!
Notes
For variations, try different cookie flavors or add toppings such as peanut butter or mint.
- Prep Time: 10 minutes
- Cook Time: 0 minutes
- Category: Dessert
- Method: Blending
- Cuisine: American
Nutrition
- Serving Size: 1 serving
- Calories: 600
- Sugar: 50g
- Sodium: 200mg
- Fat: 25g
- Saturated Fat: 15g
- Unsaturated Fat: 8g
- Trans Fat: 0g
- Carbohydrates: 70g
- Fiber: 2g
- Protein: 10g
- Cholesterol: 60mg
Keywords: milkshake, Oreo, dessert, treat, creamy, cookies
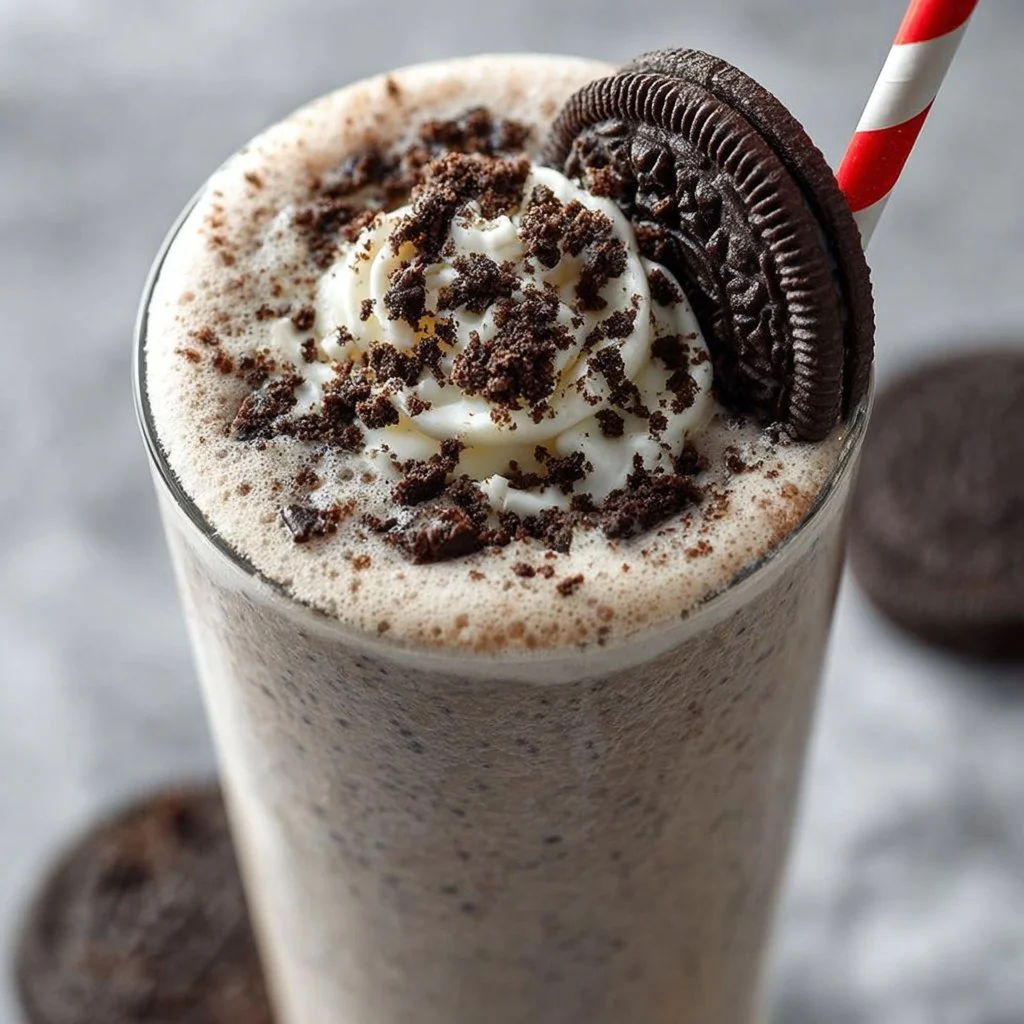
Oreo Milkshake
Creamy Dreamy Oreo Milkshake Recipe
Welcome to my cozy corner of the kitchen! Today, I’m excited to share a recipe that’s not just a treat, but a nostalgic trip down memory lane: the delicious Oreo milkshake. There’s something undeniably magical about this simple combination of ice cream, milk, and those iconic black-and-white cookies. With every sip, we’re transported back to carefree summer days and the joyful hugs of family gatherings.
As a passionate home cook, I truly believe that food is more than just fuel; it’s an experience meant to be shared. Whether you’re enjoying it alone on a quiet evening or whipping up a batch for a gathering of friends, an Oreo milkshake never fails to put a smile on my face (and I’m sure it’ll do the same for you!).
Today’s recipe is about more than just a tasty indulgence — it’s about creating memories with the people you cherish most. Let’s dive into the delightful world of Oreo milkshakes, where the only requirement is a love for delicious flavors and a willingness to sprinkle a little happiness into your day.
Personal Story
I remember the first time I made an Oreo milkshake. I was about ten years old, standing on a stool in my mom’s kitchen while trying to reach the blender on the countertop. The kitchen was filled with warm scents of baking cookies, and in the background, my siblings were busy with their own fun kitchen experiments. We had just come back from our favorite ice cream parlor, where we were dessert-testing for the family.
Eager to recreate that magical shake, I took a little trip to the pantry and grabbed a bag of Oreos. I carefully opened them, but the cookies crumbled under the weight of my excitement, and chocolate crumbs flew everywhere! Instead of worrying about the mess, my mom joined in the fun, helping me toss the cookies into the blender along with scoops of cool vanilla ice cream.
The milkshake was a little lumpy, twinkling with bits of Oreos floating around like stars in a chocolate galaxy. Once it was done, we each grabbed a straw and took that first sip together. It was a moment that sparked laughter, joy, and the pure bliss of homemade treats. That creamy, sweet concoction taught me that cooking is more than technique; it’s about having fun and making memories.
Ingredients
Now, let’s gather our ingredients! Here’s what you’ll need for this fantastic Oreo milkshake:
-
Oreo Cookies: The stars of the show! Famous for their creamy filling and cookie crunch, these iconic treats provide the base flavor. You can experiment with different Oreo varieties, like double-stuffed or mint, for a unique twist.
-
Vanilla Ice Cream: This creamy delight gives the milkshake its luscious texture. Feel free to swap with any ice cream you love — chocolate or cookies and cream work beautifully too.
-
Whole Milk: This adds the right amount of creaminess and helps blend everything smoothly together. If you want to cut down on calories, opt for 2% milk or your favorite milk alternative like almond or oat milk.
-
Whipped Cream: While optional, it’s a glorious topping that adds extra fluff and sweetness. You can either whip your own or grab a can from the store.
-
Chocolate Syrup: Drizzled on top or blended in, it amps up the chocolatey goodness! Use store-bought or homemade syrup for a personal touch.
-
Chocolate Shavings or Crushed Oreos for Garnish: These are perfect for that finishing touch. Don’t skip out on garnishing; it makes the treat feel extra special!
Chef Insight:
For a richer flavor, consider adding a splash of vanilla extract to the milkshake mixture. It enhances the taste just like a scoop of love!
Step-by-Step Instructions
Now that we’ve got our ingredients lined up, let’s get to the fun part – making your Oreo milkshake!
-
Crush the Oreos: Start by crushing about 4-5 Oreo cookies. You can use a food processor or pop them into a zip-lock bag and give them a hearty whack with a rolling pin. This will create a delightful crumb texture in your shake! Reserve some crumbs for garnish later.
-
Blend the Ingredients: In a blender, combine 3-4 scoops of vanilla ice cream, about 1 cup of whole milk, and the crushed cookies. The amount of milk can be adjusted based on how thick you want your shake. For a thicker shake, start with less milk and add gradually.
- Tip: Always add ice cream before the milk to prevent a messy blender situation. Trust me, I’ve been there!
-
Add Chocolate Syrup: For an extra indulgent flavor, next drizzle in 2 tablespoons of chocolate syrup. If you’re like me and love a good chocolate taste, don’t hold back!
-
Blend Again: Put the lid on and blend until combined and smooth — about 30 seconds to a minute. You want to see a beautiful, thick milkshake with cookie bits peppered throughout.
-
Taste Test: Here comes the most fun part! Pour a little bit into a glass to taste. If it’s perfect, wonderful! If not, tweak it — maybe a little more syrup or ice cream, depending on your taste.
-
Serve it Up: Pour the milkshake into tall glasses. You can go fancy if you want by drizzling chocolate syrup on the insides of the glass before pouring in the shake.
-
Top with Whipped Cream & Oreos: Now, the pièce de résistance! Add whipped cream to the top, and sprinkle those reserved Oreo crumbs and/or chocolate shavings to make it visually appealing and extra delicious!
Chef Hack:
If you want to get fancy, you can add a dollop of whipped cream followed by a whole Oreo cookie standing proud on top! It makes for a show-stopper treat.
Serving Suggestions
Presentation is key! Serve your Oreo milkshake in tall, clear glasses so that those layers of rich chocolate and creamy white ice cream are showing off. You can even accompany your milkshake with a few extra Oreos on the side for some dipping fun (and another way to experience that creamy goodness)!
Recipe Variations
Feeling adventurous? Let’s shake things up! Here are a few tasty twists to try with your Oreo milkshake:
-
Mint Oreo Shake: Swap regular Oreos for Mint Oreos and add a drop of peppermint extract for a refreshingly cool flavor.
-
Peanut Butter Oreo Shake: Toss in a tablespoon of creamy peanut butter before blending for a deliciously nutty twist.
-
Coffee Oreo Shake: If you love your caffeine fix, add a shot of espresso or strong brewed coffee to give it a delightful kick!
-
Cookies and Cream Oreo Shake: For an ultra-creamy treat, use cookies and cream ice cream as the base, combining both flavors in every sip.
-
Vegan Version: Use dairy-free ice cream and plant-based milk for a version that everyone can enjoy, regardless of dietary restrictions!
Chef’s Notes
This recipe has transformed over time, reflecting the various delights of my own kitchen experiments. I once discovered that tossing in a sprinkle of cinnamon elevated the chocolatey experience further! I urge you to think outside the box and personalize your shake; it’s all about making memories and having fun! And hey, if you find yourself making a bit of a mess — embrace it! Every splash and spill is a story waiting to be told.
FAQs and Troubleshooting
-
Why is my milkshake too thick?
- If it’s too thick, just add a bit more milk until you get the desired consistency. Blend again to ensure everything mixes nicely.
-
Can I make this milkshake ahead of time?
- Milkshakes are best enjoyed fresh, but you can prepare the base ahead. Just blend the ice cream and milk, then add the Oreos just before serving.
-
What’s the best way to store leftovers?
- If you have any leftover milkshake (rare, but it happens!), store it in an airtight container in the freezer. Let it sit at room temperature for a few minutes before trying to blend again.
-
How do I adjust the sweetness?
- If it’s too sweet for your liking, add a pinch of sea salt or a dash of unsweetened cocoa powder to balance flavors.
Nutritional Info
While I don’t often dwell on numbers in my kitchen adventures, a typical serving of this Oreo milkshake contains around 540 calories, with varying amounts depending on specific brands of ingredients used. Don’t forget — it’s all about balance and treating ourselves now and then!
So there you have it! Your very own Oreo milkshake recipe, filled with love and kitchen tales that spark joy. I hope you enjoy making this rich and creamy drink as much as I do. Cheers to sweet indulgences and even sweeter memories! Happy cooking!
Print
Creamy Dreamy Oreo Milkshake
- Total Time: 10 minutes
- Yield: 2 servings 1x
- Diet: Vegetarian
Description
A rich and creamy Oreo milkshake that captures the joy of childhood memories with every sip.
Ingredients
- 4–5 Oreo Cookies
- 3–4 scoops Vanilla Ice Cream
- 1 cup Whole Milk
- 2 tablespoons Chocolate Syrup
- Whipped Cream (optional)
- Chocolate Shavings or Crushed Oreos for garnish
Instructions
- Crush the Oreos: Start by crushing about 4-5 Oreo cookies in a food processor or zip-lock bag.
- Blend the Ingredients: In a blender, combine 3-4 scoops of vanilla ice cream, 1 cup of whole milk, and the crushed cookies.
- Add Chocolate Syrup: Drizzle in 2 tablespoons of chocolate syrup.
- Blend Again: Blend until combined and smooth, about 30 seconds to a minute.
- Taste Test: Pour a little into a glass to taste. Adjust sweetness or thickness as needed.
- Serve it Up: Pour the milkshake into tall glasses, drizzling chocolate syrup inside the glass if desired.
- Top with Whipped Cream & Oreos: Add whipped cream, and garnish with reserved Oreo crumbs and/or chocolate shavings.
Notes
For a richer flavor, consider adding a splash of vanilla extract. Serve with extra Oreos for dipping!
- Prep Time: 10 minutes
- Cook Time: 0 minutes
- Category: Dessert
- Method: Blending
- Cuisine: American
Nutrition
- Serving Size: 1 serving
- Calories: 540
- Sugar: 45g
- Sodium: 170mg
- Fat: 25g
- Saturated Fat: 14g
- Unsaturated Fat: 6g
- Trans Fat: 0g
- Carbohydrates: 53g
- Fiber: 2g
- Protein: 8g
- Cholesterol: 70mg
Keywords: Oreo Milkshake, Dessert, Ice Cream, Summer Treat