
Pin by Mohammad Hijas on Easy Milkshake Recipe | Easy Milkshake Recipe, Gourmet Cupcakes, Delicious Food
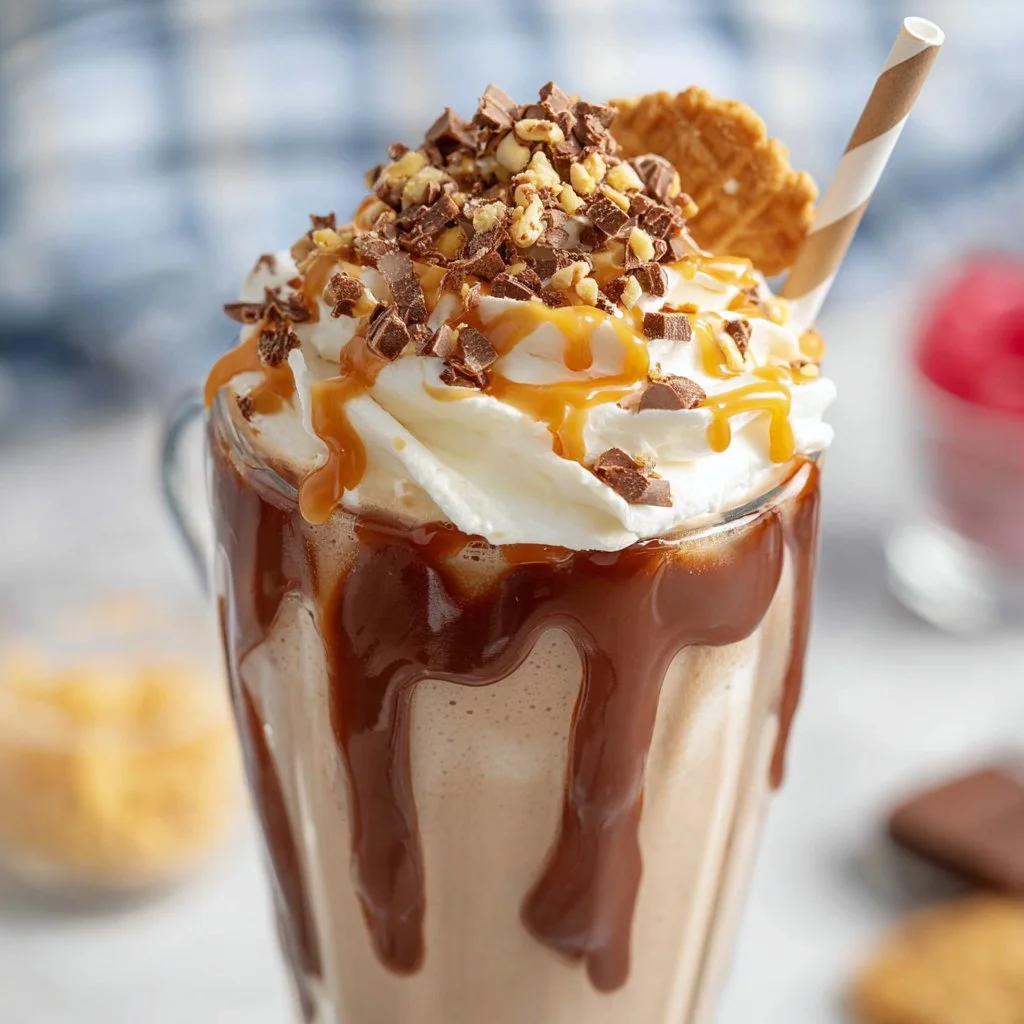
Easy Milkshake Recipe That’ll Make You Smile
Welcome to my kitchen! Today, I’m excited to share a delightful and classic treat that brings pure joy to any day: the easy milkshake! As the sun shines and the warmth of summer wafts through the air, nothing beats the simple pleasure of sipping on a creamy, dreamy milkshake. Trust me; this isn’t just a drink—it’s a celebration in a glass, a way to indulge your sweet tooth, and an invitation to reminisce about carefree childhood days when you’d rush to get your hands on that cold, frosty concoction.
Milkshakes are the quintessential comfort food; they meld nostalgia and happiness, making every moment deliciously memorable. Let’s face it—who can resist that chilled, thick, velvety sweetness? Whether you’re chilling at home, hosting a backyard barbecue, or simply pampering yourself after a long day, making a milkshake is not just easy; it’s an experience and a chance to get creative with flavors. Let’s dive into this easy milkshake recipe that’s not only scrumptious but also incredibly customizable!
Are you ready to whip up a treat that’ll have you and your loved ones grinning from ear to ear? Grab your blender, and let’s turn that craving into a reality. With just a handful of ingredients and a few simple steps, you’ll be relishing your homemade milkshake before you know it!
Personal Story
Every summer as a child, my family would take a trip to the local ice cream shop near the beach. The shop was a treasure trove of flavors, boasting everything from classic vanilla to wild concoctions like bubblegum and peppermint patty. But my absolute favorite? The heavenly chocolate milkshake. My sister and I would always beg our parents to let us indulge every single day, and, bless their hearts, they obliged more often than not! I can still visualize my sister and me standing in line, eyes sparkling with excitement, eagerly waiting for our frosty treats.
Every time I sip on a milkshake, I’m hit with a wave of nostalgia. It reminds me of those sun-drenched days filled with laughter, sticky fingers, and melted ice cream dribbling down our arms. Fast forward to today, and I recreate that joy in my own kitchen, perfecting my version of the chocolate milkshake that once defined my summers. Join me as we revive those cherished moments, crafting a classic milkshake that brings smiles to both young and old!
Ingredients
Here’s what you need to whip up the best milkshake ever!
-
Ice Cream (2 cups): The star of the show! I recommend using your favorite flavor—classic vanilla or rich chocolate. Pro tip: If you want a lighter version, opt for frozen yogurt or a dairy-free ice cream alternative!
-
Milk (1 cup): Milk adds that creamy texture. Whole milk gives the thickest shake, but you can also use almond milk, oat milk, or coconut milk for a dairy-free version.
-
Chocolate Syrup (1/4 cup, optional): This is for the extra touch of sweetness and decadence. Feel free to switch it up with caramel or strawberry syrup if you’re feeling adventurous!
-
Whipped Cream (for topping): Trust me; every milkshake deserves a generous dollop! The best part? You can make it fresh or grab a can from the store for convenience.
-
Cherries or Sprinkles (for garnish, optional): These are not just for decoration; they add an extra layer of fun! Want to take it up a notch? How about crushed nuts for an added crunch?
Got everything? Perfect! The magic is about to begin.
Step-by-Step Instructions
-
Gather Your Ingredients. Start by collecting all your ingredients and tools. You’ll need a blender, measuring cups, and glasses for serving. Having everything at your fingertips will make the process much smoother (and more enjoyable).
-
Scoop the Ice Cream. Using a large spoon or ice cream scooper, add 2 cups of your chosen ice cream into the blender. Take a moment to admire it—yummy!
-
Pour in the Milk. Next, measure 1 cup of milk and pour it into the blender over the ice cream. This will help with blending. If you like a thicker shake, reduce the milk a bit.
-
Add the Flavoring. If you’re using chocolate syrup (or any syrup of your choice), drizzle it in now. If you want to mix things up, you can add a tablespoon of peanut butter or Nutella for a delightful twist!
-
Blend Away! Secure the blender lid (trust me, you don’t want a milky explosion) and blend on medium speed. Keep an eye on it. You want a smooth, creamy consistency. If it’s too thick, add a bit more milk; if it’s too thin, toss in another scoop of ice cream.
-
Taste Test! Ah, the best part! Give your milkshake a quick taste. Need more sweetness? Add a dash more syrup or ice cream.
-
Pour & Serve! Once everything is blended to perfection, pour the milkshake into your favorite glass(es). If you’re feeling fancy, you can drizzle some chocolate syrup inside the glass before pouring to give it that professional touch!
-
Finish with Toppings. Now, it’s time for the fun part! Top your milkshake with a generous swirl of whipped cream, sprinkle on some colorful sprinkles, and pop a cherry on top. Grab a straw, and get ready to enjoy!
Serving Suggestions
For the ultimate presentation, serve your milkshake in tall, chilled glasses. You could even use mason jars for a rustic vibe! I love to pair milkshakes with homemade cookies or brownies for a delightful dessert experience. A platter of mini pastries can also elevate your serving game for gatherings, making it the star of any party.
Recipe Variations
-
Mint Chocolate Chip Milkshake: Swap out chocolate ice cream for mint chocolate chip and add a few drops of peppermint extract for a refreshing twist.
-
Banana Cream Milkshake: Use vanilla ice cream and add a ripe banana! Enhance it with a sprinkle of cinnamon for warmth.
-
Cookies and Cream Milkshake: Add crushed Oreo cookies into your blender along with the ice cream for that sweet, crunchy texture.
-
Strawberry Milkshake: Substitute your ice cream with strawberry-flavored or vanilla ice cream, and toss in some fresh strawberries for a fruity delight.
-
Vegan Milkshake: Swap ice cream for a banana or coconut milk-based ice cream and almond or oat milk to make it completely dairy-free!
Chef’s Notes
Every time I make this milkshake, I can’t help but think about the versatility it offers. It’s like a blank canvas just waiting for your personal touch! I’ve experimented with different toppings, adding everything from crushed cookies to caramel drizzle, and each variation brings something new to the table.
One of my funniest kitchen stories revolves around an epic milkshake-making session with friends. We mistook teaspoons for tablespoons while adding syrup—needless to say, we ended up with the sweetest milkshake ever, definitely a memory that has made me a more careful chef!
FAQs and Troubleshooting
1. Why is my milkshake too thin?
If your milkshake is on the thin side, it usually means you’ve added too much milk. Just toss in an extra scoop of ice cream to thicken it up, and blend it well!
2. How can I make my milkshake healthier?
You can use low-fat ice cream or frozen yogurt, swap full-fat milk for a lighter option, or add fresh fruit to enhance the flavor without excessive sugar.
3. Why isn’t my milkshake blending well?
If you’re having trouble blending, ensure your liquid (milk) is at the bottom, as it helps the ice cream incorporate better. Also, give your blender a rest in between heavy use to avoid overheating.
4. Can I make this milkshake ahead of time?
I recommend enjoying your milkshake fresh. However, you can prepare the ingredients ahead and combine them right before serving to retain that creamy texture.
Nutritional Info
While milkshakes are often a treat, here’s a rough breakdown of the nutritional content for a classic milkshake made with vanilla ice cream and whole milk:
- Calories: Approximately 500–600 calories per serving (12 oz)
- Protein: 10–12g
- Fat: 20–25g
- Carbohydrates: 70–80g
- Sugar: 60–70g
Remember, all nutritional values vary with the ingredients you use and the size of the serving!
So there you have it, a delightful journey into the world of homemade milkshakes! Whether you enjoy it solo or share it with friends, this recipe is designed to bring joy and deliciousness to every sip. Remember to get creative with flavors and have fun in the process. Cooking is all about exploring and experiencing new combinations that make your taste buds dance! Happy shaking, my friends! 🎉🥤
Print
Easy Milkshake Recipe That’ll Make You Smile
- Total Time: 5 minutes
- Yield: 2 servings
- Diet: Vegetarian
Description
A delightful and classic milkshake recipe that brings joy and nostalgia to any day.
Ingredients
- Ice Cream (2 cups) – Your favorite flavor, such as vanilla or chocolate
- Milk (1 cup) – Whole milk or a dairy-free alternative like almond milk
- Chocolate Syrup (1/4 cup, optional) – For added sweetness
- Whipped Cream (for topping) – Fresh or store-bought
- Cherries or Sprinkles (for garnish, optional) – For added fun
Instructions
- Gather Your Ingredients. Collect all ingredients and tools.
- Scoop the Ice Cream. Add 2 cups of ice cream to the blender.
- Pour in the Milk. Measure 1 cup of milk into the blender.
- Add the Flavoring. Drizzle in chocolate syrup or any syrup of choice.
- Blend Away! Secure the lid and blend on medium speed until smooth.
- Taste Test! Adjust sweetness if needed.
- Pour & Serve! Pour the milkshake into glasses, drizzling syrup if desired.
- Finish with Toppings. Top with whipped cream, sprinkles, and cherries.
Notes
For a thicker shake, reduce the milk. Serve in chilled glasses.
- Prep Time: 5 minutes
- Cook Time: 0 minutes
- Category: Dessert
- Method: Blending
- Cuisine: American
Nutrition
- Serving Size: 1 milkshake
- Calories: 550
- Sugar: 65g
- Sodium: 200mg
- Fat: 22g
- Saturated Fat: 14g
- Unsaturated Fat: 6g
- Trans Fat: 0g
- Carbohydrates: 70g
- Fiber: 1g
- Protein: 12g
- Cholesterol: 70mg
Keywords: milkshake, easy recipe, dessert, summer treat, nostalgic
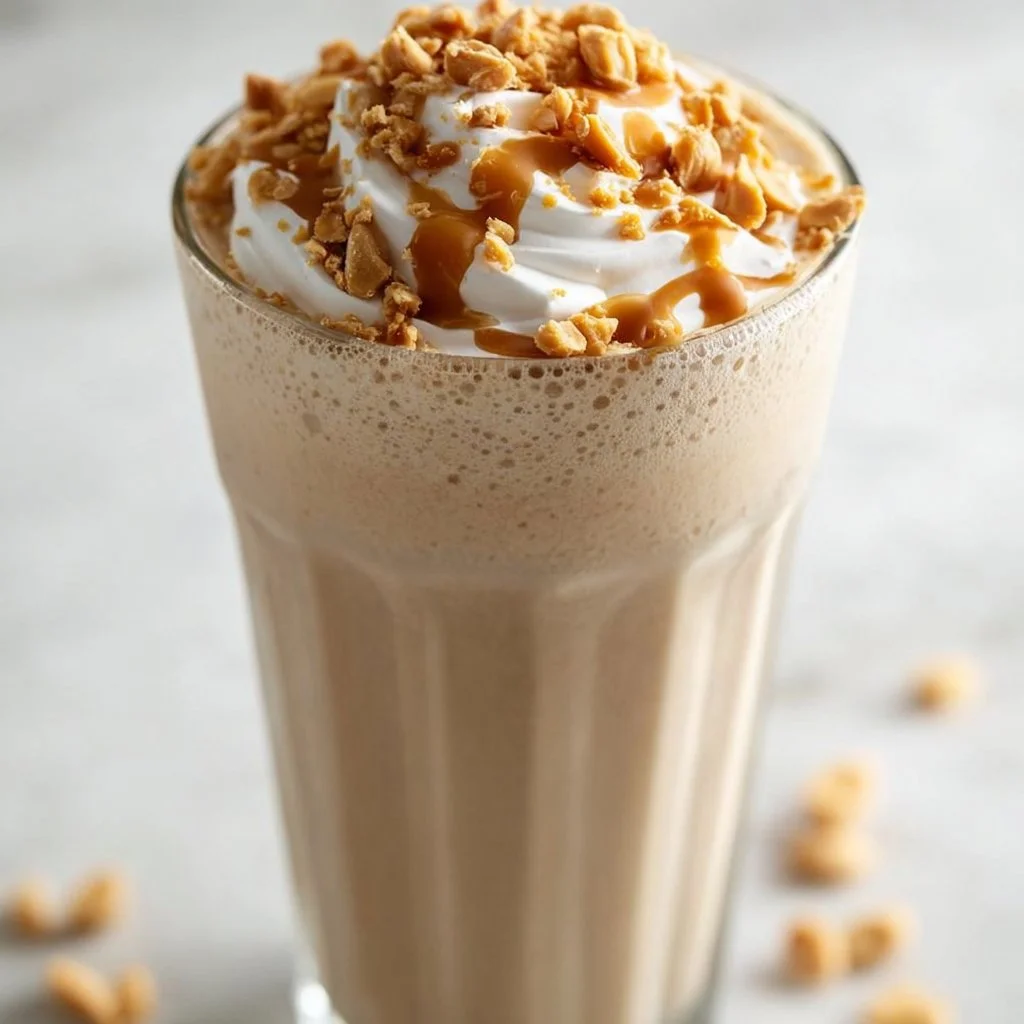
Peanut Butter Milkshake
The Ultimate Peanut Butter Milkshake: A Creamy Dream Come True!
Welcome to my kitchen! If you’re anything like me, you’re someone who can’t resist the rich, nutty aroma of peanut butter wafting through the air. Combine that with the creamy goodness of milk and the sweet kiss of ice cream, and you have a peanut butter milkshake that feels like a warm hug in a glass! Today, I’m excited to share my go-to recipe for this delightful treat, perfect for a hot summer day or just when you need a little pick-me-up.
Imagine standing in your cozy kitchen, the sun shining through the window, and the sounds of laughter filling the air. This isn’t just any ordinary milkshake; it’s a classic that sparks nostalgia and evokes memories of childhood afternoons spent at the local diner, where the milkshakes were thick enough to stand a spoon in.
Peanut butter milkshakes are a celebration of comfort, and they’re very easy to whip up at home. With just a few simple ingredients, you can create something that will impress your friends and family — or just give yourself a special treat after a long day. So, grab your blender (or a trusty mason jar if you’re feeling adventurous), and let’s dive into the deliciousness that is the peanut butter milkshake!
A Nostalgic Journey Through Peanut Butter
Growing up, my weekends were often filled with the delight of baking cookies and indulging in sweet treats. My fondest memories revolve around my late grandmother, who could make the best peanut butter cookies. When she was in the kitchen, it was an aromatic wonderland. I remember standing on a stool, peering over the counter as she mixed ingredients and shared stories about her favorite family recipes.
One day, I caught her making a batch of peanut butter milkshakes for dessert. I’d never seen anyone blend ice cream and peanut butter together before, but I can still recall the pure bliss on her face as she poured thick, creamy goodness into tall glasses. She always topped them off with crushed peanuts and a drizzle of chocolate syrup — and let me tell you, I was in heaven. Every sip was a burst of comfort and happiness.
Now, whenever I make this milkshake, I’m reminded of those beautiful moments and the passion my grandmother had for sharing love through food. It’s a simple drink, but it holds a wealth of love, just like the time spent with family over a delicious meal. And that’s what it’s all about — bringing people together over food that warms the soul!
Ingredients: The Essentials for a Delicious Peanut Butter Milkshake
Before we dive into the preparations, let’s gather our ingredients. Here’s what you’ll need:
-
2 cups vanilla ice cream
- The hero of our milkshake! Use your favorite brand for the creamiest consistency.
-
1 cup milk (whole or almond)
- Whole milk gives a rich texture, but you can swap it for almond milk for a dairy-free option.
-
1/2 cup creamy peanut butter
- Look for natural peanut butter without added sugars. Smooth and creamy works best, but crunchy peanut butter can add some fun texture!
-
2 tablespoons chocolate syrup (optional)
- Who could resist a hint of chocolate? Drizzling some chocolate syrup elevates the flavor and adds visual appeal!
-
Whipped cream for topping
- A must! It adds a fluffy contrast. You can make your own or grab a can from the store for convenience.
-
Crushed peanuts (optional)
- These add a lovely crunch and a fun finishing touch to your milkshake!
Substitution Tips:
- If you’re watching your sugar intake, use a sugar-free ice cream or a healthier alternative for milk and peanut butter.
- Feel free to swap in other flavors of ice cream – chocolate or banana peanut butter shake? Yes, please!
- Experiment with flavor extracts like vanilla or even a pinch of cinnamon for an added twist.
Step-by-Step Instructions: Crafting the Perfect Milkshake
Now that we have everything set, let’s get to blending! Follow these steps for a peanut butter milkshake that’s sure to satisfy:
-
Start with the Ice Cream
Scoop those 2 cups of vanilla ice cream straight into your blender. This is the foundation of your milkshake, so make sure it’s nice and soft — let it sit out for a few minutes if needed. -
Pour in the Milk
Add 1 cup of milk. Depending on your preferred thickness, adjust the milk. Less milk means a thicker shake, and more milk gives you a slightly thinner, sippable delight. -
Add the Peanut Butter
Spoon in your 1/2 cup of creamy peanut butter. This magical ingredient is what gives the shake that sweet, nutty goodness. If you’re a peanut butter lover (like me), feel free to toss in a little extra! -
Blend It Up
Secure the lid on your blender and blend on medium speed for about 30 seconds until your mixture is smooth and creamy. Here’s a little chef hack: Start on lower speed to avoid splatters, and gradually increase to ensure everything combines beautifully. -
Check the Consistency
After blending, stop and give it a taste! This is where you can decide if it’s creamy enough for you. If you want it thicker, add more ice cream. For a thinner shake, add a splash more milk. -
Add Chocolate Syrup (Optional)
If you’re feeling fancy and want to introduce a hint of chocolate, drizzle about 2 tablespoons of chocolate syrup into the blender and give it a quick swirl. You don’t need to blend this completely; some ribbons of chocolate can give you that swirly, café-style finish. -
Serve in Style
Now, pour your shake into tall, chilled glasses. Here’s a pro tip: pre-chill your glasses in the freezer for about 10 minutes before pouring for an extra frosty treat! -
Top and Enjoy
Finish off with a generous dollop of whipped cream on top, a drizzle of chocolate syrup, and a sprinkle of crushed peanuts for that added texture. Grab a straw (or a spoon, no judgment here) and dig in!
Serving Suggestions: Presenting Your Masterpiece
Serving a peanut butter milkshake is all about the presentation! Use tall glasses for that classic diner feel. Feel free to garnish with additional toppings — maybe some chocolate shavings, a cherry on top, or a fun straw that matches your kitchen vibe. If you’re feeling adventurous, serve them alongside some homemade cookies or a slice of your favorite pie for a delightful dessert spread. Trust me, your guests will be impressed!
Recipe Variations: Shake Things Up!
Here are some fun twists to consider for your peanut butter milkshake:
-
Banana Peanut Butter Milkshake: Add 1 ripe banana to the blender for a naturally sweet and creamy twist!
-
Chocolate Peanut Butter Milkshake: Swap in chocolate ice cream for vanilla and add an extra tablespoon of chocolate syrup for that rich chocolatey flavor.
-
Peanut Butter Banana Smoothie: For a healthier option, blend in some spinach for a hidden veggie boost. You can add hemp seeds for protein, too!
-
Nutty Protein Shake: Add a scoop of your favorite protein powder for a post-workout treat. This will keep you energized and fill you up.
-
Dairy-Free Delight: Use coconut milk ice cream and almond milk to create a magical dairy-free version without sacrificing flavor.
Chef’s Notes: Every Milkshake Tells a Story
This recipe has been a staple in my kitchen for years, with little tweaks over time to suit my evolving tastes. One “oops” moment I remember is when I accidentally added too much milk during a late-night milkshake craving. Instead of panicking, I fixed it by adding more ice cream and, voila! A happy accident turned into a new favorite version! So remember, if things don’t quite go as planned in the kitchen, just embrace it. Cooking is all about experimenting and making joyful messes.
FAQs and Troubleshooting: Your Questions Answered
1. Why is my milkshake too thick?
If you find your milkshake too thick, simply add a touch more milk and blend again. Remember, it’s all about finding the perfect consistency that you enjoy!
2. Can I make this dairy-free?
Absolutely! Use dairy-free ice cream and nut milk, such as almond or oat milk, to create a deliciously creamy shake without any dairy.
3. How can I store leftovers?
If you have leftovers (though I doubt it!), store your milkshake in an airtight container for up to 24 hours. However, just keep in mind that the texture might change slightly after freezing, so a quick stir before enjoying again can help.
4. Can I double the recipe?
Yes! This recipe can easily be doubled for parties or gatherings. Just make sure you have a blender large enough to handle the increased volume.
Nutritional Info (Optional)
For a single serving of the classic peanut butter milkshake (using vanilla ice cream and whole milk), you can expect:
- Calories: Approximately 600
- Protein: 15g
- Fat: 25g (primarily from the peanut butter)
- Carbohydrates: 60g
Remember, these can fluctuate based on any variations or substitutions made!
And there you have it — the ultimate peanut butter milkshake, infused with love, memories, and just the right amount of nostalgia. I hope this recipe becomes a beloved addition to your kitchen just as it is in mine. Whether you’re sipping it solo or sharing it with friends, may your days be filled with cozy flavor and sweet memories. Happy blending!
Print
The Ultimate Peanut Butter Milkshake
- Total Time: 5 minutes
- Yield: 2 servings 1x
- Diet: Vegetarian
Description
A creamy peanut butter milkshake that’s perfect for a refreshing treat on a hot day.
Ingredients
- 2 cups vanilla ice cream
- 1 cup milk (whole or almond)
- 1/2 cup creamy peanut butter
- 2 tablespoons chocolate syrup (optional)
- Whipped cream for topping
- Crushed peanuts (optional)
Instructions
- Start with the Ice Cream: Scoop those 2 cups of vanilla ice cream straight into your blender.
- Pour in the Milk: Add 1 cup of milk.
- Add the Peanut Butter: Spoon in your 1/2 cup of creamy peanut butter.
- Blend It Up: Secure the lid on your blender and blend on medium speed for about 30 seconds.
- Check the Consistency: After blending, stop and give it a taste!
- Add Chocolate Syrup (Optional): Drizzle about 2 tablespoons of chocolate syrup into the blender.
- Serve in Style: Pour your shake into tall, chilled glasses.
- Top and Enjoy: Finish off with whipped cream, a drizzle of chocolate, and a sprinkle of crushed peanuts.
Notes
Experiment with other flavors of ice cream and toppings for a unique twist.
- Prep Time: 5 minutes
- Cook Time: 0 minutes
- Category: Dessert
- Method: Blending
- Cuisine: American
Nutrition
- Serving Size: 1 serving
- Calories: 600
- Sugar: 45g
- Sodium: 300mg
- Fat: 25g
- Saturated Fat: 10g
- Unsaturated Fat: 10g
- Trans Fat: 0g
- Carbohydrates: 60g
- Fiber: 3g
- Protein: 15g
- Cholesterol: 60mg
Keywords: peanut butter, milkshake, dessert, creamy, summer treat


