
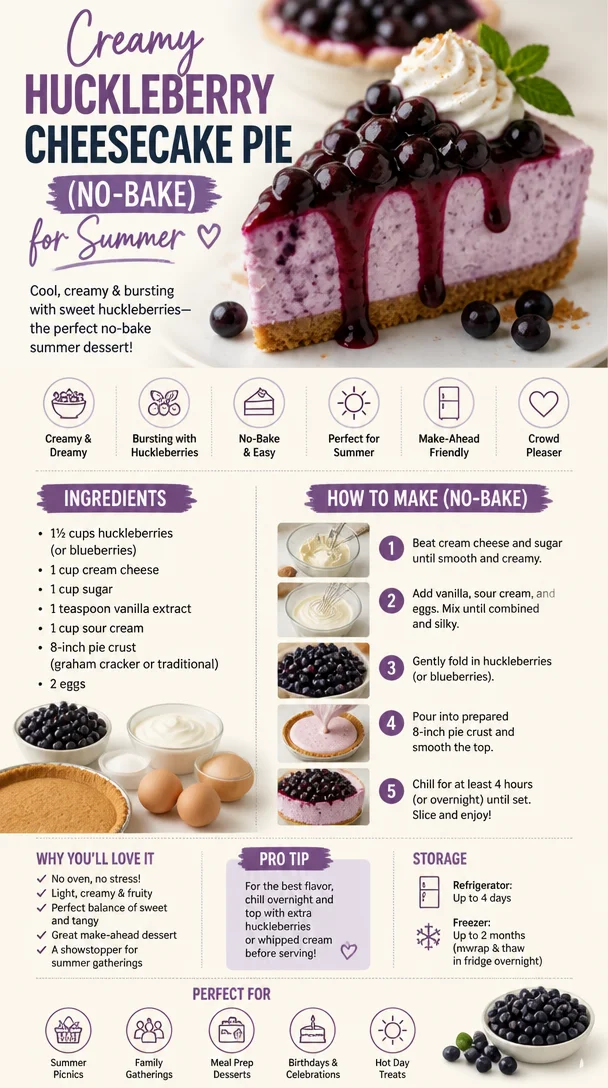
Creamy Huckleberry Cheesecake Pie (No-Bake) for Summer
Huckleberry Cheesecake Pie: A Slice of Summer
Welcome to my kitchen! Today, we’re diving into a pie that’s not just a dessert but a celebration of flavors that feels like summer on a plate: the Huckleberry Cheesecake Pie. If you’ve never experienced the delight that is huckleberries, let me tell you—these tiny berries pack a punch of sweet-tart goodness that will have you rethinking every other fruit out there. Picture this: you take a bite and the flavor bursts in your mouth, transporting you to sun-drenched berry-picking adventures in the mountains. Isn’t that what cooking is all about?
There’s something magical about pies—especially creamy ones like this cheesecake pie. They not only tantalize your taste buds but also create moments. Whether it’s a backyard barbecue, a cozy family dinner, or simply a chill night in with your favorite people, nothing beats the joy of sharing a homemade dessert. Plus, huckleberries have a nostalgic charm; they remind me of warm summer days spent gathering wild berries with my family, laughing, and savoring the sweetness of life.
In this blog post, I’m going to take you through the entire process of making a Huckleberry Cheesecake Pie, from the dreamy ingredients to the last bite of velvety goodness. You don’t need to be a culinary wizard to whip this up; just some good vibes and a pinch of enthusiasm! Let’s get cooking, shall we?
A Sweet Memory
Every time I make this pie, I can’t help but think back to that one summer when my family decided to hit the road and explore the mountainous landscapes of Idaho. We were on the hunt for those elusive huckleberries that everyone raved about. I remember the scent of pine in the air and the thrill of seeing those tiny purple gems nestled among the leaves. My mom was quick to fill a basket, while my dad teased us about our “berry strategy.”
When we finally returned home, we decided to mix those fragrant huckleberries into my grandmother’s cheesecake recipe. It was like magic—each bite was a sweet reminder of that day in the mountains. We all gathered around the table, forks in hand, and the laughter filled the kitchen as we savored every creamy, fruity morsel. That pie was more than just a dessert; it was a symbol of our family unity and adventure. I still use that same recipe today, adding a twist of my own with a touch of creativity.
Ingredients
Here’s what you’ll need to create this scrumptious Huckleberry Cheesecake Pie:
-
Huckleberries (2 cups): The star of this dish! These tiny berries are packed with flavor and have a sweet-tart profile. If you can’t find huckleberries, blueberries are a great substitute, though you may need to adjust the sugar slightly.
-
Cream Cheese (16 oz, softened): This base adds that rich, creamy texture we love in cheesecake. Make sure it’s room temperature for easy mixing. For a lighter version, you can substitute with Greek yogurt.
-
Granulated Sugar (1 cup): This sweetens your filling. You can use coconut sugar or a sugar substitute, but it might alter the final taste a bit.
-
Sour Cream (1 cup): This adds a delightful tanginess and creaminess. For a non-dairy option, try using non-dairy sour cream or coconut cream.
-
Vanilla Extract (2 teaspoons): Adds warmth and depth. Make sure to use pure vanilla extract for the best flavor!
-
Eggs (2 large): These provide structure and richness. If you’re looking for a vegan option, try flax eggs (1 tablespoon of ground flaxseed mixed with 2.5 tablespoons of water per egg).
-
Graham Cracker Crust (store-bought or homemade): You can’t have cheesecake pie without this crust! Use a store-bought option for convenience or whip up a quick homemade version with crushed graham crackers, sugar, and melted butter.
-
Butter (1/2 cup, melted): This binds the crust together and gives it that wonderful flavor. If you’re making a gluten-free version, you can use gluten-free graham crackers.
Step-by-Step Instructions
Step 1: Prepare Your Crust
-
Mix the crust ingredients: In a mixing bowl, combine 1 ½ cups of crushed graham crackers, 1/3 cup of sugar, and 1/2 cup of melted butter. Give it a good stir until it resembles wet sand.
- Chef Tip: If you want a little extra flavor, consider adding a pinch of cinnamon or a tablespoon of cocoa powder to the crust.
-
Press and bake: Firmly press the mixture into the bottom and up the sides of a 9-inch pie pan. Bake at 350°F (175°C) for about 10 minutes or until golden brown. Once it’s done, remove it from the oven and let it cool.
- Commentary: A well-baked crust holds everything in place and adds a lovely crunch to your creamy filling—don’t skip this step!
Step 2: Make the Filling
-
Blend the cream cheese: In a large mixing bowl, beat the softened cream cheese until smooth and creamy.
- Chef Hack: Make sure there aren’t any lumps. A whisk or handheld mixer works wonders here!
-
Add sugar and sour cream: Gradually mix in the granulated sugar and sour cream until well combined. Then add in the vanilla extract.
- Pro Tip: Tasting the filling at this stage is crucial—adjust the sweetness if necessary to suit your taste!
-
Incorporate the eggs: Beat in the eggs, one at a time, mixing just until combined. Overmixing can lead to cracks during baking.
- Insider Info: If you’re making this pie for an event, beat the eggs in separately. This adds air and creates a fluffier texture in the final pie.
-
Fold in huckleberries: Gently fold in your fresh or frozen huckleberries with a spatula. You want to keep them intact for that burst of flavor in every bite!
- Little Joy: If using frozen huckleberries, there’s no need to thaw them first.
Step 3: Assemble and Bake
-
Pour into crust: Carefully pour the cheesecake filling into your cooled crust, smoothing the top with a spatula.
- Tip: To avoid bubbles, tap the pie pan on the counter a few times to release any air pockets.
-
Bake the pie: Bake in a preheated oven at 325°F (160°C) for about 50-60 minutes, or until the center is just set but still has a slight jiggle.
- Watch Out: Overbaking can lead to cracks! To prevent this, you can place a pan of water below the pie in the oven to create steam.
-
Cool and chill: Turn off the oven and crack the door open. Let the pie slowly cool down for about 1 hour before transferring it to the fridge to chill for at least four hours, preferably overnight.
- Classic Chef Note: Cooling slowly helps prevent the dreaded cracks.
Serving Suggestions
Once your pie has chilled and is ready to be savored, slice it up and serve it on a pretty plate. A dollop of whipped cream on top never hurt anyone! To elevate your presentation, consider garnishing with a sprig of mint or additional huckleberries. Trust me, the vibrant colors will make it Instagram-ready!
Recipe Variations
- Berry Medley: Swap huckleberries for a mix of your favorite berries like blueberries, raspberries, and strawberries for a mixed berry cheesecake pie.
- Chocolate Drizzle: Drizzle some melted dark chocolate over the cooled pie for an indulgent twist.
- Crunchy Topping: Add a crumble topping made from oats, nuts, and brown sugar for a textural contrast.
- Lemon Zest: Add a teaspoon of lemon zest to the filling for a refreshing tang that balances the sweetness.
- Vegan Version: Substitute cream cheese with a cashew cream or vegan cream cheese for a delicious dairy-free option.
Chef’s Notes
This recipe has traveled with me through years of experimentation, and I love how it always brings people together. One memorable mistake I made was forgetting to add the sugar once—let’s just say it was an unforgettable experience! Everybody found it hilarious, and it turned into a running joke in our family about a “diet cheesecake.”
Every time I revisit this recipe, I play with the balance of ingredients, and while I’m always perfecting it, the essence of that summer road trip is my guiding star. Feel free to put your own spin on it!
FAQs and Troubleshooting
1. Why did my cheesecake crack?
Cracks often form from overmixing eggs or baking at too high a temperature. Ensure you mix just until combined and bake slowly.
2. Can I use frozen huckleberries?
Absolutely! Frozen huckleberries work perfectly—just toss them directly into the batter without thawing.
3. How do I store leftovers?
Store your Huckleberry Cheesecake Pie in an airtight container in the fridge for up to 5 days. You can also freeze slices wrapped tightly for up to 2 months.
4. My pie isn’t setting properly—what went wrong?
If the filling remains too jiggly after baking, it may need more time in the oven. Check on it every 5-10 minutes until it firms up but still jiggles slightly in the center.
Nutritional Info
While loving dessert is important, it’s good to know what you’re indulging in! A slice of Huckleberry Cheesecake Pie is approximately:
- Calories: 320
- Protein: 6g
- Carbs: 40g
- Fat: 15g
(Note: Nutritional values may vary depending on the exact ingredients used and portion sizes.)
Thank you for joining me in my kitchen today! I hope this Huckleberry Cheesecake Pie recipe inspires you to create sweet memories in your own home. Remember, every slice is an opportunity to share love, laughter, and a taste of nostalgia. Happy baking!
Print
Huckleberry Cheesecake Pie
- Total Time: 85 minutes
- Yield: 8 servings
- Diet: Vegetarian
Description
A creamy pie filled with sweet-tart huckleberries, perfect for summer gatherings.
Ingredients
- Huckleberries (2 cups)
- Cream Cheese (16 oz, softened)
- Granulated Sugar (1 cup)
- Sour Cream (1 cup)
- Vanilla Extract (2 teaspoons)
- Eggs (2 large)
- Graham Cracker Crust (store-bought or homemade)
- Butter (1/2 cup, melted)
Instructions
- Mix the crust ingredients: In a mixing bowl, combine 1 ½ cups of crushed graham crackers, 1/3 cup of sugar, and 1/2 cup of melted butter. Give it a good stir until it resembles wet sand.
- Press the mixture into the bottom and up the sides of a 9-inch pie pan. Bake at 350°F (175°C) for about 10 minutes or until golden brown. Let it cool.
- Blend the cream cheese: In a large mixing bowl, beat the softened cream cheese until smooth and creamy.
- Add sugar and sour cream: Gradually mix in the granulated sugar and sour cream until well combined. Then add in the vanilla extract.
- Incorporate the eggs: Beat in the eggs, one at a time, mixing just until combined.
- Fold in huckleberries: Gently fold in the fresh or frozen huckleberries with a spatula.
- Pour the cheesecake filling into your cooled crust, smoothing the top with a spatula.
- Bake in a preheated oven at 325°F (160°C) for about 50-60 minutes, or until the center is just set but still has a slight jiggle.
- Cool and chill: Let the pie cool for about 1 hour before transferring it to the fridge to chill for at least four hours, preferably overnight.
Notes
Serve with whipped cream and garnish with a sprig of mint or additional huckleberries for a beautiful presentation.
- Prep Time: 15 minutes
- Cook Time: 70 minutes
- Category: Dessert
- Method: Baking
- Cuisine: American
Nutrition
- Serving Size: 1 slice
- Calories: 320
- Sugar: 20g
- Sodium: 120mg
- Fat: 15g
- Saturated Fat: 9g
- Unsaturated Fat: 6g
- Trans Fat: 0g
- Carbohydrates: 40g
- Fiber: 3g
- Protein: 6g
- Cholesterol: 80mg
Keywords: huckleberry, cheesecake, summer dessert, pie, creamy dessert
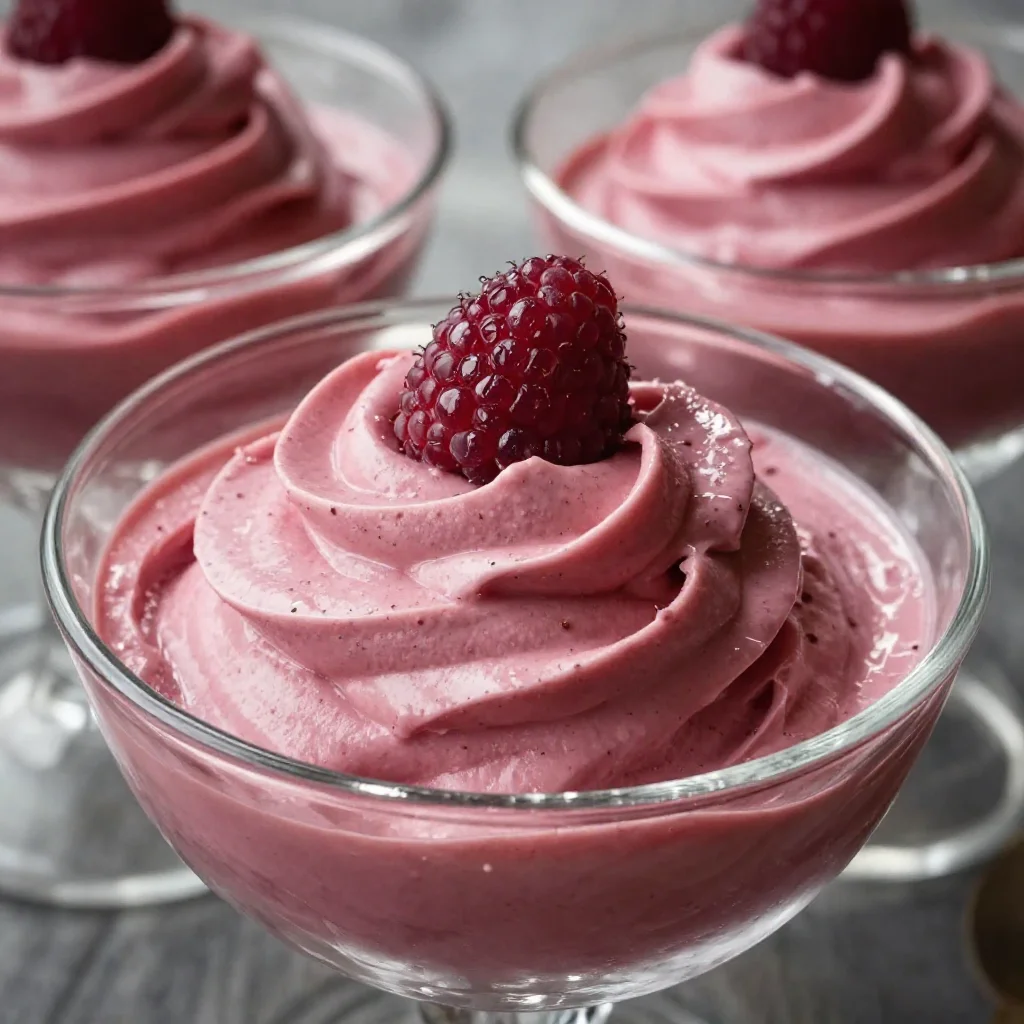
Raspberry Mousse in 15 Minutes: 5-Ingredient Creamy Delight
Raspberry Mousse: An Incredible Ultimate Recipe
Introduction
Hey there, fellow food lovers! If you’re anything like me, the mere mention of raspberry mousse might summon dreams of light, fluffy clouds of sweetness resting elegantly on a plate. Perhaps you can picture a sunlit afternoon gathering with friends, laughter mingling with the aroma of desserts swirling in the air. Well, you’re in the right place! Today, we’re diving into an easy-to-follow, yet absolutely delicious raspberry mousse recipe that will not only wow your taste buds but also impress your loved ones.
Raspberry mousse holds a special place in my heart—like many of my kitchen adventures, it’s steeped in nostalgia and cozy moments. I remember the first time I made this delight as a young cook. My mom and I spent an entire Saturday afternoon in the kitchen, battling the heat wave and an overabundance of berries from the garden. With sticky fingers and laughter, we whipped up a batch that ended up being the star of the family barbecue later that evening. Watching my cousins take their first bites, their eyes widening with delight—it was priceless!
So, let’s recreate some of that magic together! Whether you’re planning a romantic dinner, a chic brunch, or simply a night of self-pampering, this raspberry mousse recipe is here to elevate your culinary repertoire. Trust me, it’s fancy enough to look great on any holiday table, but simple enough for any night of the week. Let’s get those mixing bowls ready!
Personal Story
As I mentioned, my love for raspberry mousse began in the warm embrace of my family’s kitchen. One steamy summer, we found ourselves with a garden bursting with fresh, ripe raspberries. I can still see my mom meticulously picking the juiciest ones, her fingers stained with berry juice, while I eagerly waited with a bowl at the ready.
It was during this berry bonanza that we decided to throw together a raspberry mousse, a recipe my mom claimed was "the easiest yet most delightful dessert" she had up her sleeve. We spent hours whisking and folding, chatting about everything from school to her childhood memories. The best part? As the mousse chilled in the fridge, we took turns sneaking spoonfuls instead of waiting for the final presentation. Each spoonful was a burst of flavor that reminded me how wonderful it is to create something together. That day not only sparked my love for cooking but also created an everlasting bond through food and laughter.
Ingredients
Now that we’ve set the mood, let’s talk about what you’ll need to whip up this raspberry mousse. Here’s your shopping list:
-
Fresh Raspberries (2 cups): The star of the show! Look for vibrant, plump berries for the best flavor. If they’re out of season, frozen berries work too—just thaw and drain the excess liquid.
-
Sugar (1/2 cup): This will sweeten the puree. Feel free to adjust based on your taste—agave or honey work as fantastic substitutes if you want a natural sweetener.
-
Heavy Cream (1 1/2 cups): This adds richness and creaminess to the mousse. Keep it cold for optimal whipping. If you’re looking for a lighter option, whipped coconut cream is a great alternative.
-
Vanilla Extract (1 teaspoon): Adds a warm, aromatic note to the mousse. Homemade vanilla extract elevates the flavor, but store-bought is perfectly fine!
-
Gelatin Powder (1 tablespoon): This helps the mousse firm up beautifully. If you prefer a vegetarian option, try using agar-agar instead! Just follow the package instructions for usage.
-
Water (2 tablespoons): Needed for blooming the gelatin. Keep it warm so it dissolves easily.
Step-by-Step Instructions
Now comes the fun part! Let’s whip up this raspberry mousse step by step. Grab your mixing bowls and let’s get started!
-
Prepare the Raspberries:
- Wash the fresh raspberries gently and place them in a blender or food processor. Aim for about 2 cups (you can adjust this based on how raspberry-flavored you want your mousse).
- Add the sugar to the raspberries and blend until smooth. You can leave tiny seeds if you like a bit of texture; otherwise, feel free to strain the puree through a sieve to achieve a silky-smooth consistency.
- Chef Tip: Reserve a few whole raspberries for garnish later—they’ll add a pop of color to your final presentation!
-
Bloom the Gelatin:
- In a small bowl, sprinkle gelatin over the warm water and let it stand for about 5 minutes until it swells up, creating a “bloom.”
- Glad to have this step out of the way? I always keep some gelatin handy—it’s a secret weapon for so many desserts!
-
Combine the Raspberry Puree and Gelatin:
- Place the bloomed gelatin in the microwave for about 10 seconds just to slightly heat it (make sure it’s warm enough to dissolve but not bubbling hot).
- Stir the gelatin into the raspberry puree until completely dissolved. This is where the magic happens!
-
Whip the Cream:
- In a medium mixing bowl, pour in the heavy cream and add the vanilla extract. Using an electric mixer, whisk on medium speed until soft peaks form. You’re looking for a frothy, pillowy cloud, not a butter!
- Chef Tip: Keep your mixing bowl and beaters chilled for easier whipping!
-
Fold It All Together:
- Gradually add the raspberry mixture into the whipped cream. Use a folding motion—gently lift and turn the cream, combining them without deflating the air you’ve whipped in. Aim for a beautiful swirly texture that still shows off those lovely pink hues.
- If you want deeper flavors, consider folding in a bit of lemon zest for brightness!
-
Chill the Mousse:
- Once everything is mixed, scoop the mousse into serving glasses or bowls, leaving some room at the top for garnishing later. Cover them with plastic wrap and pop them into the fridge for at least 4 hours (or overnight best) to set.
- Chef Tip: This is where you can take a breather—go catch up on your favorite show while your mousse works its magic!
Serving Suggestions
When you’re ready to serve, bring out those beautiful glasses brimming with raspberry goodness. To really wow your guests, you can top each mousse with a dollop of whipped cream (a little more never hurt, right?), some whole raspberries, and a sprinkle of mint leaves for an elegant touch. Drizzle a bit of raspberry sauce or chocolate sauce over the top, and you’re ready to dig in!
Recipe Variations
Feeling adventurous? Here are a few creative variations to try:
- Chocolate Raspberry Mousse: Fold in some melted dark chocolate into the mousse for a rich twist that balances sweet-tart goodness.
- Mint Infusion: Add a few finely chopped mint leaves or a drop of mint extract to the raspberry puree for a refreshing hint.
- Bourbon Raspberry Mousse: Add a tablespoon of bourbon to the raspberry puree for an adult-only twist that complements the sweet tartness perfectly.
- Vegan Raspberry Mousse: Substitute heavy cream with whipped coconut cream and gelatin with agar-agar to create a delightful plant-based version.
Chef’s Notes
This raspberry mousse holds a treasure trove of memories for me, evolving over the years from my mom’s original recipe to my own playful adaptation. Every time I make it, I’m reminded of those sweet summer afternoons full of raspberries and laughter. It’s not just a dessert; it’s a connection to my roots, but it also seamlessly fits into any occasion—be it a family gathering or a cozy dessert for one. Oh, and don’t let those berries go to waste—switch it up with different fruits as the seasons change!
FAQs and Troubleshooting
-
Why is my mousse not setting?
- Make sure your gelatin is properly bloomed and dissolved before folding it into the mixture. If it’s too warm when added, it might not set properly!
-
Can I use other berries?
- Absolutely! Strawberries, blueberries, or mixed berries can be a fantastic substitute for raspberries. Just remember that sweetness and acidity might vary.
-
How can I get the mousse to look pretty in the serving glass?
- For a layered look, alternate spoonfuls of raspberry mousse and whipped cream into the serving glasses before chilling—it’ll give a beautiful visual contrast once set!
-
What if I want a less sweet mousse?
- Simply reduce the amount of sugar in the raspberry puree. The natural tartness of the berries will shine through beautifully!
Nutritional Info
(Optional) Each serving of raspberry mousse contains approximately:
- Calories: 250
- Fat: 18g
- Carbohydrates: 24g
- Protein: 2g
And there you have it! An incredible raspberry mousse recipe filled with flavor, texture, and heart. I hope you enjoy creating this delicious dish as much as I do. Remember, the kitchen is your playground—don’t be afraid to get messy and have fun! Happy cooking, my fellow food enthusiasts!
Print
Raspberry Mousse
- Total Time: 240 minutes
- Yield: 4 servings
- Diet: Vegetarian
Description
An effortless yet delightful raspberry mousse that will impress your loved ones and elevate your culinary repertoire.
Ingredients
- Fresh Raspberries, 2 cups
- Sugar, 1/2 cup
- Heavy Cream, 1 1/2 cups
- Vanilla Extract, 1 teaspoon
- Gelatin Powder, 1 tablespoon
- Water, 2 tablespoons
Instructions
- Prepare the Raspberries: Wash and place in a blender with sugar; blend until smooth.
- Bloom the Gelatin: Sprinkle gelatin over warm water and let it stand for 5 minutes.
- Combine the Raspberry Puree and Gelatin: Heat the bloomed gelatin, then stir it into the raspberry puree.
- Whip the Cream: Beat heavy cream with vanilla extract until soft peaks form.
- Fold It All Together: Gently combine the raspberry mixture with the whipped cream.
- Chill the Mousse: Scoop into glasses, cover, and refrigerate for at least 4 hours.
Notes
Serve with whipped cream, whole raspberries, and mint for an elegant touch. Consider variations like chocolate or vegan options.
- Prep Time: 15 minutes
- Cook Time: 0 minutes
- Category: Dessert
- Method: Chilling
- Cuisine: American
Nutrition
- Serving Size: 1 serving
- Calories: 250
- Sugar: 22g
- Sodium: 30mg
- Fat: 18g
- Saturated Fat: 11g
- Unsaturated Fat: 7g
- Trans Fat: 0g
- Carbohydrates: 24g
- Fiber: 2g
- Protein: 2g
- Cholesterol: 70mg
Keywords: raspberry mousse, dessert, easy recipe, summer treat, mousse recipe

No-Bake Raspberry Crumb Bars: Easy 20-Minute Summer Treat
Raspberry Crumb Bars: A Sweet Slice of Nostalgia
Welcome to my cozy corner of the internet! Today, I’m thrilled to share a delightful treat that holds a special place in my heart: Raspberry Crumb Bars. Let me tell you—the moment you take your first bite of these sweet, tart bars, you’ll be transported to a sun-drenched afternoon filled with laughter and joy.
There’s something magical about the combination of buttery, crumbly crust layered with a vibrant raspberry filling. Whether you’re a fruit lover or just enjoy a good old-fashioned sweet treat, these bars are the perfect addition to any gathering or a lovely afternoon snack while curled up with your favorite book.
Growing up, my summer days were often spent in my grandmother’s kitchen, where the aroma of freshly baked goods wafted through the air. One summer, she decided we would make raspberry bars together. We picked the juiciest, plumpest raspberries from her garden, giggling as juice dripped from our fingers. I can still hear her playful teasing about my messy apron (which, let’s be honest, has become a badge of honor for me!). Those days are etched in my memory, each bite of those crumb bars filled with sweet nostalgia.
So, roll up your sleeves, don that apron—messy or not—and let’s dive into making these Raspberry Crumb Bars together!
Key Ingredients
For the Crust and Topping:
- All-purpose flour (2 cups): The backbone of the crumb bar. For a gluten-free option, substitute with gluten-free flour blend.
- Granulated sugar (¾ cup): Added for sweetness. Brown sugar can be used for a deeper flavor.
- Baking powder (1 teaspoon): This will give your bars a nice lift; make sure it’s fresh to ensure better rising.
- Salt (½ teaspoon): A pinch of salt helps balance the sweetness and enhances flavor.
- Butter (½ cup, cold and cubed): The heart and soul of these crumb bars. You can use unsalted butter or vegan butter as a substitute for dairy-free.
- Egg (1 large): Acts as a binding agent. For a vegan option, try using flaxseed meal (1 tablespoon mixed with 2.5 tablespoons water) as a substitute.
For the Raspberry Filling:
- Fresh raspberries (2 cups): The star of the show! Frozen raspberries will work, but fresh fruit provides the best flavor and texture.
- Lemon juice (1 tablespoon): Brings brightness to the raspberry filling. Lime juice can also be a zesty alternative.
- Cornstarch (2 tablespoons): Thickens the filling so it doesn’t ooze all over. Feel free to swap it with arrowroot powder for a different thickening agent.
- Granulated sugar (½ cup): Sweetens the tangy raspberries. Adjust to your taste depending on the ripeness of your fruit.
Step-by-Step Instructions
Step 1: Preheat Your Oven
Let’s get started by preheating your oven to 350°F (175°C) and greasing a 9×9-inch baking pan. Trust me; it’s going to be worth the wait!
Step 2: Prepare the Crust
In a large mixing bowl, combine the all-purpose flour, granulated sugar, baking powder, and salt. Now, here’s the fun part: use a fork or your fingers to cut the cold, cubed butter into the dry ingredients. You want a crumbly texture, similar to wet sand. You can also use a pastry cutter for a quicker method. Pro tip: Keep the butter cold for flakier crusts!
Step 3: Add the Egg
Crack in the egg and mix until everything just comes together. Don’t overmix! We want a tender crumb, not tough bars.
Step 4: Bake the Crust
Press about two-thirds of this mixture into the prepared baking pan. Bake for 15 minutes just until it starts to turn golden. The smell will be tantalizing, trust me!
Step 5: Make Raspberry Filling
While the crust is baking, it’s time to prepare the filling. In a medium saucepan over medium heat, combine the raspberries, lemon juice, granulated sugar, and cornstarch. Cook it down until the raspberries release their juices and thicken slightly, about 5-7 minutes. Stir gently to avoid smashing the fruit into mush.
Step 6: Assemble and Bake
Once your crust has baked and the filling is ready, pour it evenly over the crust. Crumble the remaining crust mixture on top. Bake these beauties for an additional 25 minutes until the top is golden brown and the filling is bubbling. It might take some patience, but oh, is it worth it!
Step 7: Cool and Slice
Let the bars cool in the pan for at least 30 minutes before slicing. (I know it’s tempting, but trust me—this step is crucial!) Once they’re cool, dust with powdered sugar for a little extra flair.
Serving Suggestions
These Raspberry Crumb Bars are best served slightly warm or at room temperature. You can serve them as is or dress them up with a scoop of vanilla ice cream or a dollop of freshly whipped cream for an elevated experience!
Recipe Variations
- Berry Blast: Mix in blueberries or blackberries with the raspberries for a delightful berry medley.
- Nutty Addition: Stir in some chopped nuts, such as almonds or walnuts, to the crumb topping for added crunch.
- Zesty Surprise: Add some grated lemon or orange zest to the filling for an extra fresh flavor.
- Chocolate Drizzle: Once cooled, drizzle melted dark chocolate over the bars for a luscious twist.
- Spiced Version: Sprinkle in some cinnamon or nutmeg to the crumb mixture for a warm, cozy flavor profile.
Chef’s Notes
Ah, Raspberry Crumb Bars—they’ve become a staple in my kitchen, evolving over the years from my grandmother’s simple recipe to something I love putting my own stamp on. I’ll never forget the time I added a pinch of cayenne pepper to the berry filling out of curiosity. I was surprised by how the heat enhanced those sweet, tangy raspberries; just a little spice gives it a whole new depth!
And of course, you can always sprinkle some crumbs into a bowl of yogurt for breakfast or even use the filling in a tart. So versatile!
FAQs and Troubleshooting
Q: My crumb topping didn’t come out crumbly! What went wrong?
A: This usually happens if the butter is too soft or if the mixture was overmixed. Keep your butter cold and mix just until combined for that perfect crumble.
Q: Can I make these ahead of time?
A: Absolutely! These bars hold up well for 3-4 days in an airtight container. Just let them cool completely before storing.
Q: How do I store leftovers?
A: Keep them in an airtight container in the fridge for up to a week, or freeze them for longer storage – I love pulling out a slice on a quiet afternoon!
Q: Can I use other fruits for the filling?
A: Yes! Feel free to experiment with strawberries, peaches, or even a mix of fruits. Just adjust the sugar according to the fruit’s sweetness.
Nutritional Info
Calories per serving: Approximately 200
Fat: 10g
Carbohydrates: 28g
Fiber: 1g
Protein: 2g
There you have it! Raspberry Crumb Bars that are sure to warm your heart and delight your taste buds. I hope these bars inspire many happy memories for you and your loved ones—just like they did for me. So go ahead, grab those raspberries, and let’s get baking! Happy cooking, friends!
Print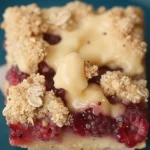
Raspberry Crumb Bars
- Total Time: 55 minutes
- Yield: 16 servings 1x
- Diet: Vegetarian
Description
Delightful and nostalgic Raspberry Crumb Bars with a buttery crust and vibrant raspberry filling, perfect for any gathering or an afternoon snack.
Ingredients
- 2 cups all-purpose flour
- ¾ cup granulated sugar
- 1 teaspoon baking powder
- ½ teaspoon salt
- ½ cup butter, cold and cubed
- 1 large egg
- 2 cups fresh raspberries
- 1 tablespoon lemon juice
- 2 tablespoons cornstarch
- ½ cup granulated sugar (for filling)
Instructions
- Preheat your oven to 350°F (175°C) and grease a 9×9-inch baking pan.
- Combine the all-purpose flour, granulated sugar, baking powder, and salt in a large mixing bowl.
- Cut the cold, cubed butter into the dry ingredients until crumbly.
- Crack in the egg and mix until just combined.
- Press about two-thirds of the mixture into the prepared baking pan and bake for 15 minutes.
- Cook the raspberries, lemon juice, granulated sugar, and cornstarch in a medium saucepan over medium heat until thickened, about 5-7 minutes.
- Pour the raspberry filling over the baked crust and crumble the remaining crust mixture on top.
- Bake for an additional 25 minutes until golden brown and bubbling.
- Cool the bars in the pan for at least 30 minutes before slicing.
Notes
Dust with powdered sugar before serving. These bars pair wonderfully with vanilla ice cream or whipped cream.
- Prep Time: 15 minutes
- Cook Time: 40 minutes
- Category: Dessert
- Method: Baking
- Cuisine: American
Nutrition
- Serving Size: 1 bar
- Calories: 200
- Sugar: 14g
- Sodium: 150mg
- Fat: 10g
- Saturated Fat: 6g
- Unsaturated Fat: 4g
- Trans Fat: 0g
- Carbohydrates: 28g
- Fiber: 1g
- Protein: 2g
- Cholesterol: 30mg
Keywords: raspberry, crumb bars, dessert, sweet treat, baking

No-Bake Raspberry Cream Pie: Easy Summer Dessert Recipe
Raspberry Cream Pie: A Slice of Summer in Every Bite
Welcome to my kitchen! Today, I’m thrilled to take you on a delightful journey, where we’ll celebrate the vibrant flavors of fresh raspberries with a recipe that truly captures the essence of summer — Raspberry Cream Pie. This dessert is one of my all-time favorites, and I can’t wait to share it with you. Whether you’re a seasoned pro or a kitchen newbie, this pie is approachable, satisfying, and guaranteed to put a smile on your face.
Imagine this: it’s a warm afternoon, sunlight filters through the trees, and you’re surrounded by loved ones. The sweet scent of freshly baked crust fills the air, mingling with the tangy aroma of ripe raspberries, creating a cozy atmosphere that feels like home. That’s what Raspberry Cream Pie is all about — sharing, laughter, and the joy of good food.
Personal Story
Let me take you back to my childhood summers at my grandmother’s house, where the most decadent treats blossomed from her kitchen. She had a small garden filled with plump, juicy raspberries that I would pick during our outdoor escapades. I remember the sweet, tart juice staining my fingers as I quickly snacked on the ripe berries, forgetting entirely that they were meant for dessert.
One day, she decided we’d make the Raspberry Cream Pie together. I was enthralled by the whir of the mixer and the rich cream taking shape. She guided me patiently, every now and then giving me tastes of the luscious filling. That pie wasn’t just a dessert; it was a piece of my childhood wrapped in buttery crust and fluffy filling, a creation of love and togetherness. Each summer since, I’ve held onto that memory, eager to recreate it and share its magic with others. And now, I’m excited for you to experience it too!
Ingredients
Before we dive into the cooking, let’s gather our ingredients. Having everything prepped and ready to go will make the process smooth and enjoyable.
-
For the Pie Crust:
- 1 ½ cups all-purpose flour: This is the backbone of your crust. If you’re looking for a gluten-free option, almond or oat flour works beautifully!
- ½ cup unsalted butter, chilled and cubed: Butter adds richness and flavor. If you prefer a lighter version, you could use coconut oil.
- 2-4 tablespoons ice water: This brings the dough together. If you don’t have ice water, cold milk can also work in a pinch.
-
For the Raspberry Filling:
- 2 cups fresh raspberries: The star of the show! Frozen raspberries are also a great alternative if fresh ones aren’t available.
- ½ cup granulated sugar: This balances the tartness of the berries. Substitute with honey or maple syrup for a natural touch.
- 2 tablespoons cornstarch: This helps to set the filling. If you’re avoiding cornstarch, arrowroot powder can be an excellent alternative.
- 1 tablespoon lemon juice: A splash of acidity enhances the raspberry flavor. Lime juice also adds a lovely twist!
-
For the Cream Topping:
- 1 cup heavy cream: This creates the dreamy whipped topping. You could try coconut cream for a dairy-free version.
- 2 tablespoons powdered sugar: Adds sweetness and stability. You can use agave syrup instead for a less processed option.
- 1 teaspoon vanilla extract: This adds depth to your cream. Feel free to experiment with almond or lemon extract!
Step-by-Step Instructions
Alright, let’s get cooking! Follow these steps, and I promise you’ll create a gorgeous Raspberry Cream Pie that’ll wow your friends and family.
Step 1: Prepare the Pie Crust
-
Mix the Dry Ingredients: In a large bowl, combine the all-purpose flour and a pinch of salt. This combo creates a flavorful crust base.
-
Cut in the Butter: Add the chilled, cubed butter to the flour mixture. Using a pastry cutter or your fingertips, work the butter into the flour until the mixture resembles coarse crumbs. This step is crucial for obtaining that flaky texture we all love.
-
Add Ice Water: Gradually add the ice water, one tablespoon at a time. Mix until the dough comes together but is not sticky. If you squeeze it and it holds, you’re golden!
-
Chill the Dough: Shape the dough into a disk, wrap it in plastic, and refrigerate it for at least 30 minutes. This helps the gluten relax and makes rolling easier later on.
Step 2: Bake the Pie Crust
-
Preheat Your Oven: While the dough chills, preheat your oven to 375°F (190°C).
-
Roll out the Dough: On a lightly floured surface, roll out your chilled dough until it’s about 1/8 inch thick. Carefully place it into a 9-inch pie pan. Trim any excess dough and crimp the edges for that homemade touch.
-
Pre-bake the Crust: Prick the bottom of the crust with a fork to prevent it from puffing up. Place it in the oven and bake for about 20 minutes, or until it’s just golden brown. A little chef hack? Cover the edges with aluminum foil halfway through to prevent over-browning.
Step 3: Prepare the Raspberry Filling
-
Cook the Raspberries: In a saucepan over medium heat, combine the raspberries, sugar, cornstarch, and lemon juice. Stir gently until the mixture comes to a simmer. This will take about 5-7 minutes. You want the raspberries to break down a bit and create a beautiful sauce.
-
Cool the Mixture: Once simmered, remove the pan from the heat and let the filling cool slightly. This ensures it doesn’t cook the crust when assembled.
Step 4: Whip the Cream
- Make the Whipped Cream: In a mixing bowl, combine the heavy cream, powdered sugar, and vanilla extract. Using a hand mixer, beat on medium speed until soft peaks form. Don’t whip too much or you’ll end up with butter — not what we want here!
Step 5: Assemble the Pie
-
Fill the Crust: Pour the raspberry filling into your cooled pie crust, spreading it evenly.
-
Top with Cream: Spoon the whipped cream over the raspberries, creating a fluffy blanket of goodness. If you’re feeling fancy, use a piping bag to create decorative swirls!
-
Chill: Refrigerate the pie for at least 2 hours to allow everything to set up nicely.
Serving Suggestions
When it’s finally time to serve, slice into your beautiful Raspberry Cream Pie and present it like a true masterpiece. Fresh mint leaves make a lovely garnish, and a sprinkle of extra raspberries on top adds a burst of color. Consider serving it alongside a scoop of vanilla ice cream or a glass of sparkling lemonade for the full summer experience!
Recipe Variations
- Berry Medley Pie: Mix in some blueberries or blackberries for a colorful twist.
- Chocolate Raspberry Cream: Add some melted chocolate to the cream for a delicious chocolate raspberry combo!
- Lemon Raspberry Pie: Incorporate lemon zest into the filling for a zesty kick.
- Vegan Version: Substitute the heavy cream with coconut cream and the butter in the crust with vegan butter.
- Healthier Option: Swap sugar for a natural sweetener like stevia or monk fruit in the filling.
Chef’s Notes
As I reflect on this recipe, I can’t help but think about how it’s evolved over the years. Originally, my grandmother added a sprinkle of nutmeg to her crust, which I still adore. The beauty of cooking is that it can adapt to your palate and personal touch. Don’t be afraid to play around with flavors! And trust me, this pie isn’t just a dessert — it’s a celebration of flavors, seasons, and memories.
FAQs and Troubleshooting
1. My filling didn’t thicken; what happened?
This could be due to not enough cornstarch or cooking the filling for too short a time. Make sure to simmer it long enough for the cornstarch to activate fully!
2. Can I make this pie ahead of time?
Absolutely! You can prepare it one day in advance. Just make sure to cover it well to keep it fresh.
3. What if my crust is too dry?
If your crust feels crumbly, it likely needed a bit more water when mixing. Next time, add just a teaspoon at a time until you get a workable dough.
4. How do I store leftovers?
Cover the pie with plastic wrap and store it in the refrigerator. It’s best enjoyed within 3 days for the freshest flavor!
Nutritional Info
While I understand that desserts should be enjoyed, I know some of you keep an eye on nutritional values. A slice of Raspberry Cream Pie contains approximately:
- Calories: 350
- Fat: 20g
- Carbohydrates: 40g
- Protein: 3g
Remember, the joy of cooking is about balance and indulgence, so treat yourself to a slice or two!
And there you have it, your very own Raspberry Cream Pie! I hope you’ve enjoyed this journey with me and feel empowered to recreate this recipe in your kitchen. Cooking is all about love, creativity, and sharing delicious moments. Happy baking, my friends — I can’t wait to hear your stories and see your beautiful pies!
Print
Raspberry Cream Pie
- Total Time: 150 minutes
- Yield: 8 servings 1x
- Diet: Vegetarian
Description
A delightful Raspberry Cream Pie that captures the essence of summer with vibrant flavors of fresh raspberries.
Ingredients
- 1 ½ cups all-purpose flour
- ½ cup unsalted butter, chilled and cubed
- 2–4 tablespoons ice water
- 2 cups fresh raspberries
- ½ cup granulated sugar
- 2 tablespoons cornstarch
- 1 tablespoon lemon juice
- 1 cup heavy cream
- 2 tablespoons powdered sugar
- 1 teaspoon vanilla extract
Instructions
- Mix the dry ingredients: In a large bowl, combine the all-purpose flour and a pinch of salt.
- Cut in the butter: Add the chilled, cubed butter and work it into the flour until it resembles coarse crumbs.
- Add ice water: Gradually mix in the ice water until the dough comes together.
- Chill the dough: Shape into a disk, wrap in plastic, and refrigerate for at least 30 minutes.
- Preheat your oven: Preheat to 375°F (190°C).
- Roll out the dough: On a floured surface, roll out the dough to 1/8 inch thick and place into a 9-inch pie pan.
- Pre-bake the crust: Prick the bottom and bake for about 20 minutes until golden brown.
- Cook the raspberries: In a saucepan, combine raspberries, sugar, cornstarch, and lemon juice and simmer for 5-7 minutes.
- Cool the mixture: Remove from heat and let it cool slightly.
- Make the whipped cream: Beat heavy cream, powdered sugar, and vanilla until soft peaks form.
- Fill the crust: Pour the raspberry filling into the cooled crust.
- Top with cream: Spoon the whipped cream over the raspberries.
- Chill: Refrigerate for at least 2 hours.
Notes
For variations, consider adding blueberries for a berry medley, or substitute coconut cream for a dairy-free option.
- Prep Time: 30 minutes
- Cook Time: 20 minutes
- Category: Dessert
- Method: Baking
- Cuisine: American
Nutrition
- Serving Size: 1 slice
- Calories: 350
- Sugar: 18g
- Sodium: 100mg
- Fat: 20g
- Saturated Fat: 12g
- Unsaturated Fat: 6g
- Trans Fat: 0g
- Carbohydrates: 40g
- Fiber: 4g
- Protein: 3g
- Cholesterol: 60mg
Keywords: Raspberry Pie, Summer Dessert, Cream Pie, Fresh Berries
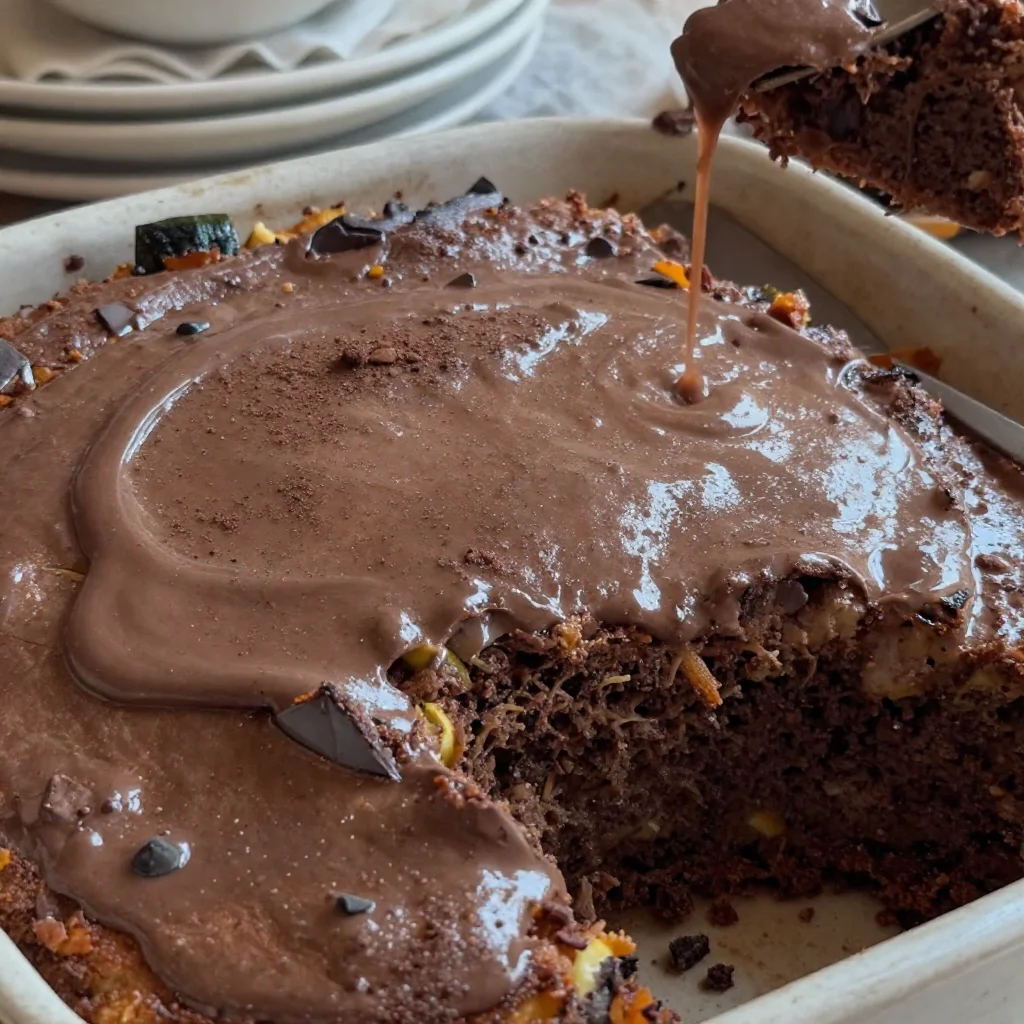
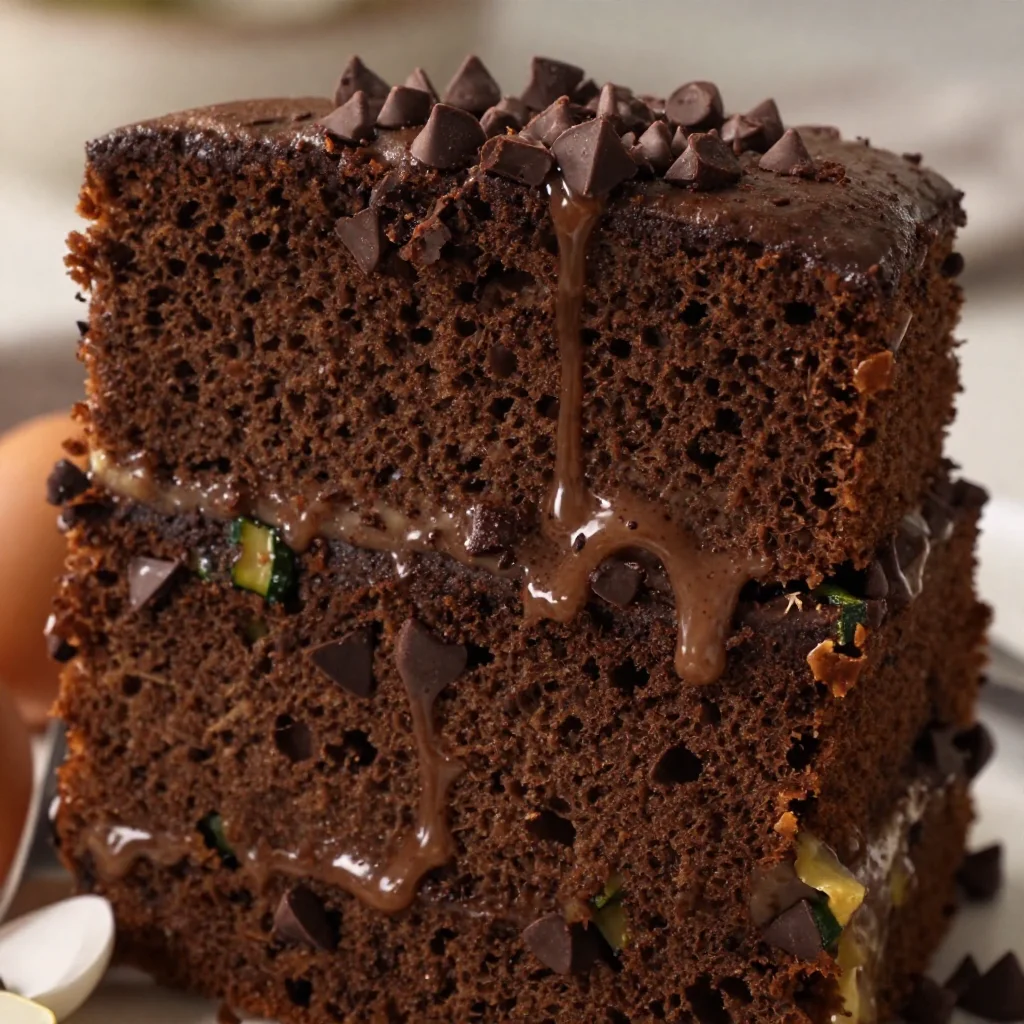
One-Bowl Chocolate Zucchini Cake: Easy Weeknight Treat
The Best Chocolate Zucchini Cake: A Delightful Surprise!
Welcome to my kitchen, fellow foodies! Today, I’m super excited to share a recipe that combines two surprisingly harmonious elements: rich, decadent chocolate and moist, nutrient-packed zucchini. This Chocolate Zucchini Cake is not just an ordinary dessert; it’s an enchanting twist that’ll have everyone wondering about your magic touch. With the summer garden bursting with zucchini, it’s the perfect time to whisk up this delightful cake that is sure to charm your friends and family.
Now, you may be thinking, “Zucchini in a cake? Really?” Trust me—you’re in for a treat! This cake is wonderfully moist, decadent, and brimming with chocolatey goodness, making it a delightful disguise for the often-overlooked zucchini. Not only does it add moisture, but it also blends seamlessly into the rich chocolate flavor. Plus, it’s a sneaky way to add a bit of nutrition to your dessert!
A bit about my journey into the wonderful world of chocolate zucchini cake: A few summers ago, while on a quest to use up an overflowing basket of fresh zucchini from my garden, I stumbled upon this recipe in my late grandmother’s old cookbook. The memories came rushing back—summers spent in her sunlit kitchen, enveloped in the aromas of chocolate and baking bread. Cooking always felt like a gathering of love, and piecing together the ingredients for this cake was like rekindling those fond memories. After some trial and error (thank you, messy kitchen apron!), I finally created my own version, a cake that not only tastes fabulous but also tells a story.
Join me on this delightful adventure. Let’s make some memorable moments, shall we?
Personal Story
I’ll never forget the first time I made this Chocolate Zucchini Cake for a summer potluck at my friend Sarah’s house. I had just learned the recipe from my grandmother’s dusty cookbook and was eager to impress everyone with my culinary skills. Armed with a fresh batch of zucchini and bags of chocolate chips, I dove into the mixing, the kitchen filling up with the sweet scent of cocoa powder and vanilla.
Before long, I pulled the cake out of the oven, its surface glistening with a glossy sheen. I couldn’t wait to get it to the potluck, where I was sure it would steal the show. When it was finally time to taste it, I hesitated. What if they could taste the zucchini? Would they even like it?
Much to my surprise, as soon as the cake was served, the compliments poured in. “What’s your secret ingredient?” one of my friends asked, eyes wide with delight. I smiled, “A little zucchini magic!” That night, as my friends devoured slice after slice, I realized how special it was to share something homemade—something imbued with love and memories. Every bite was nostalgic for me, a reminder of summers spent baking with my grandmother. From then on, this cake has become a staple in my baking repertoire, a comforting delight that always brings smiles and joy.
Ingredients
To make this delicious Chocolate Zucchini Cake, you’ll need the following ingredients:
For the Cake:
-
2 cups all-purpose flour
The base of your cake! If you’re gluten-free, you can substitute with a 1:1 gluten-free flour blend. -
2 cups granulated sugar
This sweetens your cake beautifully—you could use coconut sugar for a lower glycemic option. -
½ cup unsweetened cocoa powder
This brings the rich chocolate flavor. Look for a high-quality cocoa for the best results. -
1 tsp baking soda
Helps the cake rise and become fluffy. Always check the expiration date for the best effect! -
1 tsp baking powder
Works in tandem with baking soda, providing that perfect lift. -
1 tsp salt
Enhances the flavors of the cake. Feel free to cut down on this for a lower sodium version. -
1 cup vegetable oil
Adds moisture to the cake. You could use melted coconut oil for a hint of sweetness or even apple sauce for a lower-calorie version! -
3 large eggs
Binds the ingredients together, giving structure to the cake. Consider using flaxseed meal mixed with water for a vegan swap. -
2 cups grated zucchini
The star of the show! No need to peel—just wash and grate (you can easily swap in carrots if you’re feeling adventurous!). -
1 tsp vanilla extract
Adds a warm, inviting flavor to the cake. Use pure vanilla extract for the best taste. -
1 cup chocolate chips
For that ooey-gooey melt-in-your-mouth decadence! You can use dark, semi-sweet, or even dairy-free chips depending on your preference.
Step-by-Step Instructions
Now that we have our ingredients ready, it’s time to get cooking! Here’s how to make this beautiful Chocolate Zucchini Cake.
Step 1: Preheat the Oven
Preheat your oven to 350°F (175°C). This step is crucial because a properly heated oven allows the cake to rise perfectly without sinking in the middle—trust me, nobody likes a flat cake!
Step 2: Prepare Your Pan
Grease and flour a 9×13-inch baking pan or line it with parchment paper. This not only helps in the easy release of the cake but also ensures a nice presentation (hello, clean edges!).
Step 3: Grate the Zucchini
Grate your zucchini using a box grater or a food processor. There’s no need to peel the zucchini first; the skin adds color and nutrients! After grating, place it in a clean dish towel and squeeze out excess moisture. This keeps the cake from becoming too soggy—no one wants a wet cake!
Step 4: Mix the Dry Ingredients
In a medium-sized bowl, whisk together the flour, cocoa powder, baking soda, baking powder, and salt. This step distributes the leavening agents evenly and ensures your cake rises without any pesky lumps.
Step 5: Mix the Wet Ingredients
In a large mixing bowl, combine the sugar and oil. Whisk until well blended. Next, add the eggs and vanilla extract, mixing until fully incorporated. Pro tip: if you want your eggs to blend more smoothly, make sure they’re at room temperature before mixing.
Step 6: Combine Zucchini with Wet Ingredients
Add the grated zucchini to your wet mixture, folding it gently with a spatula. The zucchini will release some moisture, making the batter even more luscious.
Step 7: Combine Wet and Dry Mixtures
Gradually add the dry ingredients to the wet mixture, folding gently until just combined. Be careful not to overmix—this keeps your cake tender and fluffy!
Step 8: Add Chocolate Chips
Stir in the chocolate chips, allowing them to distribute evenly throughout the batter. I like to save a handful to sprinkle on top before baking for an added touch of chocolate goodness!
Step 9: Bake
Pour the batter into your prepared baking pan and spread it evenly. Bake in your preheated oven for 30-35 minutes, or until a toothpick inserted in the center comes out clean. Keep an eye on it—I’ve had cakes bake faster than expected, especially if your oven runs hot.
Step 10: Cool
Once baked, remove the cake from the oven and leave it in the pan for about 10 minutes. Then, transfer it to a wire rack to cool completely. This step allows the structure to firm up, making it easier to cut later.
Serving Suggestions
This Chocolate Zucchini Cake is scrumptious on its own, but you can elevate it even further! Serve a warm slice with a scoop of vanilla ice cream or a dollop of whipped cream for a perfect dessert. Drizzle a little chocolate ganache or dust with powdered sugar for an elegant touch. Wouldn’t it be fun to serve it along with a fresh berry compote for some tartness?
Recipe Variations
Feel free to get creative! Here are some fun variations to try:
- Spicy Kick: Add a dash of cayenne pepper or cinnamon for a spiced chocolate zucchini cake.
- Nutty Addition: Fold in some chopped walnuts or pecans for added crunch.
- Fruit Fusion: Add in a cup of chopped strawberries or raspberries for a fruity twist.
- Vegan Variations: Substitute eggs with flaxseed meal and oil with applesauce for a vegan-friendly version.
- Frosting Fun: Top it with a tangy cream cheese frosting for a decadent dessert!
Chef’s Notes
When I first attempted this recipe, I accidentally overlooked the zucchini squeezing step. Let’s just say the cake turned out more of a chocolate pudding than anything else! Thus, I learned the invaluable lesson of managing moisture. Now, every time I make this cake, I think back to that not-so-perfect attempt and smile. It reminds me that cooking is all about experimenting, learning, and most importantly, having fun in the kitchen!
Over the years, this Chocolate Zucchini Cake has evolved in my kitchen. I’ve played around with various additions and toppings, and I love how versatile it can be!
FAQs and Troubleshooting
1. My cake sunk in the middle. What went wrong?
A sunken cake is often due to overmixing or having the oven temperature too low. Be gentle when combining ingredients and ensure your oven is properly preheated!
2. What if my cake is too dry?
It could be overbaked or there wasn’t enough moisture in the batter. Make sure you’re accurately measuring and don’t exceed the baking time.
3. Can I make this cake ahead of time?
Absolutely! It can be made a day in advance and stored in an airtight container. If you want it warm when serving, just pop it in the oven for a few minutes before serving.
4. Is it possible to freeze the cake?
Yes! Wrap the cooled cake tightly in plastic wrap and place it in a freezer-safe container. It can last for up to three months. Just let it thaw in the refrigerator or at room temperature!
Nutritional Info (Optional)
While I believe in the magic of desserts, I also want you to enjoy treats mindfully. Here’s a general breakdown per slice (based on 12 slices):
- Calories: 280
- Total Fat: 12g
- Saturated Fat: 4g
- Carbohydrates: 42g
- Dietary Fiber: 2g
- Sugars: 24g
- Protein: 3g
This Chocolate Zucchini Cake is a delightful way to satisfy your sweet tooth while sneaking in some extra veggies!
Thank you for joining me in my kitchen today and for letting me share this cherished recipe with you. I hope you find as much joy in baking this Chocolate Zucchini Cake as I have. Happy baking!
Print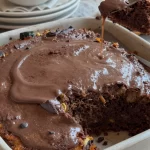
Chocolate Zucchini Cake
- Total Time: 55 minutes
- Yield: 12 servings 1x
- Diet: Vegetarian
Description
A moist and decadent chocolate cake that cleverly incorporates grated zucchini for added nutrition and flavor.
Ingredients
- 2 cups all-purpose flour
- 2 cups granulated sugar
- ½ cup unsweetened cocoa powder
- 1 tsp baking soda
- 1 tsp baking powder
- 1 tsp salt
- 1 cup vegetable oil
- 3 large eggs
- 2 cups grated zucchini
- 1 tsp vanilla extract
- 1 cup chocolate chips
Instructions
- Preheat your oven to 350°F (175°C).
- Grease and flour a 9×13-inch baking pan or line it with parchment paper.
- Grate your zucchini and squeeze out excess moisture.
- Mix the dry ingredients in a bowl: flour, cocoa powder, baking soda, baking powder, and salt.
- Combine the sugar and oil in a large bowl, then whisk in the eggs and vanilla.
- Add the grated zucchini and mix gently.
- Fold the dry ingredients into the wet ingredients until just combined.
- Stir in the chocolate chips.
- Pour the batter into the prepared pan and spread it evenly.
- Bake for 30-35 minutes, or until a toothpick comes out clean.
- Cool in the pan for 10 minutes, then transfer to a wire rack.
Notes
Store in an airtight container. Can be made a day in advance. This cake can also be frozen for up to three months.
- Prep Time: 20 minutes
- Cook Time: 35 minutes
- Category: Dessert
- Method: Baking
- Cuisine: American
Nutrition
- Serving Size: 1 serving
- Calories: 280
- Sugar: 24g
- Sodium: 400mg
- Fat: 12g
- Saturated Fat: 4g
- Unsaturated Fat: 6g
- Trans Fat: 0g
- Carbohydrates: 42g
- Fiber: 2g
- Protein: 3g
- Cholesterol: 30mg
Keywords: chocolate cake, zucchini cake, dessert, baking
One-Bowl Chocolate Zucchini Cake: Quick, Moist & Easy
Indulge in a Slice of Heaven: Chocolate Zucchini Cake Recipe
Welcome to my cozy kitchen! Today, I’m excited to whisk you away into the delightful world of baking with one of my all-time favorite recipes: Chocolate Zucchini Cake. If you’re a fellow food enthusiast who loves the smell of something sweet wafting through the air, you’re in for a treat. This cake is not only incredibly moist and delicious, but it also sneaks in a good serving of vegetables—yes, you read that right!
Growing up, I always associated baking with warmth and love. I fondly recall afternoons spent in my grandmother’s kitchen, where she transformed the most unsuspecting ingredients into magical desserts. Chocolate Zucchini Cake was one of her signature recipes. I can still picture her dusting cocoa powder on the counter, her laughter filling the room as we prepared to mix the batter. Using zucchini was her clever way of taking advantage of summer harvests. It was our little secret–no one ever guessed there were veggies hiding in our sweet treats!
As we whipped up that rich batter, I remember sneaking tastes and marveling at how the chocolate completely masked the zucchini. Each slice of cake was a celebration at the dinner table, perfect for birthdays, potlucks, or simply as a special afternoon treat. I knew from that moment on that I would have to share this cake with others. It’s not just about feeding your loved ones; it’s about creating memories that linger long after the last bite. So, grab your whisks, and let’s dive into this delightful Chocolate Zucchini Cake together!
The Story Behind the Cake
What makes this recipe extra special for me? It’s not just the rich chocolatey goodness that envelops this cake, but the memories and laughs shared while making it. I remember one summer afternoon when my cousin came over unannounced, and we decided to whip something up. Armed with fresh zucchinis from my garden, we looked at each other and said, “Chocolate Zucchini Cake, it is!”
The kitchen soon filled with laughter, flour, and a few accidental messes—who knew a simple recipe could turn into a cocoa avalanche? We turned on the radio, dancing and singing while mixing ingredients, all the while sneaking spoonfuls of the batter. Finally, once we pulled the cake from the oven, the kitchen filled with a heavenly aroma that drew in my family like moths to a flame.
That day wasn’t just about making cake; it was about creating cherished moments that I still carry with me today. It’s the kind of joy I want to share every time I bake. So, let’s bring that warmth and happiness into your own kitchen together!
Ingredients
Here’s what you’ll need to create this amazing Chocolate Zucchini Cake:
-
1½ cups grated zucchini
A moisture-packed ingredient that adds tenderness, zucchini provides a wonderful texture without overpowering the chocolate flavor. You can substitute with finely grated carrots for a similar moisture effect. -
1½ cups all-purpose flour
The backbone of any cake. If you’re looking for a gluten-free option, you can experiment with almond flour or a 1:1 gluten-free flour blend. -
1 cup granulated sugar
This sweet staple adds to the cake’s fluffiness. You can substitute with coconut sugar for a lower glycemic index, but the cake may alter slightly in color and flavor. -
⅓ cup unsweetened cocoa powder
A key player for that rich chocolate flavor. Opt for Dutch-processed cocoa for a smoother taste, or use carob powder for a caffeine-free alternative. -
½ teaspoon baking powder
This helps the cake rise and ensures a light texture. If you’re out, baking soda works in a pinch, but cut it in half since it’s stronger. -
½ teaspoon baking soda
Another leavening agent that works wonders, especially combined with acid from the zucchinis or cocoa. -
½ teaspoon salt
Balances out the sweetness and enhances flavors. -
½ cup vegetable oil
For moistness and richness. You can substitute with applesauce for a healthier option or melted coconut oil for a delightful twist. -
2 large eggs
Essential for binding the ingredients together. For an egg-free alternative, use ¼ cup unsweetened applesauce per egg. -
1 teaspoon vanilla extract
The aromatic quality of vanilla elevates the entire cake! Feel free to swap with almond extract for a unique flavor. -
½ cup chocolate chips (optional)
Who can resist chocolate chunks in chocolate cake? Dark chocolate or dairy-free chips work perfectly here too!
Step-by-Step Instructions
Now, let’s get to the magic part—making your cake from scratch! Here’s how to do it:
-
Preheat the Oven
Start by preheating your oven to 350°F (175°C). This ensures a perfectly baked cake. While the oven heats up, grab your baking pan—a 9×13-inch pan works wonders—grease it lightly to prevent sticking. -
Prepare the Zucchini
Wash and grate your zucchini. To avoid excess moisture, use a clean kitchen towel to squeeze out any liquid. Trust me; it can make a difference in texture! -
Mix Dry Ingredients
In a large mixing bowl, whisk together the flour, cocoa powder, baking powder, baking soda, and salt until fully combined. This step helps distribute the leavening agents evenly throughout the batter, ensuring a consistent rise. -
Combine Wet Ingredients
In a separate bowl, whisk together the granulated sugar, vegetable oil, eggs, and vanilla extract until smooth and homogenous. That lovely golden color will have you drooling already! -
Combine All Ingredients
Gradually add the wet mixture to the dry ingredients, stirring gently until just combined (be careful not to overmix!). Fold in the grated zucchini until it’s incorporated, followed by the chocolate chips if using. The batter will be thick and luscious—just how we like it! -
Pour and Bake
Pour the batter into your prepared baking pan, smoothing the top with a spatula. Bake for about 35-40 minutes or until a toothpick inserted into the center comes out clean (or with a few moist crumbs). You got this! -
Cool and Serve
Once baked, remove the pan from the oven and let it cool in the pan for about 10 minutes before transferring to a wire rack. This helps prevent sticking. Let it cool completely, and enjoy the heavenly aroma as you wait!
Serving Suggestions
Slice your beautifully baked Chocolate Zucchini Cake and serve with a light dusting of powdered sugar or a dollop of whipped cream for an extra touch of indulgence. You can also pair it with fresh berries for a touch of fruity freshness that balances the richness of the chocolate. It’s perfect for dessert or as a delicious snack with afternoon tea!
Recipe Variations
Feel free to let your creativity shine! Here are some variations to spice things up:
-
Mocha Madness: Mix in a tablespoon of instant coffee granules for a delightful mocha flavor that pairs beautifully with chocolate.
-
Spiced Up: Add a teaspoon of cinnamon or a pinch of nutmeg for a warm, earthy flavor.
-
Nutty Delight: Toss in some chopped walnuts or pecans for an extra crunch that complements the moist cake.
-
Fruity Twist: Add in a half-cup of mashed bananas for a hint of natural sweetness and a different flavor profile.
-
Coconut Flair: Incorporate unsweetened shredded coconut for a tropical feel—just adjust the moisture slightly to maintain the cake’s consistency.
Chef’s Notes
Over the years, I’ve experimented with this Chocolate Zucchini Cake recipe, and it has blossomed into a family favorite that everyone raves about. I vividly remember one time baking it for a friend’s birthday. In my excitement, I grabbed the wrong container and added salt instead of sugar! Let’s just say it was a monumental flop. But as they say, every mistake is a chance to learn. That mishap encouraged me to keep my ingredients organized and labeled!
This cake has become synonymous with celebrations in my home. It’s one of those desserts that never goes left uneaten. In fact, it often gets devoured before I even have time to snap a pic! So, I leave you with a friendly reminder: always have your camera at the ready when you bake this beauty!
FAQs and Troubleshooting
-
Why does my cake turn out dense?
A dense cake can result from overmixing the batter or adding too much zucchini. Remember to mix until just combined, and ensure your grated zucchini is adequately drained. -
How do I store leftovers?
Store in an airtight container at room temperature for up to three days or refrigerate for up to a week. You can also freeze slices for up to three months—perfect for a quick treat! -
Can I make this cake healthier?
Absolutely! Substituting applesauce for oil, using whole wheat flour, or reducing sugar by a third are all great ways to lighten this dessert while keeping the flavor intact. -
Can I make this cake in advance?
Yes! It actually tastes better the next day as the flavors have time to meld. Just ensure it’s stored properly.
With all these tips at your fingertips, you’re all set to bake the perfect Chocolate Zucchini Cake! Embrace the little messes and enjoy the process—we’re all friends in this cozy kitchen of ours. So, gather your loved ones, mix up that batter, and let the memories unfold sweetly and joyfully. Happy baking!
Print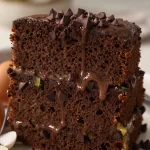
Chocolate Zucchini Cake
- Total Time: 55 minutes
- Yield: 12 servings 1x
- Diet: Vegetarian
Description
A moist and delicious chocolate cake that cleverly incorporates zucchini for added texture and nutrition.
Ingredients
- 1½ cups grated zucchini
- 1½ cups all-purpose flour
- 1 cup granulated sugar
- ⅓ cup unsweetened cocoa powder
- ½ teaspoon baking powder
- ½ teaspoon baking soda
- ½ teaspoon salt
- ½ cup vegetable oil
- 2 large eggs
- 1 teaspoon vanilla extract
- ½ cup chocolate chips (optional)
Instructions
- Preheat the oven to 350°F (175°C) and grease a 9×13-inch baking pan.
- Wash and grate the zucchini, squeezing out excess moisture with a kitchen towel.
- Whisk together flour, cocoa powder, baking powder, baking soda, and salt in a large bowl.
- Combine granulated sugar, vegetable oil, eggs, and vanilla in a separate bowl until smooth.
- Add the wet mixture to dry ingredients, stirring gently until just combined, then fold in zucchini and chocolate chips.
- Pour batter into prepared pan and bake for 35-40 minutes until a toothpick comes out clean.
- Cool in the pan for 10 minutes, then transfer to a wire rack to cool completely.
Notes
Serve with powdered sugar or whipped cream. Variations include adding coffee granules for a mocha flavor or nuts for a crunchy texture.
- Prep Time: 15 minutes
- Cook Time: 40 minutes
- Category: Dessert
- Method: Baking
- Cuisine: American
Nutrition
- Serving Size: 1 slice
- Calories: 350
- Sugar: 20g
- Sodium: 200mg
- Fat: 15g
- Saturated Fat: 2g
- Unsaturated Fat: 10g
- Trans Fat: 0g
- Carbohydrates: 45g
- Fiber: 3g
- Protein: 5g
- Cholesterol: 70mg
Keywords: chocolate cake, zucchini cake, dessert, moist cake, baking
Beginner-friendly fudgy chocolate cake from scratch
The Ultimate Super Rich and Fudgy Chocolate Cake
Welcome to my kitchen! Today we’re diving deep into the world of chocolate—a sweet escape that speaks to all of us. I’m thrilled to share with you my Super Rich and Fudgy Chocolate Cake, a luscious dessert that feels like a warm hug on a plate. This cake is perfect for celebrations, cozy get-togethers, or just because you deserve it! Imagine sinking your fork into a moist, decadent slice filled with intense chocolate flavor. Doesn’t that make your heart sing?
Growing up, chocolate cake was a staple at every family gathering. My mom would whip up her famous recipe for birthdays, holidays, and even the random Tuesday just because. I can still picture her standing over the mixing bowl, her apron dusted with flour, humming a tune while the rich aroma of melting chocolate enveloped our cozy kitchen. This cake was a family favorite, not just for its flavor, but for the memories it created around the dinner table. It was in those sweet moments of laughter and love, sharing a slice of cake with family, that I learned how food can connect us in the most powerful ways.
Now, it’s your turn to create your own memories with this delicious treat! So, let’s get started!
Ingredients
To make the best Super Rich and Fudgy Chocolate Cake, you’ll need the following ingredients:
-
1 ¾ cups all-purpose flour
A must-have in any cake, flour gives structure. If you need a gluten-free option, swap half of it with almond flour for a nutty twist! -
2 cups granulated sugar
Sugar adds sweetness and moisture. For a caramel touch, use brown sugar or try coconut sugar for a healthier alternative. -
¾ cup unsweetened cocoa powder
This is the star of the show! It brings that deep chocolate flavor. Look for Dutch-processed cocoa for a smoother taste, or use raw cacao for health benefits. -
1 ½ teaspoons baking powder
Helps the cake rise. If you’re out of baking powder, you can use baking soda, but double the amount using a bit of vinegar or yogurt for a tender crumb. -
1 teaspoon baking soda
Critical for a fluffy texture. Make sure it’s fresh! A little expired baking soda can leave your cake dense. -
1 teaspoon salt
A pinch of salt enhances the flavors. Kosher salt works well, but sea salt adds a lovely crunch when sprinkled on top! -
2 large eggs
They provide moisture and help bind. For a vegan twist, use flax eggs (1 tablespoon ground flaxseed mixed with 3 tablespoons water per egg). -
1 cup whole milk
Rich buttermilk can be substituted if you want extra richness, or use almond milk for a plant-based version. -
½ cup vegetable oil
Oil keeps the cake moist. Canola oil or melted coconut oil are fantastic alternatives. -
2 teaspoons vanilla extract
Adds depth to flavor. Don’t skip this! Use pure vanilla extract for the best taste. -
1 cup boiling water
Surprised? Adding boiling water helps the cocoa bloom, enhancing the chocolate flavor. You can replace it with brewed coffee for a mocha taste (trust me, it’s magic!).
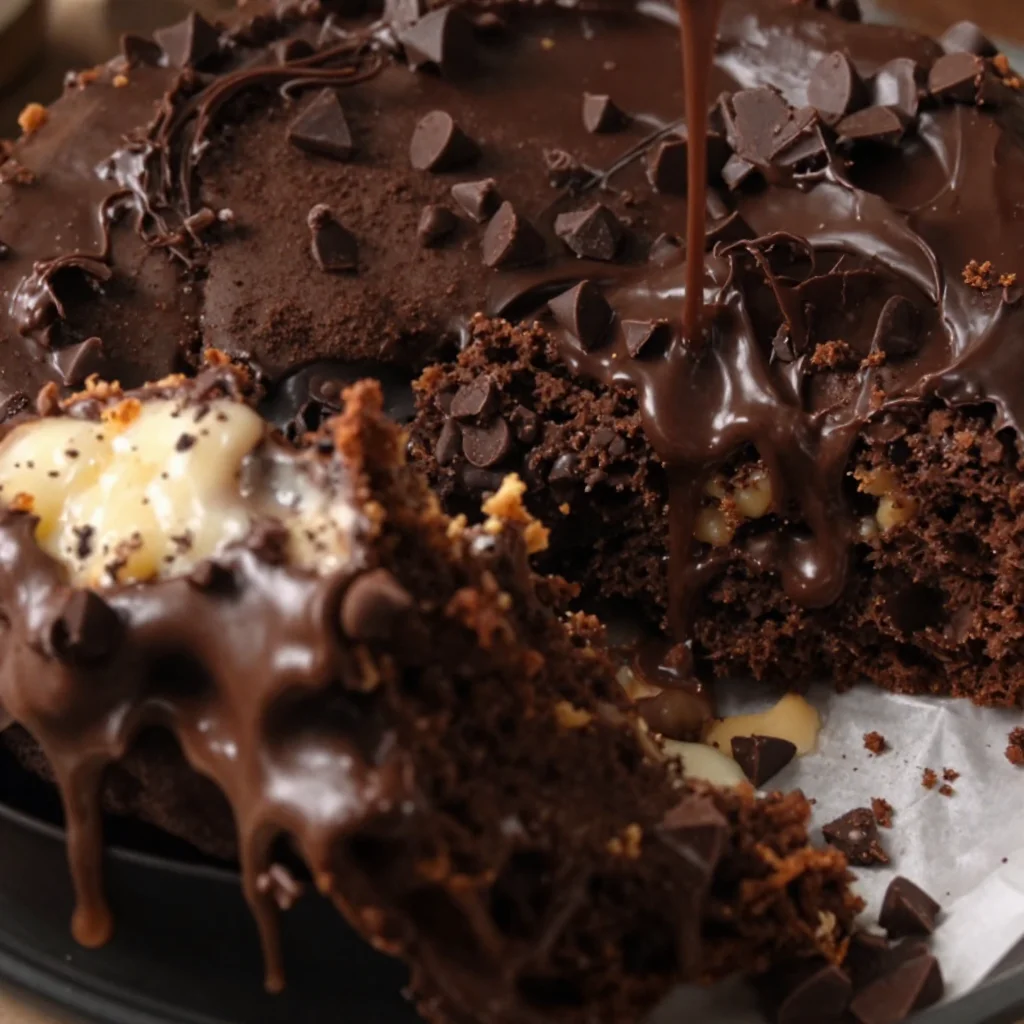
Step-by-Step Instructions
-
Preheat the Oven: Preheat your oven to 350°F (175°C). Greasing and lining two 9-inch round cake pans with parchment paper will make it easier to remove the cakes later. A quick swipe of non-stick spray or butter works wonders!
-
Mix Dry Ingredients: In a large mixing bowl, combine the flour, sugar, cocoa powder, baking powder, baking soda, and salt. Whisk together until well combined. Pro tip: Sifting the cocoa powder can help eliminate any lumps!
-
Combine Wet Ingredients: In another bowl, whisk together the eggs, milk, oil, and vanilla until smooth and frothy. This step infuses air into your batter, which adds to the fluffiness of the cake.
-
Blend Together: Pour the wet ingredients into the dry ingredients and mix until just combined. Be careful not to overmix; a few lumps are fine. Your stiff batter will loosen up with the next step!
-
Add Boiling Water: Slowly pour in the boiling water and stir. This will thin out your batter, which might look a little strange, but trust me—it’s supposed to be this way! This step is key—it makes for an ultra-moist cake.
-
Bake: Divide the batter evenly between the prepared cake pans. Tap them lightly on the counter to release any air bubbles. Bake for 30-35 minutes or until a toothpick inserted in the center comes out clean.
-
Cool: Let the cakes cool in the pans for about 10 minutes, then transfer them to wire racks to cool completely. This cooling step is essential for making your frosting spreadable!
-
Frost and Serve: Once the cakes have cooled, layer and frost with your favorite chocolate frosting (I’ll share my easy recipe soon). You can also sprinkle some sea salt on top for a sweet-salty contrast.
Serving Suggestions
Serve slices of this decadent cake on a beautiful plate with a scoop of vanilla ice cream on the side. Drizzle a little chocolate sauce or a berry compote over the top for that extra “wow” factor. It’s perfect for impressing guests or indulging on a cozy night in.
Recipe Variations
-
Chocolate Mint Cake: Add a teaspoon of peppermint extract to the batter for a refreshing twist!
-
Espresso Delight: Stir in a tablespoon of instant espresso powder to deepen the chocolate flavor.
-
Nutty Chocolate Cake: Fold in half a cup of chopped nuts (walnuts or pecans) for an added crunch.
-
Fruit-Filled Indulgence: Add in a cup of fresh raspberries or cherries for a fruity contrast.
-
Vegan Variation: Use plant-based milk, flax eggs, and coconut oil to make this cake completely vegan without sacrificing flavor!
Chef’s Notes
This recipe is a cherished hit among friends and family. I’ve evolved it over the years, experimenting with different flours and extracts until I found the perfect balance. One of my funniest kitchen disasters happened when I accidentally swapped the sugar for salt—let’s just say that cake did NOT make it out of the pan! But every baking misstep has taught me so much about the magic happening behind the scenes. That’s the beauty of cooking—you learn, you grow, and you develop a passion that’s truly unique.
FAQs and Troubleshooting
-
Why is my cake dense?
A dense cake can result from overmixing the batter or using old leavening agents. Make sure to mix just until combined and check the expiration dates on your baking powder and soda. -
How do I store the cake?
If you have leftovers (which is rare!), store them in an airtight container at room temperature for 3-4 days. You can also refrigerate it, but bring it to room temperature before serving for the best texture. -
Can I make this cake ahead of time?
Absolutely! You can bake and cool the cake a day in advance. Just keep it tightly wrapped. Frosting can also be made a day in advance and stored in the fridge—just give it a quick whisk before using. -
What can I do if my frosting is too thick?
If your frosting is too thick to spread, you can thin it out by adding a tablespoon of milk or cream. Mix in a little at a time until you get the right consistency.
Nutritional Info
While this cake is a special treat and not necessarily a “health food,” it’s all about balance, right? Each slice (without frosting) typically contains about 350 calories, with a good amount of richness that’s worth every bite.
So there you have it—my Super Rich and Fudgy Chocolate Cake recipe! With every step, I hope you filled your kitchen with warmth and love, just like my mother did. Don’t forget to enjoy the little moments—the laughter, the smells, and the taste of success. Happy baking!
Print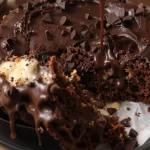
Super Rich and Fudgy Chocolate Cake
- Total Time: 50
- Yield: 8 servings 1x
- Diet: Vegetarian
Description
A luscious chocolate cake that’s moist, decadent, and filled with intense chocolate flavor.
Ingredients
- 1 ¾ cups all-purpose flour
- 2 cups granulated sugar
- ¾ cup unsweetened cocoa powder
- 1 ½ teaspoons baking powder
- 1 teaspoon baking soda
- 1 teaspoon salt
- 2 large eggs
- 1 cup whole milk
- ½ cup vegetable oil
- 2 teaspoons vanilla extract
- 1 cup boiling water
Instructions
- Preheat the Oven: Preheat your oven to 350°F (175°C) and prepare two 9-inch round cake pans.
- Mix Dry Ingredients: In a large bowl, combine the flour, sugar, cocoa powder, baking powder, baking soda, and salt.
- Combine Wet Ingredients: In another bowl, whisk together the eggs, milk, oil, and vanilla.
- Blend Together: Pour the wet ingredients into the dry ingredients and mix until just combined.
- Add Boiling Water: Slowly pour in the boiling water and stir until smooth.
- Bake: Divide the batter between the prepared pans and bake for 30-35 minutes.
- Cool: Let the cakes cool in the pans for 10 minutes before transferring them to wire racks.
- Frost and Serve: Layer and frost with your favorite chocolate frosting.
Notes
For extra flavor variations, consider adding peppermint extract, espresso powder, or fresh fruits.
- Prep Time: 15
- Cook Time: 35
- Category: Dessert
- Method: Baking
- Cuisine: American
Nutrition
- Serving Size: 1 slice
- Calories: 350
- Sugar: 35g
- Sodium: 400mg
- Fat: 12g
- Saturated Fat: 3g
- Unsaturated Fat: 7g
- Trans Fat: 0g
- Carbohydrates: 54g
- Fiber: 3g
- Protein: 6g
- Cholesterol: 40mg
Keywords: chocolate cake, dessert, rich cake, fudgy cake, baking
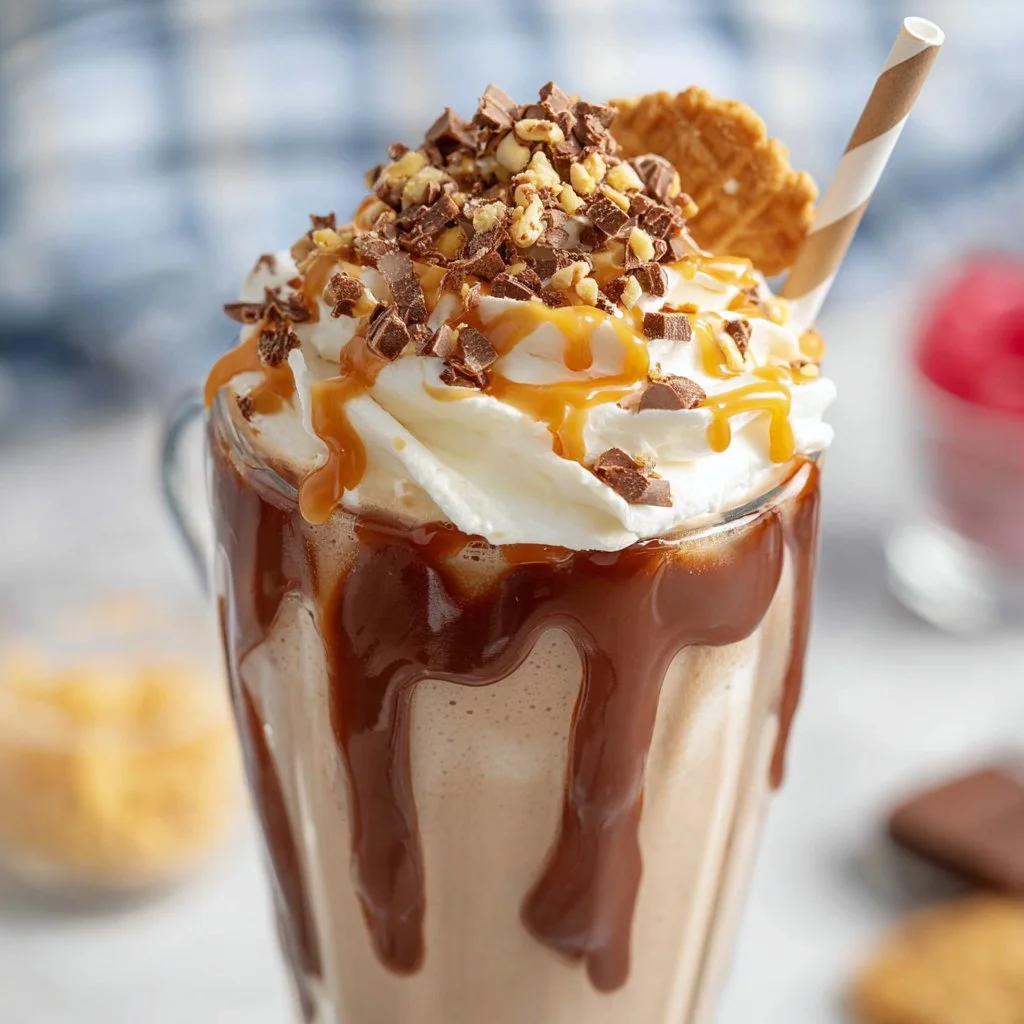
Pin by Mohammad Hijas on Easy Milkshake Recipe | Easy Milkshake Recipe, Gourmet Cupcakes, Delicious Food
Easy Milkshake Recipe That’ll Make You Smile
Welcome to my kitchen! Today, I’m excited to share a delightful and classic treat that brings pure joy to any day: the easy milkshake! As the sun shines and the warmth of summer wafts through the air, nothing beats the simple pleasure of sipping on a creamy, dreamy milkshake. Trust me; this isn’t just a drink—it’s a celebration in a glass, a way to indulge your sweet tooth, and an invitation to reminisce about carefree childhood days when you’d rush to get your hands on that cold, frosty concoction.
Milkshakes are the quintessential comfort food; they meld nostalgia and happiness, making every moment deliciously memorable. Let’s face it—who can resist that chilled, thick, velvety sweetness? Whether you’re chilling at home, hosting a backyard barbecue, or simply pampering yourself after a long day, making a milkshake is not just easy; it’s an experience and a chance to get creative with flavors. Let’s dive into this easy milkshake recipe that’s not only scrumptious but also incredibly customizable!
Are you ready to whip up a treat that’ll have you and your loved ones grinning from ear to ear? Grab your blender, and let’s turn that craving into a reality. With just a handful of ingredients and a few simple steps, you’ll be relishing your homemade milkshake before you know it!
Personal Story
Every summer as a child, my family would take a trip to the local ice cream shop near the beach. The shop was a treasure trove of flavors, boasting everything from classic vanilla to wild concoctions like bubblegum and peppermint patty. But my absolute favorite? The heavenly chocolate milkshake. My sister and I would always beg our parents to let us indulge every single day, and, bless their hearts, they obliged more often than not! I can still visualize my sister and me standing in line, eyes sparkling with excitement, eagerly waiting for our frosty treats.
Every time I sip on a milkshake, I’m hit with a wave of nostalgia. It reminds me of those sun-drenched days filled with laughter, sticky fingers, and melted ice cream dribbling down our arms. Fast forward to today, and I recreate that joy in my own kitchen, perfecting my version of the chocolate milkshake that once defined my summers. Join me as we revive those cherished moments, crafting a classic milkshake that brings smiles to both young and old!
Ingredients
Here’s what you need to whip up the best milkshake ever!
-
Ice Cream (2 cups): The star of the show! I recommend using your favorite flavor—classic vanilla or rich chocolate. Pro tip: If you want a lighter version, opt for frozen yogurt or a dairy-free ice cream alternative!
-
Milk (1 cup): Milk adds that creamy texture. Whole milk gives the thickest shake, but you can also use almond milk, oat milk, or coconut milk for a dairy-free version.
-
Chocolate Syrup (1/4 cup, optional): This is for the extra touch of sweetness and decadence. Feel free to switch it up with caramel or strawberry syrup if you’re feeling adventurous!
-
Whipped Cream (for topping): Trust me; every milkshake deserves a generous dollop! The best part? You can make it fresh or grab a can from the store for convenience.
-
Cherries or Sprinkles (for garnish, optional): These are not just for decoration; they add an extra layer of fun! Want to take it up a notch? How about crushed nuts for an added crunch?
Got everything? Perfect! The magic is about to begin.
Step-by-Step Instructions
-
Gather Your Ingredients. Start by collecting all your ingredients and tools. You’ll need a blender, measuring cups, and glasses for serving. Having everything at your fingertips will make the process much smoother (and more enjoyable).
-
Scoop the Ice Cream. Using a large spoon or ice cream scooper, add 2 cups of your chosen ice cream into the blender. Take a moment to admire it—yummy!
-
Pour in the Milk. Next, measure 1 cup of milk and pour it into the blender over the ice cream. This will help with blending. If you like a thicker shake, reduce the milk a bit.
-
Add the Flavoring. If you’re using chocolate syrup (or any syrup of your choice), drizzle it in now. If you want to mix things up, you can add a tablespoon of peanut butter or Nutella for a delightful twist!
-
Blend Away! Secure the blender lid (trust me, you don’t want a milky explosion) and blend on medium speed. Keep an eye on it. You want a smooth, creamy consistency. If it’s too thick, add a bit more milk; if it’s too thin, toss in another scoop of ice cream.
-
Taste Test! Ah, the best part! Give your milkshake a quick taste. Need more sweetness? Add a dash more syrup or ice cream.
-
Pour & Serve! Once everything is blended to perfection, pour the milkshake into your favorite glass(es). If you’re feeling fancy, you can drizzle some chocolate syrup inside the glass before pouring to give it that professional touch!
-
Finish with Toppings. Now, it’s time for the fun part! Top your milkshake with a generous swirl of whipped cream, sprinkle on some colorful sprinkles, and pop a cherry on top. Grab a straw, and get ready to enjoy!
Serving Suggestions
For the ultimate presentation, serve your milkshake in tall, chilled glasses. You could even use mason jars for a rustic vibe! I love to pair milkshakes with homemade cookies or brownies for a delightful dessert experience. A platter of mini pastries can also elevate your serving game for gatherings, making it the star of any party.
Recipe Variations
-
Mint Chocolate Chip Milkshake: Swap out chocolate ice cream for mint chocolate chip and add a few drops of peppermint extract for a refreshing twist.
-
Banana Cream Milkshake: Use vanilla ice cream and add a ripe banana! Enhance it with a sprinkle of cinnamon for warmth.
-
Cookies and Cream Milkshake: Add crushed Oreo cookies into your blender along with the ice cream for that sweet, crunchy texture.
-
Strawberry Milkshake: Substitute your ice cream with strawberry-flavored or vanilla ice cream, and toss in some fresh strawberries for a fruity delight.
-
Vegan Milkshake: Swap ice cream for a banana or coconut milk-based ice cream and almond or oat milk to make it completely dairy-free!
Chef’s Notes
Every time I make this milkshake, I can’t help but think about the versatility it offers. It’s like a blank canvas just waiting for your personal touch! I’ve experimented with different toppings, adding everything from crushed cookies to caramel drizzle, and each variation brings something new to the table.
One of my funniest kitchen stories revolves around an epic milkshake-making session with friends. We mistook teaspoons for tablespoons while adding syrup—needless to say, we ended up with the sweetest milkshake ever, definitely a memory that has made me a more careful chef!
FAQs and Troubleshooting
1. Why is my milkshake too thin?
If your milkshake is on the thin side, it usually means you’ve added too much milk. Just toss in an extra scoop of ice cream to thicken it up, and blend it well!
2. How can I make my milkshake healthier?
You can use low-fat ice cream or frozen yogurt, swap full-fat milk for a lighter option, or add fresh fruit to enhance the flavor without excessive sugar.
3. Why isn’t my milkshake blending well?
If you’re having trouble blending, ensure your liquid (milk) is at the bottom, as it helps the ice cream incorporate better. Also, give your blender a rest in between heavy use to avoid overheating.
4. Can I make this milkshake ahead of time?
I recommend enjoying your milkshake fresh. However, you can prepare the ingredients ahead and combine them right before serving to retain that creamy texture.
Nutritional Info
While milkshakes are often a treat, here’s a rough breakdown of the nutritional content for a classic milkshake made with vanilla ice cream and whole milk:
- Calories: Approximately 500–600 calories per serving (12 oz)
- Protein: 10–12g
- Fat: 20–25g
- Carbohydrates: 70–80g
- Sugar: 60–70g
Remember, all nutritional values vary with the ingredients you use and the size of the serving!
So there you have it, a delightful journey into the world of homemade milkshakes! Whether you enjoy it solo or share it with friends, this recipe is designed to bring joy and deliciousness to every sip. Remember to get creative with flavors and have fun in the process. Cooking is all about exploring and experiencing new combinations that make your taste buds dance! Happy shaking, my friends! 🎉🥤
Print
Easy Milkshake Recipe That’ll Make You Smile
- Total Time: 5 minutes
- Yield: 2 servings
- Diet: Vegetarian
Description
A delightful and classic milkshake recipe that brings joy and nostalgia to any day.
Ingredients
- Ice Cream (2 cups) – Your favorite flavor, such as vanilla or chocolate
- Milk (1 cup) – Whole milk or a dairy-free alternative like almond milk
- Chocolate Syrup (1/4 cup, optional) – For added sweetness
- Whipped Cream (for topping) – Fresh or store-bought
- Cherries or Sprinkles (for garnish, optional) – For added fun
Instructions
- Gather Your Ingredients. Collect all ingredients and tools.
- Scoop the Ice Cream. Add 2 cups of ice cream to the blender.
- Pour in the Milk. Measure 1 cup of milk into the blender.
- Add the Flavoring. Drizzle in chocolate syrup or any syrup of choice.
- Blend Away! Secure the lid and blend on medium speed until smooth.
- Taste Test! Adjust sweetness if needed.
- Pour & Serve! Pour the milkshake into glasses, drizzling syrup if desired.
- Finish with Toppings. Top with whipped cream, sprinkles, and cherries.
Notes
For a thicker shake, reduce the milk. Serve in chilled glasses.
- Prep Time: 5 minutes
- Cook Time: 0 minutes
- Category: Dessert
- Method: Blending
- Cuisine: American
Nutrition
- Serving Size: 1 milkshake
- Calories: 550
- Sugar: 65g
- Sodium: 200mg
- Fat: 22g
- Saturated Fat: 14g
- Unsaturated Fat: 6g
- Trans Fat: 0g
- Carbohydrates: 70g
- Fiber: 1g
- Protein: 12g
- Cholesterol: 70mg
Keywords: milkshake, easy recipe, dessert, summer treat, nostalgic
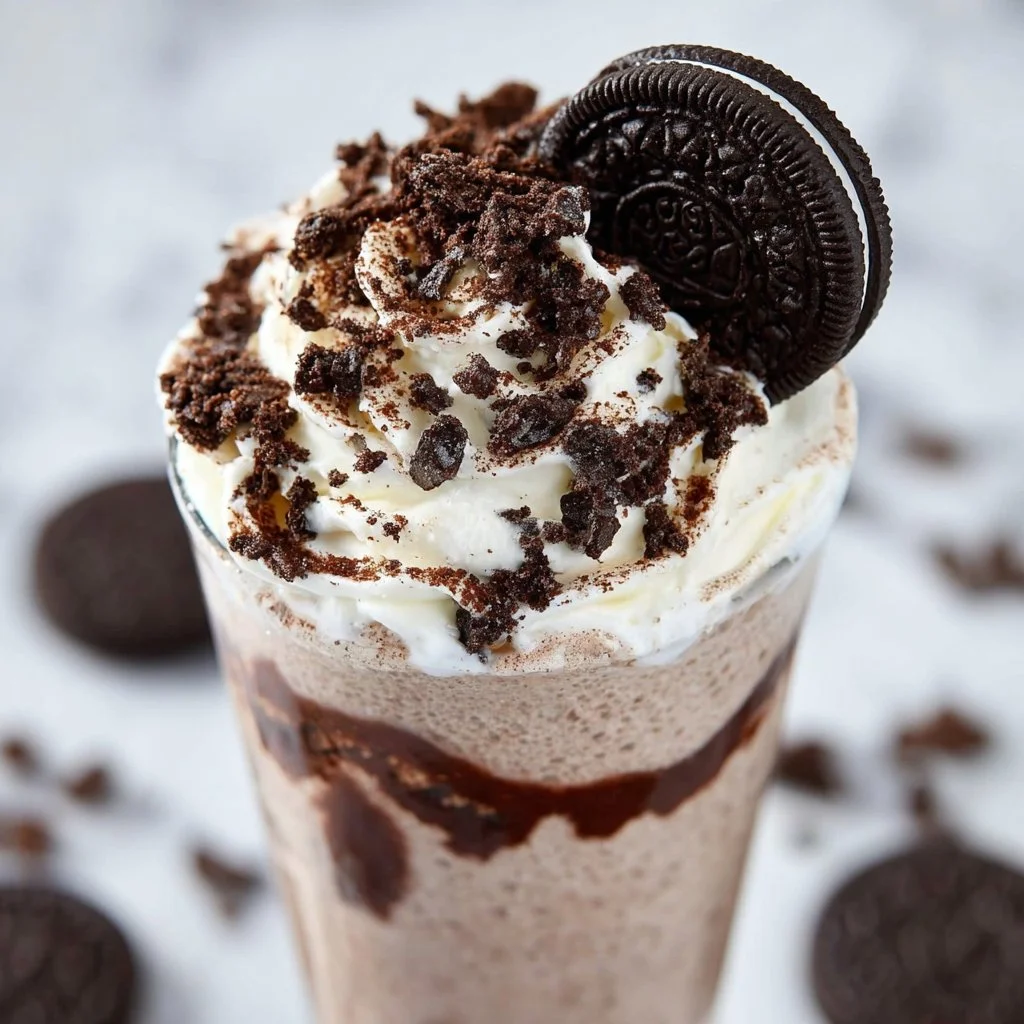
Oreo Milkshake
Whip Up a Delightful Oreo Milkshake: A Sweet Journey into Nostalgia
Hey there, fellow food lovers! Welcome to my cozy corner of the kitchen, where today, we’re diving into a sweet indulgence that’s sure to stir up some fond memories and take our tastebuds on a delicious ride. That’s right; we’re making an Oreo Milkshake! If you’ve ever taken a sip of this creamy, chocolatey goodness, you know it’s not just a drink; it’s a delightful experience packed with nostalgia and comfort.
Picture this: It’s a warm summer day, and the ice cream truck is parked down the street, its jingle echoing through the neighborhood. The excitement builds as you rush outside, clutching your allowance tightly. The moment you lay your eyes on the giant ice cream cones and delicious milkshakes, your eyes light up. Ah, to be a kid again, right? Well, with this Oreo Milkshake recipe, you can channel that joy anytime, anywhere!
This milkshake is the perfect blend of creamy vanilla ice cream, rich chocolate cookies, and velvety milk, all coming together in one glorious glass. You don’t need fancy ingredients or cooking skills to whip this up; just a little enthusiasm and a love for cookies (and who doesn’t love those?). Plus, it’s a fun way to get your little ones involved in the kitchen!
As we go through this delightful journey of creating the perfect Oreo Milkshake, you’ll find tips, tricks, and creative twists that I’ve picked up over the years. So, grab your blender, put on your favorite tunes, and let’s get shaking – it’s time for some deliciousness!
Personal Story
Let me take you back a few years to one of my favorite childhood memories. It was a scorching July afternoon, and my friends and I were gathered for a backyard movie night under the stars. My mom decided to surprise us all with homemade Oreo Milkshakes!
I remember her filling the blender as we gathered around, our excitement bubbling just like the concoction inside. The sound of the blender filled the air, a melody of whirring that meant something delicious was coming our way. When those frosty milkshakes were finally poured into our cups, topped with whipped cream and a single Oreo balancing precariously on top, our eyes lit up with delight.
Sipping on that creamy treat while snuggled in blankets under the stars made that summer night feel magical. Now, years later, every time I blend up an Oreo Milkshake, it transports me back to that joyful evening, filled with laughter, sticky fingers, and endless chatter among friends. That’s the beauty of food—it has a way of connecting us to our happiest moments and the people we cherish most. And today, I’m here to help you create a new memory or two with this delicious treat!
Ingredients
Here’s what you’ll need to create your own scrumptious Oreo Milkshake. Let’s talk ingredients!
-
Oreo Cookies (6-8 cookies)
Classic Oreo cookies are the star of this show! Their chocolatey crunch pairs perfectly with the sweetness of creamy ice cream. Can’t find Oreos? Try any chocolate sandwich cookie you love—it’ll work just as well! -
Vanilla Ice Cream (2 cups)
The creaminess of vanilla ice cream is what gives this shake its luxurious texture. If you’re looking for a lighter option, low-fat or dairy-free ice cream can still give you that delightful creamy feel. -
Milk (1 cup)
Whole milk adds richness to our shake, but you can use any type of milk—almond, oat, or even chocolate milk for an extra flavor punch! -
Whipped Cream (for topping)
A dollop of whipped cream on top not only makes your milkshake look fantastic but also adds a lovely creamy finish. Store-bought is great, or you can whip it up fresh if you’re feeling adventurous! -
Additional Oreos (for garnish)
Crushed or whole, these cookies add a lovely crunchy surprise as you sip on your shake. Plus, they make for a pretty presentation!
Step-by-Step Instructions
Alright, let’s get down to business and whip up this irresistible Oreo Milkshake! Follow these simple steps to enjoy the most delightful treat:
-
Gather Your Ingredients
Prep your workspace by laying out all your ingredients. This helps to make the process smoother and more organized. You’ll want your ice cream slightly softened for easier blending, so dig in and let it sit for a few minutes while you grab your blender. -
Crush the Oreos
Grab 6-8 Oreo cookies and gently break them into pieces. You can crush them in a plastic bag with a rolling pin or by using the blender for a few quick pulses. We want a mix of fine crumbs and larger chunks for that perfect texture! -
Blend It Up!
Pour the crushed cookies into your blender, followed by the vanilla ice cream and milk. Make sure to add the milk gradually—if you like your milkshake thick, start with ¾ cup and add more if needed. Pop the lid on and blend on high until it reaches a smooth and creamy consistency. Pause to scrape down the sides if needed. -
Adjust the Consistency
Check your milkshake’s consistency. Too thick? Add a splash of milk. Too thin? Toss in another scoop of ice cream! Blend until perfectly combined, and you’re almost there! -
Taste Test
Here comes the fun part! Get a straw or a spoon, taste a little, and see if it needs more cookie crumbles or even a pinch of chocolate syrup if you’re feeling extra cheeky. This is the time to personalize your shake based on your unique taste preferences! -
Serve with Style
Pour your Oreo Milkshake into chilled glasses (this keeps it cold for longer). For the ultimate presentation, top with whipped cream, crushed Oreos, and maybe even a drizzle of chocolate syrup. -
Get Ready to Enjoy!
Dive into that glorious shake with a straw or spoon and share it with your favorite people—or keep it all to yourself if you prefer! Get cozy and enjoy every sip.
Serving Suggestions
To present your delightful Oreo Milkshake, serve it in tall, frosty glasses topped with a generous swirl of whipped cream. You can sprinkle some crushed Oreos on top for an eye-catching finish. For a truly decadent treat, consider pairing it with a slice of chocolate cake or some freshly baked cookies on the side. Who said you can’t have dessert with dessert?
Recipe Variations
Want to switch things up? Here are a few creative twists you can try with your Oreo Milkshake:
- Minty Fresh: Add a drop of peppermint extract and use mint Oreos for a refreshing mint chocolate flavor!
- Peanut Butter Bliss: Toss in a couple of spoonfuls of peanut butter for an indulgent and nutty version.
- Chocolate Lovers: Use chocolate ice cream instead of vanilla for an extra chocolatey experience—an absolute must-try for chocolate enthusiasts!
- Extra Crunch: Fold in some crushed nuts or even a few scoops of your favorite brownie bites for extra texture and flavor.
- Dairy-Free Delight: Substitute traditional ingredients with almond milk, cashew ice cream, and vegan Oreos for a delicious dairy-free version that still offers all the satisfaction!
Chef’s Notes
Creating this Oreo Milkshake has been a delightful journey for me over the years. Each time I blend up this treat, I’m reminded of those joyful summer nights with my friends. Sometimes, I play around with flavors and ingredients! Once, I tried mixing in some espresso powder for a coffee-infused Oreo shake, and let me tell you, it was an absolute game changer for those mornings when you need a little extra caffeine. Food truly evolves, just like the memories attached to it.
FAQs and Troubleshooting
1. My milkshake is too thick. What should I do?
If your milkshake ends up thicker than you’d like, simply add a splash more milk and blend again. Start with small amounts until it reaches your desired consistency.
2. Can I use regular milk instead of ice cream?
While milk can add creaminess, it won’t replicate the thickness of ice cream. Stick with ice cream for that perfect shake!
3. What’s a good substitute for vanilla ice cream?
If you’re out of vanilla, any flavor of ice cream will do! Just remember that it will change the final flavor of your shake—try chocolate or cookies and cream for a fun twist.
4. How can I make my Oreo Milkshake healthier?
You can reduce the calories slightly by using low-fat ice cream or yogurt as a base and adding less sugar or cookies than the recipe calls for. It may not be as indulgent, but it’ll still be a tasty treat!
Nutritional Info
(If you want to keep track of the nutritional information for your Oreo Milkshake, here’s a rough estimate per serving:)
- Calories: 500-600
- Protein: 10g
- Carbohydrates: 70g
- Sugars: 55g
- Fat: 25g
(Note: Values may vary based on exact ingredients used.)
So, there you have it! Just a few simple steps to create an Oreo Milkshake that’s bound to become a favorite in your household. Remember to savor the process, enjoy the little moments in the kitchen, and find joy in home-cooked treats. Happy shaking, my fellow foodies! 🍦🥛
Print
Oreo Milkshake
- Total Time: 5 minutes
- Yield: 2 servings 1x
- Diet: Vegetarian
Description
A delightful and creamy Oreo Milkshake that captures the joy of childhood memories.
Ingredients
- 6–8 Oreo Cookies
- 2 cups Vanilla Ice Cream
- 1 cup Milk
- Whipped Cream (for topping)
- Additional Oreos (for garnish)
Instructions
- Gather your ingredients.
- Crush the Oreos.
- Blend it up!
- Adjust the consistency.
- Taste test.
- Serve with style.
- Get ready to enjoy!
Notes
Consider variations like adding mint, peanut butter, or using different ice cream flavors for creative twists.
- Prep Time: 5 minutes
- Cook Time: 0 minutes
- Category: Dessert
- Method: Blending
- Cuisine: American
Nutrition
- Serving Size: 1 serving
- Calories: 550
- Sugar: 55g
- Sodium: 250mg
- Fat: 25g
- Saturated Fat: 15g
- Unsaturated Fat: 5g
- Trans Fat: 0g
- Carbohydrates: 70g
- Fiber: 2g
- Protein: 10g
- Cholesterol: 50mg
Keywords: Oreo, milkshake, dessert, summertime, ice cream
Chocolate chip edible cookie dough for one [3 variations]
The Ultimate Guide to Chocolate Chip Edible Cookie Dough for One (With 3 Delicious Variations!)
Welcome to my kitchen, fellow food enthusiasts! I’m Olivia Bennett, your enthusiastic home cook and culinary companion. Today, I’m excited to share one of my all-time favorite treats that never fails to spark joy—the irresistible chocolate chip edible cookie dough! That’s right, we’re diving into the delightful world of dough without the baking—perfect for those times when you need a sweet fix without the wait!
Let’s set the scene: Picture yourself settling in after a long day, craving something sweet and comforting. What better way to treat yourself than a generous scoop of soft, chewy chocolate chip cookie dough? The kind that melts in your mouth, packed with chocolatey goodness, and gives you all those cozy vibes!
I started making edible cookie dough during my college days. Back then, my idea of gourmet cooking was to whip up a batch of cookies just so I could sneak a spoonful of that raw goodness. However, the looming health warnings about raw eggs and raw flour led me to come up with a solution: edible cookie dough that was safe to eat! Fast forward to today, and I’ve perfected the art of making single-serving cookie dough that hits the spot without the extra guilt.
So get ready to embrace your sweet tooth without hesitation! In this blog post, we’ll not only make a classic chocolate chip edible cookie dough but explore some creative variations to tantalize your taste buds. Let’s get cooking!
Personal Story: My Cookie Dough Epiphany
Ah, the memories! It was a chilly evening, with rain pattering against my window, when I impulsively decided I needed something sweet. With a few basic ingredients on hand—flour, butter, sugar, and, of course, chocolate chips—I started mixing up a batch of cookies. As I stood there, savouring the aroma of vanilla and sugar dancing together, I couldn’t resist stealing a spoonful of that luscious dough.
But then it hit me: the alarming thoughts about salmonella and the risk of consuming raw flour! I was devastated—how could something so delicious possibly come with a warning? It was then I realized that I could perfect a safe-to-eat edible cookie dough, dedicating my evenings to fine-tuning this guilty pleasure. Eventually, I successfully created a recipe that allowed me to enjoy the flavors I loved while keeping my health in check. Now I can indulge whenever I want—while sharing the joy with all of you!
Ingredients
Let’s gather our ingredients! Here’s what you’ll need for our single-serving chocolate chip edible cookie dough, along with some tips to enhance your experience:
-
1 tablespoon unsalted butter
- Softened for easy mixing; if you’re in a hurry, you can microwave for just 10 seconds to soften it up but don’t melt it!
-
1 tablespoon brown sugar
- This adds that rich, caramel-like flavor. If you don’t have brown sugar, you can substitute with granulated sugar, but you might miss that deep taste.
-
1 tablespoon granulated sugar
- Balances out the molasses flavor from the brown sugar. You could also replace it with coconut sugar for a less processed option.
-
1 teaspoon vanilla extract
- A must-have for that dreamy cookie dough flavor! If you’re feeling adventurous, try using almond extract for a unique twist.
-
2 tablespoons all-purpose flour (heat-treated)
- Heat-treat your flour (microwave on high for 1 minute, then let cool) to kill any bacteria. You can also swap this for almond flour or oat flour for a gluten-free option.
-
2 tablespoons mini chocolate chips
- Because who doesn’t love extra chocolate? You can use dark, semi-sweet, or even white chocolate chips—whatever your heart desires.
-
Pinch of salt
- It enhances the sweetness and brings all the flavors together. Don’t skip this step!
Optional Mix-Ins
- Nuts: Chopped walnuts or pecans can add a lovely crunch.
- Sprinkles: For a festive or celebratory touch!
Step-by-Step Instructions
Let’s get down to the fun part—making our edible cookie dough! Follow these simple steps, and I’ll sprinkle in some tips for the best results:
-
Mix Your Butter and Sugars.
- In a small mixing bowl, combine the softened butter, brown sugar, and granulated sugar. Use a fork or a small whisk to blend them until it’s creamy and fluffy. This step builds the foundation for your cookie dough. If you want an extra kick of flavor, cream the butter for an extra minute until it’s light.
-
Add Vanilla Extract.
- Pour the vanilla extract into the butter-sugar mixture and stir until combined. The aroma will get your taste buds tingling in anticipation!
-
Incorporate the Flour.
- Gradually add the heat-treated flour to the mixture. This is where you start to see it come together! Mix until it’s fully combined. If your dough feels too dry, you can add a splash of milk (or plant-based milk) to smooth it out.
-
Fold in the Chocolate Chips.
- Gently fold in the mini chocolate chips. Don’t be shy—add as many as your heart desires! This is the moment when everything transforms into that classic cookie dough consistency.
-
Taste Test Time!
- Before you dive in, taste a spoonful. Adjust the sweetness by adding a bit more sugar if you like it sweeter. Yummm!
-
Chill (Optional).
- For a firmer texture, you can pop your cookie dough into the fridge for about 10 minutes. This isn’t necessary, but if you prefer a chilled version, it’s a nice option!
-
Serve.
- Spoon your cookie dough into a cute bowl or on a pretty plate. Add a sprinkle of sea salt on top to enhance the flavors. It’s time to enjoy your creation!
Serving Suggestions
It’s all about presentation! You can serve your edible cookie dough in a small bowl with some cute garnish. Try pairing it with fresh fruit on the side for a delightful, colorful plate, or enjoy it directly from the mixing bowl for that cozy home cook vibe. Bonus points if you serve it with a scoop of ice cream on the side—now that’s a dessert to celebrate!
Recipe Variations
Feeling adventurous? Here are three delightful twists you can add to your edible cookie dough:
-
Peanut Butter Chocolate Chip Dough
- Substitute half of the butter with creamy peanut butter for a nutty twist. This will give you the irresistible combination of chocolate and peanut butter!
-
Cookie Dough Brownie Bites
- Mix brownie batter into your dough, forming small balls. Chill them and enjoy them as bite-sized brownie cookie dough!
-
S’mores Cookie Dough
- Add crushed graham crackers and mini marshmallows to the dough for a campfire-inspired treat! The addition of a hint of cinnamon will truly elevate this version.
-
Nutty Chocolate Chip Dough
- Toss in some chopped nuts, like almonds or pecans, for an extra crunch and a satisfying texture!
-
Pumpkin Spice Cookie Dough
- For a seasonal twist, mix in canned pumpkin puree and a sprinkle of pumpkin spice! You’ll get the perfect fall-inspired dessert.
Chef’s Notes
As I’ve navigated the world of cookie dough recipes, I’ve learned that the key is to tailor it to your preferences. I remember one time experimenting with some leftover butterscotch chips—let me tell you, I nearly ate the whole batch! Experimentation is half the fun, so don’t shy away from trying out different flavor combinations or textures.
Also, I can’t stress enough how important it is to heat-treat your flour. It’s a small step that ensures you enjoy this sweet treat without any worries!
Cooking is an evolving experience for all of us, and my relationships with food have grown and changed over time—but this cookie dough recipe has always remained a comforting go-to.
FAQs and Troubleshooting
-
Can I use regular flour?
- I don’t recommend using raw flour because it can contain harmful bacteria. Always ensure to heat-treat it first!
-
Why does my cookie dough feel too sticky?
- If your dough is sticky, add a little more flour, one teaspoon at a time, until the consistency feels right.
-
How long can I store leftover cookie dough?
- Store the cookie dough in an airtight container in the refrigerator for up to one week. You can also freeze it for longer storage!
-
Can I make this without butter?
- Absolutely! You can substitute with coconut oil or even applesauce for a healthier twist, although the texture may vary slightly.
Nutritional Info (Optional)
While I usually don’t focus on numbers, I understand the importance of being mindful. A single serving of this cookie dough contains approximately:
- ~~Calories: 200-250 (depending on chocolate chips and substitutions)~~
- ~Protein: 2g~
- ~Carbohydrates: 30g~
- ~Fat: 10g~
- ~Sugar: 15g~
Feel free to adjust ingredients for a healthier version if you prefer. Remember, the joy of cooking lies in making it your own!
And there you have it—your guide to making a delicious, indulgent chocolate chip edible cookie dough! I hope you’re inspired to whip up your own batch, savoring every bite as you relax and enjoy life’s sweet moments. Happy cooking, and remember to always sprinkle a little love into everything you make! 🌟
Print
Chocolate Chip Edible Cookie Dough for One
- Total Time: 5 minutes
- Yield: 1 serving 1x
- Diet: Vegetarian
Description
Indulge in this delicious and safe-to-eat chocolate chip edible cookie dough, perfect for satisfying your sweet cravings without baking!
Ingredients
- 1 tablespoon unsalted butter, softened
- 1 tablespoon brown sugar
- 1 tablespoon granulated sugar
- 1 teaspoon vanilla extract
- 2 tablespoons all-purpose flour, heat-treated
- 2 tablespoons mini chocolate chips
- Pinch of salt
- Optional Mix-Ins: Chopped nuts, sprinkles
Instructions
- Mix your butter and sugars in a small mixing bowl until creamy and fluffy.
- Add the vanilla extract and stir until combined.
- Incorporate the heat-treated flour gradually into the mixture.
- Fold in the mini chocolate chips gently until well combined.
- Taste test and adjust sweetness if desired.
- Chill for 10 minutes if you prefer a firmer texture (optional).
- Serve in a bowl with a sprinkle of sea salt on top.
Notes
Always heat-treat your flour for safe consumption. Experiment with different mix-ins to customize your cookie dough!
- Prep Time: 5 minutes
- Cook Time: 0 minutes
- Category: Dessert
- Method: No-Cook
- Cuisine: American
Nutrition
- Serving Size: 1 serving
- Calories: 250
- Sugar: 15g
- Sodium: 50mg
- Fat: 10g
- Saturated Fat: 4g
- Unsaturated Fat: 6g
- Trans Fat: 0g
- Carbohydrates: 30g
- Fiber: 1g
- Protein: 2g
- Cholesterol: 15mg
Keywords: cookie dough, edible cookie dough, chocolate chip, dessert, quick dessert


