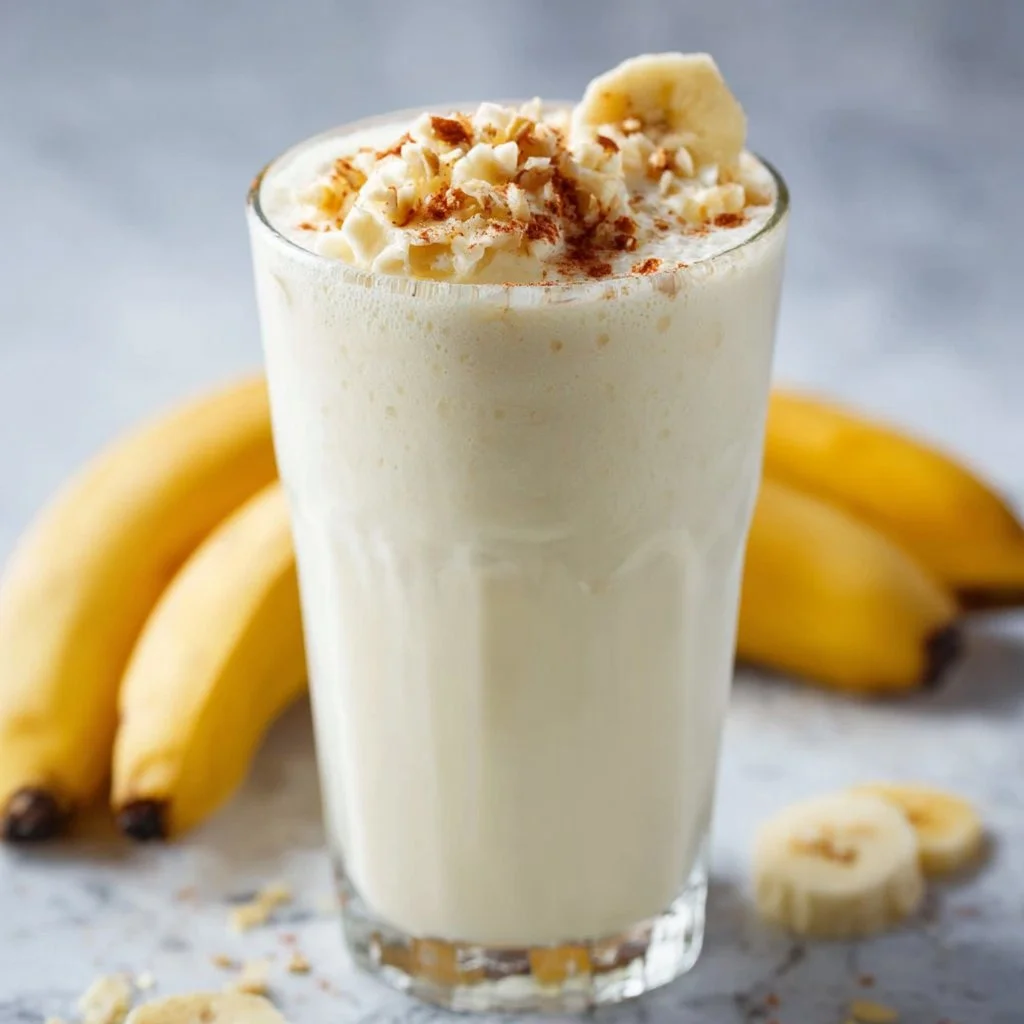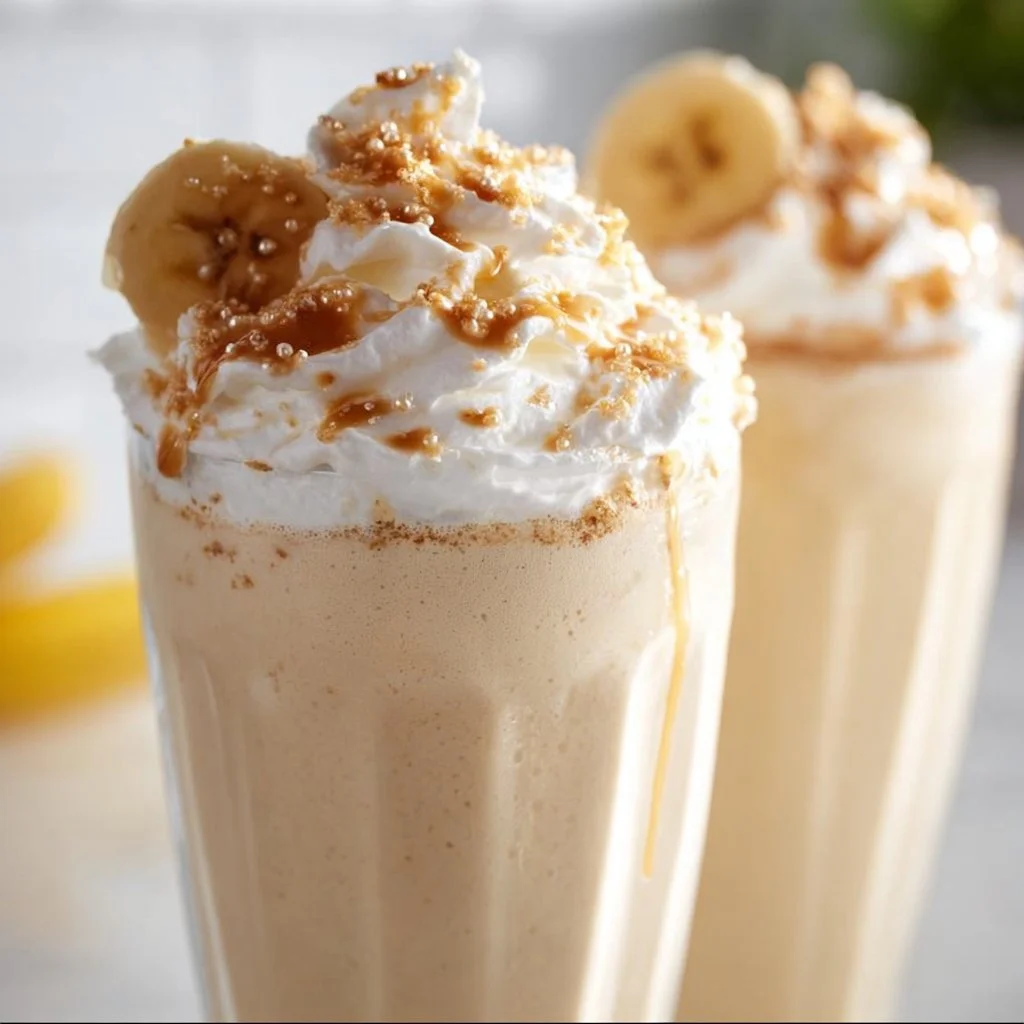
Banana Cream Pie Milkshake
Indulge in Bliss: The Ultimate Banana Cream Pie Milkshake Recipe
Welcome to my kitchen! Today, I’m thrilled to share a recipe that combines my love for desserts and my passion for all things creamy and dreamy. Get ready to blend up some nostalgia with this Banana Cream Pie Milkshake. If you’ve ever found yourself craving a slice of that classic banana cream pie but wanted it in a glass, then my friend, this is the recipe for you! Not only is it delicious, but it’s also a fun way to bring the flavors of a beloved dessert to summer—er, or any time of year, really. Just remember, life is better with a milkshake!
A Taste of Nostalgia
Let me take you back to my childhood. Picture a sunny Saturday afternoon, the smell of fresh banana bread wafting through the house, and laughter echoing from the backyard. My family had a tradition of making banana cream pie during the summer months when ripe bananas were abundant. We would gather in the kitchen, flour dusting our faces, as my mom expertly layered whipped cream over the luscious banana filling. Those moments were full of joy, teamwork, and, of course, a lot of tasting—after all, it’s not really baking if you don’t sneak a few bites along the way!
But one particularly hot day, my brother and I were craving something cold to cool us down. That’s when my creativity kicked in! I grabbed some vanilla ice cream, blended it with bananas and milk, and voilà—a milkshake that tasted just like our favorite pie. This Banana Cream Pie Milkshake became a summer staple, loved by friends and family alike. Now, I want to share this indulgent treat with you, so let’s jump into the flavorful adventure that awaits!
Ingredients
Gather your utensils because we need to round up our ingredients! Here’s what you’ll need for our Banana Cream Pie Milkshake:
-
2 ripe bananas: The star of our show! Look for bananas that are just speckled with brown spots for optimal sweetness. If you don’t have ripe bananas, you can substitute with frozen bananas for a creamier texture.
-
2 cups vanilla ice cream: Creamy and dreamy, vanilla ice cream is the perfect base! You can use a dairy-free option if you want to make it vegan or simply want a lighter version—coconut or almond milk ice creams work great too.
-
1 cup whole milk: This helps create a silky texture. If you’re looking to lighten things up, use skim or almond milk.
-
1 teaspoon vanilla extract: Adds depth and enhances the banana flavor. If you’re feeling adventurous, a splash of almond extract could add a unique twist!
-
Whipped cream (for topping): Because what’s a milkshake without some light, fluffy whipped cream? You can use store-bought or whip your own—it’s easy and satisfying.
-
Graham cracker crumbs (for garnish): These give that essential pie crust vibe. In a pinch, crushed digestive biscuits work just as well!
With these ingredients in hand, you’re halfway to milkshake heaven!
Step-by-Step Instructions
Let’s make this milkshake magic happen! Follow these simple steps, and you’ll be sipping on a delicious Banana Cream Pie Milkshake in no time.
-
Prep your bananas: Peel your ripe bananas and slice them into chunks. Keep one slice aside for garnish if you’d like a cute finishing touch. This little detail shows that you took the time to present your masterpiece!
-
Blend it up: In a blender, combine the sliced bananas, vanilla ice cream, milk, and vanilla extract. Start on a low speed to get everything mixed together without creating a banana explosion. Gradually increase to high speed until everything is smooth and creamy—about 30 to 60 seconds of blending will do it. If you find it too thick, add a little more milk; too thin? You can always toss in more ice cream!
-
Taste test time: Now’s the moment of truth. Grab a spoon and taste your creation. Does it bring back memories of sunny summers, warm pies, and family laughter? Adjust the flavors if you need to. A pinch more vanilla? A splash more milk? This is your milkshake, so make it yours!
-
Serve it up: Pour the creamy mixture into chilled glasses that are just waiting to be filled with goodness. You want that milkshake to stay cold for as long as possible—I aim for at least an hour of coolness!
-
Top it off with whipped cream: Generously dollop whipped cream on top of each milkshake. You want to see it towering above the glass—it should be a showstopper! Sprinkle graham cracker crumbs on top for that pie-like crunch.
-
Garnish and enjoy: Finally, place that slice of banana you saved earlier on the edge of the glass, and maybe also a cute straw! Grab your loved ones, take a moment to appreciate your handiwork, and get ready to indulge!
Serving Suggestions
One of the best things about this milkshake is how versatile it is! You can serve it in tall milkshake glasses for that classic diner feel or in mason jars for a rustic vibe. A side of extra graham cracker crumbs for dipping never hurts, either; trust me, it’s delicious!
Recipe Variations
Feeling inspired? Here are a few creative twists you might want to try:
-
Peanut Butter Banana Cream Pie Milkshake: Add a few tablespoons of peanut butter to the blender for a creamy, nutty flavor that pairs perfectly with bananas.
-
Chocolate Drizzle: Swirl some chocolate syrup into the milkshake mix before serving. This adds a decadent chocolatey twist reminiscent of chocolate cream pie.
-
Banana Nut Crunch: Add a handful of chopped walnuts or pecans to the milkshake for added texture and flavor.
-
Dairy-Free Delight: Use coconut or almond milk and vegan ice cream for a delicious dairy-free treat.
-
Caramel Swirl: Drizzle some caramel sauce inside your glass before pouring in the milkshake for a sweet surprise with every sip!
Chef’s Notes
As with any recipe, there are countless ways to make this Banana Cream Pie Milkshake truly your own. Over the years, I’ve made a few adjustments based on availability and seasonal ingredients. Sometimes I’ve added cinnamon for warmth, or even a touch of nutmeg to evoke that cozy, homey vibe. One time, I decided to make it in a blender with my nephew, and let’s just say it was more a banana “splatter pie” experience than a bake-off! But those moments? They’re what cooking—and life—is all about: creating memories while having a bit of fun along the way!
FAQs and Troubleshooting
-
Why is my milkshake too thin?
- No worries! Simply add a little more ice cream to thicken it up. If it’s too thick, just blend in a splash more milk to get it to your desired consistency.
-
Can I make this ahead of time?
- It’s best enjoyed fresh, but you can prepare the banana and ice cream mixture and keep it in the freezer if you’d like to prep ahead. Just blend it once again before serving.
-
What if I don’t have a blender?
- You can use an immersion blender or even mash the bananas by hand and stir in the other ingredients. Just be prepared for a little more elbow grease!
-
How can I make it healthier?
- Swap the ice cream for Greek yogurt or frozen yogurt to cut back on calories while still enjoying a deliciously creamy treat.
Nutritional Info
While this recipe is all about indulgence, it’s also good to know what you’re enjoying! Here’s an approximate nutritional breakdown for one serving:
- Calories: 450
- Fat: 20g
- Carbohydrates: 63g
- Protein: 7g
Note: Nutritional information may vary based on specific ingredients used.
So there you have it, friends! Your very own Banana Cream Pie Milkshake that’s just bursting with flavor and nostalgia. As we sip and savor, let’s remember that the kitchen is not just about food; it’s about creating joy, sharing love, and making memories. Enjoy this delightful creation, and let it inspire you to whip up more sweet moments in your cooking adventures! Happy blending! 🍌🥛✨
Print
Banana Cream Pie Milkshake
- Total Time: 10 minutes
- Yield: 2 servings 1x
- Diet: Vegetarian
Description
Indulge in this creamy and dreamy Banana Cream Pie Milkshake that captures the flavors of a classic dessert in a glass.
Ingredients
- 2 ripe bananas, sliced
- 2 cups vanilla ice cream
- 1 cup whole milk
- 1 teaspoon vanilla extract
- Whipped cream (for topping)
- Graham cracker crumbs (for garnish)
Instructions
- Prep your bananas: Peel and slice the bananas, saving one slice for garnish.
- Blend it up: In a blender, combine the bananas, vanilla ice cream, milk, and vanilla extract. Blend until smooth.
- Taste test time: Taste and adjust flavors as needed.
- Serve it up: Pour the mixture into chilled glasses.
- Top it off with whipped cream: Add a generous dollop of whipped cream and sprinkle with graham cracker crumbs.
- Garnish and enjoy: Add the reserved banana slice and serve with a straw.
Notes
Feel free to swap ingredients for variations such as peanut butter, chocolate drizzle, or nut toppings.
- Prep Time: 10 minutes
- Cook Time: 0 minutes
- Category: Dessert
- Method: Blending
- Cuisine: American
Nutrition
- Serving Size: 1 serving
- Calories: 450
- Sugar: 35g
- Sodium: 120mg
- Fat: 20g
- Saturated Fat: 12g
- Unsaturated Fat: 7g
- Trans Fat: 0g
- Carbohydrates: 63g
- Fiber: 3g
- Protein: 7g
- Cholesterol: 60mg
Keywords: banana milkshake, dessert, creamy, summer treat, nostalgic dessert
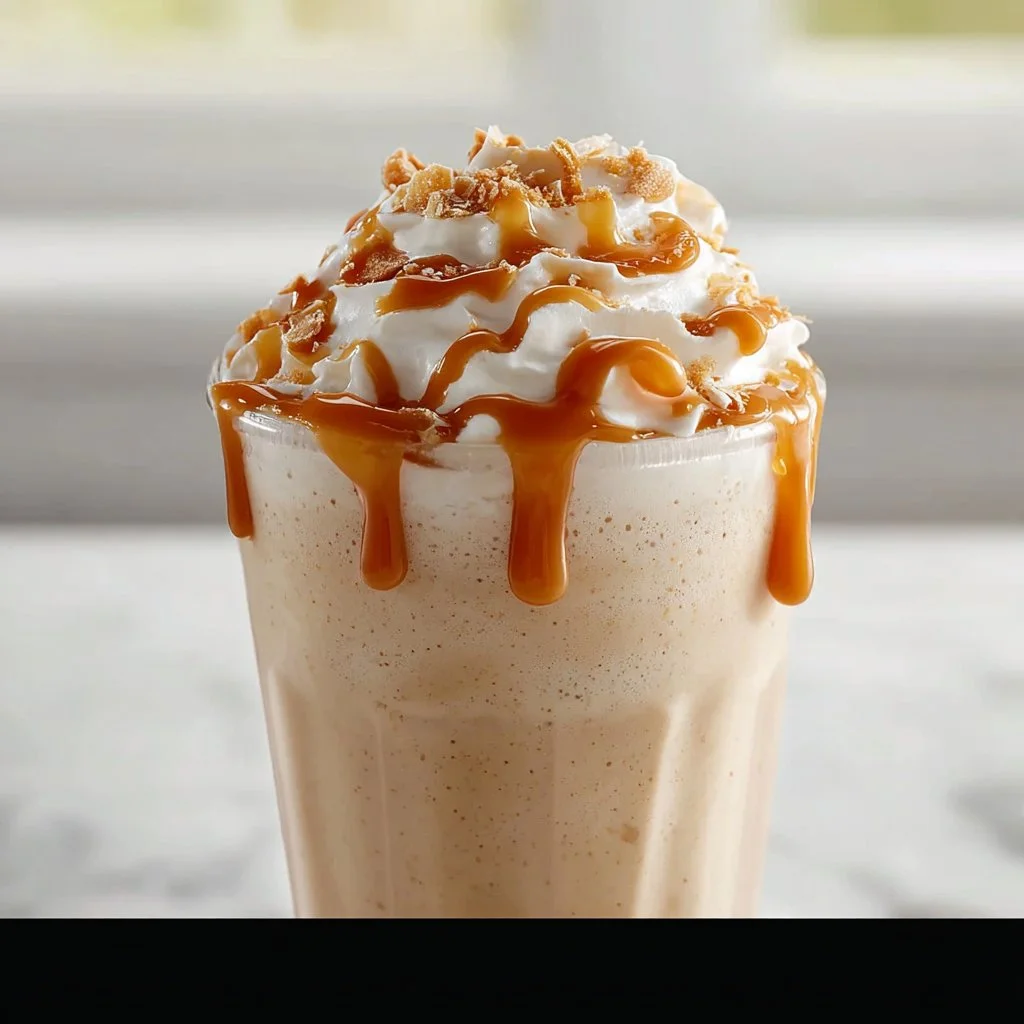
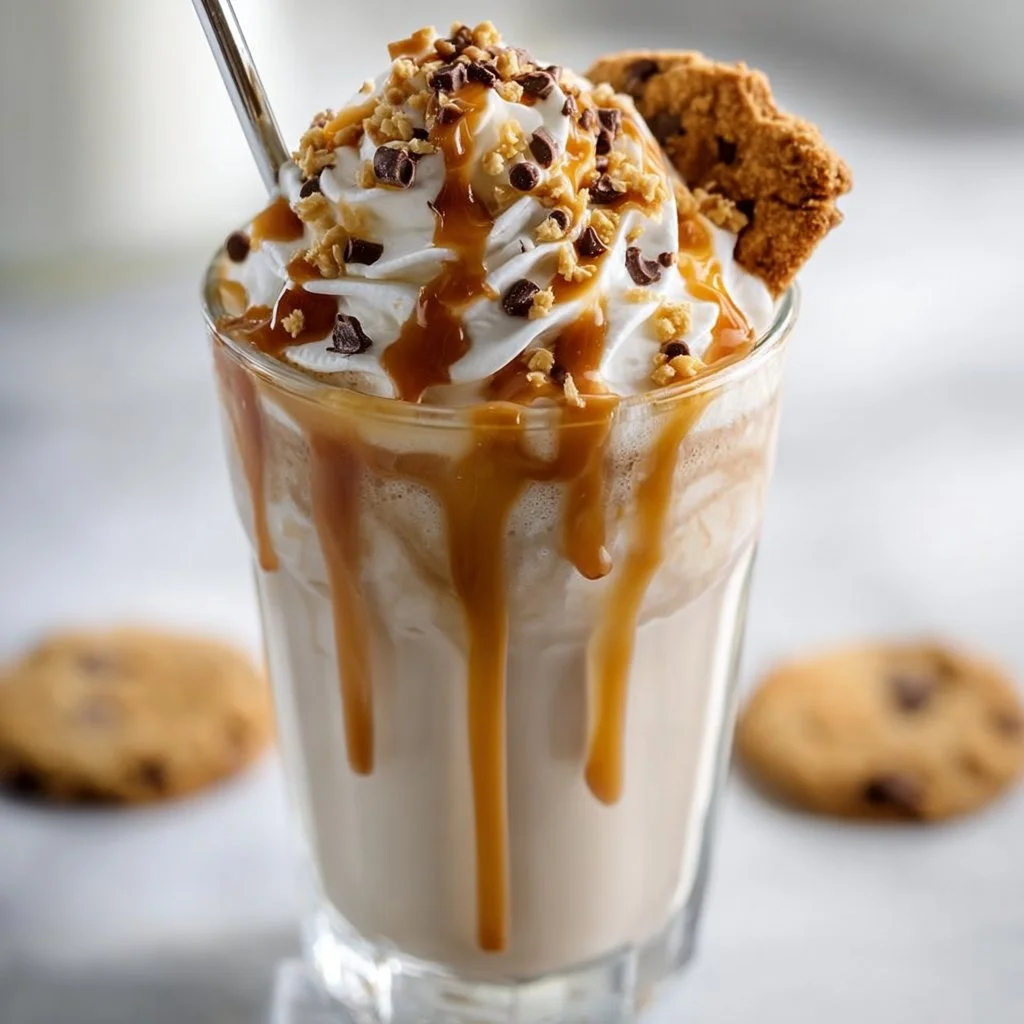
Ninja Slushie Caramel Milkshake Recipe
Ninja Slushie Caramel Milkshake Recipe
Welcome to my kitchen! If you’ve ever been on a hot summer day, yearning for a refreshingly sweet treat that perfectly balances indulgence and nostalgia, you’re in for a real treat today. I’m Olivia Bennett, and today we’re diving into the world of delightful milkshakes—not just any milkshakes, but the fabulously fun Ninja Slushie Caramel Milkshake! Think of it as a cool breeze on a hot day, a comforting hug in a cup, and an adventure in flavor all mixed together.
Picture this: it’s a sunny Saturday afternoon, and the kids are running around the yard while the grill sizzles with delicious barbecue. You’re seeking something to cool off with—maybe to share or indulge in solo. That’s when the Ninja Slushie Caramel Milkshake comes into play, transforming simple ingredients into something magical. With the swoosh of a Ninja blender (or any trusty blender), you can create a delightful concoction that mesmerizes taste buds and fills your home with the sweet aroma of caramel.
This isn’t just any milkshake; it’s a fun twist on the classic, enhanced with yummy caramel swirls and frosty goodness that blend together to create an experience you’ll want to revisit over and over again. So, whether it’s a sunny day or an enjoyable night in, let’s whip up something that not only tastes absolutely yummy but also takes us back to warm, fuzzy memories of childhood ice cream trucks and lazy weekends.
Personal Story
Let me tell you about my very first milkshake experience. I was a little girl, and every summer, my family would take a day trip to the beach. Before hitting the sandy shores, we’d always stop at this charming little diner known for its milkshakes. I remember the excitement in my tummy as I gazed at the menu with all its whimsical flavors, but my heart was set on one thing: the creamy caramel milkshake.
The waitress would bring it to our table in this tall, frosty glass, topped with whipped cream and an extra drizzle of caramel that glistened like sunshine. That moment was more than just a drink; it was about the smiles, laughter, and family moments we shared around that table. I can’t help but giggle now thinking about my dad trying to keep the whipped cream from reaching his nose. It’s those simple pleasures and cherished memories that inspire this colorful Ninja Slushie Caramel Milkshake recipe today!
Ingredients
-
Ice Cream:
- Vanilla or Caramel Flavor: A rich vanilla makes a great base, while caramel-flavored ice cream adds an extra punch. Feel free to swap with dairy-free options if you’re looking for a vegan treat—coconut or almond milk ice creams work wonders!
-
Milk:
- Whole or Almond Milk: About 1 cup of whole milk for creaminess, or almond milk for a lighter version. You can adjust the quantity based on your desired thickness.
-
Caramel Sauce:
- Store-bought or Homemade: Look for quality caramel sauce that will delight your taste buds. If you’re feeling adventurous, try your hand at making it from scratch using butter, sugar, and cream for a fun kitchen project!
-
Ice:
- Crushed or Cubed Ice: Use more or less depending on your desired slushie texture. Crushed ice is fantastic for achieving that refreshing slush consistency!
-
Whipped Cream:
- A Must-Have Topping: You can make it fresh or use pre-made. Don’t forget to add an extra drizzle of caramel on top. It’s all about the presentation!
-
Optional Toppings:
- Chocolate Shavings, Nuts, or Sprinkles: Get creative! You can customize your milkshake with these fun toppings for added crunch and flair.
Step-by-Step Instructions
Alright, let’s get our hands a bit messy, shall we? Grab your apron and let’s blend up some magic!
Step 1: Gather Your Ingredients
Start by gathering all your ingredients on your countertop. This will ensure you have everything you need at your fingertips. Nobody enjoys running around the kitchen mid-blend, right?
Step 2: Blend the Base
In your mighty Ninja blender, add about 2 cups of vanilla ice cream, followed by the milk. Start with 1 cup; you can always add more later for thickness. Secure the top and blend until smooth. Pro tip: If your milkshake feels too thick, gradually add a splash of milk until you achieve your desired consistency.
Step 3: Add the Caramel
Now comes the fun part—drizzle about ¼ cup of caramel sauce into the mix while the blender runs. The caramel swirls will infuse a delightful flavor into your milkshake. Note: you may wish to adjust the caramel based on how sweet you prefer your shake.
Step 4: Ice, Ice, Baby!
Toss in about 1-2 cups of ice (depending on how slushy you want it), and blend again for about 30 seconds until crushed and well-combined. This is where the Ninja’s power shines! You should see a luscious, creamy mix taking shape.
Step 5: Taste Test
This is my favorite step! Give your milkshake a taste. If you think it needs a little more caramel or is too thick, go ahead and adjust. It’s all about personal preference here!
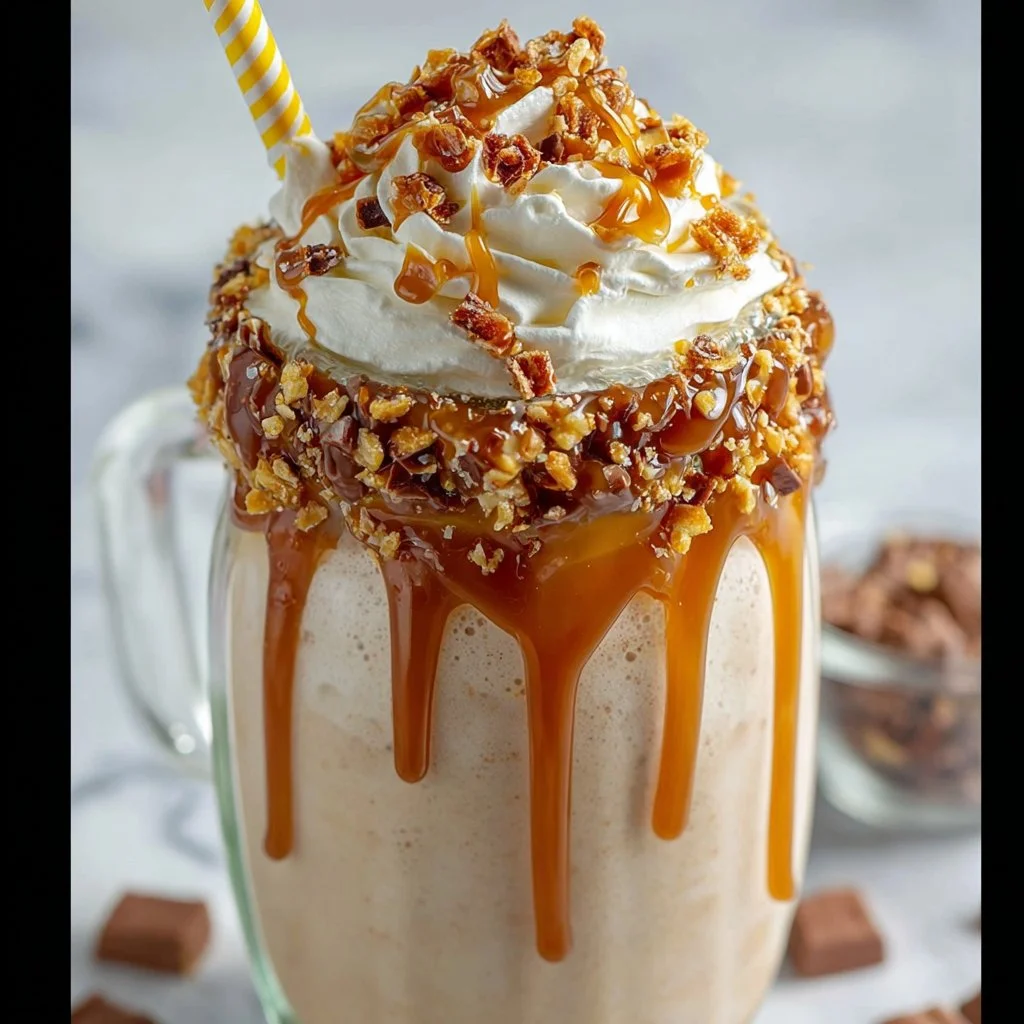
Step 6: Serve It Up!
Grab your fanciest glasses (or the fun ones your kids picked out), and pour your Ninja Slushie Caramel Milkshake right in. Make sure you see those delightful layers!
Step 7: Toppings Galore!
Dollop on a whirlwind of whipped cream and drizzle with an extra swirl of caramel. You could even sprinkle chocolate shavings, nuts, or rainbow sprinkles on top for a festive touch. Ta-da!
Serving Suggestions
Present your beautiful milkshake topped with a bright maraschino cherry for an extra pop of color. Hand out colorful straws or even set up a mini milkshake bar with various toppings so everyone can customize their creations. It makes for great conversation and a wonderful way to connect over something sweet!
Recipe Variations
- Nutty Caramel Chocolate: Blend in some chocolate ice cream, and sprinkle chopped nuts on top for that satisfying crunch.
- Salted Caramel: A touch of sea salt can elevate your milkshake game to a whole new level by balancing the sweetness of caramel beautifully.
- Banana-Fudge Delight: Toss in half a ripe banana to add natural sweetness and creaminess, then finish off with a drizzle of fudge.
- Coconut Bliss: Use coconut milk ice cream and top with toasted coconut flakes for a tropical twist.
- Cookie Lover’s Dream: Add crushed cookies to the mix and as topping for a delicious cookie-and-cream-inspired shake.
Chef’s Notes
This Ninja Slushie Caramel Milkshake recipe has come a long way since I first tried making it years ago! I’ve fiddled with different ice cream flavors, caramel types and even experimented with adding seasonal spices like cinnamon or nutmeg to see what fits best. Every time I whip this up, it brings back memories of family trips, friends gathered in my kitchen, and lots of giggles over who can make the tallest whipped cream mountain!
Don’t ever let kitchen messes discourage you—some of the best culinary creations come from those spontaneous moments. Remember to take a look back at your “oops” moments—they often lead to the best stories and smiles!
FAQs and Troubleshooting
-
What if my milkshake is too thin?
Don’t fret! Just add more ice or ice cream and blend it again until you get that creamy thickness you crave. -
Can I make it ahead of time?
While it’s best enjoyed fresh, you can store it in the freezer for a short time. Just remember to let it sit for a bit before serving again to soften it up! -
Can I use a different flavor of ice cream?
Absolutely! The beauty of a milkshake is its versatility. Try experimenting with mint chocolate chip, cookies and cream, or even some fruity flavors for a summer twist. -
What if I don’t have a blender?
No blender? No problem! Consider using a milkshake maker if you have one. Alternatively, mix your ice cream and milk in a large jar with a tight-fitting lid and shake, shake, shake until blended!
Nutritional Info (Optional)
- Serving Size: 1 medium milkshake
- Calories: Approximately 500 calories (depending on ingredients used)
- Total Fat: 25g
- Carbohydrates: 65g
- Sugars: 45g
- Protein: 10g
So there you have it, my fabulous Ninja Slushie Caramel Milkshake recipe! I hope you enjoy making it as much as I do. Embrace the joy of creating something delicious from the heart. Let’s keep cooking, sharing stories, and making cherished memories together. Happy blending! 🍦💕
Print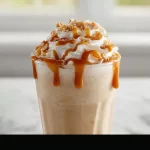
Ninja Slushie Caramel Milkshake
- Total Time: 10 minutes
- Yield: 2 servings 1x
- Diet: Vegetarian
Description
A delightfully refreshing and indulgent milkshake, enhanced with caramel swirls for a nostalgic treat on hot summer days.
Ingredients
- 2 cups Vanilla or Caramel Ice Cream
- 1 cup Whole or Almond Milk
- ¼ cup Caramel Sauce (store-bought or homemade)
- 1–2 cups Crushed or Cubed Ice
- Whipped Cream (for topping)
- Optional Toppings: Chocolate Shavings, Nuts, Sprinkles
Instructions
- Gather your ingredients on your countertop.
- Blend the base by adding ice cream and milk in the blender.
- Add the caramel sauce while blending.
- Toss in the ice and blend until well-combined.
- Taste your milkshake and adjust flavors as desired.
- Serve the milkshake in glasses, showcasing delightful layers.
- Dollop whipped cream and add toppings on top.
Notes
For added flavor, try variations like Nutty Caramel Chocolate or Salted Caramel. Perfect for customizing with your favorite toppings!
- Prep Time: 10 minutes
- Cook Time: 0 minutes
- Category: Dessert
- Method: Blending
- Cuisine: American
Nutrition
- Serving Size: 1 milkshake
- Calories: 500
- Sugar: 45g
- Sodium: 150mg
- Fat: 25g
- Saturated Fat: 15g
- Unsaturated Fat: 7g
- Trans Fat: 0g
- Carbohydrates: 65g
- Fiber: 1g
- Protein: 10g
- Cholesterol: 80mg
Keywords: milkshake, caramel, dessert, summer treat, sweet