
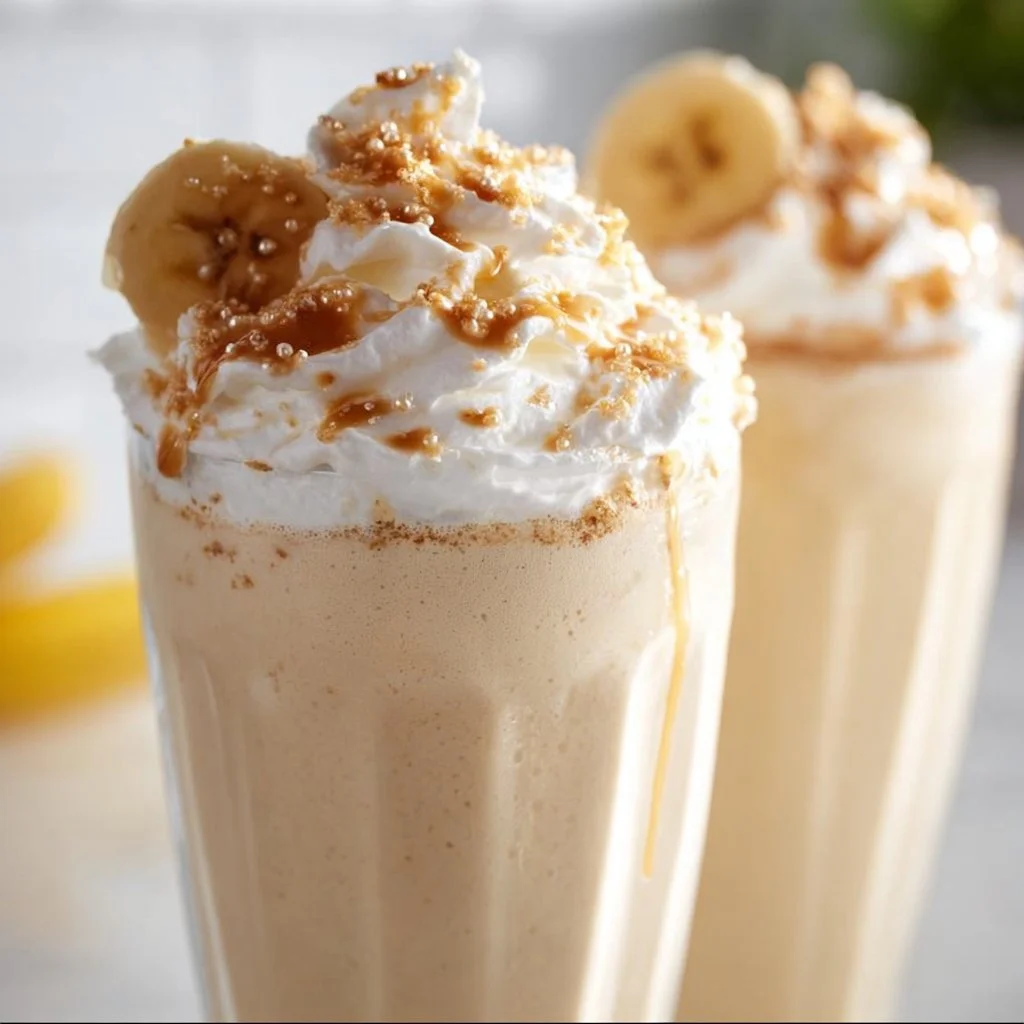
Banana Cream Pie Milkshake
Indulge in Bliss: The Ultimate Banana Cream Pie Milkshake Recipe
Welcome to my kitchen! Today, I’m thrilled to share a recipe that combines my love for desserts and my passion for all things creamy and dreamy. Get ready to blend up some nostalgia with this Banana Cream Pie Milkshake. If you’ve ever found yourself craving a slice of that classic banana cream pie but wanted it in a glass, then my friend, this is the recipe for you! Not only is it delicious, but it’s also a fun way to bring the flavors of a beloved dessert to summer—er, or any time of year, really. Just remember, life is better with a milkshake!
A Taste of Nostalgia
Let me take you back to my childhood. Picture a sunny Saturday afternoon, the smell of fresh banana bread wafting through the house, and laughter echoing from the backyard. My family had a tradition of making banana cream pie during the summer months when ripe bananas were abundant. We would gather in the kitchen, flour dusting our faces, as my mom expertly layered whipped cream over the luscious banana filling. Those moments were full of joy, teamwork, and, of course, a lot of tasting—after all, it’s not really baking if you don’t sneak a few bites along the way!
But one particularly hot day, my brother and I were craving something cold to cool us down. That’s when my creativity kicked in! I grabbed some vanilla ice cream, blended it with bananas and milk, and voilà—a milkshake that tasted just like our favorite pie. This Banana Cream Pie Milkshake became a summer staple, loved by friends and family alike. Now, I want to share this indulgent treat with you, so let’s jump into the flavorful adventure that awaits!
Ingredients
Gather your utensils because we need to round up our ingredients! Here’s what you’ll need for our Banana Cream Pie Milkshake:
-
2 ripe bananas: The star of our show! Look for bananas that are just speckled with brown spots for optimal sweetness. If you don’t have ripe bananas, you can substitute with frozen bananas for a creamier texture.
-
2 cups vanilla ice cream: Creamy and dreamy, vanilla ice cream is the perfect base! You can use a dairy-free option if you want to make it vegan or simply want a lighter version—coconut or almond milk ice creams work great too.
-
1 cup whole milk: This helps create a silky texture. If you’re looking to lighten things up, use skim or almond milk.
-
1 teaspoon vanilla extract: Adds depth and enhances the banana flavor. If you’re feeling adventurous, a splash of almond extract could add a unique twist!
-
Whipped cream (for topping): Because what’s a milkshake without some light, fluffy whipped cream? You can use store-bought or whip your own—it’s easy and satisfying.
-
Graham cracker crumbs (for garnish): These give that essential pie crust vibe. In a pinch, crushed digestive biscuits work just as well!
With these ingredients in hand, you’re halfway to milkshake heaven!
Step-by-Step Instructions
Let’s make this milkshake magic happen! Follow these simple steps, and you’ll be sipping on a delicious Banana Cream Pie Milkshake in no time.
-
Prep your bananas: Peel your ripe bananas and slice them into chunks. Keep one slice aside for garnish if you’d like a cute finishing touch. This little detail shows that you took the time to present your masterpiece!
-
Blend it up: In a blender, combine the sliced bananas, vanilla ice cream, milk, and vanilla extract. Start on a low speed to get everything mixed together without creating a banana explosion. Gradually increase to high speed until everything is smooth and creamy—about 30 to 60 seconds of blending will do it. If you find it too thick, add a little more milk; too thin? You can always toss in more ice cream!
-
Taste test time: Now’s the moment of truth. Grab a spoon and taste your creation. Does it bring back memories of sunny summers, warm pies, and family laughter? Adjust the flavors if you need to. A pinch more vanilla? A splash more milk? This is your milkshake, so make it yours!
-
Serve it up: Pour the creamy mixture into chilled glasses that are just waiting to be filled with goodness. You want that milkshake to stay cold for as long as possible—I aim for at least an hour of coolness!
-
Top it off with whipped cream: Generously dollop whipped cream on top of each milkshake. You want to see it towering above the glass—it should be a showstopper! Sprinkle graham cracker crumbs on top for that pie-like crunch.
-
Garnish and enjoy: Finally, place that slice of banana you saved earlier on the edge of the glass, and maybe also a cute straw! Grab your loved ones, take a moment to appreciate your handiwork, and get ready to indulge!
Serving Suggestions
One of the best things about this milkshake is how versatile it is! You can serve it in tall milkshake glasses for that classic diner feel or in mason jars for a rustic vibe. A side of extra graham cracker crumbs for dipping never hurts, either; trust me, it’s delicious!
Recipe Variations
Feeling inspired? Here are a few creative twists you might want to try:
-
Peanut Butter Banana Cream Pie Milkshake: Add a few tablespoons of peanut butter to the blender for a creamy, nutty flavor that pairs perfectly with bananas.
-
Chocolate Drizzle: Swirl some chocolate syrup into the milkshake mix before serving. This adds a decadent chocolatey twist reminiscent of chocolate cream pie.
-
Banana Nut Crunch: Add a handful of chopped walnuts or pecans to the milkshake for added texture and flavor.
-
Dairy-Free Delight: Use coconut or almond milk and vegan ice cream for a delicious dairy-free treat.
-
Caramel Swirl: Drizzle some caramel sauce inside your glass before pouring in the milkshake for a sweet surprise with every sip!
Chef’s Notes
As with any recipe, there are countless ways to make this Banana Cream Pie Milkshake truly your own. Over the years, I’ve made a few adjustments based on availability and seasonal ingredients. Sometimes I’ve added cinnamon for warmth, or even a touch of nutmeg to evoke that cozy, homey vibe. One time, I decided to make it in a blender with my nephew, and let’s just say it was more a banana “splatter pie” experience than a bake-off! But those moments? They’re what cooking—and life—is all about: creating memories while having a bit of fun along the way!
FAQs and Troubleshooting
-
Why is my milkshake too thin?
- No worries! Simply add a little more ice cream to thicken it up. If it’s too thick, just blend in a splash more milk to get it to your desired consistency.
-
Can I make this ahead of time?
- It’s best enjoyed fresh, but you can prepare the banana and ice cream mixture and keep it in the freezer if you’d like to prep ahead. Just blend it once again before serving.
-
What if I don’t have a blender?
- You can use an immersion blender or even mash the bananas by hand and stir in the other ingredients. Just be prepared for a little more elbow grease!
-
How can I make it healthier?
- Swap the ice cream for Greek yogurt or frozen yogurt to cut back on calories while still enjoying a deliciously creamy treat.
Nutritional Info
While this recipe is all about indulgence, it’s also good to know what you’re enjoying! Here’s an approximate nutritional breakdown for one serving:
- Calories: 450
- Fat: 20g
- Carbohydrates: 63g
- Protein: 7g
Note: Nutritional information may vary based on specific ingredients used.
So there you have it, friends! Your very own Banana Cream Pie Milkshake that’s just bursting with flavor and nostalgia. As we sip and savor, let’s remember that the kitchen is not just about food; it’s about creating joy, sharing love, and making memories. Enjoy this delightful creation, and let it inspire you to whip up more sweet moments in your cooking adventures! Happy blending! 🍌🥛✨
Print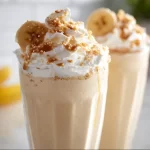
Banana Cream Pie Milkshake
- Total Time: 10 minutes
- Yield: 2 servings 1x
- Diet: Vegetarian
Description
Indulge in this creamy and dreamy Banana Cream Pie Milkshake that captures the flavors of a classic dessert in a glass.
Ingredients
- 2 ripe bananas, sliced
- 2 cups vanilla ice cream
- 1 cup whole milk
- 1 teaspoon vanilla extract
- Whipped cream (for topping)
- Graham cracker crumbs (for garnish)
Instructions
- Prep your bananas: Peel and slice the bananas, saving one slice for garnish.
- Blend it up: In a blender, combine the bananas, vanilla ice cream, milk, and vanilla extract. Blend until smooth.
- Taste test time: Taste and adjust flavors as needed.
- Serve it up: Pour the mixture into chilled glasses.
- Top it off with whipped cream: Add a generous dollop of whipped cream and sprinkle with graham cracker crumbs.
- Garnish and enjoy: Add the reserved banana slice and serve with a straw.
Notes
Feel free to swap ingredients for variations such as peanut butter, chocolate drizzle, or nut toppings.
- Prep Time: 10 minutes
- Cook Time: 0 minutes
- Category: Dessert
- Method: Blending
- Cuisine: American
Nutrition
- Serving Size: 1 serving
- Calories: 450
- Sugar: 35g
- Sodium: 120mg
- Fat: 20g
- Saturated Fat: 12g
- Unsaturated Fat: 7g
- Trans Fat: 0g
- Carbohydrates: 63g
- Fiber: 3g
- Protein: 7g
- Cholesterol: 60mg
Keywords: banana milkshake, dessert, creamy, summer treat, nostalgic dessert

Peanut Butter Cup Milkshake
The Ultimate Peanut Butter Cup Milkshake: A Cozy Kitchen Creation
Welcome back to my cozy kitchen, my fellow food lovers! Today, we’re diving into a treat that blends nostalgia with pure joy—a Peanut Butter Cup Milkshake. If the mere mention of this creamy delight doesn’t tug at your heartstrings, let me invite you to join me on this adventure of flavor and sweetness.
The inspiration for this milkshake comes from countless afternoons spent in my childhood kitchen, where my siblings and I would eagerly await the arrival of summer. The sun would pour through the windows, lighting up our tiny space like a scene from a movie. It was during those blissful months that our mom would treat us to ice cream milkshakes made from whatever delicious ingredients were within reach. Peanut butter cups were a special occasion, a feast woven into the fabric of our family traditions. The peanut butter’s creamy richness pairing with chocolate was the ultimate treat that marked a day of fun and laughter.
Milkshakes may seem like a simple indulgence, but for me, they carry so much more meaning. They remind us to slow down, savor each bite, and relish the moments spent with the ones we love. Today, I’m excited to share this Peanut Butter Cup Milkshake recipe with you so you can recreate that same smile-inducing experience in your own kitchen. Grab your blender and let’s get to work!
Personal Story
I remember a summer afternoon when my siblings and I took it upon ourselves to take our milkshake-making skills to the next level. The backyard was alive with laughter and excitement, and little did we know we were about to embark on a deliciously messy adventure. With a stash of peanut butter cups scavenged from a recent candy haul, we decided to create our very own milkshake masterpiece.
Armed with a blender and a somewhat questionable understanding of proper milkshake ratios, we started throwing in everything: ice cream, whole milk, chocolate syrup, and of course—those glorious peanut butter cups. The blender roared to life, and we giggled as it sent a sugary cyclone swirling, transforming our colorful concoction into a thick milkshake. We poured our creations into mismatched cups, topped them with whipped cream (of course), and had a glorious taste-test — each sip filled with laughter and rewards for our chaotic kitchen expedition.
That day, amidst the sticky counters and laughter-filled blurs, I realized that food could be a beautiful way to forge memories. And though we may have been racing against melting ice cream in the hot sun, each sip was filled with the essence of summer—sweetness, joy, and a hint of sibling rivalry. Those blissful moments inspire me to recreate this Peanut Butter Cup Milkshake and share it with you, so you can create your own delicious, joyful kitchen stories.
Ingredients
Now that you’re ready to blend up some magic, here’s what you’ll need for this epic Peanut Butter Cup Milkshake:
- Ice Cream (2 cups): I recommend vanilla or chocolate for a classic taste. If you’re feeling adventurous, you could use cookie dough or peanut butter ice cream!
- Milk (1 cup): Whole milk will give you a rich, creamy texture, but feel free to use almond, oat, or soy milk for dairy-free options.
- Peanut Butter Cups (4-5 pieces): The real star of the show! A classic, but feel free to experiment with dark chocolate or white chocolate versions for a twist.
- Peanut Butter (2 tablespoons): Uses natural peanut butter for a richer, creamier flavor or hit up those flavored options like chocolate peanut butter for an extra kick.
- Chocolate Syrup (2 tablespoons): This is where we get the indulgent chocolatey goodness! You can make your own or substitute with a dairy-free version if needed.
- Whipped Cream (for topping): Nothing says milkshake like a generous dollop of whipped cream on top. You can use store-bought or homemade for more cozy vibes.
- Extra Peanut Butter Cups (for garnish): Because one can never have too many peanut butter cups, right? Chop them up and sprinkle them on top!
Chef Insights:
- Ingredient Swaps: Don’t have peanut butter cups? Use crushed Oreos or cookie dough for a different flavor profile.
- Milk: Adjust the milk according to your desired thickness—less for a thick shake, more for a thinner one!
Step-by-Step Instructions
Alright, let’s get those blenders buzzing! Here’s how to whip up this Peanut Butter Cup Milkshake step-by-step.
-
Gather Your Ingredients: First things first! Get all your ingredients ready and within reach. Trust me; it makes the blending process easier when everything is prepped and ready to go.
-
Add Ice Cream & Milk: In your blender, start by adding the ice cream. The foundation of a great milkshake! Follow it up with the milk. If you want a thicker shake, use less milk. For a thinner consistency, go for the full cup.
-
Crush the Peanut Butter Cups: Time to get those peanut butter cups in there! Break them up into smaller pieces so they blend more easily. You can add them whole if you prefer chunks in your shake. Toss them into the blender.
-
Spoon in the Peanut Butter: Measure out two tablespoons of peanut butter and add it to the mix. If you’re using any flavored peanut butter, you’re about to elevate this shake to new heights!
-
Drizzle in Chocolate Syrup: Drizzling the chocolate syrup into the blender will add a touch of sweetness and indulgence. Go ahead and shake it up a bit, and save some for the garnish later.
-
Blend Away: Put the lid on your blender and blend everything until smooth and creamy. Give it a few bursts to make sure everything is well combined. If you want a thicker shake, stop here, and if you want a thinner shake, add a splash more milk and blend again!
-
Taste Test: It’s essential to make sure your creation is on point. Grab a spoon, taste a little, and adjust to your liking! Want it sweeter? Add more chocolate syrup. More peanut butter flavor? Toss in a tad more.
-
Serve It Up: Pour your milkshake into glasses. Take a moment to admire the creamy goodness swirling within, and let the anticipation build!
-
Top It Off: This is a crucial step: top your milkshakes with whipped cream, and add a drizzle of chocolate syrup for that visual wow factor. And don’t forget to sprinkle those extra chopped peanut butter cups on top!
-
Enjoy: Grab a straw, sip, and enjoy the beautiful marriage of chocolate and peanut butter, reminiscent of your childhood summer afternoons!
Serving Suggestions
For an extra special touch, serve your Peanut Butter Cup Milkshake in tall glasses with striped straws for that classic milkshake diner feel. Feel free to add some chocolate shavings on top of the whipped cream or even a sprinkle of sea salt to balance the sweetness and elevate the flavors. If you’re feeling fancy, couple it with a couple of extra peanut butter cups on a small plate on the side for a delightful treat.
Recipe Variations
- Banana Peanut Butter Cup Shake: Add a ripe banana into the mix for a creamier texture and an added layer of fruity sweetness.
- Minty Chocolate Twist: Add a few drops of peppermint extract for a refreshing mint chocolate experience—think holidays in a glass!
- Protein-Packed Version: Incorporate a scoop of your favorite protein powder for a filling, post-workout treat. Choose vanilla for a subtle flavor profile.
- Dairy-Free Delight: Substitute all dairy products with coconut milk ice cream and almond milk for a delightful lactose-free option!
- Cinnamon Peanut Butter Variation: Add a pinch of ground cinnamon for a warm, inviting flavor twist that makes the shake truly unique.
Chef’s Notes
Over the years, my Peanut Butter Cup Milkshake recipe has continuously evolved. Initially, I used whatever was in the freezer—often leading to some “interesting” combinations! Now, I’ve learned to focus on balance. I still chuckle at the time I attempted to add caramel for extra sweetness. Let’s just say it was an experience!
And of course, no milkshake brings the joy quite like doing it with friends. It’s become a tradition for my friends and me to have cozy nights in where we whip up different versions of milkshakes, competing for the ultimate flavor combination! So don’t hesitate to invite a friend into your kitchen for this—sharing is really where the magic happens!
FAQs and Troubleshooting
Q1: My milkshake is too thick! What can I do?
A1: Don’t fret! Just add a splash of milk and give it another blend. If you want to keep it thick but still drinkable, try using a thicker straw or using a spoon to scoop it out.
Q2: What if I don’t have a blender?
A2: A hand mixer can do the trick just fine! Just whisk the ingredients together until well combined. It might take a little extra effort, but it’ll be worth it!
Q3: Can I prepare this ahead of time?
A3: I suggest enjoying it fresh, but you can prepare the ingredients in advance and store them separately in the fridge. Just blend when you’re ready for your treat!
Q4: Can I make this dairy-free?
A4: Absolutely! Just stick with dairy-free ice cream options and substitute milk with almond, soy, or oat milk for a delicious dairy-free treat!
Nutritional Info
- Calories: Approximately 600 per serving (this can vary based on portions and specific ingredients)
- Fat: 30g (mostly healthy fats from peanut butter)
- Carbohydrates: 70g
- Protein: 10g (especially if you add in protein powder)
So there you have it—your guide to creating the ultimate Peanut Butter Cup Milkshake! Dive into this delightful recipe and share the love with those around you. As always, my kitchen is a place for joy, creativity, and heartwarming memories, and I hope this milkshake brings a touch of that to your home. Happy blending!
Print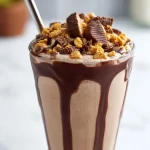
The Ultimate Peanut Butter Cup Milkshake
- Total Time: 10 minutes
- Yield: 2 servings 1x
- Diet: Vegetarian
Description
A rich and creamy Peanut Butter Cup Milkshake that blends nostalgia with pure joy, perfect for sharing with loved ones.
Ingredients
- 2 cups Ice Cream (vanilla or chocolate)
- 1 cup Milk (whole, almond, oat, or soy)
- 4–5 pieces Peanut Butter Cups
- 2 tablespoons Peanut Butter
- 2 tablespoons Chocolate Syrup
- Whipped Cream (for topping)
- Extra Peanut Butter Cups (for garnish)
Instructions
- Gather your ingredients: Get all your ingredients ready and within reach.
- Add ice cream and milk: Start by adding the ice cream to your blender, followed by the milk.
- Crush the peanut butter cups: Break them up into smaller pieces and toss into the blender.
- Spoon in the peanut butter: Measure out two tablespoons of peanut butter and add it to the mix.
- Drizzle in chocolate syrup: Add a drizzle of chocolate syrup into the mixture.
- Blend away: Blend everything until smooth and creamy.
- Taste test: Taste your milkshake and adjust sweetness as desired.
- Serve it up: Pour your milkshake into glasses.
- Top it off: Top with whipped cream, drizzle with chocolate syrup, and add chopped peanut butter cups.
- Enjoy: Sip and enjoy the delightful combination of chocolate and peanut butter!
Notes
For a thicker shake, reduce milk; for a thinner shake, add more milk. Experiment with different flavored peanut butters!
- Prep Time: 10 minutes
- Cook Time: 0 minutes
- Category: Dessert
- Method: Blending
- Cuisine: American
Nutrition
- Serving Size: 1 serving
- Calories: 600
- Sugar: 50g
- Sodium: 250mg
- Fat: 30g
- Saturated Fat: 12g
- Unsaturated Fat: 15g
- Trans Fat: 0g
- Carbohydrates: 70g
- Fiber: 3g
- Protein: 10g
- Cholesterol: 10mg
Keywords: milkshake, peanut butter cup, dessert, summer treat, nostalgia
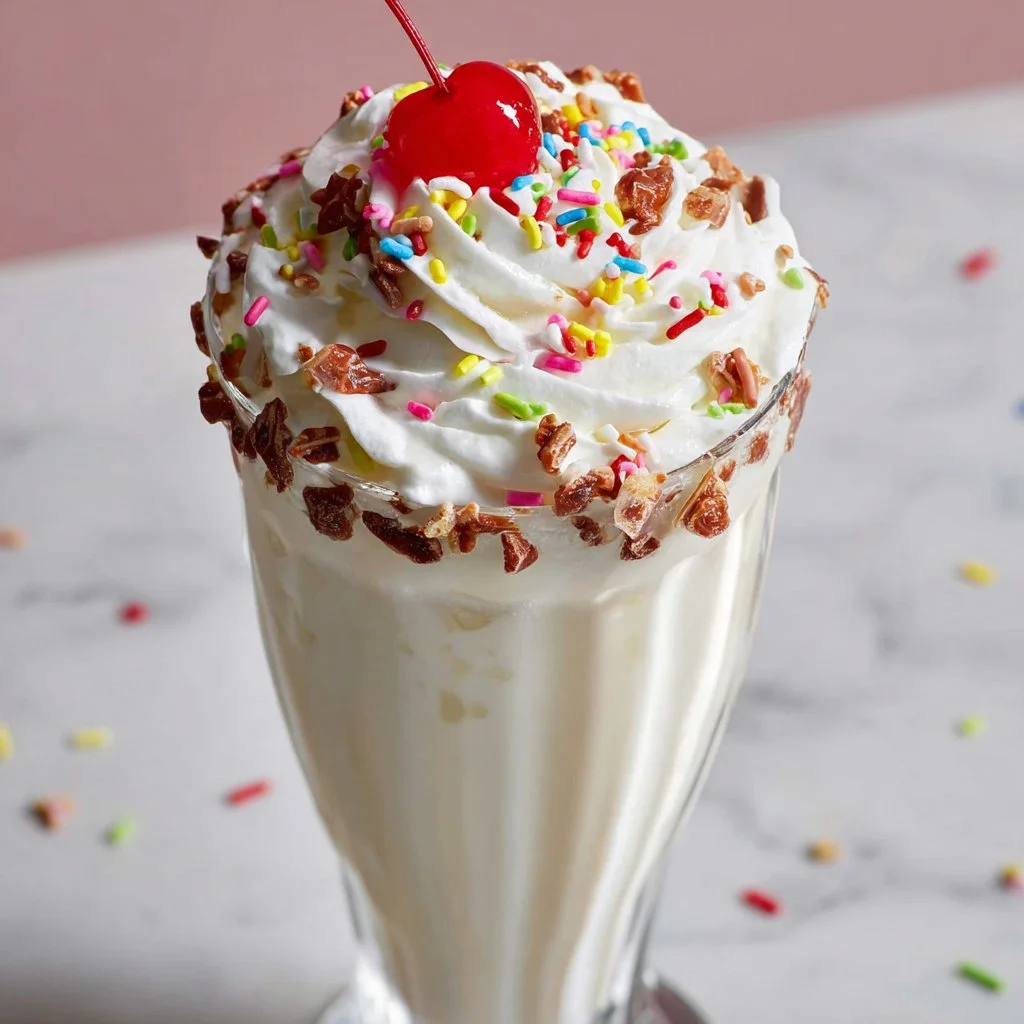
Vanilla Milkshake
A Perfectly Creamy Vanilla Milkshake Recipe to Satisfy Your Sweet Tooth
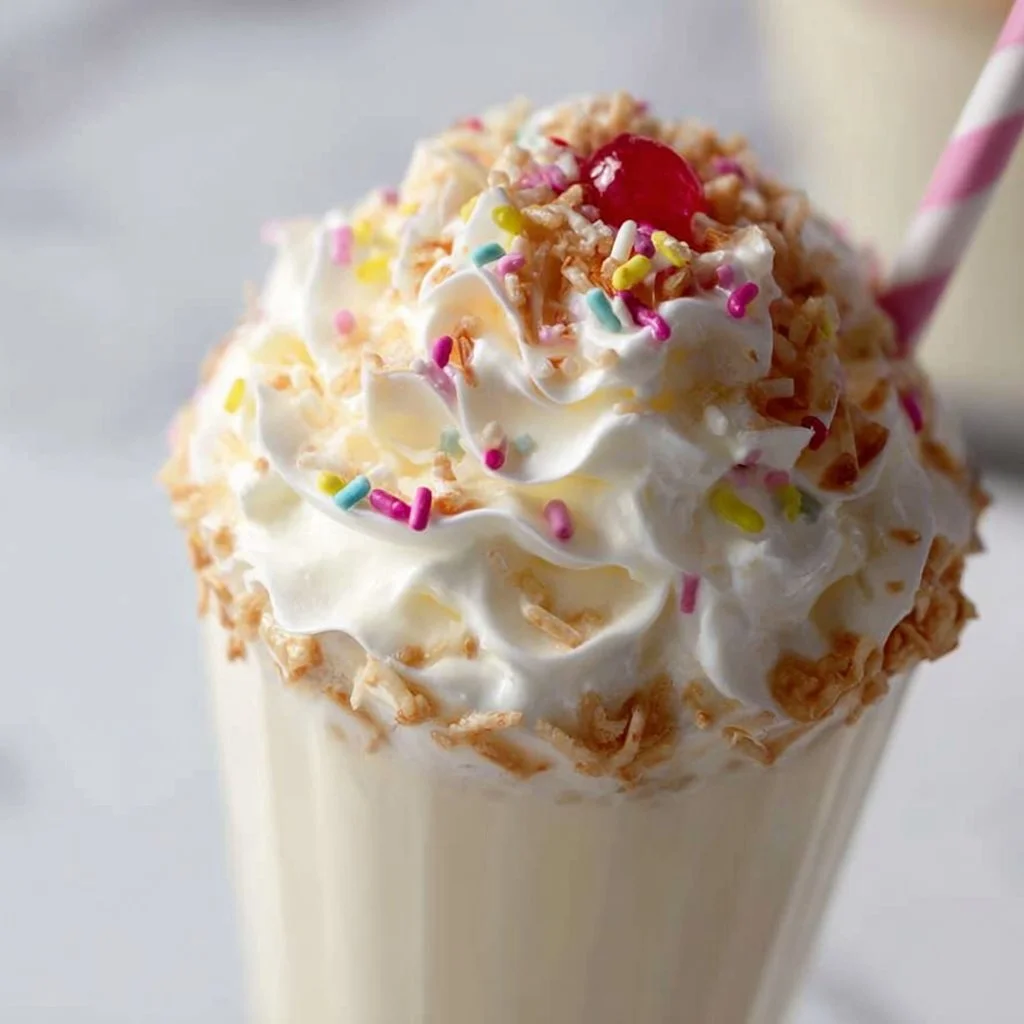
Oh, the joy of a vanilla milkshake! The mere mention of it conjures up memories of hot summer days and delightful ice cream parlors. The way it swirls in the glass, thick and creamy, drawing you in with its sweet, nostalgic aroma is a universal call to indulge. Hi, I’m Olivia Bennett, and today we’re diving into the world of the classic vanilla milkshake—my ultimate guilty pleasure that never fails to whip me back into childhood carefree days.
Milkshakes are more than just a cold drink; they offer an experience—the joy of sipping, the laughter shared with loved ones, and that blissful moment when your taste buds are tickled with sweetness. While I adore gourmet meals, there’s something uniquely satisfying about crafting a vanilla milkshake. Perhaps it’s the cozy familiarity of its flavor, or the way a simple blend of ingredients can spark spontaneous joy.
What’s more, this recipe is designed for everyone, whether you’re a seasoned pro or a kitchen newbie. You don’t need a fancy blender or an extensive pantry—just a few basic ingredients, a sprinkle of creativity, and you’re on your way to milkshake heaven. So grab your blender, and let’s create something that’s not only delicious but also adds a dash of happiness to your day. Trust me, this milkshake will become a staple in your kitchen!
Personal Story
I’ll never forget the summer of my childhood when my parents took me and my younger brother to the local ice cream shop every Friday. It became our special ritual—even the anticipation as we drove there, with the scent of waffle cones wafting in from the door, sent shivers of excitement through me. I always ordered the vanilla milkshake (what can I say? I was a classic fan), and my brother would challenge me to finish it before he finished his towering scoop of rocky road.
One hot afternoon, I remember our usual spot being flooded, forcing us to snag a picnic table outside. The sun painted everything in a warm, golden hue as we shared laughs; I was slurping away on my creamy treat, and the world felt blissfully quiet apart from our giggles and the hum of bees buzzing nearby. That perfect blend of nostalgia, the sweet taste of vanilla, and the joy of togetherness stayed with me, inspiring me to recreate that experience in my kitchen. Each milkshake since has reminded me of that simple happiness—finding joy in the little moments.
Ingredients
Here’s what you’ll need for your divine vanilla milkshake:
-
Vanilla Ice Cream (2 cups)
The star of the show! Use a quality brand for maximum creaminess. You can swap it out for any dairy-free alternative if needed or reduce to one cup if you’re looking for a lighter option. -
Whole Milk (1 cup)
This adds the perfect creaminess and richness. For a lighter version, you can opt for skim or almond milk instead—just remember it might alter the texture a bit! -
Vanilla Extract (1 teaspoon)
A splash of pure vanilla extract intensifies the flavor. If you find yourself out, you can substitute a vanilla bean pod for a more sophisticated twist, or even use almond extract for a unique spin. -
Whipped Cream (for topping)
This is optional but highly recommended! It’s a delightful finishing touch. You could also customize with coconut whipped cream or Greek yogurt for a healthier yet creamy alternative. -
Maraschino Cherries (for garnish)
A classic topping—because every shake deserves a cherry on top! No cherries? Try some colorful sprinkles or even a few slices of fresh fruit.
In no time, you’ll be blending up the happiest milkshake around!
Step-by-Step Instructions
Let’s break this down into easy, playful steps. Here’s how to whip up this delectable vanilla milkshake:
-
Gather Your Tools: Before you begin, make sure you have a blender ready and your ingredients close at hand. Nothing’s worse than hunting for the honey while your blender buzzes patiently!
-
Scoop the Ice Cream: Take your vanilla ice cream and scoop 2 cups into the blender. Let it sit for a minute; slightly softened ice cream blends better. If it’s a hot day and you’re feeling particularly nostalgic, eat a spoonful while you’re at this stage!
-
Pour in the Milk: Add 1 cup of whole milk to the blender. If you’re craving a thicker shake, reduce the milk to ¾ cup. Want it thinner? You can always add a bit more milk later, but start with this to maintain that luscious texture.
-
Add Vanilla Extract: Now’s the time to add your one teaspoon of vanilla extract. This is the splash of magic that brings the whole thing together—don’t skip it!
-
Blend Away: Secure the blender lid, and blend on medium speed until smooth and creamy, which usually takes about 30 seconds. If it’s too thick, add a splash more milk and blend again. You’re looking for a velvety consistency that holds a ‘soft peak’ when you lift the blender lid.
-
Serve It Up: Pour the milkshake into tall glasses. Here’s a little tip: if you have a fun glass, whip out your favorite short or retro glass for presentation—your taste buds will appreciate every sip even more!
-
Finish with Whipped Cream: Top each milkshake with a generous swirl of whipped cream. Go ahead, let the whipped cream spill over! If you’re feeling fancy, you can use a piping bag for swirled artistry; if not, the good ol’ spoon will do just fine.
-
Garnish and Enjoy: Finally, pop a maraschino cherry on top, and you can even sprinkle a few chocolate shavings or colorful sprinkles for added fun. Now, grab a straw (or just a spoon!) and savor every creamy sip.
Serving Suggestions
For serving, I love to use tall milkshake glasses, but feel free to get creative! Serve with a side of homemade cookies or a slice of pie to create an indulgent dessert platter. If you’re hosting a brunch, why not set up a milkshake bar? Provide toppings like crushed cookies, fresh berries, or chocolate chips, and let guests create their own unique concoctions. The customization feels playful—and it’s a talking point!
Recipe Variations
Looking for some twists to keep it exciting? Here are a few ideas!
-
Chocolate Vanilla Milkshake: Add in a couple of tablespoons of chocolate syrup before blending for a delightful chocolate-vanilla combo.
-
Coffee Milkshake: Introduce a shot of espresso or some cold brew coffee to the mix for a morning pick-me-up. This is perfect for coffee lovers!
-
Fruit-Filled Shake: Toss in some berries—strawberries, blueberries, or even bananas—for a fruity treat. Just adjust the ice cream based on the amount of fruit used to maintain thickness.
-
Spice it Up: Add a pinch of cinnamon or nutmeg for a warm, cozy vibe to your milkshake. It might just become your new favorite!
-
Dairy-Free Delight: Swap the vanilla ice cream for coconut milk ice cream and use almond milk instead of whole milk for a refreshing twist that keeps it light.
Chef’s Notes
Creating a vanilla milkshake is truly one of those delightful experiences where the simplicity marries happiness. Over the years, I’ve had so much fun experimenting with flavors, and sometimes, a single spoonful can spark a wave of nostalgia. The only hiccup? My blender has a talent for making a mess—which is why I always keep the kitchen towels close by!
I originally started whipping these up for my friends in college, where we would gather for movie marathons. It wasn’t unusual to have milkshake taste tests, and I’d always be on the lookout for unique flavors—we even made a mint chocolate chip version that knocked our socks off! My love for this classic has only deepened over time, reminding me that it’s the little things in life that offer the most sweetness.
FAQs and Troubleshooting
-
Why does my milkshake come out too thin?
If your milkshake isn’t thick enough, it may be due to too much milk or not enough ice cream. You can remedy this by adding more ice cream gradually until you achieve your desired consistency. -
Can I store leftovers?
While a milkshake is best enjoyed fresh, any leftovers can be saved in the freezer in an airtight container. When you’re ready to enjoy again, let it sit out for a few minutes before blending again for a creamy texture. -
My milkshake is too sweet! What can I do?
If it’s too sweet for your taste, add a splash of milk or a pinch of salt to balance out the flavors. Salt can do wonders for enhancing overall taste! -
How can I make it healthier?
You can substitute whole milk with almond or oat milk, use lite ice cream or Greek yogurt instead of regular ice cream, and add in some fresh fruits or a scoop of protein powder for added nutrition.
Nutritional Info
While every recipe can have varying nutritional values based on ingredients, here’s a rough estimate per serving of this classic vanilla milkshake:
- Calories: 400-500 kcal
- Protein: 10g
- Carbohydrates: 60g
- Fat: 20g
- Sugar: 40g
Remember, milkshakes are a treat that can easily fit into a balanced diet when enjoyed in moderation!
So there you have it—a classic vanilla milkshake recipe that’s as sweet as memories from the past. I hope you enjoy making (and indulging in) this delightful beverage as much as I do. Happy blending, and cheers to creating more beautiful memories in your kitchen!
Print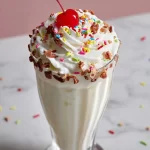
Perfectly Creamy Vanilla Milkshake
- Total Time: 5 minutes
- Yield: 2 servings 1x
- Diet: Vegetarian
Description
A classic vanilla milkshake recipe that’s thick, creamy, and bursting with nostalgia, perfect for sweet indulgence.
Ingredients
- 2 cups Vanilla Ice Cream
- 1 cup Whole Milk
- 1 teaspoon Vanilla Extract
- Whipped Cream (for topping)
- Maraschino Cherries (for garnish)
Instructions
- Gather your tools: Before you begin, make sure you have a blender ready and your ingredients close at hand.
- Scoop the ice cream: Take your vanilla ice cream and scoop 2 cups into the blender.
- Pour in the milk: Add 1 cup of whole milk to the blender.
- Add vanilla extract: Now’s the time to add your one teaspoon of vanilla extract.
- Blend away: Secure the blender lid, and blend on medium speed until smooth and creamy.
- Serve it up: Pour the milkshake into tall glasses.
- Finish with whipped cream: Top each milkshake with a generous swirl of whipped cream.
- Garnish and enjoy: Finally, pop a maraschino cherry on top and serve cold.
Notes
Customize with fruit or chocolate syrup for different flavors!
- Prep Time: 5 minutes
- Cook Time: 0 minutes
- Category: Dessert
- Method: Blending
- Cuisine: American
Nutrition
- Serving Size: 1 serving
- Calories: 450
- Sugar: 40g
- Sodium: 120mg
- Fat: 20g
- Saturated Fat: 12g
- Unsaturated Fat: 6g
- Trans Fat: 0g
- Carbohydrates: 60g
- Fiber: 0g
- Protein: 10g
- Cholesterol: 60mg
Keywords: vanilla milkshake, dessert, creamy shake, ice cream drink
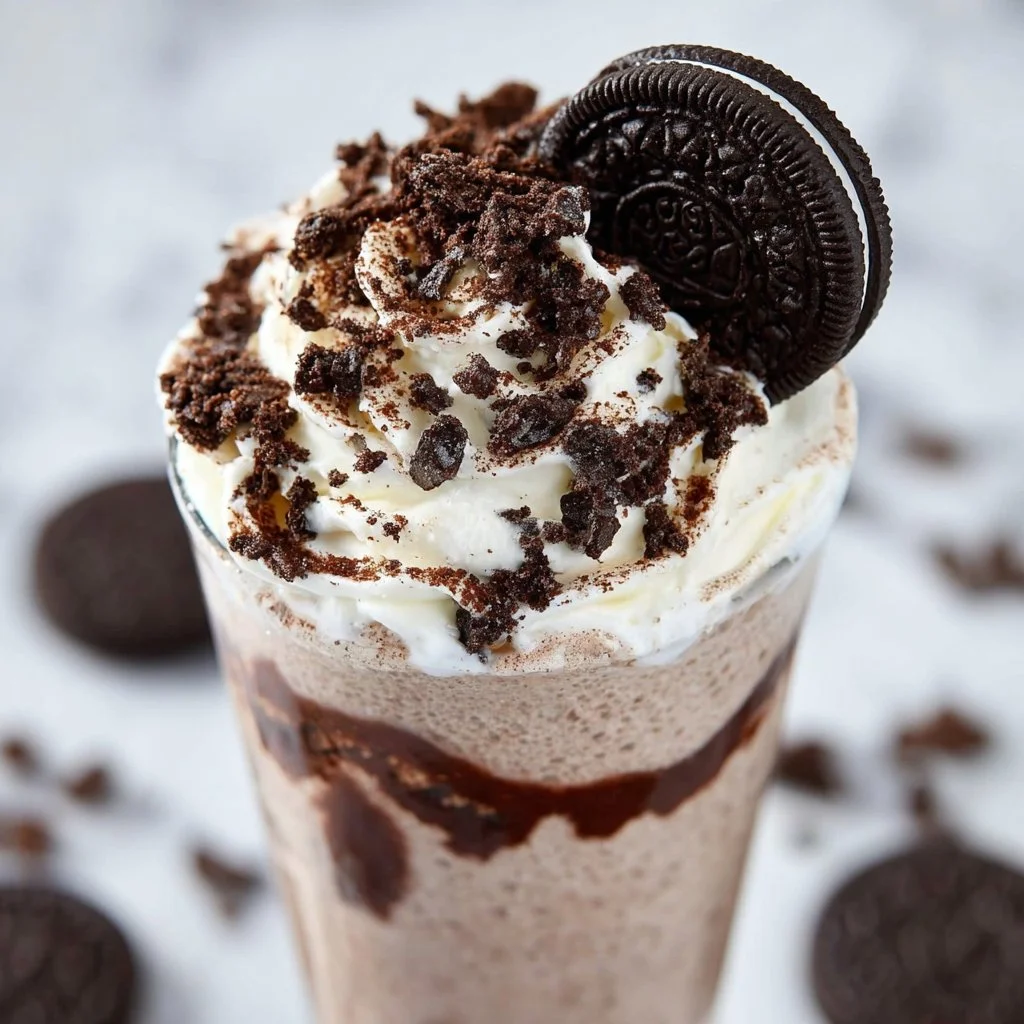
Oreo Milkshake
Whip Up a Delightful Oreo Milkshake: A Sweet Journey into Nostalgia
Hey there, fellow food lovers! Welcome to my cozy corner of the kitchen, where today, we’re diving into a sweet indulgence that’s sure to stir up some fond memories and take our tastebuds on a delicious ride. That’s right; we’re making an Oreo Milkshake! If you’ve ever taken a sip of this creamy, chocolatey goodness, you know it’s not just a drink; it’s a delightful experience packed with nostalgia and comfort.
Picture this: It’s a warm summer day, and the ice cream truck is parked down the street, its jingle echoing through the neighborhood. The excitement builds as you rush outside, clutching your allowance tightly. The moment you lay your eyes on the giant ice cream cones and delicious milkshakes, your eyes light up. Ah, to be a kid again, right? Well, with this Oreo Milkshake recipe, you can channel that joy anytime, anywhere!
This milkshake is the perfect blend of creamy vanilla ice cream, rich chocolate cookies, and velvety milk, all coming together in one glorious glass. You don’t need fancy ingredients or cooking skills to whip this up; just a little enthusiasm and a love for cookies (and who doesn’t love those?). Plus, it’s a fun way to get your little ones involved in the kitchen!
As we go through this delightful journey of creating the perfect Oreo Milkshake, you’ll find tips, tricks, and creative twists that I’ve picked up over the years. So, grab your blender, put on your favorite tunes, and let’s get shaking – it’s time for some deliciousness!
Personal Story
Let me take you back a few years to one of my favorite childhood memories. It was a scorching July afternoon, and my friends and I were gathered for a backyard movie night under the stars. My mom decided to surprise us all with homemade Oreo Milkshakes!
I remember her filling the blender as we gathered around, our excitement bubbling just like the concoction inside. The sound of the blender filled the air, a melody of whirring that meant something delicious was coming our way. When those frosty milkshakes were finally poured into our cups, topped with whipped cream and a single Oreo balancing precariously on top, our eyes lit up with delight.
Sipping on that creamy treat while snuggled in blankets under the stars made that summer night feel magical. Now, years later, every time I blend up an Oreo Milkshake, it transports me back to that joyful evening, filled with laughter, sticky fingers, and endless chatter among friends. That’s the beauty of food—it has a way of connecting us to our happiest moments and the people we cherish most. And today, I’m here to help you create a new memory or two with this delicious treat!
Ingredients
Here’s what you’ll need to create your own scrumptious Oreo Milkshake. Let’s talk ingredients!
-
Oreo Cookies (6-8 cookies)
Classic Oreo cookies are the star of this show! Their chocolatey crunch pairs perfectly with the sweetness of creamy ice cream. Can’t find Oreos? Try any chocolate sandwich cookie you love—it’ll work just as well! -
Vanilla Ice Cream (2 cups)
The creaminess of vanilla ice cream is what gives this shake its luxurious texture. If you’re looking for a lighter option, low-fat or dairy-free ice cream can still give you that delightful creamy feel. -
Milk (1 cup)
Whole milk adds richness to our shake, but you can use any type of milk—almond, oat, or even chocolate milk for an extra flavor punch! -
Whipped Cream (for topping)
A dollop of whipped cream on top not only makes your milkshake look fantastic but also adds a lovely creamy finish. Store-bought is great, or you can whip it up fresh if you’re feeling adventurous! -
Additional Oreos (for garnish)
Crushed or whole, these cookies add a lovely crunchy surprise as you sip on your shake. Plus, they make for a pretty presentation!
Step-by-Step Instructions
Alright, let’s get down to business and whip up this irresistible Oreo Milkshake! Follow these simple steps to enjoy the most delightful treat:
-
Gather Your Ingredients
Prep your workspace by laying out all your ingredients. This helps to make the process smoother and more organized. You’ll want your ice cream slightly softened for easier blending, so dig in and let it sit for a few minutes while you grab your blender. -
Crush the Oreos
Grab 6-8 Oreo cookies and gently break them into pieces. You can crush them in a plastic bag with a rolling pin or by using the blender for a few quick pulses. We want a mix of fine crumbs and larger chunks for that perfect texture! -
Blend It Up!
Pour the crushed cookies into your blender, followed by the vanilla ice cream and milk. Make sure to add the milk gradually—if you like your milkshake thick, start with ¾ cup and add more if needed. Pop the lid on and blend on high until it reaches a smooth and creamy consistency. Pause to scrape down the sides if needed. -
Adjust the Consistency
Check your milkshake’s consistency. Too thick? Add a splash of milk. Too thin? Toss in another scoop of ice cream! Blend until perfectly combined, and you’re almost there! -
Taste Test
Here comes the fun part! Get a straw or a spoon, taste a little, and see if it needs more cookie crumbles or even a pinch of chocolate syrup if you’re feeling extra cheeky. This is the time to personalize your shake based on your unique taste preferences! -
Serve with Style
Pour your Oreo Milkshake into chilled glasses (this keeps it cold for longer). For the ultimate presentation, top with whipped cream, crushed Oreos, and maybe even a drizzle of chocolate syrup. -
Get Ready to Enjoy!
Dive into that glorious shake with a straw or spoon and share it with your favorite people—or keep it all to yourself if you prefer! Get cozy and enjoy every sip.
Serving Suggestions
To present your delightful Oreo Milkshake, serve it in tall, frosty glasses topped with a generous swirl of whipped cream. You can sprinkle some crushed Oreos on top for an eye-catching finish. For a truly decadent treat, consider pairing it with a slice of chocolate cake or some freshly baked cookies on the side. Who said you can’t have dessert with dessert?
Recipe Variations
Want to switch things up? Here are a few creative twists you can try with your Oreo Milkshake:
- Minty Fresh: Add a drop of peppermint extract and use mint Oreos for a refreshing mint chocolate flavor!
- Peanut Butter Bliss: Toss in a couple of spoonfuls of peanut butter for an indulgent and nutty version.
- Chocolate Lovers: Use chocolate ice cream instead of vanilla for an extra chocolatey experience—an absolute must-try for chocolate enthusiasts!
- Extra Crunch: Fold in some crushed nuts or even a few scoops of your favorite brownie bites for extra texture and flavor.
- Dairy-Free Delight: Substitute traditional ingredients with almond milk, cashew ice cream, and vegan Oreos for a delicious dairy-free version that still offers all the satisfaction!
Chef’s Notes
Creating this Oreo Milkshake has been a delightful journey for me over the years. Each time I blend up this treat, I’m reminded of those joyful summer nights with my friends. Sometimes, I play around with flavors and ingredients! Once, I tried mixing in some espresso powder for a coffee-infused Oreo shake, and let me tell you, it was an absolute game changer for those mornings when you need a little extra caffeine. Food truly evolves, just like the memories attached to it.
FAQs and Troubleshooting
1. My milkshake is too thick. What should I do?
If your milkshake ends up thicker than you’d like, simply add a splash more milk and blend again. Start with small amounts until it reaches your desired consistency.
2. Can I use regular milk instead of ice cream?
While milk can add creaminess, it won’t replicate the thickness of ice cream. Stick with ice cream for that perfect shake!
3. What’s a good substitute for vanilla ice cream?
If you’re out of vanilla, any flavor of ice cream will do! Just remember that it will change the final flavor of your shake—try chocolate or cookies and cream for a fun twist.
4. How can I make my Oreo Milkshake healthier?
You can reduce the calories slightly by using low-fat ice cream or yogurt as a base and adding less sugar or cookies than the recipe calls for. It may not be as indulgent, but it’ll still be a tasty treat!
Nutritional Info
(If you want to keep track of the nutritional information for your Oreo Milkshake, here’s a rough estimate per serving:)
- Calories: 500-600
- Protein: 10g
- Carbohydrates: 70g
- Sugars: 55g
- Fat: 25g
(Note: Values may vary based on exact ingredients used.)
So, there you have it! Just a few simple steps to create an Oreo Milkshake that’s bound to become a favorite in your household. Remember to savor the process, enjoy the little moments in the kitchen, and find joy in home-cooked treats. Happy shaking, my fellow foodies! 🍦🥛
Print
Oreo Milkshake
- Total Time: 5 minutes
- Yield: 2 servings 1x
- Diet: Vegetarian
Description
A delightful and creamy Oreo Milkshake that captures the joy of childhood memories.
Ingredients
- 6–8 Oreo Cookies
- 2 cups Vanilla Ice Cream
- 1 cup Milk
- Whipped Cream (for topping)
- Additional Oreos (for garnish)
Instructions
- Gather your ingredients.
- Crush the Oreos.
- Blend it up!
- Adjust the consistency.
- Taste test.
- Serve with style.
- Get ready to enjoy!
Notes
Consider variations like adding mint, peanut butter, or using different ice cream flavors for creative twists.
- Prep Time: 5 minutes
- Cook Time: 0 minutes
- Category: Dessert
- Method: Blending
- Cuisine: American
Nutrition
- Serving Size: 1 serving
- Calories: 550
- Sugar: 55g
- Sodium: 250mg
- Fat: 25g
- Saturated Fat: 15g
- Unsaturated Fat: 5g
- Trans Fat: 0g
- Carbohydrates: 70g
- Fiber: 2g
- Protein: 10g
- Cholesterol: 50mg
Keywords: Oreo, milkshake, dessert, summertime, ice cream
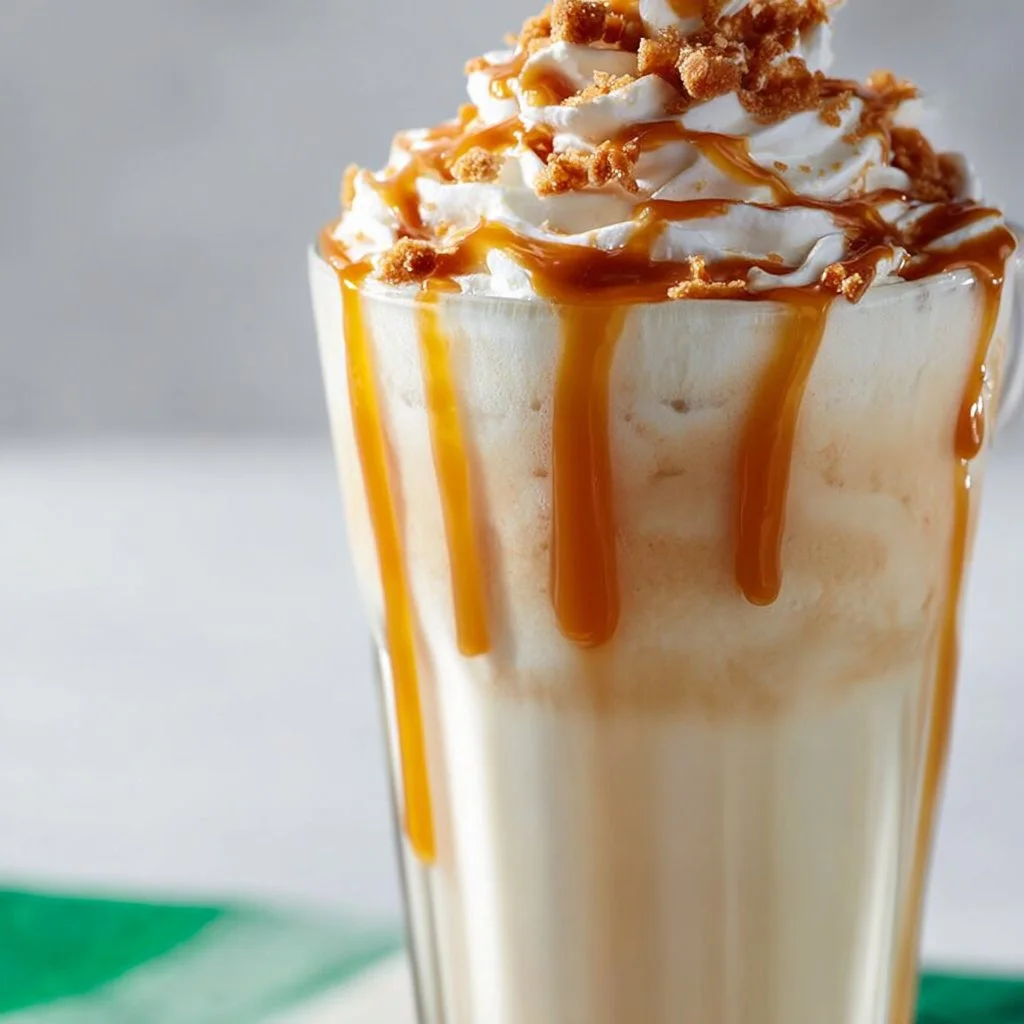
Salted Caramel Milkshake
Salted Caramel Milkshake: A Dreamy Indulgence
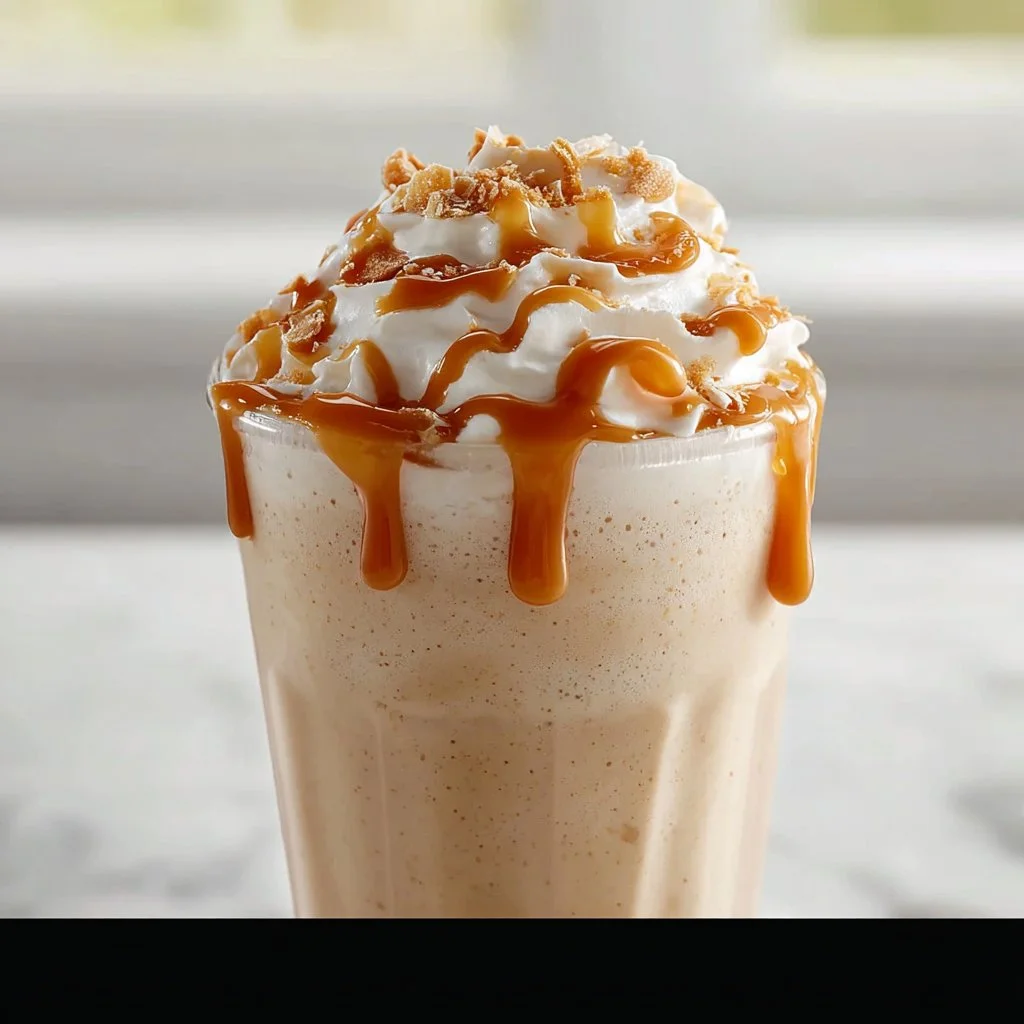
Welcome to my kitchen, food lovers! Today, we’re diving into a treat that’s sure to create a heavenly smile on your face and a little dance in your heart. Get ready for the ultimate Salted Caramel Milkshake! This luscious blend of creamy vanilla ice cream, rich caramel sauce, and a touch of salt creates a flavor explosion that makes indulging feel like a party — because let’s be honest, sometimes we all need a sweet escape. So grab your aprons, and let’s whip up a milkshake that’s as memorable as a warm hug on a chilly day.
A Sweet Memory Resurrected
This milkshake isn’t just any ordinary shake for me; it’s a delightful reminder of that unforgettable summer during my college days. One lazy afternoon, my friends and I decided to take a break from our relentless study sessions and do something fun. We ambled our way to a charming little diner, famed for its decadent desserts. The moment we walked in, the aroma of freshly whipped cream and melted caramel danced through the air, sparking a craving that pulled us straight to the milkshake menu.
After some serious deliberation (you know the kind where it feels like time has stopped?), I ordered their famous salted caramel milkshake. You guys, it was bliss in liquid form. That silky sweetness hit all the right notes! Sipping that shake took me to cloud nine, and I can still feel the laughter and chatter swirling around that small diner as we indulged. It was one of those moments that stick with you, and since then, I’ve been on a mission to perfect my own version. So, let’s create some memories together while we blend this delightful concoction!
Ingredients
Here’s what you’ll need to make this sensational Salted Caramel Milkshake, along with some handy insights and substitutions if you’re out of something or looking to mix it up:
-
Vanilla Ice Cream (4 cups)
The star of our show. This creamy goodness gives the milkshake its base. You can substitute it with dairy-free or vegan ice cream if you prefer. -
Whole Milk (1 cup)
Helps to blend the ice cream smoothly, creating that milkshake texture we love. You can swap it with almond milk or oat milk if you’re looking for a lactose-free option. -
Caramel Sauce (1/2 cup)
Go for store-bought for simplicity, but homemade is always a treasured touch! If you don’t have caramel on hand, try using butterscotch sauce. -
Sea Salt (1/2 teaspoon)
This is the magic element that balances the sweetness and brings out the flavors. Use a flaky sea salt for texture—trust me, it makes a difference! -
Whipped Cream (1 cup)
Smooth and fluffy topping for that perfect finish. You can top it with homemade whipped cream or store-bought if you’re in a hurry. -
Chocolate or Caramel Syrup (for drizzling)
Optional, but come on, who could resist? Drizzling a touch of syrup elevates your shake to a whole new level. Use it generously!
Step-by-Step Instructions
Now, let’s get our hands dirty and create this creamy dream! Follow these steps, and I promise you’ll not only enjoy crafting this masterpiece but maybe even dance a little while waiting.
-
Gather Your Ingredients
First things first, gather all your ingredients. This step might seem basic, but believe me, it helps keep things organized, and less mess equals more fun! -
Blend It Up
In a blender, combine 4 cups of vanilla ice cream, 1 cup of whole milk, and 1/2 cup of caramel sauce. This is where the magic starts! Don’t be afraid to dive in with a little enthusiasm. For a super creamy shake, blend on a medium speed until smooth, about 30 to 45 seconds.Chef Tip: If your shake is too thick, add a splash more milk until you reach your desired consistency. Remember, you can always add but can’t take away!
-
Season It Right
Now it’s time to add 1/2 teaspoon of sea salt to the blender. Blend for another 10 seconds to incorporate that delightful saltiness, balancing out that sweet caramel flavor. -
Taste Test!
This part is perhaps the most important step—taste! Isn’t that the best part of cooking? If you want a hint more sweetness, feel free to add a bit more caramel and blend it again. -
Get Ready to Serve
Grab your favorite tall glasses or milkshake mugs— presentation is key! Drizzle a generous amount of chocolate or caramel syrup down the insides of the glass, and then pour in your luscious milkshake. -
Top It Off
Finish it off with a hearty dollop of whipped cream on top. You can go wild here—add as much or little as you like! If you want to get fancy, sprinkle a little extra sea salt on top for that stylish touch. -
Chill and Enjoy!
Grab your favorite straw, and dive right in. And don’t forget to take a moment to admire your creation!
Serving Suggestions
Your Salted Caramel Milkshake will look fabulous just as it is, but here’s a little extra something: pair it with some homemade cookies or a slice of warm chocolate fudge cake for an indulgent treat that’ll make your dessert dreams come true. Guests will rave about this dreamy combination!
Recipe Variations
Now that you know the basic recipe, let’s mix it up a bit! Here are some delicious variations to keep things interesting:
-
Chocolate Salted Caramel Milkshake: Add a couple of tablespoons of cocoa powder or a handful of chocolate chips to your blender for a rich, chocolatey twist.
-
Nutty Caramel Bacon Milkshake: Crumble some crispy bacon on top and swirl in some crushed nuts for a smoky, savory note.
-
Pumpkin Spice Salted Caramel Milkshake: In fall, swap in pumpkin ice cream and add a sprinkle of pumpkin spice to the mix for a seasonal delight.
-
Banana Salted Caramel Shake: Toss in a ripe banana before blending for a fruity flavor that complements the caramel beautifully.
-
Vegan Salted Caramel Shake: Use coconut or almond milk, and a dairy-free ice cream for a plant-based treat that everyone can enjoy!
Chef’s Notes
This Salted Caramel Milkshake has come a long way since that summer in the diner. Over the years, I’ve experimented with various ingredients — different types of ice cream, homemade caramel sauce, and new flavor pairings. It’s beautiful to see how something can evolve from a beloved memory to a staple in my kitchen. I often enjoy making this milkshake when friends come over, and no matter the occasion, it always hits the sweet spot! It’s not just about the flavors; it’s about the laughter and joy that come with sharing good food.
Oh, and a funny story for you! One time, I had a little mishap with the blender while making this shake for a party. I hit the wrong speed, and let’s just say caramel was everywhere. We all shared a good laugh while cleaning up that sticky mess, but the milkshakes still turned out to be a crowd-pleaser, proving that sometimes the mishaps bring the best memories!
FAQs and Troubleshooting
1. My Milkshake is too thick! What should I do?
- Add a splash of milk a tablespoon at a time to dilute it until you reach your desired consistency.
2. How can I store leftover milkshake?
- You can store it in an airtight container in the freezer. Just remember to thaw it slightly before trying to drink it again.
3. How do I make my milkshake even sweeter?
- You can blend in a little more caramel sauce or use flavored syrups, like vanilla or butterscotch, for an added kick!
4. Can I make this the day before?
- Milkshakes are best enjoyed fresh, but if you’re prepping ahead, mix everything and store it in the fridge before blending it fresh to serve.
Nutritional Info
While indulging is the key to enjoying a Salted Caramel Milkshake, keeping in mind nutritional content is always a good idea. An average serving of this milkshake is usually around 600 calories, depending on your ingredient choices. It’s made up mostly of carbohydrates and sugar, with some protein coming from the ice cream and milk. It’s meant to be a treat, so enjoy it occasionally!
There you have it, my delightful food friends! Your homemade Salted Caramel Milkshake awaits! Whether it’s a sunny afternoon or a cozy evening in, treat yourself to this concoction that’s sure to bring warmth and sweet joy. You’ll find that every sip sparks a memory and every batch creates another story. Happy blending, and remember to share the love!
Print
Salted Caramel Milkshake: A Dreamy Indulgence
- Total Time: 10 minutes
- Yield: 4 servings 1x
- Diet: Vegetarian
Description
A luscious blend of creamy vanilla ice cream, rich caramel sauce, and a touch of salt creates a flavor explosion in this delightful milkshake.
Ingredients
- 4 cups Vanilla Ice Cream
- 1 cup Whole Milk
- 1/2 cup Caramel Sauce
- 1/2 teaspoon Sea Salt
- 1 cup Whipped Cream
- Chocolate or Caramel Syrup (for drizzling)
Instructions
- Gather Your Ingredients
- Blend It Up: In a blender, combine the ice cream, milk, and caramel sauce, blending until smooth.
- Season It Right: Add the sea salt and blend for another 10 seconds.
- Taste Test!
- Get Ready to Serve: Drizzle syrup inside the glasses and pour in the milkshake.
- Top It Off: Add whipped cream and extra sea salt for garnish.
- Chill and Enjoy!
Notes
This milkshake pairs well with cookies or a slice of chocolate fudge cake.
- Prep Time: 10 minutes
- Cook Time: 0 minutes
- Category: Dessert
- Method: Blending
- Cuisine: American
Nutrition
- Serving Size: 1 serving
- Calories: 600
- Sugar: 75g
- Sodium: 200mg
- Fat: 20g
- Saturated Fat: 10g
- Unsaturated Fat: 8g
- Trans Fat: 0g
- Carbohydrates: 84g
- Fiber: 0g
- Protein: 10g
- Cholesterol: 50mg
Keywords: milkshake, dessert, salted caramel, ice cream, indulgent treat, sweet drink
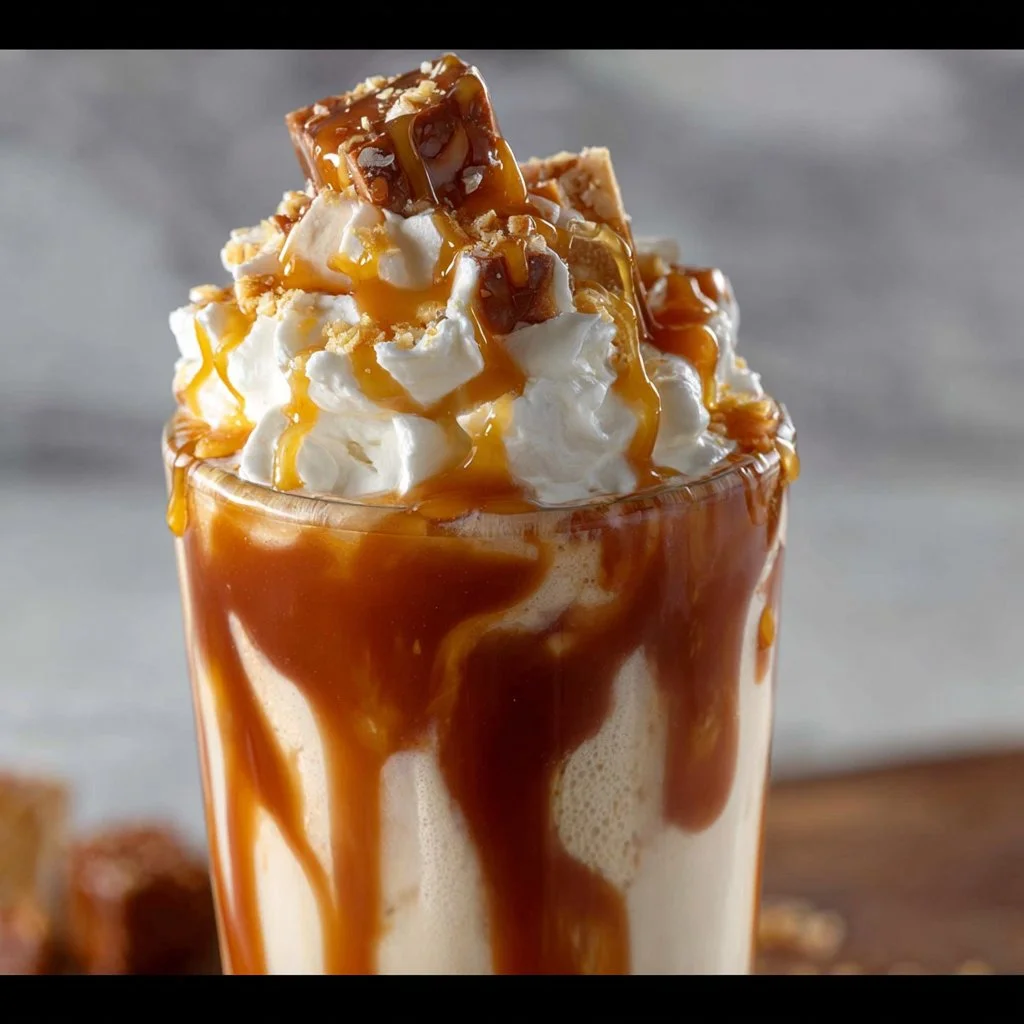
Spiked Caramel Milkshake with Tennessee Whiskey
Indulge in a Spiked Caramel Milkshake with Tennessee Whiskey
Welcome to my cozy corner of the kitchen! I’m Olivia Bennett, and today, we’re diving into the delicious world of milkshakes—specifically, I’ll be guiding you through making a rich and indulgent Spiked Caramel Milkshake with Tennessee Whiskey. If you’re like me and have a penchant for the sweet and boozy, then this delightful treat will make your heart sing.
Imagine this: it’s a sunny afternoon, and you can hear the ice cream truck jingle in the distance. You race outside, filled with excitement and anticipation. This nostalgic feeling of bliss isn’t just for kids; it’s something that can be cherished well into adulthood! There’s something truly special about recreating that joy in the form of a decadent milkshake, and what better way to elevate it than with a splash (or two) of Tennessee whiskey?
This milkshake isn’t just a drink; it’s an experience—rich caramel mixing with creamy ice cream and a kick of whiskey to warm your spirits. It’s perfect for a summer get-together or when you simply need to kick back and treat yourself. So grab your favorite glass, and let’s get started on creating this heavenly concoction together!
A Sweet Memory with a Twist
Growing up, my family had a little tradition of heading to the local diner every Friday night. After a long week filled with school and endless homework, the diner was our haven. One of my fondest memories was the vanilla milkshake that made an appearance every visit. It was thick, creamy, and topped with whipped cream and a cherry. However, it wasn’t until I went to college that I discovered the beauty of adult milkshakes—those incredible creations that combine the nostalgic flavors of childhood with a delightful adult twist.
My friends and I stumbled upon a local bar that offered a “boozy milkshake” many nights out. I remember the first time I tried a whiskey-infused shake; I was taken aback by how expertly the whiskey paired with the caramel and vanilla flavors, creating something truly unforgettable. Fast forward to today, and I find joy in blending those memories with something new, like this Spiked Caramel Milkshake. It reminds me of those carefree nights while also giving me the chance to discuss flavors and cocktails with friends. Isn’t that what food is all about? Creating delicious memories that bring us together!
Ingredients
Here’s what you’ll need to whip up your very own Spiked Caramel Milkshake with Tennessee Whiskey. I’ll give you some tips, too!
-
2 scoops vanilla ice cream
Use the highest quality ice cream you can find! A rich and creamy base is essential for that indulgent texture. If you want to experiment, vanilla bean or caramel ice cream works beautifully too! -
1/2 cup milk
Whole milk will yield a creamier shake, but you can substitute with almond or oat milk for a dairy-free option. Just keep in mind that the flavor will change slightly. -
2 oz Tennessee whiskey
I’m partial to Jack Daniel’s for its smooth flavor. However, if you want more depth, you could try a honey bourbon or rye whiskey for a different kick. -
1/4 cup caramel sauce
You can use store-bought or homemade. If you want an extra touch, add a pinch of sea salt for a salted caramel flavor. -
Whipped cream (for topping)
Because what’s a milkshake without the fluffy topping? Feel free to use whipped coconut cream for a dairy-free option. -
Extra caramel sauce for drizzling
A must for that extra visual appeal (and flavor!). -
Maraschino cherries (for garnish)
A classic nod to childhood milkshakes! You can also use fresh cherries if you’re feeling fancy.
Step-by-Step Instructions
Alright, let’s roll up those sleeves and get mixing! Making this delightful Spiked Caramel Milkshake is as simple as it gets.
Step 1: Gather and Prep
Start by gathering all your ingredients. This is key to a smooth cooking process—nobody wants to be running around the kitchen when they’re ready to blend. Lay out your ice cream, milk, whiskey, and caramel sauce within arm’s reach. If you want to make your whipped cream from scratch, now is a good time to whip that up!
Step 2: Blend it Up!
In a blender, combine the two scoops of vanilla ice cream, milk, whiskey, and caramel sauce. Here’s my favorite chef tip: start with the liquids first! This will ensure everything blends smoothly. Trust me; you don’t want a clingy scoop of ice cream refusing to mix.
Blend until creamy and smooth. If you find your shake is too thick for your preference, feel free to add a splash more milk. If you like it thicker, add a bit more ice cream. Experimenting is half the fun of cooking!
Step 3: Taste Test (Important!)
Before you pour, this is your moment to taste! You might want a little more caramel for sweetness or a touch more whiskey for a kick. This is your creation, so don’t be shy!
Step 4: Serve with Style
Grab your favorite tall glass, and pour in the delicious milkshake. It’s best to tilt the glass slightly as you pour to create that lovely swirl. Now, let’s top it off! Generously add whipped cream on the top—don’t skimp; this is where the fun begins!
Step 5: The Finishing Touches
Drizzle extra caramel sauce over the whipped cream, and add a maraschino cherry on top to complete the classic look. If you’re feeling extra fancy, you can sprinkle some crushed graham crackers or nuts on top for a delightful crunch.
Step 6: Enjoy!
Grab a big straw (or a spoon) and enjoy your Spiked Caramel Milkshake. Share it with friends, sip it slowly, and take a moment to savor the flavors—you deserve it!
Serving Suggestions
This Spiked Caramel Milkshake is best served immediately after blending to enjoy the creamy texture while it lasts. Pair it with a slice of chocolate cake or some buttery popcorn for a movie night that’ll have everyone raving! If you want a full dessert experience, why not serve it alongside caramel brownie bites? Now, that’s a sweet treat combo!
Recipe Variations
Don’t be afraid to get creative! Here are a few ideas for you to mix things up:
- Chocolate Caramel Milkshake: Add a couple of tablespoons of chocolate syrup for a chocolate twist!
- Nutty Caramel Delight: Stir in a spoonful of nut butter for a protein boost and a nutty flavor.
- Coffee Lover’s Shake: Substitute the whiskey with cold brew coffee for a caffeine kick. Yummy!
- Spiced Version: Add a sprinkle of cinnamon or nutmeg for a warm, spiced flavor that’s perfect for cozy nights.
- Vegan Delight: Substitute with coconut or almond milk ice cream and use a vegan caramel sauce for a dairy-free version.
Chef’s Notes
I originally came up with this recipe after a late-night craving hit while reminiscing about those diner milkshakes. You can say I was a little inspired by my surroundings! Over time, I’ve played around with different whiskey brands and flavors, resulting in this perfect combination of sweet and spirited. There’s something magical about caramel and whiskey coming together—like a warm hug on a chilly evening!
Also, don’t feel bad about those extra toppings; life’s too short not to indulge! Trust me; each layer adds to the experience.
FAQs and Troubleshooting
Q: What can I do if my milkshake is too thick?
A: If your milkshake is too thick, simply add more milk, a tablespoon at a time, until you reach your desired consistency.
Q: Can I make this milkshake without alcohol?
A: Absolutely! Just omit the whiskey and perhaps add a dash of vanilla extract for extra flavor!
Q: How can I store leftovers?
A: While these are best enjoyed fresh, you can store leftovers in an airtight container in the freezer for up to an hour. Just give it a quick mix again before serving!
Q: What can I substitute for ice cream?
A: You can use frozen yogurt, dairy-free ice cream, or even a banana for a healthier version. Just keep in mind, the flavor and texture will change a bit.
Nutritional Info (Optional)
*Calories: ~450 (based on standard ingredients, will vary based on substitutions).
*Fat: ~20g
*Carbohydrates: ~60g
*Protein: ~12g
And there you have it! A delightful, indulgent Spiked Caramel Milkshake with Tennessee Whiskey that’s sure to bring back those sweet childhood memories while igniting new ones. Whether you’re enjoying it solo or sharing it with friends, this milkshake is perfect for any occasion. So gather everyone around, give it a try, and embrace the magic of cooking—one delightful sip at a time! Cheers!
Print
Spiked Caramel Milkshake with Tennessee Whiskey
- Total Time: 10 minutes
- Yield: 1 serving 1x
- Diet: Vegetarian
Description
A rich and indulgent milkshake combining creamy vanilla ice cream, warm caramel, and a splash of Tennessee whiskey for an adult twist on a classic treat.
Ingredients
- 2 scoops vanilla ice cream
- 1/2 cup milk
- 2 oz Tennessee whiskey
- 1/4 cup caramel sauce
- Whipped cream (for topping)
- Extra caramel sauce for drizzling
- Maraschino cherries (for garnish)
Instructions
- Gather all your ingredients.
- In a blender, combine the vanilla ice cream, milk, whiskey, and caramel sauce. Blend until creamy and smooth.
- Taste your milkshake and adjust sweetness or whiskey level to your preference.
- Pour the milkshake into a tall glass, tilting it slightly as you pour.
- Add whipped cream generously on top.
- Drizzle extra caramel sauce over the whipped cream and garnish with a maraschino cherry.
- Enjoy your Spiked Caramel Milkshake!
Notes
Feel free to experiment with different ice cream flavors or alcohol types to create your perfect shake.
- Prep Time: 10 minutes
- Cook Time: 0 minutes
- Category: Dessert
- Method: Blending
- Cuisine: American
Nutrition
- Serving Size: 1 serving
- Calories: 450
- Sugar: 60g
- Sodium: 200mg
- Fat: 20g
- Saturated Fat: 10g
- Unsaturated Fat: 8g
- Trans Fat: 0g
- Carbohydrates: 60g
- Fiber: 0g
- Protein: 12g
- Cholesterol: 70mg
Keywords: milkshake, caramel, whiskey, dessert, summer, indulgent
Vanilla Milkshake
Irresistibly Creamy Vanilla Milkshake: A Home Cook’s Delight
Hello, fellow food lovers! Welcome back to my cozy corner of the culinary world. Today, we’re diving into one of the simplest yet most delightful treats you can whip up in your kitchen: the classic vanilla milkshake. There’s something magical about the combination of creamy ice cream, cool milk, and rich vanilla that can transport you right back to those hot summer days of childhood. Remember the joy of hearing the familiar sound of an ice cream truck approaching, and you’d rush outside with a few crumpled bills in hand? Well, this homemade milkshake will rekindle those sweet memories and keep your taste buds singing!
I’ll guide you through crafting the perfect vanilla milkshake from scratch, sharing everything I’ve learned along the way. This isn’t just a recipe; it’s a journey into flavors and nostalgia that celebrates the beauty of simplicity in cooking. So, grab your favorite blender and let’s make some magic happen!
Personal Story
Growing up, Saturday afternoons at my grandparents’ house were a true highlight. After a long week at school, there was nothing better than knowing I’d be ending the week right with my family. My grandmother had a ritual; she’d whip up a batch of thick vanilla milkshakes for us. The kitchen would fill with the joyful sound of blender whirring, and the smell of vanilla would dance through the air. We’d gather around the table, each of us with a tall glass topped off with whipped cream and a cherry, laughing and sharing stories.
Those milkshakes were more than just a treat; they were a tradition, a memory-laden experience that smeared smiles across our faces. It’s these moments that I strive to recreate in my own kitchen, using recipes that foster connection and joy. Making this vanilla milkshake brings back all of those cherished feelings while allowing me to create new memories with my loved ones.
Ingredients
Let’s gather our star players for this delectable vanilla milkshake:
-
Vanilla Ice Cream (2 cups): The base for our milkshake! Always go for high-quality vanilla—real vanilla bean or gourmet ice cream can elevate your shake beyond the ordinary. You can substitute it with dairy-free ice cream if you prefer a vegan option.
-
Milk (1 cup): Whole milk gives the creamiest results, but feel free to use low-fat or plant-based alternatives (like almond, cashew, or oat milk) for lighter options. Just note that the thickness may vary.
-
Vanilla Extract (1 tsp): This enhances the vanilla flavor. Use pure vanilla extract for the best taste. If you’re in a pinch, clear vanilla extract will work too, but it is less flavorful.
-
Whipped Cream (for topping): Nothing says milkshake like a generous dollop of whipped cream! You can buy pre-made or whip some up at home—it’s super easy and much tastier.
-
Maraschino Cherry (for garnish): This is an optional, but classic topping that screams “dessert!”
-
Sprinkles (optional): Because a bit of color makes everything better, right? These aren’t necessary, but they sure do add some fun!
Chef Insight: Don’t be afraid to play around with these ingredients. The beauty of a milkshake lies in its versatility. Adjust milk to ice cream ratio depending on how thick or mild you want it!
Step-by-Step Instructions
Ready to bring this milkshake to life? Let’s get to business!
-
Gather Your Ingredients: It’s always a good idea to have everything within reach. This not only streamlines the process but makes the cooking experience feel effortless.
-
Scoop the Ice Cream: Use a sturdy ice cream scoop to get about 2 cups of vanilla ice cream. If it’s a bit hard, let it sit for a couple of minutes to soften up—this will make blending smoother.
-
Pour in the Milk: Add 1 cup of milk to your blender. If you prefer a thicker milkshake, start with ¾ cup and see how it goes. You can always add more!
-
Add the Vanilla Extract: Pour in 1 teaspoon of pure vanilla extract. This is where the magic happens; it infuses our shake with richness and depth.
-
Blend: Secure the lid tightly on your blender and start on a low speed, gradually increasing it until your mixture is creamy and smooth. This usually takes about 30 seconds to 1 minute, depending on your blender. You want to make sure everything is well combined, but be cautious—over-blending can introduce too much air!
-
Taste Test: Here’s my favorite part! Dip a spoon into your milkshake and give it a taste. If you want a stronger vanilla flavor, feel free to add a splash more extract or a scoop of sugar!
-
Pour and Serve: Grab your favorite tall glasses, and pour the milkshake in, filling them to the rim if you’re feeling indulgent.
-
Top it Off: Add the whipped cream on top like it’s a crown, and finish with a maraschino cherry and sprinkles if you’re feeling extra!
Chef Hack: If you’re worried about messy pouring, use a liquid measuring cup with a spout to transfer your shake into the glasses.
Serving Suggestions
Presenting your vanilla milkshake is all about adding a little flair! Serve them with colorful striped straws, or even place a piece of chocolate or cookie on the side for that extra touch. For a gathering, consider using mason jars—everyone loves a good mason jar moment!
Recipe Variations
-
Chocolate Vanilla Twist: Add 2 tablespoons of chocolate syrup to your blender to create a Chocolate Vanilla Milkshake. You can even blend in some chocolate chips for extra texture!
-
Strawberries and Cream: Throw in half a cup of fresh or frozen strawberries for a delightful strawberry vanilla twist. This not only changes up the flavor but adds a vibrant pink hue!
-
Cookies and Cream: Crush a few Oreo cookies and stir them into the shake before pouring. This is a twist that cookie lovers will not be able to resist!
-
Coffee Kick: For the coffee enthusiasts, try blending in a shot of espresso or a tablespoon of instant coffee granules. The caffeine will give your milkshake a delightful lift!
-
Nutty Vanilla Shake: Add a tablespoon of almond butter or peanut butter for a nutty flavor boost. It pairs beautifully with the vanilla!
Chef’s Notes
This vanilla milkshake recipe has evolved through the years, from a simple combination of just three ingredients made at my grandma’s house to a base I now customize for family and friends. I love how versatile and forgiving milkshakes can be! It’s like a canvas waiting for you to paint your flavor masterpiece.
And let’s not forget—if you have any leftovers (which is rare), you can freeze your milkshake in an ice cube tray and toss them into your morning smoothies for a delicious vanilla kick!
FAQs and Troubleshooting
Q: My milkshake is too thin. What do I do?
A: If you find your milkshake is thinner than you’d like, simply toss in more ice cream and blend again. It’s all about adjusting to your texture preference!
Q: How do I make a thicker milkshake?
A: The secret is to reduce the amount of milk and increase the ice cream. Ice cream is the thickener, so the less milk you use, the creamier your shake will be.
Q: Can I make this dairy-free?
A: Absolutely! Use dairy-free ice cream and a plant-based milk option, like almond or oat milk. You’ll still end up with a delicious milkshake!
Q: How can I store leftovers?
A: If you happen to have any leftovers, pour them into an airtight container and freeze for a future treat. Just blend it with a splash of milk when you’re ready to enjoy it again!
Nutritional Info (if applicable)
For a standard vanilla milkshake made with 2 cups of vanilla ice cream and 1 cup of whole milk, here’s a quick estimate for one serving:
- Calories: Approximately 450-500 calories
- Fat: 18g
- Carbohydrates: 75g
- Protein: 10g
(These values can vary based on specific ingredients used.)
I hope you’re as thrilled as I am to create your very own vanilla milkshake! It’s a beautiful reminder that sometimes, simple pleasures hold the most joy. Whether you’re enjoying it solo or sharing with friends and family, this recipe aims to spark sweetness and fun in every sip. Happy blending, and don’t forget to share those delightful milkshake moments! 🍦✨
Print
Irresistibly Creamy Vanilla Milkshake
- Total Time: 5 minutes
- Yield: 2 servings 1x
- Diet: Vegetarian
Description
A classic vanilla milkshake made with creamy ice cream, cool milk, and rich vanilla, perfect for rekindling childhood memories.
Ingredients
- 2 cups Vanilla Ice Cream
- 1 cup Milk
- 1 tsp Vanilla Extract
- Whipped Cream (for topping)
- Maraschino Cherry (for garnish)
- Sprinkles (optional)
Instructions
- Gather Your Ingredients.
- Scoop the Ice Cream.
- Pour in the Milk.
- Add the Vanilla Extract.
- Blend until creamy and smooth.
- Taste Test.
- Pour and Serve.
- Top it Off.
Notes
Experiment with different toppings or flavors to customize your milkshake experience. You can make it dairy-free by using plant-based ingredients.
- Prep Time: 5 minutes
- Cook Time: 0 minutes
- Category: Dessert
- Method: Blending
- Cuisine: American
Nutrition
- Serving Size: 1 serving
- Calories: 450
- Sugar: 60g
- Sodium: 100mg
- Fat: 18g
- Saturated Fat: 11g
- Unsaturated Fat: 3g
- Trans Fat: 0g
- Carbohydrates: 75g
- Fiber: 0g
- Protein: 10g
- Cholesterol: 70mg
Keywords: milkshake, vanilla, dessert, ice cream, creamy, nostalgic
Ninja Slushie Caramel Milkshake Recipe
Ninja Slushie Caramel Milkshake Recipe
Welcome to my kitchen! If you’ve ever been on a hot summer day, yearning for a refreshingly sweet treat that perfectly balances indulgence and nostalgia, you’re in for a real treat today. I’m Olivia Bennett, and today we’re diving into the world of delightful milkshakes—not just any milkshakes, but the fabulously fun Ninja Slushie Caramel Milkshake! Think of it as a cool breeze on a hot day, a comforting hug in a cup, and an adventure in flavor all mixed together.
Picture this: it’s a sunny Saturday afternoon, and the kids are running around the yard while the grill sizzles with delicious barbecue. You’re seeking something to cool off with—maybe to share or indulge in solo. That’s when the Ninja Slushie Caramel Milkshake comes into play, transforming simple ingredients into something magical. With the swoosh of a Ninja blender (or any trusty blender), you can create a delightful concoction that mesmerizes taste buds and fills your home with the sweet aroma of caramel.
This isn’t just any milkshake; it’s a fun twist on the classic, enhanced with yummy caramel swirls and frosty goodness that blend together to create an experience you’ll want to revisit over and over again. So, whether it’s a sunny day or an enjoyable night in, let’s whip up something that not only tastes absolutely yummy but also takes us back to warm, fuzzy memories of childhood ice cream trucks and lazy weekends.
Personal Story
Let me tell you about my very first milkshake experience. I was a little girl, and every summer, my family would take a day trip to the beach. Before hitting the sandy shores, we’d always stop at this charming little diner known for its milkshakes. I remember the excitement in my tummy as I gazed at the menu with all its whimsical flavors, but my heart was set on one thing: the creamy caramel milkshake.
The waitress would bring it to our table in this tall, frosty glass, topped with whipped cream and an extra drizzle of caramel that glistened like sunshine. That moment was more than just a drink; it was about the smiles, laughter, and family moments we shared around that table. I can’t help but giggle now thinking about my dad trying to keep the whipped cream from reaching his nose. It’s those simple pleasures and cherished memories that inspire this colorful Ninja Slushie Caramel Milkshake recipe today!
Ingredients
-
Ice Cream:
- Vanilla or Caramel Flavor: A rich vanilla makes a great base, while caramel-flavored ice cream adds an extra punch. Feel free to swap with dairy-free options if you’re looking for a vegan treat—coconut or almond milk ice creams work wonders!
-
Milk:
- Whole or Almond Milk: About 1 cup of whole milk for creaminess, or almond milk for a lighter version. You can adjust the quantity based on your desired thickness.
-
Caramel Sauce:
- Store-bought or Homemade: Look for quality caramel sauce that will delight your taste buds. If you’re feeling adventurous, try your hand at making it from scratch using butter, sugar, and cream for a fun kitchen project!
-
Ice:
- Crushed or Cubed Ice: Use more or less depending on your desired slushie texture. Crushed ice is fantastic for achieving that refreshing slush consistency!
-
Whipped Cream:
- A Must-Have Topping: You can make it fresh or use pre-made. Don’t forget to add an extra drizzle of caramel on top. It’s all about the presentation!
-
Optional Toppings:
- Chocolate Shavings, Nuts, or Sprinkles: Get creative! You can customize your milkshake with these fun toppings for added crunch and flair.
Step-by-Step Instructions
Alright, let’s get our hands a bit messy, shall we? Grab your apron and let’s blend up some magic!
Step 1: Gather Your Ingredients
Start by gathering all your ingredients on your countertop. This will ensure you have everything you need at your fingertips. Nobody enjoys running around the kitchen mid-blend, right?
Step 2: Blend the Base
In your mighty Ninja blender, add about 2 cups of vanilla ice cream, followed by the milk. Start with 1 cup; you can always add more later for thickness. Secure the top and blend until smooth. Pro tip: If your milkshake feels too thick, gradually add a splash of milk until you achieve your desired consistency.
Step 3: Add the Caramel
Now comes the fun part—drizzle about ¼ cup of caramel sauce into the mix while the blender runs. The caramel swirls will infuse a delightful flavor into your milkshake. Note: you may wish to adjust the caramel based on how sweet you prefer your shake.
Step 4: Ice, Ice, Baby!
Toss in about 1-2 cups of ice (depending on how slushy you want it), and blend again for about 30 seconds until crushed and well-combined. This is where the Ninja’s power shines! You should see a luscious, creamy mix taking shape.
Step 5: Taste Test
This is my favorite step! Give your milkshake a taste. If you think it needs a little more caramel or is too thick, go ahead and adjust. It’s all about personal preference here!
Step 6: Serve It Up!
Grab your fanciest glasses (or the fun ones your kids picked out), and pour your Ninja Slushie Caramel Milkshake right in. Make sure you see those delightful layers!
Step 7: Toppings Galore!
Dollop on a whirlwind of whipped cream and drizzle with an extra swirl of caramel. You could even sprinkle chocolate shavings, nuts, or rainbow sprinkles on top for a festive touch. Ta-da!
Serving Suggestions
Present your beautiful milkshake topped with a bright maraschino cherry for an extra pop of color. Hand out colorful straws or even set up a mini milkshake bar with various toppings so everyone can customize their creations. It makes for great conversation and a wonderful way to connect over something sweet!
Recipe Variations
- Nutty Caramel Chocolate: Blend in some chocolate ice cream, and sprinkle chopped nuts on top for that satisfying crunch.
- Salted Caramel: A touch of sea salt can elevate your milkshake game to a whole new level by balancing the sweetness of caramel beautifully.
- Banana-Fudge Delight: Toss in half a ripe banana to add natural sweetness and creaminess, then finish off with a drizzle of fudge.
- Coconut Bliss: Use coconut milk ice cream and top with toasted coconut flakes for a tropical twist.
- Cookie Lover’s Dream: Add crushed cookies to the mix and as topping for a delicious cookie-and-cream-inspired shake.
Chef’s Notes
This Ninja Slushie Caramel Milkshake recipe has come a long way since I first tried making it years ago! I’ve fiddled with different ice cream flavors, caramel types and even experimented with adding seasonal spices like cinnamon or nutmeg to see what fits best. Every time I whip this up, it brings back memories of family trips, friends gathered in my kitchen, and lots of giggles over who can make the tallest whipped cream mountain!
Don’t ever let kitchen messes discourage you—some of the best culinary creations come from those spontaneous moments. Remember to take a look back at your “oops” moments—they often lead to the best stories and smiles!
FAQs and Troubleshooting
-
What if my milkshake is too thin?
Don’t fret! Just add more ice or ice cream and blend it again until you get that creamy thickness you crave. -
Can I make it ahead of time?
While it’s best enjoyed fresh, you can store it in the freezer for a short time. Just remember to let it sit for a bit before serving again to soften it up! -
Can I use a different flavor of ice cream?
Absolutely! The beauty of a milkshake is its versatility. Try experimenting with mint chocolate chip, cookies and cream, or even some fruity flavors for a summer twist. -
What if I don’t have a blender?
No blender? No problem! Consider using a milkshake maker if you have one. Alternatively, mix your ice cream and milk in a large jar with a tight-fitting lid and shake, shake, shake until blended!
Nutritional Info (Optional)
- Serving Size: 1 medium milkshake
- Calories: Approximately 500 calories (depending on ingredients used)
- Total Fat: 25g
- Carbohydrates: 65g
- Sugars: 45g
- Protein: 10g
So there you have it, my fabulous Ninja Slushie Caramel Milkshake recipe! I hope you enjoy making it as much as I do. Embrace the joy of creating something delicious from the heart. Let’s keep cooking, sharing stories, and making cherished memories together. Happy blending! 🍦💕
Print
Ninja Slushie Caramel Milkshake
- Total Time: 10 minutes
- Yield: 2 servings 1x
- Diet: Vegetarian
Description
A delightfully refreshing and indulgent milkshake, enhanced with caramel swirls for a nostalgic treat on hot summer days.
Ingredients
- 2 cups Vanilla or Caramel Ice Cream
- 1 cup Whole or Almond Milk
- ¼ cup Caramel Sauce (store-bought or homemade)
- 1–2 cups Crushed or Cubed Ice
- Whipped Cream (for topping)
- Optional Toppings: Chocolate Shavings, Nuts, Sprinkles
Instructions
- Gather your ingredients on your countertop.
- Blend the base by adding ice cream and milk in the blender.
- Add the caramel sauce while blending.
- Toss in the ice and blend until well-combined.
- Taste your milkshake and adjust flavors as desired.
- Serve the milkshake in glasses, showcasing delightful layers.
- Dollop whipped cream and add toppings on top.
Notes
For added flavor, try variations like Nutty Caramel Chocolate or Salted Caramel. Perfect for customizing with your favorite toppings!
- Prep Time: 10 minutes
- Cook Time: 0 minutes
- Category: Dessert
- Method: Blending
- Cuisine: American
Nutrition
- Serving Size: 1 milkshake
- Calories: 500
- Sugar: 45g
- Sodium: 150mg
- Fat: 25g
- Saturated Fat: 15g
- Unsaturated Fat: 7g
- Trans Fat: 0g
- Carbohydrates: 65g
- Fiber: 1g
- Protein: 10g
- Cholesterol: 80mg
Keywords: milkshake, caramel, dessert, summer treat, sweet


