
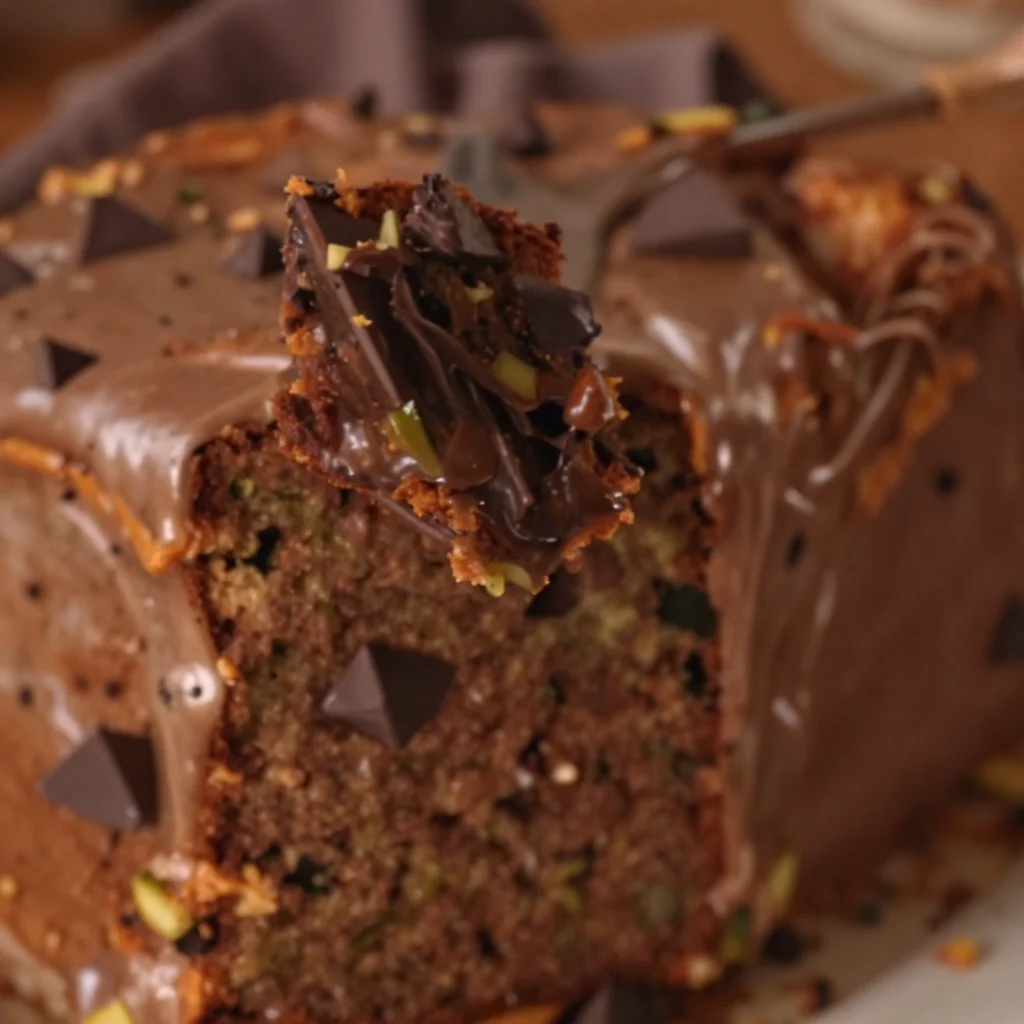
One-Bowl Chocolate Zucchini Cake: Easy Weeknight Dessert
Chocolate Zucchini Cake: A Deliciously Moist Treat
Welcome to my kitchen, dear friends! If there’s one thing that brings me an overwhelming sense of joy, it’s baking something delicious that becomes an instant hit with family and friends. There’s a special magic that happens when you combine simple ingredients to create something extraordinarily delightful. Today, I’m excited to share with you my go-to recipe for Chocolate Zucchini Cake. This lush cake is not only a chocolate lover’s dream, but it also sneaks in some veggies—shh, don’t tell the kids!
This cake is the perfect example of how we can take what seems like a simple ingredient (like zucchini) and transform it into something that feels indulgent and special. So, if you’re ready to experience the rich and moist flavors of this fabulous dessert, grab your apron, and let’s get baking!
A Memory Wrapped in Chocolate
Growing up, I spent countless hours in my grandmother’s kitchen. She had an incredible ability to turn the most mundane ingredients into fantastic desserts. One summer afternoon, I remember walking into her house, greeted by the sweet, chocolatey aroma wafting through the air. She was experimenting with a new recipe—a chocolate cake with zucchini! At first, I was hesitant. Zucchini in a cake? But as I took my first bite, all my doubts vanished. The cake was rich, moist, and oh-so-delicious!
From that day forward, chocolate zucchini cake became a staple at our family gatherings. We shared stories, laughter, and, of course, second servings of this magical cake. Creating this recipe today isn’t just about baking; it’s about cherishing those memories and passing them on through food.
Ingredients: What You’ll Need
To whip up this delightful Chocolate Zucchini Cake, gather the following ingredients:
-
Zucchini (2 cups, grated)
- Moisture is key! Zucchini keeps the cake tender, so don’t skimp on it. You can substitute with carrots for a different flavor profile.
-
All-purpose flour (1 ¾ cups)
- This is the backbone of your cake. If you’re feeling adventurous, try whole wheat flour for added fiber or gluten-free flour for a gluten-free version.
-
Unsweetened cocoa powder (¾ cup)
- Cocoa adds deep chocolate flavor. Make sure it’s unsweetened so you can control the sweetness of your cake!
-
Granulated sugar (1 ½ cups)
- Sweetness is essential, but if you’re looking to cut sugar, honey or maple syrup can be excellent natural sweeteners.
-
Brown sugar (½ cup)
- This adds moisture and a hint of caramel flavor. Light or dark will work; the darker will give you a richer taste.
-
Baking soda (1 tsp)
- This is your leavening agent. Make sure it’s fresh for the best rise.
-
Baking powder (1 tsp)
- A backup leavener to ensure a fluffy cake. Always check the expiration date!
-
Salt (½ tsp)
- Enhances all the flavors. Don’t leave it out—you’ll be surprised how much it contributes!
-
Eggs (2 large)
- They bind the ingredients and add richness. If you need an egg substitute, consider using flaxseed meal or applesauce (1/4 cup per egg).
-
Vanilla extract (1 tsp)
- A simple yet essential flavor booster. You can use almond extract for a different twist.
-
Vegetable oil (¾ cup)
- Keeps the cake moist. If you prefer a lighter option, try using unsweetened applesauce!
-
Chocolate chips (1 cup, optional)
- Add these to bring an extra chocolate punch! You can swap them for nuts or dried fruit for added texture.
Step-by-Step Instructions: How to Create Your Masterpiece
-
Preheat Your Oven:
Preheat your oven to 350°F (175°C). This ensures your cake bakes evenly from the get-go! While the oven warms up, take a moment to gather your ingredients and enjoy the delightful aroma of the cocoa. -
Prepare Your Baking Pan:
Grease and flour a 9×13 inch baking pan. This prevents the cake from sticking. You can also line it with parchment paper for easy removal and cleanup. Trust me, you want to get this cake out in one piece! -
Grate the Zucchini:
Grate the zucchini using a box grater or food processor. No need to peel it; the skin adds color! Once grated, place it in a clean kitchen towel, twist it, and squeeze out excess moisture. This step is crucial for avoiding a soggy cake. -
Mix Dry Ingredients:
In a large bowl, whisk together the flour, cocoa powder, baking soda, baking powder, and salt. This step helps to evenly distribute the dry ingredients, ensuring every bite is just as delicious as the last! -
Combine Wet Ingredients:
In another bowl, whisk the granulated sugar, brown sugar, eggs, vanilla extract, and vegetable oil until smooth. You should see a lovely, glossy mixture. This is where the magic starts! If you can sneak a taste at this point, go for it—just remember, we’re saving room for cake! -
Mix Everything Together:
Gradually add the dry ingredients into the wet ingredients, stirring until just combined. Don’t overmix—lumps are okay! Then, gently fold in the grated zucchini and chocolate chips if you’re using them. You want to keep that wonderful texture! -
Pour Into the Pan:
Pour the batter into the prepared baking pan, spreading it evenly. Take a moment to admire the deep, dark color of the batter. It’ll rise beautifully in the oven! -
Bake:
Bake in your preheated oven for 30–35 minutes, or until a toothpick inserted into the center comes out clean. Keep an eye on it; ovens can vary. The cake should spring back when lightly touched. -
Cool Down:
Let the cake cool in the pan for about 15 minutes before transferring it to a wire rack to cool completely. This cool-down is the hardest part, but trust me; it’s worth the wait!
Serving Suggestions: Treat Your Guests!
Once your cake is cool, it’s time to slice and serve! For a delightful presentation, dust the top with powdered sugar or top with a scoop of vanilla ice cream. If you’re feeling extra indulgent, drizzle a warm chocolate ganache over it! Serve it on a cozy plate, maybe with a sprig of mint for that pop of color.
Recipe Variations: Creative Twists to Try
- Spicy Chocolate: Add a pinch of cayenne pepper or cinnamon to the batter for a warm, spicy kick.
- Nuts & Zucchini: Fold in chopped walnuts or pecans for added crunch.
- Fruity Delight: Mix in some shredded coconut or even crushed pineapple for an exotic twist.
- Gluten-Free: Use a gluten-free flour blend to make it suitable for gluten-free eaters.
- Sugar-Free Version: Substitute granulated sugar with a sugar substitute like erythritol or stevia for a low-calorie treat!
Chef’s Notes: A Cake Journey
This Chocolate Zucchini Cake recipe has been tirelessly refined over the years. I’ve experimented with countless variations, but I always return to this classic! I remember one time I decided to swap zucchini for beet puree. While the taste was phenomenal, my cake came out a vibrant shade of pink. My friends called it “Rosy Chocolate Cake” affectionately; it was definitely a hit in terms of flavor!
Don’t hesitate to play around with the ingredients—it’s how you find your perfect version.
FAQs and Troubleshooting: Common Questions
1. My cake turned out too dense. What did I do wrong?
It’s likely because of overmixing. Be gentle when combining wet and dry ingredients, and avoid overbaking—this will also dry it out!
2. Can I make this cake ahead of time?
Absolutely! This cake keeps well in an airtight container for 3-4 days at room temperature. You can also freeze it—just wrap slices in plastic wrap and place them in a freezer bag.
3. How do I know when my cake is done?
A toothpick inserted into the center should come out clean, or with just a few moist crumbs attached. If it comes out wet, give it a few more minutes in the oven.
4. What if I don’t have eggs?
No problem! Use 1/4 cup applesauce or a flax egg (1 tablespoon ground flaxseed mixed with 3 tablespoons water). Let it sit for a few minutes to thicken.
Nutritional Info (Optional)
For those counting calories: one slice of this delightful Chocolate Zucchini Cake typically has around 250 calories. Packed with fiber from the zucchini, it can be a guilt-free indulgence when enjoyed in moderation!
In the end, whether you’re baking this treat for yourself or to share with others, remember that food is about community, about connection. Each bite of this Chocolate Zucchini Cake brings a reminder of those warm, loving moments in the kitchen. So, let’s celebrate cooking together—happy baking!
Print
Chocolate Zucchini Cake
- Total Time: 50 minutes
- Yield: 12 servings 1x
- Diet: Vegetarian
Description
A deliciously moist chocolate cake that sneakily incorporates zucchini for added tenderness and nutrition.
Ingredients
- 2 cups Zucchini, grated
- 1 ¾ cups All-purpose flour
- ¾ cup Unsweetened cocoa powder
- 1 ½ cups Granulated sugar
- ½ cup Brown sugar
- 1 tsp Baking soda
- 1 tsp Baking powder
- ½ tsp Salt
- 2 large Eggs
- 1 tsp Vanilla extract
- ¾ cup Vegetable oil
- 1 cup Chocolate chips (optional)
Instructions
- Preheat your oven to 350°F (175°C).
- Prepare a 9×13 inch baking pan by greasing and flouring it.
- Grate the zucchini and squeeze out excess moisture using a kitchen towel.
- Mix dry ingredients: whisk together flour, cocoa powder, baking soda, baking powder, and salt in a large bowl.
- Combine wet ingredients: whisk granulated sugar, brown sugar, eggs, vanilla extract, and vegetable oil until smooth.
- Mix everything together by gradually adding dry ingredients to wet ingredients, stirring until just combined. Fold in zucchini and chocolate chips if using.
- Pour the batter into the prepared baking pan, spreading it evenly.
- Bake for 30–35 minutes, or until a toothpick inserted comes out clean.
- Cool in the pan for 15 minutes, then transfer to a wire rack to cool completely.
Notes
For extra indulgence, dust with powdered sugar or top with vanilla ice cream. This cake can be kept in an airtight container for 3-4 days or frozen for longer storage.
- Prep Time: 15 minutes
- Cook Time: 35 minutes
- Category: Dessert
- Method: Baking
- Cuisine: American
Nutrition
- Serving Size: 1 slice
- Calories: 250
- Sugar: 22g
- Sodium: 360mg
- Fat: 10g
- Saturated Fat: 1.5g
- Unsaturated Fat: 8g
- Trans Fat: 0g
- Carbohydrates: 37g
- Fiber: 2g
- Protein: 4g
- Cholesterol: 40mg
Keywords: chocolate zucchini cake, dessert, baking, chocolate cake, vegetable cake
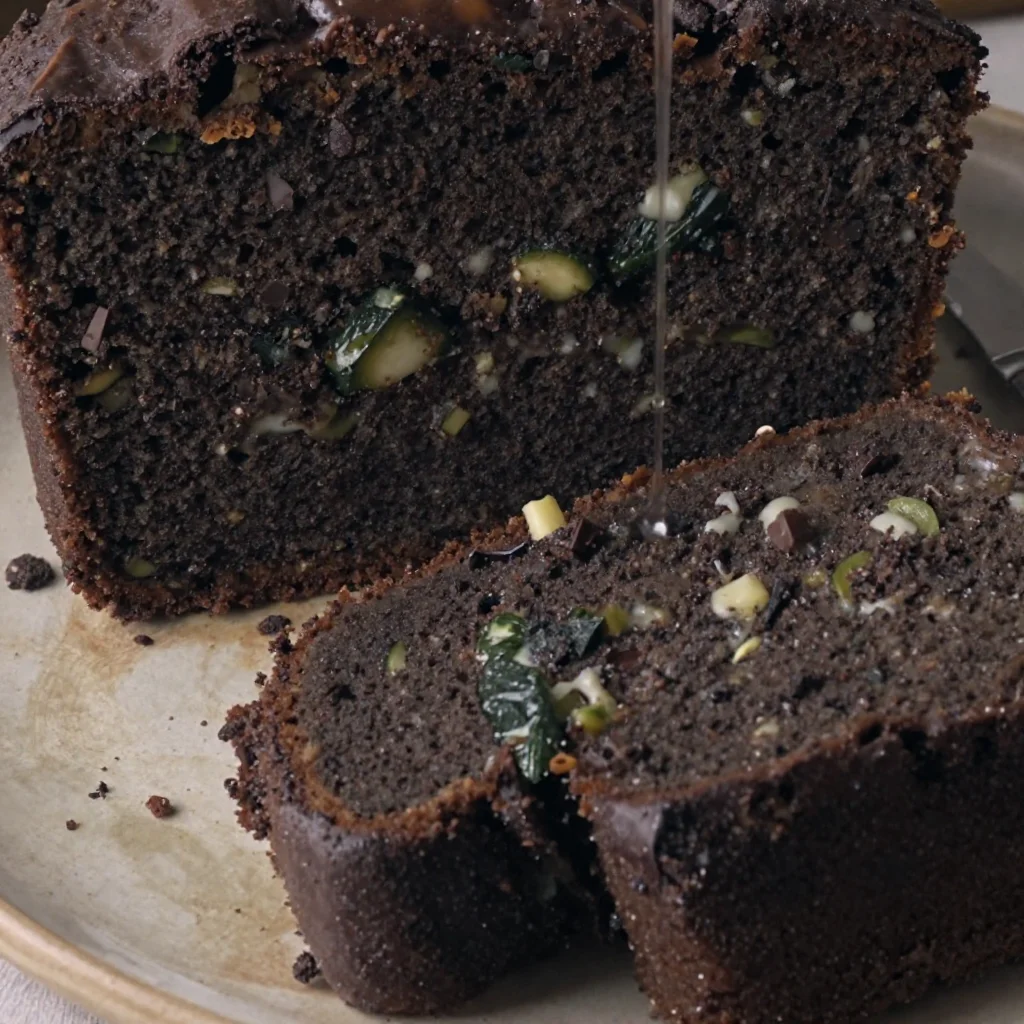
One-Bowl Vegan Chocolate Courgette Cake: Moist & Rich
Indulge in Decadence: Vegan Chocolate Courgette Cake Recipe
Welcome to my kitchen! If you’ve stumbled here, you’re likely someone who gets giddy at the whiff of something sweet baking in the oven—a true culinary vibe that I relish in. Today, I’m excited to share a recipe that’s not just delicious but also a sneaky way to add some hidden nutrition to your dessert. Let’s dive into the world of vegan baking with a delightful Vegan Chocolate Courgette Cake!
You might be thinking: “Courgette? In a cake?!” Trust me; this moist and decadent cake will not only satisfy your sweet tooth but might also win over even the pickiest eaters. With simple ingredients and straightforward instructions, you’ll be able to whip this cake up in no time, bringing joy to your taste buds while sneaking in some veggies. Whether you’re hosting a line-up of family gatherings, a cozy evening with friends, or simply craving something sweet for yourself, this recipe is perfect.
So, tie on that apron, and let’s get baking together!
A Slice of Nostalgia: My Courgette Cake Journey
Ah, where do I begin with my love for courgette cake? It takes me back to summers spent in my grandmother’s airy kitchen, where sunshine poured through the big windows, and the air was always filled with laughter, stories, and, of course, the divine aroma of baked goods. My grandmother was the queen of making desserts that seemed almost magical. She had a knack for turning the most unexpected ingredients into divine treats, and her chocolate courgette cake was nothing short of legendary.
This was the cake everyone eagerly awaited during family gatherings—a mystery wrapped in a delicious sponge, that would leave everyone pondering what made it so moist and rich. When I grew older, I realized the secret was the courgette—it kept the cake tender and moist, without the need for eggs! Inspired by her culinary wizardry, I decided to recreate this popular dish as a vegan option to share with all of you.
Baking this cake always brings back fond memories of family gatherings and the joy that comes from sharing food. As I pop it in the oven, I can almost hear my grandmother’s gentle voice encouraging me, reminding me that cooking is all about love, creativity, and a dash of adventure. Let’s keep that spirit alive as we embark on this delightful baking journey together!
Gather Your Ingredients
Here’s what you’ll need to whip up this indulgent cake:
-
1 ½ cups (180 g) all-purpose flour
This classic ingredient acts as the base of your cake. For a gluten-free version, you could substitute it with almond or gluten-free flour. Just keep in mind the texture may vary slightly. -
1 cup (100 g) cocoa powder
Cocoa powder brings rich chocolate flavor; it’s the heart of this cake! If you’re looking for a less intense flavor, opt for Dutch-processed cocoa. -
1 tsp baking soda
This hero helps the cake rise, giving it a light texture. Don’t use expired baking soda, or your cake may not puff up as you expect! -
½ tsp baking powder
Pairing it with baking soda ensures a great rise. They work hand in hand. -
½ tsp salt
Just a pinch enhances all the flavors! -
1 cup (200 g) granulated sugar
This is the sweet prince of our cake! You can substitute it with coconut sugar or maple syrup for a healthier alternative, though be careful with the liquid ratios. -
1 cup (240 ml) almond milk
Soft, creamy, and vegan-friendly! You can use soy or oat milk if preferred. -
½ cup (120 ml) vegetable oil
It adds moisture and richness. For a lighter option, you can use unsweetened applesauce. -
1 tsp vanilla extract
A splash of this goodness brings everything together beautifully. -
1 ½ cups grated courgette (zucchini)
This is our star ingredient! It keeps the cake moist and adds the needed nutrients. Grate it finely for even distribution. -
½ cup dairy-free chocolate chips
For the chocolate addicts out there, add a handful of these into the batter for extra indulgence!
Chef’s Insight:
Feel confident switching out or adding ingredients; cooking is all about creativity! If you have leftover courgette in the fridge or excess cocoa from a previous baking adventure, don’t hesitate to use them!
Mastering the Technique: Step-by-Step Instructions
-
Prep Your Kitchen:
Start by preheating your oven to 350°F (175°C). Greasing and lining an 8-inch round cake pan with parchment paper will ensure your cake pops right out after baking—trust me, this little step avoids sad cake situations. -
Combine the Dry Ingredients:
In a large mixing bowl, whisk together the flour, cocoa powder, baking soda, baking powder, and salt. This action aerates your ingredients and helps ensure a light cake. Plus, it’s a great workout for your whisking arm! -
Mix in the Wet Ingredients:
In another bowl, whisk together the sugar, almond milk, vegetable oil, and vanilla extract. It should feel silky and sweet! Once combined, gently fold the wet mixture into the dry ingredients, mixing just until combined. Over-mixing can result in a tight cake texture. -
Incorporate the Star of the Show:
Fold in your grated courgette and chocolate chips, being careful not to overwork the batter. Feel free to sneak a chocolate chip or two for the chef while you’re at it! -
Transfer to Baking Pan:
Pour the cake batter into the prepared pan and smooth the top. Give it a gentle tap on the counter to settle the mixture. This allows for an even bake. -
Bake to Perfection:
Place the pan in your preheated oven and let it bake for about 30-35 minutes. You’ll know it’s done when a toothpick inserted in the center comes out clean or with just a few moist crumbs. -
Cool Down:
Once baked, remove it from the oven and allow it to cool in the pan for about 10-15 minutes before transferring to a wire rack. Here’s a fun tip: don’t rush this stage; the cake continues to set as it cools! -
Prepare for Serving:
Once cool, if desired, dust with powdered sugar or frost it with your favorite vegan chocolate frosting. A sprinkle of chocolate chips on top always adds an appealing touch too!
Serving Suggestions
Slice the cake into generous wedges and serve it as is or with a scoop of dairy-free ice cream for that classic sundae feel. Top it off with fresh berries for a pop of color and added flavor—picture those dark chocolate tones contrasting with the vibrant berries! You could even drizzle a little melted chocolate over the top for an extra indulgent experience. It’s all about pleasure, after all!
Creative Twists: Recipe Variations
- Spices Upgrade: Add a teaspoon of cinnamon or espresso powder to amplify flavors.
- Nutty Terrain: Fold in a cup of chopped walnuts or pecans for a delightful crunch.
- Zesty Twist: For an unexpected burst, mix in some orange zest for a fresh flavor combo.
- Fruity Surprise: Incorporate a half-cup of pureed banana or applesauce to enhance moisture and sweetness.
- Gluten-Free Adaptation: Use a gluten-free flour blend instead of all-purpose flour for a gluten-sensitive option.
Chef’s Notes
In the evolving world of cooking, this recipe holds a special place in my heart. I’ve experimented countless times, tweaking here and there—extending to spelt flour variations and less sugar to clean it up a tad. My kitchen has seen excitement and occasional chaotic baking sessions, especially when my friends challenge me to a ‘no-recipe’ bake-off. Every time I taste this cake, I’m reminded of those sunny days baking with my grandmother, stirring memories into every mix.
Also, let’s address the fun fact: the folks who don’t typically go for chocolate-flavored anything have often been flummoxed by this cake. They never guess there’s courgette inside!
FAQs and Troubleshooting
1. Why is my cake dense?
A dense cake can occur from overmixing the batter or too much moisture. Make sure to only mix until ingredients are combined, and ensure you’re measuring your courgette post-grating and not packed.
2. Can I freeze this cake?
Absolutely! Once cooled, wrap it tightly in plastic wrap and freeze for up to three months. Just allow it to come to room temperature before enjoying again.
3. How do I know when it’s done baking?
Use the toothpick test—is it clean or has just a few crumbs? If there’s wet batter, give it a few more minutes.
4. Can I double the recipe?
Definitely! Just be mindful of adjusting your baking time. A larger cake may take a bit longer to bake through.
Nutritional Info (Optional)
- Calories: 205 per slice
- Carbohydrates: 30g
- Protein: 3g
- Fat: 9g
- Fiber: 3g
- Sugar: 12g
This cake is a wonderful treat that incorporates hidden veggies while delivering a chocolatey goodness that feels indulgent. Enjoy every moment spent in the mix of baking and remember that the soul of cooking is about sharing love and a piece of yourself! So, gather your loved ones around, slice that vegan chocolate courgette cake, and celebrate the glorious art of home cooking that fills the air with warmth and delight! Happy baking!
Print
Vegan Chocolate Courgette Cake
- Total Time: 50 minutes
- Yield: 8 servings 1x
- Diet: Vegan
Description
A moist and decadent vegan chocolate cake made with grated courgette, perfect for satisfying sweet cravings while sneaking in some veggies.
Ingredients
- 1 ½ cups (180 g) all-purpose flour
- 1 cup (100 g) cocoa powder
- 1 tsp baking soda
- ½ tsp baking powder
- ½ tsp salt
- 1 cup (200 g) granulated sugar
- 1 cup (240 ml) almond milk
- ½ cup (120 ml) vegetable oil
- 1 tsp vanilla extract
- 1 ½ cups grated courgette (zucchini)
- ½ cup dairy-free chocolate chips
Instructions
- Prep your kitchen: Preheat your oven to 350°F (175°C) and prepare an 8-inch round cake pan.
- Combine the dry ingredients: In a large bowl, whisk together flour, cocoa powder, baking soda, baking powder, and salt.
- Mix in the wet ingredients: In another bowl, whisk together sugar, almond milk, vegetable oil, and vanilla extract. Fold the wet mixture into the dry ingredients until combined.
- Incorporate the grated courgette and chocolate chips, folding gently to combine.
- Transfer the batter into the prepared pan and smooth the top.
- Bake for 30-35 minutes or until a toothpick comes out clean.
- Cool the cake in the pan for about 10-15 minutes before transferring it to a wire rack.
- Prepare for serving: Dust with powdered sugar or frost as desired.
Notes
Feel free to substitute ingredients for allergies or to enhance flavors. Use coconut sugar or maple syrup for a healthier sweetener option.
- Prep Time: 15 minutes
- Cook Time: 35 minutes
- Category: Dessert
- Method: Baking
- Cuisine: Vegan
Nutrition
- Serving Size: 1 slice
- Calories: 205
- Sugar: 12g
- Sodium: 400mg
- Fat: 9g
- Saturated Fat: 2g
- Unsaturated Fat: 7g
- Trans Fat: 0g
- Carbohydrates: 30g
- Fiber: 3g
- Protein: 3g
- Cholesterol: 0mg
Keywords: vegan cake, chocolate cake, courgette cake, zucchini cake, healthy dessert

Peanut Butter Cup Milkshake
The Ultimate Peanut Butter Cup Milkshake: A Cozy Kitchen Creation
Welcome back to my cozy kitchen, my fellow food lovers! Today, we’re diving into a treat that blends nostalgia with pure joy—a Peanut Butter Cup Milkshake. If the mere mention of this creamy delight doesn’t tug at your heartstrings, let me invite you to join me on this adventure of flavor and sweetness.
The inspiration for this milkshake comes from countless afternoons spent in my childhood kitchen, where my siblings and I would eagerly await the arrival of summer. The sun would pour through the windows, lighting up our tiny space like a scene from a movie. It was during those blissful months that our mom would treat us to ice cream milkshakes made from whatever delicious ingredients were within reach. Peanut butter cups were a special occasion, a feast woven into the fabric of our family traditions. The peanut butter’s creamy richness pairing with chocolate was the ultimate treat that marked a day of fun and laughter.
Milkshakes may seem like a simple indulgence, but for me, they carry so much more meaning. They remind us to slow down, savor each bite, and relish the moments spent with the ones we love. Today, I’m excited to share this Peanut Butter Cup Milkshake recipe with you so you can recreate that same smile-inducing experience in your own kitchen. Grab your blender and let’s get to work!
Personal Story
I remember a summer afternoon when my siblings and I took it upon ourselves to take our milkshake-making skills to the next level. The backyard was alive with laughter and excitement, and little did we know we were about to embark on a deliciously messy adventure. With a stash of peanut butter cups scavenged from a recent candy haul, we decided to create our very own milkshake masterpiece.
Armed with a blender and a somewhat questionable understanding of proper milkshake ratios, we started throwing in everything: ice cream, whole milk, chocolate syrup, and of course—those glorious peanut butter cups. The blender roared to life, and we giggled as it sent a sugary cyclone swirling, transforming our colorful concoction into a thick milkshake. We poured our creations into mismatched cups, topped them with whipped cream (of course), and had a glorious taste-test — each sip filled with laughter and rewards for our chaotic kitchen expedition.
That day, amidst the sticky counters and laughter-filled blurs, I realized that food could be a beautiful way to forge memories. And though we may have been racing against melting ice cream in the hot sun, each sip was filled with the essence of summer—sweetness, joy, and a hint of sibling rivalry. Those blissful moments inspire me to recreate this Peanut Butter Cup Milkshake and share it with you, so you can create your own delicious, joyful kitchen stories.
Ingredients
Now that you’re ready to blend up some magic, here’s what you’ll need for this epic Peanut Butter Cup Milkshake:
- Ice Cream (2 cups): I recommend vanilla or chocolate for a classic taste. If you’re feeling adventurous, you could use cookie dough or peanut butter ice cream!
- Milk (1 cup): Whole milk will give you a rich, creamy texture, but feel free to use almond, oat, or soy milk for dairy-free options.
- Peanut Butter Cups (4-5 pieces): The real star of the show! A classic, but feel free to experiment with dark chocolate or white chocolate versions for a twist.
- Peanut Butter (2 tablespoons): Uses natural peanut butter for a richer, creamier flavor or hit up those flavored options like chocolate peanut butter for an extra kick.
- Chocolate Syrup (2 tablespoons): This is where we get the indulgent chocolatey goodness! You can make your own or substitute with a dairy-free version if needed.
- Whipped Cream (for topping): Nothing says milkshake like a generous dollop of whipped cream on top. You can use store-bought or homemade for more cozy vibes.
- Extra Peanut Butter Cups (for garnish): Because one can never have too many peanut butter cups, right? Chop them up and sprinkle them on top!
Chef Insights:
- Ingredient Swaps: Don’t have peanut butter cups? Use crushed Oreos or cookie dough for a different flavor profile.
- Milk: Adjust the milk according to your desired thickness—less for a thick shake, more for a thinner one!
Step-by-Step Instructions
Alright, let’s get those blenders buzzing! Here’s how to whip up this Peanut Butter Cup Milkshake step-by-step.
-
Gather Your Ingredients: First things first! Get all your ingredients ready and within reach. Trust me; it makes the blending process easier when everything is prepped and ready to go.
-
Add Ice Cream & Milk: In your blender, start by adding the ice cream. The foundation of a great milkshake! Follow it up with the milk. If you want a thicker shake, use less milk. For a thinner consistency, go for the full cup.
-
Crush the Peanut Butter Cups: Time to get those peanut butter cups in there! Break them up into smaller pieces so they blend more easily. You can add them whole if you prefer chunks in your shake. Toss them into the blender.
-
Spoon in the Peanut Butter: Measure out two tablespoons of peanut butter and add it to the mix. If you’re using any flavored peanut butter, you’re about to elevate this shake to new heights!
-
Drizzle in Chocolate Syrup: Drizzling the chocolate syrup into the blender will add a touch of sweetness and indulgence. Go ahead and shake it up a bit, and save some for the garnish later.
-
Blend Away: Put the lid on your blender and blend everything until smooth and creamy. Give it a few bursts to make sure everything is well combined. If you want a thicker shake, stop here, and if you want a thinner shake, add a splash more milk and blend again!
-
Taste Test: It’s essential to make sure your creation is on point. Grab a spoon, taste a little, and adjust to your liking! Want it sweeter? Add more chocolate syrup. More peanut butter flavor? Toss in a tad more.
-
Serve It Up: Pour your milkshake into glasses. Take a moment to admire the creamy goodness swirling within, and let the anticipation build!
-
Top It Off: This is a crucial step: top your milkshakes with whipped cream, and add a drizzle of chocolate syrup for that visual wow factor. And don’t forget to sprinkle those extra chopped peanut butter cups on top!
-
Enjoy: Grab a straw, sip, and enjoy the beautiful marriage of chocolate and peanut butter, reminiscent of your childhood summer afternoons!
Serving Suggestions
For an extra special touch, serve your Peanut Butter Cup Milkshake in tall glasses with striped straws for that classic milkshake diner feel. Feel free to add some chocolate shavings on top of the whipped cream or even a sprinkle of sea salt to balance the sweetness and elevate the flavors. If you’re feeling fancy, couple it with a couple of extra peanut butter cups on a small plate on the side for a delightful treat.
Recipe Variations
- Banana Peanut Butter Cup Shake: Add a ripe banana into the mix for a creamier texture and an added layer of fruity sweetness.
- Minty Chocolate Twist: Add a few drops of peppermint extract for a refreshing mint chocolate experience—think holidays in a glass!
- Protein-Packed Version: Incorporate a scoop of your favorite protein powder for a filling, post-workout treat. Choose vanilla for a subtle flavor profile.
- Dairy-Free Delight: Substitute all dairy products with coconut milk ice cream and almond milk for a delightful lactose-free option!
- Cinnamon Peanut Butter Variation: Add a pinch of ground cinnamon for a warm, inviting flavor twist that makes the shake truly unique.
Chef’s Notes
Over the years, my Peanut Butter Cup Milkshake recipe has continuously evolved. Initially, I used whatever was in the freezer—often leading to some “interesting” combinations! Now, I’ve learned to focus on balance. I still chuckle at the time I attempted to add caramel for extra sweetness. Let’s just say it was an experience!
And of course, no milkshake brings the joy quite like doing it with friends. It’s become a tradition for my friends and me to have cozy nights in where we whip up different versions of milkshakes, competing for the ultimate flavor combination! So don’t hesitate to invite a friend into your kitchen for this—sharing is really where the magic happens!
FAQs and Troubleshooting
Q1: My milkshake is too thick! What can I do?
A1: Don’t fret! Just add a splash of milk and give it another blend. If you want to keep it thick but still drinkable, try using a thicker straw or using a spoon to scoop it out.
Q2: What if I don’t have a blender?
A2: A hand mixer can do the trick just fine! Just whisk the ingredients together until well combined. It might take a little extra effort, but it’ll be worth it!
Q3: Can I prepare this ahead of time?
A3: I suggest enjoying it fresh, but you can prepare the ingredients in advance and store them separately in the fridge. Just blend when you’re ready for your treat!
Q4: Can I make this dairy-free?
A4: Absolutely! Just stick with dairy-free ice cream options and substitute milk with almond, soy, or oat milk for a delicious dairy-free treat!
Nutritional Info
- Calories: Approximately 600 per serving (this can vary based on portions and specific ingredients)
- Fat: 30g (mostly healthy fats from peanut butter)
- Carbohydrates: 70g
- Protein: 10g (especially if you add in protein powder)
So there you have it—your guide to creating the ultimate Peanut Butter Cup Milkshake! Dive into this delightful recipe and share the love with those around you. As always, my kitchen is a place for joy, creativity, and heartwarming memories, and I hope this milkshake brings a touch of that to your home. Happy blending!
Print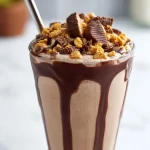
The Ultimate Peanut Butter Cup Milkshake
- Total Time: 10 minutes
- Yield: 2 servings 1x
- Diet: Vegetarian
Description
A rich and creamy Peanut Butter Cup Milkshake that blends nostalgia with pure joy, perfect for sharing with loved ones.
Ingredients
- 2 cups Ice Cream (vanilla or chocolate)
- 1 cup Milk (whole, almond, oat, or soy)
- 4–5 pieces Peanut Butter Cups
- 2 tablespoons Peanut Butter
- 2 tablespoons Chocolate Syrup
- Whipped Cream (for topping)
- Extra Peanut Butter Cups (for garnish)
Instructions
- Gather your ingredients: Get all your ingredients ready and within reach.
- Add ice cream and milk: Start by adding the ice cream to your blender, followed by the milk.
- Crush the peanut butter cups: Break them up into smaller pieces and toss into the blender.
- Spoon in the peanut butter: Measure out two tablespoons of peanut butter and add it to the mix.
- Drizzle in chocolate syrup: Add a drizzle of chocolate syrup into the mixture.
- Blend away: Blend everything until smooth and creamy.
- Taste test: Taste your milkshake and adjust sweetness as desired.
- Serve it up: Pour your milkshake into glasses.
- Top it off: Top with whipped cream, drizzle with chocolate syrup, and add chopped peanut butter cups.
- Enjoy: Sip and enjoy the delightful combination of chocolate and peanut butter!
Notes
For a thicker shake, reduce milk; for a thinner shake, add more milk. Experiment with different flavored peanut butters!
- Prep Time: 10 minutes
- Cook Time: 0 minutes
- Category: Dessert
- Method: Blending
- Cuisine: American
Nutrition
- Serving Size: 1 serving
- Calories: 600
- Sugar: 50g
- Sodium: 250mg
- Fat: 30g
- Saturated Fat: 12g
- Unsaturated Fat: 15g
- Trans Fat: 0g
- Carbohydrates: 70g
- Fiber: 3g
- Protein: 10g
- Cholesterol: 10mg
Keywords: milkshake, peanut butter cup, dessert, summer treat, nostalgia
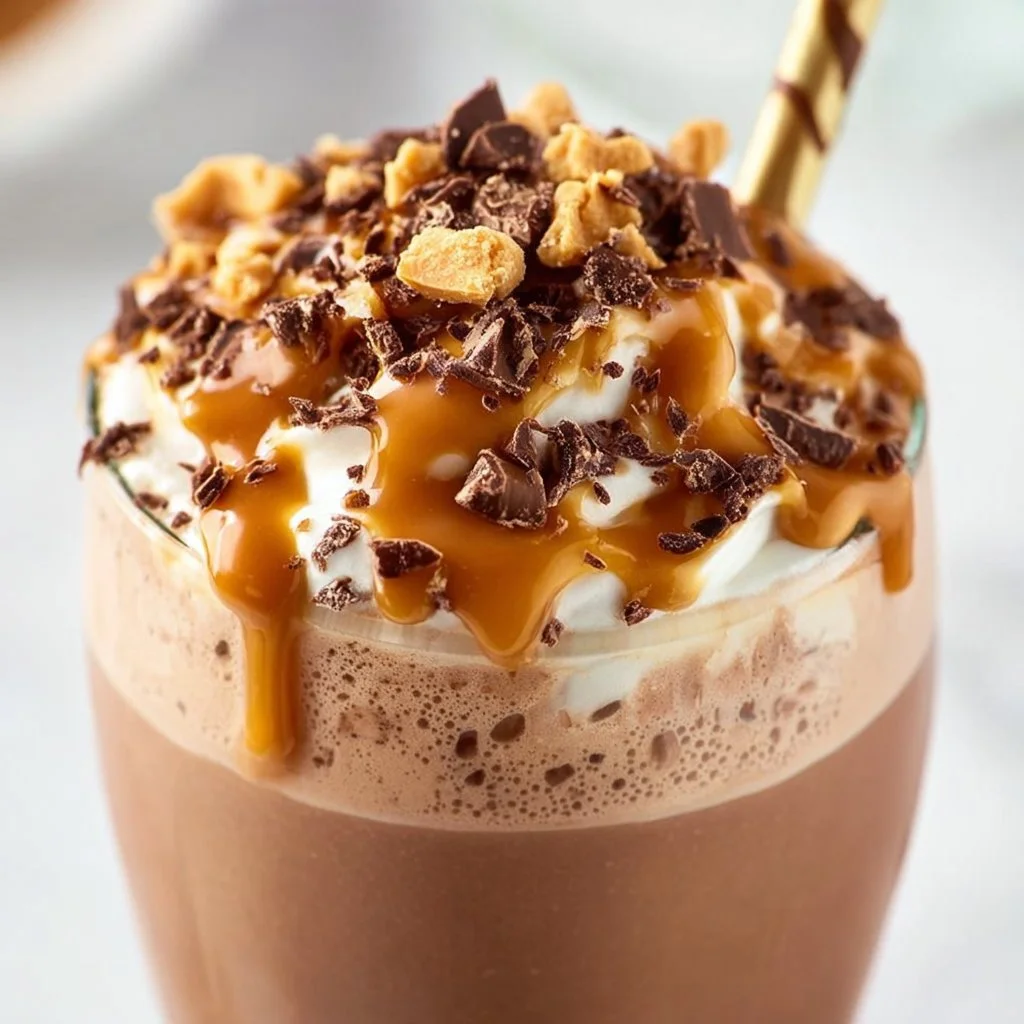
Chocolate Peanut Butter Milkshake Recipe
# The Ultimate Chocolate Peanut Butter Milkshake Recipe

## Introduction

Hey there, fellow foodies! Welcome back to my cozy corner of the internet—my kitchen! Today, I’m excited to take you on a delicious journey as we whip up a decadent **Chocolate Peanut Butter Milkshake**. This treat is the perfect blend of creamy, nutty, and chocolatey goodness that will transport you right back to your childhood. It's one of those recipes that brings joy to both the cook and anyone lucky enough to enjoy it.

I can still remember the first time I savored this delightful concoction. It was a warm summer afternoon, and my best friend Lily and I decided to embark on a mini cooking adventure in her parents' kitchen. We had stolen a couple of ripe bananas and a half-empty jar of peanut butter from the pantry, and after a bit of haphazard mixing, we ended up with something magical. Little did we know we were on the brink of creating a classic treat that would become a staple in our summer hangouts.

Fast-forward to today, and I still get that same rush of happiness whenever I hear the blender whirl and the sweet, nutty aroma fills the air. Whether you’re planning a cozy movie night or searching for a sweet treat to surprise friends, this milkshake is sure to impress. Plus, who doesn’t love a recipe with only a handful of ingredients that comes together in a snap?

So grab your blender and put on your favorite playlist, because it’s time to create a chocolate peanut butter paradise that you won’t be able to resist!

---

## Personal Story

Oh! How can I forget the summer of 2015? I was visiting my grandparents’ house, and they had just renovated their kitchen. My grandma, an incredible cook, always encouraged me to experiment with flavors. One afternoon, we decided it was time for a milkshake extravaganza. After blending up some classic vanilla, we thought, "Why not add some chocolate and peanut butter?" I’ll never forget my grandma's mischievous smile as we poured a splash of chocolate syrup into the mix.

As we blended it all together, the kitchen quickly filled with laughter, and the delicious aroma made our tummies rumble. When we finally poured the milkshake into tall glasses and topped it off with whipped cream and a drizzle of peanut butter, it felt like a masterpiece! We raised our glasses in a toast: “To the best summer ever!”

That first sip was like a burst of happiness, and I knew right then that chocolate and peanut butter were a match made in heaven. Since then, it’s become a celebrated treat in my family, shared during game nights, birthday parties, and just-because moments. I can’t wait for you to create your own sweet memories with this milkshake recipe!

---

## Ingredients

To make our delightful Chocolate Peanut Butter Milkshake, you only need a few simple ingredients. Here's what you’ll need to gather:

- **Vanilla Ice Cream (2 cups)**
  The backbone of our milkshake! You can substitute with dairy-free or low-fat ice cream if you want a lighter version.

- **Milk (1 cup)**
  Whole milk gives a rich flavor and texture, but feel free to use almond, soy, or oat milk for dairy alternatives.

- **Creamy Peanut Butter (1/3 cup)**
  Go for the creamy variety for a smooth blend. If you're feeling adventurous, try crunchy peanut butter for added texture!

- **Chocolate Syrup (1/4 cup)**
  A classic! Use your favorite chocolate syrup or even make your own by melting dark chocolate if you're feeling fancy.

- **Optional Toppings:**
  - **Whipped Cream:** For a luscious finish.
  - **Chocolate Shavings or Chips:** To add a touch of sweetness and garnish.
  - **Sliced Bananas:** A nod to our childhood whimsy and a fun twist!

---

## Step-by-Step Instructions

Let's make this milkshake! Follow my steps closely, and don’t be afraid to channel your inner chef!

1. **Gather Your Ingredients:**
   Gather all your ingredients and tools: a blender, a measuring cup, and a few tall glasses. This part is key—trust me, a well-organized workspace makes a world of difference.

2. **Scoop the Ice Cream:**
   With an ice cream scoop, measure out 2 cups of creamy vanilla ice cream directly into your blender. This is where the magic begins! If it’s too hard to scoop, let it sit at room temperature for a few minutes to soften.

3. **Add the Milk:**
   Pour in 1 cup of milk of your choice. The more milk you add, the thinner your milkshake will be. If you like it thicker, start with 3/4 cup and adjust from there.

4. **Incorporate Peanut Butter:**
   Now for the star of the show! Add 1/3 cup of creamy peanut butter. This is where it gets fun—use a spatula to scrape out every last bit, because we don’t want any peanut goodness left behind!

5. **Add Chocolate Syrup:**
   Drizzle in 1/4 cup of chocolate syrup. Honestly, if you want to channel your inner Willy Wonka, feel free to add more. You do you!

6. **Blend Away!**
   Secure the lid tightly and blend on high until all ingredients are well combined and smooth. Here’s a little tip: if the mix is too thick to blend, add a splash more milk to help it along. If it’s too thin, just toss in another scoop of ice cream!

7. **Taste Test:**
   Once you have a beautifully creamy texture, stop blending and taste! Is it chocolatey enough? Feel free to add more syrup or peanut butter if desired!

8. **Pour and Serve:**
   Grab your tall glasses and pour in your delicious milkshake! Enjoy the swirls of chocolate and peanut butter—how gorgeous is that?

---

## Serving Suggestions

Ready to serve? Top your milkshake with a generous dollop of whipped cream and sprinkle on some chocolate shavings or crushed peanuts for added flair. For a fun twist, insert a colorful straw or a fancy spoon for that extra touch. This milkshake is perfect for a cozy movie night, a casual hangout, or even a mini celebration! Don’t forget to snap a picture for Instagram before diving in!

---

## Recipe Variations

Here are a few fun variations you might want to try out:

1. **Banana Chocolate Peanut Butter Milkshake:**
   Toss in half a ripe banana before blending for a delightful fruit twist—it’s like having a sundae smoothie!

2. **Mint Chocolate Peanut Butter Milkshake:**
   Add a few drops of mint extract for a refreshing minty flavor. Garnish with crushed mint chocolate candies for added flair!

3. **Spicy Chocolate Peanut Butter Milkshake:**
   For the adventurous, add just a pinch of cayenne pepper or a dash of cinnamon. It will surprise everyone with a flavor kick!

4. **Vegan Delight:**
   Substitute dairy milk for almond milk and the ice cream for a coconut-based alternative, making this milkshake creamy and dairy-free.

---

## Chef’s Notes

As with any recipe, you can easily make your **Chocolate Peanut Butter Milkshake** uniquely yours! There have been times when I’ve thrown in leftover crushed cookies or even a scoop of protein powder when I’m feeling active. No two shakes need to be the same!

One sunny weekend, my friends and I had a little milkshake-off. We each made our version using whatever ingredients we could find in the pantry. It was a hilarious mess but resulted in some to-die-for shakes (and a kitchen that needed serious cleaning). I learned that creativity in the kitchen is just as important as following a recipe!

---

## FAQs and Troubleshooting

**1. My milkshake is too thin; how can I thicken it?**
Don’t worry! Simply add an extra scoop of ice cream or blend in a little bit of frozen banana to give it that creamy texture.

**2. Is there a way to make it less sweet?**
Absolutely! Reduce the amount of chocolate syrup, and you can even use dark chocolate options as they usually have less sugar.

**3. What if I don’t have a blender?**
If you don’t have a blender, you can mix the ingredients using a handheld mixer in a large bowl until combined. It’ll take a bit more time, but you’ll still love the end result!

**4. Can it be made ahead of time?**
I recommend making it fresh, as milkshakes are best enjoyed right after blending. However, if you must make it ahead, keep it in the freezer, let it soften a bit before serving, and blend again!

---

## Nutritional Info

(Feel free to include this if applicable)

- **Calories:** Approximately 450 per serving (depending on specific ingredient choices)
- **Fat:** 20g
- **Carbohydrates:** 55g
- **Protein:** 10g

---

There you have it—your guide to making a delicious, sloppy, creamy **Chocolate Peanut Butter Milkshake**! I hope this recipe inspires you to get into your kitchen and whip up something delicious. Remember, cooking is about having fun and creating joyful moments!

Happy blending, and cheers to sweet memories!
The Ultimate Chocolate Peanut Butter Milkshake
- Total Time: 10 minutes
- Yield: 2 servings 1x
- Diet: Vegetarian
Description
A decadent chocolate peanut butter milkshake that combines creamy, nutty, and chocolatey goodness in a quick and easy recipe.
Ingredients
- 2 cups Vanilla Ice Cream
- 1 cup Milk
- 1/3 cup Creamy Peanut Butter
- 1/4 cup Chocolate Syrup
- Optional Toppings: Whipped Cream, Chocolate Shavings or Chips, Sliced Bananas
Instructions
- Gather Your Ingredients: Gather all your ingredients and tools: a blender, a measuring cup, and a few tall glasses.
- Scoop the Ice Cream: Measure out 2 cups of creamy vanilla ice cream directly into your blender.
- Add the Milk: Pour in 1 cup of milk of your choice.
- Incorporate Peanut Butter: Add 1/3 cup of creamy peanut butter.
- Add Chocolate Syrup: Drizzle in 1/4 cup of chocolate syrup.
- Blend Away!: Secure the lid tightly and blend on high until smooth.
- Taste Test: Once creamy, stop blending and taste.
- Pour and Serve: Pour in your milkshake and top with whipped cream and any other garnishes.
Notes
You can easily modify the milkshake with different flavor additions or substitutions for a unique taste.
- Prep Time: 10 minutes
- Cook Time: 0 minutes
- Category: Dessert
- Method: Blending
- Cuisine: American
Nutrition
- Serving Size: 1 serving
- Calories: 450
- Sugar: 40g
- Sodium: 200mg
- Fat: 20g
- Saturated Fat: 10g
- Unsaturated Fat: 8g
- Trans Fat: 0g
- Carbohydrates: 55g
- Fiber: 2g
- Protein: 10g
- Cholesterol: 60mg
Keywords: milkshake, chocolate, peanut butter, dessert, summer treat


