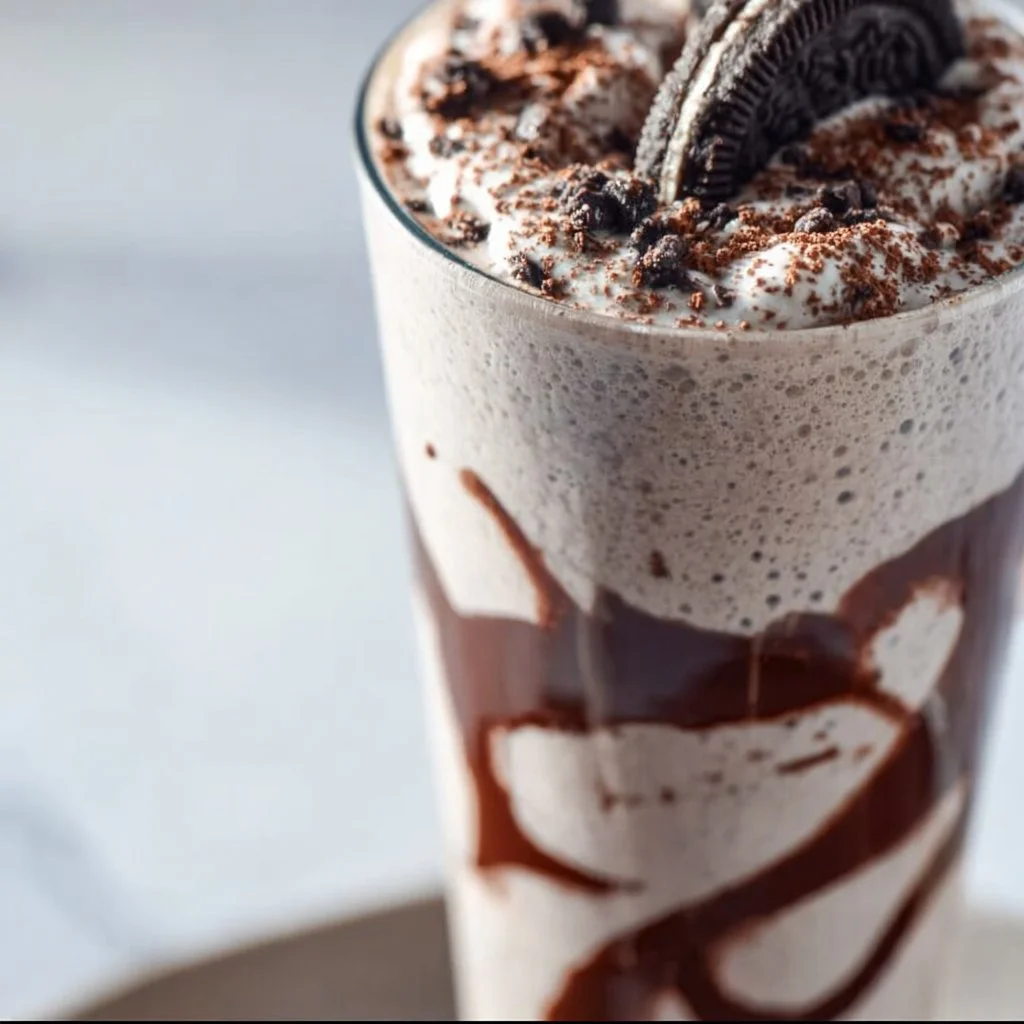
Peanut Butter Cup Milkshake
The Ultimate Peanut Butter Cup Milkshake: A Cozy Kitchen Creation
Welcome back to my cozy kitchen, my fellow food lovers! Today, we’re diving into a treat that blends nostalgia with pure joy—a Peanut Butter Cup Milkshake. If the mere mention of this creamy delight doesn’t tug at your heartstrings, let me invite you to join me on this adventure of flavor and sweetness.
The inspiration for this milkshake comes from countless afternoons spent in my childhood kitchen, where my siblings and I would eagerly await the arrival of summer. The sun would pour through the windows, lighting up our tiny space like a scene from a movie. It was during those blissful months that our mom would treat us to ice cream milkshakes made from whatever delicious ingredients were within reach. Peanut butter cups were a special occasion, a feast woven into the fabric of our family traditions. The peanut butter’s creamy richness pairing with chocolate was the ultimate treat that marked a day of fun and laughter.
Milkshakes may seem like a simple indulgence, but for me, they carry so much more meaning. They remind us to slow down, savor each bite, and relish the moments spent with the ones we love. Today, I’m excited to share this Peanut Butter Cup Milkshake recipe with you so you can recreate that same smile-inducing experience in your own kitchen. Grab your blender and let’s get to work!
Personal Story
I remember a summer afternoon when my siblings and I took it upon ourselves to take our milkshake-making skills to the next level. The backyard was alive with laughter and excitement, and little did we know we were about to embark on a deliciously messy adventure. With a stash of peanut butter cups scavenged from a recent candy haul, we decided to create our very own milkshake masterpiece.
Armed with a blender and a somewhat questionable understanding of proper milkshake ratios, we started throwing in everything: ice cream, whole milk, chocolate syrup, and of course—those glorious peanut butter cups. The blender roared to life, and we giggled as it sent a sugary cyclone swirling, transforming our colorful concoction into a thick milkshake. We poured our creations into mismatched cups, topped them with whipped cream (of course), and had a glorious taste-test — each sip filled with laughter and rewards for our chaotic kitchen expedition.
That day, amidst the sticky counters and laughter-filled blurs, I realized that food could be a beautiful way to forge memories. And though we may have been racing against melting ice cream in the hot sun, each sip was filled with the essence of summer—sweetness, joy, and a hint of sibling rivalry. Those blissful moments inspire me to recreate this Peanut Butter Cup Milkshake and share it with you, so you can create your own delicious, joyful kitchen stories.
Ingredients
Now that you’re ready to blend up some magic, here’s what you’ll need for this epic Peanut Butter Cup Milkshake:
- Ice Cream (2 cups): I recommend vanilla or chocolate for a classic taste. If you’re feeling adventurous, you could use cookie dough or peanut butter ice cream!
- Milk (1 cup): Whole milk will give you a rich, creamy texture, but feel free to use almond, oat, or soy milk for dairy-free options.
- Peanut Butter Cups (4-5 pieces): The real star of the show! A classic, but feel free to experiment with dark chocolate or white chocolate versions for a twist.
- Peanut Butter (2 tablespoons): Uses natural peanut butter for a richer, creamier flavor or hit up those flavored options like chocolate peanut butter for an extra kick.
- Chocolate Syrup (2 tablespoons): This is where we get the indulgent chocolatey goodness! You can make your own or substitute with a dairy-free version if needed.
- Whipped Cream (for topping): Nothing says milkshake like a generous dollop of whipped cream on top. You can use store-bought or homemade for more cozy vibes.
- Extra Peanut Butter Cups (for garnish): Because one can never have too many peanut butter cups, right? Chop them up and sprinkle them on top!
Chef Insights:
- Ingredient Swaps: Don’t have peanut butter cups? Use crushed Oreos or cookie dough for a different flavor profile.
- Milk: Adjust the milk according to your desired thickness—less for a thick shake, more for a thinner one!
Step-by-Step Instructions
Alright, let’s get those blenders buzzing! Here’s how to whip up this Peanut Butter Cup Milkshake step-by-step.
-
Gather Your Ingredients: First things first! Get all your ingredients ready and within reach. Trust me; it makes the blending process easier when everything is prepped and ready to go.
-
Add Ice Cream & Milk: In your blender, start by adding the ice cream. The foundation of a great milkshake! Follow it up with the milk. If you want a thicker shake, use less milk. For a thinner consistency, go for the full cup.
-
Crush the Peanut Butter Cups: Time to get those peanut butter cups in there! Break them up into smaller pieces so they blend more easily. You can add them whole if you prefer chunks in your shake. Toss them into the blender.
-
Spoon in the Peanut Butter: Measure out two tablespoons of peanut butter and add it to the mix. If you’re using any flavored peanut butter, you’re about to elevate this shake to new heights!
-
Drizzle in Chocolate Syrup: Drizzling the chocolate syrup into the blender will add a touch of sweetness and indulgence. Go ahead and shake it up a bit, and save some for the garnish later.
-
Blend Away: Put the lid on your blender and blend everything until smooth and creamy. Give it a few bursts to make sure everything is well combined. If you want a thicker shake, stop here, and if you want a thinner shake, add a splash more milk and blend again!
-
Taste Test: It’s essential to make sure your creation is on point. Grab a spoon, taste a little, and adjust to your liking! Want it sweeter? Add more chocolate syrup. More peanut butter flavor? Toss in a tad more.
-
Serve It Up: Pour your milkshake into glasses. Take a moment to admire the creamy goodness swirling within, and let the anticipation build!
-
Top It Off: This is a crucial step: top your milkshakes with whipped cream, and add a drizzle of chocolate syrup for that visual wow factor. And don’t forget to sprinkle those extra chopped peanut butter cups on top!
-
Enjoy: Grab a straw, sip, and enjoy the beautiful marriage of chocolate and peanut butter, reminiscent of your childhood summer afternoons!
Serving Suggestions
For an extra special touch, serve your Peanut Butter Cup Milkshake in tall glasses with striped straws for that classic milkshake diner feel. Feel free to add some chocolate shavings on top of the whipped cream or even a sprinkle of sea salt to balance the sweetness and elevate the flavors. If you’re feeling fancy, couple it with a couple of extra peanut butter cups on a small plate on the side for a delightful treat.
Recipe Variations
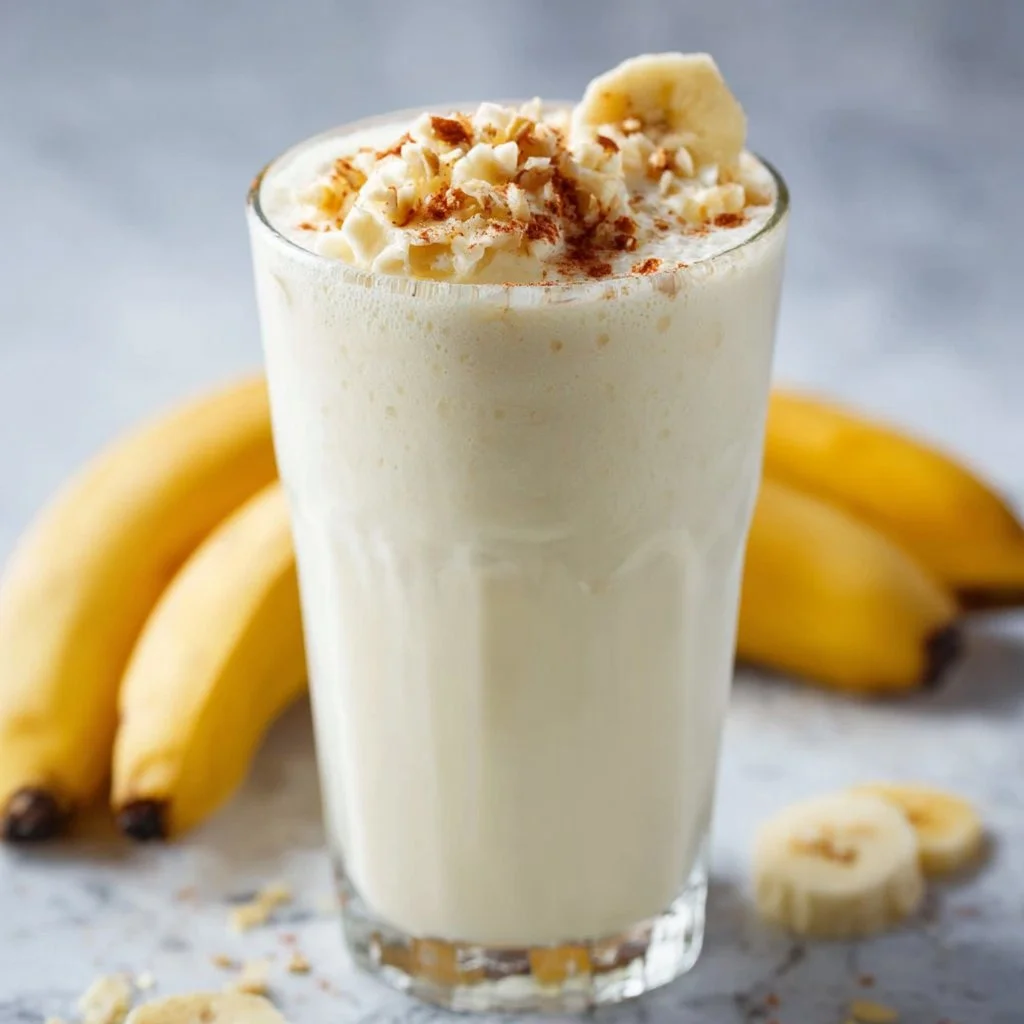
- Banana Peanut Butter Cup Shake: Add a ripe banana into the mix for a creamier texture and an added layer of fruity sweetness.
- Minty Chocolate Twist: Add a few drops of peppermint extract for a refreshing mint chocolate experience—think holidays in a glass!
- Protein-Packed Version: Incorporate a scoop of your favorite protein powder for a filling, post-workout treat. Choose vanilla for a subtle flavor profile.
- Dairy-Free Delight: Substitute all dairy products with coconut milk ice cream and almond milk for a delightful lactose-free option!
- Cinnamon Peanut Butter Variation: Add a pinch of ground cinnamon for a warm, inviting flavor twist that makes the shake truly unique.
Chef’s Notes
Over the years, my Peanut Butter Cup Milkshake recipe has continuously evolved. Initially, I used whatever was in the freezer—often leading to some “interesting” combinations! Now, I’ve learned to focus on balance. I still chuckle at the time I attempted to add caramel for extra sweetness. Let’s just say it was an experience!
And of course, no milkshake brings the joy quite like doing it with friends. It’s become a tradition for my friends and me to have cozy nights in where we whip up different versions of milkshakes, competing for the ultimate flavor combination! So don’t hesitate to invite a friend into your kitchen for this—sharing is really where the magic happens!
FAQs and Troubleshooting
Q1: My milkshake is too thick! What can I do?
A1: Don’t fret! Just add a splash of milk and give it another blend. If you want to keep it thick but still drinkable, try using a thicker straw or using a spoon to scoop it out.
Q2: What if I don’t have a blender?
A2: A hand mixer can do the trick just fine! Just whisk the ingredients together until well combined. It might take a little extra effort, but it’ll be worth it!
Q3: Can I prepare this ahead of time?
A3: I suggest enjoying it fresh, but you can prepare the ingredients in advance and store them separately in the fridge. Just blend when you’re ready for your treat!
Q4: Can I make this dairy-free?
A4: Absolutely! Just stick with dairy-free ice cream options and substitute milk with almond, soy, or oat milk for a delicious dairy-free treat!
Nutritional Info
- Calories: Approximately 600 per serving (this can vary based on portions and specific ingredients)
- Fat: 30g (mostly healthy fats from peanut butter)
- Carbohydrates: 70g
- Protein: 10g (especially if you add in protein powder)
So there you have it—your guide to creating the ultimate Peanut Butter Cup Milkshake! Dive into this delightful recipe and share the love with those around you. As always, my kitchen is a place for joy, creativity, and heartwarming memories, and I hope this milkshake brings a touch of that to your home. Happy blending!
Print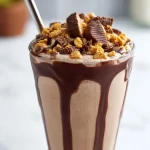
The Ultimate Peanut Butter Cup Milkshake
- Total Time: 10 minutes
- Yield: 2 servings 1x
- Diet: Vegetarian
Description
A rich and creamy Peanut Butter Cup Milkshake that blends nostalgia with pure joy, perfect for sharing with loved ones.
Ingredients
- 2 cups Ice Cream (vanilla or chocolate)
- 1 cup Milk (whole, almond, oat, or soy)
- 4–5 pieces Peanut Butter Cups
- 2 tablespoons Peanut Butter
- 2 tablespoons Chocolate Syrup
- Whipped Cream (for topping)
- Extra Peanut Butter Cups (for garnish)
Instructions
- Gather your ingredients: Get all your ingredients ready and within reach.
- Add ice cream and milk: Start by adding the ice cream to your blender, followed by the milk.
- Crush the peanut butter cups: Break them up into smaller pieces and toss into the blender.
- Spoon in the peanut butter: Measure out two tablespoons of peanut butter and add it to the mix.
- Drizzle in chocolate syrup: Add a drizzle of chocolate syrup into the mixture.
- Blend away: Blend everything until smooth and creamy.
- Taste test: Taste your milkshake and adjust sweetness as desired.
- Serve it up: Pour your milkshake into glasses.
- Top it off: Top with whipped cream, drizzle with chocolate syrup, and add chopped peanut butter cups.
- Enjoy: Sip and enjoy the delightful combination of chocolate and peanut butter!
Notes
For a thicker shake, reduce milk; for a thinner shake, add more milk. Experiment with different flavored peanut butters!
- Prep Time: 10 minutes
- Cook Time: 0 minutes
- Category: Dessert
- Method: Blending
- Cuisine: American
Nutrition
- Serving Size: 1 serving
- Calories: 600
- Sugar: 50g
- Sodium: 250mg
- Fat: 30g
- Saturated Fat: 12g
- Unsaturated Fat: 15g
- Trans Fat: 0g
- Carbohydrates: 70g
- Fiber: 3g
- Protein: 10g
- Cholesterol: 10mg
Keywords: milkshake, peanut butter cup, dessert, summer treat, nostalgia

Indulge Guilt-Free: Peanut Butter Cup Cottage Cheese Mousse
Indulge Guilt-Free: Peanut Butter Cup Cottage Cheese Mousse
Introduction
Hey there, fellow food lovers! Welcome to my cozy corner of the kitchen, where we create delicious dishes that bring a little joy into our everyday lives. Today, I’m thrilled to share a fantastic recipe that has been a delicious secret in my family—Peanut Butter Cup Cottage Cheese Mousse. Yes, you read that right! This delightful dessert gives you all the creamy, dreamy goodness you crave without the guilt.
Imagine this: you’re sitting down for a well-deserved treat after a long day. You want something truly decadent, but also healthy enough to keep you feeling good about your choices. This mousse ticks all the boxes. It’s light, fluffy, and utterly irresistible, making it the perfect indulgence for any occasion. Plus, if you have little helpers—perhaps your kids or friends—they will love getting involved, helping you whip it up in no time.
I’ll take you through the steps to make this beautiful dessert, and even share some of my warm kitchen stories that make this dish even more special. So, let’s roll up our sleeves and dive into this wonderfully yummy world of flavors!
Personal Story
Many years ago, I hosted a cozy gathering for a group of friends. We laughed, shared stories, and reminisced about our favorite desserts from childhood. That evening, my friend Sarah shared her obsession with peanut butter cups, while I gushed over the heavenly texture of mousse. As the night wore on, an idea blossomed: why not combine our favorites?
Armed with a tub of cottage cheese (don’t roll your eyes just yet!), I set out to create a guilt-free dessert that satisfied our sweet cravings without leaving us feeling weighed down. To my delight, it turned into a hit! As we savored the lightness of the mousse paired with the rich peanut buttery goodness, our laughter filled the kitchen, and I knew I had stumbled onto something magical.
Years later, this Peanut Butter Cup Cottage Cheese Mousse remains a staple at my gatherings, reminding me of friendship, laughter, and the joy of cooking. Plus, it’s incredibly versatile and can easily be adapted for any sweet tooth!
Ingredients
Here’s what you’ll need to create this delectable Peanut Butter Cup Cottage Cheese Mousse:
-
Cottage Cheese (1 cup)
- A creamy base that adds protein and a light texture. Opt for low-fat or full-fat, depending on your preference. For a dairy-free option, try silken tofu!
-
Natural Peanut Butter (½ cup)
- Choose a good-quality, unsweetened peanut butter for the best flavor. You can substitute it with almond butter or sunflower seed butter if allergies are a concern.
-
Honey or Maple Syrup (¼ cup)
- These natural sweeteners provide just the right amount of sweetness. Feel free to adjust to taste or use a sugar substitute like stevia if you want to cut down on the sugars.
-
Vanilla Extract (1 teaspoon)
- Adds a warm floral note to your mousse. Always use pure vanilla extract for a richer flavor.
-
Cocoa Powder (2 tablespoons)
- This will give you that chocolatey element, evoking the classic flavor of peanut butter cups. For a richer taste, opt for dark cocoa powder.
-
Greek Yogurt (¼ cup, optional)
- Adds extra creaminess and a tangy flavor kick. Feel free to leave this out if you want a lighter mousse.
-
Whipped Cream (for topping, optional)
- A dollop on top makes this dessert feel truly indulgent! You can whip up some coconut cream for a dairy-free version.
Step-by-Step Instructions
Ready to whip up this delightful dessert? Let’s get cooking!
-
Prep Your Ingredients
Start by gathering all your ingredients and measuring them out. This ensures a smooth cooking process. Plus, it’s a lot more fun to have everything ready to go! -
Blend the Cottage Cheese
Add the cottage cheese to a food processor or blender. This step is essential! Blend until the cottage cheese is silky and smooth—about 1-2 minutes. This ensures no lumps and a mousse-like texture. -
Incorporate the Peanut Butter
Once your cottage cheese is nice and creamy, add in the natural peanut butter. Blend again until the mixture is fully combined. You should get a luscious peanut butter cream that will make your KitchenAid swoon! -
Sweeten It Up
Now, add in the honey or maple syrup, vanilla extract, and cocoa powder. Blend until everything is well mixed. Give it a taste! Don’t be shy—feel free to adjust the sweetness to your liking. -
Optional Upgrades
If you’re feeling extra adventurous, mix in the Greek yogurt at this stage. It’ll give your mousse a slight tang and an even creamier texture. Blend once more until you achieve that beautiful mousse consistency! -
Chill the Mousse
Transfer your mousse into serving bowls or glasses. Pop them in the fridge for at least an hour to help set and chill. Trust me, this step makes a difference, allowing the flavors to meld beautifully! -
Serve and Enjoy
Once chilled, it’s time to garnish! You can top your mousse with whipped cream, a sprinkle of cocoa powder, or even a drizzle of melted chocolate for an extra touch of elegance.
Serving Suggestions
Presentation is key! Serve your peanut butter cup mousse in clear bowls or glasses to showcase its beautiful colors. You can add a few crushed peanuts or chocolate shavings on top for that extra flair. It’s honestly so simple yet oh-so-elegant. If you’re hosting, consider pairing it with fresh fruit like strawberries or banana slices on the side for a pop of color!
Recipe Variations
Now, let’s get creative! Here are some fun twists to try:
-
Add a Fruit Twist: Incorporate a layer of your favorite fruit puree, like banana or raspberry, at the bottom of your serving glasses before adding the mousse.
-
Choco-Peanut Butter Swirl: Simply fold in some melted dark chocolate into the mousse for a richer flavor.
-
Nutty Crunch: Mix in chopped nuts or granola for a delightful crunch!
-
Dairy-Free Delight: Swap cottage cheese with silken tofu and use coconut cream for topping to make it dairy-free and vegan-friendly.
-
Spicy Kick: Add a pinch of cayenne pepper or a dash of cinnamon for a surprising heat that pairs beautifully with peanut butter!
Chef’s Notes
One of my favorite things about cooking is that it’s always evolving. This recipe came together as a means to satisfy those late-night cravings without the guilt, and it has since become a go-to treat for me. I still remember the first time I brought it to a potluck, and everyone was surprised to learn it was made with cottage cheese. Their reactions were priceless!
Cooking should be fun and experimental, so don’t hesitate to play around with this recipe and make it your own. You may even come up with a twist that becomes your signature dish!
FAQs and Troubleshooting
Q: Can I use non-dairy alternatives?
Absolutely! You can use silken tofu instead of cottage cheese and coconut cream for whipped topping to keep it dairy-free.
Q: The mousse isn’t thickening. What did I do wrong?
It should thicken up in the fridge as it chills. If it’s still not to your liking, consider blending in a bit of gelatin (for non-vegan) or chia seeds to help it set.
Q: How long will leftovers last?
Stored in an airtight container in the fridge, this mousse should last about 3-5 days. Just give it a quick stir before serving!
Q: Can I freeze this mousse?
While it’s best enjoyed fresh, you can freeze it for up to a month. Just be aware that the texture may change slightly upon thawing.
Nutritional Info
Per serving (without optional toppings):
- Calories: ~210
- Protein: 12g
- Fat: 10g
- Carbohydrates: 20g (with natural sugars)
- Fiber: 2g (varies based on ingredients)
And there you have it! A guilt-free indulgence perfect for any occasion, packed with rich flavors and delightful textures. I hope you enjoy making this Peanut Butter Cup Cottage Cheese Mousse as much as I do. Happy cooking, and don’t forget to share your creations with me!
Print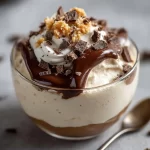
Peanut Butter Cup Cottage Cheese Mousse
- Total Time: 70 minutes
- Yield: 4 servings 1x
- Diet: Gluten-Free, Vegetarian
Description
A light and creamy mousse made with cottage cheese and peanut butter, perfect for a guilt-free indulgence.
Ingredients
- 1 cup Cottage Cheese
- ½ cup Natural Peanut Butter
- ¼ cup Honey or Maple Syrup
- 1 teaspoon Vanilla Extract
- 2 tablespoons Cocoa Powder
- ¼ cup Greek Yogurt (optional)
- Whipped Cream (for topping, optional)
Instructions
- Prep your ingredients by gathering and measuring them out.
- Blend the cottage cheese in a food processor until silky and smooth.
- Incorporate the peanut butter and blend until fully combined.
- Sweeten it up by adding honey or maple syrup, vanilla extract, and cocoa powder, then blend until mixed.
- Optional upgrades: mix in Greek yogurt for extra creaminess and blend again.
- Chill the mousse in the fridge for at least an hour to set.
- Serve and enjoy with toppings like whipped cream or cocoa powder.
Notes
This recipe can be easily adapted to be dairy-free by using silken tofu and coconut cream. Experiment with flavors and toppings!
- Prep Time: 10 minutes
- Cook Time: 0 minutes
- Category: Dessert
- Method: No-Cook
- Cuisine: American
Nutrition
- Serving Size: 1 serving
- Calories: 210
- Sugar: 12g
- Sodium: 130mg
- Fat: 10g
- Saturated Fat: 2.5g
- Unsaturated Fat: 7.5g
- Trans Fat: 0g
- Carbohydrates: 20g
- Fiber: 2g
- Protein: 12g
- Cholesterol: 10mg
Keywords: peanut butter, mousse, cottage cheese, dessert, healthy dessert, guilt-free dessert, no-bake dessert