

Air Fryer Butternut Squash Halves: Quick, Crispy Side
Air Fryer Butternut Squash Halves: A Cozy, Flavorful Delight
Welcome to my kitchen, dear friends! Today, we’re diving into the delightful world of butternut squash, specifically in the form of Air Fryer Butternut Squash Halves. If you haven’t experienced the wonder of cooking squash in an air fryer, you’re in for a treat! I can hardly contain my excitement as I think about the sweet, nutty flavor of roasted butternut squash, combined with the ease and convenience of using an air fryer. Whether you’re looking for a simple side dish, a comforting meal, or a nourishing treat, this recipe ticks all the boxes!
But let’s be honest for a moment; cooking doesn’t have to be a wild culinary adventure every time. This recipe is about savoring the simple pleasures of food. The air fryer takes the humble butternut squash to new heights, providing tender, caramelized, and deliciously savory halves in no time at all. Plus, the best part? You can enjoy them on a weeknight or wow your friends at a holiday gathering.
Let’s jump into some kitchen magic! Ready to impress your taste buds and your loved ones with this delicious dish? Buckle up, and let’s get cooking! I promise you, this is not just a recipe; it’s a heartfelt experience.
A Cozy Memory
My love affair with butternut squash started on cool autumn afternoons when my grandma would make her famous roasted squash for Sunday dinners. I can still picture the kitchen filled with the warm aroma of herbs and spices, mingling with laughter and stories shared around the family table. She would slice that squash with such precision, her hands moving like seasoned art. Grandma would always say, “It’s not just about the food; it’s about the love you put into it.”
One day, in her cozy kitchen, while watching her work, I asked her to teach me her secrets. She chuckled and said jokingly, “Oh, dear! There are no secrets in cooking, just a little heart and some kitchen know-how!” That’s exactly what this recipe embodies! It’s about celebrating those nostalgic times, transforming simple ingredients into something heartwarming, and adding your own twist—just like grandma would have wanted.
Ingredients
Here’s what you’ll need to bring this cozy dish to life, along with some helpful tips:
-
1 Medium Butternut Squash
The star of the show! Choose a squash that feels heavy for its size with smooth, unblemished skin. If you can’t find butternut squash, pumpkin or acorn squash is a great substitute. -
2 tablespoons Olive Oil
This adds just the right richness to our squash. If you’re watching your calories, feel free to reduce the amount. You could also use melted coconut oil for a delightful flavor. -
1 teaspoon Salt
Salt enhances the natural sweetness of the squash. If you’re looking for low-sodium options, consider using a pinch of garlic powder or herb seasoning for flavor. -
1/2 teaspoon Black Pepper
Black pepper provides a kick, but if you prefer a milder flavor, you can use white pepper instead. -
1 teaspoon Ground Cinnamon
This is optional, but it adds a warm, sweet note that complements the squash beautifully. For a twist, try nutmeg or allspice instead! -
Fresh Herbs (optional)
Fresh sage or thyme makes for a flavorful herbaceous topping. If you don’t have fresh herbs, dried ones will do!
Step-by-Step Instructions
Let’s get that air fryer humming! Here’s how to make your Air Fryer Butternut Squash Halves step by step:
-
Prepare the Squash
Start by washing and drying your butternut squash. Using a sharp knife, carefully cut it in half lengthwise. If you’re not used to knife work, take it slow and steady; safety first! The flesh is pretty tough, so ensure your knife is sharp. -
Scoop Out the Seeds
Using a spoon, scoop out the seeds and the fibrous strings in the center. This part can be messy, but that’s part of the fun! Save those seeds if you want to roast them later as a crunchy snack. -
Season the Squash
Place the squash halves cut-side up on a large cutting board. Drizzle the olive oil over each half and sprinkle the salt, pepper, and cinnamon. Use your hands to rub the seasoning all over the flesh, ensuring an even coating. This is where the magic begins! Your hands will get a little oily, but that’s just a reminder of the love you’re putting into your dish. -
Air Frying Time
Preheat your air fryer to 370°F (190°C). Once hot, carefully place the butternut squash halves in the air fryer basket, cut-side up. Don’t overcrowd! You want to let the air circulate for that perfect roast. Depending on your air fryer’s capacity, you might need to do this in batches. -
Cook and Check
Air fry the squash for about 25-30 minutes. Halfway through, take a peek and check for tenderness by poking it with a fork. If it glides through easily, you’re all set—if not, let it cook a bit longer. The goal is perfectly tender flesh that’s also caramelized on top. Yum! -
Serving the Squash
Once cooked, carefully remove the squash from the air fryer. Be sure to let it cool for a few minutes before serving. As a finishing touch, sprinkle some fresh herbs on top for a pop of color and extra flavor.
Serving Suggestions
These Air Fryer Butternut Squash Halves are incredibly versatile! You can serve them as a side dish at dinner, stuffed with grains or quinoa for a heartier meal, or simply drizzled with a little balsamic glaze for a touch of sweetness. They pair beautifully with chicken, pork, or even a lovely fall salad.
For a fun presentation, you can place them on a large serving platter alongside some additional sautéed greens or roasted veggies to brighten up the dish.
Recipe Variations
-
Stuffed Squash: After air frying, scoop out some of the flesh and mix it with cooked grains, nuts, cranberries, and spices for a delicious stuffing.
-
Sweet Maple Glaze: Drizzle some maple syrup over the halves in the last few minutes of cooking for a sweet twist.
-
Spicy Kick: Add a sprinkle of cayenne pepper or chili powder for some heat alongside the cinnamon.
-
Cheesy Goodness: Top with crumbled feta or goat cheese before serving for a savory finish.
-
Mediterranean Touch: Blend in sun-dried tomatoes and olives for a unique flavor profile that transports your taste buds straight to the Mediterranean.
Chef’s Notes
Cooking is not just about following a recipe; it’s about experimenting, creating, and making it your own. This Air Fryer Butternut Squash Halves recipe has evolved since I first started making it. Initially, I kept it super simple, but I’ve found that experimenting with spices and toppings allows me to honor the essence of what butternut squash is while adding my own personal flair.
And sometimes, kitchen mishaps become the best stories! One time, I miscalculated the air fryer settings and ended up with a truly caramelized batch of squash—I thought I ruined dinner, but everyone loved the intensified flavor. So don’t sweat it if something doesn’t go precisely as planned; celebrate those "happy accidents!"
FAQs and Troubleshooting
Q1: How do I know when the butternut squash is done cooking?
You’ll want to test the tenderness with a fork. It should slide in easily without resistance. If it feels firm, give it a few more minutes!
Q2: Can I use frozen butternut squash?
Absolutely! Just adjust the cooking time. Frozen squash may need slightly less time, so start checking for doneness at around 20 minutes.
Q3: My squash turned out mushy; what went wrong?
This can happen if the squash was overcooked or if there was too much moisture. Make sure to check it a little earlier next time!
Q4: Can I make this in the oven?
For sure! Preheat your oven to 400°F (200°C) and roast the squash halves for about 40-50 minutes, cut-side up, until tender and caramelized.
Nutritional Info
While I encourage you to enjoy your cooking journey, I know nutrition is important! Butternut squash is loaded with vitamins A and C, high in fiber, and low in calories. It’s the ultimate comforting dish that also provides a nutrient boost—definitely a win-win!
And there you have it! Air Fryer Butternut Squash Halves, bursting with flavor and the warmth of home cooking. I hope this recipe brings as much joy to your kitchen as it does to mine! Whether you whip it up on your own or gather friends and family around, remember to savor each bite and make it your own. Happy cooking, friends!
Print
Air Fryer Butternut Squash Halves
- Total Time: 45 minutes
- Yield: 4 servings 1x
- Diet: Vegetarian
Description
Delight in the sweet, nutty flavors of roasted butternut squash halves, perfectly cooked in an air fryer for a quick and healthy dish.
Ingredients
- 1 Medium Butternut Squash
- 2 tablespoons Olive Oil
- 1 teaspoon Salt
- 1/2 teaspoon Black Pepper
- 1 teaspoon Ground Cinnamon (optional)
- Fresh Herbs (optional, for topping)
Instructions
- Prepare the Squash: Wash and dry your butternut squash. Cut it in half lengthwise with a sharp knife.
- Scoop Out the Seeds: Use a spoon to remove the seeds and fibrous strings in the center.
- Season the Squash: Drizzle olive oil on each half and sprinkle with salt, pepper, and cinnamon. Rub the seasoning over the flesh.
- Air Frying Time: Preheat your air fryer to 370°F (190°C). Place the squash halves cut-side up in the basket.
- Cook and Check: Air fry for about 25-30 minutes, checking for tenderness halfway through.
- Serve the Squash: Remove from the air fryer, let cool, and sprinkle fresh herbs on top before serving.
Notes
Experiment with different spices and toppings like maple syrup, cayenne pepper, or cheese for diverse flavors.
- Prep Time: 15 minutes
- Cook Time: 30 minutes
- Category: Side Dish
- Method: Air Frying
- Cuisine: American
Nutrition
- Serving Size: 1 half
- Calories: 150
- Sugar: 2g
- Sodium: 300mg
- Fat: 10g
- Saturated Fat: 1g
- Unsaturated Fat: 8g
- Trans Fat: 0g
- Carbohydrates: 23g
- Fiber: 4g
- Protein: 3g
- Cholesterol: 0mg
Keywords: butternut squash, air fryer, vegetarian, side dish, healthy cooking
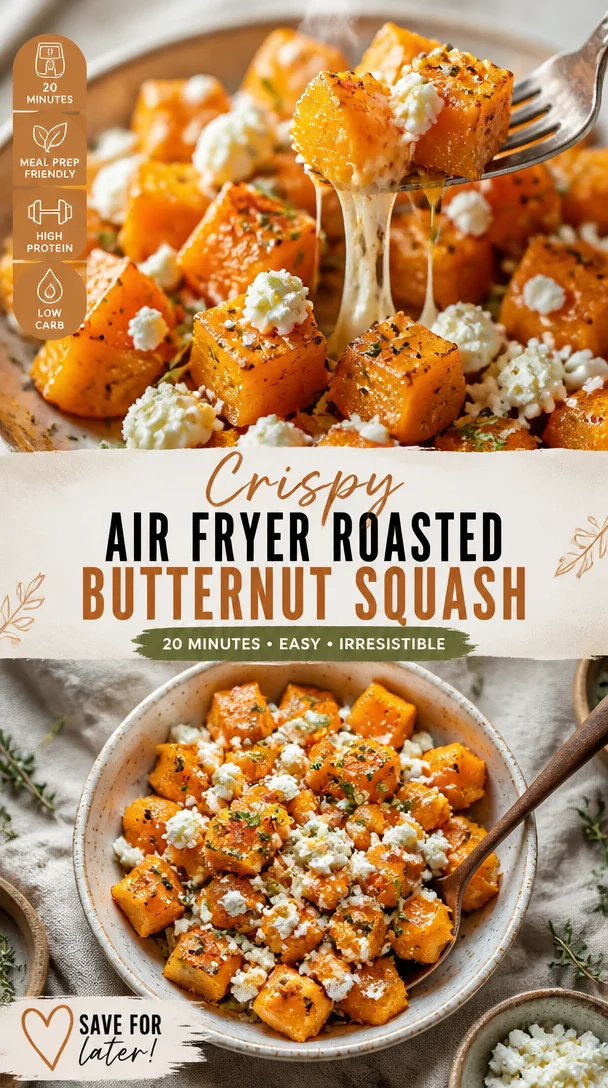
Crispy Air Fryer Roasted Butternut Squash in 20 Minutes
Air Fryer Roasted Butternut Squash: A Cozy Delight
Welcome back to my kitchen, my dear reader! Today, we’re diving into a dish that perfectly captures the essence of cozy cooking: Air Fryer Roasted Butternut Squash. If you’ve ever had a moment in the kitchen where the aroma of something warm and sweet fills the air, you know just how comforting it can be. The sweet, nutty flavor and buttery texture of roasted butternut squash warm not just your belly but your heart too.
Now, I know what some of you might be thinking: “But Olivia, I can just toss squash in the oven. Why the air fryer?” Let me tell you, my friends, this kitchen gadget is a game-changer! With the air fryer, you’ll get that golden, caramelized crunch on the outside while keeping the tender goodness inside. Plus, it’s faster and uses less oil than traditional frying or roasting methods, making it a perfect option for weeknight dinners or last-minute gatherings.
Before we jump into the recipe, let me set the scene for you. Picture this: it’s a chilly autumn afternoon, leaves are swirling in the wind, and the smell of something delicious fills your home. You pull out a beautiful butternut squash, a vibrant orange canvas waiting to be transformed. As you peel and chop it, you’re hit with a flashback — your grandmother’s kitchen, where she would whip up comforting autumn dishes that made everyone feel at home. It’s a food memory, simple yet profound, and it reminds us of why we cook: to create connections, to savor flavors, and to bring warmth to our lives.
So, let’s embrace that nostalgia and turn our butternut squash into something truly unforgettable! Grab your apron (don’t worry, messy hands are the hallmark of a good cook), and let’s get started on this delicious journey together.
Personal Story
Ah, butternut squash! Whenever I think about it, my mind wanders back to family gatherings during the holidays. My grandmother, the undisputed queen of the kitchen, would always feature this delightful squash in her seasonal repertoire. I can almost hear her chuckling as she’d ask for my help in peeling and slicing; she insisted it was her secret weapon for impressing guests.
I remember one year when I decided to surprise her by making my very own butternut squash dish. I borrowed her recipe, attempting to put my spin on it with spices I had learned about. Let’s just say my enthusiasm got the better of me, and I may have gone a bit overboard with the cinnamon! My grandmother adored the effort, though; we both ended up in stitches as we tasted my concoction. It wasn’t perfect — but it was ours. That experience taught me a valuable lesson: it’s not just about the food; it’s about the love, the laughter, and the stories that unfold in the kitchen.
Ingredients
Here’s everything you’ll need to roast your butternut squash to perfection in the air fryer:
-
Butternut Squash: The star of the show! Make sure to choose a firm squash without blemishes. If you’re short on time, pre-cut squash can work too, but fresh is always best!
-
Olive Oil: A light drizzle will help the squash caramelize. Avocado oil can be a great substitute for a high smoke point and buttery flavor.
-
Salt: Just a pinch enhances the natural flavors. Feel free to use sea salt or kosher salt based on your preference.
-
Black Pepper: Freshly cracked produces the best flavor. For a little kick, consider swapping in red pepper flakes.
-
Garlic Powder: This adds a savory depth. You can use fresh minced garlic, but I love the instant flavor boost that powder gives.
-
Paprika: For a hint of smokiness! Try smoked paprika for an extra punch.
-
Maple Syrup (optional): If you want to amplify that sweetness, a touch of pure maple syrup is heavenly.
-
Fresh Herbs (optional): Rosemary or thyme can elevate your dish. Just toss some in at the end for vibrant flavor.
With these ingredients, you’ll create a delightful dish that’s not only healthy but packed with flavor. And remember, cooking is about personal flair! If you have herbs or spices you love, sprinkle them in and make it your own.
Step-by-Step Instructions
Ready to transform that squash into something magical? Let’s break this down step-by-step:
-
Prep Your Squash: Start by washing your butternut squash. Once clean, carefully cut off both ends — this gives it stability when slicing. With a sharp vegetable peeler, peel off the skin in long strokes. You might feel like a master chef at this point!
-
Cut it Up: Next, slice the squash in half lengthwise, scoop out the seeds with a spoon (you can roast those later for a crunchy snack), and chop it into bite-sized cubes. Aim for uniform pieces so they cook evenly.
-
Season it Right: In a large mixing bowl, toss the cubed squash with olive oil, salt, black pepper, garlic powder, and paprika. If you’re adding maple syrup, drizzle it in now. Use your hands to ensure each piece is thoroughly coated — this is the fun part!
-
Preheat Your Air Fryer: While you’re mixing, preheat your air fryer to 375°F (190°C). This will help your squash start crisping up right away.
-
Air Fry to Perfection: Place the seasoned squash in the air fryer basket in a single layer, making sure there’s some space between the cubes for that all-important air circulation. (If your air fryer is small, you might need to do this in batches.)
-
Cooking Time: Air fry for about 15-20 minutes, shaking the basket halfway through the cooking time. This helps to get every side golden and slightly crispy. Keep an eye on it during the last few minutes — you want that perfect caramelization!
-
Finishing Touches: Once the squash is tender and golden brown, remove it from the air fryer. Toss it with fresh herbs if desired or a final drizzle of maple syrup for that sweet touch.
And just like that, you’ve created something extraordinary! It’s so satisfying to pull out beautifully roasted butternut squash.
Serving Suggestions
Let’s talk plating! For a cozy night in, serve your air-fried butternut squash on a rustic wooden board alongside a warm grain salad or simply with a bowl of your favorite soup. If you’re feeling fancy, sprinkle some feta or goat cheese on top, along with extra herbs for a gourmet touch.
For gatherings, arrange the squash on a beautiful serving platter and accompany it with dips like tahini or yogurt sauce. Trust me; your guests will be raving about it long after the last piece is snatched up!
Recipe Variations
Now, let’s shake things up! Here are a few creative twists you can try with this air fryer roasted butternut squash:
-
Spicy Maple: Add a pinch of cayenne alongside the maple syrup for a sweet and spicy kick!
-
Curry Flavor: Swap out the paprika for curry powder for an exotic twist. A touch of coconut oil can also add a nice flavor!
-
Sweet & Savory: Toss in some dried cranberries or raisins halfway through cooking for a burst of sweetness that pairs beautifully with the squash.
-
Mediterranean Style: Use olive oil, lemon zest, and some za’atar seasoning for a vibrant, herbaceous flavor profile.
-
Nutty Crunch: After cooking, sprinkle chopped pecans or walnuts over the top for added texture and flavor.
Chef’s Notes
Oh my goodness, let me share a funny story from my kitchen adventures! The first time I attempted this dish was, let’s just say, a learning experience. I was so excited and distracted by the enticing smell of roasting squash that I forgot a key step — the seasoning! It wasn’t until I took that first bite that I realized I’d forgotten to add the salt and pepper. The flavor was like a blank canvas! Lesson learned: always read the recipe twice before starting! Now, I keep my spices within arm’s reach, just a little reminder as I cook.
This recipe has evolved over the years. Initially, it started as a winter dish, but now I find myself roasting butternut squash all year round. It’s a versatile secret weapon for adding flavor and color to any meal.
FAQs and Troubleshooting
-
Why isn’t my squash getting crispy?
- If your squash is soggy instead of crispy, it might be due to overcrowding the air fryer basket. Make sure the pieces are in a single layer and not stacked on top of each other.
-
Can I use frozen butternut squash?
- Absolutely! Just be aware that the cooking time might vary. Start at a lower temperature and adjust accordingly until tender.
-
How do I know when the squash is done?
- You want the squash to be fork-tender and caramelized on the edges. A good rule of thumb is to test a piece with a fork after about 15 minutes.
-
Can I prepare this in advance?
- Certainly! Roasted butternut squash can be stored in the fridge for up to 3 days. Just reheat in the air fryer for a few minutes before serving to regain that lovely texture!
Nutritional Info
While this recipe isn’t labeled as “healthy” or “indulgent,” butternut squash is indeed a nutritional powerhouse. It’s low in calories yet rich in vitamins A and C, and it’s packed with fiber. If you’re curious about exact nutritional info, feel free to use a calorie-counting app based on the quantities you use — but honestly, it’s more about enjoying the deliciousness and the memories created along the way!
So there you have it, my friends! A simple, cozy dish that embraces the essence of home cooking. May your air fryer be an extension of your love for flavor, and may every bite remind you of warmth, laughter, and cherished moments in the kitchen. I hope you’ll give this roasted butternut squash a try, and if you do, let me know your thoughts! Happy cooking! 🍂💛
Print
Air Fryer Roasted Butternut Squash
- Total Time: 35 minutes
- Yield: 4 servings 1x
- Diet: Vegetarian
Description
A cozy dish that features sweet, nutty butternut squash roasted to perfection in an air fryer.
Ingredients
- 1 Butternut Squash
- 2 tablespoons Olive Oil
- 1/2 teaspoon Salt
- 1/4 teaspoon Black Pepper
- 1 teaspoon Garlic Powder
- 1 teaspoon Paprika
- 1 tablespoon Maple Syrup (optional)
- Fresh Herbs (optional)
Instructions
- Prep your squash: Start by washing your butternut squash. Cut off both ends, then peel off the skin.
- Cut it up: Slice the squash in half lengthwise, scoop out the seeds, and chop it into bite-sized cubes.
- Season it right: Toss the cubed squash with olive oil, salt, black pepper, garlic powder, and paprika. Add maple syrup if desired.
- Preheat your air fryer to 375°F (190°C).
- Air fry the squash: Place the seasoned squash in the air fryer basket in a single layer.
- Cook for about 15-20 minutes, shaking the basket halfway through.
- Finishing touches: Once tender and golden brown, remove from the air fryer and toss with fresh herbs if desired.
Notes
For a cozy night, serve with a warm grain salad or soup. Sprinkling feta or goat cheese adds a gourmet touch.
- Prep Time: 15 minutes
- Cook Time: 20 minutes
- Category: Side Dish
- Method: Air Frying
- Cuisine: American
Nutrition
- Serving Size: 1 serving
- Calories: 150
- Sugar: 7g
- Sodium: 200mg
- Fat: 7g
- Saturated Fat: 1g
- Unsaturated Fat: 5g
- Trans Fat: 0g
- Carbohydrates: 22g
- Fiber: 3g
- Protein: 2g
- Cholesterol: 0mg
Keywords: butternut squash, air fryer, roasted vegetables, healthy recipes, fall recipes
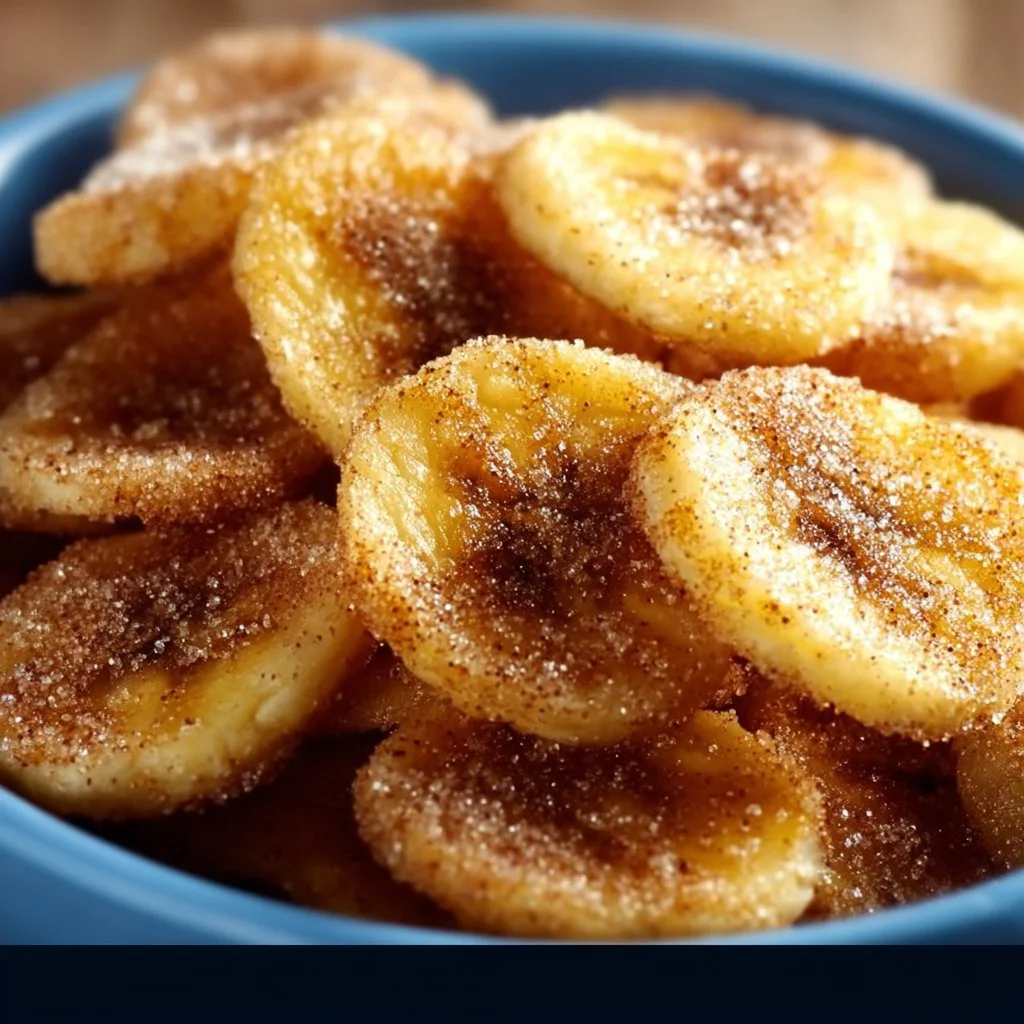
Cinnamon-Sugar Air Fryer Banana Chips
# Cinnamon-Sugar Air Fryer Banana Chips: A Sweet Treat for Every Occasion

## Introduction

Welcome to my cozy little corner of the internet! I’m Olivia Bennett, your friendly, neighborhood kitchen enthusiast ready to share one of my absolute favorite snacks: Cinnamon-Sugar Air Fryer Banana Chips. If you're anything like me—someone who finds pure bliss in the aroma of something delicious wafting through the air—you'll love how quick and easy it is to whip up this delightful treat.

These banana chips are crispy, crunchy, and just the right balance of sweet and spicy. Plus, they’re made right in your air fryer, which means minimal mess and maximum flavor. It’s like a hug for your taste buds! The best part? They’re a healthier alternative to traditional potato chips, so you can enjoy them guilt-free. Whether you're snacking solo or entertaining friends and family, these banana chips are sure to satisfy and spark conversations about your kitchen adventures!

As the seasons change and the days get busier, it’s essential to find those quick yet rewarding recipes to keep us grounded in the kitchen. Making your own snacks has a sense of nostalgia and creativity. Remember when we used to gather around the kitchen table, sharing stories and munching on homemade goodies? That’s the vibe we’re going for! So grab your apron, and let’s dive into the world of air fryer banana chips!

---

## Personal Story

I still remember the first time I made these banana chips. It was a lazy Sunday afternoon, and I had a handful of overripe bananas sitting on the counter—those beauties that definitely weren’t getting eaten raw anymore. I knew I wanted to create something special with them, but I didn’t have hours to spend in the kitchen. That’s when the air fryer came to my rescue!

With a little experimentation and plenty of joy, I sliced those bananas, sprinkled them with cinnamon and sugar, then popped them into the air fryer. I was beyond excited—would they turn out crunchy? Would they taste heavenly? Fast forward to the moment I opened the air fryer, and the sweet aroma enveloped me. The first bite was a revelation! They were perfectly crisp with just the right amount of sweetness, and I found myself daydreaming about all the fun ways I could enjoy them. From that day on, they became a staple in my home, and I couldn’t wait to share the recipe with everyone.

---

## Ingredients

Before we dive into the cooking process, let's gather our ingredients! Here's what you'll need:

- **Bananas**: Choose ripe bananas for the best sweetness and flavor. If you prefer, green bananas will work too; they’ll just be less sweet.
- **Cinnamon**: This warm spice not only adds flavor but also brings a delightful aroma. It's a staple in my spice cabinet, and you can easily swap it out for nutmeg or pumpkin spice if you're looking for a unique twist!
- **Sugar**: I use granulated sugar for that classic sweetness, but feel free to use coconut sugar, brown sugar, or even a sugar substitute if you’re following a particular diet.
- **Oil (optional)**: A light spray of coconut oil or canola oil helps to make the chips crispier, but you can also skip this if you prefer a lighter option.

### Quick Chef Insights
- **Banana Rips**: Look for bananas with a few brown spots; they’re at their sweetest.
- **Cinnamon Variety**: There are two main types of cinnamon: Ceylon (true cinnamon) and Cassia (more common). Ceylon is sweeter and more aromatic, but either will work wonderfully.
- **Sweetness Level**: Adjust the sugar based on your preference. If you're making these for kids, a little extra sweetness goes a long way!

---

## Step-by-Step Instructions

Ready to make some magic happen in your air fryer? Let’s get started with these easy-peasy steps!

### Step 1: Prep the Bananas
Peel your bananas and slice them into even rounds, about 1/4-inch thick. The important thing here is to keep those slices consistent. Thicker slices will be chewy, while thinner ones will crisp up nicely. Trust me; a little uniformity goes a long way!

### Step 2: Season the Slices
In a mixing bowl, combine your banana rounds with cinnamon and sugar. Use a tablespoon of sugar for every teaspoon of cinnamon (but feel free to adjust based on your taste preferences!). Toss gently to ensure all the banana slices are coated. **Chef Hack**: For extra crunch, you can dust some cornstarch along with your sugar and cinnamon mix.

### Step 3: Preheat the Air Fryer
This little gem works best when preheated! Set your air fryer to 350°F (175°C) and let it warm up for about 3 minutes. This step is crucial because it ensures your chips will crisp up perfectly.

### Step 4: Arrange the Bananas
Place your banana slices in the air fryer basket in a single layer. Try not to overcrowd them so they can cook evenly. If you have a small air fryer, you may need to do this in batches.

### Step 5: Air Fry Those Chips
Cook for about 10 to 15 minutes, flipping midway. Keep an eye on them so they don’t burn—yes, I speak from experience! They should come out golden brown and crispy.

**Tip**: Check around the 8-minute mark—every air fryer is a little different.

### Step 6: Cool and Crisp
Once the chips are done, carefully transfer them to a wire rack to cool. They will crisp up even more as they cool down, making it hard to resist sneaking one before they hit the serving platter!

---

## Serving Suggestions

Now that your Cinnamon-Sugar Air Fryer Banana Chips are all done and cooling, here’s how I like to serve them up! Arrange them in a fun, rustic bowl or on a colorful platter—the presentation makes all the difference. Pair them with a scoop of yogurt or serve them alongside a dipping sauce like peanut butter or even a drizzle of chocolate for that decadent feel. Fancy, right?

---

## Recipe Variations

Here are a few fun twists to take your banana chips to the next level:

- **Chocolate-Dipped Bliss**: Melt dark or white chocolate and dip half of the banana chips for an indulgent treat.
- **Nutty Bananas**: Sprinkle finely chopped nuts like almonds or pecans over your banana slices before air-frying. The crunch is phenomenal!
- **Spicy Kick**: Add a pinch of cayenne pepper for a sweet and spicy combination.
- **Coconut Delight**: Toss in some unsweetened shredded coconut for a tropical twist.

---

## Chef’s Notes

As I reflect on my journey of creating the perfect air fryer banana chips, I have to chuckle at my early attempts. The first batch turned out more like little banana pancakes than chips! However, with time and a few happy accidents, these chips became a staple around my home. They’re not just a tasty snack; they’ve transformed into fond memories of laughter and experimentation in the kitchen.

The beauty of cooking is that it’s always evolving. These banana chips are perfect as is, but they can also be the base for countless creative twists. Don’t be afraid to experiment!

---

## FAQs and Troubleshooting

### Q1: Why are my banana chips soggy?
A1: Make sure your banana slices are evenly cut and not too thick. Also, ensure that you're flipping them halfway through to allow even crisping.

### Q2: Can I use frozen bananas?
A2: Yes, but keep in mind that frozen bananas tend to be a bit mushier. Thaw them before slicing and seasoning.

### Q3: How can I store leftover banana chips?
A3: Store in an airtight container at room temperature for up to a week. However, I bet they won’t last that long!

### Q4: My chips browned too quickly. What happened?
A4: Air fryers can vary in temperature. If they brown too fast, try reducing the temperature to 325°F (160°C) and cooking a bit longer.

---

## Nutritional Info

While exact values can vary, here’s a rough estimate per serving (about 1 ounce):

- Calories: 150
- Carbohydrates: 35g
- Fiber: 3g
- Sugars: 12g
- Protein: 1g
- Fat: 0.5g

---

And there you have it! Your very own Cinnamon-Sugar Air Fryer Banana Chips that are perfect for snacking anytime. I hope this recipe inspires you to step into the kitchen and create something delightful! Remember to share your kitchen adventures—tag me on social media, and let’s keep this food community thriving. Happy cooking!

Cinnamon-Sugar Air Fryer Banana Chips
- Total Time: 25 minutes
- Yield: 2 servings 1x
- Diet: Vegan
Description
Crispy, sweet, and a healthier alternative to traditional snacks, these air fryer banana chips bring joy without the guilt.
Ingredients
- 2 ripe bananas
- 1 teaspoon cinnamon
- 1 tablespoon granulated sugar
- A light spray of oil (optional)
Instructions
- Peel your bananas and slice them into even rounds, about 1/4-inch thick.
- Combine your banana rounds with cinnamon and sugar in a mixing bowl.
- Preheat your air fryer to 350°F (175°C) for about 3 minutes.
- Place banana slices in a single layer in the air fryer basket.
- Cook for about 10 to 15 minutes, flipping midway.
- Transfer the chips to a wire rack to cool, allowing them to crisp up.
Notes
For extra crunch, dust some cornstarch along with your sugar and cinnamon mix. Store leftovers in an airtight container at room temperature for up to a week.
- Prep Time: 10 minutes
- Cook Time: 15 minutes
- Category: Snack
- Method: Air Frying
- Cuisine: American
Nutrition
- Serving Size: 1 ounce
- Calories: 150
- Sugar: 12g
- Sodium: 1mg
- Fat: 0.5g
- Saturated Fat: 0g
- Unsaturated Fat: 0g
- Trans Fat: 0g
- Carbohydrates: 35g
- Fiber: 3g
- Protein: 1g
- Cholesterol: 0mg
Keywords: air fryer snacks, banana chips, healthy snacks, cinnamon sugar, easy recipes
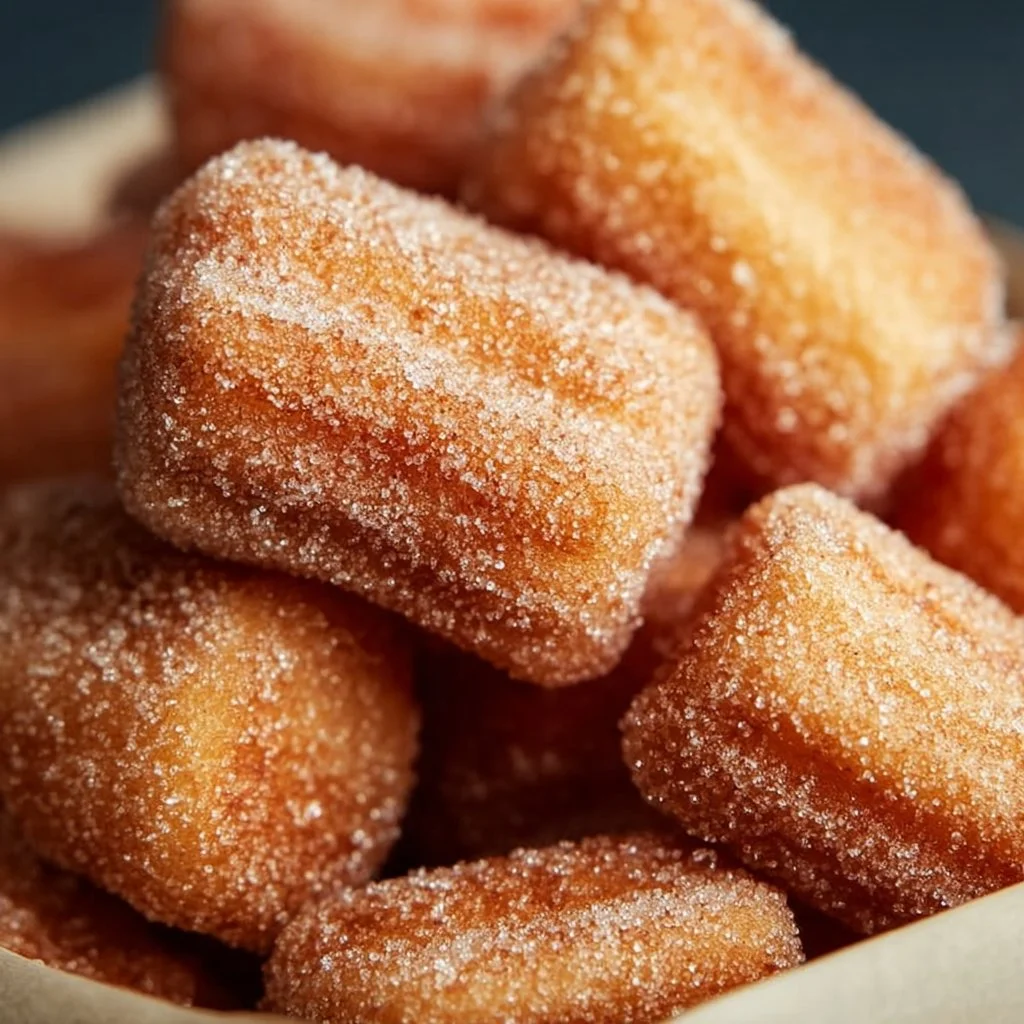
Crispy Air Fryer Churro Bites
Crispy Air Fryer Churro Bites: A Sweet Treat Worth Sharing!
Welcome to my cozy corner of the internet! I’m Olivia Bennett, your friendly guide through the world of delightful flavors and homemade goodness. Today, I’m excited to share a recipe that’ll have you dreaming of carnival nights and sweet indulgence: Crispy Air Fryer Churro Bites! Whether you’re looking to impress your friends or simply satisfy that sweet tooth, this recipe is the perfect combination of ease and deliciousness.
Imagine the warm aroma of cinnamon and sugar wafting through your kitchen, enveloping you in memories of fun fairs and festive events. Whenever I think of churros, I can’t help but smile. There’s something undeniably nostalgic about them; perhaps it’s the crispy exterior giving way to a soft, pillowy inside, or maybe it’s the sheer joy of seeing a little one’s eyes light up as they take their first bite. Whatever it is, churros have that magical ability to transform any ordinary day into a celebration, and today, we’re harnessing that magic in bite-sized form using the air fryer.
Why the air fryer, you ask? Well, I love the crispy texture it offers without the fuss or calories of deep-frying. These churro bites are not only super easy to whip up, but they are also a guilt-free indulgence that lets you and your loved ones enjoy a classic treat in a healthier way. So, roll up your sleeves and let’s dive into the world of crispy, caramelized, cinnamon-sugar happiness. I promise this will be one of the most delightful kitchen adventures you’ve embarked on!
Personal Story
Let me take you back to one of my fondest childhood memories: a summer evening at the carnival. The sun had just dipped below the horizon, painting the sky in delicious cotton-candy hues as the faint sounds of laughter and thrill rode the air like a sweet melody. My family and I would roam from ride to ride, trying our hands at games and cheekily racing each other to try all the food stands. My absolute favorite? The churro cart.
I’ll never forget that crisp first bite as I savored the warm sweetness, the dusting of cinnamon sugar sticking to my fingers. I can still hear my dad’s laughter as I tried to lick the sugar off my fingers before it smudged my face—an impossible task! That simple joy of discovery and laughter made those churros feel like magic. Fast forward to today, and I still crave that experience. With my air fryer, I can replicate those tranquil carnival evenings right at home. So, let’s recreate that magic together!
Ingredients
Here’s what you’ll need to bring these Crispy Air Fryer Churro Bites to life:
-
For the Churro Bites:
- 1 cup all-purpose flour
- This is your base! For a gluten-free option, sub with almond or oat flour; the texture will vary slightly, but they’ll still be delicious.
- 2 tablespoons granulated sugar
- Adds a touch of sweetness to the churro dough. You can use coconut sugar for a more caramel-like flavor.
- 1 teaspoon baking powder
- Helps the churro bites rise and puff up perfectly. Double-check that it’s fresh for the best results!
- 1/2 teaspoon ground cinnamon
- The classic spice that defines churros. Feel free to mix up the spice game with some nutmeg or cardamom if you want a twist!
- 1/4 teaspoon salt
- Balances out the sweetness. Don’t skip this; it’s essential for flavor depth.
- 1/2 cup water
- This will help create the dough. You could also use milk for a richer flavor.
- 2 tablespoons unsalted butter
- Adds richness and flavor. You can substitute with vegan butter if you prefer a dairy-free option.
- 1 cup all-purpose flour
-
For the Cinnamon Sugar Coating:
- 1/4 cup granulated sugar
- This is the main star of the topping. An easy substitute could be a mix of half sugar and half stevia or monk fruit for a low-calorie version.
- 1 tablespoon ground cinnamon
- Essential for that warm churro flavor. You can play with the ratio to suit your taste!
- 1/4 cup granulated sugar
Step-by-Step Instructions
-
Prepare the Dough:
- In a medium saucepan, melt the butter over medium heat. Once melted, whisk in the water, granulated sugar, and salt until combined. Bring the mixture to a boil.
- Tip: Stirring constantly while bringing it to a boil prevents burning and ensures even cooking.
-
Mix in the Dry Ingredients:
- Once boiling, remove it from the heat and add the flour, baking powder, and cinnamon. Using a wooden spoon, quickly stir until a dough forms.
- Chef Hack: Let the dough rest for about 5 minutes after mixing. This allows the flour to hydrate fully and makes it easier to work with.
-
Shape the Churros:
- Transfer the dough into a piping bag fitted with a star tip (or a zip-top bag with the corner snipped off). Pipe small bites onto a piece of parchment paper, about 1-inch long.
- Pro Tip: If you dampen your fingers lightly, it’ll help shape the churro bites without the dough sticking to you.
-
Air Frying Time!
- Preheat your air fryer to 375°F (190°C). Spray the basket with a non-stick cooking spray. Place the churro bites in the basket, ensuring they’re spaced out for even cooking.
- Tip: Don’t overcrowd the basket. You might need to do this in batches depending on the size of your air fryer.
-
Cooking:
- Cook for about 8-10 minutes or until the churros are golden brown and crisp. Shake the basket halfway through for even browning.
- Chef Insight: If you like them extra crispy, add another minute or two, but keep an eye on them!
-
Cinnamon Sugar Coating:
- While the churro bites cool slightly, whisk together the sugar and cinnamon in a small bowl. Toss the warm churro bites in the cinnamon sugar until well coated.
- Tip: Do this step while the churros are warm for maximum adherence of the sugar coating!
Serving Suggestions
Plate these delightful churro bites in a colorful bowl and serve immediately! Pair them with a small dipping dish of chocolate sauce or caramel for an added sweet touch. If you’re feeling especially indulgent, a scoop of ice cream on the side would make for a heavenly treat!
Recipe Variations
Feeling adventurous? Here are a few creative twists to try:
-
Chocolate-Filled Churro Bites:
- Add a small piece of chocolate in the middle of each churro bite before air frying. Gooey chocolate filling will take them to the next level!
-
Pumpkin Spice Churro Bites:
- Substitute 1/4 cup of flour with pumpkin puree and add a pinch of nutmeg to the cinnamon sugar mixture for a fall-inspired treat.
-
Coconut Churro Bites:
- Mix shredded coconut into the dough for a tropical twist, and use coconut sugar for the cinnamon coating for extra flavor.
-
Savory Churro Bites:
- Swap out sugar for shredded cheese in the dough and enjoy as a savory snack; use herbs like rosemary or thyme in the coating. The possibilities are endless!
Chef’s Notes
This recipe has evolved over the years as I experiment with flavors and textures. I started with traditional churros, and after countless frying mishaps (and a few too many oil splatters), the air fryer became my go-to. Now, I can enjoy these crispy bites without feeling guilty on a cozy Sunday afternoon. Feel free to share your own variations with me; I love to see how this recipe sparks creativity in my fellow foodies!
FAQs and Troubleshooting
-
Q: Why are my churro bites not crispy?
- A: Ensure your air fryer is preheated properly. If they’re still not crispy, consider adding a little more time and checking frequently to avoid overcooking.
-
Q: Can I prepare the dough in advance?
- A: Yes! You can make the dough up to a day ahead; just store it covered in the fridge. Before use, let it come to room temperature for easier piping.
-
Q: Can these churros be frozen?
- A: Absolutely! Pipe and freeze the churro bites in a single layer on a baking sheet, then transfer to a zip-top bag once frozen. Air fry from frozen, adding a couple of minutes to the cook time.
-
Q: How do I keep the churros warm for a gathering?
- A: Place the cooked churro bites in a warm oven (around 200°F/90°C) until you’re ready to serve to keep them crispy and warm.
Nutritional Info (Optional)
(Typically optional, but here’s a basic rundown.)
- Serving Size: 5 churro bites
- Calories: Approximately 200
- Carbohydrates: 30g
- Protein: 2g
- Fat: 8g
- Sugar: 10g
With these Crispy Air Fryer Churro Bites, you’ll not only bring a bit of the carnival to your kitchen, but also create joyful memories! Enjoy whipping up these treats and share them with family and friends for a truly unforgettable experience. Happy cooking!
Print
Crispy Air Fryer Churro Bites
- Total Time: 25 minutes
- Yield: 5 servings 1x
- Diet: Vegetarian
Description
These Crispy Air Fryer Churro Bites are a guilt-free indulgence that bring the carnival spirit right into your home.
Ingredients
- 1 cup all-purpose flour
- 2 tablespoons granulated sugar
- 1 teaspoon baking powder
- 1/2 teaspoon ground cinnamon
- 1/4 teaspoon salt
- 1/2 cup water
- 2 tablespoons unsalted butter
- 1/4 cup granulated sugar (for coating)
- 1 tablespoon ground cinnamon (for coating)
Instructions
- Melt the butter in a medium saucepan over medium heat. Once melted, whisk in the water, granulated sugar, and salt until combined. Bring the mixture to a boil.
- Remove from the heat and add flour, baking powder, and cinnamon. Stir until a dough forms.
- Transfer the dough into a piping bag fitted with a star tip. Pipe small bites onto parchment paper, about 1-inch long.
- Preheat your air fryer to 375°F (190°C). Spray the basket with non-stick cooking spray and place churro bites in the basket.
- Cook for about 8-10 minutes until golden brown and crisp, shaking the basket halfway through.
- Whisk together the sugar and cinnamon in a bowl while churro bites cool slightly. Toss the warm churro bites in the cinnamon sugar until well coated.
Notes
Serve with chocolate sauce or caramel for dipping. Enjoy with ice cream for an indulgent treat!
- Prep Time: 15 minutes
- Cook Time: 10 minutes
- Category: Dessert
- Method: Air Frying
- Cuisine: Spanish
Nutrition
- Serving Size: 5 churro bites
- Calories: 200
- Sugar: 10g
- Sodium: 200mg
- Fat: 8g
- Saturated Fat: 4g
- Unsaturated Fat: 3g
- Trans Fat: 0g
- Carbohydrates: 30g
- Fiber: 1g
- Protein: 2g
- Cholesterol: 15mg
Keywords: churros, air fryer, dessert, sweet treats, carnival food




