
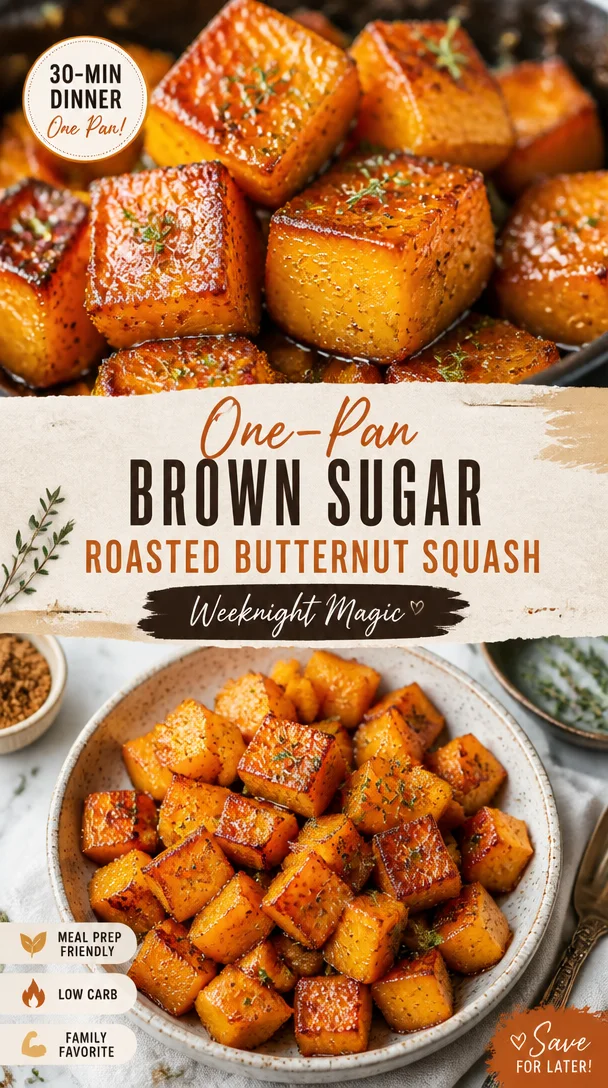
One-Pan Brown Sugar Roasted Butternut Squash (Weeknight)
Brown Sugar Roasted Butternut Squash: A Cozy Kitchen Delight
Welcome to my kitchen! Today, we’re diving into one of my all-time favorite comfort dishes: Brown Sugar Roasted Butternut Squash. As the weather starts cooling down and autumn whispers its arrival, there’s something incredibly special about cozying up with a warm, sweet, and savory dish that feels like a hug in a bowl. This roasted butternut squash recipe is rich, buttery, and kissed with the warm flavors of brown sugar and spices—perfect for adding a touch of fall magic to your dinner table or meal prep.
Imagine the sweet, caramelized aroma filling your kitchen as the squash roasts to golden perfection. Whether served as a side dish at Thanksgiving or enjoyed alongside a hearty grain bowl, this recipe is not only delicious but versatile, too! Plus, it’s so simple to make—if you can chop veggies and set a timer, you’re already halfway there!
So, grab your apron, and let’s embark on this cozy cooking adventure together. Not only will you end up with a delightful dish, but you’ll also find a space to reflect, connect, and enjoy the simple pleasures of cooking!
A Sweet Memory: The First Time I Roasted Squash
The first time I roasted butternut squash, I was a college student trying to impress my friends with my newfound cooking skills. I can still remember the day—it was chilly outside, and the leaves were swirling like dancers in the wind. Armed with my trusty old cookbook, I decided to tackle roasted butternut squash. As I chopped the vibrant orange flesh, the sweet aroma filled my small apartment kitchen, making my roommates flock in like moths to a flame.
With the oven doing its magic, I nervously paced around, waiting for those 30 minutes to pass. When the timer went off, I opened the oven door to find the squash beautifully caramelized, with that irresistible, sweet, and slightly nutty scent wafting through the air. It felt like I had unlocked a culinary treasure! That night, we all gathered around the table, laughter filling the air as we enjoyed our meal. That simple dish ignited my love for cooking and the joy of sharing homemade meals, a tradition I carry on through this blog.
Ingredients You’ll Need
Here’s the rundown of ingredients for this delicious Brown Sugar Roasted Butternut Squash. Each plays a crucial role in creating depth of flavor and that cozy vibe we crave.
-
Butternut Squash (1 medium): The star of the show! Sweet, nutty, and creamy when roasted. You can substitute with acorn or pumpkin if that’s what you have on hand.
-
Brown Sugar (¼ cup): This adds that irresistible caramel-like sweetness. If you want a healthier option, you can use coconut sugar or maple syrup in moderation.
-
Olive Oil (2 tablespoons): This helps in roasting the squash evenly. Feel free to swap it out with melted coconut oil for a different flavor profile.
-
Cinnamon (1 teaspoon): The warm spice perfectly complements the sweetness of the squash. Nutmeg or pumpkin pie spice also works beautifully here.
-
Salt (½ teaspoon): Just a pinch enhances all flavors. Remember, good quality sea salt is a chef’s best friend!
-
Black Pepper (¼ teaspoon): A little kick to offset the sweetness. Try smoked paprika for a more complex flavor twist.
-
Optional Fresh Herbs (½ teaspoon): Such as thyme or rosemary. They add an earthy freshness—perfect if you’re feeling adventurous!
Step-by-Step Instructions
Now, let’s get cooking! Follow these steps closely, and I promise you’ll end up with a stunning dish that will steal the show.
-
Prepare the Squash: Start by preheating your oven to 400°F (200°C). While it heats up, grab your butternut squash. Cutting it can be a bit challenging due to its tough skin. I recommend using a sturdy chef’s knife and being cautious—it’s easy to slip! Cut the squash in half lengthwise, scoop out the seeds with a spoon, and then chop it into bite-sized cubes. If you’re short on time, you can often find pre-cut butternut squash at the grocery store.
-
Mix the Ingredients: In a large mixing bowl, combine the cubed butternut squash, olive oil, brown sugar, cinnamon, salt, and black pepper. Smell that? It’s pure bliss! Toss everything together until the squash is well-coated, ensuring each piece is evenly dressed for roasting. Chef’s tip: Don’t be shy—use your hands for this! You’ll get a better sense of how much oil and sugar is clinging to your squash.
-
Roast, Baby, Roast: Spread the coated squash evenly on a baking sheet lined with parchment paper. This ensures easy cleanup and prevents sticking! Roast in the preheated oven for about 25-30 minutes. Halfway through, give it a good toss with a spatula so every piece gets a chance to caramelize beautifully. The goal is for your squash to be golden brown and fork-tender.
-
Cooling Down: Once ready, take the sheet out of the oven and allow the squash to cool for about 5 minutes. This will allow the flavors to settle in and avoid burning your tongue when you dive in!
-
Serving Time: Transfer the roasted squash to a beautiful serving bowl. Sprinkle with fresh herbs for that extra flair—trust me; your guests will be impressed!
Serving Suggestions
This Brown Sugar Roasted Butternut Squash is fantastic on its own, but let’s get creative! Serve it warm as a side dish alongside roasted chicken or grilled steak, or toss it over a bed of greens for a delicious salad. You can also mix it with quinoa or farro for a hearty, satisfying meal. It’s also incredible nestled into a grain bowl, topped with feta cheese, pumpkin seeds for crunch, and a drizzle of balsamic glaze.
Recipe Variations
Feeling adventurous? Here are a few creative twists to bring to this cozy dish:
-
Maple-Mustard Glaze: Replace the brown sugar with maple syrup and add a teaspoon of Dijon mustard for a sweet and tangy flavor.
-
Spicy Kick: Add a pinch of cayenne or red pepper flakes to the mixture for a delightful and warming heat.
-
Savory Spin: Swap cinnamon with cumin and toss in some chopped garlic. This will transform the squash into a fragrant, savory dish.
-
Herb Infusion: Mix in fresh sage or thyme before roasting to infuse your squash with fragrant herbal notes.
-
Sweet and Tart: Toss in some cranberries or pomegranate seeds after roasting for a burst of color and tartness that pairs perfectly with the sweetness.
Chef’s Notes
Over the years, this recipe has undergone a few transformations in my kitchen. Initially, it started with just olive oil and brown sugar, but as my palate has evolved, I’ve added spices and fresh herbs to enhance the flavors. I’ve even used this roasted squash as a filling in tacos—and let me tell you, it’s a game-changer!
And here’s a little kitchen story for you: One day, I accidentally spilled a whole jar of brown sugar into my bowl. Instead of panicking, I decided to embrace the extra sweetness and ended up with a deliciously caramelized flavor. So don’t be afraid of little accidents—sometimes they turn out to be happy accidents!
FAQs and Troubleshooting
1. My butternut squash didn’t caramelize—what went wrong?
This can happen if your oven isn’t hot enough or if the squash was packed too closely on the baking sheet. Ensure even spacing and that you preheat your oven thoroughly.
2. Can I make this dish ahead of time?
Absolutely! Roast the squash ahead of time and reheat it in the oven or microwave just before serving. It doesn’t lose its charm and flavors even as leftovers!
3. What’s the best way to cut a butternut squash?
Using a sharp knife and a cutting board with a damp towel underneath can help stabilize it. Start by cutting off both ends to create a flat surface for easier handling.
4. How can I store leftovers?
Store any leftover roasted squash in an airtight container in the fridge for up to 3-4 days. Reheat in the oven or the microwave, and enjoy!
Nutritional Information
(Per serving, approximately ½ cup)
- Calories: 150
- Protein: 2g
- Fat: 7g
- Carbohydrates: 25g
- Fiber: 3g
- Sugar: 10g
Isn’t it amazing how something so simple can evoke such joy and warmth? This Brown Sugar Roasted Butternut Squash is more than just a recipe; it’s a reminder to enjoy the little moments in the kitchen and the comfort of good food. Happy cooking, my friends, and may your kitchens always be filled with love and laughter!
Print
Brown Sugar Roasted Butternut Squash
- Total Time: 45 minutes
- Yield: 4 servings 1x
- Diet: Vegetarian
Description
A warm and sweet dish featuring roasted butternut squash caramelized with brown sugar and spices, perfect for fall!
Ingredients
- 1 medium Butternut Squash
- ¼ cup Brown Sugar
- 2 tablespoons Olive Oil
- 1 teaspoon Cinnamon
- ½ teaspoon Salt
- ¼ teaspoon Black Pepper
- ½ teaspoon Optional Fresh Herbs (thyme or rosemary)
Instructions
- Prepare the Squash: Preheat your oven to 400°F (200°C). Cut the squash in half lengthwise, scoop out the seeds, and chop into bite-sized cubes.
- Mix the Ingredients: In a large bowl, combine cubed squash, olive oil, brown sugar, cinnamon, salt, and black pepper. Toss until well-coated.
- Roast: Spread the coated squash on a lined baking sheet. Roast for 25-30 minutes, tossing halfway through, until golden and fork-tender.
- Cooling Down: Allow roasting squash to cool for about 5 minutes.
- Transfer to a serving bowl and sprinkle with fresh herbs if desired.
Notes
This dish can be made ahead of time and reheated before serving.
- Prep Time: 15 minutes
- Cook Time: 30 minutes
- Category: Side Dish
- Method: Roasting
- Cuisine: American
Nutrition
- Serving Size: ½ cup
- Calories: 150
- Sugar: 10g
- Sodium: 300mg
- Fat: 7g
- Saturated Fat: 1g
- Unsaturated Fat: 6g
- Trans Fat: 0g
- Carbohydrates: 25g
- Fiber: 3g
- Protein: 2g
- Cholesterol: 0mg
Keywords: butternut squash, roasted vegetables, fall recipes, vegetarian, cozy meals
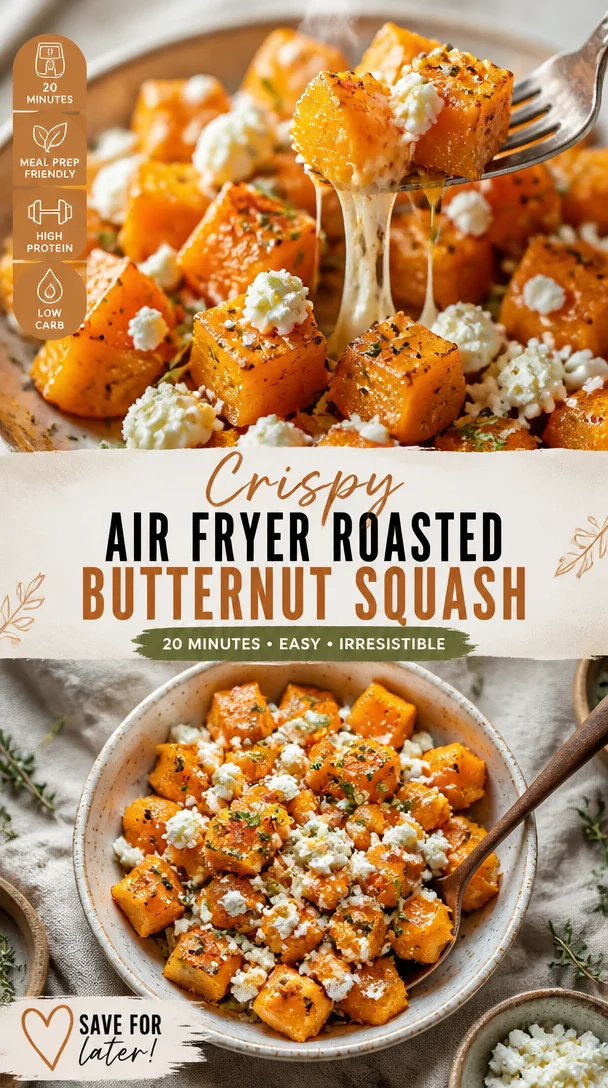
Crispy Air Fryer Roasted Butternut Squash in 20 Minutes
Air Fryer Roasted Butternut Squash: A Cozy Delight
Welcome back to my kitchen, my dear reader! Today, we’re diving into a dish that perfectly captures the essence of cozy cooking: Air Fryer Roasted Butternut Squash. If you’ve ever had a moment in the kitchen where the aroma of something warm and sweet fills the air, you know just how comforting it can be. The sweet, nutty flavor and buttery texture of roasted butternut squash warm not just your belly but your heart too.
Now, I know what some of you might be thinking: “But Olivia, I can just toss squash in the oven. Why the air fryer?” Let me tell you, my friends, this kitchen gadget is a game-changer! With the air fryer, you’ll get that golden, caramelized crunch on the outside while keeping the tender goodness inside. Plus, it’s faster and uses less oil than traditional frying or roasting methods, making it a perfect option for weeknight dinners or last-minute gatherings.
Before we jump into the recipe, let me set the scene for you. Picture this: it’s a chilly autumn afternoon, leaves are swirling in the wind, and the smell of something delicious fills your home. You pull out a beautiful butternut squash, a vibrant orange canvas waiting to be transformed. As you peel and chop it, you’re hit with a flashback — your grandmother’s kitchen, where she would whip up comforting autumn dishes that made everyone feel at home. It’s a food memory, simple yet profound, and it reminds us of why we cook: to create connections, to savor flavors, and to bring warmth to our lives.
So, let’s embrace that nostalgia and turn our butternut squash into something truly unforgettable! Grab your apron (don’t worry, messy hands are the hallmark of a good cook), and let’s get started on this delicious journey together.
Personal Story
Ah, butternut squash! Whenever I think about it, my mind wanders back to family gatherings during the holidays. My grandmother, the undisputed queen of the kitchen, would always feature this delightful squash in her seasonal repertoire. I can almost hear her chuckling as she’d ask for my help in peeling and slicing; she insisted it was her secret weapon for impressing guests.
I remember one year when I decided to surprise her by making my very own butternut squash dish. I borrowed her recipe, attempting to put my spin on it with spices I had learned about. Let’s just say my enthusiasm got the better of me, and I may have gone a bit overboard with the cinnamon! My grandmother adored the effort, though; we both ended up in stitches as we tasted my concoction. It wasn’t perfect — but it was ours. That experience taught me a valuable lesson: it’s not just about the food; it’s about the love, the laughter, and the stories that unfold in the kitchen.
Ingredients
Here’s everything you’ll need to roast your butternut squash to perfection in the air fryer:
-
Butternut Squash: The star of the show! Make sure to choose a firm squash without blemishes. If you’re short on time, pre-cut squash can work too, but fresh is always best!
-
Olive Oil: A light drizzle will help the squash caramelize. Avocado oil can be a great substitute for a high smoke point and buttery flavor.
-
Salt: Just a pinch enhances the natural flavors. Feel free to use sea salt or kosher salt based on your preference.
-
Black Pepper: Freshly cracked produces the best flavor. For a little kick, consider swapping in red pepper flakes.
-
Garlic Powder: This adds a savory depth. You can use fresh minced garlic, but I love the instant flavor boost that powder gives.
-
Paprika: For a hint of smokiness! Try smoked paprika for an extra punch.
-
Maple Syrup (optional): If you want to amplify that sweetness, a touch of pure maple syrup is heavenly.
-
Fresh Herbs (optional): Rosemary or thyme can elevate your dish. Just toss some in at the end for vibrant flavor.
With these ingredients, you’ll create a delightful dish that’s not only healthy but packed with flavor. And remember, cooking is about personal flair! If you have herbs or spices you love, sprinkle them in and make it your own.
Step-by-Step Instructions
Ready to transform that squash into something magical? Let’s break this down step-by-step:
-
Prep Your Squash: Start by washing your butternut squash. Once clean, carefully cut off both ends — this gives it stability when slicing. With a sharp vegetable peeler, peel off the skin in long strokes. You might feel like a master chef at this point!
-
Cut it Up: Next, slice the squash in half lengthwise, scoop out the seeds with a spoon (you can roast those later for a crunchy snack), and chop it into bite-sized cubes. Aim for uniform pieces so they cook evenly.
-
Season it Right: In a large mixing bowl, toss the cubed squash with olive oil, salt, black pepper, garlic powder, and paprika. If you’re adding maple syrup, drizzle it in now. Use your hands to ensure each piece is thoroughly coated — this is the fun part!
-
Preheat Your Air Fryer: While you’re mixing, preheat your air fryer to 375°F (190°C). This will help your squash start crisping up right away.
-
Air Fry to Perfection: Place the seasoned squash in the air fryer basket in a single layer, making sure there’s some space between the cubes for that all-important air circulation. (If your air fryer is small, you might need to do this in batches.)
-
Cooking Time: Air fry for about 15-20 minutes, shaking the basket halfway through the cooking time. This helps to get every side golden and slightly crispy. Keep an eye on it during the last few minutes — you want that perfect caramelization!
-
Finishing Touches: Once the squash is tender and golden brown, remove it from the air fryer. Toss it with fresh herbs if desired or a final drizzle of maple syrup for that sweet touch.
And just like that, you’ve created something extraordinary! It’s so satisfying to pull out beautifully roasted butternut squash.
Serving Suggestions
Let’s talk plating! For a cozy night in, serve your air-fried butternut squash on a rustic wooden board alongside a warm grain salad or simply with a bowl of your favorite soup. If you’re feeling fancy, sprinkle some feta or goat cheese on top, along with extra herbs for a gourmet touch.
For gatherings, arrange the squash on a beautiful serving platter and accompany it with dips like tahini or yogurt sauce. Trust me; your guests will be raving about it long after the last piece is snatched up!
Recipe Variations
Now, let’s shake things up! Here are a few creative twists you can try with this air fryer roasted butternut squash:
-
Spicy Maple: Add a pinch of cayenne alongside the maple syrup for a sweet and spicy kick!
-
Curry Flavor: Swap out the paprika for curry powder for an exotic twist. A touch of coconut oil can also add a nice flavor!
-
Sweet & Savory: Toss in some dried cranberries or raisins halfway through cooking for a burst of sweetness that pairs beautifully with the squash.
-
Mediterranean Style: Use olive oil, lemon zest, and some za’atar seasoning for a vibrant, herbaceous flavor profile.
-
Nutty Crunch: After cooking, sprinkle chopped pecans or walnuts over the top for added texture and flavor.
Chef’s Notes
Oh my goodness, let me share a funny story from my kitchen adventures! The first time I attempted this dish was, let’s just say, a learning experience. I was so excited and distracted by the enticing smell of roasting squash that I forgot a key step — the seasoning! It wasn’t until I took that first bite that I realized I’d forgotten to add the salt and pepper. The flavor was like a blank canvas! Lesson learned: always read the recipe twice before starting! Now, I keep my spices within arm’s reach, just a little reminder as I cook.
This recipe has evolved over the years. Initially, it started as a winter dish, but now I find myself roasting butternut squash all year round. It’s a versatile secret weapon for adding flavor and color to any meal.
FAQs and Troubleshooting
-
Why isn’t my squash getting crispy?
- If your squash is soggy instead of crispy, it might be due to overcrowding the air fryer basket. Make sure the pieces are in a single layer and not stacked on top of each other.
-
Can I use frozen butternut squash?
- Absolutely! Just be aware that the cooking time might vary. Start at a lower temperature and adjust accordingly until tender.
-
How do I know when the squash is done?
- You want the squash to be fork-tender and caramelized on the edges. A good rule of thumb is to test a piece with a fork after about 15 minutes.
-
Can I prepare this in advance?
- Certainly! Roasted butternut squash can be stored in the fridge for up to 3 days. Just reheat in the air fryer for a few minutes before serving to regain that lovely texture!
Nutritional Info
While this recipe isn’t labeled as “healthy” or “indulgent,” butternut squash is indeed a nutritional powerhouse. It’s low in calories yet rich in vitamins A and C, and it’s packed with fiber. If you’re curious about exact nutritional info, feel free to use a calorie-counting app based on the quantities you use — but honestly, it’s more about enjoying the deliciousness and the memories created along the way!
So there you have it, my friends! A simple, cozy dish that embraces the essence of home cooking. May your air fryer be an extension of your love for flavor, and may every bite remind you of warmth, laughter, and cherished moments in the kitchen. I hope you’ll give this roasted butternut squash a try, and if you do, let me know your thoughts! Happy cooking! 🍂💛
Print
Air Fryer Roasted Butternut Squash
- Total Time: 35 minutes
- Yield: 4 servings 1x
- Diet: Vegetarian
Description
A cozy dish that features sweet, nutty butternut squash roasted to perfection in an air fryer.
Ingredients
- 1 Butternut Squash
- 2 tablespoons Olive Oil
- 1/2 teaspoon Salt
- 1/4 teaspoon Black Pepper
- 1 teaspoon Garlic Powder
- 1 teaspoon Paprika
- 1 tablespoon Maple Syrup (optional)
- Fresh Herbs (optional)
Instructions
- Prep your squash: Start by washing your butternut squash. Cut off both ends, then peel off the skin.
- Cut it up: Slice the squash in half lengthwise, scoop out the seeds, and chop it into bite-sized cubes.
- Season it right: Toss the cubed squash with olive oil, salt, black pepper, garlic powder, and paprika. Add maple syrup if desired.
- Preheat your air fryer to 375°F (190°C).
- Air fry the squash: Place the seasoned squash in the air fryer basket in a single layer.
- Cook for about 15-20 minutes, shaking the basket halfway through.
- Finishing touches: Once tender and golden brown, remove from the air fryer and toss with fresh herbs if desired.
Notes
For a cozy night, serve with a warm grain salad or soup. Sprinkling feta or goat cheese adds a gourmet touch.
- Prep Time: 15 minutes
- Cook Time: 20 minutes
- Category: Side Dish
- Method: Air Frying
- Cuisine: American
Nutrition
- Serving Size: 1 serving
- Calories: 150
- Sugar: 7g
- Sodium: 200mg
- Fat: 7g
- Saturated Fat: 1g
- Unsaturated Fat: 5g
- Trans Fat: 0g
- Carbohydrates: 22g
- Fiber: 3g
- Protein: 2g
- Cholesterol: 0mg
Keywords: butternut squash, air fryer, roasted vegetables, healthy recipes, fall recipes
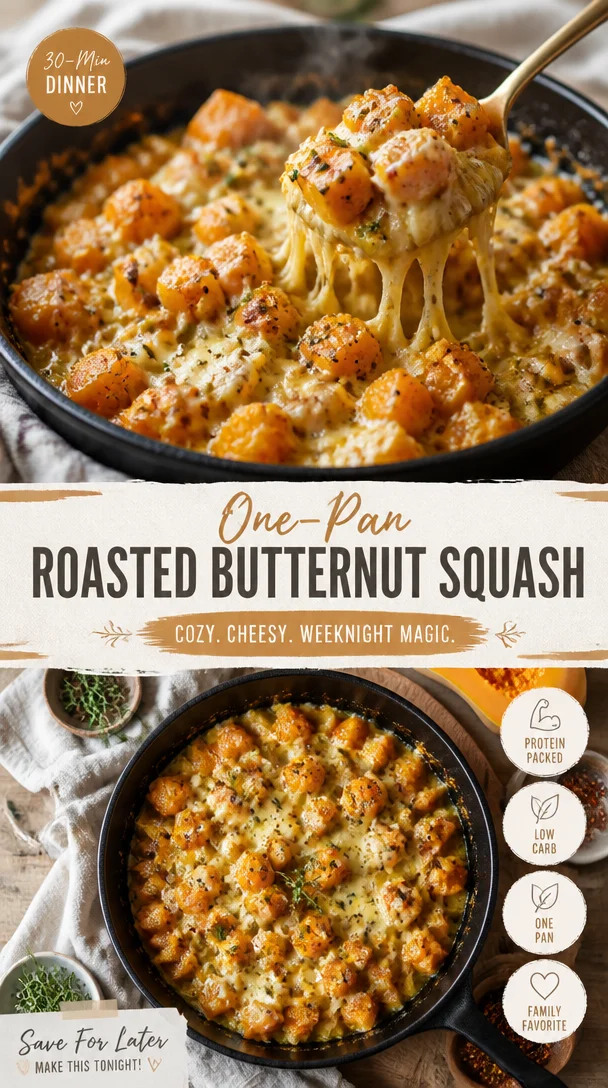
One-Pan Roasted Butternut Squash Recipe for Weeknights
Embrace the Sweetness: A Heartwarming Butternut Squash Recipe
Welcome to my cozy kitchen, food lovers! Today, we’re diving into the delightful world of butternut squash—one of fall’s most beloved ingredients. Whether you’re dodging that winter chill or seeking to impress your friends with your newfound culinary skills, this sweet, nutty gem is a fantastic ingredient to bring warmth and comfort to your table.
Butternut squash isn’t just delicious; it’s also incredibly versatile! You can roast it, mash it, or even blend it into a velvety soup. The possibilities are endless, and today, I want to show you how to create a dish that’s not only easy to make but also packed with flavor and love.
Imagine the scent of roasted butternut squash wafting through your kitchen as you prepare this dish. It’s the kind of aroma that wraps around you like a warm hug, inviting everyone to the table. Cooking for me has always been about sharing moments and creating memories, and there’s something inherently joyful about preparing a meal with love, especially when it comes to a dish as comforting as this.
In this post, we’ll whip up a savory butternut squash and sage risotto that’s bound to become a family favorite. With creamy Arborio rice, roasted squash, and fragrant sage, it’s a dish that bridges the gap between comfort food and gourmet goodness. I promise, once you try this, your loved ones will be singing your praises! So, let’s roll up our sleeves, tie on our aprons, and get cooking!
A Slice of Nostalgia
Growing up, my grandmother would make the best butternut squash soup every autumn. The whole house would fill with the aroma of spices and slow-cooked goodness. I’d watch as she peeled and chopped the squash, her hands moving with a kind of grace that came from years of experience. We’d sit together, her sharing tales from her childhood while we stirred the pot, and it quickly became a tradition I cherished.
Those cozy afternoons inspired my love for cooking, and no dish fills me with nostalgia quite like a butternut squash creation. As I experimented with various recipes over the years, I found a special love for risotto—a creamy, cheesy delight that transforms a simple meal into a memorable feast. This dish feels like a comforting embrace, and I know that with every bite, you’ll be connecting with those same laughs, stories, and cozy moments from your own life.
Ingredients
Here’s what you’ll need to whip up this delightful dish:
-
1 medium butternut squash, peeled and cubed: This serves as the star of the show! Butternut squash is naturally sweet and creamy. If you need a substitute, pumpkin or sweet potato works beautifully.
-
1 cup Arborio rice: This short-grain rice is what gives risotto its signature creaminess. If you’re in a pinch, you can use Carnaroli or even short-grain brown rice, though this will alter the texture slightly.
-
4 cups vegetable broth (or chicken broth): Homemade is ideal, but store-bought works just as well. If you want to lower the salt content, opt for low-sodium broth.
-
1 medium onion, finely chopped: This adds sweetness and depth of flavor. Shallots are great too if you want a subtler flavor.
-
2 cloves garlic, minced: A must-have for any savory dish! Fresh garlic is best, but if you have garlic powder, use about 1/2 teaspoon.
-
2 tablespoons olive oil: For sautéing and drizzling. If you’re looking for a different flavor, consider using avocado oil or even a bit of butter.
-
1/2 cup grated Parmesan cheese: This contributes to the creaminess and a little cheesy goodness. For a dairy-free version, try nutritional yeast.
-
1 tablespoon fresh sage, chopped (or 1 teaspoon dried sage): Sage pairs beautifully with squash, adding an earthy flavor. Thyme or rosemary can also work as tasty substitutes!
-
Salt and pepper to taste: Seasonings are crucial! Freshly cracked pepper adds a lovely kick.
-
Optional: A drizzle of balsamic reduction for garnishing—this adds a touch of acidity and sweetness that elevates the dish.
With these ingredients, you’re all set to prepare a comforting bowl of butternut squash risotto that will have everyone coming back for seconds!
Step-by-Step Instructions
Let’s get down to the delicious part—cooking! Here’s how you can prepare your butternut squash risotto:
-
Prep the Squash: Begin by preheating your oven to 400°F (200°C). While it heats, peel your butternut squash and cut it into 1-inch cubes. Place the cubes on a baking sheet, drizzle with olive oil, and sprinkle with a bit of salt and pepper. Toss to combine. Roast for about 25-30 minutes, or until tender and caramelized around the edges. Chef Tip: Roasting enhances sweetness and depth!
-
Warm the Broth: In a saucepan, heat your vegetable broth and keep it warm over low heat. This will help maintain the temperature when adding it to the rice.
-
Sauté the Aromatics: In a large pot or Dutch oven, heat 2 tablespoons of olive oil over medium heat. Add the chopped onion and sauté for 3-4 minutes, until translucent. Add the minced garlic and fresh sage, cooking for an additional minute until fragrant. Chef Hack: Make sure to keep an eye on the garlic—it browns quickly!
-
Toast the Rice: Stir in the Arborio rice, cooking for 1-2 minutes until it’s lightly toasted. This helps to release the nutty aroma and prepares the rice for absorbing liquids.
-
Add the Broth: Begin adding your warm broth one ladleful at a time, stirring frequently. Allow the rice to absorb most of the liquid before adding more. This will take about 18-20 minutes. Think of it as a labor of love! Tip: This slow, steady process releases the starches, giving risotto its creaminess.
-
Incorporate the Squash: After about 15 minutes of cooking, add your roasted butternut squash pieces into the pot, mixing gently. This will ensure each bite has that delicious squash flavor. Pro Tip: You can reserve a few pieces for garnishing later!
-
Finish With Cheese: Once your risotto is creamy and the rice is al dente, remove it from heat. Stir in the grated Parmesan cheese until melted. Season to taste with salt and pepper. Chef’s Note: If you want that extra creaminess, add a tablespoon of butter!
-
Serve: Your butternut squash risotto is ready! Spoon it into bowls and garnish with the reserved squash, a sprinkle of extra Parmesan, and a drizzle of balsamic reduction if you’re feeling fancy.
Serving Suggestions
For a beautiful presentation, serve your risotto in deep bowls and top with a sprinkle of fresh sage leaves and a light drizzle of olive oil or balsamic reduction. Pair it with a simple arugula salad with lemon vinaigrette to balance out the creamy rice and enrich your dining experience.
Recipe Variations
Feeling adventurous? Here are a few variations to try:
-
Creamy Vegan Version: Substitute Parmesan cheese with nutritional yeast and coconut milk for a creamy base that’s dairy-free.
-
Add Some Protein: Toss in sautéed mushrooms, spinach, or chickpeas for added texture and nutrition—perfect for a hearty meal!
-
Spice It Up: Add a pinch of red pepper flakes to the onions for a hint of heat or stir in some ground nutmeg or cinnamon for a warm spice vibe.
-
Herb Swaps: Don’t have sage? Thyme or even fresh parsley can add a delightful touch! Season according to your pantry.
-
Seasonal Greens: Stir in some kale or Swiss chard at the end of cooking for added vitamins and a colorful presentation.
Chef’s Notes
I have to confess, the first time I made this risotto, I didn’t stir it enough and ended up with a clumpy mess! It was a lesson learned—so trust me when I say that constant stirring is key! Over the years, this dish has evolved from a simple recipe to a celebration of seasonal ingredients, with each rendition evoking a different memory or experience in the kitchen. This risotto has taken me to cozy dinners at home, dinner parties with friends, and even evenings of culinary experimentation. It’s become a beloved staple in my family, and I hope it will become a cherished recipe in yours as well!
FAQs and Troubleshooting
1. Why did my risotto come out too sticky?
If risotto becomes too sticky, it’s often due to either too much stirring or not using enough broth. Remember, slow and steady is key—keep an eye on your rice and add broth gradually.
2. Can I make this risotto ahead of time?
Risotto is best served fresh, but if you have leftovers, you can store them in the refrigerator for 1-2 days. Reheat gently, adding a splash of broth to loosen it up.
3. My risotto is too bland! What can I do?
If your risotto lacks flavor, it may just need more seasoning. Don’t hesitate to add a pinch of salt or more garlic. Also, the quality of your broth matters!
4. What if I don’t have Arborio rice?
If you can’t find Arborio rice, you can use other short-grain varieties like Carnaroli or even sushi rice in a bind. Just keep in mind the texture might change!
Nutritional Info (if applicable)
On average, a serving of butternut squash risotto (without additional toppings) contains approximately:
- Calories: 350
- Protein: 12g
- Carbohydrates: 60g
- Fats: 10g
- Fiber: 4g
Now that you have all the know-how to create this delicious dish, don’t be shy—get cooking! I can’t wait to hear your thoughts and stories as you enjoy this comforting, heartwarming butternut squash risotto. Happy cooking, my friends! 🍂✨
Print
Butternut Squash and Sage Risotto
- Total Time: 45 minutes
- Yield: 4 servings 1x
- Diet: Vegetarian
Description
A comforting and creamy risotto made with roasted butternut squash and fragrant sage, perfect for sharing with loved ones.
Ingredients
- 1 medium butternut squash, peeled and cubed
- 1 cup Arborio rice
- 4 cups vegetable broth (or chicken broth)
- 1 medium onion, finely chopped
- 2 cloves garlic, minced
- 2 tablespoons olive oil
- 1/2 cup grated Parmesan cheese
- 1 tablespoon fresh sage, chopped (or 1 teaspoon dried sage)
- Salt and pepper to taste
- Optional: A drizzle of balsamic reduction for garnishing
Instructions
- Prep the squash: Preheat your oven to 400°F (200°C). Peel the butternut squash and cut it into 1-inch cubes. Place the cubes on a baking sheet, drizzle with olive oil, and sprinkle with salt and pepper. Toss to combine. Roast for about 25-30 minutes until tender and caramelized.
- Warm the broth: In a saucepan, heat the vegetable broth and keep it warm over low heat.
- Sauté the aromatics: In a large pot, heat olive oil over medium heat. Add chopped onion and sauté for 3-4 minutes until translucent. Add minced garlic and fresh sage, cooking for an additional minute until fragrant.
- Toast the rice: Stir in Arborio rice and cook for 1-2 minutes until lightly toasted.
- Add the broth: Begin adding the warm broth one ladle at a time, stirring frequently, until absorbed—this takes about 18-20 minutes.
- Incorporate the squash: After 15 minutes of cooking, add the roasted butternut squash, mixing gently.
- Finish with cheese: Remove from heat and stir in grated Parmesan cheese until melted. Season with salt and pepper.
- Serve: Spoon the risotto into bowls and garnish with reserved squash, extra Parmesan, and balsamic reduction if desired.
Notes
Stir constantly to ensure creamy consistency and avoid clumping. Serve fresh for the best flavor.
- Prep Time: 15 minutes
- Cook Time: 30 minutes
- Category: Main Course
- Method: Stovetop
- Cuisine: Italian
Nutrition
- Serving Size: 1 serving
- Calories: 350
- Sugar: 6g
- Sodium: 400mg
- Fat: 12g
- Saturated Fat: 4g
- Unsaturated Fat: 6g
- Trans Fat: 0g
- Carbohydrates: 45g
- Fiber: 4g
- Protein: 12g
- Cholesterol: 30mg
Keywords: butternut squash, risotto, comfort food, fall recipes, vegetarian


