
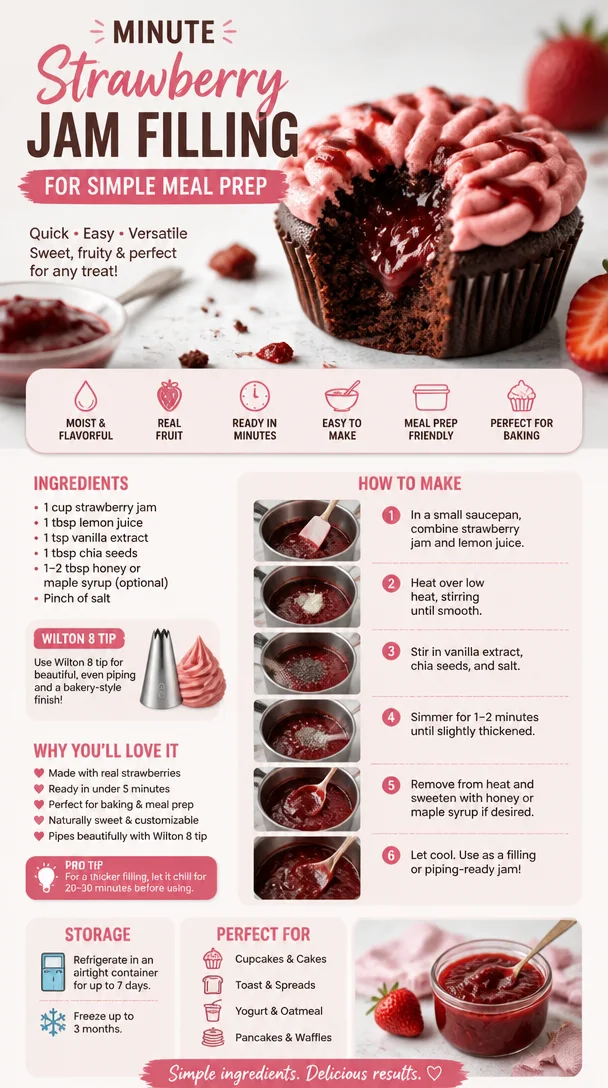
Minute Strawberry Jam Filling for Simple Meal Prep
The Sweetness of Homemade Strawberry Jam Filling: A Heartfelt Guide
Welcome back to my cozy kitchen! It’s Olivia Bennett here, guiding you through a delightful culinary journey that celebrates one of my favorite treats—homemade strawberry jam filling. There’s nothing quite like the joy of spreading freshly made jam on a warm scone, a slice of toasted bread, or even dolloping it atop a luscious cake—yum! Today, we’ll explore not only how to make this delicious filling from scratch but also why it’s a beloved tradition in many homes (including mine).
The scent of strawberries simmering on the stove reminds me of lazy summer afternoons spent in my grandmother’s kitchen. As a child, I would watch her work with a twinkle in her eye, guiding me through each step with love and laughter. "The secret," she would say, "is to use the ripest strawberries you can find. They’re nature’s candy!" The sweet, sticky mixture bubbling away would fill the room with a fragrance that made my mouth water, and I couldn’t wait to taste the final product.
Today, let’s keep that nostalgia alive as we create a vibrant strawberry jam filling that’s sure to become a treasured recipe in your home as well. Not only does it make for a fantastic addition to pastries, desserts, and breakfast items, but it also carries that personal touch that store-bought versions simply can’t compete with. Grab your apron, and let’s get cooking!
A Taste of Nostalgia: My Strawberry Jam Story
Growing up, summer meant strawberry picking with my family. My siblings and I would race each other through the rows of berry-laden plants, eager to fill our baskets with plump, juicy strawberries. It was a tradition that brought us closer, filled our afternoons with sunshine, and rewarded us with the sweetest of treats.
Once we had our bounty, we’d head home, sweaty and giggly, only to dive into my grandmother’s kitchen, where the magic happened. I recall the excitement of watching her cook the strawberries down with sugar, their color deepening into a ruby red as the sweet scent enveloped us. Every spoonful of that warm strawberry jam seemed to hold the essence of our summer adventures, and each jar we sealed was a treasure that would last through the year.
Today, I still make strawberry jam using the same recipe, infused with those delightful memories, and I can’t wait for you to create your own unforgettable experiences with this filling!
Ingredients
Here’s what you’ll need to whip up this luscious strawberry jam filling:
- 2 pounds fresh strawberries: The stars of the show! Look for ripe, sweet strawberries for the best flavor. If strawberries aren’t in season, you can substitute with frozen, thawed strawberries, but ensure they retain some natural sweetness.
- 1 cup granulated sugar: This sweetness balances the tartness of the strawberries. Feel free to use less sugar or sugar substitutes like honey or maple syrup if you prefer.
- 1 tablespoon lemon juice: This adds brightness and helps preserve the color of the strawberries. Freshly squeezed lemon juice is best, but bottled lemon juice works too.
- 1 teaspoon vanilla extract (optional): A touch of vanilla enhances the flavors! You can even use almond extract for a slightly different twist.
- 1 packet fruit pectin: Pectin helps the jam set perfectly. You can use either powdered or liquid based on your preference, and some brands even come low-sugar options.
Step-by-Step Instructions
Step 1: Prepare the Strawberries
Start by washing the strawberries thoroughly under cold water. Remove the green tops and hull the strawberries—this means cutting away the stem and the white part just beneath it. You can slice them in half for quicker cooking, or if you prefer a chunkier texture, leave them intact.
Chef’s Tip: Use a paring knife to hull the strawberries easily, creating a nice, clean cut without wasting fruit!
Step 2: Macerate the Strawberries
Place your cleaned strawberries in a large mixing bowl. Sprinkle the cup of granulated sugar over them, and add the tablespoon of lemon juice. Gently toss the strawberries until they’re all coated in sugar. Let them sit for about 30 minutes. This step draws out the natural juices from the fruit and creates a syrupy mixture that is bursting with flavor!
Chef’s Insight: This process of maceration not only enhances the strawberry flavors but also allows the sugar to dissolve, leading to a smoother jam.
Step 3: Cook the Mixture
Transfer the macerated strawberries into a large saucepan over medium heat. Bring the mixture to a gentle boil, stirring frequently to prevent sticking. Once boiling, add the pectin packet, mixing well to incorporate it into the strawberries effectively.
Chef Hack: If you prefer a smoother consistency, consider using an immersion blender to purée the strawberries to your desired texture!
Step 4: Let it Simmer
Allow the mixture to simmer for about 15-20 minutes, continuing to stir frequently. You’ll notice the mixture thickening and bubbling up like magic. Keep an eye on it to avoid any sticking or burning.
Pro Tip: To check if your jam is ready, place a small amount on a chilled plate. If it holds its shape after a minute, it’s time to turn off the heat!
Step 5: Bottle It Up
Once your jam has reached the desired consistency, carefully ladle it into sterilized jars. Leave a little headspace at the top. Seal the jars with lids while the jam is still hot, and invert them for a few minutes to help create a vacuum seal.
Chef’s Note: Proper sealing will help preserve the freshness of your jam for longer, and these little jars make for lovely gifts!
Step 6: Cool and Store
Let your jars cool completely at room temperature before storing them in the fridge or pantry. Your homemade strawberry jam filling is now ready to shine in all your favorite recipes!
Serving Suggestions
When it comes to serving your homemade strawberry jam filling, the possibilities are endless! Spread it generously on toast, use it as a layer in sponge cakes, or fill pastries for a dessert that will have everyone returning for seconds. You can also swirl it into yogurt or oatmeal for a splash of fruity goodness. If you’re feeling adventurous, try it in savory dishes, like glazing grilled chicken or pork to add a sweet twist!
Recipe Variations
Here are a few fun variations to make your strawberry jam uniquely yours:
- Strawberry Lemon Jam: Add an extra zing by increasing the lemon juice to 2 tablespoons.
- Balsamic Strawberry Jam: Stir in a splash of balsamic vinegar for a sophisticated touch that pairs beautifully with cheese.
- Spiced Strawberry Jam: Infuse with spices like cinnamon or ginger for a warm flavor profile—perfect for fall!
- Strawberry-Basil Jam: Fold in a handful of fresh basil leaves at the end of cooking for a fragrant herbaceous twist.
Chef’s Notes
Every time I make this strawberry jam filling, it’s a warm reminder of love, family, and tradition. Some days, I can hear my grandmother’s voice in my head, guiding me through the steps while I craft this rich blend of flavors. Over the years, I’ve tweaked this recipe to suit my preferences—adding a hint of vanilla one day or tossing in a few raspberries on another for fun.
Cooking is about creativity and exploration, so don’t hesitate to make it your own!Each jar of jam captures not just flavors but also sweet moments, waiting to be shared with those you love.
FAQs and Troubleshooting
-
Why didn’t my jam set?
If your jam is too runny, you may need to cook it a little longer, letting it reach a higher temperature for more evaporation. If using pectin, make sure you followed the quantity correctly! -
Can I use frozen strawberries?
Yes, frozen strawberries are a great option! Just thaw them completely and drain any excess liquid before following the normal steps. -
How long does this jam last?
Properly sealed and stored in a cool place, your homemade strawberry jam can last up to a year in the pantry and a few months in the fridge after opening. -
Is it safe to use jars that don’t seal?
If a jar doesn’t seal, it’s best to refrigerate it and use it within a few weeks. You can also reprocess the jam into a new jar with a new lid for better sealing.
Nutritional Info
Though I haven’t provided specific nutritional information, homemade strawberry jam is generally light and can be enjoyed in moderation. It provides a good dose of vitamin C from the fresh strawberries, with sugar adding sweetness to your meals.
With this guide, you’re now equipped to bring the sweetness of homemade strawberry jam filling into your kitchen. I hope you recreate these cherished memories and make it a family tradition of your own. Happy cooking, my fellow foodies! 🍓💖
Print
Homemade Strawberry Jam Filling
- Total Time: 50 minutes
- Yield: 4 cups 1x
- Diet: Vegetarian
Description
A delightful homemade strawberry jam filling, perfect for spreading on toast or using in desserts, capturing the essence of summer in every jar.
Ingredients
- 2 pounds fresh strawberries
- 1 cup granulated sugar
- 1 tablespoon lemon juice
- 1 teaspoon vanilla extract (optional)
- 1 packet fruit pectin
Instructions
- Prepare the strawberries by washing them and removing the green tops.
- Macerate the strawberries with sugar and lemon juice, then let sit for 30 minutes.
- Cook the strawberries over medium heat until boiling, then add the pectin.
- Let the mixture simmer for 15-20 minutes, stirring frequently.
- Bottle the jam into sterilized jars, leaving headspace.
- Cool the jars at room temperature before storing them.
Notes
For variations, consider adding more lemon juice, balsamic vinegar, or spices for unique flavors.
- Prep Time: 30 minutes
- Cook Time: 20 minutes
- Category: Spread
- Method: Canning
- Cuisine: American
Nutrition
- Serving Size: 2 tablespoons
- Calories: 50
- Sugar: 12g
- Sodium: 1mg
- Fat: 0g
- Saturated Fat: 0g
- Unsaturated Fat: 0g
- Trans Fat: 0g
- Carbohydrates: 13g
- Fiber: 1g
- Protein: 0g
- Cholesterol: 0mg
Keywords: strawberry jam, homemade jam, jam filling, preserves, summer recipes
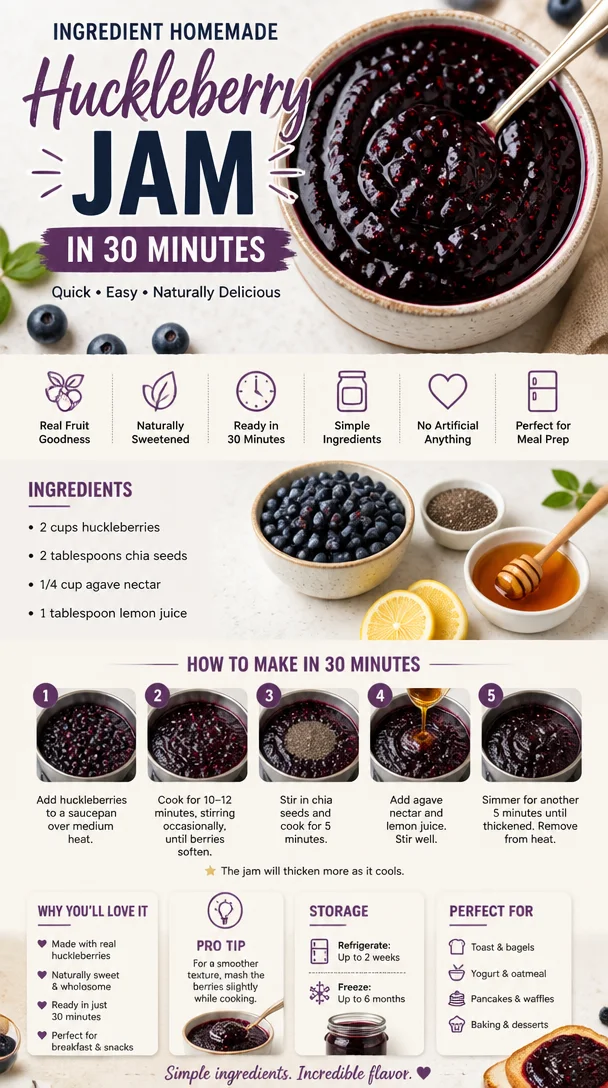
Ingredient Homemade Huckleberry Jam in 30 Minutes
Homemade Huckleberry Jam: A Sweet Little Jar of Joy
Welcome to my kitchen! Today, we are diving headfirst into one of my absolute favorite recipes: homemade huckleberry jam. There’s something magical about spreading a sweet, tangy jam over buttered toast or fluffy pancakes, and when it’s homemade, every bite is filled with love and nostalgia. Huckleberries are like little bursts of sunshine, and their vibrant flavor makes them the perfect star for this jam.
Imagine waking up on a lazy Sunday morning, sunlight streaming through the kitchen window as you pull out a jar of huckleberry jam from the fridge. You can almost smell the sweet aroma wafting through the air already, can’t you? Whether you’re new to canning or an old pro, making homemade jam is not just about preserving fruit—it’s about creating cherished memories and sharing something truly special with your loved ones.
So, why huckleberries? Growing up, my family would go picking for these gems in the wilds of the Pacific Northwest. I’ll never forget the thrill of finding a bush full of plump, juicy huckleberries shining like little treasures under the sun. We’d spend hours filling our baskets, our fingers stained with the inky juice, and laughter echoing through the trees. Those summer days spent outdoors are some of my happiest memories, and now, I can recreate that joy in each jar of jam.
In this post, I’ll guide you step-by-step on how to make your very own huckleberry jam, share some kitchen tips, and sprinkle in a few personal stories along the way. So, grab your spoon, put on your favorite apron (mine’s always a bit messy), and let’s get cooking!
A Memory Worth Preserving
As I mentioned, my love for huckleberries started in childhood. My grandmother, the queen of jams and jellies, would gather the whole family for our annual berry-picking adventures. I remember one summer in particular—the sun was shining, and the berries were abundant. My little cousin and I were so engrossed in our hunt that we completely lost track of time. Suddenly, we were called back to the picnic blanket for lunch, and I was convinced we had the most huckleberries picked. My grandmother’s legendary huckleberry jam was the reward for our hard work, and as we spooned it onto buttermilk biscuits, I remember thinking that life couldn’t be sweeter.
Cooking for me is deeply intertwined with those beautiful moments of connection—sharing a meal, a story, or a simple jar of jam. Now, every time I scoop huckleberry jam from my fridge, it transports me back to those carefree childhood days, sharing laughter and sweet treats with loved ones. I want to help you create those same memories for you and your family!
Ingredients
Before we dive into the recipe, here’s what you’ll need to make your huckleberry jam:
-
Huckleberries (4 cups): Look for ripe, plump huckleberries. If you can’t find them, blueberries can work as a substitute; they’ll yield a slightly different flavor but still delicious!
-
Sugar (2 cups): Regular granulated sugar works best, helping to balance the tangy flavor of the berries. You can reduce the sugar if you prefer it less sweet or use a sugar substitute (be sure to check the package for equivalent ratios).
-
Lemon juice (1/4 cup): Freshly squeezed lemon juice adds brightness to the jam and helps preserve it. If you don’t have fresh lemons, bottled juice will work as well; just aim for the organic kind, if possible.
-
Pectin (1 box): This is critical for helping your jam set. There are low-sugar pectins available if you want to cut down on the sugars. Just follow the instructions on the box for quantities.
-
Water (1/4 cup): Used to help simmer the fruit at the beginning.
Step-by-Step Instructions
Now that we’ve gathered our ingredients, let’s roll up our sleeves and get started!
-
Prepare Your Jars: First things first, let’s sanitize our jars. Begin by washing your jars and lids in hot, soapy water, then rinse well. You can sterilize them further by boiling them in water for 10 minutes. This step ensures your jam stays fresh longer!
-
Wash the Huckleberries: Rinse your huckleberries gently under cold running water. This step removes any dirt while keeping those precious berries intact. Drain well and set aside.
-
Cook the Berries: In a large pot, combine the huckleberries, sugar, lemon juice, and water. Stir everything together and bring it to a gentle boil over medium heat. Cook for about 10-15 minutes, stirring frequently to prevent sticking (I know it’s tempting to keep a spoon in there to taste the delightful mixture!).
-
Check for Consistency: This is where your jam magic happens! Using a ladle, take a small amount of the jam and spoon it onto a plate. Let it cool for a minute, then run your finger through it. If it holds its shape and wrinkles slightly, it’s ready for pectin. If not, continue cooking for another few minutes and test again.
-
Add the Pectin: Stir in the pectin according to the package instructions. Bring the mixture back to a boil for another minute, stirring constantly. It should start to thicken up beautifully!
-
Fill Your Jars: Carefully pour your hot jam into the sterilized jars, leaving about 1/4 inch of space at the top. Wipe the rims with a clean cloth to remove any sticky residue before sealing with the lids.
-
Process the Jars: To ensure a good seal and to keep your jam fresh, you can process the jars in a boiling water bath. Place them in a pot of boiling water and let them bath for 10-15 minutes. Once done, carefully remove the jars and allow them to cool on a clean kitchen towel. You should hear the satisfying "pop" of the lids sealing!
-
Cool and Store: Leave your huckleberry jam at room temperature for 24 hours. Make sure the lids are sealed properly (they should not flex when pressed). Store your jars in a cool, dark place for up to a year (if they last that long!).
Serving Suggestions
There’s no better way to enjoy your homemade huckleberry jam than by slathering it on warm, buttered toast! It also pairs beautifully with creamy yogurt, drizzled on top of pancakes or waffles, or even as a filling for pastries. I love it on a charcuterie board, served alongside cheeses and crackers. The tangy-sweet flavor complements many savory items perfectly!
Recipe Variations
Feeling adventurous? Here are a few creative twists to try with your huckleberry jam:
-
Spicy Twist: Add a pinch of cinnamon or a dash of cayenne pepper to the mix for some warming spice that will tickle your taste buds!
-
Herb Infusion: For a unique flavor, try adding fresh herbs like rosemary or thyme while the jam simmers. Just strain them out before jarring.
-
Tropical Blend: Mix in crushed pineapple or a bit of mango puree for a huckleberry-pineapple jam that brings a fun, tropical twist.
-
Chia Jam: Replace the pectin with chia seeds! They create a gel-like consistency and boost the nutritional value, plus it has a fabulous crunch.
-
Sugar-Free Version: Use a sugar substitute like erythritol or monk fruit sweetener if you’re looking for a low-sugar jam.
Chef’s Notes
As with any recipe, this huckleberry jam has evolved over the years in my kitchen. I’ve experimented with everything from adding spices to mixing fruits, and I love how versatile it is. I remember one time, I must have been in a creative mood, and I decided to throw in some fresh ginger. The results were delightful, and I was pleasantly surprised by how that little kick complemented the huckleberries!
Also, don’t be discouraged if your jam doesn’t set the very first time. There’s always a learning curve when you’re canning! Just know that your efforts are worth it; there’s nothing like the satisfaction of seeing rows of homemade jam lining your pantry shelves.
FAQs and Troubleshooting
-
Why didn’t my jam set?
If your jam didn’t set, it could be due to not enough pectin or cooking time. Make sure to boil long enough for the pectin to activate and dissolve fully. You can also reheat the jam and add more pectin if needed! -
How long does homemade huckleberry jam last?
If processed and sealed properly, it can last up to a year in a cool, dark place. Once opened, store in the fridge and consume within a month for freshness. -
Can I use frozen huckleberries?
Absolutely! Just thaw and drain excess liquid before using. Frozen berries are a great option when fresh ones aren’t in season. -
What do I do if my jam is too sweet?
If your jam turns out too sweet, try mixing in a bit of lemon juice or adding some tangy fruit like cranberries during cooking next time. A touch more acidity can balance out sweetness beautifully.
Nutritional Info
(Note: nutritionally, this will vary depending on the amount of sugar and fruit used):
- Serving Size: 1 tablespoon
- Calories: 50
- Total Fat: 0g
- Sugars: 12g
- Protein: 0g
Now, my kitchen friend, you have all the tools you need to create your own batch of huckleberry jam! I can’t wait for you to experience the same joy and nostalgia that fills my heart when I make it. Let me know how it turns out, and share your kitchen stories. Happy cooking!
Print
Homemade Huckleberry Jam
- Total Time: 55 minutes
- Yield: 4 cups
- Diet: Vegetarian
Description
A delightful homemade huckleberry jam that’s sweet, tangy, and perfect for spreading on toast or pancakes.
Ingredients
- Huckleberries (4 cups)
- Sugar (2 cups)
- Lemon juice (1/4 cup)
- Pectin (1 box)
- Water (1/4 cup)
Instructions
- Prepare your jars: Wash and sterilize the jars and lids in hot, soapy water or boil them for 10 minutes.
- Wash the huckleberries: Rinse them gently under cold running water and drain well.
- Cook the berries: Combine huckleberries, sugar, lemon juice, and water in a large pot and bring to a gentle boil over medium heat. Cook for 10-15 minutes.
- Check for consistency: Test the jam on a cooled plate to see if it holds its shape.
- Add the pectin: Stir in pectin according to package instructions and boil for another minute.
- Fill your jars: Pour hot jam into sterilized jars, leaving 1/4 inch space at the top.
- Process the jars: Process in a boiling water bath for 10-15 minutes to seal.
- Cool and store: Let jars sit at room temperature for 24 hours to ensure they are sealed.
Notes
If your jam doesn’t set, reheat and add more pectin. Store opened jars in the fridge and consume within a month.
- Prep Time: 30 minutes
- Cook Time: 25 minutes
- Category: Preserves
- Method: Canning
- Cuisine: American
Nutrition
- Serving Size: 1 tablespoon
- Calories: 50
- Sugar: 12g
- Sodium: 0mg
- Fat: 0g
- Saturated Fat: 0g
- Unsaturated Fat: 0g
- Trans Fat: 0g
- Carbohydrates: 13g
- Fiber: 0g
- Protein: 0g
- Cholesterol: 0mg
Keywords: huckleberry jam, homemade jam, preserves, sweet spread, canning, fruit jam
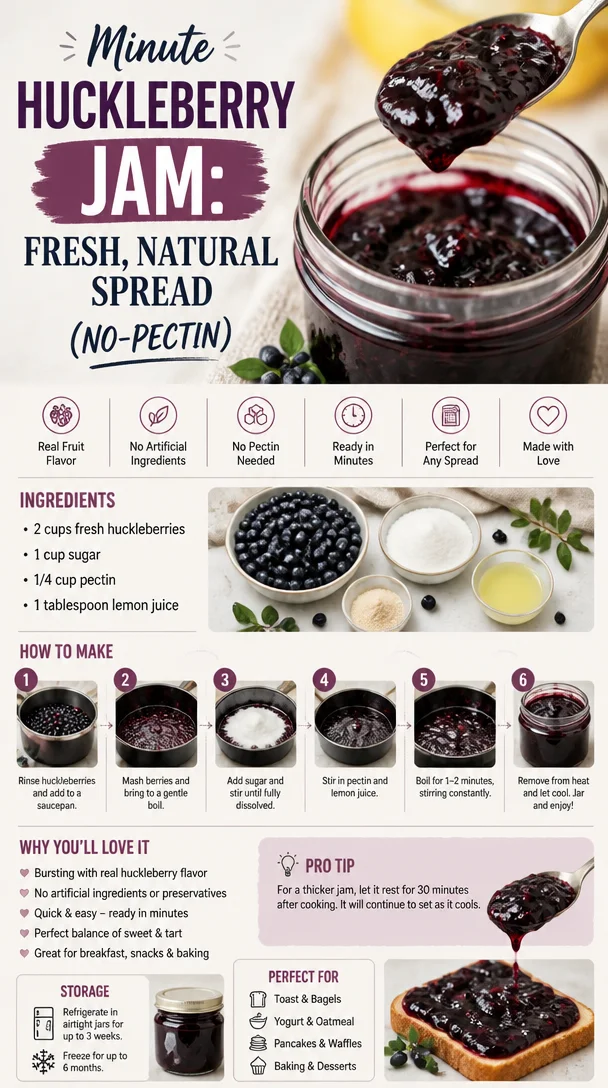
Minute Huckleberry Jam: Fresh, Natural Spread (No-Pectin)
Homemade Huckleberry Jam: A Sweet Journey of Flavor and Memories
Welcome to my kitchen, my fellow food enthusiasts! Today, we’re diving into a recipe that not only bursts with flavor but also stirs up delightful memories — homemade huckleberry jam. There’s something truly magical about jam-making, isn’t there? It’s like capturing the essence of summer in a jar, preserving those juicy, sweet notes for colder days ahead. So, if you’ve got some huckleberries (or blueberries, if you need to substitute), roll up your sleeves and get ready for a delicious adventure that’s sure to warm your heart.
Personal Story: A Huckleberry Memory
Let me take you back to a sunny summer day when I was a child, plucking ripe huckleberries with my grandmother in the dense woods near our home. We’d set out early, armed with our small buckets and an insatiable appetite for adventure. My grandmother had a knack for discovering the juiciest spots, and with every handful of huckleberries we gathered, my excitement grew. The taste was out of this world — a mixture of sweet and tart that danced on my tongue, a reminder of childhood bliss.
Once we returned home, the real fun began. My grandmother would transform our treasured berries into the most mouthwatering huckleberry jam, filling the kitchen with the scent of sweetness simmering on the stovetop. That summer ritual wasn’t just about the jam; it was about connecting, sharing stories, and laughing until our bellies hurt. Now, every time I make huckleberry jam, I feel that same joy. It reminds me to savor the moment and celebrate the simple ingredients and the love that goes into them.
Ingredients
Here’s what you’ll need to whip up your own delightful huckleberry jam:
-
Huckleberries (4 cups)
Fresh is best! Huckleberries are small, juicy, and filled with flavor; they grow wild in many regions, especially in the Northwest. If you can’t find huckleberries, blueberries make an excellent substitute. -
Granulated sugar (2 cups)
This sweetener helps balance the tartness of the huckleberries, creating a lovely flavor harmony. If you prefer a lower-sugar option, you can use a sugar alternative or decrease the amount to your taste. -
Lemon juice (1/4 cup)
Freshly squeezed lemon juice brightens the flavor of the jam and helps preserve its vibrant color. If you don’t have lemons, a splash of vinegar can also work, but it will change the flavor profile slightly. -
Pectin (1 packet, approximately 1.75 oz)
Pectin is crucial for achieving that perfect jam consistency. If you prefer a natural thickener, you can look for low-sugar or no-sugar pectin. -
Water (1/4 cup)
This will help dissolve the sugar and combine all the flavors beautifully.
Step-by-Step Instructions
Now that you have your ingredients ready, let’s get to the good part: making the jam!
-
Prepare Your Equipment
Start by sterilizing your canning jars. You can either wash them in hot soapy water and rinse them thoroughly or place them in a hot dishwasher cycle. It’s essential to ensure that your jars are clean to avoid any undesired bacteria in your delicious jam. -
Wash the Huckleberries
Rinse your huckleberries under cool running water, then gently pat them dry with a paper towel. Remember, you want to treat these little gems gently — no squishing! -
Heat Those Berries
In a large saucepan, combine the huckleberries, water, and lemon juice over medium heat. Stir gently to break down the berries as they heat up. This process usually takes about 5 minutes. The berries will release their juices, and the aroma will fill your kitchen — pure bliss! -
Add Sugar and Pectin
Once the huckleberries are bubbling and juicy, it’s time to add the granulated sugar and pectin. Stir them in quickly, ensuring everything is well incorporated. Continue stirring until the mixture reaches a full rolling boil, which can maintain its bubble even when stirred. -
Boil and Check for Thickness
Let the mixture boil for about 10-15 minutes while stirring occasionally. To know if your jam is ready, you can perform the “plate test.” Spoon a little jam onto a chilled plate; let it sit for a minute, then push it with your finger. If it wrinkles and stays put, it’s time to jar it up! -
Fill Your Jars
Using a ladle, carefully fill your sterilized jars with the hot jam, leaving about 1/4-inch headspace at the top. Wipe the rims of the jars with a clean cloth to remove any sticky residue, then top with sterilized lids. -
Process the Jars
If you’re wanting to store your jam for a long time, you’ll want to process it in a water bath. Place the jars in a large pot of boiling water, ensuring they’re covered by at least an inch of water. Process for about 10 minutes, then remove and let them cool completely. You’ll know they’re sealed when the lid pops down after cooling!
Serving Suggestions
Once your huckleberry jam is ready, there are so many delicious ways to enjoy it! Spread it generously on warm buttered toast, swirl it into yogurt for a delightful breakfast, or serve it alongside a cheese platter for a beautiful appetizer. It’s also fantastic as a filling for cakes, pastries, or drizzled over pancakes and waffles for an extra special breakfast treat.
Recipe Variations
Feeling adventurous? Here are a few creative twists to try with your huckleberry jam:
- Spiced Huckleberry Jam: Add a pinch of cinnamon or nutmeg to the mixture while it’s cooking for a warm, cozy flavor.
- Huckleberry-Chili Jam: For a little heat, incorporate some finely chopped jalapeños or crushed red pepper flakes.
- Lavender Infusion: Toss in a few sprigs of fresh lavender while cooking for a beautifully aromatic jam.
- Citrus Twist: Mix in some orange or lime zest for an extra tangy pop!
- Berry Medley: Combine huckleberries with strawberries or raspberries for a lovely mixed berry jam.
Chef’s Notes
As I’ve evolved as a cook, this huckleberry jam recipe has been a staple in my kitchen — a delicious way to relive those gorgeous summer days. One of my favorite moments was when I tried incorporating a splash of bourbon into the mix after a friend suggested it during a fun cooking session. It added a rich depth that transformed the jam into a truly adult treat!
Remember, cooking is all about experimenting and evolving your recipes. Don’t worry if things don’t go perfectly; some of my biggest kitchen blunders have turned into delicious surprises.
FAQs and Troubleshooting
1. Can I use frozen huckleberries?
Absolutely! Frozen huckleberries work just as well. Just be sure to thaw and drain any excess water before you begin.
2. What if my jam doesn’t thicken?
Don’t fret! If your jam is too runny, you can return it to the pot, add a bit more pectin, and reheat it. Make sure to boil for a few minutes to activate the pectin.
3. How long will my jam last?
If properly sealed and stored in a cool, dark place, your huckleberry jam can last for up to a year. However, once opened, it’s best to enjoy it within a few weeks — though I doubt it will last that long!
4. Can I use this recipe for other berries?
Yes! Feel free to swap in different berries like blueberries, raspberries, or blackberries, adjusting the sugar and acidity slightly to account for their varying sweetness.
Nutritional Info
While I love indulging in this sweet treat, it’s good to be mindful of consumption. A standard tablespoon of huckleberry jam is roughly around 50 calories, primarily from sugar and natural fruit sugars. However, it offers a lovely dose of antioxidants and vitamins from the huckleberries, making it a delightful addition to your meals in moderation.
So there you have it! A lovely journey of flavors with nostalgic memories baked right in. I hope you feel inspired to make your own batch of homemade huckleberry jam. It’s not just about preserving fruit; it’s about creating memories and enjoying every moment in the kitchen. Happy cooking!
Print
Homemade Huckleberry Jam
- Total Time: 45 minutes
- Yield: 4 servings 1x
- Diet: Vegetarian
Description
Capture the essence of summer with this delightful homemade huckleberry jam, a perfect blend of sweet and tart flavors.
Ingredients
- 4 cups Huckleberries
- 2 cups Granulated sugar
- 1/4 cup Lemon juice
- 1 packet Pectin (approximately 1.75 oz)
- 1/4 cup Water
Instructions
- Prepare your canning jars by sterilizing them.
- Wash the huckleberries under cool running water and pat them dry.
- Heat the huckleberries, water, and lemon juice in a large saucepan over medium heat.
- Add the granulated sugar and pectin once the huckleberries are bubbling.
- Boil the mixture for about 10-15 minutes until it thickens.
- Fill the sterilized jars with the hot jam, leaving about 1/4-inch headspace.
- Process the jars in a boiling water bath for about 10 minutes.
Notes
Feel free to experiment with different berry combinations or add spices for a unique twist.
- Prep Time: 15 minutes
- Cook Time: 30 minutes
- Category: Preserves
- Method: Canning
- Cuisine: American
Nutrition
- Serving Size: 1 tablespoon
- Calories: 50
- Sugar: 10g
- Sodium: 0mg
- Fat: 0g
- Saturated Fat: 0g
- Unsaturated Fat: 0g
- Trans Fat: 0g
- Carbohydrates: 13g
- Fiber: 1g
- Protein: 0g
- Cholesterol: 0mg
Keywords: huckleberry, jam, preserves, summer recipes, canning
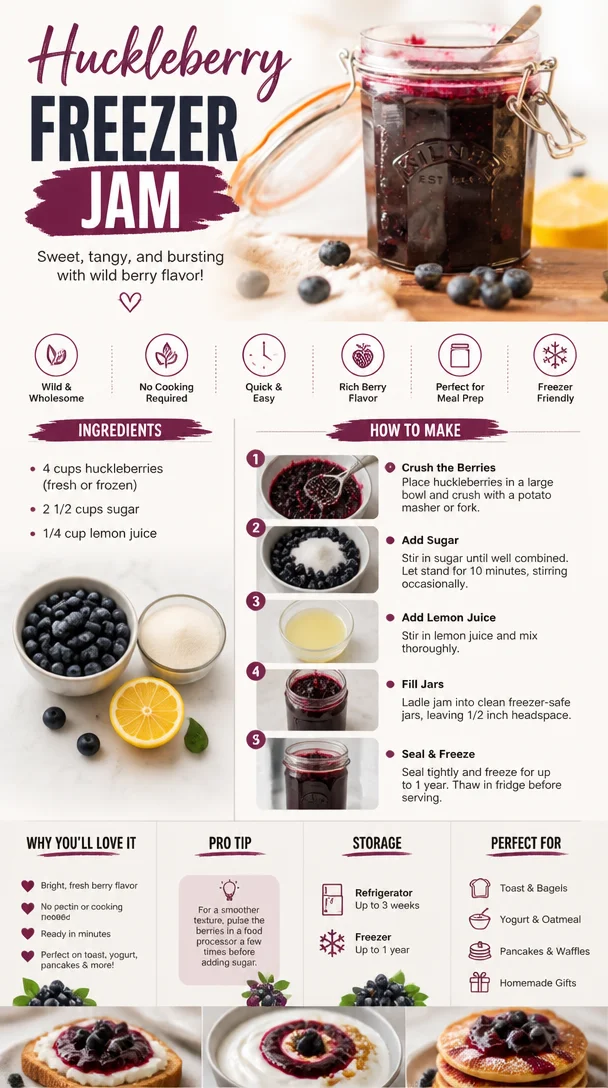
Huckleberry Freezer Jam
The Sweet Embrace of Huckleberry Freezer Jam
Welcome back to my cozy corner of the kitchen, dear friends! Today, we’re diving into a delightful, sweet adventure that perfectly captures the spirit of summertime — Huckleberry Freezer Jam. If you’ve ever indulged in the delightfully tart sweetness of huckleberries, you know just how magical they can be. This recipe is not just about preserving summer’s bounty; it’s about capturing memories, flavors, and the joy of sharing something homemade with the people you love.
So, why freezer jam, you ask? Freezer jam is a fantastic way to preserve fruit without all the fuss of canning. It’s fruity, fresh, and boasts vibrant colors that remind you of sunny days spent in the great outdoors, surrounded by nature’s wonders. Plus, it’s incredibly easy to make, and requires no special equipment beyond some good-quality freezer containers. Whether you enjoy it slathered on a warm piece of toast in the morning, drizzled over vanilla ice cream, or swirled into yogurt, this jam is sure to impress!
As we go through this sweet journey together, I’ll sprinkle in some stories and tips that will not only boost your confidence in the kitchen but will also make the process feel special and personal. So slip on that apron (don’t worry; we all know it’ll get messy) and let’s get started on creating a jar of summer sunshine that you can savor all year long!
A Dip into Nostalgia
I’ve always had a soft spot for huckleberries. Growing up in the Pacific Northwest, my family would often take weekend trips to the mountains, where the air was crisp and the trails lined with sweet, plump huckleberries just waiting to be picked. There’s something incredibly special about foraging for your own ingredients, and I vividly remember those days spent hand-picking the juicy gems with my family. We’d leave with our buckets overflowing, our fingers stained a lovely deep purple, and our hearts full.
One summer, I decided I wanted to turn our berry haul into something special, rather than just tossing them into pancakes or my mouth (let’s be real; I did plenty of that too!). That’s when I first attempted making huckleberry jam. With my mom’s guidance, I discovered a world beyond store-bought options. The vibrant color, the explosion of flavor — it was pure magic! Our little kitchen turned into a whirlwind of laughter and sticky fingers as I tried to measure ingredients, giggling the whole time as I accidentally dropped some berries on the floor.
That batch of jam holds a treasured place in my heart, as it symbolizes a time spent in nature, with family by my side, enjoying one of life’s simple pleasures. I’ve continued that tradition, and now, each summer, I seek out those huckleberries, savoring every moment that leads to creating this delightful jam.
Ingredients
To make your very own Huckleberry Freezer Jam, here’s what you’ll need:
-
Fresh Huckleberries (2 cups): The star of our show! These small berries have a sweet-tart flavor profile. If you can’t find huckleberries locally, blueberries can be a great substitute, though the taste will be a bit sweeter and less tangy.
-
Granulated Sugar (1 ½ cups): Sugar helps to preserve the fruit and balance out the tartness. You could substitute with a no-calorie sweetener, but ensure you check the package for proper ratios, as they can vary!
-
Lemon Juice (2 tablespoons): This adds acidity, which brightens the flavor of the jam. Freshly squeezed lemon juice is best, but bottled juice will work in a pinch.
-
Pectin (2 tablespoons): Pectin is the magic ingredient that helps the jam set. You can find low-sugar versions if you’d like to make a lower-sugar jam. If you’re looking for a natural option, consider looking into options like chia seeds or agar-agar.
-
Water (1/4 cup): This helps dissolve the pectin and creates a smoother texture. Ensure it’s warm to help with the dissolving process.
Each of these ingredients plays an essential role, making this jam both delicious and uniquely capture the essence of huckleberries.
Step-by-Step Instructions
Now that you have your ingredients ready, let’s jump into the joy of making Huckleberry Freezer Jam!
-
Prepare Your Berries: First, rinse your fresh huckleberries under cold water to remove any dirt. Remove any stems or leaves. It’s time to celebrate the beauty of these tiny fruits! You can even give them a gentle mash with a fork or a potato masher to release some of that luscious juice, adding a bit of texture.
-
Make the Pectin Mixture: In a small saucepan, combine the water and pectin. Stir it over medium heat until it comes to a gentle boil. Keep stirring for about 1-2 minutes until it is fully dissolved. This step is crucial because it activates the pectin, ensuring your jam will set correctly.
-
Mix Berries & Sugar: In a large bowl, combine the huckleberries, sugar, and lemon juice. Stir well and let it sit for about 10 minutes. This allows the sugar to draw out the natural juices from the berries, which helps dissolve the sugar completely. If you love a chunkier jam, you can use a potato masher to break down some of the berries while keeping some whole.
-
Combine Mixtures: After the 10 minutes are up, pour the dissolved pectin mixture into the berry-sugar mix. Stir quickly to fully combine, making sure there are no clumps of pectin remaining. You’ll notice the mixture starting to thicken slightly; this is the wonderful pectin working its magic!
-
Fill Your Containers: Pour the jam mixture into your pre-prepared freezer-safe containers, leaving about half an inch of space at the top (the jam will expand while freezing). This part is so satisfying — you’ll marvel at the vibrant colors!
-
Set and Freeze: Allow the jam to set at room temperature for about 30 minutes. After that, transfer it to the freezer. Your kitchen is about to be filled with the sweet aroma of summer!
-
Thawing for Enjoyment: When you’re ready to enjoy your jam, simply move it from the freezer to the fridge a few hours before serving. Once thawed, it will keep in your refrigerator for up to 3 weeks.
Serving Suggestions
Huckleberry freezer jam is as versatile as it is delightful! A simple spread over morning toast or warm biscuits is a classic way to enjoy it. I love topping a bowl of creamy Greek yogurt with a dollop of jam and some granola for a delicious breakfast or snack. On a warm summer evening, try it as a topping for ice cream. The tartness of the huckleberry pairs beautifully with creamy vanilla!
Additionally, if you’re feeling adventurous, swirl a few spoonfuls of jam into your favorite cake batter or pancake mix for a burst of flavor!
Recipe Variations
-
Honey Sweetened Huckleberry Jam: Substitute granulated sugar with an equal amount of honey for a naturally sweet option.
-
Spicy Huckleberry Jam: Add a pinch of cayenne pepper or finely chopped jalapeño for a spicy twist that’s perfect for cheese boards!
-
Chia Seed Jam: For a healthier version, add 1/4 cup of chia seeds instead of pectin. Let the mix sit for about an hour so the seeds can soak up the liquid and create a gel-like texture.
-
Mixed Berry Jam: Incorporate other summer berries, like blueberries or raspberries, for a delightful mixed berry jam experience.
Chef’s Notes
As I’ve experimented with huckleberry jam over the years, I’ve discovered that every batch can tell a story! Sometimes, if I’m feeling particularly nostalgic, I’ll add a splash of homemade vanilla extract for that extra kick of flavor. One time, I accidentally grabbed the cayenne and ended up with a spontaneous spicy version that shocked my taste buds but thrilled my friends during a brunch gathering!
Jams have this incredible way of evolving based on what’s available in the kitchen and the creativity you bring to it. Just don’t forget to enjoy the process!
FAQs and Troubleshooting
-
Q: Why did my jam not set?
A: The most common reason for jam not setting is not using enough pectin or not mixing it properly. Make sure to follow the instructions accurately and give it enough time for the pectin to activate. -
Q: Can I use frozen huckleberries?
A: Absolutely! Just be sure to thaw them first and drain any excess liquid before mixing with sugar. -
Q: How long does the jam last in the freezer?
A: If stored properly, huckleberry freezer jam can last for up to a year in the freezer. Just remember to label your jars! -
Q: Is this recipe adaptable for other fruits?
A: Yes! You can use just about any berry or fruit. Always remember to adjust the sugar and pectin based on the sweetness and firmness of the fruit you’re using.
Nutritional Info
While the nutritional stats can vary based on ingredient choices and serving sizes, here’s a rough breakdown per tablespoon of Huckleberry Freezer Jam:
- Calories: 50
- Total Fat: 0g
- Carbohydrates: 13g
- Sugars: 12g
- Protein: 0g
Now you’re equipped with everything you need to create a jar (or several!) of lovely huckleberry freezer jam! I can’t wait for you to savor the taste of summer all year long. So, grab your huckleberries, summon your inner chef, and let’s make some joyful memories in the kitchen together! Happy jamming!
Print
Huckleberry Freezer Jam
- Total Time: 15 minutes
- Yield: 2 cups
- Diet: Vegan
Description
A delightful and easy recipe for preserving summer’s sweet-tart huckleberries in a no-cook freezer jam.
Ingredients
- Fresh Huckleberries (2 cups)
- Granulated Sugar (1 ½ cups)
- Lemon Juice (2 tablespoons)
- Pectin (2 tablespoons)
- Water (1/4 cup)
Instructions
- Prepare Your Berries: Rinse your fresh huckleberries under cold water and remove stems or leaves.
- Make the Pectin Mixture: In a small saucepan, combine the water and pectin, stirring over medium heat until it boils and dissolves.
- Mix Berries & Sugar: In a large bowl, combine huckleberries, sugar, and lemon juice, letting it sit for about 10 minutes.
- Combine Mixtures: Pour the dissolved pectin mixture into the berry-sugar mix and stir quickly to combine.
- Fill Your Containers: Pour the jam mixture into freezer-safe containers, leaving space at the top.
- Set and Freeze: Allow the jam to set at room temperature for about 30 minutes, then transfer to the freezer.
- Thawing for Enjoyment: Move the jam from the freezer to the fridge a few hours before serving.
Notes
Allowing the jam to set properly is crucial for achieving the right consistency.
- Prep Time: 10 minutes
- Cook Time: 5 minutes
- Category: Condiment
- Method: Freezing
- Cuisine: American
Nutrition
- Serving Size: 1 tablespoon
- Calories: 50
- Sugar: 12g
- Sodium: 0mg
- Fat: 0g
- Saturated Fat: 0g
- Unsaturated Fat: 0g
- Trans Fat: 0g
- Carbohydrates: 13g
- Fiber: 0g
- Protein: 0g
- Cholesterol: 0mg
Keywords: huckleberry, jam, freezer jam, preserves, summer
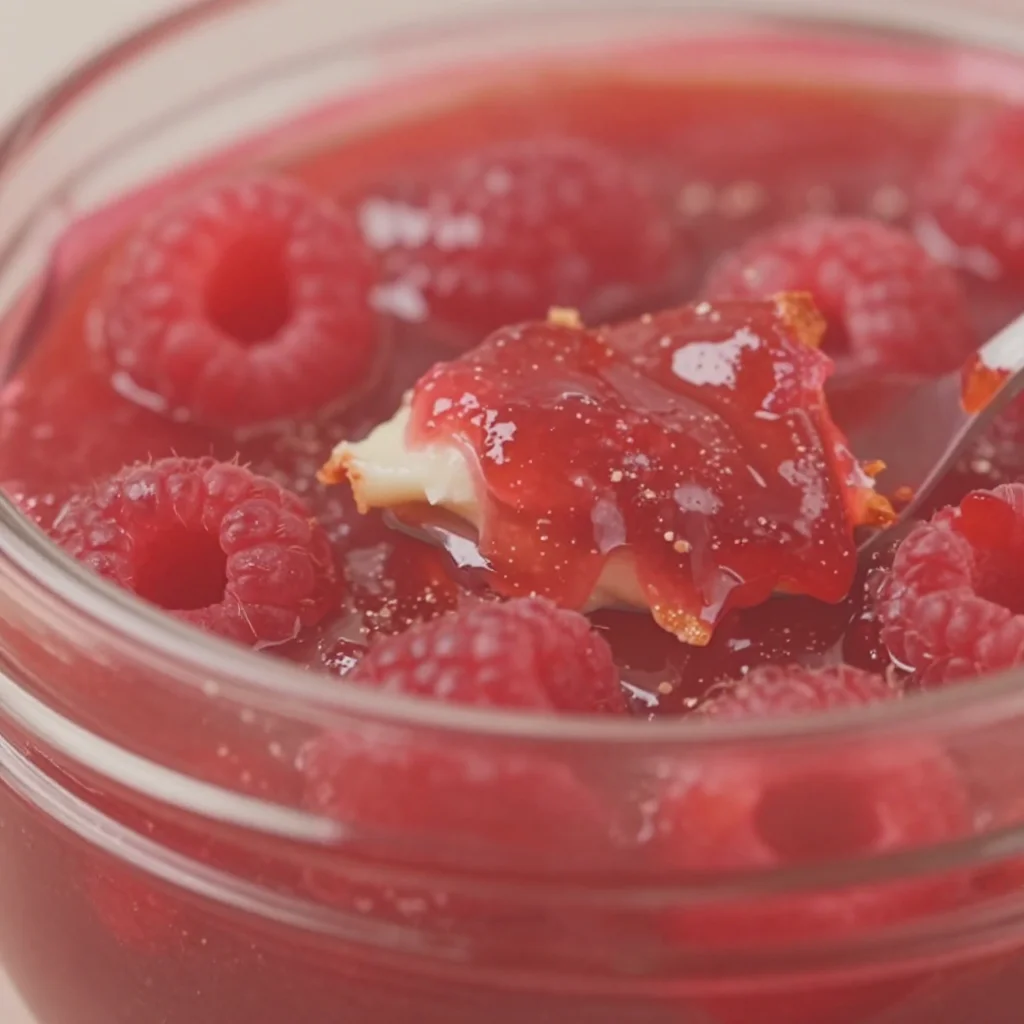
Easy 10 Minute Raspberry Jam
The Sweet Simplicity of Homemade Raspberry Jam in Just 10 Minutes
Welcome to another delightful adventure in my kitchen! Today, we’re diving into a treat that feels like summer in a jar: homemade raspberry jam. You might be thinking, "Making jam sounds complicated!" but trust me—I’m here to show you how easy it can be, especially when you’ve got just 10 minutes to spare. Picture this: a sunny morning, warm toast on the table, and the vibrant, tangy flavor of raspberry jam brightening every bite. Could anything be better?
Jams and preserves have a beautiful history, often wrapping us in nostalgia and warmth with every spoonful. I remember as a child, visiting my grandmother’s farmhouse in the countryside where she would walk me through her garden, collecting fresh fruit. Her raspberry bushes sprawled like a wild canvas, full of plump, juicy berries just begging to be picked. The sweet smell of berries merging with her laughter and stories felt like magic in the air. Once we returned to the kitchen with our colorful haul, we spent hours cooking, chatting, and creating a delicious mess. The aroma of bubbling fruit on the stove filled the air as she poured her heart into each jar, transforming simple ingredients into something extraordinary.
Raspberry jam is the perfect way to recreate those cherished memories and share them with your loved ones. Whether you’re slathering it on warm buttered toast, dolloping it on your morning yogurt, or using it as a filling for a delightful pastry, this jam is sure to become an essential in your kitchen. Plus, it’s a sensational way to preserve that burst of summer sweetness for cooler months ahead. Ready to create some kitchen magic? Let’s get started!
Ingredients for Easy 10-Minute Raspberry Jam
-
Fresh Raspberries (2 cups): The star of our jam! You can use fresh or frozen raspberries, but fresh always gives a vibrant flavor. If you don’t have raspberries on hand, feel free to substitute them with strawberries or blackberries for a delicious twist.
-
Granulated Sugar (1 cup): Sugar not only enhances the sweetness but also helps with the preservation of the jam. If you’re looking to cut down on sugar, coconut sugar or honey can be used, but be aware they might alter the taste slightly.
-
Fresh Lemon Juice (2 tablespoons): This brightens up the flavor and acts as a natural preservative. If you don’t have fresh lemons, bottled lemon juice works too, but I always prefer the taste of fresh whenever possible.
-
Pectin (1 tablespoon): A natural thickening agent that helps achieve that perfect jam texture. If you prefer a more rustic jam, you can skip this ingredient and simply mash the raspberries to retain a chunkier feel.
-
Pinch of Salt: Just a tiny touch to balance the sweetness and elevate the overall flavor of the jam!
Step-by-Step Instructions to Make Your Raspberry Jam
-
Prep Your Ingredients: Wash those beautiful raspberries gently under cold water, then pat them dry with a kitchen towel. This ensures they retain their lovely texture. If you’re using frozen ones, let them defrost and drain any excess water.
-
Mashing the Raspberries: In a mixing bowl, take your fresh raspberries and use a potato masher or the back of a fork to mash them slightly. Leave some chunks for texture! This is also the perfect time to taste a little bit—just remember that the sugar will make it sweeter soon!
-
Cook the Jam Mixture: Transfer those delightful mashed berries into a saucepan over medium heat. Stir in the sugar and lemon juice, making sure it all combines beautifully. Heat this mixture, stirring occasionally. You want to keep an eye on it so the sugar dissolves fully—this takes about 3-4 minutes. That lovely smell is about to waft through your kitchen!
-
Add the Pectin and Salt: Once the mixture is bubbling gently, stir in the pectin and a pinch of salt. This combo is what helps our jam thicken and creates that wonderful glossy finish. Allow the jam to simmer for another 2-3 minutes, stirring frequently.
-
Check the Consistency: To test if your jam is ready, drop a spoonful onto a plate that you’ve chilled in the freezer for a minute. Let it sit for 30 seconds, then run your finger through the middle. If the line holds, you’re good to go! If it’s still too runny, simmer for another minute or so.
-
Cool and Store: Remove the pan from heat and let the jam cool for about 10-15 minutes in the saucepan. Then, pour the jam into sterilized jars (this is crucial for preserving!). Make sure to leave a little space at the top of the jars. Allow the jars to cool completely before sealing them with lids.
And there you have it! In less than 10 minutes, you’ve created a fantastic homemade raspberry jam that captures all the magic of summer.
Serving Suggestions
Serving your homemade raspberry jam is a delightful experience! Spread it generously on warm toast or buttery croissants for breakfast. It pairs wonderfully with creamy cheeses for a savory-sweet snack. You can also swirl it into your morning yogurt or use it as a filling for cakes, tarts, or pastries. For a special touch, consider presenting it in a cute jar as a thoughtful gift for friends or family. Trust me; they’ll love you for it!
Recipe Variations
- Spicy Raspberry Jam: Add a pinch of crushed red pepper flakes or a splash of jalapeño juice for a sweet and spicy twist!
- Vanilla Raspberry Jam: Stir in a splash of vanilla extract along with the lemon juice for a delightful aromatic experience.
- Herbal Infusion: Toss in a few sprigs of fresh mint or thyme while simmering for a fragrant, herby version.
- Citrus Medley Jam: Mix in some zest from an orange or lime for a refreshing citrus vibe that brightens up the flavor.
- Chia Seed Jam: For a healthier alternative, replace the pectin with 2 tablespoons of chia seeds. They add fiber and create a beautiful texture!
Chef’s Notes
Every time I make this raspberry jam, I’m transported back to those sunny afternoons with my grandmother. It’s fascinating how something as simple as fruit, sugar, and a little love can become a cherished memory. Over the years, I’ve refined this recipe, always making little adjustments to evoke that familiar flavor of childhood. Cooking is about evolution and creativity—don’t be afraid to make it your own!
One time, I even tried to make peach jam with leftover raspberries; oh, what a lovely disaster that was! The kitchen was a complete mess, but the taste? An unexpected hit! Remember, cooking might get messy, but it’s the best kind of fun—embrace it!
FAQs and Troubleshooting
1. My jam is too runny! What did I do wrong?
It’s likely that it either didn’t cook for long enough or there wasn’t enough pectin. Just simmer it a bit longer and test it like we discussed!
2. Can I use frozen raspberries?
Absolutely! Just thaw them and drain any excess liquid, as they can be a bit more watery than fresh.
3. How long can I store my jam?
In a sealed jar, this jam should last up to a month in the fridge. For longer preservation, consider water-bath canning techniques!
4. Can I double the recipe?
Yes, but be mindful of cooking it in batches. Doubling the quantities might require you to extend the cooking time to get the right consistency.
Nutritional Info (per tablespoon)
- Calories: 36
- Total Fat: 0g
- Saturated Fat: 0g
- Sugars: 9g
- Protein: 0g
- Carbohydrates: 9g
So, there you have it—a delightful journey into the world of homemade raspberry jam! I hope this recipe inspires you to create your own kitchen magic. Remember, the best flavor comes from sharing with friends and family. Happy cooking, and enjoy every sweet moment!
Print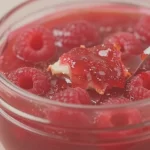
Easy 10-Minute Raspberry Jam
- Total Time: 10 minutes
- Yield: 1 jar 1x
- Diet: Vegetarian
Description
A quick and delightful recipe for homemade raspberry jam that’s perfect for preserving summer sweetness in just 10 minutes.
Ingredients
- 2 cups Fresh Raspberries
- 1 cup Granulated Sugar
- 2 tablespoons Fresh Lemon Juice
- 1 tablespoon Pectin
- Pinch of Salt
Instructions
- Prep Your Ingredients: Wash those beautiful raspberries gently under cold water, then pat them dry with a kitchen towel.
- Mashing the Raspberries: In a mixing bowl, take your fresh raspberries and use a potato masher or the back of a fork to mash them slightly.
- Cook the Jam Mixture: Transfer those delightful mashed berries into a saucepan over medium heat, stir in the sugar and lemon juice.
- Add the Pectin and Salt: Once the mixture is bubbling gently, stir in the pectin and a pinch of salt.
- Check the Consistency: Drop a spoonful onto a plate that you’ve chilled in the freezer for a minute.
- Cool and Store: Remove the pan from heat and let the jam cool for about 10-15 minutes in the saucepan.
Notes
This jam can last up to a month in the fridge. For longer preservation, consider water-bath canning techniques.
- Prep Time: 5 minutes
- Cook Time: 5 minutes
- Category: Condiments
- Method: Cooking
- Cuisine: American
Nutrition
- Serving Size: 1 tablespoon
- Calories: 36
- Sugar: 9g
- Sodium: 0mg
- Fat: 0g
- Saturated Fat: 0g
- Unsaturated Fat: 0g
- Trans Fat: 0g
- Carbohydrates: 9g
- Fiber: 0g
- Protein: 0g
- Cholesterol: 0mg
Keywords: raspberry jam, homemade jam, summer recipe




