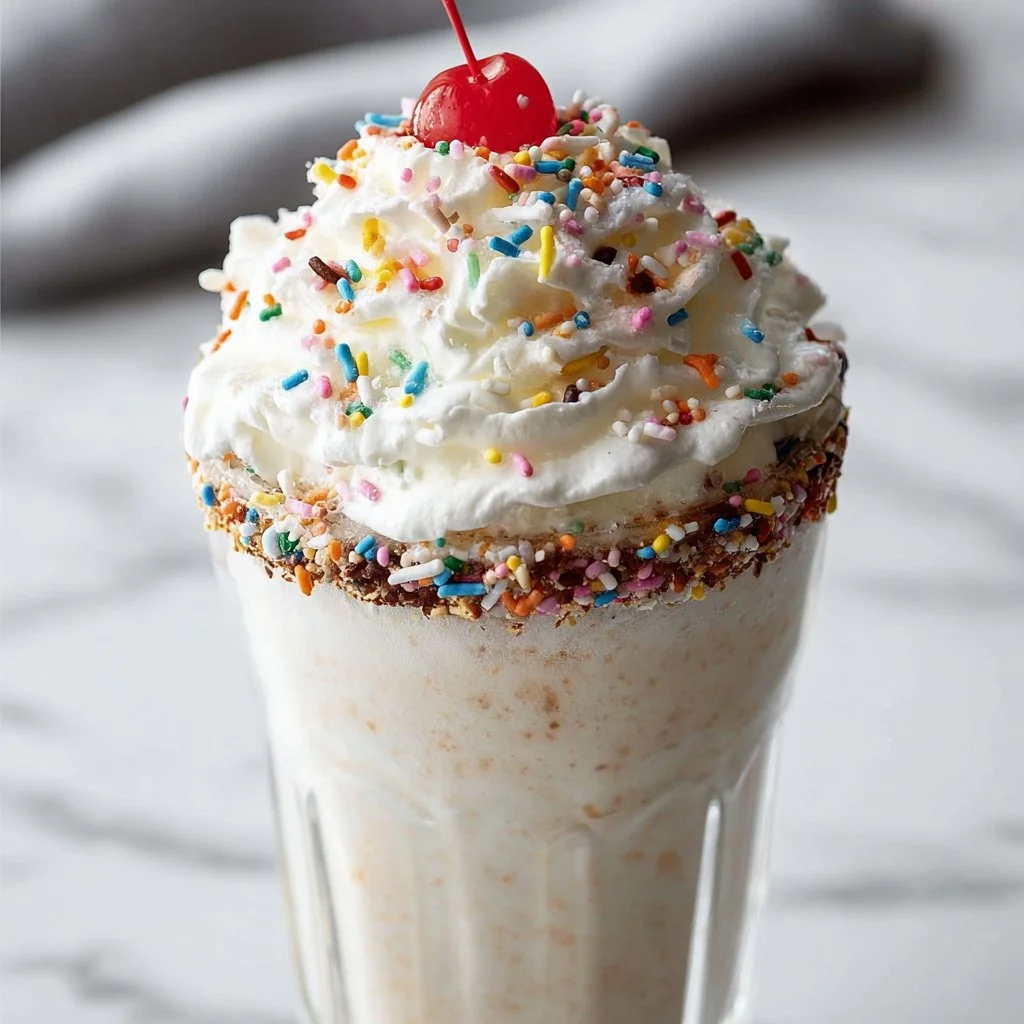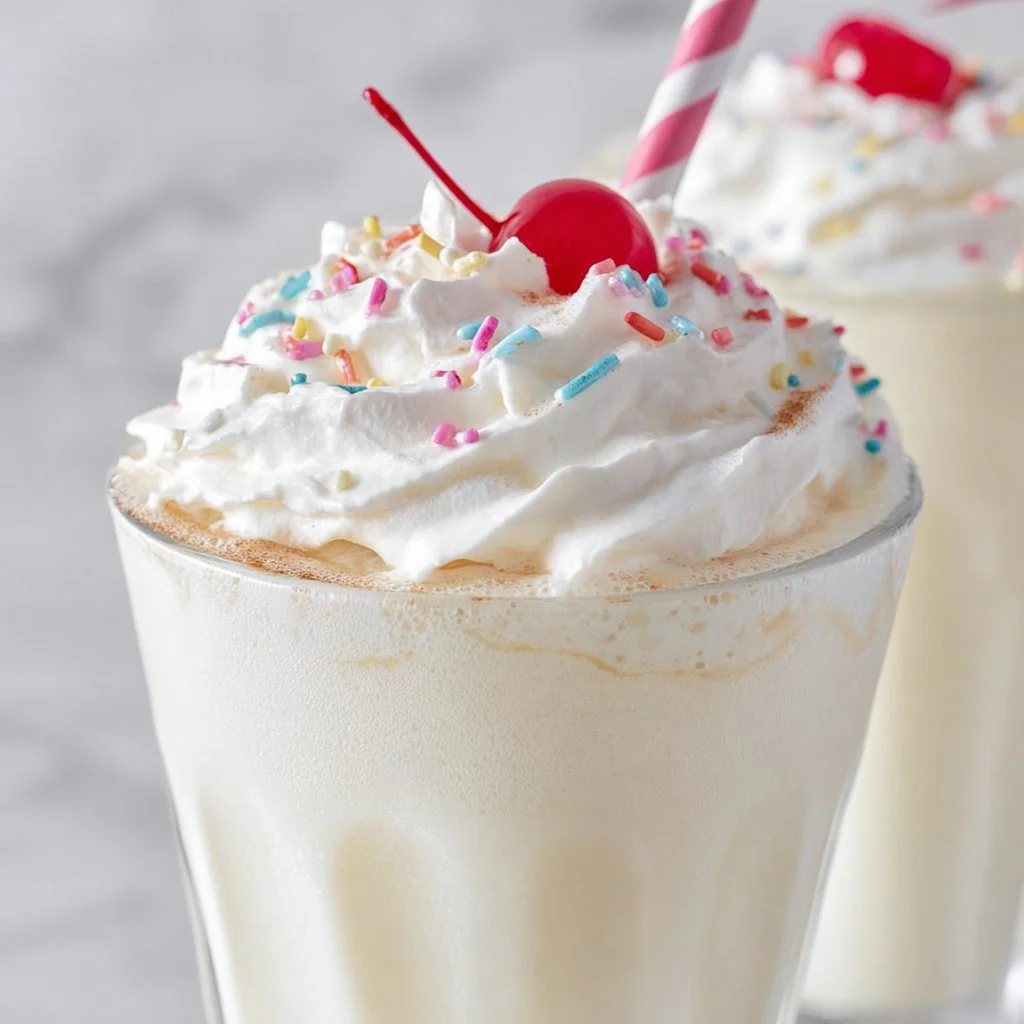
Old-Fashioned Vanilla Milkshake
Old-Fashioned Vanilla Milkshake: A Nostalgic Treat from My Kitchen
Welcome back to my kitchen! Today, I’m thrilled to share with you a recipe that holds a special place in my heart: the classic old-fashioned vanilla milkshake. This creamy, dreamy beverage is the epitome of comfort and nostalgia. Who doesn’t remember those hot summer days when you’d rush to the ice cream shop with friends, eager to indulge in a thick milkshake that seemed to melt away all your worries?
When I think of a vanilla milkshake, I’m immediately transported back to my childhood, probably because this sweet treat was a cherished staple in my home. My mom would whip up these delightful concoctions on Friday afternoons as a surprise to kick off the weekend. Watching her blend the ingredients together, the sound of the blender whirring with anticipation, and the delightful aroma of fresh vanilla wafting through our cozy kitchen is a memory that never gets old.
Now, I’m here to turn that nostalgia into a delicious reality for you! With just a few simple ingredients, you can create a milkshake that feels just like the ones you remember. The best part? You don’t need fancy equipment or culinary prowess to achieve that thick, velvety texture. Just gather your ingredients, put on your apron (even if it’s a bit messy), and let’s create something special together.
This old-fashioned vanilla milkshake isn’t just a drink; it’s a moment to savor. Whether you’re enjoying it on a sunny afternoon or as a late-night treat, each sip brings back a sense of joy and celebration. So grab a comfy chair, put on your favorite tunes, and let’s make a milkshake that will charm your taste buds and warm your heart!
Personal Story
One of my fondest memories involving vanilla milkshakes happened when I was about eight years old. It was a blazing hot July afternoon, and my friends and I decided to have a mini talent show in my backyard. We’d practice our acts all day—singing, dancing, and even attempting some bad magic tricks that mostly involved our pet cat, Mr. Whiskers, who was having none of it!
After our grand performances, feeling like true stars, my mom surprised us with her heavenly vanilla milkshakes. I remember watching her whip the ingredients together in our old blender, and the sound was like music to my ears. She poured each of us a tall glass, and as we toasted with our milkshakes, the world felt perfect. That moment of sheer delight—sticky hands, chocolate syrup smiles, and laughter with my closest friends—is a treasure I hold dear.
Fast forward to today, and I still find that making these milkshakes transports me back to that sun-drenched afternoon. It’s amazing how certain flavors can evoke memories and feelings from our past. So, if you’re ready to create some memories of your own, let’s dive into this delightful recipe!
Ingredients
Here’s what you’ll need to whip up your own old-fashioned vanilla milkshake:
-
Vanilla Ice Cream: A rich and creamy base that’s essential for a perfect milkshake. I recommend a premium quality vanilla ice cream for a true indulgence. If you’re looking for a lighter option, try using frozen yogurt or dairy-free ice cream.
-
Whole Milk: This ingredient helps achieve that dreamy liquid consistency you want in a milkshake. Whole milk gives it richness, but you can substitute it with any milk (almond, oat, or soy) if you’re looking to make a dairy-free version.
-
Vanilla Extract: Pure vanilla extract adds depth and enhances the vanilla flavor in your milkshake. If you’re in a pinch, you could use imitation vanilla extract, but for the best flavor, go for the real deal!
-
Whipped Cream: While optional, whipped cream takes your milkshake to the next level. You can easily make your own or use canned whipped cream for convenience. Want an extra twist? Try adding a sprinkle of cinnamon or cocoa powder on top!
-
Maraschino Cherries: These little beauties are the quintessential garnish for a milkshake, adding a pop of color and sweetness. If cherries aren’t your thing, consider crushed cookies, sprinkles, or even a drizzle of chocolate sauce.
Step-by-Step Instructions
Now let’s break down the steps to achieving the perfect milkshake!
Step 1: Gather Your Ingredients
Start by gathering all your ingredients in one place. This way, you won’t be scrambling through your kitchen looking for that elusive bottle of vanilla extract. It’s a small life hack that saves time and keeps the energy flowing!
Step 2: Scoop the Ice Cream
Take about three generous scoops of vanilla ice cream and place them in a blender. Remember, the more ice cream you add, the thicker your milkshake will be! If you like a runnier shake, you can reduce the amount a bit.
Step 3: Pour in the Milk
Add about half a cup of whole milk to the blender. You can always adjust the milk amount later. If you’re going for a thicker milkshake, start with less— you can always add more milk if necessary.
Step 4: Add Vanilla Extract
Now for the magic touch! Drizzle in about a teaspoon of pure vanilla extract. This will elevate the vanilla flavor and give your milkshake that homemade quality.
Step 5: Blend It Up
Put the lid on your blender, and blend the mixture on medium speed until smooth. You know it’s ready when you see a beautiful, creamy consistency whirl around. Keep an eye on it; if it’s too thick, pause the blender and add a bit more milk.
Step 6: Taste Test
Here comes the best part! Stop the blender and take a quick taste test. Is it sweet enough? If you prefer a sweeter milkshake, consider adding a tablespoon of sugar or a splash of sweetened condensed milk. Blend again briefly to mix it all together.
Step 7: Pour and Serve
Once you have the consistent blend you desire, pour your milkshake into tall glasses. If you’re feeling extra fancy, you can drizzle the inside of your glass with chocolate or caramel syrup before pouring in the milkshake for that café-style look.
Step 8: Top It Off
Finally, top your milkshake with a generous dollop of whipped cream. Add a maraschino cherry on top, and maybe a sprinkle of chocolate shavings or crushed cookies for an extra touch. You deserve it!
Serving Suggestions
When it comes to serving your old-fashioned vanilla milkshake, presentation is key! Use tall glasses or vintage milkshake cups if you have them—this adds that retro feel. Serve with a colorful straw and a small plate of your favorite cookies or chocolate chips on the side. Not only does this make the experience even more enjoyable, but it also brings a sense of whimsy!
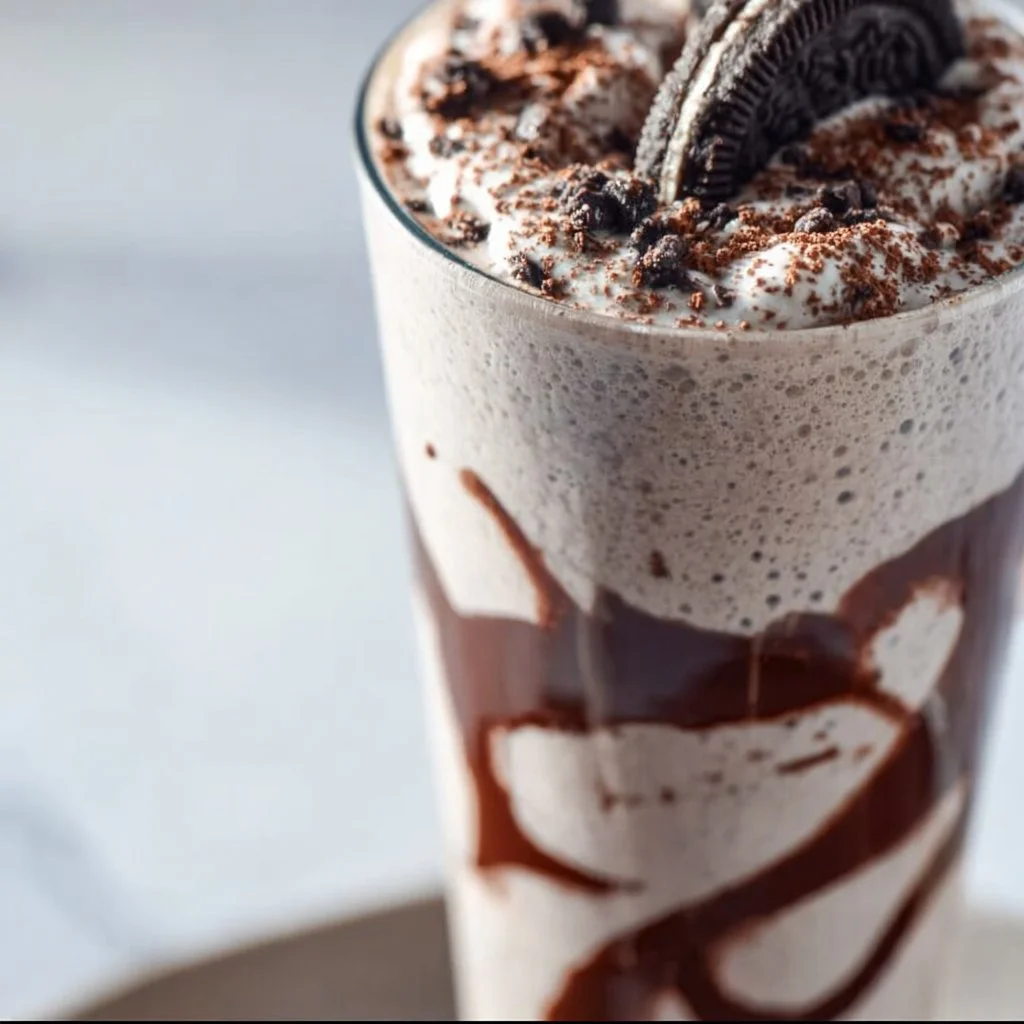
Recipe Variations
-
Chocolate Vanilla Milkshake: Add two tablespoons of chocolate syrup or cocoa powder to your blender for a delicious chocolate twist.
-
Coffee Vanilla Milkshake: For a delightful caffeinated treat, mix in a splash of cold brew coffee or espresso.
-
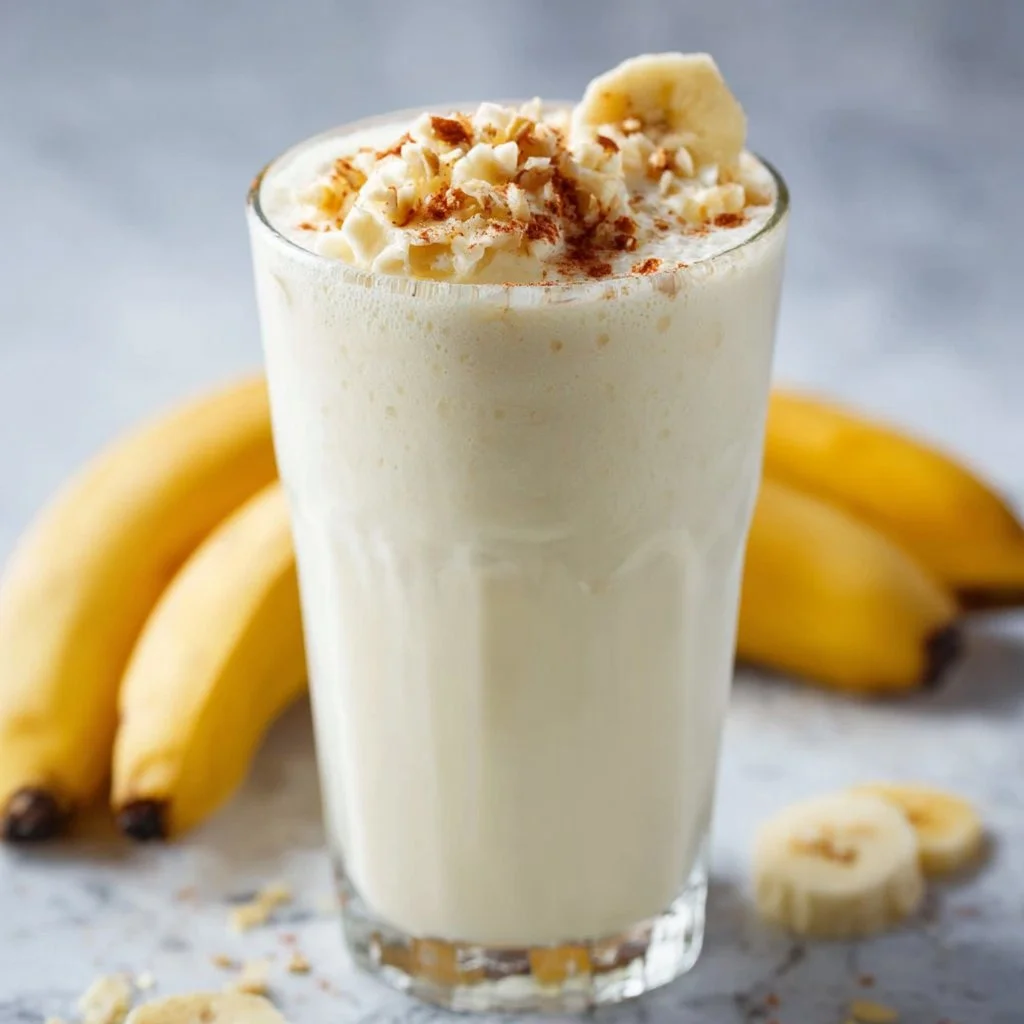
Banana Vanilla Milkshake: Add half a ripe banana into the blender for a creamy spin that’s perfect for banana lovers!
-
Mint Vanilla Milkshake: Toss in a few fresh mint leaves with the other ingredients for a refreshing minty flavor.
-
Vegan Vanilla Milkshake: Substitute dairy ice cream and milk with your favorite plant-based alternatives, and you’ve got a vegan version that’s equally delicious!
Chef’s Notes
As I reflect on the evolution of this recipe, I can’t help but chuckle at the time I tried to make a flavored milkshake using lavender extract instead of vanilla. Let’s just say, my taste test led to some very confused faces! While the classic recipe is tried and true, don’t hesitate to get creative. Just remember: start with quality ingredients and adjust flavors to your preference.
There’s magic in the kitchen when we try something new, but nothing beats the classic that evokes those cherished memories from our past. As you whip up your milkshake, think about the moments and people in your life that bring a smile to your face.
FAQs and Troubleshooting
Q: Why is my milkshake too thick?
A: No worries! Simply add a bit more milk, blend, and it’ll loosen up beautifully.
Q: Can I use low-fat milk instead of whole milk?
A: Absolutely! While it might slightly change the creaminess of the shake, you can still achieve a delightful milkshake using low-fat or any plant-based milk.
Q: My milkshake isn’t sweet enough. What can I do?
A: You can add sugar, honey, or flavored syrups to perfect the sweetness. Blend for a few more seconds to combine everything well.
Q: How can I store leftover milkshake?
A: If you have any leftovers, store them in an airtight container in the freezer. Just remember to let it sit out for a few minutes before blending again when you want to enjoy it!
Nutritional Info (optional)
For those counting, each serving of this classic old-fashioned vanilla milkshake contains approximately:
- Calories: 400
- Total Fat: 15g
- Saturated Fat: 9g
- Cholesterol: 80mg
- Total Carbohydrates: 56g
- Sugars: 49g
- Protein: 8g
(Values may vary based on specific ingredients used.)
And there you have it! An old-fashioned vanilla milkshake that’s as comforting as a warm hug. I hope you enjoy making and sipping this delightful treat as much as I have. Remember, cooking is all about the joy of creativity and sharing moments with those you love. Until next time, happy cooking!
Print
Old-Fashioned Vanilla Milkshake
- Total Time: 10 minutes
- Yield: 2 servings 1x
- Diet: Vegetarian
Description
A nostalgic treat that brings back fond memories, this classic old-fashioned vanilla milkshake is creamy, dreamy, and perfect for any occasion.
Ingredients
- 3 scoops vanilla ice cream
- 1/2 cup whole milk (or alternative)
- 1 teaspoon pure vanilla extract
- Whipped cream (for topping)
- Maraschino cherries (for garnish)
Instructions
- Gather your ingredients.
- Scoop the ice cream into a blender.
- Pour in the milk.
- Add the vanilla extract.
- Blend until smooth.
- Taste and adjust sweetness if needed.
- Pour into tall glasses.
- Top with whipped cream and garnish with a cherry.
Notes
For a fun twist, try adding chocolate syrup, coffee, banana, or fresh mint to create different variations of the milkshake.
- Prep Time: 10 minutes
- Cook Time: 0 minutes
- Category: Dessert
- Method: Blending
- Cuisine: American
Nutrition
- Serving Size: 1 serving
- Calories: 400
- Sugar: 49g
- Sodium: 150mg
- Fat: 15g
- Saturated Fat: 9g
- Unsaturated Fat: 6g
- Trans Fat: 0g
- Carbohydrates: 56g
- Fiber: 0g
- Protein: 8g
- Cholesterol: 80mg
Keywords: milkshake, vanilla, dessert, nostalgic, creamy

Lemon Cottage Cheese Pudding
The Zesty Delight of Lemon Cottage Cheese Pudding: A Sweet Escape
Hey there, fellow food lovers! Welcome back to my kitchen. Today, we’re diving into a delightful little dessert that’s not only bursting with flavor but also carries a silky, creamy texture that will have your taste buds dancing: Lemon Cottage Cheese Pudding. Yes, you heard it right! This is not just any pudding; it’s a luscious blend of tangy lemon and smooth cottage cheese that will remind you of sunny days and happy gatherings.
Every time I whip up this simple yet inventive dish, I’m taken back to lazy summer afternoons spent in my grandmother’s sunlit kitchen. The zest of fresh lemons filled the air as we mixed our ingredients, and laughter echoed around us. This recipe holds so much nostalgia for me—it’s the perfect blend of comfort and brightness. And guess what? It’s a breeze to make!
Whether you’re hosting a brunch, treating your sweet tooth after a long day, or just trying to impress your friends with a unique dessert, this pudding is your new best friend. Filled with protein and made with wholesome ingredients, it’s a sweet escape that feels indulgent without packing on the guilt. Ready to take a trip down memory lane and create some new delicious moments? Let’s get started!
Personal Story: A Sweet Memory
My journey with lemon pudding began when I was a little girl standing on a stool, precariously reaching for the mixing bowl on the counter. My grandmother, a culinary wizard in her own right, was teaching me the art of balance—life and flavor. Lemon Cottage Cheese Pudding was our go-to dish for family get-togethers.
I can still picture her vibrant yellow apron, flour dust swirling in the air as she squeezed fresh lemons while sharing stories of her childhood. Each bite of that pudding was like a burst of sunshine! We often served it chilled with a sprinkle of crushed graham crackers on top, giving it that perfect contrast of textures.
The flavors and memories melded into one perfect bite, sparking joy not just for us but for everyone who got to enjoy it! As I got older, I carried on this tradition, adapting the recipe here and there while staying true to the fundamental charm it had in my grandmother’s kitchen. Today, I’m excited to share this beloved recipe with you, along with some personal twists I’ve designed to make it your own.
Ingredients
Let’s gather our ingredients to create this delectable lemon cottage cheese pudding! Here’s what you’ll need:
-
Cottage Cheese (2 cups): The backbone of our pudding! It adds creaminess and a delightful flavor. If you’re after a smoother texture, opt for small or blended cottage cheese. You can substitute with Greek yogurt for a tangier kick.
-
Fresh Lemons (2 large): Using fresh lemons adds vibrant flavor and zest to the pudding. If you’re in a pinch, bottled lemon juice works, but fresh is always best!
-
Granulated Sugar (½ cup): This sweetens the tartness of the lemon. For a twist, consider using honey or maple syrup as a natural sweetener!
-
Vanilla Extract (1 teaspoon): A hint of vanilla elevates the flavor profile. Feel free to swap in almond extract for a nutty undertone!
-
Cornstarch (2 tablespoons): This helps set the pudding and give it that delightful pudding-like consistency. If you’re in need of a gluten-free alternative, arrowroot powder works great!
-
Milk (½ cup): A splash of milk helps blend everything smoothly. You can use almond milk, oat milk, or any dairy-free alternative for a vegan version.
-
Salt (a pinch): Don’t forget this! It balances the sweetness and enhances the overall flavor.
Ready to create some magic? Let’s jump into the cooking process!
Step-by-Step Instructions
Step 1: Prep Your Ingredients
Start by gathering all your ingredients so they’re within arm’s reach. Take a moment to slice your lemons and extract their juice—aim for about ¼ cup of fresh lemon juice. Zesting a lemon can add an extra zing, so don’t shy away from that colorful yellow skin!
Step 2: Blend the Cottage Cheese
In a blender or food processor, toss in the cottage cheese along with the lemon juice, zest, vanilla extract, and sugar. Blend until you achieve a smooth, creamy consistency. This will be your flavorful base! If you find the mixture a bit thick, add a splash more milk until it’s silky.
Chef’s Tip: Taste the mixture before moving on! Adjust the sweetness or tartness to your liking. Want more lemon? Squeeze it in!
Step 3: Prepare the Pudding Mixture
In a small saucepan over medium heat, combine the blended cottage cheese mixture with cornstarch and a pinch of salt. Stir continuously until the mixture begins to thicken, about 5-7 minutes. Be careful not to let it boil; you’re looking for a gently steaming mix!
Chef Hack: Whisking is your best friend here! It helps incorporate air, giving the pudding a lightness while eliminating any lumps.
Step 4: Chill the Pudding
Once it’s thickened up nicely, remove it from heat and transfer it to serving cups or a large bowl. Cover with plastic wrap, pressing it directly onto the pudding’s surface to prevent a skin from forming, and let it chill in the fridge for at least 2 hours (or overnight for the best flavor).
Chef Insight: This pudding is great for meal prep! Make it a day in advance, and let those flavors meld together in the fridge.
Step 5: Serve and Enjoy
When you’re ready to serve, remove the pudding from the fridge and give it a quick stir. Optionally, you can garnish with fresh berries, crushed graham crackers, or even a sprig of mint for that extra pop!
Serving Suggestions
To plate your Lemon Cottage Cheese Pudding, scoop it into individual servings for a lovely presentation. Top with a sprinkling of lemon zest and fresh fruit, or even a dollop of whipped cream—if you’re feeling indulgent! This way, each bite is a refreshing explosion of flavor and creaminess.
You can also serve it as part of a brunch spread or alongside a delicious handmade cake for a delightful dessert platter!
Recipe Variations
Want to shake things up a bit? Here are some creative variations to consider:
-
Berry Bliss: Fold in fresh strawberries, blueberries, or raspberries for a fruity twist. You can even create a berry compote to drizzle on top!
-
Chocolate Lover’s Delight: Add a tablespoon of cocoa powder for a chocolatey version, or fold in mini chocolate chips.
-
Coconut Classic: Mix in shredded coconut and a splash of coconut milk for a tropical flair.
-
Herbal Infusion: Consider blending in some fresh chopped herbs like basil or mint for a unique, refreshing touch.
-
Spice It Up: A dash of cinnamon or nutmeg can provide unexpected warmth to your pudding!
Chef’s Notes
This recipe has traveled with me through many kitchen adventures! I’ve swapped ingredients, played with flavors, and even made it for various dietary needs. It started as a simple family recipe, and over the years, it has become a crowd favorite at gatherings.
One of my favorite moments was when I hosted a potluck and someone insisted it wasn’t cottage cheese in the dessert. Pleasingly surprised, they left with the recipe—You’d be amazed at how many people are turned off by cottage cheese until they give it a try!
FAQs and Troubleshooting
Q: Can I use low-fat cottage cheese for this recipe?
Yes, you can! Just keep in mind that the pudding may have a slightly different texture, but it will still be delicious.
Q: How long does this pudding keep in the fridge?
Stored properly in an airtight container, this pudding can keep for about 3-5 days. Just remember to give it a stir before serving if it thickens!
Q: Can I freeze the pudding?
While you technically can freeze it, the texture might change once thawed. It’s best enjoyed fresh!
Q: What if my pudding didn’t thicken?
If your pudding doesn’t thicken, it might be due to not cooking long enough or not enough cornstarch. Next time, ensure to stir continuously and follow the cooking time closely. You can always whisk a bit more cornstarch in a little milk and bring it back to the heat.
Nutritional Info (optional)
While the exact nutritional content can vary based on your ingredient choices, here’s a rough estimate for one serving (makes about 4):
- Calories: 120
- Protein: 10g
- Fat: 5g
- Carbohydrates: 12g
- Sugar: 7g
And there you have it! Lemon Cottage Cheese Pudding is not just a dessert; it’s a celebration of flavors and memories. I hope you enjoy making it as much as I do. Feel free to improvise and make it your own, turning it into a memorable treat for you and your loved ones. Let me know how it turns out, and happy cooking!
Print
Lemon Cottage Cheese Pudding
- Total Time: 120 minutes
- Yield: 4 servings 1x
- Diet: Vegetarian
Description
A delightful lemon cottage cheese pudding that combines tangy lemon with creamy cottage cheese for a refreshing dessert.
Ingredients
- 2 cups Cottage Cheese
- 2 large Fresh Lemons
- ½ cup Granulated Sugar
- 1 teaspoon Vanilla Extract
- 2 tablespoons Cornstarch
- ½ cup Milk
- a pinch Salt
Instructions
- Prep your ingredients by slicing the lemons and extracting the juice.
- Blend the cottage cheese, lemon juice, zest, vanilla extract, and sugar until smooth.
- Prepare the pudding mixture by combining the blended mixture with cornstarch and salt in a saucepan and heat until thickened.
- Chill the pudding in the fridge for at least 2 hours.
- Serve the pudding in cups, garnished with fresh fruit or crushed graham crackers.
Notes
Feel free to experiment by adding fresh fruit, chocolate, or spices to the pudding.
- Prep Time: 15 minutes
- Cook Time: 7 minutes
- Category: Dessert
- Method: Chilling
- Cuisine: American
Nutrition
- Serving Size: 1 serving
- Calories: 120
- Sugar: 7g
- Sodium: 200mg
- Fat: 5g
- Saturated Fat: 2g
- Unsaturated Fat: 3g
- Trans Fat: 0g
- Carbohydrates: 12g
- Fiber: 0g
- Protein: 10g
- Cholesterol: 15mg
Keywords: dessert, lemon pudding, cottage cheese, refreshing dessert, summer treat

Baked Yogurt
The Creamy Delight of Baked Yogurt: A Recipe to Warm Your Heart
Welcome to my cozy little corner of the culinary universe! Today, I’m excited to share a recipe that’s near and dear to my heart: Baked Yogurt. If you’ve never tried this delightful dish before, you’re in for a treat! Imagine a creamy, rich base made from yogurt, gently baked until it transforms into a luscious custard-like texture, all while maintaining that tangy goodness. Perfect as a light dessert or a comforting snack, this dish wraps you in warmth and nostalgia, just like your favorite blanket on a chilly day.
Growing up in a home filled with the aromas of baking and the chatter of family, I often found myself in the kitchen, helping my mom whip up simple yet satisfying dishes. One of my fondest memories revolves around the first time I tasted baked yogurt — it was creamy, airy, and oh-so-delicious! Mom would surprise us by transforming plain yogurt into something magical with just a few ingredients and a little love. This dish represents everything I adore about cooking: the ability to take humble ingredients and transform them into something extraordinary that brings people together.
So, whether you’re looking for a new dessert to impress or simply want to indulge your creamy yogurt cravings, let’s dive into this delicious recipe together!
The Memories Behind Baked Yogurt
I still remember the warm glow of our kitchen on those lazy Sunday afternoons when the scent of baked yogurt wafted through the air. It was my mom’s go-to when we had family gatherings or when she wanted to treat us after a long week. She’d line up small ramekins on the kitchen counter and fill them with a luscious blend of yogurt, sugar, and vanilla extract, sending us running to the oven, eagerly anticipating the sweet satisfaction to come.
After the magical transformation in the oven, she would top each serving with a sprinkle of cinnamon and a handful of fresh berries, and we would gather around the table, giggles echoing as we dug into our tiny bowls of joy. It wasn’t just the taste that made it special; it was the feeling of togetherness that accompanied each scoop, the joy of sharing homemade goodness, and the warmth of family bonds strengthened over sweet bites.
Now, I’m thrilled to bring this beloved recipe to your kitchen, filled with love and a pinch of nostalgia.
Ingredients
Gathering ingredients is half the fun! Here’s what you’ll need to whip up this creamy baked yogurt:
-
2 cups plain yogurt
Choose a good quality, thick yogurt for the best results. Greek yogurt works beautifully here too! If you’re dairy-free, opt for coconut yogurt or almond yogurt, but just ensure it’s thick enough to hold its shape. -
1/2 cup sugar
Adjust the sweetness to your taste! You can use coconut sugar, honey, or maple syrup for a more natural option. Just keep in mind the flavor change. -
1 teaspoon vanilla extract
This adds a lovely depth of flavor. Feel free to use vanilla bean paste for an even richer experience or substitute with almond extract for a different twist. -
3 large eggs
Eggs help bind everything together and provide that custard-like consistency. For a vegan option, try using flax eggs (1 tablespoon ground flaxseed mixed with 2.5 tablespoons water per egg). -
Pinch of salt
A little hint of salt balances the sweetness and enhances the overall flavor. Don’t skip on this! -
Toppings (optional)
Fresh fruits, nuts, honey, or even a drizzle of caramel sauce can take this dish to the next level! Customize your toppings to suit your mood or what you have on hand.
Step-by-Step Instructions
Now that you have all your ingredients, let’s get cooking! Here’s how to make the most delightful baked yogurt:
Step 1: Preheat the Oven
Preheat your oven to 350°F (175°C). This is key! The goal is to slowly bake the yogurt mixture to achieve that creamy texture without curdling. Make sure it’s nice and hot before you pop in your dish.
Step 2: Prepare Your Ramekins
Lightly grease your ramekins or a baking dish with a touch of butter or non-stick spray. This ensures your baked yogurt won’t stick, making serving a breeze. If you’re feeling fancy, you could even sprinkle a bit of sugar inside to create a lovely caramelized crust.
Step 3: Whisk the Yogurt Mixture
In a mixing bowl, combine the yogurt, sugar, and vanilla extract. Use a whisk to blend them until smooth and creamy. Here’s where the fun begins! Feel free to sneak a taste; it’s delicious!
Step 4: Add the Eggs
Crack the eggs into the bowl, one at a time, whisking gently until fully combined. Don’t overmix — just enough to incorporate them. This will help achieve that dreamy custard effect!
Step 5: A Dash of Salt
Don’t forget the pinch of salt! It’s a tiny addition but makes a world of difference. Just a little sprinkle will help heighten the flavors and tie everything together.
Step 6: Pour and Bake
Now, carefully pour the mixture into your prepared ramekins or baking dish. If you’re using multiple ramekins, place them in a large baking pan filled with about an inch of hot water. This water bath ensures even baking and prevents the edges from getting too brown.
Bake for about 30-35 minutes or until the edges are set but the center gently jiggles. Keep an eye on them — every oven is a little different!
Step 7: Cool Down
Once they’re done, remove them from the oven and the water bath. Allow them to cool for about 10-15 minutes at room temperature. Then, transfer them to the refrigerator to chill for at least an hour. The chilling time helps achieve that perfect creamy texture we’re looking for.
Step 8: Serve it Up
When you’re ready to serve, it’s time to get creative! Top each portion with your favorite fruits, a sprinkle of cinnamon, or a drizzle of honey. The contrast of the cool yogurt with warm toppings is absolute bliss!
Serving Suggestions
Baked yogurt can be served warm or cold, depending on your preference. A beautiful way to present it is in individual ramekins, garnished with a vibrant medley of berries, a sprinkle of chopped nuts, or a drizzle of honey or caramel sauce. Remember, food is not just about taste — it’s also about aesthetics!
Recipe Variations
Looking to switch things up? Here are a few delicious variations to consider:
-
Scented Spices: Add a pinch of cardamom or nutmeg to the yogurt mixture for an aromatic twist.
-
Citrus Zest: Infuse some zest from lemons, limes, or oranges into the mixture for a refreshing zing.
-
Chocolate Delight: Fold in a few tablespoons of cocoa powder for a chocolate version that’s absolute heaven!
-
Nutty Crunch: Incorporate finely chopped nuts into the mixture before baking, creating added texture.
-
Fruit Fusion: Swirl in fresh or frozen fruit puree (like raspberry or mango) into the yogurt before baking for a fruity kick!
Chef’s Notes
I must confess, this baked yogurt has evolved a bit since my early kitchen adventures! Initially, I relied heavily on my mom’s recipe, but as I grew comfortable with different flavors, I began experimenting. I vividly remember one instance where I reached into the pantry and added a scoop of peanut butter to the yogurt mixture — absolute flavor explosion!
It’s these delightful kitchen experiments that make cooking so rewarding. Don’t be afraid to play around with flavors and have fun in your kitchen!
FAQs and Troubleshooting
Q1: My baked yogurt cracked. What went wrong?
Cracking generally happens if the oven temperature is too high. Ensuring a gentle baking environment using a water bath can help prevent this.
Q2: Why is my yogurt watery?
You may have used a yogurt with too much liquid. Opt for a thicker yogurt or strain your yogurt for a bit before using it.
Q3: How can I sweeten it without sugar?
You can easily substitute with honey, maple syrup, or agave syrup. Just adjust the quantities to your taste as they might require different measurements than granulated sugar.
Q4: Can I make it ahead of time?
Absolutely! Baked yogurt can be made a day in advance. Just keep it covered in the refrigerator until you’re ready to serve.
Nutritional Info (per serving)
- Calories: Approximately 150
- Protein: 8g
- Fat: 6g
- Carbohydrates: 20g
- Sugars: 12g
- Fiber: 1g
So there you have it! A simple, comforting baked yogurt recipe that’s sure to fill your home with warmth and love. Cooking should be an adventure, and I hope this recipe ignites your passion for creating cozy, flavorful dishes! Happy cooking, and remember: every great recipe starts with a pinch of love!
Print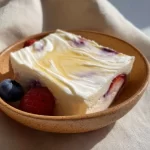
Baked Yogurt
- Total Time: 50 minutes
- Yield: 4 servings 1x
- Diet: Vegetarian
Description
A creamy and delightful baked yogurt recipe that transforms plain yogurt into a luscious custard-like dessert.
Ingredients
- 2 cups plain yogurt
- 1/2 cup sugar
- 1 teaspoon vanilla extract
- 3 large eggs
- Pinch of salt
- Toppings (optional): Fresh fruits, nuts, honey, or caramel sauce
Instructions
- Preheat your oven to 350°F (175°C).
- Prepare your ramekins by greasing them lightly.
- Whisk the yogurt, sugar, and vanilla extract until smooth.
- Add the eggs one at a time, whisking gently.
- Include a pinch of salt.
- Pour the mixture into prepared ramekins and place in a water bath.
- Bake for about 30-35 minutes until set but jiggly in the center.
- Cool for 10-15 minutes at room temperature, then chill in the refrigerator for at least an hour.
- Serve topped with your favorite additions.
Notes
You can make this ahead of time and store it in the refrigerator until ready to serve. Experiment with various toppings for added flavor.
- Prep Time: 15 minutes
- Cook Time: 35 minutes
- Category: Dessert
- Method: Baking
- Cuisine: Global
Nutrition
- Serving Size: 1 serving
- Calories: 150
- Sugar: 12g
- Sodium: 50mg
- Fat: 6g
- Saturated Fat: 3g
- Unsaturated Fat: 3g
- Trans Fat: 0g
- Carbohydrates: 20g
- Fiber: 1g
- Protein: 8g
- Cholesterol: 185mg
Keywords: baked yogurt, dessert, creamy dessert, yogurt recipes, comfort food