

Min Protein-Packed Espresso Cottage Cheese Brownies
Indulge Guilt-Free: Protein Cottage Cheese Espresso Brownies
Welcome to my warm and cozy kitchen! I’m Olivia Bennett, and today I’m stealing you away from the ordinary with a recipe that melds indulgence and nutrition: Protein Cottage Cheese Espresso Brownies! How can a brownie be healthy, you ask? Well, let’s just say I’m all about transforming classic treats into something spectacular without sacrificing flavor. With these brownies, we’re diving into a delightful blend of richness, a hint of espresso kick, and the lovely creaminess of cottage cheese. Trust me, your sweet tooth won’t know what hit it!
The world of baking often conjures images of flour clouds, sweet smell wafting through the air, and, oh yes, a bit of a mess — but that’s part of the fun, isn’t it? Growing up, I remember spending countless weekends in my grandma’s kitchen. We’d mix and taste and giggle as we tried to decipher the perfect balance of sugar and chocolate. It was here that I learned that a little experimentation could lead to something lovely. Fast forward to today, as I whip up these brownies, I can still feel the warmth of those memories, reminding me that food is about love, creativity, and sharing. So, let’s ignite our ovens and get baking these glorious Protein Cottage Cheese Espresso Brownies together!
Personal Story
One of my fondest memories in the kitchen occurred when I was about twelve years old. I had decided to take a stab at my first-ever baking project: a classic batch of chocolate brownies. I was so excited and convinced that I was about to become the baking sensation of our small town! Armed with a dog-eared recipe card from my grandma and an endless supply of enthusiasm, I went to work.
As I mixed my ingredients, I couldn’t help but sneak spoonfuls of batter – I mean, who can resist that rich chocolaty goodness? But in my eagerness, I miscalculated and doubled the cocoa—talk about a chocolate explosion! Panic set in, but rather than discard the mixture, I added some cottage cheese for creaminess and went with it. What I ended up with was a bizarre concoction that, surprisingly, turned out deliciously moist and surprisingly rich.
Years later, that memory inspired this recipe for Protein Cottage Cheese Espresso Brownies. They embody that spirit of creativity (and accidental genius) I discovered as a kid! So let’s not waste time and dive right into these delightful brownies that promise to be both fantastic and fulfilling!
Ingredients
Here’s everything you’ll need to whip up these decadent Protein Cottage Cheese Espresso Brownies:
-
1 cup cottage cheese: This provides creaminess and a protein boost. Looking for alternatives? Greek yogurt works well too for a slightly tangy flavor.
-
⅓ cup unsweetened cocoa powder: An essential for that rich brownie flavor. If you prefer something sweet, unsweetened chocolate can substitute, but keep the ratios in check as it’s less concentrated.
-
1 cup honey or maple syrup: A natural sweetener that enhances the brownie’s texture and taste. You can swap in coconut sugar for a different sweetness level, but your brownies may be less gooey.
-
2 large eggs: They bind everything together and contribute to that fudgy consistency. If you want to make this vegan, replace with flax eggs (1 tablespoon ground flax + 2.5 tablespoons water = 1 egg).
-
1 tablespoon vanilla extract: This adds flavor depth. Use a high-quality extract for the best results, or even try almond extract for a delightful twist!
-
1 teaspoon baking powder: Gives brownies that perfect rise. Baking soda can be used, but adjust your acid levels accordingly.
-
1 tablespoon instant espresso powder: This elevates the chocolate flavor with a subtle coffee note. Don’t have it? Brewed espresso works! Just reduce the liquid slightly.
-
½ teaspoon salt: Essential to enhance the flavors and balance sweetness; it truly cuts through the richness!
-
Optional toppings: A sprinkle of chocolate chips, chopped nuts, or a drizzle of melted dark chocolate can take these brownies over the top.
Step-by-Step Instructions
Now let’s dive into the fun part! Here’s how to make your Protein Cottage Cheese Espresso Brownies step by step:
-
Preheat Your Oven: Begin by preheating your oven to 350°F (175°C). This is crucial for evenly baking those brownies – nobody wants a mushy middle!
-
Blend the Base: In a mixing bowl, combine the cottage cheese, honey/maple syrup, eggs, and vanilla extract. Blend until smooth using a mixer or a handheld blender. This step is essential; a creamy mixture is the secret to a luscious brownie.
-
Mix in Dry Ingredients: In another bowl, combine the cocoa powder, baking powder, espresso powder, and salt. This way, you’ll ensure every bite has that chocolate-coffee goodness without clumps. Now, gradually add this dry mixture into the wet ingredients. Stir until just combined; be careful not to overmix!
-
Prepare the Pan: Line an 8×8-inch baking dish with parchment paper or lightly grease it. Do this to make sure your brownies have an easy exit; nobody enjoys wrestling their sweet treats out of the pan!
-
Pour and Spread: Pour the batter into your prepared pan, and use a rubber spatula to smooth it out. If you’re feeling adventurous, sprinkle some chocolate chips or nuts on top for extra flavor and texture.
-
Bake: Pop those beauties into the oven and bake for about 25-30 minutes. Stick a toothpick in the center; if it comes out with a few moist crumbs, you’re golden! If it’s completely clean, they might be overcooked — oops!
-
Cool Down: Once out of the oven, allow the brownies to cool in the pan for about 10 minutes, then lift them out using the parchment paper. Let them cool completely on a wire rack before cutting them into squares. The patience is worth it!
Serving Suggestions
These brownies are delightful on their own, but let’s talk about how to take them to the next level! Serve them warm with a scoop of vanilla ice cream or a dollop of Greek yogurt for an indulgent dessert. A sprinkle of fresh berries adds a beautiful pop of color and a fruity contrast that brightens the brownie experience.
For a more elegant plating, layer them with a simple chocolate sauce drizzle or serve with a side of homemade whipped cream. You could also try pairing them with a hot cup of coffee or a rich dark roast to heighten the espresso flavors!
Recipe Variations
Feeling creative? Here are a few variations to try with your Protein Cottage Cheese Espresso Brownies:
-
Nutty Almond Brownies: Add chopped almonds or almond butter to the batter for a delightful crunch.
-
Minty Fresh: Throw in some peppermint extract for a refreshing twist, or top with crushed peppermint candies for a holiday flair!
-
Fruity Addition: Mix in a half cup of raspberries or dried cherries for a fruity burst that complements the chocolate perfectly.
-
Spiced Up: Add a pinch of cinnamon or even chili powder for a subtle kick that transforms your brownies into something exciting.
-
Gluten-Free: Swap the cocoa powder for gluten-free cocoa and ensure all ingredients are certified gluten-free!
Chef’s Notes
As you can see, this recipe has truly unfolded into a personal journey for me! The transformation from my childhood mishap to a well-thought-out treat is incredibly gratifying. These brownies have not only become a staple in my own home, but they’ve also been a hit at parties and gatherings. Friends often ask for the secret behind them, and they are always shocked to hear about the cottage cheese – it’s my little surprise ingredient that adds a delightful depth!
Don’t be afraid to get creative in the kitchen; it’s truly where the spice of life resides. Remember, each batch can carry a story, much like my accidental brownie creation that turned into something delicious!
FAQs and Troubleshooting
Q: My brownies turned out dry. What went wrong?
A: Overbaking is typically the culprit! Ensure you keep an eye on them near the end of the baking time. It’s always better to err on the side of underbaking as they’ll continue to cook as they cool.
Q: Can I use regular cheese instead of cottage cheese?
A: It’s best to stick with cottage cheese for that creamy texture. Regular cheese may make your brownies heavy and alter the flavor profile significantly.
Q: I want these brownies sweeter. What can I do?
A: You can definitely add a bit more honey or maple syrup, or even throw in some chocolate chips, as they melt and contribute additional sweetness!
Q: How can I store leftovers?
A: These brownies keep well in an airtight container at room temperature for up to three days or can be refrigerated for about a week. You can also freeze them; just slice and place them in a freezer-safe bag or container, then thaw when ready to enjoy!
Nutritional Info
While the actual nutrition may vary, each brownie typically packs in about 120-150 calories, 5-7 grams of protein, and a nice balance of healthy carbs and fats. Given the protein boost from cottage cheese and a reduced amount of sugar, they make a great choice for a post-workout snack or a guilt-free dessert!
Now, are you ready to bring the comforting magic of these Protein Cottage Cheese Espresso Brownies to your kitchen? Each bite is a celebration of flavor, nostalgia, and a fun modern twist on a classic treat. Let’s turn your kitchen into a haven of sweetness and creativity. Happy baking, my fellow food lovers!
Print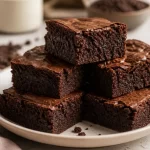
Protein Cottage Cheese Espresso Brownies
- Total Time: 40 minutes
- Yield: 16 brownies 1x
- Diet: Vegetarian
Description
Indulge in these guilt-free Protein Cottage Cheese Espresso Brownies, a perfect blend of richness and nutrition.
Ingredients
- 1 cup cottage cheese
- ⅓ cup unsweetened cocoa powder
- 1 cup honey or maple syrup
- 2 large eggs
- 1 tablespoon vanilla extract
- 1 teaspoon baking powder
- 1 tablespoon instant espresso powder
- ½ teaspoon salt
- Optional toppings: chocolate chips, chopped nuts, or melted dark chocolate
Instructions
- Preheat your oven to 350°F (175°C).
- Blend the cottage cheese, honey or maple syrup, eggs, and vanilla extract until smooth.
- Mix the cocoa powder, baking powder, espresso powder, and salt in another bowl.
- Gradually add the dry mixture into the wet ingredients and stir until just combined.
- Prepare an 8×8-inch baking dish with parchment paper or grease it lightly.
- Pour the batter into the pan and smooth it out with a spatula. Add optional toppings if desired.
- Bake for 25-30 minutes, checking for moist crumbs with a toothpick.
- Cool in the pan for 10 minutes, then transfer to a wire rack to cool completely before cutting.
Notes
These brownies are delightful warm or served with ice cream or yogurt. Feel free to experiment with different toppings and variations!
- Prep Time: 10 minutes
- Cook Time: 30 minutes
- Category: Dessert
- Method: Baking
- Cuisine: American
Nutrition
- Serving Size: 1 brownie
- Calories: 135
- Sugar: 10g
- Sodium: 150mg
- Fat: 4g
- Saturated Fat: 2g
- Unsaturated Fat: 2g
- Trans Fat: 0g
- Carbohydrates: 22g
- Fiber: 2g
- Protein: 7g
- Cholesterol: 50mg
Keywords: brownies, healthy dessert, protein brownies, cottage cheese brownies, espresso brownies
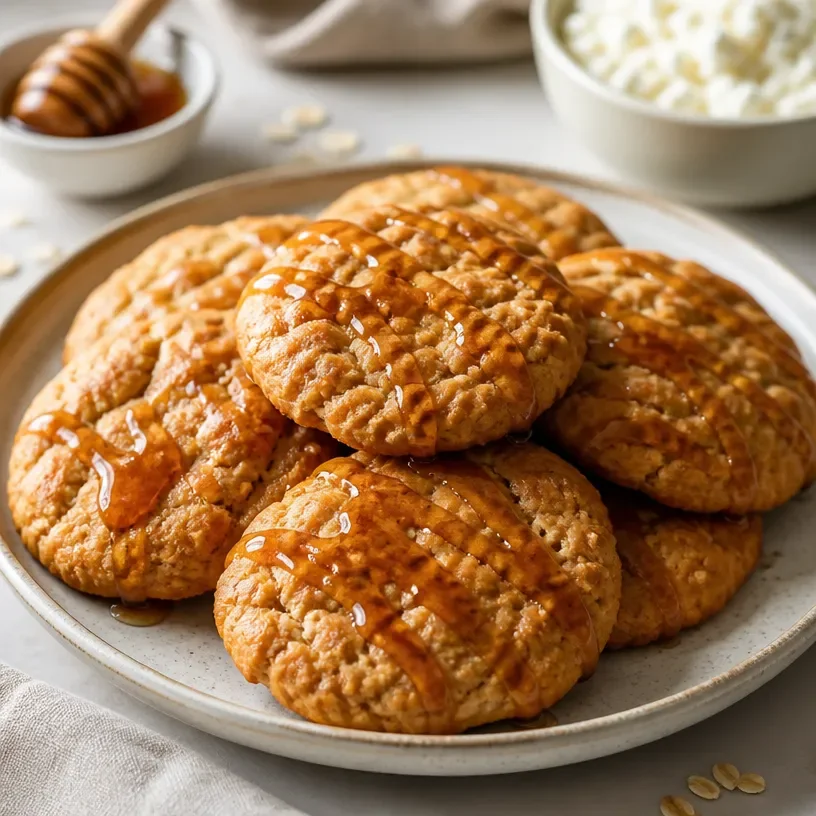
Ingredient High-Protein Cottage Cheese Maple Cookies
Protein Cottage Cheese Maple Cookies: A Sweet and Nutritious Treat!
Welcome to my cozy corner of the internet, fellow food enthusiasts! Today, we’re diving into the world of delightful baking with a twist on a classic treat: Protein Cottage Cheese Maple Cookies. Yes, you heard that right! These deliciously soft cookies are not only packed with flavor but also loaded with protein, making them a perfect snack for any time of day. Whether you’re looking for a post-workout bite or a sweet addition to your afternoon tea, these cookies are sure to satisfy your sweet tooth without the guilt.
Every time I wander into my kitchen, I can’t help but feel inspired by the simple, wholesome ingredients around me. The aroma of baked goods fills my home with warmth, and there’s nothing like the joy of sharing something freshly baked with friends and family. I remember the first time I tried incorporating cottage cheese into cookies—it was a happy accident! I was experimenting with healthier baking alternatives, and cottage cheese turned out to be the secret ingredient that took my cookies to the next level.
Imagine the moment when you bite into a warm cookie, the rich flavor of maple syrup mingling with the subtle tang of cottage cheese. Each bite is soft, chewy, and bursts with wholesome goodness. Not only do these cookies satisfy your cravings, but they also provide a boost of protein, making them a nutritious option for busy days. Join me as we embark on this culinary adventure together, and let’s whip up a batch of Protein Cottage Cheese Maple Cookies that will have everyone asking for seconds!
Personal Story
Let me take you back to a chilly autumn afternoon a few years ago. The leaves were turning golden, and the air was crisp—a perfect day for baking! I was having a cozy get-together with my closest friends, and we decided to whip up some treats together. I found an old recipe tucked away in my kitchen drawer that called for cottage cheese. Initially, I hesitated, thinking that cottage cheese in cookies might be a strange combination. But, remembering my goal to create something nutritious and delicious, I decided to give it a go.
As we stirred and mixed, the laughter filled the air, and soon the sweet scent of maple syrup intertwined with the creamy cottage cheese wafted through the kitchen. When the cookies came out of the oven, they were golden and fluffy, inviting us to dig in! Each bite was better than the last, and my friends couldn’t believe how good they were. By the end of the night, the batch had vanished, leaving only empty plates and full hearts. Since that day, these Protein Cottage Cheese Maple Cookies have become a staple in my home, always bringing a sense of nostalgia and joy.
Ingredients
Here’s what you’ll need to make these delicious cookies:
-
Cottage Cheese (1 cup): The star ingredient! It adds moisture, a hint of tang, and boosts the protein content. Use low-fat for a lighter option, or skip it entirely for a plant-based alternative.
-
Oats (1 cup, rolled or quick): These provide texture and a healthy dose of fiber. If you’re gluten-free, substitute with certified gluten-free oats.
-
Maple Syrup (½ cup): This natural sweetener gives the cookies a rich, warm flavor. Honey or agave syrup can be used as a substitute, but you’ll miss that unique maple essence.
-
Peanut Butter (½ cup): Also known as your flavor buddy! It enhances protein and provides creaminess. Almond butter or sunflower seed butter work as fantastic alternatives.
-
Egg (1 large): Acts as a binder for the cookies. For a vegan option, ¼ cup of unsweetened applesauce or a flax egg (1 tablespoon ground flaxseed + 2.5 tablespoons water) can work wonders.
-
Baking Powder (1 tsp): This little powerhouse helps the cookies rise and become fluffy. Make sure it’s fresh for the best results!
-
Cinnamon (1 tsp): Because, well, why not? It adds warmth and depth to the flavor. Feel free to swap in nutmeg or pumpkin spice for a fun twist.
-
Salt (½ tsp): To balance the sweetness and enhance the flavors.
-
Chocolate Chips (optional, ½ cup): For those who can’t resist a touch of chocolate! Dark chocolate chips boast extra antioxidants; but if you want to keep it simple, you can omit them entirely.
Step-by-Step Instructions
Now that we’ve gathered our ingredients let’s get down to the fun part—baking these delightful cookies! Here’s how to create your Protein Cottage Cheese Maple Cookies in just a few simple steps.
-
Preheat Your Oven (350°F / 175°C): Always start by preheating your oven. This ensures your cookies bake evenly right from the start.
-
Prepare Your Baking Sheet: Line a baking sheet with parchment paper. This will prevent the cookies from sticking and make cleanup a breeze.
-
Mix the Wet Ingredients: In a large mixing bowl, combine the cottage cheese, maple syrup, peanut butter, and egg. Using a whisk or a fork, mix until everything is well combined and creamy. This step is crucial—creamy wet ingredients equal a softer cookie texture.
-
Add the Dry Ingredients: To your wet mixture, add the oats, baking powder, cinnamon, and salt. Mix everything together until just combined. Be careful not to over-mix; we want our cookies to be tender, not tough!
-
Fold in the Chocolate Chips: If you’re using chocolate chips, gently fold them into the cookie dough. Their melty goodness will add an extra layer of decadence to our cookies.
-
Scoop the Dough: Using a cookie scoop or a tablespoon, drop heaping mounds of dough onto the prepared baking sheet. Leave space between each cookie, as they will spread slightly while baking.
-
Bake to Perfection: Place the baking sheet in the preheated oven and bake for 12-15 minutes or until the edges turn golden and the centers look set. Keep an eye on them, as every oven bakes differently!
-
Cool Down: Once baked, remove the cookies from the oven and allow them to cool on the baking sheet for 5 minutes. This helps them set up before transferring them to a wire rack for complete cooling. Trust me—the wait is worth it!
-
Enjoy: Once cooled, dive in and savor the delightful flavors of these cookies! Perfect for a cozy treat with your favorite cup of tea or coffee.
Serving Suggestions
These cookies are perfect on their own, but why not go the extra mile? Serve them warm with a drizzle of extra maple syrup or a dollop of Greek yogurt for added creaminess. You can also create a delightful cookie sandwich with a layer of nut butter or your favorite jam. They make fantastic afternoon snacks or even a sweet start to your day alongside a smoothie—endless possibilities await!
Recipe Variations
Here are a few creative twists to keep things exciting:
-
Chocolate Chip Cranberry Cookies: Add dried cranberries along with chocolate chips for a sweet and tart flavor combo.
-
Pumpkin Spice Cottage Cheese Cookies: Replace half of the cottage cheese with pumpkin puree and add pumpkin spice for a seasonal treat.
-
Nutty Energy Boost: Toss in chopped nuts or seeds to enhance the crunch factor and boost the protein content even more.
-
Lemon Zest Delight: Add fresh lemon zest for a refreshing citrusy note that pairs beautifully with maple syrup.
-
Coconut Bliss: Mix in shredded coconut for a tropical twist that’s utterly irresistible!
Chef’s Notes
These Protein Cottage Cheese Maple Cookies have evolved over time. Initially, they were just a fun experiment to use up some cottage cheese I had left over from a recipe. Little did I know they would become a go-to cookie in my kitchen! I’ll never forget the first time I brought them to a potluck. Everyone was raving, and I had to guard my plate to keep others from stealing the last few!
One memorable moment involved a baking mishap—I accidentally added double the baking powder! Thankfully, it turned into a fluffy cookie explosion, which had its charm. Now, I always remind myself that in the kitchen, accidents can lead to delightful discoveries!
FAQs and Troubleshooting
1. My cookies are too flat! What went wrong?
- Ensure your baking powder is fresh and measure your ingredients accurately. If your dough is too warm, let it chill in the fridge for about 30 minutes before baking. This helps the cookies hold their shape.
2. Can I freeze these cookies?
- Absolutely! Once cooled, place the cookies in an airtight container or freezer bag and store them in the freezer for up to 3 months. Thaw them in the fridge overnight and enjoy!
3. How can I make these cookies dairy-free?
- Swap the cottage cheese for dairy-free yogurt or applesauce. Use a plant-based nut butter to keep everything creamy and delicious!
4. What should I do if my dough is too dry?
- If the dough feels crumbly, add a splash of milk or an extra tablespoon of maple syrup. Mix until just combined; you want a soft but not overly sticky dough.
Nutritional Info
While I love sharing the experiences behind my recipes, I also understand the importance of nutrition. Here’s a rough estimate for one cookie (assuming the batch yields about 12 cookies):
- Calories: ~130
- Protein: ~5g
- Carbohydrates: ~15g
- Fat: ~6g
- Fiber: ~2g
Keep in mind that these values can vary based on ingredient substitutions!
So, there you have it! Delicious, soft, and protein-packed Protein Cottage Cheese Maple Cookies, perfect for any occasion. Let’s keep the cozy vibes going in the kitchen, and remember, every cookie tells a story—what will yours be? Happy baking!
Print
Protein Cottage Cheese Maple Cookies
- Total Time: 30 minutes
- Yield: 12 cookies 1x
- Diet: Vegetarian
Description
Deliciously soft and protein-packed cookies that combine the rich flavor of maple syrup with the moisture of cottage cheese.
Ingredients
- 1 cup Cottage Cheese
- 1 cup Oats (rolled or quick)
- ½ cup Maple Syrup
- ½ cup Peanut Butter
- 1 large Egg
- 1 tsp Baking Powder
- 1 tsp Cinnamon
- ½ tsp Salt
- ½ cup Chocolate Chips (optional)
Instructions
- Preheat your oven to 350°F (175°C).
- Prepare a baking sheet by lining it with parchment paper.
- Mix the cottage cheese, maple syrup, peanut butter, and egg in a large bowl until creamy.
- Add oats, baking powder, cinnamon, and salt to the wet mixture and combine gently.
- Fold in the chocolate chips if using.
- Scoop heaping mounds of dough onto the baking sheet, leaving space between each.
- Bake for 12-15 minutes until edges are golden and centers are set.
- Cool for 5 minutes on the baking sheet before transferring to a wire rack.
- Enjoy warm or cooled, perfect with tea or coffee!
Notes
For a vegan option, use applesauce or a flax egg instead of the egg. To make them gluten-free, use certified gluten-free oats.
- Prep Time: 15 minutes
- Cook Time: 15 minutes
- Category: Dessert
- Method: Baking
- Cuisine: American
Nutrition
- Serving Size: 1 cookie
- Calories: 130
- Sugar: 6g
- Sodium: 95mg
- Fat: 6g
- Saturated Fat: 1g
- Unsaturated Fat: 5g
- Trans Fat: 0g
- Carbohydrates: 15g
- Fiber: 2g
- Protein: 5g
- Cholesterol: 18mg
Keywords: cookies, healthy snacks, baking, protein cookies, cottage cheese cookies, maple cookies
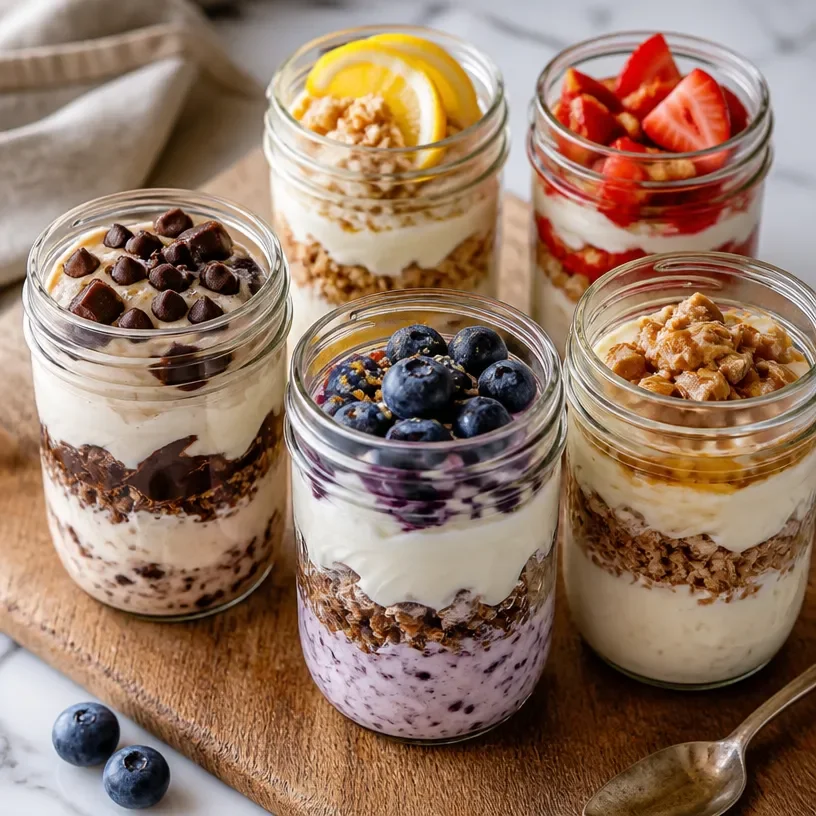
Five-Flavor Protein Dessert Jar Set for Quick Prep Snacks
Indulge in Guilt-Free Deliciousness: Protein Dessert Sampler Jar Set
Welcome to my kitchen! Today, I’m bubbling with excitement as I share a delightful recipe that’s not only scrumptious but also packs a protein punch—our Protein Dessert Sampler Jar Set! This treat is perfect for anyone looking to satisfy their sweet tooth while keeping health goals in sight. Plus, who doesn’t love a charming jar filled with layered goodness? You’ll feel like a gourmet chef as you create these colorful, plated masterpieces that will impress friends and family alike.
There’s something magical about having a variety of desserts at your fingertips—no need to choose just one! This sampler set gives you a taste of everything: creamy, crunchy, fruity, and chocolaty, all in one beautiful package. Imagine treating yourself to a delightful indulgence guilt-free, savoring each spoonful, and knowing you’re fueling your body with high-quality ingredients.
So grab your apron, roll up your sleeves, and let’s dive into this fun culinary adventure. Get ready to whip up a feast for the senses that is as enjoyable to make as it is to eat!
A Taste of Nostalgia
Let me take you back to my childhood for a moment. I remember sitting in my grandmother’s kitchen, the warm aroma of freshly baked goods enveloping the air as she stirred her famous chocolate mousse. It was one of those recipes that seemed so magical—a dessert that felt light as air yet was rich with flavor. As we layered the mousse into glass jars, my siblings and I would sneak spoonfuls when we thought she wasn’t looking. That joy of creating something beautiful and delicious together is what inspired me to develop this protein dessert sampler jar set.
Fast forward to today! My passion for healthy living grew, and so did my guilt about dessert. But what if we could have the best of both worlds? With these protein-rich ingredients and vibrant flavors, I’m here to share a modern twist on that nostalgic layering experience—a treat you can feel good about indulging in. Whether you want a post-workout reward, a sweet treat for your family, or a convenient snack to grab on the go, these protein dessert jars will reignite that spark of joy I felt in my grandmother’s kitchen.
Ingredients
Here’s a rundown of delicious ingredients that will bring your protein dessert sampler jar set to life:
-
Greek Yogurt (2 cups)
- A lean source of protein, Greek yogurt gives your dessert a creamy base. No plain yogurt in the fridge? No worries! You can use regular yogurt, just aim for the thicker varieties for a similar texture.
-
Protein Powder (1 cup)
- Choose a flavor you love, like vanilla or chocolate, for added richness. If you’re dairy-free, plant-based protein powders work great too!
-
Almond Butter (½ cup)
- This nutty spread adds healthy fats and extra protein. If you have a nut allergy, sunflower seed butter is a fantastic substitute!
-
Honey or Maple Syrup (¼ cup)
- Natural sweeteners like honey or maple syrup add a lovely sweetness. For a sugar-free option, try using stevia or a sugar-free syrup.
-
Fresh Berries (1 cup)
- Strawberries, blueberries, or raspberries add a burst of freshness and color. You can use frozen berries in a pinch or even purée them for a smooth layer.
-
Granola (1 cup)
- A crunchy layer that brings texture to your jars. Opt for a low-sugar granola, or make your own for a customized touch!
-
Dark Chocolate Chips (½ cup)
- A sprinkle of chocolate chips elevates these jars into dessert heaven! For a healthier version, choose dark chocolate with a high cocoa content.
Chef Insight
When choosing protein powder, think about your flavor preference and dietary needs. An unflavored or vanilla protein powder allows the other flavors to shine, while chocolate lends itself to more indulgent experiences. Remember, the protein powder you choose can significantly alter the taste, so don’t hesitate to experiment until you find your perfect match!
Step-by-Step Instructions
Now, let’s get into the fun part: assembling your protein dessert sampler jars!
-
Prepare Your Bases
- In a medium mixing bowl, combine the Greek yogurt and protein powder. Use a whisk to beat them together until smooth and creamy. (Tip: If you find the mixture too thick, add a splash of milk or almond milk to reach your desired consistency. This creates the perfect base for your jars!)
-
Make the Almond Butter Mixture
- In another bowl, mix the almond butter with honey or maple syrup until smooth. If the almond butter is too hard, you can microwave it for a few seconds to loosen it up. (Chef hack: Stir in a pinch of sea salt for enhanced flavor!)
-
Layering Your Jars
- Start with a layer of the Greek yogurt mixture at the bottom of your jar, filling it about one-third full. Use the back of a spoon to pack it down gently so it creates a solid base.
- Next, add a layer of the almond butter mixture, smoothing it out evenly over the yogurt layer. (Having a clean offset spatula or a spoon will help you achieve a polished look!)
-
Add the Fresh Berries
- Gently place a handful of fresh berries on top of the almond butter layer. Mixing different types of berries provides beautiful color and flavor diversity.
-
Repeat the Layers
- Continue layering until you reach the top of your jar. Alternate between the yogurt and almond butter layers. Aim for three layers each. You’ll want your last layer to be a yogurt layer topped with granola for a delightful crunch.
-
Garnish with Chocolate Chips
- Finish off your layers with a sprinkle of chocolate chips and any remaining berries on top for a gorgeous presentation.
-
Chill and Enjoy!
- Cover the jars with lids or plastic wrap and refrigerate for at least an hour before serving. This allows the flavors to meld together beautifully.
Chef Tips
- Play with the order of your layers! Want a surprise chocolate burst in the middle? Add chocolate chips between your yogurt and almond butter layers!
- These jars make for beautiful make-ahead desserts. Prepare them over the weekend for a week’s worth of sweet treats!
Serving Suggestions
When it comes to serving your protein dessert sampler jars, presentation is key! Remove the lids and place them on a beautiful platter for a vibrant display. You can even add a sprig of mint or a dusting of cocoa on top of the jars for a pop of color.
For a more interactive experience, provide additional toppings like shredded coconut, nuts, or more fresh fruit for guests to personalize their jar. Trust me, this will bring your dessert game to another level!
Recipe Variations
Feel free to get creative! Here are a few fun variations to make these jars uniquely yours:
- Peanut Butter Swirl: Substitute almond butter with creamy peanut butter for a nutty twist that will make your heart soar.
- Coconut Dreams: Add flaked coconut as a layer or topping for a tropical vibe that transports you straight to the beach.
- Coffee Dessert Jars: Mix in a tablespoon of instant coffee granules with your Greek yogurt for a mocha-inspired dessert. Perfect for coffee lovers!
- Chia Seed Layer: Mix chia seeds into your yogurt for added fiber and a nutritional boost. A great way to sneak in more nutrients!
Chef’s Notes
Each time I whip up these protein dessert sampler jars, I’m reminded of that time in my grandma’s kitchen. I’ve evolved this recipe over the years, always embracing new techniques and ingredients, but it never loses that essence of warmth and joy. I fondly recall trying various toppings based on what we had in the pantry, making every jar a surprise.
Every bite of these jars not only satisfies a sweet craving but also evokes love, nostalgia, and the essence of family cooking.
FAQs and Troubleshooting
Here are some common questions and troubleshooting tips if you encounter bumps along the way:
1. My yogurt mixture is too thick; what should I do?
- Add a splash of milk or almond milk and whisk again until smooth. This will help achieve a creamier texture!
2. Can I use non-dairy yogurt?
- Absolutely! There are many fantastic coconut or almond-based yogurts available; just ensure they’re unsweetened for the best results.
3. How long do these jars last in the fridge?
- They can last up to four days in the fridge if properly sealed. Just remember to add your granola right before serving to ensure it stays crunchy!
4. My almond butter is too runny. What can I do?
- If you find your almond butter too runny, consider chilling it in the fridge for a bit to thicken before layering.
Nutritional Info
Each jar contains:
- Approximately 350 calories
- 25g protein
- 15g healthy fats
- 30g carbohydrates
This protein dessert sampler jar set not only brings delight but also nourishes your body with wholesome ingredients!
As you embark on this delightful culinary adventure, remember each jar is an opportunity to express your creativity. Mix and match flavors, share stories, and turn such simple ingredients into something unforgettable. I can’t wait to hear how yours turn out—happy cooking, friends!
Print
Protein Dessert Sampler Jar Set
- Total Time: 60 minutes
- Yield: 4 servings 1x
- Diet: Protein-rich
Description
A delightful, protein-packed dessert sampler jar set with layers of Greek yogurt, almond butter, fresh berries, and granola.
Ingredients
- 2 cups Greek Yogurt
- 1 cup Protein Powder
- ½ cup Almond Butter
- ¼ cup Honey or Maple Syrup
- 1 cup Fresh Berries
- 1 cup Granola
- ½ cup Dark Chocolate Chips
Instructions
- Combine Greek yogurt and protein powder in a bowl until smooth.
- Mix almond butter with honey or maple syrup until smooth.
- Start layering with Greek yogurt mixture in the bottom of the jar.
- Add a layer of the almond butter mixture over the yogurt.
- Place fresh berries on top of the almond butter layer.
- Repeat the layers until the jar is filled, finishing with yogurt and granola.
- Garnish with chocolate chips and any remaining berries on top.
- Cover and refrigerate for at least 1 hour before serving.
Notes
Experiment with flavors and layer combinations. These jars can be prepped ahead for convenience.
- Prep Time: 15 minutes
- Cook Time: 0 minutes
- Category: Dessert
- Method: No cooking required
- Cuisine: Healthy
Nutrition
- Serving Size: 1 jar
- Calories: 350
- Sugar: 15g
- Sodium: 150mg
- Fat: 15g
- Saturated Fat: 2g
- Unsaturated Fat: 10g
- Trans Fat: 0g
- Carbohydrates: 30g
- Fiber: 5g
- Protein: 25g
- Cholesterol: 10mg
Keywords: protein dessert, healthy dessert, protein jars, guilt-free dessert, layered desserts
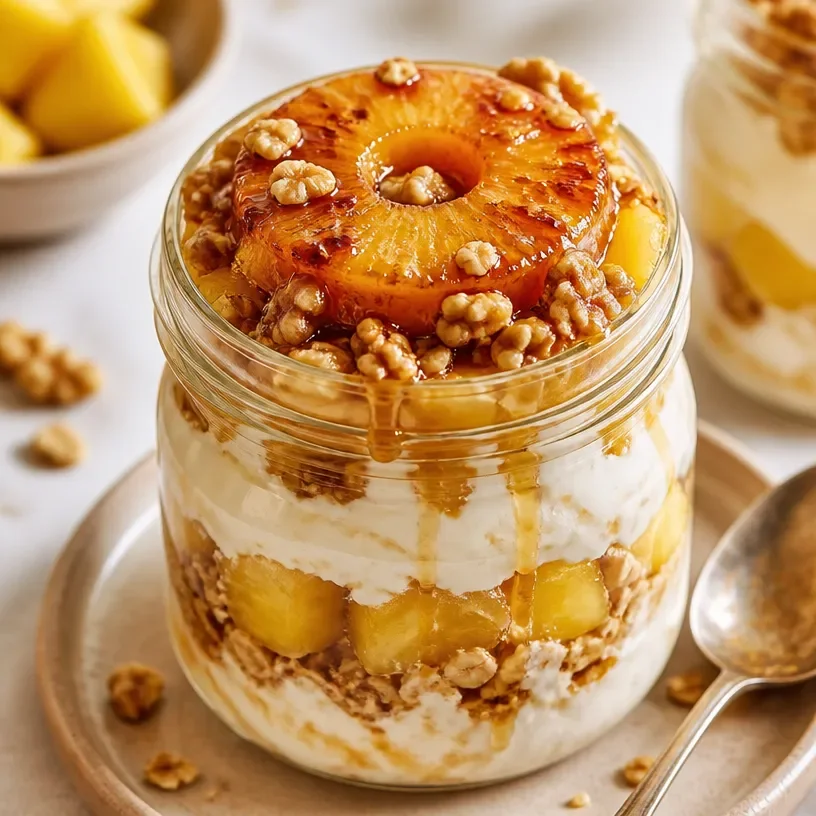
Ingredient Protein Pineapple Upside-Down Cake Jars
A Sweet Twist on Tradition: Protein Pineapple Upside-Down Cake Jars
Welcome to my kitchen, friends! Today, we’re whipping up a delightful treat that’s just as nostalgic as it is modern—a Protein Pineapple Upside-Down Cake Jar! As someone who loves to blend classic flavors with a contemporary twist, this recipe strikes the perfect balance between indulgence and health. If you’re a fan of moist, fruity desserts but also want a protein-packed punch, then you’ve landed in the right spot.
Growing up, my family had a tradition of making pineapple upside-down cake during special celebrations. I can vividly remember my grandmother standing in front of the oven, peering through the glass, her apron dusted with flour and smiles. Each cake emerged with a golden, caramelized pineapple topping—a sweet aroma that filled our home. We’d gather around the dining table, forks at the ready, digging into the delectable layers of cake and fruit, laughter echoing with each bite. This dessert was more than just a treat; it was a way to create memories, bond, and share our love of food.
Fast forward to today, and while I still cherish those childhood memories, I wanted to create a version that aligns with my current lifestyle—a dessert that could double as a snack or a post-workout treat. Enter the Protein Pineapple Upside-Down Cake Jar! This updated version keeps the nostalgia intact while adding a protein boost that won’t make you feel guilty. Plus, with the charming little jars, you can easily make portions for everyone. Let’s get to it!
Personal Story
One of the vivid memories I have associated with pineapple upside-down cake was my first attempt at making it solo. I was around twelve years old, and my mom was busy in the garden, tending to her flowers. Feeling a surge of independence, I decided it was the perfect time to surprise her with a homemade cake. While I followed her handwritten recipe, I accidentally swapped the sugar and salt—whoops! The look on my family’s faces when they tasted my creation was priceless. To this day, we laugh about that salty cake, but it taught me a valuable lesson about paying attention to detail in the kitchen. In essence, cooking is about experimenting, making mistakes, and learning—just like life. So, let’s avoid that salty scenario together and dive into this delicious Protein Pineapple Upside-Down Cake Jar, shall we?
Ingredients
Here’s what you’ll need for your Protein Pineapple Upside-Down Cake Jar:
-
Canned Pineapple Slices
The classic star of the dish, pineapple adds a juicy sweetness to your cake! Opt for canned in juice (not syrup) to keep it healthier. Substitution tips: fresh pineapple works wonderfully if you prefer to go fresh. -
Brown Sugar
This gives that signature caramel flavor when it melts with the pineapple. You can substitute it with coconut sugar for a healthier option. Tip: lightly pack it into your measuring cup for extra richness! -
Unsalted Butter
A must-have for moist, flavorful cake. If you’re watching your dairy intake, try using a vegan butter substitute or unsweetened applesauce. Insight: using room temperature butter helps it blend better with the sugar. -
Self-Rising Flour
This flour already contains baking powder and salt, making it a convenient choice. For a gluten-free option, replace it with oat flour or a gluten-free all-purpose blend. Tip: sift the flour for lightness! -
Protein Powder
The star of our healthy twist! You can use whey protein or your favorite plant-based powder. Insight: flavors like vanilla or coconut work best! -
Eggs
These keep the cake moist and help it rise. For a vegan option, applesauce, mashed bananas, or flax eggs can do the trick! Chef’s tip: make sure they’re at room temperature for better mixing! -
Vanilla Extract
Enhances the overall flavor profile. Use pure extract if possible, or consider almond extract for a nutty twist. -
Cinnamon
A savory addition that complements the sweetness of the pineapple. Feel free to add more if you love that warm spice! -
Greek Yogurt (optional)
This adds protein and moisture to the cake. You can substitute it with any plain yogurt or even silken tofu for a vegan alternative.
Step-by-Step Instructions
Step 1: Prepare the Jars
Before we dive into mixing, let’s set the stage! Preheat your oven to 350°F (175°C). While that’s warming up, grab your cute glass jars—these will be our charming individual servings. Lightly butter the insides of each jar and sprinkle a bit of brown sugar at the bottom. This forms a delightful caramel layer once the cakes bake!
Tip: If you’re lucky enough to have mini cast iron skillets, they could work perfectly for an individual serving too!
Step 2: Arrange the Pineapple
After placing the sugar and butter, lay one pineapple slice on top, or if you’re feeling fancy, cut the slices into smaller pieces and arrange them artfully. You can even throw in some maraschino cherries for an extra nostalgic flair!
Pro tip: Feel free to add a touch of coconut flakes for some tropical vibes.
Step 3: Mix the Batter
In a mixing bowl, cream together the butter and brown sugar until fluffy. This usually takes about 3-5 minutes with an electric mixer. Add in your eggs and vanilla extract, mixing until fully combined.
Chef’s hack: You can always substitute one egg with ¼ cup of Greek yogurt for added moisture!
Step 4: Dry Ingredients Unite!
In another bowl, whisk together the self-rising flour, protein powder, cinnamon, and a pinch of salt. Gradually fold this dry mixture into the wet ingredients. Be careful not to overmix here! You want it all combined but don’t mind a few lumps; they will bake out perfectly.
Note: If your batter feels too thick, mix in a splash of milk (dairy or plant-based) to achieve the desired consistency.
Step 5: Fill the Jars
Now, it’s time to scoop the batter into your prepared jars—about two-thirds full should do (remember, they need room to rise!).
Tip: Using an ice cream scoop can make this part a breeze!
Step 6: Bake Until Perfect
Pop those jars in the oven and bake for about 20–25 minutes or until a toothpick inserted comes out clean. The smell that fills your kitchen during this time will have you tapping your toes in excitement!
Note: Keep an eye on them to avoid overbaking; we want moist, fluffy goodness!
Step 7: Cool and Serve
Once baked, let the jars cool for about 10 minutes. Carefully run a knife around the edge of the cake, then flip it over to reveal the gorgeous caramelized pineapple topping. If the cake doesn’t gently release, give it a nudge with a spoon.
Pro chef tip: Serve warm with a dollop of Greek yogurt or a scoop of your favorite ice cream on top for a wonderful indulgence!
Serving Suggestions
These Protein Pineapple Upside-Down Cake Jars are beautiful on their own, but presentation is key! Serve them directly in the jars for a rustic vibe. You can add a sprig of fresh mint on top for a pop of color. Or, if you want to take it a step further, a drizzle of honey or a sprinkle of toasted coconut will elevate the look and flavor!
Recipe Variations
- Coconut Cream Twist: Mix shredded coconut into both the batter and as a topping for a tropical flair!
- Berry Blend: Swap the pineapple for mixed berries—think blueberries, strawberries, and raspberries for a twist on a classic.
- Spiced Variations: Add nutmeg or cardamom along with the cinnamon for a more complex flavor profile.
- Sugar-Free Option: Use stevia or monk fruit sweetener in place of brown sugar for a lower-calorie treat.
- Nutty Goodness: Toss in some walnut or pecan pieces for added crunch and nutrition.
Chef’s Notes
This recipe has a special place in my heart, not just for its nostalgic flavors but because it represents a journey—a blend of my childhood love for cooking with my current focus on health. The idea of turning a traditional dessert into something more nourishing is a reflection of growth and creativity in the kitchen. Remember, the best part about cooking is making it your own. If you find yourself having too many missed moments with measuring cups or flour dust, know that those are the stories worth telling around the table!
FAQs and Troubleshooting
Q1: My cake is too dense, what went wrong?
A: Dense cakes can occur if the batter is overmixed or if there’s too much flour. Be sure to gently fold the flour into the wet ingredients and measure accurately.
Q2: How can I make these jars ahead of time?
A: You can prepare the batter the night before and store it in the fridge. Fill the jars just before baking for the freshest outcome.
Q3: What if my jars crack in the oven?
A: Make sure you avoid sudden temperature changes—never place a cold jar in a hot oven! Let them come to room temperature to prevent shock.
Q4: How do I store leftovers?
A: These cakes can be stored in an airtight container in the refrigerator for up to three days. Simply reheat them for a quick treat any time!
Nutritional Info
While specific nutritional information will depend on your exact ingredients and measurements, here’s a general rundown of what you can expect:
- Calories: Approximately 180 per serving (1 jar)
- Protein: About 10-15g (depending on the protein powder used)
- Carbs: Roughly 25g
- Fats: Around 6g
Thank you for joining me on this delightful journey into the world of Protein Pineapple Upside-Down Cake Jars! With a touch of nostalgia and a dose of modern creativity, I hope this recipe inspires you to create your own memories in the kitchen. Whether for a brunch with friends or a special treat for yourself, these little jars are sure to bring joy. Happy baking! 🍍✨
Print
Protein Pineapple Upside-Down Cake Jars
- Total Time: 40 minutes
- Yield: 4 servings
- Diet: Gluten-Free, Vegetarian
Description
A delightful and healthy twist on the classic pineapple upside-down cake, these protein-packed cake jars are perfect for a nostalgic treat.
Ingredients
- Canned Pineapple Slices
- Brown Sugar
- Unsalted Butter
- Self-Rising Flour
- Protein Powder
- Eggs
- Vanilla Extract
- Cinnamon
- Greek Yogurt (optional)
Instructions
- Preheat your oven to 350°F (175°C) and butter the insides of glass jars with brown sugar at the bottom.
- Arrange the pineapple slices on top of the butter and sugar in the jars.
- Cream together the butter and brown sugar until fluffy, then add the eggs and vanilla extract.
- Whisk the self-rising flour, protein powder, cinnamon, and salt in another bowl, then fold it into the wet ingredients.
- Scoop the batter into the jars, filling them about two-thirds full.
- Bake for 20-25 minutes, or until a toothpick comes out clean.
- Cool the jars for 10 minutes before flipping them over to serve.
Notes
Serve warm with Greek yogurt or ice cream for an indulgent touch.
- Prep Time: 15 minutes
- Cook Time: 25 minutes
- Category: Dessert
- Method: Baking
- Cuisine: American
Nutrition
- Serving Size: 1 serving
- Calories: 180
- Sugar: 10g
- Sodium: 200mg
- Fat: 6g
- Saturated Fat: 3g
- Unsaturated Fat: 3g
- Trans Fat: 0g
- Carbohydrates: 25g
- Fiber: 2g
- Protein: 15g
- Cholesterol: 30mg
Keywords: pineapple upside-down cake, protein dessert, healthy baking, nostalgic dessert
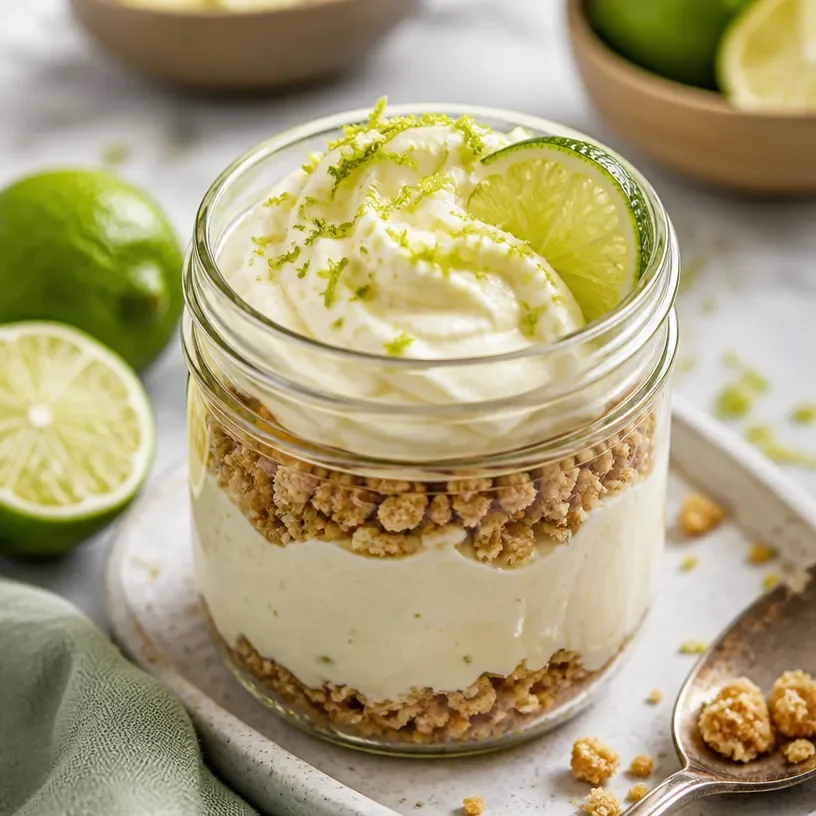
Protein Key Lime Pie Jar
Ultimate Protein Key Lime Pie Jars: A Healthy Twist on a Classic Treat
Welcome to my kitchen, friends! If you’re as enchanted by the tart, creamy goodness of Key Lime Pie as I am, then brace yourself for a treat that combines nostalgia and nutrition into a deliciously satisfying creation: Protein Key Lime Pie Jars. 🎉
The aroma of zesty lime mixed with a hint of buttery crust can transport you straight to sunny Florida beaches, even on a drizzly day. But who says we can’t enjoy this classic dessert while staying healthy? That’s exactly what I’m here to show you! Not only is this recipe bursting with flavor, but it also brings a generous protein punch, making it perfect for a post-workout snack or a guilt-free dessert after dinner.
I’ve discovered over the years that cooking is so much more than just following a recipe; it’s about sharing moments and making memories. The best part about this dessert is that it’s a no-bake wonder, so you can whip it up in a jiffy. Whether you’re entertaining guests or indulging in some “me-time,” these jars are sure to impress everyone.
So, roll up those sleeves, throw on your favorite apron (messy is the new chic, after all), and let’s dive into this delightful journey of creamy, zesty goodness!
A Nostalgic Twist: My Childhood Love for Key Lime Pie
Growing up, my summers were filled with trips to the coast, where the warm sun kissed my skin and the salty air filled my lungs. Each year, we’d stop by a quaint little beachside shack that served the best Key Lime Pie I’ve ever tasted. The moment I took my first bite, I was hooked. The sweet, tangy filling paired with that crumbly crust created a symphony of flavors that danced on my palate.
That little shack became a summer tradition, and I would always beg my parents to let me have a second slice. The joy of sharing that pie with family and friends while telling stories and laughing is something I cherish. As I grew older and became more conscious of nutrition, I realized I didn’t want to let go of that beloved dessert. Instead, I decided to reinvent it into something healthier, without compromising the flavors I adored. And thus, the Protein Key Lime Pie Jar was born!
Ingredients to Whip Up Some Magic!
Now that you’re feeling inspired, let’s gather the ingredients! By the end of this list, you’ll be diving right into the preparation like a pro.
-
Greek Yogurt (1 cup)
This creamy delight is the star of our filling. Packed with protein and probiotics, it adds a luscious texture while keeping it light. For a dairy-free alternative, opt for coconut yogurt! -
Key Lime Juice (1/2 cup)
The essential ingredient for that iconic tang! You can find bottled Key lime juice, but if you’re feeling adventurous, freshly squeezed limes are unbeatable. -
Honey or Maple Syrup (1/4 cup)
A natural sweetener to balance the tartness. If you’re looking to cut calories, you can use a sugar substitute like stevia or monk fruit sweetener. -
Coconut Cream (1/2 cup)
Adds that rich flavor and creaminess. For a lighter version, you can use low-fat whipped cream. Just keep in mind the flavor might differ slightly. -
Vanilla Extract (1 tsp)
A must-have for depth of flavor! If you want to get fancy, try swapping for almond extract for a unique twist. -
Graham Cracker Crumbs (1 cup)
These are for our crust! If you want a gluten-free option, use almond flour mixed with a bit of melted coconut oil. -
Butter or Coconut Oil (1/4 cup)
This ingredient binds the crumbs together. For the vegan option, coconut oil works perfectly! -
Protein Powder (Optional: 1/2 cup)
Boost your protein content by adding your favorite flavor. Vanilla or unflavored protein powder blends seamlessly!
Step-by-Step Instructions: Let’s Get Cooking!
Ready to make your jars? Follow these detailed steps, and don’t forget to check out my chef hacks along the way!
-
Prepare Your Crust
In a mixing bowl, combine 1 cup of graham cracker crumbs and 1/4 cup of melted butter (or coconut oil). Mix until all crumbs are fully coated.
Chef Hack: If you like your crust extra crunchy, bake it in a preheated oven at 350°F (175°C) for 5–7 minutes until lightly golden. -
Create the Filling
In another bowl, whisk together 1 cup of Greek yogurt, 1/2 cup of Key lime juice, 1/4 cup of honey or maple syrup, and 1/2 cup of coconut cream. Make sure everything is well incorporated.
Tip: Taste your mixture before adding more sweetener. Adjust to your preference! -
Incorporate the Protein Powder
If you’re using protein powder, gently mix it into your filling until it’s fully blended. This helps keep the texture creamy rather than chalky.
Chef Insight: I usually opt for a plant-based protein for a more balanced, lighter flavor. -
Assemble the Jars
Grab your cute jars (or bowls, no judgment here!) and start layering. Begin with a spoonful of the crust at the bottom, followed by a generous layer of the Key lime filling, then repeat until you reach the top.
Pro Tip: Leave a little space at the top for garnishes! -
Chill for Perfection
Cover your jars and pop them in the refrigerator for at least 2 hours (or overnight, if you can resist!). This helps the flavors meld together beautifully.
Funny Story: I once made these for a gathering and forgot to chill them! I served them warm, and while they weren’t what I intended, they turned out to be a hit anyway!
Serving Suggestions: Presentation Matters!
When it comes to serving, the beauty is in the simplicity of presentation. You can garnish your Protein Key Lime Pie Jars with a dollop of whipped cream, a sprinkle of graham crumbs, and a slice of lime on top. Serve them on a colorful platter for a pop of color, and watch your friends’ faces light up!
Recipe Variations: Get Creative!
Looking to switch things up? Here are a few fun variations to elevate your Protein Key Lime Pie Jars:
- Berry Bliss Version: Mix in some fresh raspberries or blueberries into the filling for an added fruity twist.
- Coconut Lime Combo: Fold in shredded coconut into your filling for that tropical zing!
- Choco Key Lime Delight: Add cocoa powder to the crust for a chocolatey flavor that perfectly complements the lime.
- Vegan Option: Substitute Greek yogurt with silken tofu blended until smooth and use maple syrup as a sweetener.
Chef’s Notes: A Touch of Reflection
Looking back, I have made this recipe countless times for friends and family, and it never fails to spark joy and laughter. It’s an evolution of my childhood memories, wrapped up in a healthier package. One time, I accidentally mistook lime juice for lemon juice and ended up creating a brand new favorite! Life in the kitchen is all about experimenting and having fun.
Whenever you’re whipping up a treat, remember that mistakes can often lead to the most delicious discoveries. Keep your spirits high, and don’t be afraid to get creative!
FAQs and Troubleshooting: Let’s Clear Up the Confusion
1. Why is my filling too runny?
If your filling is too thin, try adding more Greek yogurt or chilling the jars for a little longer so it can firm up.
2. Can I make this recipe dairy-free?
Absolutely! Substitute Greek yogurt with coconut yogurt and use vegan alternatives for cream and sweeteners. The flavor will still shine through wonderfully!
3. How do I store leftovers?
These treats can last in the fridge for up to 3 days if kept covered. Just make sure to add any toppings (like whipped cream) just before serving to keep it fresh!
4. What if I can’t find Key limes?
Regular limes work just fine! The flavor might be slightly different but still delicious—just remember to adjust the sweetness if they’re more tart than Key limes.
Nutritional Info (Optional)
While this recipe is designed to be a healthier take on a classic dessert, here’s a rough estimate per serving (1 jar):
- Calories: 250-300
- Protein: 15-20g
- Carbohydrates: 30g
- Fats: 12g
- Fiber: 3-4g
Now, there you have it, my friends! Whether needed for a summer gathering or a cozy dessert to savor in silence, these Protein Key Lime Pie Jars are a fun, creative, and healthy way to enjoy a beloved classic. Now it’s your turn to head into the kitchen, whip these up, and make some delicious memories of your own! Happy cooking! 🍋✨
Print
Ultimate Protein Key Lime Pie Jars
- Total Time: 120 minutes
- Yield: 4 servings 1x
- Diet: Healthy, High Protein
Description
A healthy twist on a classic Key Lime Pie, packed with protein and perfect for a post-workout snack or guilt-free dessert.
Ingredients
- 1 cup Greek Yogurt
- 1/2 cup Key Lime Juice
- 1/4 cup Honey or Maple Syrup
- 1/2 cup Coconut Cream
- 1 tsp Vanilla Extract
- 1 cup Graham Cracker Crumbs
- 1/4 cup Butter or Coconut Oil
- Optional: 1/2 cup Protein Powder
Instructions
- Prepare your crust by combining 1 cup of graham cracker crumbs and 1/4 cup of melted butter (or coconut oil) in a mixing bowl. Mix until all crumbs are coated.
- Create the filling by whisking together 1 cup of Greek yogurt, 1/2 cup of Key lime juice, 1/4 cup of honey or maple syrup, and 1/2 cup of coconut cream in another bowl.
- Incorporate the protein powder, if using, into your filling until fully blended.
- Assemble the jars by layering the crust and filling until filled.
- Chill the jars for at least 2 hours in the refrigerator.
Notes
Garnish with whipped cream, graham crumbs, and a slice of lime before serving. You can also switch up ingredients for different variations.
- Prep Time: 15 minutes
- Cook Time: 0 minutes
- Category: Dessert
- Method: No-Bake
- Cuisine: American
Nutrition
- Serving Size: 1 jar
- Calories: 300
- Sugar: 20g
- Sodium: 150mg
- Fat: 12g
- Saturated Fat: 7g
- Unsaturated Fat: 5g
- Trans Fat: 0g
- Carbohydrates: 30g
- Fiber: 3g
- Protein: 20g
- Cholesterol: 30mg
Keywords: Key Lime Pie, Healthy Dessert, Protein Snack



