

Protein Cottage Cheese White Chocolate Raspberry Loaf
A Joyful Journey into Baking: Protein Cottage Cheese White Chocolate Raspberry Loaf
Welcome to my vibrant kitchen, where aromas tantalize and warmth surrounds every dish! I’m Olivia Bennett, your devoted culinary companion, here to bring you deliciously cozy and unforgettable recipes that spark joy and camaraderie. Today, we’re diving into a delightful treat that perfectly balances health and indulgence: the Protein Cottage Cheese White Chocolate Raspberry Loaf.
Now, I know what you might be thinking—cottage cheese in a loaf? Trust me, it’s a game-changer! This recipe showcases how we can turn simple ingredients into something that feels luxurious without sacrificing health. Imagine a loaf that embraces the creaminess of cottage cheese, the sweetness of white chocolate, and the tartness of fresh raspberries! It’s comfort food that you can feel good about, perfect for breakfast, an afternoon snack, or a sweet dessert.
The Story Behind the Loaf
Let me whisk you away to a Saturday morning from my childhood. It was a sunny day, and I could hear the gentle clattering of pots and pans as my mom whipped up something special just for us. The kitchen was a flurry of activity—it was our family tradition to bake something sweet together every weekend! My mom had this magical ability to turn pantry staples into mouthwatering treats.
One particular Saturday, she introduced me to the joys of mixing sweet with savory. That day, we made a fruity loaf so vibrant and bursting with flavor that I knew I had to replicate it someday. Fast forward a few years, and here we are! Inspired by those sunny mornings, I crafted this Protein Cottage Cheese White Chocolate Raspberry Loaf concept. It’s not just a recipe; it’s a reminder of those fond memories filled with laughter, because every bite carries the warmth of a kitchen shared with loved ones.
Ingredients
Here’s what you’ll need to whip up your own Protein Cottage Cheese White Chocolate Raspberry Loaf:
-
1 cup cottage cheese: The star of the show! This provides moisture and protein. If you’re not a fan of cottage cheese, Greek yogurt makes an excellent substitute for a creamier texture.
-
2 large eggs: For binding and richness. If you’re looking for a vegan option, try flax eggs (1 tablespoon of ground flaxseed + 2.5 tablespoons of water per egg—let it sit for a few minutes until it thickens).
-
1/2 cup unsweetened applesauce: This adds natural sweetness and moisture. You can use mashed bananas if you want an extra fruity twist.
-
1/3 cup honey or maple syrup: A touch of sweetness fine-tunes the flavors. Feel free to reduce the amount to your taste or substitute with agave syrup.
-
1 cup all-purpose flour or whole wheat flour: The foundation of the loaf. Whole wheat flour provides additional fiber. For a gluten-free version, almond or oat flour can be great alternatives, just adjust the liquid slightly.
-
1 teaspoon baking powder and 1/2 teaspoon baking soda: These leavening agents give the loaf its fluffy texture. Double-check their freshness for the best rise!
-
1/4 teaspoon salt: A pinch to enhance all the flavors.
-
1/2 cup white chocolate chips: These melt into sweet pockets that elevate the loaf. Dark chocolate can also be used if you prefer a slightly less sweet treat.
-
1 cup fresh raspberries: For tartness and color! If you can’t find fresh ones, frozen raspberries work too—just be sure to thaw and drain them before folding into the batter.
Step-by-Step Instructions
-
Preheat your oven: Start by preheating your oven to 350°F (175°C). This ensures that by the time you’ve mixed your batter, your oven is ready and waiting!
-
Prepare your loaf pan: Grease a standard loaf pan (9×5 inches) or line it with parchment paper to help with easy removal later. I’d recommend using parchment paper—it makes the clean-up oh-so-easy!
-
Mix the wet ingredients: In a large mixing bowl, combine the cottage cheese, eggs, applesauce, and honey (or maple syrup). Whisk until smooth, and don’t worry if there are a few cottage cheese lumps—those will bake up nicely!
-
Combine the dry ingredients: In another bowl, whisk together the flour, baking powder, baking soda, and salt. This helps to evenly distribute the leavening agents throughout the flour.
-
Incorporate the dry with the wet: Gradually stir the flour mixture into your wet ingredients. Take care not to overmix—this keeps your loaf tender! Gently fold in the white chocolate chips and raspberries, ensuring they’re evenly scattered throughout the batter.
-
Pour and distribute the batter: Transfer your batter into the prepared loaf pan, smoothing the top with a spatula. Remember to tap the pan gently on the counter to remove any air bubbles, which is a little trick to ensure an even bake.
-
Bake to perfection: Place your loaf in the preheated oven and bake for 45–55 minutes, or until a toothpick inserted into the center comes out clean. If the top starts browning too quickly, loosely cover it with foil.
-
Cool down: Once baked, remove it from the oven and let it cool in the pan for about 10 minutes before transferring it to a wire rack. Let it cool completely before slicing to keep it tender.
Serving Suggestions
To serve this delightful Protein Cottage Cheese White Chocolate Raspberry Loaf, slice it into generous pieces and serve warm or at room temperature. You can drizzle a little extra honey on top or add a dollop of yogurt for creaminess. A sprinkle of powdered sugar adds a beautiful touch and makes it presentation-ready if you’re hosting brunch!
Recipe Variations
- Berry Medley Twist: Swap out the raspberries for blueberries or chopped strawberries for a delicious change.
- Nutty Delight: Add 1/2 cup of chopped almonds or walnuts for a crunch and additional healthy fats.
- Cocoa Infusion: Stir in 1/4 cup of cocoa powder to give the loaf a chocolatey base, and sub in dark chocolate chips for a delightful contrast.
- Zesty Limoncello: Add the zest of one lemon into the batter for a bright, zesty flavor that compliments the sweetness perfectly.
Chef’s Notes
This Protein Cottage Cheese White Chocolate Raspberry Loaf has become a go-to recipe for me, especially during berry season! I love to make it in large batches and gift some to friends and family—it’s always a hit. Live a little and experiment with what you have on hand; it’s okay if the first loaf isn’t perfect. I promise, the next one will be!
One little kitchen mishap I still chuckle about was when I first made this recipe and accidentally swapped salt for sugar. The loaf, as you could imagine, tasted like a savory surprise! No one ever wants to meet a loaf like that again!
FAQs and Troubleshooting
1. Why did my loaf sink in the middle?
A sunken loaf often means it was underbaked. Make sure you bake it all the way through, keeping an eye on the edges—they should be golden brown and firm to the touch.
2. Can I use frozen raspberries?
Absolutely! Just ensure you thaw and drain them beforehand, so the batter doesn’t become too wet. A quick pat with paper towels can help.
3. My batter looks too thick! Is that normal?
Yes! The cottage cheese will add to the density. If you feel it’s too thick, add a tablespoon of milk or water at a time until it reaches a slightly pourable consistency.
4. How should I store leftovers?
Once cooled, wrap your loaf tightly in plastic wrap or store it in an airtight container. It’ll last for about 3 days at room temperature or up to a week in the fridge. You can also freeze slices for up to 3 months for a quick snack later!
Nutritional Information
This Protein Cottage Cheese White Chocolate Raspberry Loaf is not only delicious; it’s also packed with protein from the cottage cheese, making it a great post-workout snack or a healthy breakfast option. Each slice contains approximately:
- Calories: 180
- Protein: 6g
- Carbohydrates: 27g
- Sugar: 10g
- Fat: 4g
Whether you’re looking to impress at brunch or simply seeking a cozy treat for yourself, this Protein Cottage Cheese White Chocolate Raspberry Loaf will not disappoint. Get ready to savor every slice—happy baking!
Print
Protein Cottage Cheese White Chocolate Raspberry Loaf
- Total Time: 65 minutes
- Yield: 8 servings 1x
- Diet: Vegetarian
Description
A deliciously cozy and healthy loaf that combines cottage cheese, white chocolate, and fresh raspberries for a delightful treat.
Ingredients
- 1 cup cottage cheese
- 2 large eggs
- 1/2 cup unsweetened applesauce
- 1/3 cup honey or maple syrup
- 1 cup all-purpose flour or whole wheat flour
- 1 teaspoon baking powder
- 1/2 teaspoon baking soda
- 1/4 teaspoon salt
- 1/2 cup white chocolate chips
- 1 cup fresh raspberries
Instructions
- Preheat your oven to 350°F (175°C).
- Prepare a standard loaf pan (9×5 inches) by greasing it or lining it with parchment paper.
- Mix the cottage cheese, eggs, applesauce, and honey (or maple syrup) in a bowl until smooth.
- Combine the flour, baking powder, baking soda, and salt in another bowl.
- Incorporate the dry ingredients into the wet ingredients, being careful not to overmix.
- Fold in the white chocolate chips and raspberries.
- Pour the batter into the prepared loaf pan, smoothing the top.
- Bake for 45–55 minutes, or until a toothpick comes out clean.
- Cool the loaf in the pan for 10 minutes before transferring it to a wire rack.
Notes
This loaf can be served warm or at room temperature. You can drizzle honey or add yogurt on top for an extra touch.
- Prep Time: 15 minutes
- Cook Time: 50 minutes
- Category: Dessert
- Method: Baking
- Cuisine: American
Nutrition
- Serving Size: 1 slice
- Calories: 180
- Sugar: 10g
- Sodium: 200mg
- Fat: 4g
- Saturated Fat: 2g
- Unsaturated Fat: 2g
- Trans Fat: 0g
- Carbohydrates: 27g
- Fiber: 1g
- Protein: 6g
- Cholesterol: 40mg
Keywords: protein, cottage cheese, white chocolate, raspberry, loaf, baking, healthy dessert
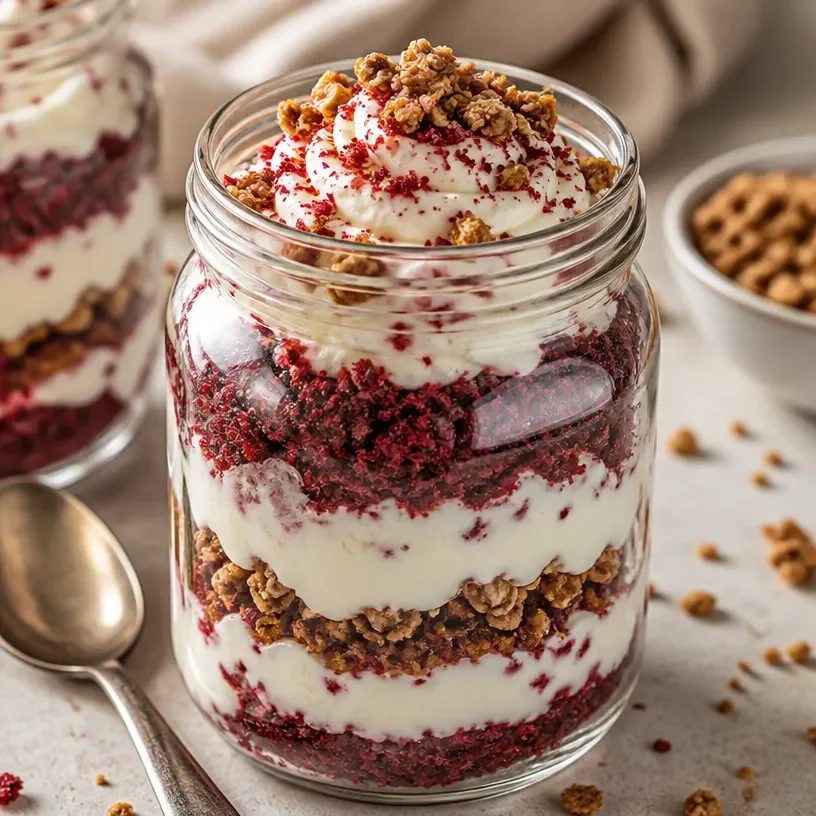
Minute Protein Red Velvet Jar for Meal Prep (No-Bake)
Protein Red Velvet Jar: A Deliciously Healthy Twist on a Classic Dessert
Welcome to my cozy kitchen, food lovers! Today, we’re diving into a delightful dessert that satisfies both your sweet tooth and your nutritional needs: the Protein Red Velvet Jar. Yes, you heard that right—this recipe takes the classic red velvet cake, infuses it with a protein boost, and transforms it into an adorable, portable jar treat that’s perfect for meal prep or a sweet pick-me-up.
Now, if you’re anything like me, you have those moments where a slice of cake calls your name, but then you remember your health goals. Cue the internal tug-of-war! That’s where this fabulous recipe comes in. Not only is it bursting with that rich, tangy flavor you love from red velvet, but it’s also packed with protein to keep you fueled throughout your day. Let’s embark on this culinary adventure together; I promise it’s going to be delicious!
A Sweet Memory
Ah, red velvet… My earliest memory of this delicious dessert takes me back to my grandmother’s kitchen. Every Valentine’s Day, she would whip up her legendary red velvet cake, complete with luscious cream cheese frosting. The vibrant red hue always captivated my young heart, and the smell of cocoa mingling with vanilla made my stomach rumble like thunder. I remember the joyous chaos as my cousins and I scrambled for the first slice, and I can still hear my grandmother’s laugh as she playfully scolded us for sneaking bites before dinner.
Now, decades later, the legacy of the red velvet cake lives on in this protein-packed version, giving a nod to those cherished memories while embracing the opportunity for a healthier twist. The same flavors and textures but made with love, creativity, and a bit of added nutrition!
Ingredients
For our Protein Red Velvet Jar, here’s what you’ll need:
-
Red Velvet Protein Powder (1 scoop)
- This is the star of our show! It provides the signature red velvet flavor while giving you that protein boost. Look for brands with natural ingredients, or you can use a plain vanilla protein powder if that’s what you have on hand.
-
Oat Flour (1/2 cup)
- It’s gluten-free but can also be substituted with all-purpose flour or almond flour for a nutty flavor. Oat flour adds a lovely texture and helps absorb the moisture.
-
Cocoa Powder (1 tablespoon)
- Choose unsweetened cocoa for a rich chocolate flavor. If you want a sweeter alternative, consider using Dutch-processed cocoa, but adjust your sugar levels accordingly.
-
Baking Powder (1 teaspoon)
- This helps our jars rise just a bit, making the texture light and fluffy. Make sure your baking powder is fresh for the best results.
-
Greek Yogurt (1/2 cup)
- This adds moisture and a creamy texture to our jar. Feel free to swap it out for a dairy-free yogurt or apple sauce for a vegan option.
-
Egg (1 large)
- Provides structure and richness. For a vegan alternative, try a flax egg (1 tablespoon of ground flaxseed mixed with 2.5 tablespoons of water).
-
Vanilla Extract (1 teaspoon)
- A flavor booster! Always choose pure vanilla extract for the most authentic taste.
-
Beet Juice or Red Food Coloring
- This is optional but adds that signature red hue. I love using beet juice for its natural coloring and health benefits!
-
Sweetener of choice (Honey, Maple Syrup, or Agave Nectar) (1/4 cup)
- Sweeten to taste! Depending on your preference, use any of these sweeteners or adjust the amount in accordance with your taste buds.
-
Cream Cheese (for frosting)
- Opt for low-fat cream cheese for a lighter option; if you prefer non-dairy, look for vegan cream cheese.
Step-by-Step Instructions
Step 1: Preheat Your Oven
Preheat your oven to 350°F (175°C). This is the perfect time to set the mood—put on your favorite playlist or podcast, and let that cozy kitchen vibe take over!
Step 2: Mixing the Dry Ingredients
In a large mixing bowl, combine the oat flour, red velvet protein powder, cocoa powder, and baking powder. Use a whisk to mix it well—this is a great way to incorporate air and ensure even distribution. Plus, it’s a fun way to play chef! If you’re feeling fancy, dress up your bowl with a little sifting action.
Step 3: Mixing the Wet Ingredients
In another bowl, combine Greek yogurt, egg, vanilla extract, and sweetener. Whisk until everything is blended smoothly. Here’s a little chef’s hack: if your Greek yogurt is too thick, you can add a splash of water or milk of your choice to loosen it up a bit!
Step 4: Combine Wet and Dry
Now, gently fold the wet ingredients into your dry mixture. Make sure not to overmix—it should just come together nicely. If you’re adding beet juice or red food coloring, this is the moment! Fold it in carefully until the reddish hue brightens the batter.
Step 5: Prepare Your Baking Jars
This part is super fun! Take mini glass jars or ramekins and grease them lightly with cooking spray or a dab of melted coconut oil. Ladle the batter into each jar, filling them to about 3/4 full to allow for rising. Arrange them on a baking tray for easy transport to the oven.
Step 6: Bake to Perfection
Slide the jars into your preheated oven and let them bake for approximately 20-25 minutes. You’ll know they’re ready when the tops spring back when touched gently or when a toothpick inserted in the center comes out clean. Keep an eye on them; every oven is a bit different—don’t let them become sad little dryness blobs!
Step 7: Frosting Time!
Once the jars have cooled for about 10-15 minutes, it’s time to frost with delicious cream cheese. Whip together some softened cream cheese with a dash of vanilla and a touch of sweetener until creamy. You can either pipe it on for a professional look or just spread it on with a knife—either way, it’s going to be wonderful!
Step 8: Chill and Serve
If you can resist, let the jars chill in the refrigerator for about half an hour to let those flavors meld beautifully together. Then, serve them up and watch everyone’s faces light up with joy!
Serving Suggestions
I love serving these adorable jars with a sprinkle of crushed nuts or a drizzle of extra honey on top. You can also garnish with fresh berries or a sprig of mint for that extra pop of color. They make a gorgeous centerpiece at any gathering, and who wouldn’t want to dive into these little lovelies?
Recipe Variations
Feel free to experiment with these variations!
- Chocolate Chip Delight: Add small dark chocolate chips into the batter for delicious melty surprises in every bite.
- Coconut Dream: Mix in shredded coconut for a tropical hint that complements the chocolate beautifully.
- Berry Boost: Layer fresh strawberries or raspberries between the layers for a tangy burst of flavor and a beautiful presentation.
- Nutty Twist: Try folding in crushed nuts like walnuts or pecans for added texture and nutty flavor.
- Gluten-Free: Swap out the oat flour for a gluten-free all-purpose blend, and you’ve got a fantastic gluten-free treat!
Chef’s Notes
When I first started making this recipe, I didn’t realize how essential the balance of sweetness would be. The first few attempts were overly sweet or lacked that tangy kick of red velvet! After several rounds of testing—and a bit of kitchen chaos involving over-spills and frosted faces—I finally nailed down a recipe I truly love. It’s turned into a crowd-pleaser at my gatherings, and I often get requests for the "red jar cake" now. It has evolved from a simple treat into a signature dish in my kitchen lore!
FAQs and Troubleshooting
-
Why is my cake too dry?
- It could be overbaked! Bake just until a toothpick comes out clean and remember that residual heat will continue to cook it slightly once it’s out of the oven.
-
Can I use a different type of protein powder?
- Absolutely! Just know that flavors may vary slightly. A flavored protein might intensify sweetness, requiring you to reduce your added sweetener.
-
What if I don’t have beet juice?
- No worries! You can use red food coloring or simply omit it for a more classic chocolate cake look; it will still taste divine.
-
Can these jars be made ahead of time?
- Yes! You can prep and bake these ahead of time; just store them in the refrigerator. Frost them the day you plan to serve for the best texture!
Nutritional Info
For each jar (based on this recipe), you can expect approximately:
- Calories: 250
- Protein: 20g
- Carbohydrates: 30g
- Healthy Fats: 5g
(This is an estimate and may vary based on specific ingredients and brands used.)
So there you have it—the delightful Protein Red Velvet Jar, a delicious nod to nostalgia with a modern twist! I hope this brightens your day and inspires the home chef in you. Get ready to treat yourself (and those you love) to something sweet and healthy! Happy cooking, and remember, every meal is a chance to create memories. Enjoy every bite!
Print
Protein Red Velvet Jar
- Total Time: 40 minutes
- Yield: 4 servings 1x
- Diet: High Protein
Description
A deliciously healthy twist on the classic red velvet dessert, infused with protein for a sweet pick-me-up.
Ingredients
- 1 scoop Red Velvet Protein Powder
- 1/2 cup Oat Flour
- 1 tablespoon Cocoa Powder
- 1 teaspoon Baking Powder
- 1/2 cup Greek Yogurt
- 1 large Egg
- 1 teaspoon Vanilla Extract
- Beet Juice or Red Food Coloring (optional)
- 1/4 cup Sweetener of choice (Honey, Maple Syrup, or Agave Nectar)
- Cream Cheese (for frosting)
Instructions
- Preheat your oven to 350°F (175°C).
- In a large mixing bowl, combine the oat flour, red velvet protein powder, cocoa powder, and baking powder.
- In another bowl, combine Greek yogurt, egg, vanilla extract, and sweetener.
- Fold the wet ingredients into your dry mixture.
- Grease mini glass jars or ramekins and ladle the batter into each jar.
- Bake for approximately 20-25 minutes.
- Frost with softened cream cheese mixed with vanilla and sweetener.
- Chill in the refrigerator for about 30 minutes before serving.
Notes
These jars can be made ahead and stored in the refrigerator. Frost them the day you plan to serve for best texture.
- Prep Time: 15 minutes
- Cook Time: 25 minutes
- Category: Dessert
- Method: Baking
- Cuisine: American
Nutrition
- Serving Size: 1 jar
- Calories: 250
- Sugar: 10g
- Sodium: 120mg
- Fat: 5g
- Saturated Fat: 2g
- Unsaturated Fat: 3g
- Trans Fat: 0g
- Carbohydrates: 30g
- Fiber: 2g
- Protein: 20g
- Cholesterol: 70mg
Keywords: red velvet, protein dessert, healthy dessert, baking, meal prep
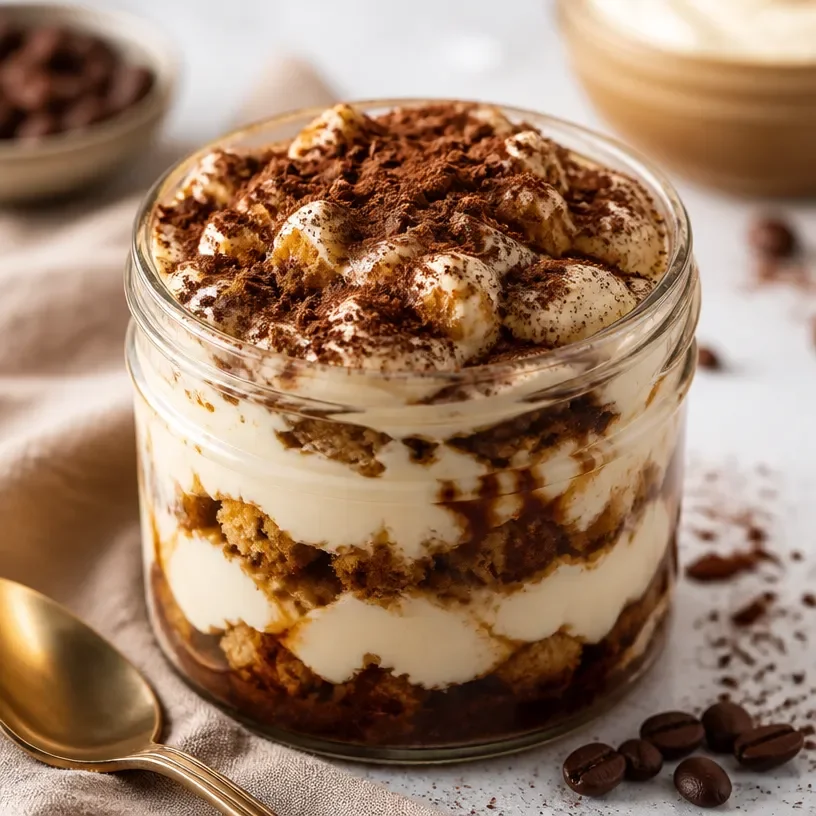
Protein Tiramisu Jar
Indulge in Delight: Protein Tiramisu Jars
Welcome to my cozy kitchen! I’m thrilled to have you join me today for a delightful journey into the world of dessert with a twist — our Protein Tiramisu Jars! Imagine diving into a velvety, rich dessert that tastes just like traditional tiramisu but comes packed with protein goodness. Whether you’re looking for a sweet treat post-workout or simply want to enjoy a guilt-free indulgence, these jars are exactly what you need.
As the aroma of coffee wafts through the air, you’ll find yourself transported to a café in Italy, rich with flavors and simplicity. The best part? We’re keeping it homemade and heartfelt. This recipe not only captures the classic essence of tiramisu but also sprinkles in the joyful crunch of ladyfingers layered with luscious protein-infused cream. It’s the perfect blend of health and indulgence that will leave your cravings satisfied and your heart full.
Have you ever whipped up a dessert only to find it’s way too complicated to navigate? Yeah, I feel you! That’s why we’ll be keeping this beautiful dessert easy and approachable. With straightforward steps, easy-to-find ingredients, and a sprinkle of fun-filled stories, you’ll be well on your way to impressing yourself and your loved ones. Get ready to embrace your inner pastry chef because this Protein Tiramisu Jar will steal the spotlight at any gathering!
So grab your apron, let’s make some magic happen, and turn those everyday ingredients into a standout dessert that not only fills the bellies but warm the hearts of everyone who gets a spoonful!
A Bite of Nostalgia: A Sweet Memory with Tiramisu
Every time I think of tiramisu, I can’t help but flash back to my childhood kitchen, where the clouds of espresso and cocoa would dance together to create a luscious mixture that could bring anyone to bliss in just one bite. My grandmother was the queen of desserts, and tiramisu was her crowning jewel. With each holiday gathering, we would all gather around the table, eagerly anticipating her decadent creation, piled high with layers of rich coffee-infused cream and dusted with rich cocoa powder.
She always insisted on making it from scratch, using her secret blend of coffee that she brought back from her travels. I’d sit on the counter, watching her mix the mascarpone, each swirl of the spoon making my mouth water with anticipation. She would let me dip the ladyfingers in coffee, and I can still remember the way she would laugh, telling me to be quick — they were just too delicate! Her tiramisu felt like a hug in dessert form, and every bite was a celebration.
Fast forward to today, where I’m embracing my own twists on classic recipes, including this protein-packed version of her beloved tiramisu. This version not only honors my grandmother’s spirit but also gives it a modern feel while ensuring that it still brings a smile to every face around the table.
Ingredients You’ll Need
Let’s gather our ingredients to build this lovely creation! Here’s what you’ll need:
-
Ladyfingers
Tip: These are the base of our dessert! If you can’t find them, you can substitute with sponge cake cut into strips for a similar texture. -
Espresso or strong brewed coffee
Chef Insight: Allow the coffee to cool before dipping the ladyfingers. If you don’t have espresso, a strong brew of coffee works just as well and will still deliver that robust flavor! -
Mascarpone cheese
Tip: The creaminess of mascarpone is irreplaceable; however, if you’re looking for a lighter version, you could use Greek yogurt mixed with a bit of cream. -
Protein powder
Insight: Choose a flavor that complements the tiramisu. Vanilla or chocolate protein works exceptionally well. -
Cocoa powder
Tip: Use unsweetened cocoa powder for dusting the layers. It adds depth and bitterness that balances the sweetness of the dessert perfectly. -
Sugar or a natural sweetener
Chef Insight: You can adjust the sweetness level based on your preference. Honey, maple syrup, or stevia can also be great alternatives. -
Vanilla extract
Tip: A splash of vanilla enhances the flavor profile dramatically. -
Milk
Insight: Use your favorite type of milk, whether it’s almond, soy, oat, or good ol’ cow’s milk. It’ll also help create that creamy consistency we adore.
By gathering these delightful ingredients, you’ll be ready to create a dessert that’s not only delicious but also filled with love!
Step-by-Step Instructions
Alright, let’s dive into our step-by-step guide to creating these Protein Tiramisu Jars! Grab your mixing bowls, spatulas, and the cutest jars you can find — because we are going to layer up some love!
-
Prepare the Coffee Station
Brew a fresh cup of espresso or strong coffee and let it cool. This step is crucial because we don’t want soggy ladyfingers! You can also mix in a tablespoon of sugar when the coffee is still hot to make it sweet and flavorful. -
Mix the Creamy Filling
In a mixing bowl, combine mascarpone cheese, protein powder, sugar, vanilla extract, and milk. Use an electric mixer or a whisk to blend these together until you have a smooth, creamy consistency. It should be thick yet light. -
Build the Coffee Assembly Line
Grab an assembly area where you can dip and place the ladyfingers. Keep the cooled coffee nearby with a shallow bowl so you can swiftly dip the ladyfingers in. Quickly dip each ladyfinger in the coffee, ensuring both sides are coated but not soggy! Place them directly into your jars vertically, standing tall like little soldiers ready for deliciousness. -
Layer it Up
Start with a layer of dipped ladyfingers in the jars. Next, add a generous scoop of your creamy mascarpone mixture. Don’t be afraid to layer it thick! Repeat this process until your jars are full, making sure to finish with a layer of the creamy mixture on top. -
Dust with Cocoa
Here comes the fun! Take a small sieve and sprinkle cocoa powder over the top layer generously. It should create a beautiful contrast and add depth to the visual appeal of the jars. -
Chill and Set
Cover each jar with a lid or plastic wrap and let them chill in the fridge for at least 4 hours, but if you can, overnight is even better. This allows the flavors to meld together beautifully! -
Serve and Enjoy!
When you’re ready to indulge, pull out those stunning jars, and feel free to add extra sprinkles of cocoa or a dollop of whipped cream on top for a little extra elegance.
And voilà! You now have your Protein Tiramisu Jars, ready for all to enjoy!
Serving Suggestions
These delightful jars are perfect for parties, family gatherings, or even a cozy night in. To serve, display them on a decorative platter with some coffee beans around as a little touch of elegance. If you’re feeling festive, you can add a sprig of mint or a chocolate curl on top for an extra touch of class. Don’t forget to provide spoons for your guests — their smiles will say it all!
Recipe Variations
Looking to shake things up a bit? Here are a few creative twists you can try with your Protein Tiramisu Jars:
- Chocolate Hazelnut Variation: Add a layer of chocolate hazelnut spread between the ladyfingers and cream to give a rich nutty flavor.
- Berry Delight: Replace some layers with a layer of berries such as strawberries or raspberries for a fruity twist and a pop of color!
- Vegan-Friendly Version: Use coconut cream instead of mascarpone, and ensure your ladyfingers are vegan-friendly, or use a sponge cake made without eggs.
- Spiced Up: Add a dash of cinnamon or pumpkin spice to the creamy mixture to give it a warm, aromatic touch perfect for the fall!
- Nutty Surprise: Fold crushed nuts, like pistachios or almonds, into the cream for additional crunch and flavor.
The possibilities are endless, and each twist brings something special to the table!
Chef’s Notes
Throughout my culinary journey, this Protein Tiramisu Jar has transformed from a kitchen experiment to a staple in my dessert repertoire. I’ve learned to embrace the unexpected moments, like when I accidentally spilled cocoa powder all over the counter one day. Instead of getting frustrated, I made it into a spontaneous cocoa dust storm for my guests!
I absolutely believe that cooking should be fun, messy, and filled with laughter. My grandmother taught me to find joy in these moments, and that’s exactly what I hope you feel while creating this dish. Whether it’s a cheer of excitement when your jars come together perfectly or a giggle at a little cocoa mishap, let’s remember to enjoy the delicious journey of flavors.
FAQs and Troubleshooting
1. My ladyfingers fell apart while dipping! What did I do wrong?
No worries! The secret to maintaining ladyfingers’ structure lies in the quick dipping. Ensure you dip them for just 1-2 seconds to coat them without letting them soak too long.
2. Can I make these jars ahead of time?
Absolutely! These jars are the perfect make-ahead dessert. They actually taste better after chilling overnight as the flavors meld together beautifully.
3. What can I use instead of mascarpone cheese?
If mascarpone isn’t available, you can substitute it with a mix of Greek yogurt and cream cheese for a similar texture. It will be slightly tangier, but still delicious!
4. How long do these Protein Tiramisu Jars last in the fridge?
These jars will last about 3-4 days in the fridge when sealed tightly. However, trust me — they’ll be gone long before that!
Nutritional Info
While nutritional information may vary based on specific ingredients and portion sizes, each serving of these delightful Protein Tiramisu Jars will provide a rich source of protein, healthy fats, and indulgent flavors! This is a dessert you can genuinely feel good about enjoying.
And there you have it! Your very own Protein Tiramisu Jars that blend the nostalgia of traditional flavors with a modern, healthier twist. With every bite, you’re not just enjoying a dessert; you’re making memories in the kitchen. So gather your loved ones, share some laughs, and dig into these delightful jars of joy. Happy cooking!
Print
Protein Tiramisu Jars
- Total Time: 240 minutes
- Yield: 4 servings
- Diet: High Protein
Description
A delightful take on traditional tiramisu, packed with protein goodness and layered with ladyfingers and a creamy filling.
Ingredients
- Ladyfingers
- Espresso or strong brewed coffee
- Mascarpone cheese
- Protein powder
- Cocoa powder
- Sugar or a natural sweetener
- Vanilla extract
- Milk
Instructions
- Prepare the Coffee Station: Brew a fresh cup of espresso or strong coffee and let it cool.
- Mix the Creamy Filling: In a mixing bowl, combine mascarpone cheese, protein powder, sugar, vanilla extract, and milk.
- Build the Coffee Assembly Line: Dip ladyfingers in the cooled coffee and place them in jars vertically.
- Layer it Up: Alternate layers of dipped ladyfingers and creamy mixture until jars are full.
- Dust with Cocoa: Sprinkle cocoa powder over the top layer.
- Chill and Set: Cover and chill in the fridge for at least 4 hours.
- Serve and Enjoy: Add extra cocoa or whipped cream for garnish.
Notes
Ensure ladyfingers are dipped quickly to maintain structure. These jars can be made ahead of time and taste even better after chilling overnight.
- Prep Time: 15 minutes
- Cook Time: 0 minutes
- Category: Dessert
- Method: Chilling
- Cuisine: Italian
Nutrition
- Serving Size: 1 jar
- Calories: 300
- Sugar: 10g
- Sodium: 150mg
- Fat: 15g
- Saturated Fat: 9g
- Unsaturated Fat: 6g
- Trans Fat: 0g
- Carbohydrates: 32g
- Fiber: 2g
- Protein: 20g
- Cholesterol: 40mg
Keywords: protein dessert, tiramisu, high protein dessert, Italian dessert, healthy dessert



