

Protein-Packed Cottage Cheese Cinnamon Coffee Cake
A Slice of Heaven: Protein Cottage Cheese Cinnamon Coffee Cake
Welcome to my cozy corner of the kitchen, where the aroma of freshly baked goodies fills the air, and joy is sprinkled into every bite. Today, I am beyond excited to share with you a recipe that truly deserves a place in your recipe box: Protein Cottage Cheese Cinnamon Coffee Cake! If you’re a fan of comfort food that not only satisfies your sweet tooth but also packs a nutritional punch, then you’re in for a treat.
Imagine sitting down with a steaming cup of coffee in hand, the sunlight streaming through the window as you take a moment to enjoy life’s simple pleasures. That warm feeling in your heart? That’s what this cake brings—perfect for breakfast, brunch, or that mid-afternoon slump! The combination of protein-rich cottage cheese, warm cinnamon, and a tender cake base creates an irresistible harmony that makes every slice an experience to savor.
But before we dive into the nitty-gritty of baking, let me take you on a little journey back in time. There’s a personal story behind this recipe that makes it even more special and close to my heart!
A Little Story from the Heart
I remember the first time I stumbled upon a cottage cheese coffee cake recipe. I was in college, juggling classes, part-time work, and the inevitable surge of late-night cravings. My roommate, Jess, was the ultimate foodie, always experimenting with ingredients in our tiny shared kitchen. One rainy afternoon, she whipped up a cottage cheese cinnamon coffee cake that quite literally stopped time.
As the cake cooled on the countertop, the enchanting aroma wafted through our little apartment, tempting our taste buds. We gathered around the table with our textbooks on one side and this delightful cake on the other. Every bite was fluffy, subtly sweet, and framed by a magnificent swirl of cinnamon.
That day, we bonded over coffee, cake, and a few silly mistakes (like forgetting to preheat the oven!). It was a moment that turned into a tradition; whenever we needed a pick-me-up or a study break, this cake was our go-to. Fast forward years later, and I’ve put my twist on that beloved recipe, making it not just delicious but packed with protein. Let’s bring that nostalgic joy into your kitchen!
Ingredients
Ready to start your baking adventure? Here’s everything you’ll need to whip up this delightful Protein Cottage Cheese Cinnamon Coffee Cake:
-
1 cup cottage cheese
A protein powerhouse, cottage cheese adds moisture and a creamy texture. If you prefer a dairy-free option, feel free to swap it with silken tofu or vegan cream cheese. -
1 cup all-purpose flour
This supplies the cake’s structure. For a healthier option, consider using whole wheat flour—just be mindful that it may yield a denser cake. -
½ cup granulated sugar
Sweetness is key! You can replace this with coconut sugar or even a sugar substitute like stevia, adjusting the quantity to taste. -
2 large eggs
They help bind everything together and provide richness. If you’re looking for an egg-free option, you can replace each egg with ¼ cup of unsweetened applesauce. -
½ cup unsalted butter, melted
Butter brings flavor and moisture. You can try coconut oil for a dairy-free option if preferred! -
1 teaspoon vanilla extract
A little bit goes a long way in enhancing sweetness and aroma. You can also use almond extract for a different flavor profile. -
1 teaspoon baking powder
This will give your cake that perfect rise. If you’re out, baking soda can work in a pinch, just remember to balance with an acid like vinegar or lemon juice. -
1 teaspoon cinnamon
Earthy and warming, it gives the cake its signature flavor! To amp up the spice, you could toss in nutmeg or cardamom for a unique twist. -
¼ teaspoon salt
This enhances all the other flavors! -
For the topping:
- 1 tablespoon cinnamon
- 2 tablespoons brown sugar
- 1 tablespoon softened butter
Mix these together to create a delightful crumb topping for that extra crunch and sweetness!
Step-by-Step Instructions
Alright, let’s dive into the baking process! Follow along, and don’t hesitate to get a little messy. It’s all part of the fun!
-
Preheat your oven: Set your oven temperature to 350°F (175°C). Preheating is super important because it sets the stage for even baking. A cold oven can lead to uneven rising, and you definitely don’t want that!
-
Prepare your baking pan: Grab an 8-inch square baking pan (or a round one if you prefer). Grease it with a little butter or use parchment paper for easy removal later on. Trust me, you’ll want every crumb!
-
Mix wet ingredients: In a large mixing bowl, combine the cottage cheese, melted butter, eggs, and vanilla extract. Whisk until it’s smooth and creamy. Oh, that’s going to be good! The cottage cheese has fantastic moisture content, which translates to a deliciously soft cake.
-
Combine dry ingredients: In another bowl, whisk together the flour, sugar, baking powder, cinnamon, and salt. This step helps distribute the leavening agents evenly. It’s a small but mighty step—no one wants an odd lump of baking powder in their slice!
-
Combine wet and dry: Gradually mix the dry ingredients into the wet mixture until just combined—don’t overmix! A few lumps are totally fine. It’s all about keeping that cake tender and airy.
-
Prepare the topping: In a small bowl, combine the brown sugar, cinnamon, and softened butter with a fork until crumbly. This topping is what takes your coffee cake to the next level!
-
Layer and bake: Pour half of the batter into the prepared pan, then sprinkle half of the cinnamon-sugar topping over it. Pour the remaining batter on top and sprinkle with the rest of the mixture. Don’t be shy with that topping; it’s the cherry on top of your cake!
-
Bake it: Pop it in the oven and bake for 30-35 minutes, or until a toothpick comes out clean from the center. The smell will be out of this world!
-
Cool and Serve: Once baked, let it cool in the pan for about 10 minutes before transferring it to a wire rack to cool completely. This helps it retain moisture and makes slicing easier.
-
Slice & Enjoy: Cut into pieces, serve it up, and watch your friends and family fall in love with it, just like I did so many years ago!
Serving Suggestions
Now that your delightful Protein Cottage Cheese Cinnamon Coffee Cake is out of the oven, it’s time to present this beauty! Serve warm or at room temperature, drizzled with a bit of honey or a dusting of powdered sugar for a sweet finish. It pairs beautifully with a hot cup of coffee or a comforting tea, making for a lovely brunch or afternoon snack.
Recipe Variations
Looking to mix things up? Here are a few delicious variations to play with:
-
Chocolate Chip Delight: Fold in a generous handful of chocolate chips into the batter for a sweet, fudgy twist!
-
Fruit-Infused: Add a layer of fresh berries or sliced bananas in between the batter layers for bursts of flavor.
-
Nutty Crunch: Toss in some chopped walnuts or pecans for an added crunch and earthy flavor.
-
Dairy-Free Option: Use dairy-free cottage cheese or the silken tofu alternative that matches the texture without compromising the deliciousness.
-
Spiced Up: Experiment with chai spice or pumpkin spice in the batter for a seasonal flavor that’s sublime!
Chef’s Notes
As I reflect on the evolution of this recipe, I can’t help but smile. It’s been a journey full of flour-covered countertops and countless taste tests. I’ve tried adding everything from pumpkin purée to matcha powder—each version leading to delightful discoveries. Remember that cooking is not just about following recipes; it’s an adventure! Feel free to infuse your personality into the mixing bowl.
If you happen to drop an ingredient or set off the smoke alarm (trust me, I’ve been there), don’t get discouraged. Cooking is meant to be messy and joyful. The kitchen is a canvas, and you’re the artist—so paint it with flavors and stories that warm your heart!
FAQs and Troubleshooting
1. Why is my coffee cake dense?
If your cake turned out too dense, it’s likely due to overmixing the batter. Remember, gentle is key! Just mix until the flour is incorporated for a light and airy cake.
2. Can I make this cake ahead of time?
Absolutely! You can bake it a day or two in advance. Just be sure to store it in an airtight container at room temperature. It can also be frozen—simply wrap it well and thaw when you’re ready to enjoy a slice!
3. What if I don’t have cottage cheese?
No worries! You can substitute it with plain Greek yogurt or silken tofu for a similar texture.
4. Can I use different flour?
While all-purpose and whole wheat flour work best, you can experiment with almond flour or gluten-free flour blends, but make sure to check for specific conversions, as these may require additional adjustments.
With this protein-packed, cozy cake in your arsenal, you’re bound to impress friends and family (and maybe even yourself!). Now, roll up those sleeves, preheat your oven, and let’s make some magic happen in the kitchen. Happy baking!
Print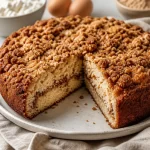
Protein Cottage Cheese Cinnamon Coffee Cake
- Total Time: 50 minutes
- Yield: 9 servings 1x
- Diet: Vegetarian
Description
A delightful coffee cake made with protein-rich cottage cheese and warm cinnamon, perfect for breakfast or a sweet afternoon treat.
Ingredients
- 1 cup cottage cheese
- 1 cup all-purpose flour
- ½ cup granulated sugar
- 2 large eggs
- ½ cup unsalted butter, melted
- 1 teaspoon vanilla extract
- 1 teaspoon baking powder
- 1 teaspoon cinnamon
- ¼ teaspoon salt
- For the topping:
- 1 tablespoon cinnamon
- 2 tablespoons brown sugar
- 1 tablespoon softened butter
Instructions
- Preheat your oven: Set your oven temperature to 350°F (175°C).
- Prepare your baking pan: Grease an 8-inch square baking pan.
- Mix wet ingredients: Combine the cottage cheese, melted butter, eggs, and vanilla extract in a large mixing bowl, whisk until smooth.
- Combine dry ingredients: Whisk together the flour, sugar, baking powder, cinnamon, and salt in another bowl.
- Combine wet and dry: Gradually mix the dry ingredients into the wet mixture until just combined.
- Prepare the topping: Combine brown sugar, cinnamon, and softened butter in a small bowl until crumbly.
- Layer and bake: Pour half of the batter into the prepared pan, sprinkle half of the topping over it, then top with remaining batter and sprinkle with the rest of the mixture.
- Bake it: Bake for 30-35 minutes until a toothpick comes out clean.
- Cool and Serve: Let it cool for about 10 minutes before transferring to a wire rack to cool completely.
- Slice & Enjoy: Cut into pieces and serve warm or at room temperature.
Notes
Serve with a drizzle of honey or a dusting of powdered sugar, perfect with coffee or tea.
- Prep Time: 15 minutes
- Cook Time: 35 minutes
- Category: Dessert
- Method: Baking
- Cuisine: American
Nutrition
- Serving Size: 1 serving
- Calories: 280
- Sugar: 10g
- Sodium: 320mg
- Fat: 11g
- Saturated Fat: 6g
- Unsaturated Fat: 4g
- Trans Fat: 0g
- Carbohydrates: 36g
- Fiber: 1g
- Protein: 8g
- Cholesterol: 55mg
Keywords: coffee cake, cottage cheese, dessert, protein, brunch
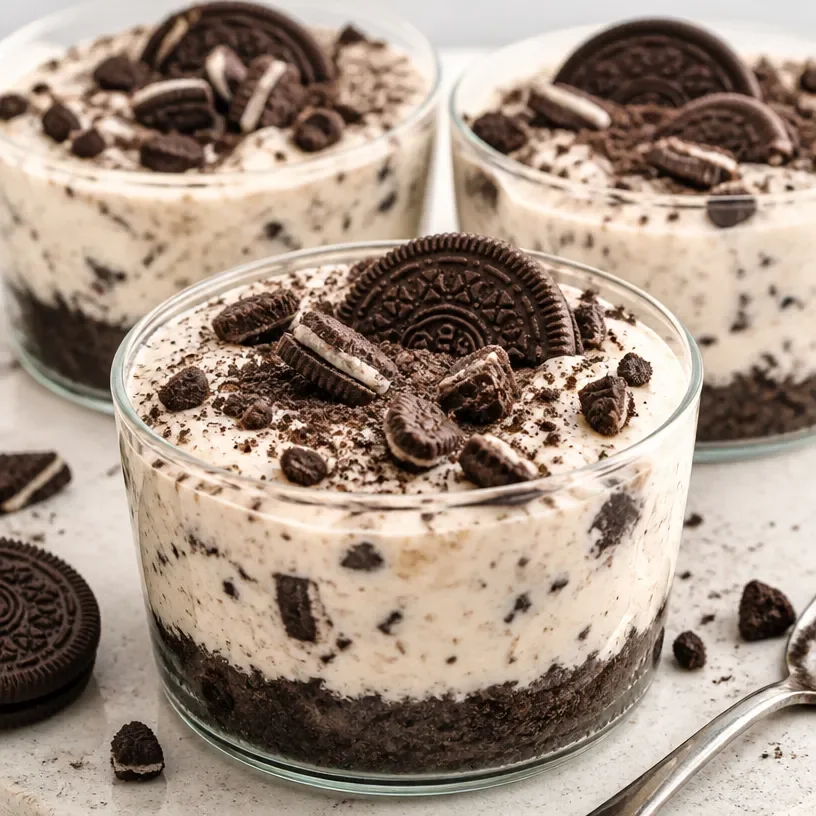
No-Bake Protein Cottage Cheese Oreo Cheesecake Cups
Decadent Protein Cottage Cheese Oreo Cheesecake Cups
Welcome to my cozy corner of the kitchen! Today, I’m thrilled to share with you a recipe that unites two of my greatest loves: cottage cheese and Oreos. Yes, you heard that right! These Protein Cottage Cheese Oreo Cheesecake Cups are going to change your snacking game forever. And trust me, they’re not just for the health enthusiast in your life—they’re delightful enough to charm the most ardent dessert lover.
Imagine this: a creamy, velvety cheesecake filling made with protein-packed cottage cheese, layered elegantly in a cup, and topped with crushed Oreos. These little wonders are not only quick to make but are also an impressive treat for gatherings, lazy afternoons, or even just a late-night snack when the sweet tooth hits!
So let’s roll up our sleeves, pour ourselves a tall glass of milk (or a dairy-free alternative), and dive into making these delightful treats. Trust me; the aroma wafting through your kitchen will draw everyone in like a moth to a flame!
A Special Childhood Memory
Before we dive into the ingredients, let me share a little story. Growing up, dessert time was always an adventure in my home. My mom would whip up cheesecakes for special occasions, but my absolute favorite was the no-bake Oreo cheesecake. I remember standing on a chair to reach the countertop, eagerly waiting to help smash the Oreos, and my mom would let me sneak a few crumbs.
As she folded the filling together, we’d chat about our day, sharing stories and laughing as I haphazardly crushed the cookies, sometimes missing the bowl entirely! Fast forward a few years, and that nostalgic experience of a no-bake cheesecake became my inspiration for these Protein Cottage Cheese Oreo Cheesecake Cups. They make me feel like a kid again, blending the past with a healthier twist. And who wouldn’t want a little trip down memory lane with each delicious bite?
Ingredients
Here’s what you’ll need for these delightful cheesecake cups:
-
1 cup of cottage cheese
A fantastic protein source that adds creaminess without the extra fat of traditional cream cheese. For a smoother texture, use ricotta cheese as a substitute. -
1/2 cup Greek yogurt
Adds a tangy kick while contributing to the creamy texture. You can swap it with sour cream if you prefer a richer flavor. -
1/3 cup honey or maple syrup
For sweetness! Adjust based on your taste. Agave syrup or coconut sugar can also work but might alter the flavor slightly. -
1 teaspoon vanilla extract
This elevates the sweet notes in your filling. Feel free to experiment with almond extract for a different twist. -
10 Oreo cookies
The classic choice for that crunchy texture and rich flavor. Use gluten-free Oreos if you need a gluten-free option! -
1 tablespoon cocoa powder
Enhances the chocolate flavor profile. You can leave this out if you want a classic cheesecake taste. -
1 scoop protein powder (optional)
Adds extra protein, especially if you’re using these as a recovery snack after a workout. Choose your favorite flavor, but vanilla works best.
Step-by-Step Instructions
Now, let’s get cooking! Here’s how to whip up these delightful bites:
-
Crush the Oreo Cookies
Place the Oreo cookies in a ziplock bag and crush them with a rolling pin or your hands. Don’t stress about making them a perfect powder; a mix of fine crumbs and larger chunks adds great texture! -
Prepare the Filling
In a mixing bowl, combine the cottage cheese, Greek yogurt, honey (or maple syrup), vanilla extract, cocoa powder, and protein powder if using. Use a hand mixer or a regular whisk to blend until everything is smooth and creamy. This is where the magic happens! Taste and adjust the sweetness if needed. -
Layer the Cups
Grab your favorite serving cups or mason jars. Start by adding a layer of crushed Oreos at the bottom—about a tablespoon works great. Then, add a generous scoop of the cheesecake filling on top. Repeat the layers until the cups are filled, finishing with a dollop of the cheesecake filling. -
Chill
Cover the cups with plastic wrap and pop them in the fridge for at least an hour. This will allow the flavors to meld beautifully, and the texture will firm up, making them easy to eat. Plus, the waiting makes for even more anticipation! -
Top It Off
Just before serving, sprinkle some extra crushed Oreos on top and maybe a drizzle of melted chocolate for an added flair. If you’re feeling extra fancy, a fresh mint leaf can add a lovely pop of color!
Serving Suggestions
These Protein Cottage Cheese Oreo Cheesecake Cups are perfect for any occasion—breakfast, dessert, or even an afternoon snack. Present them in a clear cup to showcase those stunning layers, and serve them with a side of fresh berries for a pop of sweetness and color. They also pair beautifully with a cup of coffee or a glass of cold milk. And who doesn’t love a little dessert that’s as pleasing to the eyes as it is to the palate?
Recipe Variations
Here are a few fun twists to make this recipe your own:
-
Chocolate Chip Cookie Dough Cups: Swap Oreos for chocolate chip cookies and add mini chocolate chips into the filling for a sweet surprise.
-
Peanut Butter Lovers: Stir in a couple of tablespoons of creamy peanut butter to the filling for a nutty richness.
-
Fruit-Infused Cups: Fold in diced strawberries or blueberries into the cheesecake filling for a burst of freshness.
-
Pumpkin Spice Delight: In the fall, switch the cocoa powder for pumpkin puree and add pumpkin spice for a seasonal twist!
-
Dairy-Free Version: Use dairy-free cream cheese and coconut yogurt to cater to lactose sensitivities.
Chef’s Notes
As I’ve experimented with this recipe over the years, I love knowing how versatile it is. Initially, I shared it with friends as a healthier alternative to traditional cheesecake, and the response was overwhelmingly positive! I even hosted a little dessert party where everyone created their unique versions. Some folks added a swirl of fruit preserves, while others reinvented the flavor profile completely, and it became a fun culinary experiment I often revisit.
And speaking of experiments, I once forgot to add the sugar and didn’t notice until I saw my friend’s face while tasting it. Let’s just say, that’s a memory I won’t forget! The lesson? Always taste as you go!
FAQs and Troubleshooting
1. Can I use regular cream cheese instead of cottage cheese?
Absolutely! But keep in mind that traditional cream cheese will increase the fat content. If you prefer a low-calorie option, stick with the cottage cheese.
2. My cheesecake filling is too runny. What can I do?
If your mixture is too runny, try adding a little extra cottage cheese or a tablespoon of cornstarch to thicken it up. Letting it chill longer can also help!
3. Can I freeze these cheesecake cups?
Yes, you can! Just make sure to cover them tightly with plastic wrap or foil. Thaw them in the fridge when you’re ready to devour.
4. What can I do if I over-sweetened my mixture?
If your filling is too sweet, add a touch more cottage cheese or yogurt to balance out the flavors. A pinch of salt can also help cut through the sweetness!
Nutritional Info
Serving Size: 1 cup
Calories: Approximately 160
Protein: 14g
Fat: 5g
Carbohydrates: 18g
Sugar: 10g
And there you have it! A scrumptiously simple recipe that’s just as fun to make as it is to eat. I hope you enjoy crafting these Protein Cottage Cheese Oreo Cheesecake Cups as much as I do. Happy cooking, and don’t forget to share your creations—I’d love to hear how they turn out!
Print
Protein Cottage Cheese Oreo Cheesecake Cups
- Total Time: 60 minutes
- Yield: 4 servings 1x
- Diet: High Protein
Description
A creamy and protein-packed cheesecake made with cottage cheese and topped with crushed Oreos, perfect for any occasion.
Ingredients
- 1 cup cottage cheese
- 1/2 cup Greek yogurt
- 1/3 cup honey or maple syrup
- 1 teaspoon vanilla extract
- 10 Oreo cookies
- 1 tablespoon cocoa powder
- 1 scoop protein powder (optional)
Instructions
- Crush the Oreo Cookies by placing them in a ziplock bag and crushing them with a rolling pin or hands.
- Prepare the Filling by combining cottage cheese, Greek yogurt, honey, vanilla extract, cocoa powder, and protein powder in a mixing bowl and blending until smooth.
- Layer the Cups with crushed Oreos at the bottom, followed by cheesecake filling, repeating the layers until filled.
- Chill the cups in the fridge for at least an hour.
- Top it off with extra crushed Oreos, a drizzle of melted chocolate, and a mint leaf if desired.
Notes
These cheesecake cups are versatile—experiment with flavors such as peanut butter or fruit for a personal touch.
- Prep Time: 15 minutes
- Cook Time: 0 minutes
- Category: Dessert
- Method: No-Bake
- Cuisine: American
Nutrition
- Serving Size: 1 cup
- Calories: 160
- Sugar: 10g
- Sodium: 200mg
- Fat: 5g
- Saturated Fat: 2g
- Unsaturated Fat: 2g
- Trans Fat: 0g
- Carbohydrates: 18g
- Fiber: 1g
- Protein: 14g
- Cholesterol: 10mg
Keywords: cheesecake, protein, dessert, no-bake, cottage cheese, Oreo
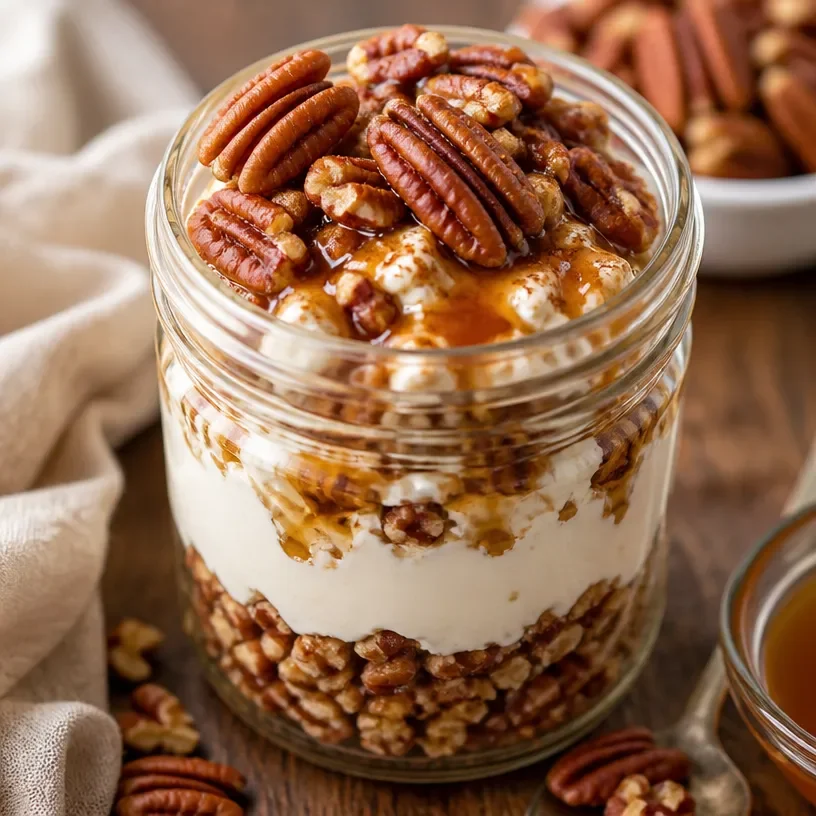
Protein Pecan Pie Jar
Indulge in Cozy Deliciousness: Protein Pecan Pie Jars
Welcome to my kitchen! I’m Olivia Bennett, and today I’m thrilled to share a recipe that brings a twist to the classic dessert we all adore: Pecan Pie. Imagine cozying up with a spoonful of sweet, nutty goodness layered perfectly in a jar, all while knowing that it’s packed with protein to keep you satisfied. These Protein Pecan Pie Jars are not only delicious but also bring a dash of nostalgia and a sprinkle of fun to your dessert game.
There’s something about pecan pie that invokes warm memories of family gatherings, especially around the holidays. I remember as a kid, my grandma would take me to the kitchen as soon as the fall air made its debut. The sweet aroma of toasted pecans mixed with buttery crust filled the room, and I knew we were in for a treat. I would sit on the counter, eagerly mixing ingredients, feeling like the star of our little cooking show. Those moments forged my love for baking and cooking, igniting a passion for creating dishes that bring joy to the table.
Fast forward to today, and I’m here with a protein-packed twist on that cherished pecan pie! These jars are perfect for an individual dessert or a delightful bonus at a family meal. They’re an easy grab-and-go treat, holding everything that made the classic recipe an all-time favorite, but crafted with a health-conscious spin. Ready to get started? Let’s dive into what we’ll need!
Ingredients for Protein Pecan Pie Jars
Here’s a list of what you’ll need for this delightful treat. Each ingredient brings its unique touch, and I’ve included some tips for substitutions and insights to help you ace your dessert-making game:
-
Pecans
Toasted pecans provide a rich, buttery flavor. Tip: You can substitute with other nuts like walnuts or almonds if you’re looking for a different flavor profile. -
Protein Powder
This will give your pie the protein boost! Use any flavor you like. Tip: Vanilla or unflavored works best to keep the pie sweet without overpowering it. -
Maple Syrup
The star of sugars! It adds natural sweetness and that classic pecan pie flavor. Tip: Replace it with agave syrup or honey if you prefer, but adjust sweetness to taste. -
Coconut Milk
This provides creaminess to your pie. Tip: Use almond milk or any other nut milk if you have a coconut allergy or want a lighter version. -
Eggs
Essential for binding and creating that custardy texture. Tip: For vegan versions, you can use flax eggs or chia seeds mixed with water (1 tbsp of seeds with 2.5 tbsp of water per egg). -
Vanilla Extract
For an aromatic boost that ties all flavors together. Tip: Use pure vanilla extract for the best flavor; imitation can taste artificial. -
Brown Sugar
Adds a depth of sweetness and that iconic caramel flavor. Tip: Coconut sugar can be a great alternative for a more wholesome option. -
Salt
A little salt enhances the sweetness! Tip: Opt for sea salt for a more complex taste. -
Crust Ingredients (optional)
You can use crushed graham crackers or gluten-free cookie crumbs for a crust layer at the bottom of your jars.
Step-by-Step Instructions
Now that we have our ingredients lined up, it’s time to bring these jars to life. Follow these steps, and don’t forget to add your chef touch along the way!
-
Preheat the Oven
Preheat your oven to 350°F (175°C). This is where the magic begins, so let’s get things warmed up! -
Toast the Pecans
Spread your pecans on a baking sheet and toast them for about 8-10 minutes or until they are fragrant. Keep an eye on them; burnt pecans can ruin your day! Chef tip: Let them cool and chop them roughly if you prefer smaller bits throughout your pie. -
Mix the Wet Ingredients
In a large bowl, combine 1 cup of coconut milk, ½ cup of maple syrup, 2 eggs, and 1 tsp of vanilla extract. Whisk together until well blended. This is crucial for getting that delightful custard consistency! -
Add the Dry Ingredients
Now, sift in 1 cup of protein powder, ½ cup of brown sugar, and a pinch of salt. Mix until just combined. Be gentle here; we don’t want to overwork the protein powder. Pro tip: If your mixture seems a bit thick, add a bit more coconut milk. -
Incorporate the Pecans
Fold in the toasted pecans, reserving a handful for topping. Get ready for that nutty goodness to shine through! -
Prepare Your Jars
If you’re using crusts, layer 2 tablespoons of crushed graham crackers at the bottom of each jar for an added crunch. This is optional, but I highly recommend it for those buttery bites! -
Fill the Jars
Carefully pour the pecan mixture into each jar until about three-quarters full. Chef hack: Use a funnel for a neater pour! -
Bake
Place the jars on a baking tray and carefully bake in the preheated oven for about 25-30 minutes. You’re looking for a slight jiggle in the middle, like a perfectly set custard. -
Cool Down
Let the jars cool at room temperature and then chill them in the fridge for at least an hour. This will help the flavors meld and give that delicious texture you crave! -
Top and Enjoy
When you’re ready to serve, sprinkle the reserved toasted pecans on top for a beautiful presentation. Now you’re ready to dig in!
Serving Suggestions
Serve these jars warm or chilled, as you prefer. They can be enjoyed on their own or paired with a dollop of whipped cream or a scoop of vanilla ice cream for a truly decadent experience. Chef’s secret: Drizzle a bit more maple syrup on top right before serving for that extra touch of sweetness and elegance!
Recipe Variations
Here are a few fun twists and variations to inspire your creativity:
- Chocolate-Chip Pecan Pie Jars: Add a handful of dark chocolate chips to the mixture for a delightful chocolatey surprise!
- Vegan Pecan Pie Jars: Use flax eggs and maple syrup as a sweetener, and a nut milk alternative to make this dish vegan-friendly.
- Spiced Pecan Pie: Toss in a touch of cinnamon and nutmeg for a spiced-up version that smells as good as it tastes.
- Nut-Free Option: Substitute with sunflower seeds or pumpkin seeds if you need to avoid nuts altogether.
- S’mores Pecan Pies: Top your jars with mini marshmallows before serving and toast them slightly for that campfire vibe.
Chef’s Notes
These Protein Pecan Pie Jars have certainly evolved over time in my kitchen. What started as a classic family recipe often turned into a huge plate of messy goodness has transformed into this sleek, portion-controlled delight. I love how portable they are; I mean, how else can you justify bringing dessert to picnics without lugging around an entire pie? Plus, it’s incredibly satisfying to see friends and family’s faces light up when they dig into their own personal jar of joy. Remember that cooking should be comfortable, playful, and full of love—so don’t hesitate to throw in your own unique twists!
FAQs and Troubleshooting
1. How can I store the leftover jars?
Store them in an airtight container in the fridge for up to 3-4 days. I like to keep it cozy by enjoying them as a snack throughout the week!
2. What if my mixture is too runny?
If your mixture seems too runny, make sure you’ve measured your protein powder correctly. You might want to add just a pinch more! Ensure your eggs are well incorporated as well.
3. Can I freeze these jars?
Absolutely! Just ensure they are cooled completely before freezing them. They can last in the freezer for up to 3 months. Thaw in the fridge before serving.
4. What can I do if my jars overflow while baking?
Okay, so if you’ve overfilled your jars, don’t fret! Place a baking sheet under your jars while they bake to catch any drips. Learn from my clumsy kitchen adventures!
Nutritional Info
While I love indulging in desserts, it’s always great to know what’s inside. Each jar contains a good amount of protein thanks to the protein powder and pecans while still offering that satisfying sweet flavor we all crave. Plus, they’re great for feeding your soul and nourishing your body!
Now that you have all the tips, tricks, and deliciousness near you, it’s your turn to create! Whether you’re making these for yourself or sharing them with loved ones, I assure you that these Protein Pecan Pie Jars are sure to become a crowd favorite — just like they have in my kitchen. Happy cooking!
Print
Protein Pecan Pie Jars
- Total Time: 45 minutes
- Yield: 4 servings 1x
- Diet: Vegetarian
Description
A delicious twist on classic pecan pie, these Protein Pecan Pie Jars are packed with protein and perfect for individual servings.
Ingredients
- 1 cup toasted pecans
- 1 cup protein powder
- ½ cup maple syrup
- 1 cup coconut milk
- 2 eggs
- 1 tsp vanilla extract
- ½ cup brown sugar
- pinch of salt
- 2 tablespoons crushed graham crackers (optional)
Instructions
- Preheat your oven to 350°F (175°C).
- Toast the pecans on a baking sheet for about 8-10 minutes.
- Mix the wet ingredients in a bowl: coconut milk, maple syrup, eggs, and vanilla extract.
- Add the dry ingredients: sift in protein powder, brown sugar, and salt.
- Incorporate the toasted pecans, reserving some for topping.
- Prepare your jars with crushed graham crackers at the bottom, if using.
- Fill each jar with the pecan mixture until about three-quarters full.
- Bake for about 25-30 minutes until slightly jiggly.
- Cool at room temperature, then chill in the fridge for at least an hour.
- Top with reserved pecans before serving.
Notes
These jars can be stored in an airtight container in the fridge for up to 3-4 days. They can also be frozen for up to 3 months.
- Prep Time: 15 minutes
- Cook Time: 30 minutes
- Category: Dessert
- Method: Baking
- Cuisine: American
Nutrition
- Serving Size: 1 jar
- Calories: 350
- Sugar: 15g
- Sodium: 200mg
- Fat: 20g
- Saturated Fat: 6g
- Unsaturated Fat: 10g
- Trans Fat: 0g
- Carbohydrates: 35g
- Fiber: 4g
- Protein: 10g
- Cholesterol: 50mg
Keywords: pecan pie, protein dessert, cozy dessert, individual treats
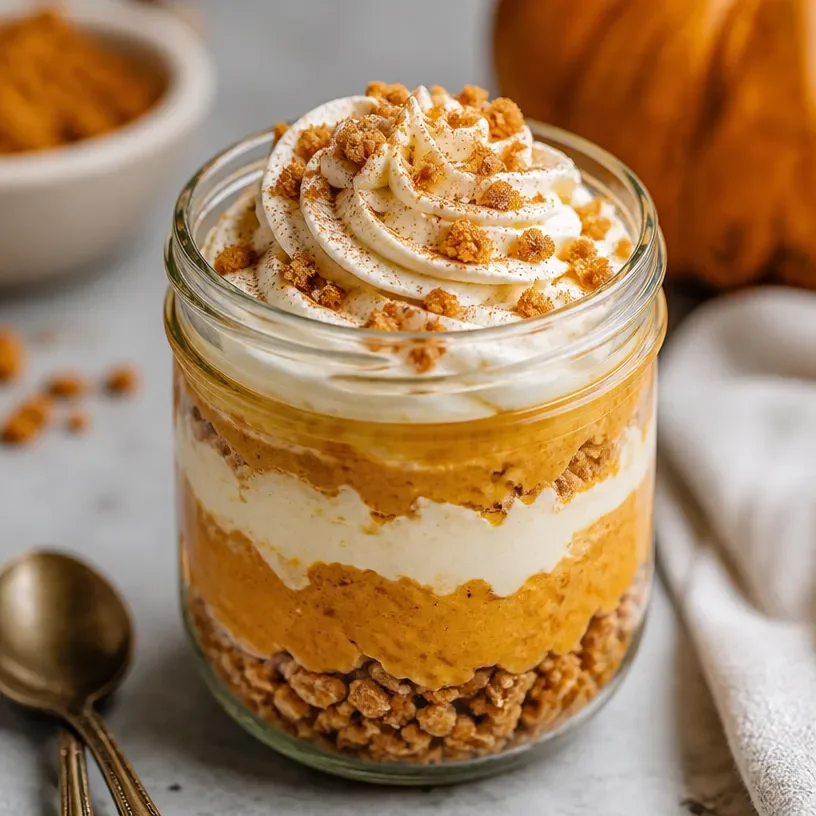
Protein-Packed Sweet Potato Pie Jar for Busy Weeknights
Sweet and Savory Protein Sweet Potato Pie Jar: A Cozy Comfort Dish
Welcome to my kitchen, dear food friends! Today, we’re diving into a delightful treat that’s bound to make your taste buds dance with joy: Protein Sweet Potato Pie Jars. If you’ve ever found comfort in a classic sweet potato pie and wished it could be a wholesome, protein-packed snack, you’re in for a real culinary surprise! This recipe is a beautiful blend of nostalgia and nutrition, perfect for anyone looking to indulge without compromising on health.
Now, let’s make this dish together and create some kitchen magic! Picture your cozy kitchen, the enticing aroma of sweet potatoes wafting through the air, and the bright colors of warm spices ready to brighten your day. Grab your favorite jar (or mason jar for the more rustic vibe) and let’s layer up some deliciousness!
A Slice of My Sweet Potato Memory
You know, every dish tells a story, and the story of sweet potato pie in my life is one I cherish dearly. It all began in my grandmother’s sunlit kitchen back in the day. I vividly remember helping her peel and mash sweet potatoes while dancing around to her favorite oldies playlist. She had this magical ability to turn simple ingredients into pure comfort.
For her, sweet potato pie wasn’t just dessert; it was an experience. I recall landing my sticky hands in the flour as I tried my best to help make the crust, often more spill than dough. But that’s where the “pie” magic happened! The luscious filling of sweet potatoes, warm spices, and a secret touch of love would remind us all why we gathered around her table more than anything else.
Today, as I whip up these sweet potato pie jars, it takes me back to those cherished moments filled with laughter, stories, and, of course, delicious food. So, let’s recreate that joy together!
The Ingredients: What You’ll Need
Here’s a list of everything you’ll need to bring our Protein Sweet Potato Pie Jars to life:
-
Sweet Potatoes (2 medium)
These creamy beauties are the star of the show! Sweet potatoes provide natural sweetness and a velvety texture. You can swap them for puréed pumpkin if you want to switch things up. -
Vanilla Protein Powder (1 scoop)
A fantastic way to pump up the protein and support your healthy lifestyle. Go for a plant-based or whey option depending on your dietary preference. -
Cinnamon (1 tsp)
This warm spice brings that cozy aroma and flavor. Feel free to use nutmeg or pumpkin spice if you want a little twist! -
Maple Syrup (2 tbsp)
A natural sweetener that enhances the sweet potato flavor. You can substitute with agave syrup or honey if desired. -
Almond Milk (1 cup)
To achieve that creamy consistency. If you’re feeling adventurous, try coconut milk for an exotic flair! -
Greek Yogurt (½ cup)
Adds creaminess and a beautiful protein boost. You can swap in dairy-free yogurt for a vegan option. -
Graham Cracker Crumbs (½ cup)
For that signature crust flavor without baking a pie! You could use crushed oats or nuts for a gluten-free alternative. -
Chopped Nuts (optional)
Add walnuts or pecans on top for some crunch and healthy fats.
Step-by-Step Instructions: Let’s Get Cooking!
-
Prepare Your Sweet Potatoes
Start by preheating your oven to 400°F (200°C). While it’s warming, wash your sweet potatoes and prick them all over with a fork. This helps steam escape and makes for super tender insides. Bake for about 45-60 minutes until they are soft. We want that sweet, buttery filling! -
Making the Sweet Potato Filling
Once the sweet potatoes are done, let them cool for a bit, then peel away the skins. Mash the flesh in a bowl until smooth (an easy clean-up tip: I love using a potato masher!). -
Mixing It Up
In a larger mixing bowl, combine your mashed sweet potatoes, vanilla protein powder, cinnamon, maple syrup, almond milk, and Greek yogurt. Stir it well until everything is evenly incorporated. It should be creamy and luscious, just like a pie filling! -
Time to Layer!
Grab your jars and start layering! Begin with a layer of sweet potato filling followed by a sprinkle of graham cracker crumbs, then do a second layer of sweet potato filling. Keep adding layers until you reach the top of your jars. Finish with a sprinkle of nuts if you like some added crunch! -
Chill and Set
Cover your jars and pop them into the refrigerator for at least one hour, allowing the flavors to meld beautifully. That’s right, during this time, grab a book and kick back!
Serving Suggestions: A Feast for the Eyes
When you’re ready to indulge, take your jars out of the fridge and give them a gentle stir. You might want to add a dollop of extra Greek yogurt on top, a drizzle of maple syrup, or even a sprinkle of cinnamon for that final touch.
Imagine presenting these charming little jars at your next gathering — they’re not only delicious but absolutely gorgeous too. Serve them up with spoons ready to scoop up those layers of flavor!
Recipe Variations: Get Creative!
Now that we’ve got the basic recipe down, let’s sprinkle in some excitement. Here are a few variations you can play around with:
-
Chocolate Decadence: Add a tablespoon of unsweetened cocoa powder to the sweet potato filling for a chocolate twist!
-
Nutty Boost: Incorporate almond butter or peanut butter for a richer flavor and creamier texture.
-
Vegan Switch: Use coconut yogurt and agave instead of Greek yogurt and maple syrup for a completely dairy-free version.
-
Spiced Up: Mix in a pinch of cayenne or ginger for an unexpected kick that balances the sweetness!
-
Layer It Up: Introduce layers with fruits like bananas or berries in between the sweet potato filling — a burst of freshness!
Chef’s Notes: A Slice of Wisdom
As we’ve chatted about this recipe, I have to admit that it has definitely evolved along the way. I initially started with an entire sweet potato pie, but with time constraints and my love for jars, it morphed into this quick and easy recipe. Plus, can we talk about portion control? Having it in jars is just so much fun!
Oh, and I remember one time experimenting with different spice combinations and accidentally dropping too much cayenne. Let’s just say, there were some fire-breathing moments, but I learned that cooking is all about experimentation — a little spice goes a long way!
FAQs and Troubleshooting: Let’s Clear It Up
-
How can I make this gluten-free?
Use gluten-free graham crackers or swap for ground oats or almond flour to create a crumb base! -
Can I use canned sweet potatoes?
Absolutely! Just ensure they’re well-drained, and you may need to adjust the amount of almond milk to maintain the right consistency. -
What if my mixture is too thick?
No problem! Simply add a little more almond milk until you reach your desired consistency. -
How long will these keep in the fridge?
Stored in an airtight container, they should last about 4-5 days in the fridge, perfect for meal prep!
Nutritional Info
While exact nutritional breakdown depends on specific brands and portion sizes, a typical Protein Sweet Potato Pie Jar could contain around:
- Calories: 300
- Protein: 15g
- Carbohydrates: 45g
- Fats: 10g
So there you have it! I hope you love making these Protein Sweet Potato Pie Jars as much as I love sharing them with you. Remember, cooking is a journey filled with laughter, love, and a sprinkle of spice. Let me know how yours turn out, and happy cooking!
Print
Protein Sweet Potato Pie Jars
- Total Time: 75 minutes
- Yield: 4 servings
- Diet: Vegetarian
Description
A wholesome and protein-packed take on classic sweet potato pie, served in charming jars.
Ingredients
- Sweet Potatoes (2 medium)
- Vanilla Protein Powder (1 scoop)
- Cinnamon (1 tsp)
- Maple Syrup (2 tbsp)
- Almond Milk (1 cup)
- Greek Yogurt (½ cup)
- Graham Cracker Crumbs (½ cup)
- Chopped Nuts (optional)
Instructions
- Preheat your oven to 400°F (200°C). Wash your sweet potatoes and prick them all over with a fork. Bake for about 45-60 minutes until soft.
- Once the sweet potatoes are done, let them cool, then peel away the skins and mash the flesh until smooth.
- In a larger bowl, combine mashed sweet potatoes, vanilla protein powder, cinnamon, maple syrup, almond milk, and Greek yogurt. Stir until incorporated.
- Grab your jars and start layering by adding sweet potato filling followed by graham cracker crumbs. Continue layering until jars are full.
- Cover the jars and refrigerate for at least one hour to allow flavors to meld.
- When ready to serve, stir gently and add a dollop of Greek yogurt, maple syrup, or cinnamon on top as desired.
Notes
Experiment with different toppings and variations, including chocolate, nut butters, or fruits.
- Prep Time: 15 minutes
- Cook Time: 60 minutes
- Category: Dessert
- Method: Baking
- Cuisine: American
Nutrition
- Serving Size: 1 jar
- Calories: 350
- Sugar: 10g
- Sodium: 200mg
- Fat: 10g
- Saturated Fat: 2g
- Unsaturated Fat: 7g
- Trans Fat: 0g
- Carbohydrates: 45g
- Fiber: 5g
- Protein: 15g
- Cholesterol: 5mg
Keywords: sweet potato pie, protein dessert, healthy snack, cozy dish, meal prep
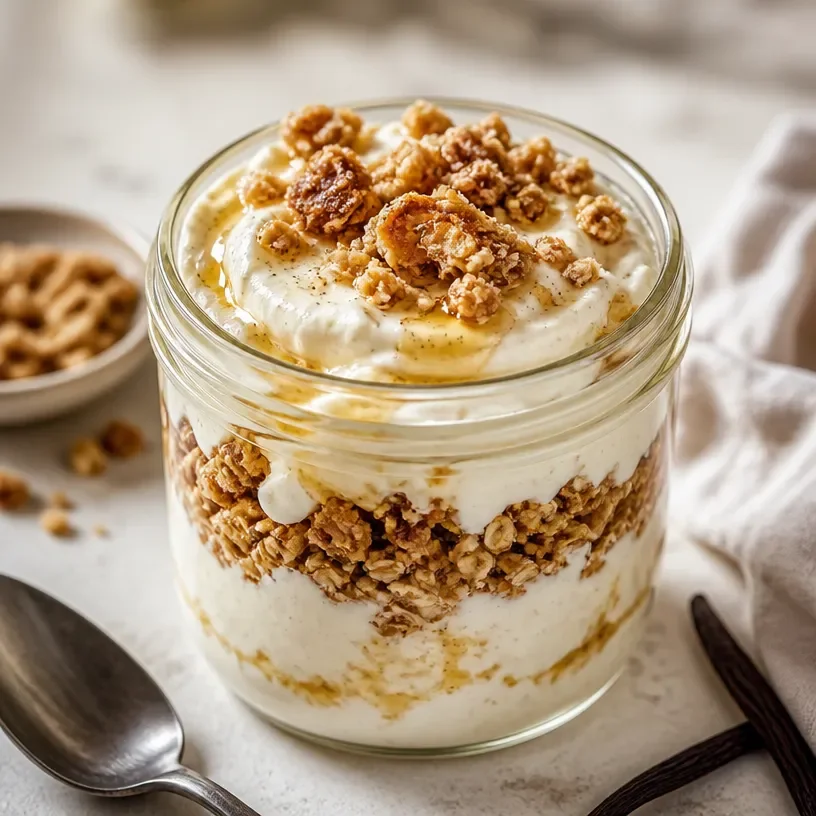
Protein Vanilla Bean Cheesecake Jar
Protein Vanilla Bean Cheesecake Jar: A Cozy, Delicious Delight
Welcome back to my cozy corner of the kitchen, friends! Today, I have a treat that combines creamy indulgence with protein-packed goodness—Protein Vanilla Bean Cheesecake Jars! If you adore the smooth, velvety texture of cheesecake but also crave a healthy twist, you’ve stumbled upon the perfect recipe. Picture this: a delightful blend of cream cheese, Greek yogurt, vanilla bean, and a touch of sweetness, all layered beautifully in a jar for an elegant presentation. Whether you’re treating yourself after a long day or impressing guests at a gathering, these little jars of joy are sure to be a hit!
Personal Story: A Cheesecake Dream
Let me take you back to a special family gathering a few years ago, where I first realized the power of cheesecake to bring people together. My grandmother, who was a wizard in the kitchen, had always made traditional cheesecakes for our family celebrations. I still remember the way the rich aroma of vanilla and baked cream cheese would fill the air, wrapping us in warmth as we gathered around the table.
That day, she decided it was time to shake things up. Instead of her classic recipe, she introduced us to a no-bake version, but with a twist. She added Greek yogurt to the mix and came up with a delightful, lighter cheesecake treat. The first bite was heavenly, and from then on, it became a family favorite. Years later, I find myself recreating that memory in my own kitchen and giving it my special touch with protein powder. So, let’s dive into this recipe together, and I’ll share the magic!
Ingredients
To whip up these delightful Protein Vanilla Bean Cheesecake Jars, you’ll need the following ingredients:
-
Cream Cheese: Use full-fat for a rich, creamy base, or low-fat for a lighter option. Make sure it’s softened to room temperature for easy mixing!
-
Greek Yogurt: This ingredient adds creaminess and a boost of protein! You can substitute it with sour cream or coconut yogurt if you’re looking for a dairy-free option.
-
Protein Powder: A vanilla-flavored protein powder works best to maintain the cheesecake essence. Try plant-based or whey protein, depending on your dietary needs.
-
Vanilla Bean Paste or Extract: Using the real thing brings enchanting notes of vanilla to this recipe. If you can’t find vanilla bean paste, pure vanilla extract will do just fine!
-
Sweetener: Honey, maple syrup, or your favorite sugar substitute will sweeten the deal. Adjust the amount according to your taste preferences.
-
Graham Cracker Crumbs: For the base, use crushed graham crackers, or swap in oat flour for a gluten-free option.
-
Butter: Unsalted butter binds the crust together. Coconut oil is a wonderful vegan substitute.
-
Fresh Berries (optional): These are gorgeous on top and add a pop of color, plus a bit of tartness to balance the sweetness.
Step-by-Step Instructions
Now that we have our ingredients, let’s get to work on these delightful jars! Follow these steps, and watch the magic happen in your kitchen.
-
Prepare the Crust:
- In a medium bowl, combine 1 cup of graham cracker crumbs with 4 tablespoons of melted butter. Mix until the crumbs resemble wet sand.
- Chef’s Tip: If you like a crunchier crust, toast the crumbs in a pan for a few minutes to enhance the flavor before mixing in the butter.
-
Set the Base:
- Scoop about 2 tablespoons of the crumb mixture into the bottom of each jar. Press down firmly to create a solid base.
- Pro Tip: Use the bottom of a shot glass or a small measuring cup to pack it tightly. This step is key for a sturdy structure!
-
Mix the Filling:
- In a large bowl, beat together 8 ounces of softened cream cheese and 1 cup of Greek yogurt until smooth and fluffy. A hand mixer comes in handy here!
- Add 1 scoop of protein powder, 1 tablespoon of vanilla bean paste, and sweetener to taste. Mix until fully combined.
- Chefs Hack: For a smoother texture, sift the protein powder before mixing it in to avoid clumps.
-
Layer It Up:
- Spoon the cheesecake filling over the crust layer in each jar, filling them about ¾ of the way full. Smooth the top with a spatula.
- Tip: Don’t worry if it’s not perfect—these are homemade treats, and a little rustic charm makes them even more endearing!
-
Chill Out:
- Place the jars in the refrigerator and let them chill for at least 2 hours before serving. This helps the flavors meld beautifully.
- Bonus Chef Insight: If you want to make them ahead of time, they can chill up to 24 hours in advance!
-
Serve with Flair:
- Just before serving, top your cheesecake jars with fresh berries or a drizzle of honey for a little extra sweetness and visual appeal.
- Plating Tip: A sprig of mint on top adds a refreshing essence and a pop of color!
Serving Suggestions
These Protein Vanilla Bean Cheesecake Jars are not just delicious; they also look stunning when served! Layered in clear jars, they make for a beautiful dessert presentation. If you’re hosting, consider serving them on a wooden board alongside some fresh fruit, or arrange them on a dessert table with candles for a cozy evening vibe. They also work wonderfully as portioned snacks for meal prep—just grab one from the fridge whenever you need a protein-packed treat on the go!
Recipe Variations
Feeling adventurous? Here are some fun variations to switch things up:
-
Chocolate Swirl: Fold in some cocoa powder or melted dark chocolate into the cheesecake filling for a rich, chocolatey experience.
-
Citrus Zest: Add some lemon or orange zest to the filling for a refreshing twist that complements the vanilla beautifully.
-
Nutty Delight: Swirl in almond or hazelnut butter for a nutty flavor that packs an extra protein punch.
-
Spiced Up: Add a pinch of cinnamon or nutmeg to give it a warm, cozy flavor that’s perfect for fall.
-
Fruit-Infused: Puree berries or mango and layer it between the crust and cheesecake filling for a fruity surprise!
Chef’s Notes
It’s funny how one recipe can evolve over the years. I started making cheesecake jars as a simple way to enjoy my grandma’s classic dessert without the hassle of baking. Over the years, I’ve added my own spin with protein powder and a Greek yogurt twist. I love how versatile this recipe is—it’s deep-rooted in family tradition yet customized to fit modern healthy lifestyles. And let me tell you, getting creative with toppings is always a fun kitchen adventure!
FAQs and Troubleshooting
-
Can I use a different sweetener?
- Absolutely! Feel free to swap in your favorite sweetener, like agave or a sugar alternative like Stevia or erythritol. Just adjust to taste!
-
Why is my cheesecake filling lumpy?
- This usually happens if the cream cheese wasn’t softened enough. Make sure it’s at room temperature before mixing! If this occurs, you can blend it longer to smooth it out.
-
How long do these last in the fridge?
- These jars can last up to 5 days in the fridge, so they’re great for meal prep! Just keep the lids on tight to maintain freshness.
-
Can I freeze these jars?
- Yes, you can freeze the filling (without the crust) in airtight containers for up to a month. When you’re ready to enjoy, thaw in the fridge overnight and then layer with freshly made crust.
With this Protein Vanilla Bean Cheesecake Jar recipe, you’ll enjoy a delicious and healthy treat that speaks of cozy memories and warm gatherings. I can’t wait to hear how you put your own spin on it, so be sure to tag me in your creations or share your kitchen stories! Happy cooking!
Print
Protein Vanilla Bean Cheesecake Jar
- Total Time: 120 minutes
- Yield: 4 servings 1x
- Diet: Healthy
Description
A delightful and healthy twist on classic cheesecake, layered beautifully in jars with creamy indulgence and protein-packed goodness.
Ingredients
- 1 cup graham cracker crumbs
- 4 tablespoons unsalted butter, melted
- 8 ounces cream cheese, softened
- 1 cup Greek yogurt
- 1 scoop vanilla-flavored protein powder
- 1 tablespoon vanilla bean paste or extract
- Sweetener to taste (honey, maple syrup, or sugar substitute)
- Fresh berries (optional)
Instructions
- Combine graham cracker crumbs and melted butter in a medium bowl until they resemble wet sand.
- Scoop about 2 tablespoons of the mixture into the bottom of each jar, pressing down firmly.
- Beat together cream cheese and Greek yogurt in a large bowl until smooth.
- Add protein powder, vanilla bean paste, and sweetener, mixing until fully combined.
- Spoon the cheesecake filling over the crust in each jar, filling about ¾ full.
- Chill in the refrigerator for at least 2 hours before serving.
- Top with fresh berries or a drizzle of honey just before serving.
Notes
These jars can last up to 5 days in the fridge and can be frozen (without crust) for up to a month.
- Prep Time: 15 minutes
- Cook Time: 0 minutes
- Category: Dessert
- Method: No-Bake
- Cuisine: American
Nutrition
- Serving Size: 1 jar
- Calories: 280
- Sugar: 10g
- Sodium: 200mg
- Fat: 14g
- Saturated Fat: 8g
- Unsaturated Fat: 6g
- Trans Fat: 0g
- Carbohydrates: 30g
- Fiber: 1g
- Protein: 12g
- Cholesterol: 30mg
Keywords: cheesecake, dessert, protein, healthy, no-bake
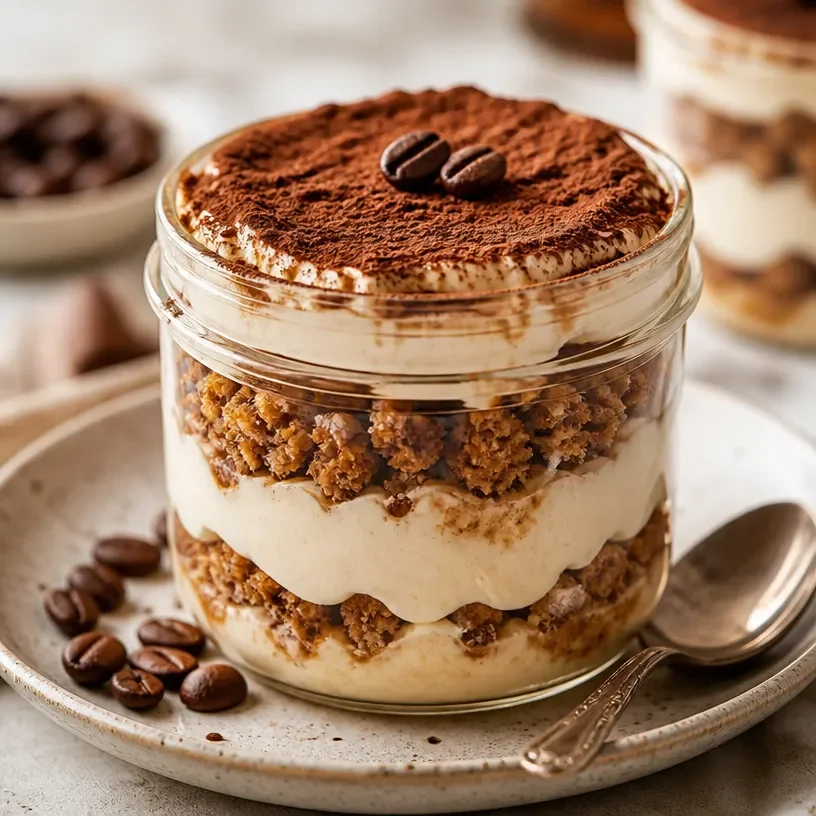
Ingredient No-Bake Protein Espresso Tiramisu Jar
A Sweet Pick-Me-Up: Protein Espresso Tiramisu Jars
Welcome back to my cozy corner of the kitchen, food lovers! Today, we’re diving into a delightful dessert that brings together the rich, velvety flavors of traditional tiramisu with a protein-packed twist. If you’re like me, you might find yourself craving a pick-me-up after a long day, and what could be better than a generous jar of Protein Espresso Tiramisu?
Imagine spooning through layers of espresso-soaked biscuits, creamy mascarpone, and a hint of cocoa powder—sounds divine, right? But here’s the kicker: this version offers an added boost of protein without sacrificing any of the indulgence. It’s perfect for satisfying your sweet tooth while fueling your body, ideal post-workout or just when you need that little extra oomph!
So, why did I choose to create these charming little jars? Well, I’ve always had a passion for balancing flavor and nourishment in my cooking. Plus, who can resist a dessert that’s not only delicious but also visually appealing? These jars are perfect for entertaining and make impressive yet simple desserts for family gatherings or intimate dinners. Let’s step into the kitchen and whip up these tasty treats!
Personal Story: My First Tiramisu Experience
Back when I was in college, I stumbled upon a quaint little Italian restaurant nestled in a side street just off campus. It had the kind of charm that drew you in with the scent of fresh pasta, garlic, and a hint of espresso wafting through the air. On one particularly exhausting week as finals approached, I decided that a dessert was in order—something that felt like a warm hug.
That evening, I ordered the tiramisu, and it was a total game changer. Each bite was an explosion of flavors—sweet, rich, and perfectly balanced with espresso. It was love at first taste, and I realized that food had an incredible way of lifting spirits. From that day on, tiramisu became my go-to treat, and I promised myself that one day I would learn to make it. Fast forward to now, and here I am sharing my beloved version of a classic with an exciting twist!
Ingredients
Here’s what you’ll need to create your Protein Espresso Tiramisu Jars:
-
Ladyfinger Biscuits (Savoiardi)
These classic sponge biscuits are perfect because they hold up beautifully when soaked in espresso. If you can’t find them, you can substitute with any sponge cake or even graham crackers in a pinch. -
Espresso
Strong, rich espresso is essential for that authentic flavor. If you don’t have an espresso machine, brewed coffee can work too. For a decaf option, just use decaffeinated coffee. -
Mascarpone Cheese
This creamy cheese gives tiramisu its signature richness. If you’re looking for a lighter alternative, you can swap in cream cheese mixed with a bit of heavy cream for a similar texture. -
Greek Yogurt or Protein Powder
Greek Yogurt lends added creaminess and protein to the mix, or you can choose unflavored protein powder for an extra boost. If you use protein powder, balance it with a little more milk or plain yogurt to maintain creaminess. -
Cocoa Powder
Unsweetened cocoa powder provides that classic chocolatey finish. You can also use dark chocolate shavings for a more decadent touch. -
Milk
Needed for soaking the biscuits, whole milk is delicious, but any plant-based milks (like almond or oat) can be great substitutes for a dairy-free version. -
Sugar or Sweetener
I prefer a touch of sugar, but you can choose honey, maple syrup, or any sweetener of your choice. Adjust the quantity according to your taste preference. -
Vanilla Extract
This little touch of vanilla amplifies all the flavors beautifully. If you want to get fancy, consider using vanilla bean paste for an even richer taste.
Step-by-Step Instructions
Let’s dive into the fun part—making our Protein Espresso Tiramisu! Follow along as I guide you through each delicious step:
-
Prepare Your Espresso:
Brew a strong cup of espresso (about 1 cup) and set it aside to cool. If you’re using coffee, try to make it robust and aromatic. -
Make the Cream Layer:
In a mixing bowl, combine mascarpone cheese, Greek yogurt (or protein powder), sugar, and vanilla extract. Use a hand mixer on medium speed until the mixture is smooth and creamy. This will be the dreamy layer that makes your tiramisu positively indulgent! -
Prepare the Biscuits:
Pour the cooled espresso into a shallow bowl. If you’re feeling adventurous, add a splash of coffee liqueur for that extra kick (but it’s totally optional). Quickly dip each ladyfinger into the espresso—don’t soak them, just a quick dip will do, as they’ll absorb moisture while layering. -
Layer it Up:
In a jar or serving dish, create a base layer with a layer of softened ladyfingers at the bottom. Spoon in a generous amount of your cream mixture over the biscuits. Tap the jar gently to settle it! -
Repeat:
Repeat the process to create a second layer of soaked biscuits, followed by another layer of the creamy mixture. Don’t forget to have fun with it—aim for at least two to three layers, depending on your jar size. -
Dust with Cocoa Powder:
Once you’ve added the final creamy layer, finish it off by sifting unsweetened cocoa powder on top. This step is essential for that lovely classic look! -
Chill the Jars:
Pop the jars in the fridge for at least 2 hours (ideally overnight) to let the flavors meld and the texture set. This waiting time is the hardest part, but trust me, it’s so worth it!
Serving Suggestions
When you’re ready to serve, I recommend adding a little flair! You can garnish with some chocolate shavings, a dusting of cocoa powder, or even a swirl of whipped cream on top for extra decadence. Arrange the jars on a beautiful platter for your guests, and watch their eyes light up with anticipation.
Recipe Variations
If you want to get creative with your tiramisu jars, here are a few fun twists:
- Matcha Tiramisu: Substitute the espresso with sweetened matcha green tea for a vibrant twist.
- Nutty Flavor: Add a tablespoon of almond extract to the cream mixture for a lovely nutty aroma or layer in crushed nuts between the layers.
- Berry Bliss: Incorporate fresh berries like raspberries or strawberries in between layers for a fruity touch.
- Dairy-Free Option: Use coconut cream instead of mascarpone and a plant-based milk for soaking. Make sure to adjust sweetness levels accordingly!
Chef’s Notes
I love how this recipe has evolved through the years. When I first started experimenting in the kitchen, I was terrified of making anything that seemed “fancy.” But as I learned that cooking is about creativity and exploration, desserts like this became my playground! The protein twist came during my fitness journey; I wanted to enjoy indulgent treats without as much guilt. Finding that perfect balance between health and happiness has become a fulfilling part of my cooking philosophy.
Alright, fellow foodies, grab your aprons and get ready to create your own batch of these Protein Espresso Tiramisu Jars—you’ll be so proud of yourself!
FAQs and Troubleshooting
-
How do I prevent soggy tiramisu?
Be quick when dipping the ladyfingers in espresso. A quick dip (just a second or two) is all you need for them to soak up flavor without becoming mushy. -
Can I make this vegan?
Absolutely! Use a dairy-free mascarpone made from cashews, swap in plant-based yogurt, and ensure your ladyfingers are vegan-friendly (some brands are made with eggs). -
What can I do if my cream mixture is too runny?
If your cream is too loose, try adding a bit more mascarpone or a tablespoon of cornstarch. It should stabilize as it chills, but you want a nice, whipped texture. -
How long will the tiramisu last?
In the fridge, these jars can stay fresh for about 3-4 days, but I must admit, they rarely last that long in my household!
Nutritional Info
While I love making indulgent desserts, it’s great that this tiramisu packs a protein punch. Each serving typically contains around 200 calories with about 10-15g of protein (depending on the ingredient ratios you choose). It’s a sweet treat that fuels your body without weighing you down!
Thanks for joining me in crafting this delicious Protein Espresso Tiramisu! I hope you enjoy every blissful bite. Happy cooking, friends!
Print
Protein Espresso Tiramisu Jars
- Total Time: 150 minutes
- Yield: 4 servings 1x
- Diet: Protein-Packed
Description
A delightful protein-packed twist on traditional tiramisu, featuring espresso-soaked ladyfingers layered with creamy mascarpone and Greek yogurt.
Ingredients
- Ladyfinger Biscuits (Savoiardi)
- 1 cup Espresso
- 8 oz Mascarpone Cheese
- 1 cup Greek Yogurt or 1 scoop Protein Powder
- 2 tbsp Cocoa Powder
- 1/2 cup Milk
- 2 tbsp Sugar or Sweetener
- 1 tsp Vanilla Extract
Instructions
- Prepare your espresso: Brew a strong cup of espresso and set it aside to cool.
- Make the cream layer: In a mixing bowl, combine mascarpone cheese, Greek yogurt (or protein powder), sugar, and vanilla extract, mixing until smooth.
- Prepare the biscuits: Pour the cooled espresso into a shallow bowl and quickly dip each ladyfinger into it.
- Layer it up: Create a base layer with soaked ladyfingers in a jar, then spoon in a generous amount of the cream mixture.
- Repeat the process to create additional layers of biscuits and cream, aiming for at least two to three layers.
- Dust with cocoa powder: Sift unsweetened cocoa powder over the final creamy layer.
- Chill the jars in the fridge for at least 2 hours before serving.
Notes
Garnish with chocolate shavings or whipped cream for extra flavor.
- Prep Time: 15 minutes
- Cook Time: 10 minutes
- Category: Dessert
- Method: Chilling
- Cuisine: Italian
Nutrition
- Serving Size: 1 serving
- Calories: 200
- Sugar: 10g
- Sodium: 100mg
- Fat: 9g
- Saturated Fat: 5g
- Unsaturated Fat: 4g
- Trans Fat: 0g
- Carbohydrates: 18g
- Fiber: 1g
- Protein: 15g
- Cholesterol: 40mg
Keywords: tiramisu, protein dessert, espresso, easy dessert, Italian dessert
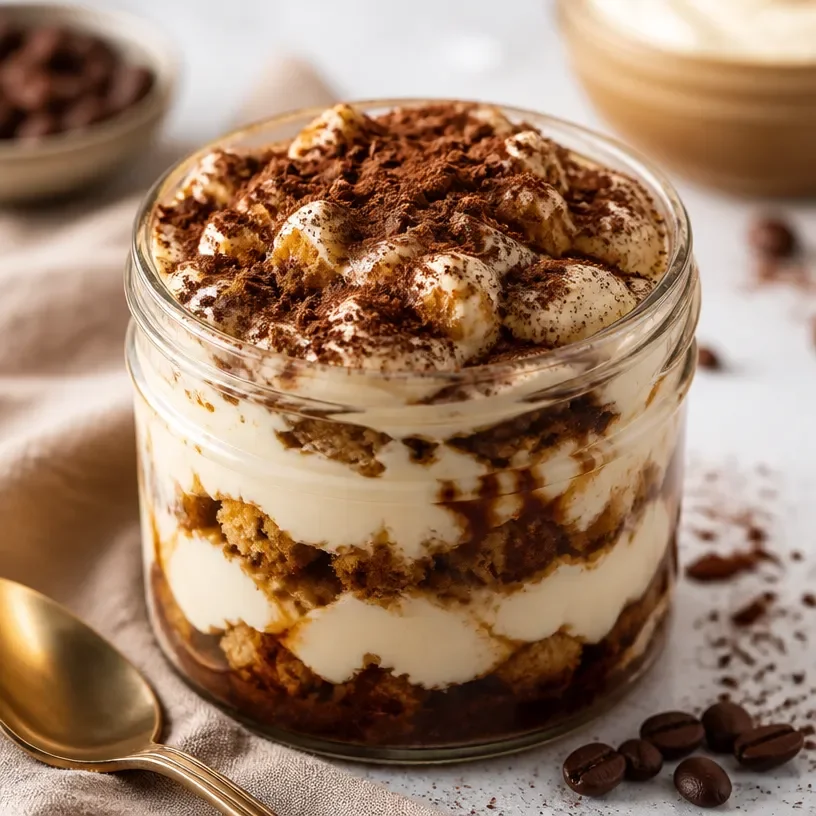
Protein Tiramisu Jar
Indulge in Delight: Protein Tiramisu Jars
Welcome to my cozy kitchen! I’m thrilled to have you join me today for a delightful journey into the world of dessert with a twist — our Protein Tiramisu Jars! Imagine diving into a velvety, rich dessert that tastes just like traditional tiramisu but comes packed with protein goodness. Whether you’re looking for a sweet treat post-workout or simply want to enjoy a guilt-free indulgence, these jars are exactly what you need.
As the aroma of coffee wafts through the air, you’ll find yourself transported to a café in Italy, rich with flavors and simplicity. The best part? We’re keeping it homemade and heartfelt. This recipe not only captures the classic essence of tiramisu but also sprinkles in the joyful crunch of ladyfingers layered with luscious protein-infused cream. It’s the perfect blend of health and indulgence that will leave your cravings satisfied and your heart full.
Have you ever whipped up a dessert only to find it’s way too complicated to navigate? Yeah, I feel you! That’s why we’ll be keeping this beautiful dessert easy and approachable. With straightforward steps, easy-to-find ingredients, and a sprinkle of fun-filled stories, you’ll be well on your way to impressing yourself and your loved ones. Get ready to embrace your inner pastry chef because this Protein Tiramisu Jar will steal the spotlight at any gathering!
So grab your apron, let’s make some magic happen, and turn those everyday ingredients into a standout dessert that not only fills the bellies but warm the hearts of everyone who gets a spoonful!
A Bite of Nostalgia: A Sweet Memory with Tiramisu
Every time I think of tiramisu, I can’t help but flash back to my childhood kitchen, where the clouds of espresso and cocoa would dance together to create a luscious mixture that could bring anyone to bliss in just one bite. My grandmother was the queen of desserts, and tiramisu was her crowning jewel. With each holiday gathering, we would all gather around the table, eagerly anticipating her decadent creation, piled high with layers of rich coffee-infused cream and dusted with rich cocoa powder.
She always insisted on making it from scratch, using her secret blend of coffee that she brought back from her travels. I’d sit on the counter, watching her mix the mascarpone, each swirl of the spoon making my mouth water with anticipation. She would let me dip the ladyfingers in coffee, and I can still remember the way she would laugh, telling me to be quick — they were just too delicate! Her tiramisu felt like a hug in dessert form, and every bite was a celebration.
Fast forward to today, where I’m embracing my own twists on classic recipes, including this protein-packed version of her beloved tiramisu. This version not only honors my grandmother’s spirit but also gives it a modern feel while ensuring that it still brings a smile to every face around the table.
Ingredients You’ll Need
Let’s gather our ingredients to build this lovely creation! Here’s what you’ll need:
-
Ladyfingers
Tip: These are the base of our dessert! If you can’t find them, you can substitute with sponge cake cut into strips for a similar texture. -
Espresso or strong brewed coffee
Chef Insight: Allow the coffee to cool before dipping the ladyfingers. If you don’t have espresso, a strong brew of coffee works just as well and will still deliver that robust flavor! -
Mascarpone cheese
Tip: The creaminess of mascarpone is irreplaceable; however, if you’re looking for a lighter version, you could use Greek yogurt mixed with a bit of cream. -
Protein powder
Insight: Choose a flavor that complements the tiramisu. Vanilla or chocolate protein works exceptionally well. -
Cocoa powder
Tip: Use unsweetened cocoa powder for dusting the layers. It adds depth and bitterness that balances the sweetness of the dessert perfectly. -
Sugar or a natural sweetener
Chef Insight: You can adjust the sweetness level based on your preference. Honey, maple syrup, or stevia can also be great alternatives. -
Vanilla extract
Tip: A splash of vanilla enhances the flavor profile dramatically. -
Milk
Insight: Use your favorite type of milk, whether it’s almond, soy, oat, or good ol’ cow’s milk. It’ll also help create that creamy consistency we adore.
By gathering these delightful ingredients, you’ll be ready to create a dessert that’s not only delicious but also filled with love!
Step-by-Step Instructions
Alright, let’s dive into our step-by-step guide to creating these Protein Tiramisu Jars! Grab your mixing bowls, spatulas, and the cutest jars you can find — because we are going to layer up some love!
-
Prepare the Coffee Station
Brew a fresh cup of espresso or strong coffee and let it cool. This step is crucial because we don’t want soggy ladyfingers! You can also mix in a tablespoon of sugar when the coffee is still hot to make it sweet and flavorful. -
Mix the Creamy Filling
In a mixing bowl, combine mascarpone cheese, protein powder, sugar, vanilla extract, and milk. Use an electric mixer or a whisk to blend these together until you have a smooth, creamy consistency. It should be thick yet light. -
Build the Coffee Assembly Line
Grab an assembly area where you can dip and place the ladyfingers. Keep the cooled coffee nearby with a shallow bowl so you can swiftly dip the ladyfingers in. Quickly dip each ladyfinger in the coffee, ensuring both sides are coated but not soggy! Place them directly into your jars vertically, standing tall like little soldiers ready for deliciousness. -
Layer it Up
Start with a layer of dipped ladyfingers in the jars. Next, add a generous scoop of your creamy mascarpone mixture. Don’t be afraid to layer it thick! Repeat this process until your jars are full, making sure to finish with a layer of the creamy mixture on top. -
Dust with Cocoa
Here comes the fun! Take a small sieve and sprinkle cocoa powder over the top layer generously. It should create a beautiful contrast and add depth to the visual appeal of the jars. -
Chill and Set
Cover each jar with a lid or plastic wrap and let them chill in the fridge for at least 4 hours, but if you can, overnight is even better. This allows the flavors to meld together beautifully! -
Serve and Enjoy!
When you’re ready to indulge, pull out those stunning jars, and feel free to add extra sprinkles of cocoa or a dollop of whipped cream on top for a little extra elegance.
And voilà! You now have your Protein Tiramisu Jars, ready for all to enjoy!
Serving Suggestions
These delightful jars are perfect for parties, family gatherings, or even a cozy night in. To serve, display them on a decorative platter with some coffee beans around as a little touch of elegance. If you’re feeling festive, you can add a sprig of mint or a chocolate curl on top for an extra touch of class. Don’t forget to provide spoons for your guests — their smiles will say it all!
Recipe Variations
Looking to shake things up a bit? Here are a few creative twists you can try with your Protein Tiramisu Jars:
- Chocolate Hazelnut Variation: Add a layer of chocolate hazelnut spread between the ladyfingers and cream to give a rich nutty flavor.
- Berry Delight: Replace some layers with a layer of berries such as strawberries or raspberries for a fruity twist and a pop of color!
- Vegan-Friendly Version: Use coconut cream instead of mascarpone, and ensure your ladyfingers are vegan-friendly, or use a sponge cake made without eggs.
- Spiced Up: Add a dash of cinnamon or pumpkin spice to the creamy mixture to give it a warm, aromatic touch perfect for the fall!
- Nutty Surprise: Fold crushed nuts, like pistachios or almonds, into the cream for additional crunch and flavor.
The possibilities are endless, and each twist brings something special to the table!
Chef’s Notes
Throughout my culinary journey, this Protein Tiramisu Jar has transformed from a kitchen experiment to a staple in my dessert repertoire. I’ve learned to embrace the unexpected moments, like when I accidentally spilled cocoa powder all over the counter one day. Instead of getting frustrated, I made it into a spontaneous cocoa dust storm for my guests!
I absolutely believe that cooking should be fun, messy, and filled with laughter. My grandmother taught me to find joy in these moments, and that’s exactly what I hope you feel while creating this dish. Whether it’s a cheer of excitement when your jars come together perfectly or a giggle at a little cocoa mishap, let’s remember to enjoy the delicious journey of flavors.
FAQs and Troubleshooting
1. My ladyfingers fell apart while dipping! What did I do wrong?
No worries! The secret to maintaining ladyfingers’ structure lies in the quick dipping. Ensure you dip them for just 1-2 seconds to coat them without letting them soak too long.
2. Can I make these jars ahead of time?
Absolutely! These jars are the perfect make-ahead dessert. They actually taste better after chilling overnight as the flavors meld together beautifully.
3. What can I use instead of mascarpone cheese?
If mascarpone isn’t available, you can substitute it with a mix of Greek yogurt and cream cheese for a similar texture. It will be slightly tangier, but still delicious!
4. How long do these Protein Tiramisu Jars last in the fridge?
These jars will last about 3-4 days in the fridge when sealed tightly. However, trust me — they’ll be gone long before that!
Nutritional Info
While nutritional information may vary based on specific ingredients and portion sizes, each serving of these delightful Protein Tiramisu Jars will provide a rich source of protein, healthy fats, and indulgent flavors! This is a dessert you can genuinely feel good about enjoying.
And there you have it! Your very own Protein Tiramisu Jars that blend the nostalgia of traditional flavors with a modern, healthier twist. With every bite, you’re not just enjoying a dessert; you’re making memories in the kitchen. So gather your loved ones, share some laughs, and dig into these delightful jars of joy. Happy cooking!
Print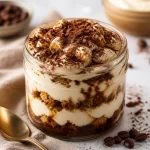
Protein Tiramisu Jars
- Total Time: 240 minutes
- Yield: 4 servings
- Diet: High Protein
Description
A delightful take on traditional tiramisu, packed with protein goodness and layered with ladyfingers and a creamy filling.
Ingredients
- Ladyfingers
- Espresso or strong brewed coffee
- Mascarpone cheese
- Protein powder
- Cocoa powder
- Sugar or a natural sweetener
- Vanilla extract
- Milk
Instructions
- Prepare the Coffee Station: Brew a fresh cup of espresso or strong coffee and let it cool.
- Mix the Creamy Filling: In a mixing bowl, combine mascarpone cheese, protein powder, sugar, vanilla extract, and milk.
- Build the Coffee Assembly Line: Dip ladyfingers in the cooled coffee and place them in jars vertically.
- Layer it Up: Alternate layers of dipped ladyfingers and creamy mixture until jars are full.
- Dust with Cocoa: Sprinkle cocoa powder over the top layer.
- Chill and Set: Cover and chill in the fridge for at least 4 hours.
- Serve and Enjoy: Add extra cocoa or whipped cream for garnish.
Notes
Ensure ladyfingers are dipped quickly to maintain structure. These jars can be made ahead of time and taste even better after chilling overnight.
- Prep Time: 15 minutes
- Cook Time: 0 minutes
- Category: Dessert
- Method: Chilling
- Cuisine: Italian
Nutrition
- Serving Size: 1 jar
- Calories: 300
- Sugar: 10g
- Sodium: 150mg
- Fat: 15g
- Saturated Fat: 9g
- Unsaturated Fat: 6g
- Trans Fat: 0g
- Carbohydrates: 32g
- Fiber: 2g
- Protein: 20g
- Cholesterol: 40mg
Keywords: protein dessert, tiramisu, high protein dessert, Italian dessert, healthy dessert



