
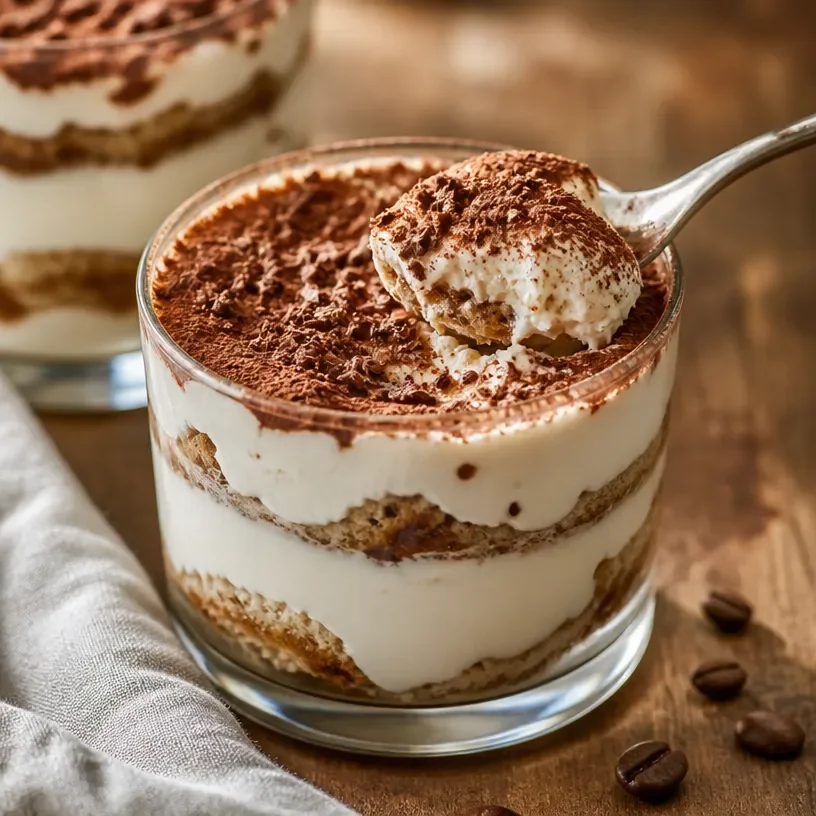
No-Bake High-Protein Cottage Cheese Tiramisu Cups
Protein Cottage Cheese Tiramisu Cups: A Light Twist on an Italian Classic
Welcome, dear friends, to my cozy kitchen! I’m Olivia Bennett, and today I’m absolutely thrilled to share a delightful twist on a classic dessert that will make your heart sing and your taste buds dance. Yes, you guessed it right — we’re diving into the world of Protein Cottage Cheese Tiramisu Cups! This treat takes the beloved Italian dessert and gives it a nutritious spin, perfect for those moments when you want something indulgent that’s also good for you.
Picture this: smooth, creamy layers of cottage cheese mingling with rich espresso, all elegantly layered into cute little cups. It’s the ideal dessert for a family gathering, a romantic dinner, or just a sweet treat after a long day. And the best part? You get to enjoy all that deliciousness without the guilt!
Now, why did I choose cottage cheese, you ask? Well, I adore the way it adds a creamy richness while keeping the protein content high! I came up with this recipe on a whim when I was on a personal quest to create healthier desserts that still retain that classic comfort we all crave. I remember the first time I served these cups to my friends, and the looks on their faces were priceless. They couldn’t believe they were eating cottage cheese!
So grab your mixing bowls, and let’s create something special together.
Bringing Back Tiramisu Memories
Let me take you on a little journey down memory lane. I remember the first time I tasted traditional tiramisu. I was just a kid, accompanying my grandmother during one of her culinary adventures to a charming Italian restaurant in our town. The warm aroma of coffee filled the air, mingling with sweet hints of cocoa and cream. My grandmother ordered tiramisu, and I was smitten at first bite. Every layer told a story — the softness of the mascarpone, the bitterness of the coffee-soaked ladyfingers, and the dusting of cocoa on top.
As we savored each bite, we talked about everything — family, dreams, and the love we shared for cooking. Those moments fueled my passion for food and the joy it brings. Fast forward to today, and I wanted to recreate that memory but with a healthier touch. Enter: Protein Cottage Cheese Tiramisu Cups! It has become a dish that is not only reminiscent of my childhood but also a nod to my journey as a home cook striving to make comfort food a little lighter and brighter.
Ingredients You’ll Need
Here’s what you’ll need to make these delightful Protein Cottage Cheese Tiramisu Cups. Not only are these ingredients simple, but they can also easily be swapped based on what you have on hand!
-
Cottage Cheese (2 cups): Look for a good-quality brand — the creaminess of full-fat or low-fat cottage cheese works best. If you’re not a cottage cheese fan, you can substitute it with Greek yogurt for a low-carb option!
-
Protein Powder (2 scoops): Choose your favorite flavor! Vanilla works wonderfully, but chocolate can add an exciting twist. You can also use a plant-based protein powder if you’re looking for a vegan alternative.
-
Espresso or Strong Coffee (1 cup): Brew a fresh cup for the best flavor. If you’re avoiding caffeine, chicory root coffee or decaf would work great too!
-
Cocoa Powder (1-2 tablespoons): Look for unsweetened cocoa powder for a rich, deep chocolate flavor. You can also use carob powder for a unique taste.
-
Honey or Maple Syrup (to taste): Sweeten to your preference! For a vegan option, stick with maple syrup.
-
Vanilla Extract (1 teaspoon): A dash amplifies the flavor — it’s a must! Or try almond extract for something unique.
-
Milk (1/4 cup): Any milk of your choice will work fine; almond, oat, or regular dairy — just ensure it’s unsweetened if you’re watching those sugar levels.
-
Ladyfingers or Biscuit Crumbs (optional): Traditional tiramisu includes ladyfingers, but to keep things simple and gluten-free, you can use crushed gluten-free cookies or skip this entirely.
-
Chocolate Shavings or Cocoa Powder for Garnish: These are optional but highly suggested for a beautiful finish!
Step-by-Step Instructions
Now, let’s get started on making these heavenly Protein Cottage Cheese Tiramisu Cups! You’ll love how simple and straightforward this recipe is.
-
Prepare Your Coffee: Brew a strong cup of espresso or coffee and let it cool slightly. If you’re like me and can’t wait, you can pop it in the fridge to speed up the process!
-
Mix the Cottage Cheese and Protein Powder: In a medium bowl, combine the cottage cheese and protein powder. You’ll want to whisk it until it’s smooth and creamy. If the mixture seems too thick, add a splash of milk to loosen it. This little tip ensures you’ll have a silky mixture that won’t need a blender!
-
Sweeten Your Mixture: Now’s the time to add honey or maple syrup, along with the vanilla extract. Keep tasting as you mix; this is your creation! You can customize to your ideal sweetness level.
-
Layering Time!: Grab your serving cups (small glasses or ramekins work beautifully). Start by dipping the ladyfingers or cookies in the cooled espresso. Quick dips are key; you want them moist but not soggy! If you’re skipping the biscuits, you can just add a layer of the cottage cheese mixture directly into the cups.
-
Create Your Layers: In each cup, start with a layer of the dipped ladyfingers (or biscuit crumbs), followed by a generous scoop of the cottage cheese mixture. Repeat this process until you fill your cups, ending with the cottage cheese layer on top.
-
Chill Out: Cover the cups with plastic wrap and pop them into the fridge for at least 2 hours, if possible. This will help all the flavors mingle together nicely!
-
Finishing Touch: Just before serving, dust the tops with cocoa powder and add chocolate shavings if you’re feeling extra fancy.
-
Serve and Enjoy!: Dig in and relish each creamy, coffee-flavored bite!
Serving Suggestions
To serve, consider having these cups already chilled in your fridge, ready to impress guests! You can sprinkle a little extra cocoa or a few more chocolate shavings on top for that gourmet touch. For a fun twist, consider serving alongside fresh berries or a dollop of whipped cream for an added texture experience.
Recipe Variations
If you want to switch things up, here are some creative variations:
-
Chocolate Delight: Use chocolate protein powder and layer some finely chopped dark chocolate in between the cottage cheese mixture.
-
Fruit Fiesta: Add a layer of fruit like strawberries or bananas for a fresh twist. They add vibrant color and taste!
-
Nutty Flavor: Fold in some almond or hazelnut extract for a nutty aroma, and use crushed nuts as layers or toppings.
-
Mochaccino Cups: Add a little cocoa powder to the espresso for an extra mocha kick.
-
Vegan Version: Substitute the cottage cheese with vegan cream cheese or blended silken tofu mixed with plant-based protein powder and maple syrup.
Chef’s Notes
The great thing about cooking is making it your own. This dessert has evolved over the years, and I love playing with flavors and textures. I once hosted a brunch where I offered a “build your own tiramisu” bar — complete with different layers and toppings! Guests could create their own unique flavors. It turned out to be such a hit!
And for a funny moment: One time, I accidentally used double the amount of cocoa powder intended, thinking it would intensify the chocolate flavor. Let’s just say it was an explosion of epic chocolate that no one could finish! Every kitchen adventure teaches us a little more — embrace the messy moments!
FAQs and Troubleshooting
-
Can I make this ahead of time?
Yes! These cups are perfect for make-ahead desserts. You can prepare them a day or two in advance. -
What if I can’t find cottage cheese?
If you can’t find it or aren’t a fan, Greek yogurt is a fantastic alternative. It maintains the creaminess and adds a nice tang. -
How can I store leftovers?
Store any leftovers covered in the refrigerator for up to three days. Just be sure they’re kept airtight! -
Is it okay to freeze these cups?
While I wouldn’t recommend freezing them, you can store the components separately and assemble them when you’re ready to enjoy!
Nutritional Info
Each serving of Protein Cottage Cheese Tiramisu Cups (serving size = 1 cup) delivers a balanced taste and nutritional value. You’re looking at approximately:
- Calories: 200
- Protein: 20g
- Carbohydrates: 25g
- Sugar: 8g
- Fat: 5g
(Values may vary based on specific ingredient brands and quantities)
There you have it — a delightful recipe that combines nostalgia with a fresh twist, making it easy to recreate a small piece of Italy at home! Remember that the kitchen is a space of creativity, love, and laughter. So don’t be afraid to mix things up and make this Protein Cottage Cheese Tiramisu Cups your very own. Enjoy the journey, and happy cooking!
Print
Protein Cottage Cheese Tiramisu Cups
- Total Time: 120 minutes
- Yield: 4 servings 1x
- Diet: Healthy
Description
A delightful twist on the classic Italian dessert, this Protein Cottage Cheese Tiramisu Cups recipe combines creamy cottage cheese with rich espresso for a nutritious treat.
Ingredients
- 2 cups Cottage Cheese
- 2 scoops Protein Powder
- 1 cup Espresso or Strong Coffee
- 1–2 tablespoons Cocoa Powder
- Honey or Maple Syrup (to taste)
- 1 teaspoon Vanilla Extract
- 1/4 cup Milk
- Ladyfingers or Biscuit Crumbs (optional)
- Chocolate Shavings or Cocoa Powder for Garnish
Instructions
- Prepare your coffee: Brew a strong cup of espresso or coffee and let it cool slightly.
- Mix the cottage cheese and protein powder in a medium bowl until smooth and creamy.
- Sweeten the mixture with honey or maple syrup and vanilla extract.
- Grab your serving cups and dip ladyfingers in the cooled espresso.
- Create layers in each cup, starting with ladyfingers and continuing with the cottage cheese mixture until filled.
- Chill the cups in the refrigerator for at least 2 hours.
- Dust the tops with cocoa powder and add chocolate shavings before serving.
- Serve and enjoy each creamy, coffee-flavored bite!
Notes
These cups can be made ahead of time and stored in the refrigerator for up to three days. Customize by adding layers of fruit or nuts for a twist.
- Prep Time: 15 minutes
- Cook Time: 5 minutes
- Category: Dessert
- Method: No-Bake
- Cuisine: Italian
Nutrition
- Serving Size: 1 cup
- Calories: 200
- Sugar: 8g
- Sodium: 150mg
- Fat: 5g
- Saturated Fat: 2g
- Unsaturated Fat: 3g
- Trans Fat: 0g
- Carbohydrates: 25g
- Fiber: 2g
- Protein: 20g
- Cholesterol: 10mg
Keywords: tiramisu, dessert, healthy dessert, cottage cheese, protein dessert, no-bake dessert
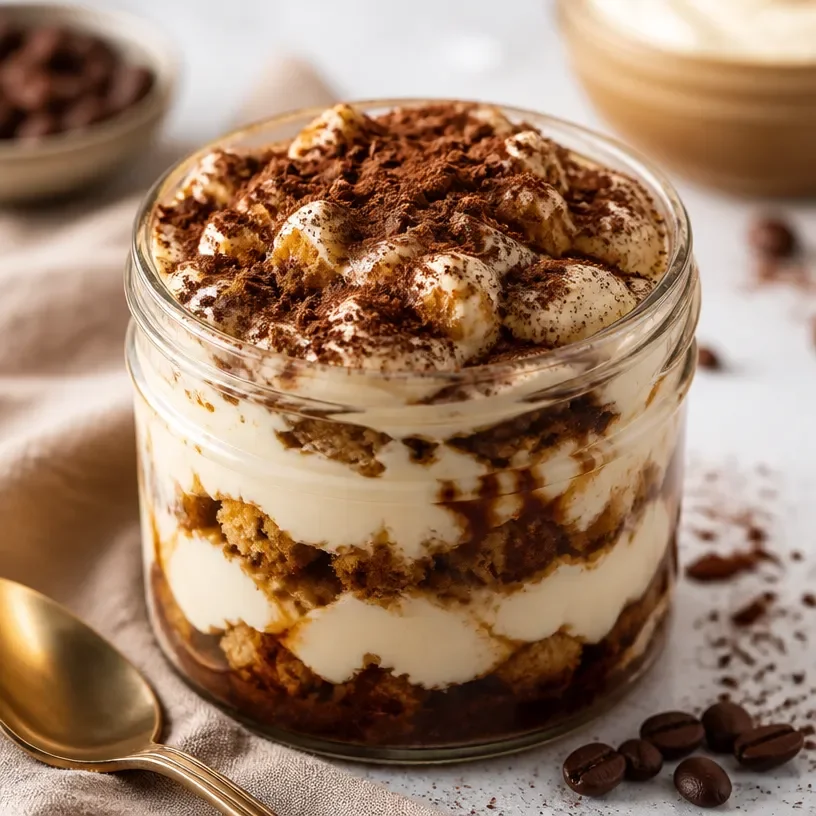
Protein Tiramisu Jar
Indulge in Delight: Protein Tiramisu Jars
Welcome to my cozy kitchen! I’m thrilled to have you join me today for a delightful journey into the world of dessert with a twist — our Protein Tiramisu Jars! Imagine diving into a velvety, rich dessert that tastes just like traditional tiramisu but comes packed with protein goodness. Whether you’re looking for a sweet treat post-workout or simply want to enjoy a guilt-free indulgence, these jars are exactly what you need.
As the aroma of coffee wafts through the air, you’ll find yourself transported to a café in Italy, rich with flavors and simplicity. The best part? We’re keeping it homemade and heartfelt. This recipe not only captures the classic essence of tiramisu but also sprinkles in the joyful crunch of ladyfingers layered with luscious protein-infused cream. It’s the perfect blend of health and indulgence that will leave your cravings satisfied and your heart full.
Have you ever whipped up a dessert only to find it’s way too complicated to navigate? Yeah, I feel you! That’s why we’ll be keeping this beautiful dessert easy and approachable. With straightforward steps, easy-to-find ingredients, and a sprinkle of fun-filled stories, you’ll be well on your way to impressing yourself and your loved ones. Get ready to embrace your inner pastry chef because this Protein Tiramisu Jar will steal the spotlight at any gathering!
So grab your apron, let’s make some magic happen, and turn those everyday ingredients into a standout dessert that not only fills the bellies but warm the hearts of everyone who gets a spoonful!
A Bite of Nostalgia: A Sweet Memory with Tiramisu
Every time I think of tiramisu, I can’t help but flash back to my childhood kitchen, where the clouds of espresso and cocoa would dance together to create a luscious mixture that could bring anyone to bliss in just one bite. My grandmother was the queen of desserts, and tiramisu was her crowning jewel. With each holiday gathering, we would all gather around the table, eagerly anticipating her decadent creation, piled high with layers of rich coffee-infused cream and dusted with rich cocoa powder.
She always insisted on making it from scratch, using her secret blend of coffee that she brought back from her travels. I’d sit on the counter, watching her mix the mascarpone, each swirl of the spoon making my mouth water with anticipation. She would let me dip the ladyfingers in coffee, and I can still remember the way she would laugh, telling me to be quick — they were just too delicate! Her tiramisu felt like a hug in dessert form, and every bite was a celebration.
Fast forward to today, where I’m embracing my own twists on classic recipes, including this protein-packed version of her beloved tiramisu. This version not only honors my grandmother’s spirit but also gives it a modern feel while ensuring that it still brings a smile to every face around the table.
Ingredients You’ll Need
Let’s gather our ingredients to build this lovely creation! Here’s what you’ll need:
-
Ladyfingers
Tip: These are the base of our dessert! If you can’t find them, you can substitute with sponge cake cut into strips for a similar texture. -
Espresso or strong brewed coffee
Chef Insight: Allow the coffee to cool before dipping the ladyfingers. If you don’t have espresso, a strong brew of coffee works just as well and will still deliver that robust flavor! -
Mascarpone cheese
Tip: The creaminess of mascarpone is irreplaceable; however, if you’re looking for a lighter version, you could use Greek yogurt mixed with a bit of cream. -
Protein powder
Insight: Choose a flavor that complements the tiramisu. Vanilla or chocolate protein works exceptionally well. -
Cocoa powder
Tip: Use unsweetened cocoa powder for dusting the layers. It adds depth and bitterness that balances the sweetness of the dessert perfectly. -
Sugar or a natural sweetener
Chef Insight: You can adjust the sweetness level based on your preference. Honey, maple syrup, or stevia can also be great alternatives. -
Vanilla extract
Tip: A splash of vanilla enhances the flavor profile dramatically. -
Milk
Insight: Use your favorite type of milk, whether it’s almond, soy, oat, or good ol’ cow’s milk. It’ll also help create that creamy consistency we adore.
By gathering these delightful ingredients, you’ll be ready to create a dessert that’s not only delicious but also filled with love!
Step-by-Step Instructions
Alright, let’s dive into our step-by-step guide to creating these Protein Tiramisu Jars! Grab your mixing bowls, spatulas, and the cutest jars you can find — because we are going to layer up some love!
-
Prepare the Coffee Station
Brew a fresh cup of espresso or strong coffee and let it cool. This step is crucial because we don’t want soggy ladyfingers! You can also mix in a tablespoon of sugar when the coffee is still hot to make it sweet and flavorful. -
Mix the Creamy Filling
In a mixing bowl, combine mascarpone cheese, protein powder, sugar, vanilla extract, and milk. Use an electric mixer or a whisk to blend these together until you have a smooth, creamy consistency. It should be thick yet light. -
Build the Coffee Assembly Line
Grab an assembly area where you can dip and place the ladyfingers. Keep the cooled coffee nearby with a shallow bowl so you can swiftly dip the ladyfingers in. Quickly dip each ladyfinger in the coffee, ensuring both sides are coated but not soggy! Place them directly into your jars vertically, standing tall like little soldiers ready for deliciousness. -
Layer it Up
Start with a layer of dipped ladyfingers in the jars. Next, add a generous scoop of your creamy mascarpone mixture. Don’t be afraid to layer it thick! Repeat this process until your jars are full, making sure to finish with a layer of the creamy mixture on top. -
Dust with Cocoa
Here comes the fun! Take a small sieve and sprinkle cocoa powder over the top layer generously. It should create a beautiful contrast and add depth to the visual appeal of the jars. -
Chill and Set
Cover each jar with a lid or plastic wrap and let them chill in the fridge for at least 4 hours, but if you can, overnight is even better. This allows the flavors to meld together beautifully! -
Serve and Enjoy!
When you’re ready to indulge, pull out those stunning jars, and feel free to add extra sprinkles of cocoa or a dollop of whipped cream on top for a little extra elegance.
And voilà! You now have your Protein Tiramisu Jars, ready for all to enjoy!
Serving Suggestions
These delightful jars are perfect for parties, family gatherings, or even a cozy night in. To serve, display them on a decorative platter with some coffee beans around as a little touch of elegance. If you’re feeling festive, you can add a sprig of mint or a chocolate curl on top for an extra touch of class. Don’t forget to provide spoons for your guests — their smiles will say it all!
Recipe Variations
Looking to shake things up a bit? Here are a few creative twists you can try with your Protein Tiramisu Jars:
- Chocolate Hazelnut Variation: Add a layer of chocolate hazelnut spread between the ladyfingers and cream to give a rich nutty flavor.
- Berry Delight: Replace some layers with a layer of berries such as strawberries or raspberries for a fruity twist and a pop of color!
- Vegan-Friendly Version: Use coconut cream instead of mascarpone, and ensure your ladyfingers are vegan-friendly, or use a sponge cake made without eggs.
- Spiced Up: Add a dash of cinnamon or pumpkin spice to the creamy mixture to give it a warm, aromatic touch perfect for the fall!
- Nutty Surprise: Fold crushed nuts, like pistachios or almonds, into the cream for additional crunch and flavor.
The possibilities are endless, and each twist brings something special to the table!
Chef’s Notes
Throughout my culinary journey, this Protein Tiramisu Jar has transformed from a kitchen experiment to a staple in my dessert repertoire. I’ve learned to embrace the unexpected moments, like when I accidentally spilled cocoa powder all over the counter one day. Instead of getting frustrated, I made it into a spontaneous cocoa dust storm for my guests!
I absolutely believe that cooking should be fun, messy, and filled with laughter. My grandmother taught me to find joy in these moments, and that’s exactly what I hope you feel while creating this dish. Whether it’s a cheer of excitement when your jars come together perfectly or a giggle at a little cocoa mishap, let’s remember to enjoy the delicious journey of flavors.
FAQs and Troubleshooting
1. My ladyfingers fell apart while dipping! What did I do wrong?
No worries! The secret to maintaining ladyfingers’ structure lies in the quick dipping. Ensure you dip them for just 1-2 seconds to coat them without letting them soak too long.
2. Can I make these jars ahead of time?
Absolutely! These jars are the perfect make-ahead dessert. They actually taste better after chilling overnight as the flavors meld together beautifully.
3. What can I use instead of mascarpone cheese?
If mascarpone isn’t available, you can substitute it with a mix of Greek yogurt and cream cheese for a similar texture. It will be slightly tangier, but still delicious!
4. How long do these Protein Tiramisu Jars last in the fridge?
These jars will last about 3-4 days in the fridge when sealed tightly. However, trust me — they’ll be gone long before that!
Nutritional Info
While nutritional information may vary based on specific ingredients and portion sizes, each serving of these delightful Protein Tiramisu Jars will provide a rich source of protein, healthy fats, and indulgent flavors! This is a dessert you can genuinely feel good about enjoying.
And there you have it! Your very own Protein Tiramisu Jars that blend the nostalgia of traditional flavors with a modern, healthier twist. With every bite, you’re not just enjoying a dessert; you’re making memories in the kitchen. So gather your loved ones, share some laughs, and dig into these delightful jars of joy. Happy cooking!
Print
Protein Tiramisu Jars
- Total Time: 240 minutes
- Yield: 4 servings
- Diet: High Protein
Description
A delightful take on traditional tiramisu, packed with protein goodness and layered with ladyfingers and a creamy filling.
Ingredients
- Ladyfingers
- Espresso or strong brewed coffee
- Mascarpone cheese
- Protein powder
- Cocoa powder
- Sugar or a natural sweetener
- Vanilla extract
- Milk
Instructions
- Prepare the Coffee Station: Brew a fresh cup of espresso or strong coffee and let it cool.
- Mix the Creamy Filling: In a mixing bowl, combine mascarpone cheese, protein powder, sugar, vanilla extract, and milk.
- Build the Coffee Assembly Line: Dip ladyfingers in the cooled coffee and place them in jars vertically.
- Layer it Up: Alternate layers of dipped ladyfingers and creamy mixture until jars are full.
- Dust with Cocoa: Sprinkle cocoa powder over the top layer.
- Chill and Set: Cover and chill in the fridge for at least 4 hours.
- Serve and Enjoy: Add extra cocoa or whipped cream for garnish.
Notes
Ensure ladyfingers are dipped quickly to maintain structure. These jars can be made ahead of time and taste even better after chilling overnight.
- Prep Time: 15 minutes
- Cook Time: 0 minutes
- Category: Dessert
- Method: Chilling
- Cuisine: Italian
Nutrition
- Serving Size: 1 jar
- Calories: 300
- Sugar: 10g
- Sodium: 150mg
- Fat: 15g
- Saturated Fat: 9g
- Unsaturated Fat: 6g
- Trans Fat: 0g
- Carbohydrates: 32g
- Fiber: 2g
- Protein: 20g
- Cholesterol: 40mg
Keywords: protein dessert, tiramisu, high protein dessert, Italian dessert, healthy dessert




