
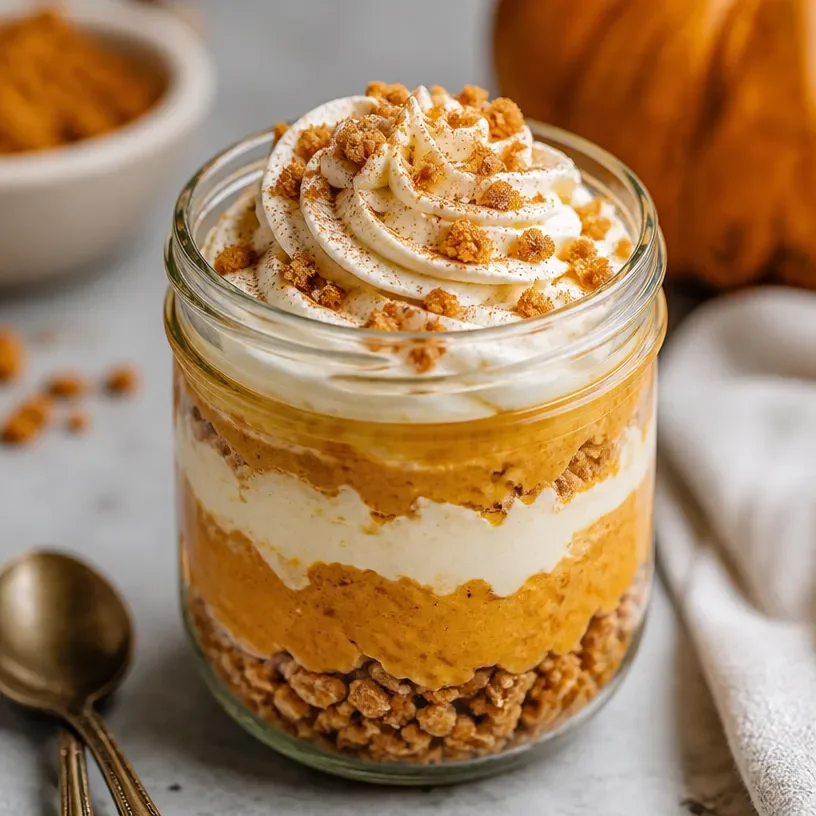
Protein-Packed Sweet Potato Pie Jar for Busy Weeknights
Sweet and Savory Protein Sweet Potato Pie Jar: A Cozy Comfort Dish
Welcome to my kitchen, dear food friends! Today, we’re diving into a delightful treat that’s bound to make your taste buds dance with joy: Protein Sweet Potato Pie Jars. If you’ve ever found comfort in a classic sweet potato pie and wished it could be a wholesome, protein-packed snack, you’re in for a real culinary surprise! This recipe is a beautiful blend of nostalgia and nutrition, perfect for anyone looking to indulge without compromising on health.
Now, let’s make this dish together and create some kitchen magic! Picture your cozy kitchen, the enticing aroma of sweet potatoes wafting through the air, and the bright colors of warm spices ready to brighten your day. Grab your favorite jar (or mason jar for the more rustic vibe) and let’s layer up some deliciousness!
A Slice of My Sweet Potato Memory
You know, every dish tells a story, and the story of sweet potato pie in my life is one I cherish dearly. It all began in my grandmother’s sunlit kitchen back in the day. I vividly remember helping her peel and mash sweet potatoes while dancing around to her favorite oldies playlist. She had this magical ability to turn simple ingredients into pure comfort.
For her, sweet potato pie wasn’t just dessert; it was an experience. I recall landing my sticky hands in the flour as I tried my best to help make the crust, often more spill than dough. But that’s where the “pie” magic happened! The luscious filling of sweet potatoes, warm spices, and a secret touch of love would remind us all why we gathered around her table more than anything else.
Today, as I whip up these sweet potato pie jars, it takes me back to those cherished moments filled with laughter, stories, and, of course, delicious food. So, let’s recreate that joy together!
The Ingredients: What You’ll Need
Here’s a list of everything you’ll need to bring our Protein Sweet Potato Pie Jars to life:
-
Sweet Potatoes (2 medium)
These creamy beauties are the star of the show! Sweet potatoes provide natural sweetness and a velvety texture. You can swap them for puréed pumpkin if you want to switch things up. -
Vanilla Protein Powder (1 scoop)
A fantastic way to pump up the protein and support your healthy lifestyle. Go for a plant-based or whey option depending on your dietary preference. -
Cinnamon (1 tsp)
This warm spice brings that cozy aroma and flavor. Feel free to use nutmeg or pumpkin spice if you want a little twist! -
Maple Syrup (2 tbsp)
A natural sweetener that enhances the sweet potato flavor. You can substitute with agave syrup or honey if desired. -
Almond Milk (1 cup)
To achieve that creamy consistency. If you’re feeling adventurous, try coconut milk for an exotic flair! -
Greek Yogurt (½ cup)
Adds creaminess and a beautiful protein boost. You can swap in dairy-free yogurt for a vegan option. -
Graham Cracker Crumbs (½ cup)
For that signature crust flavor without baking a pie! You could use crushed oats or nuts for a gluten-free alternative. -
Chopped Nuts (optional)
Add walnuts or pecans on top for some crunch and healthy fats.
Step-by-Step Instructions: Let’s Get Cooking!
-
Prepare Your Sweet Potatoes
Start by preheating your oven to 400°F (200°C). While it’s warming, wash your sweet potatoes and prick them all over with a fork. This helps steam escape and makes for super tender insides. Bake for about 45-60 minutes until they are soft. We want that sweet, buttery filling! -
Making the Sweet Potato Filling
Once the sweet potatoes are done, let them cool for a bit, then peel away the skins. Mash the flesh in a bowl until smooth (an easy clean-up tip: I love using a potato masher!). -
Mixing It Up
In a larger mixing bowl, combine your mashed sweet potatoes, vanilla protein powder, cinnamon, maple syrup, almond milk, and Greek yogurt. Stir it well until everything is evenly incorporated. It should be creamy and luscious, just like a pie filling! -
Time to Layer!
Grab your jars and start layering! Begin with a layer of sweet potato filling followed by a sprinkle of graham cracker crumbs, then do a second layer of sweet potato filling. Keep adding layers until you reach the top of your jars. Finish with a sprinkle of nuts if you like some added crunch! -
Chill and Set
Cover your jars and pop them into the refrigerator for at least one hour, allowing the flavors to meld beautifully. That’s right, during this time, grab a book and kick back!
Serving Suggestions: A Feast for the Eyes
When you’re ready to indulge, take your jars out of the fridge and give them a gentle stir. You might want to add a dollop of extra Greek yogurt on top, a drizzle of maple syrup, or even a sprinkle of cinnamon for that final touch.
Imagine presenting these charming little jars at your next gathering — they’re not only delicious but absolutely gorgeous too. Serve them up with spoons ready to scoop up those layers of flavor!
Recipe Variations: Get Creative!
Now that we’ve got the basic recipe down, let’s sprinkle in some excitement. Here are a few variations you can play around with:
-
Chocolate Decadence: Add a tablespoon of unsweetened cocoa powder to the sweet potato filling for a chocolate twist!
-
Nutty Boost: Incorporate almond butter or peanut butter for a richer flavor and creamier texture.
-
Vegan Switch: Use coconut yogurt and agave instead of Greek yogurt and maple syrup for a completely dairy-free version.
-
Spiced Up: Mix in a pinch of cayenne or ginger for an unexpected kick that balances the sweetness!
-
Layer It Up: Introduce layers with fruits like bananas or berries in between the sweet potato filling — a burst of freshness!
Chef’s Notes: A Slice of Wisdom
As we’ve chatted about this recipe, I have to admit that it has definitely evolved along the way. I initially started with an entire sweet potato pie, but with time constraints and my love for jars, it morphed into this quick and easy recipe. Plus, can we talk about portion control? Having it in jars is just so much fun!
Oh, and I remember one time experimenting with different spice combinations and accidentally dropping too much cayenne. Let’s just say, there were some fire-breathing moments, but I learned that cooking is all about experimentation — a little spice goes a long way!
FAQs and Troubleshooting: Let’s Clear It Up
-
How can I make this gluten-free?
Use gluten-free graham crackers or swap for ground oats or almond flour to create a crumb base! -
Can I use canned sweet potatoes?
Absolutely! Just ensure they’re well-drained, and you may need to adjust the amount of almond milk to maintain the right consistency. -
What if my mixture is too thick?
No problem! Simply add a little more almond milk until you reach your desired consistency. -
How long will these keep in the fridge?
Stored in an airtight container, they should last about 4-5 days in the fridge, perfect for meal prep!
Nutritional Info
While exact nutritional breakdown depends on specific brands and portion sizes, a typical Protein Sweet Potato Pie Jar could contain around:
- Calories: 300
- Protein: 15g
- Carbohydrates: 45g
- Fats: 10g
So there you have it! I hope you love making these Protein Sweet Potato Pie Jars as much as I love sharing them with you. Remember, cooking is a journey filled with laughter, love, and a sprinkle of spice. Let me know how yours turn out, and happy cooking!
Print
Protein Sweet Potato Pie Jars
- Total Time: 75 minutes
- Yield: 4 servings
- Diet: Vegetarian
Description
A wholesome and protein-packed take on classic sweet potato pie, served in charming jars.
Ingredients
- Sweet Potatoes (2 medium)
- Vanilla Protein Powder (1 scoop)
- Cinnamon (1 tsp)
- Maple Syrup (2 tbsp)
- Almond Milk (1 cup)
- Greek Yogurt (½ cup)
- Graham Cracker Crumbs (½ cup)
- Chopped Nuts (optional)
Instructions
- Preheat your oven to 400°F (200°C). Wash your sweet potatoes and prick them all over with a fork. Bake for about 45-60 minutes until soft.
- Once the sweet potatoes are done, let them cool, then peel away the skins and mash the flesh until smooth.
- In a larger bowl, combine mashed sweet potatoes, vanilla protein powder, cinnamon, maple syrup, almond milk, and Greek yogurt. Stir until incorporated.
- Grab your jars and start layering by adding sweet potato filling followed by graham cracker crumbs. Continue layering until jars are full.
- Cover the jars and refrigerate for at least one hour to allow flavors to meld.
- When ready to serve, stir gently and add a dollop of Greek yogurt, maple syrup, or cinnamon on top as desired.
Notes
Experiment with different toppings and variations, including chocolate, nut butters, or fruits.
- Prep Time: 15 minutes
- Cook Time: 60 minutes
- Category: Dessert
- Method: Baking
- Cuisine: American
Nutrition
- Serving Size: 1 jar
- Calories: 350
- Sugar: 10g
- Sodium: 200mg
- Fat: 10g
- Saturated Fat: 2g
- Unsaturated Fat: 7g
- Trans Fat: 0g
- Carbohydrates: 45g
- Fiber: 5g
- Protein: 15g
- Cholesterol: 5mg
Keywords: sweet potato pie, protein dessert, healthy snack, cozy dish, meal prep
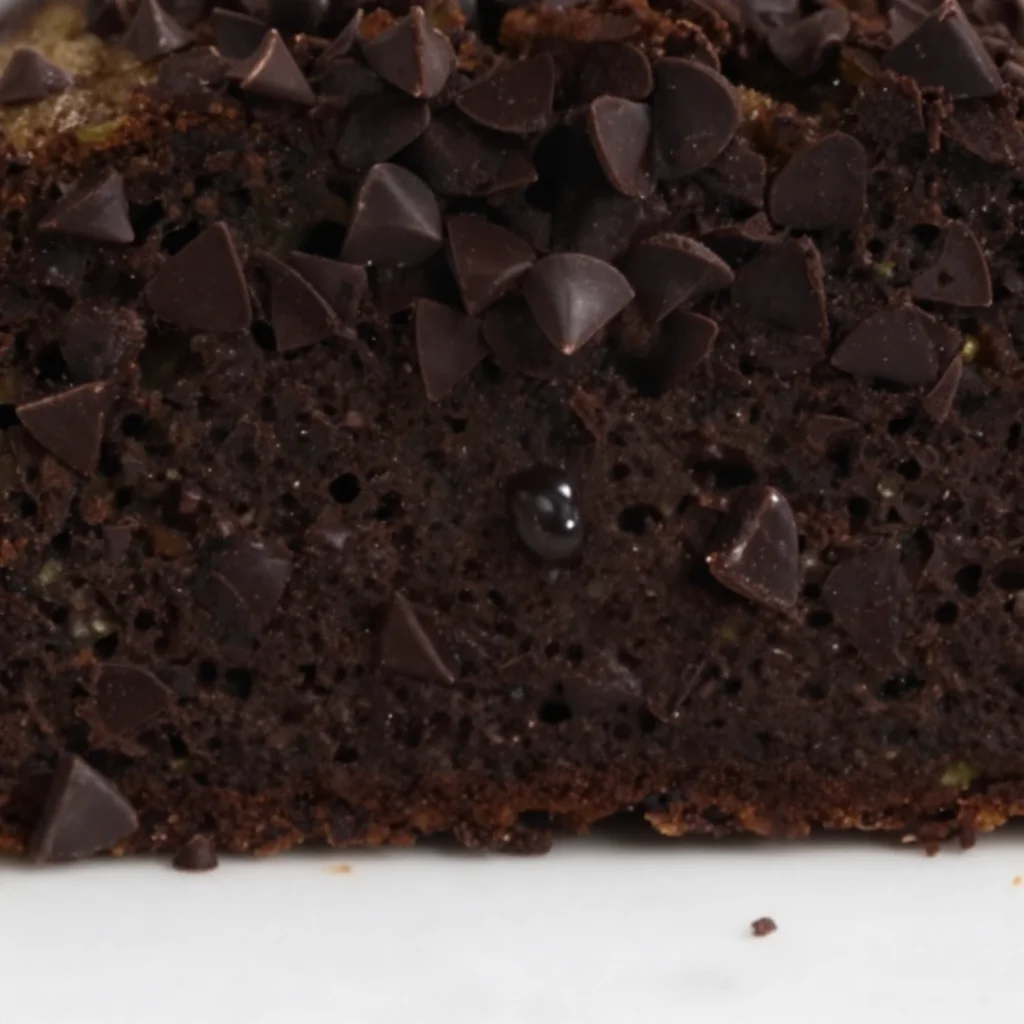
Quick Double Chocolate Zucchini Bread for Weeknight Prep
Double Chocolate Zucchini Bread: A Recipe That Feels Like Home
Welcome to my kitchen! I’m so glad you’ve decided to stop by today to explore one of my absolute favorite recipes: Double Chocolate Zucchini Bread! This delightful treat not only satisfies your sweet tooth but also gives a nod to the garden that we all love—yes, that sneaky zucchini that shows up every summer. This recipe combines the rich, indulgent flavors of chocolate with the moisture of zucchini, creating a loaf that’s both decadent and surprisingly wholesome. It’s the perfect pick-me-up for breakfast, a snack, or even dessert. Plus, it’s a great way to sneak in some veggies (shh, don’t tell the kids)!
There’s just something magical about the aroma of chocolate wafting through my kitchen. It takes me back to my childhood, where the scent of baking would drift through the house on lazy Sundays. My mom made zucchini bread every summer when our garden overflowed with those green beauties. At first, I was skeptical about anything green making its way into my dessert, but she swore by it. One slice in, and I was hooked! It was moist, chocolatey, and oh-so-delicious—a winning combination that turned me into a zucchini bread believer.
Today, I want to share not just the recipe, but the memories, tips, and tricks that make this Double Chocolate Zucchini Bread a beloved staple in my kitchen. Whether you’re a seasoned baker or just starting your culinary journey, I promise to guide you through every step in the most fun and approachable way. So, grab your favorite apron—let’s get baking!
A Slice of Nostalgia
Growing up, my summer vacations were filled with long, lazy days spent outdoors, and of course, we had our fair share of garden bounty. And oh, how those zucchinis multiplied! I remember one summer in particular when my mom decided to make her famous zucchini bread. Standing on my tiptoes at the counter, I helped her grate the zucchini, marveling at how something so unassuming could become something so delicious.
The real magic happened when she added cocoa powder and chocolate chips to the mix. “Trust me,” she said with a wink, “no one will guess there’s zucchini in here!” And she was right. My siblings and I devoured slice after slice, savoring the unique flavor and moist texture. It was our secret—an amazing treat with a veggie twist that we didn’t feel guilty about devouring. From that day on, I promised myself that I would carry on this tradition and share this delightful recipe with friends and family.
Ingredients
Here’s what you’ll need to whip up your own Double Chocolate Zucchini Bread:
-
2 cups finely grated zucchini
Fresh zucchini makes all the difference in moisture. If you don’t have fresh zucchini, you can substitute with summer squash, but aim for a similar texture! -
1 cup all-purpose flour
You can use whole wheat flour for a heartier texture or a gluten-free blend if you’re avoiding gluten! -
1 cup unsweetened cocoa powder
The star of our recipe! Dutch-process cocoa is less acidic than natural cocoa, which can give a richer taste. If you want a less intense flavor, use half cocoa powder and half all-purpose flour instead. -
1/2 cup granulated sugar
Adjust to your sweetness preference—feel free to substitute with coconut sugar or a natural sweetener! -
1/2 cup brown sugar
For that rich caramel flavor. You can use all granulated sugar, but it would lose some of that deep sweetness. -
1/2 cup vegetable oil
You can swap this for melted coconut oil for a subtler flavor. Applesauce is a fantastic lower-calorie swap but will alter the texture slightly. -
2 large eggs
They add moisture and binding. If you’re looking for a vegan alternative, try using flaxseed meal mixed with water instead! -
1 teaspoon vanilla extract
A must for every baked good! Use pure vanilla extract for optimal flavor, or try almond extract for a unique twist. -
1 teaspoon baking soda
Essential for leavening! If you run out, baking powder can work in a pinch—just adjust the measurements accordingly. -
1/2 teaspoon salt
Never underestimate the power of salt in sweet recipes; it brings everything together! -
1 cup semi-sweet chocolate chips
Who doesn’t love a little extra chocolate? Dark chocolate chips or even white chocolate can be fun substitutions!
Step-by-Step Instructions
Now that we have our ingredients lined up, let’s dive into the baking process! Here’s a detailed guide to making this delicious loaf.
-
Preheat Your Oven:
Start by preheating your oven to 350°F (175°C). This is your first step towards ensuring even baking. While the oven heats, you can focus on prepping your loaf pan! -
Prepare Your Loaf Pan:
Grease a 9×5-inch loaf pan with oil or cooking spray. For an extra precaution against sticking, line the bottom and sides with parchment paper. This little tip makes flipping the bread out a breeze! -
Grate the Zucchini:
Grab your grater and finely grate the zucchini. It should yield about 2 cups. After grating, use a clean kitchen towel to squeeze out any excess moisture. This step is crucial to prevent a soggy loaf! -
Mix the Wet Ingredients:
In a mixing bowl, whisk together the vegetable oil, granulated sugar, brown sugar, and eggs until well combined. Then, mix in the vanilla extract. The combination should be light and fluffy. -
Combine the Dry Ingredients:
In another bowl, mix the flour, cocoa powder, baking soda, and salt. It’s essential to combine these dry elements before adding them to the wet mix to avoid clumps. -
Combine Wet and Dry Ingredients:
Gradually fold the dry mixture into the wet mixture. As you do this, be gentle! Overmixing can lead to a dense loaf. -
Fold in the Zucchini and Chocolate Chips:
Now, carefully bring in that zucchini and chocolate chips. Gently fold until just combined—this is where the magic happens! -
Pour Into the Loaf Pan:
Transfer your batter into the prepared loaf pan. Use a spatula to smooth the top for an even bake. -
Bake:
Place the loaf in the preheated oven and bake for about 50-60 minutes. Check for doneness by inserting a toothpick into the center. It should come out with a few moist crumbs, not wet batter! -
Cool and Remove:
Once it’s done baking, let the bread cool in the pan for about 10 minutes before transferring it to a wire rack. This allows steam to escape and helps the crust set! -
Slice and Enjoy:
Once cool, slice into that beautiful loaf! Whether you enjoy it warm or at room temperature, this bread is out of this world.
Serving Suggestions
When it comes to serving your Double Chocolate Zucchini Bread, let your creativity shine! Slice it up into generous portions and serve it warm with a pat of butter or a drizzle of honey. For an extra indulgence, consider a scoop of vanilla ice cream on the side or a dollop of whipped cream on top. You could even sprinkle some more chocolate chips or a dusting of powdered sugar for that café-style presentation. This loaf is just as delicious on its own or as part of a fun brunch spread alongside fresh fruit and coffee.
Recipe Variations
As with any recipe, there’s always room for creativity! Here are a few fun variations to consider:
-
Nutty Zucchini Bread: Add a cup of chopped walnuts or pecans for some delightful crunch.
-
Spicy Kick: Incorporate a teaspoon of cinnamon or even cayenne for a surprising twist that pairs beautifully with chocolate.
-
Fruity Surprise: Toss in a half cup of dried cherries or cranberries for a sweet and tangy contrast. You could also swap some zucchini for finely grated carrots!
-
Minty Fresh: Add a teaspoon of peppermint extract for a refreshing mint chocolate version—perfect for the holiday season!
-
Dairy-Free Option: Use almond milk or any non-dairy milk in place of eggs and oil to make this loaf suitable for a dairy-free diet!
Chef’s Notes
This Double Chocolate Zucchini Bread isn’t just a delightful treat; it’s an experience that evolves each time you make it. Over the years, I’ve played around with different add-ins, trying everything from espresso powder for a mocha flavor to orange zest for a citrusy twist. It’s fascinating how a simple recipe can shift with the seasons or what ingredients you have on hand. My biggest lesson? Always taste as you go! You might just discover the next big twist that will become a family favorite. And remember, the best recipes come filled with love, laughter, and a bit of messiness along the way!
FAQs and Troubleshooting
Q: What if my bread is too dry?
A: If your bread ends up dry, it could be due to over-baking or too much flour. Always check for doneness on the lower end of the baking time, and gently pack the flour into your measuring cup.
Q: Can I freeze this zucchini bread?
A: Absolutely! Once cooled, wrap it tightly in plastic wrap and then in aluminum foil, or place it in a freezer-safe bag. It can last for about 3 months in the freezer. Thaw at room temperature when you’re ready to enjoy!
Q: What should I do if I don’t have zucchini?
A: Don’t fret! You can use grated carrots, applesauce, or mashed bananas as alternatives, keeping in mind that the flavor profile will change a bit. But the result will still be delicious!
Q: How do I know when my bread is done?
A: A toothpick inserted into the center should come out clean or with just a few moist crumbs. If it comes out wet, give it a few more minutes before checking again.
Nutritional Info
This Double Chocolate Zucchini Bread is not only tasty but also a bit nutritious thanks to the zucchini! While the exact nutritional values can vary based on substitutions and portion sizes, a typical slice (out of 12) will generally be around:
- Calories: 210
- Fat: 10g
- Carbohydrates: 28g
- Fiber: 2g
- Protein: 3g
Enjoy the delightful balance of flavors that this recipe brings to your kitchen. With every slice, you’re not just indulging in a decadent treat; you’re creating memories, sharing stories, and maybe even sneaking in a few veggies! Happy baking, and don’t forget to share your own kitchen stories with me!
Print
Double Chocolate Zucchini Bread
- Total Time: 75 minutes
- Yield: 12 servings 1x
- Diet: Vegetarian
Description
A delightful and moist Double Chocolate Zucchini Bread that perfectly combines the richness of chocolate with the nutritious green veggie, making it a perfect treat for any time of the day.
Ingredients
- 2 cups finely grated zucchini
- 1 cup all-purpose flour
- 1 cup unsweetened cocoa powder
- 1/2 cup granulated sugar
- 1/2 cup brown sugar
- 1/2 cup vegetable oil
- 2 large eggs
- 1 teaspoon vanilla extract
- 1 teaspoon baking soda
- 1/2 teaspoon salt
- 1 cup semi-sweet chocolate chips
Instructions
- Preheat your oven to 350°F (175°C).
- Grease a 9×5-inch loaf pan with oil or cooking spray.
- Grate the zucchini and squeeze out excess moisture.
- Mix the vegetable oil, granulated sugar, brown sugar, and eggs until combined, then add vanilla extract.
- Combine the flour, cocoa powder, baking soda, and salt in another bowl.
- Fold the dry mixture into the wet mixture gently.
- Fold in the zucchini and chocolate chips until just combined.
- Pour the batter into the prepared loaf pan.
- Bake for 50-60 minutes, checking for doneness with a toothpick.
- Cool in the pan for 10 minutes, then transfer to a wire rack to cool completely.
- Slice and enjoy!
Notes
For variations, consider adding nuts, dried fruits, or spices for added flavor.
- Prep Time: 15 minutes
- Cook Time: 60 minutes
- Category: Dessert
- Method: Baking
- Cuisine: American
Nutrition
- Serving Size: 1 slice
- Calories: 210
- Sugar: 18g
- Sodium: 150mg
- Fat: 10g
- Saturated Fat: 3g
- Unsaturated Fat: 5g
- Trans Fat: 0g
- Carbohydrates: 28g
- Fiber: 2g
- Protein: 3g
- Cholesterol: 30mg
Keywords: zucchini bread, chocolate bread, baking, dessert, healthy dessert




