
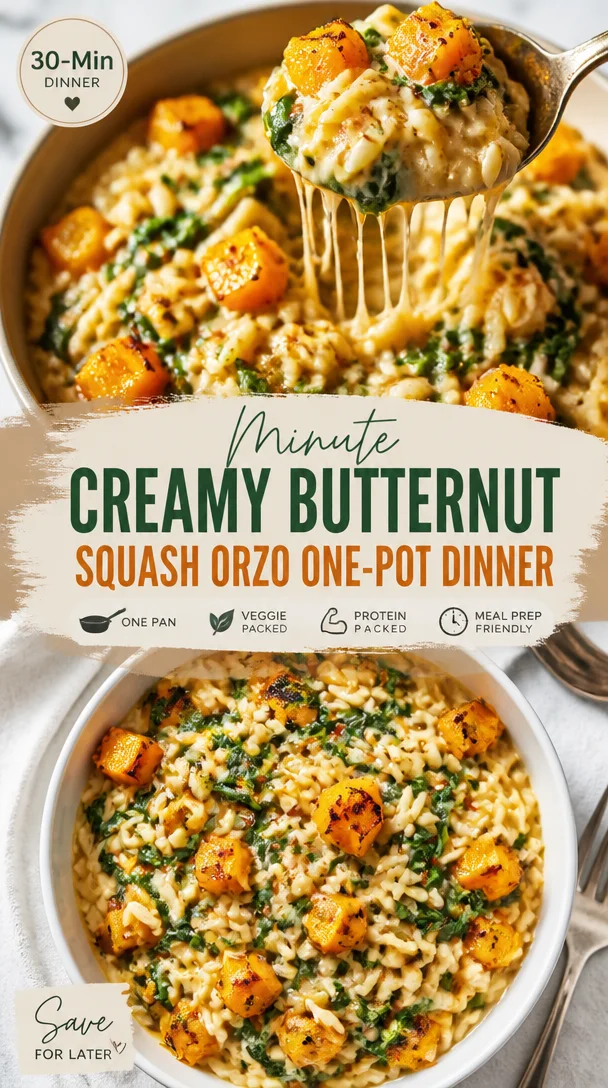
Minute Creamy Butternut Squash Orzo One-Pot Dinner
Creamy Butternut Squash Orzo: A Cozy Comfort Dish
Welcome to my kitchen, dear friends! Today, I’m thrilled to share one of my absolute favorite recipes — Creamy Butternut Squash Orzo. This dish is my chilly-weather staple and is packed full of warmth, flavor, and heart. If you’ve ever had one of those days where a hug in a bowl is exactly what you need, look no further. The creamy texture of the orzo, combined with the sweet, nutty notes of roasted butternut squash, creates a meal that feels like a cozy embrace.
Most days, you’ll find me in my kitchen surrounded by the comforting smells of spices, simmering ingredients, and laughter echoing off the walls. It’s a place where I not only create delicious food but also memories that last a lifetime. And isn’t that what cooking is all about? The joy of sharing with friends and family and creating new culinary adventures together!
As you delve into this creamy delight, remember that cooking is a journey. It doesn’t have to be perfect; it just needs to be made with love, some good tunes on in the background, and maybe a glass of wine to sip on while you cook! Get ready to chop, sauté, and toss your way to an incredible meal that not only fills your stomach but also warms your heart.
A Personal Kitchen Tale
Let me take you back to a chilly autumn evening a few years ago. The snow was beginning to tumble gently outside, painting the world in a soft white layer. I had just returned from the farmers’ market, my arms laden with vibrant, fresh produce, including a plump butternut squash that seemed to call my name.
As I peeled and diced the squash, the sweet, earthy aroma filled my kitchen. My best friend stopped by for a spontaneous dinner catch-up, and that’s when the magic happened! Together we chopped and sautéed, filling the air with the smell of garlic and thyme. We shared stories and laughter, and by the time we sat down to enjoy our creamy creation, we not only had a delicious meal but also memories that would make us chuckle every time.
That evening made me realize how food has an incredible power to bring people closer together. So, grab your apron and let’s whip up some of that magic in your own kitchen!
Ingredients
Here’s what you’ll need for the Creamy Butternut Squash Orzo:
-
Orzo Pasta: This rice-shaped pasta is perfect for absorbing flavors and creates a lovely creamy texture when cooked. If you’re gluten-free, consider using brown rice or quinoa.
-
Butternut Squash: This beauty adds sweetness and depth. Look for one that feels heavy for its size. If you can’t find butternut squash, sweet potato works as a great substitute.
-
Garlic: Fresh garlic brings a wonderful aromatic flavor. You could also opt for garlic powder in a pinch, but fresh is best!
-
Onion: A staple in many dishes, diced yellow onion offers sweetness when caramelized. You could swap in shallots if you’re in the mood for something more delicate.
-
Vegetable Broth: Using broth enhances the depth of flavor. You can use chicken broth if you prefer a non-vegetarian option, or even water in a pinch.
-
Heavy Cream: This is what gives our dish that luscious creaminess. For a lighter option, feel free to use coconut cream or a non-dairy alternative like cashew cream.
-
Parmesan Cheese: Freshly grated, it adds saltiness and depth to the dish. Nutritional yeast is a fantastic dairy-free substitute that still provides a cheesy flavor.
-
Spinach: A handful of fresh spinach adds color and nutrients. You can swap this for kale or Swiss chard if you prefer something heartier.
-
Olive Oil: For sautéing and adding rich flavor. Avocado oil is a nice alternative if you want something with a higher smoke point.
-
Salt and Pepper: Basic but essential! Always season to taste for that perfect punch.
Step-by-Step Instructions
Now, let’s get cooking! Follow these simple steps to make your very own Creamy Butternut Squash Orzo:
-
Prep the Squash: Start by preheating your oven to 400°F (200°C). While it warms up, slice the butternut squash in half lengthwise, scoop out the seeds, and dice both halves into 1-inch cubes. Toss them in a bowl with a drizzle of olive oil, a sprinkle of salt, and cracked black pepper. Spread them on a baking sheet and roast for about 25-30 minutes until they’re tender and caramelized. This step brings out their natural sweetness. (Pro tip: roasting the squash enhances its flavor, so don’t skip this!)
-
Cook the Orzo: In a large pot, bring vegetable broth to a boil. Add the orzo and cook according to package instructions until al dente, usually about 8-10 minutes. Remember to stir occasionally to prevent sticking. Once done, drain and set aside but keep a bit of that broth — you’ll need it later!
-
Sauté the Aromatics: In the same pot, add a splash of olive oil over medium heat. Toss in the diced onion and sauté until translucent — about 5 minutes. Then, add in the minced garlic and cook for another minute until fragrant. The aroma should be heavenly!
-
Combine: Once the onions are golden, add the roasted butternut squash to the pot. Mash some of it lightly with the back of your spoon, leaving some chunks for texture. Add in the cooked orzo, a splash of the reserved vegetable broth, and stir to combine everything.
-
Add Creaminess: Pour in the heavy cream and mix well, allowing everything to be enveloped in that luscious goodness. If it seems too thick, don’t hesitate to add more broth to achieve your desired consistency.
-
Finishing Touch: Stir in the fresh spinach and grated Parmesan cheese (or nutritional yeast). Keep stirring until the spinach wilts and the cheese melts into the dish. Season with salt and pepper to taste.
-
Plate It Up: Serve immediately! I love garnishing my orzo with a little extra Parmesan and a drizzle of olive oil. It makes it look fancy without much fuss!
Serving Suggestions
For a gorgeous presentation, serve your Creamy Butternut Squash Orzo in shallow bowls. Top it with freshly grated Parmesan, and maybe a sprinkle of crushed red pepper flakes for a little heat! A side of crusty bread or a simple arugula salad complements this dish perfectly. Don’t forget a glass of your favorite wine or a warm herbal tea to enhance the experience!
Recipe Variations
Feeling adventurous? Here are a few fun twists you can try:
- Spicy Kick: Add a teaspoon of red pepper flakes or diced jalapeños to the onion and garlic for a hot version.
- Herb Infusion: Stir in fresh herbs like thyme, sage, or rosemary for extra flavor — these pair wonderfully with squash.
- Protein Boost: Toss in grilled chicken, sautéed shrimp, or chickpeas for a heartier meal.
- Nutty Crunch: Top with toasted walnuts or pumpkin seeds for added texture and a nutty flavor.
- Vegan Delight: Swap heavy cream for coconut cream and leave out the cheese for a creamy vegan version.
Chef’s Notes
This recipe has definitely evolved over the years! Initially, it was just a simple pasta dish I threw together with whatever ingredients I had. But after numerous experiments and family feedback, it has morphed into this creamy, cozy treat we all adore. Don’t be surprised if you find yourself getting creative as you make it — that’s the magic of cooking!
FAQs and Troubleshooting
Q: My butternut squash is too hard to peel! Any tips?
A: Try microwaving it for 2-3 minutes to soften it a bit before peeling. Alternatively, you can roast it whole for about 20 minutes to make peeling easier.
Q: Can I use whole grain orzo?
A: Absolutely! It may have a slightly different texture compared to traditional orzo, but it will taste fantastic and add a lovely nutty flavor.
Q: What if my orzo is too sticky?
A: This can happen if it’s overcooked or if it doesn’t have enough liquid. Make sure to stir it gently while cooking and add a splash of broth to loosen it up if needed.
Q: How can I make it ahead of time?
A: You can roast the squash and cook the orzo beforehand, then store them separately in the fridge. When you’re ready to eat, combine and heat everything with the cream fresh, adding spinach just before serving for the best texture.
Nutritional Info
While I encourage everyone to enjoy their food, if you’re counting calories or watching your nutrition, here’s a quick overview (per serving):
- Calories: 400
- Protein: 12g
- Carbohydrates: 50g
- Fat: 16g
- Fiber: 4g
And there you have it! Your very own Creamy Butternut Squash Orzo. I’m so excited for you to make and share this delicious dish. Remember, cooking is about experimenting and finding what YOU love. So get in there, have fun, and savor every bite! Happy cooking!
Print
Creamy Butternut Squash Orzo
- Total Time: 55 minutes
- Yield: 4 servings 1x
- Diet: Vegetarian
Description
A cozy comfort dish featuring creamy orzo pasta and roasted butternut squash, perfect for chilly weather.
Ingredients
- 1 cup Orzo Pasta
- 1 medium Butternut Squash, diced
- 3 cloves Garlic, minced
- 1 medium Onion, diced
- 4 cups Vegetable Broth
- 1 cup Heavy Cream
- 1/2 cup Parmesan Cheese, grated
- 2 cups Fresh Spinach
- 2 tablespoons Olive Oil
- Salt and Pepper, to taste
Instructions
- Prep the Squash: Preheat your oven to 400°F (200°C). Slice the butternut squash in half lengthwise, scoop out the seeds, and dice into 1-inch cubes. Toss with olive oil, salt, and pepper, then roast for 25-30 minutes.
- Cook the Orzo: In a large pot, bring vegetable broth to a boil. Add orzo and cook until al dente, about 8-10 minutes. Drain and reserve some broth.
- Sauté the Aromatics: In the same pot, heat olive oil over medium heat. Add diced onion and sauté until translucent, then add garlic and cook for one more minute.
- Combine</strong: Add roasted butternut squash to the pot, mashing some lightly. Stir in cooked orzo and a splash of reserved broth.
- Add Creaminess: Pour in heavy cream, mixing well. Adjust consistency with more broth if necessary.
- Finishing Touch: Stir in spinach and Parmesan cheese. Season with salt and pepper to taste.
- Plate It Up: Serve immediately, garnishing with extra Parmesan and a drizzle of olive oil.
Notes
Feel free to add spices or proteins as desired. This dish pairs well with a side salad or crusty bread.
- Prep Time: 15 minutes
- Cook Time: 40 minutes
- Category: Main Course
- Method: Baking
- Cuisine: Italian
Nutrition
- Serving Size: 1 serving
- Calories: 400
- Sugar: 5g
- Sodium: 500mg
- Fat: 16g
- Saturated Fat: 9g
- Unsaturated Fat: 5g
- Trans Fat: 0g
- Carbohydrates: 50g
- Fiber: 4g
- Protein: 12g
- Cholesterol: 40mg
Keywords: butternut squash, creamy orzo, comfort food, vegetarian dish

One-Pan 30-Minute Creamy Butternut Squash Butter Chicken
Creamy Butternut Squash Butter Chicken: A Cozy Twist on a Classic
Welcome back to my kitchen, food lovers! Today, we’re diving into a soul-soothing dish that’s sure to become a favorite in your home: Creamy Butternut Squash Butter Chicken. If you’re someone who relishes that warm, inviting smell wafting through your kitchen, and the thought of an unforgettable meal excites you, you’re in for a treat!
Picture this: tender chicken simmered in a luxuriously creamy sauce filled with spices, and the unexpected sweetness of roasted butternut squash. This dish is packed with flavor, a pop of color, and a comforting vibe that’ll make you feel warm and fuzzy inside. Perfect for family dinners, special occasions, or just a cozy evening at home, this butter chicken will light up your taste buds and spark joy around your dinner table!
Personal Story
This recipe holds a special place in my heart. I remember the first time I attempted to make butter chicken; it was a chilly fall evening, and I was missing my family back home. Wanting to recreate a touch of nostalgia, I decided to experiment with my mom’s traditional recipe by adding roasted butternut squash for a creamy twist. As I tossed the squash in the oven, the vibrant orange hue brought a smile to my face, reminding me of the cozy family dinners we used to share around our table.
As the savory scents filled my kitchen, I imagined my family gathered around, laughter echoing through our home. When I took the first bite, I was transported back to those moments—weaving new memories while honoring old ones. My Butternut Squash Butter Chicken turned out to be a flavorful homage, and ever since, it has been a staple in our kitchen, bringing friends and family together for delightful gatherings. Now, I want to share this incredible recipe and the memories it captures with you!
Ingredients
Here’s what you’ll need to create this comforting dish:
-
Chicken Thighs (2 lbs): I prefer bone-in, skin-on thighs for richer flavor and moisture. If you want a lighter option, boneless, skinless thighs work too.
-
Butternut Squash (1 medium): The star of the dish! Roasting it caramelizes its natural sweetness. If you can’t find butternut squash, sweet potatoes are a great alternative.
-
Butter (4 tablespoons): For that classic buttery flavor. You can substitute with ghee or olive oil for a dairy-free version.
-
Onion (1 large): Adds depth to the sauce. You can use shallots for a sweeter taste.
-
Garlic (4 cloves): Freshly minced for the best flavor—but store-bought minced garlic can work in a pinch.
-
Ginger (1 tablespoon; grated): Adds warmth and a bit of zing. Ground ginger may be used if you don’t have fresh on hand, but adjust the quantity accordingly.
-
Coconut Milk (1 can; about 13.5 oz): For creaminess without dairy. Almond or cashew cream can substitute for a nutty twist.
-
Tomato Paste (2 tablespoons): Adds richness and balance. If you’re looking for a lower acid option, roasted red pepper puree works wonders.
-
Spices (1 tsp Garam Masala, 1 tsp Cumin, 1 tsp Coriander, and 1/2 tsp Turmeric): These warm spices provide the classic butter chicken flavor. You can adjust the spices to your taste or add a pinch of cinnamon for an extra layer.
-
Lemon Juice (2 tablespoons): For a bit of brightness to cut the creaminess. You can use lime juice for a different citrus twist.
-
Salt and Pepper: To taste, making sure everything combines beautifully.
Step-by-Step Instructions
-
Prep the Butternut Squash: Preheat your oven to 400°F (200°C). Cut the squash in half, scoop out the seeds, and peel it. Dice it into 1-inch cubes. Spread them on a baking sheet, drizzle with olive oil, and sprinkle with salt and pepper. Roast for about 25-30 minutes until tender and caramelized. (Pro tip: Don’t overcrowd the pan; give the squash enough space to roast beautifully!)
-
Cook Your Chicken: While the squash is roasting, heat a large skillet or Dutch oven over medium heat. Add 2 tablespoons of butter, then season the chicken thighs with salt and pepper. Once the butter is melted and bubbly, add your chicken to the pan, skin-side down. Cook for about 5-7 minutes until golden brown. Flip and cook for another 5-7 minutes. Remove and set aside. (Chef hack: Using chicken with skin adds richness—don’t skip this step!)
-
Sauté Aromatics: In the same skillet, add the remaining butter, then toss in the diced onion. Cook for about 5 minutes until translucent. Add the minced garlic and grated ginger, cooking for another minute until fragrant. (This is where your kitchen starts to smell heavenly!)
-
Create the Sauce: Stir in the tomato paste, letting it cook for about a minute. Then add the spices—garam masala, cumin, coriander, and turmeric. Stir continuously to toast the spices, allowing their vibrant flavors to bloom.
-
Incorporate Coconut Milk: Pour in the coconut milk, stirring gently to combine. Scrape the bottom of the pan to release any delicious brown bits. (Those bits are flavor gold!)
-
Return Chicken and Add Squash: Place the chicken back in the skillet, along with the roasted butternut squash. Bring everything to a simmer. Cover and reduce the heat, allowing it to cook for about 20-25 minutes, or until the chicken reaches an internal temperature of 165°F (75°C).
-
Finishing Touches: Once the chicken is cooked, remove it from the pan, and slice or shred it, then return it to the sauce. Stir in the lemon juice for that zesty kick, adjusting salt and pepper to your taste. (Taste as you go—this is your moment to make it truly yours!)
Serving Suggestions
To serve your Creamy Butternut Squash Butter Chicken, I love ladling the succulent chicken and sauce over a bed of fluffy basmati rice or creamy mashed potatoes. Garnish with freshly chopped cilantro or parsley for a touch of color and freshness. Serve with warm naan bread on the side to soak up all that delicious sauce—trust me, you won’t want to waste a drop!
Recipe Variations
Feeling adventurous? Here are some fun twists you can try:
- Vegan Version: Substitute the chicken with cubed tofu or chickpeas and use plant-based butter or oil.
- Spicy Kick: Add a chopped chili pepper or a pinch of cayenne in the sauce for an extra layer of heat!
- Vegetable Boost: Toss in some spinach or kale in the last few minutes of cooking for added nutrients and color.
- Nutty Flavor: Stir in some crushed peanuts or cashews for a delightful crunch.
Chef’s Notes
This recipe has become a family favorite, with my own twists evolving over the years. I once hosted a potluck and decided to serve this dish, and it was a crowd-pleaser! One friend even dubbed it “the ultimate comfort food.” There’s something magical about how a simple dish can build connections and create memories, and that’s what keeps me inspired in the kitchen. Just remember, cooking is all about having fun and making it your own, so don’t hesitate to experiment!
FAQs and Troubleshooting
-
Can I make this dish ahead of time? Absolutely! This butter chicken can be made a day in advance. Just reheat gently on the stove, adding a splash of coconut milk if it thickens too much in the fridge.
-
What if the sauce is too thick? If your sauce gets too thick, simply add a bit of chicken broth or water until it reaches your desired consistency.
-
Can I freeze this? Yes! Allow it to cool completely, then freeze it in airtight containers. It lasts about 3 months in the freezer.
-
How do I make it spicier? Add more garam masala or a dash of red pepper flakes while cooking, adjusting to your taste as you go.
Nutritional Info
While I generally avoid focusing too much on numbers, here’s a rough breakdown to consider:
- Calories per serving: Approximately 450
- Protein: 30g
- Fat: 28g (depending on the amount of butter used)
Feel free to adjust ingredient quantities according to your necessary dietary requirements!
And there you have it—my beloved Creamy Butternut Squash Butter Chicken! This dish is a true celebration of warmth and vibrant flavors, turning your kitchen into a haven of delicious memories, much like it did for me. I encourage you to gather your loved ones, try this recipe, and maybe even share a little of your own kitchen stories. Happy cooking! 🥘✨
Print
Creamy Butternut Squash Butter Chicken
- Total Time: 70 minutes
- Yield: 4 servings 1x
- Diet: Gluten-Free
Description
A cozy twist on classic butter chicken, featuring tender chicken simmered in a creamy butternut squash sauce.
Ingredients
- 2 lbs Chicken Thighs (bone-in, skin-on preferred)
- 1 medium Butternut Squash (or sweet potatoes)
- 4 tablespoons Butter (or ghee/olive oil for dairy-free)
- 1 large Onion
- 4 cloves Garlic (minced)
- 1 tablespoon Ginger (grated)
- 1 can Coconut Milk (about 13.5 oz)
- 2 tablespoons Tomato Paste
- 1 teaspoon Garam Masala
- 1 teaspoon Cumin
- 1 teaspoon Coriander
- 1/2 teaspoon Turmeric
- 2 tablespoons Lemon Juice (or lime juice)
- Salt and Pepper (to taste)
Instructions
- Prep the Butternut Squash: Preheat your oven to 400°F (200°C). Cut the squash in half, scoop out the seeds, and peel it. Dice it into 1-inch cubes. Spread them on a baking sheet, drizzle with olive oil, and sprinkle with salt and pepper. Roast for about 25-30 minutes until tender and caramelized.
- Cook Your Chicken: While the squash is roasting, heat a large skillet or Dutch oven over medium heat. Add 2 tablespoons of butter, then season the chicken thighs with salt and pepper. Once the butter is melted and bubbly, add your chicken to the pan, skin-side down. Cook for about 5-7 minutes until golden brown. Flip and cook for another 5-7 minutes. Remove and set aside.
- Sauté Aromatics: In the same skillet, add the remaining butter, then toss in the diced onion. Cook for about 5 minutes until translucent. Add the minced garlic and grated ginger, cooking for another minute until fragrant.
- Create the Sauce: Stir in the tomato paste and let it cook for about a minute. Then add the spices—garam masala, cumin, coriander, and turmeric. Stir continuously to toast the spices.
- Incorporate Coconut Milk: Pour in the coconut milk, stirring gently to combine. Scrape the bottom of the pan to release any delicious brown bits.
- Return Chicken and Add Squash: Place the chicken back in the skillet, along with the roasted butternut squash. Bring everything to a simmer. Cover and reduce the heat, allowing it to cook for about 20-25 minutes.
- Finishing Touches: Once the chicken is cooked, remove it from the pan, slice or shred it, then return it to the sauce. Stir in the lemon juice, adjusting salt and pepper to taste.
Notes
Serve over basmati rice or creamy mashed potatoes and garnish with cilantro or parsley. Naan bread pairs perfectly.
- Prep Time: 15 minutes
- Cook Time: 55 minutes
- Category: Main Course
- Method: Baking & Sautéing
- Cuisine: Indian
Nutrition
- Serving Size: 1 serving
- Calories: 450
- Sugar: 6g
- Sodium: 600mg
- Fat: 28g
- Saturated Fat: 14g
- Unsaturated Fat: 10g
- Trans Fat: 0g
- Carbohydrates: 35g
- Fiber: 5g
- Protein: 30g
- Cholesterol: 120mg
Keywords: butternut squash, butter chicken, creamy sauce
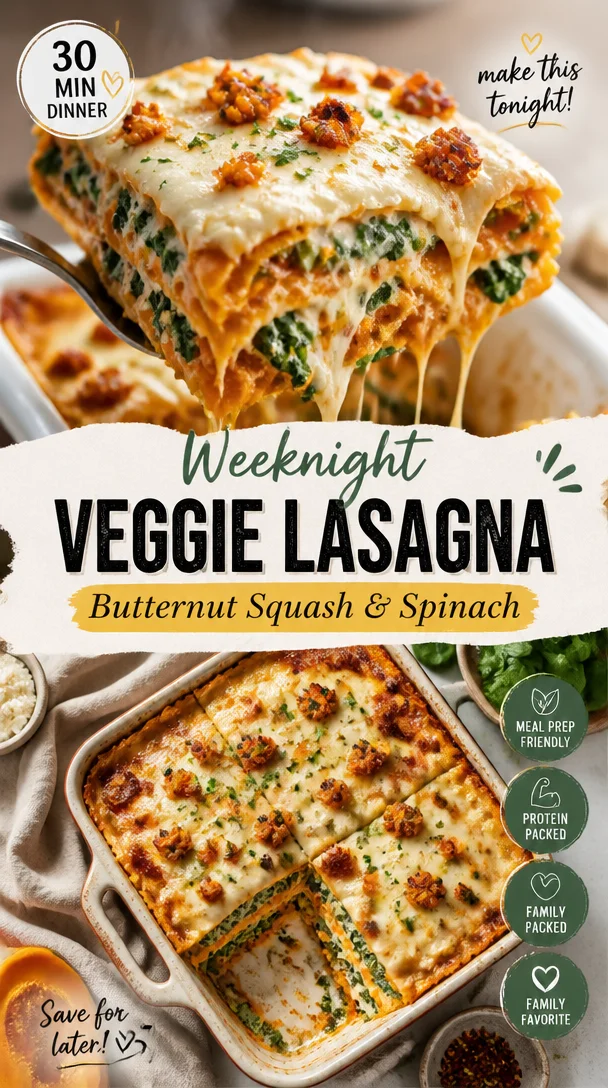
Weeknight Veggie Lasagna: Butternut Squash & Spinach
Butternut Squash and Spinach Lasagna: A Cozy Celebration of Flavors
Welcome to my kitchen, friends! Today, we’re diving into a dish that has become a staple in my home: Butternut Squash and Spinach Lasagna. This recipe is not just another meal; it’s a heartfelt celebration of flavors that embodies everything I love about cooking. There’s something magical about layering warm, cheesy goodness with colorful veggies and silky noodles. It’s the perfect dish for cozy weeknights, festive gatherings, or even a quiet Sunday when you just want to indulge a little.
I love this lasagna because it tells a story — one of family, gatherings, and the joy of preparing something special. Each layer represents a hug from the kitchen, and every bite takes you to a slice of comfort that feels like home. The creamy butternut squash combined with the earthy spinach creates a dance of flavors that’s downright irresistible. Whether you’re a seasoned chef or a novice in the kitchen, this recipe is designed to inspire confidence, creativity, and a little bit of playful messiness.
Join me as we explore the delightful journey of making this Butternut Squash and Spinach Lasagna—a dish fit for any occasion that will have your loved ones asking for seconds. So put on your apron, grab your favorite spatula, and let’s get cooking!
A Brief Dive into Nostalgia
Lasagna has always been a special dish in my family. I remember my grandmother rolling out her pasta on a Friday evening as the sun dipped low in the sky, casting a warm, golden light across the kitchen. The aroma of sautéed garlic and fresh basil filled the air, weaving its way into our hearts. She’d call me over to taste the ricotta mixture, and I’d plunge my spoon in gleefully, expecting a small morsel and inevitably ending up with a heady dollop of cheesy goodness.
But it wasn’t just regular lasagna; it was her version, packed with whatever vegetables were in season. One autumn, she introduced me to butternut squash and spinach, and that was the moment I fell in love with this vibrant, comforting dish. The sweetness of the squash balanced beautifully with the spinach’s earthiness, and looking back, it was that moment that fueled my passion for using fresh ingredients. Now, every time I make Butternut Squash and Spinach Lasagna, I think fondly of those evenings spent with Grandma, and I hope to pass on that love of food to you!
Ingredients
Let’s gather our ingredients! Here’s what you’ll need for this delightful Butternut Squash and Spinach Lasagna:
-
Lasagna Noodles
Choose between traditional or whole grain. You can also opt for no-boil noodles to save time! -
Butternut Squash
This sweet vegetable brings a lovely creaminess to your dish. If squash isn’t available, you can substitute with sweet potatoes or pumpkin. -
Fresh Spinach
Spinach is packed with nutrients and complements the sweetness of the squash perfectly. Frozen spinach works too; just be sure to thaw and drain it well! -
Ricotta Cheese
This creamy cheese adds a rich layer of flavor. If you’d like to lighten it up, use low-fat or even cottage cheese. -
Mozzarella Cheese
The gooey goodness that brings everything together. You can use part-skim mozzarella or even vegan cheese if you prefer. -
Parmesan Cheese
This adds a salty, nutty flavor that elevates the dish. Grated or shredded works well. Nutritional yeast makes a great vegan substitute! -
Eggs
They help bind the ricotta mixture. If you’re avoiding eggs, you can use a flax egg (1 tbsp flaxseed meal mixed with 2.5 tbsp water) as a substitute. -
Garlic
Fresh garlic enhances all the flavors in your dish. If you’re in a pinch, garlic powder can work as an alternative. -
Olive Oil
Use this for sautéing the spinach and garlic. Avocado oil is a great substitute! -
Nutmeg
Just a pinch in the ricotta adds a warm, aromatic touch. It pairs beautifully with squash! -
Salt and Pepper
Essential to bring all the flavors to life. You can also add herbs like Italian seasoning or red pepper flakes for a kick!
Step-by-Step Instructions
Now that we have our ingredients set, it’s time to cook! Let’s get into the nitty-gritty of creating this delicious dish.
Step 1: Prepare the Butternut Squash
First, let’s tackle that butternut squash. Peel, seed, and cube it! This might feel a bit daunting if you’re unfamiliar, but I promise it’s easier than it seems. Consider using a sturdy vegetable peeler and a sharp knife. Place the cubes in a pot of salted water, bringing it to a boil. Cook until the squash is tender, about 10-15 minutes. Drain and set aside. Pro tip: you can roast the squash for an extra depth of flavor—just toss it in olive oil, salt, and pepper before baking!
Step 2: Sauté the Spinach & Garlic
While the squash is cooking, sauté the spinach and garlic. Heat a tablespoon of olive oil in a large skillet over medium heat. Add minced garlic and cook until fragrant, about 1 minute. Toss in the spinach and cook until wilted, which should take about 3-4 minutes. Season lightly with salt and pepper. This step not only enhances the flavors but also reduces the water content in the spinach.
Step 3: Make the Ricotta Mixture
In a mixing bowl, combine the ricotta cheese, egg, a pinch of nutmeg, and a dash of salt and pepper. Mix it up until well combined. The egg is crucial for creating that perfect creamy texture, binding it all together seamlessly!
Step 4: Layer the Lasagna
Now, it’s time to assemble your lasagna! Preheat your oven to 375°F (190°C). In a 9×13 baking dish, start with a layer of the butternut squash. Follow it up with a layer of ricotta mixture, then a layer of sautéed spinach, and a sprinkle of mozzarella. Top with a layer of lasagna noodles. Repeat this layering process until you run out of ingredients, but make sure to finish with a generous layer of mozzarella and a sprinkle of Parmesan cheese on top.
Step 5: Bake to Perfection
Cover the lasagna with foil (to prevent over-browning) and bake in the preheated oven for about 30 minutes. After that, remove the foil and bake for another 15-20 minutes, until the cheese is bubbly and golden. There’s nothing quite like that cheese bubbling over the edges to get your stomach rumbling!
Step 6: Let it Rest
Once it’s out of the oven, allow your lasagna to rest for about 10-15 minutes before slicing. This step is vital as it helps the layers set, making it easier to serve. I know this waiting game can be tough, but your patience will be rewarded!
Serving Suggestions
When it comes to serving your Butternut Squash and Spinach Lasagna, a simple yet beautiful presentation goes a long way. Cut into hearty squares and serve on wide plates. A light drizzle of balsamic glaze or a sprinkle of fresh herbs like basil or parsley can make the dish pop! Pair it with a light salad dressed in lemon vinaigrette for a refreshing contrast.
Recipe Variations
- Add More Veggies: Feel free to sneak in some roasted zucchini or mushrooms for added texture and flavor.
- Spicy Kick: Mix in some crushed red pepper flakes or diced jalapeños if you crave a bit of heat!
- Herb Infusion: Incorporate fresh herbs like thyme or sage in the ricotta mixture for an aromatic twist.
- Vegan Version: Swap ricotta for blended tofu and nutritional yeast, use vegan cheese, and skip the egg.
- Quinoa Layer: Add a layer of cooked quinoa between the squash and spinach for extra protein!
Chef’s Notes
Every time I make this Butternut Squash and Spinach Lasagna, I’m reminded of my grandmother’s joyful kitchen. I’ve made tweaks over the years—like using kale instead of spinach or even adding some caramelized onions because, why not? The best part about cooking is that it’s adaptable to your taste, so don’t hesitate to let your creativity shine!
I often find that this lasagna tastes even better the next day after the flavors have melded overnight. It’s a perfect make-ahead meal, and leftovers (if you have any!) are a delightful lunch to look forward to.
FAQs and Troubleshooting
Q1: Why is my lasagna watery?
A: Watery lasagna can happen when the vegetables release moisture. To avoid this, make sure to drain your cooked spinach well and use less watery vegetables.
Q2: Can I freeze the lasagna?
A: Absolutely! Just make sure to wrap it tightly in foil and store it in an airtight container. Thaw it in the fridge overnight before reheating.
Q3: What do I do if I run out of cheese?
A: You can always substitute with a different type of cheese you have on hand, or reduce the amount on each layer while adding more veggies instead!
Q4: How long will it keep in the fridge?
A: Your lasagna will be good for up to 3-4 days when stored in an airtight container. Just reheat it in the oven or microwave before serving!
Whether you’re looking to impress guests or just enjoy a cozy night in, this Butternut Squash and Spinach Lasagna is a heartwarming dish that embodies everything we love about food. I hope this recipe brings as much joy to your kitchen as it does to mine! Happy cooking, and don’t forget to have fun with it!
Print
Butternut Squash and Spinach Lasagna
- Total Time: 65 minutes
- Yield: 4 servings
- Diet: Vegetarian
Description
A warm, cheesy lasagna layered with butternut squash, spinach, and rich cheeses, perfect for cozy nights.
Ingredients
- Lasagna Noodles
- Butternut Squash
- Fresh Spinach
- Ricotta Cheese
- Mozzarella Cheese
- Parmesan Cheese
- Eggs
- Garlic
- Olive Oil
- Nutmeg
- Salt
- Pepper
Instructions
- Prepare the Butternut Squash: Peel, seed, and cube it. Cook in salted boiling water until tender, about 10-15 minutes. Drain and set aside.
- Sauté the Spinach & Garlic: Heat olive oil in a skillet, add minced garlic, and cook until fragrant. Add spinach and cook until wilted.
- Make the Ricotta Mixture: Combine ricotta cheese, egg, nutmeg, salt, and pepper in a mixing bowl and mix until well combined.
- Layer the Lasagna: In a baking dish, layer butternut squash, ricotta mixture, sautéed spinach, and mozzarella, then repeat layers, finishing with mozzarella and Parmesan on top.
- Bake to Perfection: Cover with foil and bake at 375°F (190°C) for 30 minutes, then remove foil and bake an additional 15-20 minutes.
- Let it Rest: Allow lasagna to rest for 10-15 minutes before slicing.
Notes
This lasagna tastes even better the next day and can be made ahead of time. Great for leftovers and easy to freeze.
- Prep Time: 20 minutes
- Cook Time: 45 minutes
- Category: Main Course
- Method: Baking
- Cuisine: Italian
Nutrition
- Serving Size: 1 serving
- Calories: 380
- Sugar: 6g
- Sodium: 450mg
- Fat: 15g
- Saturated Fat: 6g
- Unsaturated Fat: 7g
- Trans Fat: 0g
- Carbohydrates: 45g
- Fiber: 5g
- Protein: 20g
- Cholesterol: 70mg
Keywords: lasagna, butternut squash, spinach, vegetarian recipes, comfort food
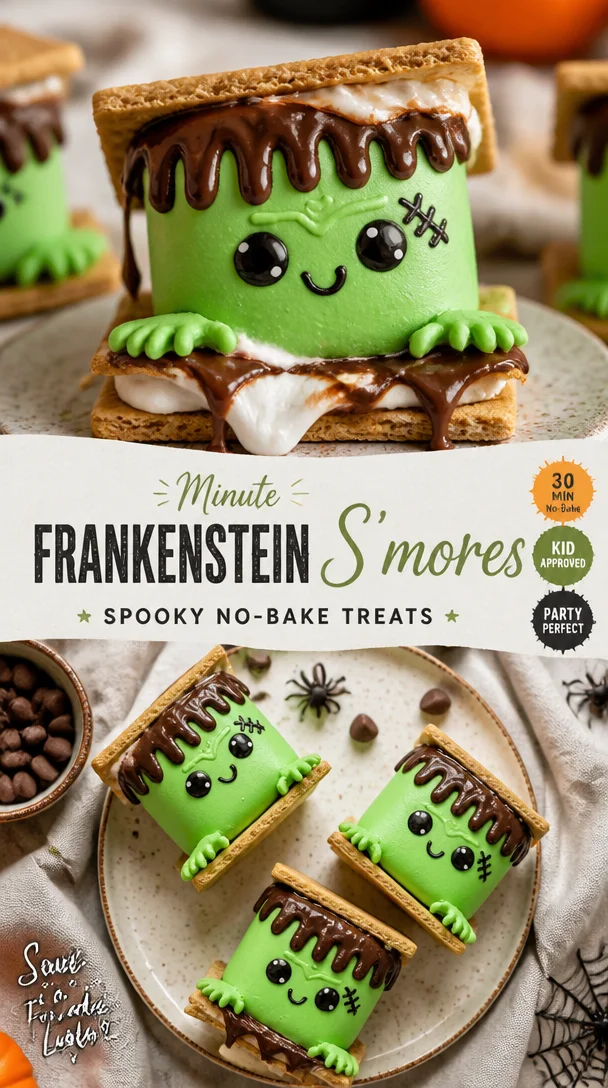
Minute Frankenstein S’mores: Spooky No-Bake Treats
Frankenstein S’mores: A Spooktacular Twist on a Classic Treat
Welcome, my fellow food lovers! Today, we’re diving into a fun kitchen adventure that’s perfect for anyone looking to add a little spooky flair to their dessert table. Inspired by the beloved campfire classic, I’m excited to introduce you to my Frankenstein S’mores: a ghoulishly green twist that’s just as delicious as the original without losing that playful charm we all adore. Whether you’re hosting a Halloween party, a cozy movie night, or just in the mood for some treats that will impress friends and family, these s’mores are sure to steal the show!
Let’s face it: there’s something magical about the combination of melted chocolate, sticky marshmallows, and crispy graham crackers. They transport us back to our childhood, reminding us of laughter around the campfire and sticky fingers at sleepovers. Now, imagine taking that nostalgic recipe and adding a modern, monstrous twist. Trust me, your taste buds will thank you!
As we embark on this sugary journey, I’ll be your guide, sharing personal stories, essential tips, and every step of the way to ensure your Frankenstein S’mores are a hit. So grab your apron (or don’t; I know how messy things can get), and let’s get cooking!
A Sweet Memory
I have a particularly fond memory that revolves around s’mores. It takes me back to those summer nights spent at my grandparents’ cabin in the woods. You could smell the pine trees mingling with the smoke from the campfire as my siblings and I giggled, dodging around the flickering firelight. My grandmother would always station herself at the fire, expertly roasting marshmallows to achieve that perfect golden-brown texture. I remember eagerly waiting for my turn, clutching my graham crackers and chocolate.
One night, in a cheeky spirit of culinary creativity, we decided to switch things up. Instead of regular chocolate, we rummaged through the pantry and found some colorful candies. We dubbed our creation “witches’ s’mores” that night, and it sparked an idea that never truly left me. Now, as an adult, I love taking simple recipes and putting a whimsical spin on them, just like that night. With Halloween around the corner, I thought it was time to breathe new life into my childhood nostalgia with these Frankenstein S’mores!
Ingredients
Here’s what you’ll need to whip up these delightful treats:
-
Graham Crackers:
- Explanation: The classic base for s’mores! Their crunchy texture and honey sweetness are essential.
- Substitution Tips: You can swap them with chocolate graham crackers for a chocolatey boost or use gluten-free options if needed.
-
Green Marshmallows (or regular plus food coloring):
- Explanation: These are crucial for that Frankenstein vibe.
- Quick Chef Insight: You can actually use white marshmallows and dip them in green candy melts for an even more vibrant look!
-
Chocolate Bars:
- Explanation: Mini chocolate bars work best for easy melting and layering.
- Substitution Tips: Use dark, milk, or even white chocolate, depending on your preference, or try flavored chocolates like peppermint for a fun twist.
-
Vanilla Frosting:
- Explanation: This will act as our “green goo” to make these s’mores extra creepy.
- Chef Insight: If you’d like a healthier option, try Greek yogurt mixed with a bit of green food coloring.
-
Plastic “Monster” Eyeballs (optional):
- Explanation: These are purely for decoration and fun!
- Fun Tip: You can find edible candy eyeballs for a sweet touch instead!
-
Cooking Spray (optional):
- Explanation: Helps prevent sticking if you’re using a pan method.
- Chef Insight: Just a light spray will do; we don’t want our marshmallows to slide off!
Step-by-Step Instructions
Now that we’ve got our ingredients lined up, let’s dive right into making these spooky treats! Follow along and don’t hesitate to get messy—after all, kitchen magic often comes with a sprinkle of chaos.
-
Prep Your Ingredients:
- Gather all your ingredients and preheat your oven to 350°F (175°C) if you’re using it. This will make the s’mores nice and gooey inside!
-
Line Your Baking Tray:
- If going the oven route, line a baking tray with parchment paper. Be generous with that spray to avoid any sticky situations.
-
Layer the Graham Crackers:
- Take a graham cracker and place it on the tray. You can break them in half if you prefer smaller s’mores or keep them whole for a substantial bite.
-
Add the Chocolate:
- Place a piece of your chosen chocolate bar on top of the graham cracker. Feel free to use layers if you’re feeling adventurous!
-
Melt the Marshmallows:
- Now, either roast marshmallows over the fire, use a kitchen torch, or pop them in the microwave for about 10-15 seconds just until they start to puff up. Try not to overdo it!
-
Assemble the S’mores:
- Top those gooey marshmallows with a second graham cracker. Press down gently so they stick together, and let the melted chocolate do its magic.
-
Frost with Green Goo:
- Smear vanilla frosting on top of the assembled s’mores to create that creepy effect. Don’t skimp on the “goo”—this is what makes them Frankenstein!
-
Decorate with Eyeballs:
- If using edible eyeballs, now’s the time to stick them on for that perfectly frightening look!
-
Chill or Serve Warm:
- You can serve these immediately for that gooey factor or pop them in the fridge for a bit if you prefer them a bit firm.
Serving Suggestions
To really make these Frankenstein S’mores pop, consider arranging them on a platter alongside some fake spider webs and mini plastic spiders for a fun Halloween touch. You could even place a few candles around them for that perfect ambiance. For a cozy movie night, serve them on a rustic wooden board, paired with your favorite film snacks. And don’t forget to have napkins on hand—these treats can get a little messy (in the best way possible)!
Recipe Variations
Looking to put your own spin on these Frankenstein S’mores? Here are a few fun variations to consider:
- Nutty Crunch: Add crushed nuts like almonds or peanuts for a delightful crunch.
- Spooky Spices: A sprinkle of cinnamon or cayenne can add a warm bite to the frosting!
- Different Flavors: Replace the chocolate with caramel squares for a sweet twist, or use flavored marshmallows, such as strawberry or mint.
- Vegan Version: Swap regular marshmallows for vegan options and use dairy-free chocolate for a plant-based treat.
- Mini-Mores: Use mini graham crackers and marshmallows for bite-sized treats perfect for parties.
Chef’s Notes
When I created these Frankenstein S’mores, I was reminded of how fun and creative the kitchen can be, especially when you’re not afraid to experiment. I remember one year I attempted a “Monster Marshmallow Cake” for a Halloween party, which ended in a flour explosion and a lot of laughter. The best part of cooking is embracing the mess and madness that comes with it. This recipe has evolved over time, wandering from traditional s’mores to something a little more whimsical and spooky.
FAQs and Troubleshooting
Q: Can I make these s’mores in advance?
Absolutely! You can prepare the components separately and assemble them right before serving to maintain that gooey goodness.
Q: My marshmallows aren’t melting! What did I do wrong?
Make sure your marshmallows are puffed up and soft before adding them to the s’mores. If they seem stiff, try microwaving them for an extra few seconds.
Q: Can I use different flavors for the frosting?
Of course! Feel free to experiment with chocolate, strawberry, or even mint frosting to match your flavor preferences. The sky’s the limit!
Q: How do I store leftovers?
If you have any s’mores left (unlikely!), store them in an airtight container at room temperature for up to three days. Just be aware they may lose some of their delicious gooeyness.
Nutritional Info
While indulgent, these Frankenstein S’mores can be a fun treat! Though I don’t typically offer nutritional info, a single treat will usually clock in around 150-200 calories depending on your ingredients—sugar is a devilish friend.
And there you have it—your ultimate guide to making irresistible Frankenstein S’mores! I hope this recipe not only brings a hint of spookiness to your kitchen but also stirs up fond memories of your own. Remember, cooking is about joy, exploration, and perhaps a touch of creative madness. Now roll up your sleeves, get those ingredients ready, and let’s make some food memories together! Happy cooking, and may your treats be as delightful as your kitchen tales!
Print
Frankenstein S’mores
- Total Time: 30 minutes
- Yield: 12 servings
- Diet: Vegetarian
Description
A spooktacular twist on the classic s’mores, featuring green marshmallows and chocolate goo.
Ingredients
- Graham Crackers
- Green Marshmallows (or regular plus food coloring)
- Chocolate Bars
- Vanilla Frosting
- Plastic “Monster” Eyeballs (optional)
- Cooking Spray (optional)
Instructions
- Prep Your Ingredients: Gather all your ingredients and preheat your oven to 350°F (175°C) if you’re using it.
- Line Your Baking Tray: If going the oven route, line a baking tray with parchment paper and spray it lightly.
- Layer the Graham Crackers: Place a graham cracker on the tray, breaking them in half if desired.
- Add the Chocolate: Place a piece of chocolate bar on top of the graham cracker.
- Melt the Marshmallows: Roast marshmallows, use a kitchen torch, or microwave them until puffy.
- Assemble the S’mores: Top marshmallows with a second graham cracker and press down gently.
- Frost with Green Goo: Apply vanilla frosting on top of the assembled s’mores.
- Decorate with Eyeballs: Stick on edible eyeballs if using.
- Chill or Serve Warm: Serve immediately or chill in the fridge for a firmer texture.
Notes
Feel free to customize with nuts, spices, or different chocolates to match personal taste.
- Prep Time: 15 minutes
- Cook Time: 15 minutes
- Category: Dessert
- Method: Baking
- Cuisine: American
Nutrition
- Serving Size: 1 s'more
- Calories: 200
- Sugar: 15g
- Sodium: 150mg
- Fat: 7g
- Saturated Fat: 3g
- Unsaturated Fat: 4g
- Trans Fat: 0g
- Carbohydrates: 29g
- Fiber: 1g
- Protein: 2g
- Cholesterol: 0mg
Keywords: Halloween, dessert, s'mores, fun, easy recipes, spooky treats

Mummy Brownies
Mummy Brownies: A Spooktacular Treat for Halloween!
Welcome to my kitchen, fellow food lovers! I’m Olivia Bennett, your go-to home cook who believes that every meal can create a memory and every dessert tells a story. As Halloween creeps around the corner, it’s time to unleash your inner culinary ghoul and whip up something delightfully spooky. Today, I’m sharing my beloved Mummy Brownies that are ooey-gooey, chocolatey, and just the right amount of festive. Whether you’re hosting a Halloween party, need a fun treat for your kids’ school, or just want to spice up your snack table, these brownies will bring out the joy of the season.
What I love most about these Mummy Brownies is not just their captivating appearance but the warmth they bring to gatherings. Imagine your guests oohing and aahing as they spot these adorable mummies nestled among other treats. Plus, who can resist a rich brownie topped with a ghostly drizzle? So grab your spatula, put on your apron (preferably one that’s messy like mine!), and let’s get baking!
A Memory to Cherish
Let me take you back to the first Halloween I made these Mummy Brownies. My daughter, Mia, was just eight years old and was bursting with excitement to decorate our front porch with cobwebs and jack-o’-lanterns. With Halloween approaching, we decided to make something special together for her school’s spooky celebration. It was one of those beautiful fall afternoons where the crisp air and rustling leaves set the perfect backdrop for baking.
We turned on some fun Halloween tunes, gathered our ingredients, and dove head-first into our culinary adventure. As we mixed, poured, and decorated, giggles mixed with the rich scent of melting chocolate. Mia’s playful side came out as she attempted to create the mummies’ faces, each one more whimsical than the last. The moment she placed the first brownie on a plate and drizzled the white chocolate with absolute concentration, I knew I had to document this recipe for future Halloweens.
That year, the kids loved the brownies so much that they declared Mia a “Mummy Brownie Queen.” The laughter, the collaboration, and the sweet mess we created together have stayed with us as one of our favorite Halloween traditions. Now, it’s your turn to create those magical moments in your kitchen!
Ingredients: What You’ll Need
Here’s a quick rundown of the ingredients that make these Mummy Brownies so delightful:
-
1 cup unsalted butter: The foundation of every great brownie. Use for richness and moisture. If you’re in a pinch, you can substitute with margarine or coconut oil, but the flavor will differ slightly.
-
2 cups granulated sugar: Sweetness is key! This balances the richness of the butter and chocolate. If you prefer, you could use brown sugar for a deeper molasses flavor.
-
4 large eggs: Eggs add structure and richness. If you’re looking for an egg-free version, you can use flaxseed meal (1 tablespoon mixed with 2.5 tablespoons of water per egg) or applesauce.
-
1 teaspoon vanilla extract: The aromatic boost that brings everything together. You can use almond extract for a twist or even a dash of espresso for depth.
-
1 cup all-purpose flour: This gives the brownies a chewy texture. Gluten-free flour blends work great as a substitute for a gluten-free version.
-
1 cup unsweetened cocoa powder: The star ingredient for that rich chocolate flavor! Dutch-processed cocoa will give a more robust chocolate taste, while natural cocoa powder will make it lighter.
-
1 teaspoon baking powder: It helps the brownies rise and get fluffy. If you’re out, replace it with baking soda, though the texture may vary slightly.
-
1/2 teaspoon salt: Enhances the sweetness and balances the flavors. Don’t skip this one!
-
1 cup white chocolate chips: For the mummy’s bandages. If you’d like a dairy-free version, sub with dairy-free white chocolate or melted coconut butter.
-
Candy eyes: These tiny decorations bring the mummies to life! You can use any edible eyeball candy or chocolate chips for a simpler version.
Gather these pantry staples, and let’s create some spooky magic!
Step-by-Step Instructions
-
Preheat the Oven: Start by preheating your oven to 350°F (175°C). This is a crucial step because the brownies need to bake evenly. While the oven warms up, I like to line a 9×13-inch baking pan with parchment paper, leaving some overhang. This makes it super easy to lift the brownies out later!
-
Melt the Butter: In a microwave-safe bowl, melt the unsalted butter until it’s just melted but not boiling. A good tip here is to microwave it in short bursts of 30 seconds to prevent it from splattering everywhere. You want it smooth and silken!
-
Mix the Sugars: In a large mixing bowl, combine the melted butter with granulated sugar. Whisk until it’s light and fluffy. This step is essential for incorporation and will help create that lovely, chewy brownie texture!
-
Add Eggs and Vanilla: Next, whisk in the eggs one at a time, ensuring each is fully incorporated before adding the next. Don’t forget the vanilla extract! This adds a wonderful aroma and flavor.
-
Combine Dry Ingredients: In another bowl, sift together the flour, cocoa powder, baking powder, and salt. This sifting step is often overlooked, but it helps prevent clumps of cocoa and ensures that your brownies have a smooth consistency.
-
Combine Wet and Dry Mixtures: Gradually fold the dry ingredients into the wet ingredients using a spatula. Be gentle here—overmixing can lead to dense brownies! Just mix until no more dry flour is visible.
-
Add Delicious Bits: At this point, feel free to fold in chocolate chips or nuts if you want to add a little extra texture. But since we’re going for a mummy look, let’s keep it simple!
-
Bake: Pour the brownie batter into your prepared baking pan and spread evenly. Bake in the preheated oven for about 25-30 minutes. Keep an eye on them; you want the edges set while the center is still slightly fudgy. A toothpick should come out with a few moist crumbs.
-
Cool and Cut: Once those brownies are out of the oven, let them cool in the pan for about 10 minutes. Carefully lift them out (using the parchment paper) and allow them to cool completely on a wire rack before cutting them into squares.
-
Decorate Your Mummies: Now for the fun part! In a microwave-safe bowl, melt the white chocolate chips until smooth. Drizzle the melted chocolate over each brownie to create “bandages.” Place two candy eyes on each brownie, and voila! You’ve assembled your adorable mummy brownies!
Serving Suggestions
These Mummy Brownies are perfect for any Halloween gathering! To create a spooktacular presentation, you might consider serving them on a rustic wooden board with other Halloween-themed treats like pumpkin spice cupcakes or ghostly marshmallow pops. You could also sprinkle some edible glitter or serve them alongside a scoop of vanilla ice cream for a deliciously witchy dessert!
Recipe Variations
Feeling adventurous? Here are a few variations you can try to personalize your Mummy Brownies:
-
Chocolate Mint Mummies: Add a few drops of peppermint extract to the brownie batter for a refreshing twist. Top with crushed mint chocolate candies instead of eyes for a festive touch.
-
Nutty Brownies: Add 1/2 cup of chopped nuts (like walnuts or pecans) to the batter for extra crunch and richness. Make sure to adjust your brownie structure slightly with a touch more flour if needed.
-
Pumpkin Spice Mummies: Substituting half of the cocoa powder with pumpkin puree (not the spiced kind) can give a delicious pumpkin flavor while still keeping the chocolatey essence. Add 1 teaspoon of pumpkin spice, and that’s a seasonal winner!
-
Caramel Stuffed: Place small dollops of caramel sauce on top of the brownie batter before baking for gooey surprises in every bite!
-
Peanut Butter Swirl: Drizzle peanut butter on top of the brownie before baking and use a knife to create a beautiful swirl. This classic combo will transport you straight to dessert heaven!
Chef’s Notes
With every recipe I share, I find that there’s a story evolving from my initial attempts. The Mummy Brownies have been a hit at countless family gatherings, evolving from simple chocolate treats to an annual tradition. One year, while making these, I accidentally mixed up my baking soda for salt! But instead of tossing them out, we tasted them and found they added a strangely delightful flavor! It just goes to show that the kitchen is often a place for happy accidents.
So, don’t stress if things don’t go according to plan; embrace the creativity and spontaneity of cooking! Each batch of Mummy Brownies has a little piece of love and laughter embedded in them, and now it’s your turn to add your unique touch!
FAQs and Troubleshooting
Q: My brownies turned out cakey instead of fudgy. What happened?
A: If your brownies are cakey, it might be due to overmixing the batter or baking them too long. Try to fold just until the dry ingredients disappear and keep a close watch while they bake.
Q: How do I store leftover brownies?
A: Store them in an airtight container at room temperature for up to 3 days or in the fridge for up to a week. You can also freeze individual servings wrapped in plastic wrap for a quick treat later!
Q: Can I use a different type of chocolate?
A: Of course! While the original recipe calls for unsweetened cocoa powder and white chocolate for decoration, feel free to experiment with dark chocolate or milk chocolate according to your taste preferences.
Q: What can I do if I don’t have candy eyes?
A: No worries! You can make “eyes” with small chocolate chips, mini marshmallows, or even use icing to draw pupils on a white chocolate base. The charm is all in the creativity!
Nutritional Info
If you’re curious about the nutritional info, a standard serving of these Mummy Brownies (one brownie) roughly has:
- Calories: 180
- Total Fat: 9g
- Saturated Fat: 5g
- Cholesterol: 40mg
- Sodium: 100mg
- Total Carbohydrates: 24g
- Dietary Fiber: 1g
- Sugars: 15g
- Protein: 2g
(Please note that these values can vary based on specific brands and ingredient variations!)
So there you have it! A fun, festive, and foolproof recipe for Mummy Brownies that will delight both young and old this Halloween season. Remember, cooking is about creating memories, so let your personality shine through each step. Enjoy baking, and don’t forget to have fun—after all, that’s what it’s all about in my cozy little kitchen! Happy haunting!
Print
Mummy Brownies
- Total Time: 50 minutes
- Yield: 12 servings 1x
- Diet: Vegetarian
Description
Delightfully spooky Mummy Brownies perfect for Halloween gatherings, combining rich chocolatey flavor with festive decoration.
Ingredients
- 1 cup unsalted butter
- 2 cups granulated sugar
- 4 large eggs
- 1 teaspoon vanilla extract
- 1 cup all-purpose flour
- 1 cup unsweetened cocoa powder
- 1 teaspoon baking powder
- 1/2 teaspoon salt
- 1 cup white chocolate chips
- Candy eyes for decoration
Instructions
- Preheat the oven to 350°F (175°C) and line a 9×13-inch baking pan with parchment paper.
- Melt the unsalted butter in a microwave-safe bowl until just melted.
- Mix the melted butter with granulated sugar until light and fluffy.
- Add eggs one at a time, mixing in vanilla extract.
- Combine flour, cocoa powder, baking powder, and salt in another bowl.
- Fold the dry ingredients into the wet ingredients gently until no dry flour is visible.
- Pour the brownie batter into the prepared baking pan and spread evenly.
- Bake for 25-30 minutes until edges are set and center is slightly fudgy.
- Cool in the pan for 10 minutes, then lift out and allow to cool completely on a wire rack.
- Decorate with melted white chocolate chips to create “bandages” and place two candy eyes on each brownie.
Notes
Store leftover brownies in an airtight container at room temperature for up to 3 days or in the fridge for up to a week.
- Prep Time: 20 minutes
- Cook Time: 30 minutes
- Category: Dessert
- Method: Baking
- Cuisine: American
Nutrition
- Serving Size: 1 brownie
- Calories: 180
- Sugar: 15g
- Sodium: 100mg
- Fat: 9g
- Saturated Fat: 5g
- Unsaturated Fat: 4g
- Trans Fat: 0g
- Carbohydrates: 24g
- Fiber: 1g
- Protein: 2g
- Cholesterol: 40mg
Keywords: Mummy Brownies, Halloween treats, chocolate brownies, festive desserts

Minute No-Bake Halloween Treats for Busy Families
Easy No-Bake Halloween Treats
Welcome to my kitchen, fellow food lovers! I’m thrilled you’re here, especially as we dive into the delightful world of Halloween treats that require absolutely no baking. That’s right! With just some simple ingredients and a sprinkle of creativity, we’ll whip up spooky, sweet delights perfect for any Halloween gathering or cozy night in.
As the leaves begin to fall and the air turns crisp, I can’t help but feel excited about all the festive possibilities this season brings. There’s something so magical about Halloween—the costumes, the decorations, the hauntingly fun parties—and of course, the treat-making! It’s the one time of year when indulgence is not just appreciated, but expected. Whether you’re planning a party, treating your little ghouls and goblins, or simply looking to satisfy your own sweet tooth, these easy no-bake treats will be the star of the show.
Join me as we create some treats that will not only impress your friends but also be a blast to make. Let’s roll up our sleeves, don those aprons (messy ones are the best!), and get ready for some kitchen fun!
A Personal Halloween Tale
One Halloween, I vividly recall a night spent with my childhood best friend, Emma. Armed with a handful of colorful sprinkles and an assortment of chocolate, we decided to create our own concoctions for our classmates. After sneaking pieces of candy from our trick-or-treat bags, we huddled over the kitchen counter, giggling, mixing, and crafting what we thought were the ultimate Halloween treats.
We melted chocolate (which we promptly dropped on the floor—oops!), layered gummy worms, and even tried to create spooky faces with candy corn. The end result? A chaotic, colorful assortment that looked like a Halloween explosion. While my mom may have needed to clean the kitchen afterward, our concoctions were a hit! Even now, thinking back on that night fills me with warmth and nostalgia. It’s this feeling I want to share with you through easy, no-bake Halloween recipes. Let’s create some wonderful memories, just like Emma and I did!
Ingredients
Let’s gather our Halloween spirit and get our ingredients ready! Here’s what you’ll need for our fabulous easy no-bake treats:
-
Chocolate Chips (1 cup): Perfect for melting and drizzling. You can use semi-sweet or milk chocolate depending on your preference. If you’re looking for a healthier option, dark chocolate works great too!
-
Cereal (3 cups): A classic base for our treats. Crisped rice or corn flakes are popular choices, but feel free to substitute with gluten-free cereal if needed.
-
Peanut Butter (1/2 cup): Creamy or crunchy works! If allergies are a concern, almond butter or sunflower seed butter are fantastic alternatives that still add that nutty goodness.
-
Marshmallows (2 cups): Mini marshmallows are perfect for adding a chewy texture. If you want to go vegan, check out plant-based marshmallows.
-
Sprinkles (1/2 cup): For decoration! Use Halloween-themed sprinkles or any colorful mix you fancy. Swap with nuts or dried fruit for a healthier twist.
-
Candy Corn (for topping): Classic and iconic, candy corn screams Halloween! If you’re not a fan, consider gummy worms or chocolate-covered raisins instead.
-
Vanilla Extract (1 tsp): This will add depth to our flavors. Replace it with almond extract for an interesting twist.
Now that we have our ingredients, let’s get that spooky creativity flowing!
Step-by-Step Instructions
Step 1: Prepare Your Workspace
First things first! Clean and set up your kitchen counter or workspace. Lay out the parchment paper where we’ll form our treats. I like to have all ingredients within reach—it makes the process smoother and way more enjoyable.
Step 2: Melt the Chocolate
In a microwave-safe bowl, add your chocolate chips. Heat them in 30-second intervals, stirring in between, until they are completely melted and smooth. (This is the time to sneak a taste. I won’t tell!)
Step 3: Mix in Peanut Butter
Once the chocolate is melted, stir in the peanut butter until well combined. The mixture should become glossy and irresistible. If you like a bit of crunch, add some crushed nuts at this stage—they give an amazing texture!
Step 4: Add Cereal and Marshmallows
Gently fold in your cereal and marshmallows, ensuring everything is coated in that beautiful chocolate-peanut butter mixture. This is where it gets fun—seeing how it all comes together!
Step 5: Shape the Treats
Using a spatula (or your hands, if you’re feeling adventurous), scoop out portions of the mixture and form them into small bars or clusters on your parchment-covered surface. Don’t worry about making them perfect; the delightful irregular shapes add character!
Step 6: Decorate
Here comes the fun part! Before the mixture sets, add sprinkles on top of each treat. Get creative—use candy corn, gummy worms, or whatever you like. Make it festive and fun!
Step 7: Chill and Set
Place your tray in the refrigerator for about 30 minutes to let everything set properly. While you wait, you can clean up your workspace, or sneak another taste of those melted chocolate remnants!
Step 8: Serve
Once set, take them out of the fridge and cut or break them into pieces. These treats are great served on a colorful platter for a Halloween party or wrapped in cellophane for handouts.
Serving Suggestions
To serve your delightful no-bake Halloween treats, place them on a spooky-themed platter adorned with faux cobwebs or miniature pumpkins for that extra flair. You can also package them up in cellophane bags tied with colorful ribbons for a charming gift. Trust me, these will be the treats everyone remembers!
Recipe Variations
Feeling adventurous? Here are some creative spins on our basic no-bake treats:
-
Pumpkin Spice Treats: Add a teaspoon of pumpkin spice to the chocolate-peanut butter mixture for a seasonal twist.
-
S’mores Bars: Swap out the cereal for crushed graham crackers and add mini marshmallows for a campfire-inspired treat.
-
Nut-Free Delight: Replace peanut butter with sunflower seed butter and use dairy-free chocolate for an allergen-friendly option.
-
Crispy Caramel Treats: Drizzle caramel sauce over your formed bars for an extra layer of sweetness.
-
Vegan Halloween Treats: Use dark chocolate, coconut cream, and nut butter to make a completely vegan-friendly version.
Chef’s Notes
These no-bake Halloween treats have evolved from that messy kitchen night with Emma into a favorite family tradition. Over the years, I’ve played with flavors, textures, and decorations. One year, I poured extra melted chocolate over the top and sprinkled crushed pretzels for a sweet-and-salty combo!
I’ll never forget the laughter that fills the kitchen when I make these with my own kids. They have their own quirky ideas of how to decorate, and it’s such a joy to see their creativity blossom. It’s recipes like this—simple, adaptable, and fun—that create lasting memories.
FAQs and Troubleshooting
1. Why are my treats falling apart?
If your treats are crumbling, it’s likely that the mixture wasn’t pressed together tightly enough. Next time, try compressing it more firmly into your chosen shape.
2. How do I store these treats?
Store them in an airtight container at room temperature for up to a week. If you live in a particularly warm area, keeping them in the fridge might be a good idea to keep the chocolate from melting.
3. What can I use instead of chocolate chips?
You can use white chocolate, carob chips, or even yogurt-covered raisins for a different flavor profile!
4. Are these treats gluten-free?
Yes, as long as you use gluten-free cereal, these treats can easily cater to gluten-sensitive diets. Always check the labels to be sure!
Nutritional Info (Optional)
While I’ve focused on the fun and creativity behind these treats, it’s always good to be mindful of indulgence. Each treat, depending on size, can range around 150 calories but provides a delightful combo of textures and flavors that make the occasional treat totally worth it.
So there you have it: Easy no-bake Halloween treats that are sure to bring a smile to anyone who tries them. Grab your ingredients, get ready to unleash your creativity, and most importantly, enjoy the process! Happy Halloween, and may your kitchen always be filled with love and laughter.
Print
Easy No-Bake Halloween Treats
- Total Time: 45 minutes
- Yield: 12 servings 1x
- Diet: Vegetarian
Description
Delightful no-bake Halloween treats perfect for any gathering, made with simple ingredients and a sprinkle of creativity.
Ingredients
- 1 cup Chocolate Chips
- 3 cups Cereal (Crisped rice or corn flakes)
- 1/2 cup Peanut Butter
- 2 cups Mini Marshmallows
- 1/2 cup Sprinkles (Halloween-themed)
- Candy Corn (for topping)
- 1 tsp Vanilla Extract
Instructions
- Prepare Your Workspace: Clean and set up your counter with parchment paper.
- Melt the Chocolate: Heat chocolate chips in intervals until melted.
- Mix in Peanut Butter: Stir until glossy and well combined.
- Add Cereal and Marshmallows: Fold in until coated.
- Shape the Treats: Scoop and form into small bars or clusters.
- Decorate: Add sprinkles and toppings before setting.
- Chill and Set: Refrigerate for about 30 minutes.
- Serve: Cut into pieces and present on a festive platter.
Notes
Store in an airtight container for up to a week. Can be made gluten-free with the right cereal.
- Prep Time: 15 minutes
- Cook Time: 0 minutes
- Category: Dessert
- Method: No-Bake
- Cuisine: American
Nutrition
- Serving Size: 1 piece
- Calories: 150
- Sugar: 20g
- Sodium: 75mg
- Fat: 8g
- Saturated Fat: 3g
- Unsaturated Fat: 5g
- Trans Fat: 0g
- Carbohydrates: 14g
- Fiber: 1g
- Protein: 2g
- Cholesterol: 0mg
Keywords: Halloween treats, no-bake dessert, easy recipes, festive snacks

Spooky Halloween Desserts for Quick Party Prep Ideas
75 Best Halloween Desserts: A Spooktacular Guide to Sweet Treats
Welcome to my kitchen, my fellow food lovers! I’m Olivia Bennett, your enthusiastic guide to everything cozy, delicious, and a bit spooky this Halloween season. If you’re like me, the crisp autumn air and the scent of cinnamon and nutmeg signal it’s time for some fun in the kitchen. Halloween is not just about costumes and trick-or-treating; it’s a fantastic occasion for whipping up some delightful desserts that will impress friends and family, and create sweet memories that will last a lifetime.
In today’s blog post, we’re diving into a treasure trove of 75 Halloween desserts that are fun to make, stunning to look at, and absolutely delectable to taste! Whether you’re hosting a haunted gathering, heading to a costume party, or just looking to bring some festive cheer to your kitchen, I’ve got homemade treats that are sure to be the highlight of the season.
Personal Story
Growing up, Halloween was always my favorite time of the year, and it wasn’t just about the candy. I have vivid memories of my mom and I spending the weekend before Halloween in our cozy kitchen. We’d put on our favorite fall music, roll up our sleeves, and dive into an array of spooky baking projects. One year, we decided to create our very own pumpkin patch with cake pops that looked like little pumpkins, complete with green frosting tendrils. Each tiny creation came with its own charm, and the kitchen was filled with laughter and the kind of sweet scent only freshly baked goods can bring.
That experience laid the foundation for my love of seasonal baking. Today, nothing excites me more than sharing spooky treats that will brighten your gathering or create a little magic in your home. Trust me; your friends will be talking about these sweets long after the last piece has been devoured!
Ingredients
Before we roll up our sleeves and get baking, let’s gather the staples you’ll need for these spooky desserts. While we’ll touch on some specific treats, here’s a handy list of common ingredients you’ll find across many Halloween delights:
- All-Purpose Flour: The backbone of most sweets. You can substitute with a gluten-free blend if needed.
- Granulated Sugar: This sweetener is used in nearly every dessert. For a darker flavor, consider using brown sugar.
- Eggs: They provide structure and moisture. If you’re baking vegan treats, applesauce or flaxseed meal can work as substitutes.
- Butter: This adds richness and creaminess. Try using coconut oil for a dairy-free option.
- Baking Powder and Baking Soda: These leavening agents help our sweets rise.
- Vanilla Extract: Always a great flavor enhancer! You can also use almond extract for a different twist.
- Cocoa Powder: Essential for chocolatey treats. If you’re looking for extra depth, try using Dutch-processed cocoa.
- Pumpkin Puree: The star of many autumn recipes—great for flavor and moisture!
- Candy Corn, Sprinkles, or Edible Glitter: For that Halloween flair. They’re also perfect for decorating!
Each ingredient plays a vital role in creating the sweet masterpieces we’ll whip up. Remember, experimenting can lead to some of the best flavors—don’t hesitate to get creative and swap ingredients based on your taste and dietary needs.
Step-by-Step Instructions
Now that we’ve gathered our ingredients, let’s dig into making some fabulous Halloween desserts! Here’s how to whip up my crowd-pleasing Pumpkin Spice Cupcakes (one of many fantastic options among our 75 treats):
1. Preheat the Oven
- Preheat your oven to 350°F (175°C). This ensures a perfectly baked cupcake. Remember, a hot oven helps in achieving that coveted dome shape!
2. Prepare the Pan
- Line a cupcake pan with fun Halloween-themed liners. You can’t have Halloween without themed decorations, right? If you don’t have liners, just grease the pan well!
3. Mix the Dry Ingredients
- In a large bowl, whisk together 1 ½ cups of all-purpose flour, 1 cup of granulated sugar, 1 tsp of baking powder, ½ tsp of baking soda, ½ tsp of salt, and 1 tbsp of pumpkin pie spice. This blend will create a flavorful base for your cupcakes.
4. Combine the Wet Ingredients
- In another bowl, whisk together ½ cup of melted butter, 2 large eggs, and 1 cup of pumpkin puree. Tip: use room temperature eggs to ensure a smoother batter!
5. Mix It All Together
- Gradually add your wet ingredients to the dry mixture. Stir until just combined. Overmixing can lead to dense cupcakes—nobody wants that!
6. Fill the Liners
- Fill each cupcake liner about ¾ full with the batter. Use a cookie scoop for even portions and less mess!
7. Bake
- Pop the pan in the preheated oven and bake for 18-20 minutes, or until you can poke a toothpick in the center and it comes out clean. Let them cool in the pan for a few minutes before transferring them to a wire rack. Pro Tip: The aroma will be irresistible—try not to eat them all!
8. Decorate
- Once cooled, top your cupcakes with cream cheese frosting (and maybe a sprinkle of orange and black sprinkles for that Halloween flair). You can even pipe little pumpkin faces on them—get creative!
This recipe is a delightful representation of the many charming desserts you can make during the spooky season. The process is simple and allows for creativity and joy, much like my childhood baking adventures.
Serving Suggestions
When serving your Halloween desserts, presentation is everything! Arrange your cupcakes on a spooky platter, and feel free to add little decorations like plastic spiders or faux cobwebs. Beautifully decorated cupcakes deserve to be on full display, making them the centerpiece of your Halloween table.
Recipe Variations
- Gingerbread Cookies: Switch it up with a gingerbread cookie recipe, perfect for spooky decor.
- Spooky Brownies: Top brownies with green buttercream skulls for a ghoulish twist.
- Ghost Meringues: Use egg whites and sugar to whip up light and airy ghost-shaped meringues.
- Witch Hat Cupcakes: Place a cookie on top of a frosted cupcake to resemble a witch’s hat!
- Vegan Pumpkin Bars: Swap ingredients for a vegan-friendly version using almond milk and flax eggs.
Chef’s Notes
The beauty of Halloween desserts is their versatility! I remember one year, a friend brought over her take on spider web cookies using melted chocolate and a bit of white frosting. We had a blast creating our spooky masterpieces, and it sparked endless fun ideas for our next baking sessions. Halloween is the perfect excuse to let your imagination run wild, and what better way to do that than by baking together?
FAQs and Troubleshooting
1. My cupcakes didn’t rise. What happened?
- This can happen if your baking soda or powder is old. Always check the freshness before using, and remember to preheat your oven!
2. How do I store my Halloween desserts?
- Keep them in an airtight container at room temperature for about 2-3 days or refrigerate for longer freshness.
3. Can I freeze these desserts?
- Absolutely! Most treats can be frozen. Just make sure they’re in an airtight container or freezer bag. They’ll be great for last-minute festivities.
4. What if I overmix my batter?
- Don’t worry too much—while it may be denser than intended, it’ll still taste delightful! Next time, just mix until combined.
Nutritional Info (Optional)
If you’re looking for nutritional information, here’s a quick reference for our Pumpkin Spice Cupcakes (per cupcake):
- Calories: 200
- Fat: 8g
- Carbohydrates: 30g
- Protein: 2g
(Note: Nutritional values can vary based on specific ingredients used and portion sizes.)
So there you have it, a spooktacular guide to making delightful Halloween desserts! I hope you feel inspired to dive into your kitchen this season. Remember, the best part about baking is not only the treats you’ll create but the memories you’ll make along the way. Happy Halloween baking!
Print
Pumpkin Spice Cupcakes
- Total Time: 35 minutes
- Yield: 12 servings 1x
- Diet: Vegetarian
Description
Deliciously spiced pumpkin cupcakes, perfect for Halloween festivities.
Ingredients
- 1 ½ cups all-purpose flour
- 1 cup granulated sugar
- 1 tsp baking powder
- ½ tsp baking soda
- ½ tsp salt
- 1 tbsp pumpkin pie spice
- ½ cup melted butter
- 2 large eggs
- 1 cup pumpkin puree
- Cream cheese frosting
- Orange and black sprinkles (for decoration)
Instructions
- Preheat the oven to 350°F (175°C).
- Prepare the pan by lining it with Halloween-themed cupcake liners.
- Mix the dry ingredients in a large bowl: flour, sugar, baking powder, baking soda, salt, and pumpkin pie spice.
- Combine the wet ingredients in another bowl: melted butter, eggs, and pumpkin puree.
- Mix the wet ingredients into the dry ingredients until just combined.
- Fill each cupcake liner about ¾ full with batter.
- Bake for 18-20 minutes, until a toothpick comes out clean.
- Decorate the cooled cupcakes with cream cheese frosting and sprinkles.
Notes
Feel free to get creative with decorations and flavors! Consider adding different types of frosting or toppings.
- Prep Time: 15 minutes
- Cook Time: 20 minutes
- Category: Dessert
- Method: Baking
- Cuisine: American
Nutrition
- Serving Size: 1 cupcake
- Calories: 200
- Sugar: 12g
- Sodium: 200mg
- Fat: 8g
- Saturated Fat: 5g
- Unsaturated Fat: 3g
- Trans Fat: 0g
- Carbohydrates: 30g
- Fiber: 1g
- Protein: 2g
- Cholesterol: 30mg
Keywords: Halloween, cupcakes, pumpkin spice, dessert, festive baking
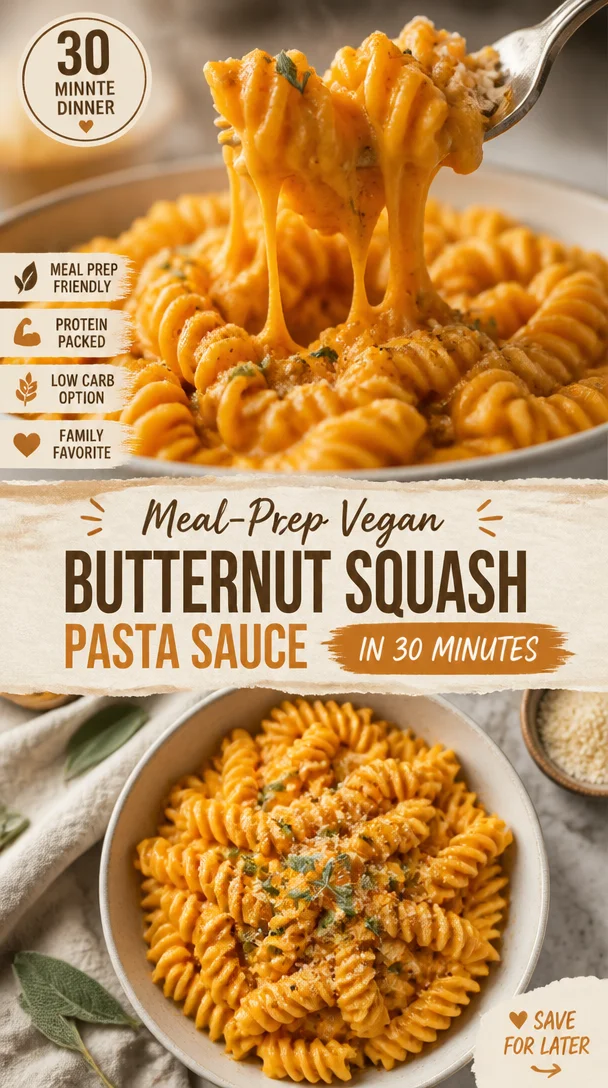
Meal-Prep Vegan Butternut Squash Pasta Sauce in 30 Minutes
Vegan Butternut Squash Pasta Sauce: A Wholesome Hug in a Bowl
Welcome to my cozy corner of the internet! I’m Olivia, your friendly kitchen guide, and today we’re diving into the delightful world of vegan cooking with an incredibly flavorful and creamy Butternut Squash Pasta Sauce. This sauce isn’t just another recipe; it’s a celebration of fall flavors and comfort all rolled into one delicious bowl. Whether you’re a seasoned cook or a kitchen newbie, I’m here to help you create a dish that’s not only healthy but also tastes like a big hug from your favorite sweater.
Picture this: it’s a crisp autumn evening, the air is filled with the sweet scent of fallen leaves, and your kitchen is warm and inviting. You’ve got that undeniable itch to whip up something cozy, something that screams comfort. Enter this Butternut Squash Pasta Sauce! It’s velvety, rich, and packed with nutrients, making it the perfect companion to your favorite pasta. Plus, it’s super easy to make, and let me tell you—it’s a crowd-pleaser!
What I love most about this sauce is its versatility. It’s not just for pasta; you can drizzle it over roasted vegetables, use it as a pizza base, or even enjoy it on a toasted slice of sourdough. The options are endless, and I can already hear your taste buds cheering! So, let’s roll up our sleeves and create something wonderful together. Trust me, once you try this sauce, you’ll wonder how you ever lived without it.
A Memory to Relish
Reminiscing about the first time I made this Butternut Squash Pasta Sauce brings a warm smile to my face. It was a chilly October evening, and my good friend Mia came over for a dinner party. We had planned for a casual get-together, but as we sat in the kitchen, chopping and stirring, it turned into a true culinary adventure.
Mia, being a die-hard pasta lover, suggested I try making a sauce that was different from our usual marinara. That’s when I grabbed a plump butternut squash from the counter and decided to get creative. We roasted it with garlic, tossed in some spices, and blended it into a smooth perfection that had us both giddy with excitement. As we twirled our pasta around our forks, we couldn’t believe how delicious it was!
That dinner ended up being filled with laughter, stories, and a dash of friendly competition over who could create the best pasta dish. And from that day forward, this creamy butternut squash sauce became my go-to recipe whenever I wanted to bring warmth and joy to my table.
Ingredients
Let’s gather our ingredients together! For this scrumptious vegan butternut squash pasta sauce, you’ll need:
-
Butternut Squash (1 medium-sized)
This is the star of the show! Its natural sweetness balances well with savory spices. If you can’t find butternut squash, pumpkin or any other sweet winter squash works as a great substitute. -
Garlic (3 cloves)
Garlic adds a wonderful depth of flavor. Roasting it will caramelize the sugars, making it sweeter and less pungent. If you prefer a milder taste, you can reduce the amount to one or two cloves. -
Olive Oil (2 tablespoons)
This healthy fat helps to sauté the garlic and gives the sauce a creamy texture. You can swap olive oil with coconut oil if you’re looking for a sweeter note. -
Vegetable Broth (1 cup)
Using vegetable broth enhances the flavor without being overpowering. You can make your own or use store-bought. For a low-sodium version, look for broth labeled as such. -
Nutritional Yeast (1/4 cup)
This is a vegan superhero! It adds a cheesy flavor while providing extra vitamins. If you can’t find it, you can skip it, but I highly recommend trying to include it for a lovely cheesy vibe. -
Salt (to taste)
As always, seasoning is key! Start with a pinch and add more based on your preference. -
Pepper (to taste)
A few cracks of black pepper will enhance all the flavors beautifully. For something with a kick, consider adding some red pepper flakes. -
Fresh Sage or Thyme (2 tablespoons, optional)
These herbs pair beautifully with the butternut squash. If you don’t have fresh herbs, dried herbs will work, just remember to reduce the quantity to 1 tablespoon as dried herbs are more potent.
Step-by-Step Instructions
Now that we’ve got everything prepped, let’s get to cooking! Follow these simple steps to create a sauce that you’ll be dreaming about.
-
Preheat the Oven
Preheat your oven to 400°F (200°C). A hot oven is key to roasting our butternut squash and garlic! -
Prepare the Squash
Carefully slice your butternut squash in half lengthwise. Scoop out the seeds and lay the halves cut-side up on a baking sheet. Drizzle them with a tablespoon of olive oil and sprinkle with salt and pepper. Roast it in the oven for about 30-40 minutes, or until it’s fork-tender and caramelized.Chef Tip: If you prefer quicker prep, you can peel and cube the squash before roasting; just keep an eye on it as the cooking time may change!
-
Roast the Garlic
While your squash is roasting, let’s roast the garlic! Peel the cloves and wrap them in aluminum foil with a drizzle of olive oil. Place them on the same baking sheet for the last 20 minutes of roasting. You’ll be greeted with a sweet, heavenly aroma! -
Blend it All
Once your squash and garlic are done, let them cool slightly. Scoop the roasted squash into your blender, add the roasted garlic, and pour in the vegetable broth. If you have fresh herbs, toss them in too! Blend until smooth and creamy. You can add more broth for a thinner sauce if you prefer.Pro Tip: Always taste the sauce before you remove it from the blender. Adjust the seasoning as needed!
-
Heat it Up
Transfer the blended sauce into a large skillet over medium heat. Add the nutritional yeast, stirring to combine. Let it simmer for 5-10 minutes, allowing the flavors to meld together. -
Serve Over Pasta
As your sauce simmers, cook your preferred pasta according to package instructions. Once cooked, drain the pasta and toss it right into the skillet with the sauce. Coat the pasta well and let it soak up that flavor!
Serving Suggestions
Now the moment you’ve been waiting for: serving it up! Plate your butternut squash pasta with a flourish. Consider garnishing it with fresh herbs like chopped sage or thyme. A sprinkle of extra nutritional yeast or a dash of olive oil can tie it all together beautifully. If you’re feeling fancy, finish with a few chili flakes for heat or some freshly cracked black pepper on top!
Recipe Variations
Switch things up with these variations!
- Add Protein: Incorporate chickpeas or white beans for added protein and texture.
- Spicy Kick: Add a tablespoon of sriracha or chili paste to the sauce for a spicy twist.
- Creamy Touch: Stir in a splash of coconut milk for a richer sauce that adds a touch of sweetness.
- Pasta Choices: Swap out regular pasta for zucchini noodles or gluten-free pasta to cater to dietary needs.
- Roasted Veggie Medley: Toss in roasted vegetables like bell peppers, spinach, or kale for a colorful and nutritious addition!
Chef’s Notes
Creating this butternut squash sauce has been a journey of love and flavor! Over time, I’ve altered it based on seasons and what I have on hand. I once added a splash of balsamic vinegar for a tangy kick, and it was a game changer!
The beauty of this sauce is that it’s forgiving. Didn’t roast enough squash? No problem! You can add more broth and cook it down to achieve the desired flavor.
Remember, a little improvisation in the kitchen can lead to the best creations!
FAQs and Troubleshooting
1. My sauce is too thick; what can I do?
Just add a splash of vegetable broth or water until you reach your desired consistency.
2. How do I store leftovers?
Store any leftovers in an airtight container in the fridge for up to 4 days. Just reheat on the stove or in the microwave before serving!
3. Can I freeze the sauce?
Yes! This sauce freezes beautifully. Place it into freezer-safe bags or containers and store for up to 3 months. Just thaw in the refrigerator before reheating.
4. What if it’s too sweet?
If you find your sauce is sweeter than you’d like, add a pinch more salt or a squeeze of lemon juice to balance the flavors.
Nutritional Info
For a general idea, one serving of the butternut squash pasta sauce contains:
- Calories: 160
- Protein: 4g
- Carbohydrates: 28g
- Dietary Fiber: 4g
- Sugars: 6g
- Fat: 5g
(Note: Nutritional values may vary depending on specific ingredients used.)
So, there you have it! Your guide to creating a comforting, velvety Vegan Butternut Squash Pasta Sauce that is as delightful to prepare as it is to eat. I’m so excited for you to try this and make it your own! Remember, cooking is all about creativity and enjoying the process, so don’t be shy—get in that kitchen and let the magic happen! Happy cooking!
Print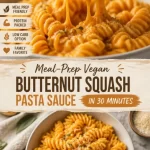
Vegan Butternut Squash Pasta Sauce
- Total Time: 50 minutes
- Yield: 4 servings 1x
- Diet: Vegan
Description
A delightful and creamy vegan butternut squash pasta sauce that brings warmth and comfort to your table.
Ingredients
- 1 medium-sized Butternut Squash
- 3 cloves Garlic
- 2 tablespoons Olive Oil
- 1 cup Vegetable Broth
- 1/4 cup Nutritional Yeast
- Salt to taste
- Pepper to taste
- 2 tablespoons Fresh Sage or Thyme (optional)
Instructions
- Preheat your oven to 400°F (200°C).
- Prepare the butternut squash by slicing it in half and scooping out the seeds. Drizzle with olive oil and sprinkle with salt and pepper.
- Roast the squash for about 30-40 minutes until fork-tender.
- Roast the garlic wrapped in foil for the last 20 minutes of the squash roasting time.
- Blend the roasted squash and garlic with vegetable broth until smooth and creamy.
- Heat the blended sauce in a skillet over medium heat and stir in nutritional yeast.
- Serve over cooked pasta, garnished with fresh herbs and additional nutritional yeast if desired.
Notes
This sauce is versatile; use it on pasta, roasted vegetables, or pizza. It can be frozen for up to 3 months.
- Prep Time: 10 minutes
- Cook Time: 40 minutes
- Category: Main Course
- Method: Roasting and Blending
- Cuisine: Vegan
Nutrition
- Serving Size: 1 serving
- Calories: 160
- Sugar: 6g
- Sodium: 300mg
- Fat: 5g
- Saturated Fat: 0.5g
- Unsaturated Fat: 4.5g
- Trans Fat: 0g
- Carbohydrates: 28g
- Fiber: 4g
- Protein: 4g
- Cholesterol: 0mg
Keywords: Vegan, Butternut Squash, Pasta Sauce, Comfort Food, Easy Recipes
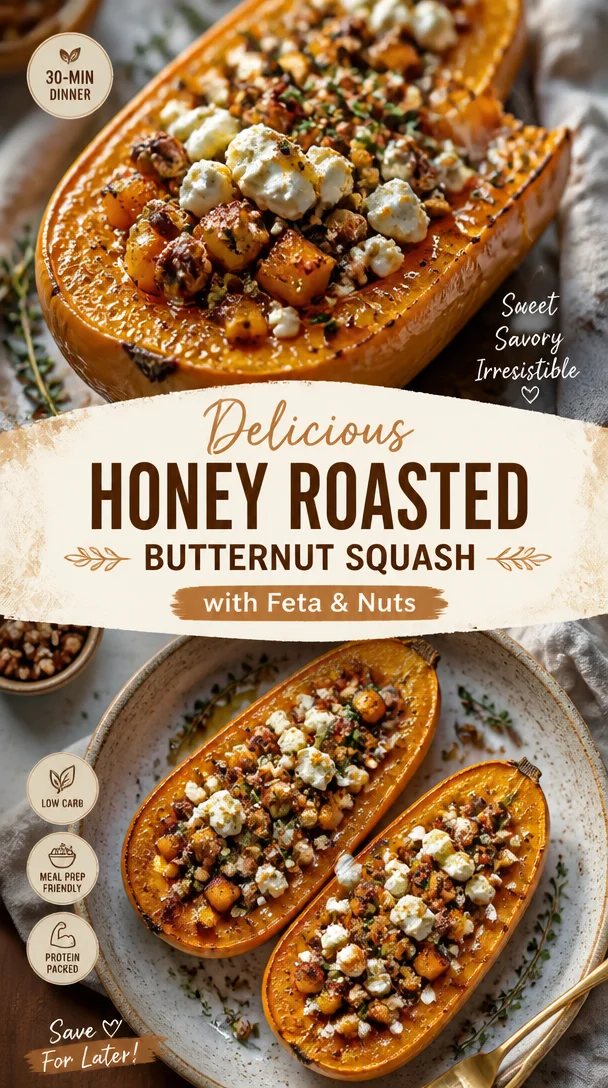
Délicieux Butternut Rôti au Miel, Feta et Noix : L’Automne en Fête
Délicieux Butternut Rôti au Miel, Feta et Noix : L’Automne en Fête
Welcome to my cozy kitchen, my fellow food lovers! As the leaves turn golden and the air turns crisp, it’s time to pull out our favorite fall ingredients and whip up some magical dishes that warm the soul. Today, I’m thrilled to share a vibrant and comforting recipe that embodies everything I adore about autumn – our star dish: Honey Roasted Butternut Squash with Feta and Walnuts. This recipe is not just a dish; it’s an experience that will fill your kitchen with delightful aromas and your heart with joy!
Let’s face it, there’s something incredibly special about the rituals of cooking during the fall. The cooler weather invites us to gather around the table with our loved ones, savoring every moment and every bite. This dish perfectly encapsulates that spirit, combining the sweet and nutty flavors of butternut squash with tangy feta cheese and crunchy walnuts. It’s a dish that speaks to the heart, reminding us of gratitude and abundance.
A Cozy Memory in the Kitchen
I remember the first time I made a version of this dish. It was during my early days of cooking, when I was still in college. I had invited a few friends to that tiny apartment kitchen I was sharing, and I was determined to impress them with a delicious meal. We had raked leaves earlier that day, our hands chilly but our spirits high. As the most amazing smell wafted through the air while my butternut squash roasted in the oven, my friends mingled and laughed—what a perfect day! That evening, as we sat around the table, a warm glow filled the room—not just from the twinkling fairy lights I had strung up, but also from the love and good vibes of good friends sharing great food. It became an instant favorite—the combination of sweet and savory was a hit, and now, many years later, I still make it to celebrate the season.
Ingredients
Here’s what you’ll need to create this lovely dish, along with some handy insights to elevate your cooking game:
-
1 medium-sized butternut squash: This sweet gem is the star of our show! It boasts a creamy texture and a natural sweetness that caramelizes beautifully when roasted. You can substitute it with acorn squash or sweet potatoes if needed.
-
2 tablespoons of honey: Honey adds a rich sweetness that balances the savory feta and nutty walnuts. If you want to spice things up, try maple syrup for a different flavor dimension.
-
4 oz feta cheese: Crumbled feta brings a lovely tanginess to the dish. If you’re vegan, feel free to swap it with a crumble-style tofu or any plant-based feta.
-
1 cup walnuts: Toasted walnuts contribute a delightful crunch and nuttiness. Don’t have walnuts on hand? Pecans work great too, or you could skip them altogether for a nut-free option.
-
2 tablespoons olive oil: A drizzle of quality olive oil ensures everything roasts perfectly. Avocado oil is a great alternative if you’re looking for a high smoke point.
-
Salt and pepper to taste: These essentials elevate all the flavors. You could also sprinkle in some smoked paprika or chili flakes for that extra kick.
-
Fresh herbs: I love adding thyme or sage for an aromatic touch. If you have dried herbs, they can work too—just use about a third of the amount since they’re more concentrated.
Step-by-Step Instructions
Let’s get cooking! Follow these detailed steps to create your delicious honey-roasted butternut squash dish.
-
Preheat Your Oven: Start by preheating your oven to 400°F (200°C). A hot oven is crucial for achieving that caramelized exterior we all crave!
-
Prepare the Butternut Squash: Carefully slice off both ends of the squash, then cut it in half lengthwise. Using a spoon, scoop out the seeds and stringy bits. Pro tip: If you find it tough to cut, microwaving it for 1-2 minutes can soften it slightly.
-
Cube the Squash: After halving, slice the squash into cubes, aiming for evenly sized pieces so they roast uniformly. About 1-inch cubes work best. Remember to admire the beautiful orange color—it’s pure autumn on your cutting board!
-
Toss with Olive Oil and Honey: In a large bowl, combine the cubed squash with olive oil, honey, salt, and pepper. Use your hands or a spatula to ensure every piece is coated evenly; this will help the squash caramelize beautifully.
-
Roast the Squash: Spread the squash cubes onto a parchment-lined baking sheet in a single layer—no crowds here! Bake them in the preheated oven for about 25-30 minutes until fork-tender and caramelized, flipping them halfway through for even roasting. Oh, those aromas wafting through your kitchen are heavenly!
-
Toast the Walnuts: While the squash roasts, add the walnuts to a dry skillet over medium heat. Toast them for about 5-6 minutes, stirring frequently until golden and fragrant. This enhances their flavor and crunch. Keep an eye on them; nuts can go from golden to burned in a flash!
-
Add Feta and Walnuts: Once the squash is beautifully roasted, remove it from the oven and sprinkle on the crumbled feta cheese and toasted walnuts. Gently toss to combine—your creation is coming together beautifully!
-
Garnish with Fresh Herbs: Finally, sprinkle your choice of fresh herbs over the top. The aroma alone will encourage everyone to gather around the table for a taste.
Serving Suggestions
To serve, I love transferring the roasted squash to a beautiful serving platter, allowing those gorgeous colors to shine. Drizzle a little extra honey on top for a finishing touch, and sprinkle with additional feta if you fancy it! Add a few sprigs of fresh thyme for a pop of color or sprinkle with some pomegranate arils for that burst of festivity. This dish is perfect as a side for roasted meats or served alongside a hearty salad for a wholesome vegetarian meal.
Recipe Variations
Here are a few creative twists you can try to mix things up:
-
Spicy Kick: Add a pinch of cayenne or smoked paprika to the squash before roasting for a spicy-sweet flavor that will tickle your taste buds.
-
Maple Glaze: Switch out honey for maple syrup for an even more autumnal flavor profile.
-
Cranberry Add-In: Toss some dried cranberries or fresh cranberries in just before serving for a tart contrast that pairs beautifully with the sweetness of the squash.
-
Vegan Delight: Omit the feta and replace it with a sprinkle of nutritional yeast or avocado for a creamy texture.
Chef’s Notes
This recipe has truly evolved over the years, starting from my first experiment in that tiny apartment kitchen. The addition of feta and walnuts came later when I realized how those textures and flavors elevated the dish. Whenever I make it, I am flooded with memories of joy, laughter, and warmth. I even sometimes add a dash of cinnamon or nutmeg for those extra cozy vibes when winter rolls around.
Cooking is all about being flexible; don’t hesitate to make this recipe your own! Each twist brings a different story, a personal touch that makes it more special.
FAQs and Troubleshooting
1. What if I don’t have butternut squash?
No problem! Acorn squash or even sweet potatoes can be excellent substitutes. Just remember that sweetness and roasting times may vary slightly.
2. How do I store leftovers?
Place any leftovers in an airtight container in the refrigerator, and they should last about 3-4 days. Reheat in the oven or a microwave until warmed through.
3. Can I make this dish ahead of time?
Absolutely! You can prepare the squash and roast it, then store it in the fridge. Just reheat before serving and add the feta and walnuts just before serving for the best texture.
4. It feels like my squash is mushy. What went wrong?
Overcooking can sometimes lead to mushy squash. Keep an eye on it while roasting and check for fork tenderness rather than complete softness. If it’s overdone, it may be time to adjust the cooking time next time around.
Nutritional Info
While I usually don’t go too heavy on the numbers, this dish is nutritious as well as delicious! It’s high in vitamins A and C, fiber from the squash and walnuts, and packed with healthy fats. A great combo to fuel those lovely fall adventures!
Now, dear friend, don’t you feel inspired to bring a little fall magic into your kitchen? This Honey Roasted Butternut Squash with Feta and Walnuts is more than just a meal; it’s an invitation to cozy gatherings, laughter, and memories around the dinner table. Enjoy making it as much as I do! Happy cooking!
Print
Honey Roasted Butternut Squash with Feta and Walnuts
- Total Time: 45 minutes
- Yield: 4 servings 1x
- Diet: Vegetarian
Description
Experience the essence of autumn with this vibrant Honey Roasted Butternut Squash, featuring tangy feta and crunchy walnuts for a delightful dish.
Ingredients
- 1 medium-sized butternut squash
- 2 tablespoons honey
- 4 oz feta cheese, crumbled
- 1 cup walnuts, toasted
- 2 tablespoons olive oil
- Salt and pepper, to taste
- Fresh herbs (thyme or sage)
Instructions
- Preheat your oven to 400°F (200°C).
- Prepare the butternut squash by slicing off both ends and cutting it in half lengthwise.
- Cube the squash into 1-inch pieces for even roasting.
- Toss the cubed squash with olive oil, honey, salt, and pepper in a large bowl.
- Roast the squash cubes on a parchment-lined baking sheet for 25-30 minutes, flipping halfway.
- Toast the walnuts in a dry skillet over medium heat for 5-6 minutes until golden.
- Add crumbled feta and toasted walnuts to the roasted squash.
- Garnish with fresh herbs before serving.
Notes
For a spicy kick, add cayenne or smoked paprika. Substitute honey with maple syrup for a twist.
- Prep Time: 15 minutes
- Cook Time: 30 minutes
- Category: Side Dish
- Method: Baking
- Cuisine: American
Nutrition
- Serving Size: 1 serving
- Calories: 320
- Sugar: 10g
- Sodium: 350mg
- Fat: 18g
- Saturated Fat: 4g
- Unsaturated Fat: 10g
- Trans Fat: 0g
- Carbohydrates: 38g
- Fiber: 5g
- Protein: 8g
- Cholesterol: 15mg
Keywords: butternut squash, autumn recipe, roasted vegetables, healthy side dish, fall flavors

Creepy Eyeball Jello Shots
Creepy Eyeball Jello Shots: A Spooktacular Treat!
Welcome to my kitchen, my fellow food lovers! Olivia Bennett here, and today we’re diving into a delightfully creepy, oh-so-fun, and totally delicious treat that will impress both kids and adults alike: Creepy Eyeball Jello Shots! Perfect for Halloween parties, spooky gatherings, or just a fun night in, these gelatin treats are not only a feast for the eyes but also tantalizingly tasty—just the right combination to make your next bash a hit!
Picture this: bright red and green Jello features with ghoulish eyeballs that make your guests do a double-take. Jello shots have been a party favorite for years, but why not take it up a notch and create something truly eye-catching (pun totally intended)? Don’t worry; these adorable yet creepy snacks are not as complicated as they may appear. In fact, I promise you’ll find joy in crafting these spooky delights.
Let’s talk about what makes these Jello shots so special. They stand out with a playful and daring twist on a classic favorite, filled with fun surprises. Plus, they’re incredibly easy to make, require minimal ingredients, and can be adapted to suit a variety of tastes and dietary preferences. So put on your favorite apron, and let’s get started!
A Little Bit of Nostalgia
I’ll never forget the first time I created these creepy eyeball Jello shots. It was a Halloween party at my good friend Sarah’s house, and we were all scrambling to come up with something that would wow the crowd. We decided to challenge ourselves and whip up something unusual—after all, what’s Halloween without a dash of horror and a sprinkle of humor?
As I poured the Jello into the cups, giggles filled the kitchen. I still remember the expression on Sarah’s face when I plopped in these adorable little googly-eyed candies to create the “eyeballs.” We both erupted into laughter as we posed for photos, deliberately making creepy faces. Believe me, it’s not just about the spooky looks—we had fun, made memories, and united everyone in the spirit of the season.
It turned out to be one of the highlights of that night! The reactions of our friends when trying them for the first time were priceless. Ever since then, I’ve made it a tradition to whip up these delightful spooky treats and share them with all my friends each year. Now it’s your turn to create your own creepy memories in the kitchen!
Ingredients
To bring these ghoulish delights to life, you’ll need the following ingredients:
-
Gelatin (flavored Jello):
- The star of the show! Use your favorite flavors. I recommend cherry or strawberry for that blood-red hue that screams spooky.
-
Water:
- Essential for rehydrating the gelatin. You can use cold water to set it up faster—a little chef hack for those impatient cooks among us!
-
Whipped cream (optional):
- For topping! Adds a lovely richness. This can be omitted for a lighter version or replaced with dairy-free alternatives.
-
Googly eyes candy:
- These adorable little candies will elevate your shot from ordinary to spooky in seconds! If you can’t find these, you could use chocolate-covered almonds or even blueberries for a more natural look.
-
Gummy worms or creepy candies (optional):
- For added drama, drop one or two into each shot before serving.
-
Empty shot glasses or small plastic cups:
- This is where the magic happens! You can find fun Halloween-themed cups online or at your local party store.
-
Ice cubes (optional):
- For a quicker chilling process. Nothing like a little icy coolness to help speed things up!
Step-by-Step Instructions
Now that you’ve gathered all your ingredients, let’s start crafting these gruesome goodies! Follow these step-by-step instructions, and I promise you’ll wow your guests.
Step 1: Prepare the Jello
-
Boil Water:
Begin by boiling 1 cup of water. This will be part of your Jello-making process. -
Dissolve the Gelatin:
Once the water is boiling, pour it into a mixing bowl. Add your flavored Jello powder. Stir well until fully dissolved—this will usually take about 2-3 minutes. The vibrant color and aroma will fill the kitchen, setting the perfect mood!Chef Tip: If you want an extra kick, consider mixing in a little vodka or rum as your second cup of liquid instead of water—just be mindful of your guests and their limits!
Step 2: Add Cold Water
- Mix in Cold Water:
Next, add 1 cup of cold water to the Jello mixture. This helps to bring down the temperature and gets it ready to set. Stir well for about a minute.
Step 3: Pour Into Shot Glasses
- Ready the Shot Glasses:
Grab your shot glasses or plastic cups and place them on a steady surface. Slowly pour the Jello mixture into each shot glass, filling them about three-quarters full. You can wiggle or gently tap the glasses to ensure they’re leveled, so the ‘eyes’ sit at the top!
Step 4: Add the Eyeballs
- Pop Those Eyeballs In:
Here comes the fun part! Carefully add a few googly eyes candy into each shot. You can also drop a gummy worm or two if you’re feeling especially naughty. This is the point where the cute meets creepy!
Step 5: Chill
-
Refrigerate:
Place the filled shot glasses in the refrigerator for at least 4-6 hours or until the Jello is fully set. Patience is key, but you can make them ahead of time—and believe me, they’ll be the first to disappear!Chef Hack: To speed up chilling, you can place your shot glasses on a baking tray filled with ice for about half an hour.
Step 6: Add a Whipped Touch
- Top It Off:
If you choose to use whipped cream, whip it up while your Jello sets! Just before serving, add a dollop on top of the shots for that extra creamy touch.
Step 7: Serve with Style
- Set Up for Serving:
Arrange your creepy creations on a cake stand, surrounded by faux spider webs and plastic spiders for an even more eerie vibe! Your guests will be howling with delight.
Serving Suggestions
For presentation, place the shot glasses on a dark serving tray or cake stand. Surround it with some spooky decorations like fake spiders or cobwebs. Serve them chilled for the best experience. When your guests take their first bite, watch their expressions transform from excitement to playful horror! Consider passing them around during a scary movie or at the height of your Halloween party for maximum laughs and screams.
Recipe Variations
Feel free to mix things up with these fun variations:
- Layered Jello Shots: Alternate layers of colored Jello (e.g., green and red) to create spine-chilling stripes.
- Vegan Option: Use agar-agar as a gelatin substitute for a plant-based version that everyone can enjoy.
- Flavored Vodka: Infuse a bit of flavor with fruit-flavored vodka or flavored schnapps to enhance the taste.
- Non-alcoholic: You can make these entirely non-alcoholic by just avoiding alcohol altogether, perfect for the kiddos!
- Fruit-Filled Eyeballs: Instead of using candy eyeballs, consider fresh fruit pieces—such as blueberries or halved cherries—to help add a fresher taste while still resembling creepy eyeballs!
Chef’s Notes
Cooking is all about creativity! I once made a batch where I splashed some food coloring for an extra gory effect—let’s just say they turned devastatingly fun! Experimenting can lead to exciting surprises, so don’t be shy!
These creepy eyeball Jello shots may have started as a playful Halloween project, but they have become a beloved favorite in my kitchen! From birthdays to random get-togethers, it’s fascinating to see how they always bring joy. You might even decide to create your own fun stories while whipping these up!
FAQs and Troubleshooting
1. How long do Jello shots take to set?
Typically, it will take around 4-6 hours in the refrigerator. For best results, make them the day before.
2. Can I make these without alcohol?
Absolutely! Just use water for the entire recipe, and they’ll still be equally delightful.
3. What if my Jello isn’t setting?
Ensure you’re using the right gelatin ratio—too little may result in a runny texture. Follow the package directions closely.
4. How do I store leftovers?
You can keep them in the fridge for 3-4 days, just be sure to cover them to keep freshness intact!
Nutritional Info (optional)
Each Jello shot contains approximately 50 calories and 10 grams of sugar (varies based on size and ingredients).
With such irresistible charm and fun visuals, these creepy eyeball Jello shots are more than just a treat—they’re a reason to gather, laugh, and celebrate the joyous and mischievous spirit of Halloween. So gather your friends, delve into the spooky atmosphere, and enjoy the delightful thrill of the season—one delightful shot at a time! Cheers to a frightfully fun kitchen adventure!
Print
Creepy Eyeball Jello Shots
- Total Time: 360 minutes
- Yield: 12 servings 1x
- Diet: Vegetarian
Description
Delightfully creepy and fun, these Jello shots are perfect for Halloween parties with ghoulish eyeballs that impress both kids and adults alike.
Ingredients
- 1 cup flavored Jello (cherry or strawberry recommended)
- 1 cup boiling water
- 1 cup cold water
- Whipped cream (optional)
- Googly eyes candy
- Gummy worms or creepy candies (optional)
- Empty shot glasses or small plastic cups
- Ice cubes (optional)
Instructions
- Boil Water: Begin by boiling 1 cup of water.
- Dissolve the Gelatin: Pour boiling water into a mixing bowl and add Jello powder. Stir until fully dissolved.
- Mix in Cold Water: Add 1 cup of cold water to the mixture and stir well.
- Ready the Shot Glasses: Place shot glasses on a steady surface and pour in Jello mixture, filling them about three-quarters full.
- Pop Those Eyeballs In: Add googly eyes candy and optional gummy worms into each shot.
- Refrigerate: Chill in the refrigerator for 4-6 hours until fully set.
- Top It Off: If using, add a dollop of whipped cream before serving.
- Set Up for Serving: Arrange on a serving tray with spooky decorations.
Notes
You can mix in flavors like vodka or schnapps for an adult twist, and substitute with agar-agar for a vegan version.
- Prep Time: 15 minutes
- Cook Time: 0 minutes
- Category: Dessert
- Method: Chilling
- Cuisine: American
Nutrition
- Serving Size: 1 shot
- Calories: 50
- Sugar: 10g
- Sodium: 5mg
- Fat: 0g
- Saturated Fat: 0g
- Unsaturated Fat: 0g
- Trans Fat: 0g
- Carbohydrates: 12g
- Fiber: 0g
- Protein: 0g
- Cholesterol: 0mg
Keywords: Halloween, Jello shots, festive treats




