
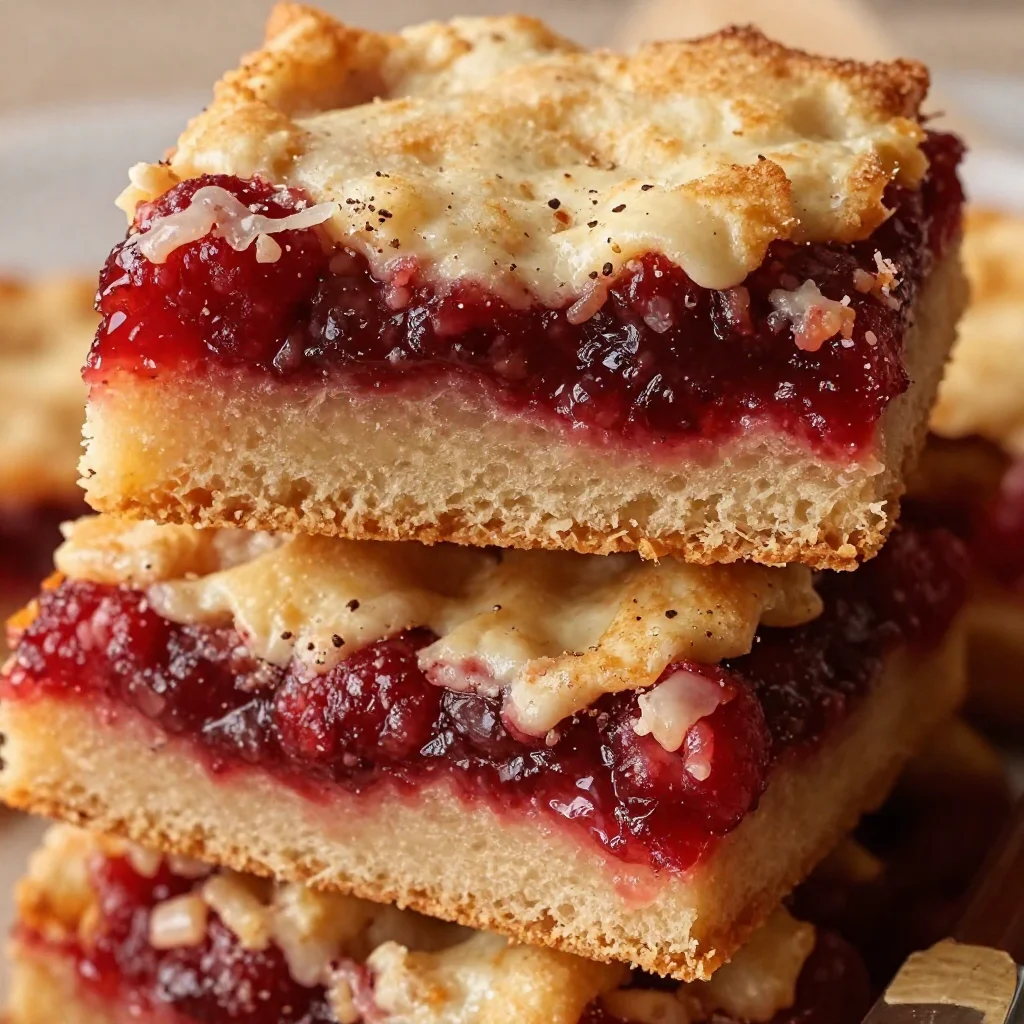
Fabulous Five Ingredient Raspberry Bars
Fabulous Five Ingredient Raspberry Bars: A Sweet Slice of Heaven
Welcome back to my cozy kitchen! Today, I’m thrilled to share with you a sweet treat that’s as easy to whip up as it is delicious: Fabulous Five Ingredient Raspberry Bars. These bars are bursting with rich raspberry flavor, and the best part? They come together with just five simple ingredients. Yes, you heard that right! We’re all about simplicity here, and trust me, this easy dessert will impress your family and friends.
There’s something magical about summer berries, and raspberries have always held a special place in my heart. They evoke fond memories of warm afternoons spent at my grandmother’s house, where we would pick wild raspberries from her garden and make our way to the kitchen, giggling and sneaking a few tangy morsels as we went. My grandmother had a way of turning simple ingredients into something extraordinary, and I aspire to do the same in my own kitchen.
Let’s dive into the joy of creating these delightful Raspberry Bars together! You’ll find that with just five ingredients, a little bit of love, and the warmth of your kitchen, you’ll not only create a scrumptious dessert but also a moment to cherish with those you love.
A Sweet Childhood Memory
Thinking back to those summer days in my grandmother’s kitchen, I can almost smell that sweet and slightly tart aroma of raspberry jam bubbling away on the stove. Every summer, we would make her famous raspberry bars, a recipe that had been passed down for generations. I remember the excitement of smashing those tart berries and mixing them with sugar, watching the transformation as they turned into a glossy filling ready to be spread over buttery crumbles. The best part was waiting for the bars to cool down before cutting into them, the anticipation almost too much to handle!
These bars not only filled our tummies but also filled our hearts with laughter, stories, and memories that would last a lifetime. It’s so much more than just a recipe; it’s a piece of nostalgia that I carry with me. Today, I want to pass on that love and joy to you through this simple, yet oh-so-delicious raspberry bar recipe.
Ingredients
Here’s what you’ll need to create these delightful bars:
-
Fresh Raspberries (2 cups): The star of the show! Use fresh berries for the best flavor. If raspberries are out of season, you can use frozen ones, just make sure to thaw and drain them first to avoid excess moisture.
-
Granulated Sugar (1 cup): Sweetness is key! Feel free to adjust the sugar level depending on your taste preferences. You could swap out regular sugar for coconut sugar or use a sugar substitute for a healthier option.
-
All-Purpose Flour (2 cups): The backbone of our crumbly crust and topping! If you’re gluten-free, a 1:1 gluten-free flour mix works wonderfully here.
-
Unsalted Butter (1 cup, softened): This adds that rich, creamy flavor to your bars. Don’t have unsalted butter? You can use salted butter instead, just reduce any added salt in the recipe.
-
Baking Powder (1 teaspoon): This little helper gives your bars a light texture. If you’re out of baking powder, you can substitute it with baking soda and an acid (like lemon juice or vinegar) in a 1:1 ratio.
Now that you have everything ready, let’s explore how to turn these simple ingredients into a masterpiece!
Step-by-Step Instructions
-
Preheat the Oven: Begin by preheating your oven to 350°F (175°C). This will ensure your bars bake evenly from start to finish.
-
Prepare the Baking Pan: Grease a 9×13-inch baking dish with a bit of butter or line it with parchment paper for easy removal. Trust me, you want your bars to come out neatly for the perfect slice!
-
Make the Crust Mixture: In a large mixing bowl, combine 1 cup of flour, ½ cup of sugar, and ¼ cup of softened butter. Mix together using a pastry cutter or your fingers until it resembles coarse crumbs. The texture should look a bit like sand with some larger pea-sized clumps. It’s okay to get a little messy!
-
Press into the Pan: Take about two-thirds of this crust mixture and evenly press it into the bottom of your prepared pan. This crust is the foundation for your bars, so make sure it’s snug and even.
-
Prepare the Raspberry Filling: In a medium bowl, toss your fresh raspberries with ½ cup of sugar and 1 cup of flour. The flour will help absorb excess liquid from the berries during baking, preventing your bars from becoming too soggy.
-
Spread the Filling: Pour the raspberry filling over the crust in the baking pan, spreading it evenly. The sweet and tangy aroma of the raspberries will make your mouth water!
-
Top with Crumb Mixture: Take the remaining crust mixture and sprinkle it evenly over the raspberry filling. As it bakes, this will create that delightful crumbly topping we all love.
-
Bake: Place the pan in your preheated oven and bake for 30-35 minutes, or until the top is golden brown and the filling is bubbling. Keep an eye on it, as oven times can vary!
-
Cool Down: Once baked, take it out of the oven and allow it to cool in the pan for about 10-15 minutes. Then transfer it to a wire rack to cool completely. Patience is key here; you don’t want to cut into these babies while they’re still warm!
-
Slice and Serve: Once cooled, cut the bars into squares or rectangles, depending on your preferred serving size. Dust with powdered sugar for an elegant finish, and enjoy a well-deserved slice of raspberry bliss!
Serving Suggestions
These Fabulous Five Ingredient Raspberry Bars are perfect for any occasion! Serve them as a sweet snack at your next picnic, as a delightful dessert for family gatherings, or even for a cozy night in with a cup of tea. Plated neatly on a decorative dish and dusted with powdered sugar, they make for a stunning presentation that’s sure to impress your guests.
Recipe Variations
-
Lemon Zest: Add a tablespoon of lemon zest to the raspberry filling for a bright, zesty kick.
-
Nutty Twist: Mix in some chopped nuts (like almonds or walnuts) into your crumb mixture for an added crunch.
-
Coconut Flakes: Sprinkle unsweetened coconut flakes on top before baking for a tropical twist.
-
Vegan Option: Substitute the butter with coconut oil and use a flax egg (1 tablespoon flaxseed meal mixed with 3 tablespoons of water) instead of the egg for a plant-based option.
-
Chocolate Drizzle: Enhance the flavor with a drizzled dark chocolate ganache over the cooled bars for a decadent finish.
Chef’s Notes
This recipe has evolved over my years of cooking, inspired by the classic raspberry bars my grandmother made. Initially, I experimented with different fruits, but raspberries always came out on top. I have fond memories of baking these with my kids, who were more interested in snacking on raw raspberries than waiting for the bars to cool. If you have little sous chefs at home, get them involved! They might just become your best kitchen helpers.
I’ve also learned that making these bars is not just about the end result but the joy of the process. So, don’t sweat the small stuff! Embrace the mess, share a laugh with loved ones, and create sweet memories along the way.
FAQs and Troubleshooting
1. My bars turned out too soggy. What went wrong?
This can happen if the berries were too juicy or if they weren’t drained properly (if using frozen). To fix this in the future, make sure to use fresh, firm raspberries, and drain any excess liquid if using frozen ones.
2. Can I use another type of berry?
Absolutely! Blueberries, blackberries, or even strawberries would work wonderfully. Just keep in mind that the sweetness may vary based on the fruit you choose.
3. How do I store leftovers?
Store any leftover bars in an airtight container in the fridge for up to a week, or freeze them for up to three months. Just make sure to thaw them overnight in the fridge before serving.
4. Can I double the recipe?
Yes! You can easily double the ingredients and use a larger baking dish for a bigger batch, perfect for gatherings or potlucks.
Nutritional Info (optional)
While I didn’t dive into the specific nutritional facts this time, feel free to use a nutrition calculator to analyze the ingredients based on your dietary needs!
There you have it! A delightful, easy-to-follow recipe for Fabulous Five Ingredient Raspberry Bars that not only pleases the taste buds but also warms the heart. I hope you dive into this recipe and enjoy every bite as much as I do! Happy baking! 🍰✨
Print
Fabulous Five Ingredient Raspberry Bars
- Total Time: 50 minutes
- Yield: 12 servings
- Diet: Vegetarian
Description
These Raspberry Bars are a delicious dessert featuring fresh raspberries and a crumbly crust, perfect for any occasion!
Ingredients
- Fresh Raspberries (2 cups)
- Granulated Sugar (1 cup)
- All-Purpose Flour (2 cups)
- Unsalted Butter (1 cup, softened)
- Baking Powder (1 teaspoon)
Instructions
- Preheat the Oven to 350°F (175°C).
- Prepare the Baking Pan by greasing a 9×13-inch baking dish with butter or lining it with parchment paper.
- Make the Crust Mixture by combining 1 cup of flour, ½ cup of sugar, and ¼ cup of softened butter until coarse crumbs form.
- Press about two-thirds of the crust mixture into the bottom of the prepared pan.
- Prepare the Raspberry Filling by tossing fresh raspberries with ½ cup of sugar and 1 cup of flour.
- Spread the raspberry filling over the crust evenly.
- Top with the remaining crust mixture.
- Bake for 30-35 minutes, or until golden brown and bubbling.
- Cool in the pan for 10-15 minutes, then transfer to a wire rack to cool completely.
- Slice into squares or rectangles and dust with powdered sugar before serving.
Notes
These bars can be enjoyed as a sweet snack or a delightful dessert. Feel free to adjust sugar levels to taste.
- Prep Time: 15 minutes
- Cook Time: 35 minutes
- Category: Dessert
- Method: Baking
- Cuisine: American
Nutrition
- Serving Size: 1 bar
- Calories: 200
- Sugar: 10g
- Sodium: 150mg
- Fat: 8g
- Saturated Fat: 5g
- Unsaturated Fat: 2g
- Trans Fat: 0g
- Carbohydrates: 28g
- Fiber: 2g
- Protein: 2g
- Cholesterol: 20mg
Keywords: raspberry bars, dessert, easy recipe, summer treats, baking
Ingredient Raspberry Cream Pie (No-Bake) – Quick Treat
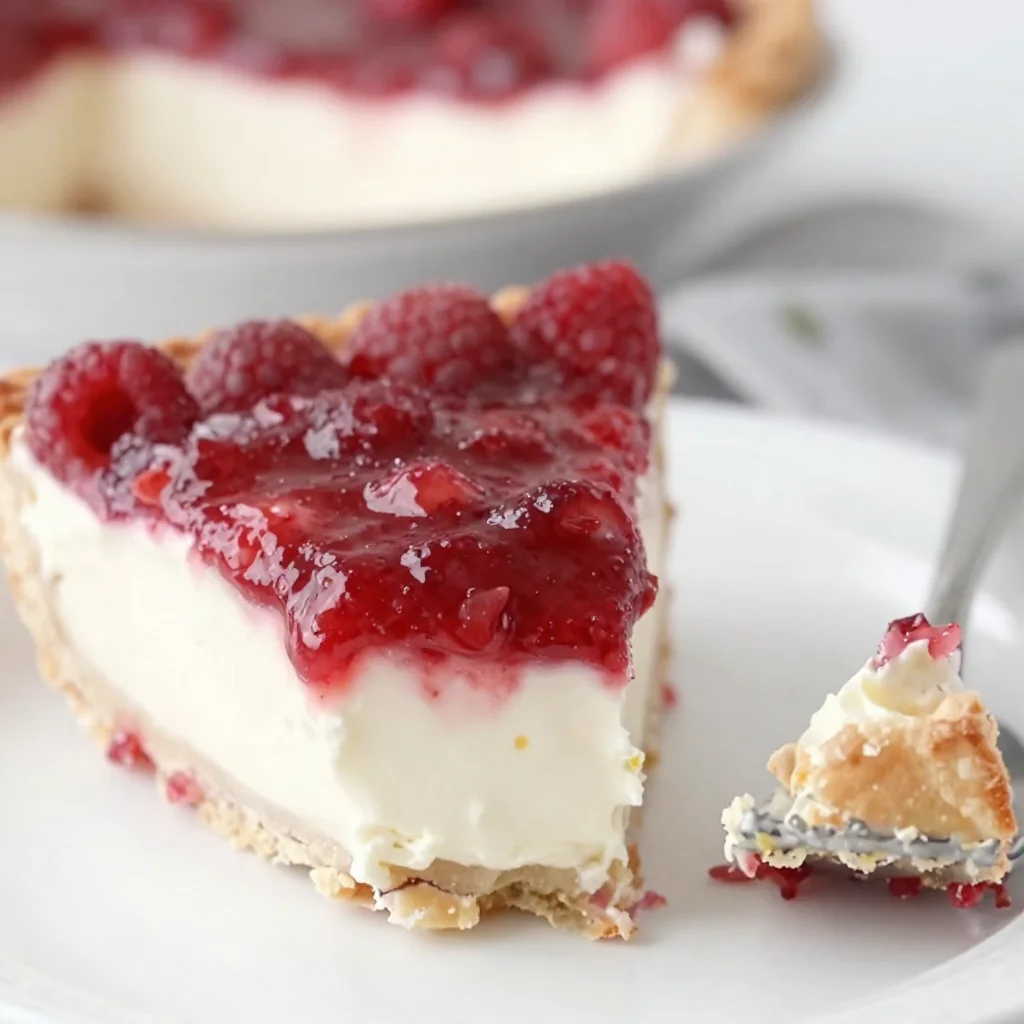
The Ultimate Raspberry Cream Pie Recipe: A Slice of Sweet Nostalgia
Welcome to my kitchen, dear friends! I’m Olivia Bennett, and I’m thrilled to have you here to whip up something absolutely delightful — a luscious Raspberry Cream Pie. This pie is not just a treat for the taste buds, but a heartfelt connection to the many joyful moments spent with family, friends, and the irresistible fragrance of fresh raspberries wafting through the air.
Imagine this: a sunny afternoon, laughter echoing through the kitchen, and the vibrant colors of freshly picked raspberries turning into delicious pie magic. That’s the essence of what we’re crafting today. Raspberry season always brings back the nostalgic memories of summer days spent with my grandmother in her cozy, bustling kitchen. She had this magical ability to turn basic ingredients into something extraordinary, and I could feel the love in every spoonful.
The best part about this Raspberry Cream Pie is its simplicity. With the balance of sweet, tangy raspberries and a rich, creamy filling, it’s a dessert that brings smiles and memories in every slice. Perfect for family gatherings, holidays, or just a little “me-time,” this pie brings joy with every bite.
So, grab your apron and let’s dive into this sweet adventure together! Whether you’re a seasoned pro or just starting your culinary journey, I promise you’ll find confidence in this recipe. Let’s make some delicious memories together!
A Slice of Memory Lane
As a kid, I spent countless afternoons at my grandmother’s farmhouse, tucked away in a quiet little corner of the countryside. She had a small garden bursting with life, and during the summer, the raspberry bushes were my favorite. I remember the thrill of sneaking berries straight from the vine—sweet, juicy, and oh-so-satisfying.
One summer, I decided I wanted to impress her by making something special. Armed with nothing but my optimism and a few basic skills, I gave my best shot at creating a dessert. The result? A rather lopsided Raspberry Cream Pie filled with a mix of berries, cream, and a sprinkle of love. My grandmother took one look at it, beamed, and declared it the best pie she ever tasted. It didn’t matter that it was far from perfect; it was made with the purest of intentions and a whole lot of heart.
That summer inspired me to always experiment in the kitchen and to bring my own twist to classic recipes. Today, I carry that spirit through every dish I create, and this Raspberry Cream Pie is a celebration of those sweet, carefree days spent learning and laughing alongside my grandmother.
Ingredients You’ll Need
Here’s what you’ll need to create this dreamy Raspberry Cream Pie. Each ingredient plays a crucial role, so let’s make sure we’re all set before we start our culinary adventure!
-
1 pre-made graham cracker crust
- A quick and easy base that adds a delightful crunch! You can also make your own; just blend some graham crackers, sugar, and melted butter together.
-
2 cups fresh raspberries
- The star of the show! Use ripe, plump raspberries for a sweet flavor. If they’re out of season, frozen raspberries can be a good substitute, just make sure to thaw and drain excess liquid.
-
1 cup heavy whipping cream
- This makes the pie wonderfully creamy! For a lighter option, you could use whipped coconut cream if you’re going dairy-free.
-
½ cup powdered sugar
- Sweetening the deal! It dissolves easily, giving your filling that perfect sweetness without the graininess.
-
1 ½ teaspoons vanilla extract
- Adds depth and enhances the flavors. Use pure vanilla extract for the best results; it’s worth the splurge!
-
2 tablespoons lemon juice
- A splash of acidity to balance the sweetness. Freshly squeezed lemon juice works best, but bottled will do in a pinch.
-
1 tablespoon cornstarch
- This helps thicken the filling, ensuring every slice holds its shape. You can substitute it with arrowroot powder if you’re looking for a gluten-free option.
Get everything ready, and trust me, you’re going to create something special!
Step-by-Step Instructions
Let’s roll up those sleeves and start creating this delightful Raspberry Cream Pie!
-
Prepare the Crust
- If you’re using a pre-made graham cracker crust, simply remove it from the packaging and set it aside. If making your own, mix 1 ½ cups of crushed graham crackers with ½ cup melted butter and ¼ cup sugar until well combined. Press the mixture firmly into a 9-inch pie pan. Bake at 350°F (175°C) for about 8-10 minutes or until golden. Let it cool completely!
-
Prepare the Raspberry Filling
- In a medium bowl, combine the fresh raspberries (reserve a handful for garnishing), lemon juice, and cornstarch. Gently toss to coat; this step will enhance the flavor and help thicken the filling. Set aside for a while.
-
Whip the Cream
- In a large mixing bowl, add the heavy whipping cream, powdered sugar, and vanilla extract. With an electric mixer, whip the cream on medium speed until soft peaks form—this usually takes about 2-3 minutes. Keep an eye on it; over-whipping can lead to butter!
-
Combine the Mixtures
- Carefully fold the raspberry mixture into the whipped cream using a spatula—be gentle to keep that airy texture! It’s here that you want to blend just until incorporated; don’t worry about making it perfectly uniform; swirls of raspberry make it even more beautiful!
-
Fill the Crust
- Pour the raspberry cream mixture into the prepared graham cracker crust, smoothing the top with a spatula. Pop it into the refrigerator and let it chill for at least 2-3 hours (or overnight for best results). This step is crucial for setting the pie, so be patient!
-
Garnish and Serve
- Once set, bring out the pie, and top it with the reserved fresh raspberries. You can also sprinkle a little extra powdered sugar for a beautiful touch. Slice, serve, and enjoy the compliments!
Serving Suggestions
For a delightful serving experience, try placing each slice on a charming dessert plate. Pair it with a dollop of whipped cream or a scoop of vanilla ice cream for an extra touch of indulgence. A sprig of mint adds a lovely pop of color and freshness! You can even consider a colorful fruit salad on the side for a refreshing contrast. Get creative with your presentation, and let each slice shine!
Recipe Variations
Here are a few creative twists to try:
- Mixed Berry Cream Pie: Swap out some of the raspberries for blueberries or blackberries for a delicious berry blend.
- Citrus Zing: Add a bit of orange or lime zest to the cream filling for a vibrant, zesty flavor boost.
- Chocolate Raspberry Cream Pie: Drizzle or fold in some melted dark chocolate for a decadent twist!
- Vegan Alternative: Use coconut cream and a vegan chocolate crust to make it completely plant-based.
- Nutty Crust: Substitute part of the graham cracker crust with crushed almonds or pecans for a crunchy texture and deeper flavor.
Chef’s Notes
This Raspberry Cream Pie has been a staple in my collection for years, and it never fails to impress! I remember making it for a potluck once and nearly losing my pie in the car because I was so anxious on the way. All was well when I arrived, but the true test was hearing everyone rave about it—talk about a proud moment!
Over the years, I’ve tweaked the recipe here and there, but the heart remains the same. Cooking is all about evolution, and it’s a beautiful thing to see a recipe grow with the seasons and with your own experiences.
FAQs and Troubleshooting
1. Can I use frozen raspberries instead of fresh?
Absolutely! Just make sure to thaw them and drain excess liquid before mixing them with the cream.
2. What if my cream doesn’t whip up?
If your cream isn’t whipping, try chilling your mixing bowl and beaters in the fridge for a few minutes before starting again. Ensure the cream is cold, as this helps in achieving those luscious peaks!
3. My filling is too runny; what did I do wrong?
If the mixture didn’t set, it may be due to not using enough cornstarch or using overripe berries that released too much juice. If this happens, try adding a bit more cornstarch, mixed with some water, and gently heating it to thicken before folding it into the cream.
4. How long can I store leftover pie?
You can keep leftovers in the fridge for up to 2-3 days, but keep in mind that the crust may get a bit soggy as time passes.
Nutritional Info
While I typically focus on flavors rather than numbers, here’s a quick breakdown for a typical slice (1/8 of a 9-inch pie):
- Calories: ~280
- Fat: 18g
- Carbohydrates: 27g
- Protein: 3g
This pie is a lovely treat, so enjoy it in moderation as part of a balanced diet!
So that’s it, my dear kitchen enthusiasts! I hope you’ve enjoyed this Raspberry Cream Pie adventure as much as I do. Remember, cooking is about the love you put into it, the moments shared, and the memories created; savor every second in your kitchen! Happy baking, and may your creations always bring joy!
Print
The Ultimate Raspberry Cream Pie
- Total Time: 180 minutes
- Yield: 8 servings 1x
- Diet: Vegetarian
Description
A luscious Raspberry Cream Pie that connects joyful moments with family through its sweet and tangy flavors.
Ingredients
- 1 pre-made graham cracker crust
- 2 cups fresh raspberries
- 1 cup heavy whipping cream
- ½ cup powdered sugar
- 1 ½ teaspoons vanilla extract
- 2 tablespoons lemon juice
- 1 tablespoon cornstarch
Instructions
- Prepare the Crust: If using a pre-made graham cracker crust, remove it from the packaging and set aside. If making your own, mix 1 ½ cups of crushed graham crackers with ½ cup melted butter and ¼ cup sugar until well combined. Press the mixture firmly into a 9-inch pie pan. Bake at 350°F (175°C) for about 8-10 minutes or until golden. Let it cool completely!
- Prepare the Raspberry Filling: In a medium bowl, combine the fresh raspberries (reserve a handful for garnishing), lemon juice, and cornstarch. Gently toss to coat; set aside.
- Whip the Cream: In a large mixing bowl, add the heavy whipping cream, powdered sugar, and vanilla extract. Whip the cream on medium speed until soft peaks form, about 2-3 minutes.
- Combine the Mixtures: Carefully fold the raspberry mixture into the whipped cream using a spatula until just incorporated.
- Fill the Crust: Pour the raspberry cream mixture into the prepared graham cracker crust, smoothing the top. Chill for at least 2-3 hours or overnight for best results.
- Garnish and Serve: Top with reserved fresh raspberries and sprinkle with extra powdered sugar. Slice, serve, and enjoy!
Notes
For an extra touch, serve with whipped cream or vanilla ice cream.
- Prep Time: 20 minutes
- Cook Time: 10 minutes
- Category: Dessert
- Method: Chilling
- Cuisine: American
Nutrition
- Serving Size: 1 slice
- Calories: 280
- Sugar: 20g
- Sodium: 50mg
- Fat: 18g
- Saturated Fat: 10g
- Unsaturated Fat: 6g
- Trans Fat: 0g
- Carbohydrates: 27g
- Fiber: 2g
- Protein: 3g
- Cholesterol: 50mg
Keywords: raspberry pie, cream pie, dessert recipe, summer dessert, easy pie recipe
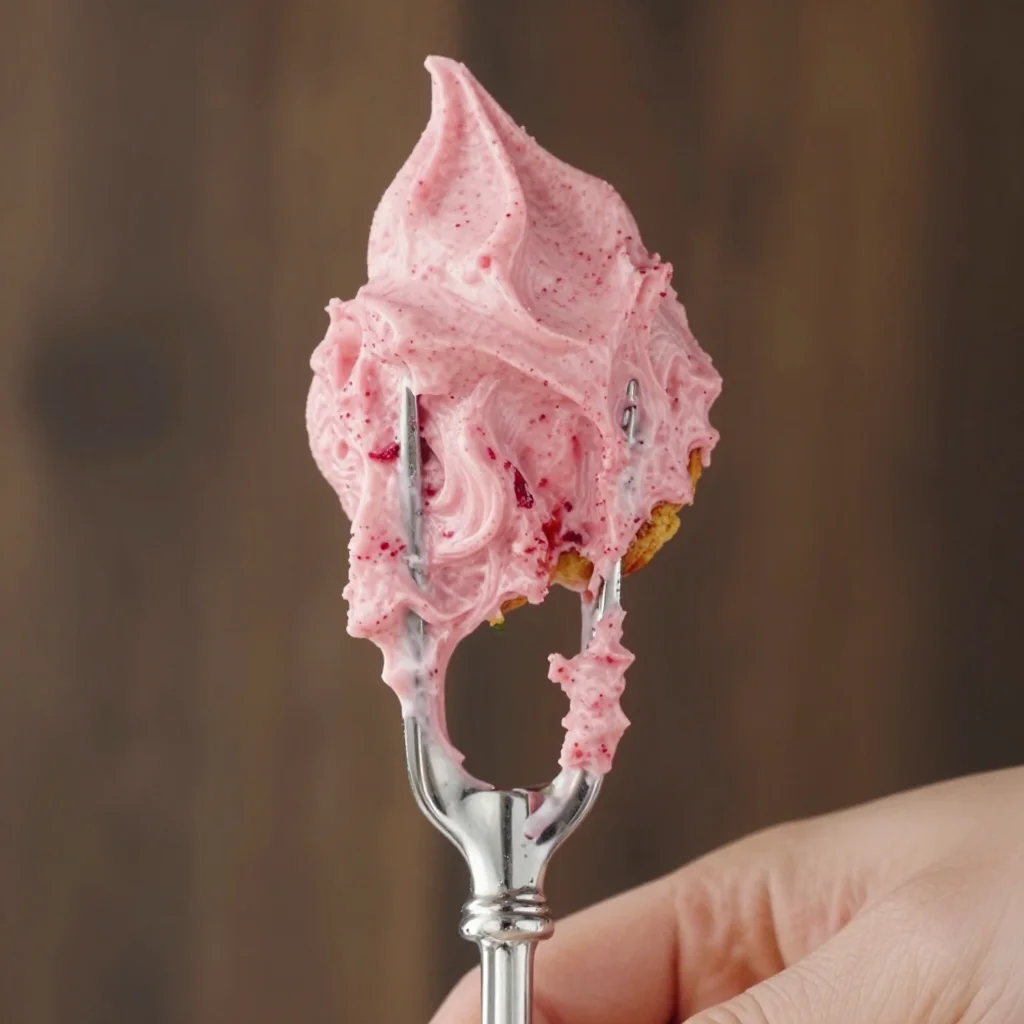
Raspberry Buttercream Frosting
Raspberry Buttercream Frosting: A Sweet Addition to Your Baking Adventures
Welcome to my kitchen! I’m Olivia Bennett, your go-to home cook, flavor enthusiast, and all-around lover of cozy culinary creations. Today, I’m inviting you to join me on a sweet journey as we whip up a delightful Raspberry Buttercream Frosting that will elevate your cakes, cupcakes, and cookies to a whole new level. If the mere thought of frosting draping over a baked treat makes your heart skip a beat, you’re in the right place!
There’s something truly magical about combining fresh fruit with fluffy buttercream, and raspberry is one of my all-time favorites. Its sweet-tart flavor provides a delightful contrast to rich cakes and buttery cookies. The vibrant pink hue of this frosting brings an inviting pop of color to your desserts, making them not just delectable, but also a feast for the eyes!
This frosting recipe is easy to follow, requiring just a handful of ingredients you likely already have on hand. Whether you’re a baking novice or a seasoned pro, you’ll find that crafting your own frosting is a rewarding experience that doesn’t demand fancy skills—just a touch of love and a dollop of creativity. So, roll up your sleeves, grab your mixing bowl, and let’s dive into the world of raspberry buttercream!
A Slice of Nostalgia
Let me take you back to one of my most cherished childhood memories—my grandmother’s kitchen during summer. The air was always thick with the sweet, mouthwatering aroma of fresh berries, and it was a joyous ritual for us to spend Saturday mornings picking raspberries from her garden.
One particular weekend stands out vividly in my mind. After our basket was brimming with bright, juicy raspberries, we headed back to the kitchen, where Grandma began to transform our haul into delicious raspberry preserves. As the berries bubbled away on the stove, she introduced me to the magic of frosting, and we whipped up a batch of her signature raspberry buttercream. I vividly remember how her laughter echoed off the walls as we sampled spoonfuls straight from the bowl, giggling as raspberry juice splattered our aprons.
That memory ignited my lifelong passion for baking and has forever linked the sweet-tart flavor of raspberries with warm moments spent in the kitchen. Now, every time I make my raspberry buttercream frosting, I’m whisked back to those carefree summer days, and my heart swells with love and nostalgia.
What You’ll Need
Here’s what you’ll need to create this scrumptious Raspberry Buttercream Frosting:
-
1 cup unsalted butter (softened): Make sure your butter is at room temperature for the smoothest consistency. If you don’t have unsalted, you can use salted butter—just reduce the added salt in the recipe a bit.
-
4 cups powdered sugar: A must for sweetness and texture! You can substitute some of this with alternative sweeteners like erythritol if you’re aiming for a lower-sugar version.
-
1/4 cup fresh raspberries: Fresh raspberries yield the best flavor! If you can’t find fresh ones, thawed frozen raspberries work, but make sure to drain excess liquid.
-
2 tablespoons heavy cream (or milk): This adds creaminess to the frosting. Almond milk or coconut milk can be used for a dairy-free option!
-
1 teaspoon vanilla extract: This enhances the flavor profile beautifully. Feel free to swap it with almond extract for a different twist!
-
A pinch of salt: It balances the sweetness and enhances the flavors. Just a small amount goes a long way!
These ingredients are relatively simple and can usually be found in most households. Just like in life, cooking is all about flexibility—feel free to mix and match based on what you have on hand!
Step-By-Step Instructions
Now that we have our ingredients ready, let’s transform them into a bowl of delicious Raspberry Buttercream Frosting!
-
Prepare the ingredients: Start by measuring all your ingredients and setting them out. This is a game-changer for efficiency and ensures you won’t forget anything during the mixing process!
-
Cream the butter: In a large mixing bowl, add the softened unsalted butter. Using an electric mixer or a sturdy whisk, cream the butter on medium speed until it’s light and fluffy—about 2-3 minutes. This step is crucial! Properly creamed butter will ensure a light, airy frosting.
-
Sift the powdered sugar: In a separate bowl (or directly into the butter if you’re feeling adventurous), sift the powdered sugar to eliminate any lumps. Gradually add this to your creamed butter, a cup at a time, mixing on low speed to start. This helps to avoid a sugary cloud explosion—trust me, I’ve been there!
-
Incorporate the raspberries: Next, mash your fresh raspberries with a fork until you have a chunky puree. You can reserve a couple for garnishing if you’re feeling fancy later! Add the raspberry mash to the mixing bowl and mix on medium speed until well combined, about 2-3 minutes. The beautiful pink hue will start to appear!
-
Add cream and flavorings: Pour in the heavy cream and vanilla extract (remember that pinch of salt?). Mix on medium-high speed for another minute or two until everything is beautifully combined and fluffy. If the frosting seems too thick, just add a little extra cream until you reach your desired consistency.
-
Taste and adjust: Give your frosting a little taste! This is the fun part. If you want more sweetness, add a bit more powdered sugar; for a tangy kick, throw in a few more mashed raspberries.
-
Get decorative: Now comes the fun! Use a spatula to lift the frosting into a piping bag or use an offset spatula to spread it across cakes and cupcakes.
Serving Suggestions
Once you’ve perfected your Raspberry Buttercream Frosting, it’s time to get creative with your serving options! This luscious frosting is a versatile companion to so many baked goodies. Think fluffy vanilla cupcakes, rich chocolate cakes, or even light and airy sponge cakes. You can pipe it into swirls on top of cupcakes, layer it between sheets of cake, or simply spread it generously on cookies for a quick treat!
To garnish, consider adding fresh raspberries on top or a sprinkle of edible glitter for a touch of sparkle. The presentation is just as important as the taste, and a bright, floral dessert will surely wow your guests!
Recipe Variations
Looking to jazz up your frosting or cater to dietary preferences? Here are some creative twists to try:
-
Lemon Raspberry Buttercream: Substitute a few tablespoons of raspberry with freshly squeezed lemon juice for a citrusy zing.
-
Vegan Raspberry Buttercream: Use coconut oil in place of butter, and swap heavy cream with coconut cream.
-
Chocolate Raspberry Buttercream: Mix in some unsweetened cocoa powder for a decadent chocolate-berry combo.
-
Raspberry Almond Buttercream: Replace vanilla with almond extract for a nutty addition that pairs perfectly with raspberry.
-
Spicy Raspberry Buttercream: Add a pinch of cayenne or chili powder for a surprising heat that contrasts beautifully with the sweetness.
Chef’s Notes
Every recipe evolves over time, and this Raspberry Buttercream Frosting is no exception! Originally, I used to make it with just raspberries and buttercream, but over the years, I’ve played around with incorporating different flavors and textures.
One time, I made a huge batch for a family reunion, but I miscalculated the raspberry-to-butter ratio and ended up with a rather liquidy frosting. Instead of panicking, I turned it into a berry drizzle! I simply heated it gently on the stove, adjusted the sweetness, and poured it over my cake—a delicious mishap indeed!
Cooking is all about finding joy in the journey, and I hope you find just as much joy in this recipe as I have over the years.
FAQs and Troubleshooting
-
My frosting is too runny; what do I do?
- No worries! You can thicken it by gradually adding more powdered sugar. If you’ve added too much liquid, a little extra sugar will usually do the trick.
-
My frosting tastes too sweet; how can I tone it down?
- Try mixing in a pinch of salt or a squeeze of lemon juice to balance the sweetness—this can help bring out the raspberry flavor and give you a more rounded taste.
-
Can I make this frosting ahead of time?
- Absolutely! You can store the frosting in an airtight container in the fridge for up to a week. Just give it a quick stir or re-whip it to fluff it up again before using.
-
What cakes work best with raspberry buttercream?
- This frosting pairs wonderfully with vanilla, chocolate, lemon, and almond cakes. The versatility of raspberry complements various flavors beautifully!
Nutritional Info
(You might want to provide this information based on your ingredients so that readers can make informed dietary decisions!)
Enjoy your culinary adventure with this Raspberry Buttercream Frosting! I hope it brings as much joy to your kitchen as it has to mine over the years. Nothing beats the joy of creating and sharing delicious food, and with this recipe, you can bring the taste of summer into your home—all year round. Happy baking, and don’t forget to keep those aprons messy!
Print
Raspberry Buttercream Frosting
- Total Time: 15 minutes
- Yield: 2 cups 1x
- Diet: Vegetarian
Description
A delightful Raspberry Buttercream Frosting that elevates cakes, cupcakes, and cookies with its sweet-tart flavor and vibrant color.
Ingredients
- 1 cup unsalted butter (softened)
- 4 cups powdered sugar
- 1/4 cup fresh raspberries
- 2 tablespoons heavy cream (or milk)
- 1 teaspoon vanilla extract
- A pinch of salt
Instructions
- Prepare the ingredients: Start by measuring all your ingredients and setting them out.
- Cream the butter: In a large mixing bowl, add the softened unsalted butter and cream until light and fluffy.
- Sift the powdered sugar: Sift the powdered sugar to eliminate lumps, then gradually add it to the creamed butter.
- Incorporate the raspberries: Mash the fresh raspberries and add them to the mixing bowl, mixing until well combined.
- Add cream and flavorings: Pour in the heavy cream and vanilla extract, mix until fluffy.
- Taste and adjust: Taste the frosting and adjust sweetness or tanginess as desired.
- Get decorative: Use a spatula or piping bag to frost your baked goods.
Notes
Consider adding fresh raspberries on top or edible glitter for decoration. This frosting pairs wonderfully with vanilla, chocolate, lemon, and almond cakes.
- Prep Time: 15 minutes
- Cook Time: 0 minutes
- Category: Dessert
- Method: Mixing
- Cuisine: American
Nutrition
- Serving Size: 1 serving
- Calories: 200
- Sugar: 25g
- Sodium: 100mg
- Fat: 9g
- Saturated Fat: 5g
- Unsaturated Fat: 4g
- Trans Fat: 0g
- Carbohydrates: 30g
- Fiber: 1g
- Protein: 1g
- Cholesterol: 30mg
Keywords: frosting, raspberry, buttercream, dessert, baking

White Chocolate Raspberry Scones
The Sweet Symphony of White Chocolate Raspberry Scones
Welcome to my kitchen, friends! Today, we’re diving into something truly delightful: White Chocolate Raspberry Scones. These little treats are more than just baked goods; they’re bites of joy that can turn any day into a special occasion. Whether you’re enjoying a cozy morning at home or hosting a charming tea party, these scones bring a burst of flavor and a sprinkle of sweetness to your life.
I remember the first time I tasted a raspberry scone — it was during a lazy Sunday brunch with my best friend Lucy. The cafe, with its mismatched furniture and floral wallpaper, radiated warmth. We’d ordered a pot of Earl Grey tea and a couple of those heavenly scones, which were golden and crusty on the outside, yet tender and bursting with juicy raspberries on the inside. The moment I took my first bite, I could feel the sweet and tart flavors dancing in harmony, with the smoothness of white chocolate elevating it all to another level. It was pure bliss! From that day on, I became determined to recreate that experience in my kitchen, and I’m excited to share what I’ve learned.
Let’s roll up our sleeves and get baking because these White Chocolate Raspberry Scones are going to steal your heart — and your taste buds. Trust me, you’ll want to whip these up again and again!
A Nostalgic Memory: The Birth of My Scone Addiction
Picture this: a sun-drenched kitchen, a gentle breeze wafting through the window, and the sweet scent of raspberries blended with a hint of white chocolate. That was the scene when I first tried my hand at baking scones at home. After my memorable brunch outing, I was inspired and slightly obsessed! I spent countless weekends experimenting, flour dusting my apron, and my dog, Oliver, eagerly waiting for any crumbs to fall.
I remember the first batch I made. It was a sunny Saturday morning, and I was determined to impress my family. The scones were a bit overcooked (okay, maybe more than a bit), but even those crispy edges couldn’t hide the delight of the rich raspberry flavor with morsels of melted white chocolate. We sat around the breakfast table, sharing laughs, and with each bite, my confidence as a baker blossomed. Those scones became a Saturday tradition in our home, a ritual that celebrated the joy of family and flavor.
And now, I want to inspire you with this simple yet elegant recipe that will just become a staple in your kitchen too. Let’s bring the warmth of that sunny kitchen into your home!
Ingredients
-
2 cups all-purpose flour
All-purpose flour forms the base of your scones, providing the right texture. If you want a slightly healthier twist, feel free to substitute half of it with whole wheat flour! -
1/4 cup granulated sugar
Sugar adds sweetness and enhances the flavor of the baked good. If you prefer a less sweet version, you can reduce the sugar slightly while still keeping the integrity of our scones. -
1 tablespoon baking powder
This helps the scones rise and become fluffy. Ensure it’s fresh; old baking powder can lead to dense scones. -
1/2 teaspoon salt
Salt enhances the overall flavor and balances the sweetness. It’s an essential ingredient! -
1/2 cup cold unsalted butter
Cold butter is crucial! It creates a flaky texture. If you’re in a pinch, you can substitute it with margarine or even coconut oil for a different flavor profile. -
1/2 cup heavy cream (plus extra for brushing)
Cream brings richness and moisture. For a lighter option, try whole milk or buttermilk. -
1 teaspoon vanilla extract
Add this for a warm, inviting flavor. Feel free to experiment with almond extract for a different twist! -
1 cup fresh raspberries
The star of the show! Fresh raspberries add vibrant color and tartness. If fresh ones aren’t available, you can use frozen, but make sure to gently fold them in while still frozen. -
1/2 cup white chocolate chips
For that sweet, creamy contrast to the tart raspberries. You can also try dark chocolate chips if you prefer a richer flavor.
Step-by-Step Instructions
Preheat and Prep
-
Preheat your oven to 400°F (200°C)
Preheating is essential for scones, as it helps achieve that beautiful golden crust. It’ll take a few minutes, so let’s just revel in the anticipation! -
Prepare your baking sheet
Line a baking sheet with parchment paper. This will prevent your scones from sticking and make clean-up a breeze!
Mix Dry Ingredients
- In a large bowl, whisk together the flour, sugar, baking powder, and salt
This ensures everything is well combined, which is key to uniform scones. Take a moment to appreciate the beauty of these simple ingredients!
Cut in the Butter
- Add the cold butter
Using a pastry cutter or your fingertips, work the butter into the flour mixture until it resembles coarse crumbs. You want small pea-sized pieces of butter left—that’s where the magic happens! This process creates those lovely flaky layers.
Combine Wet Ingredients
- In a separate bowl, whisk together the cream and vanilla extract
This will not only bring added flavor but also help ease the dry ingredients together. Whisk it until it’s nice and smooth — you want it to be a bit frothy.
Bring It Together
- Pour the wet ingredients into the dry mixture
Stir gently with a spatula until just combined. Be careful not to overmix — we want tender scones, not tough ones!
Fold in the Goodies
- Gently fold in the raspberries and white chocolate chips
Use a light hand here. This is where you’ll see those gorgeous specks of fruit and chocolate come to life in your dough!
Shape the Scones
-
Turn the dough onto a lightly floured surface
With your hands, gently shape the dough into a round disc about one inch thick. -
Cut the dough into wedges
Use a sharp knife or a pizza cutter — my secret weapon! — to slice the dough into 8 triangles.
Bake Time!
-
Transfer the scones to the prepared baking sheet
Leave a little space between them since they’ll puff up during baking. Brush the tops with a bit of cream for that golden finish. -
Bake in the preheated oven for 15-20 minutes or until golden brown
Sit back and enjoy the heavenly aroma wafting through your kitchen. It’s the best part!
Serving Suggestions
Once out of the oven, let the scones cool slightly on a wire rack. To serve, stack a few scones on a beautiful platter, dust with powdered sugar for a touch of elegance, and consider pairing them with whipped cream or clotted cream for an indulgent treat. These scones are perfect with a cup of tea or coffee, making them ideal for brunch or an afternoon snack!
Recipe Variations
-
Lemon Zest Addition
Add a teaspoon of lemon zest to the dough for a bright, citrusy twist that pairs wonderfully with the raspberries. -
Nutty Touch
Incorporate chopped nuts like almonds or hazelnuts for an added crunch. This gives a delightful texture contrast! -
Different Berries
Swap out raspberries for blueberries or strawberries. You can mix and match based on your seasonal favorites! -
Flavored Chocolate
Experiment with flavored chocolate chips — white chocolate peppermint for winter, or dark chocolate rosemary for a more sophisticated touch. -
Gluten-Free Version
Substitute the all-purpose flour with a 1:1 gluten-free baking flour blend. Just watch your baking time closely!
Chef’s Notes
When I first developed this recipe, I played around with various substitutions, trying to strike the perfect balance between sweetness and tartness. One afternoon, I accidentally dropped a whole cup of raspberries into the dough — while I thought I had ruined it, the end result was astounding! The scones were bursting with color and flavor, which inspired me to embrace imperfections in the kitchen. After all, cooking is all about experimenting and making mistakes.
I’ve had the joy of making these scones for countless brunches, family gatherings, and casual afternoons with friends. Each time, they turn out a little differently depending on the berries I use or what I have on hand, and that’s the beauty of cooking!
FAQs and Troubleshooting
Why are my scones too dry?
If your scones are dry, you might be overmixing the dough or using too much flour. Always measure your flour correctly and mix until just combined.
Can I make the dough ahead of time?
Absolutely! You can prepare the dough, shape it into a disc, and wrap it tightly in plastic wrap. Refrigerate for up to 24 hours. Just bake them directly from the fridge, but you may need to add a couple of extra minutes to the baking time.
How should I store leftover scones?
Store them in an airtight container at room temperature for up to three days. To reheat, pop them in the oven for a few minutes to restore their delightful texture.
Can I freeze these scones?
Yes! Scones freeze beautifully. Freeze them after baking and let them thaw on the counter for a few hours before enjoying. Alternatively, you can freeze unbaked scones on a baking sheet and transfer them to a bag. Bake straight from the freezer; just add a couple of extra minutes to the baking time.
Nutritional Info
(For reference; this can be adjusted based on actual ingredients used)
- Calories: 250 kcal per scone
- Total Fat: 12g
- Saturated Fat: 7g
- Carbohydrates: 35g
- Sugar: 10g
- Fiber: 1g
- Protein: 3g
And there you have it! These White Chocolate Raspberry Scones are perfect for any occasion, whether a quiet Sunday morning or a bustling brunch gathering with friends. So, roll up those sleeves, gather your ingredients, and let’s create some mouthwatering memories in the kitchen! Happy baking! 🍽️❤️
Print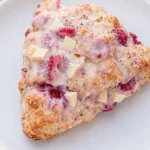
White Chocolate Raspberry Scones
- Total Time: 30 minutes
- Yield: 8 servings 1x
- Diet: Vegetarian
Description
Delightful scones bursting with fresh raspberries and white chocolate, perfect for brunch or a cozy afternoon tea.
Ingredients
- 2 cups all-purpose flour
- 1/4 cup granulated sugar
- 1 tablespoon baking powder
- 1/2 teaspoon salt
- 1/2 cup cold unsalted butter
- 1/2 cup heavy cream (plus extra for brushing)
- 1 teaspoon vanilla extract
- 1 cup fresh raspberries
- 1/2 cup white chocolate chips
Instructions
- Preheat your oven to 400°F (200°C).
- Prepare a baking sheet by lining it with parchment paper.
- Whisk together the flour, sugar, baking powder, and salt in a large bowl.
- Add the cold butter, working it into the flour mixture until it resembles coarse crumbs.
- Whisk together the cream and vanilla extract in a separate bowl until smooth.
- Pour the wet ingredients into the dry mixture and stir gently until just combined.
- Fold in the raspberries and white chocolate chips carefully.
- Turn the dough onto a lightly floured surface and shape it into a round disc about one inch thick.
- Cut the dough into 8 triangles using a sharp knife.
- Transfer the scones to the prepared baking sheet, brushing the tops with cream.
- Bake for 15-20 minutes or until golden brown.
Notes
Consider serving with whipped cream or clotted cream for an indulgent treat.
- Prep Time: 10 minutes
- Cook Time: 20 minutes
- Category: Bakery
- Method: Baking
- Cuisine: American
Nutrition
- Serving Size: 1 scone
- Calories: 250
- Sugar: 10g
- Sodium: 150mg
- Fat: 12g
- Saturated Fat: 7g
- Unsaturated Fat: 5g
- Trans Fat: 0g
- Carbohydrates: 35g
- Fiber: 1g
- Protein: 3g
- Cholesterol: 30mg
Keywords: scones, white chocolate, raspberry, brunch, dessert

Strawberry Banana Milkshake
Strawberry Banana Milkshake: A Nostalgic Sip of Summer
Introduction
Hey there, friends! Welcome back to my cozy little corner of the internet! Today, we’re diving into one of my all-time favorite treats: the classic strawberry banana milkshake. If there’s one thing that brings back sweet childhood memories, it’s sitting in my grandma’s kitchen, watching her blend up this refreshing drink on a hot summer day. The way the creamy vanilla ice cream would swirl together with ripe bananas and luscious strawberries was pure magic, and I couldn’t wait to get my hands on the first frosty glass.
As the blender whirred, I could feel the anticipation building. There was something about that bright pink color and the sugary-sweet aroma that made my heart skip a beat! Whenever we made milkshakes, it became a mini celebration — a reason to gather, to laugh, and to indulge. Now, I’m all grown up, but the delight of a homemade milkshake still captures my heart in the same way.
This strawberry banana milkshake isn’t just a delicious, creamy treat; it also holds the power to revive those fond memories and connect us with the people we care about. It’s a perfect pick-me-up for any occasion—whether you’re enjoying an afternoon snack, hosting friends for brunch, or just treating yourself on a lazy Sunday.
So grab your apron and let’s get shaking! We’re about to blend up something fantastic that will leave you craving more. Whether you’re channeling your inner child or trying your hand at homemade shakes for the first time, I’ve got everything you need right here. Trust me, once you whip this up, you’ll be dreaming of summer days all year long!
Personal Story
I remember it vividly—the sweltering summer afternoons spent at my grandmother’s house. It was one of those days when the sun blazed in the sky, and the air was sticky with the promise of heat. Grandma, with her ever-present apron tied around her waist, would announce, “It’s milkshake time!” And just like that, the world outside vanished as we gathered around her well-loved kitchen counter.
With a mischievous twinkle in her eye, she would pull out the blender and start tossing in fresh strawberries, creamy bananas, and a healthy scoop of vanilla ice cream. As a kid, I was tasked with the all-important duty of taste-testing—it was a responsibility I took very seriously! I can still recall the exhilarating blend of sweetness and creaminess that danced on my taste buds, with the burst of strawberry flavor taking the lead. Grandma always added a splash of milk and a hint of vanilla to enhance the flavors, and she had a knack for getting the consistency just right: not too thick but perfectly sippable.
These milkshake moments weren’t just about the drink; they were about connection, laughter, and creating memories that I cherish to this day. So when I whip up my own strawberry banana milkshake now, it’s like a delicious time capsule that transports me back to those warmer days filled with love, laughter, and the pure joy of being together.
Ingredients
To bring this wonderful milkshake to life, you’ll need the following ingredients. Don’t worry—this list isn’t intimidating at all!
-
Fresh Strawberries (1 cup): Sweet, juicy strawberries are the star of the show. Look for ripe ones that have a bright red color and a sweet aroma. If you don’t have fresh berries, feel free to use frozen ones—just slightly adjust the amount of milk since frozen berries can release water as they thaw!
-
Ripe Bananas (1 medium): A perfectly ripe banana adds a natural sweetness and creamy texture. Choose one that has small brown speckles; this indicates it’s at peak sweetness and flavor. If you’re out of bananas, use ½ cup of yogurt instead for a creamy base.
-
Vanilla Ice Cream (2 scoops): The creamy element that elevates this milkshake to indulgent heights! You can use any flavor you like, but the classic vanilla pairs beautifully with strawberry and banana. If you’re looking for a lighter option, consider Greek yogurt or dairy-free ice cream.
-
Milk (½ cup, adjust to preference): Whole milk offers a rich consistency, but any milk (almond, oat, or coconut) will work. You can adjust the amount depending on how thick or thin you prefer your milkshake. Start with less and add more if needed!
-
Vanilla Extract (1 teaspoon): A splash of vanilla extract brings all the flavors together and adds warmth. If you don’t have vanilla extract, almond extract could impart a unique flavor twist.
-
Whipped Cream (optional for topping): For that classic indulgent touch! Homemade whipped cream takes it to the next level, but store-bought is perfectly fine too.
Step-by-Step Instructions
Ready to blend up some nostalgia? Let’s jump into the steps!
-
Prep Your Ingredients: Start by washing your strawberries. Remove the green tops using a small knife or your fingers, then slice the strawberries to help them blend smoothly. Peel your banana and slice it into rounds for easier blending.
Chef Tip: Make sure your fruits are at room temperature for the best flavor. Cold ingredients can dull the taste, so let them sit out for a bit if they’ve been in the fridge!
-
Blend the Base: In a blender, combine the sliced strawberries and bananas. Add in two generous scoops of vanilla ice cream. Yes, this is the time to be generous—treat yourself!
Commentary: The key to a well-blended milkshake is to layer your ingredients in this order. Fruits first help them get blitzed right up against the blades, ensuring no chunky bits are left.
-
Add the Milk: Pour in about ½ cup of milk and the teaspoon of vanilla extract. This will help create that creamy, sippable consistency.
Chef Hack: If you want a super-thick milkshake, start with less milk and gradually add more during blending until you reach the desired thickness.
-
Blend Away: Secure the lid on your blender and blend on high speed for about 30 seconds to a minute. You want everything to be beautifully mixed—no banana chunks! If needed, give it a shake halfway through and keep blending until smooth.
Tip: If it’s too thick, add more milk a splash at a time; if too runny, toss in a bit more ice cream or a few extra berries.
-
Taste Test: Here’s the best part—grab a spoon and taste your creation! Adjust sweetness by adding a tiny bit of honey or sugar if necessary.
-
Serve: Pour your divine milkshake into tall glasses. Work your magic when pouring—let the creaminess cascade down the sides.
Chef Insight: Feel free to use a fancy glass if you’re feeling extra! Presentation can elevate the experience, even in your own kitchen!
-
Garnish: Top it off with a swirl of whipped cream and sprinkle some crushed strawberries or chocolate shavings, if you’re feeling indulgent.
Serving Suggestions
When it comes to serving your delightful strawberry banana milkshake, the options are endless! You can top it off with a dollop of whipped cream, drizzle some chocolate or caramel syrup, and sprinkle crushed nuts for a crunchy twist. Serve it alongside a slice of your favorite cake or some freshly baked cookies for a delicious dessert platter. If you’re entertaining, consider making milkshake flights with different flavors to wow your guests!
Recipe Variations
-
Peanut Butter Banana Milkshake: Add a couple of tablespoons of creamy peanut butter for a nutty twist that pairs perfectly with banana.
-
Chocolate Strawberry Banana Milkshake: Mix in a tablespoon of chocolate syrup or cocoa powder for a chocolatey spin.
-
Dairy-Free Delight: Use almond milk, coconut ice cream, and agave instead of regular milk and ice cream for a creamy, dairy-free version.
-
Berry Blast: Replace some of the strawberries with blueberries or blackberries for a mixed berry delight.
-
Protein Power: Sneak in a scoop of protein powder to turn this treat into a post-workout shake without sacrificing taste!
Chef’s Notes
I love how this strawberry banana milkshake recipe has evolved over the years! It started as a simple summer treat and has now turned into a versatile base for creativity. I remember a kitchen disaster when I accidentally added too much vanilla extract—my shake turned out almost too fragrant. I laughed about it, but hey, these little moments remind me why cooking is so fun! After all, cooking is about experimentation, learning, and having joy in the process, even when things don’t go exactly as planned.
FAQs and Troubleshooting
1. My milkshake is too thick! What can I do?
Simply add a little more milk, one tablespoon at a time, and blend until you reach the desired consistency.
2. Can I make this milkshake in advance?
While fresh is best, you can prepare all your ingredients and store them in the fridge for up to a few hours before blending. If making ahead, consider storing the blended shake for a short time in the fridge, but it might need a stir and a bit more milk to bring it back to life!
3. What if I don’t have ripe bananas?
Using a frozen banana or a splash of banana extract can help replicate that sweetness and flavor—just adjust the added sugar accordingly!
4. How can I make a lower-sugar version?
You can swap out the ice cream for a yogurt base or use unsweetened almond milk with a little bit of honey or stevia for sweetening. You can also reduce the amount of strawberries!
Now that you’ve got all the essential tips and tricks, why not grab your blender and whip up this delightful strawberry banana milkshake? It’s not just a recipe; it’s an experience waiting to unfold! Cheers to savoring every sweet sip! 🍓🥤
Print
Strawberry Banana Milkshake
- Total Time: 10 minutes
- Yield: 2 servings 1x
- Diet: Vegetarian
Description
A classic strawberry banana milkshake that brings back sweet childhood memories, blending creamy vanilla ice cream with fresh strawberries and ripe bananas for a refreshing treat.
Ingredients
- 1 cup Fresh Strawberries
- 1 medium Ripe Banana
- 2 scoops Vanilla Ice Cream
- ½ cup Milk (adjust to preference)
- 1 teaspoon Vanilla Extract
- Whipped Cream (optional for topping)
Instructions
- Prep your ingredients: Wash strawberries, remove tops, and slice. Peel and slice banana.
- Blend the base: Combine strawberries and bananas in a blender with vanilla ice cream.
- Add the milk and vanilla extract.
- Blend on high speed for 30 seconds to a minute until smooth.
- Taste and adjust sweetness if necessary.
- Serve the milkshake in tall glasses.
- Garnish with whipped cream and optional toppings.
Notes
Adjust the milk to achieve your desired thickness. Use frozen strawberries if fresh ones aren’t available.
- Prep Time: 10 minutes
- Cook Time: 0 minutes
- Category: Beverage
- Method: Blending
- Cuisine: American
Nutrition
- Serving Size: 1 serving
- Calories: 300
- Sugar: 40g
- Sodium: 100mg
- Fat: 10g
- Saturated Fat: 6g
- Unsaturated Fat: 4g
- Trans Fat: 0g
- Carbohydrates: 45g
- Fiber: 3g
- Protein: 5g
- Cholesterol: 30mg
Keywords: milkshake, strawberry, banana, summer drink, nostalgic dessert

Strawberry Mochi
Delightful Strawberry Mochi: A Sweet Journey into Soft, Chewy Bliss
Welcome, fellow food lovers! I’m thrilled you’ve joined me in my cozy corner of the kitchen today. If you’re here, you probably share my infatuation with that delightful chewy goodness known as mochi. Specifically, we’re going to whip up a batch of luscious Strawberry Mochi, a treat that combines the sweetness of strawberries with the delightful texture that makes mochi irresistible.
Mochi has always held a special place in my heart. It’s the type of dessert that marries tradition and creativity, offering endless possibilities for flavor. Whether it’s the chewy texture or the burst of flavor from the filling, mochi never fails to make me smile. Plus, who doesn’t adore a dessert that doubles as a fun activity? Making mochi allows you to get your hands a bit messy, which, if you know me, is often my favorite part of cooking!
Now, I know what you might be thinking, “Mochi sounds complicated!” But trust me, it’s not as daunting as it seems. With a few simple ingredients and a touch of enthusiasm, you’ll be on your way to creating these delightful, chewy morsels in no time. So, gather your ingredients and get ready to unleash your inner chef as we embark on this sweet culinary adventure together!
Personal Story
Let me take you back to a sunny afternoon in my childhood, where the air was filled with sweet fragrance and laughter. It was a hot summer day, perfect for a picnic in the park. My family decided on a fun outing, complete with homemade treats. That day, my grandmother brought along her famous strawberry mochi.
I remember biting into that colorful, chewy delight for the first time—exploding with the juicy sweetness of fresh strawberries. It was a revelation! We sat on our picnic blanket, soaking in the sun and sharing stories while devouring those delightful bites.
To this day, the memory of that picnic is firmly etched in my heart. It’s more than just a sugary treat; it’s a reminder of family, joy, and the simple pleasures found in sharing good food. Now, I’ve transformed that cherished recipe into something I can’t wait to share with you. Let’s relive those sweet moments together as we create our own strawberry mochi magic!
Ingredients
Here’s what you’ll need to create your very own Strawberry Mochi. I’ve included some handy tips and substitutions for each item to make your cooking experience even better!
-
Sweet Rice Flour (Mochiko): This is your star ingredient! Mochiko is a fine, glutenous rice flour that gives mochi its signature chewy texture. You can find it at Asian grocery stores or online. If you’re in a pinch, you can use regular glutinous rice flour, but the texture might differ slightly.
-
Sugar: A bit of sweetness goes a long way! You’ll need granulated sugar for sweetness and to balance the earthy flavors of the rice flour. If you’re looking for alternatives, consider coconut sugar or honey, but you may need to adjust liquid measurements.
-
Water: Just plain water! It helps blend the flour and sugar into a smooth, workable dough. Use room temperature water for the best results.
-
Fresh Strawberries: Juicy and ripe, strawberries infuse flavor and a colorful punch to your mochi. If strawberries aren’t in season, feel free to substitute with other berries like raspberries or blueberries, or even fruits like mango or kiwi!
-
Cornstarch: We need this to dust our surface and prevent the mochi from sticking as we work with it. You can also use potato starch as a substitute if you have that on hand.
-
Sweet Red Bean Paste (optional): Many mochi recipes call for sweet fills, but it’s totally optional when making strawberry mochi. For a traditional twist, you can use sweet red bean paste or even chocolate ganache for a fun variation.
Let’s dive in and start creating!
Step-by-Step Instructions
-
Prepare Your Strawberries:
- Begin by washing your strawberries under cold water. Pat them dry and remove the stems. If they’re large, slice them in half. Set them aside on a plate to prepare for wrapping later. Make sure they are perfectly ripe; this will enhance the flavor of the mochi!
-
Mix the Mochiko Dough:
- In a large microwave-safe bowl, combine 1 cup of sweet rice flour, 1/4 cup granulated sugar, and 3/4 cup water. Stir well until the mixture is smooth and free of lumps. If you have time, let it sit for about 10-15 minutes to allow the ingredients to meld—you’ll notice a richer flavor!
-
Cook the Mixture:
- Now it’s time to head to the microwave! Cover the bowl with plastic wrap, leaving a small vent to allow steam to escape. Microwave the mixture for 1 minute. Open the microwave, stir well, then cover and microwave for an additional minute. Repeat this process for about 3-4 minutes or until the dough becomes semi-translucent and sticky. It should resemble a thick, gooey paste at this stage. (Note: cooking times may vary depending on your microwave’s wattage!)
-
Cool the Dough:
- Once it’s done, carefully remove the bowl from the microwave. Flour your work surface generously with cornstarch to avoid stickiness when handling the dough. Let the mixture cool for a few minutes before transferring it to your floured surface.
-
Shape the Mochi:
- Dust your hands with cornstarch to prevent sticking, then scoop a small portion of the dough—about the size of a tablespoon. Flatten it gently in the palm of your hand. Place a strawberry (or a dollop of sweet red bean paste if you’re using it) right in the center. Fold the mochi around the strawberry and pinch to seal it. Roll it between your hands to form a smooth ball.
-
Repeat the Process:
- Continue this process until all your strawberries are wrapped up deliciously! Dust each finished mochi lightly with cornstarch to keep them from sticking together.
-
Chill and Serve:
- Once you’ve shaped all your mochi, place them on a plate and chill them in the refrigerator for at least 30 minutes. This helps them firm up a bit more and enhances the texture.
Chef Tip: If you’re making these for a gathering, feel free to prepare them a day in advance! They’ll keep well in an airtight container in the fridge.
Serving Suggestions
When serving, place the mochi on a beautiful platter and dust with some extra cornstarch for a sophisticated finish. Feel free to drizzle with a little melted chocolate or serve with a side of sweet sauce for dipping. And don’t forget to pair it with a steaming cup of green tea for a delightful afternoon treat!
Recipe Variations
Get creative with your Strawberry Mochi! Here are a few fun variations to inspire your culinary imagination:
-
Chocolate-Covered Mochi: After making your mochi, dip them in melted chocolate and then sprinkle some crushed nuts on top for added flavor and crunch.
-
Fruit Fusion: Instead of just strawberries, try mixing in other fruits like diced mango or matcha-flavored mochi for a Japanese twist.
-
Sweet Surprise: Add a bit of sweet red bean paste or ice cream in the center before wrapping to create an added flavor surprise!
-
Vegan Version: Use agave syrup instead of honey for a plant-based option that satisfies everyone at the table.
-
Nutty Delight: Try adding some crushed nuts, like almonds or hazelnuts, into the dough for an extra crunch and flavor boost!
Chef’s Notes
I must admit, the first time I attempted to make strawberry mochi, it didn’t turn out as perfect as I’d hoped. Picture this—mochi dough everywhere, strawberries peeking out like stubborn gremlins! But you know what? It taught me that cooking is about the journey as much as the destination. I refined my process over time, and now I enjoy every step, including the messy ones.
My friends absolutely love these little treats, and they never fail to ask for more. It’s a wonderful thing to gather around the table, sharing stories over a batch of homemade Strawberry Mochi. The satisfaction I get from making these delicious bites is beyond words. So, don’t be afraid to dive in and play around with the flavors—who knows what new creation you might inspire!
FAQs and Troubleshooting
Q1: My mochi dough turned out too sticky; what should I do?
- This can happen if there’s too much water in your initial mixture. Try adding a bit more flour to thicken it. And remember, dusting your hands and work surface generously with cornstarch will help!
Q2: Can I freeze the mochi?
- Absolutely! These little treats freeze remarkably well. Just layer them with parchment paper between each piece in an airtight container. Thaw them at room temperature before serving for the best texture.
Q3: What if my mochi cracked when shaping?
- If your mochi cracks, it might need a little more moisture—try adding a bit of water and mixing again. Overcooking can also lead to crackly mochi, so make sure not to overdo it in the microwave.
Q4: Do I have to use strawberries?
- Not at all! Feel free to experiment with other fruits or even sweet fillings to customize your mochi to your liking. The possibilities are endless!
Nutritional Info (if applicable)
While I love to indulge in delicious treats, it’s nice to keep track of what we’re munching on! Each piece of strawberry mochi contains approximately:
- Calories: 70-80 per piece (depending on size and fillings)
- Carbohydrates: 15g
- Protein: 1g
- Fat: 0.5g
Remember, these numbers may vary based on ingredient brands and portion sizes.
And there you have it—your very own homemade Strawberry Mochi! I hope you’re as excited about this recipe as I am. The chewy texture combined with the sweet burst of fresh strawberries is an experience worth sharing. So gather your friends and family, follow this simple guide, and bring a little slice of joy into your kitchen! Happy cooking!
Print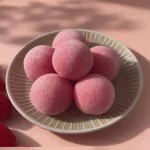
Delightful Strawberry Mochi
- Total Time: 45 minutes
- Yield: 12 pieces 1x
- Diet: Vegetarian
Description
A sweet and chewy treat combining the deliciousness of strawberries with the unique texture of mochi.
Ingredients
- 1 cup Sweet Rice Flour (Mochiko)
- 1/4 cup Granulated Sugar
- 3/4 cup Water
- Fresh Strawberries
- Cornstarch (for dusting)
- Sweet Red Bean Paste (optional)
Instructions
- Prepare your strawberries by washing them, removing stems, and slicing large ones in half.
- Mix the mochiko dough by combining sweet rice flour, sugar, and water in a microwave-safe bowl.
- Cook the mixture in the microwave for 3-4 minutes, stirring every minute until semi-translucent and sticky.
- Cool the dough slightly on a cornstarch-dusted surface.
- Shape the mochi by flattening a portion of dough, adding a strawberry, and sealing it.
- Repeat until all strawberries are wrapped.
- Chill the mochi in the refrigerator for at least 30 minutes before serving.
Notes
Dust the mochi with cornstarch to prevent sticking. These can be made a day in advance and stored in an airtight container.
- Prep Time: 15 minutes
- Cook Time: 10 minutes
- Category: Dessert
- Method: Microwave
- Cuisine: Japanese
Nutrition
- Serving Size: 1 piece
- Calories: 75
- Sugar: 12g
- Sodium: 2mg
- Fat: 0.5g
- Saturated Fat: 0g
- Unsaturated Fat: 0g
- Trans Fat: 0g
- Carbohydrates: 15g
- Fiber: 1g
- Protein: 1g
- Cholesterol: 0mg
Keywords: strawberry, mochi, dessert, Japanese dessert, sweet treat


