
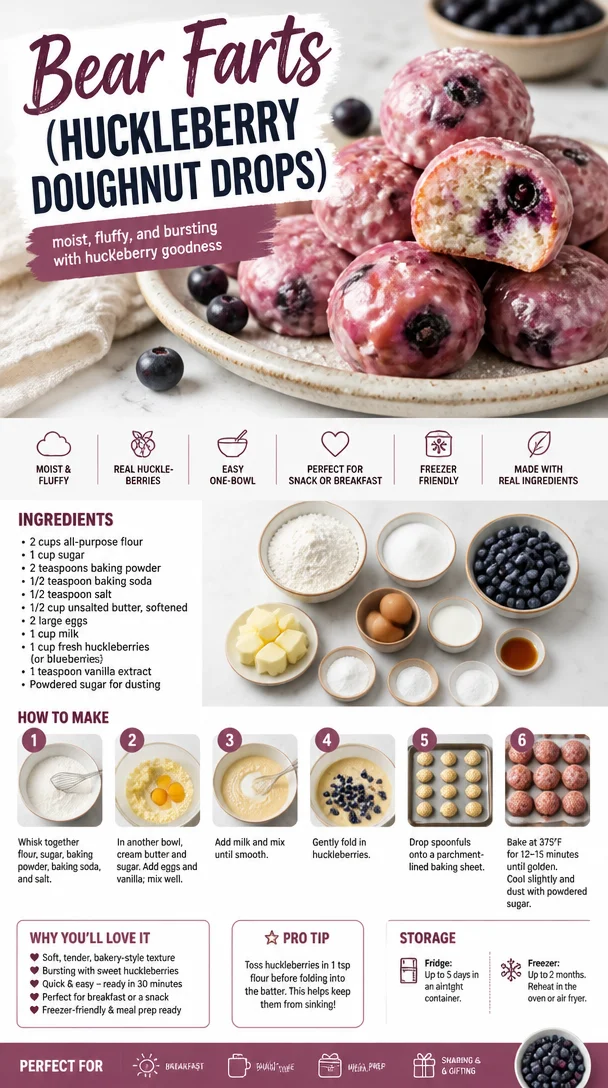
Bear Farts (Huckleberry Doughnut Drops)
Bear Farts: Huckleberry Doughnut Drops
Welcome to my cozy corner of the kitchen! I’m thrilled to share one of my favorite recipes with you today—Bear Farts! Now, don’t let the quirky name fool you; these delightful huckleberry doughnut drops are anything but silly. They’re fluffy little bites of heaven, bursting with bright berry flavor and a hint of sweetness that will make your taste buds sing. This recipe holds a special place in my heart, and I can’t wait to take you along on this delicious journey.
Introduction: A Foodie’s Magical Experience
Imagine stepping into a kitchen filled with the glorious smell of something sweet baking in the oven. It’s warm and inviting, the kind of place where laughter dances in the air and memories are made over shared meals. That’s exactly what Bear Farts remind me of—an experience steeped in nostalgia and joy. My love for baking was significantly influenced by the many summers I spent in my grandmother’s kitchen, where her infectious laughter could whisk away any worries.
It was during those golden afternoons that I first tasted huckleberries. Grandma used to take me on berry-picking adventures, her wicker basket slung over her arm, a mischievous twinkle in her eye. We would venture deep into the woods, the soft rustle of leaves underfoot and the sweet burden of ripe huckleberries waiting to be picked. My favorite part? Grandma’s secret recipe for huckleberry pastries—hot, crispy, and just sweet enough to make you feel like you were eating a slice of heaven!
Fast forward to today, and I’m proud to say I’ve put my own spin on those cherished memories. These Bear Farts, or huckleberry doughnut drops, are my way of keeping that spark alive. They’re easy to make, and the recipe yields a soft, fluffy treat that tastes like pure joy. So whether you’re whipping them up for breakfast, brunch, or just because—trust me, these little drops will bring a touch of magic to your kitchen.
Now, let’s roll up those sleeves and get to it! You’ll find that this recipe is not only simple but adaptable, perfect for chefs of all skill levels.
Personal Story: Berry Picking Adventures
Let me take you back to one of my fondest memories—an early summer morning spent berry picking with Grandma. The sun peeked through the trees, and the air was still crisp. Armed with our wooden baskets and a shared determination, we set out into the woods, excitement bubbling inside us both. Every step felt like a treasure hunt, with Grandma humming a sweet tune, her love for nature and food resonating with every note.
After what felt like hours of joyful picking, we returned to her kitchen, our baskets overflowing with slender, violet-hued huckleberries. Grandma brought them to life in her famous huckleberry doughnuts, an old family recipe passed down through generations! I remember getting flour everywhere and giggling uncontrollably, our culinary skills still in their infancy. As we pulled those golden, doughy delights from the oven, the entire house filled with warmth and love—a hallmark of her cooking.
Now, as I stand here baking my own version of those doughnuts, I can almost hear her laughter echoing in the kitchen. The memories are powerful, and the flavors are even better!
Ingredients
Here’s what you’ll need to whip up your huckleberry doughnut drops:
-
2 cups all-purpose flour: The base of your doughnuts. For a healthier twist, you can substitute with whole wheat or gluten-free flour.
-
½ cup granulated sugar: To sweeten the deal. Brown sugar can give a deeper flavor if you prefer.
-
1 tablespoon baking powder: This magical ingredient makes your doughnut drops rise beautifully.
-
½ teaspoon salt: Enhances the sweetness and brings all the flavors together.
-
2 large eggs: Add rich moisture and help bind the mixture. You can replace them with flax eggs or applesauce for a vegan option.
-
¾ cup buttermilk: This gives a tender crumb. If you don’t have buttermilk, mix regular milk with a tablespoon of vinegar and let it sit for a few minutes to sour.
-
½ cup huckleberries: The star player! If huckleberries aren’t available, blueberries or even cranberries can work.
-
1 teaspoon vanilla extract: A splash of this will elevate the dish with warmth.
-
1 tablespoon melted butter (optional): Adds extra richness. You could also try coconut oil for a dairy-free version.
Every ingredient adds a layer of flavor and character to these huckleberry doughnut drops, marrying nostalgia with a modern twist.
Step-by-Step Instructions
Ready to dive in? Let’s break this down step-by-step!
1. Preheat your oven.
Start by preheating your oven to 375°F (190°C). This ensures that your doughnut drops will bake evenly and achieve that perfect golden hue.
2. Prepare your baking pan.
Grease a mini muffin tin or doughnut drop pan (if you have one) with cooking spray or softened butter. This will help your doughnuts release easily after baking.
3. Mix the dry ingredients.
In a large mixing bowl, combine the flour, sugar, baking powder, and salt. Whisk them together until evenly distributed. This is where the magic starts! Sifting the dry ingredients can also help to lighten the batter.
4. Whisk the wet ingredients.
In another bowl, beat the eggs and add the buttermilk, vanilla extract, and melted butter (if using). Mix until fully combined. Feel free to add a pinch of nutmeg or cinnamon at this stage for an extra flavor boost!
5. Combine wet and dry ingredients.
Pour the wet mixture into the dry ingredients, gently folding them together. Be careful not to over-mix—just combine until you see no more dry flour. A few lumps are perfectly fine!
6. Add huckleberries.
Now, gently fold in the huckleberries. If you’re using frozen huckleberries, don’t thaw them beforehand; this helps prevent them from bursting and bleeding into the batter.
7. Fill those pans!
Use a spoon or a cookie scoop to fill each muffin tin section about two-thirds full. This allows room for the doughnut drops to rise and expand.
8. Bake to perfection.
Pop the tray in the preheated oven and bake for 12-15 minutes, or until a toothpick inserted into the center comes out clean. Keep an eye on them—you want a lovely golden brown on top!
9. Cool them down.
Let the doughnut drops cool in the pan for about 5 minutes, then gently remove them to a wire rack. This step makes a real difference in texture!
10. Glaze or dust.
Once cooled, you can dust them with powdered sugar or dunk them in a warm glaze made of powdered sugar and milk. You can also sprinkle some extra huckleberries on top for a stunning presentation. Yum!
Serving Suggestions
Serving these huckleberry doughnut drops is as fun as making them! Arrange them on a beautiful platter, dusted with powdered sugar, and maybe even add a few fresh huckleberries for flair. Pair them with a pot of freshly brewed coffee or tea on the side. These delightful bites are perfect for brunch gatherings, casual family breakfasts, or even as a sweet afternoon snack.
Recipe Variations
Get creative with your Bear Farts! Here are a few variations you can try:
- Citrus Bliss: Add a teaspoon of lemon or orange zest to the batter for a fresh citrus twist.
- Chocolate Dipped: Dip the top of each doughnut drop in melted chocolate for an indulgent treat.
- Nuts About It: Mix in chopped nuts like pecans or walnuts for added texture and flavor.
- Spiced Up: Experiment with adding a pinch of cardamom or ginger for a different aromatic note.
- Vegan Version: Swap the eggs for flaxseed meal and use almond or oat milk in place of buttermilk.
Chef’s Notes
One of the best parts about cooking is the endless possibilities for creativity! This recipe has evolved over time as I’ve experimented with different ingredients and flavors. I recall a time early on when I accidentally added too much baking powder and ended up with balloon-like doughnut drops! While they were funny to look at, they weren’t exactly appetizing. Now, I always recommend measuring carefully, but hey, that’s how we learn, right? Cooking is an art, and I’m living proof that every mishap leads to wisdom in the kitchen.
FAQs and Troubleshooting
1. My doughnut drops didn’t rise! What went wrong?
This usually happens due to expired baking powder or over-mixing the batter. Always check the expiration date on your baking powder, and remember to mix gently.
2. Can I use frozen huckleberries?
Absolutely! Frozen berries are a great option, and they’ll add moisture and flavor. Just add them directly to the batter without thawing.
3. Why are my doughnut drops dense?
Dense doughnut drops can be caused by over-mixing or using too much flour. For fluffier doughnuts, lighten up on the mixing, and measure your flour correctly—spoon it into the measuring cup instead of scooping directly from the bag.
4. How should I store leftovers?
These delightful treats are best enjoyed fresh but can be stored in an airtight container at room temperature for up to two days or in the fridge for up to five days. You can also freeze them! Just thaw and warm them up when you’re ready to indulge again.
Nutritional Info (Optional)
If you’re curious about the nutritional breakdown, here you go! Per doughnut drop (without glaze):
- Calories: 80
- Protein: 2g
- Carbohydrates: 12g
- Fat: 3g
- Fiber: 1g
Now you’re all set to enjoy a little slice of nostalgia with these Bear Farts! I hope this recipe brings warm memories to your table just as it has for me. Remember, cooking is all about creativity and love, so have fun with it—your kitchen adventures await!
Print
Bear Farts: Huckleberry Doughnut Drops
- Total Time: 30 minutes
- Yield: 12 servings 1x
- Diet: Vegetarian
Description
Fluffy huckleberry doughnut drops that are sweet, nostalgic, and easy to make—perfect for breakfast or a snack!
Ingredients
- 2 cups all-purpose flour
- ½ cup granulated sugar
- 1 tablespoon baking powder
- ½ teaspoon salt
- 2 large eggs
- ¾ cup buttermilk
- ½ cup huckleberries
- 1 teaspoon vanilla extract
- 1 tablespoon melted butter (optional)
Instructions
- Preheat your oven to 375°F (190°C).
- Prepare a mini muffin tin or doughnut drop pan by greasing it with cooking spray or softened butter.
- Mix the flour, sugar, baking powder, and salt in a large mixing bowl until well combined.
- Whisk the eggs, then add the buttermilk, vanilla extract, and melted butter (if using) and mix until fully combined.
- Combine the wet ingredients into the dry ingredients and fold gently until just combined.
- Add in the huckleberries, folding them into the batter carefully.
- Fill each section of the muffin tin about two-thirds full.
- Bake for 12-15 minutes, until a toothpick comes out clean.
- Cool the doughnut drops for about 5 minutes before transferring to a wire rack.
- Glaze or dust with powdered sugar before serving.
Notes
Great served with coffee or tea. These are best enjoyed fresh but can be stored in an airtight container at room temperature or in the fridge.
- Prep Time: 15 minutes
- Cook Time: 15 minutes
- Category: Dessert
- Method: Baking
- Cuisine: American
Nutrition
- Serving Size: 1 doughnut drop
- Calories: 80
- Sugar: 5g
- Sodium: 150mg
- Fat: 3g
- Saturated Fat: 1g
- Unsaturated Fat: 2g
- Trans Fat: 0g
- Carbohydrates: 12g
- Fiber: 1g
- Protein: 2g
- Cholesterol: 30mg
Keywords: huckleberry, doughnut drops, easy dessert, sweet treat, breakfast recipe
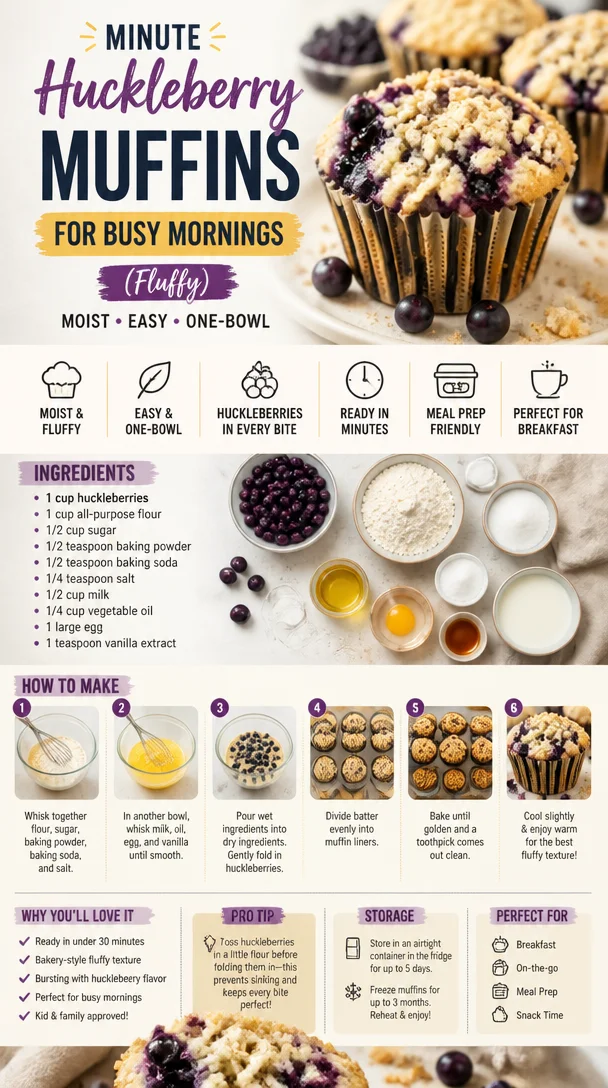
Minute Huckleberry Muffins for Busy Mornings (Fluffy)
Easy Huckleberry Muffin Recipe: A Cozy Kitchen Adventure
Welcome back to my kitchen! I’m so thrilled you’re here, and I can’t wait to share one of my favorite recipes with you today: huckleberry muffins. These delightful little morsels are the perfect blend of sweet and slightly tart, creating a burst of flavor that will have your taste buds dancing with joy. Whether you’re looking for a lazy Sunday brunch treat or a quick snack to enjoy during the week, these muffins are easy to whip up, and they fill your home with the most delightful aromas!
Huckleberries are those tiny, juicy berries that can often be overlooked for their more popular cousins like blueberries. But let me tell you, if you ever get the chance to pick them fresh, it’s an experience you won’t want to miss! I remember the first time I went huckleberry picking with my dear friend Sarah in her grandmother’s backyard. The sun was shining, and we spent hours plucking these precious little gems from the bushes. It turned into a sweet little adventure where we laughed, shared stories, and, of course, sampled a few berries straight from the bushes. When we got home, we decided to bake muffins, and the simple joy of cooking together made those muffins taste even better.
Now, every time I bake huckleberry muffins, I’m transported back to that sunlit afternoon, filled with the laughter of good friends and the warmth of cherished memories. So, are you ready to create some delightful huckleberry muffins that will not only satisfy your cravings but also bring a little sunshine into your home? Let’s dive right in!
Ingredients
To make these scrumptious huckleberry muffins, you’ll need the following ingredients:
-
1 ½ cups all-purpose flour
This is the base for your muffins. For a gluten-free option, you can use a 1:1 gluten-free flour mix. -
½ cup granulated sugar
This adds just the right amount of sweetness. You can substitute with brown sugar for a richer flavor or coconut sugar for a healthier alternative. -
½ teaspoon baking powder
A crucial ingredient that helps your muffins rise and become fluffy. If you don’t have baking powder, you can use baking soda but be sure to adjust the acidity with a bit of vinegar or lemon juice. -
½ teaspoon baking soda
Works in tandem with baking powder. If you’re short on baking soda, you can increase the amount of baking powder slightly for a boost in leavening. -
½ teaspoon salt
Salt enhances all the flavors in your muffins. If you’re watching your sodium intake, you can reduce this to ¼ teaspoon. -
1 large egg
Eggs help bind the ingredients together and give moisture. For a vegan option, you can use a flaxseed egg (1 tablespoon of flaxseed meal mixed with 2.5 tablespoons of water). -
½ cup milk
Adds moisture to the muffins. You can use any milk you like—dairy or plant-based (almond, oat, or soy milk work great!). -
¼ cup vegetable oil
This provides richness and helps keep the muffins moist. You can easily substitute with melted butter or even applesauce for a healthier twist. -
1 cup huckleberries
The star of the show! If huckleberries are hard to find, blueberries will work wonderfully in this recipe. -
1 teaspoon vanilla extract
For that warm, comforting flavor. You can use almond extract for a different twist.
With these ingredients ready, let’s jump into the process of creating these mouthwatering huckleberry muffins!
Step-by-Step Instructions
-
Preheat your oven:
Start by preheating your oven to 375°F (190°C) and line a muffin tin with paper liners or grease them lightly with oil. This will ensure your muffins come out easily, and cleanup is a breeze! -
Mix dry ingredients:
In a large bowl, whisk together the flour, sugar, baking powder, baking soda, and salt until well combined. This is an essential step to ensure that the leavening agents are evenly distributed throughout the flour. Pro tip: If you want an extra tender muffin, gently sift the flour before mixing. -
Combine wet ingredients:
In another bowl, beat the egg and then add in the milk, vegetable oil, and vanilla extract. Mix until smooth and homogenous. This step is crucial because combining the wet ingredients separately prevents overmixing when you combine them with the dry ingredients. -
Add wet to dry:
Pour your wet mixture into the dry ingredients, and mix until just combined. Don’t overmix; a few lumps are totally okay! Overmixing can lead to tough muffins, and we want them to be light and fluffy. -
Fold in huckleberries:
Gently fold in the huckleberries using a spatula or a wooden spoon. This is where the magic happens! If you’re using frozen huckleberries, there’s no need to thaw them first, but be gentle so they don’t burst and turn your batter purple. -
Fill muffin tin:
Divide the batter evenly among the prepared muffin cups, filling each about ⅔ full. If you love a crispy top, you can sprinkle a bit of sugar on top before baking. It’s a simple yet delicious addition! -
Bake:
Pop the muffin tin into your preheated oven and bake for 18-22 minutes or until a toothpick inserted into the center comes out clean. Keep an eye on them; every oven is different, and you don’t want to overbake them! -
Cool and enjoy:
Once baked, remove the muffins from the oven and let them sit in the tin for about 5 minutes. After that, transfer them to a wire rack to cool completely. The aroma will have your family and friends wandering towards the kitchen, so be prepared for some muffin love!
Serving Suggestions
These huckleberry muffins are best enjoyed warm, lightly buttered, or even with a drizzle of honey. You can serve them with a side of fresh fruit or a dollop of yogurt for a delightful breakfast or snack. They also make great additions to a brunch spread alongside your favorite coffees or teas.
Recipe Variations
-
Huckleberry Lemon Muffins:
Add the zest of one lemon to the batter for a refreshing citrus twist that complements the huckleberries beautifully. -
Huckleberry Oat Muffins:
Replace ½ cup of all-purpose flour with rolled oats for a heartier texture. -
Chocolate Chip Huckleberry Muffins:
Mix in a half cup of chocolate chips for a delightful sweet contrast to the tart huckleberries! -
Nutty Huckleberry Muffins:
Stir in some chopped nuts like walnuts or pecans for added crunch and nutty flavor. -
Vegan Huckleberry Muffins:
Substitute all eggs and dairy with plant-based equivalents, such as flaxseed eggs and almond milk, for a delicious vegan option.
Chef’s Notes
One of my favorite things about baking is how it’s an evolving art. Each time I make these huckleberry muffins, I try something new based on what I have available in the pantry. Sometimes I make them extra indulgent with chocolate chips, or I toss in leftover nuts from previous baking adventures. My huckleberry muffins have become a canvas for creativity, and I hope you feel inspired to do the same! Remember that kitchen adventures are all about experimenting, having fun, and enjoying the process with those you love.
FAQs and Troubleshooting
1. My muffins didn’t rise! What went wrong?
Be sure that your baking powder and baking soda are fresh; old leavening agents can cause your muffins to be dense.
2. Can I use frozen huckleberries?
Absolutely! Just fold them in directly from the freezer without thawing. This will prevent them from getting mushy.
3. How do I store leftover muffins?
Store them in an airtight container at room temperature for up to two days, or refrigerate them for up to a week. They also freeze beautifully for up to three months!
4. Why are my muffins dry?
Overbaking or using too much flour can lead to dry muffins. Make sure to measure your flour correctly—spoon it into the measuring cup and level it off for accuracy.
Nutritional Info
While I love to focus on the joy of cooking and sharing, I understand that nutritional information can be helpful. A standard huckleberry muffin (without toppings) contains approximately:
- Calories: 180
- Protein: 3g
- Fat: 7g
- Carbohydrates: 26g
- Fiber: 1g
- Sugar: 9g
Remember, these numbers can vary based on the specific ingredients you choose to use.
And there you have it, my lovely foodie friends! An easy, scrumptious huckleberry muffin recipe that’s packed with love and warmth. I hope you take this recipe and create your own cozy kitchen memories, just as I did. Happy Baking!
Print
Easy Huckleberry Muffins
- Total Time: 30 minutes
- Yield: 12 servings 1x
- Diet: Vegetarian
Description
Delightful huckleberry muffins that are sweet and slightly tart, perfect for brunch or a quick snack.
Ingredients
- 1 ½ cups all-purpose flour
- ½ cup granulated sugar
- ½ teaspoon baking powder
- ½ teaspoon baking soda
- ½ teaspoon salt
- 1 large egg
- ½ cup milk
- ¼ cup vegetable oil
- 1 cup huckleberries
- 1 teaspoon vanilla extract
Instructions
- Preheat your oven to 375°F (190°C) and line a muffin tin with paper liners.
- Mix the flour, sugar, baking powder, baking soda, and salt in a large bowl until well combined.
- Combine in another bowl the egg, milk, vegetable oil, and vanilla extract until smooth.
- Add the wet mixture into the dry ingredients and mix until just combined.
- Fold in the huckleberries gently using a spatula.
- Fill each muffin cup about ⅔ full with batter.
- Bake for 18-22 minutes or until a toothpick inserted into the center comes out clean.
- Cool the muffins for 5 minutes in the tin before transferring them to a wire rack to cool completely.
Notes
These muffins are best enjoyed warm, lightly buttered or with honey. They also freeze beautifully for up to three months!
- Prep Time: 10 minutes
- Cook Time: 20 minutes
- Category: Snack
- Method: Baking
- Cuisine: American
Nutrition
- Serving Size: 1 muffin
- Calories: 180
- Sugar: 9g
- Sodium: 250mg
- Fat: 7g
- Saturated Fat: 1g
- Unsaturated Fat: 6g
- Trans Fat: 0g
- Carbohydrates: 26g
- Fiber: 1g
- Protein: 3g
- Cholesterol: 30mg
Keywords: huckleberry muffins, easy muffins, baking, sweet snacks, brunch recipes
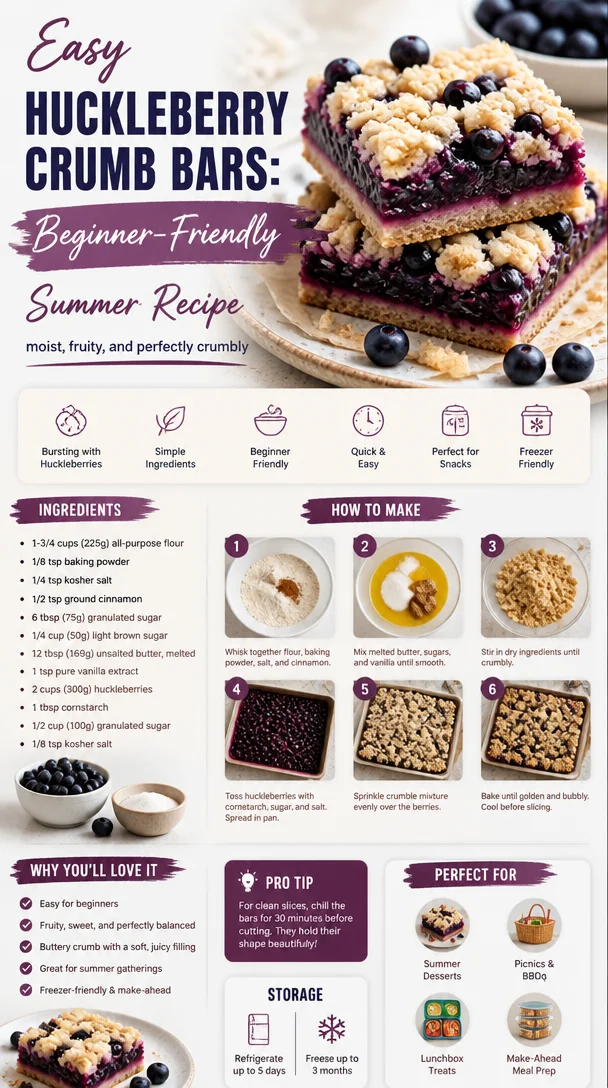
Easy Huckleberry Crumb Bars: Beginner-Friendly Summer Recipe
Huckleberry Crumb Bars: A Sweet Slice of Summer
Welcome to my kitchen, dear friend! I’m thrilled to have you here today as we embark on a delicious journey into the world of huckleberry crumb bars. There’s something special about summer and the way it lends itself to vibrant, juicy fruits. And for me, huckleberries have always been a star ingredient that dances between sweet and tart, making any dish sing!
Imagine this: the sun shining brightly, a gentle breeze coaxing the fragrant aroma of baked goods from an open window, and the laughter of friends and family filling the air. That’s the essence of culinary magic — taking a handful of simple ingredients and transforming them into something extraordinary. Today’s recipe is not only a delightful treat for your taste buds but also a reminder of cherished summertime memories spent gathering huckleberries in the wild.
Whether you’re new to baking or a seasoned pro, these huckleberry crumb bars are easy to whip up and even easier to enjoy. Perfect for picnics, potlucks, or quiet mornings with a cup of coffee, they’re bound to become a go-to recipe in your culinary arsenal. So, grab your apron and let’s dive into the scrumptious world of huckleberry crumb bars!
A Sweet Memory in the Kitchen
As I sit down to write about these delightful huckleberry crumb bars, my mind drifts back to a cherished childhood memory. Every summer, my family would venture into the woods behind our house, armed with nothing but buckets, snacks, and a healthy dose of excitement. The mission? To gather huckleberries!
Those escapades were filled with laughter, the sweet scent of pine, and the thrill of spotting those plump, purple berries glimmering in the sunlight. My siblings and I raced to see who could fill their bucket first, but the real joy was in the simple act of foraging together. Upon returning home, my mom would often turn our haul into heavenly huckleberry pies or cobblers, filling the kitchen with sweet warmth and delightful aromas.
Huckleberry crumb bars became a staple in our summer baking sessions, too — an easy, crowd-pleasing dessert that was equally at home on a picnic blanket or at a family gathering. This recipe brings back those joyful memories, and I hope it inspires you to create your own kitchen adventures filled with love and laughter.
Ingredients
Gathering ingredients for our huckleberry crumb bars is part of the fun! Here’s what you’ll need:
-
2 cups fresh huckleberries
These little gems have a unique flavor that balances sweetness with a hint of tartness. If you can’t find fresh huckleberries, you can substitute them with blueberries or blackberries, though the flavor will slightly differ. -
1 cup all-purpose flour
The backbone of our crumb bars. To make it gluten-free, you can swap in an all-purpose gluten-free blend. -
1 cup rolled oats
These provide a wonderful chewiness. If you prefer a nutty flavor, feel free to use almond flour instead for a unique twist! -
1/2 cup brown sugar
Brown sugar adds moisture and a hint of caramel flavor. If you’re looking to reduce sugar, coconut sugar is a great alternative. -
1/2 cup granulated sugar
This helps balance the tartness of the huckleberries. You can substitute with monk fruit sweetener for a lower-calorie option. -
1/2 cup unsalted butter, melted
Butter adds richness and flavor. If you’re dairy-free, coconut oil works well too! -
1 tsp vanilla extract
Vanilla enhances the sweetness of the huckleberries. You can also use almond extract for a different flavor profile. -
1 tsp baking powder
This gives our crumb bars a little lift. If you’re using self-rising flour, you can omit this ingredient. -
1/2 tsp salt
Balancing the sweetness with a touch of salt is essential! For a flavorful twist, try using sea salt instead.
Step-by-Step Instructions
Ready to bring these delicious huckleberry crumb bars to life? Here’s how to create them, step by step:
-
Preheat the Oven
Preheat your oven to 350°F (175°C). This is the first step in creating that warm, inviting environment that makes the kitchen feel alive with the scent of baking! -
Prepare Your Baking Dish
Line an 8×8-inch baking dish with parchment paper, leaving an overhang on the sides. This makes it super easy to remove the bars later. Grease the parchment with a little butter or cooking spray to ensure no sticky situations arise! -
Mix the Dry Ingredients
In a large bowl, combine the flour, rolled oats, brown sugar, granulated sugar, baking powder, and salt. Giving these ingredients a good mix ensures that your crumb base has an even distribution of flavors. -
Add the Butter and Vanilla
Pour in the melted butter and vanilla extract. Stir everything together until the mixture resembles wet sand. Don’t worry if it seems crumbly; that’s exactly what we want for that perfect crumb topping! -
Press the Mixture into the Pan
Take about 2/3 of the mixture and press it firmly into the bottom of your prepared baking dish. This creates a solid base for our huckleberry filling. Use your hands or the back of a spatula to help pack it down nicely. -
Prepare the Huckleberry Filling
In a medium bowl, combine your fresh huckleberries with a sprinkle of granulated sugar (about 2 tablespoons) and a dash of flour (1 tablespoon), gently tossing to coat the berries. This helps create a delicious filling that won’t be too runny. -
Spread the Huckleberry Mixture
Evenly spread the huckleberry mixture over the oat base in your baking dish. -
Crumble the Remaining Mixture on Top
Sprinkle the remaining crumb mixture over the huckleberries, making sure to cover them as much as possible. Those crumbs are going to crisp up beautifully in the oven! -
Bake to Perfection
Place the dish in the preheated oven and bake for about 30-35 minutes, or until the top is golden brown and the huckleberries are bubbling. Your kitchen will fill with heavenly aromas, and trust me, you’ll have a hard time waiting! -
Cool and Slice
Once baked, remove the crumb bars from the oven and let them cool in the pan for about 20 minutes. Use the parchment overhang to lift them out onto a cutting board. Let them cool completely before slicing into squares.
Serving Suggestions
These huckleberry crumb bars are as delightful to look at as they are to eat! For an elegant touch, serve them warm with a scoop of vanilla ice cream or a dollop of whipped cream on the side. Dust them with powdered sugar for an extra sprinkle of sweetness, and you’ve got an eye-catching dessert perfect for any occasion.
Recipe Variations
Feeling adventurous? Here are a few fun variations to try:
- Nutty Twist: Add chopped walnuts or pecans to the crumb mixture for an added crunch.
- Citrus Zing: Incorporate lemon or orange zest into the filling for a bright citrus flavor.
- Spiced Up: Mix in a half teaspoon of cinnamon or nutmeg to the crumbs for a cozy, spiced vibe.
- Oatmeal Bars: Use the same mixture and spread it into a larger baking pan for oatmeal bars to have on-the-go!
Chef’s Notes
As I worked on perfecting this recipe over the years, I discovered that huckleberries aren’t just found in the wild; they symbolize the joyous moments of connecting with nature and embracing simplicity. These crumb bars have evolved from being just a family treat to a recipe I share with friends, curated with love and memories, always reminding us to slow down, savor, and celebrate life’s delicious moments.
Speaking of memories, I once left my huckleberry bars in the oven a tad too long. Instead of tossing them out, I served the crispy edges as "baker’s treats!" You’d be surprised at what surprises the kitchen can throw at you!
FAQs and Troubleshooting
1. Can I use frozen huckleberries?
Absolutely! Frozen huckleberries work well; just be mindful that they might be a bit juicier, so consider adding an extra tablespoon of flour to the filling.
2. Why are my crumb bars too crumbly?
If your crumb bars turned out too crumbly, it could be due to not enough butter or overmixing the crumb mixture. For a sure result, make sure to measure carefully!
3. How do I store leftover bars?
Keep any leftovers in an airtight container at room temperature for up to three days or in the fridge for about a week. They can also be frozen for up to three months — just be sure to wrap them tightly!
4. What can I do if the bottom of the bars is too soggy?
If you noticed a soggy bottom, try pressing the crumb mixture down more firmly before adding the huckleberries. You can also bake them a few minutes longer if they seem undercooked, but keep an eye on them to avoid overbaking.
Nutritional Info
If you’re curious about the nutritional breakdown, a typical serving of these huckleberry crumb bars comes in at around 200 calories, with 8g of fat, 30g of carbs, and 2g of protein — a sweet treat that’s balanced and satisfying without overdoing it!
So there you have it, a slice of summer captured in these huckleberry crumb bars! I can’t wait for you to try this recipe and create your own beautiful memories in the kitchen. Happy baking, my friends!
Print
Huckleberry Crumb Bars
- Total Time: 50 minutes
- Yield: 12 servings 1x
- Diet: Vegetarian
Description
Delicious huckleberry crumb bars that bring the flavors of summer into your kitchen, perfect for sharing with friends and family.
Ingredients
- 2 cups fresh huckleberries
- 1 cup all-purpose flour
- 1 cup rolled oats
- 1/2 cup brown sugar
- 1/2 cup granulated sugar
- 1/2 cup unsalted butter, melted
- 1 tsp vanilla extract
- 1 tsp baking powder
- 1/2 tsp salt
Instructions
- Preheat your oven to 350°F (175°C).
- Line an 8×8-inch baking dish with parchment paper, leaving an overhang on the sides.
- In a large bowl, combine the flour, rolled oats, brown sugar, granulated sugar, baking powder, and salt.
- Pour in the melted butter and vanilla extract.
- Take about 2/3 of the mixture and press it firmly into the bottom of your prepared baking dish.
- In a medium bowl, combine your fresh huckleberries with a sprinkle of granulated sugar and a dash of flour.
- Evenly spread the huckleberry mixture over the oat base in your baking dish.
- Sprinkle the remaining crumb mixture over the huckleberries.
- Place the dish in the preheated oven and bake for about 30-35 minutes.
- Once baked, remove from the oven and let cool in the pan for about 20 minutes.
- Lift them out using the parchment overhang and allow to cool completely before slicing.
Notes
For a twist, add chopped nuts or citrus zest to the mixture. Serve warm with ice cream.
- Prep Time: 15 minutes
- Cook Time: 35 minutes
- Category: Dessert
- Method: Baking
- Cuisine: American
Nutrition
- Serving Size: 1 bar
- Calories: 200
- Sugar: 8g
- Sodium: 80mg
- Fat: 8g
- Saturated Fat: 4g
- Unsaturated Fat: 4g
- Trans Fat: 0g
- Carbohydrates: 30g
- Fiber: 2g
- Protein: 2g
- Cholesterol: 30mg
Keywords: huckleberry, dessert, summer, crumb bars, baking, easy recipe
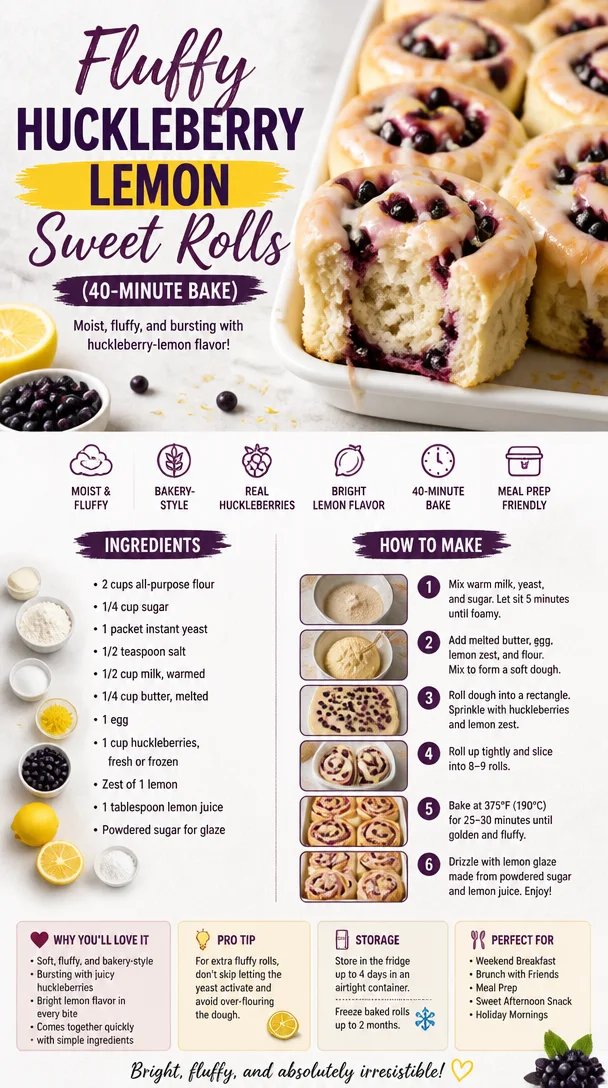
Fluffy Huckleberry Lemon Sweet Rolls (40-Minute Bake)
Huckleberry Lemon Sweet Rolls: A Cozy Kitchen Delight
Welcome to my favorite corner of the kitchen! I’m so excited to share this delightful recipe for Huckleberry Lemon Sweet Rolls with you. These generously swirled, fluffy rolls are the epitome of comfort and joy—perfect for lazy Sunday mornings or as a sweet treat to impress your loved ones. If you’re anything like me, the thought of warm, sweet dough mingling with zesty lemon and tart huckleberries makes your heart skip a beat! So, let’s dive into this comforting, berry-filled adventure that will surely make your kitchen smell like a cozy café.
I first stumbled upon the idea for these rolls during a memorable summer spent in the Pacific Northwest, surrounded by lush landscapes and wild huckleberry bushes. The air was filled with the tantalizing aroma of baked goods, and I couldn’t resist plucking handfuls of sweet, juicy huckleberries while exploring the winding trails. Every bite was a burst of flavor—the sweet berries perfectly complementing and balancing the tangy lemon. The day I turned those huckleberries into sweet rolls, I found myself transported back to that summer, every bite evoking cherished memories and laughter shared around the kitchen table.
Are you ready to think of your own special memories as we create rolling, gooey deliciousness? Let’s gather our ingredients and roll up our sleeves!
Ingredients
-
For the Dough:
- 4 cups all-purpose flour: A pantry staple, this is the backbone of our sweet rolls. If you want a lighter texture, you can substitute half with bread flour.
- 1/4 cup granulated sugar: This adds sweetness to the dough. If you’re watching your sugar intake, feel free to go for coconut sugar instead.
- 1 packet (2 1/4 teaspoons) instant yeast: The tiny magic workers that help our rolls rise! If you only have active dry yeast, use the same amount but activate it in warm water with a pinch of sugar before adding it to your mixture.
- 1 teaspoon salt: Enhancing flavor, it’s essential for balancing sweetness.
- 1 cup whole milk: For tenderness and moisture. You can swap it with almond or oat milk for a dairy-free version.
- 1/4 cup unsalted butter, melted: This adds richness. You can try using coconut oil if you prefer a vegan option.
- 2 large eggs: They help bind our dough and give it structure. For a vegan alternative, you can use flax eggs (1 tablespoon flaxseed meal + 2.5 tablespoons water per egg).
-
For the Filling:
- 1 cup huckleberries (fresh or frozen): Bursting with flavor and antioxidants, they are an absolute treat. Blueberries can be substituted if huckleberries are hard to find!
- 1/2 cup brown sugar: This will create a wonderfully gooey filling. If you want a lighter option, you could use a blend of maple sugar and a bit of cinnamon for depth.
- 2 tablespoons lemon zest: The zest adds that bright tang we love! Try it with grated orange zest for a different twist.
- 1 tablespoon lemon juice: A splash of acidity to elevate our filling. You can use lime juice as an alternative for a unique flavor!
-
For the Glaze:
- 1 cup powdered sugar: The sweetness and smooth texture that make our glaze enticing.
- 2 tablespoons lemon juice: This will give our glaze a zesty kick. Feel free to add milk for a creamier consistency.
- Lemon zest (for garnish): A little extra zest never hurt!
Step-by-Step Instructions
Now that we have everything gathered, let’s roll up our sleeves and get baking!
-
Making the Dough:
In a large bowl, whisk together the flour, sugar, salt, and instant yeast until well combined. In a saucepan, warm the milk over low heat until it’s just barely warm to the touch (not hot!). Remove it from heat and add in the melted butter. Then, whisk the eggs into the milk-butter mixture. Slowly pour the liquid into the dry ingredients, mixing just until a shaggy dough forms.Chef Tip: Don’t over-mix! A shaggy dough means you’ll have soft, chewy rolls.
-
Kneading:
On a lightly floured surface, knead the dough for about 5-7 minutes until it’s smooth and elastic. Keep your surface floured to prevent sticking!Chef Insight: Perfectly kneaded dough will bounce back when you poke it. If it’s too sticky, add a bit more flour, but resist the urge to add too much.
-
First Rise:
Place the kneaded dough in a greased bowl, cover with a kitchen towel or plastic wrap, and let it rise in a warm place until doubled in size—about 1 hour.Nostalgic Note: While the dough is rising, go ahead and take a quick break. This is a great time to put on some music and dream about how these rolls will smell!
-
Preparing the Filling:
While the dough rises, combine the huckleberries, brown sugar, lemon zest, and lemon juice in a medium bowl. Set aside, allowing the flavors to meld beautifully.Chef Insight: If using frozen huckleberries, let them thaw and drain excess liquid to avoid soggy rolls!
-
Rolling Out the Dough:
After the dough has risen, punch it down gently to release the air. Roll it out on a floured surface into a large rectangle, about 16×12 inches.Pro Tip: Aim for even thickness; this helps the rolls bake uniformly!
-
Filling and Rolling:
Spread the berry filling evenly over the dough, leaving a small border around the edges. Starting from one long side, carefully roll the dough into a tight log.Chef Hack: Use a bench scraper to help lift the dough as you roll to keep the shape intact!
-
Cutting the Rolls:
Using a sharp knife or dental floss (yes, seriously!), slice the log into 12 equal pieces. Place them in a greased baking dish, cut side up.Note: If you want to allow the rolls to rise more, you can cover them and let them sit for another 30 minutes. More fluffiness!
-
Second Rise:
Cover the rolls again with a towel and let them rise until puffed and touching each other, about 30-45 minutes.Chef Tip: Preheat your oven to 350°F (180°C) while they’re rising!
-
Baking:
Bake for 25-30 minutes or until golden brown and the center rolls are cooked through. The kitchen will smell heavenly, trust me!Final Pro Tip: Keep an eye on the rolls to prevent overbaking—nobody wants dry rolls!
-
Making the Glaze:
While the rolls cool slightly, whisk together the powdered sugar and lemon juice until smooth. Drizzle over the warm rolls and let it melt into every crevice.
Nostalgic Note: This glaze is like a lemon hug for your rolls!
Serving Suggestions
Once your Huckleberry Lemon Sweet Rolls are out of the oven and drizzled with glaze, they are ready to be served! For an eye-popping presentation, arrange them on a rustic wooden platter, sprinkle extra lemon zest on top, and garnish with fresh huckleberries or mint leaves.
Served warm, these rolls are perfect with a cup of coffee or tea, making them an inviting centerpiece for brunch or a cozy afternoon snack. Just watching your friends and family gather around, excited to dig in, will warm your heart!
Recipe Variations
- Add Spices: Mix in a teaspoon of cinnamon or nutmeg to the filling for added warmth and spice.
- Explore Flavors: Swap out huckleberries for blueberries, raspberries, or even diced strawberries for a fruity twist!
- Vegan Version: Use plant-based milk, coconut oil for butter, and flax eggs to create a completely vegan sweet roll.
- Stuff It Up: Try adding cream cheese to the filling for extra creaminess or white chocolate chips for a decadent touch!
Chef’s Notes
I can hardly believe how long I’ve been making these delightful rolls—it’s one of those recipes that feels like home. Each batch carries a piece of my heart and countless memories. I remember one particular summer, when a thunderstorm rolled in as I was in the middle of making these. With rain pouring down outside, the smell of lemon and huckleberries wafted through the house, turning a dreary afternoon into a cozy gathering with friends. We huddled around the table, stealing rolls while they were still warm, giggling as sugar dusted our noses.
This recipe is a reminder that food is not just about sustenance; it’s an experience, a memory in the making. Let these rolls inspire you to create your own kitchen stories!
FAQs and Troubleshooting
1. Why did my rolls not rise?
If your rolls didn’t rise, it may be due to expired or inactive yeast. Always check the expiration date, and ensure to proof the yeast in warm water with a pinch of sugar beforehand if using active dry yeast.
2. Can I prepare these rolls the night before?
Absolutely! After assembling the rolls, cover them and place them in the fridge overnight. In the morning, take them out and let them rise at room temperature before baking.
3. My dough is too sticky! What do I do?
If your dough is looking excessively sticky, sprinkle in a bit more flour, one tablespoon at a time, until it’s manageable for kneading.
4. Can I freeze these sweet rolls?
Yes, indeed! You can freeze unbaked rolls after cutting them. Just arrange them on a baking sheet, freeze individually, then transfer to a freezer bag. When ready to bake, place them in the fridge overnight to thaw and rise before baking.
Nutritional Info
While enjoying these sweet rolls, remember to do so in moderation! Each roll may contain approximately:
- Calories: 320
- Total Fat: 8g
- Saturated Fat: 4g
- Cholesterol: 40mg
- Sodium: 150mg
- Total Carbohydrates: 54g
- Dietary Fiber: 2g
- Sugars: 14g
- Protein: 6g
Enjoy these delightful Huckleberry Lemon Sweet Rolls and let them spark joy in your kitchen and your heart. Happy baking, friends!
Print
Huckleberry Lemon Sweet Rolls
- Total Time: 45 minutes
- Yield: 12 servings 1x
- Diet: Vegetarian
Description
Delightful Huckleberry Lemon Sweet Rolls, perfect for lazy mornings and comforting family gatherings.
Ingredients
- 4 cups all-purpose flour
- 1/4 cup granulated sugar
- 1 packet (2 1/4 teaspoons) instant yeast
- 1 teaspoon salt
- 1 cup whole milk
- 1/4 cup unsalted butter, melted
- 2 large eggs
- 1 cup huckleberries (fresh or frozen)
- 1/2 cup brown sugar
- 2 tablespoons lemon zest
- 1 tablespoon lemon juice
- 1 cup powdered sugar
- 2 tablespoons lemon juice (for glaze)
- Lemon zest (for garnish)
Instructions
- Whisk the flour, sugar, salt, and yeast in a large bowl until combined.
- Warm the milk over low heat until just warm to touch. Remove from heat and add melted butter.
- Whisk the eggs into the milk-butter mixture.
- Pour the liquid into the dry ingredients, mixing until a shaggy dough forms.
- Knead the dough on a floured surface for 5-7 minutes until smooth and elastic.
- Place the kneaded dough in a greased bowl, cover, and let it rise until doubled in size (about 1 hour).
- Combine huckleberries, brown sugar, lemon zest, and lemon juice for the filling.
- Roll out the dough into a 16×12 inch rectangle.
- Spread the berry filling evenly over the dough.
- Roll the dough into a tight log and cut into 12 equal pieces.
- Place them in a greased baking dish, cut side up, and let rise for another 30-45 minutes.
- Preheat the oven to 350°F (180°C).
- Bake for 25-30 minutes or until golden brown.
- Whisk powdered sugar and lemon juice together for the glaze and drizzle over warm rolls.
Notes
Try substituting huckleberries with blueberries for a different flavor. Perfect with coffee or tea!
- Prep Time: 15 minutes
- Cook Time: 30 minutes
- Category: Breakfast
- Method: Baking
- Cuisine: American
Nutrition
- Serving Size: 1 roll
- Calories: 320
- Sugar: 14g
- Sodium: 150mg
- Fat: 8g
- Saturated Fat: 4g
- Unsaturated Fat: 0g
- Trans Fat: 0g
- Carbohydrates: 54g
- Fiber: 2g
- Protein: 6g
- Cholesterol: 40mg
Keywords: huckleberry, lemon, sweet rolls, baking, brunch
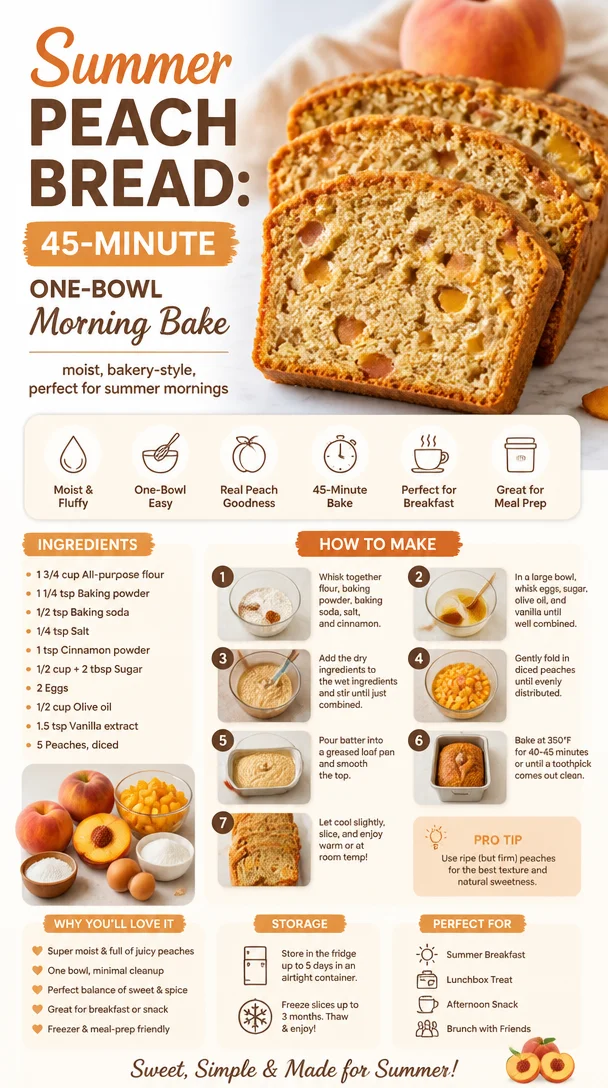
Summer Peach Bread: 45-Minute One-Bowl Morning Bake
Warm Peach Bread Recipe: A Cozy Slice of Summer
Welcome to my kitchen! Today, I’m excited to share one of my all-time favorite recipes—Peach Bread. There’s nothing quite like the scent of warm peaches baking in the oven to transport you to those sunlit summer days. This recipe captures that delightful essence, perfect for brunch with friends or a cozy afternoon snack. The beauty of peach bread lies not just in its flavor but in the joy it brings to the table. Whether you’re an experienced baker or just starting in the kitchen, this recipe is incredibly forgiving and oh-so-rewarding. So grab your apron, and let’s embark on this flavorful journey together!
A Slice of Nostalgia
Let me take you back to my childhood for a moment. Every summer, my family would visit my grandparents’ house in the countryside. Their garden was bursting with ripe peaches, the kind that drips with sweet juice. We’d spend our afternoons picking peaches and laughing under the golden sun. My grandmother had a magical way of turning those fresh, sun-kissed fruits into the most delicious peach bread I’ve ever tasted. I can still hear her humming as the batter came together, and the aroma wafting through the kitchen was simply heavenly.
When my grandmother passed down this peach bread recipe, it felt like a piece of her love was carried forward in those delightful slices. This isn’t just a recipe; it’s a tradition, a hug in the form of a baked good, and a testament to the power of family and food. So every time I bake this peach bread, I’m reminded of those sweet summers and the warmth of my family. That’s what I hope to share with you through this recipe—an invitation to create your own beautiful memories in the kitchen.
Ingredients
Here’s what you’ll need for this delightful Peach Bread, along with some tips and substitution ideas:
-
3 ripe peaches: The star ingredient! Choose peaches that are slightly soft to the touch. If fresh peaches aren’t available, you can substitute them with 1 cup of canned or frozen peaches—just be sure to drain off any excess liquid.
-
1 ½ cups all-purpose flour: This is your base. If you’re gluten-free, you can use a 1:1 gluten-free flour blend.
-
1 teaspoon baking soda: This helps the bread rise and stay fluffy. Don’t substitute it with baking powder; they serve different purposes!
-
½ teaspoon salt: A little salt enhances the sweetness of the peaches and balances the flavors.
-
½ teaspoon ground cinnamon: Cinnamon adds warmth and depth. Feel free to add a pinch of nutmeg for an extra layer of flavor.
-
½ cup granulated sugar: For sweetness! You can swap half of this with brown sugar for a deeper caramel flavor.
-
¼ cup vegetable oil: This keeps the bread moist. You can replace it with melted coconut oil or applesauce for a lighter option.
-
2 large eggs: These bind the ingredients together. For a vegan version, substitute each egg with ¼ cup of unsweetened applesauce.
-
1 teaspoon vanilla extract: This adds a lovely aroma. Homemade vanilla extract can enhance the flavor even more—trust me, it’s worth it!
-
½ cup chopped walnuts or pecans (optional): For that lovely crunch! If you or someone you’re serving is nut-free, simply leave them out or substitute with seeds.
Step-by-Step Instructions
Now, let’s get cooking! Follow these easy steps, and I promise you’ll have a warm loaf of peach bread that will wow anyone who gets a slice.
-
Preheat Your Oven: Begin by preheating your oven to 350°F (175°C). This ensures that your bread bakes evenly and rises beautifully!
-
Prepare the Peaches: While your oven is getting warm, wash and peel the peaches. I find that a simple paring knife works wonders for peeling. Chop them into bite-sized pieces—no need to be too precise; rustic is totally in!
-
Mix Dry Ingredients: In a large bowl, whisk together the flour, baking soda, salt, cinnamon, and sugar until well combined. This step is crucial because it ensures even distribution of the leavening agents and spices.
-
Mix Wet Ingredients: In another bowl, mix together the eggs, oil, and vanilla extract. Whisk until the mixture is smooth, bringing it all together for a luscious batter.
-
Combine Ingredients: Gradually pour the wet ingredients into the dry ingredients. Stir gently with a spatula until just combined—this is not the time to over-mix, as it can make your bread tough.
-
Fold in Peaches: Carefully add the chopped peaches (and nuts if you’re using them) to the batter. Fold them in gently to avoid breaking them up too much; we want those glorious chunks of peach throughout!
-
Prepare the Pan: Grease a loaf pan with non-stick spray or butter. You can also line it with parchment paper for super easy removal later.
-
Pour and Bake: Transfer the batter into the pan, smoothing the top with a spatula. Pop it into your preheated oven and bake for about 50-60 minutes. You’ll know it’s done when a toothpick inserted in the center comes out clean or with a few crumbs attached.
-
Cool and Enjoy: Once out of the oven, allow the bread to cool in the pan for about 10 minutes before transferring it to a wire rack. Let it cool further before slicing—if you can wait that long!
Serving Suggestions
Now, let’s talk plating! Serve this peach bread warm or at room temperature. A light dusting of powdered sugar on top adds a lovely touch. You can enjoy it as-is, or slather on a bit of cream cheese for a decadent treat. Pair it with a cup of hot tea or coffee for that perfect cozy experience.
Recipe Variations
Feeling adventurous? Here are some fun twists you can try:
-
Add Berries: Mix in a cup of fresh blueberries or raspberries for a burst of tangy flavor alongside the peaches.
-
Spice It Up: Add a pinch of cayenne pepper or ground ginger for an unexpected kick!
-
Coconut Peach Bread: Stir in some shredded unsweetened coconut for a tropical feel.
-
Almond Extract: Swap the vanilla for almond extract for a nutty aroma that pairs beautifully with peaches.
-
Gluten-Free Version: Use a gluten-free flour mix and a plant-based oil for a delicious gluten-free option that everyone can enjoy.
Chef’s Notes
This recipe holds a special place in my heart, and I love how versatile it is! Every time I make it, I think about my grandmother and the joy we shared in the kitchen. Once, in a hurry, I accidentally swapped sugar and salt while half-asleep, and while the resulting bread was… interesting (let’s just say it was a little salty!), it reminded me that cooking is as much about experimenting and having fun as it is about following recipes. Don’t be afraid to make this bread your own!
FAQs and Troubleshooting
1. My bread didn’t rise; what went wrong?
- Ensure your baking soda is fresh. If it’s been sitting in your pantry for a while, it may have lost its potency.
2. Can I use frozen peaches?
- Absolutely! Just thaw them and ensure to drain any excess liquid to prevent the bread from becoming too soggy.
3. How do I store leftover bread?
- Keep it in an airtight container at room temperature for up to three days, or slice and freeze for longer storage. Just toast or microwave the slices when you’re ready to indulge.
4. Why did my bread turn out dense?
- Over-mixing can create a dense loaf. Remember to gently fold your ingredients together to keep it light and fluffy!
Nutritional Info
While peach bread is a delight to eat, it’s good to balance deliciousness with nutrition. A slice (about 1/12 of the loaf) contains roughly 180 calories, 6g fat, 25g carbohydrates, and 3g protein. Of course, it’s best enjoyed in moderation, especially if you can share it with loved ones!
There you have it—a decadent, whimsical peach bread recipe loaded with love and memories. I can hardly wait for you to bake your own and fill your kitchen with that sweet aroma. Remember, the kitchen is where flavors mingle and friendships flourish. Happy baking, my foodie friends!
Print
Warm Peach Bread
- Total Time: 80 minutes
- Yield: 12 slices 1x
- Diet: Vegetarian
Description
A delightful peach bread recipe that captures the essence of summer, perfect for brunch or an afternoon snack.
Ingredients
- 3 ripe peaches (or 1 cup canned or frozen peaches, drained)
- 1 ½ cups all-purpose flour (or gluten-free flour blend)
- 1 teaspoon baking soda
- ½ teaspoon salt
- ½ teaspoon ground cinnamon (optional pinch of nutmeg)
- ½ cup granulated sugar (or brown sugar)
- ¼ cup vegetable oil (or melted coconut oil/applesauce)
- 2 large eggs (or ¼ cup unsweetened applesauce for vegan version)
- 1 teaspoon vanilla extract
- ½ cup chopped walnuts or pecans (optional)
Instructions
- Preheat your oven to 350°F (175°C).
- Prepare the peaches by washing, peeling, and chopping them into bite-sized pieces.
- Mix the dry ingredients: whisk together flour, baking soda, salt, cinnamon, and sugar in a large bowl.
- Mix the wet ingredients: in another bowl, whisk together eggs, oil, and vanilla extract.
- Combine the wet ingredients into the dry ingredients; stir gently until just combined.
- Fold in the chopped peaches (and nuts if using).
- Prepare a loaf pan by greasing it or lining it with parchment paper.
- Pour the batter into the pan and smooth the top.
- Bake for 50-60 minutes until a toothpick comes out clean.
- Cool in the pan for 10 minutes before transferring to a wire rack.
Notes
This peach bread can be served warm or at room temperature. A dusting of powdered sugar or a spread of cream cheese makes it a delightful treat.
- Prep Time: 20 minutes
- Cook Time: 60 minutes
- Category: Dessert
- Method: Baking
- Cuisine: American
Nutrition
- Serving Size: 1 slice
- Calories: 180
- Sugar: 10g
- Sodium: 200mg
- Fat: 6g
- Saturated Fat: 1g
- Unsaturated Fat: 5g
- Trans Fat: 0g
- Carbohydrates: 25g
- Fiber: 2g
- Protein: 3g
- Cholesterol: 50mg
Keywords: peach bread, summer recipe, baking, brunch, dessert
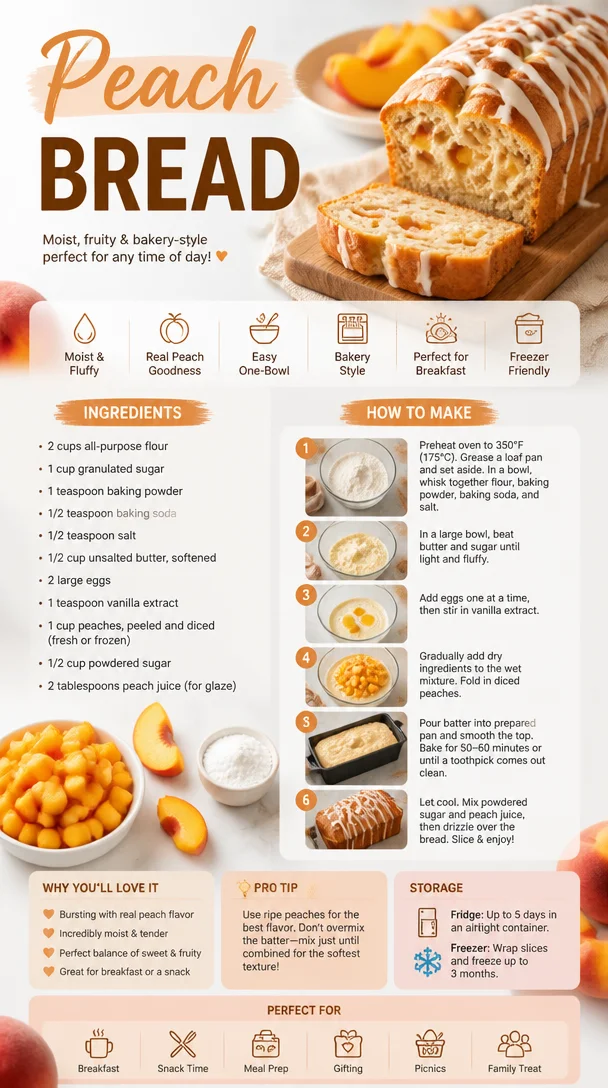
Peach Bread
The Ultimate Peach Bread Recipe: A Slice of Summer in Every Bite
Welcome to my kitchen! Today, I’m excited to share a recipe that brings me back to my childhood summers spent chasing fireflies and devouring fresh fruit straight from the tree — it’s Peach Bread! There’s something utterly magical about the aroma of peaches baking in the oven, wafting through my kitchen and making my heart swell with nostalgia. As much as I adore summer barbecues and sun-soaked afternoons, nothing beats enjoying a slice of this delightful Peach Bread with a drizzle of honey and a dollop of whipped cream.
Peach Bread combines the sweetness of ripe, juicy peaches with a cozy, warm bread base, creating a comforting treat perfect for breakfast, brunch, or even dessert. It’s easy enough to whip up on a lazy weekend morning, yet impressive enough to serve at your next gathering. Trust me, the blend of soft bread and succulent peaches will have your friends asking for the recipe while you bask in the glory of your culinary masterpiece.
In this blog post, I’m going to take you through every step of making Peach Bread, share some personal stories, and give you lots of tips and tricks along the way. Whether you’re an experienced baker or simply trying to impress your family with a delicious homemade treat, you’ll find everything you need right here!
So, roll up those sleeves, don your favorite apron, and let’s get baking some Peach Bread that will make your taste buds dance!
A Sweet and Juicy Memory
Growing up in the sunny countryside, my family had an orchard filled with lush, round peach trees. Each summer, my siblings and I would clamor to help our grandparents harvest ripe peaches, turning the experience into a competitive game. I still remember the feeling of sticky hands and sweet juice dripping down my chin, accompanied by lots of laughter and chatter. At the end of the day, my grandmother would pull together a peach dessert, and one of my favorites was her unforgettable Peach Bread.
Her recipe lacked any fancy techniques, yet it always turned out perfectly moist and fragrant. We would gather around the kitchen table, eager for the first warm slice slathered with butter. That joy of sharing a meal made with love and fresh ingredients is what has inspired me to create my own version of Peach Bread, one that echoes my childhood memories while inviting new ones to be made.
The beauty of this recipe is its simplicity. Whether you’re making it at home for your family or sharing with friends at a gathering, it’s meant to foster connection and joy. Let’s dive deeper into what you’ll need to create this delectable Peach Bread!
Ingredients
To make this delightful Peach Bread, you’ll need the following ingredients:
-
Fresh Peaches (2-3 large, about 2 cups diced)
Look for peaches that are ripe and fragrant. If they’re slightly green, leave them to ripen on your counter for a day or two. If you’re in a pinch, canned peaches can work as a substitute — just be sure to drain and pat them dry to prevent excess moisture. -
All-Purpose Flour (2 cups)
This is your base! If you’re looking to kick up the nutritional content, you can substitute half of it with whole wheat flour. Just be mindful that it may alter the texture slightly. -
Granulated Sugar (1 cup)
This sugar not only sweetens the bread but also keeps it moist. For a healthier option, you can use coconut sugar or even a sugar alternative like stevia, though it may affect the bread’s taste and moisture. -
Baking Powder (2 teaspoons)
The leavening agent is key to giving your bread a nice rise. Make sure it’s fresh — if it’s been sitting around for too long, it might not give you the lift you need! -
Salt (½ teaspoon)
A pinch of salt enhances the flavor of your bread, highlighting the sweetness of the peaches. It’s a small but mighty ingredient! -
Eggs (2 large)
Eggs provide structure and moisture. For an egg-free alternative, you can use a flaxseed meal mixture (1 tablespoon of flaxseed meal mixed with 2.5 tablespoons of water, let it sit until gelatinous). -
Vegetable Oil or Melted Butter (⅓ cup)
Using oil will yield a light and fluffy bread, while melted butter will give an extra rich flavor. Choose based on your mood! -
Vanilla Extract (1 teaspoon)
Ah, vanilla! This flavor enhancer makes everything taste better. If you’re feeling adventurous, try using almond extract instead for a twist. -
Cinnamon (1 teaspoon)
This is optional, but a sprinkle of cinnamon adds warmth and depth, complementing the sweetness of the peaches perfectly.
Now that we have our ingredients, let’s get into the step-by-step process of creating this Peach Bread masterpiece!
Step-by-Step Instructions
Preheat the Oven and Prepare Your Pan
- Preheat your oven to 350°F (175°C). While the oven is heating up, grab a 9×5-inch loaf pan and grease it with either butter or a non-stick cooking spray. This will prevent your beautiful bread from sticking. If you want more assurance against sticking, consider lining the bottom with parchment paper.
Mix the Dry Ingredients
- In a large mixing bowl, whisk together the flour, baking powder, salt, and cinnamon (if using). Mix these dry ingredients thoroughly to ensure even distribution of the leavening agent.
Prepare the Wet Ingredients
- In another bowl, beat the eggs. Once they’re frothy, add the sugar, oil (or melted butter), and vanilla extract. Whisk until everything is well combined. The mixture should be smooth and glossy.
Combine Wet and Dry Ingredients
- Gradually incorporate the dry ingredient mixture into the wet ingredients. Use a rubber spatula or wooden spoon to carefully fold them together. Be cautious not to overmix; some lumps are perfectly fine.
Add the Peaches
- Gently fold in the diced peaches. This is where the magic happens! Feel free to reserve a few peach pieces to sprinkle on top for a pretty presentation. Their juices will meld into the batter, making delicious little pockets of sweetness throughout the bread.
Pour into the Pan
- Transfer the batter into the prepared loaf pan; it should fill about two-thirds of the way to allow room for rising. Spread the top level with a spatula, and sprinkle any remaining peach pieces if you saved some.
Bake to Perfection
- Place the loaf pan in the preheated oven and bake for approximately 50-60 minutes. You’ll want to check for doneness by inserting a toothpick into the center. If it comes out clean or with just a few crumbs clinging to it, your bread is ready! If you notice it browning too quickly, cover it loosely with aluminum foil.
Cool it Down
- Once baked, remove it from the oven and let it cool in the pan for about 10-15 minutes. Afterward, gently turn it out onto a wire rack to cool completely. The aroma in your kitchen will be intoxicating.
Serving Suggestions
Now that your Peach Bread is cool and fragrant, slice it up and serve it warm with a pat of butter or a drizzle of honey. For a brunch treat, pair it with whipped cream or Greek yogurt and a dusting of powdered sugar to wow your guests! You can also enjoy it plain for a quick breakfast on-the-go.
Recipe Variations
While the classic Peach Bread is delicious on its own, here are some creative variations you can experiment with:
- Add Nuts: Throw in some chopped walnuts or pecans for a delightful crunch.
- Make it Tropical: Replace half of the peaches with diced pineapple for a tropical twist.
- Cinnamon Swirl: Swirl a cinnamon-sugar mix into your batter for a sweet surprise in every slice.
- Sourdough Version: Use sourdough starter as a base for a tangy, complex flavor.
- Gluten-Free Option: Substitute the all-purpose flour with a gluten-free baking blend, ensuring you’ve got an even balance of wet to dry for the same consistency!
Chef’s Notes
You know, this recipe has evolved over time as I experimented with different fruits, textures, and flavors. I remember the first time I swapped butter for oil and my family raved about how much they loved the moistness of the bread! I also recall one rather hilarious mishap when I grabbed salt instead of sugar. Let’s just say, the outcome was… not peachy! But every kitchen adventure only made me more determined to perfect my recipes.
Ultimately, this Peach Bread embodies the spirit of summer and family gatherings for me, and I hope it transports you to sunny moments in the kitchen just as it does for me!
FAQs and Troubleshooting
Can I use frozen peaches?
Yes! Just be sure to thaw and drain them well to avoid excess moisture in your bread, which could make it soggy.
What should I do if my bread is too dense?
If your bread turned out dense, it could be due to overmixing or using too much flour. Ensure you’re measuring flour accurately by spooning it into the measuring cup and leveling it off.
How can I tell if my bread is done baking?
Insert a toothpick into the center of the bread; if it comes out clean or with a few moist crumbs, you’re good to go! If it’s wet with batter, give it a few more minutes.
Can I make this recipe ahead of time?
Absolutely! Peach Bread keeps well in an airtight container at room temperature for about 3 days or can be stored in the fridge for up to a week. You can also freeze it; just make sure it’s well-wrapped.
Nutritional Info (if applicable)
For one slice of Peach Bread (about 1/12 of the loaf):
- Calories: ~180
- Total Fat: 7g
- Saturated Fat: 1g
- Carbohydrates: 27g
- Fiber: 1g
- Sugar: 10g
- Protein: 3g
Conclusion
And there you have it — the ultimate Peach Bread recipe, filled with sweet memories and the promise of delicious moments to come. I hope you enjoy baking and sharing this delightful treat as much as I do. Remember, cooking is all about experimentation and love, so don’t be afraid to make it your own!
Happy baking, and may your kitchen be filled with joy, laughter, and the sweet aroma of peaches! 🍑
Print
The Ultimate Peach Bread
- Total Time: 75 minutes
- Yield: 12 servings
- Diet: Vegetarian
Description
A comforting Peach Bread recipe that combines ripe peaches with a warm bread base, perfect for breakfast or dessert.
Ingredients
- Fresh Peaches (2-3 large, about 2 cups diced)
- All-Purpose Flour (2 cups)
- Granulated Sugar (1 cup)
- Baking Powder (2 teaspoons)
- Salt (½ teaspoon)
- Eggs (2 large)
- Vegetable Oil or Melted Butter (⅓ cup)
- Vanilla Extract (1 teaspoon)
- Cinnamon (1 teaspoon, optional)
Instructions
- Preheat your oven to 350°F (175°C) and grease a 9×5-inch loaf pan.
- Mix the flour, baking powder, salt, and cinnamon in a bowl.
- Prepare the eggs by beating them, then add the sugar, oil (or butter), and vanilla extract.
- Combine the dry ingredients with the wet ingredients carefully.
- Add the diced peaches to the batter and fold gently.
- Pour the batter into the prepared loaf pan.
- Bake for approximately 50-60 minutes until done.
- Cool in the pan for about 10-15 minutes, then transfer to a wire rack.
Notes
Serve with butter, honey, or whipped cream. Great for brunch or as a dessert.
- Prep Time: 15 minutes
- Cook Time: 60 minutes
- Category: Dessert
- Method: Baking
- Cuisine: American
Nutrition
- Serving Size: 1 slice
- Calories: 180
- Sugar: 10g
- Sodium: 220mg
- Fat: 7g
- Saturated Fat: 1g
- Unsaturated Fat: 4g
- Trans Fat: 0g
- Carbohydrates: 27g
- Fiber: 1g
- Protein: 3g
- Cholesterol: 60mg
Keywords: peach bread, summer recipes, quick bread, dessert, baking
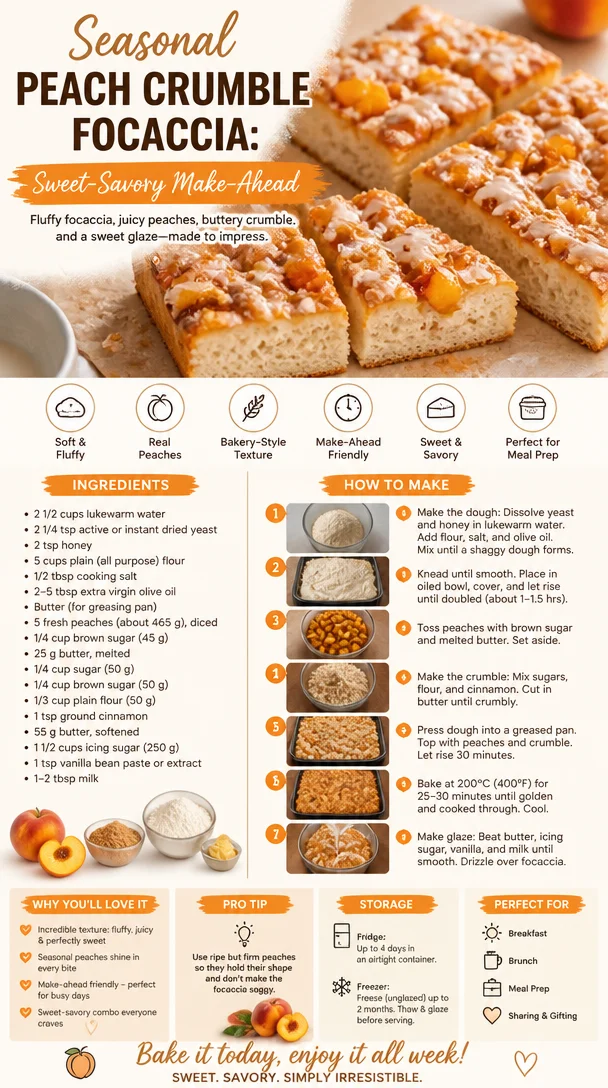
Seasonal Peach Crumble Focaccia: Sweet-Savory Make-Ahead
Peach Crumble Focaccia: An Ode to Summer’s Sweetest Fruit
Welcome, fellow food lovers! I’m thrilled to have you here in my cozy kitchen, where the aroma of baked goods always dances in the air, and laughter seems to echo off the walls. Today, we’re diving into a delightful twist on two delightful classics: focaccia and peach crumble. Think soft, pillowy bread topped with luscious, juicy peaches and a buttery crumble that will make your taste buds sing!
Imagine taking a walk in the summertime, with sun-kissed skin and the sweet scent of ripe peaches wafting through the air. That’s the kind of vibe this dish brings to the table. Picture sharing it with friends or serving it up at a family gathering, where every bite feels like a warm hug and a conversation starter.
Peach Crumble Focaccia takes the best of both worlds—savory bread and a sweet, fruity topping—and transforms them into an elegant treat. Whether it’s dessert or an indulgent breakfast, this delicious recipe creates those golden moments we treasure. So, roll up your sleeves and let’s get this peach party started!
A Personal Peachy Memory
Growing up in a tight-knit family, summer meant one thing—peach season! My grandmother had a little orchard, and it was our summer haven. Every year, we’d spend the afternoons picking juicy, sun-ripened peaches, giggling and racing to see who could find the biggest one. After loading up our baskets, we’d return to her kitchen, where the real magic happened.
I can still hear the sound of her trusty old mixer whirring as she whipped up the most delicious peach cobblers and crumbles. The kitchen would fill with the intoxicating aroma of melted butter and brown sugar mingling with fresh peaches. One afternoon, she introduced me to focaccia, explaining the art of kneading dough before we topped it with those wonderful peaches, creating a unique dessert that became an instant family favorite. That memory always brings a smile to my face, and I hope this recipe can evoke the same warmth and joy in your kitchen!
Ingredients
Here’s what you need to make this scrumptious Peach Crumble Focaccia:
-
For the Focaccia:
- 3 cups all-purpose flour: The foundation of our focaccia. You can swap with whole wheat flour for a heartier texture.
- 1 packet (2 ¼ teaspoons) instant yeast: For that magical rise! If you only have active dry yeast, just dissolve it in warm water first.
- 1 teaspoon salt: Balances the sweetness and enhances flavors.
- 1 cup warm water: This is the secret to fluffy bread. Ideally, it should be about 110°F (43°C).
- 2 tablespoons olive oil: Adds richness. You can replace it with melted butter for a different flavor.
-
For the Peach Topping:
- 3-4 ripe peaches: The star of the show! Choose peaches that are flavorful and slightly firm. If peaches aren’t in season, nectarines or plums can be great substitutes.
- 2 tablespoons brown sugar: This caramelizes beautifully when baked. You can use coconut sugar for a lighter option.
- 1 teaspoon cinnamon: Adds a touch of warmth. Feel free to adjust according to your taste preference.
-
For the Crumble Topping:
- 1 cup rolled oats: Provides a lovely texture. If you want gluten-free, be sure to use certified gluten-free oats.
- ½ cup all-purpose flour: Helps bind the crumble. You can try almond flour for a nutty flavor.
- ½ cup unsalted butter (cold, diced): Brings richness and allows for that perfect crumble. Vegan butter works here too.
- ½ cup brown sugar: Sweetness overload! You can also mix in some white sugar to balance flavors.
Step-by-Step Instructions
Now, let’s get our hands dirty! Follow these steps to create your perfect Peach Crumble Focaccia:
-
Prepare the Dough: In a large mixing bowl, combine the flour, salt, and instant yeast. Stir to mix them thoroughly. Gradually add the warm water and olive oil. Mix until a shaggy dough forms. Don’t be alarmed—it’s supposed to be sticky!
Chef’s Tip: Using a wooden spoon is easiest here. If you have a stand mixer with a dough hook, go for it! You’ll save time and get that dough nice and elastic.
-
Knead the Dough: Turn the dough onto a floured surface. Knead for about 8-10 minutes until it’s smooth and elastic. If it’s too sticky, sprinkle in more flour, but be careful not to overdo it!
Chef’s Note: This part is especially fun and therapeutic—you can even imagine you’re kneading out all the stresses of your day!
-
First Rise: Place the kneaded dough in a greased bowl, cover it with a kitchen towel, and let it rise in a warm spot for 1-2 hours or until doubled in size.
Fun Fact: If you’re short on time, you can let it rise in a turned-off oven with the light on for a little warmth.
-
Prepare the Peaches: While the dough rises, slice the peaches into wedges. Toss them with the brown sugar and cinnamon in a bowl. Set aside to let those flavors meld.
Flavor Tip: Feel free to get creative! Adding a splash of vanilla extract or lemon juice also works wonders here.
-
Make the Crumble: In another bowl, mix rolled oats, flour, cold diced butter, and brown sugar. Using your fingers, work the butter into the mixture until it resembles coarse crumbs.
Chef Hack: If you find it’s not crumbly enough, toss in a bit more flour or oats, adjusting until it’s just right.
-
Shape the Focaccia: Once your dough has risen, punch it down gently to release the air. Transfer it to a lined baking sheet and spread it out with your fingers to about ½ inch thick.
Baker’s Touch: If you’re feeling fancy, create dimples in the dough with your fingers for texture and an inviting look.
-
Topping Time: Place the marinated peach slices on top of the dough, artfully arranging them as you prefer. Don’t be shy—load it up! Sprinkle the crumble topping generously over the peaches.
Presentation Tip: Imagine how wonderful this will look fresh from the oven; it’s all about making it visually tempting!
-
Second Rise: Cover the focaccia again with the towel and let it rise for another 30 minutes while you preheat the oven to 375°F (190°C).
Baker’s Secret: This second rise helps achieve that beautifully airy focaccia texture.
-
Bake: Pop the focaccia into the oven and bake for 25-30 minutes until the top is golden brown and the peaches are bubbly. Your kitchen will smell divine!
Watch Out: Every oven is different, so check it a few minutes early to ensure it doesn’t overbake.
-
Cool and Slice: Once baked, allow it to cool slightly on a wire rack before slicing. This step is key to letting the flavors settle.
Slicing Tip: Try slicing it into squares or wedges for just the right portion to share—or keep it all for yourself!
Serving Suggestions
Serve your Peach Crumble Focaccia warm or at room temperature, and don’t forget to add a scoop of vanilla ice cream or a dollop of whipped cream on the side. You can also drizzle some honey or a sprinkle of icing sugar over the top for an extra touch of sweetness. Trust me; your friends and family will think they’ve entered dessert heaven!
Recipe Variations
Here are some fun variations to keep your Peach Crumble Focaccia exciting:
- Berry Delight: Swap half of the peaches for fresh blueberries or raspberries for a delightful twist.
- Maple Pecan: Add chopped pecans to the crumble mixture for a nutty flavor and a crunchy texture.
- Herb Infusion: Include a sprinkle of fresh thyme or rosemary on the focaccia dough before adding the peaches for an aromatic touch.
- Spiced Up: Mix in a pinch of nutmeg or ginger to the peach mixture for a more robust flavor profile.
- Vegan Alternative: Substitute the butter in the crumble with coconut oil and the dairy in the focaccia with almond or oat milk.
Chef’s Notes
Peach Crumble Focaccia started as a happy accident in my kitchen. I had some peaches on their very last legs and figured, why not combine the best of both worlds? The joy I felt crafting this recipe makes it very dear to me. It’s now become a staple at gatherings, an easy yet impressive addition that leaves everyone craving seconds!
Feel free to make it your own! Part of the fun of cooking is experimenting with flavors and techniques until you find what warms your heart.
FAQs and Troubleshooting
Q: My focaccia didn’t rise as much as I’d hoped. What went wrong?
A: There are a few possibilities. Ensure your yeast is fresh. It’s also possible that the warmth in your kitchen wasn’t enough for rising. Try wearing your beloved sweater next time, and let that warm vibe help your dough peak!
Q: Can I use frozen peaches for this recipe?
A: Absolutely! Just ensure they’re thawed and well-drained to avoid excess moisture in your focaccia.
Q: What’s the best way to store leftover focaccia?
A: Keep it in an airtight container at room temperature for up to two days. You can pop it into the oven for a few minutes to warm it back up before serving or enjoy it cold!
Q: Is there a gluten-free option?
A: Definitely! You can use a gluten-free all-purpose baking mix instead of regular flour for both the focaccia and the crumble. Just be sure to adjust the liquid content as needed.
Nutritional Info
While I don’t usually focus on dietary information (after all, we’re here for the joy of cooking!), if you’re interested, I’d be happy to help you calculate the nutritional breakdown based on your specific ingredient choices!
So there you have it! A heartwarming recipe for Peach Crumble Focaccia that not only delights the taste buds but also holds the nostalgia of summer memories. As you make this recipe, know that every bite is an ode to those beautiful, sun-soaked afternoons spent in the kitchen with family and friends. Now go bake up something special — and share the love! 🍑💖
Print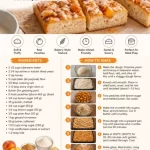
Peach Crumble Focaccia
- Total Time: 45 minutes
- Yield: 8 servings 1x
- Diet: Vegetarian
Description
A delightful twist on focaccia topped with juicy peaches and a buttery crumble, perfect for summer gatherings.
Ingredients
- 3 cups all-purpose flour
- 1 packet (2 ¼ teaspoons) instant yeast
- 1 teaspoon salt
- 1 cup warm water
- 2 tablespoons olive oil
- 3–4 ripe peaches, sliced
- 2 tablespoons brown sugar
- 1 teaspoon cinnamon
- 1 cup rolled oats
- ½ cup all-purpose flour
- ½ cup unsalted butter, cold and diced
- ½ cup brown sugar
Instructions
- Prepare the Dough: In a large mixing bowl, combine the flour, salt, and instant yeast. Gradually add the warm water and olive oil. Mix until a shaggy dough forms.
- Knead the Dough: Turn the dough onto a floured surface. Knead for about 8-10 minutes until it’s smooth and elastic.
- First Rise: Place the kneaded dough in a greased bowl, cover it with a towel, and let it rise for 1-2 hours.
- Prepare the Peaches: Slice the peaches and toss them with brown sugar and cinnamon.
- Make the Crumble: Mix rolled oats, flour, cold diced butter, and brown sugar until it resembles coarse crumbs.
- Shape the Focaccia: Transfer dough to a lined baking sheet and spread it out to ½ inch thick.
- Topping Time: Arrange marinated peach slices on the dough and sprinkle the crumble topping over the peaches.
- Second Rise: Cover the focaccia and let it rise for another 30 minutes.
- Bake: Bake at 375°F (190°C) for 25-30 minutes until golden brown.
- Cool and Slice: Allow to cool slightly before slicing.
Notes
Serve warm or at room temperature with vanilla ice cream or whipped cream.
- Prep Time: 15 minutes
- Cook Time: 30 minutes
- Category: Dessert
- Method: Baking
- Cuisine: Italian
Nutrition
- Serving Size: 1 slice
- Calories: 350
- Sugar: 15g
- Sodium: 400mg
- Fat: 15g
- Saturated Fat: 8g
- Unsaturated Fat: 5g
- Trans Fat: 0g
- Carbohydrates: 50g
- Fiber: 4g
- Protein: 6g
- Cholesterol: 30mg
Keywords: peach, crumble, focaccia, dessert, summer, baking
Sticky Chicken Bowls Recipe
Sticky Chicken Bowls: A Cozy Culinary Adventure
Welcome back to my kitchen, dear foodies! Today, we’re diving into a recipe that’s not only a crowd-pleaser but also warms the heart and fills the belly — Sticky Chicken Bowls. This dish is one of my absolute favorites and carries with it a wave of nostalgia and comfort. Picture yourself sitting around a table with family or friends, laughter echoing as you dig into a hearty bowl filled with tender chicken, colorful vegetables, and a sticky-sweet sauce that brings it all together. Let’s embark on this culinary journey together!
Imagine this scene: It’s a chilly Friday evening, and I’m cozied up in my kitchen, the delightful aroma of garlic and ginger wafting through the air. It reminds me of the many family gatherings where I first learned to cook alongside my grandmother. She had this magical ability to turn the simplest of ingredients into a feast fit for kings! Stickiness was not just about the sauce; it was about bonding, laughter, and shared stories over a warm meal. Those evenings armed me with a wealth of culinary tricks and cherished memories, and I aim to recreate that feeling with each dish I prepare.
Sticky Chicken Bowls are perfect for those who are just starting out in the kitchen or seasoned cooks looking for a quick meal without compromising on flavor. It’s incredible how a few everyday ingredients can come together to create something truly special. Ready to roll up your sleeves and get cooking? Let’s gather our ingredients!
Ingredients
-
Chicken thighs: Juicy and flavorful, chicken thighs are the star of the dish. Thighs remain moist and tender even when cooked for longer periods, making them perfect for this recipe. You can substitute them with chicken breasts, but be careful not to overcook them!
-
Soy sauce: This salty, savory sauce adds depth of flavor to the chicken. Tamari or coconut aminos can be used for a gluten-free version, maintaining the dish’s umami flavor.
-
Honey: This is our secret weapon for sweetness! Honey gives the dish its sticky quality. If you’re after a vegan option, swap it out for maple syrup or agave nectar.
-
Garlic: Freshly minced, garlic adds a punch of flavor that’s hard to resist. If you’re in a pinch, garlic powder can be used. Just remember, 1 teaspoon of garlic powder equals about 3 cloves of fresh garlic!
-
Ginger: Fresh ginger lends a warm spice that elevates the dish. If fresh ginger isn’t available, feel free to use ground ginger — but keep in mind the flavor will be milder.
-
Cornstarch: Used for thickening our sticky sauce, cornstarch gives it that irresistible gloss. For a gluten-free thickener, arrowroot powder works just as well.
-
Vegetables of choice: I love using snap peas, bell peppers, and broccoli for color and crunch. You can easily swap in whatever you have on hand, like carrots or bok choy.
-
Rice or quinoa: Serve the sticky chicken over fluffy rice or quinoa; both pair beautifully with the sticky sauce. For a low-carb option, cauliflower rice is an excellent substitute.
Step-by-Step Instructions
Now, let’s get cooking! Here’s how to whip up these delightful Sticky Chicken Bowls. Grab your apron, and let’s make some kitchen magic!
-
Prep Your Chicken: Start by cutting your chicken thighs into bite-sized pieces. This helps them marinate quickly and cook evenly. Trust me, this is where the flavor begins!
-
Marinate the Chicken: In a bowl, mix together soy sauce, honey, minced garlic, and freshly grated ginger. Add the chicken pieces, making sure they are all coated in the marinade. Allow it to marinate for at least 20 minutes. If time permits, pop it in the fridge for an hour or even overnight — the longer, the better!
-
Prep Your Veggies: While the chicken is marinating, chop your veggies into bite-sized pieces. The more colorful, the better! I love the crunch of snap peas and the sweetness of bell peppers. Bonus points for adding a pop of green from broccoli!
-
Cook the Chicken: Heat a large skillet over medium-high heat. Add a drizzle of oil, then toss in the marinated chicken (don’t discard the marinade just yet!). Cook for about 5-7 minutes, stirring occasionally, until the chicken is golden brown and cooked through.
-
Thicken the Sauce: In a small bowl, combine a tablespoon of cornstarch with two tablespoons of cold water to create a slurry. Add the remaining marinade to the skillet and bring it to a simmer. Whisk in the cornstarch slurry and watch as the sauce thickens beautifully!
-
Add Vegetables: Toss your prepared veggies into the skillet, stirring to coat them in the sticky sauce. Cook until the vegetables are tender but still crisp, about 3-4 minutes.
-
Assemble your Bowls: Now it’s time for everyone’s favorite part! Serve fluffy rice or quinoa in bowls, topped with the sticky chicken and vegetable mixture. Drizzle on any extra sauce for added goodness.
-
Garnish and Serve: Top with sesame seeds, sliced green onions, or chopped cilantro for a fresh finish.
Serving Suggestions
Let’s make our Sticky Chicken Bowls even more appealing! Consider adding a drizzle of sriracha for a touch of spice or some crushed peanuts for that delightful crunch. You can also serve these bowls alongside a crisp cucumber salad or steamed edamame for a vibrant meal!
Recipe Variations
Want to mix it up? Here are some creative ideas for your Sticky Chicken Bowls:
-
Swap the Protein: Feel free to use shrimp or firm tofu for a delightful twist on the classic.
-
Vegetable Medley: Try different combinations of veggies, such as zucchini, asparagus, or mushrooms, to keep things fresh.
-
Infuse Different Flavors: Add a splash of pineapple juice to the marinade for a tropical zing!
-
Spicy Variation: Add chopped fresh jalapeños or a spoonful of chili paste to the sauce for more heat.
Chef’s Notes
Sticky Chicken Bowls have a special place in my heart because they remind me of those whirlwind kitchen days spent with Grandma. I cherish the moments spent laughing and dancing around the kitchen as we cooked, our hands sticky with sweet sauces. Over the years, yes, I’ve added my own spin by incorporating seasonal veggies and experimenting with flavors! This recipe reflects not just my culinary journey but a love for sharing good food with the people who matter.
FAQs and Troubleshooting
Q: My chicken turned out tough. What went wrong?
A: This can often happen if the chicken is overcooked. Thighs are forgiving but try to cook them until just done for the juiciest result.
Q: Can I make this dish ahead of time?
A: Absolutely! Prepare everything up to the cooking step and then refrigerate. Just reheat gently in a skillet before serving.
Q: How can I make this dish milder for kids?
A: To tone down the flavors, use less garlic and ginger, and consider leaving out any spicy additions until served.
Q: Can I freeze leftovers?
A: Yes! The sticky chicken can be frozen for up to 3 months. Just reheat gently when you’re ready to enjoy it again.
Nutritional Info
(Adapt according to your preference; here’s a basic idea)
- Calories: 450
- Fat: 15g
- Protein: 30g
- Carbohydrates: 45g
- Fiber: 4g
- Sugar: 12g
Now, dear foodie friends, you have all the tools and knowledge to create these delightful Sticky Chicken Bowls at home! This recipe is perfect for cozy evenings, lively dinners with friends, or even meal prep for the week. So, don your apron, turn on your favorite playlist, and let the magic happen in your kitchen. Until next time, happy cooking!
Print
Sticky Chicken Bowls
- Total Time: 35 minutes
- Yield: 4 servings 1x
- Diet: Gluten-Free, Dairy-Free, Nut-Free
Description
Enjoy a cozy meal with these flavorful Sticky Chicken Bowls, filled with tender chicken, colorful vegetables, and a sticky-sweet sauce.
Ingredients
- 1 lb chicken thighs, cut into bite-sized pieces
- 1/4 cup soy sauce (or tamari for gluten-free)
- 1/4 cup honey (or maple syrup for vegan)
- 3 cloves garlic, minced
- 1 inch fresh ginger, grated
- 1 tablespoon cornstarch
- Vegetables of choice (e.g., snap peas, bell peppers, broccoli)
- 2 cups cooked rice or quinoa
Instructions
- Prep your chicken: Start by cutting your chicken thighs into bite-sized pieces.
- Marinate the chicken: In a bowl, mix together soy sauce, honey, minced garlic, and ginger. Add chicken pieces and coat well, marinate for at least 20 minutes.
- Prep your veggies: While chicken marinates, chop your veggies into bite-sized pieces.
- Cook the chicken: Heat a large skillet over medium-high heat. Add oil, then toss in the marinated chicken and cook for 5-7 minutes until golden brown.
- Thicken the sauce: In a small bowl, combine cornstarch with cold water to make a slurry. Add remaining marinade to the skillet, bring to a simmer, and whisk in the slurry.
- Add vegetables: Toss in the veggies and cook until tender but still crisp, about 3-4 minutes.
- Assemble your bowls: Serve rice or quinoa in bowls, topped with sticky chicken and veggies. Drizzle with extra sauce if desired.
- Garnish and serve: Top with sesame seeds, sliced green onions, or cilantro.
Notes
For added flavor, drizzle sriracha or sprinkle crushed peanuts over the bowls.
- Prep Time: 20 minutes
- Cook Time: 15 minutes
- Category: Main Course
- Method: Stovetop
- Cuisine: Asian
Nutrition
- Serving Size: 1 bowl
- Calories: 450
- Sugar: 12g
- Sodium: 800mg
- Fat: 15g
- Saturated Fat: 4g
- Unsaturated Fat: 6g
- Trans Fat: 0g
- Carbohydrates: 45g
- Fiber: 4g
- Protein: 30g
- Cholesterol: 90mg
Keywords: sticky chicken bowls, easy chicken recipe, comfort food, weeknight dinner, meal prep
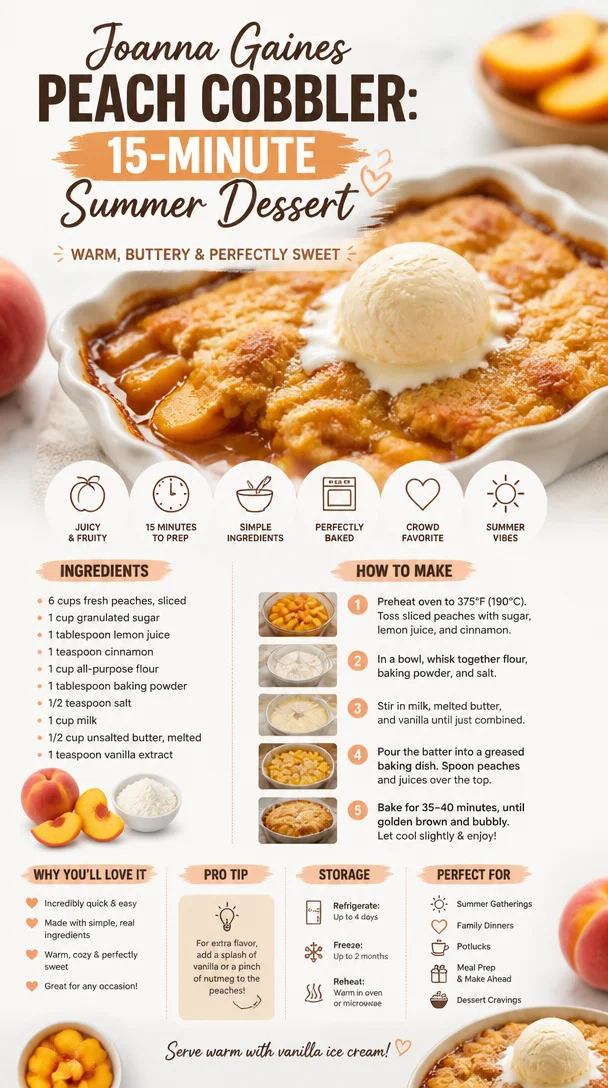
Joanna Gaines Peach Cobbler: 15-Minute Summer Dessert
The Ultimate Joanna Gaines Inspired Peach Cobbler Recipe
Welcome to my kitchen! Today, we’re diving into the world of comfort food with a delightful recipe that embodies warmth and nostalgia: Joanna Gaines’ Peach Cobbler. If there’s anything that brings people together quite like the smell of sweet, caramelized peaches mingling with buttery biscuit topping, it’s this classic dish. This peach cobbler is not just about satisfaction; it’s about creating memories, sharing stories, and, of course, indulging in a well-deserved treat after a long day.
Whether you’re serving it at a family gathering, an afternoon picnic, or for a cozy night in, this cobbler has a way of sparking joy and conversation. As you whip up the batter, you might find yourself reminiscing about summertime visits to grandma’s house or backyard barbecues with friends. Each bite is like a warm hug — light, flaky, and packed with juicy peaches that transport you directly to those sunny memories.
So, grab your apron, pour yourself a cup of something warm, and let’s embark on this peachy adventure together. With summer fruit at its peak, there’s no better time to whip up this easy, delicious dessert that’ll have everyone asking for seconds! Trust me, once you make this cobbler, it’ll become a staple in your home, a dish you return to time and time again.
All set? Let’s get cooking!
A Slice of Nostalgia
I remember the first time I made a peach cobbler. It was a spontaneous decision one summer afternoon when the sun was shining, and the air was thick with warmth. I was rummaging through my kitchen when I stumbled upon a bag of fresh peaches that had been given to me by a neighbor. They were perfectly ripe, just waiting to be transformed into something magical.
Gathering my ingredients, I decided to channel my inner Joanna Gaines — because who doesn’t want to cook like a modern-day culinary queen with a charming farmhouse vibe? As I sliced the peaches, the sweet, fragrant aroma filled my kitchen, almost making me giddy with nostalgia. It transported me back to those lazy summer days at my grandmother’s house, where cobblers simmered in the oven, their scents wafting through the open windows.
I decided to make a simple cobbler recipe I had memorized but with a couple of Joanna’s signature twists. The first bite was pure bliss, and I knew I had struck gold. Friends gathered and laughed as we dug into that cobbler, topped with a scoop of vanilla ice cream, each bite sparking stories and joy. Since that day, I’ve made it countless times, adapting it here and there, but always keeping that first adventurous spirit alive.
Ingredients to Bring This Cobbler to Life
Let’s gather our ingredients! Each component plays a vital role in ensuring our peach cobbler is nothing short of perfection:
-
Fresh Peaches (4-6 cups): The star of our show! Choose ripe, juicy peaches for the best flavor. If peaches aren’t in season, feel free to substitute with canned peaches (be sure to drain them well!).
-
Granulated Sugar (1 cup): To enhance the sweetness of those luscious peaches. You can swap it for brown sugar if you prefer a deeper, caramel flavor.
-
All-Purpose Flour (1 cup): This is the base for our cobbler topping. If you’re looking for gluten-free options, almond flour or a gluten-free flour blend works great too.
-
Baking Powder (1 tablespoon): This will give our cobbler the lift it needs. Make sure your baking powder is fresh for that perfect rise.
-
Salt (1/4 teaspoon): Just a pinch to balance the sweetness and enhance the flavors.
-
Milk (1 cup): Whole milk adds richness, but you can use almond milk or any other non-dairy milk if you’re looking to lighten it up.
-
Butter (1/2 cup, melted): Because everything is better with butter! If you’re in a pinch, coconut oil or a dairy-free alternative can be used here.
-
Ground Cinnamon (1 teaspoon): A warm spice that complements the peaches beautifully. Feel free to add nutmeg for an extra depth of flavor.
These ingredients not only create that gooey, irresistible filling and fluffy topping; they also remind us of simple, wholesome cooking.
Step-by-Step Instructions
Now, let’s roll up our sleeves and get to the fun part! Here’s how to whip up this peach cobbler from scratch:
-
Preheat Your Oven: Start by preheating your oven to 375°F (190°C). This ensures that the cobbler bakes evenly and turns golden brown.
-
Prepare Your Peaches: If you’re using fresh peaches, wash, peel, and slice them. Place the sliced peaches in a large bowl and toss them with half of the sugar (about 1/2 cup) and the ground cinnamon. Let them sit for about 10-15 minutes so that they release their natural juices.
-
Mix the Batter: In a separate bowl, whisk together the flour, baking powder, remaining sugar, and salt. Slowly add the milk and melted butter to this mixture, stirring just until combined. Be careful not to overmix; it’s okay if there are a few lumps!
-
Assemble the Cobbler: Grease a large baking dish (about 9×13 inches) with butter or cooking spray. Pour the batter evenly into the bottom of the dish without stirring (yes, it’s supposed to look a bit awkward, but trust the process). Carefully spoon the peach mixture over the batter. Don’t worry if it looks messy; it will all come together beautifully in the oven!
-
Bake to Perfection: Pop the baking dish in the preheated oven and bake for about 40-45 minutes or until the top is golden brown and the filling is bubbly. You’ll want to keep an eye on it in the last few minutes — the aroma will drive you crazy!
-
Let it Cool: Once golden, take it out and let it cool for at least 10-15 minutes before serving. This allows the cobbler to set, making it easier to slice.
Chef’s Tips:
-
Peeling Peaches: A quick tip for peeling peaches is to blanch them. Simply drop them in boiling water for 30 seconds and then transfer them to an ice bath. The skins will slip off easily!
-
Adjusting Sweetness: Before baking, taste your peaches! If they are a bit tart, don’t hesitate to add more sugar to accentuate the sweetness.
-
Layering Flavors: Feel free to add a teaspoon of vanilla extract to the batter for an aromatic touch.
Serving Suggestions
When it comes to serving your peach cobbler, the sky’s the limit! I love to serve it warm, straight from the oven, garnished with a generous scoop of vanilla ice cream or a dollop of freshly whipped cream. The combination of warm cobbler and cold ice cream creates that perfect balance of temperature and texture that takes it over the top. For an extra touch, sprinkle some ground cinnamon or chopped nuts over the top for added crunch.
Recipe Variations
Feeling adventurous? Here are some fun variations to personalize your peach cobbler:
-
Berry Twist: Add in some fresh blueberries or raspberries along with the peaches for a mixed berry cobbler. The tartness of the berries perfectly complements the sweetness of the peaches.
-
Swap the Peaches: Don’t limit yourself to just peaches! Try using apples, cherries, or even apricots in the same recipe for a unique twist.
-
Add Zest: For an extra burst of flavor, add a teaspoon of lemon or orange zest to the peach mixture. It can brighten up the flavors in a delightful way.
-
Brown Butter: For a nutty flavor, brown the butter before adding it to the batter. This adds a deeper richness and a unique twist that is sure to impress.
Chef’s Notes
This peach cobbler recipe has traveled through my kitchen, evolving with each batch I make. I remember one particularly hilarious mishap where I grabbed a container labeled "sugar" from my pantry — only to realize later it was actually salt! Talk about a salty surprise! Since then, I’ve learned to check my containers. But, every experience in the kitchen is a lesson, and I love that. The best part about making things yourself is how unique each creation can be, just like the stories behind them.
Each summer, I make it a goal to experiment with whatever fruit is in season, and peach cobbler always takes me back to simplicity and joy. Over the years, I’ve shared this recipe with friends, family, and even at potlucks, and it has never failed to delight!
FAQs and Troubleshooting
-
Why is my cobbler too runny?
- If your cobbler is too runny, it could be that the peaches had too much juice or you didn’t use enough flour. Next time, consider adding a tablespoon of cornstarch to the peach mixture to help thicken it up.
-
Can I make this a day in advance?
- Absolutely! You can prepare everything the day before and store it in the fridge. However, for the best results, I recommend baking it fresh on the day you plan to serve it.
-
What can I use if I don’t have baking powder?
- If you don’t have baking powder, you can make a substitute using 1/4 teaspoon of baking soda with 1/2 teaspoon of cream of tartar or simply use self-rising flour in place of all-purpose flour since it contains baking powder.
-
Can I freeze leftover cobbler?
- Yes! Once cooled, wrap it tightly and freeze for up to three months. To reheat, simply thaw overnight in the fridge and bake at 350°F (175°C) until warmed through.
Nutritional Info
For those curious about nutritional information, here’s a rough breakdown per serving (assuming 12 servings):
- Calories: 270
- Fat: 10g
- Carbohydrates: 40g
- Protein: 3g
- Sugar: 14g
(Please note that these values may vary depending on specific ingredients used.)
Whipping up this Joanna Gaines-inspired peach cobbler not only honors tradition and homemade goodness, but it also celebrates the simple joys in life that food brings. I hope you find as much happiness in creating this dish as I do. Now, let’s bake, gather our loved ones, and enjoy the sweet moments together! 🍑✨
Print
Joanna Gaines Inspired Peach Cobbler
- Total Time: 60 minutes
- Yield: 12 servings
- Diet: Vegetarian
Description
A delightful peach cobbler recipe inspired by Joanna Gaines, featuring sweet caramelized peaches and a buttery biscuit topping.
Ingredients
- Fresh Peaches (4-6 cups)
- Granulated Sugar (1 cup)
- All-Purpose Flour (1 cup)
- Baking Powder (1 tablespoon)
- Salt (1/4 teaspoon)
- Milk (1 cup)
- Butter (1/2 cup, melted)
- Ground Cinnamon (1 teaspoon)
Instructions
- Preheat your oven to 375°F (190°C).
- Prepare your peaches by washing, peeling, and slicing them. Toss with half of the sugar and ground cinnamon, and let sit for 10-15 minutes.
- Mix together the flour, baking powder, remaining sugar, and salt in a bowl. Add milk and melted butter, stirring gently until combined.
- Assemble the cobbler by greasing a baking dish and pouring the batter in. Spoon the peach mixture on top without stirring.
- Bake for 40-45 minutes until golden brown and bubbly.
- Let it cool for 10-15 minutes before serving.
Notes
For added flavors, consider adding vanilla extract or experimenting with different fruits.
- Prep Time: 15 minutes
- Cook Time: 45 minutes
- Category: Dessert
- Method: Baking
- Cuisine: American
Nutrition
- Serving Size: 1 serving
- Calories: 270
- Sugar: 14g
- Sodium: 100mg
- Fat: 10g
- Saturated Fat: 6g
- Unsaturated Fat: 4g
- Trans Fat: 0g
- Carbohydrates: 40g
- Fiber: 2g
- Protein: 3g
- Cholesterol: 30mg
Keywords: peach cobbler, dessert, sweet, Joanna Gaines, comfort food, summer recipe
No-Bake Raspberry Mousse: Light, Creamy Dessert in Minutes
A Creamy Delight: Raspberry Mousse Recipe to Indulge Your Sweet Tooth
Welcome to my kitchen! Today, I’m excited to share a recipe that’s as delightful to eat as it is to make: Raspberry Mousse! This is one of those desserts that effortlessly elevates any occasion, making it feel extra special. Every spoonful of this sweet, airy mousse is bursting with fresh raspberry flavor that can turn an ordinary moment into a celebration. If you love creamy, dreamy desserts that transport your taste buds to blissful heights, you’ve landed in the right place!
Why Raspberry Mousse?
Raspberry mousse holds a special place in my heart. The vibrant color and the combination of sweet and tart flavors always remind me of my childhood summers spent in my grandmother’s garden, surrounded by blossoming raspberry bushes. She would gather the ripest berries in a basket, and I would watch in awe as she magically transformed them into this velvety dessert, a treat she reserved for special family gatherings. The sheer joy of whipping up something fresh and delightful was infectious and has stayed with me ever since.
Not only is raspberry mousse a stunning centerpiece on your table, but it’s also a light dessert that allows you to indulge without feeling heavy afterward. Whether it’s for an anniversary, a dinner party, or simply a sweet treat for yourself, this raspberry mousse will wow your guests—and yourself too!
So, let’s get started on this foolproof recipe that promises to infuse your day with a burst of fruity goodness!
Ingredients
Here’s what you’ll need to whip up this luscious raspberry mousse:
-
Fresh Raspberries (2 cups)
- These juicy gems are the star of our show! If fresh berries aren’t available, you can use frozen ones, but remember to thaw and drain any excess liquid for the best flavor.
-
Granulated Sugar (1/2 cup)
- This sweetener balances the tartness of the raspberries. You can substitute with honey or maple syrup for a more natural sweetener, just adjust the quantity to taste.
-
Heavy Cream (1 cup)
- The heavy cream gives the mousse its silky texture. If you’re looking for a lighter option, use whipped coconut cream, although it will alter the flavor slightly.
-
Egg Whites (2 large eggs)
- These contribute to the airy lightness of the mousse. If you’re avoiding raw eggs, use pasteurized egg whites or look for aquafaba, the liquid from chickpeas, beaten until fluffy.
-
Vanilla Extract (1 teaspoon)
- This adds a hint of warmth that complements the raspberries perfectly. Authentic vanilla extract is key, but if you want a twist, try almond extract instead!
-
Lemon Juice (1 tablespoon)
- A touch of acidity to elevate the flavors. Feel free to experiment with lime juice for a tropical twist.
Step-by-Step Instructions
Let’s break down the process of making raspberry mousse into simple, easy-to-follow steps. Trust me, it’ll be worth every minute!
Step 1: Prepare the Raspberries
Start by washing and gently drying your fresh raspberries. Reserve a few for garnish later, as a beautiful presentation adds to the allure of this dessert! In a small saucepan, combine the raspberries and half of the granulated sugar, cooking over medium heat until the raspberries break down, about 5-7 minutes. Stir gently to avoid splashing, and do enjoy the aroma!
Chef Tip: If you want a smoother mousse, strain the mixture through a fine mesh sieve to remove the seeds. This step is optional but makes a creamier mouthfeel.
Step 2: Whip Heavy Cream
In a separate bowl, use an electric mixer to whip the heavy cream until soft peaks form. This means the cream should gently hold its shape when you lift the whisk. Be careful not to over-whip, as it can turn into butter!
Chef Hack: For extra stability, you can add a tablespoon of powdered sugar to the cream while whipping—it helps keep everything fluffy longer!
Step 3: Beat the Egg Whites
In another clean bowl, beat the egg whites until they become frothy. Gradually add the remaining sugar while continuing to beat until stiff peaks form. This is where the magic happens, and your mousse gets its delightful airiness.
Chef Insight: If you’re using aquafaba instead of egg whites, whip it until it forms stiff peaks just like you would with egg whites—it’s a fantastic vegan alternative!
Step 4: Combine It All
Gently fold the raspberry mixture into the whipped cream. Use a spatula and a light hand; you don’t want to deflate the cream too much. Once it’s incorporated, fold in the beaten egg whites, creating a light and fluffy texture. This should be beautifully swirled, with pretty pinks from the raspberries combined with the cream.
Step 5: Chill
Spoon the mousse into individual serving dishes or a large bowl, and refrigerate for at least 2 hours, or until set. The waiting can be tough, but it’s so worth it!
Step 6: Serve
When ready to serve, top with more fresh raspberries and perhaps a dollop of whipped cream for that extra luxurious touch. Enjoy immediately for the best experience!
Serving Suggestions
When it comes to serving raspberry mousse, presentation is key. Consider serving it in elegant glass cups or bowls to show off the beautiful, swirled colors. A sprinkle of crushed graham crackers or cocoa nibs on top provides a delightful crunch against the softness of the mousse. Serve each portion with a fresh mint leaf for a pop of color and a refreshing scent!
Recipe Variations
Looking to shake things up? Here are a few fun variations of raspberry mousse:
- Chocolate Raspberry Mousse: Gently fold in melted dark chocolate for a rich, decadent version.
- Citrus Twist: Incorporate orange or lime zest into the raspberry mixture for a zesty zing.
- Nutty Delight: Add almond or hazelnut extract for an extra layer of flavor.
- Berry Medley: Replace half the raspberries with strawberries or blueberries for a mixed berry mousse.
Chef’s Notes
This raspberry mousse recipe has evolved over the years, and I can’t help but smile reminiscing about the trial and error involved. I once ended up with a soup-like dessert because I didn’t give the mousse enough time to chill! Now, I make sure to emphasize chilling time in this recipe so you won’t run into the same sticky situation. Don’t let this happen to you!
I also learned that while fresh raspberries are delightful, the mood can change with the seasons. In the winter, I like to play around with warming spices like cardamom or nutmeg in the mousse—who says you can’t enjoy raspberry flavor all year round?!
FAQs and Troubleshooting
1. My mousse didn’t set properly. What did I do wrong?
- If your mousse hasn’t set, it often means it didn’t get enough chill time. Patience is a virtue here! Make sure to allow it at least 2 hours to firm up in the fridge.
2. Can I make this mousse vegan?
- Absolutely! Use aquafaba in place of the egg whites and coconut cream or a non-dairy whipped topping in place of heavy cream for a delightful vegan version.
3. How do I store leftover mousse?
- Store any leftover mousse in an airtight container in the refrigerator for up to 3 days. Enjoy it as an afternoon pick-me-up!
4. What can I do with leftover raspberry puree?
- The leftover raspberry puree (if you choose to strain it) can be used as a topping for pancakes, waffles, or yogurt. Waste not, want not!
Nutritional Info
While I usually focus on flavor, here’s a quick rundown of the nutritional breakdown per serving:
- Calories: 220
- Fat: 15g
- Carbohydrates: 20g
- Protein: 3g
- Sugars: 12g
Feel free to add or adjust based on your dietary preferences!
That’s a wrap on my beloved raspberry mousse recipe! I hope you take this delicious dessert and make it your own—adding your little touches and enjoying each bite. After all, cooking is about creating memories, and I can’t wait for you to create yours. Happy cooking, my fellow foodies!
Print
Raspberry Mousse
- Total Time: 135 minutes
- Yield: 4 servings
- Diet: Vegetarian
Description
A light and airy raspberry mousse that offers a sweet and tart flavor, perfect for any occasion.
Ingredients
- Fresh Raspberries (2 cups)
- Granulated Sugar (1/2 cup)
- Heavy Cream (1 cup)
- Egg Whites (2 large eggs)
- Vanilla Extract (1 teaspoon)
- Lemon Juice (1 tablespoon)
Instructions
- Prepare the Raspberries: Wash and dry raspberries, combine with half the sugar in a saucepan, and cook over medium heat for 5-7 minutes.
- Whip Heavy Cream: Whip heavy cream in a bowl until soft peaks form.
- Beat the Egg Whites: Beat egg whites until frothy, gradually add sugar, and continue beating to stiff peaks.
- Combine It All: Fold raspberry mixture into whipped cream, then fold in the beaten egg whites.
- Chill: Spoon into serving dishes and refrigerate for at least 2 hours to set.
- Serve: Top with fresh raspberries and whipped cream before serving.
Notes
Consider serving in elegant glass cups for a beautiful presentation. Experiment with different extracts for unique flavors.
- Prep Time: 15 minutes
- Cook Time: 7 minutes
- Category: Dessert
- Method: Chilling
- Cuisine: French
Nutrition
- Serving Size: 1 serving
- Calories: 220
- Sugar: 12g
- Sodium: 50mg
- Fat: 15g
- Saturated Fat: 9g
- Unsaturated Fat: 6g
- Trans Fat: 0g
- Carbohydrates: 20g
- Fiber: 1g
- Protein: 3g
- Cholesterol: 70mg
Keywords: raspberry mousse, dessert, light dessert, creamy dessert, easy recipes




