
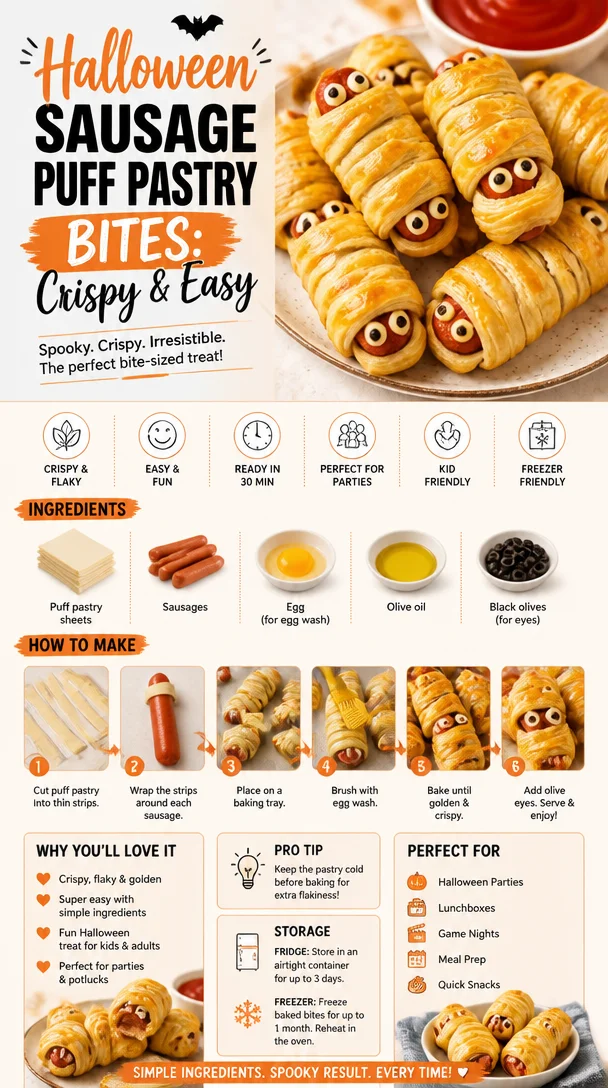
Halloween Sausage Puff Pastry Bites: Crispy & Easy
Feuilletés Saucisse: A Spooky Culinary Delight for Halloween
Welcome to my kitchen, friends! With the leaves turning crimson and pumpkin patches popping up everywhere, Halloween is upon us — a time not just for costumes and candy, but for fun, festive cooking! Today, I’m thrilled to share a recipe that’s close to my heart and perfect for your Halloween gatherings: Feuilletés Saucisse. These little savory pastries, filled with delicious sausage and wrapped in flaky pastry, are sure to be a hit at any spooky soirée.
Picture this: it’s Halloween night, and the air is filled with the scent of crisp autumn leaves. You’re gathered with friends and family, enjoying laughter and stories, the flickering candlelight casting playful shadows. You’ve just pulled a tray of Feuilletés Saucisse from the oven, their golden-brown tops gleaming. As you take that first bite, the delightful crunch of the pastry gives way to a juicy, flavorful filling, and suddenly, it feels like a scene straight out of a cozy movie.
I created this recipe with joy and a touch of nostalgia. Growing up, my family had a tradition of making these crispy pastries, especially during fall celebrations. My grandmother would whip them up for every Halloween party, and I’d help her roll out the dough. Standing on a stool, flour dusting the air, I felt like a little chef, eagerly anticipating the moment we’d take them out of the oven and feast together. Now, I’m thrilled to pass that tradition on to you!
Feuilletés Saucisse are not just easy to make; they are incredibly versatile and can be customized to cater to your taste buds. Whether you’re hosting a Halloween bash or creating a cozy night in, these savory delights will bring warmth and nostalgia to your table. Now, let’s dive into this easy-peasy, crowd-pleasing recipe!
Ingredients
To make these delightful feuilletés, you’ll need the following ingredients:
-
Puff Pastry
- This is the magical ingredient that gives these pastries their flaky texture. You can find it in the frozen section of most grocery stores. If you prefer a homemade touch, you can make your own puff pastry, but store-bought is perfectly delightful!
-
Sausages
- Choose your favorite type — pork, chicken, or even a vegan alternative work beautifully. For a twist, try spiced or herb-infused sausages to add an exciting flavor.
-
Mustard
- A classic choice for dipping, mustard adds a lovely zing! Use Dijon for a slight kick or whole grain for extra texture. You could even mix in a hint of honey for a sweet twist.
-
Egg (for egg wash)
- This is what gives your pastries that beautiful golden color. If you’re in a pinch, you can substitute a sprinkle of milk for an equally nice finish.
-
Herbs and Spices (optional)
- Fresh herbs like parsley or thyme can elevate your filling. Feel free to experiment with spices like paprika or black pepper for added depth!
Step-by-Step Instructions
Ready to get cooking? Let’s make some Feuilletés Saucisse that will inspire gasps of delight!
-
Preheat Your Oven:
- Preheat your oven to 400°F (200°C). This will ensure a perfectly crispy pastry. You’ll want your oven to be nice and hot, so those pastries puff up beautifully!
-
Prepare the Puff Pastry:
- If you’re using frozen puff pastry, remove it from the freezer and let it thaw on the counter for about 30 minutes. Once thawed, gently roll it out on a floured surface to prevent sticking. This step isn’t crucial, but it allows for a little extra flakiness!
-
Sausage Filling:
- While the pastry is thawing, let’s prep the filling. Remove the sausage casings and crumble the meat into a mixing bowl. You can also use pre-cooked sausage; just chop it into small pieces. Add your herbs and spices if you’re using them for added flavor!
-
Cut the Pastry:
- Cut the puff pastry into rectangles, about 4×6 inches. This size allows for a nice portion without being overwhelming.
-
Fill with Sausage:
- Place a small spoonful of your sausage mixture in the center of each pastry rectangle. Be careful not to overfill; a little goes a long way!
-
Fold and Seal:
- Fold the pastry over the filling to create a pocket. Press the edges with a fork to seal them nice and tight! You want to keep all that juicy goodness inside.
-
Egg Wash:
- In a small bowl, beat the egg, then brush it over the top of each filled pastry. This step ensures a beautiful golden glow when they bake.
-
Bake:
- Pop those beauties onto a baking sheet lined with parchment paper and bake for about 20-25 minutes, or until they’re golden brown and flaky. Your kitchen will start to smell irresistible!
-
Cool and Serve:
- Once they’re out of the oven, let them cool for a few minutes — if you can resist! You can serve them warm or at room temperature.
Serving Suggestions
To plate your Feuilletés Saucisse beautifully, arrange them on a festive platter. You can garnish with fresh herbs or serve with a side of dipping sauces like mustard or ketchup. For a Halloween twist, use a creepy cloth or a cutting board decorated with mini pumpkins and faux cobwebs for a spooky look. They’ll be the centerpiece of your Halloween spread!
Recipe Variations
Here are a few creative twists you can consider:
- Cheesy Delight: Add grated cheese into the sausage mixture for a gooey, savory treat.
- Veggie Medley: Mix in sautéed onions, peppers, or mushrooms into your filling for an extra boost of flavor.
- Spicy Kick: Add jalapeños or a pinch of cayenne pepper to the sausage for a spicy version.
- Herbed Up: Experiment with different herbs! Fennel or rosemary can give a fresh twist.
- Sweet and Savory: Blend in some caramelized apples or fig jam into the filling for a sweet contrast to the savory sausage.
Chef’s Notes
Feuilletés Saucisse has traveled through time in my kitchen. I first learned the art of making them with my grandmother, and over the years, I’ve adapted the recipe to suit my tastes and, of course, those of my friends. Sometimes, I toss in whatever veggies I have lying around — there’s never a bad time to be resourceful in the kitchen! I even remember one Halloween where we made them themed to look like little mummies, wrapping the sausage filling with strips of pastry and drawing eyes with mustard! The laughter and delight those little creations brought were unforgettable!
FAQs and Troubleshooting
1. My pastry isn’t puffing up — what went wrong?
- Make sure your oven is preheated and that your pastry is cold before it goes in. Puff pastry thrives on high heat!
2. Can I make these ahead of time?
- Absolutely! You can prepare them up to the baking stage, cover them, and refrigerate. Bake them just before your guests arrive for that fresh-out-of-the-oven experience.
3. Can I freeze them?
- Yes! Freeze the unbaked Feuilletés on a baking sheet, and once frozen solid, place them in a freezer bag. Bake directly from frozen, adding a few minutes to the cooking time.
4. What’s the best way to reheat them?
- The oven is your best bet for reheating. Place them in a preheated oven at 350°F (175°C) for about 10–15 minutes until warmed through.
Nutritional Info (Optional)
While I’m not a nutritionist, I like to remind everyone to enjoy these delicious treats in moderation, especially during the festive season! They’re a wonderful treat filled with flavor, and sharing them with others is what truly makes them special.
So there you have it—your ultimate guide to making Feuilletés Saucisse this Halloween! I hope these savory delights sprinkle some warmth and joy into your celebrations. Remember, cooking is all about fun, experimentation, and savoring the company of those you love. So roll up those sleeves, get that kitchen messy, and enjoy every delicious bite! Happy cooking!
Print
Feuilletés Saucisse
- Total Time: 55 minutes
- Yield: 12 servings 1x
- Diet: Omnivore
Description
Delicious savory pastries filled with sausage, perfect for Halloween gatherings.
Ingredients
- Puff Pastry
- Sausages (pork, chicken, or vegan)
- Mustard (Dijon or whole grain)
- 1 Egg (for egg wash)
- Herbs and Spices (optional)
Instructions
- Preheat your oven to 400°F (200°C).
- Prepare the puff pastry by thawing and rolling it out.
- Remove sausage casings and crumble meat into a bowl.
- Cut puff pastry into 4×6 inch rectangles.
- Place a spoonful of the sausage mixture in the center of each pastry.
- Fold the pastry over the filling and seal edges with a fork.
- Beat the egg and brush it over the top of each pastry.
- Bake for 20-25 minutes, or until golden brown.
- Cool for a few minutes before serving.
Notes
Serve with mustard or ketchup for dipping. These can be customized with various fillings or toppings.
- Prep Time: 30 minutes
- Cook Time: 25 minutes
- Category: Appetizer
- Method: Baking
- Cuisine: French
Nutrition
- Serving Size: 1 serving
- Calories: 280
- Sugar: 1g
- Sodium: 450mg
- Fat: 16g
- Saturated Fat: 6g
- Unsaturated Fat: 8g
- Trans Fat: 0g
- Carbohydrates: 26g
- Fiber: 1g
- Protein: 9g
- Cholesterol: 40mg
Keywords: Feuilletés Saucisse, Halloween recipes, savory pastries, puff pastry, sausage snacks
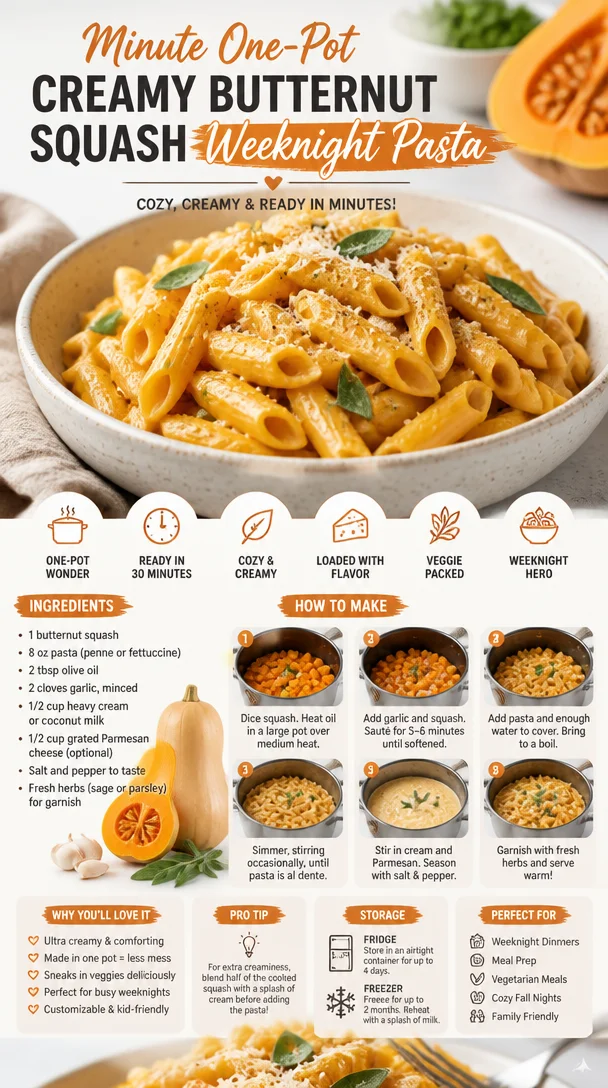
Minute One-Pot Creamy Butternut Squash Weeknight Pasta
Butternut Squash Pasta: A Cozy Bowl of Comfort
Welcome to my kitchen! Today, we’re diving into a dish that warms not just the tummy but also the heart: Butternut Squash Pasta. If you’ve ever walked into a home where something delicious is bubbling away, you know that feeling of comfort and nostalgia it brings. This dish perfectly encapsulates that vibe—creamy, savory, and just a tad sweet, it’s everything a cozy meal should be. Plus, it celebrates the beautiful fall harvest, reminding us of all the warm memories we create around the table.
Butternut squash is one of those seasonal ingredients that turns an ordinary bowl of pasta into something special. It’s adaptable and pairs beautifully with a variety of flavors, from sage to garlic, and even toasted nuts for a little crunch. Trust me; you’re going to want to add this dish to your repertoire. Whether you’re sharing it with friends, family, or just treating yourself to a delicious dinner, this pasta will make you feel all warm and fuzzy inside.
A Dash of Nostalgia
Let me take you back to a chilly autumn evening years ago when I first crafted this Butternut Squash Pasta recipe. I was at my aunt’s cozy home for a family gathering, and the air was filled with laughter—and more importantly, the inviting scent of roasted butternut squash wafting through the kitchen. I vividly remember watching her peel and chop the squash as she chatted about her own fond memories of cooking with her grandmother. The way she stirred that golden puree into a pot of pasta made me realize just how much love could be infused into a meal.
As we gathered around the table, our plates piled high with that rich, creamy pasta, I knew I had to keep this tradition alive. It wasn’t just about the food itself; it was about connection and sharing stories between bites. That evening ignited a passion in me—a desire to create meals that not only nourished bodies but also souls. This Butternut Squash Pasta is my twist on that cherished recipe, and I can’t wait to share it with all of you!
Ingredients
To bring this comforting dish to life, gather the following ingredients:
-
Butternut Squash: This star ingredient is not only sweet and creamy but also packed with vitamins A and C. If butternut squash isn’t available, you can substitute it with pumpkin or acorn squash for a similar flavor profile.
-
Pasta: I recommend using a sturdy pasta like fettuccine, gnocchi, or even whole grain spaghetti. Gluten-free pasta options work wonderfully if you’re looking for a gluten-free meal.
-
Olive Oil: A high-quality extra-virgin olive oil elevates the dish with a rich flavor. You can swap it with avocado oil for a different taste but keep the flavor of olive oil in mind.
-
Garlic: Fresh garlic imparts an aromatic flavor that complements the sweetness of the squash beautifully. If you’re in a pinch, garlic powder can work too, but fresh is always better!
-
Vegetable Broth: This adds depth to the sauce. Homemade is ideal, but you can use store-bought low-sodium broth as a shortcut. For a quick swap, try using white wine for a bit of acidity.
-
Cream (or Non-Dairy Alternative): Heavy cream provides a luxurious texture. For a lighter option, you can use half-and-half, or for a vegan version, coconut cream or cashew cream works brilliantly.
-
Parmesan Cheese (or Nutritional Yeast): Grated Parmesan adds a salty, umami bite. If you’re dairy-free, nutritional yeast provides that cheesy flavor without the dairy.
-
Sage: Fresh sage enhances the dish with an earthy aroma. Dried sage can be used in a pinch, but fresh leaves provide a brighter flavor.
-
Salt and Pepper: To taste, of course! These will help balance the dish.
Step-by-Step Instructions
Now, let’s get cooking! You’ll love how simple this process is.
-
Prepare the Butternut Squash: Start by preheating your oven to 400°F (200°C). Cut the butternut squash in half, scoop out the seeds, and drizzle with olive oil—this allows it to roast beautifully. Sprinkle with salt and pepper, then place it cut-side down on a baking sheet. Roast for about 30-40 minutes until it’s fork-tender. The caramelization will create an amazing depth of flavor.
Chef Hack: To make peeling the squash easier, try microwaving it for 30 seconds before cutting. It softens the skin just enough to make cutting a breeze!
-
Cook the Pasta: While your squash is roasting, bring a large pot of salted water to a boil. Toss in your pasta and cook until al dente according to package instructions. Reserve about a cup of pasta water before draining the pasta.
Tip: Salt your pasta water well! It should taste like the sea for the best flavor.
-
Sauté the Aromatics: In a large skillet, heat a tablespoon of olive oil over medium heat. Add minced garlic and sage leaves. Sauté for 1-2 minutes until fragrant but not browned—burnt garlic can be quite bitter!
Little Chef Secret: If you love a deeper flavor, try adding a pinch of red pepper flakes here for a bit of heat.
-
Make the Sauce: Scoop the roasted butternut squash into the skillet. Add the vegetable broth and cream. Use an immersion blender or a regular blender to purée the mixture until smooth. If you like it chunky, give it a quick mash with a fork instead.
Chef’s Insight: If you want a thicker sauce, let it simmer a bit longer over low heat, allowing it to reduce.
-
Combine Everything: Add the cooked pasta directly into the skillet, along with a splash of the reserved pasta water to loosen things up. Toss everything well until the pasta is fully coated with that creamy butternut squash goodness. If it feels too thick, just keep adding a bit more pasta water until you reach your desired consistency.
Tip: Don’t forget to taste and adjust seasoning with additional salt and pepper as needed!
Serving Suggestions
To serve, plate the Butternut Squash Pasta with a generous sprinkle of grated Parmesan cheese or nutritional yeast for my vegan friends. A few crispy sage leaves on top as a garnish adds a lovely touch and elevates the presentation. Pair with a fresh green salad and, maybe, some crusty bread for a cozy dinner night. You could even enjoy it alongside a glass of white wine; it’s the perfect complement to this rich dish!
Recipe Variations
If you’re feeling adventurous, try these twists on the classic:
-
Add Protein: Toss in some sautéed chicken or shrimp for a heartier meal. Chickpeas or lentils can be an excellent plant-based protein addition, too!
-
Roasted Vegetables: Add roasted Brussels sprouts or kale for an extra nutrient boost and texture.
-
Seasonal Flavors: Swap out sage for thyme or rosemary, or stir in a pinch of nutmeg for a warm, holiday-inspired flavor.
-
Nutty Crunch: Top with toasted pine nuts or walnuts for added crunch and healthy fats.
-
Spicy Kick: Add a dash of cayenne pepper if you crave some spice to contrast the sweetness of the squash.
Chef’s Notes
As with any recipe, this Butternut Squash Pasta has evolved over time. I originally started with just a simple sauce and pasta, but with every iteration, I experimented with different herbs and textures, finding the right balance that made everyone’s taste buds dance. It’s like a warm hug in a bowl—perfect for a cozy night in or a lively dinner party!
Speaking of cozy, I remember one night I tried to impress some friends with a dinner party using this recipe. Everything was going smoothly until I realized I had run out of Parmesan cheese! I used some leftover feta instead, and while it wasn’t the original plan, it turned out delicious and created hilarious stories we still laugh about!
FAQs and Troubleshooting
1. My sauce is too thick. What can I do?
No worries! Just add a bit more reserved pasta water or broth to thin it out. Keep stirring until you reach your desired creamy consistency.
2. Can I make this ahead of time?
Absolutely! You can roast the butternut squash and prepare the sauce ahead of time. Just store it in the fridge, and when you’re ready, reheating it and tossing in the pasta is all you need to do!
3. My sauce is bland. What can I do?
Start by tasting it and adjusting with more salt, pepper, or even a splash of lemon juice for brightness. Fresh herbs can also elevate the flavors.
4. How can I store leftovers?
Store any leftovers in an airtight container in the refrigerator for up to 3 days. Reheat gently on the stove with a splash of water or broth to bring the creaminess back!
Nutritional Info
While nutritional information can vary based on specific brands and ingredients, here’s a general breakdown per serving:
- Calories: 400
- Protein: 12g
- Carbohydrates: 60g
- Fat: 15g
- Fiber: 6g
With these tips and tricks, you’re well on your way to cooking up a delightful Butternut Squash Pasta that will no doubt become an anchor in your recipe collection. So, roll up those sleeves, tighten that apron, and let’s create some kitchen magic together! Enjoy every bite, and remember: cooking is all about love and embracing the joy of sharing good food with great company!
Print
Butternut Squash Pasta
- Total Time: 55 minutes
- Yield: 4 servings 1x
- Diet: Vegetarian
Description
A creamy and savory pasta dish featuring roasted butternut squash, perfect for cozy meals.
Ingredients
- 1 Butternut Squash
- 8 oz Pasta (fettuccine, gnocchi, or whole grain spaghetti)
- 2 tbsp Olive Oil
- 3 cloves Garlic, minced
- 1 cup Vegetable Broth
- 1 cup Cream (or non-dairy alternative)
- 1/2 cup Grated Parmesan Cheese (or nutritional yeast)
- 5–6 Fresh Sage Leaves
- Salt and Pepper, to taste
Instructions
- Preheat your oven to 400°F (200°C). Cut the butternut squash in half, scoop out the seeds, and drizzle with olive oil. Sprinkle with salt and pepper, then place it cut-side down on a baking sheet. Roast for about 30-40 minutes until fork-tender.
- While the squash is roasting, bring a large pot of salted water to a boil. Cook the pasta until al dente according to package instructions, reserving about a cup of pasta water before draining.
- In a large skillet, heat a tablespoon of olive oil over medium heat. Add minced garlic and sage leaves, sautéing for 1-2 minutes until fragrant.
- Scoop the roasted butternut squash into the skillet. Add vegetable broth and cream, then purée the mixture until smooth. Adjust consistency with reserved pasta water if too thick.
- Add the cooked pasta directly into the skillet, tossing until completely coated with the sauce. Season with additional salt and pepper as needed.
Notes
For a vegan option, use coconut cream or cashew cream instead of heavy cream. Store leftovers in an airtight container in the refrigerator for up to 3 days.
- Prep Time: 15 minutes
- Cook Time: 40 minutes
- Category: Main Course
- Method: Baking
- Cuisine: Italian
Nutrition
- Serving Size: 1 serving
- Calories: 400
- Sugar: 6g
- Sodium: 350mg
- Fat: 15g
- Saturated Fat: 8g
- Unsaturated Fat: 7g
- Trans Fat: 0g
- Carbohydrates: 60g
- Fiber: 6g
- Protein: 12g
- Cholesterol: 30mg
Keywords: butternut squash, pasta, vegetarian, cozy meals, fall recipes
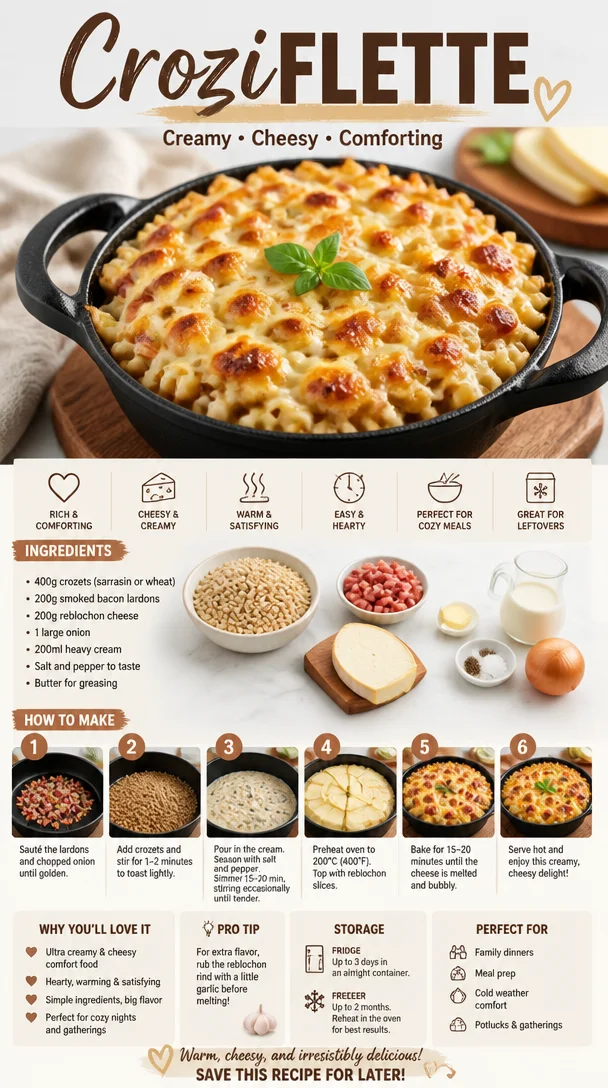
Croziflette
Croziflette: A Cozy Dish Straight from the Heart of Savoy
Welcome to my kitchen, fellow food enthusiasts! Today, I’m excited to share one of my favorite dishes that feels like a warm hug on a chilly day—Croziflette. This delightful dish hails from the Savoie region in France, combining the comfort of cheesy pasta with the rich flavors of smoky lardons and creamy crème fraîche. Whether you’re preparing a cozy dinner for your family or hosting a gathering of friends, Croziflette guarantees to bring smiles and satisfaction to the table!
Imagine stepping into your kitchen, and the wonderful aroma of melting cheese mingles with the savory scent of lardons sizzling in a pan. Instantly, it feels like a celebration, doesn’t it? Croziflette perfectly embodies the joy of cooking without the need for elaborate techniques or fancy ingredients. Just straight-up good food that brings people together. So, grab your apron (or your favorite messy kitchen shirt) and let’s dive into the wonderful world of Croziflette!
A Slice of Nostalgia
I remember the first time I tasted Croziflette during a trip to the French Alps. Nestled in a rustic chalet, the snow softly blanketed the town outside while inside, laughter and warmth filled the air. As we huddled around a wooden table, a steaming dish of Croziflette emerged, bubbling with deliciousness. Each bite awakened my taste buds, with creamy textures being enveloped by the savory goodness of pancetta and cheese. Amidst the laughter, stories were shared, and I felt an unmistakable connection to the rich culinary traditions of this region. Inspired by that fleeting moment, I returned home eager to recreate this dish and share it with my loved ones. And thus, my Croziflette journey began!
Ingredients
Here’s what you’ll need to make your very own Croziflette:
-
Crozets (or small pasta): These delightful little pasta squares are the stars of this dish. If you can’t find them, you can substitute with small shells or even orzo.
-
Lardons (or pancetta): These are small strips of pork that add a lovely smokiness. If you’re looking for a vegetarian option, smoked mushrooms or sautéed eggplant can work wonders.
-
Gruyère cheese: The melty, nutty flavor of Gruyère is irreplaceable. Emmental or even mozzarella can be used in a pinch for a different flavor profile.
-
Crème fraîche: This adds a luscious creaminess to the dish. If you’re in a bind, sour cream or Greek yogurt can serve as alternatives. Just remember to add a splash of lemon juice for tang!
-
Onion: Sweet and caramelized, onions bring depth to the dish. Shallots can also be a nice twist if you prefer a milder flavor.
-
Garlic: A classic flavor enhancer that brings everything together. If you’re not a fan of garlic, feel free to omit it or substitute with garlic powder.
-
Nutmeg: Just a pinch enhances the flavors beautifully, making everything taste a bit more complex. If you’re not a nutmeg fan, try freshly cracked black pepper for an added kick.
-
Salt and pepper: Essential for balancing flavors. Always season to taste as each ingredient may have its own level of saltiness.
Step-by-Step Instructions
Ready to whip up some magic? Let’s get started on this delicious Croziflette!
-
Cook the Crozets
Start by bringing a pot of salted water to a boil. Add the Crozets and cook according to package instructions—usually about 10-12 minutes—until al dente. Don’t forget to stir occasionally to prevent sticking! Once cooked, drain the pasta and set it aside. A little tip? Drizzling a touch of olive oil prevents clustering later on! -
Sauté the Lardons
In a large skillet over medium heat, toss in your lardons. Cook until they’re golden brown and crispy. Their smoky aroma will fill your kitchen and instantly transport you to the Alps. If you’re using pork alternatives, sauté them in a bit of oil until they achieve a lovely color. -
Caramelize the Onions and Garlic
Remove the lardons from the skillet, leaving behind the delicious fat. Add diced onions and cook on low until they’re soft and caramelized—this could take about 10-15 minutes. Stir in minced garlic in the last minute of cooking for a fragrant finish. Trust me, your nose will thank you! -
Combine Ingredients
In a large bowl, mix together the cooked Crozets, crispy lardons, caramelized onions, and minced garlic. Add in the crème fraîche, grated Gruyère cheese, a sprinkle of nutmeg, salt, and pepper. This is where the magic happens—mix until everything is beautifully combined! -
Prepare for Baking
Preheat your oven to 400°F (200°C). Transfer the Croziflette mixture into a greased baking dish. Don’t be shy; pile it in high! Top with an additional handful of Gruyère for that melty, golden-brown crust we all crave. -
Bake Until Golden
Pop your dish in the oven and bake for 20-25 minutes or until the top is bubbly and beautifully browned. The smell wafting through your home will be irresistible, so be prepared for some eager taste-testers! -
Cool and Serve
Once out of the oven, let the Croziflette cool for about 5 minutes. This short wait allows it to set up a bit so you can serve perfect portions. Plating can be as simple as scooping out servings into bowls, garnished with a sprinkle of fresh herbs, or fresh cracked pepper on top for a pop of color!
Serving Suggestions
Croziflette is fantastic served straight from the oven, bubbly and golden. Pair it with a fresh green salad tossed in a light vinaigrette to balance out the richness of the dish. For a complete Alpine experience, serve it alongside a glass of white wine or a warm spiced cider. This dish practically screams for cozy evenings with friends—the kind where you reminisce about old memories while savoring new flavors.
Recipe Variations
Feel like getting creative? Here are a few fun twists to make this dish your own:
-
Vegetarian Delight: Swap the lardons for sautéed mushrooms and a sprinkle of smoked paprika for an umami kick.
-
Spicy Kick: Add a pinch of red pepper flakes or diced jalapeños for a hint of heat that plays beautifully with the creamy texture.
-
Herb Infusion: Toss in fresh thyme, rosemary, or parsley for a burst of freshness. Fresh herbs add a lovely nuance that elevates every bite.
-
Cheese Overload: Try using a mix of cheeses like Fontina, Comté, or even blue cheese for a more robust flavor profile.
-
Seasonal Variations: Incorporate seasonal veggies like sautéed spinach, roasted squash, or caramelized Brussels sprouts for added nutrition and taste!
Chef’s Notes
Croziflette has become a staple in my kitchen, a recipe that’s constantly evolving with every new twist I try. I often joke with friends that I might need to open a “Croziflette Bar” because each version offers something special, and the possibilities are endless! One of my fondest memories with this dish was experimenting one late night with leftover veggies from the fridge. What started as a “clean out the fridge” mission turned into a feast that we enjoyed under twinkling fairy lights in my garden.
FAQs and Troubleshooting
-
Can I make Croziflette in advance?
Absolutely! You can prepare the dish up to the baking stage, cover it tightly, and refrigerate. When ready to serve, just pop it in the oven, adding a few extra minutes to the baking time. -
What if I don’t have crème fraîche?
No worries! Sour cream or Greek yogurt works as a substitute. Just make sure to thin it out slightly with a splash of milk or broth for the right consistency. -
How can I make a gluten-free version?
Look for gluten-free pasta alternatives that resemble Crozets, or you could even explore making a cauliflower grain base to keep it hearty yet gluten-free. -
My top layer of cheese didn’t brown nicely. What happened?
Make sure your oven is adequately preheated, and avoid covering the dish with foil while baking—it inhibits browning. If you find the top needs an extra boost, put it under the broiler for 1-2 minutes (but keep a close eye!).
Nutritional Info
While I believe in enjoying comfort food in moderation, here’s a quick glimpse of what a serving of Croziflette entails:
- Calories: Approximately 400-500 (depending on specific ingredients and serving size)
- Protein: 20-25g
- Carbohydrates: 40-50g
- Fats: 20-25g
This dish, layered with flavors, nutrition, and love, celebrates every gathering and insists on cozy nights spent with those we cherish.
So there you have it—your ultimate guide to making and enjoying Croziflette! I hope you feel inspired to gather your ingredients and embark on this deliciously comforting culinary adventure. Remember, cooking is all about joy, creativity, and connection. Here’s to many more happy meals in your kitchen—bon appétit!
Print
Croziflette
- Total Time: 45 minutes
- Yield: 4 servings
- Diet: Vegetarian (substituting lardons for mushrooms)
Description
A comforting dish from the Savoie region of France, combining cheesy pasta with smoky lardons and creamy crème fraîche.
Ingredients
- Crozets (or small pasta)
- Lardons (or pancetta)
- Gruyère cheese
- Crème fraîche
- Onion
- Garlic
- Nutmeg
- Salt and pepper
Instructions
- Cook the Crozets by boiling salted water and cooking according to package instructions (10-12 minutes) until al dente.
- Sauté the lardons in a skillet over medium heat until golden brown and crispy.
- Caramelize the onions in the skillet until soft, then add minced garlic for the last minute.
- Combine cooked Crozets, crispy lardons, caramelized onions, garlic, crème fraîche, grated Gruyère, nutmeg, salt, and pepper in a large bowl.
- Prepare the baking dish by transferring the mixture, topping it with additional Gruyère, and preheating the oven to 400°F (200°C).
- Bake for 20-25 minutes until the top is bubbly and golden brown.
- Cool for 5 minutes before serving.
Notes
Croziflette can be made in advance and refrigerated before baking. Substitute crème fraîche with sour cream or Greek yogurt if needed.
- Prep Time: 15 minutes
- Cook Time: 30 minutes
- Category: Main Course
- Method: Baking
- Cuisine: French
Nutrition
- Serving Size: 1 serving
- Calories: 450
- Sugar: 3g
- Sodium: 700mg
- Fat: 25g
- Saturated Fat: 10g
- Unsaturated Fat: 10g
- Trans Fat: 0g
- Carbohydrates: 45g
- Fiber: 2g
- Protein: 20g
- Cholesterol: 50mg
Keywords: Croziflette, French cuisine, cheesy pasta, comfort food, baking

Banana Ice Cream in 5 Minutes: 2-Ingredient No-Churn
Welcome to the World of Banana Ice Scream!
When it comes to indulging in a sweet treat, few things hit the spot quite like a creamy, dreamy bowl of banana ice cream. There’s something so delightful about taking a familiar fruit and transforming it into a frozen delight that can make any day feel like a special occasion. Whether it’s a hot summer afternoon, a cozy movie night, or simply an excuse to treat yourself (because, let’s be honest, we all deserve it!), banana ice scream is an ultimate crowd-pleaser.
For me, ice cream has always held a special place in my heart — not just as a dessert, but as a key player in countless joyful memories. Some of my fondest times in the kitchen revolve around experimenting with flavors, but nothing quite compares to the nostalgia that banana ice cream brings. The aroma of ripe bananas, the soothing swirls of cream, and that satisfying first scoop always take me back to warm, sunny days spent with family, sharing laughter and stories.
Making banana ice scream is not just about blending flavors; it’s about embracing the art of creating something magical. It’s about taking simple ingredients and rescuing those overripe bananas from the depths of your fruit bowl. So grab your favorite spoon and let’s dive into a world where bananas meet creaminess on a blissful journey of flavor that will leave you screaming for more (in the best possible way)!
A Sweet Memory of Homemade Ice Cream
Let me share a little story that perfectly encapsulates why banana ice cream holds such a special spot in my heart. I remember the summer afternoons spent at my grandma’s house, where the air was filled with the scent of her famous banana bread baking in the oven. After lunch, she would pull out an old ice cream maker — a relic from her youth that always brought a smile to my face.
“Today we’re making banana ice cream!” she would proclaim with delight. Together, we would mash those ripe bananas, stirring in cream and sugar as she shared stories of her childhood. As the ice cream maker churned away, the anticipation built. Eventually, we would dive into the cool, creamy goodness, each spoonful bursting with sweet banana flavor.
It’s these precious moments — the laughter, the patience of waiting during the churning, and the joy of sharing delicious foods — that led me to recreate my own version of banana ice cream. No childhood memory involving food is complete without that element of love and togetherness, and I want you to experience that same happiness in your kitchen with this recipe.
Ingredients
For this delightful banana ice scream, you’ll need the following simple ingredients:
-
4 ripe bananas: When bananas start to brown, that’s when the magic happens! They are at their sweetest and most flavorful. If you need an alternative, you can use frozen bananas, which will give you similar results.
-
1 cup heavy cream: This adds the rich, creamy texture that we all love in ice cream. For a lighter version, feel free to substitute with half-and-half or coconut cream for a dairy-free option.
-
1 cup whole milk: The base of our ice cream, whole milk creates a smooth consistency. For a vegan alternative, you can use almond milk or oat milk.
-
3/4 cup granulated sugar: This sweetens things up! If you’re looking to cut down on sugar, consider using honey or maple syrup, but keep in mind it might alter the flavor slightly.
-
1 teaspoon vanilla extract: This enhances the banana flavor. If you’re feeling adventurous, you could also experiment with almond extract for a nutty twist.
-
Pinch of salt: Just a touch to brighten all the flavors and balance the sweetness.
Step-by-Step Instructions
Ready to make your own banana ice scream? Let’s break it down step by step, and I’ll sprinkle in some tips to ensure you become a banana ice cream master in no time!
Step 1: Prep Your Bananas
Begin by peeling the ripe bananas and cutting them into chunks. Toss them into a large mixing bowl. The riper your bananas, the sweeter your ice cream, so don’t shy away from those speckled beauties! If you’re using frozen bananas, allow them to thaw a bit for easier blending.
Step 2: Mash and Mix
Using a fork or a potato masher, mash those bananas until smooth. Don’t worry about making them completely lump-free; a few small chunks can add some delightful texture. Once you’ve reached your desired consistency, it’s time to mix in the stars of the show — the cream and milk!
Pour in 1 cup of heavy cream and 1 cup of whole milk, along with 3/4 cup of granulated sugar. Remember to sprinkle in a pinch of salt and 1 teaspoon of vanilla extract. Give it a good stir until everything comes together. Pro tip: taste the mixture before freezing — it’s your chance to adjust sweetness or flavor.
Step 3: Blend It Up
For a smooth and creamy texture, use an immersion blender or a regular blender to thoroughly combine the mixture. This will incorporate air and make your ice cream extra fluffy. Blend on high for about 30 seconds — just enough to integrate the bananas and cream fully.
Step 4: Chill Time
Pour the mixture into an airtight container and pop it into the fridge for about 1-2 hours. Chilling it first will help you achieve a smoother consistency since it allows the flavors to meld beautifully.
Step 5: Freeze the Mixture
After chilling, it’s time to freeze the fun! If you have an ice cream maker, pour the mixture into it and churn according to the manufacturer’s instructions. Typically, this takes about 20-30 minutes.
No ice cream maker? No problem! Pour the mixture into a shallow container and freeze. Stir it every 30 minutes for the first 2-3 hours to break up ice crystals — this way, you’ll maintain that creamy texture.
Step 6: Enjoy!
Once your ice cream reaches a soft-serve consistency, it’s ready to scoop! If you prefer a firmer texture, let it freeze for an additional 2-4 hours. Serve it up in bowls or cones and indulge your sweet tooth!
Serving Suggestions
When it comes to serving banana ice scream, simple is often best! Scoop it into a cute bowl, sprinkle some crushed nuts on top for an added crunch, or drench it in a chocolate sauce for an indulgent touch. If you’re feeling creative, serve it in a waffle cone, or pair it with slices of fresh bananas on the side. To elevate the presentation further, add a sprig of mint or a drizzle of caramel sauce – because we all know dessert is all about the aesthetics!
Recipe Variations
- Nutty Banana Delight: Mix in crushed walnuts or pecans for a delightful crunch!
- Chocolate Banana Ice Scream: Add in some cocoa powder or swirls of chocolate sauce to create a chocolatey twist.
- Spiced Banana Bliss: Sprinkle in a bit of cinnamon or nutmeg for warmth — perfect for cozy evenings.
- Tropical Banana: Blend in some coconut cream and top with toasted coconut flakes for a refreshing tropical treat.
- Peanut Butter Banana: Swirl in some creamy peanut butter for added flavor — it’s like a banana split in a bowl!
Chef’s Notes
This banana ice scream recipe has evolved over time and has become a family favorite. It all started while experimenting to find ways to use up the bananas that would inevitably go brown before we could eat them. The journey through countless trials led to this final version that I’m proud to share with you! Every time I make it, I can’t help but smile at the memories of my grandma and those joyful summer days spent making delicious creations.
And here’s a funny kitchen story — one time, I had an eager little helper (my niece) who was more interested in the taste test than the actual making process. Let’s just say, by the time we were ready to churn, there was hardly enough mixture left! Sometimes, the mess and laughter are what make cooking with kids so special. Don’t forget to invite your little ones to join in on the fun — it’s a great way to create memories in the kitchen!
FAQs and Troubleshooting
-
Why is my ice cream too icy or hard?
- If your ice cream becomes too icy, it might not have been churned enough. Ensure you mix it thoroughly. If you’re using the freezer method, stir it every 30 minutes to distribute the ice crystals.
-
Can I use dairy alternatives?
- Yes! You can definitely swap out the dairy ingredients for alternatives like coconut milk or almond milk. Just keep in mind that it might change the flavor slightly.
-
What if I don’t have an ice cream maker?
- No problem! Just use the shallow container and stir method mentioned above. It may take a little longer, but you’ll still end up with a delicious treat!
-
How can I store leftovers?
- Keep any leftover ice cream in an airtight container in the freezer. It will stay good for up to two weeks, but I guarantee it won’t last that long!
Making banana ice cream not only results in a delicious treat but also creates moments of joy and togetherness. It’s an homage to the simplicity of good food and the happiness it brings. So go ahead, roar with excitement at your creation, and share the happiness with loved ones. Happy cooking!
Print
Banana Ice Scream
- Total Time: 40 minutes
- Yield: 4 servings 1x
- Diet: Vegetarian
Description
A creamy, dreamy banana ice cream that transforms ripe bananas into a delightful frozen treat, perfect for any occasion.
Ingredients
- 4 ripe bananas, cut into chunks
- 1 cup heavy cream
- 1 cup whole milk
- 3/4 cup granulated sugar
- 1 teaspoon vanilla extract
- Pinch of salt
Instructions
- Begin by peeling the ripe bananas and cutting them into chunks. Toss them into a large mixing bowl.
- Mash those bananas until smooth using a fork or potato masher.
- Pour in 1 cup of heavy cream and 1 cup of whole milk, along with 3/4 cup of sugar, a pinch of salt, and 1 teaspoon of vanilla extract. Stir until combined.
- Blend the mixture with an immersion blender or regular blender for 30 seconds.
- Pour the mixture into an airtight container and chill in the fridge for 1-2 hours.
- Freeze the mixture using an ice cream maker or shallow container method, stirring every 30 minutes for the first 2-3 hours.
- Once the mixture reaches a soft-serve consistency, serve it up and enjoy!
Notes
Best served with toppings like crushed nuts or chocolate sauce. Store any leftovers in an airtight container in the freezer for up to two weeks.
- Prep Time: 10 minutes
- Cook Time: 30 minutes
- Category: Dessert
- Method: Churning
- Cuisine: American
Nutrition
- Serving Size: 1 serving
- Calories: 250
- Sugar: 30g
- Sodium: 50mg
- Fat: 14g
- Saturated Fat: 9g
- Unsaturated Fat: 5g
- Trans Fat: 0g
- Carbohydrates: 35g
- Fiber: 2g
- Protein: 3g
- Cholesterol: 70mg
Keywords: banana, ice cream, dessert, frozen treat, sweet
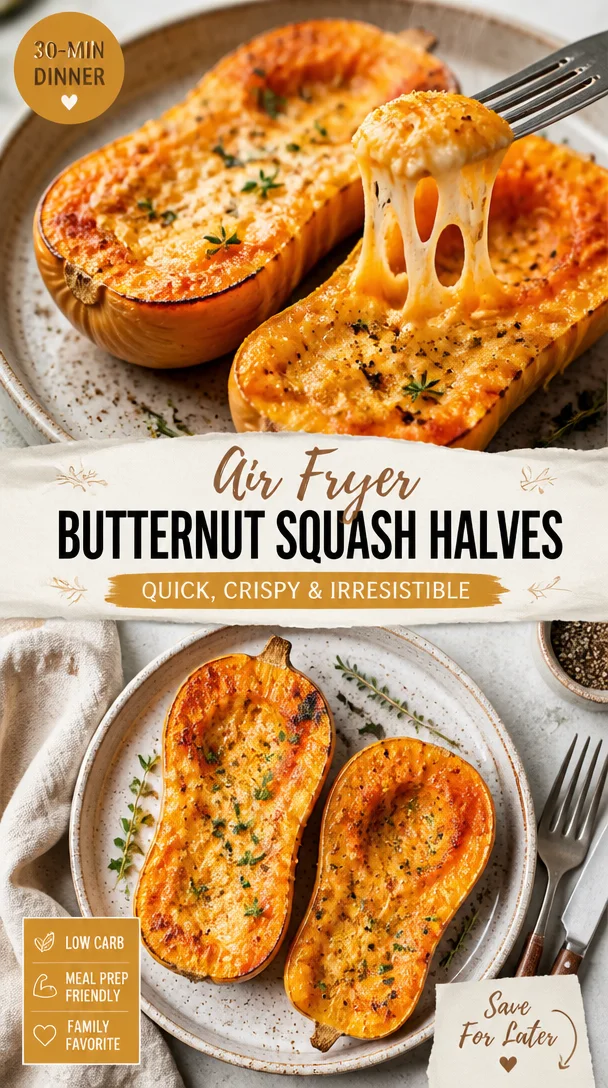
Air Fryer Butternut Squash Halves: Quick, Crispy Side
Air Fryer Butternut Squash Halves: A Cozy, Flavorful Delight
Welcome to my kitchen, dear friends! Today, we’re diving into the delightful world of butternut squash, specifically in the form of Air Fryer Butternut Squash Halves. If you haven’t experienced the wonder of cooking squash in an air fryer, you’re in for a treat! I can hardly contain my excitement as I think about the sweet, nutty flavor of roasted butternut squash, combined with the ease and convenience of using an air fryer. Whether you’re looking for a simple side dish, a comforting meal, or a nourishing treat, this recipe ticks all the boxes!
But let’s be honest for a moment; cooking doesn’t have to be a wild culinary adventure every time. This recipe is about savoring the simple pleasures of food. The air fryer takes the humble butternut squash to new heights, providing tender, caramelized, and deliciously savory halves in no time at all. Plus, the best part? You can enjoy them on a weeknight or wow your friends at a holiday gathering.
Let’s jump into some kitchen magic! Ready to impress your taste buds and your loved ones with this delicious dish? Buckle up, and let’s get cooking! I promise you, this is not just a recipe; it’s a heartfelt experience.
A Cozy Memory
My love affair with butternut squash started on cool autumn afternoons when my grandma would make her famous roasted squash for Sunday dinners. I can still picture the kitchen filled with the warm aroma of herbs and spices, mingling with laughter and stories shared around the family table. She would slice that squash with such precision, her hands moving like seasoned art. Grandma would always say, “It’s not just about the food; it’s about the love you put into it.”
One day, in her cozy kitchen, while watching her work, I asked her to teach me her secrets. She chuckled and said jokingly, “Oh, dear! There are no secrets in cooking, just a little heart and some kitchen know-how!” That’s exactly what this recipe embodies! It’s about celebrating those nostalgic times, transforming simple ingredients into something heartwarming, and adding your own twist—just like grandma would have wanted.
Ingredients
Here’s what you’ll need to bring this cozy dish to life, along with some helpful tips:
-
1 Medium Butternut Squash
The star of the show! Choose a squash that feels heavy for its size with smooth, unblemished skin. If you can’t find butternut squash, pumpkin or acorn squash is a great substitute. -
2 tablespoons Olive Oil
This adds just the right richness to our squash. If you’re watching your calories, feel free to reduce the amount. You could also use melted coconut oil for a delightful flavor. -
1 teaspoon Salt
Salt enhances the natural sweetness of the squash. If you’re looking for low-sodium options, consider using a pinch of garlic powder or herb seasoning for flavor. -
1/2 teaspoon Black Pepper
Black pepper provides a kick, but if you prefer a milder flavor, you can use white pepper instead. -
1 teaspoon Ground Cinnamon
This is optional, but it adds a warm, sweet note that complements the squash beautifully. For a twist, try nutmeg or allspice instead! -
Fresh Herbs (optional)
Fresh sage or thyme makes for a flavorful herbaceous topping. If you don’t have fresh herbs, dried ones will do!
Step-by-Step Instructions
Let’s get that air fryer humming! Here’s how to make your Air Fryer Butternut Squash Halves step by step:
-
Prepare the Squash
Start by washing and drying your butternut squash. Using a sharp knife, carefully cut it in half lengthwise. If you’re not used to knife work, take it slow and steady; safety first! The flesh is pretty tough, so ensure your knife is sharp. -
Scoop Out the Seeds
Using a spoon, scoop out the seeds and the fibrous strings in the center. This part can be messy, but that’s part of the fun! Save those seeds if you want to roast them later as a crunchy snack. -
Season the Squash
Place the squash halves cut-side up on a large cutting board. Drizzle the olive oil over each half and sprinkle the salt, pepper, and cinnamon. Use your hands to rub the seasoning all over the flesh, ensuring an even coating. This is where the magic begins! Your hands will get a little oily, but that’s just a reminder of the love you’re putting into your dish. -
Air Frying Time
Preheat your air fryer to 370°F (190°C). Once hot, carefully place the butternut squash halves in the air fryer basket, cut-side up. Don’t overcrowd! You want to let the air circulate for that perfect roast. Depending on your air fryer’s capacity, you might need to do this in batches. -
Cook and Check
Air fry the squash for about 25-30 minutes. Halfway through, take a peek and check for tenderness by poking it with a fork. If it glides through easily, you’re all set—if not, let it cook a bit longer. The goal is perfectly tender flesh that’s also caramelized on top. Yum! -
Serving the Squash
Once cooked, carefully remove the squash from the air fryer. Be sure to let it cool for a few minutes before serving. As a finishing touch, sprinkle some fresh herbs on top for a pop of color and extra flavor.
Serving Suggestions
These Air Fryer Butternut Squash Halves are incredibly versatile! You can serve them as a side dish at dinner, stuffed with grains or quinoa for a heartier meal, or simply drizzled with a little balsamic glaze for a touch of sweetness. They pair beautifully with chicken, pork, or even a lovely fall salad.
For a fun presentation, you can place them on a large serving platter alongside some additional sautéed greens or roasted veggies to brighten up the dish.
Recipe Variations
-
Stuffed Squash: After air frying, scoop out some of the flesh and mix it with cooked grains, nuts, cranberries, and spices for a delicious stuffing.
-
Sweet Maple Glaze: Drizzle some maple syrup over the halves in the last few minutes of cooking for a sweet twist.
-
Spicy Kick: Add a sprinkle of cayenne pepper or chili powder for some heat alongside the cinnamon.
-
Cheesy Goodness: Top with crumbled feta or goat cheese before serving for a savory finish.
-
Mediterranean Touch: Blend in sun-dried tomatoes and olives for a unique flavor profile that transports your taste buds straight to the Mediterranean.
Chef’s Notes
Cooking is not just about following a recipe; it’s about experimenting, creating, and making it your own. This Air Fryer Butternut Squash Halves recipe has evolved since I first started making it. Initially, I kept it super simple, but I’ve found that experimenting with spices and toppings allows me to honor the essence of what butternut squash is while adding my own personal flair.
And sometimes, kitchen mishaps become the best stories! One time, I miscalculated the air fryer settings and ended up with a truly caramelized batch of squash—I thought I ruined dinner, but everyone loved the intensified flavor. So don’t sweat it if something doesn’t go precisely as planned; celebrate those "happy accidents!"
FAQs and Troubleshooting
Q1: How do I know when the butternut squash is done cooking?
You’ll want to test the tenderness with a fork. It should slide in easily without resistance. If it feels firm, give it a few more minutes!
Q2: Can I use frozen butternut squash?
Absolutely! Just adjust the cooking time. Frozen squash may need slightly less time, so start checking for doneness at around 20 minutes.
Q3: My squash turned out mushy; what went wrong?
This can happen if the squash was overcooked or if there was too much moisture. Make sure to check it a little earlier next time!
Q4: Can I make this in the oven?
For sure! Preheat your oven to 400°F (200°C) and roast the squash halves for about 40-50 minutes, cut-side up, until tender and caramelized.
Nutritional Info
While I encourage you to enjoy your cooking journey, I know nutrition is important! Butternut squash is loaded with vitamins A and C, high in fiber, and low in calories. It’s the ultimate comforting dish that also provides a nutrient boost—definitely a win-win!
And there you have it! Air Fryer Butternut Squash Halves, bursting with flavor and the warmth of home cooking. I hope this recipe brings as much joy to your kitchen as it does to mine! Whether you whip it up on your own or gather friends and family around, remember to savor each bite and make it your own. Happy cooking, friends!
Print
Air Fryer Butternut Squash Halves
- Total Time: 45 minutes
- Yield: 4 servings 1x
- Diet: Vegetarian
Description
Delight in the sweet, nutty flavors of roasted butternut squash halves, perfectly cooked in an air fryer for a quick and healthy dish.
Ingredients
- 1 Medium Butternut Squash
- 2 tablespoons Olive Oil
- 1 teaspoon Salt
- 1/2 teaspoon Black Pepper
- 1 teaspoon Ground Cinnamon (optional)
- Fresh Herbs (optional, for topping)
Instructions
- Prepare the Squash: Wash and dry your butternut squash. Cut it in half lengthwise with a sharp knife.
- Scoop Out the Seeds: Use a spoon to remove the seeds and fibrous strings in the center.
- Season the Squash: Drizzle olive oil on each half and sprinkle with salt, pepper, and cinnamon. Rub the seasoning over the flesh.
- Air Frying Time: Preheat your air fryer to 370°F (190°C). Place the squash halves cut-side up in the basket.
- Cook and Check: Air fry for about 25-30 minutes, checking for tenderness halfway through.
- Serve the Squash: Remove from the air fryer, let cool, and sprinkle fresh herbs on top before serving.
Notes
Experiment with different spices and toppings like maple syrup, cayenne pepper, or cheese for diverse flavors.
- Prep Time: 15 minutes
- Cook Time: 30 minutes
- Category: Side Dish
- Method: Air Frying
- Cuisine: American
Nutrition
- Serving Size: 1 half
- Calories: 150
- Sugar: 2g
- Sodium: 300mg
- Fat: 10g
- Saturated Fat: 1g
- Unsaturated Fat: 8g
- Trans Fat: 0g
- Carbohydrates: 23g
- Fiber: 4g
- Protein: 3g
- Cholesterol: 0mg
Keywords: butternut squash, air fryer, vegetarian, side dish, healthy cooking
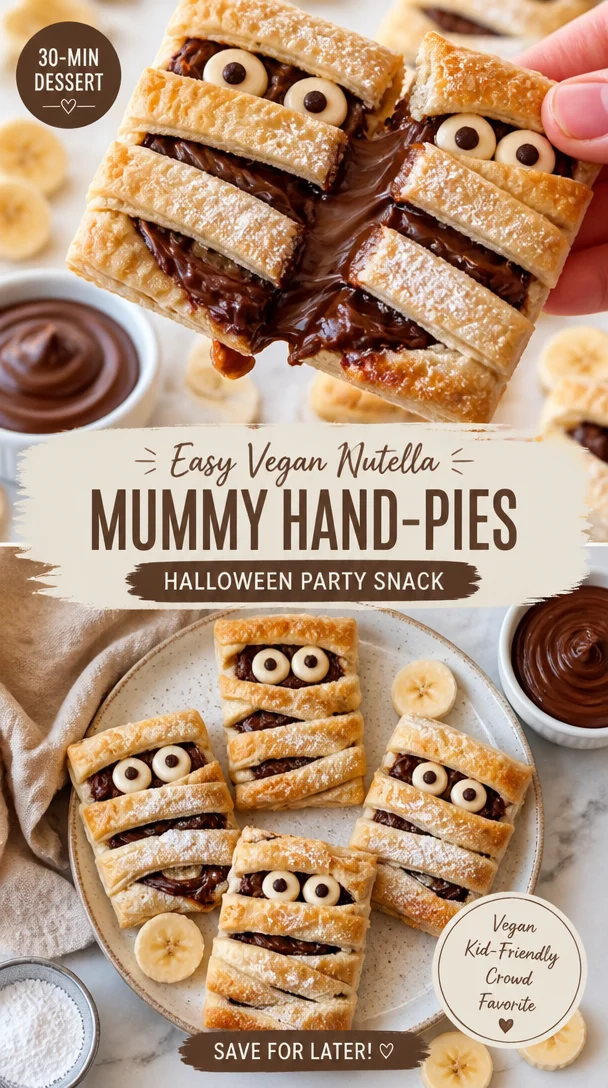
Easy Vegan Nutella Mummy Hand-Pies: Halloween Party Snack
Vegan Nutella Halloween Mummy Hand-Pies: Spooktacular Treats for Your Autumn Celebrations
Welcome to a magical corner of my kitchen, where the air is filled with the enchanting scents of chocolate and spice. If you’re anything like me, the joy of cooking isn’t just about making food; it’s about creating memories, sharing laughter, and bringing a bit of cozy warmth into the hearts of those we love. With Halloween right around the corner, what better way to celebrate than by whipping up a batch of Vegan Nutella Halloween Mummy Hand-Pies? Trust me, these delightful little pastries are sure to become a tradition that will fill your kitchen with giggles and sweet aromas!
Picture this: a crisp autumn afternoon, the leaves danced in the wind, and the sweet smell of baking wafted through my mom’s kitchen. Every year, as Halloween approached, we would set aside a weekend to create spooky treats. One of my absolute favorites was this super simple Nutella dessert pies! Except back then, we didn’t have a reliable store-bought vegan option, and we certainly didn’t know what “vegan” meant. Yet somehow, we always ended up with gooey chocolate filling enveloped in flaky, buttery pastry. Fast forward to today, and while my mom may not be in the kitchen with me, her spirit lives on in every recipe I craft. Today, I’m excited to share a plant-based twist on our childhood favorite that’s just as delicious and perfect for a Halloween gathering.
These hand-pies are not only adorable but also incredibly easy to make! Plus, they are filled with a rich, vegan Nutella equivalent – yep, it’s that luscious chocolate-hazelnut spread you’ve always loved – but made without any animal products. The flaky crust resembles the fun, ghostly bandages of a mummy, making them a wonderfully festive choice for your Halloween soirée. So grab your apron, and let’s dive into making these scrumptious treats that awaken your inner child while satisfying your sweet tooth!
A Whimsical Memory that Sparks Joy
One of my most cherished Halloween memories revolves around these hand-pies. I can still recall the gleeful chaos that unfolded in our kitchen. My siblings and I had concocted a plan to surprise our parents with a batch of spooky treats to celebrate the season. We donned our best Halloween costumes (because what’s Halloween without a little dress-up, right?), wielding spatulas and cookie cutters like our culinary swords.
There we were, flour dusting our faces, laughing uncontrollably as we tried to form little mummies from pieces of pie crust. Everything turned into a delightful mess of dough and Nutella – and the more mess we made, the more we laughed! Once they were baked, our “mummies” came to life, delightfully golden and flaky, and that first bite, revealed gooey chocolate heaven. Each hand-pie was a nostalgic nod to the magic and joy of family—just the kind of warmth you can always spread through food. It’s those kinds of memories that inspired me to recreate and share this vegan version. After all, food not only nourishes our bodies but also feeds our soul!
Ingredients
Now, let’s gather our ingredients! This recipe is straightforward and calls for items you may already have on hand. Here’s what you need to create these bewitching hand-pies:
-
Vegan Pie Crust
- What it is: This forms the flaky exterior of your hand-pies.
- Substitution tips: You can use store-bought vegan pie crust for quicker preparation. Just make sure to check the label!
-
Nutella (or Vegan Hazelnut Spread)
- What it is: The gooey, rich filling that makes these hand-pies irresistible.
- Substitution tips: If Nutella is not available, any other vegan hazelnut spread works beautifully or try making your own!
-
All-Purpose Flour
- What it is: A classic choice for the crust, lending structure and tenderness.
- Substitution tips: If you’re looking for a gluten-free option, you can substitute with a gluten-free all-purpose flour blend.
-
Confectioners’ Sugar
- What it is: This sweetens the pastry and creates a nice drizzle for the mummies.
- Substitution tips: If you’re avoiding sugar, you could use powdered monk fruit or coconut sugar.
-
Unsweetened Almond Milk (or any plant milk)
- What it is: This helps bind the pie crust and adds moisture.
- Substitution tips: Any non-dairy milk (like soy, oat, or coconut milk) works well here.
-
Salt
- What it is: A crucial flavor enhancer that brings all the elements together.
- Chef insight: Just a pinch can make all the difference!
-
Vanilla Extract
- What it is: Adds a lovely aroma and depth of flavor to both the crust and filling.
- Substitution tips: If you don’t have vanilla extract, almond extract is a great alternative.
Now that we have our ingredients ready, let’s get to the fun part: cooking!
Step-by-Step Instructions
-
Make the Dough:
In a large bowl, combine 2 cups of all-purpose flour, ½ teaspoon of salt, and 1 tablespoon of confectioners’ sugar. To bring the dough to life, add ½ cup of vegan butter (chilled and cubed) and use your fingers or a pastry cutter to mash the butter into the flour until it resembles coarse crumbs. This step is essential—it’s what gives your hand-pies that buttery, flaky texture we love! -
Add the Liquid:
Gradually pour in 4 to 6 tablespoons of almond milk and 1 teaspoon of vanilla extract, mixing until the dough just comes together. Don’t overmix—I promise, your hand-pies will thank you later! Once combined, wrap the dough in plastic wrap and refrigerate it for at least 30 minutes. This will allow the butter to firm up, ensuring a flakier crust. -
Preheat the Oven:
While the dough chills, preheat your oven to 375°F (190°C). This way, it’s ready to bake as soon as your hand-pies are assembled. -
Roll Out the Dough:
On a floured surface, roll out the dough to about ⅛ inch thick. Use a round cookie cutter (or any circular object) to cut out circles about 4 inches in diameter. Transfer them to a parchment-lined baking sheet. -
Fill the Mummies:
Place about a tablespoon of Nutella (or your favorite hazelnut spread) in the center of each round. Be sure to leave some space around the edges to seal the pies later. -
Seal the Pies:
To form the mummies, take a smaller circle of dough and cut it into thin strips (about ½ inch wide). Place a few strips across the filling to resemble a mummy’s wrappings. Press the edges of the bottom dough circle with a fork or pinch them to seal, ensuring nothing leaks out while baking. -
Brush with Almond Milk:
To help achieve that golden, mouthwatering finish, brush the top of your mummies with a little almond milk. This little chef hack makes a significant difference in creating that bakery-style sheen. -
Bake the Hand-Pies:
Pop those beauties into the preheated oven for 20-25 minutes, or until they are golden brown and puffed. Keep a close eye on them—they bake quickly and you want them to be perfectly golden! -
Cool and Decorate:
Once baked, allow the hand-pies to cool for at least 10 minutes. When you’re ready, create a quick glaze by mixing a couple of tablespoons of almond milk with confectioners’ sugar until you reach a drizzling consistency. Drizzle it over the cooled hand-pies to give them some adorable mummy eyes (you can use mini chocolate chips if you want them to look especially spooky!).
Serving Suggestions
These Vegan Nutella Halloween Mummy Hand-Pies are perfect for serving at a Halloween party, Halloween-themed brunch, or even as a fun after-school treat. Arrange them on a festive platter and add some spooky decorations, like small plastic spiders or Halloween-themed napkins. They also pair wonderfully with a cup of tea or coffee for those chilly fall evenings!
Recipe Variations
If you’re looking to switch things up and add a personal flair, here are a few fun twists to your mummies:
- Berry Mummies: Swap out the Nutella for your favorite berry jam or preserves for a delightful fruity surprise!
- Pumpkin Spice Fill: Try filling your hand-pies with a mix of pumpkin puree, vegan cream cheese, and pumpkin spice for an autumnal taste explosion.
- Peanut Butter Surprise: Change it up by using a vegan peanut butter spread for a nutty twist on the classic!
- Chocolate Chip Spillover: Add a handful of dairy-free chocolate chips to the Nutella for extra chocolaty goodness!
- Cinnamon Sugar Dust: Dust the hand-pies with cinnamon sugar post-baking for a sweet crunch.
Chef’s Notes
As with any recipe, feel free to have fun with it! Get creative with the filling, play with shapes (who says mummies can’t be ghosts on Halloween?), and don’t be afraid to let your personality shine through the kitchen chaos! I’ll often throw in whatever leftover candies or nuts I have lying around. The recipe has beautifully evolved from my childhood kitchen memories into a recipe that adapts to the seasons and my ever-changing cravings. Remember, the magic of cooking lies not in perfection but in the joyful experience of making something delicious!
FAQs and Troubleshooting
1. My dough is too crumbly; what did I do wrong?
A crumbly dough could be a sign that there wasn’t enough liquid added during mixing or the butter got too warm. Make sure your butter is chilled, and add a bit more almond milk if it feels too dry.
2. Why did my hand-pies leak filling while baking?
If the filling leaks, it might be that the pies weren’t sealed securely. Ensure that you press down firmly around the edges and check for any punctures in the crust.
3. Can I freeze the hand-pies?
Absolutely! Just bake them, then allow them to cool completely. Place them in airtight containers or freezer bags, and they’ll last up to three months in the freezer. Reheat them in the oven straight from frozen—you may need to add a few extra minutes to the baking time.
4. How do I store leftovers?
These are best eaten fresh, but you can store them in an airtight container at room temperature for 1-2 days. If you’ve made a large batch (because who could resist?), consider putting some in the fridge for a longer shelf life.
Nutritional Info
Calories: Approx. 150 per hand-pie
Fat: 7g
Carbohydrates: 20g
Protein: 2g
Vegan and nut-free options available based on ingredient choices.
So there you have it! A playful and heartfelt recipe to bring those warm Halloween vibes right into your kitchen. These Vegan Nutella Halloween Mummy Hand-Pies are more than just a delightful treat; they’re a celebration of memories, creativity, and, most importantly, good food! Happy baking!
Print
Vegan Nutella Halloween Mummy Hand-Pies
- Total Time: 40 minutes
- Yield: 12 hand-pies 1x
- Diet: Vegan
Description
Delightful vegan hand-pies filled with rich hazelnut spread, perfect for Halloween celebrations.
Ingredients
- 2 cups all-purpose flour
- ½ teaspoon salt
- 1 tablespoon confectioners’ sugar
- ½ cup vegan butter, chilled and cubed
- 4 to 6 tablespoons unsweetened almond milk (or any plant milk)
- 1 teaspoon vanilla extract
- Nutella (or vegan hazelnut spread)
- Mini chocolate chips (optional, for decoration)
Instructions
- Combine the flour, salt, and confectioners’ sugar in a large bowl.
- Add the vegan butter and mix until you get coarse crumbs.
- Pour in the almond milk and vanilla extract, mixing until the dough comes together.
- Wrap the dough in plastic wrap and refrigerate for at least 30 minutes.
- Preheat your oven to 375°F (190°C).
- Roll out the dough to about ⅛ inch thick and cut into 4-inch circles.
- Place one tablespoon of Nutella in the center of each round.
- Cut smaller circles into strips to form the mummy wrappings and seal the edges.
- Brush the top with almond milk for a golden finish.
- Bake for 20-25 minutes until golden brown.
- Allow to cool, then drizzle with a glaze made from almond milk and confectioners’ sugar.
Notes
These hand-pies can be customized with different fillings like berry jam or pumpkin puree. Perfect for any Halloween party!
- Prep Time: 15 minutes
- Cook Time: 25 minutes
- Category: Dessert
- Method: Baking
- Cuisine: Vegan
Nutrition
- Serving Size: 1 hand-pie
- Calories: 150
- Sugar: 5g
- Sodium: 200mg
- Fat: 7g
- Saturated Fat: 1g
- Unsaturated Fat: 5g
- Trans Fat: 0g
- Carbohydrates: 20g
- Fiber: 1g
- Protein: 2g
- Cholesterol: 0mg
Keywords: Vegan Halloween dessert, Nutella hand-pies, spooky treats, Halloween recipes
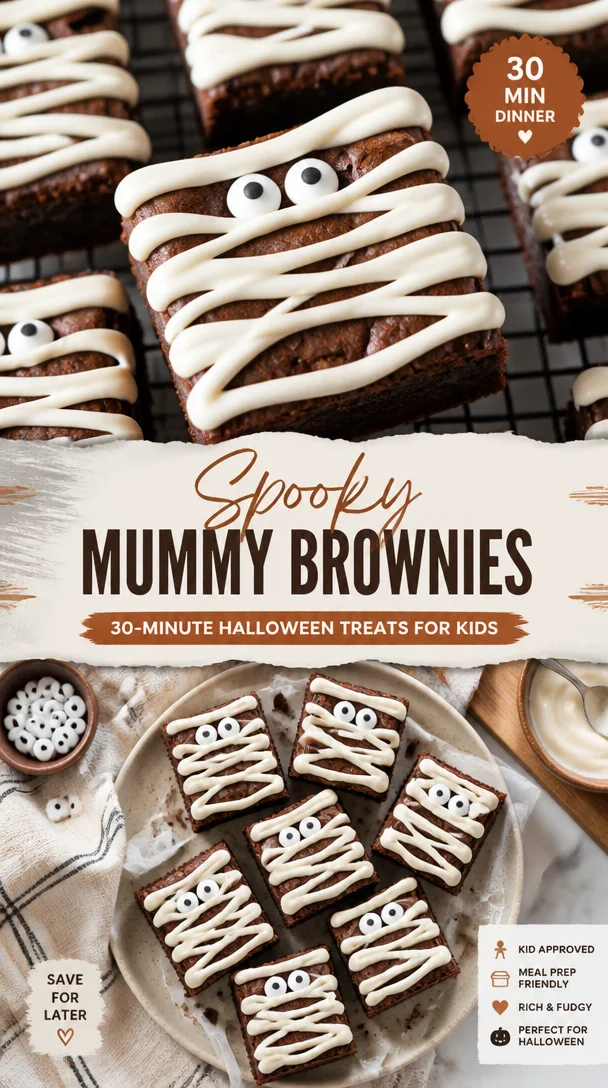
Spooky Mummy Brownies: 30-Minute Halloween Treats for Kids
Spooky Mummy Brownies: A Halloween Treat to Delight
Welcome to my kitchen, food friends! I’m so thrilled to have you here today. As we approach Halloween, the air becomes crisp, leaves crunch underfoot, and the scent of baked goods wafts through homes everywhere. There’s something truly magical about this time of year — it’s all about treats, spooky vibes, and the joy of creating something delightful to share with friends and family. Today, I’m sharing a recipe that’s near and dear to my heart: Spooky Mummy Brownies.
These brownies are not just fudgy and decadent; they’re irresistibly cute with their mummy-like appearance. Perfect for both kids and adults, these treats may just become your new Halloween tradition. Imagine this: a cozy kitchen filled with laughter and the warm aroma of chocolate as you whip up a batch of these spooky brownies. It’s a recipe that combines the fun of crafting with the joy of cooking — and who could say no to that?
When I think of Halloween, I can’t help but remember the excitement shared with my family as we prepped for the spooky season. We’d gather together, donned in our costumes, with bowls of candy and stacks of decorations piled high. One year, we decided to throw a Halloween-themed dinner party, complete with ghoulish decorations and a dessert table that had everyone buzzing. That’s when I first served these Mummy Brownies, and their popularity skyrocketed. They became the highlight of the evening, and the kids couldn’t get enough of them. The best part? The scaredy-cats among us loved that they were surprisingly satisfying and indulgent, despite their eerie look.
So, ready to dive into the creation of these delightful mummies? Let’s get baking!
Ingredients
For your Spooky Mummy Brownies, you will need the following ingredients:
-
1 cup (2 sticks) unsalted butter: Butter adds richness to your brownies; feel free to use a dairy-free alternative if you’re looking for a vegan option.
-
2 cups granulated sugar: This sweetens your brownies wonderfully. For a less sweet version, try using coconut sugar.
-
4 large eggs: Eggs provide moisture and help bind everything together. If you’re vegan, you can substitute ground flaxseed (1 tablespoon of flaxseed with 3 tablespoons of water for one egg).
-
1 teaspoon vanilla extract: Vanilla enhances the flavors. Use pure vanilla for the best taste, or sub with almond extract for a different twist!
-
1 cup all-purpose flour: This gives structure to your brownies. For gluten-free options, a 1:1 gluten-free flour blend works great.
-
1 cup unsweetened cocoa powder: Cocoa is key for that rich chocolate flavor. Dutch-process cocoa can be used for a deeper taste.
-
1 teaspoon baking powder: This helps the brownies rise slightly during baking. If you’re out, baking soda works in a pinch—just use half the amount.
-
½ teaspoon salt: A little salt balances the sweetness. You can reduce it slightly if you are watching your sodium intake.
-
Candy eyes: These bring the mummies to life! Use small chocolate chips if you can’t find candy eyes.
-
White chocolate melts or candy coating: For wrapping your brownies like mummies. If you want to keep it dairy-free, look for vegan white chocolate.
Step-by-Step Instructions
Let’s jump right into making these spooky delights! Follow these steps for brownie perfection:
-
Preheat the oven to 350°F (175°C). This is essential, as it allows for even cooking right from the start. While it heats, prepare your baking pan.
-
Prepare your baking pan: Grease a 9×13 inch baking dish or line it with parchment paper. This will prevent sticking and make it easier to remove the brownies after baking. I always recommend parchment paper for ease of lifting out the brownies.
-
Melt the butter: In a medium saucepan over low heat, melt the butter. Stir it gently until it has fully melted, making sure it doesn’t brown. If you do overheat and brown it, don’t worry — just let it cool a bit before proceeding.
-
Combine sugar and eggs: In a large mixing bowl, whisk together the melted butter and sugar until well blended. Then, add the eggs one at a time, mixing thoroughly after each. The mixture should be creamy and smooth.
-
Add the vanilla: Stir in the vanilla extract. This is where the magic happens, as the aroma fills your kitchen, making it feel cozier.
-
Incorporate dry ingredients: Now, sift together the flour, cocoa powder, baking powder, and salt in another bowl. This step is key to ensuring there are no lumps in your brownies and the flavors mix well. Gradually add this dry mixture to the wet ingredients and stir until just combined. Be careful not to overmix. We want fudgy brownies, not cake-like ones!
-
Pour into the pan: Transfer the brownie batter into the prepared baking dish and spread it evenly. A spatula works great for this step.
-
Bake for 25-30 minutes: You know your brownies are done when a toothpick inserted into the center comes out with a few moist crumbs. No batter, but a little gooey is exactly what we’re aiming for.
-
Cool completely: Once baked, let the brownies cool in the pan on a wire rack. This allows them to firm up before cutting.
-
Cut into pieces: Once cooled, cut the brownies into rectangles or squares, depending on your preference.
-
Mummify them up!: Melt your white chocolate melts according to the package instructions. Use a piping bag or a zip-top bag with the corner snipped off to drizzle the melted chocolate over the brownies, creating mummy bandages. Place two candy eyes on each brownie while the chocolate is still soft.
Serving Suggestions
Serve your Spooky Mummy Brownies on a rustic wooden board or a vibrant Halloween-themed platter. They look fantastic with miniature pumpkins or autumn leaves scattered around for decor. These brownies are perfect for Halloween parties, school events, or simply to enjoy with your family on a cozy movie night. Pair them with a scoop of vanilla ice cream or a drizzle of caramel for an added treat!
Recipe Variations
Want to mix things up? Here are a few creative twists you can try:
-
Peanut Butter Swirl: Before baking, drop spoonfuls of peanut butter into the brownie batter and swirl it lightly for a delicious twist.
-
Fruity Add-ins: Add chopped cherries or raspberries for a tart surprise within the brownies.
-
Spicy Kick: A pinch of cinnamon or cayenne pepper can give your brownies a unique flavor profile with a little warmth.
-
Nutty Crunch: Toss in some chopped nuts like walnuts or pecans to add texture—just make sure your guests are nut-friendly!
-
Oreo Surprise: Crush some Oreo cookies and fold them into the batter. The cookies will create delightful pockets of flavor.
Chef’s Notes
As with any beloved recipe, mine has seen many iterations over the years. The chocolate drizzle was born from my love for decoration, and every Halloween party I host somehow ends with these brownies being the star! I remember an autumn night when I forgot to buy candy eyes, and we ended up using mini chocolate chips instead. The kids loved them just as much and even named them “Choco-Mummies!”
Every time I make these brownies, I reminisce about those cozy family gatherings and how the simple act of cooking can bring everyone together. These brownies aren’t just a treat; they’re a medium for laughter and connection!
FAQs and Troubleshooting
Here are some common questions I’ve received, along with answers:
1. Why are my brownies cakey?
- Ensure you’re not overmixing the batter. Also, be cautious with your baking time; check your brownies a few minutes early. Fudgy brownie perfection lies just under the “done” threshold.
2. What’s the best way to store leftover brownies?
- Store them in an airtight container at room temperature for up to three days. They also freeze beautifully for up to three months!
3. Can I make these brownies ahead of time?
- Absolutely! You can make them a day or two before your event. Just keep them covered to maintain freshness.
4. What if I want vegan brownies?
- You can easily substitute the eggs with ground flaxseed and use plant-based butter and chocolate. Just check that your chocolate and candy eyes are dairy-free!
Nutritional Info
While I usually focus on enjoyment over nutrition when it comes to indulging, I believe it’s helpful to know what you’re eating! Each brownie (out of about 24 servings) contains approximately:
- Calories: 200-250
- Total Fat: 10g
- Carbohydrates: 30g
- Protein: 2g
Feel free to adjust portions based on your serving size and dietary needs!
Conclusion
There you have it! Spooky Mummy Brownies that are not only scrumptious but also add a playful twist to your Halloween festivities. I hope this recipe fills your kitchen with warmth and laughter, making memories with every bite. So, gather your loved ones, crank up your favorite Halloween tunes, and have a blast while baking!
Happy Halloween, and may your kitchen always smell like something delicious! If you make these brownies, I’d love to hear how they turn out. Share your spooky creations with me!
Print
Spooky Mummy Brownies
- Total Time: 45 minutes
- Yield: 24 brownies 1x
- Diet: Vegetarian
Description
These fudgy and decadent Spooky Mummy Brownies are irresistibly cute and perfect for Halloween celebrations.
Ingredients
- 1 cup (2 sticks) unsalted butter
- 2 cups granulated sugar
- 4 large eggs
- 1 teaspoon vanilla extract
- 1 cup all-purpose flour
- 1 cup unsweetened cocoa powder
- 1 teaspoon baking powder
- ½ teaspoon salt
- Candy eyes
- White chocolate melts or candy coating
Instructions
- Preheat the oven to 350°F (175°C).
- Prepare your baking pan: Grease a 9×13 inch baking dish or line it with parchment paper.
- Melt the butter in a medium saucepan over low heat.
- Combine the melted butter and sugar in a large mixing bowl until well blended.
- Add the eggs one at a time, mixing thoroughly after each.
- Stir in the vanilla extract.
- Incorporate dry ingredients: sift flour, cocoa powder, baking powder, and salt in another bowl.
- Gradually add the dry mixture to the wet ingredients and stir until just combined.
- Pour the brownie batter into the prepared baking dish and spread it evenly.
- Bake for 25-30 minutes until a toothpick comes out with a few moist crumbs.
- Cool completely in the pan on a wire rack.
- Cut into rectangles or squares.
- Mummify the brownies with melted white chocolate and place candy eyes on top.
Notes
Store leftover brownies in an airtight container at room temperature for up to three days or freeze for up to three months.
- Prep Time: 15 minutes
- Cook Time: 30 minutes
- Category: Dessert
- Method: Baking
- Cuisine: American
Nutrition
- Serving Size: 1 brownie
- Calories: 225
- Sugar: 25g
- Sodium: 85mg
- Fat: 10g
- Saturated Fat: 6g
- Unsaturated Fat: 4g
- Trans Fat: 0g
- Carbohydrates: 30g
- Fiber: 2g
- Protein: 3g
- Cholesterol: 30mg
Keywords: Halloween, brownies, dessert, spooky, treats

Cauldron Cookies: 5 Spooky Halloween Treats in Minutes
Get Ready to Indulge: Cauldron Cookies That Enchant Your Taste Buds!
Welcome to my kitchen, where the aromas of baking and the spirit of cozy cooking swirl together in perfect harmony! Today, I’m excited to share a family recipe that holds a special place in my heart: Cauldron Cookies. These delightful bites bring a sense of magic with every crunch and chew, perfect for all those who seek comforting flavors and fun memories.
Picture this: the first crisp days of autumn drift in, and there’s a certain magic in the air. It’s that time of year again when Halloween decorations start to pop up, pumpkins sit proudly on doorsteps, and the leaves transform into vibrant shades of orange and gold. This is the same season that my late grandmother, a formidable wizard in the kitchen, would bring out her legendary cookie cauldron. Picture a giant dungeon-like pot bubbling with molten chocolate, gooey marshmallows, and a sprinkle of enchanting spices — those Cauldron Cookies paired with a warm glass of milk were a staple in our household.
As a child, I’d race home from school with the sweet anticipation of indulging in these precious treats. The kitchen would be filled with laughter, and we would get our hands sticky as we rolled out the dough and added ingredients to our cauldron. It wasn’t just about the cookies; it was about the joy of creation and the bonds formed over mixing, baking, and—let’s be honest—sampling all the delicious bits that didn’t quite make it into the oven.
The beauty of these cookies is that they can easily become a tradition in your own home. They’re perfect for sharing, too, whether you’re welcoming friends over for a cozy autumn evening or simply treating yourself to an after-dinner delight. Let’s dive into the magical world of Cauldron Cookies, shall we?
Ingredients to Create Cookie Magic
To conjure up a batch of these delightful Cauldron Cookies, you’ll need the following ingredients. Each of them has a role in crafting the perfect cookie experience:
-
1 cup unsalted butter: The base of any good cookie. Don’t have unsalted butter? No problem! You can use salted butter; just watch the added salt in the recipe.
-
1 cup brown sugar: This adds that rich, caramel-like depth. Dark brown sugar is a great substitute for more molasses flavor, while white sugar can be used if you’re in a pinch.
-
1 cup granulated sugar: Balances the flavors for that perfect sweet spot. If you want to reduce the sugar, consider using half the amount or substituting with coconut sugar.
-
2 large eggs: Bind the ingredients together. If you’re looking for an egg-free option, you can use flax eggs (1 tablespoon ground flaxseed mixed with 2.5 tablespoons water per egg) to keep that texture.
-
2 teaspoons vanilla extract: Adds a warm, nostalgic flavor. Feel free to use almond extract for a twist!
-
2.5 cups all-purpose flour: This is the structure of your cookies. You could swap some or all of it for whole wheat flour for a nutty flavor.
-
1 teaspoon baking soda: This is your leavening agent, giving the cookies that soft, fluffy texture. Baking powder can be used as a substitute but will alter the final texture slightly.
-
1/2 teaspoon salt: Balances the sweetness wonderfully. Skip it if using salted butter.
-
1 cup chocolate chips (or any mix, like butterscotch or white chocolate): Chocolate chips are the star of the show! Mix and match with your favorite kinds for an exciting flavor twist.
-
1 cup mini marshmallows: These give a delightful gooey texture. If you’re not a marshmallow fan, you can replace them with dried fruit or nuts for added chewiness.
-
1 cup crushed pretzels (optional): For a delightful crunch! If gluten-free, swap with gluten-free pretzels or skip entirely.
Gather these ingredients, and let the magic begin!
Step-by-Step Instructions to Conjure Up Your Cookies
-
Preheat the oven: Set your oven to 350°F (175°C). Preheating ensures that your cookies bake evenly.
-
Cream the butter and sugars: In a large mixing bowl, beat the unsalted butter, brown sugar, and granulated sugar together until light and fluffy—about 2-3 minutes. This process incorporates air into the mixture, contributing to a nice chewy texture.
-
Add eggs and vanilla: Crack the eggs into the bowl, followed by the vanilla extract. Mix until fully integrated; don’t worry if it looks a bit curdled!
-
Combine dry ingredients: In a separate bowl, whisk together the all-purpose flour, baking soda, and salt. This helps to evenly distribute the leavening agent and ensures no lumps in your cookies.
-
Slowly introduce dry to wet: Gradually add the dry ingredients to the wet mixture. Mix until just combined; be careful not to overwork the dough! If you prefer, you can use a spatula here for a gentle fold.
-
Stir in the goodies: Gently fold in the chocolate chips, mini marshmallows, and crushed pretzels (if using). This is where the cookie’s magic happens! Those little chunks of joy will melt and create pockets of goodness in every bite.
-
Scoop the dough: Use a cookie scoop or tablespoon to portion the dough onto a parchment-lined baking sheet. Make sure to leave enough space between them as they will spread!
-
Bake: Pop those cookie-filled trays in the oven and bake for 10-12 minutes or until the edges are lightly golden. The secret? Take them out when they still look a bit soft; they’ll continue to set as they cool.
-
Cool down: Let the cookies rest on the baking sheet for about 5 minutes before transferring them to a wire rack. This helps to enhance their chewy texture.
-
Dive In: Once they’ve cooled (if you can resist!), indulge in a warm Cauldron Cookie and enjoy those unbeatable flavors!
Serving Suggestions to Make Your Cookies Shine
These Cauldron Cookies are absolutely divine on their own, but to elevate your cookie experience, I recommend serving them warm alongside a tall glass of milk or a cozy cup of hot cocoa. For a fun twist, pair them with a scoop of vanilla ice cream for an unforgettable dessert treat that will impress every guest! You could also try drizzling some melted chocolate or caramel over the top for an extra touch of sweetness.
Recipe Variations: Switch Up the Magic
Feeling adventurous? Here are a few fun twists to make this recipe uniquely yours:
-
Nutty Considerations: Add chopped nuts like pecans or walnuts for an extra crunch and nutty flavor.
-
Spiced Up: Incorporate a teaspoon of cinnamon or pumpkin spice for a cozy fall twist that enhances the overall flavor.
-
Fruit Fusion: Swap the chocolate chips for dried cherries, cranberries, or apricots for a fruity variation.
-
Buttercream Delight: Use frosting as a dip! Make a simple frosting with cream cheese and powdered sugar to pair alongside your cookies.
-
Dairy-Free Option: Substitute all butter with coconut oil and make sure to use dairy-free chocolate chips for a fantastic dairy-free treat.
Chef’s Notes: A Cookie Journey
Every recipe has its story, and the evolution of these Cauldron Cookies is no exception. I remember experimenting with all kinds of mix-ins, from M&M’s to leftover Halloween candies. Each variation brought something new to the table, and I can still hear my family laughing as we created our own version of the recipe together.
What started as a simple butter and sugar base has now metamorphosed into a gooey, textured treat with depths of flavor and an array of textures, thanks to the added bits I’ve discovered along the way. This recipe has become a symbol of togetherness in my home—an excuse to gather around the kitchen and share stories over warm cookies!
FAQs and Troubleshooting: Common Cookie Conundrums
Q: My cookies spread too much during baking. What happened?
A: This could be due to the butter being too warm or if the dough was not chilled before baking. A quick fix? Chill the dough for 30 minutes before scooping it onto the baking sheet.
Q: Why are my cookies hard?
A: Overbaking or overmixing the dough can lead to tough cookies. One way to ensure they’re soft is to take them out of the oven while they’re still slightly underbaked—remember, they will continue cooking as they cool.
Q: Can I freeze these cookies?
A: Absolutely! You can freeze the baked cookies in an airtight container for up to three months. To reheat, pop them in the oven for about 5 minutes at 350°F (175°C).
Q: How can I make these cookies gluten-free?
A: Substituting all-purpose flour with your favorite gluten-free flour blend should work well! Just make sure that it includes xanthan gum to maintain the cookie’s structure.
Nutritional Info (Optional)
Feel free to calculate the nutritional values based on your ingredient modifications, but keep in mind, these cookies are best enjoyed in moderation as a sweet treat to delight your taste buds!
And there you have it—a complete journey into the world of Cauldron Cookies! I hope you enjoy making these treats as much as I love sharing them with you. Whether you’re creating new family memories or indulging in a little self-care with a sweet, warm cookie, I wish you all the delicious joy these cookies bring. Happy baking!
Print
Cauldron Cookies
- Total Time: 27 minutes
- Yield: 24 servings 1x
- Diet: Vegetarian
Description
Delightful Cauldron Cookies that bring magical flavors with every bite, perfect for an autumn treat.
Ingredients
- 1 cup unsalted butter
- 1 cup brown sugar
- 1 cup granulated sugar
- 2 large eggs
- 2 teaspoons vanilla extract
- 2.5 cups all-purpose flour
- 1 teaspoon baking soda
- 1/2 teaspoon salt
- 1 cup chocolate chips
- 1 cup mini marshmallows
- 1 cup crushed pretzels (optional)
Instructions
- Preheat the oven: Set your oven to 350°F (175°C).
- Cream the butter and sugars: In a large mixing bowl, beat the unsalted butter, brown sugar, and granulated sugar together until light and fluffy—about 2-3 minutes.
- Add eggs and vanilla: Crack the eggs into the bowl, followed by the vanilla extract. Mix until fully integrated.
- Combine dry ingredients: In a separate bowl, whisk together the all-purpose flour, baking soda, and salt.
- Slowly introduce dry to wet: Gradually add the dry ingredients to the wet mixture. Mix until just combined.
- Stir in the goodies: Gently fold in the chocolate chips, mini marshmallows, and crushed pretzels (if using).
- Scoop the dough: Use a cookie scoop or tablespoon to portion the dough onto a parchment-lined baking sheet.
- Bake: Bake for 10-12 minutes or until the edges are lightly golden.
- Cool down: Let the cookies rest on the baking sheet for about 5 minutes before transferring them to a wire rack.
- Dive In: Enjoy a warm Cauldron Cookie!
Notes
These cookies are best enjoyed warm, ideally served with milk or hot cocoa. Consider adding nuts or spices for variations.
- Prep Time: 15 minutes
- Cook Time: 12 minutes
- Category: Dessert
- Method: Baking
- Cuisine: American
Nutrition
- Serving Size: 1 cookie
- Calories: 150
- Sugar: 10g
- Sodium: 100mg
- Fat: 7g
- Saturated Fat: 4g
- Unsaturated Fat: 2g
- Trans Fat: 0g
- Carbohydrates: 20g
- Fiber: 0g
- Protein: 2g
- Cholesterol: 30mg
Keywords: cookies, Halloween, baking, dessert

Halloween Mozza Eyes: Quick, Spooky Mozzarella Eyeballs
Halloween Mozza Eyes
Introduction
Welcome to my kitchen, fellow food lovers! As the air turns crisp and the nights grow longer, there’s an undeniable excitement that creeps in. Halloween isn’t just a day for candy and costumes; it’s a chance to get a little creative in the kitchen and whip up some whimsically spooky treats! Today, I’m thrilled to share one of my favorite Halloween snacks: Mozza Eyes.
These adorable bites are not only fun to make but equally delightful to eat. Imagine creamy mozzarella balls staring back at you, complete with playful olives and cherry tomatoes, ready to make any gathering a hit. The best part? They come together in no time, allowing you to spend more time enjoying the festivities and less time fretting over complicated recipes. Whether you’re hosting a pumpkin-carving party or simply seeking a festive treat for your family’s Halloween movie night, Mozza Eyes are sure to turn heads—and stomachs!
I’ve always believed that the kitchen is a space for creativity and laughter. Over the years, I’ve explored countless recipes, but nothing quite compares to the joy of sharing a dish that simply screams fun! Let’s dive right in, and I’ll guide you through making these spooky snacks that are not only delicious but also a fantastic way to kick off the Halloween spirit.
Personal Story
Let me take you back to my childhood, where my love for Halloween first blossomed. I remember stringing fake cobwebs in the living room, surrounded by pumpkins, and preparing for the ghoulish trick-or-treaters. It was during one of these joyful afternoons that I decided to get my little hands into the kitchen with my mom. We whipped up a pot of her famous tomato soup, and just for fun, she had the brilliant idea of crafting eerie "eyeball" mozzarella balls to float in the soup.
As we crafted our mozzarella eyes, we laughed and shared stories about the spookiest pranks we had pulled on friends and family. The balance of laughter, delicious flavors, and the thrill of Halloween made that memory one I cherish deeply. Fast forward to today, and that playful spirit remains. Now it’s my turn to not only create memories with family and friends but to inspire others to find joy in their kitchens. So let’s put on our aprons and get to work on turning ordinary ingredients into extraordinary Halloween delights!
Ingredients
For our Halloween Mozza Eyes, you’ll need a few simple, yet crucial ingredients. Here’s what you’ll need:
-
Mozzarella Balls: Use bocconcini or ciliegine mozzarella. They’re bite-sized, creamy, and will mimic the eyeball effect wonderfully. Tip: If mozzarella isn’t available, ricotta balls can work too!
-
Black Olives: These will serve as the “pupil” of our eyes. You can use whole olives or sliced, depending on how eerie you want them to look. Substitution: Substitute with dark grapes for a sweet twist!
-
Cherry Tomatoes: Their red color adds a pop of festivity, plus they go perfectly with mozzarella. You could even use heirloom tomatoes for a more unique aesthetic. Insight: Opt for firm tomatoes to keep their shape in the dish.
-
Fresh Basil: This isn’t just for decoration; a hint of freshness elevates the flavor profile of our dish. Tip: If you can’t find fresh basil, you can use arugula or spinach for added color.
-
Balsamic Glaze: A drizzle here and there can elevate these Mozza Eyes by adding a touch of sweetness that plays off the savory mozzarella. Note: Feel free to make your own by reducing balsamic vinegar over low heat!
Step-by-Step Instructions
Now that we have our ingredients ready, it’s time for the fun part—creating these spooky Mozza Eyes! Follow along with these simple steps:
-
Prep Your Ingredients: Rinse the mozzarella balls and cherry tomatoes under cool water, then pat them dry. Slice the cherry tomatoes in half if you want a more even balance between the mozzarella and the tomato.
Chef Tip: A paring knife is great for slicing tomatoes without squishing them!
-
Make the Eyes: For each eye, take one mozzarella ball and place it in the center of your serving platter. Then, take a sliced or whole black olive and push it into the center of the mozzarella ball. This will create that uncanny "pupil" dynamic!
Commentary: Don’t be afraid to mix and match; some eyes can be more expressive with half olives pointing in different directions.
-
Add the Cherry Tomato: Next, take a halved cherry tomato and place it right beside (or on top of) the mozzarella eye. This will mimic the surrounding tissue and enhance the spooky presentation.
Chef Hack: For a more grotesque look, try using slightly smaller cherry tomatoes!
-
Give Them Life: Once you’ve laid out your mozzarella eyes, finely chop some fresh basil and sprinkle it around the edges—this adds a pop of color amidst the array of white and red.
-
Drizzle with Balsamic Glaze: To finish off your spooktacular creation, drizzle some balsamic glaze over the mozzarella eyes and the basil. This adds a delightful tang that balances everything out.
Personal Note: I love to reserve some balsamic glaze for dipping—because who doesn’t love a good dressing?
Serving Suggestions
When it comes to serving your Mozza Eyes, presentation is key! Use a large, beautiful platter that allows your lively creations to shine. You can also set them alongside some crackers or toasted baguette slices for added crunch. Arrange the mozzarella eyes close together to create a cohesive eyeball effect, and perhaps place some extra cherry tomato halves, olives, or basil leaves around the serving tray for color.
Recipe Variations
Feeling adventurous? Here are a few creative twists to elevate your Mozza Eyes:
-
Spicy Version: Use jalapeño slices instead of olives for a fiery kick!
-
Caprese Style: Layer fresh mozzarella and cherry tomatoes on skewers with basil for a more substantial bite.
-
Gluten-Free Option: Serve these eyes with gluten-free crackers or cucumber slices for a refreshing crunch.
-
Vegan Alternative: Swap mozzarella for marinated tofu balls (they’ll soak up the flavors beautifully!).
-
Flavor Experimentalist: Try infusing your mozzarella with garlic or herbs before assembling for an extra flavor burst!
Chef’s Notes
This recipe has become a Halloween staple in my house, evolving from my childhood memories into a festive tradition. I often find myself experimenting with the presentation—sometimes I make an entire plate of “freaky” eyes, and other times I incorporate them into Halloween-themed charcuterie boards.
One of my favorite moments happened last Halloween when my son’s friends came over. As I served these Mozza Eyes, their ecstatic reactions—from squeals to laughter—cracked me up! It reminded me how food can transform a simple gathering into a cherished memory, full of flavor and fun.
FAQs and Troubleshooting
1. My mozzarella balls are oozing liquid, how do I fix this?
Occasionally, mozzarella can release some liquid. Just be sure to drain them well or pat them dry with a paper towel before using to minimize the mess.
2. Can I prepare these in advance?
Absolutely! You can assemble the Mozza Eyes a few hours ahead. However, I recommend waiting to drizzle the balsamic glaze until just before serving to maintain freshness.
3. What if I’m not a fan of olives?
No problem! You can leave them out entirely or use pickles, capers, or even small dollops of avocado for a unique twist.
4. How do I store leftovers?
Keep any leftovers in an airtight container in the refrigerator for up to 2 days. Just know that the texture may change a bit as time goes on.
Nutritional Info
While I recommend enjoying these Mozza Eyes in moderation as a delightful snack, here’s a rough estimate of what you might expect per serving (approx. 4 Mozza Eyes):
- Calories: 150
- Protein: 10g
- Carbohydrates: 6g
- Fat: 9g
- Sodium: 400mg
So there you have it—all the ingredients, insights, and tips needed to whip up your own Halloween Mozza Eyes! I hope this recipe sparks joy in your kitchen and becomes a favorite tradition for you, too. Happy cooking, and may your Halloween be filled with spooky fun and delicious treats!
Print
Halloween Mozza Eyes
- Total Time: 10 minutes
- Yield: 4 servings
- Diet: Vegetarian
Description
Adorable mozzarella bites resembling spooky eyes, perfect for Halloween gatherings.
Ingredients
- Bocconcini or ciliegine mozzarella balls
- Black olives
- Cherry tomatoes
- Fresh basil
- Balsamic glaze
Instructions
- Prep your ingredients: Rinse the mozzarella balls and cherry tomatoes under cool water, then pat them dry. Slice the cherry tomatoes in half if you want a more even balance between the mozzarella and the tomato.
- Make the eyes: For each eye, take one mozzarella ball and place it in the center of your serving platter. Then, take a sliced or whole black olive and push it into the center of the mozzarella ball.
- Add the cherry tomato: Next, take a halved cherry tomato and place it right beside (or on top of) the mozzarella eye.
- Give them life: Once you’ve laid out your mozzarella eyes, finely chop some fresh basil and sprinkle it around the edges.
- Drizzle with balsamic glaze: To finish off your spooktacular creation, drizzle some balsamic glaze over the mozzarella eyes and the basil.
Notes
Assemble a few hours ahead but wait to drizzle with balsamic glaze until just before serving for freshness.
- Prep Time: 10 minutes
- Cook Time: 0 minutes
- Category: Appetizer
- Method: No-Cook
- Cuisine: Italian
Nutrition
- Serving Size: 4 Mozza Eyes
- Calories: 150
- Sugar: 3g
- Sodium: 400mg
- Fat: 9g
- Saturated Fat: 3g
- Unsaturated Fat: 5g
- Trans Fat: 0g
- Carbohydrates: 6g
- Fiber: 1g
- Protein: 10g
- Cholesterol: 25mg
Keywords: Halloween, Mozza Eyes, Spooky Snack, Appetizer
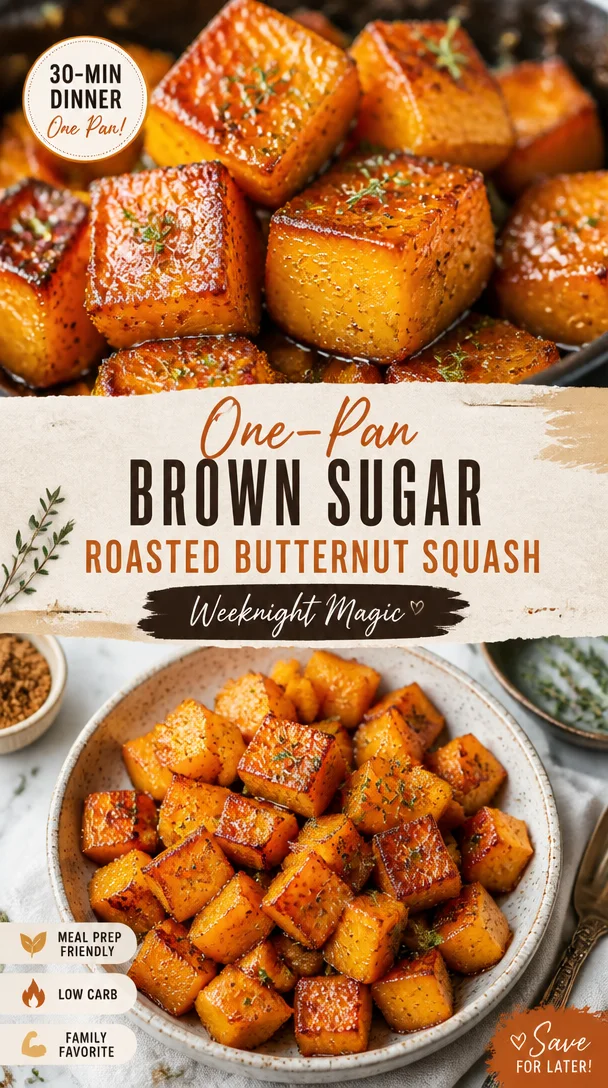
One-Pan Brown Sugar Roasted Butternut Squash (Weeknight)
Brown Sugar Roasted Butternut Squash: A Cozy Kitchen Delight
Welcome to my kitchen! Today, we’re diving into one of my all-time favorite comfort dishes: Brown Sugar Roasted Butternut Squash. As the weather starts cooling down and autumn whispers its arrival, there’s something incredibly special about cozying up with a warm, sweet, and savory dish that feels like a hug in a bowl. This roasted butternut squash recipe is rich, buttery, and kissed with the warm flavors of brown sugar and spices—perfect for adding a touch of fall magic to your dinner table or meal prep.
Imagine the sweet, caramelized aroma filling your kitchen as the squash roasts to golden perfection. Whether served as a side dish at Thanksgiving or enjoyed alongside a hearty grain bowl, this recipe is not only delicious but versatile, too! Plus, it’s so simple to make—if you can chop veggies and set a timer, you’re already halfway there!
So, grab your apron, and let’s embark on this cozy cooking adventure together. Not only will you end up with a delightful dish, but you’ll also find a space to reflect, connect, and enjoy the simple pleasures of cooking!
A Sweet Memory: The First Time I Roasted Squash
The first time I roasted butternut squash, I was a college student trying to impress my friends with my newfound cooking skills. I can still remember the day—it was chilly outside, and the leaves were swirling like dancers in the wind. Armed with my trusty old cookbook, I decided to tackle roasted butternut squash. As I chopped the vibrant orange flesh, the sweet aroma filled my small apartment kitchen, making my roommates flock in like moths to a flame.
With the oven doing its magic, I nervously paced around, waiting for those 30 minutes to pass. When the timer went off, I opened the oven door to find the squash beautifully caramelized, with that irresistible, sweet, and slightly nutty scent wafting through the air. It felt like I had unlocked a culinary treasure! That night, we all gathered around the table, laughter filling the air as we enjoyed our meal. That simple dish ignited my love for cooking and the joy of sharing homemade meals, a tradition I carry on through this blog.
Ingredients You’ll Need
Here’s the rundown of ingredients for this delicious Brown Sugar Roasted Butternut Squash. Each plays a crucial role in creating depth of flavor and that cozy vibe we crave.
-
Butternut Squash (1 medium): The star of the show! Sweet, nutty, and creamy when roasted. You can substitute with acorn or pumpkin if that’s what you have on hand.
-
Brown Sugar (¼ cup): This adds that irresistible caramel-like sweetness. If you want a healthier option, you can use coconut sugar or maple syrup in moderation.
-
Olive Oil (2 tablespoons): This helps in roasting the squash evenly. Feel free to swap it out with melted coconut oil for a different flavor profile.
-
Cinnamon (1 teaspoon): The warm spice perfectly complements the sweetness of the squash. Nutmeg or pumpkin pie spice also works beautifully here.
-
Salt (½ teaspoon): Just a pinch enhances all flavors. Remember, good quality sea salt is a chef’s best friend!
-
Black Pepper (¼ teaspoon): A little kick to offset the sweetness. Try smoked paprika for a more complex flavor twist.
-
Optional Fresh Herbs (½ teaspoon): Such as thyme or rosemary. They add an earthy freshness—perfect if you’re feeling adventurous!
Step-by-Step Instructions
Now, let’s get cooking! Follow these steps closely, and I promise you’ll end up with a stunning dish that will steal the show.
-
Prepare the Squash: Start by preheating your oven to 400°F (200°C). While it heats up, grab your butternut squash. Cutting it can be a bit challenging due to its tough skin. I recommend using a sturdy chef’s knife and being cautious—it’s easy to slip! Cut the squash in half lengthwise, scoop out the seeds with a spoon, and then chop it into bite-sized cubes. If you’re short on time, you can often find pre-cut butternut squash at the grocery store.
-
Mix the Ingredients: In a large mixing bowl, combine the cubed butternut squash, olive oil, brown sugar, cinnamon, salt, and black pepper. Smell that? It’s pure bliss! Toss everything together until the squash is well-coated, ensuring each piece is evenly dressed for roasting. Chef’s tip: Don’t be shy—use your hands for this! You’ll get a better sense of how much oil and sugar is clinging to your squash.
-
Roast, Baby, Roast: Spread the coated squash evenly on a baking sheet lined with parchment paper. This ensures easy cleanup and prevents sticking! Roast in the preheated oven for about 25-30 minutes. Halfway through, give it a good toss with a spatula so every piece gets a chance to caramelize beautifully. The goal is for your squash to be golden brown and fork-tender.
-
Cooling Down: Once ready, take the sheet out of the oven and allow the squash to cool for about 5 minutes. This will allow the flavors to settle in and avoid burning your tongue when you dive in!
-
Serving Time: Transfer the roasted squash to a beautiful serving bowl. Sprinkle with fresh herbs for that extra flair—trust me; your guests will be impressed!
Serving Suggestions
This Brown Sugar Roasted Butternut Squash is fantastic on its own, but let’s get creative! Serve it warm as a side dish alongside roasted chicken or grilled steak, or toss it over a bed of greens for a delicious salad. You can also mix it with quinoa or farro for a hearty, satisfying meal. It’s also incredible nestled into a grain bowl, topped with feta cheese, pumpkin seeds for crunch, and a drizzle of balsamic glaze.
Recipe Variations
Feeling adventurous? Here are a few creative twists to bring to this cozy dish:
-
Maple-Mustard Glaze: Replace the brown sugar with maple syrup and add a teaspoon of Dijon mustard for a sweet and tangy flavor.
-
Spicy Kick: Add a pinch of cayenne or red pepper flakes to the mixture for a delightful and warming heat.
-
Savory Spin: Swap cinnamon with cumin and toss in some chopped garlic. This will transform the squash into a fragrant, savory dish.
-
Herb Infusion: Mix in fresh sage or thyme before roasting to infuse your squash with fragrant herbal notes.
-
Sweet and Tart: Toss in some cranberries or pomegranate seeds after roasting for a burst of color and tartness that pairs perfectly with the sweetness.
Chef’s Notes
Over the years, this recipe has undergone a few transformations in my kitchen. Initially, it started with just olive oil and brown sugar, but as my palate has evolved, I’ve added spices and fresh herbs to enhance the flavors. I’ve even used this roasted squash as a filling in tacos—and let me tell you, it’s a game-changer!
And here’s a little kitchen story for you: One day, I accidentally spilled a whole jar of brown sugar into my bowl. Instead of panicking, I decided to embrace the extra sweetness and ended up with a deliciously caramelized flavor. So don’t be afraid of little accidents—sometimes they turn out to be happy accidents!
FAQs and Troubleshooting
1. My butternut squash didn’t caramelize—what went wrong?
This can happen if your oven isn’t hot enough or if the squash was packed too closely on the baking sheet. Ensure even spacing and that you preheat your oven thoroughly.
2. Can I make this dish ahead of time?
Absolutely! Roast the squash ahead of time and reheat it in the oven or microwave just before serving. It doesn’t lose its charm and flavors even as leftovers!
3. What’s the best way to cut a butternut squash?
Using a sharp knife and a cutting board with a damp towel underneath can help stabilize it. Start by cutting off both ends to create a flat surface for easier handling.
4. How can I store leftovers?
Store any leftover roasted squash in an airtight container in the fridge for up to 3-4 days. Reheat in the oven or the microwave, and enjoy!
Nutritional Information
(Per serving, approximately ½ cup)
- Calories: 150
- Protein: 2g
- Fat: 7g
- Carbohydrates: 25g
- Fiber: 3g
- Sugar: 10g
Isn’t it amazing how something so simple can evoke such joy and warmth? This Brown Sugar Roasted Butternut Squash is more than just a recipe; it’s a reminder to enjoy the little moments in the kitchen and the comfort of good food. Happy cooking, my friends, and may your kitchens always be filled with love and laughter!
Print
Brown Sugar Roasted Butternut Squash
- Total Time: 45 minutes
- Yield: 4 servings 1x
- Diet: Vegetarian
Description
A warm and sweet dish featuring roasted butternut squash caramelized with brown sugar and spices, perfect for fall!
Ingredients
- 1 medium Butternut Squash
- ¼ cup Brown Sugar
- 2 tablespoons Olive Oil
- 1 teaspoon Cinnamon
- ½ teaspoon Salt
- ¼ teaspoon Black Pepper
- ½ teaspoon Optional Fresh Herbs (thyme or rosemary)
Instructions
- Prepare the Squash: Preheat your oven to 400°F (200°C). Cut the squash in half lengthwise, scoop out the seeds, and chop into bite-sized cubes.
- Mix the Ingredients: In a large bowl, combine cubed squash, olive oil, brown sugar, cinnamon, salt, and black pepper. Toss until well-coated.
- Roast: Spread the coated squash on a lined baking sheet. Roast for 25-30 minutes, tossing halfway through, until golden and fork-tender.
- Cooling Down: Allow roasting squash to cool for about 5 minutes.
- Transfer to a serving bowl and sprinkle with fresh herbs if desired.
Notes
This dish can be made ahead of time and reheated before serving.
- Prep Time: 15 minutes
- Cook Time: 30 minutes
- Category: Side Dish
- Method: Roasting
- Cuisine: American
Nutrition
- Serving Size: ½ cup
- Calories: 150
- Sugar: 10g
- Sodium: 300mg
- Fat: 7g
- Saturated Fat: 1g
- Unsaturated Fat: 6g
- Trans Fat: 0g
- Carbohydrates: 25g
- Fiber: 3g
- Protein: 2g
- Cholesterol: 0mg
Keywords: butternut squash, roasted vegetables, fall recipes, vegetarian, cozy meals




