
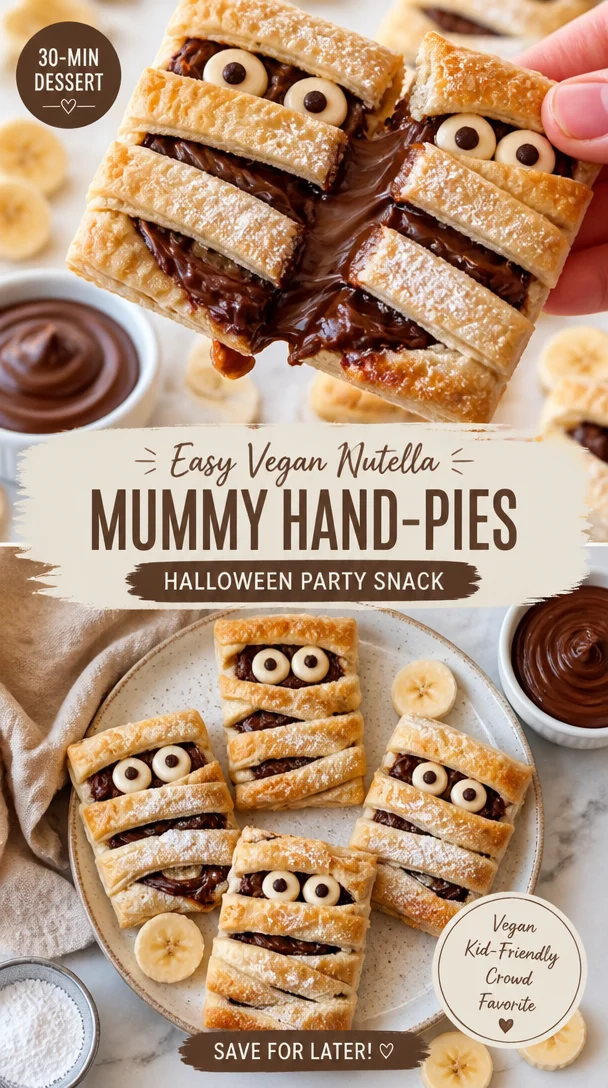
Easy Vegan Nutella Mummy Hand-Pies: Halloween Party Snack
Vegan Nutella Halloween Mummy Hand-Pies: Spooktacular Treats for Your Autumn Celebrations
Welcome to a magical corner of my kitchen, where the air is filled with the enchanting scents of chocolate and spice. If you’re anything like me, the joy of cooking isn’t just about making food; it’s about creating memories, sharing laughter, and bringing a bit of cozy warmth into the hearts of those we love. With Halloween right around the corner, what better way to celebrate than by whipping up a batch of Vegan Nutella Halloween Mummy Hand-Pies? Trust me, these delightful little pastries are sure to become a tradition that will fill your kitchen with giggles and sweet aromas!
Picture this: a crisp autumn afternoon, the leaves danced in the wind, and the sweet smell of baking wafted through my mom’s kitchen. Every year, as Halloween approached, we would set aside a weekend to create spooky treats. One of my absolute favorites was this super simple Nutella dessert pies! Except back then, we didn’t have a reliable store-bought vegan option, and we certainly didn’t know what “vegan” meant. Yet somehow, we always ended up with gooey chocolate filling enveloped in flaky, buttery pastry. Fast forward to today, and while my mom may not be in the kitchen with me, her spirit lives on in every recipe I craft. Today, I’m excited to share a plant-based twist on our childhood favorite that’s just as delicious and perfect for a Halloween gathering.
These hand-pies are not only adorable but also incredibly easy to make! Plus, they are filled with a rich, vegan Nutella equivalent – yep, it’s that luscious chocolate-hazelnut spread you’ve always loved – but made without any animal products. The flaky crust resembles the fun, ghostly bandages of a mummy, making them a wonderfully festive choice for your Halloween soirée. So grab your apron, and let’s dive into making these scrumptious treats that awaken your inner child while satisfying your sweet tooth!
A Whimsical Memory that Sparks Joy
One of my most cherished Halloween memories revolves around these hand-pies. I can still recall the gleeful chaos that unfolded in our kitchen. My siblings and I had concocted a plan to surprise our parents with a batch of spooky treats to celebrate the season. We donned our best Halloween costumes (because what’s Halloween without a little dress-up, right?), wielding spatulas and cookie cutters like our culinary swords.
There we were, flour dusting our faces, laughing uncontrollably as we tried to form little mummies from pieces of pie crust. Everything turned into a delightful mess of dough and Nutella – and the more mess we made, the more we laughed! Once they were baked, our “mummies” came to life, delightfully golden and flaky, and that first bite, revealed gooey chocolate heaven. Each hand-pie was a nostalgic nod to the magic and joy of family—just the kind of warmth you can always spread through food. It’s those kinds of memories that inspired me to recreate and share this vegan version. After all, food not only nourishes our bodies but also feeds our soul!
Ingredients
Now, let’s gather our ingredients! This recipe is straightforward and calls for items you may already have on hand. Here’s what you need to create these bewitching hand-pies:
-
Vegan Pie Crust
- What it is: This forms the flaky exterior of your hand-pies.
- Substitution tips: You can use store-bought vegan pie crust for quicker preparation. Just make sure to check the label!
-
Nutella (or Vegan Hazelnut Spread)
- What it is: The gooey, rich filling that makes these hand-pies irresistible.
- Substitution tips: If Nutella is not available, any other vegan hazelnut spread works beautifully or try making your own!
-
All-Purpose Flour
- What it is: A classic choice for the crust, lending structure and tenderness.
- Substitution tips: If you’re looking for a gluten-free option, you can substitute with a gluten-free all-purpose flour blend.
-
Confectioners’ Sugar
- What it is: This sweetens the pastry and creates a nice drizzle for the mummies.
- Substitution tips: If you’re avoiding sugar, you could use powdered monk fruit or coconut sugar.
-
Unsweetened Almond Milk (or any plant milk)
- What it is: This helps bind the pie crust and adds moisture.
- Substitution tips: Any non-dairy milk (like soy, oat, or coconut milk) works well here.
-
Salt
- What it is: A crucial flavor enhancer that brings all the elements together.
- Chef insight: Just a pinch can make all the difference!
-
Vanilla Extract
- What it is: Adds a lovely aroma and depth of flavor to both the crust and filling.
- Substitution tips: If you don’t have vanilla extract, almond extract is a great alternative.
Now that we have our ingredients ready, let’s get to the fun part: cooking!
Step-by-Step Instructions
-
Make the Dough:
In a large bowl, combine 2 cups of all-purpose flour, ½ teaspoon of salt, and 1 tablespoon of confectioners’ sugar. To bring the dough to life, add ½ cup of vegan butter (chilled and cubed) and use your fingers or a pastry cutter to mash the butter into the flour until it resembles coarse crumbs. This step is essential—it’s what gives your hand-pies that buttery, flaky texture we love! -
Add the Liquid:
Gradually pour in 4 to 6 tablespoons of almond milk and 1 teaspoon of vanilla extract, mixing until the dough just comes together. Don’t overmix—I promise, your hand-pies will thank you later! Once combined, wrap the dough in plastic wrap and refrigerate it for at least 30 minutes. This will allow the butter to firm up, ensuring a flakier crust. -
Preheat the Oven:
While the dough chills, preheat your oven to 375°F (190°C). This way, it’s ready to bake as soon as your hand-pies are assembled. -
Roll Out the Dough:
On a floured surface, roll out the dough to about ⅛ inch thick. Use a round cookie cutter (or any circular object) to cut out circles about 4 inches in diameter. Transfer them to a parchment-lined baking sheet. -
Fill the Mummies:
Place about a tablespoon of Nutella (or your favorite hazelnut spread) in the center of each round. Be sure to leave some space around the edges to seal the pies later. -
Seal the Pies:
To form the mummies, take a smaller circle of dough and cut it into thin strips (about ½ inch wide). Place a few strips across the filling to resemble a mummy’s wrappings. Press the edges of the bottom dough circle with a fork or pinch them to seal, ensuring nothing leaks out while baking. -
Brush with Almond Milk:
To help achieve that golden, mouthwatering finish, brush the top of your mummies with a little almond milk. This little chef hack makes a significant difference in creating that bakery-style sheen. -
Bake the Hand-Pies:
Pop those beauties into the preheated oven for 20-25 minutes, or until they are golden brown and puffed. Keep a close eye on them—they bake quickly and you want them to be perfectly golden! -
Cool and Decorate:
Once baked, allow the hand-pies to cool for at least 10 minutes. When you’re ready, create a quick glaze by mixing a couple of tablespoons of almond milk with confectioners’ sugar until you reach a drizzling consistency. Drizzle it over the cooled hand-pies to give them some adorable mummy eyes (you can use mini chocolate chips if you want them to look especially spooky!).
Serving Suggestions
These Vegan Nutella Halloween Mummy Hand-Pies are perfect for serving at a Halloween party, Halloween-themed brunch, or even as a fun after-school treat. Arrange them on a festive platter and add some spooky decorations, like small plastic spiders or Halloween-themed napkins. They also pair wonderfully with a cup of tea or coffee for those chilly fall evenings!
Recipe Variations
If you’re looking to switch things up and add a personal flair, here are a few fun twists to your mummies:
- Berry Mummies: Swap out the Nutella for your favorite berry jam or preserves for a delightful fruity surprise!
- Pumpkin Spice Fill: Try filling your hand-pies with a mix of pumpkin puree, vegan cream cheese, and pumpkin spice for an autumnal taste explosion.
- Peanut Butter Surprise: Change it up by using a vegan peanut butter spread for a nutty twist on the classic!
- Chocolate Chip Spillover: Add a handful of dairy-free chocolate chips to the Nutella for extra chocolaty goodness!
- Cinnamon Sugar Dust: Dust the hand-pies with cinnamon sugar post-baking for a sweet crunch.
Chef’s Notes
As with any recipe, feel free to have fun with it! Get creative with the filling, play with shapes (who says mummies can’t be ghosts on Halloween?), and don’t be afraid to let your personality shine through the kitchen chaos! I’ll often throw in whatever leftover candies or nuts I have lying around. The recipe has beautifully evolved from my childhood kitchen memories into a recipe that adapts to the seasons and my ever-changing cravings. Remember, the magic of cooking lies not in perfection but in the joyful experience of making something delicious!
FAQs and Troubleshooting
1. My dough is too crumbly; what did I do wrong?
A crumbly dough could be a sign that there wasn’t enough liquid added during mixing or the butter got too warm. Make sure your butter is chilled, and add a bit more almond milk if it feels too dry.
2. Why did my hand-pies leak filling while baking?
If the filling leaks, it might be that the pies weren’t sealed securely. Ensure that you press down firmly around the edges and check for any punctures in the crust.
3. Can I freeze the hand-pies?
Absolutely! Just bake them, then allow them to cool completely. Place them in airtight containers or freezer bags, and they’ll last up to three months in the freezer. Reheat them in the oven straight from frozen—you may need to add a few extra minutes to the baking time.
4. How do I store leftovers?
These are best eaten fresh, but you can store them in an airtight container at room temperature for 1-2 days. If you’ve made a large batch (because who could resist?), consider putting some in the fridge for a longer shelf life.
Nutritional Info
Calories: Approx. 150 per hand-pie
Fat: 7g
Carbohydrates: 20g
Protein: 2g
Vegan and nut-free options available based on ingredient choices.
So there you have it! A playful and heartfelt recipe to bring those warm Halloween vibes right into your kitchen. These Vegan Nutella Halloween Mummy Hand-Pies are more than just a delightful treat; they’re a celebration of memories, creativity, and, most importantly, good food! Happy baking!
Print
Vegan Nutella Halloween Mummy Hand-Pies
- Total Time: 40 minutes
- Yield: 12 hand-pies 1x
- Diet: Vegan
Description
Delightful vegan hand-pies filled with rich hazelnut spread, perfect for Halloween celebrations.
Ingredients
- 2 cups all-purpose flour
- ½ teaspoon salt
- 1 tablespoon confectioners’ sugar
- ½ cup vegan butter, chilled and cubed
- 4 to 6 tablespoons unsweetened almond milk (or any plant milk)
- 1 teaspoon vanilla extract
- Nutella (or vegan hazelnut spread)
- Mini chocolate chips (optional, for decoration)
Instructions
- Combine the flour, salt, and confectioners’ sugar in a large bowl.
- Add the vegan butter and mix until you get coarse crumbs.
- Pour in the almond milk and vanilla extract, mixing until the dough comes together.
- Wrap the dough in plastic wrap and refrigerate for at least 30 minutes.
- Preheat your oven to 375°F (190°C).
- Roll out the dough to about ⅛ inch thick and cut into 4-inch circles.
- Place one tablespoon of Nutella in the center of each round.
- Cut smaller circles into strips to form the mummy wrappings and seal the edges.
- Brush the top with almond milk for a golden finish.
- Bake for 20-25 minutes until golden brown.
- Allow to cool, then drizzle with a glaze made from almond milk and confectioners’ sugar.
Notes
These hand-pies can be customized with different fillings like berry jam or pumpkin puree. Perfect for any Halloween party!
- Prep Time: 15 minutes
- Cook Time: 25 minutes
- Category: Dessert
- Method: Baking
- Cuisine: Vegan
Nutrition
- Serving Size: 1 hand-pie
- Calories: 150
- Sugar: 5g
- Sodium: 200mg
- Fat: 7g
- Saturated Fat: 1g
- Unsaturated Fat: 5g
- Trans Fat: 0g
- Carbohydrates: 20g
- Fiber: 1g
- Protein: 2g
- Cholesterol: 0mg
Keywords: Vegan Halloween dessert, Nutella hand-pies, spooky treats, Halloween recipes
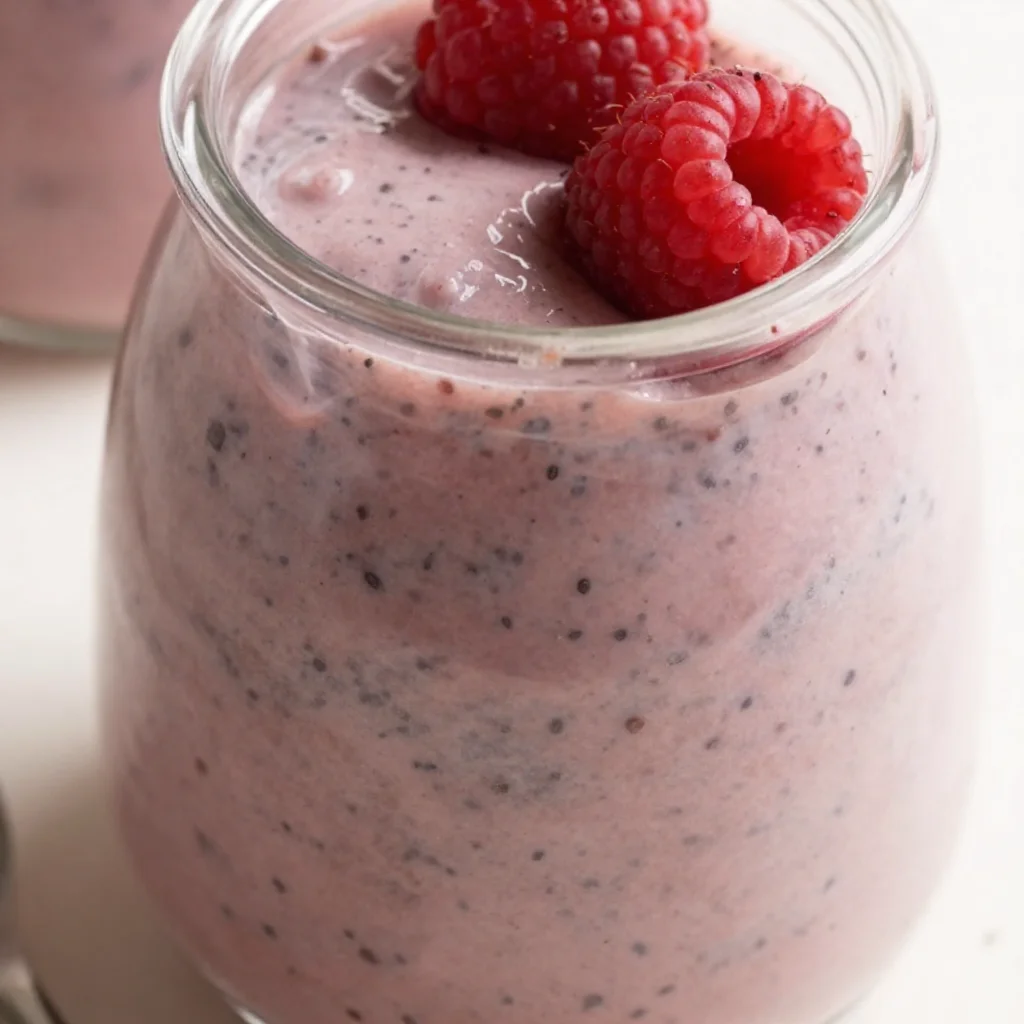
Ingredient Raspberry Chia Pudding: Quick, Creamy Breakfast
5 Ingredient Raspberry Chia Pudding: A Delightful, Fruity Adventure!
Welcome to my kitchen once again, fellow food lovers! Today, I’m thrilled to share with you one of my absolute favorite recipes that fits snugly into the realm of quick, healthy, and oh-so-delicious — Raspberry Chia Pudding! This vibrant treat is not only luscious and decadent but also incredibly easy to whip up. Perfect for breakfast, an afternoon snack, or even dessert, this pudding shines with its fruity freshness and creamy texture.
Now, I know what you might be thinking — “Chia pudding? Does it really taste good?” Oh yes, my friend! This dish is like a little sweet hug in a bowl. It’s bursting with the tartness of ripe raspberries, the nuttiness of chia seeds, and a lovely creaminess that makes it feel indulgent, even though it’s made with whole foods. Plus, with just five ingredients, you’ll be amazed at how simple it is to put together.
As a home cook, I love recipes that let me get creative while still being approachable. This chia pudding is all about experimenting with flavors while keeping the base super simple. So grab your apron, and let’s dive into this delightful and healthful recipe!
A Walk Down Memory Lane
Growing up, I spent countless weekends at my grandmother’s house, and every Saturday morning was special. The kitchen would fill with laughter and the aroma of a pot of tea boiling on the stove. Grandma’s kitchen was a treasure trove of memories, filled with whimsical jars full of dried fruits, nuts, and, yes — chia seeds! Though they weren’t as trendy back then, she used them in a variety of unique dishes.
One particular Saturday stands out in my mind: Grandma decided to put her spin on pudding, which wasn’t the traditional creamy version. I walked into the kitchen to find her mixing something in a bowl, and I could see tiny seeds dancing around in her mixture. “I’m making a special pudding, dear,” she said with a wink. The memory of that fluffy, fruity dessert inspired many of my kitchen adventures today. Every time I prepare chia pudding, I can’t help but feel her spirit guiding my hands. It’s a reminder that cooking isn’t just about food; it’s about family, tradition, and the love we share through our meals.
Ingredients
To make this 5 Ingredient Raspberry Chia Pudding, you will need:
-
Chia Seeds: These tiny powerhouses are rich in omega-3s, fiber, and protein. If you don’t have chia seeds on hand, you can replace them with flaxseeds, but the texture will differ, so keep that in mind.
-
Ripe Raspberries: Fresh or frozen, raspberries bring a tart, juicy brightness to the pudding. If raspberries aren’t available, feel free to swap them for strawberries, blueberries, or mangoes for a different fruity twist.
-
Milk (Dairy or Non-Dairy): Whether you opt for almond milk, coconut milk, or good old cow’s milk, this will help soak the chia seeds, creating that lovely pudding-like texture. Choose your favorite milk for a flavor that you love!
-
Honey or Maple Syrup: Striking the perfect balance of sweetness, the natural sugars in honey or maple syrup elevate the flavors. For a vegan option, stick with maple syrup. Feel free to adjust the sweetness to your taste!
-
Vanilla Extract: Just a splash adds a warm, aromatic depth to your pudding. If you want something more exotic, try a hint of almond extract for a nutty essence.
These five simple ingredients will transform into something that not only looks stunning but tastes even better. Trust me!
Step-by-Step Instructions
-
Combine the Base: In a mixing bowl, add 1 cup of your chosen milk and 1/4 cup of chia seeds. Stir well to ensure the seeds are evenly distributed. This is where the magic begins as it’s crucial to prevent clumping!
-
Add Sweetness and Flavor: Pour in 2 tablespoons of honey (or maple syrup) and 1 teaspoon of vanilla extract. Give it a good stir until everything is well blended. Sweeten to your liking—after all, no one likes a bland pudding!
-
Get Fruity: Now, fold in 1 cup of raspberries. If you’re using frozen raspberries, there’s no need to thaw them, but do gently crush them a bit to release their juices. This way, you’ll get those lovely raspberry swirls throughout the pudding!
-
Whisk It Up: Let’s channel some energy here! Use a whisk or fork to mix everything together thoroughly. You want to break up any clumps of chia seeds while also getting the raspberries and sweetener distributed throughout.
-
Chill Time: Cover your bowl with plastic wrap or transfer it to individual serving containers. Pop it in the fridge for at least 2-3 hours, or even better, overnight! This allows the chia seeds to absorb the liquid and swell, creating that wonderful pudding texture you’re dreaming of.
-
Serve and Enjoy: When you’re ready to dig in, give it a good stir, and if you like, top your chia pudding with extra fresh raspberries, a sprinkle of coconut, or a handful of granola for added texture.
A little chef hack: If you don’t have time to wait, you can enjoy this pudding after only an hour, but it will be thinner in consistency.
Serving Suggestions
To serve, grab your favorite bowls or mason jars to showcase the vibrant colors of the chia pudding! Layer the pudding in the glass and top with a few fresh raspberries, a drizzle of honey, or a sprinkle of nuts for some crunch. This not only makes it look gorgeous but also adds different textures. Invite your family to the kitchen table and serve it with a warm cup of tea or coffee for a delightful breakfast treat!
Recipe Variations
Here are a few fun variations to keep things exciting:
-
Tropical Twist: Swap out the raspberries for mango or pineapple. Add a pinch of coconut flakes on top for a beachy vibe!
-
Chocolate Lovers Unite: Mix in a tablespoon of cocoa powder to the milk before adding the chia seeds for a rich, chocolatey pudding. Top with fresh strawberries for added sweetness.
-
Nutty Delight: Stir in a tablespoon of almond or peanut butter for a creamy, nutty flavor. This adds healthy fats and protein!
-
Berry Medley: Mix it up with whatever berries you have—blueberries, strawberries, or blackberries give you a boost of antioxidants!
-
Cinnamon Spice: Add a sprinkle of cinnamon before serving for a warm, comforting flavor that pairs beautifully with the sweetness of the pudding.
Chef’s Notes
This recipe for Raspberry Chia Pudding has evolved quite a bit since I first started making it. I’ll never forget the first time I served it at a brunch with friends — it was a hit! Now, I like to jazz it up depending on the season. Summer calls for fresh stone fruits, while in the winter, I’ll bring in spices and maybe some roasted nuts. The flexibility of chia pudding makes it my secret weapon for quick, wholesome meals, and I hope it becomes one of your go-to recipes, too!
Oh! And here’s a funny kitchen story: One time, I mistakenly used salt instead of sugar while making my chia pudding. Let’s just say, that was a memorable moment, but hey, we all make mistakes! The important thing is to keep laughing and tasting, and you will always find a way to make things work.
FAQs and Troubleshooting
-
Why did my chia pudding turn out runny?
If your pudding didn’t thicken up, it might be that you didn’t use enough chia seeds or that it needs more time in the fridge. Let it set longer to reach that pudding-like consistency! -
How long can I store chia pudding?
You can keep your chia pudding in the fridge for up to 5 days, so it can be a great meal prep option! Just remember to give it a stir before serving. -
What if I can’t find raspberries?
No worries! You can substitute with any fruit you prefer. Frozen berries work perfectly, and even a fruit purée will do wonders — just remember to adjust the sweetness! -
Can I make the pudding vegan?
Absolutely! Just use plant-based milk and sweeten with maple syrup instead of honey. It’s delicious, and no one will notice the difference!
Nutritional Info
If you’re curious about the nutrition in this yummy pudding:
- Calories: Approximately 150 calories per serving
- Protein: 5g
- Fiber: 10g
- Fat: 4g
So there you have it — a wholesome, satisfying treat that’s as easy as it is delicious! Enjoy every spoonful, and don’t forget to get a little creative in your kitchen. Happy cooking, and until next time, stay cozy!
Print
5 Ingredient Raspberry Chia Pudding
- Total Time: 180 minutes
- Yield: 4 servings 1x
- Diet: Vegan
Description
A quick, healthy, and delightful chia pudding bursting with the fresh tartness of raspberries and the creaminess of chia seeds.
Ingredients
- 1 cup Milk (Dairy or Non-Dairy)
- 1/4 cup Chia Seeds
- 1 cup Ripe Raspberries
- 2 tablespoons Honey or Maple Syrup
- 1 teaspoon Vanilla Extract
Instructions
- Combine the Base: In a mixing bowl, add 1 cup of your chosen milk and 1/4 cup of chia seeds. Stir well to ensure the seeds are evenly distributed.
- Add Sweetness and Flavor: Pour in 2 tablespoons of honey (or maple syrup) and 1 teaspoon of vanilla extract. Stir until well blended.
- Get Fruity: Fold in 1 cup of raspberries, gently crushing them if using frozen.
- Whisk It Up: Mix thoroughly to break up clumps of chia seeds and distribute the raspberries.
- Chill Time: Cover and refrigerate for at least 2-3 hours, or overnight.
- Serve and Enjoy: Stir before serving and top with extra raspberries, coconut, or granola if desired.
Notes
For a quicker serving, allow to chill for at least one hour, though the consistency will be thinner.
- Prep Time: 10 minutes
- Cook Time: 0 minutes
- Category: Dessert
- Method: Refrigeration
- Cuisine: Healthy
Nutrition
- Serving Size: 1 serving
- Calories: 150
- Sugar: 8g
- Sodium: 30mg
- Fat: 4g
- Saturated Fat: 1g
- Unsaturated Fat: 3g
- Trans Fat: 0g
- Carbohydrates: 28g
- Fiber: 10g
- Protein: 5g
- Cholesterol: 0mg
Keywords: chia pudding, raspberry, healthy dessert, vegan, easy recipe
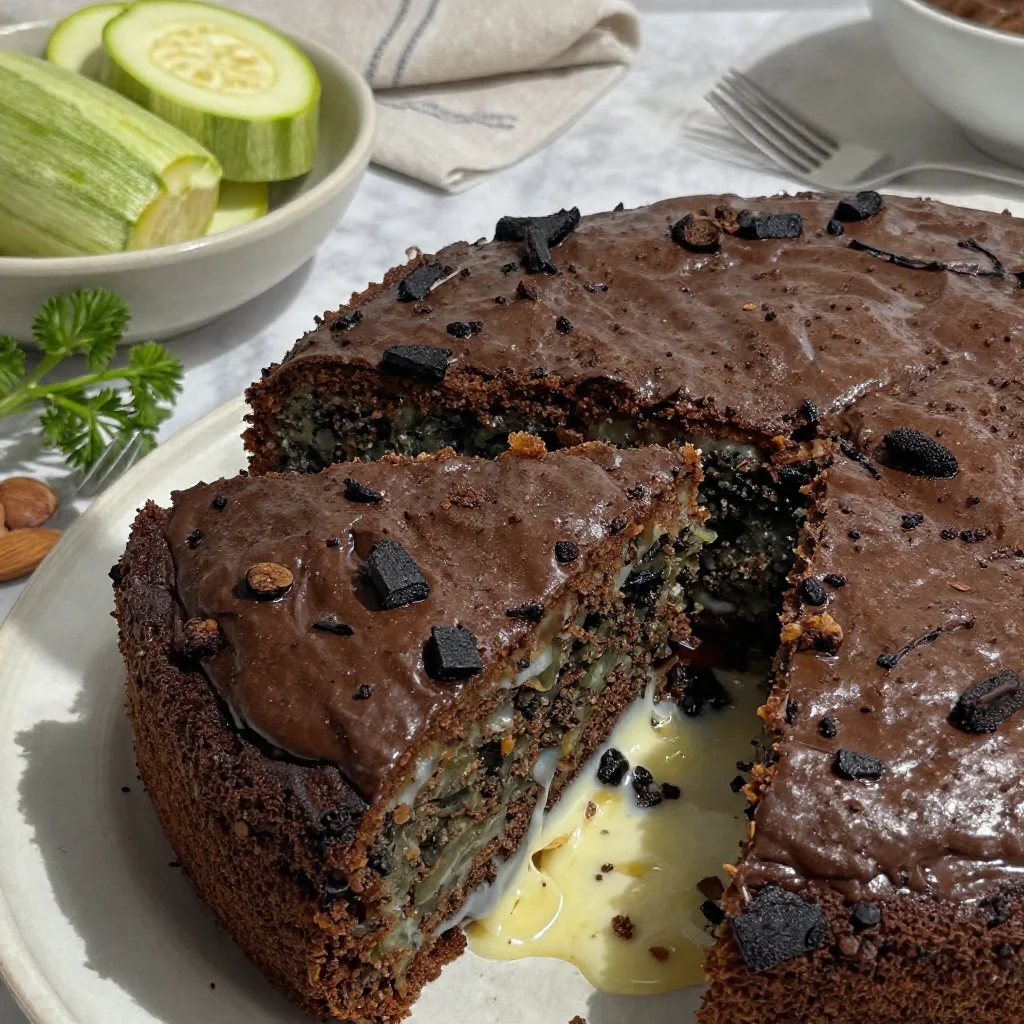
One-Bowl Vegan Chocolate Zucchini Cake in 30 Minutes
Easy Vegan Chocolate Zucchini Cake: A Cozy Delight
Welcome to my kitchen, friends! Today, I’m thrilled to share a recipe that’s not just delicious, but also filled with nostalgia and a touch of chocolatey magic. Picture this: warm, cozy afternoons spent in the kitchen, the aroma of chocolate wafting through the air as I whip up something special. That’s where our star of the day comes in—this Easy Vegan Chocolate Zucchini Cake!
Now, if you think that zucchini doesn’t belong in cake, I invite you to pull up a chair, grab a cup of your favorite brew, and let me take you on this tasty journey. This cake is moist, fudgy, and utterly indulgent—everything you could want in a dessert, with a healthier twist. You see, it’s not just a chocolate cake; it’s a delightful way to sneak some veggies into your life! Plus, it’s plant-based, so everyone can enjoy it, no matter their dietary preferences.
Let me tell you a little secret: I wasn’t always the confident baker you see before you. There was a time when I’d cringe at the thought of using veggies in dessert—especially in something as rich as chocolate cake! But after a few kitchen experiments, I discovered that zucchini adds the perfect texture and moisture. Trust me, no one will ever guess there’s a veggie inside. It’s like a fluffy little cloud of happiness on a plate.
So, are you ready to dive into this scrumptious cake recipe? Grab your apron, and let’s bake a little magic together!
A Sweet Slice of Nostalgia
Let me take you back to one of my favorite childhood memories—my grandmother’s kitchen, filled with the smell of freshly baked treats. Every summer when the zucchini overflowed from her garden, she would whip up her famous chocolate zucchini bread. The moment those flavors mixed in the bowl, I could hardly contain my excitement! After it was baked to perfection, we’d slice it warm, spreading a generous dab of vegan butter on top.
Those sunny afternoons spent licking the bowl and sneaking bites of warm cake from the oven are etched in my heart forever. When I started my own kitchen adventures, I knew I had to recreate that magic. Thus, this Easy Vegan Chocolate Zucchini Cake was born! This recipe is my homage to those carefree summer days, and I can’t wait for you to experience a slice of that memory.
Ingredients: What You’ll Need
Here’s a simple list of ingredients to get you started on this chocolatey journey. Each one plays a crucial role in making the cake delicious and moist:
-
1 ½ cups grated zucchini: This adds moisture to the cake without an overpowering vegetable taste. You can substitute with grated carrots or even applesauce for a different flavor profile.
-
1 cup whole wheat flour: Bringing a nutty flavor and added nutrients. If you prefer gluten-free options, almond flour works beautifully here.
-
1 cup raw cacao powder: This is what gives our cake that rich chocolate flavor. In a pinch, unsweetened cocoa powder will do just fine.
-
1 cup coconut sugar: A natural sweetener that keeps the cake moist. Feel free to swap for brown sugar or even maple syrup; just reduce your liquids by a bit.
-
1 teaspoon baking soda: This helps the cake rise and achieve that fluffy texture. Baking powder can be used too, but double the amount.
-
½ teaspoon salt: Balances the sweetness and enhances the chocolate flavor.
-
1 teaspoon vanilla extract: A must for that warm, inviting flavor! You could also try almond extract for a new twist.
-
½ cup plant-based milk: Almond, soy, or oat milk all work here. Choose your favorite or whatever you have on hand.
-
¼ cup vegetable oil: This keeps the cake moist and adds richness. If you prefer, applesauce can also be used for a lighter version.
Make sure to modify these ingredients based on your taste preferences and what you have available. There are no hard rules in the kitchen—just delicious outcomes!
Step-by-Step Instructions: Let’s Bake!
-
Preheat Your Oven: Start by preheating your oven to 350°F (175°C). While that’s warming up, it gives you time to prepare your ingredients and create an enticing baking atmosphere.
-
Grate Your Zucchini: Wash your zucchini and grate it using a box grater or a food processor. There’s no need to peel it! The skin contains nutrients and color. Place the grated zucchini in a clean kitchen towel and squeeze out excess moisture.
-
Mix Dry Ingredients: In a large mixing bowl, whisk together the flour, cacao powder, baking soda, and salt until they’re well combined. This step ensures that your leavening agent is evenly distributed, making for a perfectly risen cake.
-
Combine Wet Ingredients: In another bowl, mix the grated zucchini, coconut sugar, plant-based milk, oil, and vanilla extract. Stir until it’s all combined. The mixture should look creamy and inviting!
-
Merge the Mixtures: Pour the wet ingredients into the bowl with the dry ingredients. Using a spatula, fold the mixture gently until just combined. Don’t overmix; some lumps are perfectly fine! This helps keep the cake nice and fluffy.
-
Prepare Your Cake Pan: Grease a 9-inch round cake pan with vegetable oil or line it with parchment paper—either works like a charm! This will ensure your cake releases easily.
-
Pour and Shake: Pour your batter into the prepared cake pan. Give it a little shake to level the top. It’s okay if it isn’t perfect—baking is like life; a little imperfect can add character!
-
Bake Time: Place the pan in the preheated oven and bake for 30-35 minutes. Keep an eye on it! The cake is done when a toothpick inserted into the center comes out clean or with a few crumbs attached.
-
Cool Down: Once baked, take it out and let it cool in the pan for about 10 minutes. Then, remove it from the pan and let it cool on a wire rack. Your patience will be rewarded as the aromas fill the air!
-
Frost or Enjoy Neat: You can enjoy this cake as is, or you can frost it with your favorite vegan chocolate frosting or a simple dusting of powdered sugar.
Serving Suggestions
Now that your Easy Vegan Chocolate Zucchini Cake is baked to perfection, how about we dress it up a little? Slice the cake into generous wedges and serve it on a beautiful platter. For a delightful presentation, add some fresh berries on the side or a scoop of vegan vanilla ice cream. Drizzle with a little chocolate sauce if you’re feeling indulgent!
Recipe Variations: Get Creative!
Feeling adventurous? Here are a few fun twists to switch things up with this recipe:
- Chocolate Chip Zucchini Cake: Fold in a cup of vegan chocolate chips to amplify that chocolatey goodness.
- Nutty Header: Add chopped walnuts or pecans for a delightful crunch.
- Spice It Up: A teaspoon of cinnamon or pumpkin pie spice can elevate the flavor profile, giving that cozy fall feel.
- Fruity Zing: Toss in some grated orange zest for a refreshing citrus aroma.
- Gluten-Free Delight: Swap whole wheat flour for a gluten-free blend, and enjoy just as much!
Chef’s Notes
Baking this chocolate zucchini cake has truly evolved over the years for me. Initially, I was skeptical about adding veggies to a dessert. However, with a few successful trials, I’ve come to embrace that extra moisture and nutrition that zucchini offers.
Once, I accidentally added way too much coconut sugar and ended up with a cake that was practically dessert-licious—it became a household favorite! I suggest taking risks; the kitchen is your playground.
And remember, while baking is an art, it’s also a science. Feel free to play around with ingredients and make this recipe your own. Just don’t forget to have fun along the way!
FAQs and Troubleshooting
1. Can I really taste the zucchini?
Nope! The zucchini literally melts into the cake, providing moisture without any veggie flavor. It’s like a delightful surprise in each bite!
2. What if my cake doesn’t rise?
If your cake didn’t rise well, double-check that you used fresh baking soda. Old leavening agents can lose their potency and affect your cake’s lift.
3. Can I store this cake?
Absolutely! Store it in an airtight container at room temperature for up to 3 days. For longer freshness, refrigerate for up to a week. Just warm it slightly before serving for that freshly-baked vibe!
4. How can I make this cake sweeter?
If you prefer a sweeter cake, you can increase the coconut sugar to 1 ¼ cups. Just make sure to balance it out with the dry ingredients accordingly.
Nutritional Info (if applicable)
- Serving Size: 1 slice (1/8 of the cake)
- Calories: Approximately 200
- Protein: 3g
- Carbohydrates: 28g
- Fat: 8g
- Fiber: 2g
And there you have it! A cozy, inviting recipe for Easy Vegan Chocolate Zucchini Cake that’s perfect for any occasion (or just because you deserve a treat!). I hope this meal brings a little joy to your kitchen as it has to mine. Happy baking, my friends! 🍫💚
Print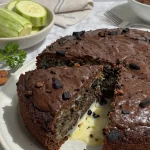
Easy Vegan Chocolate Zucchini Cake
- Total Time: 50 minutes
- Yield: 8 servings 1x
- Diet: Vegan
Description
A moist and fudgy vegan chocolate cake made with grated zucchini for added moisture and a healthier twist.
Ingredients
- 1 ½ cups grated zucchini
- 1 cup whole wheat flour
- 1 cup raw cacao powder
- 1 cup coconut sugar
- 1 teaspoon baking soda
- ½ teaspoon salt
- 1 teaspoon vanilla extract
- ½ cup plant-based milk
- ¼ cup vegetable oil
Instructions
- Preheat your oven to 350°F (175°C).
- Grate your zucchini and squeeze out excess moisture.
- Mix dry ingredients: flour, cacao powder, baking soda, and salt.
- Combine wet ingredients: zucchini, coconut sugar, plant-based milk, oil, and vanilla extract.
- Merge the wet and dry ingredients until just combined.
- Prepare a 9-inch round cake pan by greasing or lining it.
- Pour the batter into the prepared pan and level the top.
- Bake for 30-35 minutes or until a toothpick comes out clean.
- Cool in the pan for 10 minutes, then transfer to a wire rack.
- Frost or enjoy the cake neat.
Notes
For added flavor variations, consider folding in chocolate chips or nuts, or adding spices like cinnamon.
- Prep Time: 15 minutes
- Cook Time: 35 minutes
- Category: Dessert
- Method: Baking
- Cuisine: Vegan
Nutrition
- Serving Size: 1 serving
- Calories: 200
- Sugar: 12g
- Sodium: 300mg
- Fat: 8g
- Saturated Fat: 2g
- Unsaturated Fat: 6g
- Trans Fat: 0g
- Carbohydrates: 28g
- Fiber: 2g
- Protein: 3g
- Cholesterol: 0mg
Keywords: vegan cake, chocolate cake, zucchini cake, healthy dessert, plant-based




