
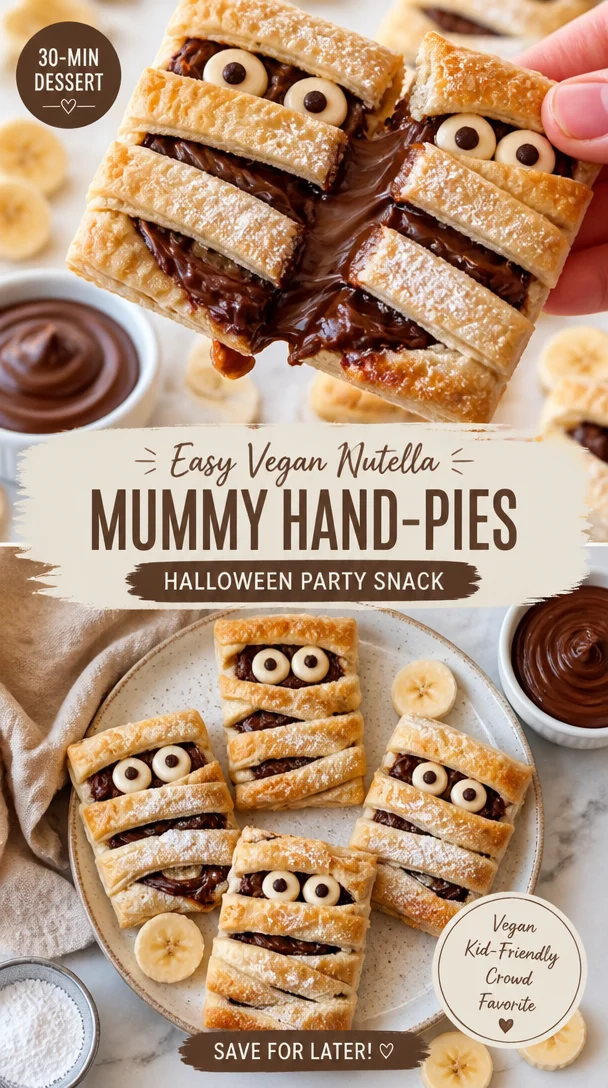
Easy Vegan Nutella Mummy Hand-Pies: Halloween Party Snack
Vegan Nutella Halloween Mummy Hand-Pies: Spooktacular Treats for Your Autumn Celebrations
Welcome to a magical corner of my kitchen, where the air is filled with the enchanting scents of chocolate and spice. If you’re anything like me, the joy of cooking isn’t just about making food; it’s about creating memories, sharing laughter, and bringing a bit of cozy warmth into the hearts of those we love. With Halloween right around the corner, what better way to celebrate than by whipping up a batch of Vegan Nutella Halloween Mummy Hand-Pies? Trust me, these delightful little pastries are sure to become a tradition that will fill your kitchen with giggles and sweet aromas!
Picture this: a crisp autumn afternoon, the leaves danced in the wind, and the sweet smell of baking wafted through my mom’s kitchen. Every year, as Halloween approached, we would set aside a weekend to create spooky treats. One of my absolute favorites was this super simple Nutella dessert pies! Except back then, we didn’t have a reliable store-bought vegan option, and we certainly didn’t know what “vegan” meant. Yet somehow, we always ended up with gooey chocolate filling enveloped in flaky, buttery pastry. Fast forward to today, and while my mom may not be in the kitchen with me, her spirit lives on in every recipe I craft. Today, I’m excited to share a plant-based twist on our childhood favorite that’s just as delicious and perfect for a Halloween gathering.
These hand-pies are not only adorable but also incredibly easy to make! Plus, they are filled with a rich, vegan Nutella equivalent – yep, it’s that luscious chocolate-hazelnut spread you’ve always loved – but made without any animal products. The flaky crust resembles the fun, ghostly bandages of a mummy, making them a wonderfully festive choice for your Halloween soirée. So grab your apron, and let’s dive into making these scrumptious treats that awaken your inner child while satisfying your sweet tooth!
A Whimsical Memory that Sparks Joy
One of my most cherished Halloween memories revolves around these hand-pies. I can still recall the gleeful chaos that unfolded in our kitchen. My siblings and I had concocted a plan to surprise our parents with a batch of spooky treats to celebrate the season. We donned our best Halloween costumes (because what’s Halloween without a little dress-up, right?), wielding spatulas and cookie cutters like our culinary swords.
There we were, flour dusting our faces, laughing uncontrollably as we tried to form little mummies from pieces of pie crust. Everything turned into a delightful mess of dough and Nutella – and the more mess we made, the more we laughed! Once they were baked, our “mummies” came to life, delightfully golden and flaky, and that first bite, revealed gooey chocolate heaven. Each hand-pie was a nostalgic nod to the magic and joy of family—just the kind of warmth you can always spread through food. It’s those kinds of memories that inspired me to recreate and share this vegan version. After all, food not only nourishes our bodies but also feeds our soul!
Ingredients
Now, let’s gather our ingredients! This recipe is straightforward and calls for items you may already have on hand. Here’s what you need to create these bewitching hand-pies:
-
Vegan Pie Crust
- What it is: This forms the flaky exterior of your hand-pies.
- Substitution tips: You can use store-bought vegan pie crust for quicker preparation. Just make sure to check the label!
-
Nutella (or Vegan Hazelnut Spread)
- What it is: The gooey, rich filling that makes these hand-pies irresistible.
- Substitution tips: If Nutella is not available, any other vegan hazelnut spread works beautifully or try making your own!
-
All-Purpose Flour
- What it is: A classic choice for the crust, lending structure and tenderness.
- Substitution tips: If you’re looking for a gluten-free option, you can substitute with a gluten-free all-purpose flour blend.
-
Confectioners’ Sugar
- What it is: This sweetens the pastry and creates a nice drizzle for the mummies.
- Substitution tips: If you’re avoiding sugar, you could use powdered monk fruit or coconut sugar.
-
Unsweetened Almond Milk (or any plant milk)
- What it is: This helps bind the pie crust and adds moisture.
- Substitution tips: Any non-dairy milk (like soy, oat, or coconut milk) works well here.
-
Salt
- What it is: A crucial flavor enhancer that brings all the elements together.
- Chef insight: Just a pinch can make all the difference!
-
Vanilla Extract
- What it is: Adds a lovely aroma and depth of flavor to both the crust and filling.
- Substitution tips: If you don’t have vanilla extract, almond extract is a great alternative.
Now that we have our ingredients ready, let’s get to the fun part: cooking!
Step-by-Step Instructions
-
Make the Dough:
In a large bowl, combine 2 cups of all-purpose flour, ½ teaspoon of salt, and 1 tablespoon of confectioners’ sugar. To bring the dough to life, add ½ cup of vegan butter (chilled and cubed) and use your fingers or a pastry cutter to mash the butter into the flour until it resembles coarse crumbs. This step is essential—it’s what gives your hand-pies that buttery, flaky texture we love! -
Add the Liquid:
Gradually pour in 4 to 6 tablespoons of almond milk and 1 teaspoon of vanilla extract, mixing until the dough just comes together. Don’t overmix—I promise, your hand-pies will thank you later! Once combined, wrap the dough in plastic wrap and refrigerate it for at least 30 minutes. This will allow the butter to firm up, ensuring a flakier crust. -
Preheat the Oven:
While the dough chills, preheat your oven to 375°F (190°C). This way, it’s ready to bake as soon as your hand-pies are assembled. -
Roll Out the Dough:
On a floured surface, roll out the dough to about ⅛ inch thick. Use a round cookie cutter (or any circular object) to cut out circles about 4 inches in diameter. Transfer them to a parchment-lined baking sheet. -
Fill the Mummies:
Place about a tablespoon of Nutella (or your favorite hazelnut spread) in the center of each round. Be sure to leave some space around the edges to seal the pies later. -
Seal the Pies:
To form the mummies, take a smaller circle of dough and cut it into thin strips (about ½ inch wide). Place a few strips across the filling to resemble a mummy’s wrappings. Press the edges of the bottom dough circle with a fork or pinch them to seal, ensuring nothing leaks out while baking. -
Brush with Almond Milk:
To help achieve that golden, mouthwatering finish, brush the top of your mummies with a little almond milk. This little chef hack makes a significant difference in creating that bakery-style sheen. -
Bake the Hand-Pies:
Pop those beauties into the preheated oven for 20-25 minutes, or until they are golden brown and puffed. Keep a close eye on them—they bake quickly and you want them to be perfectly golden! -
Cool and Decorate:
Once baked, allow the hand-pies to cool for at least 10 minutes. When you’re ready, create a quick glaze by mixing a couple of tablespoons of almond milk with confectioners’ sugar until you reach a drizzling consistency. Drizzle it over the cooled hand-pies to give them some adorable mummy eyes (you can use mini chocolate chips if you want them to look especially spooky!).
Serving Suggestions
These Vegan Nutella Halloween Mummy Hand-Pies are perfect for serving at a Halloween party, Halloween-themed brunch, or even as a fun after-school treat. Arrange them on a festive platter and add some spooky decorations, like small plastic spiders or Halloween-themed napkins. They also pair wonderfully with a cup of tea or coffee for those chilly fall evenings!
Recipe Variations
If you’re looking to switch things up and add a personal flair, here are a few fun twists to your mummies:
- Berry Mummies: Swap out the Nutella for your favorite berry jam or preserves for a delightful fruity surprise!
- Pumpkin Spice Fill: Try filling your hand-pies with a mix of pumpkin puree, vegan cream cheese, and pumpkin spice for an autumnal taste explosion.
- Peanut Butter Surprise: Change it up by using a vegan peanut butter spread for a nutty twist on the classic!
- Chocolate Chip Spillover: Add a handful of dairy-free chocolate chips to the Nutella for extra chocolaty goodness!
- Cinnamon Sugar Dust: Dust the hand-pies with cinnamon sugar post-baking for a sweet crunch.
Chef’s Notes
As with any recipe, feel free to have fun with it! Get creative with the filling, play with shapes (who says mummies can’t be ghosts on Halloween?), and don’t be afraid to let your personality shine through the kitchen chaos! I’ll often throw in whatever leftover candies or nuts I have lying around. The recipe has beautifully evolved from my childhood kitchen memories into a recipe that adapts to the seasons and my ever-changing cravings. Remember, the magic of cooking lies not in perfection but in the joyful experience of making something delicious!
FAQs and Troubleshooting
1. My dough is too crumbly; what did I do wrong?
A crumbly dough could be a sign that there wasn’t enough liquid added during mixing or the butter got too warm. Make sure your butter is chilled, and add a bit more almond milk if it feels too dry.
2. Why did my hand-pies leak filling while baking?
If the filling leaks, it might be that the pies weren’t sealed securely. Ensure that you press down firmly around the edges and check for any punctures in the crust.
3. Can I freeze the hand-pies?
Absolutely! Just bake them, then allow them to cool completely. Place them in airtight containers or freezer bags, and they’ll last up to three months in the freezer. Reheat them in the oven straight from frozen—you may need to add a few extra minutes to the baking time.
4. How do I store leftovers?
These are best eaten fresh, but you can store them in an airtight container at room temperature for 1-2 days. If you’ve made a large batch (because who could resist?), consider putting some in the fridge for a longer shelf life.
Nutritional Info
Calories: Approx. 150 per hand-pie
Fat: 7g
Carbohydrates: 20g
Protein: 2g
Vegan and nut-free options available based on ingredient choices.
So there you have it! A playful and heartfelt recipe to bring those warm Halloween vibes right into your kitchen. These Vegan Nutella Halloween Mummy Hand-Pies are more than just a delightful treat; they’re a celebration of memories, creativity, and, most importantly, good food! Happy baking!
Print
Vegan Nutella Halloween Mummy Hand-Pies
- Total Time: 40 minutes
- Yield: 12 hand-pies 1x
- Diet: Vegan
Description
Delightful vegan hand-pies filled with rich hazelnut spread, perfect for Halloween celebrations.
Ingredients
- 2 cups all-purpose flour
- ½ teaspoon salt
- 1 tablespoon confectioners’ sugar
- ½ cup vegan butter, chilled and cubed
- 4 to 6 tablespoons unsweetened almond milk (or any plant milk)
- 1 teaspoon vanilla extract
- Nutella (or vegan hazelnut spread)
- Mini chocolate chips (optional, for decoration)
Instructions
- Combine the flour, salt, and confectioners’ sugar in a large bowl.
- Add the vegan butter and mix until you get coarse crumbs.
- Pour in the almond milk and vanilla extract, mixing until the dough comes together.
- Wrap the dough in plastic wrap and refrigerate for at least 30 minutes.
- Preheat your oven to 375°F (190°C).
- Roll out the dough to about ⅛ inch thick and cut into 4-inch circles.
- Place one tablespoon of Nutella in the center of each round.
- Cut smaller circles into strips to form the mummy wrappings and seal the edges.
- Brush the top with almond milk for a golden finish.
- Bake for 20-25 minutes until golden brown.
- Allow to cool, then drizzle with a glaze made from almond milk and confectioners’ sugar.
Notes
These hand-pies can be customized with different fillings like berry jam or pumpkin puree. Perfect for any Halloween party!
- Prep Time: 15 minutes
- Cook Time: 25 minutes
- Category: Dessert
- Method: Baking
- Cuisine: Vegan
Nutrition
- Serving Size: 1 hand-pie
- Calories: 150
- Sugar: 5g
- Sodium: 200mg
- Fat: 7g
- Saturated Fat: 1g
- Unsaturated Fat: 5g
- Trans Fat: 0g
- Carbohydrates: 20g
- Fiber: 1g
- Protein: 2g
- Cholesterol: 0mg
Keywords: Vegan Halloween dessert, Nutella hand-pies, spooky treats, Halloween recipes
Cowboy Caviar
Cowboy Caviar: The Ultimate Celebration of Flavor and Community
Welcome to my kitchen! If you’ve landed here, you’re probably searching for a fun and flavorful recipe that’ll bring smiles to your family and friends. Well, you’re in for a treat because today, we’re making one of my all-time favorites: Cowboy Caviar! This vibrant, colorful dish isn’t just a feast for the eyes—it’s a harmony of flavors that you can enjoy as a dip, a salad, or even as a filling for tacos.
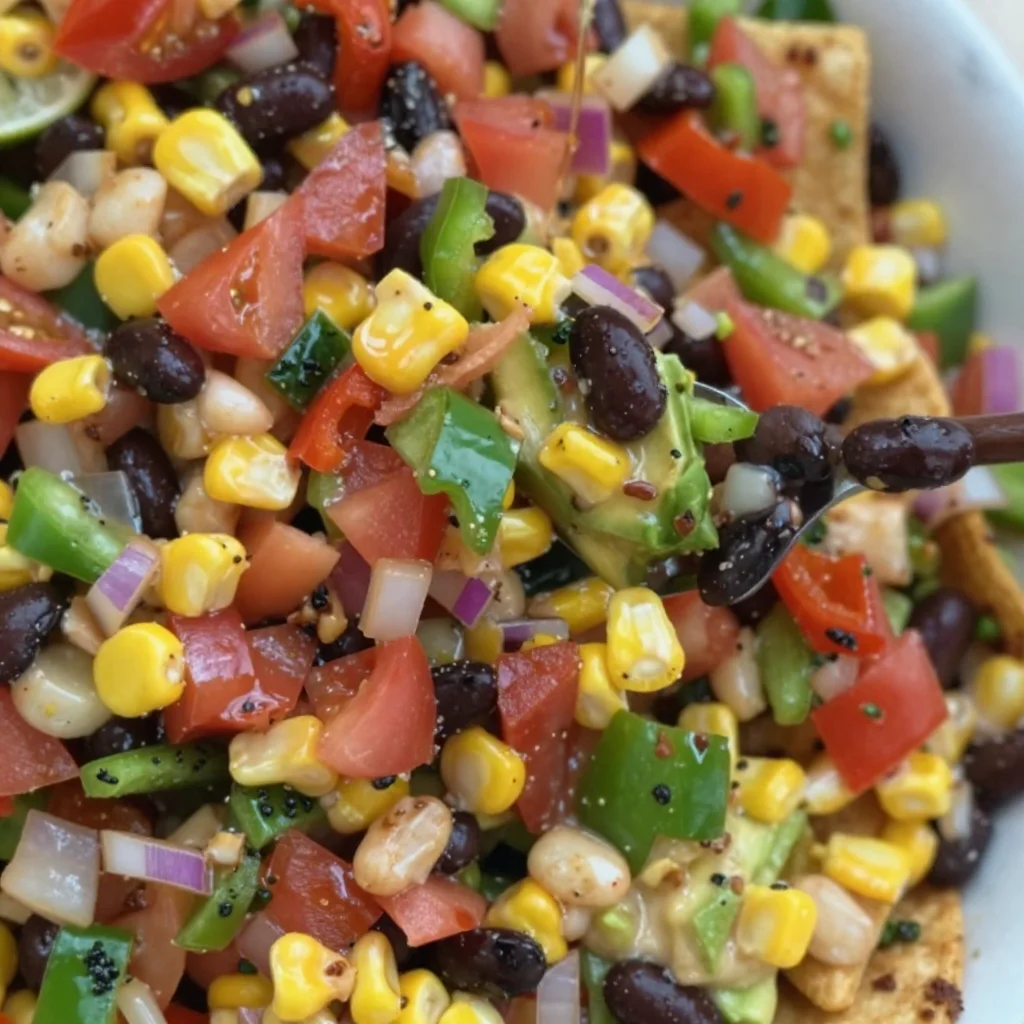
Cowboy Caviar is essentially a party on a plate, bursting with fresh veggies, beans, and a zesty dressing that will have everyone coming back for more. It’s perfect for those sunny days when you want to serve something refreshing and light or for any gathering where you want to impress without spending hours slaving in the kitchen. Plus, it’s an incredible way to celebrate the bounty of seasonal produce.
Now, you might be wondering why it’s called “Cowboy Caviar.” Well, let me take you back to my childhood. In our family, gatherings meant good food, laughter, and lots of storytelling. My grandmother would whip up a big batch of what she called “cowboy salad” during our summer cookouts, and it was always the hit of the party. We’d dip crispy tortilla chips into that colorful mixture, and every bite felt like a taste of sunshine. Fast forward to today, and we’re still sharing those moments with new flavors and twists, but the nostalgia remains.
So roll up your sleeves and let’s dive into this delightful Cowboy Caviar recipe that’ll have you feeling like a culinary rockstar.
Personal Story
One of my favorite memories involves my childhood friend, Emma. Each summer, we would spend countless afternoons in our backyard, soaking up the sun and devouring whatever delicious concoctions we could whip up. Emma’s mom would always make her famous “cowboy salad,” and it instantly became our favorite. It seemed like magic how such simple ingredients transformed into a vibrant mix of flavor and texture. We could never get enough of those crispy tortilla chips paired with the colorful medley of black beans, corn, and tomatoes.
One day, we decided to host our own backyard barbecue and surprise her mom by recreating that cowboy salad. Armed with a garden full of ripe tomatoes, fresh herbs, and a couple of cans from the pantry, we set to work. The kitchen was filled with laughter and our slightly off-pitched renditions of our favorite songs. By the time we were done, we realized it wasn’t just about the food—it was about the memories we were making together. That’s why this Cowboy Caviar holds a special place in my heart; it symbolizes the joy of cooking together and sharing food with the people we love.
Ingredients
Let’s get all our ingredients ready! Here’s what you’ll need to create this delicious Cowboy Caviar:
-
Black Beans: One can, drained and rinsed. If you prefer, you can use pinto beans or chickpeas for a different texture. They’re packed with protein and fiber, making this dish healthy, too!
-
Corn: One cup of frozen corn (thawed) or fresh corn cut off the cob. The sweetness from the corn really enhances the flavor profile of this dish. If you’re a fan of spicy, try grilling the corn before adding it for a smoky kick!
-
Cherry Tomatoes: About one cup, halved. These bright little gems add juiciness. You can substitute grape tomatoes or even diced regular tomatoes if that’s what you’ve got.
-
Red Onion: One small, finely chopped. For a milder flavor, soak it in cold water for 10 minutes before chopping. This will mellow its sharpness a bit.
-
Green Bell Pepper: One medium-sized, diced. It adds crunch and freshness. Feel free to swap it with a yellow or orange bell pepper for a sweeter flavor or even jalapeño for some heat!
-
Cilantro: A small bunch, roughly chopped. This herb is essential for that fresh flavor! If you’re not a fan of cilantro, parsley can serve as a great substitute.
-
Lime Juice: Freshly squeezed from one lime. The acidity brightens the whole dish. Not a lime fan? A splash of red wine vinegar works nicely, too.
-
Olive Oil: Two tablespoons for the dressing. It helps bring everything together. You can also use avocado oil for a milder taste.
-
Taco Seasoning: About one to two teaspoons depending on your spice preference. You can make your own mix or use a store-bought option. To decrease sodium, use a homemade spice blend with cumin, paprika, and chili powder.
-
Salt & Pepper: To taste. These basic seasonings elevate the flavors—don’t skip them!
Step-by-Step Instructions
Now that we have everything gathered, let’s turn those ingredients into a vibrant Cowboy Caviar!
-
Rinse and Drain: Start by rinsing the black beans under cold water in a fine-mesh sieve. Draining them well helps to avoid a watery mixture!
Tip: If you’re using dried beans, soak and cook them the night before for a fresh, homemade taste!
-
Prepare the Corn: If using fresh corn, slice it off the cob and boil it briefly (about 2-3 minutes) to retain its sweetness and crunch. If you’re using frozen, just toss it in a bowl to thaw.
-
Chop the Veggies: Dice the cherry tomatoes, red onion, and green bell pepper into bite-sized pieces. Feel free to go big or small, depending on your preference!
Chef Hack: Keeping the pieces consistent in size not only makes it visually appealing but also ensures a balanced bite each time you dig in.
-
Mix It All Together: In a large mixing bowl, combine the rinsed black beans, corn, halved cherry tomatoes, and chopped veggies. Use a spatula or wooden spoon to combine—this is where you can get creative!
-
Make the Dressing: In a separate small bowl, whisk together the lime juice, olive oil, taco seasoning, salt, and pepper. Taste as you go to balance it out according to your liking.
Chef Tip: Adding a bit of honey or agave can help cut the acidity if you prefer a touch of sweetness.
-
Dress the Caviar: Pour the dressing over the cowboy caviar mixture and toss gently to coat everything evenly.
-
Chill: For the best flavor, let your Cowboy Caviar sit in the refrigerator for at least 30 minutes. This resting time allows the flavors to mingle and develop.
Personal Note: I often make this a day ahead of time! It’s one of those recipes that gets better with each passing hour.
-
Serve: When you’re ready to serve, give it a final toss and send it to the table with crispy tortilla chips, or layer it as a topping for tacos or burritos!
Serving Suggestions
Whether you’re hosting a big get-together or enjoying a cozy movie night at home, Cowboy Caviar can stand on its own or play a role in various meals! Serve it in a beautiful bowl with tortilla chips surrounding it for that party vibe. You can also scoop it onto greens for a refreshing salad or pile it high in burritos. It’s versatile, colorful, and just downright delicious!
Recipe Variations
Feeling adventurous? Here are a few tasty twists you can try with your Cowboy Caviar:
- Avocado Addition: Dice a ripe avocado and gently fold it into your mixture for a creamy texture that adds richness.
- Spicy Cowboy Caviar: Toss in diced jalapeños or a pinch of cayenne pepper for heat.
- Grain Bowls: Serve the caviar over quinoa or rice for a hearty and satisfying meal.
- Mediterranean Twist: Swap out corn for diced cucumber and add feta cheese and kalamata olives for a refreshing Mediterranean vibe.
- Sweet and Spicy: For a unique flavor profile, drizzle some honey over it before serving to balance out the heat and add sweetness.
Chef’s Notes
This recipe is always evolving in my kitchen! I’ve experimented with different beans, veggies, and spice levels over the years. One of my funniest memories was when I mistakenly added a spoonful of cayenne pepper instead of chili powder—let’s just say it turned into a fiery adventure! The key takeaway is to have fun and make it your own. Food is a reflection of our tastes and experiences, so feel free to add elements that resonate with you.
FAQs and Troubleshooting
Q: How long can I store Cowboy Caviar?
A: You can store it in an airtight container in the refrigerator for up to 3 days. However, the sooner you eat it, the better it tastes!
Q: What if my Cowboy Caviar is too soupy?
A: If you find it too liquidy after mixing, try adding more beans or corn to absorb the extra moisture. You can also drain some liquid before serving.
Q: Can I make this recipe ahead of time?
A: Absolutely! I recommend making it a few hours in advance or even the night before. Just wait to add any avocado until right before serving to prevent browning.
Q: Is it possible to turn this into a main dish?
A: Totally! Serve it over a bed of greens or grains like quinoa or brown rice. You can even add grilled chicken or shrimp for a protein-packed meal.
Nutritional Info
Per Serving (based on 10 servings): Approximately 130 calories, 5g protein, 20g carbohydrates, 4g fat, 3g fiber. Keep in mind that the caloric count can change based on any added ingredients or variations.
Cowboy Caviar is more than just a recipe; it’s a way to gather people and create memories. So, throw on your apron, bring the energy, and let’s celebrate good food and great company. Happy cooking, friends!
Print
Cowboy Caviar
- Total Time: 20 minutes
- Yield: 10 servings 1x
- Diet: Vegetarian
Description
A vibrant and flavorful dish bursting with fresh veggies, beans, and a zesty dressing, perfect for a dip, salad, or filling for tacos.
Ingredients
- 1 can Black Beans, drained and rinsed
- 1 cup Corn, frozen (thawed) or fresh
- 1 cup Cherry Tomatoes, halved
- 1 small Red Onion, finely chopped
- 1 medium Green Bell Pepper, diced
- 1 small bunch Cilantro, roughly chopped
- Juice of 1 Lime, freshly squeezed
- 2 tablespoons Olive Oil
- 1 to 2 teaspoons Taco Seasoning
- Salt & Pepper, to taste
Instructions
- Rinse the black beans under cold water in a fine-mesh sieve.
- Prepare the corn by slicing it off the cob and boiling it briefly if using fresh.
- Chop the cherry tomatoes, red onion, and green bell pepper into bite-sized pieces.
- Mix the rinsed black beans, corn, halved cherry tomatoes, and chopped veggies in a large bowl.
- Make the dressing by whisking together lime juice, olive oil, taco seasoning, salt, and pepper in a separate bowl.
- Dress the cowboy caviar mixture and toss gently to coat.
- Chill for at least 30 minutes in the refrigerator.
- Serve with crispy tortilla chips or use as a topping for tacos or burritos.
Notes
This dish can be made ahead of time; it tastes better after sitting for a few hours or overnight.
- Prep Time: 15 minutes
- Cook Time: 5 minutes
- Category: Appetizer
- Method: Mixing
- Cuisine: American
Nutrition
- Serving Size: 1 serving
- Calories: 130
- Sugar: 3g
- Sodium: 200mg
- Fat: 4g
- Saturated Fat: 0.5g
- Unsaturated Fat: 3g
- Trans Fat: 0g
- Carbohydrates: 20g
- Fiber: 3g
- Protein: 5g
- Cholesterol: 0mg
Keywords: Cowboy Caviar, Dip, Salad, Tacos, Vegetarian, Easy Recipe, Fresh Veggies


