
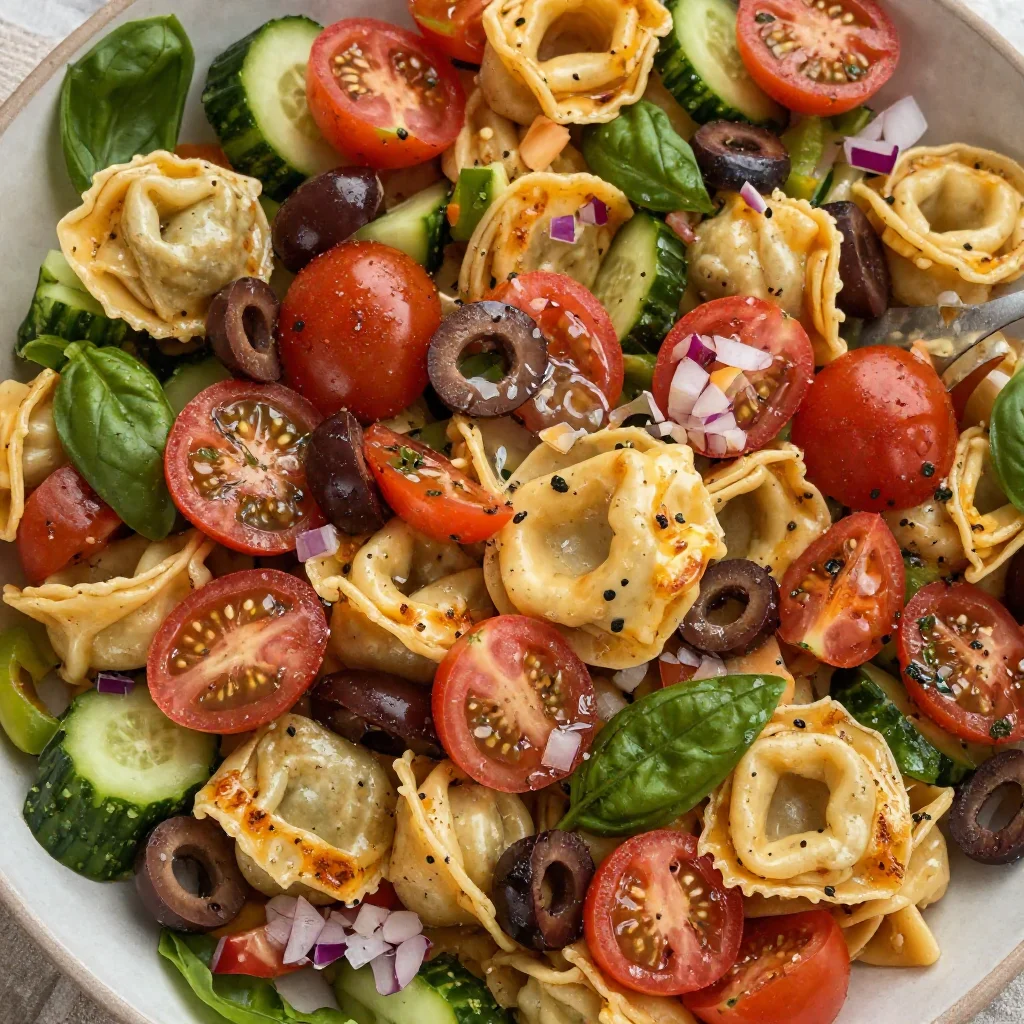
Minute Tortellini Pasta Salad for Busy Weeknights
Tortellini Pasta Salad: A Burst of Flavor and Nostalgia in Every Bite
Welcome to my kitchen, food friends! Today, I’m excited to share a dish that’s not just a delicious meal but a delightful experience. We’re diving into the world of Tortellini Pasta Salad—a dish that brings back warm memories and plenty of flavor. Whether you’re preparing a quick weeknight dinner, hosting a potluck, or planning a summer picnic, this salad is sure to impress!
There’s something so comforting about the combination of tender tortellini, fresh veggies, and a zesty dressing. But let’s not forget the best part—it’s incredibly versatile! You can personalize it with your favorite ingredients, making it a canvas for your culinary creativity. But enough about that for the moment; let’s take a little stroll down memory lane.
A Nostalgic Dive into Family Gatherings
Growing up, my family had this wonderful tradition every summer where we’d gather in my grandma’s sunny backyard for a cookout. She would whip up her famous Tortellini Pasta Salad adorned with a medley of colorful veggies, a sprinkle of cheese, and a generous helping of her secret vinaigrette. The smell of fresh basil, the laughter of cousins running around, and the sight of a big bowl filled with deliciousness always filled my heart with joy.
I remember one year when I was tasked with “helping” Grandma. I was only eight, and my idea of help was mostly taste-testing. As she showed me how to mix the ingredients, I accidentally knocked over a jar of olives. The bright green gems rolled everywhere, and we spent more time laughing and picking them up than making the salad! That day taught me that cooking is not only about the food; it’s about the memories we create, the connections made, and the joy in sharing meals together.
And that’s precisely what this Tortellini Pasta Salad represents to me—a dish brimming with love, laughter, and of course, tasty bites. So, let’s roll up our sleeves and create some new memories together!
Ingredients
Now, let’s talk about what you’ll need for this delightful dish. Here’s a list of the main ingredients along with some fun insights and substitution tips!
-
Cheese Tortellini: This is the star of the dish! You can find cheese-filled tortellini at your local grocery store—fresh or frozen. If you’re feeling adventurous, try spinach or mushroom tortellini for a flavor twist!
-
Cherry Tomatoes: These bite-sized beauties are sweet and juicy. Look for vibrant red or yellow ones! If you can’t find them, you can use chopped regular tomatoes instead, but keep them in bite-sized pieces.
-
Cucumber: Adds a crisp crunch! Use English cucumbers for less bitterness. If you don’t like cucumbers, bell peppers offer a great crunch and sweetness.
-
Red Onion: This gives the salad a lovely bite! Soak chopped onion in cold water for 10 minutes to mellow out the flavor. If red onion isn’t your thing, green onions are a milder alternative.
-
Bell Peppers: I recommend a mix of colors for visual appeal. Use red, yellow, or orange for sweetness. Green peppers are fine too, just know they pack a sharper punch.
-
Fresh Basil: This herb adds a beautiful aroma and flavor. If basil isn’t available, try substituting with fresh parsley or even dill for a different flavor profile.
-
Feta Cheese: Crumbled feta brings a creamy, tangy element to the salad. If you prefer a non-dairy option, you can use vegan feta or leave it out entirely.
-
Olive Oil: A good quality extra virgin olive oil enhances the dressing immensely. For a lighter option, avocado oil works wonderfully too.
-
Red Wine Vinegar: Adds acidity and brightness. If you don’t have it, apple cider vinegar can be used as a substitute.
-
Honey or Maple Syrup: Just a touch of sweetness to balance the acidity. For a vegan alternative, stick with maple syrup.
-
Salt and Pepper: Essential for enhancing flavors. Don’t skip these!
Step-by-Step Instructions
Ready to create some kitchen magic? Let’s jump into the cooking process!
-
Cook the Tortellini: Start by bringing a large pot of salted water to a rolling boil. Gently add the tortellini and cook according to package instructions, usually around 5-7 minutes until they float to the top. Pro tip: don’t overcook! You want them tender but firm. Drain and rinse under cold water to stop the cooking process. This also helps keep them from sticking together.
-
Prep the Veggies: While the tortellini cooks, chop up your veggies. First, slice the cherry tomatoes in half, dice the cucumber, finely chop the red onion, and dice the bell peppers. Take a moment to appreciate how colorful your cutting board is—food is all about delighting the senses!
-
Make the Dressing: In a small bowl, whisk together the olive oil, red wine vinegar, honey (or maple syrup), and a sprinkle of salt and pepper. Taste it! Adjust the seasoning or sweetness as your palate desires. If you fancy a little zing, add a pinch of crushed red pepper flakes!
-
Combine Everything: In a large bowl, add the cooked tortellini, chopped vegetables, and crumbled feta. Drizzle the dressing over the top and gently toss everything together. Take care not to break the tortellini! Remember, they’re delicate little pockets of joy.
-
Add Fresh Herbs: Fold in the freshly chopped basil gently. The aroma will be intoxicating!
-
Taste and Adjust: This is the fun part! Taste your salad and see if it needs more seasoning or maybe some more dressing. Feel free to have a little nibble as you go—it’s really part of the process!
-
Chill: For the best flavor, let your pasta salad chill in the refrigerator for at least 30 minutes before serving. This allows the flavors to meld together beautifully.
Serving Suggestions
Now, let’s talk presentation! This Tortellini Pasta Salad is as pretty as a spring garden, so don’t shy away from showcasing that vibrant color. Serve the salad on a large platter for a family-style gathering or in individual bowls for a casual picnic. For a bit of flair, garnish it with extra basil on top and a drizzle of olive oil. Serve it alongside grilled chicken, crusty bread, or as a stand-alone meal—you really can’t go wrong.
Recipe Variations
-
Mediterranean Twist: Add olives, artichoke hearts, and sun-dried tomatoes for a Mediterranean vibe.
-
Protein Power: Toss in diced grilled chicken, shrimp, or chickpeas for extra protein.
-
Creamy Option: Mix in a dollop of Greek yogurt or mayonnaise to make it creamier.
-
Roasted Veggies: Roast your tomatoes and peppers before adding them to the salad for a different depth of flavor.
-
Spicy Kick: Add diced jalapeños or a few dashes of hot sauce to amp up the heat.
Chef’s Notes
This recipe is like a reliable friend—it’s easy to customize and always brings the smiles! Over the years, I’ve modified this Tortellini Pasta Salad countless times based on what I have on hand or what’s in season. One year, I used grilled veggies and drizzled balsamic reduction on top, which added a fabulous twist. Honestly, don’t be afraid to play with it! Cooking should be fun and an outlet for your creativity.
And remember that time I dropped my entire bowl of salad on the floor? What a disaster! My dog had the best day ever. But it also taught me to always have a backup salad on hand—which is why I often double this recipe.
FAQs and Troubleshooting
-
Can I make this salad ahead of time?
Absolutely! You can prepare it a day in advance. Just wait to add the basil until serving to keep it fresh! -
What if I have leftovers?
This salad holds up beautifully in the fridge for a couple of days. Just be aware that the tortellini may absorb some dressing. -
Can I freeze this salad?
I wouldn’t recommend freezing it, as freezing will change the texture of the tortellini and veggies once defrosted. -
What if I overcooked the tortellini?
No worries! They might be a bit mushy, but the vibrant flavors of the salad will help mask the texture. Consider adding some crunchy elements like nuts or crispy lettuce for contrast.
Now you have the ultimate guide to making Tortellini Pasta Salad! So, gather your ingredients, invite some friends over, and enjoy the process of cooking and sharing this delightful dish. Happy salad-making, friends!
Print
Tortellini Pasta Salad
- Total Time: 45 minutes
- Yield: 4 servings 1x
- Diet: Vegetarian
Description
A refreshing and versatile salad featuring cheese tortellini, fresh vegetables, and a zesty dressing.
Ingredients
- 12 oz cheese tortellini
- 1 cup cherry tomatoes, halved
- 1 cucumber, diced
- 1/2 red onion, finely chopped
- 1 bell pepper, diced
- 1/4 cup fresh basil, chopped
- 1/2 cup feta cheese, crumbled
- 1/4 cup olive oil
- 2 tbsp red wine vinegar
- 1 tbsp honey or maple syrup
- Salt and pepper to taste
Instructions
- Cook the tortellini in salted boiling water according to package instructions for 5-7 minutes until they float to the top. Drain and rinse under cold water.
- Prep the veggies: slice cherry tomatoes, dice cucumber, chop red onion, and dice bell pepper.
- Make the dressing by whisking together olive oil, red wine vinegar, honey, salt, and pepper.
- Combine the cooked tortellini, veggies, and feta in a large bowl. Drizzle with dressing and toss gently.
- Add fresh basil and fold it into the salad carefully.
- Taste the salad and adjust seasoning if necessary.
- Chill the salad in the refrigerator for at least 30 minutes before serving.
Notes
Customize with your favorite ingredients. Serve chilled for best flavor.
- Prep Time: 15 minutes
- Cook Time: 10 minutes
- Category: Salad
- Method: Boiling
- Cuisine: Italian
Nutrition
- Serving Size: 1 serving
- Calories: 350
- Sugar: 5g
- Sodium: 400mg
- Fat: 12g
- Saturated Fat: 4g
- Unsaturated Fat: 6g
- Trans Fat: 0g
- Carbohydrates: 45g
- Fiber: 3g
- Protein: 15g
- Cholesterol: 30mg
Keywords: tortellini salad, pasta salad, summer salad, vegetarian salad

Budget-Friendly Chocolate Oreo Cake (Easy Weeknight Dessert)
Decadent Chocolate Oreo Cake: A Slice of Nostalgia and Happiness
Welcome to my kitchen! Today, I’m excited to share a beautiful creation that’s as rich in flavor as it is in fond memories: a Chocolate Oreo Cake that’s guaranteed to make your heart sing and your taste buds dance!
Imagine the fragrance of fresh-baked chocolate mingling with the nostalgic scent of crushed Oreos wafting through your home. This cake is more than just dessert; it’s an experience, a reason to gather friends and family and create lasting memories. Whether it’s a birthday celebration, a casual get-together, or a cozy night in, this cake invites everyone to indulge and relax.
Baking this Chocolate Oreo Cake takes me back to my childhood, spending lazy afternoons in my mom’s kitchen, where the walls were adorned with little doodles and flour marks. I remember my little brother and I fighting over who got to crush the Oreos as we constructed treat after treat. It was not just about the cake; it was the laughter and joy that surrounded it.
So, let’s roll up our sleeves, dust off that apron, and dive into this sweet adventure of baking a Chocolate Oreo Cake!
A Little Taste of Nostalgia
Whenever I make this Chocolate Oreo Cake, I can’t help but reminisce about a special summer when I was 10 years old. My family threw a backyard barbecue. I was in charge of dessert, and I decided to whip up an Oreo cake from a recipe I’d found in a magazine.
Things didn’t go quite as planned. I may have accidentally added twice the amount of sugar (who can resist that sweet allure?), which led to a delightfully sticky situation. But, that cake turned out to be the highlight of the day! Everyone devoured it, raving about how it was "the best cake ever!" Moments like that—filled with laughter, some chaos in the kitchen, and a delicious result—shaped my love for baking and my belief that the best recipes often come with a side of adventure.
Let’s recreate that charming chaos and make a cake that will bring as much joy to your loved ones as it did to mine!
Ingredients
For this Chocolate Oreo Cake, we’ll need the following ingredients. Don’t fret if you’re missing something; I’ve included a few tips for substitutions!
-
1 ¾ cups all-purpose flour
Essential for giving the cake structure. For a gluten-free option, use a 1:1 gluten-free flour blend. -
¾ cup unsweetened cocoa powder
Adds a deep chocolate flavor. Dutch-processed cocoa can give a smoother taste, while raw cocoa adds a more robust flavor. -
2 cups granulated sugar
This sweetener amplifies flavor and moisture. If you want a healthier option, consider coconut sugar or a sugar substitute like monk fruit. -
1 ½ teaspoons baking powder
Helps the cake rise. Make sure it’s fresh for the best results! -
1 ½ teaspoons baking soda
Also aids in leavening. Check the expiration date; you want it strong and effective! -
1 teaspoon salt
Balances sweetness and amplifies the overall flavor. Trust me, don’t skip this step! -
2 large eggs
Acts as a binding agent, providing moisture and richness. For vegan options, try flax eggs (1 tablespoon ground flaxseed mixed with 2.5 tablespoons water). -
1 cup whole milk
Gives a moist texture. You could substitute it with almond milk, oat milk, or even yogurt for a thicker batter. -
½ cup vegetable oil
Adds moisture and density. If you want a lighter feel, substitute with applesauce, but keep in mind—it might alter the flavor a touch. -
2 teaspoons vanilla extract
Enhances sweetness and flavor. Pure vanilla extract is best, but imitation works in a pinch! -
1 cup boiling water
This magical ingredient helps to bloom the cocoa and gives the cake a moist crumb. No substitutes here for best results! -
1 ½ cups crushed Oreos
The star of the show! Adds a delightful crunch and flavor to the cake. You can use any chocolate sandwich cookie if you don’t have Oreos. -
1 batch chocolate frosting
(You can make your own, but store-bought is okay too! Just ensure it’s creamy and delicious.)
Step-by-Step Instructions
-
Preheat Your Oven
Preheat your oven to 350°F (175°C). It’s essential to get the oven hot before putting the cake in! Trust me, your cake deserves that optimal baking environment. -
Prepare Your Pans
Grease and flour two 9-inch round cake pans. You can also line the bottoms with parchment paper for easy removal. A little tip: use cocoa powder instead of flour for dusting the pans if you want to avoid any white streaks. -
Combine Dry Ingredients
In a large mixing bowl, combine the flour, cocoa powder, sugar, baking powder, baking soda, and salt. Whisk them together to ensure they’re evenly mixed. When all your dry ingredients are well combined, you’ll end up with a light dusting of chocolate goodness ready to absorb the wet ingredients. -
Mix in the Wet Ingredients
Add the eggs, milk, vegetable oil, and vanilla extract to the dry ingredients. Mix on medium speed for about 2 minutes until everything is well combined. You want a lovely smooth batter with a rich chocolate hue! -
Boiling Water Time!
Now here’s where the magic happens. Carefully stir in the boiling water. (Yes, boiling!) The batter will become thinner — that’s normal and it’s what keeps the cake moist. -
Fold in the Oreos
Gently fold the crushed Oreos into the batter. This is the fun part! The chunks of Oreo add a delightful texture. Just remember not to overmix; a few swirls are enough. -
Bake the Cakes
Divide the batter equally between the prepared cake pans. Bake in the preheated oven for 30-35 minutes, or until a toothpick inserted into the center comes out clean (or with very few crumbs). -
Cool the Cakes
Once baked, remove the cakes from the oven and let them cool in the pans for about 10 minutes. Then, turn them out onto wire racks to cool completely. Do you smell that? That heavenly aroma is pure happiness!
Serving Suggestions
Once your Chocolate Oreo Cake has cooled down, it’s time to frost! Spread your chocolate frosting generously on top of one layer, add the other layer, and cover the top and sides with even more frosting. For a scrumptious finishing touch, decorate the top with extra crushed Oreos or even whole cookies for a rustic look. Slice it up, serve it on pretty plates, and you’ve got a showstopper that’s sure to impress!
Recipe Variations
Looking to mix things up? Here are a few creative twists to consider:
- Minty Oreos: Use mint-flavored Oreos for a refreshing twist.
- Peanut Butter: Add a layer of peanut butter frosting between the cake layers for a decadent treat!
- Dairy-Free Option: Substitute all dairy ingredients with plant-based alternatives such as almond milk or coconut cream.
- Chocolate Chip Add-in: Toss in some chocolate chips for an extra chocolatey experience.
- Layer It Up: Create a multi-layer cake by doubling the recipe and stacking three or four layers for a tower of chocolate bliss!
Chef’s Notes
This Chocolate Oreo Cake has a special place in my heart, and over the years, it has evolved beautifully. I once added a layer of raspberry jam because, well, chocolate and raspberry are a match made in heaven! Some families like to celebrate major milestones with this cake, and each time I see their smiles, I’m reminded of why I love baking. The joy of transforming simple ingredients into something spectacular keeps me inspired in the kitchen.
FAQs and Troubleshooting
1. My cake sunk in the middle! What happened?
This issue often arises from underbaking or opening the oven door too soon. Make sure your oven is properly preheated, and resist the urge to peek before the minimum baking time.
2. The frosting is too stiff; how can I fix it?
If your frosting is too thick, mix in a tablespoon of milk at a time until you reach the desired consistency. Adding a pinch of salt can also help balance sweetness!
3. Can I make this cake ahead of time?
Absolutely! This cake keeps well in an airtight container for 3-4 days at room temperature. You can also freeze it, wrapped tightly in plastic wrap, for up to three months. Just thaw and frost when you’re ready to serve!
4. What if I want a lighter cake?
For a lighter cake, try substituting half of the flour with cake flour, which gives a more delicate crumb. You could also reduce the amount of sugar and use applesauce as a partial fat replacement.
Nutritional Info
The nutritional values can fluctuate based on specific ingredients and portion sizes, but this cake per slice can typically include:
Calories: 400, Carbohydrates: 58g, Protein: 5g, Fat: 19g, Sugar: 38g.
There you have it! A delightful Chocolate Oreo Cake recipe that combines nostalgia with an irresistible flavor. Feel free to share your baking adventures and any twists you make to this recipe! Whether you’re whipping this up for a celebration or just because, I hope it adds a touch of sweetness to your day. Happy baking!
Print
Decadent Chocolate Oreo Cake
- Total Time: 50 minutes
- Yield: 8 servings 1x
- Diet: Vegetarian
Description
A rich chocolate cake infused with crushed Oreos, perfect for any celebration or cozy night in.
Ingredients
- 1 ¾ cups all-purpose flour
- ¾ cup unsweetened cocoa powder
- 2 cups granulated sugar
- 1 ½ teaspoons baking powder
- 1 ½ teaspoons baking soda
- 1 teaspoon salt
- 2 large eggs
- 1 cup whole milk
- ½ cup vegetable oil
- 2 teaspoons vanilla extract
- 1 cup boiling water
- 1 ½ cups crushed Oreos
- 1 batch chocolate frosting
Instructions
- Preheat your oven to 350°F (175°C).
- Prepare your pans by greasing and flouring two 9-inch round cake pans.
- Combine the dry ingredients in a large mixing bowl and whisk together.
- Mix in the wet ingredients using medium speed for about 2 minutes.
- Stir in the boiling water carefully.
- Fold in the crushed Oreos gently into the batter.
- Bake in the preheated oven for 30-35 minutes.
- Cool the cakes in pans for 10 minutes before transferring to wire racks.
Notes
For a lighter cake, consider using half cake flour and reducing sugar. This cake can be frozen for up to three months.
- Prep Time: 15 minutes
- Cook Time: 35 minutes
- Category: Dessert
- Method: Baking
- Cuisine: American
Nutrition
- Serving Size: 1 slice
- Calories: 400
- Sugar: 38g
- Sodium: 330mg
- Fat: 19g
- Saturated Fat: 3g
- Unsaturated Fat: 16g
- Trans Fat: 0g
- Carbohydrates: 58g
- Fiber: 2g
- Protein: 5g
- Cholesterol: 50mg
Keywords: chocolate cake, Oreo cake, dessert recipe, baking

Orange Cake
The Sweet Zest of Orange Cake: A Cozy Culinary Adventure
Welcome to my kitchen, fellow food lovers! Today, we’re diving into a delightful dessert that embodies the warmth and brightness of citrus — Orange Cake! If the mere thought of fresh cake slathered in orange glaze makes your heart flutter, you’re in the right place. This splendid treat is not just a dessert; it’s a celebration of seasonal flavors and a reminder of life’s sweet moments.
There’s something magical about cake. It brings people together and creates a sense of joy that’s hard to replicate. As I whisk together flour and sugar, I’m transported to my grandma’s kitchen, where the aroma of oranges would fill the air on lazy Sunday afternoons. I remember the first time I helped her make this cake; she handed me a zester and said, “Here, my dear, start with this magical ingredient.”
Watching the bright orange zest fall into the mixing bowl felt like sprinkling sunshine into our afternoon. The best part? Grandma’s laughter would echo in the background as we tasted the batter (don’t worry — a little raw batter won’t hurt you!) and shared stories of family gatherings filled with love and laughter.
Today, we’ll recreate that cherished memory together. Not only will I guide you through each step with care and a sprinkle of humor, but I’ll also share tips and tricks that will have you whipping up this Orange Cake with confidence. So, put on your favorite apron, grab your ingredients, and let’s make some magic happen!
Personal Story: A Slice of Nostalgia
When I think of Orange Cake, my thoughts drift back to family get-togethers at Grandma’s house. She had this knack for transforming our ordinary weekends into extraordinary feasts. The centerpiece? Always her mouthwatering Orange Cake.
I remember how she’d meticulously zest fresh oranges, her hands moving quick like a magician — all while weaving in stories of her youth. “You know, sweetie,” she’d say, “the secret to a great cake is in the love you put into it.” I chuckle now, recalling how my young self took her words to heart, believing that if I just stirred vigorously enough, a bit of that love would leap into the pan, creating a masterpiece.
As time went on, I witnessed how this simple cake became a tradition. It graced tables at birthdays, holidays, and even just Wednesday afternoon coffee breaks. When I serve it today, I feel her presence, becoming part of each slice I share with friends and family. So, let’s don our aprons and embrace the spirit of togetherness as we bake this timeless treat!
Ingredients: Gather Your Sunshine
To whip up this delightful Orange Cake, you’ll need the following ingredients:
-
2 cups all-purpose flour
- This forms the base of your cake. For a gluten-free version, substitute with almond flour or a gluten-free blend.
-
1 ½ cups granulated sugar
- Sweetness alert! You can reduce the sugar by a third if you like a less sweet cake or swap in coconut sugar for a hint of caramel flavor.
-
1/2 cup unsalted butter (softened)
- Butter not only adds richness but also helps create that tender crumb. If you’d prefer a dairy-free option, coconut oil works wonders.
-
1 cup fresh orange juice
- Here’s where your cake gets its vibrant flavor! Freshly squeezed is best, but store-bought works in a pinch.
-
2 teaspoons baking powder
- This is your leavening agent! Ensure it’s fresh for that perfect rise. You can use baking soda, but you’ll need to adjust the quantities.
-
1/2 teaspoon salt
- Salt enhances sweetness. Don’t skip it, or your cake may taste flat!
-
3 large eggs
- Eggs provide moisture and richness. For a vegan twist, replace each egg with 1/4 cup unsweetened applesauce.
-
Zest of 2 oranges
- Zest adds concentrated flavor. The fresher, the better! A microplane makes quick work of this.
-
1 teaspoon vanilla extract
- Vanilla rounds out the flavors beautifully. In a pinch, almond extract can substitute if you’re feeling adventurous.
-
Optional: Powdered sugar for dusting
- A light dusting of powdered sugar elevates your cake presentation, making it Instagram-worthy!
Step-by-Step Instructions: Let’s Bake!
Now that we’ve rounded up our ingredients, it’s time to get baking! Here’s how to create a glorious Orange Cake that bursts with flavor:
-
Preheat Your Oven:
Preheat your oven to 350°F (175°C). This ensures a perfectly baked cake. While it’s warming up, grease and flour a 9-inch round cake pan, or line it with parchment paper. -
Cream Butter and Sugar:
In a large mixing bowl, cream the softened butter with the granulated sugar until light and fluffy. This step is crucial for creating air pockets leading to a tender cake. Aim for about 4-5 minutes — patience is key here! -
Add Eggs:
Beat in the eggs, one at a time, ensuring each is well incorporated. It should look creamy and luscious. Toss in that teaspoon of vanilla — ah, the aroma is heavenly! -
Mix in Orange Juice and Zest:
Stir in the fresh orange juice and zest. The bright orange aroma will make you feel sunny inside! Here’s a fun tip: If you have any leftover orange zest, toss it into your morning smoothie for an extra zing. -
Combine Dry Ingredients:
In a separate bowl, whisk together the flour, baking powder, and salt. Gradually fold this mixture into your wet ingredients. Be gentle with this step; over-mixing can lead to a dense cake. -
Pour into the Pan:
Once the batter is just combined, pour it into your prepared cake pan. Use a spatula to level the top. Don’t forget to clean any batter off the sides — no one wants a burnt crust! -
Bake:
Place the pan in the preheated oven and bake for 25 to 30 minutes or until a toothpick inserted into the center comes out clean. Keep an eye on it after the 25-minute mark — we want that gorgeous, golden hue! -
Cool Down:
Once baked, remove the cake from the oven and let it cool in the pan for about 10 minutes. Then, carefully transfer it to a wire rack to cool completely. Patience is key; let it cool down before you dive in! -
Glaze (Optional):
For a citrusy twist, you can make a quick glaze! Simply mix powdered sugar with a bit of orange juice until smooth and drizzle over the cooled cake. You’ll feel like a professional pastry chef in no time!
Serving Suggestions: Let’s Plate It Up!
When it comes to serving, I like to keep it simple yet elegant. A generous slice of your Orange Cake on a beautiful plate is already a treat in itself. Add a few thin slices of fresh orange or a sprig of mint for a pop of color and freshness. For an extra special touch, serve it alongside a dollop of whipped cream or a scoop of vanilla ice cream, letting the creamy sweetness meld with the bright citrus notes.
Recipe Variations: Put Your Twist on It!
This recipe is so versatile! Here are a few fun variations to keep it interesting:
-
Chocolate Orange Cake: Add 1/2 cup of cocoa powder to the flour mixture for a deliciously rich twist.
-
Nutty Delight: Stir in 1/2 cup of finely chopped walnuts or almonds into the batter to add a delightful crunch.
-
Spiced Orange Cake: Incorporate 1 teaspoon of cinnamon or ginger for a warm, spicy note that complements the citrus beautifully.
-
Marmalade Glaze: For an extra layer of flavor, use orange marmalade instead of glaze. Just heat it slightly to thin it out before drizzling!
-
Gluten-Free Orange Cake: Substitute the all-purpose flour with a gluten-free flour blend, ensuring that your baking powder is certified gluten-free for a perfect rise!
Chef’s Notes: A Dash of Love and Laughter
This Orange Cake holds a special place in my heart. As I perfected it over the years, I’ve tested numerous variations, and each time I pull it from the oven, I’m reminded of Grandma’s laughter and wisdom. I’ve learned to embrace the mess of baking; after all, it’s called a “kitchen adventure” for a reason!
I’ve also experienced my fair share of kitchen catastrophes. Like the time I forgot the baking powder and ended up with a sunken sponge. It wasn’t pretty! But through those little hiccups, I learned that cooking is about experimentation and having fun — and sharing the results, good or bad, always sparks laughter.
FAQs and Troubleshooting: Let’s Avoid Those Kitchen Gremlins!
1. Why did my cake sink in the middle?
- This often happens if it was underbaked or the oven temperature was too low. Always trust your toothpick test and keep an eye on that timer!
2. Can I use bottled orange juice instead of fresh?
- Yes, you can! However, fresh juice will give you the best flavor. If using store-bought, look for one that’s pure juice without additives.
3. How do I store leftovers?
- This cake can stay fresh at room temperature for 2-3 days. For extended life, wrap it tightly and refrigerate it for up to a week. Just be sure to bring it back to room temperature before serving — the flavors bloom beautifully!
4. My glaze turned out too thick; what can I do?
- Simply add a few drops of orange juice or water to thin it out. Remember, you want it pourable but still thick enough to coat!
Nutritional Info (Optional, but Helpful)
- Serving Size: 1 slice (1/12 of cake)
- Calories: 250
- Total Fat: 9g
- Saturated Fat: 5g
- Cholesterol: 40mg
- Sodium: 150mg
- Total Carbohydrates: 38g
- Dietary Fiber: 1g
- Sugars: 20g
- Protein: 3g
Now, my friends, you’re ready to create some homemade happiness with this Orange Cake. It’s more than just a recipe; it’s about the memories and connections built around it. Bake it, share it, and most importantly, enjoy every crumb. I hope this cake brightens your days as much as it has brightened mine! Happy baking!
Print
Orange Cake
- Total Time: 45 minutes
- Yield: 12 servings 1x
- Diet: Vegetarian
Description
A delightful Orange Cake that embodies the warmth and brightness of citrus, perfect for any occasion.
Ingredients
- 2 cups all-purpose flour
- 1 ½ cups granulated sugar
- 1/2 cup unsalted butter (softened)
- 1 cup fresh orange juice
- 2 teaspoons baking powder
- 1/2 teaspoon salt
- 3 large eggs
- Zest of 2 oranges
- 1 teaspoon vanilla extract
- Optional: Powdered sugar for dusting
Instructions
- Preheat your oven to 350°F (175°C) and prepare a 9-inch round cake pan.
- Cream the softened butter with the granulated sugar until light and fluffy for about 4-5 minutes.
- Add the eggs one at a time, incorporating each one fully, then mix in the vanilla extract.
- Mix in the fresh orange juice and zest until well combined.
- Combine the flour, baking powder, and salt in a separate bowl, then gradually fold into the wet ingredients.
- Pour the batter into the prepared pan, leveling the top, and clean any batter off the sides.
- Bake for 25 to 30 minutes, or until a toothpick inserted in the center comes out clean.
- Cool in the pan for 10 minutes, then turn out onto a wire rack to cool completely.
- Glaze (Optional): Mix powdered sugar with a little orange juice for a quick glaze and drizzle over the cooled cake.
Notes
Serve with a drizzle of glaze and garnish with fresh orange slices or a sprig of mint for added elegance.
- Prep Time: 15 minutes
- Cook Time: 30 minutes
- Category: Dessert
- Method: Baking
- Cuisine: American
Nutrition
- Serving Size: 1 slice (1/12 of cake)
- Calories: 250
- Sugar: 20g
- Sodium: 150mg
- Fat: 9g
- Saturated Fat: 5g
- Unsaturated Fat: 4g
- Trans Fat: 0g
- Carbohydrates: 38g
- Fiber: 1g
- Protein: 3g
- Cholesterol: 40mg
Keywords: orange cake, citrus dessert, baking recipes, family recipes, nostalgic cake
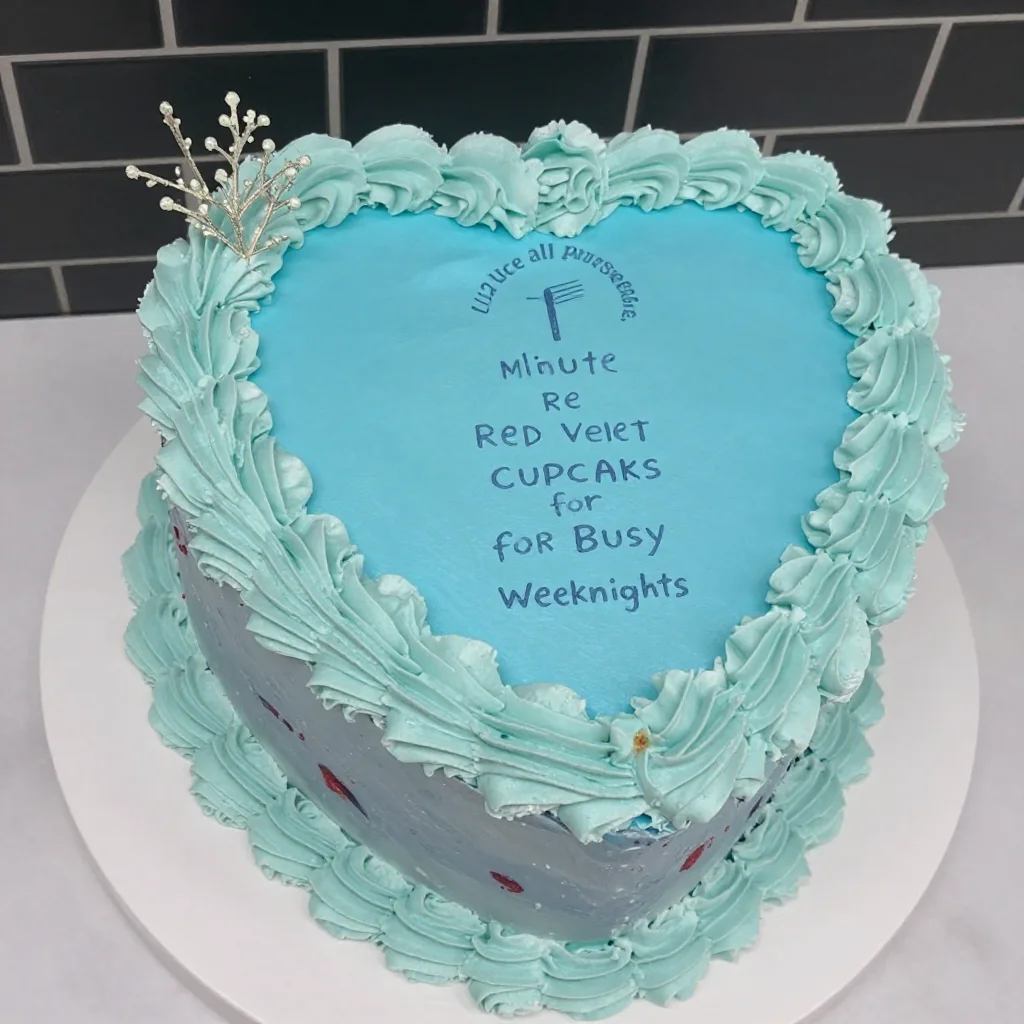
Minute Red Velvet Cupcakes for Busy Weeknights
The Ultimate Red Velvet Cupcakes: A Sweet Journey You’ll Love
Welcome to my cozy kitchen! Today, we’re diving into the world of Red Velvet Cupcakes, those scrumptious little bites that blend sophistication with pure nostalgia. Not only are these vibrant treats a feast for the eyes, but they also pack a flavor punch that will leave you craving more. Picture this: you take a bite, and the soft, moist cake melts in your mouth, perfectly complemented by the rich cream cheese frosting. Nothing says “special occasion” quite like the beautiful red hue of these cupcakes, beautifully topped and ready to impress your friends and family.
Growing up, Red Velvet was a staple at our family gatherings. My grandma made the most amazing version, and every holiday felt incomplete without her coveted cupcakes. She had a special touch with flavors and a secret ingredient that made them extra memorable—her love for baking. Being in the kitchen with her was always a delight, and I often found myself stealing spoonfuls of frosting when she wasn’t looking. Those sweet moments inspired me to create this blog and share my culinary adventures with all of you!
So, whether you’re celebrating a birthday, hosting a tea party, or just indulging yourself on a cozy evening, these cupcakes are sure to bring joy to your table. Let’s roll up our sleeves, preheat that oven, and get baking!
A Fond Memory with Red Velvet
I still remember that one summer afternoon when my grandma decided to teach me how to make her legendary Red Velvet Cupcakes. I was around ten years old, my blonde curls bouncing as I dashed in and out of the kitchen, excited yet a bit clumsy. I was on cupcake duty while she whipped up her famous cream cheese frosting. I was tasked with sifting the flour and cocoa powder—I’ll admit that a cloud of cocoa ended up decorating my face rather than the mixing bowl!
As we mixed the ingredients, my grandma shared stories of how she first learned to bake from her own mother in the south, where Red Velvet had earned its iconic status. This was about more than just baking; it was about love and tradition. Those cupcakes became our special project, a blend of sweet flavors and fun-filled moments. They not only filled our tummies but also warmed our hearts. And that, dear friends, is the true essence of cooking!
Let me take you through this delightful journey, and together we’ll create Red Velvet Cupcakes that will make you feel all the warm fuzzies.
Ingredients for Red Velvet Cupcakes
-
1 and 1/2 cups all-purpose flour
The base of these cupcakes. You can substitute with gluten-free flour if needed! -
1 cup granulated sugar
This adds sweetness and moisture. For a healthier twist, use coconut sugar. -
1 teaspoon baking soda
Helps these babies rise beautifully. Make sure it’s fresh for the best results! -
1 teaspoon baking powder
It works in tandem with baking soda for that perfect fluffy texture. -
1/2 teaspoon salt
Balances the sweetness. -
1 tablespoon cocoa powder
This gives that signature red velvet flavor. Dutch-processed cocoa works well too. -
1 cup vegetable oil
Oil keeps the cupcakes moist. You can use melted coconut oil for a more tropical twist! -
1 cup buttermilk, room temperature
Buttermilk makes these cupcakes incredibly tender. Don’t have it? Mix a cup of milk with 1 tablespoon of vinegar for a quick substitute. -
2 large eggs, room temperature
Helps bind the ingredients and create a fluffy texture. -
2 tablespoons red food coloring
This is where the magic happens! You can opt for natural food coloring, but the shade of red may vary. -
1 teaspoon vanilla extract
Adds depth to the flavor. Nothing beats the pure vanilla extract! -
1 teaspoon white vinegar
This reacts with the baking soda to help the cupcakes rise. -
Cream Cheese Frosting (for topping)
- 8 oz cream cheese, softened
- 1/2 cup unsalted butter, softened
- 4 cups powdered sugar
- 1 teaspoon vanilla extract
Step-by-Step Instructions
Step 1: Preheat Your Oven
Preheat your oven to 350°F (175°C). As the oven warms up, line a cupcake pan with paper liners. This small preparation step might seem simple, but it sets the stage for baking success!
Step 2: Combine Dry Ingredients
In a large mixing bowl, whisk together the flour, sugar, baking powder, baking soda, salt, and cocoa powder until well combined. This not only helps blend the flavors evenly but also aerates the dry ingredients for fluffier cupcakes. Trust me, this is a game-changer!
Step 3: Mix Wet Ingredients
In another bowl, combine the vegetable oil, buttermilk, eggs, red food coloring, vanilla extract, and white vinegar. Whisk them together until you have a smooth mixture. The vibrant color should stir your excitement as you see it come together. Feel free to use a hand mixer here for an extra fluffy mixture.
Step 4: Combine Both Mixtures
Gently pour the wet mixture into the dry ingredients. Use a spatula to fold the mixtures together until just combined. Be careful not to overmix—this is a light and airy cupcake we’re aiming for, not a dense brick! A few floury streaks are okay.
Step 5: Fill the Cupcake Liners
Using an ice cream scoop or a ladle, fill each cupcake liner about two-thirds full. This ensures they have room to rise without overflowing. It’s okay to get a bit messy; you’re in your kitchen, and that’s part of the fun!
Step 6: Bake!
Place the filled cupcake pan in the preheated oven and bake for about 18-20 minutes, or until a toothpick inserted into the center comes out clean. The sweet smell of red velvet wafting through your kitchen will be heavenly—try not to sneak a taste too soon!
Step 7: Cool Down
Once baked, remove the cupcakes from the oven and let them cool in the pan for about 5 minutes. Then carefully transfer them to a wire rack to cool completely. Patience is key here; you don’t want to frost warm cupcakes!
Step 8: Prepare the Cream Cheese Frosting
While the cupcakes cool, let’s whip up the frosting! In a large bowl, beat the softened cream cheese and unsalted butter until smooth. Gradually add the powdered sugar, then mix in the vanilla extract until everything is fully blended and fluffy.
Step 9: Frost the Cupcakes
Once the cupcakes have completely cooled, it’s time to frost them! Use a piping bag for a professional look, or simply spread the frosting with a knife for a rustic charm. Don’t be shy; pile on that cream cheese goodness!
Step 10: Decorate and Serve
For a little flair, sprinkle some red velvet cake crumbs or chocolate shavings on top of the frosting. Place them onto a pretty platter and watch your guests’ eyes light up!
Serving Suggestions
These Red Velvet Cupcakes are perfect for any occasion. Serve them on a beautiful dessert stand at a party, or arrange them on a rustic wooden platter for that homey feel. You could also pair them with a scoop of vanilla ice cream for an indulgent dessert that will leave your taste buds dancing!
Recipe Variations
- Mini Red Velvet Cupcakes: Use a mini cupcake pan for bite-sized versions of these treats!
- Red Velvet Whoopie Pies: Sandwich cream cheese frosting between two red velvet cookies for a fun twist.
- Gluten-Free Option: Substitute all-purpose flour with a gluten-free blend to enjoy these cupcakes without the wheat.
- Alternative Frosting: Try a vanilla buttercream or chocolate ganache instead of cream cheese frosting for a different flavor profile.
- Add Nuts: Mix in chopped walnuts or pecans for an added crunch in the batter.
Chef’s Notes
These Red Velvet Cupcakes have a rich history tied to Southern traditions and celebrations. I’ve experimented with this recipe over the years, and I love how people put their unique twist on it. Once, I added a hint of orange zest, and it was surprisingly delightful! The frosting was a disaster one time (don’t ask!), but I now have perfected a no-fail cream cheese recipe to ensure a smooth frosting experience. Remember, cooking is all about fun and embracing the mess!
FAQs and Troubleshooting
Q: Why did my cupcakes sink in the middle?
A: This could happen if the oven temperature was too low or if the cupcakes were underbaked. Make sure to reach the right temperature and test with a toothpick.
Q: Can I make these cupcakes ahead of time?
A: Absolutely! You can bake them a day in advance and store them in an airtight container. Frost them when you’re ready to serve.
Q: How can I store leftover cupcakes?
A: Keep them in an airtight container in the fridge for up to 3 days. You can also freeze them without frosting for up to 3 months—just thaw them in the fridge overnight when you’re ready to indulge!
Q: Can I use other types of food coloring?
A: Yes, you can experiment with different colors! Just remember that the flavor might slightly change with natural food coloring.
Nutritional Info
(Per Cupcake)
- Calories: 250
- Fat: 12g
- Carbohydrates: 35g
- Protein: 2g
I hope you enjoyed this journey into making Red Velvet Cupcakes! Whether you’re a seasoned pro or a first-time baker, these treats are sure to fill your kitchen with warmth and happiness. Remember, the most important ingredient is always love—so get in there and bake with joy! Happy baking, everyone!
Print
Ultimate Red Velvet Cupcakes
- Total Time: 40 minutes
- Yield: 12 servings 1x
- Diet: Vegetarian
Description
These Red Velvet Cupcakes are soft, moist, and topped with rich cream cheese frosting, perfect for any occasion.
Ingredients
- 1 and 1/2 cups all-purpose flour
- 1 cup granulated sugar
- 1 teaspoon baking soda
- 1 teaspoon baking powder
- 1/2 teaspoon salt
- 1 tablespoon cocoa powder
- 1 cup vegetable oil
- 1 cup buttermilk, room temperature
- 2 large eggs, room temperature
- 2 tablespoons red food coloring
- 1 teaspoon vanilla extract
- 1 teaspoon white vinegar
- 8 oz cream cheese, softened (for frosting)
- 1/2 cup unsalted butter, softened (for frosting)
- 4 cups powdered sugar (for frosting)
- 1 teaspoon vanilla extract (for frosting)
Instructions
- Preheat your oven to 350°F (175°C) and line a cupcake pan with paper liners.
- Combine the flour, sugar, baking powder, baking soda, salt, and cocoa powder in a large mixing bowl.
- Mix the vegetable oil, buttermilk, eggs, red food coloring, vanilla extract, and white vinegar in another bowl.
- Combine the wet mixture into the dry ingredients and gently fold until just combined.
- Fill each cupcake liner about two-thirds full using an ice cream scoop or ladle.
- Bake for about 18-20 minutes, or until a toothpick comes out clean.
- Cool in the pan for 5 minutes, then transfer to a wire rack to cool completely.
- Prepare the frosting by beating the cream cheese and butter until smooth, then gradually mix in the powdered sugar and vanilla extract.
- Frost the cooled cupcakes with the cream cheese frosting.
- Decorate with red velvet cake crumbs or chocolate shavings, and serve.
Notes
For a healthier twist, substitute granulated sugar with coconut sugar. You may also use a gluten-free flour blend to cater to dietary preferences.
- Prep Time: 20 minutes
- Cook Time: 20 minutes
- Category: Dessert
- Method: Baking
- Cuisine: American
Nutrition
- Serving Size: 1 cupcake
- Calories: 250
- Sugar: 20g
- Sodium: 200mg
- Fat: 12g
- Saturated Fat: 6g
- Unsaturated Fat: 4g
- Trans Fat: 0g
- Carbohydrates: 35g
- Fiber: 1g
- Protein: 2g
- Cholesterol: 30mg
Keywords: Red Velvet, Cupcakes, Desserts, Baking, Cream Cheese Frosting
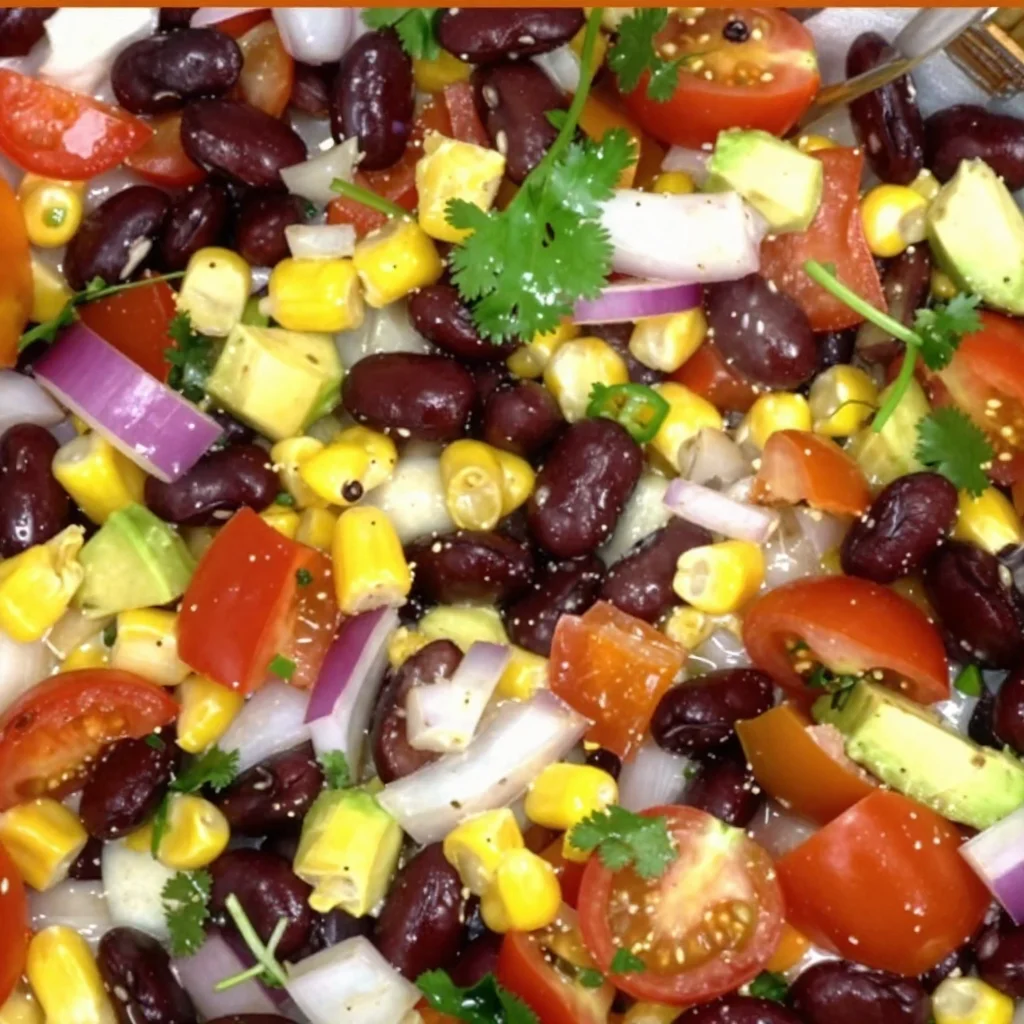
Minute Cowboy Caviar Salad for Weeknight Meal Prep
Cowboy Caviar Salad: A Flavorful Fiesta in a Bowl
Welcome to my kitchen! I’m so excited to share one of my absolute favorite salads with you today—Cowboy Caviar Salad. This vibrant dish is not just a salad; it’s a party in a bowl! Bursting with fresh vegetables, beans, and a zesty dressing, it’s perfect for any gathering, from casual get-togethers to festive celebrations. The best part? It’s super easy to whip up and is guaranteed to impress your friends and family.
Picture this: you’re kicking back at a summer barbecue, the sun is shining, and the aroma of grilled veggies wafts through the air. A big bowl of Cowboy Caviar Salad sits front and center on the picnic table, shimmering with colors that beckon everyone to dig in. As soon as you take a bite, the crunch of the veggies combined with the tangy dressing brings a wave of fresh flavors that instantly brightens your day. This dish is all about celebration—celebrating good food, good company, and the joy of sharing comforting meals that people will rave about long after the last bite.
Now that I’ve whetted your appetite, let me tell you a little story about how I fell in love with Cowboy Caviar Salad. One summer, I traveled to a friend’s ranch in Texas. It was my first time experiencing authentic cowboy culture, and I was on cloud nine. My friend’s mom made this incredible salad for a barbecue, and I was instantly hooked. The combination of black beans, corn, and fresh veggies was unlike anything I’d ever tasted, and the addition of a tantalizing dressing brought everything together perfectly. That moment sparked a journey into perfecting my own version of Cowboy Caviar Salad, filled with a few personal touches and a whole lot of love.
So grab your apron, and let’s get cooking!
Ingredients
Here’s what you’ll need to make this delicious Cowboy Caviar Salad. Each ingredient plays a vital role in creating those exciting flavors that keep everyone coming back for more.
-
Black Beans (1 can, drained and rinsed)
Black beans are the protein powerhouse of this dish! They add a creamy texture and a hearty flavor. You can substitute with kidney beans or pinto beans if you’re looking for a little twist. -
Corn (1 cup, fresh, frozen, or canned)
Corn brings a sweetness and crunch that lighten the salad. If fresh corn is out of season, frozen corn works just as well—just thaw it out before adding! Canned corn is also fine; just remember to drain and rinse it first. -
Cherry Tomatoes (1 cup, halved)
These little gems burst with tangy flavor and add a pop of color. If you can’t find cherry tomatoes, diced regular tomatoes will also do the trick. -
Red Bell Pepper (1, diced)
Red bell pepper adds sweetness and crunch. You can swap it for a yellow or orange bell pepper if you prefer. -
Red Onion (1/2, finely chopped)
It brings a sharp bite that balances the other flavors. You could substitute with green onions for a milder taste or even use shallots for sweetness. -
Avocado (1, diced)
Creamy avocado elevates the entire dish and adds a healthy fat component. If you’re looking to reduce calories, you can skip this or replace it with a dollop of Greek yogurt for creaminess. -
Cilantro (1/2 cup, chopped)
Fresh cilantro adds a burst of herbaceous flavor. If you’re not a fan, feel free to switch it out for parsley or omit it altogether. -
Lime Juice (from 2 limes)
This brightens everything up! Fresh lime juice works best; bottled lime juice won’t have the same vibrant flavor. -
Olive Oil (3 tablespoons)
Helps to marry the flavors and adds richness. You can use avocado oil for a different flavor profile. -
Salt and Pepper (to taste)
Always taste as you go! A pinch of salt and fresh cracked black pepper brings out the taste of all the ingredients. -
Cumin (1 teaspoon)
A pinch of cumin adds an earthy warmth that ties everything together. If you’re not a fan, you can skip it or use smoked paprika instead for a bit of a kick.
Step-by-Step Instructions
Alright, let’s get down to business and make this Cowboy Caviar Salad! Follow these steps, and I promise you’ll be enjoying a beautiful bowl of yum in no time.
Step 1: Prep Your Ingredients
First things first, let’s get everything washed, diced, and ready! Rinse the black beans and corn (if using canned), chop your tomatoes, bell pepper, onion, and cilantro, and dice your avocado. The key here is to get everything bite-sized so that every spoonful is a perfect mix of flavors and textures.
Step 2: Mix It All Together
Once your ingredients are prepped, it’s time to combine them. In a large mixing bowl, toss together the black beans, corn, cherry tomatoes, bell pepper, red onion, avocado, and cilantro. This is where the colorful magic happens! I love using a wooden spoon to gently mix everything, being careful not to mash the avocado too much.
Step 3: Whip Up the Dressing
Next, let’s elevate this salad with a zesty dressing! In a small bowl, whisk together the lime juice, olive oil, cumin, salt, and pepper. You want this dressing to be bold and bright! Drizzle it over your salad and toss everything together until it’s nicely coated. If you’re feeling adventurous, add a touch of hot sauce for an extra kick!
Step 4: Taste and Adjust
This is one of my favorite parts! Give your salad a taste and adjust the flavors as needed. Maybe it needs a pinch more salt or a squeeze of lime. Trust your palate; it knows what it wants! If the salad is too robust, you can always add a touch of honey or agave to balance it out.
Step 5: Chill and Serve
For the flavors to meld beautifully, let the Cowboy Caviar Salad chill in the fridge for at least 30 minutes. This is how the magic happens! When you finally serve it, it’s bursting with flavor. Feel free to add a sprinkle of extra cilantro on top for a pretty presentation.
Serving Suggestions
Cowboy Caviar Salad is incredibly versatile! Serve it in a large bowl with tortilla chips for dipping, as a side dish to your favorite grilled proteins, or even as a topping for tacos or burrito bowls. You can also layer it in a mason jar for a fun grab-and-go lunch. However you choose to enjoy it, it’s guaranteed to bring smiles to the table.
Recipe Variations
Here are some creative twists you can try with your Cowboy Caviar Salad:
- Spicy Cowboy Caviar: Add diced jalapeños for a spicy kick. Adjust the amount based on your heat tolerance!
- Southwestern Twist: Incorporate diced grilled chicken or shrimp for a heartier meal.
- Mediterranean Style: Swap out the beans for chickpeas and add feta cheese and olives for a Greek-inspired vibe.
- Quinoa Cowboy Caviar: Mix in cooked quinoa for added protein and a different texture.
- Fruit Fusion: Toss in some chopped mango or pineapple for a sweet twist that complements the savory ingredients beautifully.
Chef’s Notes
This Cowboy Caviar Salad has evolved over the years with my own personal touches! The original recipe I had in Texas was pretty basic, but I love adding different ingredients based on what’s in season or what I have in my fridge. Each batch has its own flair and story—some with an extra kick from chili powder or others with a touch of honey for sweetness. It’s all about experimenting and making it your own!
Whenever I make this salad, it reminds me of that fantastic summer in Texas and the memories made around the table with friends and family. Food has a wonderful way of connecting us, doesn’t it?
FAQs and Troubleshooting
1. Can I use canned beans?
Absolutely! Canned black beans work perfectly. Just make sure to drain and rinse them to remove excess sodium.
2. How long will it last in the fridge?
This salad is best enjoyed fresh, but it can last about 2-3 days in the fridge. The longer it sits, the softer the avocado will become. If you anticipate leftovers, consider adding avocado just before serving.
3. Can I make it ahead of time?
Definitely! Just make sure to add any avocado right before serving to prevent browning. The flavor will actually improve as it sits and chills.
4. What should I do if it’s too salty?
If your salad ends up being too salty, add a little bit of extra lime juice or a touch of sugar to balance it out. A little more corn or beans can also help dilute the saltiness.
Nutritional Info
(If applicable, please add the nutritional info for calculations based on your specific ingredients.)
This Cowboy Caviar Salad is not just delicious but also colorful and nutritious, packing in proteins, healthy fats, and fiber. Plus, it’s naturally gluten-free and vegan!
Thank you for joining me in my kitchen today! I hope you feel inspired to whip up this Cowboy Caviar Salad and share it with your loved ones. Remember, cooking is all about joy and creativity, so don’t be afraid to make it your own. Happy cooking, foodie friend!
Print
Cowboy Caviar Salad
- Total Time: 45 minutes
- Yield: 4 servings 1x
- Diet: Vegan
Description
A vibrant and flavorful salad bursting with fresh vegetables, beans, and a zesty dressing, perfect for any gathering.
Ingredients
- 1 can Black Beans, drained and rinsed
- 1 cup Corn (fresh, frozen, or canned)
- 1 cup Cherry Tomatoes, halved
- 1 Red Bell Pepper, diced
- 1/2 Red Onion, finely chopped
- 1 Avocado, diced
- 1/2 cup Cilantro, chopped
- Juice of 2 Limes
- 3 tablespoons Olive Oil
- Salt and Pepper, to taste
- 1 teaspoon Cumin
Instructions
- Prep your ingredients by washing, dicing, and getting everything ready.
- Mix all prepped ingredients in a large mixing bowl.
- Whip up the dressing by whisking together lime juice, olive oil, cumin, salt, and pepper.
- Taste and adjust flavors as needed.
- Chill the salad in the fridge for at least 30 minutes before serving.
Notes
Customize the salad with added ingredients like jalapeños for spice or grilled chicken for heartiness.
- Prep Time: 15 minutes
- Cook Time: 0 minutes
- Category: Salad
- Method: Mixing
- Cuisine: Tex-Mex
Nutrition
- Serving Size: 1 serving
- Calories: 250
- Sugar: 4g
- Sodium: 300mg
- Fat: 12g
- Saturated Fat: 1.5g
- Unsaturated Fat: 10g
- Trans Fat: 0g
- Carbohydrates: 30g
- Fiber: 8g
- Protein: 10g
- Cholesterol: 0mg
Keywords: salad, cowboy caviar, Tex-Mex, black beans, healthy recipes
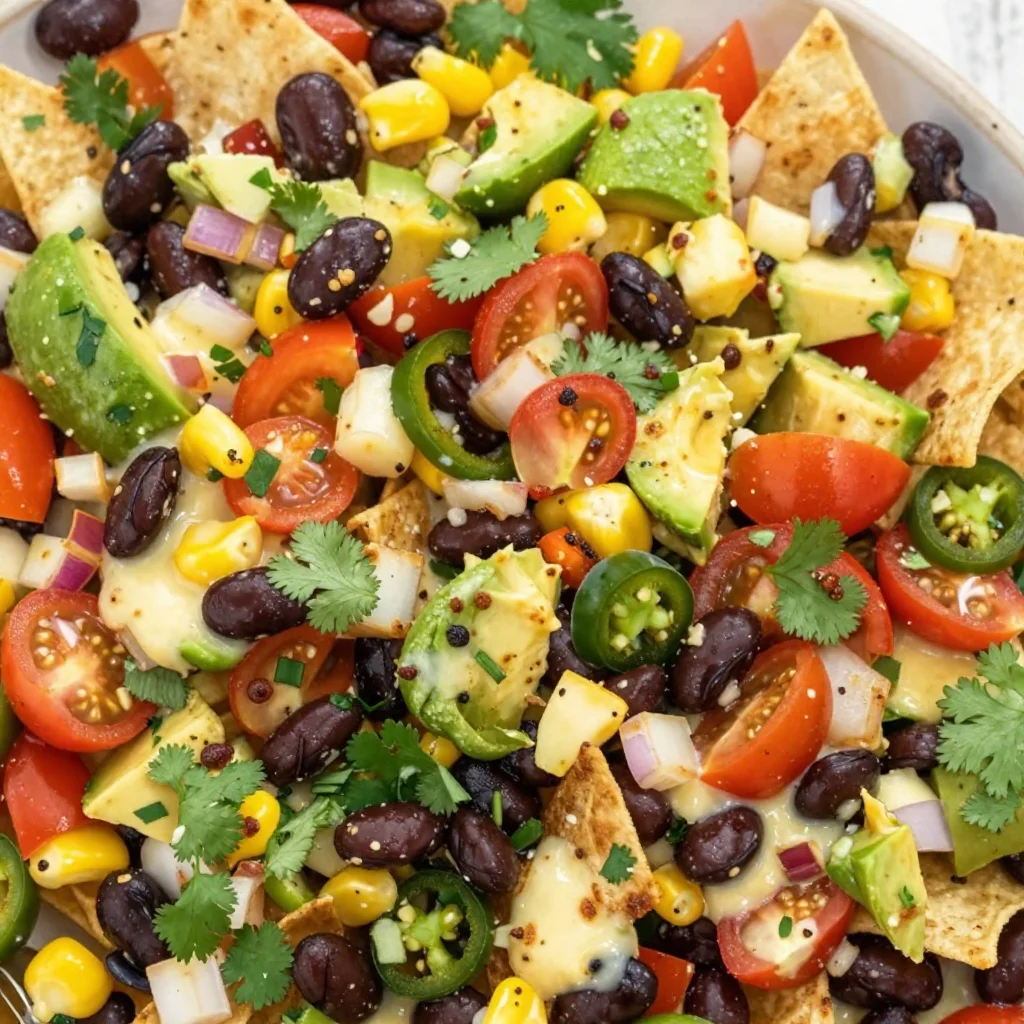
Cowboy Caviar
Cowboy Caviar: A Flavorful Twist on Fresh Ingredients
Welcome back to my cozy kitchen! I’m so excited to share with you a vibrant, crowd-pleasing recipe that’s near and dear to my heart: Cowboy Caviar. This dish is all about bold flavors, fresh ingredients, and the joy of sharing good food with friends and family. Whether you’re whipping it up for a game day party, a summer picnic, or just a cozy night in, this recipe is sure to be a hit!
Let’s face it, food has a way of bringing us together. When I think about my childhood, I remember weekends filled with laughter, stories, and lots of delicious food. Cowboy Caviar was often the star of our gatherings—a delightful mix of beans, veggies, and a zesty vinaigrette that just left everyone wanting more! The first time I tasted it, I was charmed by the explosion of flavors and colors in the dish. It caught my eye and my taste buds at my best friend’s barbecue, where her mom served it as a dip alongside crispy tortilla chips. I still remember how all of us gathered around the table, eagerly scooping up the vibrant concoction, chatting and giggling through bites. That moment captured the essence of what food truly means—community.
The best part about Cowboy Caviar is its versatility. You can easily customize it to suit your own taste preferences, making it a fantastic way to show off your culinary creativity. Plus, it’s no-fuss and requires no cooking (hello, fresh produce!). So, whether you’re a kitchen novice or a seasoned chef, you’ll definitely feel at home with this recipe. Grab your apron, put on your favorite playlist, and let’s get to cooking!
Personal Story
I fondly remember that summer evening when I first encountered Cowboy Caviar at my best friend Mia’s backyard barbecue. Her mom had this magical touch in the kitchen, creating dishes that felt both comforting and exciting. As the sun dipped below the horizon, casting a warm glow over the yard, we gathered at a picnic table lined with all kinds of summer food. There it was—a bright, colorful bowl of Cowboy Caviar, shimmering under the string lights hanging above.
Curious and eager, I dipped a tortilla chip into the vibrant mixture and took my first bite. It was a party of flavors—zesty, sweet, crunchy—each ingredient singing in harmony. We laughed, talked, and continued to devour the dish until it had nearly vanished. That experience not only created a beautiful memory with friends, but it also sparked my love for creating dishes that encourage connection and joy. Since then, I’ve made my own versions of Cowboy Caviar, each one bringing me back to that magical summer night. Now, it’s a staple at my gatherings where everyone feels welcomed and loved through shared deliciousness.
Ingredients
Here’s what you’ll need to whip up this delightful Cowboy Caviar! Make sure to get your hands on fresh produce for the best flavors:
- Black Beans: The base of our dish, providing protein and fiber. Canned black beans work perfectly; be sure to rinse and drain them before adding.
- Pinto Beans: They add a creamy texture and earthy flavor. You can swap them for more black beans if needed, or use chickpeas for a different twist.
- Corn: Sweet corn lends a pop of sweetness. Fresh off the cob is fantastic, but frozen or canned corn works just as well—just drain it well.
- Bell Peppers: Any color works (red, yellow, or green). They add crunch and color! Feel free to substitute with diced jalapeños for some heat.
- Red Onion: Offers a sharp bite that balances the creaminess of the beans. Soaking them in cold water for 10 minutes will mellow their flavor if you prefer a milder taste.
- Avocado: Creamy and rich, this adds a beautiful texture. Make sure it’s ripe to achieve the best flavor. You can omit it for a lower-fat version or use diced mango for sweetness!
- Cherry Tomatoes: Burst with sweetness! Halved or quartered, they brighten the dish. You can use any tomatoes you have on hand.
- Cilantro: Fresh herbs introduce a burst of flavor. If you’re not a cilantro fan, fresh parsley or chives can be great substitutes.
- Lime Juice: This brightens the whole dish! Fresh is best, but bottled lime juice will work in a pinch.
- Olive Oil: A splash adds richness. Feel free to experiment with flavored oils like garlic or lemon for extra depth.
- Salt and Pepper: Essential for seasoning! Always taste your dish and adjust as needed.
Step-by-Step Instructions
Now that we have our ingredients ready, let’s dive into the fun part—how to put it all together!
-
Prepare the Beans: In a large mixing bowl, add the rinsed and drained black beans and pinto beans. Give them a good stir. By combining the two types of beans, you’re introducing a beautiful contrast in flavors and textures. Feel free to use canned beans; they save time and still taste great!
-
Add the Corn: Next, toss in the corn. If using frozen corn, let it thaw before adding it to the mix. Fresh corn? Simply cut it off the cob and mix it in raw—the sweetness will be outstanding!
-
Chop the Veggies: Dice the bell peppers, red onion, and cherry tomatoes. Aim for equal-sized pieces so they all blend seamlessly for a balanced bite. I love using a sharp knife to make this easy, then scooping all those colorful chunks into the mixing bowl.
-
Fresh Ingredients Come Together: At this stage, add your finely chopped cilantro and diced avocado. Avocado adds a creamy texture, contributing to the overall mouthfeel—just be careful not to mash it into the mix!
-
Dress It Up: In a separate small bowl, whisk together lime juice, a drizzle of olive oil, and salt and pepper. This dressing brings the flavors together—tangy and savory! Pour it over the cowboy caviar mixture.
-
Give it a Good Stir: Using a spatula or spoon, gently fold everything together. Make sure you’re mixing evenly, but be gentle with the avocado. You want everything combined without mashing the beautiful pieces.
-
Taste Test: This is my favorite part! Grab a chip and dip into your Cowboy Caviar. Taste and adjust seasoning if necessary. More lime? A sprinkle of salt? Go for it! Your taste buds should guide this part.
-
Chill: For the most delicious flavors, let the Cowboy Caviar sit in the fridge for at least 30 minutes before serving. This helps the flavors meld beautifully. If you’re short on time, don’t worry—it’s still delicious right away!
Serving Suggestions
When it’s time to serve, grab your favorite tortilla chips and a beautiful serving bowl. Scoop the Cowboy Caviar into a vibrant dish to showcase all those beautiful colors! You can also use it as a topping for tacos, grilled chicken, or even a hearty salad. A sprinkle of extra cilantro or a squeeze of lime on top for presentation looks extra inviting!
Recipe Variations
Cowboy Caviar is wonderfully flexible! Here are some fun twists to try:
- Spicy Kick: Add diced jalapeños or a splash of your favorite hot sauce for an extra kick.
- Sweet & Savory: Incorporate diced mango or pineapple for a refreshing sweetness.
- Greek-Style: Swap out the cilantro for fresh dill and add crumbled feta cheese for a Mediterranean flair.
- Quinoa Boost: Mix in cooked quinoa for added protein and texture.
- Southwestern Flair: Include diced avocado and a sprinkle of taco seasoning for a bold southwestern flavor.
Chef’s Notes
As I’ve made Cowboy Caviar over the years, I’ve discovered so many ways to adjust it to fit the mood or occasion! It started as a simple dip and has evolved into a colorful side dish at potlucks or barbecues. I even find that it makes a great breakfast when piled over scrambled eggs or avocado toast! One funny memory is when my brother tried to recreate it without a recipe—let’s just say, we discovered he should stick to grilling steak! Cooking is about experimenting and having fun, and that’s the spirit I hope to share with you through this recipe.
FAQs and Troubleshooting
Here are a few common questions I receive about Cowboy Caviar and some potential pitfalls to avoid:
-
Can I make it ahead of time? Absolutely! Cowboy Caviar tastes even better the next day as the flavors meld. Just make sure to add the avocado right before serving to keep it fresh.
-
What if I don’t like beans? No problem! You can skip them and replace them with extra veggies like zucchini or squash for a fresh alternative.
-
How do I store leftovers? Store in an airtight container in the fridge. It’ll last for about 3-5 days, but it’s best enjoyed fresh!
-
What’s the best way to use leftovers? I love using leftover Cowboy Caviar as a topping for grilled fish, tacos, or salads. Get creative—your meal will be tastier for it!
Nutritional Info
This Cowboy Caviar is not only packed with flavor but also offers a variety of health benefits! A typical serving provides a good balance of protein, fiber, and healthy fats. Here’s a quick breakdown (per serving, approximately 1/2 cup):
- Calories: 150
- Protein: 8g
- Fat: 6g
- Carbohydrates: 20g
- Fiber: 6g
Thanks for joining me in my kitchen today! I hope you enjoy the wonderful flavors of Cowboy Caviar and the delightful moments it brings to your gatherings. Now grab your ingredients, put on some music, and start stirring up your own bowl of happiness! Happy cooking!
Print
Cowboy Caviar
- Total Time: 15 minutes
- Yield: 4 servings 1x
- Diet: Vegetarian
Description
A vibrant, crowd-pleasing dish with a bold mix of beans, veggies, and a zesty vinaigrette, perfect for gatherings.
Ingredients
- 1 can Black Beans, rinsed and drained
- 1 can Pinto Beans, rinsed and drained
- 1 cup Corn (fresh, frozen, or canned)
- 1 cup Bell Peppers, diced
- 1/2 cup Red Onion, diced
- 1 Avocado, diced
- 1 cup Cherry Tomatoes, halved
- 1/4 cup fresh Cilantro, chopped
- 1/4 cup Lime Juice
- 2 tbsp Olive Oil
- Salt and Pepper to taste
Instructions
- Prepare the Beans: In a large mixing bowl, add the rinsed and drained black beans and pinto beans. Stir to combine.
- Add the Corn: Toss in the corn, ensuring it’s well mixed with the beans.
- Chop the Veggies: Dice the bell peppers, red onion, and cherry tomatoes into equal-sized pieces.
- Fresh Ingredients Come Together: Add the finely chopped cilantro and diced avocado into the mixing bowl.
- Dress It Up: In a separate bowl, whisk together lime juice, olive oil, salt, and pepper, then pour over the Cowboy Caviar mixture.
- Give it a Good Stir: Gently fold everything together without mashing the avocado.
- Taste Test: Adjust seasoning as necessary according to your taste.
- Chill: Allow the Cowboy Caviar to sit in the fridge for at least 30 minutes before serving.
Notes
Cowboy Caviar tastes better the next day, so feel free to make it ahead of time. Add avocado just before serving to keep it fresh.
- Prep Time: 15 minutes
- Cook Time: 0 minutes
- Category: Appetizer
- Method: Mixing
- Cuisine: Mexican
Nutrition
- Serving Size: 1/2 cup
- Calories: 150
- Sugar: 3g
- Sodium: 300mg
- Fat: 6g
- Saturated Fat: 1g
- Unsaturated Fat: 5g
- Trans Fat: 0g
- Carbohydrates: 20g
- Fiber: 6g
- Protein: 8g
- Cholesterol: 0mg
Keywords: Cowboy Caviar, Dip, Appetizer, Beans, Fresh Produce
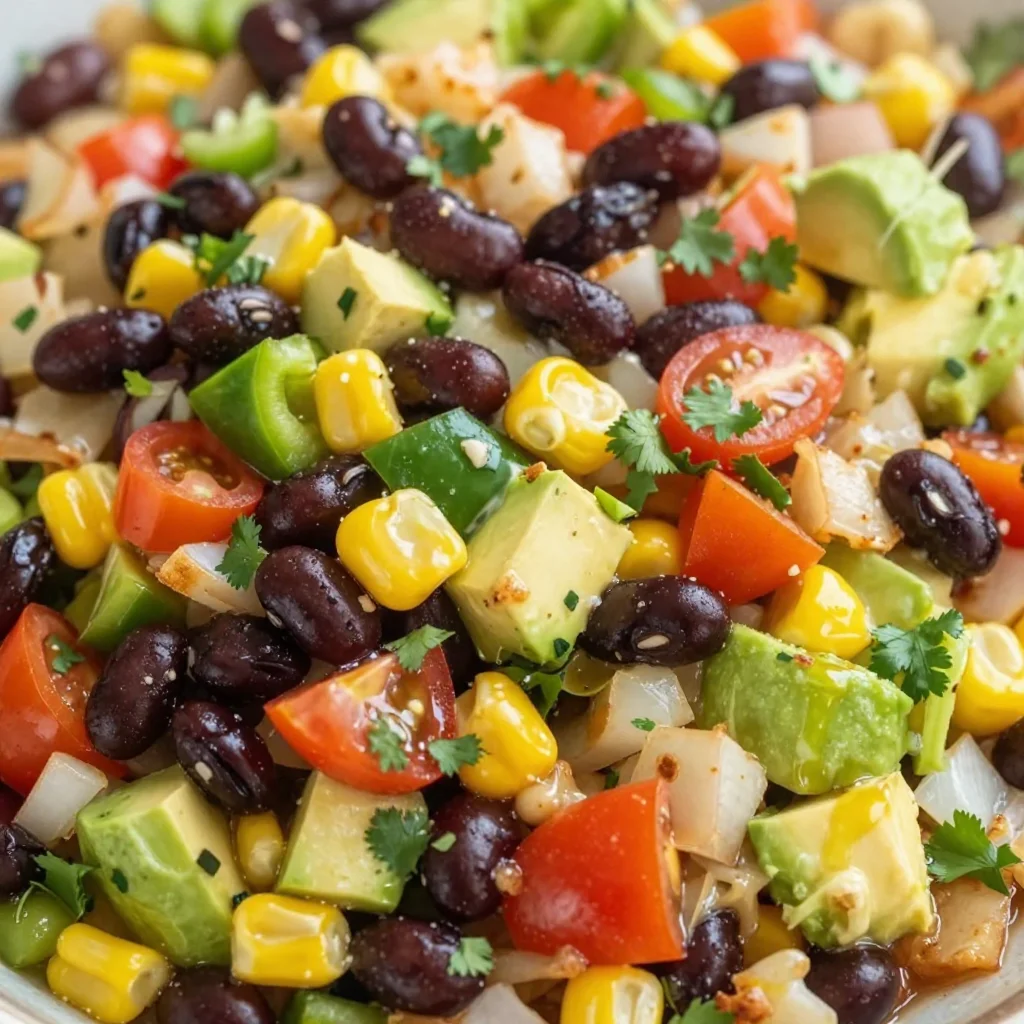
Cowboy Caviar
Cowboy Caviar: A Colorful Dip for Every Occasion
Welcome to my kitchen, my foodie friends! Today, I’m beyond excited to share a recipe that brings a burst of flavor and a bit of sunshine to any gathering: Cowboy Caviar. This vibrant dish is not only a feast for the eyes, but it’s also packed with nutrients and love. Picture this: a colorful medley of black beans, corn, tomatoes, and zesty dressings that combine to create a dip that is simply irresistible. Perfect for parties, picnics, or even just a cozy evening at home, Cowboy Caviar has become a staple in my kitchen, and I can’t wait for you to experience it too!
Now, let me take you back to a warm summer day when I first encountered this crowd-pleaser. My best friend Sarah invited me over for a casual backyard BBQ, and as soon as I stepped through the gate, I was hit with the inviting scent of grilled veggies and something oh-so-fresh. It was then that I saw it — a big bowl of Cowboy Caviar sitting pretty on the table, glimmering in the sunlight like a rainbow. I took a dip with some crispy tortilla chips, and the explosion of flavors made my taste buds dance! From that moment, I was hooked. Since then, I’ve played around with the traditional recipe and made it my own. It’s a dish that brings people together, and I can guarantee that this version will do just that!
But before we dive into the delicious details, let’s talk ingredients. No need for fancy-schmancy stuff here. Just a few simple, fresh ingredients will do the trick, and I promise you’ll be amazed by the incredible flavors that come together. So grab your apron, and let’s get cooking!
Ingredients
Here’s what you’ll need to create your own Cowboy Caviar:
-
Black Beans (1 can, rinsed and drained)
Black beans are not only delicious but also packed with protein and fiber. If you don’t have black beans, feel free to substitute them with kidney beans or pinto beans for a different twist! -
Corn (1 can, drained)
Sweet corn adds a natural sweetness and crunch. You can also use fresh corn off the cob when it’s in season or even frozen corn—just make sure to thaw and drain it well! -
Cherry Tomatoes (1 cup, halved)
Cherry tomatoes add a pop of color and juiciness. Any tomato variety works here, though I recommend using grape tomatoes for their sweetness. If fresh isn’t available, you can use a can of diced tomatoes, just drain them! -
Red Bell Pepper (1, finely chopped)
The sweetness and crunch of red bell peppers are essential for that crunchy texture. If you’re looking for more spice, diced jalapeños can offer a delightful kick, or you can use green bell peppers for a milder flavor. -
Red Onion (1/2, finely chopped)
Adds a delightful sharpness to the mix. If you find raw onion too intense, soak the chopped onion in cold water for about 10 minutes to mellow out the flavor. -
Fresh Cilantro (1/4 cup, chopped)
This herb elevates the dish with its fresh flavor. If you’re not a fan of cilantro, try using parsley or omit it altogether. -
Lime Juice (from 2 limes)
Lime juice gives Cowboy Caviar its zesty brightness. You can switch it up with lemon juice for a slightly different flavor profile. -
Olive Oil (2 tablespoons)
A splash of olive oil helps bring everything together. Avocado oil is a great alternative if you’d like a change in flavor. -
Seasoning (1 teaspoon each of salt, pepper, cumin, and chili powder)
These spices bring warmth and depth to the dish. Feel free to add more chili powder if you like it spicy or swap in taco seasoning for a different flavor spin.
Step-by-Step Instructions
Now that we’ve got our vibrant cast of ingredients ready, let’s bring this Cowboy Caviar to life! Trust me, it’s easier than you think.
-
Prep the Veggies: Start by gathering all your fresh ingredients. Rinse and drain the black beans and corn in a colander. Then, chop the red onion, red bell pepper, and cilantro, halving the cherry tomatoes as you go.
Tip: A sharp knife is your best friend—keep everything tidy and neat to make it easier to mix later!
-
Mix It Up: In a large mixing bowl, combine the black beans, corn, chopped cherry tomatoes, red bell pepper, red onion, and cilantro. Use a spatula or wooden spoon to gently fold everything together. You want to make sure all the ingredients are well incorporated without smashing them!
Hack: If you’re using canned beans, give them a quick rinse to get rid of excess sodium and residue. This really elevates the fresh flavor!
-
Dressing Time: In a separate small bowl, whisk together the lime juice, olive oil, salt, pepper, cumin, and chili powder. This dressing is the magic sauce that ties all the flavors together, so don’t skip this step!
Chef Insight: If you love a little heat, consider adding a few dashes of hot sauce to the dressing before mixing it in!
-
Combine Everything: Pour the dressing over the vegetable mixture and gently fold until everything is well coated. Taste and adjust the seasoning if needed—you want to find that perfect balance of flavors!
-
Let It Chill: Cover the bowl with plastic wrap or a lid and let it chill in the fridge for at least 30 minutes. This allows the ingredients to meld beautifully. Trust me, it’s worth the wait!
Tip: If you’re short on time, you can serve it right away, but letting it chill enhances the flavors significantly!
-
Serve It Up: Once the flavors have mingled beautifully, scoop your Cowboy Caviar into a serving bowl! You can garnish it with a sprinkle of additional cilantro or maybe a few diced avocados for added creaminess.
Serving Suggestions
Cowboy Caviar is versatile! Serve it as a dip with tortilla chips, pile it onto a bed of greens for a zesty salad, or use it as a topping for grilled chicken or fish. The colorful presentation will not only delight your guests but will also have everyone asking for the recipe!
Recipe Variations
-
Add Avocado: Cube up a ripe avocado and fold it into the mix right before serving for creaminess that’s heavenly!
-
Spicy Twist: Add diced jalapeños if you like some heat, or use a spicy bean mix instead of regular beans.
-
Tropical Touch: Toss in some diced mango or pineapple for a sweet, tropical flair.
-
Grain Boost: For a heartier dish, serve it with cooked quinoa or brown rice to create a filling bowl.
-
Cheesy Fun: Sprinkle crumbled feta or shredded cheese on top for a decadent twist!
Chef’s Notes
Cowboy Caviar has evolved so much in my kitchen over the years. Initially, I followed traditional recipes strictly, but as I began to experiment, I discovered how forgiving and versatile it is. I’ve enjoyed it during vibrant summer barbecues, cozy winter gatherings, and even as a quick snack when I’m craving something fresh. Plus, it’s a fantastic recipe to make with the kids—let them choose their favorite ingredients for a fun, family cooking session!
FAQs and Troubleshooting
-
Why is my Cowboy Caviar too watery?
If your dip seems too liquidy, ensure you’ve drained everything well, especially the beans and corn. You might also want to add more solid ingredients like bell peppers to balance it out! -
Can I make it ahead of time?
Yes! Cowboy Caviar actually tastes better the next day as the flavors have time to blend. Just keep it in an airtight container in the fridge for up to 3 days. -
What can I serve it with?
Cowboy Caviar pairs fabulously with tortilla chips, but it can also be served with pita chips, on tacos, or even as a topping for grilled meats and fish. -
Can I freeze it?
It’s best enjoyed fresh, but if you have leftover, you can freeze it. However, the texture may change once thawed, so it’s better as a fresh dish!
Nutritional Info
While nutritional information may vary based on specific ingredients and brands used, here’s a general breakdown per serving (1/2 cup):
- Calories: 120
- Protein: 7g
- Carbohydrates: 20g
- Fiber: 5g
- Fat: 4g
And there you have it—your very own Cowboy Caviar! So whether you’re dipping into it on game day or serving it for a fancy brunch with friends, this recipe is sure to bring joy and deliciousness to your table. I’d love to hear about your adventures in the kitchen as you whip up this gem, so feel free to share your stories or any fun twists you create! Happy cooking!
Print
Cowboy Caviar
- Total Time: 45 minutes
- Yield: 4 servings 1x
- Diet: Vegan
Description
A vibrant dip made with black beans, corn, tomatoes, and zesty dressings, perfect for parties and gatherings.
Ingredients
- 1 can Black Beans, rinsed and drained
- 1 can Corn, drained
- 1 cup Cherry Tomatoes, halved
- 1 Red Bell Pepper, finely chopped
- 1/2 Red Onion, finely chopped
- 1/4 cup Fresh Cilantro, chopped
- Juice from 2 Limes
- 2 tablespoons Olive Oil
- 1 teaspoon Salt
- 1 teaspoon Pepper
- 1 teaspoon Cumin
- 1 teaspoon Chili Powder
Instructions
- Prep the Veggies: Gather all your fresh ingredients. Rinse and drain the black beans and corn in a colander. Chop the red onion, red bell pepper, and cilantro, halving the cherry tomatoes as you go.
- Mix It Up: In a large mixing bowl, combine the black beans, corn, cherry tomatoes, red bell pepper, red onion, and cilantro. Use a spatula to gently fold everything together.
- Dressing Time: In a separate small bowl, whisk together the lime juice, olive oil, salt, pepper, cumin, and chili powder.
- Combine Everything: Pour the dressing over the vegetable mixture and gently fold until well coated. Taste and adjust seasoning if needed.
- Let It Chill: Cover the bowl and let it chill in the fridge for at least 30 minutes.
- Serve It Up: Scoop the Cowboy Caviar into a serving bowl and garnish as desired.
Notes
This dip is perfect as a snack or served with tortilla chips. It tastes even better the day after as flavors meld.
- Prep Time: 15 minutes
- Cook Time: 0 minutes
- Category: Appetizer
- Method: Mixing
- Cuisine: Tex-Mex
Nutrition
- Serving Size: 1/2 cup
- Calories: 120
- Sugar: 4g
- Sodium: 300mg
- Fat: 4g
- Saturated Fat: 0.5g
- Unsaturated Fat: 3g
- Trans Fat: 0g
- Carbohydrates: 20g
- Fiber: 5g
- Protein: 7g
- Cholesterol: 0mg
Keywords: cowboy caviar, dip recipe, black bean dip, healthy appetizer
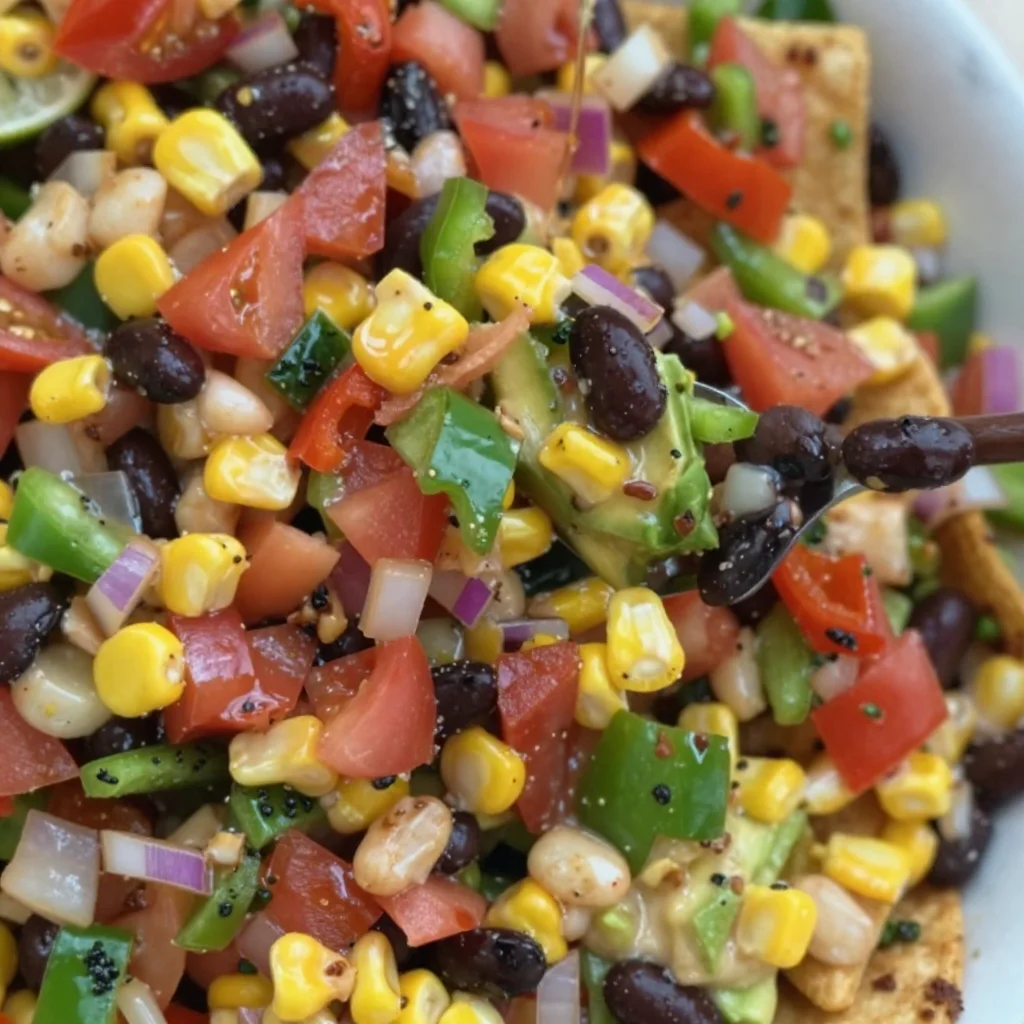
Cowboy Caviar
Cowboy Caviar: The Ultimate Celebration of Flavor and Community
Welcome to my kitchen! If you’ve landed here, you’re probably searching for a fun and flavorful recipe that’ll bring smiles to your family and friends. Well, you’re in for a treat because today, we’re making one of my all-time favorites: Cowboy Caviar! This vibrant, colorful dish isn’t just a feast for the eyes—it’s a harmony of flavors that you can enjoy as a dip, a salad, or even as a filling for tacos.
Cowboy Caviar is essentially a party on a plate, bursting with fresh veggies, beans, and a zesty dressing that will have everyone coming back for more. It’s perfect for those sunny days when you want to serve something refreshing and light or for any gathering where you want to impress without spending hours slaving in the kitchen. Plus, it’s an incredible way to celebrate the bounty of seasonal produce.
Now, you might be wondering why it’s called “Cowboy Caviar.” Well, let me take you back to my childhood. In our family, gatherings meant good food, laughter, and lots of storytelling. My grandmother would whip up a big batch of what she called “cowboy salad” during our summer cookouts, and it was always the hit of the party. We’d dip crispy tortilla chips into that colorful mixture, and every bite felt like a taste of sunshine. Fast forward to today, and we’re still sharing those moments with new flavors and twists, but the nostalgia remains.
So roll up your sleeves and let’s dive into this delightful Cowboy Caviar recipe that’ll have you feeling like a culinary rockstar.
Personal Story
One of my favorite memories involves my childhood friend, Emma. Each summer, we would spend countless afternoons in our backyard, soaking up the sun and devouring whatever delicious concoctions we could whip up. Emma’s mom would always make her famous “cowboy salad,” and it instantly became our favorite. It seemed like magic how such simple ingredients transformed into a vibrant mix of flavor and texture. We could never get enough of those crispy tortilla chips paired with the colorful medley of black beans, corn, and tomatoes.
One day, we decided to host our own backyard barbecue and surprise her mom by recreating that cowboy salad. Armed with a garden full of ripe tomatoes, fresh herbs, and a couple of cans from the pantry, we set to work. The kitchen was filled with laughter and our slightly off-pitched renditions of our favorite songs. By the time we were done, we realized it wasn’t just about the food—it was about the memories we were making together. That’s why this Cowboy Caviar holds a special place in my heart; it symbolizes the joy of cooking together and sharing food with the people we love.
Ingredients
Let’s get all our ingredients ready! Here’s what you’ll need to create this delicious Cowboy Caviar:
-
Black Beans: One can, drained and rinsed. If you prefer, you can use pinto beans or chickpeas for a different texture. They’re packed with protein and fiber, making this dish healthy, too!
-
Corn: One cup of frozen corn (thawed) or fresh corn cut off the cob. The sweetness from the corn really enhances the flavor profile of this dish. If you’re a fan of spicy, try grilling the corn before adding it for a smoky kick!
-
Cherry Tomatoes: About one cup, halved. These bright little gems add juiciness. You can substitute grape tomatoes or even diced regular tomatoes if that’s what you’ve got.
-
Red Onion: One small, finely chopped. For a milder flavor, soak it in cold water for 10 minutes before chopping. This will mellow its sharpness a bit.
-
Green Bell Pepper: One medium-sized, diced. It adds crunch and freshness. Feel free to swap it with a yellow or orange bell pepper for a sweeter flavor or even jalapeño for some heat!
-
Cilantro: A small bunch, roughly chopped. This herb is essential for that fresh flavor! If you’re not a fan of cilantro, parsley can serve as a great substitute.
-
Lime Juice: Freshly squeezed from one lime. The acidity brightens the whole dish. Not a lime fan? A splash of red wine vinegar works nicely, too.
-
Olive Oil: Two tablespoons for the dressing. It helps bring everything together. You can also use avocado oil for a milder taste.
-
Taco Seasoning: About one to two teaspoons depending on your spice preference. You can make your own mix or use a store-bought option. To decrease sodium, use a homemade spice blend with cumin, paprika, and chili powder.
-
Salt & Pepper: To taste. These basic seasonings elevate the flavors—don’t skip them!
Step-by-Step Instructions
Now that we have everything gathered, let’s turn those ingredients into a vibrant Cowboy Caviar!
-
Rinse and Drain: Start by rinsing the black beans under cold water in a fine-mesh sieve. Draining them well helps to avoid a watery mixture!
Tip: If you’re using dried beans, soak and cook them the night before for a fresh, homemade taste!
-
Prepare the Corn: If using fresh corn, slice it off the cob and boil it briefly (about 2-3 minutes) to retain its sweetness and crunch. If you’re using frozen, just toss it in a bowl to thaw.
-
Chop the Veggies: Dice the cherry tomatoes, red onion, and green bell pepper into bite-sized pieces. Feel free to go big or small, depending on your preference!
Chef Hack: Keeping the pieces consistent in size not only makes it visually appealing but also ensures a balanced bite each time you dig in.
-
Mix It All Together: In a large mixing bowl, combine the rinsed black beans, corn, halved cherry tomatoes, and chopped veggies. Use a spatula or wooden spoon to combine—this is where you can get creative!
-
Make the Dressing: In a separate small bowl, whisk together the lime juice, olive oil, taco seasoning, salt, and pepper. Taste as you go to balance it out according to your liking.
Chef Tip: Adding a bit of honey or agave can help cut the acidity if you prefer a touch of sweetness.
-
Dress the Caviar: Pour the dressing over the cowboy caviar mixture and toss gently to coat everything evenly.
-
Chill: For the best flavor, let your Cowboy Caviar sit in the refrigerator for at least 30 minutes. This resting time allows the flavors to mingle and develop.
Personal Note: I often make this a day ahead of time! It’s one of those recipes that gets better with each passing hour.
-
Serve: When you’re ready to serve, give it a final toss and send it to the table with crispy tortilla chips, or layer it as a topping for tacos or burritos!
Serving Suggestions
Whether you’re hosting a big get-together or enjoying a cozy movie night at home, Cowboy Caviar can stand on its own or play a role in various meals! Serve it in a beautiful bowl with tortilla chips surrounding it for that party vibe. You can also scoop it onto greens for a refreshing salad or pile it high in burritos. It’s versatile, colorful, and just downright delicious!
Recipe Variations
Feeling adventurous? Here are a few tasty twists you can try with your Cowboy Caviar:
- Avocado Addition: Dice a ripe avocado and gently fold it into your mixture for a creamy texture that adds richness.
- Spicy Cowboy Caviar: Toss in diced jalapeños or a pinch of cayenne pepper for heat.
- Grain Bowls: Serve the caviar over quinoa or rice for a hearty and satisfying meal.
- Mediterranean Twist: Swap out corn for diced cucumber and add feta cheese and kalamata olives for a refreshing Mediterranean vibe.
- Sweet and Spicy: For a unique flavor profile, drizzle some honey over it before serving to balance out the heat and add sweetness.
Chef’s Notes
This recipe is always evolving in my kitchen! I’ve experimented with different beans, veggies, and spice levels over the years. One of my funniest memories was when I mistakenly added a spoonful of cayenne pepper instead of chili powder—let’s just say it turned into a fiery adventure! The key takeaway is to have fun and make it your own. Food is a reflection of our tastes and experiences, so feel free to add elements that resonate with you.
FAQs and Troubleshooting
Q: How long can I store Cowboy Caviar?
A: You can store it in an airtight container in the refrigerator for up to 3 days. However, the sooner you eat it, the better it tastes!
Q: What if my Cowboy Caviar is too soupy?
A: If you find it too liquidy after mixing, try adding more beans or corn to absorb the extra moisture. You can also drain some liquid before serving.
Q: Can I make this recipe ahead of time?
A: Absolutely! I recommend making it a few hours in advance or even the night before. Just wait to add any avocado until right before serving to prevent browning.
Q: Is it possible to turn this into a main dish?
A: Totally! Serve it over a bed of greens or grains like quinoa or brown rice. You can even add grilled chicken or shrimp for a protein-packed meal.
Nutritional Info
Per Serving (based on 10 servings): Approximately 130 calories, 5g protein, 20g carbohydrates, 4g fat, 3g fiber. Keep in mind that the caloric count can change based on any added ingredients or variations.
Cowboy Caviar is more than just a recipe; it’s a way to gather people and create memories. So, throw on your apron, bring the energy, and let’s celebrate good food and great company. Happy cooking, friends!
Print
Cowboy Caviar
- Total Time: 20 minutes
- Yield: 10 servings 1x
- Diet: Vegetarian
Description
A vibrant and flavorful dish bursting with fresh veggies, beans, and a zesty dressing, perfect for a dip, salad, or filling for tacos.
Ingredients
- 1 can Black Beans, drained and rinsed
- 1 cup Corn, frozen (thawed) or fresh
- 1 cup Cherry Tomatoes, halved
- 1 small Red Onion, finely chopped
- 1 medium Green Bell Pepper, diced
- 1 small bunch Cilantro, roughly chopped
- Juice of 1 Lime, freshly squeezed
- 2 tablespoons Olive Oil
- 1 to 2 teaspoons Taco Seasoning
- Salt & Pepper, to taste
Instructions
- Rinse the black beans under cold water in a fine-mesh sieve.
- Prepare the corn by slicing it off the cob and boiling it briefly if using fresh.
- Chop the cherry tomatoes, red onion, and green bell pepper into bite-sized pieces.
- Mix the rinsed black beans, corn, halved cherry tomatoes, and chopped veggies in a large bowl.
- Make the dressing by whisking together lime juice, olive oil, taco seasoning, salt, and pepper in a separate bowl.
- Dress the cowboy caviar mixture and toss gently to coat.
- Chill for at least 30 minutes in the refrigerator.
- Serve with crispy tortilla chips or use as a topping for tacos or burritos.
Notes
This dish can be made ahead of time; it tastes better after sitting for a few hours or overnight.
- Prep Time: 15 minutes
- Cook Time: 5 minutes
- Category: Appetizer
- Method: Mixing
- Cuisine: American
Nutrition
- Serving Size: 1 serving
- Calories: 130
- Sugar: 3g
- Sodium: 200mg
- Fat: 4g
- Saturated Fat: 0.5g
- Unsaturated Fat: 3g
- Trans Fat: 0g
- Carbohydrates: 20g
- Fiber: 3g
- Protein: 5g
- Cholesterol: 0mg
Keywords: Cowboy Caviar, Dip, Salad, Tacos, Vegetarian, Easy Recipe, Fresh Veggies
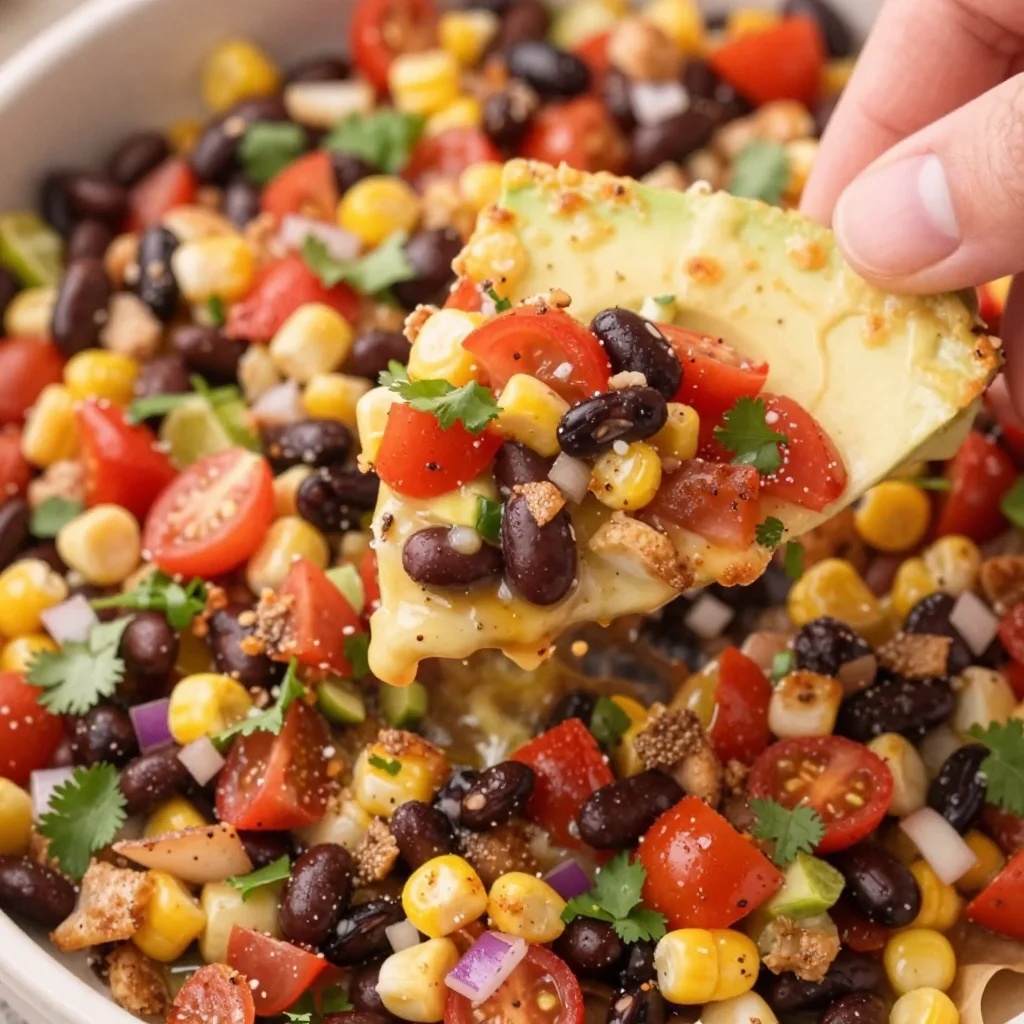
Cowboy Caviar
Cowboy Caviar: A Flavorful Journey into the Heart of the Southwest
Welcome to my kitchen! I’m thrilled you’re here to explore the colorful world of Cowboy Caviar with me. If you’ve never experienced this zesty, vibrant dish, prepare to embark on a culinary adventure that’s perfect for gatherings, cozy evenings in, or even a solo snack session. Think of Cowboy Caviar as a fiesta in a bowl — a scrumptious blend of fresh ingredients that brings a taste of the Southwest right to your table.
Picture this: a hot summer day, the sun shining, and laughter filling the air as friends gather for a casual backyard barbecue. The grill is sizzling, and the scent of smoky meats wafts through the air. But wait! The real star of the spread is bubbling away in a bowl nestled on the picnic table — that’s right, it’s Cowboy Caviar! Your friends dip their tortilla chips into the shimmering mix of beans, tomatoes, and bright peppers while chatting and sharing stories, and suddenly the day feels a little brighter and filled with love.
What I adore about Cowboy Caviar is its versatility and ease. It can be an appetizer, a side dish, or even a light meal on its own. And, like any good recipe, it’s inspired by my moments in the kitchen — where every stir, taste, and garnish tells a story. As a home cook, my goal is to create dishes that celebrate the joy of cooking and sharing. So grab your apron and let’s dive into some Cowboy Caviar magic!
A Trip Down Memory Lane
Cowboy Caviar was something I discovered during a family reunion in Texas a few years back. Armed with my trusty notepad and a healthy appetite, I was determined to soak up every recipe, tip, and tale from my relatives. One evening, while the sun dipped deliciously low in the sky, my great-aunt Clara set down a bowl brimming with what I would come to know as Cowboy Caviar.
I remember the vibrant colors of black beans, fresh corn, and sunny tomatoes mingling with a kick of lime and cilantro. It was a feast for the eyes as much as the palate! As we sat around the table, everyone shared their versions of the dish, each with its own flair and family secrets. By the end of the night, with bellies full and laughter echoing, I realized that this lively dish didn’t just feed us; it connected us. It’s funny how food has a way of wrapping you in nostalgia, isn’t it?
I left that family reunion not just with a full stomach but with a heart bursting with inspiration. That’s when I knew I had to recreate Cowboy Caviar in my own kitchen — blending my personal touches with the cherished memories from my family.
Ingredients: The Building Blocks of Flavor
Now that we’ve set the scene, let’s gather our ingredients. Cowboy Caviar is super accessible, and you probably have many of these items on hand. Here’s what you’ll need:
-
Black Beans (1 can, rinsed and drained): The hearty base of the dish adds protein. Feel free to substitute with pinto or kidney beans for a different flavor.
-
Corn (1 can or 1 cup fresh): Sweet and crunchy, corn brings a pop of flavor! If using fresh corn, grill it for extra smokiness.
-
Diced Tomatoes (1 cup): Juicy, ripe tomatoes are a must! Cherry tomatoes work great here. If you want less liquid, opt for diced fire-roasted tomatoes.
-
Red Onion (1 small, diced): Adds a sharp bite. If raw onion isn’t your thing, soak the diced onion in cold water for 10 minutes to mellow it out.
-
Bell Peppers (1-2, diced): Choose a mix of colors — green, red, and yellow — for sweetness and crunch. If you’re feeling adventurous, throw in a jalapeño for heat!
-
Cilantro (1/4 cup, chopped): Fresh cilantro lifts the entire dish. If cilantro isn’t for you, try fresh parsley for a different herbaceous note.
-
Lime (2, juiced): The zesty acid brightens everything up! You can substitute lime with lemon if that’s what you have on hand.
-
Olive Oil (2 tablespoons): Adds richness. If you’re looking for a lighter version, use less, or skip it entirely.
-
Salt and Pepper (to taste): Simple but necessary for balancing flavors. Remember, seasoning is key!
-
Optional spices: Consider adding chili powder or cumin for an extra Southwest kick.
When prepping a dish as fun as Cowboy Caviar, allow yourself to play around with substitutes and additions! Cooking is an art, not a science, and the best dishes often come from some playful experimentation in the kitchen.
Step-by-Step Instructions: Bringing It All Together
Alright, foodies — let’s get to cooking!
-
Prep Your Ingredients: Start by rinsing and draining your black beans. If using canned corn, do the same. If you’re using fresh corn, I recommend grilling it or steaming briefly for a bit of tenderness.
-
Chop and Dice: Next, finely dice your red onion and bell peppers. Grab your cutting board and channel your inner chef! The trick here is to aim for a uniform size, so everything blends beautifully in your bowl. Don’t forget to give those tomatoes a good chop — using cherry tomatoes? Halve them for that perfect bite!
-
Mix It Up: In a large mixing bowl, combine the black beans, corn, diced tomatoes, diced red onion, bell peppers, and cilantro. Give it a gentle toss to combine. You want the colors to intermingle — it’s a party in there!
-
Dress It: Now, add the lime juice and olive oil to your mixture. A little salt and pepper sprinkle over the top, and you’re ready for the fun part! Stir everything with a wooden spoon (or your favorite spatula) until well coated. Taste and adjust for seasoning — could it use a bit more salt or lime juice? Go for it!
-
Let It Sit: I know it’s tough to wait, but let the Cowboy Caviar sit for at least 30 minutes in the fridge. This helps the flavors meld together beautifully over time. It’s kind of like letting a good story simmer!
-
Serve & Enjoy: When you’re ready to serve, give it one last gentle toss. Dive in with your favorite tortilla chips or use it as a topping for tacos, grilled meats, or even salads!
Seeing that beautiful, vibrant bowl of Cowboy Caviar makes all the chopping and mixing worthwhile, doesn’t it? The anticipation builds as you plate it up, ready to share the deliciousness with those around you.
Serving Suggestions: How to Delight Your Guests
When it comes to serving Cowboy Caviar, presentation is everything! Consider serving it in a rustic bowl for that authentic feel. Pair it with crunchy tortilla chips for dipping or have it as a topping on grilled chicken or fish.
You can also make it more festive by garnishing with a sprinkle of extra cilantro or avocado slices! If you’re feeling fancy, try serving it in small cups for a fun appetizer at parties — trust me; your guests will love it. The vibrant colors will brighten up any table setting — making it not just a dish but a centerpiece!
Recipe Variations: Put Your Own Spin on It
Just like any cherished recipe, you can make Cowboy Caviar your own! Here are a few creative twists to consider:
-
Spicy Twist: Add diced jalapeños or a pinch of cayenne pepper for some heat!
-
Avocado Cowboy Caviar: Toss in diced avocados right before serving for creaminess and a great texture contrast.
-
Quinoa Power: Swap out the beans for cooked quinoa for added protein and a fun texture.
-
Tropical Fusion: Experiment with pineapple or mango for a sweet, tropical flavor that balances the savory ingredients.
-
Vegan Delight: This dish is already vegan-friendly, but you can add some nuts or seeds for crunch. Sunflower seeds or chopped walnuts work beautifully!
Feel free to have fun with it, using these variations as a springboard to explore your creativity in the kitchen!
Chef’s Notes: A Little Extra Love from My Kitchen
This Cowboy Caviar recipe has evolved over the years, much like my journey as a home cook. I’ve experimented with various ingredients, and every time I prepare it, I remember that warm summer night with my great-aunt Clara. It’s always served at family gatherings, and it has a way of bringing everyone together, regardless of how crowded the kitchen gets.
One funny little story I have is that I once added too much lime juice, and the caviar turned out to be a bit too tart. My sister cleverly named it “Navy Caviar,” and it became an inside joke every time I made it! So remember — taste as you go, and don’t be afraid to share those little kitchen mishaps!
FAQs and Troubleshooting
1. How long can I store Cowboy Caviar?
You can store it in an airtight container in the refrigerator for about 3-5 days. The flavors will deepen over time, but keep in mind that the veggies may get softer.
2. Can I make this dish ahead of time?
Absolutely! In fact, making it a day in advance allows the flavors to develop even more. Just make sure to give it a stir before serving!
3. What can I substitute if I’m allergic to cilantro?
If cilantro isn’t your friend, fresh parsley is a great alternative. It offers a similar freshness without the distinct flavor of cilantro.
4. My Cowboy Caviar came out too salty. What can I do?
If you oversalted, try adding more canned beans or corn to balance the flavors. You could also add more lime juice, which can help offset the saltiness.
With these tips, you’ll be well on your way to mastering Cowboy Caviar — and ensuring it’s always a hit at your gatherings!
Nutritional Info
Here’s a rough estimate for a serving of Cowboy Caviar (not including tortilla chips):
- Calories: 150
- Protein: 7g
- Carbohydrates: 25g
- Fat: 4g
- Fiber: 7g
- Sugars: 3g
Remember, these values can change based on specific brands or variations you might use.
So there you have it, my dear foodies! Cowboy Caviar is a celebration of fresh flavors and cherished memories — perfect for sharing or enjoying all by yourself. I hope this recipe inspires you to create delicious moments in your kitchen. Happy cooking, and may your kitchen always be filled with joy and the aroma of something wonderful!
Print
Cowboy Caviar
- Total Time: 30 minutes
- Yield: 4 servings 1x
- Diet: Vegan
Description
A vibrant and zesty Southwestern dish combining beans, corn, and fresh vegetables, perfect for gatherings or as a light meal.
Ingredients
- 1 can Black Beans, rinsed and drained
- 1 can or 1 cup fresh Corn
- 1 cup Diced Tomatoes
- 1 small Red Onion, diced
- 1–2 Bell Peppers, diced
- 1/4 cup Cilantro, chopped
- 2 Limes, juiced
- 2 tablespoons Olive Oil
- Salt and Pepper, to taste
- Optional: Chili powder or cumin
Instructions
- Prep your ingredients by rinsing and draining the beans and corn.
- Chop and dice the red onion and bell peppers uniformly.
- Mix all ingredients in a large mixing bowl and gently toss to combine.
- Dress the mixture with lime juice, olive oil, salt, and pepper, then stir until well coated.
- Let it sit in the fridge for at least 30 minutes to meld flavors.
- Serve with tortilla chips or as a topping for tacos or grilled meats.
Notes
Feel free to experiment with ingredients or add spices for personal touches. Serve in a rustic bowl for authenticity.
- Prep Time: 15 minutes
- Cook Time: 0 minutes
- Category: Appetizer
- Method: Mixing
- Cuisine: Southwestern
Nutrition
- Serving Size: 1 serving
- Calories: 150
- Sugar: 3g
- Sodium: 200mg
- Fat: 4g
- Saturated Fat: 0g
- Unsaturated Fat: 4g
- Trans Fat: 0g
- Carbohydrates: 25g
- Fiber: 7g
- Protein: 7g
- Cholesterol: 0mg
Keywords: cowboy caviar, appetizer, vegan, southwestern, fresh ingredients
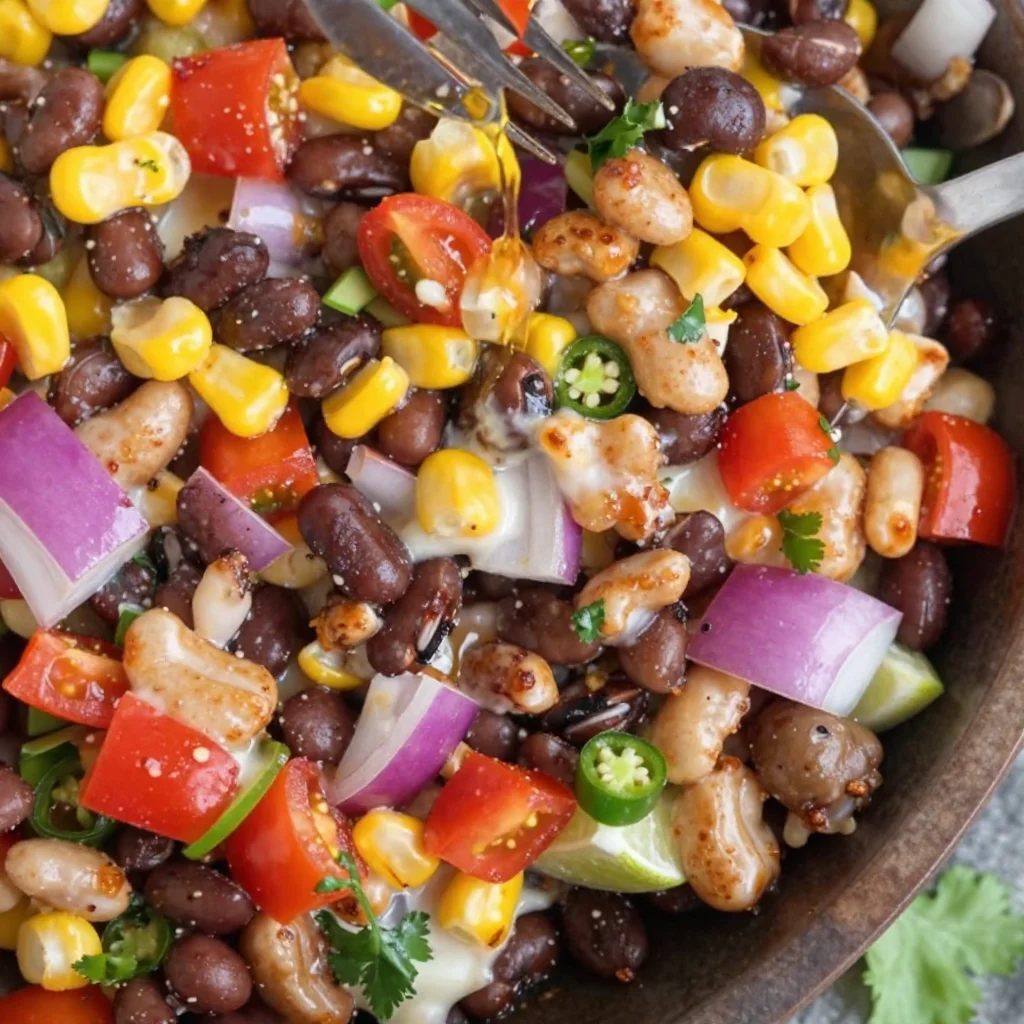
Minute Cowboy Caviar: Quick Prep for Weeknight Meals
Easy Cowboy Caviar: A Flavorful Festivity in a Bowl
Welcome to my cozy kitchen! Today, I’m thrilled to share with you one of my all-time favorite recipes: Easy Cowboy Caviar. Now, you might be wondering what on Earth Cowboy Caviar is. Well, it’s a vibrant bean and vegetable salad that’s perfect for gatherings or simply as a delightful snack. It’s got loads of personality—much like the cowboys who inspired its name!
Imagine this: a sunny afternoon, the smell of spices wafting through the air, laughter bubbling over among friends or family, and a giant bowl of Cowboy Caviar sitting at the center of your table. This dish is not just about the flavors; it’s a celebration of togetherness and joy. And trust me, once you taste it, you’ll find yourself discovering reasons to make it again and again!
Personal Story: Memories from Grandma’s Kitchen
Let me take you back to my childhood for a moment. My grandma, the queen of gatherings, would whip up her version of Cowboy Caviar—though she called it “Texas Caviar”. I remember the vibrant colors filling her kitchen, making everything feel alive and welcoming. Every summer, she’d host a backyard barbecue, and it was a tradition to have her Texas Caviar as a starter.
I can still hear the sound of excited chatter and the clinking of plates as family and friends dug into the tantalizing bowl of goodies. We’d stand around the table, scooping the beans, corn, tomatoes, and all those crunchy veggies with our chips, and laughing together as stories flowed as freely as the drinks. This dish was a bridge that brought generations together, and even now, it evokes a warm nostalgia that is hard to replicate. Now, I want you to experience that same joy with this Easy Cowboy Caviar recipe!
Ingredients
Here’s what you’ll need to make this dish luscious:
-
Black Beans (1 can, drained and rinsed)
Packed with protein and fiber, black beans are hearty and nutritious. If you’re short on time, canned beans are perfect, but you could also use cooked dried beans (just soak and cook them beforehand!). -
Corn (1 cup, canned or frozen)
Sweet corn adds a pop of flavor and texture. If you’re using frozen corn, just thaw it beforehand. You could also try grilled corn for an extra smoky touch! -
Cherry Tomatoes (1 cup, halved)
Juicy and sweet, they add freshness. Substitute with diced Roma tomatoes if you want; just make sure to squeeze out excess moisture. -
Red Onion (1 small, finely chopped)
For a sharp, tangy bite. If red onion is too strong for your palate, try using green onions or sweet onions instead. -
Bell Pepper (1, diced)
A colorful addition! You can use any type you like—red, yellow, or orange—to bring a different flavor profile. -
Cilantro (1/4 cup, chopped)
This herb is a game-changer! If you’re not a fan of cilantro, consider parsley or chopped green onions for a milder taste. -
Jalapeño (1, minced)
Adds a little heat! If you prefer a milder version, remove the seeds, or use a milder pepper like a green bell pepper or even skip it entirely. -
Lime Juice (from 1 lime)
A splash of lime juice brightens everything! Fresh juice will give the best flavor, but you can use bottled juice in a pinch. -
Olive Oil (2 tablespoons)
A drizzle of olive oil brings everything together. You can experiment with flavored oils or use avocado oil for a different twist. -
Salt & Pepper (to taste)
Essential for seasoning—don’t skip this step! Regular table salt works fine, but sea salt adds a nice crunch.
Step-by-Step Instructions
Let’s dive into the making of this vibrant Cowboy Caviar!
-
Prep Your Ingredients: Start by gathering all the ingredients listed. Washing and chopping the vegetables will make the process smoother. Pro tip: if you soak the black beans overnight, they will cook faster, or you can simply use canned for convenience.
-
Combine the Beans and Corn: In a large mixing bowl, add the drained black beans and corn. Use a spatula or spoon to gently fold them together. I love to mix these first so they can absorb the flavors before the other ingredients are added.
-
Chop & Add the Veggies: Chop your cherry tomatoes, red onion, and bell pepper. Add them to the bowl with the beans and corn. Make sure to mix gently to avoid mushing the tomatoes. This part is so colorful—feel free to savor the sight before continuing.
-
Spice It Up: Now it’s time for jalapeño and cilantro! If you like heat, go for the full jalapeño. If not, make sure to dice it finely and remove the seeds. Toss it in along with cilantro and give everything a good stir.
-
Dress It Up: Drizzle the olive oil and lime juice over the mixture. Season with salt and pepper. This is where you can really elevate the flavor! Mix everything well, ensuring the oil coats all the ingredients nicely.
-
Taste and Adjust: Here comes a fun part! Taste your Cowboy Caviar and adjust the seasoning if necessary. Feel free to add more lime juice or salt to make it even more flavorful. Don’t be shy—it’s your kitchen!
-
Chill (Optional): For the best flavor, let it sit in the fridge for at least 30 minutes. I love to cover it and allow it to mingle in the fridge—this lets the flavors combine beautifully!
Serving Suggestions
When it comes time to serve, present your Cowboy Caviar in a vibrant bowl. This dish is perfect for dipping! Use tortilla chips, pita chips, or even veggie sticks. For a beautiful touch, pop in some fresh lime wedges on the side to squeeze over. If you’re feeling fancy, you could also use it as a topping for grilled chicken or fish—it’s that versatile!
Recipe Variations
Now, let’s spice things up even further! Here are a few variations to try:
- Tropical Twist: Add diced mango or pineapple for a sweet and fruity flavor. This gives a fun island vibe!
- Avocado Heaven: Incorporate diced avocado for creaminess. Just be cautious since avocados can brown quickly.
- Quinoa Boost: For added protein and texture, mix in cooked quinoa. It’ll make it heartier while being gluten-free!
- Herbaceous Fusion: Swap cilantro for fresh basil or mint for a completely different aromatic profile—perfect for summer!
- Spicy Kick: Add a dash of hot sauce or a sprinkle of chili powder if you like a good heat level!
Chef’s Notes
Cowboy Caviar is a dish that has evolved for me over the years. I remember when I first learned to make it, I followed a standard recipe to the letter. But over time, it transformed into my own creation! Now, I love mixing different beans or adding in whatever veggies are in my fridge. The best part? It’s nearly impossible to mess up! Just keep it fresh and vibrant, and you’ll have a winner every time. And who knows? Maybe it will become a cherished family recipe for you, too!
FAQs and Troubleshooting
Here are some common questions you may have when making your Easy Cowboy Caviar:
1. Can I make Cowboy Caviar ahead of time?
Absolutely! You can prepare it a day ahead of your event. Just remember to give it a good stir before serving, and adjust any seasonings as necessary since flavors may mellow overnight.
2. Is Cowboy Caviar healthy?
You bet! It’s loaded with fiber from the beans, vitamins from the veggies, and healthy fats if you add avocado. Perfect for a nutritious snack or side dish.
3. What can I do with leftovers?
Store leftovers in an airtight container in the refrigerator for up to 3 days. It’s great on tacos, salads, or mixed into scrambled eggs for an added twist!
4. What if I don’t like beans?
No problem! You can simply leave the beans out and make it more of a veggie salsa. Just be sure to balance the other flavors well.
Nutritional Info
While exact nutrition can vary based on specific brands and quantities, here’s a general breakdown per serving (assuming 6 servings):
- Calories: 150
- Protein: 6g
- Carbohydrates: 20g
- Dietary Fiber: 5g
- Sugars: 3g
- Fat: 7g
And there you have it! This Easy Cowboy Caviar is more than just a dish; it’s a canvas for creativity, flavor, and, most importantly, connection. I hope you enjoy making it as much as I do, and even more, I hope it brings smiles and laughter to your gatherings! Happy cooking, and let the festivities begin!
Print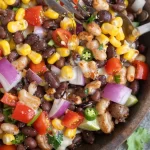
Easy Cowboy Caviar
- Total Time: 30 minutes
- Yield: 6 servings 1x
- Diet: Vegetarian
Description
A vibrant bean and vegetable salad that’s perfect for gatherings or as a delightful snack.
Ingredients
- 1 can Black Beans, drained and rinsed
- 1 cup Corn, canned or frozen
- 1 cup Cherry Tomatoes, halved
- 1 small Red Onion, finely chopped
- 1 Bell Pepper, diced
- 1/4 cup Cilantro, chopped
- 1 Jalapeño, minced
- Juice from 1 Lime
- 2 tablespoons Olive Oil
- Salt & Pepper, to taste
Instructions
- Prep Your Ingredients: Start by gathering all the ingredients listed. Washing and chopping the vegetables will make the process smoother.
- Combine the Beans and Corn: In a large mixing bowl, add the drained black beans and corn. Use a spatula or spoon to gently fold them together.
- Chop & Add the Veggies: Chop your cherry tomatoes, red onion, and bell pepper. Add them to the bowl with the beans and corn. Mix gently to avoid mushing the tomatoes.
- Spice It Up: Add jalapeño and cilantro, tossing everything together.
- Dress It Up: Drizzle olive oil and lime juice over the mixture, and season with salt and pepper. Mix everything well.
- Taste and Adjust: Taste your Cowboy Caviar and adjust the seasoning if necessary.
- Chill (Optional): For the best flavor, let it sit in the fridge for at least 30 minutes before serving.
Notes
Perfect for serving with tortilla chips, pita chips, or veggie sticks. Can also be used as a topping for grilled chicken or fish.
- Prep Time: 15 minutes
- Cook Time: 0 minutes
- Category: Salad
- Method: Mixing
- Cuisine: American
Nutrition
- Serving Size: 1 serving
- Calories: 150
- Sugar: 3g
- Sodium: 150mg
- Fat: 7g
- Saturated Fat: 1g
- Unsaturated Fat: 6g
- Trans Fat: 0g
- Carbohydrates: 20g
- Fiber: 5g
- Protein: 6g
- Cholesterol: 0mg
Keywords: Cowboy Caviar, bean salad, vegetable salad, party food, healthy snack




