
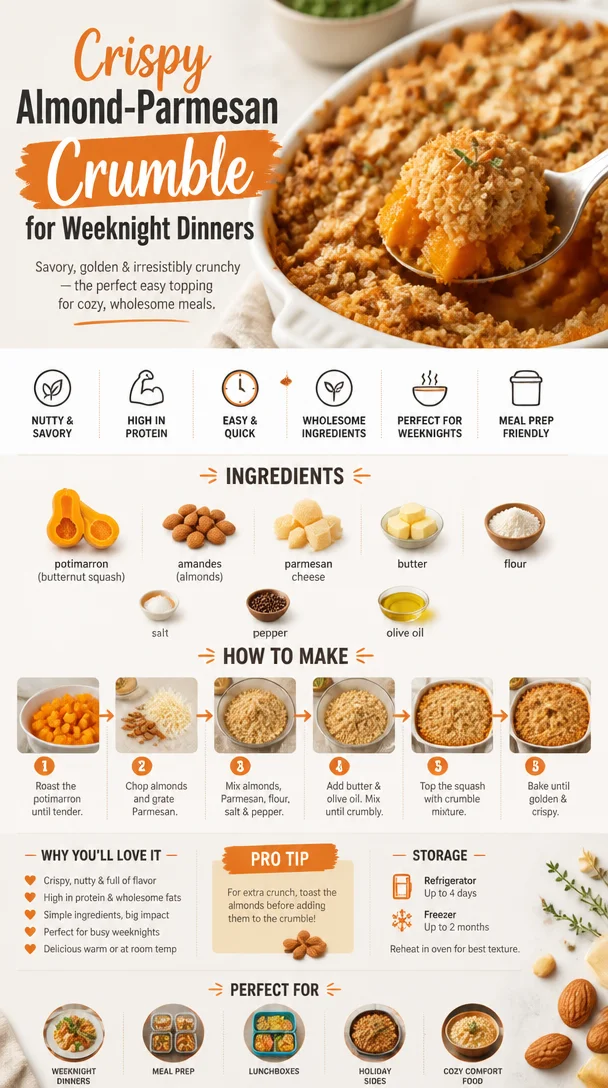
Crispy Almond-Parmesan Crumble for Weeknight Dinners
Discovering the Joy of Crumble aux Amandes et Parmesan
Welcome to my kitchen, friends! Today, I’m excited to take you on a flavor-packed journey that celebrates one of my ultimate comfort foods: Crumble aux Amandes et Parmesan. Imagine a dish that flawlessly marries the nutty crunch of almonds with the rich, umami depth of Parmesan. It’s a delightful creation that transforms a few humble ingredients into a cozy crowd-pleaser, whether served as a side or a main dish.
I’ll never forget the first time I encountered this delightful dish. I was visiting a charming bistro nestled in the heart of Paris—you know, the kind where the tables spill out onto the cobblestone streets and the aroma of baking bread invites you in like a warm hug. I ordered a vegetable crumble topped with the most luxurious almond and Parmesan mixture. When the servers brought it to my table, I could hardly contain my excitement; that golden-brown crust looked like a masterpiece! Just one bite sent me soaring to comfort food heaven—crunchy, creamy, rich, and utterly satisfying.
The beauty of Crumble aux Amandes et Parmesan is that it’s as versatile as it is delicious. It can elevate a classic vegetable medley into something extraordinary, or it can act as a stand-alone dish worthy of a celebratory dinner. Whether you are looking for an impressive side to share or a heartwarming meal to enjoy after a long day, this crumble will fit the bill beautifully. So grab your apron—let’s dive into the recipe and create something unforgettable, just like that day in Paris!
A Cozy Memory in the Kitchen
It was a chilly autumn afternoon, and I was at my grandmother’s house, surrounded by her eclectic collection of cookbooks and the warmth of her well-loved kitchen. She was the queen of bringing family together through food. I remember her teaching me how to make a similar crumble with whatever vegetables were leftover in the fridge. As we chopped carrots, zucchini, and potatoes, she spoke about the importance of not wasting food. That day, she introduced me to the concept of transforming simple ingredients into a delightful dish topped with a crumbly, cheesy mixture.
Her secret? A generous handful of toasted almonds and that magical ingredient, freshly grated Parmesan, layered thick on top. As we pulled our creation from the oven, the aroma wafting through the air was nothing short of magical. I still remember the crunch of that topping paired with the roasted vegetables beneath. That memory has stayed with me, and now I recreate it in my own kitchen, adding touches of my own while keeping that special warmth and love alive in each bite.
Ingredients: What You’ll Need
To create a mouthwatering Crumble aux Amandes et Parmesan, gather these ingredients:
-
Vegetables (about 4 cups mixed):
- Zucchini: A great base vegetable, it adds moisture and a subtle sweet flavor. If you’re out of zucchini, yellow squash or even eggplant work beautifully.
- Carrots: They add a touch of sweetness and vibrant color. Substitute with sweet potatoes for a richer flavor.
- Bell Peppers: Choose any color you like! If you prefer, you can swap them out for leeks for a milder taste.
-
Almonds (1 cup, sliced or slivered):
- Almonds provide a lovely crunch and nutty flavor. No almonds? Go for walnuts or pecans for a different texture and taste.
-
Parmesan cheese (1 cup, grated):
- Parmesan lends a savory umami kick to the crumble. Pecorino Romano can be a fun substitute that offers a tangier flavor profile.
-
Breadcrumbs (1 cup):
- Use plain or seasoned breadcrumbs for added flavor; panko breadcrumbs give extra crunch. For a gluten-free option, try almond flour.
-
Olive oil (1/4 cup):
- Extra virgin olive oil enhances the flavors and helps the crumble reach that golden perfection. For a flavored twist, consider using garlic-infused olive oil.
-
Salt and pepper (to taste):
- Essential seasonings! Always taste as you go to get a perfect balance. You can add herbs like thyme or rosemary for extra warmth.
These ingredients blend together to create a dish that’s not just about flavor but about creativity and making the most of what you have on hand.
Step-by-Step Instructions: Let’s Get Cooking!
Follow this detailed guide to whip up your Crumble aux Amandes et Parmesan:
-
Preheat your oven to 375°F (190°C). This sets the stage for an evenly cooked crumble with that beautifully crispy top.
-
Prepare your vegetables: Chop your zucchini, carrots, and bell peppers into bite-sized pieces. Aim for uniformity so that they cook evenly. If you’re using carrots, consider shaving them into thin ribbons for a tender texture; they’ll soak up the flavors beautifully.
-
Sauté the veggies: In a large skillet, heat about 2 tablespoons of olive oil over medium heat. Toss in your chopped vegetables, seasoning them lightly with salt and pepper. Cook for about 5-7 minutes, just until they start to soften. This step brings out their flavors and prevents the dish from becoming watery.
-
Spread the veggie mixture: Transfer your sautéed vegetables to a greased baking dish. You want them to be in an even layer; it makes for a more beautiful presentation.
-
Prepare the crumble topping: In a separate bowl, combine the sliced almonds, grated Parmesan, breadcrumbs, the remaining olive oil, a pinch of salt, and pepper. Your goal is to create a crumbly mixture that clumps together slightly. If it looks too dry, drizzle in a bit more olive oil.
-
Top it off: Sprinkle the almond and cheese mixture generously over the sautéed vegetables. Make sure it’s evenly distributed for that perfect bake.
-
Bake: Pop the baking dish into the oven and let it bake for 25-30 minutes until the topping is golden brown and the vegetables are bubbling beneath. If you’re feeling adventurous, you can turn on the broiler for a minute or two at the end to get that topping extra crispy—just keep a close eye on it to avoid burning.
-
Cool and serve: Once done, take it out of the oven and let it cool for about 5 minutes before digging in. This allows the flavors to meld.
Chefs Tip: Use this time to set the table or brew a cup of your favorite tea. There’s nothing better than enjoying a warm, home-cooked dish with a cozy beverage!
Serving Suggestions: Time to Plate!
When it’s time to serve your Crumble aux Amandes et Parmesan, consider these delightful presentation tips:
- Use a large spoon to scoop generous portions onto each plate, ensuring everyone gets their fair share of that crunchy topping.
- For a fresh twist, add a squeeze of lemon juice or a sprinkle of fresh herbs like parsley or basil on top before serving. This adds a lovely brightness that complements the rich flavors beautifully.
- Serve it alongside a simple green salad drizzled with balsamic vinaigrette for a well-rounded meal.
Enjoy with your loved ones, and savor the joy of conversation and togetherness that good food brings!
Recipe Variations: Mix It Up!
Get creative with your Crumble aux Amandes et Parmesan! Here are a few variations to consider:
-
Add Protein: Toss in some cooked chicken, turkey, or chickpeas for a heartier dish.
-
Spice It Up: Sprinkle in some red pepper flakes or smoked paprika for a kick.
-
Cheesy Delight: Experiment with different cheeses like goat cheese for a tangy twist, or a mix of cheddar for that super cheesy topping.
-
Seasonal Favorites: Swap out the vegetables based on what’s in season—think roasted squash in the fall or fresh asparagus in the spring!
-
Gluten-Free Option: Substitute breadcrumbs with crushed gluten-free crackers or almond flour to make this dish gluten-free without sacrificing taste.
Chef’s Notes: A Reminder of Love in Cooking
Cooking should always evoke a sense of joy, warmth, and nostalgia. This recipe for Crumble aux Amandes et Parmesan has evolved from my grandmother’s insightful teachings to a dish I can enjoy with my family and friends. Over time, I’ve learned to incorporate newer flavors, like a dash of balsamic vinegar, to create a delightful tang in my vegetable medley. For me, every crumble carries a memory—the laughter shared, the ingredients swapped, and the conversations that flow freely over delicious food.
I hope you create your own cherished memories as you enjoy this delightful dish. The kitchen is a place for love and creativity, so don’t hesitate to put your twist on it!
FAQs and Troubleshooting: Answers to Common Questions
-
What if my topping is too dry?
- If your crumble topping seems too dry, add a touch more olive oil or melted butter to help it clump together. You want that perfect crispy, golden crunch!
-
Can I make this dish ahead of time?
- Absolutely! You can prepare your vegetables and topping in advance, then assemble and bake them when you’re ready. Just add an extra few minutes to the baking time if cooking from a cold state.
-
How can I store leftovers?
- Store any leftovers in an airtight container in the fridge for up to 3 days. Reheat in the oven or microwave until warmed through. The topping may lose a little crunch, but it will still be delicious!
-
What if I don’t have any Parmesan?
- No problem! Feel free to use any hard cheese you have on hand, like aged Gouda or even vegan cheese! Just ensure it has a good flavor to complement the dish.
Nutritional Info (Optional)
While I believe in enjoying food, here’s a rough nutritional breakdown to be mindful:
- Portions: 6
- Calories: 320 per serving
- Protein: 12g
- Carbohydrates: 25g
- Fat: 20g
Nutrition values are approximate and can vary based on exact ingredients used and portion sizes.
As we wrap up this delicious journey together, I hope you feel inspired to whip up your own version of Crumble aux Amandes et Parmesan! It’s more than just a recipe; it’s a celebration of food, memories, and shared experiences. Happy cooking!
Print
Crumble aux Amandes et Parmesan
- Total Time: 45 minutes
- Yield: 6 servings 1x
- Diet: Vegetarian
Description
A comforting dish that combines the nutty crunch of almonds with the rich flavors of Parmesan, transforming simple vegetables into a delightful culinary experience.
Ingredients
- 4 cups mixed vegetables (zucchini, carrots, bell peppers)
- 1 cup sliced or slivered almonds
- 1 cup grated Parmesan cheese
- 1 cup breadcrumbs
- 1/4 cup olive oil
- Salt and pepper to taste
Instructions
- Preheat your oven to 375°F (190°C).
- Prepare your vegetables: Chop zucchini, carrots, and bell peppers into bite-sized pieces.
- Sauté the veggies: Heat 2 tablespoons of olive oil in a large skillet, add chopped vegetables, and season with salt and pepper for about 5-7 minutes.
- Spread the veggie mixture in a greased baking dish in an even layer.
- Prepare the crumble topping: In a bowl, mix sliced almonds, grated Parmesan, breadcrumbs, remaining olive oil, salt, and pepper.
- Top the sautéed vegetables with the almond and cheese mixture.
- Bake for 25-30 minutes until the topping is golden brown and vegetables are bubbling.
- Cool for 5 minutes before serving.
Notes
Experiment with different vegetables or cheeses to create your own variation. For a gluten-free option, use almond flour instead of breadcrumbs.
- Prep Time: 15 minutes
- Cook Time: 30 minutes
- Category: Main Course
- Method: Baking
- Cuisine: French
Nutrition
- Serving Size: 1 serving
- Calories: 320
- Sugar: 5g
- Sodium: 350mg
- Fat: 20g
- Saturated Fat: 4g
- Unsaturated Fat: 12g
- Trans Fat: 0g
- Carbohydrates: 25g
- Fiber: 3g
- Protein: 12g
- Cholesterol: 30mg
Keywords: vegetable crumble, almond, parmesan, comfort food, baking
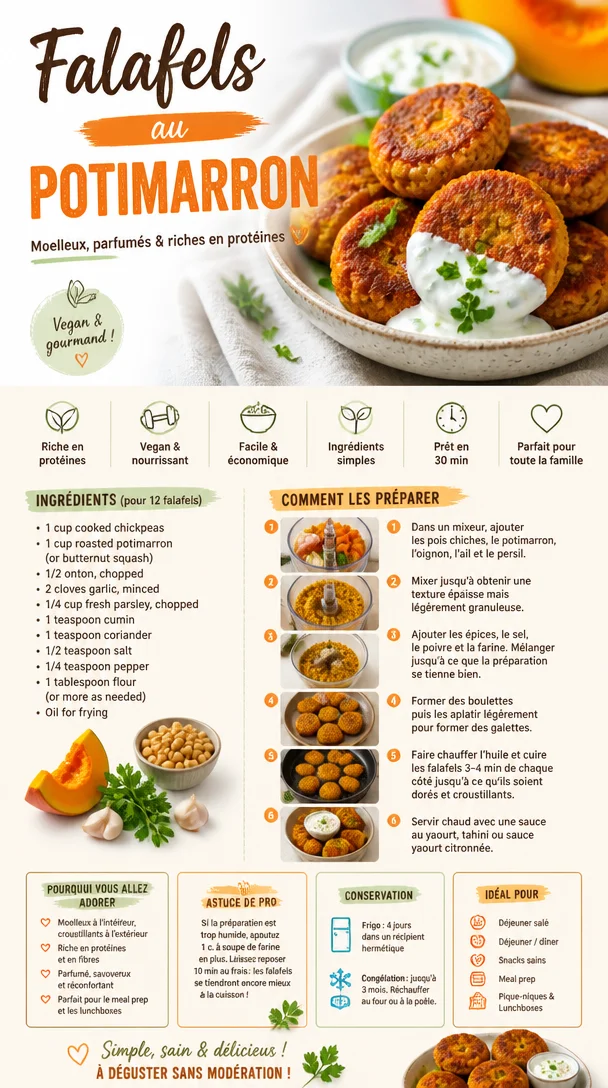
Falafels au potimarron
Falafels au Potimarron: A Cozy Kitchen Adventure
Welcome back to my kitchen, fellow food lovers! Today, we’re diving into a delightful cuisine that perfectly marries heartiness with warmth: falafels au potimarron, or pumpkin falafels. If the thought of crispy, golden-brown falafels made with sweet winter squash makes your mouth water, then you’re in for a treat. This recipe is not just about the food; it’s about the joy of cooking and sharing delicious meals with the people you love.
Growing up, my family was all about cozy meals that brought everyone together, usually featuring something deliciously roasted from our garden. I fondly remember the autumn days when the air turned crisp, and my mom would bring home a hefty potimarron — the sweetest pumpkin you could ever taste. She’d whip up everything from hearty soups to beautiful roasted slices drizzled with honey. And every time I think of potimarron, I can almost hear the laughter and kitchen chatter as we gathered around the table, savoring every bite of those cozy meals.
Fast forward to today, and I’ve taken the essence of those comforting dishes and added a chic twist. This falafel recipe balances the nutty flavor of chickpeas with the sweet earthiness of potimarron, giving you a crispy exterior and a fluffy interior that’s completely irresistible. So let’s roll up our sleeves and get cooking!
Personal Story
The first time I experimented with potimarron in my falafels, it was more out of culinary curiosity than necessity. I remember my friend Sarah coming over for a dinner party; we had planned an elaborate feast that ended up being a wildly fun disaster (there were more laughs than actual food). At the last minute, I threw some potimarron into the food processor with my traditional falafel mix, and oh boy, did that change everything!
Those golden nuggets of goodness were a hit! My guests couldn’t get enough, and I nearly started a food frenzy in my small kitchen. The memory of their happy faces and satisfied spirits fueled my passion for cooking more than any recipe ever could. This dish not only became a family favorite but also found its way into my heart as a reminder that sometimes, the best moments come from being spontaneous and adventurous in the kitchen.
Ingredients
Here’s what you’ll need to create these fabulous falafels au potimarron:
-
1 cup chickpeas (dried, soaked overnight)
- Essential for the classic falafel texture. If you’re short on time, canned chickpeas work but may yield slightly less crispy results.
-
1 cup cooked potimarron (peeled and cubed)
- Adds a unique sweetness. If unavailable, butternut squash is a great alternative.
-
1 small onion, roughly chopped
- Essential for flavor. You can substitute with shallots for a milder taste or leeks for a unique twist.
-
2 cloves garlic, minced
- The aromatic powerhouse! Feel free to use roasted garlic for a sweeter flavor.
-
1 tablespoon ground cumin
- Adds warmth; can be swapped with coriander or smoked paprika for a different flavor profile.
-
1 tablespoon ground coriander
- Compliments the chickpeas perfectly. Not a fan? Try dried dill or oregano for a herbal note.
-
1 teaspoon salt
- Essential for flavor. Adjust as needed for dietary preferences.
-
1/2 teaspoon black pepper
- For a subtle kick. If you like it spicy, add a pinch of cayenne pepper!
-
2 tablespoons fresh parsley, chopped
- Brightens up the flavors; cilantro works too for an even fresher taste.
-
1 tablespoon tahini (optional)
- A lovely creamy addition, but feel free to substitute with sunflower seed butter for nut-free diets.
-
Oil for frying (canola or sunflower)
- Essential for achieving crispy falafels. For a healthier spin, consider baking!
Step-by-Step Instructions
Step 1: Prepare the Chickpeas
Start by soaking your dried chickpeas in water for about 8 hours or overnight. This plumps them up and makes them easier to blend. If you’re using canned chickpeas, just give them a good rinse and drain. This step is crucial because it ensures your falafels are light and fluffy!
Step 2: Roast the Potimarron
While the chickpeas are soaking, you can prepare your potimarron. Preheat your oven to 400°F (200°C). Cut the potimarron in half, scoop out the seeds, and peel the skin (though you can leave it on for added texture if you prefer). Cut into cubes, toss them with a drizzle of olive oil, and season with salt and pepper. Roast for about 20-25 minutes until fork-tender and slightly caramelized. This step intensifies the sweetness!
Step 3: Blend the Ingredients
In a food processor, combine the soaked and drained chickpeas, roasted potimarron, onion, garlic, cumin, coriander, salt, pepper, and fresh parsley. Pulse until everything is mixed but not completely puréed. You want some texture here; don’t turn it into mush! If the mixture feels too dry, you can add a splash of water or a bit of tahini for creaminess.
Step 4: Chill the Mixture
Transfer the falafel mixture to a bowl, cover it, and chill in the fridge for at least 30 minutes. This step allows the flavors to meld and helps hold the falafels together when frying — a little patience goes a long way in the kitchen!
Step 5: Shape the Falafels
Once chilled, it’s time to shape your falafels. Using your hands, scoop out about a tablespoon of mixture and form small balls or patties. This is a great time to get your hands a bit messy (isn’t that part of the fun?)! If the mixture is too crumbly, add a touch more water or chickpea flour; if it’s too wet, a bit of breadcrumbs can help.
Step 6: Fry or Bake
Heat the oil in a heavy-bottomed skillet over medium heat. Fry in batches, about 4-5 falafels at a time, for 3-4 minutes on each side until golden brown. The sizzle is music to the ears! If you’d rather bake them, preheat your oven to 375°F (190°C) and arrange the falafels on a baking sheet lined with parchment paper. Brush with a bit of oil and bake for around 20-25 minutes, flipping halfway through.
Step 7: Enjoy
Serve your crispy falafels warm, drizzled with tahini or a spicy sauce, and perhaps nestled in a warm pita or on a bed of fresh greens with a side of yogurt dip. Bon appétit!
Serving Suggestions
To plate these gorgeous falafels, consider serving them family-style with a vibrant Mediterranean-inspired salad, garnished with pickled red onions, fresh cucumber, and a few slices of ripe tomatoes. Add a sprinkle of sumac for a zesty punch. Pile your falafels on a large platter, drizzle tahini sauce over them, and voilà! A feast for the eyes and the belly!
Recipe Variations
- Spicy Falafels: Toss in some chopped jalapeños or a pinch of cayenne for kick!
- Herb-Infused Version: Mix in some fresh mint or dill for a refreshing twist.
- Baked Falafels: For a lighter option, bake instead of frying. They’ll still be delicious!
- Mediterranean Bowl: Serve over grains like quinoa or couscous with your favorite tahini dressing.
- Falafel Wrap: Wrap them in a flatbread with your choice of veggies and sauces for the perfect on-the-go meal.
Chef’s Notes
This recipe has been through many iterations in my kitchen! From experimenting with different spices to adjusting the ratio of chickpeas and squash, each time is an adventure. I once had a mishap where I accidentally used smoked paprika instead of regular – talk about a game changer. Those smoky falafels had a cult following for a good while!
Cooking is about exploring and evolving. Don’t be afraid to make it your own. Remember, if something doesn’t go according to plan, just laugh it off; those kitchen stories are the ones we cherish the most!
FAQs and Troubleshooting
-
Why do my falafels fall apart when frying?
- This usually happens if the mixture is too wet. Try adding more flour or breadcrumbs to bind it.
-
Can I make these falafels ahead of time?
- Absolutely! You can prepare the mixture ahead of time and store it in the fridge for 1-2 days. Just shape and cook when you’re ready.
-
What dipping sauces pair well?
- My favorites are a cool yogurt tahini dip or a spicy harissa sauce. Both complement the falafel beautifully!
-
How do I store leftover falafels?
- Store any leftovers in an airtight container in the fridge for up to 3 days. Reheat in the oven or a skillet for the best texture.
Nutritional Info
(Calories and nutritional info will depend on the specific ingredients used and cooking methods)
These falafels are packed with plant protein, fiber, and healthy fats, making them a nourishing choice for any meal!
So there you have it, my friends! A cozy journey through the art of making Falafels au Potimarron. May your kitchen be filled with laughter, warmth, and really good food. Until next time, happy cooking! 🍽️
Print
Falafels au Potimarron
- Total Time: 45 minutes
- Yield: 4 servings 1x
- Diet: Vegetarian
Description
Delicious pumpkin falafels that balance the nutty flavor of chickpeas with the sweetness of potimarron, resulting in crispy exteriors and fluffy interiors.
Ingredients
- 1 cup chickpeas (dried, soaked overnight)
- 1 cup cooked potimarron (peeled and cubed)
- 1 small onion, roughly chopped
- 2 cloves garlic, minced
- 1 tablespoon ground cumin
- 1 tablespoon ground coriander
- 1 teaspoon salt
- 1/2 teaspoon black pepper
- 2 tablespoons fresh parsley, chopped
- 1 tablespoon tahini (optional)
- Oil for frying (canola or sunflower)
Instructions
- Prepare the Chickpeas: Soak your dried chickpeas in water for about 8 hours or overnight. If you’re using canned chickpeas, rinse and drain them. This step is crucial for fluffy falafels!
- Roast the Potimarron: Preheat your oven to 400°F (200°C). Cut the potimarron in half, scoop out the seeds, and peel. Cut into cubes and toss with olive oil, salt, and pepper. Roast for 20-25 minutes until fork-tender.
- Blend the Ingredients: In a food processor, combine the soaked chickpeas, roasted potimarron, onion, garlic, cumin, coriander, salt, pepper, and parsley. Pulse until mixed but not puréed.
- Chill the Mixture: Transfer the mixture to a bowl, cover, and chill in the fridge for at least 30 minutes.
- Shape the Falafels: Once chilled, scoop out a tablespoon of mixture and form small balls or patties. Adjust texture if needed with water or breadcrumbs.
- Fry or Bake: Heat oil in a skillet over medium heat. Fry in batches for 3-4 minutes on each side until golden brown, or bake at 375°F (190°C) for 20-25 minutes.
- Enjoy: Serve warm drizzled with tahini or a spicy sauce in pita or on a bed of greens.
Notes
Feel free to experiment with spices and ingredients to make it your own. If the mixture is too wet, add flour; if too dry, add a bit of water.
- Prep Time: 15 minutes
- Cook Time: 30 minutes
- Category: Main Course
- Method: Frying
- Cuisine: Mediterranean
Nutrition
- Serving Size: 1 serving
- Calories: 350
- Sugar: 5g
- Sodium: 500mg
- Fat: 12g
- Saturated Fat: 1g
- Unsaturated Fat: 9g
- Trans Fat: 0g
- Carbohydrates: 45g
- Fiber: 8g
- Protein: 15g
- Cholesterol: 0mg
Keywords: falafel, potimarron, pumpkin, vegetarian, Mediterranean
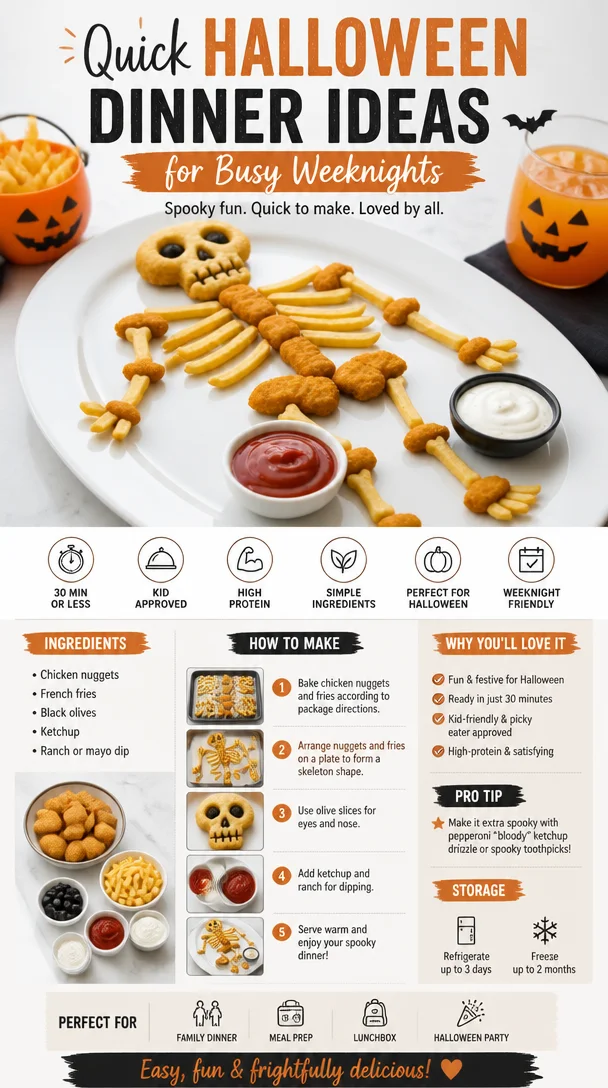
Quick Halloween Dinner Ideas for Busy Weeknights
100 Halloween Themed Dinner Ideas to Spook Up Your Feast
There’s something wonderfully enchanting about Halloween. As the air turns crisp and the days grow shorter, there’s a certain magic that makes us want to celebrate with friends, family, and, of course, a table full of delicious food. Picture a night filled with laughter, spooky decorations, and the rich aroma of delights bubbling away in the kitchen. I’m Olivia Bennett, your friendly kitchen companion, and today we’re diving into a treasure trove of Halloween-themed dinner ideas. Whether you’re planning a casual get-together, a cozy family dinner, or a full-blown Halloween party, these recipes will add a touch of whimsy and a dash of fright to your table!
Halloween is not just about the candy and costumes; it’s a wonderful opportunity to get creative in the kitchen. Each recipe is designed to be approachable, whether you’re a seasoned home cook or just starting to experiment with flavors. Here, you’ll find dishes that delight the eyes and the palate, encourage conversation, and spark joy among your loved ones. So, grab your favorite apron and let’s whip up something magical!
A Pot Full of Memories
Growing up, Halloween was a big deal in our household. My siblings and I would spend weeks planning our costumes, but the highlight of the night was always the dinner my mom made to kick off our trick-or-treating adventures. One year, she crafted the infamous "witch’s stew" — a bubbling pot of vegetable soup with a twist! She added deep green kale for "witch’s hair," spiced it with cauldron seasoning (also known as her secret blend of herbs), and served it in black bowls with some spooky eyeballs (aka meatballs) floating on top. It was such a hit that we still reminisce about it during our Halloween gatherings.
I think that’s what’s so special about food; it has a way of crafting memories. This year, let’s create some magical moments together in your kitchen. Ready to explore a hauntingly delicious realm? Let’s get started!
Ingredients
Here’s a collection of spellbinding ingredients that’ll help you concoct your Halloween feast. Some of these will make the dishes sing, while others can be swapped for delightful alternatives:
-
Pumpkin: The star of Halloween! Use fresh pumpkin or canned pumpkin puree for soups, pies, or even pastas. Tip: For a healthier twist, try butternut squash as a substitute.
-
Black Beans: Perfect for a spooky salad or chili, these little gems are packed with protein and are a great base for a scare-fest feast. Substitution: Chickpeas can add a similar hearty texture, but with a different flavor.
-
Spaghetti: An excellent choice for creating "wormy" dishes. Use whole wheat or gluten-free pasta to cater to different dietary needs. Chef Insight: Add a splash of olive oil to keep the strands from sticking together.
-
Cheddar Cheese: Grate it for a delicious topping on almost everything, especially when crafting your creepy casseroles! Tip: Try sharp cheddar for a more robust flavor — it pairs well with pumpkin!
-
Eggs: An inspiring ingredient for brunch or savory bites. Perfect for making (you guessed it!) creepy deviled eggs. Substitution: Flax eggs (1 tablespoon ground flaxseed mixed with 3 tablespoons water) work great for vegan recipes!
-
Avocado: Bring some richness to your dish, whether it’s a salad or a spooky spread. Chef Insight: When mashing, add a squeeze of lime to keep it bright and green!
This Halloween, think outside the box and let these ingredients guide your creativity!
Step-by-Step Instructions
-
Start with the Cauldron: Begin by setting out all your ingredients on your countertop. This not only keeps things organized (and fun!) but also inspires your creative juices!
-
Brew Up a Soup: For our signature witch’s stew, begin by sautéing chopped onions and garlic in a large pot over medium heat. This builds a flavorful base. Tip: If you want a little extra spice, include some chopped jalapeños or chili powder!
-
Add Your Greens: Once your onions are translucent, toss in the kale or other greens and allow them to wilt slightly. This is part of the "witches’ hair" effect!
-
Pumpkin Time: Pour in your chopped pumpkin or pumpkin puree. Don’t forget to add vegetable broth for depth. Let the mixture simmer together for about 20 minutes to let all the flavors mingle. Chef Hack: Use an immersion blender to puree the soup for a creamy texture without transferring to a blender.
-
Spooky Touches: Time to make your “eyeballs"! Roll small meatballs (using ground meat or a meat alternative) and drop them into the pot during the last 10 minutes of cooking. They’ll float to the top, looking eerily delightful.
-
Season to Taste: Don’t shy away from seasonings! Add salt, pepper, and any additional herbs that you like. A hint of nutmeg goes surprisingly well with pumpkin!
-
Serve with Style: Ladle your witch’s stew into dark-colored bowls. Top each serving with a dollop of sour cream (spooky eyeball sauce) and garnish with fresh herbs like thyme or parsley. Serve with a slice of crusty bread to soak up all those delicious flavors.
Serving Suggestions
For a visually stunning presentation, set the cauldrons (or bowls) on a spider web tablecloth, adding some miniature pumpkins and ghoulish decor around the table. Serve your stew with crusty “witches’ brooms”—think breadsticks (aka broomsticks) served alongside your bubbling pot. The perfect combination of eerie and enticing!
Recipe Variations
-
Vegetarian Twist: Swap the meatballs for quinoa or lentil “eyeballs” made with cooked lentils, spices, and breadcrumbs. This keeps it heart-healthy and oh-so-delicious!
-
Spicy Delight: Add a kick by tossing in some diced jalapeños when you sauté the onions. For garnish, use spicy roasted pumpkin seeds!
-
Creamy Version: Want an extra decadent touch? Stir in some heavy cream or coconut milk during the last few minutes of cooking for a velvety texture.
-
Add Some Grains: For an added depth of flavor and texture, throw in some cooked quinoa or rice right before serving for a more filling meal.
-
Halloween Themed Casserole: Layer the stew with a cheesy topping and bake it for a hearty casserole dish that will have everyone reaching for seconds.
Chef’s Notes
This witch’s stew has been a family recipe in various forms for years. Each Halloween, my siblings and I have fun competing to see who can make the spookiest version! Over the years, I’ve added different twist-spices and seasonal vegetables to keep things interesting. It never fails; everyone leaves the table with a smile and a full belly!
FAQs and Troubleshooting
-
What if my soup is too thick?
If your soup turns out thicker than you’d like, simply add a bit more broth or water to reach your desired consistency. Stir well and let it blend for a few moments more. -
How can I make this dish ahead of time?
Great question! You can prepare this soup a day in advance. Just rewarm it gently on the stove before serving. -
My kale is tough; what can I do?
If your kale is a bit tough, simply give it a longer sauté time or even massage it with a bit of olive oil before adding it to the soup to soften. -
What do I serve with this stew?
While it pairs excellently with crusty bread, consider serving with a light green salad or a side of cornbread for a comforting meal.
Nutritional Info
(Provide upon request, or check with additional nutrition calculators for specifics based on ingredient adjustments.)
There you have it, my fellow foodies! With these Halloween-themed dinner ideas, you’re all set to whip up a delightful feast that’s not only fun but also full of heart. Remember, cooking should be enjoyable, so embrace the messy apron, let your creativity flow, and savor every bite of your Halloween magic! Happy cooking!
Print
Witch’s Stew
- Total Time: 45 minutes
- Yield: 4 servings 1x
- Diet: Vegetarian
Description
A bubbling pot of vegetable soup with kale and spooky meatballs, perfect for Halloween celebrations.
Ingredients
- 2 cups fresh pumpkin or 1 can pumpkin puree
- 1 can black beans or chickpeas
- 1 pound spaghetti or whole wheat/gluten-free pasta
- 1 cup cheddar cheese, grated
- 4 eggs or flax eggs for vegan option
- 1 avocado
- 2 cups kale or other greens
- 1 medium onion, chopped
- 2 cloves garlic, minced
- 4 cups vegetable broth
- 1 tablespoon olive oil
- Salt and pepper to taste
- 1 teaspoon nutmeg
- Optional: jalapeños or chili powder for heat
Instructions
- Start with the cauldron: Set out all your ingredients on your countertop.
- Brew up a soup: Sauté chopped onions and garlic in a pot over medium heat.
- Add your greens: Toss in kale and allow to wilt slightly.
- Pour in the pumpkin along with the vegetable broth, then simmer for about 20 minutes.
- Roll small meatballs and add them in the last 10 minutes of cooking.
- Season to taste with salt, pepper, and any additional herbs.
- Serve with style: Ladle into bowls and garnish with sour cream and fresh herbs.
Notes
For a vegetarian twist, use lentil ‘eyeballs’ instead of meatballs. Add cream for a richer, creamy version.
- Prep Time: 15 minutes
- Cook Time: 30 minutes
- Category: Main Course
- Method: Cooking
- Cuisine: American
Nutrition
- Serving Size: 1 serving
- Calories: 350
- Sugar: 5g
- Sodium: 400mg
- Fat: 12g
- Saturated Fat: 4g
- Unsaturated Fat: 6g
- Trans Fat: 0g
- Carbohydrates: 45g
- Fiber: 10g
- Protein: 15g
- Cholesterol: 30mg
Keywords: Halloween, soup, vegetarian, witches stew, spooky recipes, Halloween dinner
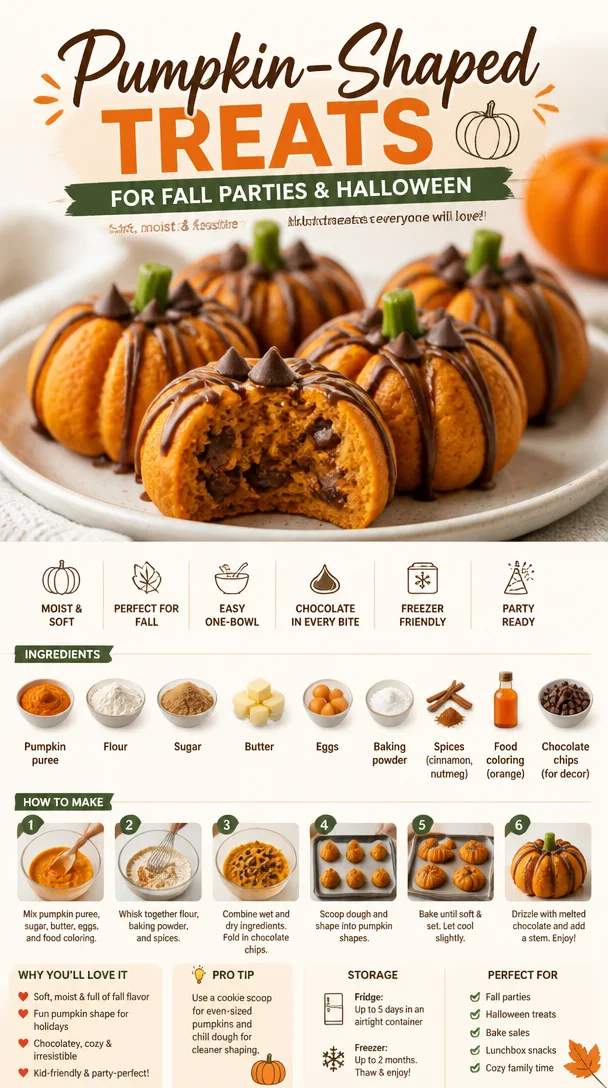
Pumpkin-Shaped Treats for Fall Parties & Halloween
Pumpkin-Shaped Food Ideas: A Fun and Festive Cooking Adventure!
Welcome to my cozy corner of the kitchen, fellow food lovers! I’m Olivia Bennett, your go-to culinary guide, and today, we’re diving into a delightful and playful adventure with pumpkin-shaped food ideas. As the leaves start to turn and the air gets a little crisper, there’s something undeniably magical about creating dishes that celebrate the spirit of fall. From adorable pumpkin-shaped cakes to savory delights that look like the iconic gourd, this post will inspire you to get creative in the kitchen.
Imagine the laughter that fills your home as you and your loved ones gather around a table adorned with charming, pumpkin-shaped treats. Whether it’s for Halloween, Thanksgiving, or simply to add a little whimsy to a mundane weekday, these recipes are perfect for making every meal feel special. So, roll up your sleeves, grab that trusty apron, and let’s whip up some festive fun!
A Fond Memory in the Kitchen
I can’t help but reminisce about the first time I made pumpkin-shaped cookies. I was only eight years old, shoulders barely peeking over the counter as I stood beside my grandmother, who was a fabulous baker. The smell of warm spices filled our tiny kitchen as we mixed the dough together, her hands guiding mine to create the perfect pumpkin shapes. We used a cookie cutter, and soon enough, the entire kitchen was filled with laughter and flour dust!
After we baked and iced those little treats, my grandmother and I decorated each one with tiny chocolate chips for eyes and a green frosting stem. They were absolutely charming—tiny orange pumpkins sitting proudly on our kitchen countertop, just waiting to be devoured. That moment sparked my love for cooking and baking, teaching me that food is not just about flavor but also about bringing people together. Each pumpkin-shaped creation holds a piece of nostalgia, and I can’t wait to share that joy with you!
Ingredients List
Let’s gather our ingredients! Below are the essentials you’ll need to make delicious pumpkin-shaped treats, whether they’re cookies, cakes, or savory snacks:
-
All-purpose flour: The backbone of many recipes, providing structure. If you’re gluten-free, substitute with a gluten-free blend.
-
Pumpkin puree: This gives moisture and flavor. Canned pumpkin works well, but fresh roasted pumpkin is even better!
-
Brown sugar: For warmth and depth of sweetness. You can swap it for coconut sugar for a hint of caramel flavor.
-
Granulated sugar: To balance the richness. Feel free to use a sugar substitute for a lower-calorie version.
-
Baking powder: This leavening agent will help your treats rise and become fluffy. Baking soda can be used, but adjust the acids accordingly.
-
Pumpkin pie spice: A delightful blend that typically includes cinnamon, nutmeg, and ginger. You can make your own if you’re feeling adventurous!
-
Eggs: They bind everything together. If you need a vegan option, you can use flax eggs or applesauce!
-
Butter or coconut oil: For richness and flavor. Coconut oil is an excellent alternative for a dairy-free version.
-
Vanilla extract: A must for flavor; always go for pure extract if you can find it!
-
Chocolate chips: Optional, but highly recommended for decoration or added sweetness. You can use dark chocolate or white chocolate for a different flavor.
With these ingredients in hand, you’re on your way to creating pumpkin-shaped culinary wonders.
Step-by-Step Instructions
Now for the exciting part—let’s get cooking! Follow the steps below to create your pumpkin-shaped treats.
-
Preheat Your Oven: Set your oven to 350°F (175°C) so it’s ready for baking.
Chef Tip: Make sure your oven is fully preheated to ensure even baking!
-
Mix Dry Ingredients: In a large bowl, whisk together 2 cups of all-purpose flour, 1 teaspoon of baking powder, and 2 teaspoons of pumpkin pie spice.
Chef Hack: Sifting the flour can help reduce lumps and give your treats a lighter texture!
-
Combine Wet Ingredients: In another bowl, cream together 1 cup of softened butter (or coconut oil) and 1 cup of brown sugar and ½ cup of granulated sugar until fluffy. Add 1 cup of pumpkin puree and 2 eggs (or flax eggs), along with 2 teaspoons of vanilla extract.
Chef Insight: Don’t skip creaming the butter and sugars; it creates air pockets that make your treats lighter!
-
Blend It Together: Gradually add the dry ingredients to the wet mixture, mixing until just combined. If you’re including chocolate chips, fold them in at this point.
Tip: Overmixing can lead to tough cookies, so mix gently!
-
Shape Your Pumpkins: Scoop portions of dough and roll them into balls. Gently flatten the tops a bit to achieve more of a pumpkin shape, then use your hands to make slight indentations to mimic pumpkin ridges.
Chef’s Secret: A fork can help you create those cute lines!
-
Bake: Place your pumpkin shapes on a parchment-lined baking sheet and bake for about 10-12 minutes, or until the edges are lightly golden.
Remember: They’ll continue to cook a bit from residual heat after you take them out, so don’t overbake!
-
Cool and Decorate: Allow them to cool completely on a wire rack before decorating with frosting or more chocolate chips to create stems and eyes.
Tip: For frosting, a simple cream cheese frosting works fantastically, and you can tint it green for added fun!
Serving Suggestions
Once your adorable pumpkin-shaped treats are out of the oven and decorated, it’s time for presentation! Try arranging them on a rustic wooden platter for a cozy vibe. You can even add some leaves or mini pumpkins around for that extra autumnal touch. These treats shine brightly on dessert tables or as charming gifts for friends—it’s truly all about the presentation!
Recipe Variations
Now that you have the basic recipe down, let’s play! Here are a few creative twists you might consider for your pumpkin-shaped delights:
-
Pumpkin Spice and Everything Nice: Add chopped nuts or dried cranberries for extra texture and flavor.
-
Chocolate Pumpkin Delight: Substitute half of the flour with cocoa for a chocolaty version and frost with chocolate ganache.
-
Savory Spin: Use the same shaping technique but make a savory blend with cheese, herbs, and spices for pumpkin-shaped cheese puffs.
-
Gluten-Free Fun: Use a gluten-free flour blend for your pumpkin treats; they’ll be just as fun and delicious!
-
Vegan Version: Replace the eggs and butter with flax eggs and plant-based butter for a plant-friendly option.
Chef’s Notes
This pumpkin-shaped recipe has become a staple in my kitchen, especially during the fall! It’s incredible to see how a simple recipe can evolve over time. I recall experimenting with it at my son’s kindergarten Halloween party, and the kids loved them so much I felt like a superhero for the day!
Another funny kitchen story: One time, I got a little too into the spirit and tried to decorate them with a pumpkin carving kit. Let’s just say, I learned that cookie dough doesn’t hold up under a carving knife! Nevertheless, it’s these quirky kitchen moments that remind us to enjoy the process and not take ourselves too seriously.
FAQs and Troubleshooting
-
Why are my cookies spreading too much?
- This might be due to excess butter or not chilling the dough. Try refrigerating your cookie dough for 30 minutes before baking!
-
What if my cookies are too dry?
- Make sure you’re measuring your flour correctly—not too packed! You can also try adding a tablespoon of milk or additional pumpkin puree to moisten the dough.
-
How can I decorate them without frosting?
- You can use melted chocolate or simply dust them with powdered sugar for a lovely finish. A sprinkle of cinnamon sugar is a nice touch too!
-
Can I make the dough ahead of time?
- Definitely! You can prepare the dough, shape it into a ball, wrap it in plastic, and store it in the fridge for up to 3 days or freeze it for up to a month.
Nutritional Info
Nutritional values vary based on specific ingredients and portion sizes, but a typical pumpkin cookie (without icing) is around 150 calories, 7 grams of fat, and 2 grams of protein. Adjust based on your modifications!
With these pumpkin-shaped food ideas, you’re all set to add a touch of whimsy and a bucket full of flavor to your fall festivities. Cooking should always be about fun and creativity, and I hope these recipes inspire you to gather your loved ones and create lasting memories in your kitchen. Happy cooking, and may your pumpkins always be delicious! 🍂🎃
Print
Pumpkin-Shaped Treats
- Total Time: 32 minutes
- Yield: 24 servings 1x
- Diet: Vegetarian
Description
Delicious pumpkin-shaped cookies and treats perfect for fall festivities, bringing cheerful whimsy to your table.
Ingredients
- 2 cups all-purpose flour
- 1 teaspoon baking powder
- 2 teaspoons pumpkin pie spice
- 1 cup softened butter (or coconut oil)
- 1 cup brown sugar
- ½ cup granulated sugar
- 1 cup pumpkin puree
- 2 eggs (or flax eggs)
- 2 teaspoons vanilla extract
- Optional: chocolate chips for decoration
Instructions
- Preheat your oven to 350°F (175°C).
- Mix dry ingredients in a bowl.
- Combine wet ingredients in another bowl.
- Blend the wet and dry ingredients together until just combined.
- Shape the dough into balls and flatten slightly.
- Bake for 10-12 minutes or until edges are golden.
- Cool and decorate as desired.
Notes
Use a fork to create the ridges of the pumpkins. Allow the cookies to cool completely before decorating.
- Prep Time: 20 minutes
- Cook Time: 12 minutes
- Category: Dessert
- Method: Baking
- Cuisine: American
Nutrition
- Serving Size: 1 cookie
- Calories: 150
- Sugar: 15g
- Sodium: 150mg
- Fat: 7g
- Saturated Fat: 4g
- Unsaturated Fat: 2g
- Trans Fat: 0g
- Carbohydrates: 20g
- Fiber: 1g
- Protein: 2g
- Cholesterol: 30mg
Keywords: pumpkin, cookies, fall treats, baking, festive desserts
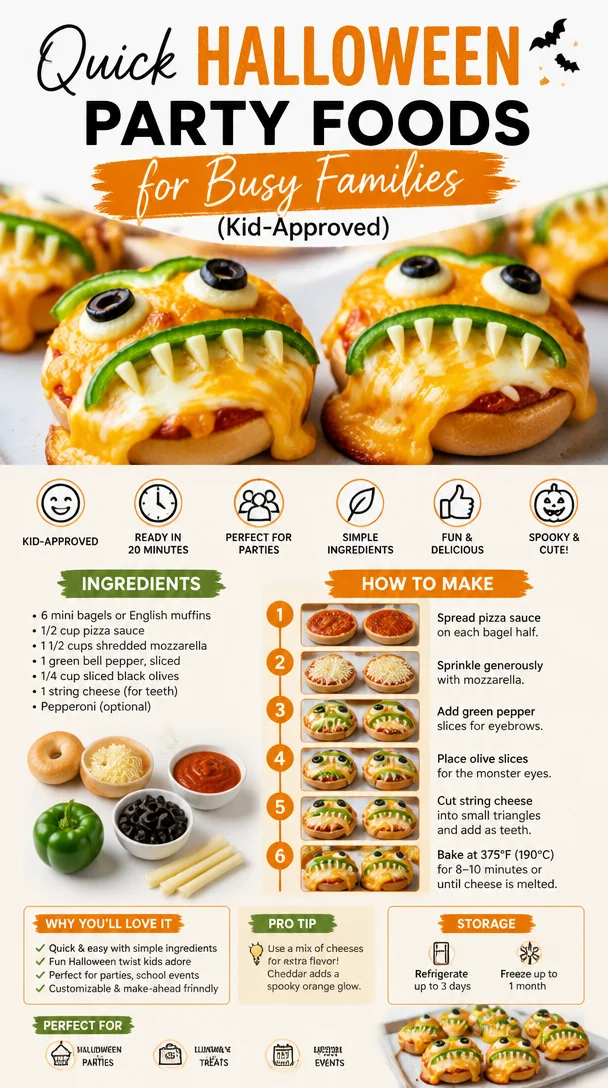
Quick Halloween Party Foods for Busy Families (Kid-Approved)
75 Fun Halloween Food Ideas for Kids: Spooktacular Treats for All Ages!
Welcome to my kitchen, food lovers! It’s that time of year again when the leaves turn golden, pumpkins appear at every corner store, and the air fills with the aroma of cinnamon and spice. Yes, my friends, it’s Halloween season — a time for costumes, trick-or-treaters, and, of course, spooky snacks! If you’re looking to create some hauntingly delightful dishes that will not only please the kiddos but also keep the grown-ups smiling, you’ve come to the right place.
This Halloween, let’s amp up the fun with 75 incredible food ideas that will make your guests shriek with delight (and maybe a little bit of fright!). From playful finger foods to creepy desserts, there’s something for everyone here. So, grab your mixing bowls and spatulas, and let’s have some wicked fun in the kitchen!
Personal Story: Haunted Memories in the Kitchen
As a kid, Halloween was my absolute favorite holiday. Every year, my friends and I would gather to carve pumpkins and concoct the most outrageous costumes we could dream up. But my most cherished memories were made in the kitchen. For weeks leading up to October 31st, my mother and I would whip up batches of “monster cookies,” a concoction of oatmeal, chocolate chips, and a sprinkle of colorful Halloween candies.
Each bite was a nostalgia bomb, sending me back to the thrill of running through the neighborhood, my plastic pumpkin bucket clanking against my legs, filled to the brim with candy. Those cookies had a way of bringing us together, filled with laughter and sticky fingers. It’s those kitchen moments that inspire me to ignite that same joy in others. I can still hear my mom saying, “Cooking should be fun, darling!” If you ask me, it definitely is, especially when you’re crafting spooky treats to share with those you love.
Ingredients: Spooky Goodies Galore
Let’s gear up for a Halloween feast! Here’s a breakdown of some crucial ingredients that will elevate our spooky spread.
-
Pumpkin Puree: The star of fall! Puree makes for moist brownies and bread. You can use homemade puree by roasting your pumpkin or opt for canned for convenience.
-
Chocolate Chips: A must-have for any Halloween treat! Use dark or milk chocolate; both options bring rich flavor. Dairy-free chips are also available for a vegan twist.
-
Oats: Ideal for texture in cookies and granola bars. Old-fashioned oats give more chewiness, whereas quick oats meld seamlessly into batter.
-
Food Coloring: Transform ordinary treats into frightful delights! Gel food coloring will give your creations vibrant hues, while liquid coloring can work as a substitute when needed.
-
Sprinkles: They add not just flavor but also a festive touch! Get creative with Halloween-themed sprinkles to add some lively color to cupcakes or cookies.
-
Cream Cheese: Perfect for frosting spooky cakes or for making dip. Swap with Greek yogurt for a healthier alternative or vegan cream cheese for plant-based goodies.
Step-by-Step Instructions: Spooky Snacks That Steal the Show
Now that you’ve gathered your ingredients, it’s time to dive into some devilishly delicious recipes! I’m here to provide step-by-step guidance with a sprinkle of chef commentary. Let’s start crafting our Halloween menu!
Pumpkin Monster Cookies
-
Prep the Oven: Preheat your oven to 350°F (175°C). Line a baking sheet with parchment paper. This makes for easy clean-up, leaving you with more time to scare your friends!
-
Mix the Dry Ingredients: In a medium bowl, whisk together 2 cups of oats, 1 cup of flour, and 1 teaspoon of baking soda. This combo builds the base for your cookies, adding both texture and volume.
-
Cream the Butter and Sugar: In your mixing bowl, beat 1 stick of softened butter with 1 cup of brown sugar and ½ cup of granulated sugar. Creaming these ingredients gets a lovely fluffy texture and enhances flavor.
-
Add Pumpkin Puree: Stir in 1 cup of pumpkin puree along with 1 teaspoon of vanilla extract. This step not only gives moisture but also infuses the cookies with that signature seasonal flavor.
-
Combine the Mixtures: Gradually add the dry ingredients to the wet, mixing just until combined. Avoid overmixing to keep those cookies soft and chewy – we want them to be downright monsterously delicious!
-
Incorporate Fun Mix-Ins: Fold in 1 cup of chocolate chips and ½ cup of festive sprinkles. Feel free to mix in nuts or coconut for added crunch – go wild!
-
Scoop and Bake: Use a cookie scoop to drop dough onto the baking sheet. Bake in the oven for 12-15 minutes or until the edges are golden. Watch them closely; you want soft, chewy centers with a bit of crispiness around the edges.
-
Cool and Enjoy: Let them sit on the baking tray for a couple of minutes before moving them to a wire rack to cool completely. Enjoy the delightful smell as they waft through your home—pure Halloween magic!
Serving Suggestions: How to Plate Your Spooky Snack
To add flair to your Halloween sweets, consider serving these cookies on a creepy spiderweb tablecloth or a ghostly platter. For added drama, dust them with powdered sugar and arrange them in a tiered cake stand, garnished with mini pumpkins or faux spider decorations. Don’t forget to pair these cookies with a glass of spooky punch or warm apple cider!
Recipe Variations: Monster Cookie Twist-Ups
Here are a few fun variations to explore with your monster cookies:
-
Vegan Monster Cookies: Swap the butter with coconut oil and replace the egg with a flaxseed meal or a chia seed substitute.
-
Nutty Delight: Fold in ½ cup chopped pecans or walnuts for added crunch and a wonderful flavor contrast.
-
Choco-Mint Version: Add a few drops of peppermint extract to the dough. Pair with dark chocolate chips for that refreshing wintery vibe!
-
Creepy-Crawly Cookies: Shape your cookies into monster shapes and add candy eyes for a fun decoration that will impress the kids.
Chef’s Notes: A Journey Through Halloween Treats
Every Halloween, I find myself reflecting on how my cookie recipes evolve. One year, I tried using gluten-free flour, and it didn’t quite work out. However, I learned from that experience, and now I keep a stash of alternatives handy when experimenting. Who knew a simple cookie could hold so many memories and lessons? It’s all about the journey we create in the kitchen, and I invite you to explore your own culinary evolution!
FAQs and Troubleshooting: Common Cookie Conundrums
-
Why are my cookies flat? This could be due to not using enough flour or not chilling the dough before baking. Always ensure your butter isn’t too soft—room temperature is best!
-
Can I freeze the cookie dough? Absolutely! You can freeze the dough for up to 3 months. Just scoop the dough onto a tray, freeze until solid, and then store in an airtight container.
-
My cookies turned out dry. What happened? Dry cookies usually mean they were overbaked. Keep an eye on them, as they will continue to bake on the sheet even after being removed from the oven.
-
How do I store these cookies? Keep your cookies in an airtight container on the kitchen counter for up to a week (if they last that long!). They can also be frozen for up to 3 months.
Nutritional Information
For those watching their dietary intake, here’s a quick look at the nutritional information per cookie (based on a standard recipe yielding about 24 cookies):
- Calories: 120
- Total Fat: 6g
- Saturated Fat: 3g
- Cholesterol: 12mg
- Sodium: 75mg
- Total Carbohydrates: 16g
- Dietary Fiber: 1g
- Sugars: 7g
- Protein: 2g
As always, you can modify the ingredients to suit your dietary needs or preferences. Remember, cooking is about creating joy — let’s scare off those kitchen anxieties!
There you have it folks! An upbeat, vibrant collection of Halloween food ideas filled with little touches of nostalgia and hands-on tips to guide you along your culinary journey. Let’s embrace the spookiness of the season with fun and tasty dishes that bring everyone together. May your Halloween be filled with laughter, delicious treats, and unforgettable memories! Happy cooking!
Print
Pumpkin Monster Cookies
- Total Time: 30 minutes
- Yield: 24 cookies 1x
- Diet: Vegetarian
Description
These Pumpkin Monster Cookies are a delightful Halloween treat that combines oats, chocolate chips, and festive sprinkles for a fun and chewy snack.
Ingredients
- 2 cups oats
- 1 cup all-purpose flour
- 1 teaspoon baking soda
- 1 stick softened butter
- 1 cup brown sugar
- ½ cup granulated sugar
- 1 cup pumpkin puree
- 1 teaspoon vanilla extract
- 1 cup chocolate chips
- ½ cup festive sprinkles
Instructions
- Preheat your oven to 350°F (175°C). Line a baking sheet with parchment paper.
- Mix together the oats, flour, and baking soda in a medium bowl.
- Cream the softened butter, brown sugar, and granulated sugar until fluffy.
- Add the pumpkin puree and vanilla extract to the wet mixture.
- Combine the dry ingredients with the wet ingredients until just mixed.
- Incorporate the chocolate chips and festive sprinkles into the batter.
- Scoop dough onto the baking sheet and bake for 12-15 minutes.
- Cool on the tray for a few minutes before transferring to a wire rack.
Notes
For added fun, shape cookies into monsters and add candy eyes for decoration.
- Prep Time: 15 minutes
- Cook Time: 15 minutes
- Category: Dessert
- Method: Baking
- Cuisine: American
Nutrition
- Serving Size: 1 cookie
- Calories: 120
- Sugar: 7g
- Sodium: 75mg
- Fat: 6g
- Saturated Fat: 3g
- Unsaturated Fat: 2g
- Trans Fat: 0g
- Carbohydrates: 16g
- Fiber: 1g
- Protein: 2g
- Cholesterol: 12mg
Keywords: Halloween cookies, pumpkin cookies, monster cookies
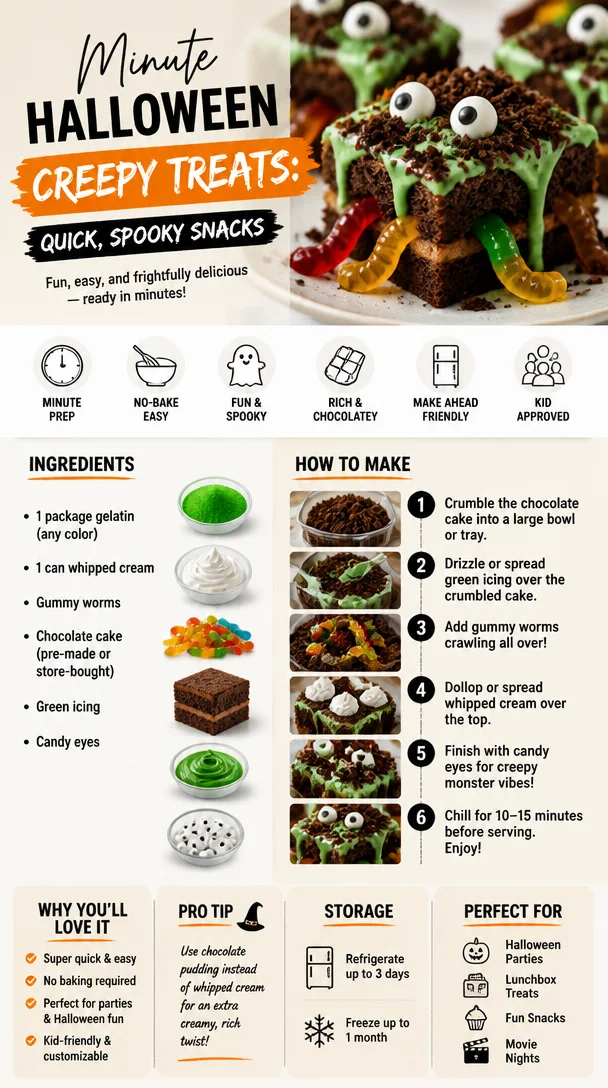
Minute Halloween Creepy Treats: Quick, Spooky Snacks
Halloween Creepy Treats: Spooky Recipes to Delight and Fright
Hello, fellow food adventurers! It’s that spine-tingling time of year again — Halloween is creeping up on us, and you know what that means: time to roll up our sleeves and whip up some deliciously eerie treats! If you’re as excited about Halloween as I am, you’ve landed in the right spot! This blog post is packed with whimsical ideas to bring fun frights to your kitchen and create lasting memories with your friends and family.
There’s something magical about this time of year. The air is crisp, the leaves are turning, and, let’s be honest, who doesn’t love a good excuse to get a little spooky in the kitchen? From ghostly cupcakes to monster brownies, Halloween treats can be as creepy or cute as you want. They spark joy and creativity, and, most importantly, they can bring everyone together in the kitchen for a fun-filled afternoon!
I remember the thrill of decorating Halloween treats with my family every year—my mom would bring home a collection of icing, sprinkles, and all the candies we could dream of. We would gather around the kitchen table, inspired by the wild ideas racing through our minds, creating our own versions of Halloween masterpieces (or masterpieces gone delightfully wrong!). That collaboration wasn’t just about food; it was about laughter, creativity, and of course, a sprinkle of friendly competition on who could come up with the scariest treat.
So, are you ready to dive into some Halloween creepy treat fun? Whether you’re hosting a haunted house party, a school gathering, or just looking to make something fun at home, I’ve got you covered with charmingly creepy treats that will steal the show. Let’s get to it!
Personal Story
One of my fondest Halloween memories dates back to when I was about ten years old, standing next to my best friend Lucy in her kitchen. It was tradition to make themed treats for our friends and families, and we decided to go all out. That year, we baked cookies, but not just any cookies — we made “witch’s fingers.” These weren’t your average Halloween treat; they were almond-infused delights that we decorated with green icing and slivered almonds for a truly ghoulish effect.
I can still hear our giggles as we shaped the dough into long digits, carefully placing the “fingernails” on each cookie. The looks on our family members’ faces as they hesitantly took a bite were priceless — half amused, half horrified! But the best part? We tricked a few of them into believing we had actually baked witch’s fingers. It became the highlight of our Halloween celebrations for years to come, and I still make those witch’s fingers today, each time with new imaginative flair! I invite you to create your own ooey-gooey memories this Halloween, and what better way to kick things off than by baking some deliciously creepy treats?
Ingredients
Here are all the ghoulish goodies you’ll need for your Halloween treats:
-
Sugar Cookies (or store-bought cookie dough):
Great as a base for any Halloween treat. Use your favorite sugar cookie recipe or a pre-made dough to save time. If you’re looking for a gluten-free option, many stores carry gluten-free cookie dough! -
Green Icing:
Use ready-made frosting or make your own with powdered sugar, milk, and a few drops of green food coloring. This will add a whimsical touch to your treats. If green isn’t your thing, how about blood-red icing for a vampire twist? -
Almonds (slivered and whole):
Slivered almonds work perfectly for “fingernails.” But if you’re nut-free, try using pumpkin seeds for a similarly eerie effect! -
Gummy Worms:
Perfect for adding a squishy bite to your treats or creating creepy scenes. Any candy store should have them, or you can find them at most supermarkets. -
Chocolate Chips:
These can be used as eyes for your treats — mix dark and white chocolate for added effect. Looking for dairy-free options? Look for vegan chocolate chips in your local grocery store. -
Marshmallows:
Use them to create marshmallow ghosts or fill in empty spaces of creativity. They are versatile and can be cut to a variety of shapes. For a healthier version, you could use dried banana chips shaped like ghostly figures! -
Sprinkles (various colors):
Grab spooky sprinkles to scatter on top of your treats. It adds color and fun! Keep an eye out for Halloween-themed mixes with tiny bats, pumpkins, and ghosts.
This ingredient list might seem overwhelming, but trust me, the fun lies in using your creativity to mix, match, and improvise!
Step-by-Step Instructions
Now, let’s get our hands dusty and dive into the cooking process! Here’s how to whip up your Halloween creepy treats:
-
Preheat Your Oven:
Begin by preheating your oven to 350°F (175°C). It’s essential to have your oven warmed up for an even baking! -
Prepare the Cookie Dough:
If you’re using homemade cookie dough, roll it out onto a floured surface to about ¼ inch thickness. If you are using store-bought, place it between two sheets of parchment paper and roll it out. This prevents sticking and makes for easier cleanup! -
Cut Out the Cookie Shapes:
Use a finger-shaped cookie cutter (or simply shape them by hand) to cut out the dough. If you’re up for Halloween-inspired shapes — think pumpkins, ghosts, and bats— the options are endless! Don’t forget to place those on a lined baking sheet. -
Bake the Cookies:
Slide those bad boys into the oven and let them bake for about 10-12 minutes, or until the edges are lightly golden. Watch them closely; you don’t want to overdo it! -
Cool the Cookies:
Allow the cookies to cool on a wire rack for about 5–10 minutes before transferring them to a cooling rack. This will prevent them from becoming soggy while decorating. -
Decorate, Decorate, Decorate!
Now for the fun part! Use your green icing to create a “creepy” base on top of the cooled cookies, carefully spreading it or piping it out. For the witch’s fingers, place slivered almonds at the end of each cookie to create the look of nails. Add chocolate chips as “eyes” if you’re feeling whimsical. You can even use edible markers to draw on features! -
Assemble the Creepy Scene:
Get creative! Use gummy worms and sprinkles to create creepy decorations around your cookies. Position gummy worms like they’re crawling on the cookies or hide them underneath for a surprise! -
Present Your Spooky Treats:
Arrange your creepy concoctions on a decorated platter to accentuate the Halloween theme. Maybe even add some fake cobwebs or plastic spiders for that extra touch of eeriness!
And there you have it, my friends! A delightful set of Halloween creepy treats that will thrill your guests and spark creative conversations.
Serving Suggestions
To create an unforgettable experience, serve your creepy treats on a spooky-themed platter adorned with seasonal decorations like mini pumpkins and faux cobwebs. Pair them with a spooky punch made from soda and gummy worms for a complete Halloween vibe! You can even challenge your guests to guess what they’re eating while they nibble on these delectable delights.
Recipe Variations
-
Vampire Bite Cupcakes: Top chocolate cupcakes with red frosting and place a gummy fang hanging off the edge for that extra bite!
-
Monster Brownies: Use brownie mix and decorate with chocolate frosting, candy eyes, and sprinkles to create wacky monster faces.
-
Spooky Rice Krispie Treats: Form Rice Krispie treats into ghost shapes and use chocolate chips for eyes, perfect for a no-bake snack!
-
Ghostly Meringues: Whip egg whites and sugar to shape into meringue ghosts, adding chocolate chip eyes for a sweet and spooky surprise!
-
Pumpkin Spice Cookies: Mix pumpkin puree and spices into your sugar cookie dough for a seasonal twist; they’ll taste as good as they look!
Chef’s Notes
As I mentioned earlier, my love for Halloween treats stems from those childhood baking sessions that I cherished. Each year brings about experimentation with flavors, ingredients, and of course, a sprinkle of chaos! Tradition may hold a special place in our hearts, but creativity is key! I’ve learned that sometimes the messiest kitchens produce the most delicious results. Remember, it’s all about having fun, so don’t stress over perfection — embrace the spooky mess, and most importantly, enjoy the time spent creating memories with loved ones!
FAQs and Troubleshooting
-
Why are my cookies spreading too much?
Ensure that your butter isn’t too warm when mixing; try chilling the cookie dough for about 30 minutes before baking to maintain their shape! -
How can I make my icing stiffer?
If your icing is too runny, gradually add more powdered sugar until you achieve the desired consistency. -
What if I can’t find slivered almonds?
No worries! Pumpkin seeds or even cut-up pieces of dried fruit can work as perfect substitutes for nail designs. -
Can I freeze these treats?
Absolutely! Just make sure to wrap them tightly in an airtight container or freeze them without icing. You can ice them once thawed for best freshness!
Nutritional Info
While it’s crucial to indulge on Halloween, being mindful of ingredients is also important! If you want, you can consider the following general breakdown (this will vary depending on portion sizes and ingredients used):
- Calories: Approximately 150-200 calories per cookie (varies by size and toppings).
- Fat: Around 5-8g (dependent on butter or margarine used).
- Carbohydrates: Roughly 20-25g, with an emphasis on sugar.
- Protein: About 1-2g (can increase if adding nuts).
- Fiber: Approximately 0.5g unless using whole grains for the cookies.
With these tips and recipes in hand, you’re all set to create your own spooky Halloween treats! Let the creativity and fun ignite the spirit of the season. So turn up the tunes, grab your apron, and let’s bake something together that will be the highlight of any Halloween festivity! Happy Halloween, my fellow foodies! 🎃
Print
Halloween Creepy Treats
- Total Time: 27 minutes
- Yield: 12 servings
- Diet: Vegetarian
Description
Delight in making spooky treats for Halloween with these creative recipes that transform traditional cookies into ghoulish masterpieces.
Ingredients
- Sugar Cookies (or store-bought cookie dough)
- Green Icing
- Almonds (slivered and whole)
- Gummy Worms
- Chocolate Chips
- Marshmallows
- Sprinkles (various colors)
Instructions
- Preheat your oven to 350°F (175°C).
- Prepare the cookie dough, rolling it out to about ¼ inch thickness.
- Cut out the cookie shapes using a finger-shaped cookie cutter or by hand.
- Bake the cookies for about 10-12 minutes, or until the edges are lightly golden.
- Cool the cookies on a wire rack for 5–10 minutes.
- Decorate the cooled cookies with green icing and slivered almonds to create a spooky effect.
- Assemble gummy worms and sprinkles around your cookies for creative touches.
- Present your spooky treats on a themed platter for an extra frightful display.
Notes
Embrace creativity when decorating your treats. Consider using alternative ingredients for allergies or personal preferences.
- Prep Time: 15 minutes
- Cook Time: 12 minutes
- Category: Dessert
- Method: Baking
- Cuisine: American
Nutrition
- Serving Size: 1 cookie
- Calories: 175
- Sugar: 12g
- Sodium: 100mg
- Fat: 7g
- Saturated Fat: 3g
- Unsaturated Fat: 4g
- Trans Fat: 0g
- Carbohydrates: 25g
- Fiber: 1g
- Protein: 2g
- Cholesterol: 15mg
Keywords: Halloween treats, spooky recipes, creepy cookies, festive baking, fun desserts
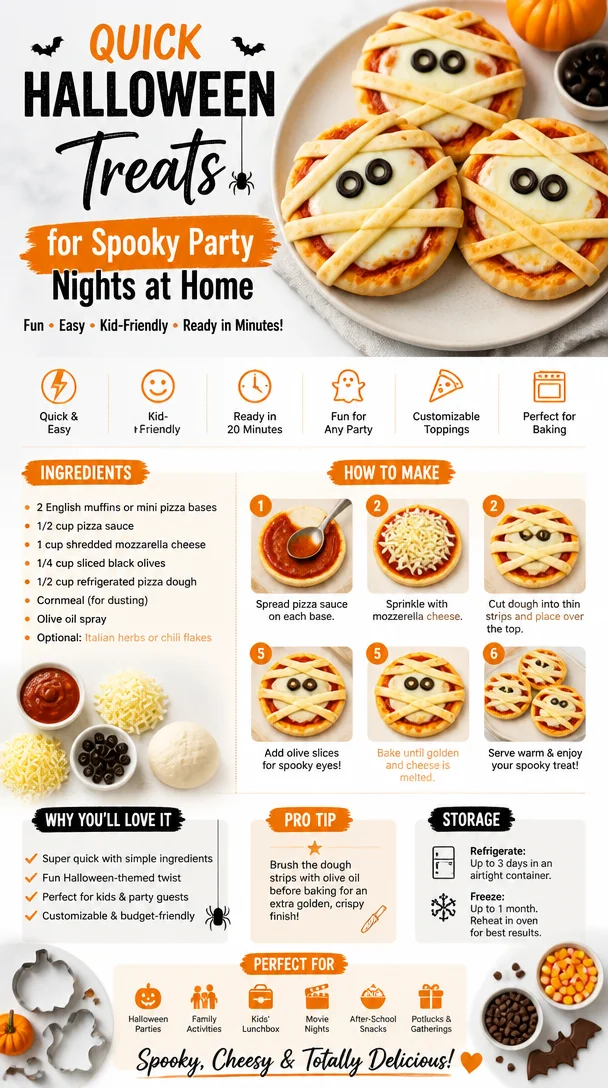
Quick Halloween Treats for Spooky Party Nights at Home
Spooktacular Halloween Treats: Sweet and Simple Recipes for a Fang-tastic Celebration
Welcome to my kitchen, fellow foodies! As the leaves turn golden and the air gets a crisp bite, it’s time to celebrate one of my favorite seasons—Halloween! It’s a time for spooky decorations, creative costumes, and, of course, scrumptious treats that make your taste buds tingle with delight. There’s something magical about this time of year; a hint of nostalgia fills the air, reminding us of the excitement of trick-or-treating and the joy of gathering around a table filled with themed goodies.
Halloween treats are not just about candy (though I won’t be turning down a chocolate bar anytime soon!). They’re about fun creativity in the kitchen, turning simple ingredients into delightfully eerie delights that will bring smiles to faces young and old. And don’t worry if you’re not a seasoned chef—I promise that my recipes are easy, approachable, and designed to add a sprinkle of enchantment to your Halloween parties.
Whether you’re planning a haunted gathering, helping with school events, or just want to surprise your family with a delightfully spooky snack, I’ve got you covered! From ghostly marshmallow pops to wickedly fun pumpkin cupcakes, we’re diving into a treasure trove of treats that will impress and inspire.
So, put on your favorite apron, grab your mixing bowls and spatulas, and let’s scare up some deliciousness together!
A Whimsical Memory
To really get into the spooky spirit, I can’t help but reminisce about my childhood Halloween parties. One of my favorite memories is gathering around the kitchen table with my family, concocting our Halloween goodies. We’d always make popcorn balls, covered in gooey caramel and colorful sprinkles, transforming them into whimsical creations—sometimes they were ghosts, other times they were just colorful blobs of sweetness!
The kitchen would fill with laughter, and the air would be thick with delicious fragrances. “Not too sticky!” Mom would yell with a glint of mischief in her eye, while we’d all giggle trying to shape the sticky popcorn into the perfect ball. These moments were so magical. It’s that same enthusiasm and passion for creating memorable experiences that I hope to channel in today’s recipes. Let’s recreate that sense of joy and deliciousness in our own kitchens this Halloween!
Ingredients
Here’s what you’ll need to whip up these Halloween treats. Each ingredient plays a unique role in bringing together flavors and textures:
-
Popcorn: The base of our treat. Light and crunchy, it serves as the perfect canvas for all your spooky designs. You can substitute with rice cereal for a different texture altogether.
-
Granulated Sugar: This sweetener is essential for creating a divine caramel. Brown sugar can give your caramel a deeper flavor if you’re feeling adventurous!
-
Butter: Essential for richness in flavor. Use unsalted butter to have better control over the seasoning, or try coconut oil for a dairy-free option.
-
Mini Marshmallows: They add a chewy texture and sweetness. You can swap them for chocolate chips or even dried fruits like cranberries for a chewy surprise.
-
Food Coloring: For all those vibrant hues! Use gel food coloring to get more vibrant colors without adding too much liquid. Natural coloring can be made from beet juice or turmeric for yellow.
-
Sprinkles: These little pops of color are non-negotiable for fun Halloween treats! Use themed sprinkles or colored sugar to add spookiness. For a healthier option, try crushed nuts or seeds.
Step-by-Step Instructions
-
Pop the Popcorn:
Start by popping the popcorn. You can use a popcorn maker, an air popper, or the old-fashioned pot method on the stove. If you’re using the stovetop, heat about 2 tablespoons of oil in a large pot, add 1/2 cup of popcorn kernels, cover with a lid, and shake occasionally until popping slows down. Remove from heat and let it cool.Chef Tip: Toss in a pinch of salt while it’s still warm for extra flavor, or experiment with your favorite seasonings!
-
Make the Caramel:
In a saucepan over medium heat, combine 1 cup of granulated sugar, 1/2 cup of butter, and 1/4 cup of corn syrup (optional but adds a lovely sheen). Stir continuously until the butter melts, and the mixture bubbles. You want to reach a beautiful amber color, which should take about 5-7 minutes.Chef Tip: Watch this closely—it goes from perfect to burnt in seconds!
-
Add the Marshmallows:
Once the caramel is ready, reduce the heat to low and mix in 2 cups of mini marshmallows. Stir continually until they are fully melted and smooth. -
Combine with Popcorn:
Pour the warm caramel mixture over your popped popcorn in a large bowl. Quickly mix it gently with a spatula, making sure all the popcorn gets coated in that glorious caramel goodness. This part is messy—the sticky fingers are the best part of baking, right?Chef Tip: You can wear rubber gloves for easier handling if you don’t want sticky fingers!
-
Shape Your Treats:
Once combined, let the mixture cool slightly. Then, using your hands (grab those gloves if you like), form the mixture into balls or whatever spooky shape your imagination conjures (think pumpkins or ghosts)! Place them on a parchment-lined baking sheet to set. -
Decorate:
While still slightly tacky, drizzle with melted chocolate and sprinkle with your choice of fun decorations! Use red for an eerie blood effect or green for a witchy vibe.Chef Tip: For an extra spook element, add edible glitter for a magical shimmer!
-
Set and Serve:
Allow the treats to cool completely until set. If you’re not serving them immediately, store them in an airtight container to maintain their freshness.
Serving Suggestions
These treats are best served at room temperature. For a fun presentation, create a Halloween-themed dessert table! Use colorful platters, decorate with fake spider webs, and display your treats in a cauldron for a spooky delight. If you’re feeling crafty, wrap them individually in cellophane tied with ghostly ribbons for party favors.
Recipe Variations
Want to put a twist on your Halloween treats? Here are a few fun variations to consider:
-
Chocolate Drizzled Corn Treats: Instead of decorating with colorful icing, drench your treats in melted dark or white chocolate for an extra delightful layer.
-
Pumpkin Spice Popcorn Balls: Add a teaspoon of pumpkin spice to your caramel mixture for a seasonal kick that’s sure to delight spice lovers.
-
Ghostly Meringues: Use the same mixture but pipe shapes onto a baking sheet and bake until crisp, then decorate with mini chocolate chips as eyes for cute ghostly figures!
Chef’s Notes
I remember the first time I made popcorn balls on my own—it was a glorious sticky disaster that ended up with popcorn stuck to the ceiling! But these non-fussy treats don’t have to be perfect to be fun. Feel free to experiment with different shapes, colors, and flavors. And remember, the best part of cooking is sharing your creations and memories with friends and family!
FAQs and Troubleshooting
Q: My caramel turned out too hard—what happened?
A: If your caramel cools too fast or cooks too long, it can harden. Keep an eye on the temperature and don’t overcook!
Q: Can I use microwave popcorn?
A: Absolutely, just make sure it’s plain popcorn without too much butter or seasoning. You’ll be coating it in delicious caramel!
Q: What if I can’t find mini marshmallows?
A: You can chop up regular marshmallows into smaller pieces or substitute with crunchy cereal like Rice Krispies for a different texture!
Q: How do I store leftover treats?
A: Keep them in an airtight container at room temperature. If you refrigerate them, they might become too hard, and we don’t want that spooky situation!
Now that you have everything you need to create fantastic Halloween treats, gather your loved ones, turn on some spooky tunes, and get ready for a fun-filled evening in the kitchen! So, let’s make this Halloween spooktacular, one treat at a time! Happy cooking!
Print
Spooktacular Halloween Treats
- Total Time: 25 minutes
- Yield: 4 servings 1x
- Diet: Vegetarian
Description
Celebrate Halloween with these fun and easy popcorn ball treats that are perfect for all ages.
Ingredients
- 1/2 cup Popcorn kernels
- 1 cup Granulated sugar
- 1/2 cup Butter (unsalted)
- 1/4 cup Corn syrup (optional)
- 2 cups Mini marshmallows
- Food coloring
- Sprinkles
Instructions
- Pop the popcorn using your preferred method and let it cool.
- Combine sugar, butter, and corn syrup in a saucepan and cook until caramel forms.
- Add the mini marshmallows to the caramel and stir until melted.
- Pour the caramel mixture over popcorn and mix until coated.
- Shape the mixture into balls or spooky shapes and place on a baking sheet.
- Decorate with melted chocolate and sprinkles.
- Allow to cool completely before serving.
Notes
Feel free to experiment with different shapes and themes for your Halloween treats! Store leftovers in an airtight container.
- Prep Time: 15 minutes
- Cook Time: 10 minutes
- Category: Dessert
- Method: Baking
- Cuisine: American
Nutrition
- Serving Size: 1 serving
- Calories: 250
- Sugar: 22g
- Sodium: 200mg
- Fat: 10g
- Saturated Fat: 6g
- Unsaturated Fat: 4g
- Trans Fat: 0g
- Carbohydrates: 36g
- Fiber: 1g
- Protein: 2g
- Cholesterol: 30mg
Keywords: Halloween treats, popcorn balls, spooky snacks, easy desserts
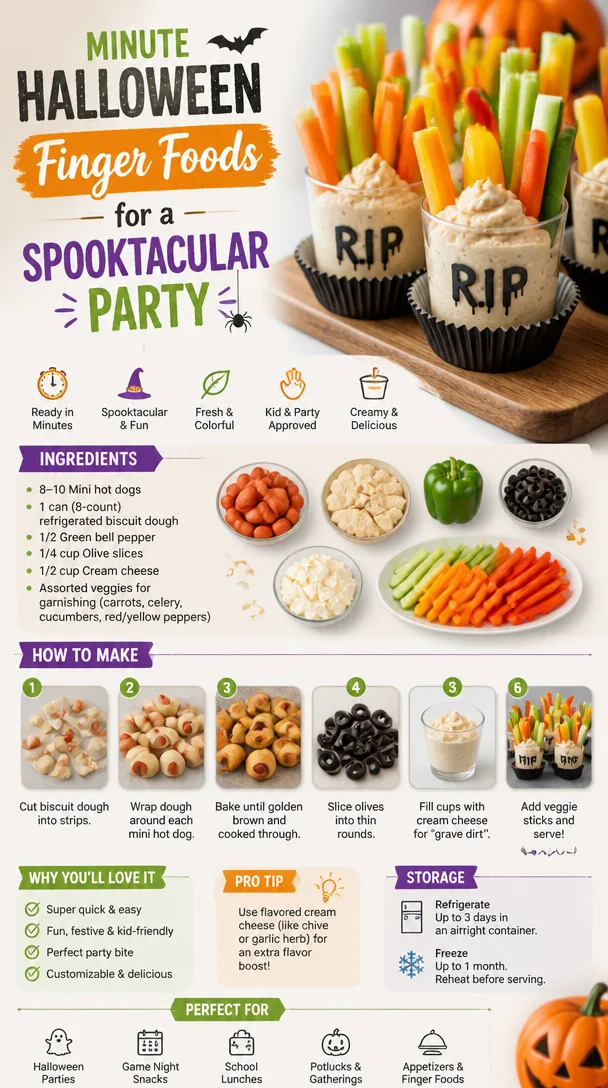
Minute Halloween Finger Foods for a Spooktacular Party
Spooktacular Halloween Finger Foods to Delight Your Guests
Welcome to my kitchen, my fellow food lovers! As October rolls in and the air turns crisp, it’s time to embrace all things spooky and delightful. Halloween isn’t just about costumes and candy; it’s a fantastic opportunity to gather friends and family for a themed celebration filled with food that makes you giggle and gasp. Today, we’re diving into the world of Halloween finger foods that are sure to impress your guests and make your spooky soirée unforgettable.
Imagine the scene: a table adorned with spooky snacks that are both delicious and delightfully creepy. You have pumpkin-shaped cheese balls, ghostly tacos, and even mummified hot dogs. Each dish tells a story and adds a playful spirit to your gathering. I’m here to walk you through some of the most fun and flavorful Halloween finger foods that will have everyone coming back for seconds, thirds, and who knows—maybe even fourths!
What’s incredible about finger foods is their versatility. You can be as creative as you want with flavors, presentations, and triggers of nostalgia. And trust me, these recipes are beginner-friendly. You don’t need a culinary degree to create a memorable Halloween spread. So grab your apron (the messier, the better), and let’s conjure up some delicious treats that will impress and entertain!
In this post, you’ll find a collection of recipes that are simple yet festive, each accompanied by my personal anecdotes and chef tips. So, let’s get started on this culinary adventure brought to life by the spirit of Halloween!
A Taste of Nostalgia
Ah, Halloween—one of those magical times of the year where the air buzzes with excitement, and creativity runs rampant! I still remember one particular Halloween when I was about eight years old. My mom decided we’d host a Halloween party for my neighborhood friends, and the kitchen turned into a veritable cauldron of creativity.
We spent the afternoon together, whipping up the most fantastical finger foods. The laughter, spooky decorations, and the smell of warm treats filled our home. We made “witches’ fingers” out of veggie sticks dipped in green hummus, and my favorite was the “bloody” ketchup served with mini hot dogs dressed up as mummies. It was those finger foods that sparked my love for hosting and cooking. Every dish we created felt like a little potion of joy, bringing everyone together to share giggles, tales, and, of course, as many snacks as they could manage!
Those joyful memories linger, and they remind me that cooking is not just about food; it’s about making connections and sharing laughter. This Halloween, as I share these delectable finger foods with you, I hope they inspire some laughter and joy in your kitchen, too!
Ingredients You’ll Need
Here’s a delectable list of ingredients that will bring these Halloween finger foods to life:
For Witches’ Fingers (Veggie Sticks with Green Hummus)
-
Cucumbers: Crisp and refreshing, these are perfect for our “witches’ fingers.”
Substitution Tip: You can use carrots or celery sticks if you prefer. -
Green Hummus: A blend of chickpeas, tahini, and fresh herbs for that vibrant color.
Chef Insight: Blend in spinach or avocado for extra green flair!
For Mummified Hot Dogs
-
Mini Hot Dogs: These adorable morsels are the stars of the show.
Substitution Tip: Use veggie dogs for a meat-free version. -
Puff Pastry: The flaky pastry that wraps around for a delicious outer layer.
Chef Hack: Thaw and roll out the puff pastry for a beautiful flaky crust. -
Mustard or Ketchup: For the eyes—simple and effective!
Flavor Option: Try sriracha for a spicy twist!
For Pumpkin Cheese Balls
-
Cream Cheese: The main ingredient for our cheesy pumpkin shape.
Substitution Tip: Use ricotta for a lighter texture. -
Cheddar Cheese: Adds flavor and color to your cheese ball.
Chef Insight: Experiment with smoked cheddar for a unique taste! -
Herbs (Chives, Parsley): Fresh herbs add a burst of flavor and color.
Flavor Option: Add some spices like paprika for an extra kick.
Step-by-Step Instructions
Witches’ Fingers with Green Hummus
-
Prepare the Hummus: In a food processor, combine 1 can of drained chickpeas, 2 tablespoons tahini, 1 clove garlic, 2 tablespoons lemon juice, and a handful of spinach or 1 ripe avocado. Pulse until smooth, adding olive oil until you reach your desired consistency.
Tip: Add a sprinkle of salt and pepper to taste. -
Slice the Cucumbers: Cut the cucumbers into sticks that resemble fingers. Aim for about 4 inches long.
Chef Hack: To make the “nails,” slice a small piece of bell pepper and add it to the tip of each cucumber finger.
Mummified Hot Dogs
-
Preheat the Oven: Set your oven to 375°F (190°C) so it’s nice and hot when your treats are ready.
-
Roll Out the Puff Pastry: On a floured surface, roll out your thawed puff pastry. Cut it into thin strips—about ½ inch wide.
Tip: The thinner the strips, the more flaky the end product can be. -
Wrap the Hot Dogs: Take each mini hot dog and carefully wrap it in the strips of puff pastry, leaving a small space for the “eyes.”
Chef Hack: You can twist the pastry for a more mummified appearance. -
Bake: Place your mummies on a baking sheet lined with parchment paper and bake for about 15-20 minutes or until golden brown.
-
Add the Eyes: Once cooled, dot mustard or ketchup on the puff pastry to create spooky eyes.
Pumpkin Cheese Balls
-
Mix Ingredients: In a bowl, combine 8 ounces of softened cream cheese, 1 cup grated cheddar cheese, and chopped chives and parsley. Mix well.
Tip: Add a bit of garlic powder for extra flavor. -
Shape the Cheese: Scoop the mixture into a round ball and then gently press it into a pumpkin shape. Use your fingers to create little grooves to mimic a pumpkin’s body.
Chef Hack: You can use a small piece of celery or pretzel stick for the pumpkin stem. -
Chill: Refrigerate for at least 30 minutes before serving to let it firm up a bit.
Serving Suggestions
Arrange your witches’ fingers, mummified hot dogs, and pumpkin cheese ball on a large platter. Add some tomato sauce and mustard in small bowls for dipping. Surround everything with colorful veggies and a variety of crackers—making it a feast for the eyes as well as the stomach!
Recipe Variations
-
Mummy Meatball Subs: Use meatballs instead of hot dogs, wrap them in strips of puff pastry, and bake. Serve them in mini sub rolls with marinara sauce.
-
Spooky Cheese Board: Add an assortment of cheeses, cured meats, and themed crackers to create a Halloween cheese board that invites creativity.
-
Vegetarian Ghost Wraps: For a meatless option, use black bean or chickpea salad, wrapped in tortillas and cut into “ghost shapes.”
-
Frankenstein Guacamole Cups: Serve guacamole in small cups with veggie sticks poking out, decorated like Frankenstein using sliced olives for eyes.
-
Monster Faces: Use sliced fruit and nuts to create fun monster faces on crackers or rice cakes as an allergen-free snack option.
Chef’s Notes
As I evolve in my cooking journey, I find that Halloween finger foods provide an awesome platform for creativity. I always encourage cooks of all levels to let loose and have fun in the kitchen. After all, the more you cook, the better you become!
Funny story: One Halloween, I decided to host a last-minute gathering. Instead of going for my usual pumpkin-flavored everything, I mistakenly grabbed cumin instead of cinnamon for my pumpkin pie. The confused faces around the table were priceless! Lesson learned—always double-check your spice jars, especially when creating festive finger foods!
FAQs and Troubleshooting
Q1: Can I make these ahead of time?
Absolutely! Most of these recipes can be prepared a day in advance. Just store them in airtight containers until you’re ready to serve.
Q2: What if I don’t have puff pastry?
You can use tortillas or biscuit dough as a substitute for wrapping your hot dogs. They won’t puff up, but they’ll still be tasty!
Q3: How do I keep the hummus from discoloring?
To keep your hummus vibrant, make sure to store it in an airtight container and cover the surface with a thin layer of olive oil. This keeps it fresh and colorful!
Q4: Can I use other vegetables?
Definitely! Feel free to swap out cucumbers for celery sticks, bell peppers, or even carrots to create your spooky fingers.
Nutritional Info (optional)
- Witches’ Fingers: Low-calorie and packed with fiber.
- Mummified Hot Dogs: Moderate protein, consider using turkey or plant-based options for healthier alternatives.
- Pumpkin Cheese Balls: Higher in calories due to cheese but very nutrient-dense.
Remember, the most important ingredient in any recipe is love (and a touch of fun). So this Halloween, gather your ingredients, don your most creative apron, and let’s whip up some memories with these spooky, delicious finger foods. Happy Haunting in the kitchen!
Print
Spooktacular Halloween Finger Foods
- Total Time: 50 minutes
- Yield: 12 servings
- Diet: Vegetarian
Description
A fun collection of Halloween-themed finger foods that are sure to delight your guests.
Ingredients
- Cucumbers: 5 (for witches’ fingers)
- Green Hummus: 1 cup
- Mini Hot Dogs: 12
- Puff Pastry: 1 package
- Ketchup or Mustard: for decoration
- Cream Cheese: 8 ounces (for pumpkin cheese balls)
- Cheddar Cheese: 1 cup grated
- Chives: 1/4 cup chopped
- Parsley: 1/4 cup chopped
Instructions
- Prepare the hummus: In a food processor, combine 1 can of drained chickpeas, 2 tablespoons tahini, 1 clove garlic, 2 tablespoons lemon juice, and a handful of spinach or 1 ripe avocado. Pulse until smooth.
- Slice the cucumbers: Cut the cucumbers into sticks that resemble fingers, about 4 inches long.
- Preheat the oven: Set your oven to 375°F (190°C).
- Roll out the puff pastry on a floured surface and cut it into thin strips.
- Wrap the mini hot dogs in the strips of puff pastry, leaving spaces for the eyes.
- Bake: Place on a baking sheet and bake for 15-20 minutes until golden brown.
- Add the eyes with ketchup or mustard once cooled.
- Mix the cheese ball ingredients: Combine cream cheese, grated cheddar, chives, and parsley.
- Shape: Form into a round ball and create grooves to resemble a pumpkin.
- Chill: Refrigerate for at least 30 minutes before serving.
Notes
These finger foods are perfect for Halloween parties and can be made in advance.
- Prep Time: 30 minutes
- Cook Time: 20 minutes
- Category: Appetizer
- Method: Baking
- Cuisine: American
Nutrition
- Serving Size: 3 pieces
- Calories: 250
- Sugar: 2g
- Sodium: 600mg
- Fat: 15g
- Saturated Fat: 6g
- Unsaturated Fat: 7g
- Trans Fat: 0g
- Carbohydrates: 20g
- Fiber: 3g
- Protein: 8g
- Cholesterol: 20mg
Keywords: Halloween, finger foods, spooky snacks, appetizers, themed party foods
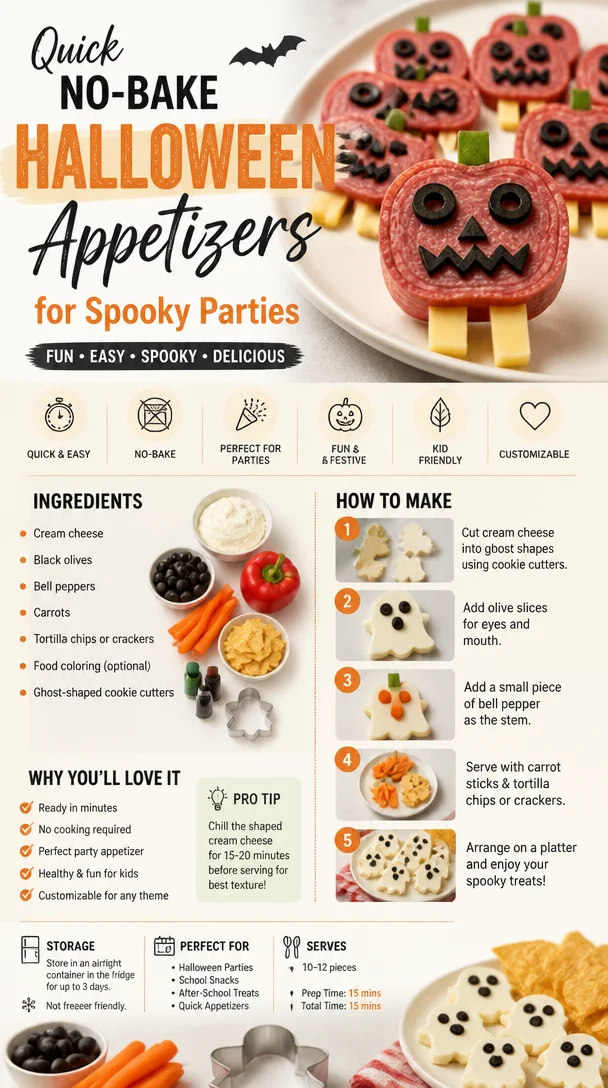
Quick No-Bake Halloween Appetizers for Spooky Parties
No-Bake Halloween Appetizers: Spook-tacular Treats for Your Festivities!
Welcome, fellow foodies, to my cozy little kitchen, where the air is filled with delightful aromas and the spirit of everything homemade! With Halloween creeping around the corner, it’s time to get prepped for a night of spooky fun, laughter, and of course, delicious food. Today, I’m super excited to share with you some absolutely fang-tastic no-bake Halloween appetizers that will not only tickle your taste buds but also impress your guests.
Having hosted countless Halloween get-togethers, I’ve learned that sometimes the most memorable dishes are the ones you whip up without even turning on the oven. Whether you’re throwing a festive party, a casual get-together, or simply looking for ways to celebrate the season, these no-bake appetizers are sure to be a hit. So grab your favorite Halloween playlist, don your most fun apron (and maybe a witch hat!), and let’s conjure up some culinary magic!
Imagine your guests mingling, sharing spooky stories, and laughing over delightful bites that look just as good as they taste. From creepy critter-themed cheese balls to eyeball-inspired deviled eggs, the options are endless when it comes to getting a little creative in the kitchen. Plus, the beauty of no-bake recipes is that they leave you plenty of time to focus on those hauntingly good conversations with your favorite people.
No bake means simple, fun, and oh-so-delicious! I’m all about creating recipes that bridge connections, and this collection of spooky appetizers is guaranteed to get your gathering off to a ghoulishly great start. So let’s dive right in!
A Nostalgic Kitchen Memory: Halloween Flea Market Fun
Before I share my favorite no-bake Halloween appetizers, let me take you on a quick trip down memory lane. Growing up, my family was all about hosting the most spirited Halloween parties ever! I fondly remember the time when my mom decided to turn our garage into a haunted house, complete with cobwebs, rubber bats, and sounds of ghostly moans.
One of my favorite moments was when she kicked off the festivities with a make-your-own appetizer table. She laid out an array of colorful ingredients and encouraged us to get creative. I remember giggling as we tried to build the most bizarre, spooky-looking snacks, like gummy worm layered dips or spider webs made of whipped cream. My best friend and I ended up crafting these crazy cheese balls covered in crumbled olives that we dubbed “The Haunted Cheese Mounds.” They were a total hit, and the spirit of creativity and laughter filled the air.
This experience not only fueled my love for cooking but also reminded me of how food can weave deeper connections among friends and family. Now, as an adult, I strive to recreate that magic in my own kitchen and make Halloween just as memorable for the next generation. Armed with that warmth and nostalgia, let’s get into the specifics of these no-bake bites!
Ingredients for No-Bake Halloween Appetizers
Let’s gather our ingredients! Here’s what you’ll need to create these spooky no-bake Halloween treats.
-
Cream Cheese: The creamy base for many of our appetizers. It adds richness and pairs well with various flavors. If you’re dairy-free, you can use a nut-based cream cheese for similar texture.
-
Shredded Cheese: I love using sharp cheddar, but feel free to mix in your favorites. For a twist, try pepper jack for a little kick!
-
Olives: Black olives create the perfect ‘eyeball’ effect for our spooky appetizers, but green olives can work too! If olives aren’t your thing, try cherry tomatoes for a pop of color.
-
Fresh Herbs: Parsley or chives add freshness to balance out the creamy ingredients. You can easily swap these for dried herbs; just remember to adjust the quantity!
-
Veggies: Bell peppers, cucumbers, or baby carrots can add crunch to your bites. Choose colorful varieties to make your platter visually appealing!
-
Graham Crackers: Great for some sweet no-bake treats! You could use gluten-free crackers or even crushed nuts for a grain-free option.
-
Chocolate or Candy Eyes: These are a fun way to add creepy features to your appetizers. If you can’t find them, you could use regular chocolate chips too (though they won’t be quite as spooky!).
-
Worm Gummy Candy: A must-have for Halloween-themed snacks! These can be switched out for any other candy you might have on hand, like gummy bears or jelly beans.
Step-by-Step Instructions for No-Bake Halloween Appetizers
Now the fun part! Here, I’ll guide you through assembling three spooktacular no-bake appetizers.
Creepy Cheese Ball Eyeballs
-
Prep the Ingredients: Start by softening 8 oz of cream cheese in a mixing bowl. Let it sit at room temperature for 15 minutes. This helps the cheese mix smoothly.
-
Mix the Cheese: Add in 1 cup of shredded cheddar cheese to the softened cream cheese. Use a spatula or a mixer to blend them together until smooth. This will be your monstrous eyeball base!
-
Shape the Balls: Using your hands, scoop out portions of the cheese mixture and roll them into balls, roughly the size of ping pong balls. This can get a bit messy, but who doesn’t love a little culinary chaos?
-
Chill: Place the cheese balls on a plate or baking sheet and pop them in the fridge for about 30 minutes. This helps them firm up, making them easier to handle later.
-
Decorate: After they set, take them out and press one chocolate or candy eye into the top of each cheese ball. For a fun twist, surround each eyeball with sliced olives to create a “screaming” face.
Monster Veggie Platter
-
Prepare the Base: Start with a flat platter and layer your choice of dips at the center. Consider using hummus or ranch for the ‘monster’ body.
-
Add the Veggies: Arrange colorful veggies around the dip to serve as ‘hair’ (think curly cucumbers and carrots), creating a fun visual presentation.
-
Create Faces: Cut small veggies like cherry tomatoes horizontally, using half for the eyes, and black olives for pupils. Carrots and bell pepper slices work great for mouths. Get creative with the monster features!
-
Serve with a Smile: This allows guests to dip and create their own monster faces on their plates, providing a fun interactive touch that makes the platter come alive!
Halloween Graham Cracker Ghosts
-
Prepare the Crackers: Begin by breaking graham cracker sheets in half to create your ghost ‘bodies’.
-
Make the Ghosts: Spread a generous layer of whipped cream (or any white frosting) over the top of each half cracker. You’ll want to create a nice, ghostly layer. Resist the urge to eat them—just for a few minutes longer!
-
Add Eyes: Place chocolate eyes on top while the cream is still soft. You can use two on each ghost for big spooky eyes.
-
Chill: If time allows, chill them in the fridge for about 15 minutes before serving so they’re slightly firmer, and get ready for some smiles!
Serving Suggestions
When it comes to serving these no-bake Halloween appetizers, presentation is key! For the cheese ball eyeballs, arrange them on a spooky-themed platter surrounded by fresh parsley or edible flowers for that eerie effect. The monster veggie platter should take center stage, standing out with its colorful veggies and funny faces. As for the ghostly graham cracker treats, stack them creatively on a haunted dish, complete with little decorations like fake spiders or mini tombstones.
Recipe Variations
-
Spicy Variation: Mix in some jalapeños or hot sauce into your cheese ball mix for a spicy surprise!
-
Fruit Halloween Treats: Swap out the savory snacks for spooky fruit kabobs using strawberries, bananas, and mini marshmallows for ghostly accents.
-
Nut-Free Option: Use seeds instead of nuts for texture in any of the dips or cheese balls to cater to guests with nut allergies.
-
Vegan Version: Swap cream cheese with tofu-based alternatives and use plant-based cheese and sour creams for a killer vegan option!
Chef’s Notes
These no-bake appetizers have really evolved for me over the years. I used to spend hours in the kitchen, but now I know that the simplest dishes can bring the greatest joy. It’s also amazing to see how many twists these recipes can take depending on seasonal ingredients or personal preferences! My friend once snuck pickled jalapeños into the cheese balls for an unexpected kick – they were a huge hit!
Each year, I discover new ways to reinvent these spooky treats and get everyone involved in the kitchen. Sharing those moments with friends and family while creating a delicious spread is what truly brings the holiday to life!
FAQs and Troubleshooting
-
Can I make these appetizers ahead of time?
Absolutely! You can prepare the cheese balls and ghosts a day in advance. Just keep them refrigerated until serving time for optimal freshness. -
What if my cheese mixture is too runny?
If your cream cheese mixture isn’t thick, try adding a bit more shredded cheese or a handful of crushed crackers. This will help firm it up. -
How do I make these snacks gluten-free?
Use gluten-free crackers and ensure that any other packaged ingredients (like dips) are labeled gluten-free. -
Can I omit certain ingredients?
Yes! Feel free to get creative and swap any ingredients based on personal taste and dietary restrictions. Cooking is all about improvisation, after all!
With these no-bake Halloween appetizers up your sleeve, you’re ready to charm and delight your guests. Remember, the best part is sharing the joy that comes from cooking and gathering together. Happy Halloween, and may your kitchen always be filled with warmth and laughter!
Print
No-Bake Halloween Appetizers
- Total Time: 45 minutes
- Yield: 8 servings 1x
- Diet: Vegetarian
Description
Delicious and fun no-bake appetizers perfect for your Halloween festivities!
Ingredients
- 8 oz Cream Cheese
- 1 cup Shredded Cheese (sharp cheddar or pepper jack)
- Olives (black or green)
- Fresh Herbs (parsley or chives)
- Veggies (bell peppers, cucumbers, baby carrots)
- Graham Crackers
- Chocolate or Candy Eyes
- Worm Gummy Candy
Instructions
- Prep the Ingredients: Start by softening the cream cheese in a mixing bowl for 15 minutes.
- Mix the Cheese: Add shredded cheese to the cream cheese and blend until smooth.
- Shape the Balls: Scoop mixture and roll into balls, about the size of ping pong balls.
- Chill: Place cheese balls in the fridge for about 30 minutes.
- Decorate: Press a chocolate eye into each cheese ball and surround with sliced olives.
- Prepare the Base: Layer your choice of dips on a flat platter.
- Add the Veggies: Arrange colorful veggies around the dip for visual appeal.
- Create Faces: Use small veggies for monster features like eyes and mouths.
- Serve with a Smile: Allow guests to create their own monster faces.
- Prepare the Crackers: Break graham cracker sheets in half.
- Make the Ghosts: Spread whipped cream on each half cracker.
- Add Eyes: Place chocolate eyes on each ghost.
- Chill: Refrigerate for 15 minutes before serving.
Notes
These appetizers can be made a day in advance. Keep refrigerated until serving.
- Prep Time: 15 minutes
- Cook Time: 0 minutes
- Category: Appetizer
- Method: No-Bake
- Cuisine: American
Nutrition
- Serving Size: 2-3 pieces
- Calories: 200
- Sugar: 5g
- Sodium: 300mg
- Fat: 15g
- Saturated Fat: 6g
- Unsaturated Fat: 5g
- Trans Fat: 0g
- Carbohydrates: 20g
- Fiber: 1g
- Protein: 5g
- Cholesterol: 30mg
Keywords: Halloween, appetizers, no-bake, spooky snacks, party food
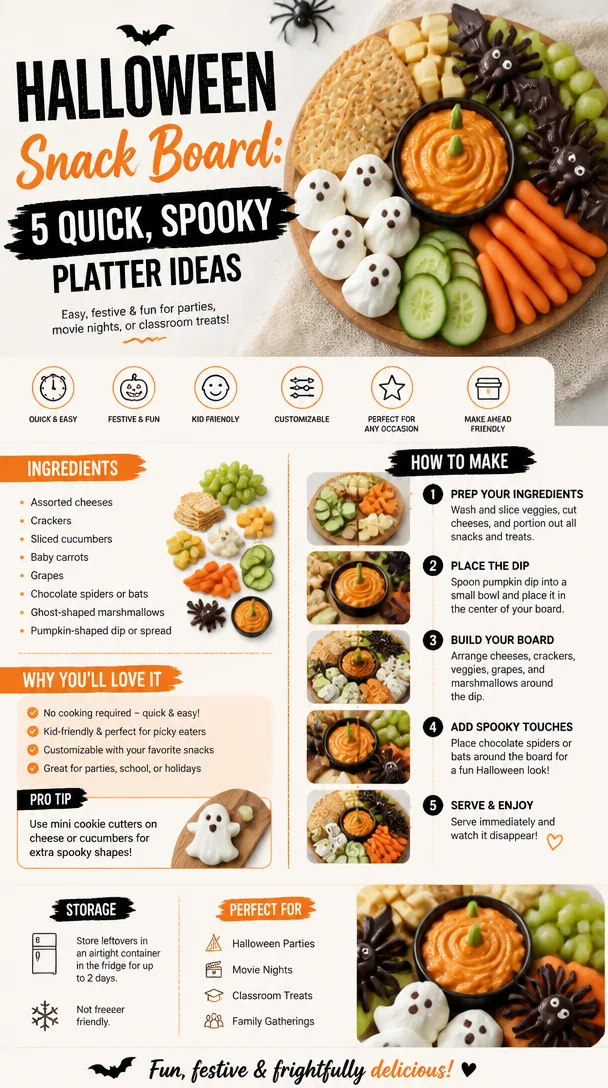
Halloween Snack Board: 5 Quick, Spooky Platter Ideas
Creepy-Cool Halloween Snack Board: A Spooktacular Feast for the Eyes and Taste Buds
Welcome to my kitchen! As the leaves start to tumble and the air turns crisp, you can bet that I’m brewing up something festive and fun to celebrate the season. Halloween is just around the corner, and what better way to celebrate than with a Halloween Snack Board that’s not only delicious but also downright delightful to look at? Whether you’re hosting a haunted gathering or simply looking for a way to enjoy October’s eerie charm, this snack board is the perfect centerpiece.
Imagine this: You’ve invited a few friends over for a spooky movie marathon, or perhaps the kids are gearing up for trick-or-treating. The excitement fills the air, and your kitchen is alive with laughter and chatter. Suddenly, you unveil a beautifully crafted Halloween Snack Board adorned with vibrant colors, playful shapes, and a mix of flavors that make everyone’s taste buds tingle with anticipation. It’s all about creating a delightful experience that gathers people together — and that’s what this festive board does so perfectly!
The joy of a snack board lies in its endless possibilities. You can use your favorite flavors, add seasonal touches, and of course, make it as spooky (or as sweet) as your heart desires. I’ll guide you through the ins and outs of assembling a Halloween Snack Board that will impress your guests and put you at the center of the fun. Let’s unleash your creativity and embrace the flavors of fall together, shall we?
A Bite of Nostalgia
When I think of Halloween, I can’t help but reminisce about my childhood. It was always such an enchanting time of the year. Dress-up costumes, bobbing for apples, and, of course, being surrounded by a mountain of candy were highlights. But it was the Halloween parties that stood out the most. My mom would whip up a monstrous spread of spooky snacks that looked as good as they tasted. I remember one year, she created a “witch’s brew” punch and shaped her famous cheese ball into a pumpkin, complete with pretzel stems.
That pumpkin cheese ball has always stuck with me, a reminder of the joy and laughter that fills the kitchen during this festive season. Years later, I found myself hosting my own Halloween parties, inspired by those cherished memories. Now, I take all of those fond flavors and whimsical designs to create snack boards — gatherings that bridge my past with my present. Each board is a canvas of horror and fun, sparking joy and nostalgia in every bite. So, let’s take a trip down memory lane and create a Halloween Snack Board that will enchant everyone who sees it!
Ingredients
To create this spooky Halloween Snack Board, you’ll need a variety of ingredients that not only provide a burst of flavors but also allow for creativity in presentation. Here’s a list of key components you’ll want to gather:
-
Cheddar Cheese (or “Pumpkin Cheese Ball”): The star of any snack board! You can use classic sharp cheddar for its bite or swap in a creamier cheese like gouda for smoothness. If you want to make it festive, mold your cheese into a pumpkin shape using a cheese ball recipe and decorate it with pretzels.
-
Salami (or any cured meats): A savory element is essential! Go for sliced salami or prosciutto. For a spicy kick, consider adding some spicy chorizo. These add a nice contrast to the cheeses.
-
Veggies (carrot sticks, cucumber slices, bell pepper ghosts): Fresh veggies provide crunch and color. You can cut cucumbers into spooky shapes with cookie cutters, and carrot sticks add a pop of color! Bell peppers can be carved like little ghosts too.
-
Fruit (grapes, figs, or apple slices): Gingerly sweet additions like grapes or figs bring balance to your snack board. You can even apple slices dotted with peanut butter to add charm!
-
Nuts (almonds, walnuts, pumpkin seeds): Nuts add a satisfying crunch and are great for nibbling. Pumpkin seeds are especially fitting for Halloween!
-
Dips (hummus, guacamole, or pumpkin dip): Dips are a must! Choose something herby and delicious like pesto hummus or create a festive pumpkin dip with cream cheese for a sweet twist.
-
Crackers and breadsticks: For serving with dips and cheese. Get creative with spooky-shaped crackers or even offer breadsticks dressed up as broomsticks!
-
Sweets (candy corn, chocolate spiders, or gummy worms): You can’t forget the sweets! They add whimsy and a touch of fun. Get creative with gummy worms trailing down like little monsters or chocolate spiders hiding among the cheese!
Creating an invitation with these ingredients allows you to mix and match according to your preferences and audience. Feel free to substitute any items you think might be more suited to the taste of your guests!
Step-by-Step Instructions
Now that you’ve got your ingredients gathered, let’s get down to the exciting part: assembling your Halloween Snack Board! Follow these steps for a frightfully fun display:
-
Choose a Board: A large wooden cutting board or a slate platter works beautifully as your base. You want something that can showcase your delicious spread, while still allowing for creativity in arrangement. If you don’t have a dedicated board, a large platter will also do!
-
Start with Cheese and Meats: Begin by placing your cheese on the board. If you’ve shaped your cheese into a pumpkin, place it front and center! For sliced cheese, arrange the slices in a corner or fan them out for an appealing display. Next, rustic fold your salami or prosciutto and add it nearby. Balance is key—try to have it on opposite sides to let the eye travel across the board.
-
Add Veggies: Next, fill in the spaces with your colorful veggies. Place carrot sticks standing up like spooky trees, and scatter cucumber rounds nearby. Don’t forget to include those bell pepper ghosts! Their varying colors will brighten up the board beautifully.
-
Create Clusters with Fruits and Nuts: Time to add sweet and salty! Let’s create little clusters of fruits and nuts to fill those gaps. Arrange grapes in a little pile near the veggies and sprinkle nuts in a couple of spots. This gives the board more texture and keeps everything from looking too organized.
-
Dips and Crackers: Set bowls of dips on the board, spacing them out for easy access. Now it’s time to add your crackers and breadsticks. Arrange them around your dips and cheese to invite people in to munch away!
-
Finish with Sweets: Last but not least, finish your board with those delightful sweets. Scatter candy corn and creepy gummy worms across the board, tucking them into the nooks and crannies. Maybe even dot some chocolate spiders around for an extra fright!
-
Add Decorative Touches: If you want to make it even more festive, add little decorative elements like pumpkin spice shakers or a tiny spooky scarecrow. These little touches help elevate your board from merely delicious to truly thematic!
And voila! You have yourself a visually stunning and delicious Halloween Snack Board. Don’t forget to step back and admire your artwork before your guests dig in!
Serving Suggestions
When it’s time to serve your Halloween Snack Board, make it all about the experience! Encourage your guests to gather around the board, inviting them to mix and match their own bites. You could even provide small plates or napkins and some festive toothpicks for easy snacking. I like to let everyone get creative, layering their favorite ingredients into delicious bites that represent the flavors they crave.
Remember, this board is a show-stopper. Keep it at the center of your dining room table or coffee table while the laughter and chatter flow, creating an inviting atmosphere. It’s the perfect way to keep your guests munching throughout the night!
Recipe Variations
While the classic Halloween Snack Board has its charm, you can switch things up with these variations:
-
Spooky Charcuterie: Amp up your meats with different charcuterie options and complement with gourmet cheeses and preserves. Add figs and olives for an extra gourmet touch.
-
Healthy Harvest Board: Swap the sweets for things like apple slices with almond butter, popcorn drizzled in white chocolate, and a few seasonal veggies with a light dip—perfect for health-conscious guests!
-
Chocolate Lovers’ Board: Create an all-sweets version filled with chocolates, cookies, dried fruits, and marshmallows. Include nut butter for dipping and chocolate snacks such as chocolate-covered pretzels!
-
Mexican Fiesta Board: Incorporate nacho chips, guacamole, salsa, spicy sausage, and jalapeños for a southwest-inspired snack board.
-
Kid-Friendly Fun Board: Make it more wholesome by including slices of cheese shaped like bats, mini sandwiches cut into spooky shapes, and lots of fruit pieces for the little trick-or-treaters!
Chef’s Notes
Over the years, I’ve watched this Halloween Snack Board evolve beautifully. What started with just candy and cheese transformed into a delightful cluster of flavors and experiences, just like the seasons themselves. I remember one Halloween where my only goal was to create a snack board that my nephews would love. I decided to involve them in the process! We baked pumpkin-spice cookies together and decorated them, and suddenly, that Halloween became a cherished memory.
Each year, as I craft my board, I allow myself a bit of whimsy. I like to keep the mood light, encouraging friends and family to get their hands into this creation. The joy is in the collaboration, all of us together, sharing flavors that remind us of simpler times. So, don’t take a snack board too seriously—have some fun with it. The more laughter shared, the better the flavors!
FAQs and Troubleshooting
-
How do I keep the fruits and veggies from browning? To prevent your apple slices from browning, soak them in a solution of water and lemon juice for about 5-10 minutes. This keeps them fresh and crunchy for serving!
-
What if I have dietary restrictions to consider? No problem! Be mindful of your guests’ dietary needs by incorporating gluten-free crackers, nut-free dips, or vegan cheeses. You can customize the board to accommodate everyone.
-
How can I make a larger board for a big gathering? Scale up by adding more of each component — consider a wider variety of cheese and meats, larger bowls for dips, and plenty of colors to keep things inviting and exciting!
-
What if I have leftovers? Snack boards are infinitely flexible. Leftovers can be repurposed into wraps, salads, or even a filling for quesadillas. Store any extra independently in airtight containers to keep them fresh.
Final Thoughts
Creating a Halloween Snack Board is a joyful adventure filled with flavors, creativity, and togetherness. It’s a way to celebrate not only the season but also the people we share it with. I hope you find as much joy in crafting your own version as I do in sharing mine. Don’t forget to embrace the laughter, the memories, and a bit of Halloween magic along the way. Happy snacking! 🎃
I hope you enjoy making your own Halloween Snack Board! It’s a celebration of flavors, togetherness, and the warmth of the season. Happy cooking, and let your creativity run wild!
Print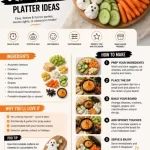
Creepy-Cool Halloween Snack Board
- Total Time: 20 minutes
- Yield: 8 servings
- Diet: Vegetarian
Description
A festive and delicious Halloween Snack Board perfect for gatherings, featuring a mix of cheeses, meats, veggies, fruits, and delightful sweets.
Ingredients
- Cheddar Cheese (or Pumpkin Cheese Ball)
- Salami (or any cured meats)
- Veggies (carrot sticks, cucumber slices, bell pepper ghosts)
- Fruit (grapes, figs, or apple slices)
- Nuts (almonds, walnuts, pumpkin seeds)
- Dips (hummus, guacamole, or pumpkin dip)
- Crackers and breadsticks
- Sweets (candy corn, chocolate spiders, or gummy worms)
Instructions
- Choose a board: A large wooden cutting board or a slate platter works beautifully.
- Start with cheese and meats: Place your cheese on the board, and add salami or prosciutto nearby.
- Add veggies: Fill the spaces with colorful veggies like carrot sticks and bell pepper ghosts.
- Create clusters with fruits and nuts: Arrange grapes and sprinkle nuts in spots for texture.
- Dips and crackers: Set bowls of dips on the board and arrange crackers around them.
- Finish with sweets: Scatter candy corn and gummy worms for a festive touch.
- Add decorative touches: Enhance the board with seasonal decor for extra flair.
Notes
Encourage guests to mix and match their own bites for a fun experience. Customize ingredients to suit dietary preferences.
- Prep Time: 20 minutes
- Cook Time: 0 minutes
- Category: Appetizer
- Method: No Cooking Required
- Cuisine: American
Nutrition
- Serving Size: 1 plate
- Calories: 400
- Sugar: 15g
- Sodium: 600mg
- Fat: 25g
- Saturated Fat: 10g
- Unsaturated Fat: 12g
- Trans Fat: 0g
- Carbohydrates: 35g
- Fiber: 4g
- Protein: 15g
- Cholesterol: 30mg
Keywords: Halloween, Snack Board, Party Food, Appetizer, Festive Snacks




