
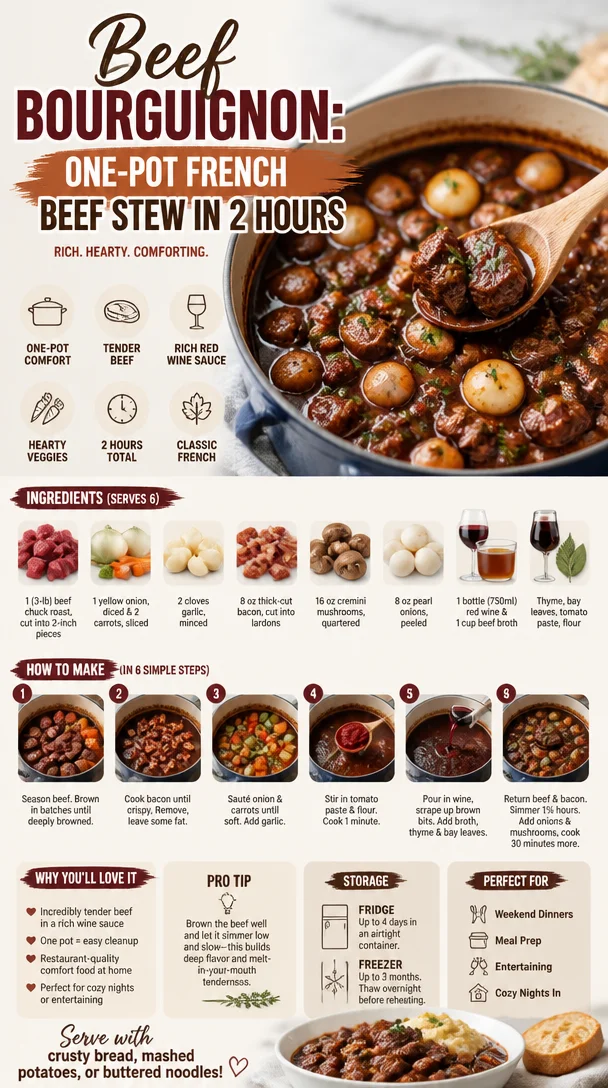
Beef Bourguignon: One-Pot French Beef Stew in 2 Hours
Indulge in Comfort: A Journey through Beef Bourguignon
Welcome to my kitchen! Today, we’re diving into a dish that’s as comforting as a warm hug on a chilly evening—Beef Bourguignon. Picture this: tender chunks of beef simmering in a rich, aromatic wine sauce, complemented by earthy vegetables and fresh herbs. A dish that not only satisfies your taste buds but warms your heart and soul. It’s more than just a meal; it’s an experience steeped in tradition and flavor.
Now, you might find yourself wondering, “What’s the story behind this classic dish?” Well, let’s take a trip down memory lane. My first experience with Beef Bourguignon was in a rustic little bistro tucked away in a quiet French village. I was on a culinary pilgrimage, chasing down inspiring flavors and experiences to bring back to my kitchen. The moment the dish arrived, the aroma enveloped me, pulling me into a world where time slows down and meals become the centerpiece of gatherings. Each bite introduced a new layer of flavor, a dance of decadence that transcended the ordinary weekday meal.
Fast forward several years, and here I am, eager to share my own take on Beef Bourguignon with you. While I may not be in that quaint French bistro anymore, I can assure you that every time I make this dish, I’m reminded of that magical experience. Are you ready to recreate some of that magic in your own kitchen? Let’s get cooking!
Personal Story
One brisk autumn evening, I gathered my closest friends for a cozy dinner party, intending to showcase my interpretation of Beef Bourguignon. The house filled with laughter, and as the dish simmered on the stovetop, the aroma wafted through every corner, inviting everyone to the table. The warmth of the kitchen reflected our camaraderie, with stories shared over glasses of deep red wine, each sip enhancing the anticipation for the feast ahead.
Just as I was about to serve, my mischievous cat, Oliver, made a surprise appearance, darting past my feet and into the pot (don’t worry, he was unharmed but definitely startled!). Amid the laughter and momentary chaos, I realized that it wasn’t just about the food; it was about the connections we forged through sharing meals. That night, every tender bite of beef sparked storytelling, laughter, and memories we would cherish forever.
And that’s the magic of Beef Bourguignon—it’s not just a dish; it’s an invitation to gather and celebrate life’s small joys.
Ingredients
To make this Beef Bourguignon, you’ll need the following ingredients:
-
2 pounds of beef chuck: The star of our show! Chuck roast is perfect as it becomes incredibly tender when simmered. If you can’t find chuck, any stew meat will work—but aim for a cut with some marbling for richness.
-
4 slices of bacon: For that smoky flavor and richness. If you prefer a lighter touch, turkey bacon or pancetta can be excellent substitutes, though you’ll miss a bit of that depth from the pork fat.
-
2 cups of red wine: A classic Burgundy if you want to stay authentic, but any dry red wine will do (think Merlot or Cabernet). Don’t forget, if it’s not good enough to drink, it’s not good enough for your stew!
-
2 cups of beef broth: This adds another layer of flavor. If you’re looking for a lighter version, you can substitute half the beef broth with vegetable broth.
-
2 tablespoons of tomato paste: This helps deepen the color and adds an umami punch. If you’re in a pinch, ketchup can work as a last-minute substitute!
-
1 tablespoon of all-purpose flour: Used to help thicken our sauce. For a gluten-free option, cornstarch mixed with a bit of cold water makes a great alternative.
-
1 cup of pearl onions: These sweet little gems are delightful in the stew! If they’re hard to find, chopped shallots or yellow onions can serve as a good backup.
-
3 cloves of garlic: Fresh garlic is a must for that aromatic kick. If you’re feeling adventurous, roasted garlic can provide a sweet, caramelized flavor.
-
2 cups of button mushrooms: Their earthy flavor complements the beef perfectly. Feel free to mix it up with shiitake or cremini mushrooms if that’s your vibe.
-
2 carrots, sliced: These add sweetness and color. If you’re looking for a variation, parsnips or even sweet potatoes can add a delightful twist.
-
1 bay leaf and a few sprigs of fresh thyme: Essential for infusing that herbal aroma. And don’t fret if you don’t have fresh herbs; dried herbs work too—just use a fraction of the amount since dried herbs are more concentrated.
-
Salt and pepper to taste: Essential for seasoning throughout the cooking process.
Gather these ingredients, and you’re ready to embark on your culinary adventure!
Step-by-Step Instructions
Now, let’s transform these fresh ingredients into a beautiful, aromatic Beef Bourguignon!
-
Preparation is Key: Begin by cutting your beef chuck into 1.5-inch cubes. Ensure they’re all about the same size to cook evenly. Pat the beef dry with paper towels (this helps in getting that lovely brown sear!).
-
Sear the Bacon: In a large Dutch oven, cook those strips of bacon over medium heat until crispy. This should take about 5-7 minutes. Once done, use a slotted spoon to transfer the bacon to a paper towel-lined plate and leave the drippings in the pot. That’s flavor city right there!
-
Brown the Beef: Increase the heat to medium-high and add the beef to the same pot. Don’t crowd the pan; sear the beef in batches if necessary. Aim for a lovely golden-brown crust on all sides. This caramelization is crucial for developing depth in flavor!
-
Vegetable Time: After browning the beef, remove it from the pot and set it aside. In the same pot, add the pearl onions and mushrooms. Sauté until they’re golden and have given off some moisture (about 5-6 minutes). Add the garlic and carrots and sauté for another 2-3 minutes.
-
Unleash the Flavors: Stir in the tomato paste and flour, mixing well to coat the vegetables. This not only adds flavor but also thickens our stew. Cook it for about a minute, letting the flavors meld together.
-
De-glaze with Wine: Pour in the red wine, scraping up any brown bits at the bottom (they are packed with flavor!) Bring the mixture to a simmer and let it cook for about 5 minutes, reducing it slightly.
-
Back to the Pot: Add the beef and bacon back into the pot, followed by the beef broth, bay leaf, thyme, and seasoning with salt and pepper. Bring everything to a gentle simmer.
-
Slow Cook is the Way: Cover the pot and reduce the heat to low. Let it simmer for at least 2.5 to 3 hours—or until that beef is melt-in-your-mouth tender. Alternatively, if your schedule allows, transfer the whole pot to a preheated oven at 325°F (160°C) for the same amount of time.
-
Final Touches: Remove the pot from heat. Fish out the bay leaf and thyme sprigs once everything is cooked and tender. Taste and adjust seasoning if necessary. The aroma alone will have everyone eagerly waiting at the stove!
-
Rest before Serving: It’s best to let the dish rest for about 10-15 minutes before serving. This allows the flavors to settle and blend even more!
The result? A beautiful pot of Beef Bourguignon that will have you feeling accomplished and ready to transport your taste buds to France!
Serving Suggestions
When it comes to presentation, simplicity can be key! Ladle the Beef Bourguignon into rustic bowls and serve it with a sprinkle of fresh parsley for a pop of color. Crusty French baguette or a side of creamy mashed potatoes or buttery egg noodles makes for the perfect accompaniment, soaking up every bit of that luscious sauce. If you’re feeling fancy, a dollop of sour cream or crème fraîche can add an extra layer of creaminess.
Recipe Variations
Feeling a bit adventurous? Here are some delightful variations on this classic recipe:
-
Mushroom Lovers’ Delight: Add even more mushrooms or experiment with wild mushrooms for an earthy twist.
-
Herbaceous Flair: Swap the thyme for rosemary or sage for a different herbal profile.
-
Spicy Kick: Add a pinch of crushed red pepper flakes or a bit of cayenne for a subtle heat.
-
Vegetarian Version: Substitute beef with hearty vegetables like lentils and potatoes for a wholesome, meat-free meal.
-
Coconut Twist: Replace beef broth with coconut milk for a creamy, tropical spin—perfect for adventurous palates!
Chef’s Notes
As much as I adore the traditional recipe, I’ve come to appreciate how adaptable Beef Bourguignon can be. I’ve made it with various cuts of beef, even venison for a gamey twist during hunting season! I’ve also shared this dish with friends celebrating birthdays, and every time it comes out a little different based on what I have on hand, making the experience delightful.
Oh! And that fateful dinner party with Oliver the cat? It became a running joke among friends. Now every time I host, at least one friend asks, “So, how’s Oliver doing with the Beef Bourguignon?”
FAQs and Troubleshooting
-
Why is my Beef Bourguignon tough?
If your meat isn’t tender, it probably needs more time. Low and slow is the way to go! Keep simmering until it reaches the desired tenderness. -
What if I don’t have red wine?
While wine creates a depth of flavor, you can substitute with additional beef broth (add a splash of vinegar for acidity) or non-alcoholic wine as alternatives! -
Can I make this ahead of time?
Absolutely! In fact, it often tastes better the next day as the flavors meld together. Just reheat gently before serving. -
How do I store leftovers?
Store in airtight containers in the refrigerator for up to 3 days. This dish also freezes well for up to 3 months—just thaw and reheat.
Nutritional Info
While Beef Bourguignon is a hearty dish, if you’re looking to keep an eye on nutrition, it’s loaded with protein from the beef and vitamins from the vegetables. Each serving can be approximately 400-500 calories but can vary based on specific ingredients and portions. Balancing it with a side salad or light vegetable dish can make for a well-rounded meal!
And there you have it! An in-depth journey into creating your own Beef Bourguignon right from the comfort of your kitchen. I hope you enjoy making it as much as I enjoy sharing it. Don your apron, pour yourself a glass of wine, and let’s turn a bunch of simple ingredients into something spectacular. Happy cooking!
Print
Beef Bourguignon
- Total Time: 210 minutes
- Yield: 6 servings 1x
- Diet: None
Description
A comforting classic dish featuring tender chunks of beef simmered in a rich, aromatic wine sauce with earthy vegetables and fresh herbs.
Ingredients
- 2 pounds of beef chuck, cut into 1.5-inch cubes
- 4 slices of bacon
- 2 cups of red wine
- 2 cups of beef broth
- 2 tablespoons of tomato paste
- 1 tablespoon of all-purpose flour
- 1 cup of pearl onions
- 3 cloves of garlic, minced
- 2 cups of button mushrooms, sliced
- 2 carrots, sliced
- 1 bay leaf
- Few sprigs of fresh thyme
- Salt and pepper to taste
Instructions
- Begin by cutting your beef chuck into 1.5-inch cubes, then pat dry.
- Cook the bacon in a large Dutch oven over medium heat until crispy, then transfer to a paper towel-lined plate.
- Increase the heat to medium-high and brown the beef in the same pot in batches.
- Remove the beef and add pearl onions and mushrooms, sauté until golden, then add garlic and carrots.
- Stir in tomato paste and flour, cooking for a minute.
- Pour in red wine, scraping the bottom of the pot, and simmer for 5 minutes.
- Add the beef and bacon back, along with beef broth, bay leaf, and thyme.
- Cover and simmer on low for 2.5 to 3 hours.
- Fish out bay leaf and thyme, then adjust seasoning as necessary before serving.
- Let the dish rest for about 10-15 minutes before serving.
Notes
This dish can be made ahead of time, as it often tastes better the next day. Store leftovers in airtight containers for up to 3 days or freeze for up to 3 months.
- Prep Time: 30 minutes
- Cook Time: 180 minutes
- Category: Main Course
- Method: Braising
- Cuisine: French
Nutrition
- Serving Size: 1 serving
- Calories: 450
- Sugar: 5g
- Sodium: 800mg
- Fat: 20g
- Saturated Fat: 7g
- Unsaturated Fat: 10g
- Trans Fat: 0g
- Carbohydrates: 25g
- Fiber: 3g
- Protein: 35g
- Cholesterol: 85mg
Keywords: beef bourguignon, french cuisine, comfort food, stew, beef stew
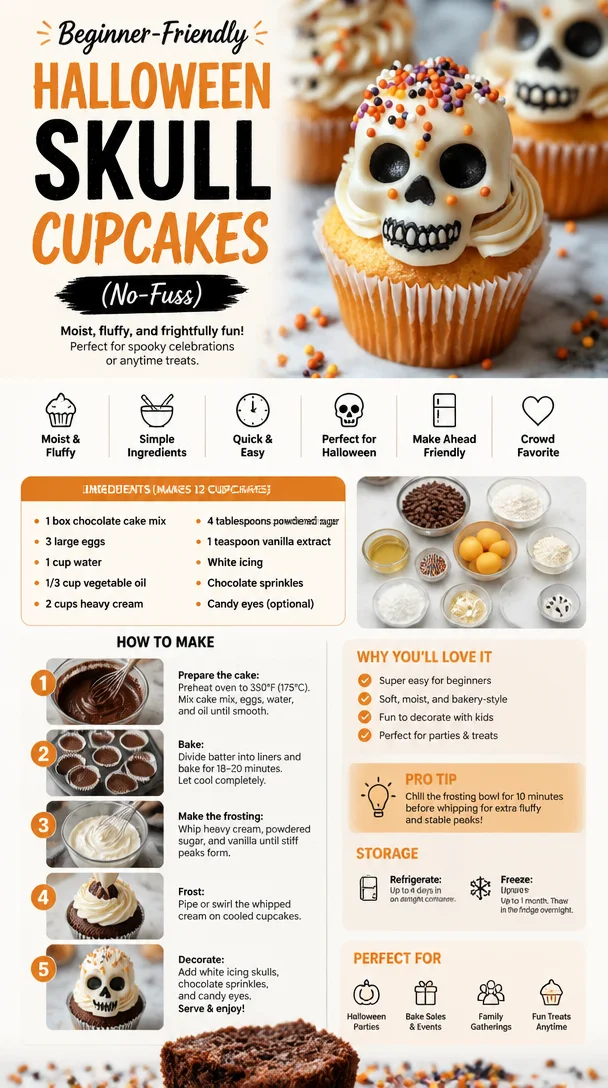
Beginner-Friendly Halloween Skull Cupcakes (No-Fuss)
Spooky Halloween Skull Cupcake Recipe: A Hauntingly Delicious Treat!
Welcome to my kitchen! I’m so excited to share a delightful recipe that’s perfect for Halloween — Spooky Halloween Skull Cupcakes! As the leaves turn crisp and the nights grow longer, there’s something magical about this season. The air is filled with the scent of pumpkin spice, and children (and adults, let’s be honest!) eagerly anticipate the joys of trick-or-treating. There’s nothing like gathering around the table with friends and family, sharing terrifying tales and indulging in deliciously spooky treats.
But let me tell you, these Skull Cupcakes aren’t just any Halloween dessert. They’re a fun and interactive way to celebrate the season while satisfying your sweet tooth. Picture this: soft, moist vanilla cupcakes topped with rich buttercream frosting, all cleverly decorated to resemble skulls. These little creatures will not only add a festive touch to your Halloween gathering, but they also make for an excellent weekend baking project.
Whether you’re planning a Halloween party, a family gathering, or just wanting to treat yourself to something extraordinary, these cupcakes are sure to be a hit. So grab your apron, and let’s dive into a spine-tingling culinary adventure together!
A Personal Story: The Halloween Tradition
Growing up, Halloween was a magical time in my household. I fondly remember my mom whipping up all sorts of spooky treats, but one year in particular stands out the most. It was the year I got to help her bake for the neighborhood Halloween party. We had our mix of ghoulish desserts, but it was her "Skull Cupcakes" that stole the show.
I remember the thrill of mixing the batter, sneaking bites of frosting, and adorning the cupcakes with glowing candy eyes. As we placed them on a tray alongside creepy cobweb cupcakes and ghostly cookies, I felt an overwhelming sense of joy — we were creating a mini-festival of treats! Everyone raved about those cupcakes. Kids laughed, parents chatted, and as the sun set, I felt warmth spread through me, a memory created not just through the food, but through the joy of sharing, laughter, and creativity.
As I grew older, I took those lessons and those flavors with me, and now, I can’t think of Halloween without these cupcakes. They remind me not just of deliciousness but of love, connection, and the passion of creating something special with my hands. And now, it’s my turn to pass this tradition on. Let’s make some spooky skull cupcakes that’ll become part of your own Halloween memories!
Ingredients: What You’ll Need
Here’s what you’ll need to whip up these hauntingly festive cupcakes. Each ingredient plays a crucial role, so let’s detail everything out:
-
For the Vanilla Cupcakes:
- 1 ½ cups all-purpose flour
- The foundation of your cupcakes! For a gluten-free alternative, you can swap this for an equal amount of gluten-free baking blend.
- 1 cup granulated sugar
- Sweetness is key! If you’d like a healthier option, feel free to use coconut sugar for a lower glycemic index.
- ½ cup unsalted butter, softened
- The moisture and flavor powerhouse! Margarine can be substituted for a dairy-free version.
- 2 large eggs
- Provides structure and tenderness. If you’re vegan, you can use flax eggs (1 tablespoon flaxseed meal + 2.5 tablespoons water equals one egg).
- ½ cup whole milk
- Makes the cupcakes stay moist! Almond or soy milk will work well if you’re avoiding dairy.
- 2 tsp baking powder
- This adds the fluffiness we all love! If you’re out, baking soda can also do the trick — just don’t forget the acid!
- 1 tsp vanilla extract
- The secret ingredient for that enchanting aroma! Consider using almond extract for a unique twist.
- 1 ½ cups all-purpose flour
-
For the Buttercream Frosting:
- 1 cup unsalted butter, softened
- The base of the frosting that gives it that creamy texture. Vegan butter is a great substitute if needed.
- 4 cups powdered sugar
- Sweetness central! For a less sugary option, try using powdered erythritol.
- 2 tbsp heavy cream or milk
- This thins out your frosting to that just-perfect consistency. Coconut cream is an excellent non-dairy substitute.
- 1 tsp vanilla extract
- The familiar flavor that brings everything together.
- 1 cup unsalted butter, softened
-
For Decoration:
- Mini chocolate candies or chocolate chips for eyes
- A fun way to bring your skulls to life (or perhaps to “unlife!”).
- Edible black gel or food coloring
- To give your cupcakes that spooky skull appearance!
- Mini chocolate candies or chocolate chips for eyes
Step-by-Step Instructions: Let’s Bake!
Now that we have all our goodies ready, let’s dive into the baking process. Follow these steps, and you’ll be well on your way to creating your spooky masterpieces!
1. Preheat the Oven
Preheat your oven to 350°F (175°C). Trust me, starting with a properly heated oven is essential for even baking!
2. Mix the Dry Ingredients
In a mixing bowl, whisk together the flour, baking powder, and sugar until combined. This will ensure that your baking powder is evenly distributed throughout the flour.
3. Cream the Butter
In another bowl, cream together the softened butter and sugar until it’s light and fluffy, about 3-4 minutes. This step is vital for creating a light texture in your cupcakes.
4. Beat in Eggs
Add the eggs one at a time, mixing well after each addition. And don’t forget the vanilla extract! Mixing in the eggs gradually ensures that they’re properly incorporated into the butter mixture.
5. Alternate Dry and Wet Ingredients
Now, add the flour mixture and milk to the butter mixture, alternating between the two. Start with a third of the flour mixture, then half the milk, another third of flour, last of the milk, and finish with the flour. This method helps maintain a smooth batter without over-mixing.
6. Scoop the Batter Into Cupcake Liners
Line a muffin tin with cupcake liners and fill each liner about two-thirds full with batter. I love using an ice cream scoop for this step — it’s mess-free and gives you consistently sized cupcakes!
7. Bake
Bake in your preheated oven for 18-20 minutes, or until a toothpick inserted into the center comes out clean. Don’t open the oven door too soon; you want your cupcakes to rise beautifully.
8. Cool Your Cupcakes
Once baked, remove them from the oven and let them cool in the pan for about 5 minutes before transferring them to a wire rack. Don’t rush this step; frosting warm cupcakes is a recipe for disaster!
9. Make the Buttercream Frosting
In a mixing bowl, beat the softened butter until creamy. Gradually add in powdered sugar, ensuring it’s mixed well before adding the next batch. Add the heavy cream and vanilla until you reach a smooth, spreadable consistency.
10. Frost Your Cupcakes
Using a piping bag, or simply a spatula, generously frost each cupcake with the buttercream. You can create different skull shapes with your piping technique — try some as classic skull shapes, and others can be a bit more avant-garde!
11. Decorate with Candy
Finally, use mini chocolate candies or chocolate chips for eyes. Create fun expressions by placing them at different angles!
12. Add the Finishing Touch
Using the black gel or food coloring, pipe small details onto the cupcakes to enhance their skull-like appearance. Get creative!
Serving Suggestions: Plate Like a Pro!
When it comes to serving, presentation is key! For Halloween, you could place these marvelous skull cupcakes on a decorated platter with spooky accents, like mini skeletons or ghostly cobwebs made with cotton candy. If you want to be extra theatrical, arrange them on a cake stand surrounded by “graveyard” decorations — think chocolate cookie crumbs for dirt and candy pumpkins for some added color.
Recipe Variations: Get Creative!
Once you’ve mastered the classic skull cupcakes, why not explore some creative variations? Here are a few ideas to mix things up:
- Red Velvet Skull Cupcakes: Swap the vanilla for red velvet for a festive color twist!
- Chocolate Cupcakes: Use a chocolate cupcake base instead. Rich and delightful!
- Spooky Flavors: Consider adding a dash of peppermint extract or corn syrup for a chewy, candy-like flavor in your frosting.
- Gluten-Free Version: Use almond flour or a gluten-free blend for an allergen-friendly take.
- Vegan Skull Cupcakes: Replace all dairy and egg ingredients with plant-based alternatives for a vegan delight.
Chef’s Notes: My Kitchen Memories
Every recipe carries a story, and these skull cupcakes are no exception. Over the years, I’ve tweaked the frosting and added my personal touches, but the essence remains the same: celebrating connection and creativity. The first time I put a skull face on a cupcake, I giggled at the fun expressions I could create — it’s such a joy to bring laughter to the table!
One Halloween years ago, I overdid the black gel details, and they turned out looking like startled skulls! But do you know what? Everyone loved them even more because of the goofy expressions, and we all shared a hearty laugh. It’s these moments that truly spark joy in the kitchen.
FAQs and Troubleshooting
1. Why did my cupcakes sink?
This could happen if the batter is over-mixed or if the oven temperature was too low. Stick to the recipe and ensure your oven is preheated properly.
2. Can I make the frosting ahead of time?
Absolutely! You can prepare the frosting up to 3 days in advance. Just keep it in an airtight container in the fridge and let it come to room temperature before frosting your cupcakes.
3. How do I keep my cupcakes from sticking to the liners?
Make sure to coat your cupcake liners with non-stick spray before pouring in the batter. This little trick ensures a smooth release and a clean look!
4. Can I freeze these cupcakes?
Yes, you can! Freeze the baked and cooled cupcakes in an airtight container for up to 2 months. Just frost them once they’re thawed to keep that fresh frosting look and taste.
Nutritional Info (if applicable)
While cupcakes are undeniably a treat, being mindful of portion sizes can help! Each vanilla skull cupcake (without frosting) generally has around 180 calories, 6g of fat, and 28g of carbs, but this can vary based on your frosting and decorations.
So there you have it — a delightful recipe for Spooky Halloween Skull Cupcakes! As you whip up these treats, remember that cooking is all about enjoyment. So embrace your creativity, share your love through food, and most importantly, have fun in the kitchen! Happy Halloween! 🎃👻
Print
Spooky Halloween Skull Cupcakes
- Total Time: 40 minutes
- Yield: 12 servings 1x
- Diet: Vegetarian
Description
A fun and delicious recipe for Halloween-themed cupcakes decorated like skulls, perfect for celebrations and gatherings.
Ingredients
- 1 ½ cups all-purpose flour
- 1 cup granulated sugar
- ½ cup unsalted butter, softened
- 2 large eggs
- ½ cup whole milk
- 2 tsp baking powder
- 1 tsp vanilla extract
- 1 cup unsalted butter, softened (for frosting)
- 4 cups powdered sugar
- 2 tbsp heavy cream or milk
- 1 tsp vanilla extract (for frosting)
- Mini chocolate candies or chocolate chips for decoration
- Edible black gel or food coloring for decoration
Instructions
- Preheat your oven to 350°F (175°C).
- Mix together the flour, baking powder, and sugar in a mixing bowl.
- Cream the softened butter and sugar until light and fluffy, about 3-4 minutes.
- Beat in the eggs one at a time, mixing well after each addition and adding the vanilla extract.
- Alternate adding the flour mixture and milk to the butter mixture, starting and ending with flour.
- Scoop the batter into muffin tins lined with cupcake liners, filling each about two-thirds full.
- Bake for 18-20 minutes, or until a toothpick comes out clean.
- Cool the cupcakes in the pan for 5 minutes, then transfer them to a wire rack.
- Make the buttercream by beating the softened butter, then gradually adding powdered sugar, heavy cream, and vanilla.
- Frost each cupcake generously with the buttercream.
- Decorate with mini chocolate candies or chocolate chips for eyes.
- Add finishing touches using black gel or food coloring for detailed skull decorations.
Notes
These cupcakes can be made gluten-free or vegan by substituting specific ingredients as mentioned. Prepare frosting ahead of time and store it in the refrigerator.
- Prep Time: 20 minutes
- Cook Time: 20 minutes
- Category: Dessert
- Method: Baking
- Cuisine: American
Nutrition
- Serving Size: 1 cupcake
- Calories: 220
- Sugar: 25g
- Sodium: 200mg
- Fat: 10g
- Saturated Fat: 5g
- Unsaturated Fat: 5g
- Trans Fat: 0g
- Carbohydrates: 28g
- Fiber: 1g
- Protein: 2g
- Cholesterol: 30mg
Keywords: Halloween, cupcakes, spooky, dessert, skull, baking
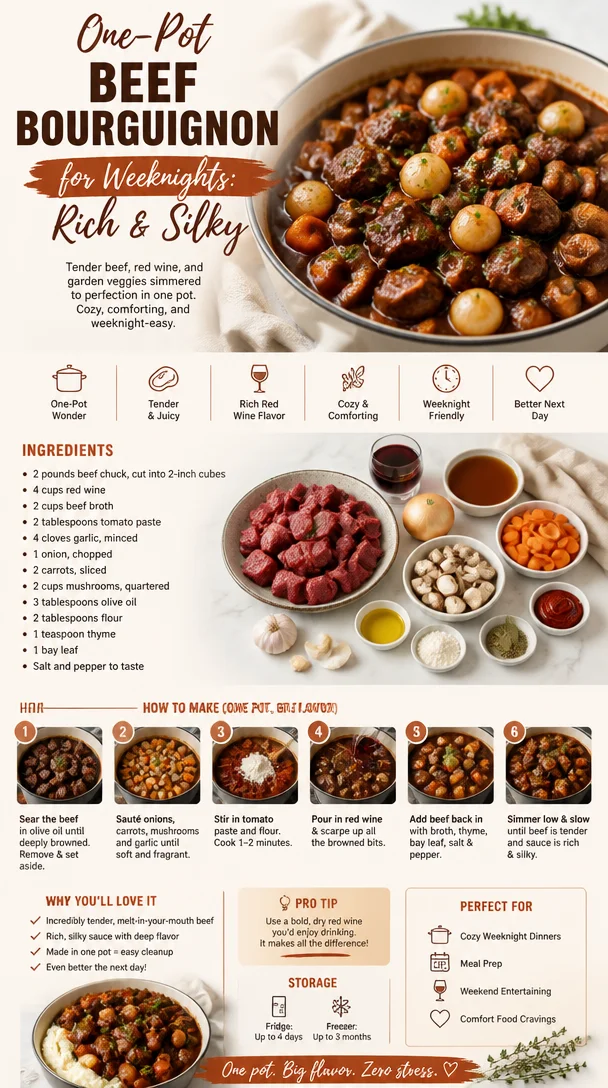
One-Pot Beef Bourguignon for Weeknights: Rich & Silky
The Allure of Beef Bourguignon: A Cozy Culinary Adventure
Welcome to my kitchen, foodie friends! I’m Olivia Bennett, and today, we’re diving into the heart of French cuisine with a dish that embodies warmth, richness, and a whole lot of love: Beef Bourguignon. This fantastic stew is not just a recipe; it’s an experience that warms the soul, brings back fond memories, and transforms ordinary ingredients into a spectacular feast for family and friends.
Picture this: the sun has set, and the scents of garlic, red wine, and tender beef are dancing in the air. As you stir your pot, the comforting aroma fills your kitchen, evoking feelings of nostalgia and coziness. Whether you’re hosting a dinner party or simply treating yourself, Beef Bourguignon wraps you in a comforting hug with every bite. Let’s embark on this culinary journey together as I share my favorite Beef Bourguignon recipe, along with a sprinkle of kitchen tales and tasty tips to make this dish remarkably easy and wonderfully delicious!
A Whiff of Nostalgia: My Beef Bourguignon Story
I still remember the first time I tasted Beef Bourguignon. It was at my grandmother’s house when I was about ten years old. She had invited the family over for Sunday dinner—a ritual that brought us all together amid laughter, stories, and of course, her amazing cooking. The moment I walked into her cozy kitchen, the savory smell enveloped me, making my stomach growl in anticipation.
My grandmother was stirring a large pot, and as I peered over her shoulder, my eyes widened at the glorious sight of succulent beef simmering in a luscious sauce kissed by red wine. She caught me staring and winked, saying, “Good things come to those who wait, darling.” Little did I know that my patience would reward me with a delectable plate that night.
That unforgettable Sunday dinner has influenced my desire to recreate that dish in my own kitchen. Now, I love to whip up Beef Bourguignon not just for special occasions but also on chilly evenings when I need a little comfort food. The memories and flavors meld together beautifully, proving that cooking is about so much more than just food; it’s about love, family, and sharing those cherished moments.
Ingredients: Gather Your Goodies
Let’s talk about the ingredients that will make this dish shine! Here’s what you’ll need to create this delightful Beef Bourguignon. Don’t worry; I’ll provide some handy tips along the way.
-
2-3 pounds beef chuck roast: The star ingredient! Choose a well-marbled cut for tender and flavorful results. If you want a leaner option, consider using sirloin, but be aware it might not be as juicy.
-
Salt and freshly ground black pepper: Essential for seasoning the beef. Don’t be shy! Use plenty to enhance the flavor.
-
3 tablespoons olive oil: A good oil helps in browning the meat. You can substitute with vegetable oil, but olive oil adds a nice depth of flavor.
-
1 large onion, chopped: Onions provide sweetness. Yellow onions are great, but you could use shallots for a milder taste.
-
2-3 cloves garlic, minced: Garlic brings that fragrant zing! If you’re a garlic lover (like me), feel free to add more.
-
4 cups red wine: Traditionally, a full-bodied red wine like Burgundy works wonders. If you’re worried about the alcohol, substitute with beef broth or grape juice, but the complexity may change slightly.
-
2 cups beef broth: For extra?! Yep! It adds depth to the sauce. You can use low-sodium broth to control the salt.
-
2 tablespoons tomato paste: This ingredient is key to deepening the stew’s flavor. If you’re out, ketchup can be a substitute in a pinch.
-
2-3 carrots, sliced: Carrots add sweetness to balance the dish. Feel free to swap with parsnips for a change in flavor.
-
1-2 cups pearl onions or small onions: I love using frozen pearl onions for convenience. Fresh ones? Just peel them!
-
8-10 ounces mushrooms, sliced: Button mushrooms are classic, but feel free to mix in cremini for a touch of earthiness.
-
2-3 bay leaves: They add an aromatic touch. Remove them before serving—nobody likes a chewy leaf!
-
Fresh thyme: Use about a teaspoon of dried thyme if you don’t have fresh. It adds a lovely herbaceous note.
That’s it! With these scrumptious ingredients, you’re on your way to creating a dish that will impress anyone lucky enough to partake!
Step-by-Step Instructions: Let’s Get Cooking
Are you ready to bring this hearty Beef Bourguignon to life? Grab that apron, and let’s roll up those sleeves together!
-
Prepare Your Beef: Cut the chuck roast into 2-inch cubes. Season with salt and pepper generously. This is your flavor foundation, so don’t skip this step!
-
Brown the Meat: In a large Dutch oven or heavy pot, heat the olive oil over medium-high heat. Once hot, add the beef in batches, ensuring not to overcrowd the pan. Brown on all sides—this should take about 4-5 minutes per batch. Browning is crucial; it locks in flavor and gives that irresistible texture. Transfer the browned beef to a plate and set aside.
-
Sauté the Aromatics: In the same pot, add the chopped onions and cook until soft and golden (about 5-7 minutes). Don’t rush this; caramelizing will deepen the flavors. Toss in the minced garlic and cook for an additional minute until fragrant.
-
Deglaze with Wine: Pour in the red wine and bring it to a simmer, scraping up any brown bits from the bottom of the pot. These bits are flavor gold! Let the wine cook down for about 5 minutes, allowing the alcohol to evaporate. It’s time to unlock those flavors!
-
Add the Good Stuff: Stir in the beef broth, tomato paste, carrots, pearl onions, mushrooms, bay leaves, and thyme. Mix it all together, creating a beautiful medley of ingredients. This is the magic moment when it all comes together!
-
Return the Beef: Add the browned beef back into the pot, ensuring it’s submerged in the liquid. Bring it to a gentle simmer. Once simmering, cover the pot and reduce the heat to low. Allow it to cook slowly for about 2-3 hours, or until the beef is tender and the sauce has thickened beautifully. You want your home to smell amazing during this time—don’t rush it!
-
Check and Adjust: Every once in a while, give it a gentle stir and check the seasoning. You may want to add more salt or pepper to your liking.
-
Finishing Touches: Once the meat is fork-tender and the sauce is rich and flavorful, remove it from the heat. Discard the bay leaves and thyme stems. If you’re feeling fancy, you can thicken the sauce further by simmering it uncovered for a few minutes.
Serving Suggestions: Time to Plate!
Now that your Beef Bourguignon is ready, let’s talk presentation! Serve it in deep bowls—it’s perfect for cozy dinners. Scoop generous portions over a bed of creamy mashed potatoes, buttery noodles, or a crusty baguette. Garnish with freshly chopped parsley for a pop of color and flavor.
For an added flourish, you could drizzle a little olive oil over the top or sprinkle some coarse sea salt. This dish is all about indulgence, so embrace it!
Recipe Variations: A Twist on Tradition
While it’s tempting to stick with the classic Beef Bourguignon, here are a few creative variations you might try:
-
Vegetarian Option: Swap the beef for hearty mushrooms, lentils, or a mix of root vegetables to create a comforting Vegan Bourguignon.
-
Spicy Kick: Add a teaspoon of red pepper flakes or a splash of hot sauce when sautéing the onions for a delightful kick!
-
Mediterranean Flair: Instead of red wine, use a good-quality white wine and add olives and sun-dried tomatoes for a unique twist.
-
Herbaceous Touch: Mix in fresh rosemary along with the thyme for a more aromatic profile.
-
Slow Cooker Method: If you prefer using a slow cooker, simply follow the browning steps, then transfer everything into the slow cooker. Cook on low for 6-8 hours, and you’ll still have an incredible meal.
Chef’s Notes: A Recipe’s Journey
Ah, Beef Bourguignon! This dish has seen its fair share of kitchen adventures over the years. I remember one time, I was so excited to impress my friends, and I accidentally used a sweet white wine. The result? A deliciously sweet stew that left everyone puzzled but laughing. From that day on, I make sure to double-check my wine choices!
Every time I make this dish, I tweak it slightly, whether it’s adding a dash of Worcestershire sauce for umami or a touch of balsamic vinegar for brightness. Recipes are meant to evolve, and that’s the beauty of cooking—experiment, taste, and make it your own!
FAQs and Troubleshooting: Let’s Clear Things Up
-
Why is my Beef Bourguignon tough?
Cooking the beef long enough at low heat is key. If it’s tough, it likely needs more time to break down the connective tissues. Don’t rush the love; let it simmer longer! -
Can I use other cuts of beef?
Absolutely! While chuck roast is ideal, you can use brisket or round. Just keep in mind that tenderness may vary, and you might need to adjust cooking times. -
Can I make Beef Bourguignon ahead of time?
Yes! In fact, it often tastes even better the next day as the flavors meld. Store it in the fridge and reheat gently on the stovetop. -
What should I serve with Beef Bourguignon?
It’s wonderful with mashed potatoes, crusty bread, or buttered noodles. Green beans or a simple side salad are great for balance!
Nutritional Info
While Beef Bourguignon may not be the lightest dish on the menu, it is packed with protein and hearty goodness. A typical serving may contain approximately:
- Calories: 450-550
- Protein: 35-40 g
- Fat: 20-25 g
- Carbohydrates: 30-35 g (depending on sides)
Remember, the magic is all in the portion sizes and accompanying sides!
And there you have it! Your cozy journey into the world of Beef Bourguignon is complete. I hope this recipe brings as much joy to your kitchen as it has to mine. Happy cooking, and may your home always be filled with laughter, love, and delicious food! 🍷✨
Print
Beef Bourguignon
- Total Time: 150 minutes
- Yield: 6 servings 1x
- Diet: None
Description
A cozy and rich Beef Bourguignon recipe that evokes feelings of warmth and nostalgia, perfect for sharing with loved ones.
Ingredients
- 2–3 pounds beef chuck roast, cut into 2-inch cubes
- Salt and freshly ground black pepper
- 3 tablespoons olive oil
- 1 large onion, chopped
- 2–3 cloves garlic, minced
- 4 cups red wine
- 2 cups beef broth
- 2 tablespoons tomato paste
- 2–3 carrots, sliced
- 1–2 cups pearl onions or small onions
- 8–10 ounces mushrooms, sliced
- 2–3 bay leaves
- Fresh thyme
Instructions
- Prepare your beef: Cut the chuck roast into 2-inch cubes. Season with salt and pepper generously.
- Brown the meat: In a large Dutch oven, heat the olive oil over medium-high heat. Add the beef in batches, brown on all sides for about 4-5 minutes per batch. Transfer the browned beef to a plate and set aside.
- Sauté the aromatics: In the same pot, add the chopped onions and cook until soft and golden (about 5-7 minutes). Add minced garlic and cook for an additional minute.
- Deglaze with wine: Pour in the red wine and bring it to a simmer, scraping up any brown bits from the bottom of the pot. Let it cook for about 5 minutes.
- Add the good stuff: Stir in beef broth, tomato paste, carrots, pearl onions, mushrooms, bay leaves, and thyme.
- Return the beef: Add the browned beef back into the pot, cover, reduce heat to low, and let it cook slowly for about 2-3 hours.
- Check and adjust: Occasionally, stir and check the seasoning, adding more salt or pepper if needed.
- Finishing touches: Once the meat is tender and the sauce is rich, remove from heat. Discard bay leaves and thyme stems.
- Serve hot in deep bowls topped with fresh parsley and enjoy!
Notes
This dish is incredibly comforting and can be made ahead of time to enhance the flavors.
- Prep Time: 30 minutes
- Cook Time: 120 minutes
- Category: Main Course
- Method: Stovetop
- Cuisine: French
Nutrition
- Serving Size: 1 serving
- Calories: 500
- Sugar: 6g
- Sodium: 600mg
- Fat: 23g
- Saturated Fat: 9g
- Unsaturated Fat: 10g
- Trans Fat: 0g
- Carbohydrates: 32g
- Fiber: 4g
- Protein: 37g
- Cholesterol: 80mg
Keywords: Beef Bourguignon, French cuisine, comfort food, stew
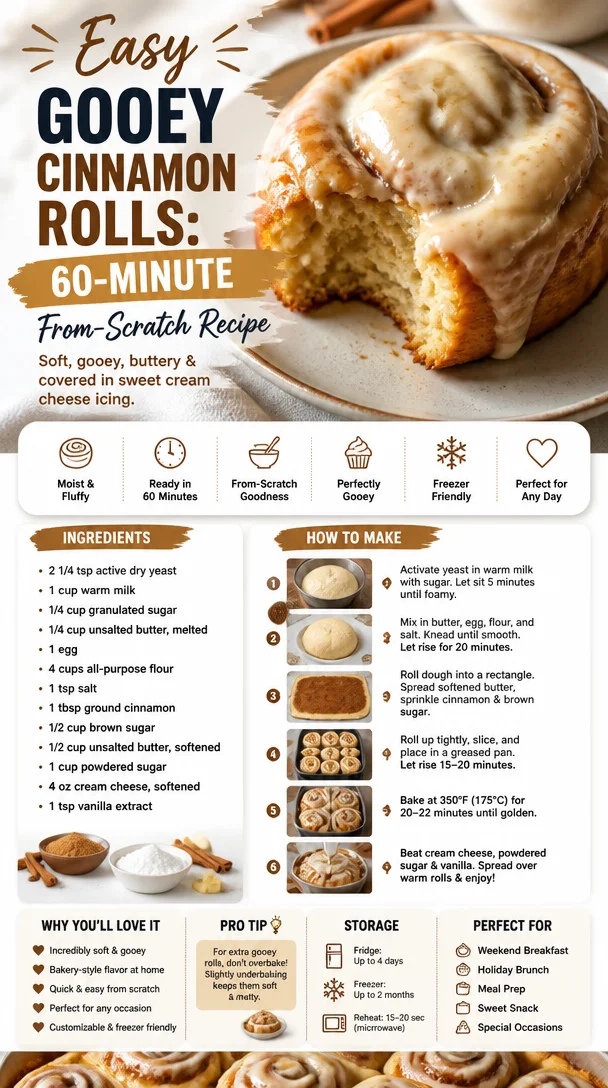
Easy Gooey Cinnamon Rolls: 60-Minute From-Scratch Recipe
Gooey Cinnamon Rolls: The Ultimate Comfort Food
Welcome back to my cozy kitchen! Today, we’re diving into a timeless treat that warms the heart and satisfies the soul—gooey cinnamon rolls! Oh, the smell of sweet cinnamon mingling with freshly baked dough is like a warm hug on a chilly morning. Whether you’re indulging on a lazy Sunday or celebrating a special occasion, these rolls are sure to bring cheer to your table.
There’s something so magical about homemade cinnamon rolls. They remind me of the countless weekends I spent in my grandmother’s kitchen. I can still hear her squeaking wooden chair as she whisked up the dough, her laughter filling the air as she told stories about her youth. The process was a team effort; I would be her little sous-chef, sprinkling cinnamon sugar on the dough with a seriousness only an eight-year-old can muster. We would wait together, peering into the oven, as the sweet aroma enveloped us, making our mouths water in anticipation.
These gooey little delights aren’t just food; they’re a celebration of love, warmth, and togetherness. So roll up your sleeves, put on your favorite apron (yes, the one splattered with flour, just like mine), and let’s get baking! Trust me; you’ll want to save this recipe—it’s guaranteed to become a family favorite.
Personal Story
One crisp autumn morning, with leaves falling outside and a light chill in the air, I decided to recreate my grandmother’s famous cinnamon rolls for our family breakfast. As I kneaded the dough, I felt her presence with me, guiding my hands. The recipe was almost tattooed onto my brain, but there was an element of magic that came with her storytelling and laughter.
As the rolls baked, I set the table and brewed a pot of coffee. The scent wafted through the house, coaxing my loved ones from their cozy corners. When the timer went off, revealing a pan of golden, puffed-up rolls, we all gathered around the kitchen island, eager to dig in. But before we could take a bite, I realized I needed to snap a picture—these gooey beauties took a lot of love to create!
With one bite, we were transported back to that old kitchen, and we shared stories that made us laugh and reminisce. Moments like these are why I love cooking. The joy of feeding those I love and sharing laughter over good food is truly the heart of every gathering.
Ingredients
Here’s what you’ll need for your gooey cinnamon rolls:
-
For the Dough:
- 4 cups all-purpose flour
Tip: For a lighter texture, you can substitute 1 cup of it with bread flour. - 1 packet (2 ¼ tsp) active dry yeast
Chef Insight: Always check the expiration date—active yeast is key to fluffy rolls! - ½ cup granulated sugar
Substitution: Use coconut sugar for a healthier option with caramel notes. - 1 cup whole milk (warm)
Tip: If you’re out of milk, almond or oat milk works too! - ⅓ cup unsalted butter (melted)
Make sure it’s melted but not hot to prevent killing the yeast! - 2 large eggs
Substitution: Ground flaxseed mixed with water (1 tbsp flaxseed + 2.5 tbsp water) makes a great vegan substitute! - 1 teaspoon salt
- 4 cups all-purpose flour
-
For the Filling:
- ¾ cup brown sugar (packed)
Tip: Light brown sugar works, but dark brown gives a richer flavor! - 2 tablespoons ground cinnamon
For a twist, try adding cardamom for an exotic hint! - ⅓ cup unsalted butter (softened)
Don’t melt the butter for spreading; it should be soft enough to spread easily!
- ¾ cup brown sugar (packed)
-
For the Cream Cheese Frosting:
- 4 oz cream cheese (softened)
Tip: For a dairy-free option, try using cashew cream! - ¼ cup unsalted butter (softened)
- 2 cups powdered sugar
For an extra hit of flavor, add a dash of vanilla extract! - 2 tablespoons milk (or plant-based milk)
Adjust the milk quantity for desired consistency!
- 4 oz cream cheese (softened)
Step-by-Step Instructions
Alright, it’s time to turn those ingredients into something truly scrumptious! Here’s how we do it:
-
Activate the Yeast:
- In a small bowl, combine the warm milk with the yeast and a pinch of sugar. Let it sit for about 5-10 minutes until it’s frothy and bubbly. This means your yeast is alive and ready to do its magic!
-
Mix the Dough:
- In a large mixing bowl, combine the flour, sugar, and salt. Create a well in the center, and pour in the melted butter, eggs, and the activated yeast mixture. Stir until a shaggy dough forms, then turn it out onto a floured surface.
-
Knead the Dough:
- Knead the dough for about 8-10 minutes until it’s smooth and elastic. This is a great arm workout, so feel free to take out any stress from the week! If the dough is sticky, sprinkle a little more flour as needed.
-
Let It Rise:
- Place the kneaded dough into a greased bowl, cover it with a kitchen towel, and let it rise in a warm spot (like your kitchen—thank you, oven) for about 1 to 1.5 hours, or until it doubles in size. Patience is key—you want that fluff!
-
Prepare the Filling:
- While the dough is rising, mix together the brown sugar, cinnamon, and softened butter in a medium bowl until well combined—it should resemble a spreadable paste. Set aside.
-
Roll Out the Dough:
- After the dough has risen, punch it down gently (no need to be rough!) and turn it out onto a floured surface. Roll it into a large rectangle about ¼ inch thick.
-
Spread the Filling:
- Evenly spread the cinnamon filling over the dough rectangle, leaving about a ½ inch border at the edges. This is where the goodies will ooze from!
-
Roll It Up:
- Starting from one long edge, roll the dough tightly into a log. Make sure it’s snug but not overly tight—your rolls need room to expand!
-
Cut the Rolls:
- Using a sharp knife or dental floss (yes, you read that right!), slice the log into 12-15 equal pieces, about 1.5 inches thick. Arrange them in a greased baking dish, cut side up, leaving a little space between each for rising.
-
Second Rise:
- Cover the dish with a towel and let the rolls rest for another 30-45 minutes until they’ve puffed up beautifully.
-
Preheat the Oven:
- About 15 minutes before the rolls are ready, preheat your oven to 350°F (175°C).
-
Bake:
- Once the rolls have risen, pop them into the oven and bake for 20-25 minutes until golden brown. If they’re browning too quickly, loosely cover with aluminum foil during the last few minutes.
-
Make the Frosting:
- While the rolls are baking, whip together the softened cream cheese and butter in a mixing bowl until light and fluffy. Gradually add the powdered sugar and mix until smooth, then add milk until you reach the desired consistency.
-
Frost and Serve:
- As soon as the rolls come out of the oven, generously slather them with the cream cheese frosting. Let the frosting melt into the nooks and crannies for maximum gooey goodness.
Serving Suggestions
Ready to serve those tantalizing gooey cinnamon rolls? Place them on a large plate or, for a rustic touch, a wooden board. Drizzle some extra frosting over the top, and sprinkle with chopped nuts or a dusting of powdered sugar for that perfect presentation. Pair them with a steaming cup of coffee or a glass of freshly squeezed orange juice. Your family and friends will be flocking to your kitchen in no time!
Recipe Variations
If you’re feeling adventurous, here are a few fun twists you can try with your cinnamon rolls:
- Nutty Add-In: Fold in some chopped walnuts or pecans for a delicious crunch.
- Fruit-Filled Rolls: Add sliced apples or pears with the cinnamon filling for a fruity surprise!
- Spicy Kick: Mix in a touch of cayenne pepper into the cinnamon filling for a sweet and spicy twist.
- Chocolate Drizzle: After frosting, drizzle some melted chocolate over the rolls for a decadent dessert.
- Pumpkin Spice: Swap some of the sugar for pumpkin puree and add pumpkin spice to the filling for a fall-themed treat!
Chef’s Notes
These gooey cinnamon rolls have been a staple in my kitchen for years, and they continue to evolve. I often play around with the spices, occasionally adding nutmeg or ginger for a seasonal twist. And let’s talk about the frosting—it’s the cherry on top! Some days, I skip the cream cheese for a simple glaze of powdered sugar and milk, while other days I indulge in extra frosting. That’s the beauty of this recipe; you can make it your own!
And let’s not forget those kitchen mishaps—one time, I mistook baking powder for baking soda and ended up with a flat, cookie-like mess! But even then, it turns into a funny story shared over cups of coffee and leftover rolls. Remember, cooking is as much about joy and creativity as it is about precision.
FAQs and Troubleshooting
-
Why are my rolls dense?
- If your rolls didn’t rise properly, it may be due to old yeast or not allowing enough time to rise. Always test your yeast before baking!
-
How do I make my rolls gooey?
- The key to gooeyness lies in the butter and sugar content. Make sure your filling is generous, and fresh out of the oven, slather on that cream cheese frosting!
-
How do I store leftover rolls?
- Store any leftover rolls in an airtight container at room temperature for up to 3 days. You can also freeze them for up to a month; just reheat in the oven for a cozy treat!
-
Can I make the dough ahead of time?
- Absolutely! You can prepare the dough and refrigerate it overnight. Just let it come to room temperature and rise before baking the next day.
Nutritional Info
Here’s a rough estimate per roll (without frosting):
- Calories: 280
- Protein: 4g
- Carbohydrates: 45g
- Fat: 10g
- Fiber: 1g
(Note: Nutrition can vary based on specific brands and measurements used)
Now that you have this deliciously cozy recipe in your hands, go ahead and spread the love—share your newly baked gooey cinnamon rolls with your family and friends. Enjoy the process, embrace the mess, and remember that the best moments happen around the kitchen table. Happy baking, my fellow foodies! 🍽️
Print
Gooey Cinnamon Rolls
- Total Time: 120 minutes
- Yield: 12 servings 1x
- Diet: Vegetarian
Description
Delicious and cozy gooey cinnamon rolls perfect for any occasion.
Ingredients
- 4 cups all-purpose flour
- 1 packet (2 ¼ tsp) active dry yeast
- ½ cup granulated sugar
- 1 cup whole milk (warm)
- ⅓ cup unsalted butter (melted)
- 2 large eggs
- 1 teaspoon salt
- ¾ cup brown sugar (packed)
- 2 tablespoons ground cinnamon
- ⅓ cup unsalted butter (softened)
- 4 oz cream cheese (softened)
- ¼ cup unsalted butter (softened)
- 2 cups powdered sugar
- 2 tablespoons milk (or plant-based milk)
Instructions
- Activate the yeast: In a small bowl, combine the warm milk with the yeast and a pinch of sugar. Let it sit for about 5-10 minutes until frothy.
- Mix the dough: In a large bowl, combine flour, sugar, and salt. Create a well, then add melted butter, eggs, and activated yeast mixture. Stir until shaggy dough forms.
- Knead the dough: Knead for about 8-10 minutes until smooth and elastic. Sprinkle flour if necessary.
- Let it rise: Place dough in a greased bowl, cover, and let it rise for about 1 to 1.5 hours until doubled in size.
- Prepare the filling: Mix brown sugar, cinnamon, and softened butter until well combined.
- Roll out the dough: Punch down the risen dough, turn it out onto a floured surface, and roll it into a large rectangle about ¼ inch thick.
- Spread the filling: Evenly spread the cinnamon filling over the dough, leaving a ½ inch border.
- Roll it up: Starting from one long edge, roll the dough tightly into a log.
- Cut the rolls: Slice the log into 12-15 equal pieces and arrange in a greased baking dish.
- Second rise: Cover and let the rolls rest for 30-45 minutes until puffed up.
- Preheat the oven: About 15 minutes before the rolls are ready, preheat oven to 350°F (175°C).
- Bake: Once risen, bake for 20-25 minutes until golden brown.
- Make the frosting: Whip together cream cheese and butter, then add powdered sugar and milk until desired consistency.
- Frost and serve: Generously slather the frosting on the rolls as soon as they come out of the oven.
Notes
For a healthier twist, consider using coconut sugar and substituting almond or oat milk for whole milk.
- Prep Time: 15 minutes
- Cook Time: 25 minutes
- Category: Dessert
- Method: Baking
- Cuisine: American
Nutrition
- Serving Size: 1 roll
- Calories: 280
- Sugar: 10g
- Sodium: 200mg
- Fat: 10g
- Saturated Fat: 4g
- Unsaturated Fat: 4g
- Trans Fat: 0g
- Carbohydrates: 45g
- Fiber: 1g
- Protein: 4g
- Cholesterol: 30mg
Keywords: cinnamon rolls, gooey cinnamon rolls, desserts, baking, comfort food
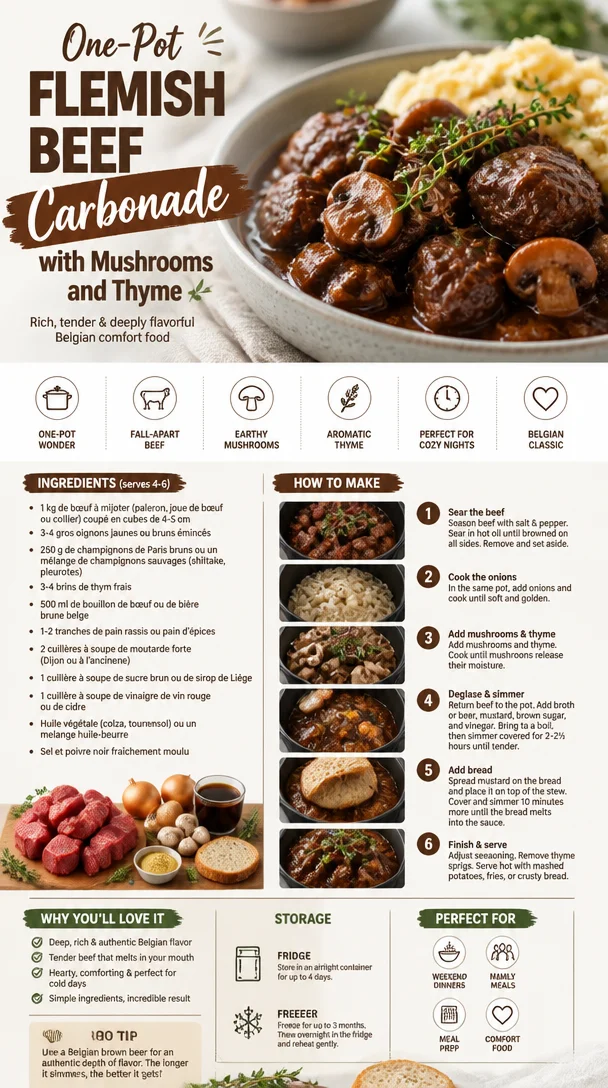
One-Pot Flemish Beef Carbonade with Mushrooms and Thyme
Délicieuse Carbonade Flamande aux Champignons et Thym
Welcome to my cozy little kitchen! I’m so excited to share one of my absolute favorite recipes with you today: Délicieuse Carbonade Flamande aux Champignons et Thym. If you’re in the mood for a warming, hearty dish that celebrates the rustic flavors of Belgium, you’ve landed in the right spot. Imagine a tender, beefy stew simmered low and slow with the magical combination of mushrooms, thyme, and the lusciousness of dark beer—it’s the ultimate comfort food that warms your soul as much as it fills your belly.
A Taste of Nostalgia
I still remember the first time I tasted Carbonade Flamande. It was during a chilly fall evening at my friend’s house, surrounded by laughter and the comforting aroma of something delicious bubbling away in the kitchen. Her grandmother was the chef of the night, stirring a pot filled with treasures that spoke of history, warmth, and love. The richness of the dish and the depth of flavor completely captivated me, and I knew right then that I had to learn how to make it myself. Each bite was a celebration, bringing everyone around the table together and fostering connection over shared stories and delicious food.
That evening sparked my passion for cooking hearty, rustic dishes that carry a story. Inspired, I’ve crafted my own take on this classic, adding mushrooms for an earthy depth and a touch of thyme for freshness. It’s a dish perfect for gatherings or simply enjoying solo, and it never fails to create a warm atmosphere reminiscent of that unforgettable night. Grab your apron, and let’s dive into this culinary adventure!
Ingredients
Here’s everything you’ll need to create this delectable Carbonade Flamande aux Champignons et Thym:
-
2 pounds beef chuck, cut into 1-inch pieces: This is a tender, flavorful cut of meat perfect for slow cooking. If you’re looking for a lighter option, you can swap in turkey or chicken, though the texture will be different.
-
2 tablespoons olive oil: You’ll want this for searing your beef. If you prefer, you can use butter for a richer flavor.
-
1 large onion, finely sliced: Onions add a wonderful sweetness as they caramelize. Shallots also work excellently if you have them on hand.
-
3 cloves garlic, minced: Garlic is aromatic and adds depth. If you’re a garlic lover, feel free to add more!
-
8 ounces mushrooms, sliced: I recommend a mix of cremini and shiitake for varied textures. Feel free to use any mushrooms you enjoy or have available.
-
2 tablespoons tomato paste: This is essential for a rich base. If you’re out of tomato paste, you can use tomato sauce, but the flavor will be slightly altered.
-
1 cup dark beer (like a Belgian ale): This gives the dish its unique flavor. If you prefer non-alcoholic, you can substitute with beef broth and a dash of vinegar for acidity.
-
2 cups beef broth: A flavorful base is crucial! If you want a lighter broth, chicken broth works, but may not match the richness of beef.
-
2 teaspoons dried thyme: Thyme complements the beef beautifully. Fresh thyme is even better—just use a handful, as it can be stronger in flavor.
-
Salt and pepper, to taste
-
1 bay leaf: This adds subtle flavor and aroma; don’t forget to remove it before serving!
-
Fresh parsley, chopped for garnish: This adds a pop of color and freshness to please the eye.
Step-by-Step Instructions
-
Prep the Beef: Season your beef chunks generously with salt and pepper. This step is crucial as it will enhance the meat’s natural flavors as it cooks.
-
Sear the Beef: In a large Dutch oven or heavy pot, heat the olive oil over medium-high heat. Add the beef in batches, ensuring not to crowd the pot. Sear until browned all over, about 5 minutes per batch. Don’t skip this step—it caramelizes the meat and adds incredible flavor! Remove the beef and set it aside on a plate.
-
Sauté the Onions and Garlic: In the same pot, add the sliced onions and a pinch of salt. Cook, stirring occasionally, until the onions are golden and caramelized, about 8-10 minutes. Add the minced garlic and sauté for another minute until fragrant. The onions should be sweet and softly golden, creating a beautiful base.
-
Add the Mushrooms: Toss in the sliced mushrooms and cook for 5-7 minutes until they’ve released their liquid and are nicely browned. The more moisture you get out now, the better your final dish will be!
-
Stir in Tomato Paste: Push the veggies to the side and add the tomato paste, cooking for 1-2 minutes until it darkens in color. This helps to deepen the flavors in our stew.
-
Deglaze with Beer: Pour in the dark beer, scraping up the lovely brown bits stuck to the bottom of the pot. This is where all the magic is! Let it simmer for about 5 minutes, allowing the alcohol to cook off and the flavors to meld.
-
Return the Beef: Add back the seared beef along with any juices that have collected on the plate. Then pour in the beef broth until the meat is just submerged. Toss in the bay leaf and thyme, giving everything a good stir.
-
Simmer Slowly: Bring the pot to a simmer, then reduce the heat to low, cover it, and forget about it for at least 2 hours. The longer, the better; low and slow is the key here! Stir occasionally and keep an eye on the liquid level.
-
Final Adjustments: Once your beef is fork-tender and the sauce has thickened beautifully, taste and season with salt and pepper as needed. You can remove the bay leaf at this point.
Serving Suggestions
To serve this gorgeous Carbonade Flamande, ladle generous portions into bowls and sprinkle with freshly chopped parsley. Serve alongside creamy mashed potatoes, crusty bread for soaking up the delicious gravy, or even some sautéed green beans for a pop of color!
Recipe Variations
-
Vegetarian Option: Swap out the beef for hearty vegetables like butternut squash and chickpeas, and use vegetable broth instead. Trust me—it’s a stunning version!
-
Herb Variations: Experiment with herbs like rosemary or even a bit of bay leaf for added complexity.
-
Asian Twist: Add soy sauce and ginger for an Asian-inspired flavor profile! You can also make it a stir-fry rather than a stew for a quick weeknight meal.
-
Spicy Kick: Toss in some chili flakes or fresh chili peppers if you want to turn up the heat!
Chef’s Notes
As with any dish, this Carbonade Flamande recipe has gone through a few tweaks over the years. I’ve learned that letting the meat simmer longer elevates the flavors and makes it even more decadent. Plus, any leftovers? They’re even better the next day! This dish not only warms your heart but encourages you to cherish the moments around the table with loved ones—there’s nothing like sharing a good meal and creating memories that last a lifetime.
FAQs and Troubleshooting
-
What if my sauce is too thin? Simply remove the lid during the last 30 minutes of cooking to allow it to thicken. You can also mix a small amount of cornstarch with water and add it—just make sure to stir well!
-
Can I use a slow cooker? Absolutely! After browning the beef and sautéing the veggies on the stovetop, transfer everything to a slow cooker and cook on low for 6-8 hours.
-
Why is my beef tough? Make sure you’re using the right cut of beef (chuck works best) and allow it to cook long enough. Tough cuts need time to break down.
-
How can I freeze leftovers? This dish freezes wonderfully! Allow it to cool completely, then store in airtight containers for up to three months. Just thaw in the fridge overnight and reheat gently on the stovetop.
This Carbonade Flamande aux Champignons et Thym is not just a recipe; it’s an invitation to gather, to share stories, and to enjoy the beauty of cooking at home. I hope it finds a cozy spot in your kitchen, as it has in mine! Happy cooking, dear friends!
Print
Délicieuse Carbonade Flamande aux Champignons et Thym
- Total Time: 135 minutes
- Yield: 6 servings 1x
- Diet: None
Description
A hearty Belgian stew with beef, mushrooms, and thyme, simmered in dark beer for the ultimate comfort food.
Ingredients
- 2 pounds beef chuck, cut into 1-inch pieces
- 2 tablespoons olive oil
- 1 large onion, finely sliced
- 3 cloves garlic, minced
- 8 ounces mushrooms, sliced
- 2 tablespoons tomato paste
- 1 cup dark beer (like a Belgian ale)
- 2 cups beef broth
- 2 teaspoons dried thyme
- Salt and pepper, to taste
- 1 bay leaf
- Fresh parsley, chopped for garnish
Instructions
- Prep the beef: Season your beef chunks generously with salt and pepper.
- Sear the beef: In a large Dutch oven, heat the olive oil over medium-high heat and add beef in batches for about 5 minutes.
- Sauté the onions and garlic: Add sliced onions and cook until caramelized, about 8-10 minutes, then add minced garlic.
- Add the mushrooms: Toss in the sliced mushrooms and cook for 5-7 minutes until browned.
- Stir in tomato paste: Cook for 1-2 minutes until it darkens in color.
- Deglaze with beer: Pour in the dark beer and scrape up the brown bits from the pot, then simmer for 5 minutes.
- Return the beef: Add the seared beef and any juices, along with beef broth, bay leaf, and thyme.
- Simmer slowly: Cover and simmer for at least 120 minutes, stirring occasionally.
- Final adjustments: Once tender, taste and season with salt and pepper before removing bay leaf.
Notes
Serve with creamy mashed potatoes or crusty bread for soaking up the gravy. Leftovers improve in flavor.
- Prep Time: 15 minutes
- Cook Time: 120 minutes
- Category: Main Course
- Method: Stovetop
- Cuisine: Belgian
Nutrition
- Serving Size: 1 serving
- Calories: 480
- Sugar: 6g
- Sodium: 450mg
- Fat: 18g
- Saturated Fat: 7g
- Unsaturated Fat: 8g
- Trans Fat: 0g
- Carbohydrates: 32g
- Fiber: 3g
- Protein: 40g
- Cholesterol: 120mg
Keywords: Carbonade Flamande, Belgian stew, comfort food
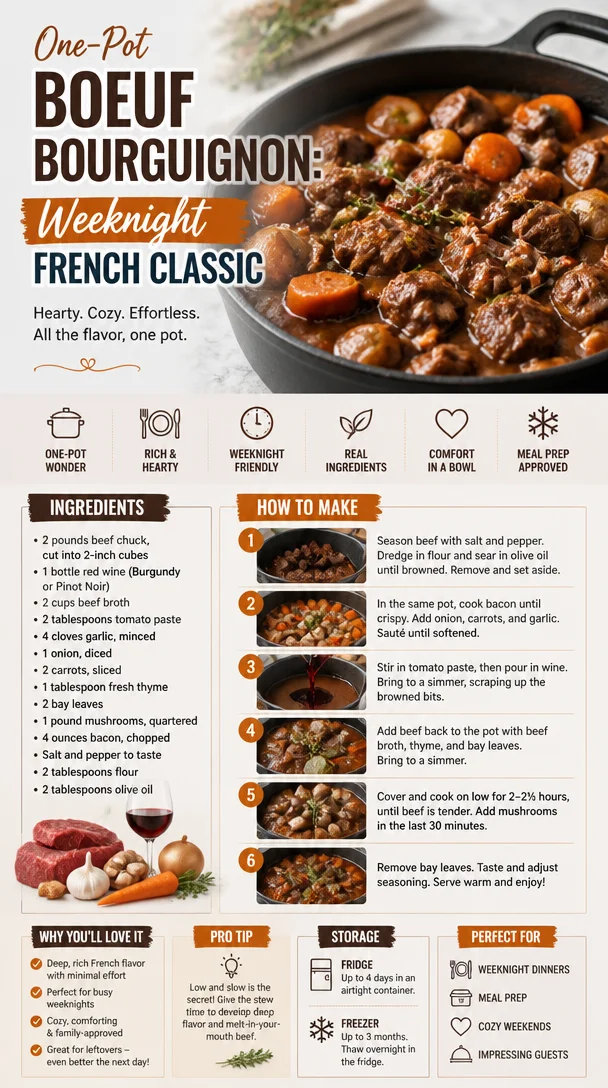
One-Pot Boeuf Bourguignon: Weeknight French Classic
Unraveling the Comfort of Boeuf Bourguignon
Welcome back to my cozy kitchen, friends! Today, we’re diving into a dish that’s as loaded with flavor as it is with nostalgia: Boeuf Bourguignon. Yes, this classic French stew is much more than just fancy fodder; it’s a warm hug in a bowl that fills your home with delicious aromas and turns an ordinary meal into something truly special.
The Magic of Boeuf Bourguignon
Why is this dish so special, you ask? Well, let me take you on a little culinary journey. I first encountered Boeuf Bourguignon on a chilly autumn evening, fresh out of college. I had moved into my first tiny apartment and was excited to explore my culinary prowess. My kitchen was a whirlwind of pots and pans, and amidst the chaos, my nose caught the scent of something transcendent simmering from my neighbor’s apartment.
It turned out she was whipping up Boeuf Bourguignon. The rich aroma of tender beef, vibrant vegetables, and deep, red wine wafted through the hall, transporting me right to a lovely Parisian bistro, despite my humble surroundings. After some friendly chatter and maybe a hint of food envy, she generously offered me a taste, and oh boy, was it love at first bite! The fork-tender beef, the sweet notes from the wine—everything came together in perfect harmony. It was magical. I left her apartment that evening with a full belly and a newfound determination to create my version of this hearty dish.
From that day on, Boeuf Bourguignon became a staple in my kitchen, evolving with my cooking journey, adapting to different ingredients and seasonal flair. Every time I make it, I savor not just the flavors but also the memories connected to each bite.
Ingredients to Bring the Dish to Life
Let’s gather all the ingredients we need for our Boeuf Bourguignon! Here’s what you’ll be searching for:
-
2 lbs beef chuck (or stew meat)
The star of the show! Chuck is perfect for slow cooking due to its marbling. If you can’t find it, brisket or round can work too but may be a tad leaner. -
4 oz bacon lardons
This adds smoky flavor—trust me, it’s crucial. You can substitute pancetta or even omit it for a lighter dish, although you’ll miss that rich depth. -
1 large onion, chopped
Onions provide a foundation of sweetness. Shallots can be a great substitute for a more subtle flavor. -
2 carrots, sliced
For sweetness and color! Parsnips can be a nice variation if you’re feeling adventurous. -
2 cloves garlic, minced
Garlic elevates any dish. If fresh isn’t available, feel free to use granulated garlic—just go easy on it. -
2 tablespoons flour
Helps thicken the sauce. You could swap in a gluten-free flour or cornstarch if you’re gluten intolerant. -
3 cups red wine
Burgundy is traditional, but any robust red wine (like Merlot or Cabernet Sauvignon) will work. Remember: only cook with wine you’d drink! -
2 cups beef broth
Adds depth to the stew. You could also use mushroom broth for a vegetarian twist. -
1 bouquet garni (a bundle of herbs like thyme, bay leaf, and parsley)
This imparts fragrant notes to the dish. A simple herb sachet in a piece of cheesecloth works beautifully. -
Salt and pepper to taste
Standard seasoning, but don’t hold back on the seasoning towards the end!
Step-by-Step Instructions to Culinary Bliss
Ready to create this glorious dish? Let’s do it step-by-step!
-
Prep your ingredients:
Before we dive in, gather your ingredients and have everything chopped and ready to go. A little prep goes a long way in making the cooking process smooth and enjoyable. -
Brown the bacon:
In a large Dutch oven or heavy pot over medium heat, add your bacon lardons. Cook until crispy and browned, about 5-7 minutes. This step is crucial for developing flavor, so take your time! -
Sear the beef:
Remove the crispy bacon with a slotted spoon and set aside. In the bacon drippings, add your beef in batches to avoid overcrowding, searing each piece until browned on all sides (about 3-4 minutes per side). Browning not only creates flavor, but also gives your stew a beautiful color. -
Sauté the vegetables:
With all your beef seared, toss in your chopped onions and carrots into the same pot. Sauté for about 5 minutes until softened, then add the minced garlic and cook for an additional minute. The fragrant aroma will have you salivating! -
Sprinkle in the flour:
Sprinkle flour over the veggie and beef mixture, stirring constantly for about 1-2 minutes. This helps to cook off the raw flavor of the flour, ensuring you’ll have a rich sauce. -
Deglaze the pot:
Pour in your red wine, scraping up all those delightful bits stuck to the bottom of the pot (trust me; this step is where the magic happens). Bring it to a simmer, letting it bubble away for about 5 minutes. -
Add broth and the bouquet garni:
Once your wine is beautifully reduced, pour in the beef broth along with your reserved bacon. Toss in the bouquet garni, season with salt and pepper, and bring it all to a gentle simmer. -
Cook low and slow:
Cover the pot and let it simmer on the stove for about 2 to 2.5 hours, or until the beef is fork-tender. Occasionally check to make sure the pot isn’t too dry; you want a nice, velvety sauce! -
Final touches:
Once your stew is done, discard the bouquet garni and check for seasoning. Adjust with more salt and pepper as needed. If you want to make it even more luxurious, you can stir in a bit of butter at the end! -
Serve and enjoy:
Ladle your Boeuf Bourguignon into bowls, top with some chopped fresh parsley for a pop of color, and watch as smiles light up around the table.
Serving Suggestions
To serve your Boeuf Bourguignon, I recommend pairing it with a hearty crusty bread or creamy mashed potatoes. A side of sautéed green beans or a fresh arugula salad can introduce a nice crunch and brightness to the plate. And of course, pour yourself a glass of that beautiful red wine you used in the stew—it’s the perfect complement!
Recipe Variations
Feel like mixing things up? Here are a few fun variations to consider:
-
Mushroom Medley: Add a variety of mushrooms (like cremini or shiitake) during the last 30 minutes of cooking for an earthy flavor.
-
Herb-Infused: Play around with fresh herbs like rosemary or sage to give the dish an aromatic twist.
-
Spicy Kick: Add a pinch of crushed red pepper flakes for a little heat.
-
Vegetable Bonanza: Throw in some diced potatoes or turnips for a heartier stew.
-
Wine-Free Option: You can swap the wine for more beef broth or a splash of balsamic vinegar for acidity.
Chef’s Notes
Over the years, my Boeuf Bourguignon recipe has evolved, much like my cooking style. I once tried adding dark chocolate to the sauce—fascinating, but not quite my jam! I’ve also played around with different wines and herbs, each iteration bringing its flair to the dish. The heart of it remains the same: a rich, comforting stew perfect for chilly nights.
Remember, cooking is about experimenting and finding what resonates with your palate. So, don’t hesitate to make this recipe your own!
FAQs and Troubleshooting
1. Why is my stew tough?
If the beef isn’t tender after the cooking time, it may need a bit longer. Low and slow is the key to tender beef!
2. Can I make this ahead of time?
Absolutely! In fact, Boeuf Bourguignon tastes even better the next day as the flavors meld. Just reheat gently on the stove.
3. What if I don’t like red wine?
You can substitute with beef broth or a non-alcoholic red wine alternative. Keep in mind that it might alter the flavor slightly.
4. How do I thicken my sauce?
If your sauce seems too thin, simmer it longer uncovered to reduce it, or mix a bit of cornstarch with cold water and stir it into the stew.
Nutritional Info
While I usually focus more on the joy of cooking than the numbers, here’s a rough breakdown (per serving):
- Calories: 450
- Protein: 36g
- Fat: 22g
- Carbohydrates: 25g
- Fiber: 3g
Remember, cooking is about balance, and this hearty dish, paired with veggies or a salad, makes for a delightful and satisfying meal!
So, there you have it, my dear foodies! A journey through Boeuf Bourguignon, filled with flavors and stories that warm the heart. Gather your loved ones, get cooking, and let’s keep that spirit of culinary adventure alive! Happy cooking!
Print
Boeuf Bourguignon
- Total Time: 180 minutes
- Yield: 6 servings 1x
- Diet: Non-Vegetarian
Description
A classic French stew that combines tender beef, vegetables, and rich red wine for a heartwarming dish.
Ingredients
- 2 lbs beef chuck (or stew meat)
- 4 oz bacon lardons
- 1 large onion, chopped
- 2 carrots, sliced
- 2 cloves garlic, minced
- 2 tablespoons flour
- 3 cups red wine
- 2 cups beef broth
- 1 bouquet garni (a bundle of herbs like thyme, bay leaf, and parsley)
- Salt and pepper to taste
Instructions
- Prep your ingredients: Gather your ingredients and have everything chopped and ready to go.
- Brown the bacon: In a large Dutch oven or heavy pot, add your bacon lardons. Cook until crispy, about 5-7 minutes.
- Sear the beef: Remove the bacon and add beef in batches, searing until browned on all sides (about 3-4 minutes per side).
- Sauté the vegetables: Add chopped onions and carrots, sauté for 5 minutes, then add minced garlic and cook for an additional minute.
- Sprinkle in the flour: Sprinkle flour over the mixture, stirring constantly for 1-2 minutes.
- Deglaze the pot: Pour in red wine, scrape the bottom of the pot, and simmer for 5 minutes.
- Add broth and bouquet garni: Pour in beef broth, add reserved bacon, toss in bouquet garni, and season with salt and pepper.
- Cook low and slow: Cover and simmer for 120 to 150 minutes, or until the beef is fork-tender.
- Final touches: Discard bouquet garni, adjust seasoning with salt and pepper, and add butter if desired.
- Serve and enjoy: Ladle into bowls and serve with chopped fresh parsley.
Notes
Serve with crusty bread or mashed potatoes. This dish tastes even better the next day!
- Prep Time: 30 minutes
- Cook Time: 150 minutes
- Category: Main Course
- Method: Slow Cooking
- Cuisine: French
Nutrition
- Serving Size: 1 serving
- Calories: 450
- Sugar: 5g
- Sodium: 600mg
- Fat: 22g
- Saturated Fat: 8g
- Unsaturated Fat: 6g
- Trans Fat: 0g
- Carbohydrates: 25g
- Fiber: 3g
- Protein: 36g
- Cholesterol: 70mg
Keywords: Boeuf Bourguignon, French Stew, Comfort Food
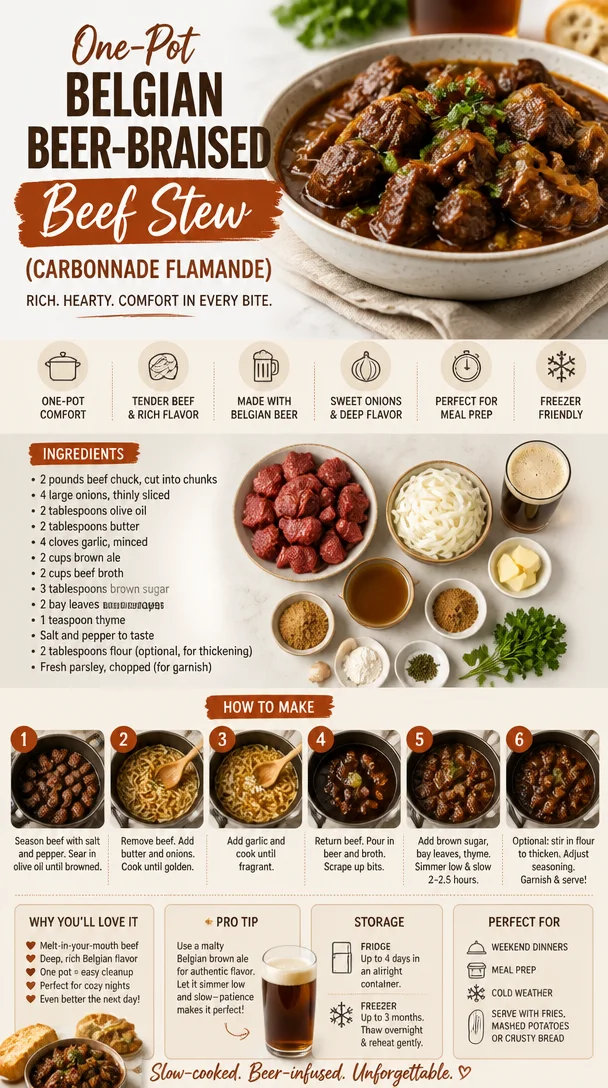
One-Pot Belgian Beer-Braised Beef Stew (Carbonnade Flamande)
Flemish Beef and Beer Stew (Carbonnade): A Cozy Culinary Journey
Welcome, dear foodies, to my cozy kitchen, warm with the scents of home and happiness! Today, I’m inviting you to embark on a delightful culinary adventure with me as we whip up a heartwarming dish that carries the spirit of togetherness: Flemish Beef and Beer Stew, or better known as Carbonnade. This flavorful stew is not just a meal; it’s a hug in a bowl, perfect for chilly evenings or any time you want to bring a little comfort into your life.
Now, let’s talk about this stew. The star of our show is beef, beautifully braised in a rich sauce made vibrant with beer. Imagine rich, tender chunks of beef, simmered to perfection with caramelized onions, aromatic herbs, and tangy mustard. It’s a dish that tells stories—stories of gathering around a family table, of laughs and shared moments, and of indulging in the simple pleasure of good food. Whether you’re whipping this up for a weeknight dinner or a gathering of friends, this stew promises to impress and comfort in equal measure.
You might be wondering, “What makes Carbonnade so special?” Well, it’s not just the ingredients but the love and thought that goes into making it. This recipe has roots in Belgian culinary history, bringing flavors that melt together as they cook low and slow. Believe me, when that pot bubbles away, you’re not just cooking; you’re creating memories, bridging hearts over a shared experience. So, put on your favorite apron, grab a trusted pot, and let’s dive headfirst into this delicious journey!
A Personal Story: The First Taste of Carbonnade
Oh, let me take you back to a chilly autumn evening when I first tried my hand at making Carbonnade. It was my first year away at college, and I was determined to impress my new friends with something homey and delicious. As I flipped through my mom’s old recipe book, the dog-eared pages whispered memories of cherished family dinners, laughter echoing through the air as rich, savory scents filled our home.
I stumbled upon a handwritten recipe for Flemish Beef and Beer Stew. It felt like fate! Armed with my trusty Dutch oven, I set out to recreate that warm family tradition. As the beef browned and the onions caramelized, my dorm was soon enveloped in an aroma so inviting that both my roommates ventured in, curious and hungry. We laughed, shared stories over the bubbling pot, and that delicious stew became a hallmark of our friendship—no longer just a recipe for me, but a new memory in the making. Each batch I made after that was filled with laughter and love, and now it’s my pleasure to share that experience with you!
Ingredients
Here’s what you’ll need to create this soul-soothing stew:
-
2 pounds beef chuck, cut into 1-inch pieces
(The chuck is the best cut for stewing, known for its rich flavor and tenderness after slow cooking. You can substitute with brisket or round if needed.) -
4 large onions, sliced
(Onions are the base of flavor here. Yellow onions work beautifully, but if you want a touch of sweetness, try using Vidalia or shallots.) -
3 cloves garlic, minced
(Garlic brings an aromatic kick! Feel free to add more if you’re like me and love that garlicky goodness.) -
1 tablespoon brown sugar
(This is to balance the beer’s bitterness. You can swap it with honey or maple syrup for a unique twist!) -
2 tablespoons balsamic vinegar
(This adds depth and acidity. Red wine vinegar can be a great substitute in a pinch.) -
2 cups beef stock
(Homemade is the way to go, but store-bought works too! Look for low sodium if you’re watching your salt intake.) -
3 cups Belgian ale or stout
(A good beer is key! If you don’t like beer, try using beef broth.) -
2 tablespoons Dijon mustard
(The mustard adds a tangy punch. If you want a milder version, try yellow mustard.) -
2 bay leaves
(They impart a subtle fragrance. Remember to remove them before serving!) -
4 sprigs fresh thyme or 1 teaspoon dried thyme
(Herbs bring everything to life! You can swap thyme with rosemary for a different flavor profile.) -
Salt and pepper to taste
(Essential seasonings. Remember, adjust to your palate!)
Chef Insight: Fresh ingredients make a world of difference in this dish. When possible, opt for fresh herbs and high-quality cuts of meat. Trust me, your taste buds will thank you!
Step-by-Step Instructions
Now that we have our fabulous ingredients, let’s get cooking! Here’s how to create the perfect Flemish Beef and Beer Stew:
Step 1: Brown the Beef
Heat a large Dutch oven over medium-high heat. Add a splash of vegetable oil (about 1 tablespoon is sufficient). When the oil shimmers, season the beef chunks with salt and pepper, then add them in batches. Avoid overcrowding the pot; this will help achieve that lovely brown crust. Sear the beef for about 3-4 minutes per side, or until they’re nicely browned. Don’t rush this step! The caramelization will amplify the stew’s flavor.
Step 2: Sauté the Aromatics
Once the beef is browned, remove it from the pot and set it aside. In the same pot, add your sliced onions and a small pinch of salt. This will help draw out their moisture. Cook them for about 10-15 minutes until they turn golden and caramelized. This step pays huge dividends in flavor. Add the minced garlic and sauté for an additional 1-2 minutes until fragrant.
Step 3: Deglaze with Beer
Pour in the Belgian ale, scraping the bottom of the pot with a wooden spoon to release any brown bits stuck to the base. This is where the magic happens; it’s called deglazing! Stir in the brown sugar and balsamic vinegar, adding sweetness and deeper flavor. Allow the mixture to simmer for about 5 minutes to reduce slightly.
Step 4: Stir in the Remaining Ingredients
Return the browned beef to the pot. Add in the beef stock, Dijon mustard, bay leaves, and thyme. Stir well to combine everything, and taste for seasoning. Now, here’s a pro tip: if you want to take it to the next level, add a splash more of your beer. Why not, right?
Step 5: Simmer to Perfection
Bring the stew to a gentle boil, then reduce the heat to low. Cover it partially with a lid and let it simmer for 2-3 hours, stirring occasionally. The low, slow cooking will tenderize the beef, making it melt-in-your-mouth good! If you’re short on time, you can speed up the process in a pressure cooker, cooking for about 50 minutes and allowing natural release.
Step 6: Final Touches
When the beef is fork-tender and the stew has thickened, remove it from the heat. Discard the bay leaves and give the stew a good stir. Taste again, adjusting with more salt and pepper if needed.
Chef Hack: If you find the stew too thin, simmer it uncovered for a bit longer to let some of the liquid evaporate and thicken up. If it’s too thick, just add a splash of beef stock or water to achieve your desired consistency!
Serving Suggestions
To serve your Flemish Beef and Beer Stew, ladle it into bowls and garnish with freshly chopped parsley for a pop of color. Pair it with hearty crusty bread to soak up all that delicious sauce, or serve alongside creamy mashed potatoes for an indulgent twist. This stew is fantastic the next day as the flavors deepen, making it perfect for meal prep or leftovers!
Recipe Variations
Feel free to get creative with these variations:
- Vegetarian Version: Swap the beef for hearty root vegetables like carrots, parsnips, and potatoes, and use vegetable broth instead of beef stock.
- Spicy Kick: Add a splash of hot sauce or a pinch of red pepper flakes for some heat!
- Mushroom Magic: Toss in some diced mushrooms for extra umami, complementing the flavors beautifully.
- Herbs of Choice: Try experimenting with different herbs. Fresh oregano or bay laurel leaves can add an interesting twist.
Chef’s Notes
This stew has certainly evolved for me over the years. Initially, I followed my mom’s exact recipe, but as I began to express my culinary creativity, I added my own flair—sometimes I throw in a splash of whiskey instead of beer for an herbal essence, or I might play with different root vegetables. The essence of Carbonnade remains, though: hearty, nostalgic, and perfect for gathering around the table. And let’s be honest; cooking this stew always conjures fond memories of my college days and the heartwarming joy of friendship.
FAQs and Troubleshooting
Q: Can I use a different type of beer?
A: Absolutely! While Belgian ale is traditional for its depth of flavor, any hearty beer like a stout or even a brown ale will work. Just avoid lagers, which are too light for this dish.
Q: What if I don’t have a Dutch oven?
A: No worries! Any heavy-bottomed pot will do just fine. Just ensure it has a lid to retain moisture during the cooking process.
Q: Can I make this in advance?
A: Yes, yes, YES! Carbonnade tastes even better the next day as the flavors meld together. Just store it in an airtight container in the refrigerator, and reheat gently on the stove.
Q: My stew ended up too oily. How can I fix this?
A: If your stew is too greasy, skim off the excess fat with a spoon before serving or chill it, allowing the fat to solidify on top for easy removal.
Nutritional Info
While I like to focus more on flavor than exact numbers, here’s a quick estimate per serving (based on a 1-cup serving size):
- Calories: 450
- Protein: 35g
- Carbohydrates: 18g
- Fat: 25g
So there it is, folks—your journey into the rich, flavorful world of Flemish Beef and Beer Stew. I hope this recipe warms your hearts as much as it does mine. So gather your loved ones, share some stories over steaming bowls of Carbonnade, and create your own delicious memories in the kitchen.
Happy cooking!
Print
Flemish Beef and Beer Stew (Carbonnade)
- Total Time: 195 minutes
- Yield: 6 servings 1x
- Diet: None
Description
A heartwarming Flemish beef stew made with tender chunks of beef braised in a rich beer sauce, with caramelized onions and aromatic herbs.
Ingredients
- 2 pounds beef chuck, cut into 1-inch pieces
- 4 large onions, sliced
- 3 cloves garlic, minced
- 1 tablespoon brown sugar
- 2 tablespoons balsamic vinegar
- 2 cups beef stock
- 3 cups Belgian ale or stout
- 2 tablespoons Dijon mustard
- 2 bay leaves
- 4 sprigs fresh thyme or 1 teaspoon dried thyme
- Salt and pepper to taste
Instructions
- Heat a large Dutch oven over medium-high heat. Add a splash of vegetable oil. Season the beef chunks with salt and pepper, then add them in batches, searing for about 3-4 minutes per side.
- Remove the beef from the pot and set it aside. In the same pot, add sliced onions and a pinch of salt. Cook for about 10-15 minutes until golden and caramelized, then add minced garlic and sauté for 1-2 minutes.
- Pour in the Belgian ale, scraping the bottom of the pot to release any brown bits. Stir in brown sugar and balsamic vinegar, then simmer for about 5 minutes.
- Return the browned beef to the pot. Add beef stock, Dijon mustard, bay leaves, and thyme, stirring well to combine.
- Bring the stew to a gentle boil, then reduce heat to low. Cover partially with a lid and let it simmer for 2-3 hours, stirring occasionally.
- Remove from heat, discard bay leaves, and taste for seasoning, adjusting with more salt and pepper if needed.
Notes
Garnish with freshly chopped parsley and serve with crusty bread or creamy mashed potatoes. This stew tastes even better the next day.
- Prep Time: 15 minutes
- Cook Time: 180 minutes
- Category: Main Course
- Method: Braised
- Cuisine: Belgian
Nutrition
- Serving Size: 1 cup
- Calories: 450
- Sugar: 5g
- Sodium: 600mg
- Fat: 25g
- Saturated Fat: 10g
- Unsaturated Fat: 10g
- Trans Fat: 0g
- Carbohydrates: 18g
- Fiber: 2g
- Protein: 35g
- Cholesterol: 100mg
Keywords: beef stew, comfort food, Flemish recipe, Carbonnade, cozy meals
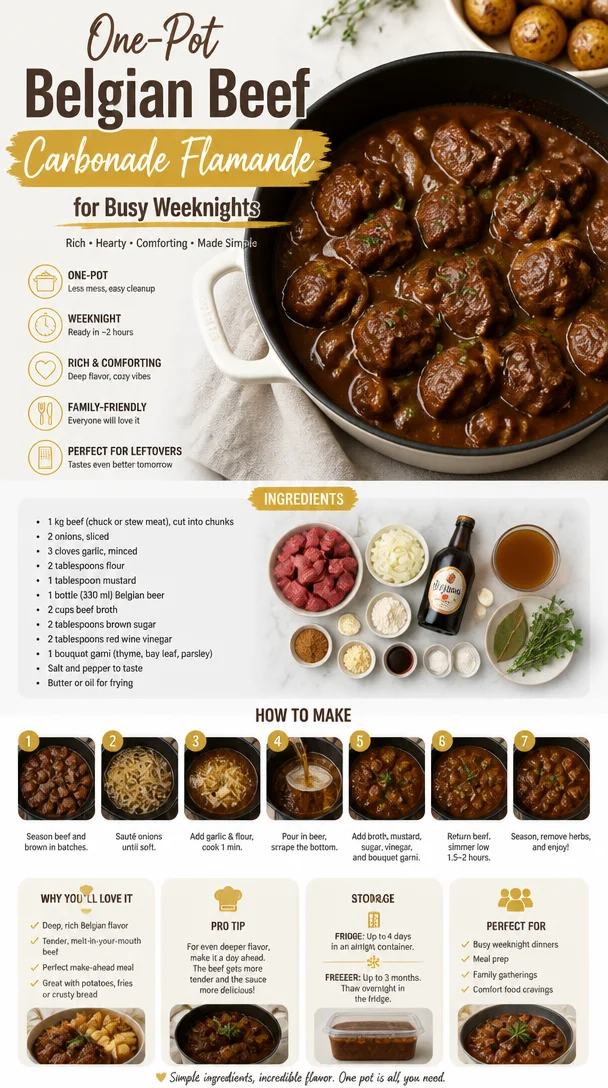
One-Pot Belgian Beef Carbonade Flamande for Busy Weeknights
Celebrate Carbonade Flamande: A Hearty Belgian Beef Stew
Welcome to my cozy kitchen, friends! Today, I am bubbling over with excitement to share a recipe that holds a special place in my heart: Carbonade Flamande, a traditional Belgian beef stew that embodies comfort, warmth, and a touch of nostalgia. The very mention of Carbonade Flamande transports me to sunlit afternoons in the kitchen of my childhood home, where the aroma of simmering beer and caramelized onions would waft through the air, drawing family and friends together around the dining table.
This dish is more than just a hearty meal; it’s a celebration of flavors, memories, and, most importantly, the people we love. With each spoonful of this rich, velvety beef stew, you’ll experience the deep, comforting flavors that define Belgian cuisine. It’s the perfect dish for cold evenings, family gatherings, or a cozy date night at home.
As a self-proclaimed flavor enthusiast, I can’t wait to guide you through every step of creating this delicious dish. Don’t worry if you’re not a culinary wizard; cooking should be fun and approachable! So, roll up your sleeves, put on that favorite apron (messy is totally okay!), and let’s bring Carbonade Flamande to life!
A Taste of Nostalgia
One of my fondest memories associated with Carbonade Flamande comes from visits to my Belgian grandmother’s house during the holidays. She would always beckon us with an irresistible scent wafting from her kitchen, a warm embrace made of caramelized onions and hearty beef mingling with fragrant herbs and spices.
On one particular visit, I remember walking in to find my grandma standing over the stove, her hands dancing gracefully as she sautéed the onions in a cloud of steam. She had a knack for transforming simple ingredients into magic, and I was her eager sous-chef, ready to soak up her wisdom. It was during those moments that I learned not just how to cook, but also how to create a dish that tells a story—a dish that warms the soul. Every time we shared a bowl of Carbonade Flamande, it felt like I was giving and receiving love all at once, a beautiful reminder of the joy that comes from the kitchen.
What You’ll Need: Ingredients
To make this delightful Carbonade Flamande, gather the following ingredients:
-
2 pounds beef chuck: This cut of meat is ideal for slow-cooking, becoming tender and flavorful as it simmers. If you prefer a leaner option, you can substitute with brisket, but don’t skip the marbling!
-
2 large onions: Sliced into thin rings, these babies will caramelize beautifully, adding depth and sweetness. If you’re in a pinch, shallots can work as a substitute, though they’ll impart a slightly different flavor.
-
1 tablespoon olive oil: Perfect for browning the meat and onions. You can use any neutral oil, but I always love the flavor olive oil adds.
-
2-3 cups beef broth: This is the heart and soul of the stew. Homemade is ideal, but a quality store-bought variety will do just fine. Be mindful of sodium content!
-
1 cup Belgian beer: Choose a rich, malty beer like a dubbel or brown ale. For a non-alcoholic option, you can use beef broth with a splash of apple cider or malt vinegar for some acidity.
-
2 tablespoons brown sugar: This ingredient helps balance the bitterness of the beer and strengthens the caramel notes in the dish. If you’d like a richer flavor, try using muscovado sugar.
-
3-4 sprigs of fresh thyme: The aroma of thyme adds an herbal complexity to the stew. If fresh isn’t available, opt for dried thyme but reduce the amount by half.
-
2 bay leaves: These flavor powerhouses will add an aromatic note to your dish. Just remember to remove them before serving!
-
Salt and pepper to taste: Always season as you go! Freshly cracked black pepper is my favorite for an extra kick.
Step-by-Step Instructions: Cooking Carbonade Flamande
Now, let’s dive into the cooking process step by step! Follow along, and I promise you’ll create a dish that will impress everyone.
-
Prepare the Ingredients:
- Begin by cutting the beef chuck into 1.5-inch cubes. Season generously with salt and pepper. This initial seasoning step is crucial as it builds the flavor foundation for your stew.
-
Sear the Beef:
- In a large Dutch oven or heavy pot, heat 1 tablespoon of olive oil over medium-high heat. Once shimmering, add the beef cubes in batches (to avoid overcrowding). Sear on all sides until beautifully browned, about 4-5 minutes. Don’t rush this step! Browning adds depth to the stew, making it rich and robust.
-
Caramelize the Onions:
- Remove the beef from the pot and set aside. In the same pot, add the onion rings. Lower the heat to medium and stir occasionally, allowing the onions to turn golden brown and sweeten, about 15-20 minutes. If the pan gets too dry, splash in a bit of broth. This step is essential; it’s where the magic happens!
-
Deglaze with Beer:
- Once the onions are caramelized, it’s time to add in the Belgian beer. Scrape up those delicious brown bits from the bottom of the pot as the beer bubbles away. This deglazing step infuses even more flavor into your stew!
-
Combine the Ingredients:
- Return the seared beef to the pot, followed by the beef broth. Add the brown sugar, thyme, bay leaves, and stir to combine. Bring everything to a gentle simmer.
-
Slow Cook the Stew:
- Cover the pot with a lid and reduce the heat to low, allowing the stew to simmer gently for about 2 to 2.5 hours. This low and slow approach is critical for breaking down the meat and developing that deep, comforting flavor. Trust me; the aroma that fills your kitchen will be irresistible!
-
Final Adjustments:
- After the meat is fork-tender, taste your stew! Adjust the seasoning with more salt and pepper if necessary. You can even add a splash more beer to crank up the flavor! If the sauce is too thin, let it simmer uncovered for a while to thicken.
-
Serve It Up:
- Once all the flavors have melded beautifully, it’s time to plate up! Remove the bay leaves and thyme sprigs. Serve the Carbonade Flamande hot, preferably with a side of crispy frites or crusty bread to soak up all that glorious sauce.
Serving Suggestions
This Carbonade Flamande shines when served in shallow bowls, with plenty of rich sauce ladled over tender chunks of meat. Consider garnishing it with a sprinkle of fresh parsley for a pop of color. Pair it with a side of golden fries or garlic-roasted potatoes, and don’t forget that crusty bread—perfect for dipping! For drinks, I suggest a malty beer or a robust red wine to complement the dish beautifully.
Recipe Variations
Feeling adventurous? Here are a few creative twists you can try with this classic dish:
-
Vegetarian Option: Swap the beef for hearty mushrooms like portobello or a mix of root vegetables. Use vegetable broth and a splash of balsamic vinegar to mimic that rich flavor.
-
Herb Variations: Experiment with different herbs! A sprig or two of rosemary can elevate the dish with its aromatic notes.
-
Spicy Kick: Add in some red pepper flakes or a diced jalapeño for a spicy bite that complements the richness.
-
Add Veggies: Incorporate root vegetables like carrots or parsnips for added sweetness and texture.
-
One-Pot Wonder: For a complete meal, toss in some baby potatoes in the last hour of cooking to make it a one-pot feast!
Chef’s Notes
This Carbonade Flamande recipe has evolved over the years, inspired by my time in the kitchen with family and influences from various cookbooks I’ve gathered. I have fond memories of tasting different versions of this stew in Belgium—from family gatherings to local pubs, each one is unique. I invite you to make this recipe your own! Don’t be afraid to play with the ingredients, just as I did on those cozy evenings with my grandma.
Fun fact: My kitchen is filled with "happy accidents." The time I mistook cinnamon for paprika led to a surprisingly delicious (if not unusual) rendition of the dish. That’s the beauty of cooking—each dish can tell its own story!
FAQs and Troubleshooting
-
What can I do if my stew is too salty?
- If you realize your stew is too salty, add a peeled raw potato to absorb some of the salt. Let it simmer for 15 minutes, and then remove the potato before serving.
-
Can I use a slow cooker for this dish?
- Absolutely! Follow the initial steps of browning in a pan, then transfer everything to the slow cooker and cook on low for 6-8 hours for tender results.
-
How can I thicken my stew?
- If your stew isn’t thickening to your liking, you can mix a tablespoon of cornstarch with cold water to make a slurry. Stir it in during the last few minutes of cooking until it thickens.
-
What’s the best way to reheat leftovers?
- Reheat gently on the stove over low heat, stirring occasionally. You can add a splash of broth to loosen it up if needed.
Nutritional Info
While nourishing the soul, Carbonade Flamande is quite comforting on the waistline. A typical serving (about 1 cup) contains approximately:
- Calories: 450-500
- Protein: 35g
- Carbohydrates: 20g
- Fat: 25g
This is a rough estimate and may vary based on ingredient choices and portion size.
Cooking is all about love, laughter, and a little bit of magic in the kitchen. This recipe for Carbonade Flamande not only pays tribute to my roots but also invites you to create your own culinary masterpiece. So gather your ingredients, embrace the process, and share your delicious creation with your loved ones. Happy cooking, foodies! 🍽️
Print
Carbonade Flamande
- Total Time: 165 minutes
- Yield: 4 servings 1x
- Diet: N/A
Description
A traditional Belgian beef stew that embodies comfort, warmth, and a touch of nostalgia.
Ingredients
- 2 pounds beef chuck, cut into 1.5-inch cubes
- 2 large onions, sliced into thin rings
- 1 tablespoon olive oil
- 2–3 cups beef broth
- 1 cup Belgian beer
- 2 tablespoons brown sugar
- 3–4 sprigs of fresh thyme
- 2 bay leaves
- Salt and pepper to taste
Instructions
- Begin by cutting the beef chuck into 1.5-inch cubes. Season generously with salt and pepper.
- Heat 1 tablespoon of olive oil in a large Dutch oven over medium-high heat and sear the beef cubes until browned, about 4-5 minutes.
- Remove the beef from the pot and set aside. Add onion rings and caramelize for 15-20 minutes.
- Add the Belgian beer to deglaze the pot, scraping up brown bits.
- Return the seared beef to the pot, add the beef broth, brown sugar, thyme, and bay leaves.
- Cover and simmer for 2 to 2.5 hours over low heat until fork-tender.
- Remove bay leaves and thyme sprigs before serving hot.
Notes
Serve with crispy frites or crusty bread to soak up the sauce. Consider garnishing with fresh parsley.
- Prep Time: 15 minutes
- Cook Time: 150 minutes
- Category: Main Course
- Method: Slow Cooking
- Cuisine: Belgian
Nutrition
- Serving Size: 1 cup
- Calories: 450
- Sugar: 5g
- Sodium: 600mg
- Fat: 25g
- Saturated Fat: 10g
- Unsaturated Fat: 10g
- Trans Fat: 0g
- Carbohydrates: 20g
- Fiber: 2g
- Protein: 35g
- Cholesterol: 75mg
Keywords: beef stew, Belgian cooking, hearty meals, comfort food, Carbonade Flamande
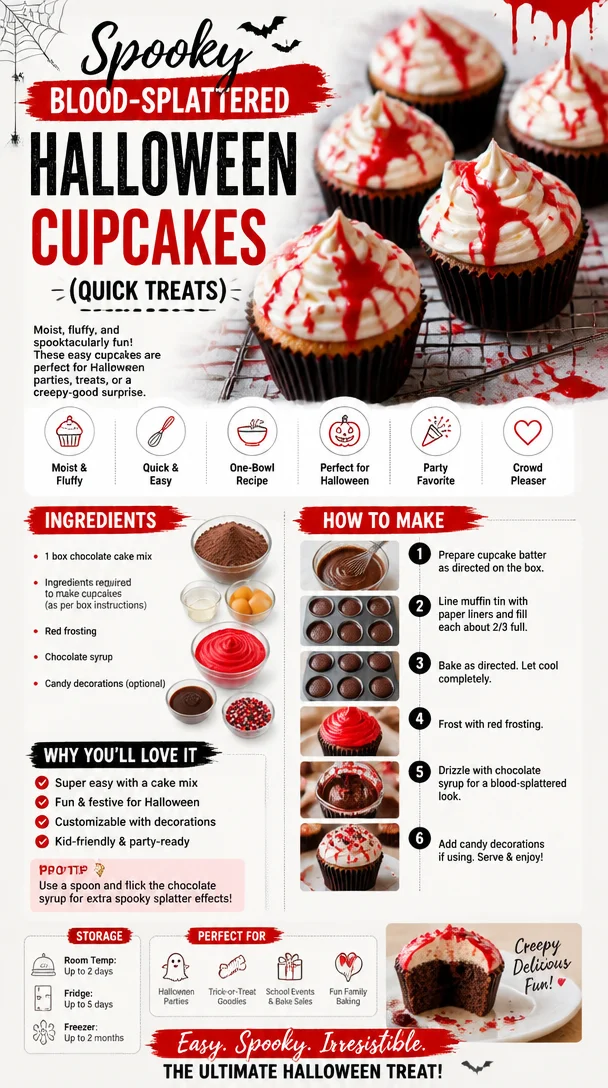
Spooky Blood-Splattered Halloween Cupcakes (Quick Treats)
Spooktacular Delight: Blood Splattered Halloween Cupcakes
Welcome to the spookiest time of the year! Halloween is just around the corner, and if you’re anything like me, you’re buzzing with excitement at the thought of all the treats you can whip up in the kitchen. As the leaves turn crisp and the air fills with anticipation for costume parties and spooky gatherings, there’s nothing quite like homemade treats to set the mood. Today, I’m going to share with you a wickedly delightful recipe that combines my love for all things cozy, festive, and a touch creepy—Blood Splattered Halloween Cupcakes!
Imagine a dessert that’s not only delicious but also adds a haunted vibe to your table. These cupcakes are moist, rich chocolatey wonders, topped with a creamy and fantastically blood-stained frosting. Trust me, they’ll be the star of your Halloween bash, garnering gasps and giggles from friends and family alike. So grab your witches’ hats and let’s dive into this eerie culinary adventure!
But beyond just being fun and festive, these cupcakes hold a special place in my heart. I can’t help but think back to the years when my kids and I would experiment in the kitchen around Halloween. We would cover the kitchen counter in flour and sprinkles while laughing and making creative messes. One specific Halloween, my daughter and I decided to craft “bloody” treats for a party. What started as a simple frosting experiment turned into a full-on kitchen adventure, complete with giggles as we deliberately went for that messily-spattered effect. The laughter and creativity we shared were truly the highlights, and I can’t help but pass that joy along to you!
Ingredients
To create these spine-tingling little treats, you’ll need the following ingredients:
-
All-Purpose Flour (1 ¾ cups)
The backbone of your cupcake. If you’re gluten-free, you can use a 1:1 gluten-free flour blend instead, which works wonderfully! -
Granulated Sugar (1 cup)
Sweetness is key! You can swap this for coconut sugar or use a sugar substitute if you prefer a lower glycemic index. -
Unsweetened Cocoa Powder (¾ cup)
This gives your cupcakes the rich chocolatey depth. If you want a more intense chocolate flavor, use dark cocoa powder. -
Baking Powder (1 ½ teaspoons)
Essential for fluffy cupcakes! Make sure it’s fresh for the best rise. -
Baking Soda (½ teaspoon)
Works in tandem with baking powder to create that perfect texture. -
Salt (½ teaspoon)
A tiny pinch to balance out the sweetness. You can use sea salt for a subtle flavor upgrade. -
Eggs (2 large)
These bind everything together. For a vegan option, substitute with flax eggs (2 tablespoons of ground flaxseed mixed with 6 tablespoons of water). -
Milk (1 cup)
Whole or 2% milk works best, but almond or oat milk can substitute nicely for a dairy-free option. -
Vegetable Oil (½ cup)
Helps keep the cupcakes moist. You can use melted coconut oil for a subtle flavor twist. -
Vanilla Extract (1 teaspoon)
For that warm, comforting aroma! Homemade vanilla extract can elevate the flavor even more. -
Red Food Coloring (for “blood” effect)
Intense red gel food coloring works best to achieve that dripping effect. -
Butter (1 cup, unsalted, room temperature)
The base for your frosting—nothing beats the richness of butter. For vegan cream cheese, use a vegan butter alternative. -
Powdered Sugar (3-4 cups)
Sweetness and texture for your frosting. If you’re looking for a lower-sugar option, try monk fruit sweetener! -
Cream Cheese (8 oz)
For a tangy twist in your frosting. Use a dairy-free cream cheese alternative if needed.
Step-by-Step Instructions
Now that your ingredients are assembled, let’s get into the nitty-gritty of making these eerie delights!
-
Preheat the Oven:
Preheat your oven to 350°F (175°C). Nothing sets the mood better than the sweet smell of cupcakes wafting through the air! -
Prep the Cupcake Liners:
Place cupcake liners in a muffin tin. I always go for spooky designs—think ghosts or pumpkins to add to the Halloween charm! -
Mix Dry Ingredients:
In a large bowl, whisk together the flour, sugar, cocoa powder, baking powder, baking soda, and salt until combined. This step is essential for ensuring even distribution of the dry ingredients. -
Combine Wet Ingredients:
In another bowl, whisk together the eggs, milk, oil, and vanilla extract. Make sure your wet ingredients are well combined; this will help achieve a moist cupcake! -
Bring It All Together:
Pour the wet mixture into the dry ingredients and mix until just combined. Be careful not to overmix. A few lumps are perfectly fine—your cupcakes will be light and fluffy! -
Fill the Liners:
Fill each cupcake liner about two-thirds full with the batter. I like to use an ice cream scoop for this—it’s neat and helps create uniform cupcakes! -
Bake to Perfection:
Bake in the preheated oven for 18-20 minutes or until a toothpick inserted into the center comes out clean. While waiting, clean your mess! You don’t want to be overwhelmed later. -
Cool Down:
Allow your cupcakes to cool in the pan for 5 minutes before transferring them to a wire rack. Let them cool completely before frosting—no one likes melted frosting! -
Prepare the Frosting:
Beat together the softened butter and cream cheese on medium speed until creamy and smooth. Add in the powdered sugar gradually and mix until well incorporated. Feel free to add a splash of vanilla for extra flavor. -
Add the Red Color:
Once your frosting is ready, add a few drops of red food coloring and mix until you achieve your preferred “blood” look. -
Frost the Cupcakes:
Using a piping bag or spatula, generously frost your cooled cupcakes. Don’t be shy; the messier it looks, the better! -
Create the Blood Splatter:
To get that spooky blood splatter effect, dip the tip of a clean paintbrush into red food coloring and flick it over the frosted cupcakes. It’s messy but oh-so-fun! Just be sure to cover your workspace—this is a messy one!
Serving Suggestions
When it comes to serving these spine-chilling cupcakes, make them the centerpiece of your Halloween dessert table! You could even arrange them in a haunted scene with Halloween figurines or spooky foliage for that extra flair. I love to serve them alongside a punch bowl filled with a fizzy, spooky drink to keep with the Halloween vibe.
Recipe Variations
If you’re feeling adventurous or accommodating to various dietary needs, here are a few twist ideas:
-
Vegan Surprise: Use flax eggs and coconut or almond milk with vegan butter for a completely dairy-free experience.
-
Gluten-Free Delight: Replace the all-purpose flour with a gluten-free flour blend, allowing everyone to join in on the fun!
-
Spooky Flavors: Add a sprinkle of cinnamon or pumpkin spice into the batter for a seasonal twist.
-
Chocolate Ganache: Instead of the cream cheese frosting, top with a rich chocolate ganache for a chocolaty overload.
-
Fruit Filling: Add a blood-red jam (like raspberry) filling to the cupcakes before frosting for a delightful surprise!
Chef’s Notes
This recipe has a delightful backstory. It began as a simple chocolate cupcake recipe, but once my kids decided to throw some fun into the mix with Halloween, we got creative—resulting in these memorable “bloody” creations. Each year, we tweak it a bit: sometimes it’s gummy worms, other times it’s edible eyeballs, making it a fun evolving tradition! The laughter and mess we create are what makes cooking so magical.
FAQs and Troubleshooting
-
Why are my cupcakes flat?
If your cupcakes turn out flat, check the freshness of your baking soda and baking powder. They should be lively and not expired! -
Can I make these a day ahead?
Absolutely! Bake the cupcakes a day in advance, but wait to frost them until the day of your event to maintain the frosty look. -
My frosting is too runny, what do I do?
If your frosting is too runny, slowly add more powdered sugar until you reach the desired consistency. For a thicker frosting, refrigerate it for a while! -
What if my cupcakes stick to the liners?
Make sure to let the cupcakes cool completely before frosting. If they are still warm, the moisture can make the liners stick. Using grease-proof cupcake liners can also help!
Nutritional Info
While I believe in indulging for the festive season, I understand the importance of being mindful. These cupcakes are best savored in moderation, but if you’re keeping track, here’s a quick glance at the nutritional breakdown (per cupcake):
- Calories: 250
- Total Fat: 10g
- Saturated Fat: 4g
- Carbohydrates: 38g
- Sugars: 24g
- Protein: 3g
So, there you have it—Blood Splattered Halloween Cupcakes that are as delightful to eat as they are fun to make! Don’t forget to invite some friends into your kitchen for a spooky baking party—you’ll create sweet memories worth savoring just as much as these cupcakes. Happy Halloween, foodies! Enjoy creating, sharing, and, most importantly, having fun in the kitchen!
Print
Blood Splattered Halloween Cupcakes
- Total Time: 40 minutes
- Yield: 12 servings 1x
- Diet: Vegetarian
Description
Delicious and festive chocolate cupcakes with blood-stained frosting perfect for Halloween celebrations.
Ingredients
- 1 ¾ cups All-Purpose Flour
- 1 cup Granulated Sugar
- ¾ cup Unsweetened Cocoa Powder
- 1 ½ teaspoons Baking Powder
- ½ teaspoon Baking Soda
- ½ teaspoon Salt
- 2 large Eggs
- 1 cup Milk
- ½ cup Vegetable Oil
- 1 teaspoon Vanilla Extract
- Red Food Coloring (for “blood” effect)
- 1 cup Butter (unsalted, room temperature)
- 3–4 cups Powdered Sugar
- 8 oz Cream Cheese
Instructions
- Preheat your oven to 350°F (175°C).
- Place cupcake liners in a muffin tin.
- Mix the flour, sugar, cocoa powder, baking powder, baking soda, and salt in a large bowl until combined.
- Combine the eggs, milk, oil, and vanilla extract in another bowl.
- Pour the wet mixture into the dry ingredients and mix until just combined.
- Fill each cupcake liner about two-thirds full with the batter.
- Bake in the preheated oven for 18-20 minutes or until a toothpick inserted comes out clean.
- Allow the cupcakes to cool in the pan for 5 minutes before transferring them to a wire rack.
- Beat together the softened butter and cream cheese until creamy. Gradually add powdered sugar and mix well.
- Add a few drops of red food coloring to your frosting and mix until you achieve your preferred color.
- Frost the cooled cupcakes with the frosting.
- Create the blood splatter effect using a clean paintbrush dipped in red food coloring.
Notes
These cupcakes can be made a day in advance, but frost them just before serving. Experiment with different fillings for fun variations!
- Prep Time: 20 minutes
- Cook Time: 20 minutes
- Category: Dessert
- Method: Baking
- Cuisine: American
Nutrition
- Serving Size: 1 cupcake
- Calories: 250
- Sugar: 24g
- Sodium: 200mg
- Fat: 10g
- Saturated Fat: 4g
- Unsaturated Fat: 6g
- Trans Fat: 0g
- Carbohydrates: 38g
- Fiber: 1g
- Protein: 3g
- Cholesterol: 30mg
Keywords: Halloween, cupcakes, chocolate, festive, spooky
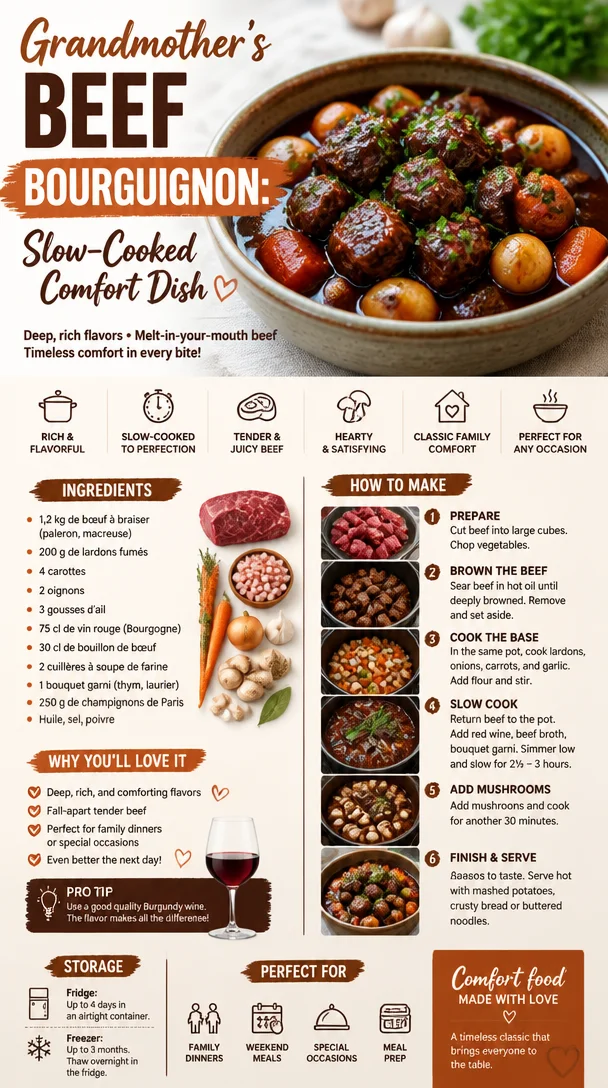
Grandmother’s Beef Bourguignon: Slow-Cooked Comfort Dish
Bœuf Bourguignon de Grand-Mère: A Cozy Classic That Warms the Heart
Welcome to my kitchen, food lovers! Today, we’re diving into one of the most beloved French dishes that carries as much warmth in its flavor as it does in its history. That’s right, we’re making Bœuf Bourguignon de Grand-Mère, which translates to “Grandma’s Beef Burgundy.” This sumptuous stew is not just a dish; it’s a celebration of love, tradition, and the simple joy of cooking with purpose.
Introduction
Every time I whip up a pot of bœuf bourguignon, I’m transported back to my childhood, standing on a stool beside my grandmother, stirring a bubbling pot on the stove. The intoxicating aroma of red wine, garlic, and savory herbs danced through the kitchen, wrapping us in a nostalgic hug that felt like home. This dish is the epitome of comfort food, perfect for gatherings with family and friends or a cozy night in.
There’s something magical about the way bœuf bourguignon transforms humble ingredients into a feast fit for royalty. It’s rich, velvety, and packed with flavor that deepens the longer it simmers. This dish can take center stage at dinner parties or simply bring a smile to someone’s face after a long day. Plus, what better way to bond over food than to share a recipe that’s been passed down through generations?
Whether you’re an experienced chef or a reluctant cook, I promise this recipe will bring out your inner culinary wizard. Don’t worry if you feel a bit intimidated—bœuf bourguignon is easier to prepare than it looks! With a little love, patience, and my step-by-step guide, you’ll be able to create a dish that would make any French grandmother proud.
So roll up your sleeves, grab your apron, and let’s make some magic in the kitchen!
Personal Story
I’ll never forget the first time I made bœuf bourguignon on my own. I had moved into my first apartment and wanted to impress my friends with a homemade dinner. With my trusty recipe from Grandma in hand, I began a culinary adventure. I invited a few friends over for what I claimed would be a “French night.”
As the stew simmered, I felt anxious. What if I burned it? What if it turned out bland? But as I added the herbs and watched the wine reduce, the fragrant aroma filled my tiny apartment, and suddenly, I was all in. My friends arrived, lured by the smell, and as we sat down to eat, laughter and stories flowed as smoothly as the wine.
By the end of the night, plates were cleared, and the table was a happy mess, filled with their compliments and satisfaction. It was a real reminder that food isn’t just about nourishment; it’s about connection. To this day, that bœuf bourguignon is a staple at every gathering I host, and it always brings friends and family together in warmth and joy.
Ingredients
Let’s talk ingredients! Each element plays a vital role in creating a rich and beautiful bœuf bourguignon.
-
Beef chuck (3–4 pounds): This is the star of our dish. Chuck is known for its flavor and tenderness when slow-cooked. If you’d like, you can substitute with brisket or stew meat for a similar result.
-
Red wine (750 ml): A good quality dry red wine, like Burgundy or Pinot Noir, is key for that authentic flavor. If you want a non-alcoholic version, try using beef broth mixed with a bit of red wine vinegar.
-
Beef broth (2 cups): This adds depth and helps tenderize the meat. Homemade broth is best, but store-bought works in a pinch!
-
Carrots (4 medium-sized, sliced): Carrots add a hint of sweetness and a lovely color. Feel free to swap in parsnips for a twist.
-
Onion (1 large, diced): The foundational flavor. You can use shallots if you prefer a milder taste.
-
Garlic (4 cloves, minced): Because what’s a stew without garlic? It really amps up the aroma. If you’re not a fan, you can reduce the amount or skip it.
-
Mushrooms (8 ounces, sliced): Earthy and meaty, they add texture. Button mushrooms or cremini work wonders here!
-
Tomato paste (2 tablespoons): This enriches the sauce and balances the flavors. You can skip it if needed, but it plays a significant role.
-
Fresh thyme (5 sprigs): Thyme provides that unmistakable savory note. Dried thyme is an option too—just use about a teaspoon.
-
Bay leaves (2): These add a wonderful aroma to the stew. Remember to remove them before serving!
-
Olive oil (2 tablespoons): For browning the meat. You could use vegetable oil as a substitute if you prefer.
-
Salt and pepper: These are essential for seasoning. Don’t be shy—it’s that sprinkle of salt that elevates the dish!
Step-by-Step Instructions
Now that we’ve got our ingredients lined up like a culinary army, let’s get cooking! Follow these steps, and you’ll have a stunning bœuf bourguignon simmering on your stove in no time.
-
Prep the Beef: Begin with cutting your beef chuck into 2-inch cubes. Don’t worry about being perfect; just aim for roughly the same size so they cook evenly. Season generously with salt and pepper.
-
Brown the Meat: In a large, heavy-bottomed pot or Dutch oven, heat the olive oil over medium-high heat. Once the oil is shimmering, add half of the beef cubes in a single layer. Let them sear without moving them for about 3-4 minutes until they’re golden brown. Flip and brown the other side. Remove the beef and set it aside on a plate. Repeat with the remaining beef. Browning adds depth of flavor to your stew!
-
Sauté the Aromatics: Add the diced onion and garlic into the same pot, scraping up any delicious browned bits stuck to the bottom. Cook for about 3–4 minutes until the onion is soft and translucent. The smell will be divine!
-
Add Carrots and Mushrooms: Toss in the sliced carrots and mushrooms. Stir and cook for another 5 minutes to soften them. This step is essential; it builds the flavor base for our stew.
-
Incorporate Tomato Paste: Add the tomato paste to the mixture and stir well. Cooking it for 2 minutes enhances its flavor.
-
Pour in the Wine: Here comes the moment that makes this dish a (kitchen) showstopper! Carefully pour the red wine into the pot, scraping the bottom again. Let it come to a gentle simmer, and then reduce the heat. You’re looking to let the wine reduce by about half, which should take 10-15 minutes.
-
Bring It All Together: Once the wine has reduced, return the browned beef to the pot. Pour in the beef broth and add the thyme and bay leaves. Everything should be submerged in gravy goodness. Bring to a gentle simmer, then cover the pot and reduce the heat to low. Let it cook for about 2 to 2.5 hours, stirring occasionally.
-
Final Touches: After the cooking time, the meat should be tender and the sauce fragrant and thick. Adjust seasoning to taste, and remember to remove the bay leaves and thyme sprigs before serving.
Serving Suggestions
Serve your bœuf bourguignon in big, rustic bowls, topped with fresh chopped parsley for a pop of color. Pair it with a side of creamy mashed potatoes or rustic baguette to soak up that rich sauce. A nice glass of the same red wine used in the dish makes for the perfect pairing!
Recipe Variations
-
Vegetarian Option: Swap the beef for hearty mushrooms (like portobello) and omit the broth for vegetable broth. Try adding extra root vegetables for flavor and texture.
-
Herb Infusion: Load in different herbs! Fresh rosemary or even some fresh sage can add a lovely twist to traditional flavors.
-
Spicy Kick: Add a hint of heat with red pepper flakes or some chopped jalapeños for a different flavor profile.
-
Creamy Style: Stir in a dollop of sour cream or crème fraîche just before serving for a luxurious twist.
-
Slow Cooker Method: If you’re short on time, you can adapt this dish for a slow cooker. Brown the meat and vegetables as directed, then transfer everything to a slow cooker. Cover and cook on low for 6-8 hours.
Chef’s Notes
Our beloved bœuf bourguignon has evolved over time. The recipe I use today is a fusion of Grandma’s teachings and my own personal twists. I don’t always have a bottle of red wine on hand, so sometimes I’ll swap in a high-quality beef broth and add a splash of red wine vinegar for that acid — it’s not quite the same, but it does the trick!
One funny memory I have is when I tried to impress my parents by making this dish for a special dinner. I was so focused on the recipe that I accidentally added a whole head of garlic instead of just the cloves! But in the end, we all laughed, and the stew was a garlicky hit. Cooking is about experimenting, learning, and enjoying the ride, after all!
FAQs and Troubleshooting
Q: My stew turned out too salty. What can I do?
A: If your stew is too salty, you can add a peeled potato to absorb some of the salt while it simmers. Remove the potato after about 30 minutes.
Q: How can I thicken my stew if it’s too thin?
A: If your sauce isn’t thick enough, mix one tablespoon of cornstarch with two tablespoons of cold water to create a slurry. Stir it into the pot and simmer for a few minutes until it thickens.
Q: Can I prepare this dish ahead of time?
A: Absolutely! Bœuf bourguignon can be made a day in advance. The flavors will deepen as it sits in the fridge overnight. Just reheat it gently on the stove when you’re ready to serve.
Q: What wine should I use?
A: As a rule of thumb, choose a wine you would enjoy drinking. It doesn’t have to be expensive; a solid, dry red like Cabernet Sauvignon or Merlot works beautifully.
Nutritional Info (Optional)
While I focus more on flavor than specific nutrition facts, here’s a rough estimate per serving (1 cup):
- Calories: 350
- Protein: 25g
- Fat: 15g
- Carbohydrates: 25g
- Fiber: 4g
And there you have it—a warm, comforting bowl of Bœuf Bourguignon de Grand-Mère! I hope you enjoyed this recipe and will bring a taste of France into your home. Cooking is all about love, laughter, and a touch of adventure, so embrace the journey and remember to savor every delicious moment. Happy cooking!
Print
Bœuf Bourguignon de Grand-Mère
- Total Time: 180 minutes
- Yield: 6 servings 1x
- Diet: None
Description
A cozy and rich French beef stew, perfect for gatherings and family dinners.
Ingredients
- 3–4 pounds Beef chuck, cut into 2-inch cubes
- 750 ml Red wine, dry (preferably Burgundy or Pinot Noir)
- 2 cups Beef broth
- 4 medium-sized Carrots, sliced
- 1 large Onion, diced
- 4 cloves Garlic, minced
- 8 ounces Mushrooms, sliced
- 2 tablespoons Tomato paste
- 5 sprigs Fresh thyme
- 2 Bay leaves
- 2 tablespoons Olive oil
- Salt and pepper, to taste
Instructions
- Prep the Beef: Cut the beef chuck into 2-inch cubes and season generously with salt and pepper.
- Brown the Meat: Heat olive oil in a large pot over medium-high heat, sear the beef in batches until golden brown, then set aside.
- Sauté the Aromatics: Add onion and garlic to the pot, softening them for 3-4 minutes.
- Add Carrots and Mushrooms: Stir in sliced carrots and mushrooms, cooking for another 5 minutes.
- Incorporate Tomato Paste: Mix in tomato paste, cooking for 2 minutes.
- Pour in the Wine: Pour red wine, reduce heat, and let it simmer until reduced by half (10-15 minutes).
- Bring It All Together: Return beef to pot, add broth, thyme, and bay leaves, simmer for 2 to 2.5 hours.
- Final Touches: Adjust seasoning, remove bay leaves and thyme sprigs before serving.
Notes
Serve in rustic bowls with mashed potatoes or crusty bread. Can be made a day in advance for deeper flavor.
- Prep Time: 30 minutes
- Cook Time: 150 minutes
- Category: Main Course
- Method: Braising
- Cuisine: French
Nutrition
- Serving Size: 1 serving
- Calories: 350
- Sugar: 5g
- Sodium: 700mg
- Fat: 15g
- Saturated Fat: 5g
- Unsaturated Fat: 8g
- Trans Fat: 0g
- Carbohydrates: 25g
- Fiber: 4g
- Protein: 25g
- Cholesterol: 90mg
Keywords: beef stew, French cuisine, comfort food, bœuf bourguignon




