

Chocolate Brigadeiro Treats
Indulge in Decadence: Making Chocolate Brigadeiro Treats
Welcome to my kitchen! Today, I’m thrilled to dive into one of my all-time favorite treat recipes—Chocolate Brigadeiro. If you haven’t experienced these delightful little bites of heaven, you’re in for a treat (quite literally)! Brigadeiro is a traditional Brazilian sweet, known for its rich, fudgy texture and bombastic chocolatey flavor. They are perfect for any occasion, from birthday parties and holiday gatherings to cozy nights in with friends. Plus, they’re incredibly easy to make, which makes them an absolute win in my book!
When the kitchen is filled with the aroma of melting chocolate and sweetened condensed milk, it’s hard not to feel all warm and cozy inside, isn’t it? It reminds me of the countless times I’ve gathered around the kitchen with friends and family, crafting these delicious confections and sharing laughter and stories. Today, I want to share that joy with you so you can bring a piece of Brazil into your home, one chocolatey bite at a time.
So, roll up your sleeves and get ready to whip up a batch of these scrumptious Brigadeiros. Whether you’re making them for a special occasion or just treating yourself (because, why not?), I promise they won’t last long once they’re in your hands!
A Sweet Memory: The First Time I Made Brigadeiros
I’ll never forget the first time I made Brigadeiros. I was a curious teenager, spending the summer with my Brazilian pen pal, Ana, who became more like family during those unforgettable weeks. One sunny afternoon, as we gathered in her vibrant kitchen, she introduced me to the world of Brigadeiros. I was immediately captivated by the simplicity of the ingredients and the transformation that happened with just a little patience and stirring.
Ana and I giggled as we melted together sweetened condensed milk and cocoa powder while debating the proper technique for rolling the chocolate balls—should they be perfectly round, or did it matter if they were a little rustic? After all, I was just a teen learning to cook! The sticky mixture was everywhere—on our hands, the countertop, even on my cheek after an enthusiastic taste test. As we coated our Brigadeiros in chocolate sprinkles, a mess of giggles and smiles filled the air. The first bite was pure ecstasy—a soft, fudgy explosion of chocolate goodness that brought an immediate smile.
To this day, Brigadeiros make me think of that warm summer filled with laughter, friendship, and way too much sugar. I hope as you make them, you’ll create your beautiful memories that you can cherish forever!
Ingredients: What You’ll Need for Perfect Brigadeiros
Let’s gather our supplies! Here’s what you’ll need to make Chocolate Brigadeiro Treats:
-
Sweetened Condensed Milk: The star of the show! This ingredient combines with cocoa powder to create the creamy, fudge-like texture. If you’re in a pinch, you can make your own by simmering milk and sugar, but I must say, the canned version is ridiculously easy and just as delicious!
-
Cocoa Powder: Unsweetened cocoa powder gives Brigadeiros their rich chocolate flavor. Use high-quality cocoa for the best results. You can substitute it with carob powder for a caffeine-free option, and it still tastes delightful!
-
Butter: A little butter helps achieve that silky smooth texture. If you need a dairy-free alternative, coconut oil works wonders as well!
-
Chocolate Sprinkles: These add a delightful crunch and true Brigadeiro charm to the treats. If you want to mix it up, try using crushed nuts or coconut flakes for rolling them instead.
-
Pinch of Salt: Just a pinch enhances the overall flavor and balances the sweetness. Never underestimate the power of salt in desserts!
Step-by-Step Instructions: Let’s Get Cooking!
Ready to bring some magic to your kitchen? Here’s how to whip up your very own Brigadeiros:
-
Combine Ingredients in a Pan: In a medium saucepan, combine the sweetened condensed milk, cocoa powder, and butter. You’ll want to use a non-stick pan; it makes the cleanup a breeze and minimizes the risk of burning!
-
Heat Slowly: Place the saucepan over medium heat. Stir continuously with a wooden spoon or a silicone spatula. It’s crucial to stir often to prevent sticking and burning. This will seem tedious, but trust me—your patience will pay off.
-
Cook Until Thickened: After about 10 minutes, you’ll notice the mixture starts to thicken and pull away from the sides of the pan. Look for the consistency where it forms a ball when stirred. That’s the sweet spot, but don’t get too impatient! Cooking longer ensures that fudgy texture we all love!
-
Cool the Mixture: Once you’ve reached the desired consistency, remove the pan from the heat and transfer the mixture to a greased plate. Allow it to cool for about 15-20 minutes; I know, it’s the hardest part!
-
Roll into Balls: Once the mixture is cool enough to handle, grease your hands with a bit of butter (seriously, it helps) and scoop about a tablespoon of the mixture. Roll it into a ball shape. If it’s sticky, just add a little more butter to your hands.
-
Coat those babies: Roll each Brigadeiro in chocolate sprinkles until fully coated. Have fun with this part—get creative with different toppings!
-
Chill and Serve: Place the Brigadeiros in mini cupcake liners or on a plate and chill them in the fridge for about 30 minutes to firm up. But honestly, if you can’t wait that long, I won’t judge you!
Serving Suggestions: Prettying Up Your Brigadeiros
Now for the fun part—serving! You can arrange your Brigadeiros on a lovely platter with some colorful sprinkles or edible flowers for a pop of color. Mini cupcake liners are also super cute and make them easy to grab. If you’re feeling festive, consider adding a little drizzle of melted chocolate on top for an extra touch of elegance. Your guests will be impressed by both your skills and presentation!
Recipe Variations: Get Creative!
While the classic Brigadeiro is a winner on its own, here are some fun variations to switch things up:
-
Nutty Brigadeiro: Roll the Brigadeiros in crushed nuts, like almonds or walnuts, instead of sprinkles for a crunchy twist.
-
Coconut Brigadeiro: Swap out the chocolate sprinkles for shredded coconut for a tropical flair!
-
Espresso Brigadeiro: Add a teaspoon of instant coffee or espresso powder to the mixture for a delightful coffee kick.
-
Flavored Brigadeiro: Experiment with different extracts (like vanilla, orange, or peppermint) mixed into the base for extra flavor excitement.
-
White Chocolate Brigadeiro: Use white chocolate in place of cocoa powder for a sweeter, decadent treat!
Chef’s Notes: Personal Reflections
Over the years, I’ve sweetened up this recipe with love, finding little tweaks to enhance the experience. The simplicity of Brigadeiros makes them irresistible for every occasion, but it’s the memories that truly add sweetness. It brings me joy to experiment with different flavors and toppings, and each batch is a little story I get to tell. Every time I make these treats, I think of my summer with Ana and the laughter that filled her kitchen.
These Brigadeiros have become a staple in my kitchen, and I love making them for gatherings, potlucks, or just a random Wednesday night! I encourage you to not only collect your own memories while making them but also try inviting friends to join you. It’s an experience made even sweeter when shared!
FAQs and Troubleshooting
-
My Brigadeiros are too sticky—what did I do wrong?
- It sounds like they may have undercooked. Ensure you’re cooking the mixture long enough for it to thicken properly. Cooking until it pulls away from the sides of the pan is key!
-
What if I overcooked the mixture?
- If it’s too hard and crumbly, don’t fret! Just add a bit of butter or cream into the mixture and reheat it gently, stirring to combine until smooth again.
-
Can I freeze Brigadeiros?
- Absolutely! Brigadeiros freeze well. Just store them in an airtight container, and when you’re ready to eat them, let them thaw in the fridge.
-
Can I adjust the sweetness?
- Of course! You can adjust the amount of cocoa powder or sweetened condensed milk according to your preference. Remember, the flavors will deepen as they chill.
Nutritional Info
While Brigadeiros are undeniably a treat meant for indulgence, here’s a rough estimate for one Brigadeiro (around 20g):
- Calories: 77
- Fat: 4.2g
- Carbohydrates: 9.6g
- Protein: 0.6g
(Nutritional content can vary based on the exact ingredients and proportions you use.)
So there you have it! Your guide to the love, laughter, and joy that comes with making Chocolate Brigadeiro treats. As you whip up this decadent dessert, I hope the sweetness fills your kitchen and brings you as much joy as it has brought me. Happy cooking, friends!
Print
Chocolate Brigadeiro Treats
- Total Time: 30 minutes
- Yield: 20 servings 1x
- Diet: Vegetarian
Description
Delight in these traditional Brazilian Chocolate Brigadeiros, rich and fudgy bites that are perfect for any occasion.
Ingredients
- 1 can Sweetened Condensed Milk
- 1/4 cup Cocoa Powder
- 2 tbsp Butter
- Chocolate Sprinkles for rolling
- Pinch of Salt
Instructions
- Combine ingredients in a pan: In a medium saucepan, combine the sweetened condensed milk, cocoa powder, and butter.
- Heat slowly: Place the saucepan over medium heat and stir continuously.
- Cook until thickened: After about 10 minutes, the mixture should start thickening and pull away from the sides of the pan.
- Cool the mixture: Remove from heat and transfer to a greased plate, allowing it to cool for about 15-20 minutes.
- Roll into balls: Once cool, grease hands and scoop about a tablespoon of mixture. Roll into a ball shape.
- Coat those babies: Roll each Brigadeiro in chocolate sprinkles until fully coated.
- Chill and serve: Place Brigadeiros in mini cupcake liners or on a plate and chill in the fridge for about 30 minutes.
Notes
Feel free to experiment with different toppings like crushed nuts or shredded coconut for a twist.
- Prep Time: 20 minutes
- Cook Time: 10 minutes
- Category: Dessert
- Method: Stovetop
- Cuisine: Brazilian
Nutrition
- Serving Size: 1 Brigadeiro
- Calories: 77
- Sugar: 8g
- Sodium: 20mg
- Fat: 4.2g
- Saturated Fat: 2.5g
- Unsaturated Fat: 1.7g
- Trans Fat: 0g
- Carbohydrates: 9.6g
- Fiber: 0g
- Protein: 0.6g
- Cholesterol: 10mg
Keywords: Brigadeiro, Brazilian dessert, chocolate treat, easy dessert
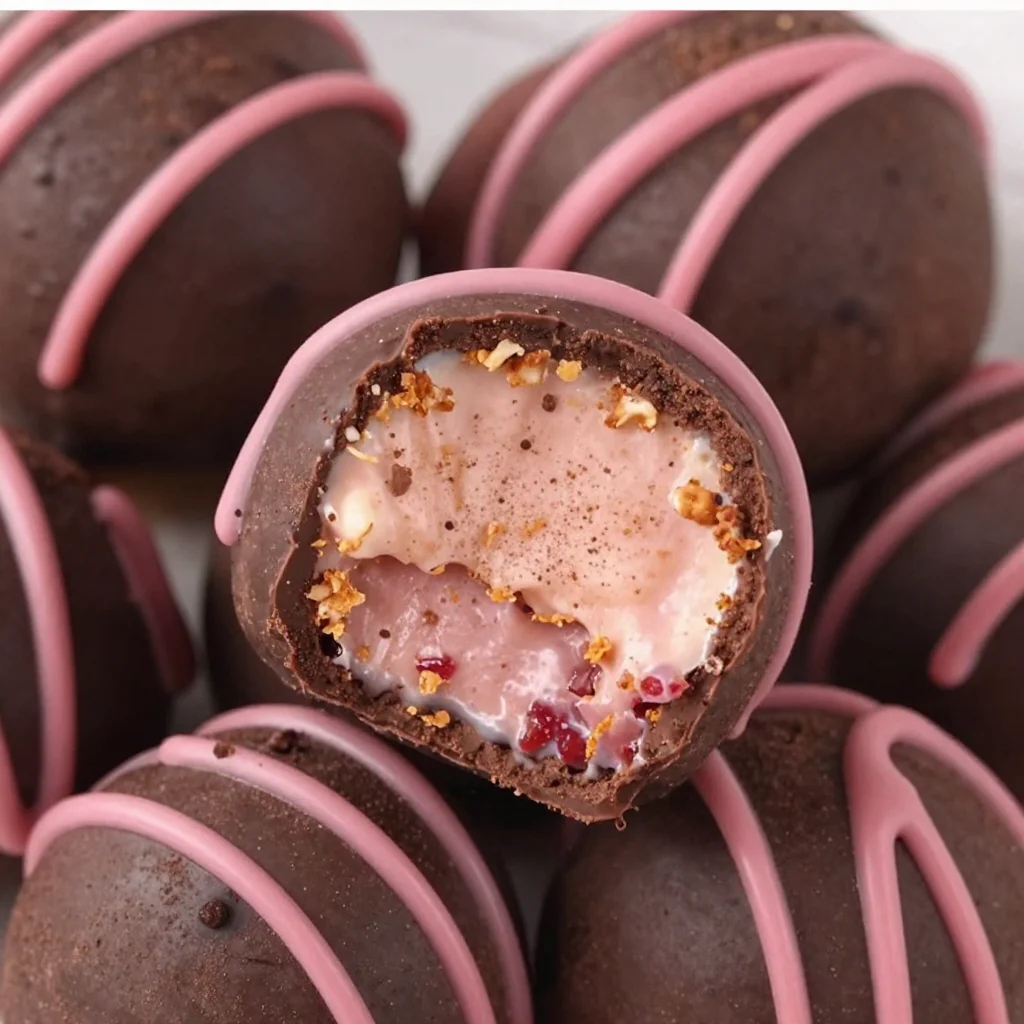
Chocolate Raspberry Truffles
Indulge in Bliss: Homemade Chocolate Raspberry Truffles
Welcome to my kitchen, my fellow flavor enthusiasts! Today, we’re going to dive into the world of decadence with my all-time favorite dessert—Chocolate Raspberry Truffles. You know those magical little bites of joy that can turn even the most ordinary days into special occasions? Yep, those are the ones I’m talking about! The combination of rich, velvety chocolate and the tart sweetness of raspberries is like a hug for your taste buds. Whether you’re whipping them up for a cozy night in, a fancy dinner party, or a sweet gift that says, "I care", these truffles are sure to hit the spot.
For me, nothing brings people together quite like chocolate. I can vividly recall rainy afternoons in my childhood kitchen, the enticing aroma of melting chocolate wafting through the air as my mom and I stirred together a pot of ganache. It was during those moments, surrounded by laughter and a sprinkling of flour on our noses, that I learned the true magic of cooking. Now, as an adult, I realize that food is so much more than just sustenance—it’s about creating memories and sharing joy. And nothing embodies that spirit more than homemade Chocolate Raspberry Truffles.
So grab your apron and let’s embark on this delicious journey! I promise you’ll cherish every minute spent crafting these delightful treats, just as much as you’ll enjoy devouring them.
A Sweet Trip Down Memory Lane
As I reflect on my love for chocolate, one memory stands out brightly—a baking marathon my mother and I embarked on when I was about ten years old. It was a stormy weekend, and we were stuck indoors. Instead of succumbing to restlessness, we decided to embark on a grand truffle-making adventure! Armed with an array of ingredients, including chocolate, cream, and a bevy of toppings, we transformed our kitchen into a mini chocolate factory.
With every melted chocolate chip that dripped on the counter, laughter filled the air. We made a delightful mess as we tossed cocoa powder and toasted coconut around while trying to roll the ganache into perfect little balls. Each truffle was a masterpiece in its own right. But what truly made the day magical was sharing our creations with the neighbors and witnessing the smiles as they indulged in our handmade sweets. From that day forward, truffle-making became a special tradition.
This recipe captures that same spirit of joy and nostalgia. These Chocolate Raspberry Truffles are not only delicious but also a reflection of love, laughter, and memories that last a lifetime.
Ingredients
Gathering the right ingredients is key to making the best Chocolate Raspberry Truffles. Here’s what you’ll need:
-
High-Quality Dark Chocolate (8 oz) – Look for chocolate that has at least 60% cocoa. The better the quality, the richer the flavor! If dark chocolate isn’t your thing, feel free to substitute semi-sweet chocolate for a milder sweetness.
-
Heavy Cream (1/2 cup) – This adds that luscious, creamy texture to the ganache. If you’re looking for a lighter version, you could use coconut cream instead. It adds an exotic twist, too!
-
Fresh Raspberries (1/2 cup) – These sweet-tart gems balance out the chocolate beautifully. If raspberries aren’t in season, you can also use frozen raspberries; just make sure to thaw and drain them well beforehand.
-
Unsweetened Cocoa Powder (for dusting) – This gives your truffles that classic look and a slight bitterness that complements the sweet center perfectly. If you want a more festive touch, try using crushed pistachios or shredded coconut instead!
-
Vanilla Extract (1 teaspoon) – A splash of this magic elixir enhances the overall flavor. Feel free to experiment with almond extract for a nutty twist.
-
Sea Salt (a pinch) – Just a touch brings out the flavors even more. It’s amazing how a little salt can elevate a sweet treat!
Step-by-Step Instructions
Now that you have your ingredients gathered, let’s make some truffles! Here’s how:
-
Chop the Chocolate: Start by finely chopping the dark chocolate and placing it in a medium-sized mixing bowl. The smaller the pieces, the easier they’ll melt. Quality chocolate is key here—don’t skip it!
-
Heat the Cream: In a small saucepan, heat the heavy cream over medium heat until it just starts to simmer. You don’t want it to boil; we’re looking for a gentle simmer here! Once it starts to bubble around the edges, remove it from heat immediately.
-
Make the Ganache: Pour the hot cream over the chopped chocolate, ensuring that all the chocolate is covered. Let it sit for about 2-3 minutes without stirring. This waiting will allow the chocolate to melt perfectly.
-
Mix It Up: After a few minutes, grab a whisk or spatula and gently stir the mixture until it’s smooth and shiny. Don’t rush this part! If there are still some lumps, it might need a tiny bit more heat. Just pop it back on the stove for a few seconds, then stir again.
-
Add the Raspberries: Fold in the fresh raspberries gently, ensuring they’re evenly distributed. The mixture will be a bit chunky, but that’s the beauty of it! If you want smoother truffles, you can mash the raspberries with a fork before mixing them in.
-
Cool Down: Cover the bowl with plastic wrap and refrigerate the ganache for about 2 hours or until it’s firm enough to handle. Patience is key here!
-
Shape Your Truffles: Once the ganache is firm, use a small cookie scoop or melon baller to portion out the mixture. With slightly damp hands (this helps prevent sticking), roll them into balls about one inch in diameter. Don’t worry about making them perfect—each truffle has its own character!
-
Dust and Chill: Roll the truffles in cocoa powder or your chosen coating to give them that marvelous finish. Place them back in the refrigerator for about 30 minutes to firm up even more.
-
Serve and Enjoy: Present your beautifully rolled truffles on a decorative plate, or package them in a cute box to share with friends and family. Watch their faces light up with delight!
Serving Suggestions
When it comes to serving, presentation is everything! Arrange your truffles on a lovely platter, and don’t forget to add a sprinkle of fresh raspberries or mint leaves for color. They look divine served alongside a steaming cup of coffee or a glass of dessert wine. You could even pair them with a scoop of vanilla ice cream for an indulgent treat.
For an added touch, consider placing your truffles in decorative cupcake liners or small glass jars tied with a ribbon if you’re gifting them. They’ll look as delightful as they taste!
Recipe Variations
The beauty of truffles is their versatility! Here are a few creative twists and variations to try:
-
Nutty Delight: Incorporate chopped nuts like hazelnuts or almonds into the ganache or roll the truffles in finely crushed nuts for extra crunch.
-
Flavor Infusion: Add a splash of flavored liqueur (like raspberry or mint) to your ganache for an adult twist.
-
Coconut Bliss: Use coconut cream instead of heavy cream, and roll your truffles in shredded coconut for a tropical vibe.
-
Seasonal Spices: For fall flavors, add a pinch of pumpkin spice or cinnamon to the ganache to create a warm autumn treat.
-
Berry Blast: Mix in crushed strawberries or blueberries with the ganache for a fruity version!
Chef’s Notes
Ah, the evolution of a recipe! I’ve been tweaking and perfecting my truffle recipe for years. I remember a blender mishap while experimenting with flavored oils, which resulted in a chocolate volcano of gooey goodness all over my kitchen counter. It was a hilarious disaster (and a real mess), but it taught me the importance of patience and precision in the kitchen!
Truffles are such a forgiving treat, allowing for so many creative expressions. Don’t stress about them being perfect; the joy lies in the process and the love you pour into them. With each batch, I’m reminded that cooking is all about experimenting and having fun!
FAQs and Troubleshooting
1. My ganache is too thin! What did I do wrong?
No worries! If your ganache is too thin, it might simply need more chilling time. Place it back in the refrigerator for a bit longer. If you find that it’s still too runny after cooling, you can add more chopped chocolate to firm it up.
2. How do I keep the truffles from sticking to my hands?
Damp hands work wonders here! Simply moisten your palms with a bit of water before rolling the ganache into balls. This way, they’ll easily come together without stickiness.
3. Can I use a different type of chocolate?
Absolutely! Feel free to experiment with milk chocolate or even white chocolate for a different flavor profile. Just adjust the sweetness accordingly, as milk chocolate is usually sweeter than dark.
4. How long do the truffles last?
When stored in an airtight container in the fridge, these beauties can last about one week. If you manage to have any leftovers, they also freeze beautifully, allowing you to enjoy them for up to a month!
Nutritional Info (optional)
While I encourage indulgence in moderation, here’s a rough idea of the nutritional info per truffle:
- Calories: 70-80
- Fat: 5g
- Carbohydrates: 8g
- Protein: 1g
Time to indulge, friends! Gather your ingredients and create your own little piece of chocolate bliss. These Chocolate Raspberry Truffles promise joy, deliciousness, and sweet memories that you’ll cherish forever. Happy cooking!
Print
Homemade Chocolate Raspberry Truffles
- Total Time: 145 minutes
- Yield: 24 truffles
- Diet: Vegetarian
Description
Decadent chocolate raspberry truffles that combine rich chocolate and tart raspberries for a magical dessert experience.
Ingredients
- High-Quality Dark Chocolate (8 oz)
- Heavy Cream (1/2 cup)
- Fresh Raspberries (1/2 cup)
- Unsweetened Cocoa Powder (for dusting)
- Vanilla Extract (1 teaspoon)
- Sea Salt (a pinch)
Instructions
- Chop the Chocolate: Start by finely chopping the dark chocolate and placing it in a medium-sized mixing bowl.
- Heat the Cream: In a small saucepan, heat the heavy cream over medium heat until it just starts to simmer.
- Make the Ganache: Pour the hot cream over the chopped chocolate and let it sit for about 2-3 minutes.
- Mix It Up: Gently stir the mixture until it’s smooth and shiny.
- Add the Raspberries: Fold in the fresh raspberries gently, ensuring they’re evenly distributed.
- Cool Down: Cover the bowl with plastic wrap and refrigerate the ganache for about 120 minutes.
- Shape Your Truffles: Use a small cookie scoop or melon baller to portion out the mixture and roll them into balls.
- Dust and Chill: Roll the truffles in cocoa powder and place them back in the refrigerator for about 30 minutes.
- Serve and Enjoy: Present your beautifully rolled truffles on a decorative plate.
Notes
For variations, consider adding nuts or flavored liqueurs to the ganache for a creative twist.
- Prep Time: 15 minutes
- Cook Time: 30 minutes
- Category: Dessert
- Method: Chilling
- Cuisine: American
Nutrition
- Serving Size: 1 truffle
- Calories: 75
- Sugar: 5g
- Sodium: 5mg
- Fat: 5g
- Saturated Fat: 3g
- Unsaturated Fat: 2g
- Trans Fat: 0g
- Carbohydrates: 8g
- Fiber: 1g
- Protein: 1g
- Cholesterol: 0mg
Keywords: chocolate truffles, raspberry dessert, homemade sweets

Chocolate Greek Yogurt Mousse
Whip Up Some Happiness with Chocolate Greek Yogurt Mousse!
Welcome, lovely food enthusiasts! Today, we’re diving into the delicious world of Chocolate Greek Yogurt Mousse. If you haven’t had the pleasure of tasting this velvety delight yet, buckle up because it’s about to become your new favorite dessert! Imagine this: luscious chocolate, creamy yogurt, and a hint of sweetness—all coming together in a light, airy mousse that feels indulgent but is secretly packed with protein. Yes, you heard that right! We’re making a dessert that not only satisfies your chocolate cravings but also feels a little healthier, thanks to Greek yogurt.
I’ve always been passionate about creating recipes that combine flavor and comfort, and this mousse is the perfect example. It’s a light yet rich dessert that’s fantastic for gatherings or a cozy night in with your favorite book. This chocolate mousse has been a delightful staple in my kitchen for years, and I can’t wait to share all the tips and tricks I’ve discovered along the way.
Now, get ready for a little chocolate magic! While the simplicity of this recipe makes it achievable for kitchen novices, the tantalizing flavor will have your friends and family thinking you spent hours crafting this treat. Whether you’re preparing a romantic dinner for two or impressing guests at a dinner party, this mousse is sure to steal the spotlight. Plus, with only a handful of ingredients, you’ll be in and out of the kitchen in no time!
Let’s put on our aprons and dive into the wonderful world of whipping up Chocolate Greek Yogurt Mousse together.
Personal Story
Ah, chocolate mousse—a dessert that instantly transports me back to my childhood. I recall evenings spent in my grandmother’s kitchen, the sweet scent of chocolate wafting through the air as she whipped up her famous dessert. I would sneak in to watch her every move, mesmerized by how effortlessly she seemed to create magic. She always insisted on using the best ingredients, and the joy on her face when serving up that silky mousse was contagious.
Fast forward to my adult years, I remember hosting my first dinner party in my tiny apartment—excited, nervous, and ready to impress! Of course, I decided to recreate my grandmother’s mousse, although I wanted to give it a twist by adding Greek yogurt for a healthier spin. The moment my guests took their first bite, I knew I had succeeded. The smiles on their faces mirrored the joy I felt watching my grandmother years ago. This Chocolate Greek Yogurt Mousse became a part of my own kitchen legacy, a delightful reminder of family gatherings, laughter, and the magic of shared meals.
Ingredients
Let’s gather a few ingredients to get us started! Each one plays a crucial role in crafting this dreamy mousse:
-
Greek Yogurt (2 cups)
A great source of protein and creaminess! I love using whole-milk Greek yogurt for a richer taste, but feel free to swap it for low-fat yogurt if you prefer. Just know that the mousse might be a bit less decadent. -
Semi-Sweet Chocolate (6 oz)
The star of the show! I recommend using high-quality chocolate for the best flavor. If you’re feeling adventurous, you can also try dark chocolate for a more intense experience or milk chocolate for a sweeter twist. -
Honey or Maple Syrup (1/4 cup)
A natural sweetener to add just the right amount of sweetness. If you prefer to keep it refined sugar-free, maple syrup is a lovely alternative. Adjust the amount according to your taste! -
Vanilla Extract (1 teaspoon)
A dash of vanilla enhances the flavors beautifully. You can substitute it with almond extract for a different taste, but use it sparingly as it can be quite potent. -
Whipped Cream (1 cup, for serving)
To top off your mousse! While homemade whipped cream is fantastic, you can also use store-bought for convenience. This step is optional, of course, but a dollop elevates the whole dessert!
Step-by-Step Instructions
Ready to whip up this mousse? Follow these simple steps for creamy perfection!
-
Melt the Chocolate
Start by breaking your semi-sweet chocolate into small pieces and placing them in a heatproof bowl. Get a pot of water simmering below—this is called a double boiler, and it’s perfect for melting chocolate evenly. Place the bowl over the pot, making sure the bottom doesn’t touch the water. Stir occasionally until the chocolate is fully melted and glossy. Chef Tip: If you’re short on time, you can melt the chocolate in the microwave in 30-second intervals, stirring in between. Just be careful not to burn it! -
Cool the Chocolate
Once melted, remove the bowl from the heat and set it aside to cool slightly. You don’t want to add hot chocolate to the yogurt, as it can compromise the texture of your mousse. -
Combine Yogurt and Sweetener
In a separate mixing bowl, scoop in the Greek yogurt and drizzle in your choice of honey or maple syrup. Use a whisk or electric mixer to blend well until creamy and smooth. Chef Hack: Add the vanilla extract at this stage so the flavor melds beautifully. -
Fold in the Chocolate
Once the chocolate has cooled (but is still pourable), slowly pour it into the yogurt mixture. Gently fold the chocolate into the yogurt using a spatula. Be careful not to overmix; you want to keep that airy feel! Fun Trick: You could also reserve a small amount of melted chocolate to drizzle on top later for a decorative touch. -
Chill the Mousse
After folding, spoon the mousse mixture into serving bowls or glasses. Cover them with plastic wrap and refrigerate for at least 2 hours (or overnight if you can resist!). This allows it to set and develop deeper flavors. -
Serve and Enjoy
When you’re ready to serve, top with a generous dollop of whipped cream and maybe even some chocolate shavings or fresh berries for garnish. Trust me, your guests will rave about how indulgent this mousse tastes, especially knowing it’s made with Greek yogurt!
Serving Suggestions
For a lovely presentation, consider serving your Chocolate Greek Yogurt Mousse in cute ramekins or elegant glassware that showcases the rich, dark color of the mousse. Top with a dollop of freshly whipped cream, a sprinkle of cocoa powder, or even some fresh raspberries for a pop of color! And if you’re feeling fancy, drizzle with a bit of melted chocolate or caramel sauce for an extra decadent touch.
Recipe Variations
Feeling adventurous? Here are a few fun twists to try on your Chocolate Greek Yogurt Mousse:
-
Mint Chocolate Mousse: Add a few drops of peppermint extract for a refreshing minty twist that pairs perfectly with chocolate.
-
Peanut Butter Swirl: Swirl in some creamy peanut butter before chilling for a deliciously nutty version.
-
Espresso Infusion: Add 1-2 teaspoons of instant espresso powder to the melted chocolate for a delightful mocha flavor.
-
Fruit Fusion: Mix in some pureed fruits like strawberries or avocados for a unique and vibrant flavor profile.
-
Nutty Delight: Fold in crushed nuts such as hazelnuts or almonds for a delightful crunch.
Chef’s Notes
I’ve made this mousse so many times over the years, and I always find a way to play with it. One of my funniest kitchen moments was when I misread the recipe and added a full cup of cocoa powder instead of just a couple of tablespoons. The result? A very intense chocolate experience! My friends were generous with their compliments, but I could tell they were slightly intimidated. Lesson learned: always double-check your measurements!
Remember, this recipe is all about having fun. Don’t hesitate to experiment with flavors and ingredients. Maybe try adding a pinch of sea salt on top for a delightful contrast! Over time, it’s evolved from my grandmother’s classic dessert to something that reflects my personal culinary journey.
FAQs and Troubleshooting
1. Why didn’t my mousse set properly?
If your mousse isn’t setting, it could be due to the yogurt you used. Make sure you’re using full-fat Greek yogurt for the best results. Also, ensure that the chocolate mixture cooled sufficiently before folding it into the yogurt.
2. Can I make this mousse ahead of time?
Absolutely! In fact, this mousse is perfect for making ahead. Just store it in the fridge for up to 3 days before serving.
3. Can I freeze the mousse?
While you can freeze chocolate mousse, it will lose its fluffy texture upon thawing. If you’re desperate for leftovers, I recommend freezing individual portions in airtight containers.
4. How can I make it dairy-free?
You can substitute Greek yogurt with a dairy-free alternative like coconut yogurt, and use dairy-free chocolate for a creamy, non-dairy version of this mousse!
Nutritional Info
This Chocolate Greek Yogurt Mousse is a delightful, guilt-free treat! Each serving (assuming 6 servings from the recipe) contains approximately:
- Calories: 160
- Protein: 6g
- Fat: 9g
- Carbohydrates: 15g
- Fiber: 1g
- Sugar: 10g
And there you have it, my friends! Chocolate Greek Yogurt Mousse that’s not only easy to make but absolutely divine. Whether you’re celebrating a special occasion or just indulging after a long day, I hope this dessert brings you as much joy as it does to me. So grab those ingredients, roll up your sleeves, and let’s get cooking! Happy whisking! 🍫✨
Print
Chocolate Greek Yogurt Mousse
- Total Time: 30 minutes
- Yield: 6 servings 1x
- Diet: Vegetarian
Description
A light yet indulgent chocolate mousse made with Greek yogurt, perfect for satisfying your sweet tooth while being packed with protein.
Ingredients
- 2 cups Greek Yogurt
- 6 oz Semi-Sweet Chocolate
- 1/4 cup Honey or Maple Syrup
- 1 teaspoon Vanilla Extract
- 1 cup Whipped Cream (for serving)
Instructions
- Melt the chocolate in a double boiler or microwave until glossy.
- Cool the chocolate slightly before combining.
- Combine the Greek yogurt with honey or maple syrup and whisk until smooth.
- Fold in the cooled chocolate gently to maintain the airy texture.
- Chill the mousse in the refrigerator for at least 2 hours.
- Serve with whipped cream and optional toppings like chocolate shavings.
Notes
Feel free to experiment with flavors by adding mint extract or peanut butter. Always use full-fat Greek yogurt for best results.
- Prep Time: 15 minutes
- Cook Time: 15 minutes
- Category: Dessert
- Method: Chilling
- Cuisine: American
Nutrition
- Serving Size: 1 serving
- Calories: 160
- Sugar: 10g
- Sodium: 60mg
- Fat: 9g
- Saturated Fat: 5g
- Unsaturated Fat: 4g
- Trans Fat: 0g
- Carbohydrates: 15g
- Fiber: 1g
- Protein: 6g
- Cholesterol: 20mg
Keywords: chocolate mousse, Greek yogurt dessert, healthy dessert, quick dessert, protein-rich dessert


