

Budget-Friendly Chocolate Oreo Cake (Easy Weeknight Dessert)
Decadent Chocolate Oreo Cake: A Slice of Nostalgia and Happiness
Welcome to my kitchen! Today, I’m excited to share a beautiful creation that’s as rich in flavor as it is in fond memories: a Chocolate Oreo Cake that’s guaranteed to make your heart sing and your taste buds dance!
Imagine the fragrance of fresh-baked chocolate mingling with the nostalgic scent of crushed Oreos wafting through your home. This cake is more than just dessert; it’s an experience, a reason to gather friends and family and create lasting memories. Whether it’s a birthday celebration, a casual get-together, or a cozy night in, this cake invites everyone to indulge and relax.
Baking this Chocolate Oreo Cake takes me back to my childhood, spending lazy afternoons in my mom’s kitchen, where the walls were adorned with little doodles and flour marks. I remember my little brother and I fighting over who got to crush the Oreos as we constructed treat after treat. It was not just about the cake; it was the laughter and joy that surrounded it.
So, let’s roll up our sleeves, dust off that apron, and dive into this sweet adventure of baking a Chocolate Oreo Cake!
A Little Taste of Nostalgia
Whenever I make this Chocolate Oreo Cake, I can’t help but reminisce about a special summer when I was 10 years old. My family threw a backyard barbecue. I was in charge of dessert, and I decided to whip up an Oreo cake from a recipe I’d found in a magazine.
Things didn’t go quite as planned. I may have accidentally added twice the amount of sugar (who can resist that sweet allure?), which led to a delightfully sticky situation. But, that cake turned out to be the highlight of the day! Everyone devoured it, raving about how it was "the best cake ever!" Moments like that—filled with laughter, some chaos in the kitchen, and a delicious result—shaped my love for baking and my belief that the best recipes often come with a side of adventure.
Let’s recreate that charming chaos and make a cake that will bring as much joy to your loved ones as it did to mine!
Ingredients
For this Chocolate Oreo Cake, we’ll need the following ingredients. Don’t fret if you’re missing something; I’ve included a few tips for substitutions!
-
1 ¾ cups all-purpose flour
Essential for giving the cake structure. For a gluten-free option, use a 1:1 gluten-free flour blend. -
¾ cup unsweetened cocoa powder
Adds a deep chocolate flavor. Dutch-processed cocoa can give a smoother taste, while raw cocoa adds a more robust flavor. -
2 cups granulated sugar
This sweetener amplifies flavor and moisture. If you want a healthier option, consider coconut sugar or a sugar substitute like monk fruit. -
1 ½ teaspoons baking powder
Helps the cake rise. Make sure it’s fresh for the best results! -
1 ½ teaspoons baking soda
Also aids in leavening. Check the expiration date; you want it strong and effective! -
1 teaspoon salt
Balances sweetness and amplifies the overall flavor. Trust me, don’t skip this step! -
2 large eggs
Acts as a binding agent, providing moisture and richness. For vegan options, try flax eggs (1 tablespoon ground flaxseed mixed with 2.5 tablespoons water). -
1 cup whole milk
Gives a moist texture. You could substitute it with almond milk, oat milk, or even yogurt for a thicker batter. -
½ cup vegetable oil
Adds moisture and density. If you want a lighter feel, substitute with applesauce, but keep in mind—it might alter the flavor a touch. -
2 teaspoons vanilla extract
Enhances sweetness and flavor. Pure vanilla extract is best, but imitation works in a pinch! -
1 cup boiling water
This magical ingredient helps to bloom the cocoa and gives the cake a moist crumb. No substitutes here for best results! -
1 ½ cups crushed Oreos
The star of the show! Adds a delightful crunch and flavor to the cake. You can use any chocolate sandwich cookie if you don’t have Oreos. -
1 batch chocolate frosting
(You can make your own, but store-bought is okay too! Just ensure it’s creamy and delicious.)
Step-by-Step Instructions
-
Preheat Your Oven
Preheat your oven to 350°F (175°C). It’s essential to get the oven hot before putting the cake in! Trust me, your cake deserves that optimal baking environment. -
Prepare Your Pans
Grease and flour two 9-inch round cake pans. You can also line the bottoms with parchment paper for easy removal. A little tip: use cocoa powder instead of flour for dusting the pans if you want to avoid any white streaks. -
Combine Dry Ingredients
In a large mixing bowl, combine the flour, cocoa powder, sugar, baking powder, baking soda, and salt. Whisk them together to ensure they’re evenly mixed. When all your dry ingredients are well combined, you’ll end up with a light dusting of chocolate goodness ready to absorb the wet ingredients. -
Mix in the Wet Ingredients
Add the eggs, milk, vegetable oil, and vanilla extract to the dry ingredients. Mix on medium speed for about 2 minutes until everything is well combined. You want a lovely smooth batter with a rich chocolate hue! -
Boiling Water Time!
Now here’s where the magic happens. Carefully stir in the boiling water. (Yes, boiling!) The batter will become thinner — that’s normal and it’s what keeps the cake moist. -
Fold in the Oreos
Gently fold the crushed Oreos into the batter. This is the fun part! The chunks of Oreo add a delightful texture. Just remember not to overmix; a few swirls are enough. -
Bake the Cakes
Divide the batter equally between the prepared cake pans. Bake in the preheated oven for 30-35 minutes, or until a toothpick inserted into the center comes out clean (or with very few crumbs). -
Cool the Cakes
Once baked, remove the cakes from the oven and let them cool in the pans for about 10 minutes. Then, turn them out onto wire racks to cool completely. Do you smell that? That heavenly aroma is pure happiness!
Serving Suggestions
Once your Chocolate Oreo Cake has cooled down, it’s time to frost! Spread your chocolate frosting generously on top of one layer, add the other layer, and cover the top and sides with even more frosting. For a scrumptious finishing touch, decorate the top with extra crushed Oreos or even whole cookies for a rustic look. Slice it up, serve it on pretty plates, and you’ve got a showstopper that’s sure to impress!
Recipe Variations
Looking to mix things up? Here are a few creative twists to consider:
- Minty Oreos: Use mint-flavored Oreos for a refreshing twist.
- Peanut Butter: Add a layer of peanut butter frosting between the cake layers for a decadent treat!
- Dairy-Free Option: Substitute all dairy ingredients with plant-based alternatives such as almond milk or coconut cream.
- Chocolate Chip Add-in: Toss in some chocolate chips for an extra chocolatey experience.
- Layer It Up: Create a multi-layer cake by doubling the recipe and stacking three or four layers for a tower of chocolate bliss!
Chef’s Notes
This Chocolate Oreo Cake has a special place in my heart, and over the years, it has evolved beautifully. I once added a layer of raspberry jam because, well, chocolate and raspberry are a match made in heaven! Some families like to celebrate major milestones with this cake, and each time I see their smiles, I’m reminded of why I love baking. The joy of transforming simple ingredients into something spectacular keeps me inspired in the kitchen.
FAQs and Troubleshooting
1. My cake sunk in the middle! What happened?
This issue often arises from underbaking or opening the oven door too soon. Make sure your oven is properly preheated, and resist the urge to peek before the minimum baking time.
2. The frosting is too stiff; how can I fix it?
If your frosting is too thick, mix in a tablespoon of milk at a time until you reach the desired consistency. Adding a pinch of salt can also help balance sweetness!
3. Can I make this cake ahead of time?
Absolutely! This cake keeps well in an airtight container for 3-4 days at room temperature. You can also freeze it, wrapped tightly in plastic wrap, for up to three months. Just thaw and frost when you’re ready to serve!
4. What if I want a lighter cake?
For a lighter cake, try substituting half of the flour with cake flour, which gives a more delicate crumb. You could also reduce the amount of sugar and use applesauce as a partial fat replacement.
Nutritional Info
The nutritional values can fluctuate based on specific ingredients and portion sizes, but this cake per slice can typically include:
Calories: 400, Carbohydrates: 58g, Protein: 5g, Fat: 19g, Sugar: 38g.
There you have it! A delightful Chocolate Oreo Cake recipe that combines nostalgia with an irresistible flavor. Feel free to share your baking adventures and any twists you make to this recipe! Whether you’re whipping this up for a celebration or just because, I hope it adds a touch of sweetness to your day. Happy baking!
Print
Decadent Chocolate Oreo Cake
- Total Time: 50 minutes
- Yield: 8 servings 1x
- Diet: Vegetarian
Description
A rich chocolate cake infused with crushed Oreos, perfect for any celebration or cozy night in.
Ingredients
- 1 ¾ cups all-purpose flour
- ¾ cup unsweetened cocoa powder
- 2 cups granulated sugar
- 1 ½ teaspoons baking powder
- 1 ½ teaspoons baking soda
- 1 teaspoon salt
- 2 large eggs
- 1 cup whole milk
- ½ cup vegetable oil
- 2 teaspoons vanilla extract
- 1 cup boiling water
- 1 ½ cups crushed Oreos
- 1 batch chocolate frosting
Instructions
- Preheat your oven to 350°F (175°C).
- Prepare your pans by greasing and flouring two 9-inch round cake pans.
- Combine the dry ingredients in a large mixing bowl and whisk together.
- Mix in the wet ingredients using medium speed for about 2 minutes.
- Stir in the boiling water carefully.
- Fold in the crushed Oreos gently into the batter.
- Bake in the preheated oven for 30-35 minutes.
- Cool the cakes in pans for 10 minutes before transferring to wire racks.
Notes
For a lighter cake, consider using half cake flour and reducing sugar. This cake can be frozen for up to three months.
- Prep Time: 15 minutes
- Cook Time: 35 minutes
- Category: Dessert
- Method: Baking
- Cuisine: American
Nutrition
- Serving Size: 1 slice
- Calories: 400
- Sugar: 38g
- Sodium: 330mg
- Fat: 19g
- Saturated Fat: 3g
- Unsaturated Fat: 16g
- Trans Fat: 0g
- Carbohydrates: 58g
- Fiber: 2g
- Protein: 5g
- Cholesterol: 50mg
Keywords: chocolate cake, Oreo cake, dessert recipe, baking

Minute Cowboy Caviar: Quick Prep for Weeknight Meals
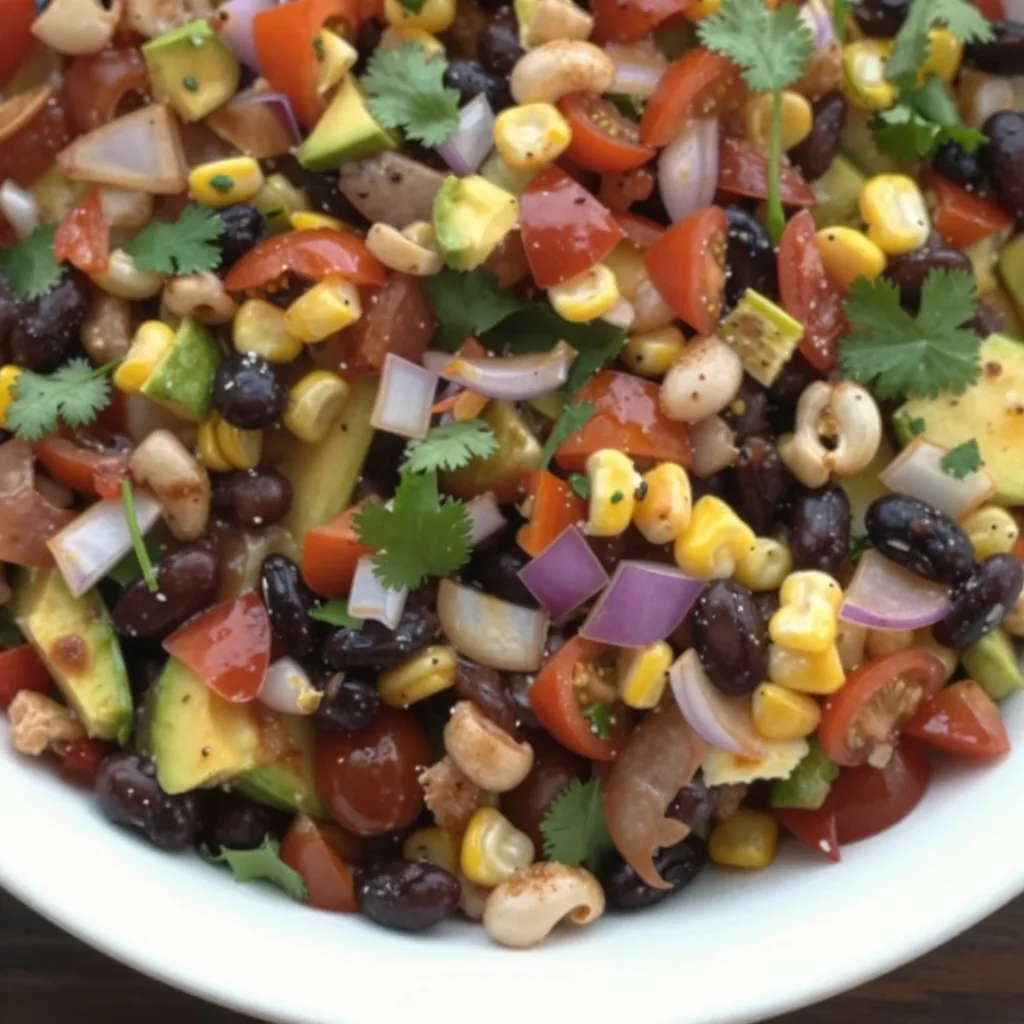
Easy Cowboy Caviar: A Flavorful Festivity in a Bowl
Welcome to my cozy kitchen! Today, I’m thrilled to share with you one of my all-time favorite recipes: Easy Cowboy Caviar. Now, you might be wondering what on Earth Cowboy Caviar is. Well, it’s a vibrant bean and vegetable salad that’s perfect for gatherings or simply as a delightful snack. It’s got loads of personality—much like the cowboys who inspired its name!
Imagine this: a sunny afternoon, the smell of spices wafting through the air, laughter bubbling over among friends or family, and a giant bowl of Cowboy Caviar sitting at the center of your table. This dish is not just about the flavors; it’s a celebration of togetherness and joy. And trust me, once you taste it, you’ll find yourself discovering reasons to make it again and again!
Personal Story: Memories from Grandma’s Kitchen
Let me take you back to my childhood for a moment. My grandma, the queen of gatherings, would whip up her version of Cowboy Caviar—though she called it “Texas Caviar”. I remember the vibrant colors filling her kitchen, making everything feel alive and welcoming. Every summer, she’d host a backyard barbecue, and it was a tradition to have her Texas Caviar as a starter.
I can still hear the sound of excited chatter and the clinking of plates as family and friends dug into the tantalizing bowl of goodies. We’d stand around the table, scooping the beans, corn, tomatoes, and all those crunchy veggies with our chips, and laughing together as stories flowed as freely as the drinks. This dish was a bridge that brought generations together, and even now, it evokes a warm nostalgia that is hard to replicate. Now, I want you to experience that same joy with this Easy Cowboy Caviar recipe!
Ingredients
Here’s what you’ll need to make this dish luscious:
-
Black Beans (1 can, drained and rinsed)
Packed with protein and fiber, black beans are hearty and nutritious. If you’re short on time, canned beans are perfect, but you could also use cooked dried beans (just soak and cook them beforehand!). -
Corn (1 cup, canned or frozen)
Sweet corn adds a pop of flavor and texture. If you’re using frozen corn, just thaw it beforehand. You could also try grilled corn for an extra smoky touch! -
Cherry Tomatoes (1 cup, halved)
Juicy and sweet, they add freshness. Substitute with diced Roma tomatoes if you want; just make sure to squeeze out excess moisture. -
Red Onion (1 small, finely chopped)
For a sharp, tangy bite. If red onion is too strong for your palate, try using green onions or sweet onions instead. -
Bell Pepper (1, diced)
A colorful addition! You can use any type you like—red, yellow, or orange—to bring a different flavor profile. -
Cilantro (1/4 cup, chopped)
This herb is a game-changer! If you’re not a fan of cilantro, consider parsley or chopped green onions for a milder taste. -
Jalapeño (1, minced)
Adds a little heat! If you prefer a milder version, remove the seeds, or use a milder pepper like a green bell pepper or even skip it entirely. -
Lime Juice (from 1 lime)
A splash of lime juice brightens everything! Fresh juice will give the best flavor, but you can use bottled juice in a pinch. -
Olive Oil (2 tablespoons)
A drizzle of olive oil brings everything together. You can experiment with flavored oils or use avocado oil for a different twist. -
Salt & Pepper (to taste)
Essential for seasoning—don’t skip this step! Regular table salt works fine, but sea salt adds a nice crunch.
Step-by-Step Instructions
Let’s dive into the making of this vibrant Cowboy Caviar!
-
Prep Your Ingredients: Start by gathering all the ingredients listed. Washing and chopping the vegetables will make the process smoother. Pro tip: if you soak the black beans overnight, they will cook faster, or you can simply use canned for convenience.
-
Combine the Beans and Corn: In a large mixing bowl, add the drained black beans and corn. Use a spatula or spoon to gently fold them together. I love to mix these first so they can absorb the flavors before the other ingredients are added.
-
Chop & Add the Veggies: Chop your cherry tomatoes, red onion, and bell pepper. Add them to the bowl with the beans and corn. Make sure to mix gently to avoid mushing the tomatoes. This part is so colorful—feel free to savor the sight before continuing.
-
Spice It Up: Now it’s time for jalapeño and cilantro! If you like heat, go for the full jalapeño. If not, make sure to dice it finely and remove the seeds. Toss it in along with cilantro and give everything a good stir.
-
Dress It Up: Drizzle the olive oil and lime juice over the mixture. Season with salt and pepper. This is where you can really elevate the flavor! Mix everything well, ensuring the oil coats all the ingredients nicely.
-
Taste and Adjust: Here comes a fun part! Taste your Cowboy Caviar and adjust the seasoning if necessary. Feel free to add more lime juice or salt to make it even more flavorful. Don’t be shy—it’s your kitchen!
-
Chill (Optional): For the best flavor, let it sit in the fridge for at least 30 minutes. I love to cover it and allow it to mingle in the fridge—this lets the flavors combine beautifully!
Serving Suggestions
When it comes time to serve, present your Cowboy Caviar in a vibrant bowl. This dish is perfect for dipping! Use tortilla chips, pita chips, or even veggie sticks. For a beautiful touch, pop in some fresh lime wedges on the side to squeeze over. If you’re feeling fancy, you could also use it as a topping for grilled chicken or fish—it’s that versatile!
Recipe Variations
Now, let’s spice things up even further! Here are a few variations to try:
- Tropical Twist: Add diced mango or pineapple for a sweet and fruity flavor. This gives a fun island vibe!
- Avocado Heaven: Incorporate diced avocado for creaminess. Just be cautious since avocados can brown quickly.
- Quinoa Boost: For added protein and texture, mix in cooked quinoa. It’ll make it heartier while being gluten-free!
- Herbaceous Fusion: Swap cilantro for fresh basil or mint for a completely different aromatic profile—perfect for summer!
- Spicy Kick: Add a dash of hot sauce or a sprinkle of chili powder if you like a good heat level!
Chef’s Notes
Cowboy Caviar is a dish that has evolved for me over the years. I remember when I first learned to make it, I followed a standard recipe to the letter. But over time, it transformed into my own creation! Now, I love mixing different beans or adding in whatever veggies are in my fridge. The best part? It’s nearly impossible to mess up! Just keep it fresh and vibrant, and you’ll have a winner every time. And who knows? Maybe it will become a cherished family recipe for you, too!
FAQs and Troubleshooting
Here are some common questions you may have when making your Easy Cowboy Caviar:
1. Can I make Cowboy Caviar ahead of time?
Absolutely! You can prepare it a day ahead of your event. Just remember to give it a good stir before serving, and adjust any seasonings as necessary since flavors may mellow overnight.
2. Is Cowboy Caviar healthy?
You bet! It’s loaded with fiber from the beans, vitamins from the veggies, and healthy fats if you add avocado. Perfect for a nutritious snack or side dish.
3. What can I do with leftovers?
Store leftovers in an airtight container in the refrigerator for up to 3 days. It’s great on tacos, salads, or mixed into scrambled eggs for an added twist!
4. What if I don’t like beans?
No problem! You can simply leave the beans out and make it more of a veggie salsa. Just be sure to balance the other flavors well.
Nutritional Info
While exact nutrition can vary based on specific brands and quantities, here’s a general breakdown per serving (assuming 6 servings):
- Calories: 150
- Protein: 6g
- Carbohydrates: 20g
- Dietary Fiber: 5g
- Sugars: 3g
- Fat: 7g
And there you have it! This Easy Cowboy Caviar is more than just a dish; it’s a canvas for creativity, flavor, and, most importantly, connection. I hope you enjoy making it as much as I do, and even more, I hope it brings smiles and laughter to your gatherings! Happy cooking, and let the festivities begin!
Print
Easy Cowboy Caviar
- Total Time: 30 minutes
- Yield: 6 servings 1x
- Diet: Vegetarian
Description
A vibrant bean and vegetable salad that’s perfect for gatherings or as a delightful snack.
Ingredients
- 1 can Black Beans, drained and rinsed
- 1 cup Corn, canned or frozen
- 1 cup Cherry Tomatoes, halved
- 1 small Red Onion, finely chopped
- 1 Bell Pepper, diced
- 1/4 cup Cilantro, chopped
- 1 Jalapeño, minced
- Juice from 1 Lime
- 2 tablespoons Olive Oil
- Salt & Pepper, to taste
Instructions
- Prep Your Ingredients: Start by gathering all the ingredients listed. Washing and chopping the vegetables will make the process smoother.
- Combine the Beans and Corn: In a large mixing bowl, add the drained black beans and corn. Use a spatula or spoon to gently fold them together.
- Chop & Add the Veggies: Chop your cherry tomatoes, red onion, and bell pepper. Add them to the bowl with the beans and corn. Mix gently to avoid mushing the tomatoes.
- Spice It Up: Add jalapeño and cilantro, tossing everything together.
- Dress It Up: Drizzle olive oil and lime juice over the mixture, and season with salt and pepper. Mix everything well.
- Taste and Adjust: Taste your Cowboy Caviar and adjust the seasoning if necessary.
- Chill (Optional): For the best flavor, let it sit in the fridge for at least 30 minutes before serving.
Notes
Perfect for serving with tortilla chips, pita chips, or veggie sticks. Can also be used as a topping for grilled chicken or fish.
- Prep Time: 15 minutes
- Cook Time: 0 minutes
- Category: Salad
- Method: Mixing
- Cuisine: American
Nutrition
- Serving Size: 1 serving
- Calories: 150
- Sugar: 3g
- Sodium: 150mg
- Fat: 7g
- Saturated Fat: 1g
- Unsaturated Fat: 6g
- Trans Fat: 0g
- Carbohydrates: 20g
- Fiber: 5g
- Protein: 6g
- Cholesterol: 0mg
Keywords: Cowboy Caviar, bean salad, vegetable salad, party food, healthy snack

Minute Cowboy Caviar Dip: Fresh, Crowd-Pleasing Recipe
Best Fresh Cowboy Caviar Dip Recipe: 5-Star Crowd Pleaser
Welcome to my kitchen! I’m so glad you’ve joined me here today because we are about to embark on a flavor-packed journey. If you’re looking for a dish that truly embodies the spirit of togetherness, let me introduce you to my all-time favorite — Cowboy Caviar Dip! This vibrant and colorful dip is not just a feast for the eyes; it’s an explosion of textures and tastes that will have your friends and family coming back for seconds (or even thirds!).
Cowboy Caviar is a delightful medley of beans, fresh vegetables, and zesty dressing, making it an ideal appetizer or a party starter. Whether you’re hosting game night, a summer barbecue, or a cozy gathering, this crowd-pleaser elevates any occasion. The best part? It’s super easy to whip up, requires minimal cooking skills, and can be made ahead of time for those busy days when you need something ready to go!
As we dive into this recipe, I’ll be breaking it down step by step, sharing little stories about what makes this dish special, and revealing some of my favorite kitchen hacks. So grab your apron, roll up those sleeves, and let’s get cooking!
A Personal Story
The first time I ever tasted Cowboy Caviar was during a family reunion in Texas. Our relatives gathered in a cozy backyard adorned with string lights, laughter, and the aroma of grilled meats wafting through the air. As kids, my cousins and I would run wild, playing tag while the adults set up a feast fit for a king!
One dish that caught my eye was a vibrant bowl of Cowboy Caviar mixed with all sorts of colorful veggies and beans. I remember dipping my tortilla chip into the mix for the first time. The crunch, the brightness, and the zing of the dressing sent me straight to flavor heaven! I knew right then and there that this would be a staple in my cooking repertoire.
Fast forward a few years, and Cowboy Caviar became a cherished part of my gatherings. I’ve modified the recipe over time, adding my own twist and ensuring every bite tells a story. Each time I make it, I’m taken back to that summer day, surrounded by love and the warmth of family.
Ingredients
Here’s what you’ll need to create this incredible Cowboy Caviar Dip:
-
Black Beans (1 can, drained and rinsed)
These hearty beans are packed with protein and add a satisfying element to the dip. If black beans aren’t your thing, feel free to swap in kidney or pinto beans! -
Corn (1 cup, fresh or canned)
Sweet corn brings in a wonderful crunchy texture. Fresh corn is best, but frozen or canned corn works too! Just be sure to drain any liquid before tossing it in. -
Diced Tomatoes (1 cup, fresh)
Use vine-ripened tomatoes for a burst of juicy flavor. If tomatoes aren’t in season, cherry tomatoes work beautifully as a substitution! -
Red Onion (1/2 cup, finely chopped)
For a zesty kick! If you’re worried about the intensity of raw onion, soak the chopped pieces in cold water for 10 minutes before adding them to your mix. This simple trick takes the edge off. -
Bell Peppers (1 cup, finely diced — mix of colors)
I love using a blend of red, yellow, and green bell peppers for color and flavor. You can also use jalapeño for a spicy kick. -
Avocado (1 ripe, diced)
Avocado adds creaminess to the dip and balances the tang of the dressing. Make sure it’s perfectly ripe for that melt-in-your-mouth texture. -
Fresh Cilantro (1/4 cup, chopped)
If you’re a cilantro lover like I am, this herb adds freshness and brightness! If not, you can easily swap it for parsley. -
Lime Juice (from 1 lime)
The acidity from the lime juice brightens up the flavors! You can substitute with lemon juice, but lime is quintessential for that zesty cowboy essence. -
Olive Oil (2 tablespoons)
This helps to bring all the ingredients together. Use extra virgin olive oil for the best flavor, or experiment with flavored oils! -
Salt and Pepper (to taste)
Essential for enhancing all those delicious flavors. Don’t be shy; seasoning is key for a dip that wows!
Step-by-Step Instructions
Alright, my fellow food lovers, let’s get to the fun part! Here’s how to create your Cowboy Caviar Dip, step by step:
-
Prep Your Ingredients
Start by gathering all your ingredients and giving them a good rinse if needed. This ensures that your veggies and beans are clean and ready to shine. -
Chop and Dice
Dice your tomatoes, bell peppers, and onions into small pieces. When chopping, aim for uniform sizes so they blend well together in the dip. Remember, the prettier your dip looks, the more appetizing it will be! -
Combine Beans and Corn
In a large mixing bowl, combine the drained black beans and corn. Give them a gentle stir to mix them together. -
Add Fresh Veggies
Toss in your chopped tomatoes, bell peppers, and onions. Don’t be afraid to mix colors! This is where the “caviar” of Cowboy Caviar really shines, making your dip super visually appealing. -
Avocado Time
Next, carefully add in your diced avocado. Use a spatula or a large spoon to fold the avocado gently into the mix. You want to keep those lovely chunks intact while ensuring that they are well incorporated. -
Cilantro and Lime
Pour in the freshly chopped cilantro and squeeze in the lime juice. The lime juice not only gives flavor but also helps prevent the avocado from browning. Give everything a gentle toss to coat. -
Drizzle the Oil
Drizzle the olive oil over your dip and season with salt and pepper to taste. A little tip: start with a pinch of salt and a sprinkle of pepper, then add more as needed. Mix well to ensure all the flavors meld together beautifully. -
Rest and Meld
For the best flavor, let your Cowboy Caviar sit in the fridge for at least 30 minutes before serving. Cover it with plastic wrap to keep it fresh! -
Serve with Joy
Once it’s time to serve, give it another light stir and transfer it to a beautiful serving bowl. Nothing says “dig in” quite like a vibrant centerpiece!
Serving Suggestions
When it comes to serving Cowboy Caviar, presentation is key! A rustic wooden board or a vibrant ceramic bowl will make your dish pop. I love serving it with sturdy tortilla chips, but you could also offer veggie sticks like carrots and celery for a healthier crunch. Try layering it on top of a fresh salad for an elevated meal, or scoop it onto tacos for an added zest. Let your creativity shine and remember—it’s all about sharing the love with friends and family!
Recipe Variations
Want to switch things up? Here are some fun Cowboy Caviar variations to try:
-
Spicy Cowboy Caviar: Add diced jalapeños for a spicy kick. Adjust the heat to your preference!
-
Southwestern Twist: Incorporate diced avocado, corn, and a sprinkle of smoked paprika for a smoky flavor boost.
-
Tropical Vibes: Swap in fresh mango for the avocado for a unique, fruity take on this classic dip.
-
Quinoa Boost: Add cooked quinoa for extra protein and a heartier dip that can double as a salad.
-
Cheesy Option: Sprinkle crumbled feta or shredded cheese over the top for a creamy addition!
Chef’s Notes
This Cowboy Caviar recipe is very close to my heart! Over the years, I have experimented with different ingredients, and it never disappoints. One funny memory that comes to mind is when I decided to add some extra spice—thinking I could handle the heat—only to realize I had accidentally grabbed a can of Habaneros instead of my usual chipotle peppers. Let’s just say, that batch sent my friends running for water!
The best part about this recipe is how forgiving it is. You can mix and match based on what you have on hand or what’s in season, making it ever-evolving. I always encourage my fellow cooks to put their own spin on things — the kitchen is yours to play in!
FAQs and Troubleshooting
-
What if my dip is too salty?
If you find your dip comes out too salty, add additional diced tomatoes or a splash of lime juice to balance the flavors. -
Can I make this ahead of time?
Absolutely! Cowboy Caviar actually gets better as it sits, allowing the flavors to meld beautifully. Just remember to add the avocado right before serving to keep it fresh. -
What’s the best way to store leftovers?
Store any leftovers in an airtight container in the fridge for up to 3 days. Just be aware that the avocado may brown slightly, but it’ll still taste delicious! -
What if I don’t like cilantro?
If cilantro isn’t your favorite herb, feel free to swap it for parsley or simply omit it altogether. The dip will still taste fantastic!
Nutritional Info
This Cowboy Caviar is a nutritious choice packed with fiber from the beans and freshness from the veggies. Each serving is low in calories, high in flavor, and loaded with the good stuff. Perfect for a satisfying snack or as part of a healthy meal!
I hope you’re as excited to dive into this Cowboy Caviar as I am to share it! Whether you’re creating it for a party or just because, know that every bite is filled with love and joy. Let’s keep those kitchens bustling with flavors and stories. Happy cooking from my kitchen to yours!
Print
Cowboy Caviar Dip
- Total Time: 45 minutes
- Yield: 4 servings 1x
- Diet: Vegetarian
Description
A vibrant and colorful dip featuring black beans, fresh vegetables, and zesty dressing, perfect for any gathering.
Ingredients
- 1 can Black Beans, drained and rinsed
- 1 cup Corn, fresh or canned
- 1 cup Diced Tomatoes, fresh
- 1/2 cup Red Onion, finely chopped
- 1 cup Bell Peppers, finely diced
- 1 ripe Avocado, diced
- 1/4 cup Fresh Cilantro, chopped
- Juice of 1 Lime
- 2 tablespoons Olive Oil
- Salt and Pepper, to taste
Instructions
- Prep your ingredients by gathering and rinsing them if needed.
- Chop and dice your tomatoes, bell peppers, and onions into small pieces.
- Combine the drained black beans and corn in a large mixing bowl.
- Add the chopped tomatoes, bell peppers, and onions to the bowl.
- Fold the diced avocado gently into the mix.
- Pour in the freshly chopped cilantro and squeeze in the lime juice.
- Drizzle the olive oil over the dip and season with salt and pepper.
- Rest the dip in the fridge for at least 30 minutes before serving.
- Serve in a beautiful bowl with tortilla chips or veggie sticks.
Notes
Can be made ahead of time for best flavor. Store leftovers in an airtight container for up to 3 days.
- Prep Time: 15 minutes
- Cook Time: 0 minutes
- Category: Appetizer
- Method: Mixing
- Cuisine: American
Nutrition
- Serving Size: 1 serving
- Calories: 200
- Sugar: 4g
- Sodium: 200mg
- Fat: 10g
- Saturated Fat: 1g
- Unsaturated Fat: 8g
- Trans Fat: 0g
- Carbohydrates: 28g
- Fiber: 7g
- Protein: 6g
- Cholesterol: 0mg
Keywords: Cowboy Caviar, Dip, Appetizer, Healthy Snack, Party Food
Cowboy Caviar
Cowboy Caviar: A Flavorful Dance of Ingredients
Welcome to my kitchen, my fellow flavor enthusiasts! Today, I’m thrilled to share a recipe that combines all the goodness of vibrant vegetables, zesty flavors, and a hint of that down-home charm we all love. Who knew that a simple dip could evoke such joy and satisfaction? Enter Cowboy Caviar, a dish that’s not only delicious but also perfect for every gathering, from cozy family dinners to festive summer barbecues.
Cowboy Caviar has become one of those staples in many homes, reminding us that food is an experience best shared. It’s simple, colorful, and packed with fresh ingredients that make your taste buds do a happy dance! Plus, making it is like throwing a mini fiesta right in your kitchen. Seriously, if you’ve never tried it before, get ready to fall head over heels.
In this post, I’ll guide you through how to whip up a fantastic batch of Cowboy Caviar, along with some fun personal anecdotes from my kitchen adventures. Let’s dive in and turn this simple gathering staple into something truly unforgettable.
A Nibble of Nostalgia: My Cowboy Caviar Journey
Let me take you back to a warm summer evening a few years ago. I was invited to my friend Lisa’s backyard barbecue, the kind where laughter wafts through the air like a sweet perfume and delicious smells tempt the senses. As guests mingled, the table was adorned with vibrant dishes, but it was Lisa’s Cowboy Caviar that stole the show.
I’ll never forget that first bite. The freshness of the black beans, the crunch of the bell peppers, and the zesty pop from the lime juice transported me to a sunny Texan ranch—complete with a fiddle playing in the background! It ignited something within me, a yearning to recreate that joyous moment in my own kitchen. And so, I did! This recipe is a tribute to the laughter, warmth, and connection that come from sharing good food. Cowboy Caviar not only fills your belly but also fills your heart, creating memories that linger long after the last scoop is gone.
Ingredients You’ll Need
Here’s what you’ll need to make this colorful Cowboy Caviar. Each ingredient adds its own unique flair and flavor, so let’s explore them together!
-
1 can black beans, drained and rinsed
- These protein-packed legumes are the backbone of your dish. If you’re looking for a different flavor profile, feel free to swap in pinto beans or chickpeas.
-
1 can corn, drained
- Sweet and crunchy, corn adds a delightful texture. You can use fresh corn if you’re in season—just grill or boil it briefly before adding.
-
1 red bell pepper, diced
- This adds a sweet crunch! You can substitute it with any color bell pepper or even diced zucchini for something a little different.
-
1 green bell pepper, diced
- A bit of extra crunch and slight bitterness to balance the sweet corn. Yellow or orange bell peppers work beautifully as substitutes, too!
-
1 medium red onion, finely chopped
- This brings a sharp bite that enhances the overall flavor. If red onion is too strong for you, a sweet onion or green onions can provide a milder alternative.
-
2 ripe avocados, diced
- Creamy and luxurious, they bind the ingredients beautifully. Be sure to use them right before serving to prevent browning, or substitute with diced mango for a fruity kick.
-
1/4 cup fresh cilantro, chopped
- A burst of freshness! If cilantro isn’t your thing, you can try parsley or just omit it.
-
2-3 medium tomatoes, diced
- Juicy and vibrant, they add that classic summery flavor. Feel free to swap with cherry tomatoes, as they tend to be sweeter!
-
Juice of 2 limes
- The zesty magic that brings all these flavors together. If you’re in a pinch, lemon juice can work too!
-
2 teaspoons chili powder
- For a robust spice kick. Go easy or crank it up! You can also use taco seasoning or smoked paprika for a smokier flavor.
-
1/2 teaspoon salt
- Always essential for enhancing those flavors! Adjust to taste based on your preferences or dietary needs.
-
1/4 teaspoon black pepper
- Adds a warm, earthly depth to your dish. You can also use cayenne for a bit more fire!
These ingredients create a medley of textures and flavors that sing summer in every bite. Now that we have our colorful cast ready, let’s dive into the exciting part!
Step-by-Step Instructions
-
Prep Your Ingredients
- First things first, grab all those fresh veggies and give them a good rinse. While you’re at it, dice your bell peppers, red onion, and tomatoes—and don’t forget to chop that cilantro! A sharp knife will be your best friend here, ensuring clean cuts and a beautiful presentation.
-
Combine the Beans and Corn in a Bowl
- In a large mixing bowl, toss together the rinsed black beans and drained corn. These two are the heartbeats of your Cowboy Caviar. If you want to experiment (and who wouldn’t?), this is a great time to season the beans with a pinch of salt and pepper for an amplified flavor.
-
Add the Chopped Veggies
- Next, toss in the diced bell peppers, onion, tomatoes, and cilantro. The colors should dance together beautifully! The key here is to mix gently, ensuring that you don’t mush the beans while distributing the vegetables evenly.
-
Incorporate the Avocados
- Time for that creamy goodness! Add the diced avocados last to avoid them getting mushy. Gently fold everything together so that each piece gets a little hug from the other flavors. Trust me, this step will make your Cowboy Caviar beautifully colorful.
-
Mix the Dressing
- In a small bowl, whisk together the lime juice, chili powder, salt, and black pepper. This dressing is where the zesty magic happens! Pour it over your salad and toss gently again, just until everything is coated and happy. Taste and adjust the seasonings as you like; don’t be afraid to add an extra squeeze of lime if you crave more tang.
-
Chill and Marinate
- If you have the time (and I recommend it!), cover the bowl with plastic wrap and pop it in the refrigerator for about 30-60 minutes. This allows the flavors to marry beautifully, creating that delicious harmony we’re all after.
-
Serve and Enjoy
- Once ready, scoop your Cowboy Caviar into a serving bowl. Pair it with crispy tortilla chips, crunchy vegetables, or even atop grilled chicken for a full meal. Dive in with friends, reminisce about those summer barbecues, and enjoy every bite!
Serving Suggestions
When it comes to serving Cowboy Caviar, think about vibrant colors and lovely textures. I recommend using a large, colorful bowl to let your creation shine. Use fresh, crunchy tortilla chips for scooping, or serve it with sliced cucumber, carrot sticks, or bell pepper strips for a healthier twist. If you want to level up your presentation even more, garnish with extra cilantro or lime wedges for those all-important pops of color!
Recipe Variations
- Spicy Kick: Add diced jalapeño or a dash of hot sauce for a fiery punch!
- Tropical Bliss: Swap in diced mango or pineapple for a fruity twist that takes your Cowboy Caviar to vacation-land.
- Southwestern Style: Toss in some grilled corn off the cob and add diced jalapeños for a smoky flavor.
- Quinoa Upgrade: Add cooked quinoa for added protein and fiber, making it more of a meal.
- Dairy Delight: Crumble queso fresco or feta on top just before serving for a creamy finish.
Chef’s Notes
Growing up, my family often held spontaneous gatherings, where the kitchen became a hub of laughter and shared stories. I remember once making Cowboy Caviar on a whim for a last-minute get-together. I had no idea how much everyone would love it! It has since evolved from a simple dip into a staple at every family and friend gathering. Each time I prepare it, I think about those moments. Cooking is an art, and our palettes can be a beautiful canvas for those cherished memories.
FAQs and Troubleshooting
1. What if my Cowboy Caviar is too acidic?
- If you find it too tart from the lime, balance the flavor by adding a bit of honey or agave syrup. Just a touch will do the trick!
2. Can I make it ahead of time?
- Absolutely! But I recommend adding the avocado right before serving to prevent browning. If you’ve made it without adding avocado, feel free to store it in the refrigerator for 2-3 days.
3. How can I keep my avocados from browning?
- If you’re preparing the Cowboy Caviar in advance, squeeze some extra lemon or lime juice over the avocado pieces, then cover tightly with plastic wrap to minimize air exposure.
4. I don’t have fresh cilantro. What can I use instead?
- If cilantro isn’t your thing, you can either omit it entirely or substitute with parsley, which adds a nice freshness without the distinct cilantro flavor.
Nutritional Info
While not extensively detailed, this Cowboy Caviar is a healthy choice, being rich in fiber, vitamins, and minerals. It’s low in calories while being high in protein and packed with nutrients from all the fresh vegetables, making it a delightful addition to any meal!
Now that you have your Cowboy Caviar recipe, I hope you take the time to gather your loved ones and enjoy this delightful creation together. Cooking is more than just following steps—it’s about bringing joy, sharing stories, and creating lasting memories. Happy cooking, and let that deliciousness roll!
Print
Cowboy Caviar
- Total Time: 15 minutes
- Yield: 4 servings 1x
- Diet: Vegan
Description
A colorful and flavorful dip combining vibrant vegetables, black beans, and zesty lime, perfect for any gathering.
Ingredients
- 1 can black beans, drained and rinsed
- 1 can corn, drained
- 1 red bell pepper, diced
- 1 green bell pepper, diced
- 1 medium red onion, finely chopped
- 2 ripe avocados, diced
- 1/4 cup fresh cilantro, chopped
- 2–3 medium tomatoes, diced
- Juice of 2 limes
- 2 teaspoons chili powder
- 1/2 teaspoon salt
- 1/4 teaspoon black pepper
Instructions
- Prep your ingredients: rinse and dice the veggies.
- Combine the beans and corn in a large bowl.
- Add the chopped veggies, mixing gently.
- Incorporate the avocados delicately.
- Mix the dressing in a small bowl and pour over the mixture.
- Chill in the refrigerator for 30-60 minutes.
- Serve with tortilla chips or fresh veggies.
Notes
Best enjoyed fresh, but can be made ahead. Add avocado before serving to prevent browning.
- Prep Time: 15 minutes
- Cook Time: 0 minutes
- Category: Appetizer
- Method: Mixing
- Cuisine: Mexican
Nutrition
- Serving Size: 1 serving
- Calories: 200
- Sugar: 4g
- Sodium: 300mg
- Fat: 9g
- Saturated Fat: 1g
- Unsaturated Fat: 8g
- Trans Fat: 0g
- Carbohydrates: 27g
- Fiber: 8g
- Protein: 6g
- Cholesterol: 0mg
Keywords: cowboy caviar, dip, healthy appetizer, summery dish

Minute Low-Calorie Breakfast Sandwiches for Busy Mornings
Low Calorie Breakfast Sandwiches: A Delicious Way to Start Your Day
Welcome to my kitchen, fellow food enthusiast! I’m Olivia Bennett, and today we’re diving into the wonderful world of breakfast sandwiches—those glorious creations that bring comfort and joy to our mornings. If you’re anything like me, the smell of freshly toasted bread and sizzling eggs in the morning is enough to make you want to dance around the kitchen!
Breakfast is often called the most important meal of the day, and rightly so. However, as we kick off our mornings with flair, it’s important to keep things light, fresh, and nourishing. That’s why I’m excited to share my recipe for Low Calorie Breakfast Sandwiches that will leave you feeling satisfied without the guilt! Grab your apron, and let’s get cooking!
A Personal Slice of Breakfast History
As a kid, my mornings were a special time, filled with the sounds of my mom bustling in the kitchen and the smell of something delicious cooking. I remember the way she would whip up breakfast sandwiches for my brother and me before school, using whatever leftovers she had in the fridge. Those sandwiches were an adventure, hiding surprises in every bite—a little cheese here, a slice of avocado there!
One of my favorite memories involves a particularly hilarious morning when my brother accidentally grabbed the jar of mayonnaise instead of the mustard. Let’s just say that his breakfast sandwich turned into a mysterious concoction only a child could appreciate. That day sparked a realization: breakfast sandwiches are not just food; they are love, laughter, and a little bit of chaos. So let’s embrace that spirit as we make our own, healthier, and lighter breakfast sandwiches that will fill our hearts (and stomachs) with happiness!
Ingredients
For our Low Calorie Breakfast Sandwiches, you’ll need the following ingredients:
-
Whole Wheat English Muffins (or any whole grain bread)
A light and wholesome choice that adds fiber to your breakfast. Feel free to swap for gluten-free options if needed! -
Eggs (or egg whites)
The star of our sandwich! Eggs are packed with protein, but for a lower calorie count, you can use egg whites or a cholesterol-free egg substitute. -
Avocado
Creamy and rich, avocados bring healthy fats to the table. If avocados are too expensive or out of season, you can use hummus as a spread instead. -
Spinach (or other greens)
Fresh greens add color and nutrition. You can also substitute with kale or sautéed mushrooms for a twist. -
Low-Fat Cheese (or nutritional yeast)
A sprinkle of cheese adds flavor! If you’re dairy-free, try nutritional yeast for a cheesy taste without the calories. -
Tomato Slices
Juicy and refreshing, tomatoes add a burst of flavor. You could also use roasted red peppers or sliced cucumbers for variety. -
Herbs and Spices (salt, pepper, and optional chili flakes)
Hero ingredients that elevate flavors! Customize your spice levels based on your palate.
Step-by-Step Instructions
Now that we have our ingredients prepped, let’s dive into the cooking process! Follow these steps to create your delicious Low Calorie Breakfast Sandwiches:
-
Preheat your grill or skillet.
A medium heat is perfect for toasting the muffins while cooking the eggs without burning them. Just a couple of minutes will do! -
Toast the English muffins.
Place the muffin halves cut-side down on the grill or skillet. Toast them until they’re golden and crispy (about 3-5 minutes). This creates a sturdy base for your sandwich! -
Cook the eggs.
Whisk your eggs or egg whites in a bowl, adding a pinch of salt and pepper. Pour them into the skillet. Stir gently with a spatula until they’re fluffy and just set. This typically takes around 3 minutes for scrambled eggs. Pro tip: For soft and creamy eggs, remove them from heat just before they look fully cooked; they’ll continue to cook off the heat! -
Assemble the sandwich.
On the bottom half of each toasted muffin, layer the cooked eggs, a slice of avocado, a handful of fresh spinach, a slice of tomato, and a sprinkle of low-fat cheese. Top it with the other muffin half. -
Heat the assembled sandwich (optional).
If you want your cheese melted, you can place the entire sandwich back on the skillet for an additional minute, covered with a lid. This helps create that gooey, dreamy layer of cheese. -
Serve and Enjoy!
Cut your sandwiches in half for a pretty presentation, and serve them immediately. Don’t forget to whisk up a little hot sauce or salsa if you’re feeling adventurous!
Serving Suggestions
These Low Calorie Breakfast Sandwiches are perfect for starting your day off right! Serve them alongside fresh fruit, yogurt, or even a small smoothie for a complete breakfast. They also make for a great snack or light lunch!
Recipe Variations
- Mediterranean Twist: Swap spinach for arugula, add feta cheese, and top with sun-dried tomatoes.
- Southwestern Kick: Mix in diced jalapeños, cilantro, and swap tomatoes for fresh avocado salsa!
- Sweet & Savory: Use a whole grain bagel, layer with almond butter, sliced bananas, and a sprinkle of cinnamon for a sweeter breakfast.
- Vegan Delight: Replace eggs with tofu scramble, and add nutritional yeast for a cheesy flavor without the dairy.
Chef’s Notes
These Low Calorie Breakfast Sandwiches are a staple in my kitchen, and I love how they can adapt to your pantry. Over the years, I’ve experimented with countless fillings, and I can honestly say it never gets boring! I remember the time I hosted a brunch for friends and turned these sandwiches into a DIY station. Everyone could customize their sandwiches, and we laughed and shared while we created delicious combinations—definitely a morning I’ll cherish forever!
FAQs and Troubleshooting
1. How can I ensure my eggs aren’t rubbery?
To avoid rubbery eggs, cook them on low heat and remove them from the pan just before they’re fully set. The residual heat will continue to cook them to perfection.
2. Can I make these sandwiches ahead of time?
Absolutely! You can prepare the ingredients in advance and store them separately. When you’re ready to eat, just assemble and toast!
3. What should I do if I don’t have an English muffin?
No problem! You can use any bread you have on hand—whole grain or sourdough works beautifully. Even a tortilla can become a delicious wrap!
4. How many calories are in one sandwich?
Depending on the specific ingredients you choose, one sandwich can range from 250 to 350 calories, making them a balanced and satisfying breakfast option.
Nutritional Info (Optional)
Although this can vary based on specific ingredients, each sandwich is typically around 300 calories, with 20 grams of protein and high fiber content. These numbers depend on your choices, so feel free to swap ingredients to fit your dietary needs!
Now that you’ve discovered the joy and ease of making Low Calorie Breakfast Sandwiches, you can start embracing those cozy cooking moments in your kitchen. Remember, cooking is all about creativity, and there’s no right or wrong way to enjoy breakfast! Feel free to experiment, share your variations, and of course—make lots of delicious memories along the way. Happy cooking!
Print
Low Calorie Breakfast Sandwiches
- Total Time: 20 minutes
- Yield: 2 servings
- Diet: Vegetarian
Description
Low calorie breakfast sandwiches that are satisfying and nourish your mornings without the guilt.
Ingredients
- Whole Wheat English Muffins (or any whole grain bread)
- Eggs (or egg whites)
- Avocado
- Spinach (or other greens)
- Low-Fat Cheese (or nutritional yeast)
- Tomato Slices
- Herbs and Spices (salt, pepper, and optional chili flakes)
Instructions
- Preheat your grill or skillet.
- Toast the English muffins until golden and crispy (about 3-5 minutes).
- Cook the eggs or egg whites until fluffy, about 3 minutes.
- Assemble the sandwich with eggs, avocado, spinach, tomato, and cheese on the toasted muffin.
- Heat the assembled sandwich on the skillet for an additional minute if you want melted cheese.
- Serve and enjoy immediately!
Notes
These sandwiches can be made ahead of time and customized to fit any dietary preferences. Try swapping the ingredients for variations!
- Prep Time: 10 minutes
- Cook Time: 10 minutes
- Category: Breakfast
- Method: Grilling
- Cuisine: American
Nutrition
- Serving Size: 1 sandwich
- Calories: 300
- Sugar: 2g
- Sodium: 300mg
- Fat: 10g
- Saturated Fat: 2g
- Unsaturated Fat: 8g
- Trans Fat: 0g
- Carbohydrates: 36g
- Fiber: 6g
- Protein: 20g
- Cholesterol: 200mg
Keywords: breakfast, low calorie, sandwich, healthy, quick meal, vegetarian

Summer Nectarine Crumb Tart: Quick, Fresh, Crisp & Easy
The Delight of Baking: Nectarine Crumb Tart
Welcome to my cozy kitchen, where the air is positively bursting with the aromas of freshly baked goods! I’m Olivia Bennett, and today, I’m excited to share with you a delightful recipe that has become a cherished staple in my home: the Nectarine Crumb Tart. If you love the sweet taste of summer and the crunch of a perfect crumbly topping, you’re in for a treat. This dessert isn’t just about satisfying your sweet tooth—it’s a celebration of seasons and gatherings, reminiscent of sun-soaked picnics and laughter shared over slices of something delicious.
There’s something inherently comforting about tarts, don’t you think? They evoke memories of afternoon teas, sunny outdoor gatherings, and family traditions passed down through generations. And this Nectarine Crumb Tart? It’s the epitome of those wonderful moments. Imagine biting into a buttery, crumbly crust, followed by juicy, sweet nectarines, all topped with a crisp, cinnamon-spiced crumb. It’s like summer on a plate, and it’s sure to make your kitchen feel like home.
Now, let me take you back to my childhood for just a moment. My grandmother used to make peach tarts every summer when the fruit was at its peak. I remember standing on a stool, peering over the countertop as she rolled out the dough, dusting it lightly with flour. The best part was always the moment she handed me a slice to savor. The smile on her face as she watched me enjoy her creation filled my heart with warmth and love. Fast forward a few years, and I’ve adapted that family recipe into my very own Nectarine Crumb Tart, honoring those sweet memories while creating new ones in my kitchen.
So, grab your apron, and let’s work together to create something magic!
Ingredients
Here’s what you’ll need to whip up this Nectarine Crumb Tart:
For the Tart Crust:
-
1 ½ cups all-purpose flour
A standard in any baking recipe, the flour provides the foundation for our crust. You can substitute it with almond flour for a gluten-free version—it’ll have a delightful nutty flavor! -
½ cup unsalted butter, softened
The secret to a flaky crust! You might use coconut oil as a dairy-free alternative, but I recommend keeping it simple with butter if you can. -
½ cup granulated sugar
Sweetens the crust just enough. If you prefer a more complex flavor, try using brown sugar! -
1 egg yolk
This adds richness to our crust. You can omit it for a vegan option, but keep in mind that the texture might change a bit.
For the Filling:
-
4 ripe nectarines, sliced
The star of the show! Substitute with peaches or plums if nectarines aren’t available. -
¼ cup brown sugar
For a deeper, caramel-like sweetness. Feel free to use maple syrup for a unique twist! -
1 tbsp lemon juice
Balances the sweetness and enhances the fruit’s flavor. Fresh is always best!
For the Crumb Topping:
-
¾ cup all-purpose flour
Just like our pie crust, this helps create that irresistible crumb topping. -
½ cup oats
Adds texture and heartiness. Swap these out for crushed nuts if you’re looking for a gluten-free option. -
½ cup brown sugar
Use this to bring out a lovely caramel flavor in the topping. -
1 tsp cinnamon
A warm spice that complements the nectarines beautifully. You can experiment with nutmeg for a slightly different flavor profile! -
½ cup unsalted butter, melted
Helps bind the crumbs together. If you’re in a pinch, melted coconut oil works as a substitute!
Step-by-Step Instructions
Preheat and Prep
-
Preheat your oven to 350°F (175°C).
Let’s get that oven nice and warm! This will ensure your tart bakes evenly. -
Prepare the tart pan.
Grease a 9-inch tart pan with non-stick spray or butter. This is a crucial step to ensure easy removal after baking, so don’t skip it!
Make the Tart Crust
-
Combine the dry ingredients.
In a mixing bowl, combine 1 ½ cups all-purpose flour and ½ cup granulated sugar. Whisk them together so they’re evenly mixed. -
Add the butter.
Cut in ½ cup of softened unsalted butter using a pastry cutter or your fingers until the mixture resembles coarse crumbs. It’s okay to get a little messy here—embrace it! -
Incorporate the egg yolk.
Add the egg yolk and mix until the dough comes together. It should be slightly crumbly but hold its shape when pressed. -
Press the dough into the pan.
Flatten the dough evenly across the bottom and up the sides of the tart pan. Make sure there are no cracks for a perfect bake! -
Chill the crust.
Pop your tart pan in the fridge for about 30 minutes. This helps prevent it from shrinking while baking.
Prepare the Filling
-
Slice the nectarines.
While the crust chills, slice up those delicious nectarines. Aim for even slices for a beautifully styled tart! -
Mix the filling.
In a bowl, toss the nectarines with ¼ cup brown sugar and 1 tablespoon lemon juice. This will not only sweeten the nectarines but also add a lovely brightness!
Make the Crumb Topping
-
Combine dry ingredients for the topping.
In another bowl, combine ¾ cup flour, ½ cup oats, ½ cup brown sugar, and 1 teaspoon cinnamon. Stir until mixed well. -
Add melted butter.
Pour in ½ cup melted unsalted butter and mix until crumbly—you want it to hold together slightly but remain crumb-like.
Assemble and Bake
-
Spread the filling.
Take your chilled crust out of the fridge and add the sweetened nectarines in an even layer over the crust. -
Top with crumbs.
Evenly sprinkle the crumb topping over the nectarines. It’s okay if some of the filling peeks through; it adds character! -
Bake the tart.
Place the tart in the preheated oven and bake for 40-45 minutes, or until the top is golden and the nectarines are bubbling. The kitchen will smell incredible, trust me! -
Cool and serve.
Once baked, allow the tart to cool for at least 15 minutes before slicing. This will help the filling to set up a tad.
Serving Suggestions
When it comes to serving, I love presenting my Nectarine Crumb Tart warm from the oven with a scoop of vanilla ice cream or a dollop of freshly whipped cream. A light dusting of powdered sugar adds a touch of elegance, and don’t forget a sprig of mint for a pop of color! You can even pair it with a refreshing herbal tea for a delightful afternoon treat.
Recipe Variations
-
Mixed Fruit Tart: This recipe isn’t just limited to nectarines! Use a medley of summer fruits like peaches, plums, and cherries for a colorful twist.
-
Crispy Walnut Crust: Replace the all-purpose flour for the crust with ground walnuts for a gluten-free and nutty base.
-
Spiced Crumb: Add nutmeg or cardamom to the crumb topping for an extra aromatic flavor.
-
Coconut Twist: Swap half the butter in the crust for coconut oil and add shredded coconut to the crumb mixture for a tropical vibe.
-
Savory Option: For a savory turn on this dish, consider using tomatoes and fresh herbs in place of nectarines—perfect for a brunch or light lunch!
Chef’s Notes
This Nectarine Crumb Tart has evolved over the years in my kitchen. Originally inspired by my grandmother’s peach tarts, I started experimenting with different fruits and toppings. One hilarious memory comes to mind when I accidentally used salt instead of sugar in a batch once. Let’s just say, the surprise face of my family was priceless! Their laughter was worth every salty bite! Now, I always double-check my ingredients before diving in. The beauty of this dish lies in its versatility—don’t be afraid to mix things up and make it your own!
FAQs and Troubleshooting
-
Why is my crust soggy?
Make sure you pre-bake the crust according to the recipe—this helps to set it before adding the filling. If your crust is still soggy, it may have needed longer in the oven or lacked chilling time. -
How do I prevent the nectarines from browning?
Tossing the nectarines in lemon juice as specified in the recipe will help prevent browning and enhance flavor! -
My crumb topping isn’t holding together like I wanted. Any tips?
Make sure your butter is melted and well incorporated with the dry ingredients. You want it crumbly yet somewhat compact. If it’s too loose, adding a bit more melted butter can help bind it. -
Can I make this tart ahead of time?
Absolutely! You can make the tart a day in advance; simply reheat it slightly before serving to enjoy that fresh-baked taste!
Nutritional Info
While I typically focus on the joy of cooking rather than strict nutritional guidelines, here’s a little breakdown per serving to help you enjoy this delightful dish guilt-free (approximate values):
- Calories: 260
- Fat: 12g
- Carbohydrates: 36g
- Fiber: 2g
- Sugar: 12g
- Protein: 3g
There you have it: my beloved Nectarine Crumb Tart! Remember, it’s not just about the food; it’s about the memories we create around it. I hope this tart finds its way into your kitchen and your heart, just like it did mine. Happy baking!
Print
Nectarine Crumb Tart
- Total Time: 75 minutes
- Yield: 8 servings 1x
- Diet: Vegetarian
Description
A delightful Nectarine Crumb Tart with a buttery crust and cinnamon-spiced topping, perfect for summery gatherings.
Ingredients
- 1 ½ cups all-purpose flour
- ½ cup unsalted butter, softened
- ½ cup granulated sugar
- 1 egg yolk
- 4 ripe nectarines, sliced
- ¼ cup brown sugar
- 1 tbsp lemon juice
- ¾ cup all-purpose flour (for crumb topping)
- ½ cup oats
- ½ cup brown sugar (for crumb topping)
- 1 tsp cinnamon
- ½ cup unsalted butter, melted (for crumb topping)
Instructions
- Preheat your oven to 350°F (175°C).
- Prepare a 9-inch tart pan by greasing it with non-stick spray or butter.
- Combine 1 ½ cups all-purpose flour and ½ cup granulated sugar in a mixing bowl.
- Add ½ cup softened unsalted butter and cut until the mixture resembles coarse crumbs.
- Incorporate the egg yolk and mix until the dough comes together.
- Press the dough into the bottom and up the sides of the tart pan.
- Chill the crust in the fridge for about 30 minutes.
- Slice the nectarines while the crust chills.
- Mix nectarines with ¼ cup brown sugar and 1 tablespoon lemon juice in a bowl.
- Combine ¾ cup flour, ½ cup oats, ½ cup brown sugar, and 1 teaspoon cinnamon for the crumb topping.
- Add ½ cup melted unsalted butter to the dry ingredients and mix until crumbly.
- Spread the nectarines evenly over the chilled crust.
- Top with the crumb mixture, allowing some filling to peek through.
- Bake the tart for 40-45 minutes until golden and the nectarines are bubbling.
- Cool for at least 15 minutes before slicing.
Notes
Serve warm with vanilla ice cream or whipped cream for a delightful treat.
- Prep Time: 30 minutes
- Cook Time: 45 minutes
- Category: Dessert
- Method: Baking
- Cuisine: American
Nutrition
- Serving Size: 1 slice
- Calories: 260
- Sugar: 12g
- Sodium: 100mg
- Fat: 12g
- Saturated Fat: 7g
- Unsaturated Fat: 5g
- Trans Fat: 0g
- Carbohydrates: 36g
- Fiber: 2g
- Protein: 3g
- Cholesterol: 30mg
Keywords: nectarine tart, crumb tart, summer dessert, baked tart, fruit dessert

Seasonal Nectarine Galette: Easy Rustic Summer Dessert
Nectarine Galette: A Slice of Summer Bliss
Welcome to my kitchen, food lovers! Today, we’re diving into the world of rustic desserts with a delightful Nectarine Galette. If you’ve never tasted the sweet, sunny richness of ripe nectarines wrapped in a buttery, flaky crust, you’re in for a treat. This dessert is all about celebrating the beautiful bounty of summer, and it’s as simple to make as it is to swoon over.
You might be asking yourself, “What’s a galette?” Well, it’s a fancy French term for a freeform pie that doesn’t require a pie dish or complex crimping. It embodies comfort and ease, much like that worn-in t-shirt you just can’t give up. Perfectly imperfect, it invites creativity, and trust me, no one will mind if your edges are a little rustic—it just adds to the charm!
I started making galettes when I stumbled upon a quaint little bakery in my neighborhood that served an array of these delicious treats. The warm, buttery aroma wafting through the air pulled me in, and let me tell you, after one bite, I was hooked! I’ve been crafting my own versions at home ever since, experimenting with different fruits and flavors. Nectarines became my go-to because of their vibrant juiciness and sweet-tart balance, especially during the summer months when they’re at their prime.
As we embark on this culinary adventure together, not only will I guide you through the steps to make a Nectarine Galette, but I’ll share stories, tips, and secrets that make this dish so special. So, let’s roll up our sleeves and get started on creating something magical that will have your family and friends raving!
A Bit of Nostalgia
One of my fondest memories associated with galettes goes back to a summer visit to my grandmother’s house. Her tiny kitchen was always filled with warmth from the oven and laughter from my family gathered around the table. Every evening, we’d pick fruits from her garden—peaches, plums, and, yes, nectarines! One particular evening, she whipped up a rustic galette, using whatever fruit we had gathered that day. Watching her work brought such a sense of joy; she moved with grace, flicking flour, rolling dough, and spilling sweet nectarines onto the countertop as if creating art.
That galette was a true masterpiece; the sweet filling spilled out ever so slightly, and the golden-brown crust glistened with a hint of sugar. We gathered around the table, forks in hand, ready to dive into that warm, comforting slice of nostalgia. It was more than just dessert; it was a reminder of love woven through the simple act of cooking. Today, I hope to recreate that magic right in your kitchen. Let’s make memories together!
Ingredients
Here’s what you’ll need to create your very own Nectarine Galette:
-
Nectarines (4-5 ripe)
- Choose ripe nectarines that yield slightly when pressed. If you don’t have nectarines, peaches work beautifully as well!
-
Flour (1 ¼ cups)
- All-purpose flour gives the crust its structure. For a gluten-free option, use a 1:1 gluten-free flour blend.
-
Unsalted Butter (½ cup, cold and cubed)
- This is the secret to a flaky crust! Cold butter helps to create that melt-in-your-mouth texture. If you’re dairy-free, try using chilled coconut oil or vegan butter.
-
Sugar (2 tablespoons)
- Sugar not only sweetens the filling but also gives a lovely caramelization on the crust. For a healthier option, use coconut sugar or honey (in the filling only).
-
Salt (¼ teaspoon)
- This enhances the flavors in the crust, balancing the sweetness.
-
Ice Water (3-4 tablespoons)
- Using cold water is key in keeping the butter cold while you work the dough. If you need a bit more moisture, add a splash of lemon juice for flavor.
-
Egg Wash (1 egg mixed with 1 tablespoon water)
- This gives the galette its golden, shiny crust. For a vegan alternative, brush with almond milk.
Step-by-Step Instructions
Let’s roll up our sleeves and get to cooking! Follow these steps to make your dreamy Nectarine Galette.
-
Make the Dough:
- In a mixing bowl, whisk together the flour, sugar, and salt. Add the cold cubed butter and, using your fingers or a pastry cutter, work the butter into the flour until you have a mixture that resembles coarse crumbs. Remember, some chunks of butter are okay!
-
Add Ice Water:
- Slowly add the ice water, one tablespoon at a time, stirring until the dough starts to come together. You want it to hold together without being sticky.
-
Chill the Dough:
- Form the dough into a disc, wrap it in plastic wrap, and refrigerate for at least 30 minutes. This resting time is crucial for developing flavor and making the dough easier to roll out.
-
Prepare the Filling:
- While the dough chills, wash, and slice the nectarines into thin wedges. You can remove the pit easily by cutting around it! Toss the slices with sugar and set aside to let the juices mix.
-
Preheat the Oven:
- Preheat your oven to 400°F (200°C). This will ensure your galette bakes evenly and gets that perfect golden crust.
-
Roll Out the Dough:
- On a floured surface, roll the dough out into a circle about 12 inches wide. Don’t stress if it’s not a perfect circle; remember rustic is the name of the game here! Transfer it to a parchment-lined baking sheet.
-
Assemble the Galette:
- Spoon the nectarines into the center of the dough, leaving about a 2-inch border. Fold the edges of the dough over the nectarines—don’t be afraid of the folds; they’re part of the charm!
-
Apply the Egg Wash:
- Brush the dough with the egg wash to give it that lovely shine. Sprinkle a little sugar on top of the crust for an extra crunchy texture.
-
Bake the Galette:
- Place the galette in your preheated oven and bake for about 30-35 minutes, or until the crust is golden brown and the nectarines are bubbling slightly.
-
Cool and Serve:
- Let your galette cool for about 10-15 minutes on a wire rack. This helps the juices set up a bit so it’s easier to slice.
Serving Suggestions
Your fantastic Nectarine Galette is now ready to serve! For a show-stopping presentation, slice it into wedges and place it on a lovely serving platter. Drizzle a bit of homemade vanilla cream or scoop of vanilla ice cream on top while it’s still warm. You can also dollop some whipped cream on each slice for that extra touch of luxury. Don’t forget a sprig of mint for color!
Recipe Variations
Get creative with these variations to make this galette your own:
- Berry Blend: Add some blueberries or raspberries to the filling for a pop of color and flavor.
- Herb Infusion: Swap out some of the sugar for fresh thyme or rosemary mixed into the filling for a surprising twist.
- Nutty Crunch: Sprinkle some chopped almonds or walnuts on the crust before adding the nectarines for a delightful crunch.
- Spiced Sensation: Add a pinch of cinnamon or nutmeg to the nectarines for a warm, cozy flavor.
Chef’s Notes
Every recipe I create has a little bit of history! Over the years, I’ve learned to adapt my galette based on what’s in season or what I have on hand. I once threw in some leftover apricots and cinnamon; it became an instant favorite among my friends! The beauty of this recipe is in its flexibility—let your imagination run free!
I still remember the first time I made this galette for a gathering. I was so nervous; what if it didn’t turn out? But, much to my delight, everyone loved it! It became our go-to dessert for every summer party thereafter, uniting us over shared moments and laughter.
FAQs and Troubleshooting
1. Why is my galette crust tough?
A tough crust usually means too much flour or overworking the dough. Remember to mix just until combined and use chilled ingredients.
2. My filling looks too liquidy! What should I do?
If your nectarines are very juicy, sprinkle some cornstarch over the fruit before you fold the dough. This helps absorb excess moisture.
3. How can I make it ahead of time?
You can prepare the dough and filling a day in advance. Just store the dough wrapped in the fridge and the fruit in an airtight container.
4. Is it okay to eat leftover galette?
Absolutely! Cover any leftovers tightly and store them in the fridge for up to 3 days. Reheat slices in the oven for a few minutes to restore that lovely crust!
Nutritional Info
(Per serving, approximately)
- Calories: 250
- Total Fat: 12g
- Saturated Fat: 7g
- Cholesterol: 35mg
- Carbohydrates: 32g
- Fiber: 2g
- Sugars: 10g
- Protein: 3g
I hope this Nectarine Galette fills your home with warmth and joy! I’d love to hear how your galette turns out and the stories that emerge from your kitchen. Remember, cooking is all about sharing love and creating memorable moments. Happy Baking!
Print
Nectarine Galette
- Total Time: 50 minutes
- Yield: 8 servings 1x
- Diet: Vegetarian
Description
A delightful, rustic dessert featuring ripe nectarines wrapped in a buttery, flaky crust, perfect for summer.
Ingredients
- 4–5 ripe nectarines
- 1 ¼ cups all-purpose flour
- ½ cup unsalted butter, cold and cubed
- 2 tablespoons sugar
- ¼ teaspoon salt
- 3–4 tablespoons ice water
- 1 egg mixed with 1 tablespoon water (for egg wash)
Instructions
- Make the dough: In a mixing bowl, whisk together the flour, sugar, and salt. Add the cold cubed butter and, using your fingers or a pastry cutter, work the butter into the flour until you have a mixture that resembles coarse crumbs.
- Add ice water: Slowly add the ice water, one tablespoon at a time, stirring until the dough starts to come together.
- Chill the dough: Form the dough into a disc, wrap it in plastic wrap, and refrigerate for at least 30 minutes.
- Prepare the filling: Wash and slice the nectarines into thin wedges. Toss the slices with sugar and set aside.
- Preheat the oven: Preheat your oven to 400°F (200°C).
- Roll out the dough: On a floured surface, roll the dough out into a circle about 12 inches wide and transfer it to a parchment-lined baking sheet.
- Assemble the galette: Spoon the nectarines into the center of the dough, leaving about a 2-inch border. Fold the edges of the dough over the nectarines.
- Apply the egg wash: Brush the dough with the egg wash and sprinkle a little sugar on top.
- Bake the galette: Bake for about 30-35 minutes, or until the crust is golden brown.
- Cool and serve: Let it cool for about 10-15 minutes on a wire rack.
Notes
Serve with vanilla ice cream or whipped cream for an extra touch of luxury.
- Prep Time: 15 minutes
- Cook Time: 35 minutes
- Category: Dessert
- Method: Baking
- Cuisine: French
Nutrition
- Serving Size: 1 slice
- Calories: 250
- Sugar: 10g
- Sodium: 400mg
- Fat: 12g
- Saturated Fat: 7g
- Unsaturated Fat: 5g
- Trans Fat: 0g
- Carbohydrates: 32g
- Fiber: 2g
- Protein: 3g
- Cholesterol: 35mg
Keywords: nectarine, galette, dessert, summer, rustic, pie, baking

Easy Summer Dessert: Baked Nectarines with Cinnamon Honey Sauce
Baked Nectarines with Cinnamon Honey Sauce
Welcome to the warm, inviting world of my kitchen! I’m Olivia Bennett, your friendly neighborhood home cook and culinary cheerleader. Today, we’re diving into a dish that truly warms not just your palate but your heart: Baked Nectarines with Cinnamon Honey Sauce. If you’re like me and have an affinity for sweet, juicy fruits that feel like a hug in dessert form, then buckle up because we’re about to create an irresistible treat that’s as delightful to make as it is to share!
There’s something incredibly magical about fruits baked to perfection, their natural sweetness magnified and enveloped in the warm embrace of cinnamon and honey. This dessert feels like nostalgia wrapped in a flavor explosion—perfect for cozy nights in or impressing your friends at your next gathering. Trust me; your house will smell like a joy-filled bakery!
So, grab your apron and get ready to transform simple nectarines into a stunning dessert. No fancy equipment or mad chef skills required—just your love for good food and a few easy steps! Let’s do this together, and who knows? You might even discover a new favorite recipe!
A Slice of My Heart
Growing up, my family kitchen was always a bustling hub of activity, filled with laughter, chatter, and the delightful aroma of baked goods. One of my fondest memories revolves around the summers spent in my grandmother’s kitchen, where the bounty of her garden filled baskets beside the windowsill. Every evening, we’d transform her freshly picked fruits into cherished desserts, and nectarines were always the star of the show.
I remember one specific summer afternoon when we decided to bake nectarines together. My grandma imparted her time-tested wisdom, gently explaining that the key was letting the fruits speak for themselves while adding just the right amount of sweet warmth. We served our baked nectarines with homemade whipped cream, and I still recall how the golden, caramelized edges made my heart skip a beat. That summer, we weren’t just cooking; we were creating memories, and those sweet nectarines have held a special place in my heart ever since.
Ingredients
Here’s what you’ll need to create this simply delightful dish:
- Nectarines (4-6 ripe ones): Look for fruit that’s slightly soft to the touch but not mushy. If you can’t find nectarines, peaches work beautifully too!
- Honey (1/4 cup): This adds a natural sweetness. Feel free to swap it with maple syrup or agave for a vegan option.
- Ground cinnamon (1 teaspoon): A warm spice that complements the freshness of nectarines. If you’re feeling adventurous, try adding cardamom for a delightful twist!
- Butter (2 tablespoons): Adds richness to the sauce. You can substitute it with coconut oil or dairy-free margarine for a dairy-free version.
- Lemon juice (1 tablespoon): This brightens the flavors. Alternatively, you could use orange juice for a more citrusy vibe.
- Chopped walnuts or pecans (optional, for garnish): For added texture and flavor. Feel free to sprinkle on some toasted coconut for a tropical twist!
Step-by-Step Instructions
-
Preheat Your Oven:
Start by preheating your oven to 350°F (175°C). This ensures an even bake, allowing the nectarines to caramelize beautifully. -
Prepare the Nectarines:
Wash your nectarines thoroughly. Slice them in half and remove the pits—this is a great time to channel your inner chef! Don’t stress if they split a little; we’re all about that rustic feel here! -
Create the Cinnamon Honey Sauce:
In a small saucepan over low heat, combine the honey, butter, and ground cinnamon. Stir until the butter melts and the mixture is well combined. This delicious concoction is where the magic lies! You’ll notice an intoxicating aroma—don’t simply linger; it’s time to drizzle! -
Bake the Nectarines:
Arrange the halved nectarines in a baking dish, cut side up. Drizzle the warm cinnamon honey sauce generously over each half. Feel free to use a spoon to ensure that each nectarine gets its fair share of goodness. Pop those beauties into the oven and bake for ~25–30 minutes, or until the nectarines are soft and can easily be pierced with a fork. -
Serve Them Up:
Once baked, let them cool for a few minutes. Top with a dollop of whipped cream or a scoop of vanilla ice cream for an indulgent touch. If using nuts, sprinkle them on top for that satisfying crunch.
Savor the moment as you pull those aromatic nectarines from the oven. The golden hue and intoxicating scent will have everyone gathering around your kitchen—consider that a win!
Serving Suggestions
Serving these baked nectarines is a breeze! I love placing the warm nectarines on a beautiful plate—perhaps with a sprinkle of chopped nuts for color and texture. A fresh mint sprig adds a pop of color and a hint of freshness. If you’re feeling fancy, a drizzle of extra honey or a dusting of powdered sugar elevates the presentation. These desserts are perfect for sharing, and they also look stunning on a buffet table at gatherings!
Recipe Variations
Looking to switch things up? Here are a few fun variations you can explore:
- Spice It Up: Add a pinch of nutmeg or a dash of vanilla extract to the honey sauce for a more complex flavor.
- Tropical Twist: Serve with a scoop of coconut ice cream instead of traditional vanilla.
- Berry Magic: Toss in some fresh berries—like blueberries or raspberries—around the nectarines for a burst of flavor and color.
- Nutty Delight: Mix finely chopped almonds or hazelnuts into the cinnamon honey sauce for an extra crunch.
- Frozen Treat: Allow leftovers to cool and freeze them for a refreshing summer dessert later!
Chef’s Notes
This recipe has journeyed with me over the years, evolving as I discovered new flavors and combinations to incorporate. One time, I attempted this with overripe nectarines and—oh boy—what a disaster! They became a mushy mess. But instead of giving up, I turned it into a delicious smoothie that introduced my friends to a whole new level of fruity goodness!
Cooking is all about learning and adapting, and that’s where the real joy comes in. So I encourage you to embrace the little mishaps—each one is a stepping stone to finding your unique culinary voice.
FAQs and Troubleshooting
1. My nectarines are too hard. Can I still bake them?
Yes! If your nectarines are a bit under-ripe, slice them thinner to help them cook faster. Just keep an eye on them in the oven!
2. How do I know when they’ve finished baking?
Baked nectarines should be tender and start to caramelize around the edges. Use a fork to check for tenderness. If it easily pierces the flesh, they’re ready!
3. Can I use frozen nectarines?
Absolutely! Just be sure to thaw them first—no one wants to bake them straight from the freezer. You might need to adjust the baking time since frozen fruit may release more moisture.
4. What if I don’t have honey?
You can substitute with any sweetener you prefer! Maple syrup or agave both work as great alternatives that bring their unique flavors to the dish.
Nutritional Info
While I won’t dive into the nitty-gritty numbers today, I can tell you that baked nectarines are a fabulous source of vitamins A and C, and the honey adds natural sugars and antioxidants. Overall, a refreshing dessert that packs in more than just flavor!
Thank you for joining me today! I hope you feel inspired to whip up these Baked Nectarines with Cinnamon Honey Sauce. Remember, the kitchen is a place for creativity and joy. Let your heart guide your cooking, and the delicious results will follow! Bon appétit!
Print
Baked Nectarines with Cinnamon Honey Sauce
- Total Time: 45 minutes
- Yield: 4 servings 1x
- Diet: Vegetarian
Description
A warm and inviting dessert made from baked nectarines enveloped in cinnamon and honey, perfect for cozy nights or gatherings.
Ingredients
- 4–6 ripe nectarines
- 1/4 cup honey
- 1 teaspoon ground cinnamon
- 2 tablespoons butter
- 1 tablespoon lemon juice
- Chopped walnuts or pecans (optional, for garnish)
Instructions
- Preheat your oven to 350°F (175°C).
- Prepare the nectarines by washing and slicing them in half, removing the pits.
- Create the cinnamon honey sauce by combining honey, butter, and cinnamon in a small saucepan over low heat.
- Bake the nectarines in a baking dish, drizzling the sauce over them, for 25-30 minutes until soft.
- Serve with whipped cream or vanilla ice cream and garnish with nuts if desired.
Notes
For a vegan option, substitute honey with maple syrup or agave. You can enhance the flavor with a pinch of nutmeg or vanilla extract.
- Prep Time: 15 minutes
- Cook Time: 30 minutes
- Category: Dessert
- Method: Baking
- Cuisine: American
Nutrition
- Serving Size: 1 serving
- Calories: 300
- Sugar: 25g
- Sodium: 50mg
- Fat: 10g
- Saturated Fat: 5g
- Unsaturated Fat: 5g
- Trans Fat: 0g
- Carbohydrates: 48g
- Fiber: 3g
- Protein: 2g
- Cholesterol: 15mg
Keywords: nectarines, baked dessert, cinnamon, honey, fruit dessert, easy recipe
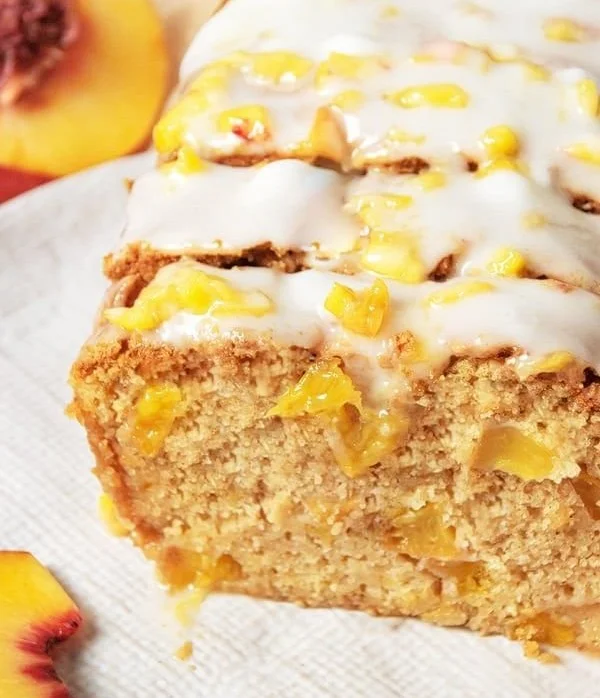
Seasonal Nectarine Bread: Beginner-Friendly Summer Recipe
Homemade Nectarine Bread: A Slice of Summer Magic
Welcome to my kitchen, dear foodies! Today, we’re diving into something truly special: Homemade Nectarine Bread. Now, if you haven’t tasted this delightful creation, let me tell you—it’s like taking a sunny vacation with every bite! There’s something wonderfully comforting about a loaf of bread packed with juicy nectarines that not only fills your kitchen with a heavenly aroma, but also warms your heart.
There’s an almost poetic quality to baking, don’t you think? The way flour, sugar, butter, and fresh fruits come together creates something so much greater than the sum of its parts. Nectarine bread is the lovechild of traditional quick breads, bursting with the essence of seasonal sweetness, perfect for breakfast, brunch, or a cozy afternoon snack.
Every time I whip up a loaf of nectarines, I’m transported back to my grandmother’s kitchen. She used to make a similar fruit bread when the stone fruits were in season, and the memories of her bustling around the kitchen, flour dusting her apron, still make me smile. It was a time filled with laughter, stories, and a whole lot of love—exactly what I hope to recreate with you today.
So grab your mixing bowl and preheat your oven! This is more than just a recipe; it’s an invitation to celebrate the joys of cooking, community, and of course, fabulous food. Let’s get started!
A Sweet Memory in Every Slice
There’s something incredibly nostalgic about baking bread, especially when it’s infused with such vibrant fruits like nectarines. I vividly remember being a child, standing on a stool beside my grandmother as she whisked and stirred in her sunlit kitchen. Her nectarines were always plump and sweet, and I was tasked with the job of peeling and pitting them—a messy chore that came with the promise of tasting the fresh nectarines afterwards, straight from the bowl!
One summer, she decided to surprise us with her specialty nectarines bread. I can still recall the excitement rolling through my stomach as I watched her mix the batter. When it finally came out of the oven, golden brown and drizzled with a sugary glaze, the world seemed to pause for just a moment. The smell wafted through the entire house, drawing us all into the kitchen for a slice of heaven. In that moment, it wasn’t just the bread I loved; it was the memories we created around it—the stories, the laughter, and the feeling of togetherness.
Now, whenever I bake nectarines bread, I try to channel that same warm comfort and joy my grandmother brought to our family kitchen, hoping to create those lasting memories for those I feed today. Let’s fill our kitchens with love as we recreate this beloved recipe together!
Ingredients You’ll Need
-
2 cups ripe nectarines (chopped)
Fresh nectarines are the star of the show here! The juiciness and sweetness they bring is unmatched. If you can’t find nectarines, peaches or apricots offer a lovely substitution. -
1/2 cup unsalted butter (melted)
Butter adds richness and depth to the bread. If you’re looking for a dairy-free option, coconut oil or a plant-based butter would work beautifully! -
1 cup granulated sugar
Sweetness is essential, but you can substitute with brown sugar for a hint of molasses flavor or use coconut sugar for a healthier twist. -
2 large eggs
Eggs act as a binding agent, helping your loaf rise and stay together. For a vegan option, try using flaxseed meal; mix 1 tablespoon of it with 2.5 tablespoons of water and let it sit for a few minutes until it becomes gelatinous. -
1 teaspoon vanilla extract
This simple ingredient elevates the flavor of the bread. Homemade vanilla extract is a real treat if you have it! -
2 cups all-purpose flour
The base of our bread! You can swap out 1 cup for whole wheat flour for added fiber. -
1 teaspoon baking soda
This is the magic leavening agent that helps our bread rise. Make sure it’s fresh for the best results! -
1/2 teaspoon baking powder
Just a little boost to ensure a fluffy texture. -
1/2 teaspoon salt
Salt helps balance the sweetness and enhances the flavors. Don’t skip it! -
1 teaspoon cinnamon (optional)
A sprinkle of cinnamon brings warmth and depth; feel free to add more or mix it up with spices like nutmeg or cardamom!
Step-by-Step Instructions to Nectarine Perfection
Now that we have everything ready, it’s time to jump into the cooking process! Baking is a delightful rhythm of actions, so let’s get into the groove.
-
Preheat Your Oven: Start by preheating your oven to 350°F (175°C). This is crucial for ensuring that your bread bakes evenly.
-
Prepare Your Loaf Pan: Grease a 9×5-inch loaf pan with butter or cooking spray, and set it aside. This helps the bread release easily after baking, which is key for that impressive slice!
-
Chop Your Nectarines: Grab those luscious nectarines! Wash them well, then slice them in half, remove the pits, and chop them into bite-sized pieces. You can leave the skin on for added color and nutrients.
-
Mix Wet Ingredients: In a large mixing bowl, combine the melted butter and sugar, mixing until well combined. This may take a minute or two, but it’s worth it to fully incorporate the sugar! Then, beat in the eggs, followed by the vanilla extract.
-
Combine Dry Ingredients: In another bowl, whisk together the flour, baking soda, baking powder, cinnamon, and salt. If you want a spoonful of flavor, you might want to go for a deeper spice profile with this step. Adjust to your taste!
-
Combine Wet and Dry: Gradually fold the dry ingredients into the wet mixture. Subtlety is key here—mix just until combined. Overmixing can lead to a dense loaf, and we want a light, airy slice!
-
Fold in Nectarines: Gently fold your chopped nectarines into the batter. It’s like tucking them into a cozy bread blanket! Optional: you might reserve a few pieces to sprinkle on top for a beautiful baked finish.
-
Transfer to Loaf Pan: Pour the batter into your greased loaf pan. Smooth the top gently with a spatula to make it even.
-
Bake: Pop the bread into the oven and let it bake for 50–60 minutes or until a toothpick inserted into the center comes out clean. Keep an eye on it; ovens can vary!
-
Cool & Glaze: Once baked, let the bread cool in the pan for about 10 minutes, then carefully transfer it to a wire rack to cool completely. If you’d like a sweet glaze, combine powdered sugar and a bit of milk (or lemon juice) to drizzle over the top once cooled.
Perfect Serving Suggestions
Slice your homemade nectarines bread and serve it warm or at room temperature on a beautiful cake stand to make it pop! You can enjoy it plain, or for a touch of indulgence, slather on some cream cheese or butter. Pair it with a cup of freshly brewed coffee or a refreshing herbal tea—this treat is perfect for breakfast, brunch, or an afternoon pick-me-up!
Recipe Variations to Try
-
Nutty Variation: Toss in some chopped walnuts, pecans, or almonds for a delightful crunch and added nutrition.
-
Chocolate Lovers’ Twist: Add in some chocolate chips for a sweet surprise. Dark chocolate pairs incredibly well with nectarines!
-
Citrus Zing: For a refreshing addition, consider zesting a lemon or orange into the batter. It brightens up the flavors beautifully!
-
Dried Fruit Delight: Substitute some of the nectarines for dried fruits like cranberries or apricots for a different texture and flavor!
-
Gluten-Free Option: Use almond flour or a gluten-free all-purpose blend to make this bread suitable for gluten-sensitive eaters.
Chef’s Notes
This recipe has a special place in my heart because it embodies the spirit of creativity in cooking. It’s evolved over the years—originally, it was a simple way to use overripe nectarines, but it has transformed into a beloved staple in my kitchen. Sometimes, I’ll switch around the spices or the sweeteners based on what I have on hand, and each iteration brings a new layer of joy.
Once, I had a friend over while I was making this, and we accidentally added way too much cinnamon! Instead of tossing it out, we called it “cinnamon explosion bread,” and it turned out to be a hit at our little get-together. So remember, baking is a journey, and sometimes the unexpected can lead to delicious results!
FAQs and Troubleshooting
1. My bread didn’t rise—what happened?
Make sure your baking soda and baking powder are fresh, as their effectiveness diminishes over time. Also, double-check that you didn’t overmix your batter, as that can create a dense loaf.
2. Can I use frozen nectarines?
Absolutely! Just make sure to thaw and drain any excess moisture before adding them to the batter. Frozen fruits can sometimes release more water during baking, so keep that in mind.
3. How do I store leftover nectarines bread?
Wrap it tightly in plastic wrap or aluminum foil and store it at room temperature for up to 3 days. You can also freeze slices for later enjoyment—just let them cool completely, wrap individually, and store them in an airtight container.
4. Can I add other fruits?
Of course! Apples, pears, or even berries can be swapped in, but keep in mind that the amount of moisture they contain might alter the final result. Adjust accordingly and have fun with it!
Nutritional Info
Serving Size: 1 slice (about 50g)
Calories: 180
Total Fat: 7g
Saturated Fat: 4g
Cholesterol: 35mg
Sodium: 150mg
Total Carbohydrates: 25g
Dietary Fiber: 1g
Sugars: 10g
Protein: 2g
Well, dear friends, I hope you enjoyed this journey through the creation of homemade nectarines bread! Remember, cooking is more than just making a meal; it’s about creating memories and enjoying every messy, beautiful moment. I can’t wait to hear your comments, tips, or stories related to this delightful recipe. Let’s bake together and ensure that love remains at the heart of our kitchens! Happy baking!
Print
Homemade Nectarine Bread
- Total Time: 75 minutes
- Yield: 8 servings 1x
- Diet: Vegetarian
Description
A delightful quick bread filled with juicy nectarines, perfect for breakfast or a cozy afternoon snack.
Ingredients
- 2 cups ripe nectarines (chopped)
- 1/2 cup unsalted butter (melted)
- 1 cup granulated sugar
- 2 large eggs
- 1 teaspoon vanilla extract
- 2 cups all-purpose flour
- 1 teaspoon baking soda
- 1/2 teaspoon baking powder
- 1/2 teaspoon salt
- 1 teaspoon cinnamon (optional)
Instructions
- Preheat your oven to 350°F (175°C).
- Grease a 9×5-inch loaf pan with butter or cooking spray.
- Chop your nectarines into bite-sized pieces.
- Combine the melted butter and sugar in a large mixing bowl.
- Beat in the eggs and vanilla extract.
- Whisk together the flour, baking soda, baking powder, cinnamon, and salt in another bowl.
- Fold the dry ingredients into the wet mixture just until combined.
- Gently fold in your chopped nectarines.
- Pour the batter into the greased loaf pan.
- Bake for 50–60 minutes or until a toothpick inserted comes out clean.
- Cool in the pan for 10 minutes before transferring to a wire rack.
- Glaze with powdered sugar and milk or lemon juice if desired.
Notes
For a nutty crunch, consider adding walnuts or pecans. Substitute nectarines with other fruits like peaches or berries for variation.
- Prep Time: 15 minutes
- Cook Time: 60 minutes
- Category: Bread
- Method: Baking
- Cuisine: American
Nutrition
- Serving Size: 1 slice
- Calories: 180
- Sugar: 10g
- Sodium: 150mg
- Fat: 7g
- Saturated Fat: 4g
- Unsaturated Fat: 3g
- Trans Fat: 0g
- Carbohydrates: 25g
- Fiber: 1g
- Protein: 2g
- Cholesterol: 35mg
Keywords: nectarine bread, fruit bread, quick bread, summer baking, homemade bread
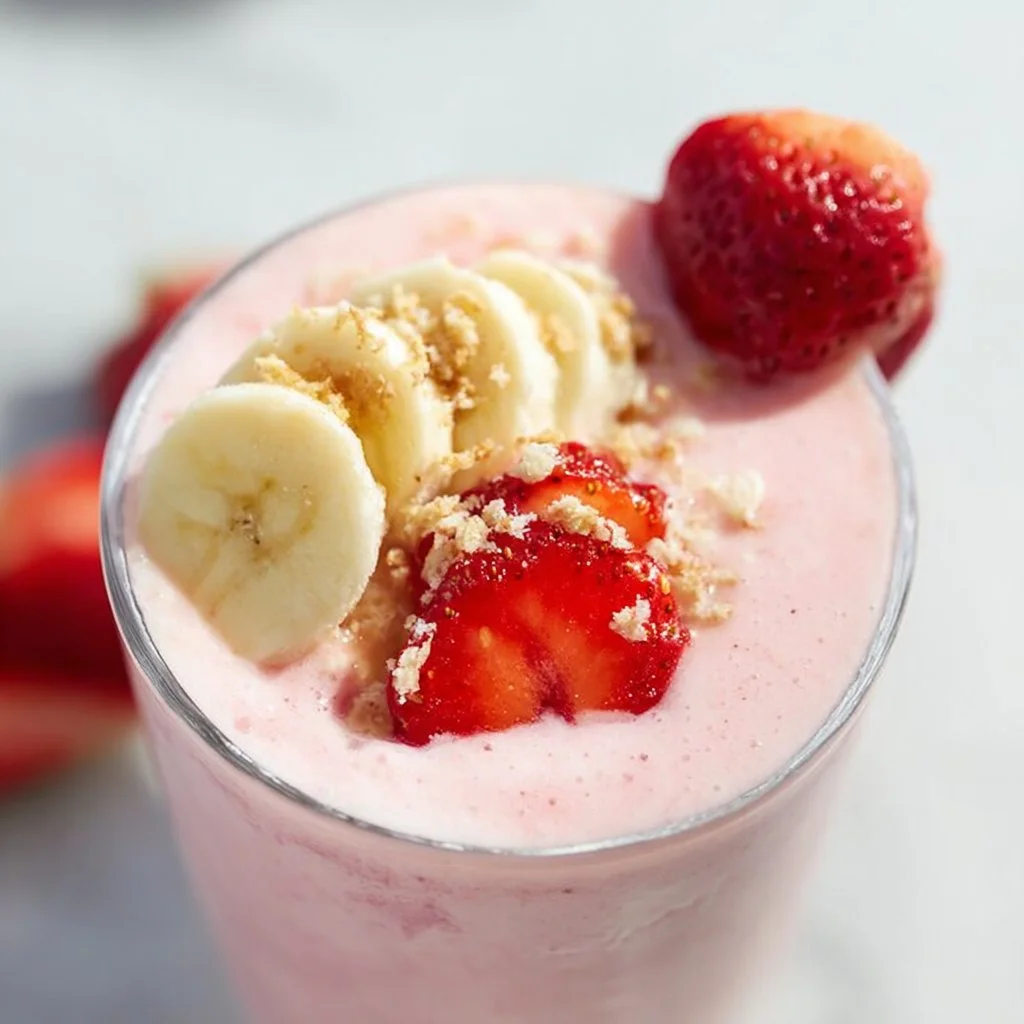
Strawberry Banana Smoothie
Refreshing Strawberry Banana Smoothie: A Taste of Summer in Every Sip
Welcome to my kitchen, friends! If you’re like me and can’t resist the allure of fresh fruits blended into creamy deliciousness, then trust me—you’re in for a treat today. We’re talking about the classic Strawberry Banana Smoothie, a timeless favorite that brings the flavors of summer right into your home, no matter the season. You might be wondering what makes this smoothie so special. Well, aside from being packed with vitamins, nutrients, and that oh-so-delightful taste, it’s also super easy to whip up! So grab your blender and let’s dive into this fruity adventure.
A Personal Touch: Why Strawberry Banana Smoothies Hold a Special Place in My Heart
Growing up, my mom had a delightful habit that I hold dear to this day: every Saturday morning, she would make us strawberry banana smoothies. The way she would slice the bananas, blend the strawberries, and watch it all come together—her joy in the kitchen was contagious! I still remember the warmth of our cozy kitchen, the smell of fresh fruit drifting through the air while my siblings and I waited impatiently at the table, pencils and paper in hand to sketch our favorite cartoon characters.
Those were the mornings filled with laughter and stories, where every sip of the smoothie felt like a blessing—a celebration of simple pleasures. It’s that nostalgia that I carry with me, inspiring me to recreate these smoothies for friends and family today. No matter where life takes us, gathering over a strawberry banana smoothie is a sweet reminder of those cherished moments spent together.
Ingredients: All the Goodness You’ll Need
To create this delightful Strawberry Banana Smoothie, gather the following ingredients. Each one plays a key role in making this drink as scrumptious as it is nutritious.
-
1 cup fresh strawberries: Fresh or frozen will work. If using frozen, omit the ice to keep it creamy. Strawberries are rich in antioxidants and vitamin C, perfect for a morning boost!
-
1 ripe banana: The riper, the better! A brown-speckled banana is naturally sweeter, which balances the tartness of the strawberries. If you’re not a banana fan, avocado can be a great creamy substitute!
-
1 cup unsweetened almond milk (or your milk of choice): Almond milk gives it a nutty undertone, but feel free to swap it for coconut milk for a tropical twist or regular cow’s milk if you prefer.
-
1 tablespoon honey or maple syrup: This is optional since the banana and strawberries provide natural sweetness. If you’re strict on sugar, use a sugar-free sweetener, or even dates!
-
1/2 cup Greek yogurt: For that luscious, creamy texture and extra protein. If you’re non-dairy, try coconut yogurt or skip it altogether for a lighter option.
-
1 tablespoon chia seeds or flaxseeds: These add a nutritional punch with omega-3s and fiber. Plus, they help give the smoothie a thicker consistency. Feel free to omit if you’re not a fan of added texture!
Step-by-Step Instructions: Let’s Get Blending!
Now that you’ve gathered all your ingredients, let’s dive into the fun part—putting everything together! Follow these detailed steps to create a strawberry banana smoothie that’s both delicious and nourishing.
-
Prep Your Ingredients (5 minutes): Start by washing your strawberries under cool water. If you’re using fresh strawberries, remove the stems and slice them in half to help them blend more easily. Peel your banana, and if you’re using a ripe one, just grab a spoon to scoop it straight into the blender.
-
Add Your Smoothie Base (2 minutes): Start by pouring in your liquid—1 cup of almond milk—into the blender first. This helps the blades move freely and makes blending smoother. It also prevents any clumping of your frozen ingredients if you’re going that route.
-
Mix in the Fruits (2 minutes): Add the strawberries and banana to the blender. Remember, layering your ingredients helps them blend more evenly. Toss in a tablespoon of honey or maple syrup if you prefer an extra touch of sweetness.
-
Get Creative with Add-Ins: If you’re opting for Greek yogurt, add in a half-cup for that creamy texture. Then, top it off with a tablespoon of chia seeds or flaxseeds for added nutrition.
-
Blend Away (1-2 minutes): Secure the blender lid tightly (trust me on this one!), and blend everything on high speed until smooth—this usually takes about 30-60 seconds. If you find your smoothie is too thick, you can always add a splash more milk to loosen it up.
-
Taste and Adjust (1 minute): Once blended, give it a taste! If it needs more sweetness, add a little more honey or syrup. If you want it cooler, toss in a handful of ice cubes and blend again until smooth.
-
Pour and Enjoy (1 minute): Service time! Grab your favorite glasses and pour in the smooth, luscious mixture. Top with a few slices of fresh strawberries or a sprinkle of chia seeds for a lovely presentation!
Serving Suggestions: Making It Pretty!
Now that you have your delicious strawberry banana smoothie, it’s time to serve it up with style! You can pour the smoothie into fun, colorful glasses, and if you’re feeling extra fancy, garnish each glass with a slice of strawberry on the rim or a sprig of mint for a pop of color. Adding a reusable straw not only makes sipping easier but also gives your smoothie a stylish touch. Perfect for brunch gatherings or just to brighten up a quiet afternoon at home!
Recipe Variations: Mix It Up!
I love how versatile smoothies can be, so here are a few fun twists to inspire your own creations:
-
Tropical Paradise: Swap out the strawberries for mango or add pineapple to bring a taste of the tropics into your smoothie!
-
Green Twist: Add a handful of spinach or kale for a nutrient boost without overpowering the flavor. You won’t even taste the greens!
-
Peanut Butter Bliss: Dive into indulgence with a tablespoon of peanut butter or almond butter for a nutty twist. It adds protein and makes the smoothie even more filling!
-
Chocolate Lover’s Dream: Blend in a tablespoon of cocoa powder or a scoop of chocolate protein powder for a decadent yet healthy treat.
-
Berry Medley: Use a mix of berries—blueberries, raspberries, or blackberries—along with the strawberries to create a multi-flavored berry smoothie.
Chef’s Notes: A Smoothie Journey
One of the beautiful things about a strawberry banana smoothie is that it evolves as your taste does. Over the years, I’ve modified this recipe countless times depending on what I had on hand. I once added a scoop of vanilla protein powder after a workout and fell in love! Another time, I experimented with coconut milk and toasted coconut flakes on top—how divine!
I’ve also had my share of blending mishaps (not everyone can be perfect!), where I accidentally grabbed a jalapeño pepper instead of a banana. Let’s just say, a spicy smoothie was definitely not on my menu that day. Always double-check your ingredients!
FAQs and Troubleshooting: Smoothie 101
-
Can I use frozen strawberries instead of fresh?
Absolutely! Frozen strawberries work wonderfully and can give your smoothie a thicker, colder texture. Just omit the ice if you’re using frozen fruits. -
Why is my smoothie too thick?
If your smoothie is more of a smoothie bowl than a drink, simply add a splash more milk until you reach your desired consistency and blend again! -
Can I store leftover smoothie?
While smoothies are best enjoyed fresh, you can store leftovers in an airtight container in the refrigerator for up to 24 hours. Just give it a good shake or blend again before sipping! -
What can I do if I don’t have a blender?
If you don’t have a blender, you can use a hand mixer or even mash the ingredients together with a fork before mixing them with yogurt or milk. It won’t be as smooth but still delicious!
Nutritional Information
(Per serving)
- Calories: Approximately 220
- Protein: 7g (with Greek yogurt)
- Carbohydrates: 34g
- Fiber: 4g
- Sugar: 18g (natural sugars from fruit)
- Fat: 4g (using almond milk with no added oil)
And there you have it, a delightful recipe for a strawberry banana smoothie that’s not only delicious but packed with memories and love. I hope you enjoy making this smoothie as much as I did sharing it with you. Remember, food is not just about nourishment; it’s about bringing people together, and I can’t wait for you to share this recipe with your loved ones, too. Cheers to delicious sips and cozy moments! 🍓🍌🥤
Print
Refreshing Strawberry Banana Smoothie
- Total Time: 5 minutes
- Yield: 2 servings 1x
- Diet: Vegetarian
Description
A classic Strawberry Banana Smoothie that brings the flavors of summer to your home, packed with vitamins and nutrients.
Ingredients
- 1 cup fresh strawberries
- 1 ripe banana
- 1 cup unsweetened almond milk
- 1 tablespoon honey or maple syrup (optional)
- 1/2 cup Greek yogurt
- 1 tablespoon chia seeds or flaxseeds
Instructions
- Prep Your Ingredients: Wash your strawberries and slice them. Peel your banana and scoop it into the blender.
- Add Your Smoothie Base: Pour 1 cup of almond milk into the blender.
- Mix in the Fruits: Add the strawberries and banana to the blender. Optionally add honey or maple syrup.
- Get Creative with Add-Ins: If using, add Greek yogurt and chia seeds or flaxseeds.
- Blend Away: Secure the lid and blend on high speed until smooth.
- Taste and Adjust: Taste and add more sweetener or ice if desired.
- Pour and Enjoy: Serve in glasses and garnish if desired.
Notes
For a tropical twist, swap almond milk with coconut milk. Feel free to experiment with different fruits and add-ins!
- Prep Time: 5 minutes
- Cook Time: 0 minutes
- Category: Beverage
- Method: Blending
- Cuisine: American
Nutrition
- Serving Size: 1 serving
- Calories: 220
- Sugar: 18g
- Sodium: 100mg
- Fat: 4g
- Saturated Fat: 0.5g
- Unsaturated Fat: 3.5g
- Trans Fat: 0g
- Carbohydrates: 34g
- Fiber: 4g
- Protein: 7g
- Cholesterol: 5mg
Keywords: smoothie, strawberry, banana, healthy, quick recipe


