
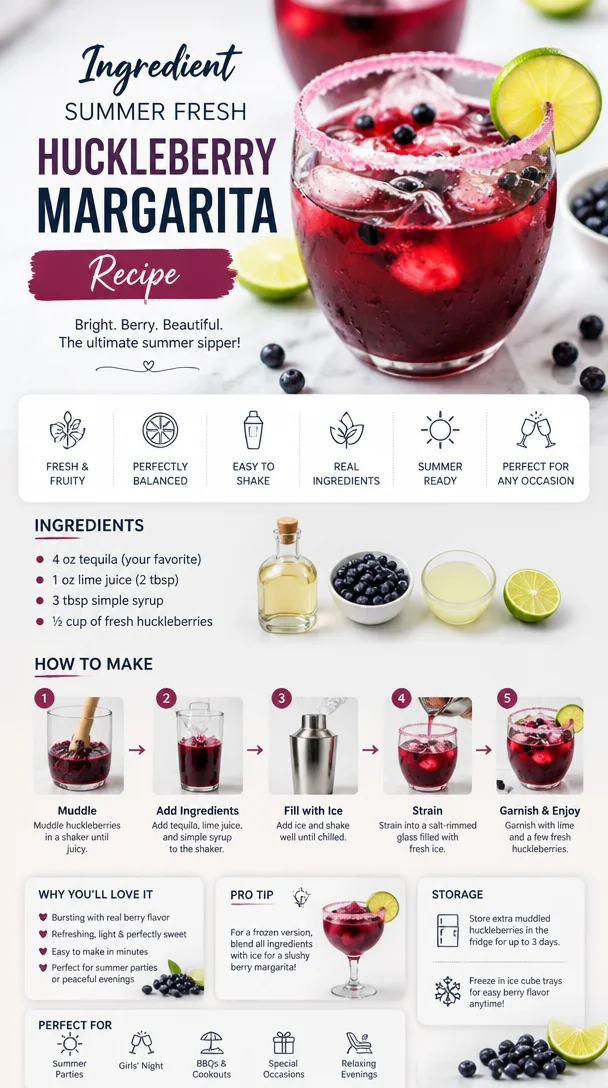
Ingredient Summer Fresh Huckleberry Margarita Recipe
The Refreshing Delight of Fresh Huckleberry Margaritas
Welcome to my kitchen! If you’re anything like me, your heart skips a beat at the thought of a refreshing cocktail on a warm day. Today, we’re diving into the world of vibrant flavors with a twist on the classic margarita — the Fresh Huckleberry Margarita. Imagine the taste of sweet, juicy huckleberries paired with zesty lime juice, smooth tequila, and a hint of sweetness! It’s the quintessential summer drink that’s not just refreshing; it’s also a delightful homage to the beautiful berries often found in the wild.
What I love most about a Fresh Huckleberry Margarita is its ability to transport you to a sun-soaked patio or a cozy gathering with friends. Picture this: you’re surrounded by good company, laughter fills the air, and the intoxicating aroma of huckleberries dances with the breeze. As we explore this delicious concoction, I’ll share a personal story, some pro tips, and unique twists to make this drink your own!
Get ready to grab your shaker and put on your favorite playlist because we’re about to mix up some magic in the kitchen. Not only will you impress your friends, but you’ll also create an unforgettable experience that turns every sip into a celebration of flavor.
A Flavorful Memory
Ah, huckleberries! They remind me of countless summers spent with my family in the Pacific Northwest. My favorite memories involve venturing into the woods with my mom, an old basket in hand, searching for these tiny, sweet gems. We’d wake up early, the sun just beginning to peek through the trees, and set off on our huckleberry hunts.
After gathering enough berries to fill our basket, we’d return home, our cheeks flushed with excitement. My mom would whip up her famous huckleberry pie, the kitchen filled with the heavenly scent of baking—not to mention the delicious juices from the huckleberries bubbling away.
Fast forward to today, and I still carry that love for huckleberries in my cooking. That’s where the inspiration for the Fresh Huckleberry Margarita comes from — a drink that captures the essence of those cherished family moments, while adding a modern twist. Let me show you how to recreate that nostalgia in a glass!
Ingredients
Here’s what you’ll need to whip up the perfect Fresh Huckleberry Margarita:
-
Fresh Huckleberries (1 cup)
These tiny fruits burst with flavor! If you can’t find fresh huckleberries, you can substitute with blueberries or even blackberries for a different but delicious twist. -
Tequila (2 ounces)
I recommend a good-quality blanco tequila for its smoothness. If you prefer a less alcoholic option, consider using a non-alcoholic tequila alternative that’s hitting the market! -
Lime Juice (1 ounce)
Fresh is always best! Bottled lime juice can work in a pinch, but fresh-squeezed juice elevates the flavor. You can also experiment with lemon juice for a unique citrus zing. -
Agave Syrup (1/2 ounce)
This adds sweetness without overwhelming the drink. Feel free to swap with simple syrup, or if you’re watching the sugar, try a liquid stevia or sugar substitute. -
Salt (for rimming the glass)
This is optional but recommended! It creates the perfect balance against the sweet huckleberries. Consider using flavored salts, like lime or chili salt, for an extra kick. -
Ice (for shaking/stirring)
Ice is essential to chill your drink and dilute it just right. Make sure your ice is fresh for the best results!
Let’s mix these ingredients to create a cocktail that’s more than just a drink — it’s a feel-good experience!
Step-by-Step Instructions
Step 1: Prepare Your Glass
Start by rimming your glass with lime. Shake a little salt onto a plate and gently press the rim of the glass into the salt until it’s evenly coated. Set it aside while you mix up the magic.
Step 2: Blend the Berries
In a cocktail shaker, add your fresh huckleberries. Using a muddler, gently mash them to release their juices. The key here is to be gentle — you want juice, not mush!
Tip: If you’re in a hurry, you can always use a blender to puree the huckleberries before adding them to the shaker! Just make sure to strain the purée to remove any seeds if you prefer a smoother drink.
Step 3: Shake It Up
Add the tequila, fresh lime juice, and agave syrup to the shaker. Fill it with ice and put the lid on tightly. Now, give it a good shake! You want to mix the ingredients thoroughly while chilling them at the same time.
Chef Hack: The longer you shake, the colder the drink! Aim for about 15-20 seconds of vigorous shaking.
Step 4: Strain and Pour
Take your prepared glass and fill it with fresh ice (if you like it on the rocks!). Strain the margarita mixture into your glass, letting the huckleberry goodness cascade in.
Pro Tip: If you enjoy a smoother drink, you can use a fine mesh strainer to sift out any remaining pulp or berry bits.
Step 5: Garnish and Serve
Finally, top your drink with a few whole huckleberries or a slice of lime for garnish. It adds a pop of color, making it as beautiful as it is tasty!
Enjoy! Take a moment to admire your handiwork before diving in.
Serving Suggestions
The best part about cocktails is that they’re meant to be shared! Serve your Fresh Huckleberry Margaritas in chilled glasses, perhaps alongside some lime wedges for added zest. Pair it with light appetizers like chips and salsa, shrimp tacos, or a fresh fruit platter to let those summer vibes flow.
For a fun twist, consider serving the margaritas in mason jars for a rustic feel—perfect for outdoor gatherings! Just remember to have extra napkins on hand; these drinks are too good not to savor.
Recipe Variations
- Frozen Huckleberry Margarita: Blend your ingredients with crushed ice for a frozen treat. Perfect for hot days!
- Spicy Twist: Add a slice of jalapeño while muddling the huckleberries for a hint of heat.
- Herbaceous Blend: Toss in some fresh mint leaves before shaking for a refreshing herb twist.
- Huckleberry Mimosa: Combine huckleberry syrup with Prosecco for a delightful brunch beverage.
- Non-Alcoholic Version: Swap the tequila for ginger beer and add a splash of soda water for a bubbly mocktail!
Chef’s Notes
Creating this Fresh Huckleberry Margarita has been a delightful journey for me. Over the years, I’ve dabbled with various fruits and liquors, but there’s a special place in my heart for huckleberries. Their unique flavor brings nostalgia, reminiscent of my family’s huckleberry pie adventures.
One of my funniest kitchen moments was when I tried to impress my friends with a “fancy” version of this margarita. I accidentally dropped a whole handful of huckleberries into my blender without measuring. Let me tell you, it’s fun to go bold in the kitchen—but I ended up with a huckleberry smoothie explosion! Lesson learned: precision is key, but so is having fun!
FAQs and Troubleshooting
Q: What do I do if I can’t find fresh huckleberries?
If you’re unable to find fresh huckleberries, don’t fret! Blueberries or blackberries work beautifully as a substitute and give a similar flavor profile.
Q: How can I enhance the flavor?
To enhance the flavors, consider adding a splash of orange liqueur (like Triple Sec or Cointreau) which complements the huckleberries and lime fantastically.
Q: Can I make this cocktail in advance?
Yes! You can mix the base (tequila, lime juice, agave syrup, and muddled huckleberries) in advance and store it in the fridge, but I recommend adding ice and shaking just before serving to keep it fresh.
Q: What if my margarita is too tart?
If you find your margarita a bit on the sour side, simply add a touch more agave syrup or even a splash of orange juice to balance out the flavors.
Nutritional Info
(If applicable, you can provide a rough estimate of calories, sugar, etc., based on the ingredients used. If not, you can skip this section. Just remember that moderation is key!)
Remember, every huckleberry margarita you make is more than just a drink. It’s a celebration of flavors and memories. So raise your glass and enjoy the journey! Cheers! 🥂
Print
Fresh Huckleberry Margarita
- Total Time: 10 minutes
- Yield: 1 serving 1x
- Diet: Vegetarian
Description
A refreshing twist on the classic margarita, made with sweet huckleberries and zesty lime juice. Perfect for summer gatherings!
Ingredients
- 1 cup Fresh Huckleberries
- 2 ounces Tequila
- 1 ounce Lime Juice
- 1/2 ounce Agave Syrup
- Salt (for rimming the glass)
- Ice (for shaking/stirring)
Instructions
- Prepare Your Glass: Rim the glass with lime and coat it with salt. Set aside.
- Blend the Berries: Muddle fresh huckleberries in a cocktail shaker to release their juices.
- Shake It Up: Add tequila, lime juice, and agave syrup to the shaker with ice and shake vigorously.
- Strain and Pour: Strain the mixture into the prepared glass filled with ice.
- Garnish and Serve: Top with whole huckleberries or a slice of lime to garnish.
Notes
Experiment with different fruits like blueberries or blackberries. For a frozen version, blend with crushed ice.
- Prep Time: 10 minutes
- Cook Time: 0 minutes
- Category: Cocktail
- Method: Mixing
- Cuisine: American
Nutrition
- Serving Size: 1 glass
- Calories: 200
- Sugar: 10g
- Sodium: 30mg
- Fat: 0g
- Saturated Fat: 0g
- Unsaturated Fat: 0g
- Trans Fat: 0g
- Carbohydrates: 22g
- Fiber: 2g
- Protein: 0g
- Cholesterol: 0mg
Keywords: huckleberry, margarita, cocktail, summer drink, refreshing
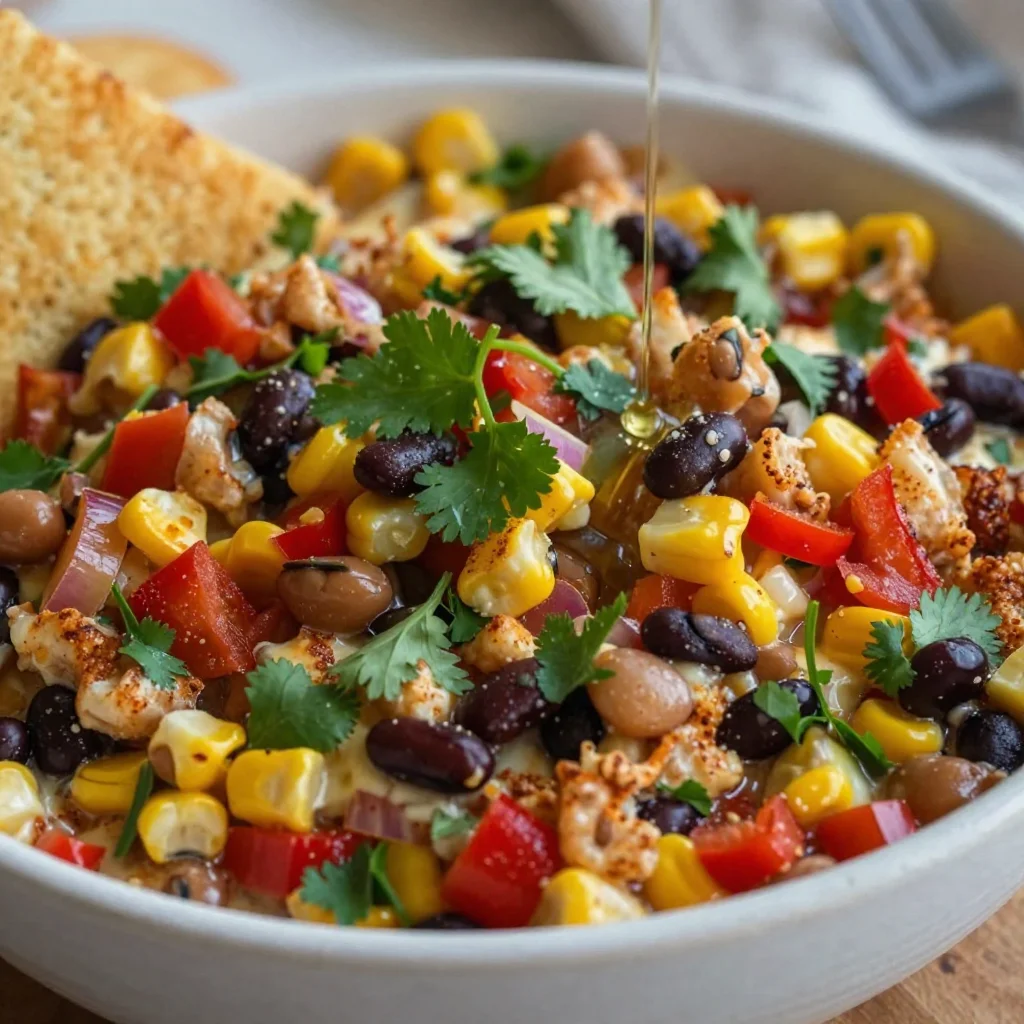
Minute Cowboy Caviar Dip: Fresh, Crowd-Pleasing Recipe
Best Fresh Cowboy Caviar Dip Recipe: 5-Star Crowd Pleaser
Welcome to my kitchen! I’m so glad you’ve joined me here today because we are about to embark on a flavor-packed journey. If you’re looking for a dish that truly embodies the spirit of togetherness, let me introduce you to my all-time favorite — Cowboy Caviar Dip! This vibrant and colorful dip is not just a feast for the eyes; it’s an explosion of textures and tastes that will have your friends and family coming back for seconds (or even thirds!).
Cowboy Caviar is a delightful medley of beans, fresh vegetables, and zesty dressing, making it an ideal appetizer or a party starter. Whether you’re hosting game night, a summer barbecue, or a cozy gathering, this crowd-pleaser elevates any occasion. The best part? It’s super easy to whip up, requires minimal cooking skills, and can be made ahead of time for those busy days when you need something ready to go!
As we dive into this recipe, I’ll be breaking it down step by step, sharing little stories about what makes this dish special, and revealing some of my favorite kitchen hacks. So grab your apron, roll up those sleeves, and let’s get cooking!
A Personal Story
The first time I ever tasted Cowboy Caviar was during a family reunion in Texas. Our relatives gathered in a cozy backyard adorned with string lights, laughter, and the aroma of grilled meats wafting through the air. As kids, my cousins and I would run wild, playing tag while the adults set up a feast fit for a king!
One dish that caught my eye was a vibrant bowl of Cowboy Caviar mixed with all sorts of colorful veggies and beans. I remember dipping my tortilla chip into the mix for the first time. The crunch, the brightness, and the zing of the dressing sent me straight to flavor heaven! I knew right then and there that this would be a staple in my cooking repertoire.
Fast forward a few years, and Cowboy Caviar became a cherished part of my gatherings. I’ve modified the recipe over time, adding my own twist and ensuring every bite tells a story. Each time I make it, I’m taken back to that summer day, surrounded by love and the warmth of family.
Ingredients
Here’s what you’ll need to create this incredible Cowboy Caviar Dip:
-
Black Beans (1 can, drained and rinsed)
These hearty beans are packed with protein and add a satisfying element to the dip. If black beans aren’t your thing, feel free to swap in kidney or pinto beans! -
Corn (1 cup, fresh or canned)
Sweet corn brings in a wonderful crunchy texture. Fresh corn is best, but frozen or canned corn works too! Just be sure to drain any liquid before tossing it in. -
Diced Tomatoes (1 cup, fresh)
Use vine-ripened tomatoes for a burst of juicy flavor. If tomatoes aren’t in season, cherry tomatoes work beautifully as a substitution! -
Red Onion (1/2 cup, finely chopped)
For a zesty kick! If you’re worried about the intensity of raw onion, soak the chopped pieces in cold water for 10 minutes before adding them to your mix. This simple trick takes the edge off. -
Bell Peppers (1 cup, finely diced — mix of colors)
I love using a blend of red, yellow, and green bell peppers for color and flavor. You can also use jalapeño for a spicy kick. -
Avocado (1 ripe, diced)
Avocado adds creaminess to the dip and balances the tang of the dressing. Make sure it’s perfectly ripe for that melt-in-your-mouth texture. -
Fresh Cilantro (1/4 cup, chopped)
If you’re a cilantro lover like I am, this herb adds freshness and brightness! If not, you can easily swap it for parsley. -
Lime Juice (from 1 lime)
The acidity from the lime juice brightens up the flavors! You can substitute with lemon juice, but lime is quintessential for that zesty cowboy essence. -
Olive Oil (2 tablespoons)
This helps to bring all the ingredients together. Use extra virgin olive oil for the best flavor, or experiment with flavored oils! -
Salt and Pepper (to taste)
Essential for enhancing all those delicious flavors. Don’t be shy; seasoning is key for a dip that wows!
Step-by-Step Instructions
Alright, my fellow food lovers, let’s get to the fun part! Here’s how to create your Cowboy Caviar Dip, step by step:
-
Prep Your Ingredients
Start by gathering all your ingredients and giving them a good rinse if needed. This ensures that your veggies and beans are clean and ready to shine. -
Chop and Dice
Dice your tomatoes, bell peppers, and onions into small pieces. When chopping, aim for uniform sizes so they blend well together in the dip. Remember, the prettier your dip looks, the more appetizing it will be! -
Combine Beans and Corn
In a large mixing bowl, combine the drained black beans and corn. Give them a gentle stir to mix them together. -
Add Fresh Veggies
Toss in your chopped tomatoes, bell peppers, and onions. Don’t be afraid to mix colors! This is where the “caviar” of Cowboy Caviar really shines, making your dip super visually appealing. -
Avocado Time
Next, carefully add in your diced avocado. Use a spatula or a large spoon to fold the avocado gently into the mix. You want to keep those lovely chunks intact while ensuring that they are well incorporated. -
Cilantro and Lime
Pour in the freshly chopped cilantro and squeeze in the lime juice. The lime juice not only gives flavor but also helps prevent the avocado from browning. Give everything a gentle toss to coat. -
Drizzle the Oil
Drizzle the olive oil over your dip and season with salt and pepper to taste. A little tip: start with a pinch of salt and a sprinkle of pepper, then add more as needed. Mix well to ensure all the flavors meld together beautifully. -
Rest and Meld
For the best flavor, let your Cowboy Caviar sit in the fridge for at least 30 minutes before serving. Cover it with plastic wrap to keep it fresh! -
Serve with Joy
Once it’s time to serve, give it another light stir and transfer it to a beautiful serving bowl. Nothing says “dig in” quite like a vibrant centerpiece!
Serving Suggestions
When it comes to serving Cowboy Caviar, presentation is key! A rustic wooden board or a vibrant ceramic bowl will make your dish pop. I love serving it with sturdy tortilla chips, but you could also offer veggie sticks like carrots and celery for a healthier crunch. Try layering it on top of a fresh salad for an elevated meal, or scoop it onto tacos for an added zest. Let your creativity shine and remember—it’s all about sharing the love with friends and family!
Recipe Variations
Want to switch things up? Here are some fun Cowboy Caviar variations to try:
-
Spicy Cowboy Caviar: Add diced jalapeños for a spicy kick. Adjust the heat to your preference!
-
Southwestern Twist: Incorporate diced avocado, corn, and a sprinkle of smoked paprika for a smoky flavor boost.
-
Tropical Vibes: Swap in fresh mango for the avocado for a unique, fruity take on this classic dip.
-
Quinoa Boost: Add cooked quinoa for extra protein and a heartier dip that can double as a salad.
-
Cheesy Option: Sprinkle crumbled feta or shredded cheese over the top for a creamy addition!
Chef’s Notes
This Cowboy Caviar recipe is very close to my heart! Over the years, I have experimented with different ingredients, and it never disappoints. One funny memory that comes to mind is when I decided to add some extra spice—thinking I could handle the heat—only to realize I had accidentally grabbed a can of Habaneros instead of my usual chipotle peppers. Let’s just say, that batch sent my friends running for water!
The best part about this recipe is how forgiving it is. You can mix and match based on what you have on hand or what’s in season, making it ever-evolving. I always encourage my fellow cooks to put their own spin on things — the kitchen is yours to play in!
FAQs and Troubleshooting
-
What if my dip is too salty?
If you find your dip comes out too salty, add additional diced tomatoes or a splash of lime juice to balance the flavors. -
Can I make this ahead of time?
Absolutely! Cowboy Caviar actually gets better as it sits, allowing the flavors to meld beautifully. Just remember to add the avocado right before serving to keep it fresh. -
What’s the best way to store leftovers?
Store any leftovers in an airtight container in the fridge for up to 3 days. Just be aware that the avocado may brown slightly, but it’ll still taste delicious! -
What if I don’t like cilantro?
If cilantro isn’t your favorite herb, feel free to swap it for parsley or simply omit it altogether. The dip will still taste fantastic!
Nutritional Info
This Cowboy Caviar is a nutritious choice packed with fiber from the beans and freshness from the veggies. Each serving is low in calories, high in flavor, and loaded with the good stuff. Perfect for a satisfying snack or as part of a healthy meal!
I hope you’re as excited to dive into this Cowboy Caviar as I am to share it! Whether you’re creating it for a party or just because, know that every bite is filled with love and joy. Let’s keep those kitchens bustling with flavors and stories. Happy cooking from my kitchen to yours!
Print
Cowboy Caviar Dip
- Total Time: 45 minutes
- Yield: 4 servings 1x
- Diet: Vegetarian
Description
A vibrant and colorful dip featuring black beans, fresh vegetables, and zesty dressing, perfect for any gathering.
Ingredients
- 1 can Black Beans, drained and rinsed
- 1 cup Corn, fresh or canned
- 1 cup Diced Tomatoes, fresh
- 1/2 cup Red Onion, finely chopped
- 1 cup Bell Peppers, finely diced
- 1 ripe Avocado, diced
- 1/4 cup Fresh Cilantro, chopped
- Juice of 1 Lime
- 2 tablespoons Olive Oil
- Salt and Pepper, to taste
Instructions
- Prep your ingredients by gathering and rinsing them if needed.
- Chop and dice your tomatoes, bell peppers, and onions into small pieces.
- Combine the drained black beans and corn in a large mixing bowl.
- Add the chopped tomatoes, bell peppers, and onions to the bowl.
- Fold the diced avocado gently into the mix.
- Pour in the freshly chopped cilantro and squeeze in the lime juice.
- Drizzle the olive oil over the dip and season with salt and pepper.
- Rest the dip in the fridge for at least 30 minutes before serving.
- Serve in a beautiful bowl with tortilla chips or veggie sticks.
Notes
Can be made ahead of time for best flavor. Store leftovers in an airtight container for up to 3 days.
- Prep Time: 15 minutes
- Cook Time: 0 minutes
- Category: Appetizer
- Method: Mixing
- Cuisine: American
Nutrition
- Serving Size: 1 serving
- Calories: 200
- Sugar: 4g
- Sodium: 200mg
- Fat: 10g
- Saturated Fat: 1g
- Unsaturated Fat: 8g
- Trans Fat: 0g
- Carbohydrates: 28g
- Fiber: 7g
- Protein: 6g
- Cholesterol: 0mg
Keywords: Cowboy Caviar, Dip, Appetizer, Healthy Snack, Party Food
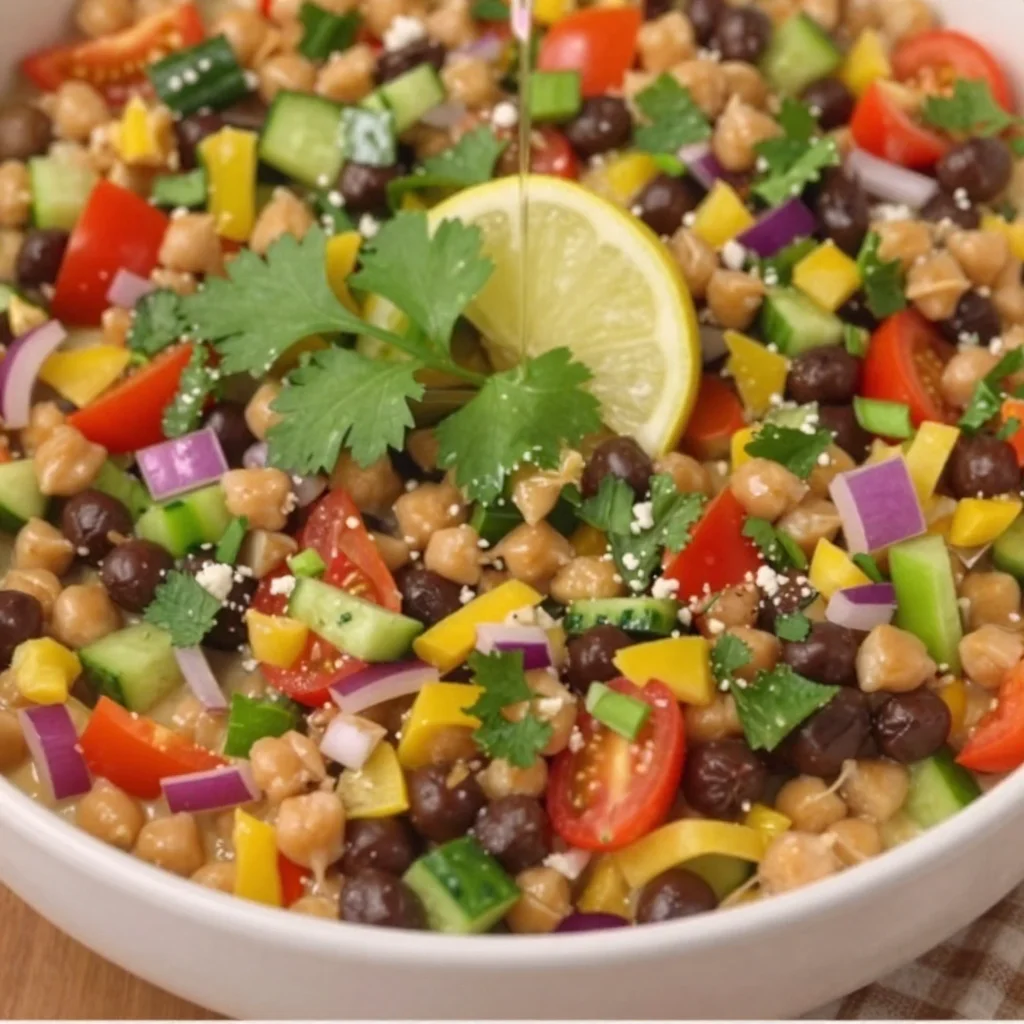
Minute Dip Salad: Fresh, Creamy Crunch in One Bowl
The Ultimate Dip Salad: A Flavor Celebration in a Bowl
Welcome to my kitchen, fellow food enthusiast! I’m thrilled you’re here, ready to dive into one of my all-time favorite recipes: the Ultimate Dip Salad. Imagine a colorful fusion of flavors and textures, where every bite transports you to a happy place filled with laughter, memories, and, of course, delicious food.
In today’s fast-paced world, we often forget how special a simple meal can be. This salad embraces the beauty of fresh ingredients and offers a delightful twist on a classic dip by turning it into a compelling salad experience. Whether you’re cooking for yourself or hosting friends, this dish is sure to impress and ignite heartfelt conversations around the table.
When I think back to my childhood, I remember summers spent at family gatherings where my aunt would whip up a delightful seven-layer dip. It would sit on the table, slowly disappearing as we gathered around, sharing stories and laughter. The creamy layers of avocados, beans, salsa, and cheese created a symphony of flavors, and I’d often sneak into the kitchen for just one more scoop. That nostalgia inspired me to create the Ultimate Dip Salad — a salad that encapsulates those joyful memories while packing a punch in terms of flavor and healthiness.
With its vibrant colors and satisfying crunch, this salad pays homage to the classic dip while bringing fresh ingredients into the spotlight. Let’s get started on this culinary adventure together!
Personal Story
The idea of creating the Ultimate Dip Salad sprang from my fondness for family gatherings, especially during summer. We’d often spend lazy afternoons lounging by the pool, full of laughter and good food. My Aunt Lucy was the queen of dips; her iconic seven-layer dip was always a hit. I can still remember the way she’d artfully layer each component, and the clinking sounds of chips dipping into creamy bliss.
One day, I decided to mix things up. While dreaming of a fresh salad for a potluck, I thought: Why not merge that tasty dip into a salad format? I wanted to capture the spirit of my aunt’s famous dish without the heaviness of traditional dips. The Ultimate Dip Salad was born, transforming a nostalgic delight into a delightful, health-forward meal that keeps the spirit alive while embracing freshness. I’ve made it countless times since, and each time it brings smiles to my loved ones’ faces, just as my aunt’s dip did for me.
Now that you’ve had a taste of my inspiration, let’s gather our ingredients and get cooking!
Ingredients
Here’s what you’ll need to make the Ultimate Dip Salad. Each ingredient has been thoughtfully chosen to bring a burst of flavor to your plate.
- Mixed Salad Greens (4 cups): I recommend using a combination of baby spinach, arugula, and romaine for a variety of textures. Feel free to substitute with kale if you’re feeling adventurous!
- Cherry Tomatoes (1 cup): These juicy little gems add a pop of color and sweetness. Substitute with diced bell peppers for a crunchier bite.
- Cucumbers (1 medium): Crisp cucumbers bring refreshing crunch. English cucumbers are great if you want fewer seeds.
- Black Beans (1 can, drained and rinsed): Packed with protein and fiber, they add a hearty element. If you’re in the mood for a different legume, chickpeas work wonderfully too.
- Avocado (1 large): The creamy texture balances out the crunch. Use a ripe avocado for the best flavor. If you’re allergic, consider using hummus in its place!
- Green Onions (3, chopped): These add a lovely oniony bite. Feel free to swap with red onions for a sharper taste, or leave them out if you prefer a milder flavor.
- Shredded Cheddar Cheese (1 cup): For that cheesy goodness! Go for sharp cheddar for more flavor, or switch to a dairy-free cheese alternative if you’re vegan.
- Sour Cream or Greek Yogurt (½ cup): This is the creamy dressing that ties everything together. For a healthier option, use natural Greek yogurt, or substitute with a dressing of your choice.
- Salsa (1 cup): A robust salsa adds a zesty kick. Choose your spice level! If salsa isn’t your thing, a homemade tomato vinaigrette could be delightful.
- Lime Juice (from 1 lime): Freshened up with a squeeze of lime juice to brighten the whole salad. You can use lemon juice if that’s what you have on hand!
Now that we have our ingredients ready, let’s move on to the fun part—cooking!
Step-by-Step Instructions
-
Prepare the Salad Base: Start by washing your mixed greens under cold water. Once they’re clean, spin them dry using a salad spinner or blot them gently with a clean kitchen towel. This step ensures your salad won’t be watery.
-
Chop the Vegetables: Next, chop the cherry tomatoes in half and slice the cucumbers into thin rounds or half-moons, depending on your preference. The key? Keeping the cucumbers and tomatoes uniform in size for even bites.
-
Make the Avocado Blend: Take your ripe avocado, slice it in half, and scoop it into a bowl. Mash it lightly using a fork but leave some chunkiness for texture. Add lime juice directly on top to keep it fresh and prevent browning.
-
Combine the Ingredients: In a large mixing bowl, start layering your salad. Begin with the mixed greens as your base, followed by the chopped cherry tomatoes, cucumbers, black beans, and shredded cheddar. Top it off with dollops of the avocado mixture.
-
Dress It Up: Spoon your salsa over the top. Remember, you can control how much you add based on personal preference! A trick here is to lightly toss the salad so that the salsa doesn’t sink to the bottom, ensuring each bite is flavorful.
-
Add a Creamy Kick: Finally, drizzle sour cream or Greek yogurt over the top. You can create fun designs or just blob it on like a pro! A sprinkle of chopped green onions over everything is the cherry on top.
-
Chill Before Serving: If you have time, let your salad sit in the fridge for about 15-20 minutes. This allows the flavors to meld beautifully together!
Isn’t it delightful how simple it is? Plus, clean-up is minimal, which we love!
Serving Suggestions
Now that your Ultimate Dip Salad is ready, it’s time to serve it up! Presentation matters, so feel free to get creative. Serve it family-style in a large bowl, allowing guests to dig in and take what they like. You can also plate individual servings in rustic, shallow bowls, making sure that each component is beautifully visible. A sprinkle of fresh herbs, like cilantro or parsley, will elevate your dish!
Consider serving it with tortilla chips on the side for some extra crunch, or even alongside grilled chicken or shrimp for a heartier meal.
Recipe Variations
The best part about the Ultimate Dip Salad is its versatility! Here are some fun twists to try next time:
-
Tex-Mex Twist: Swap out the cheddar for crumbled feta or cotija cheese, and add some jalapeños for a spicy kick!
-
Mediterranean Flair: Replace black beans with chickpeas, add diced cucumbers, sun-dried tomatoes, and finish it off with a drizzle of balsamic glaze.
-
Veggie Delight: Keep it vegan by substituting all dairy products with plant-based options, like cashew cream, and add roasted corn for extra sweetness.
-
Grilled Protein Addition: Add grilled chicken or shrimp on top for a complete meal. Perfect for summer BBQs!
-
Sweet & Spicy: Toss in diced mango or pineapple with some chili powder for a sweet context that dances alongside the tangy salsa.
The possibilities are endless, so feel free to get creative with what you have on hand!
Chef’s Notes
Cooking is all about experimentation and having fun in the kitchen! Sometimes, I like to add a splash of hot sauce for that extra zing, or even fresh herbs that I have lying around. My Ultimate Dip Salad has evolved over the years based on seasonal ingredients available at the farmer’s market and my whims — and that’s what makes it so special! Even if I stray from my original recipe, it always feels like home.
I remember one particular dinner party where I completely forgot about the avocado because I was so focused on impressing my guests with a homemade vinaigrette. It turned out great, but as soon as they took a bite, I could see the looks of joy when they found out the avocado was in the salad too. Lesson learned: It’s all about joy and surprises when cooking!
FAQs and Troubleshooting
1. What if my salad gets too soggy?
If your salad is soggy, it’s often a result of using wet greens or too much dressing. Always ensure greens are dried properly. To save a soggy salad, add more fresh lettuce and gently toss.
2. Can I make this salad ahead of time?
Absolutely! Prep the ingredients in advance but store the salad assemble separately. Put greens and beans together, and keep the toppings like avocado and salsa separate until serving.
3. Why did my avocado turn brown?
Oxygen exposure can cause browning. Always thank lime juice for halting this reaction! If you notice browning, a squeeze more of lime can freshen it up.
4. How can I make it more filling?
If you’re looking for extra protein, consider adding grilled chicken, chickpeas, or even quinoa. They’ll make it heartier without detracting from the fresh flavors!
Nutritional Info
While I’m not a nutritionist, it’s safe to say that the Ultimate Dip Salad is nutrient-rich and packed with vitamins thanks to the fresh greens, veggies, and healthy fats from the avocado. Each serving contains healthy fats, fiber, protein, and fantastic flavors — a perfect balance for a satisfying meal!
And there you have it — your guide to creating the Ultimate Dip Salad! I hope you enjoyed this journey through flavors and memories as much as I do. Now, go forth, unleash your inner chef, and share the joy of this salad with family and friends! Happy cooking!
Print
Ultimate Dip Salad
- Total Time: 20 minutes
- Yield: 4 servings 1x
- Diet: Vegetarian
Description
A colorful fusion of flavors and textures that transforms a classic dip into a delightful salad experience, perfect for gatherings.
Ingredients
- 4 cups Mixed Salad Greens (baby spinach, arugula, romaine)
- 1 cup Cherry Tomatoes (halved)
- 1 medium Cucumber (sliced)
- 1 can Black Beans (drained and rinsed)
- 1 large Avocado (mashed)
- 3 Green Onions (chopped)
- 1 cup Shredded Cheddar Cheese
- ½ cup Sour Cream or Greek Yogurt
- 1 cup Salsa
- Juice of 1 Lime
Instructions
- Prepare the Salad Base: Wash your mixed greens under cold water and dry them.
- Chop the Vegetables: Halve the cherry tomatoes and slice the cucumbers.
- Make the Avocado Blend: Mash the avocado with lime juice in a bowl.
- Combine the Ingredients: Layer mixed greens, tomatoes, cucumbers, black beans, cheddar, and the avocado mixture in a bowl.
- Dress It Up: Spoon salsa over the salad and lightly toss.
- Add a Creamy Kick: Drizzle sour cream or Greek yogurt over the top and add green onions.
- Chill Before Serving: Let the salad sit in the fridge for 15-20 minutes before serving.
Notes
Serve with tortilla chips on the side for extra crunch. You can also add grilled chicken or shrimp for a heartier meal.
- Prep Time: 15 minutes
- Cook Time: 5 minutes
- Category: Salad
- Method: No-Cook
- Cuisine: American
Nutrition
- Serving Size: 1 serving
- Calories: 350
- Sugar: 5g
- Sodium: 400mg
- Fat: 20g
- Saturated Fat: 8g
- Unsaturated Fat: 10g
- Trans Fat: 0g
- Carbohydrates: 35g
- Fiber: 10g
- Protein: 15g
- Cholesterol: 30mg
Keywords: Dip Salad, Healthy Salad, Quick Salad, Vegetarian Meal, Summer Salad
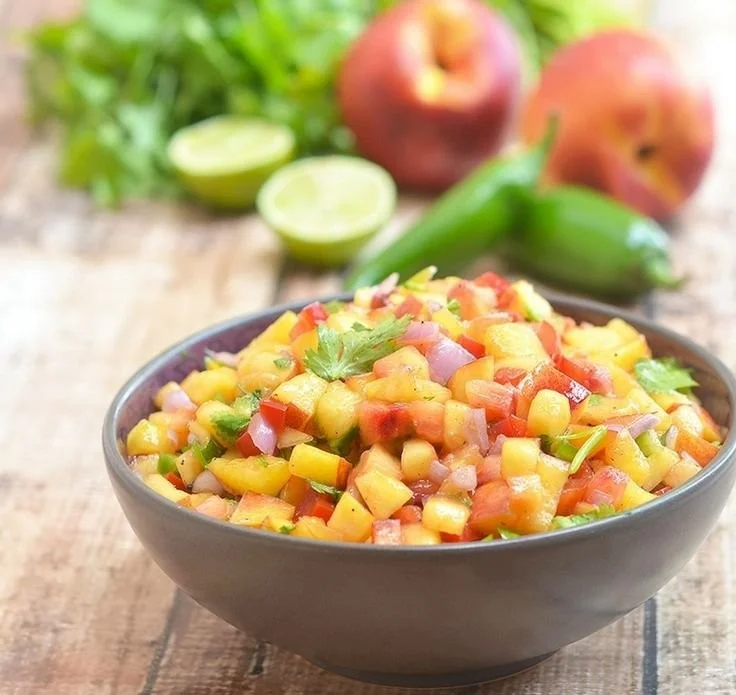
Nectarine Salsa
Nectarine Salsa: A Flavorful Summer Delight
Welcome to my kitchen, friends! I’m so glad you’re here. Today, we’re diving into a vibrant, refreshing dish that really captures the essence of summer: Nectarine Salsa. Picture this: the sun is shining, the grill is sizzling, and the air is filled with the sweet and tangy aromas of fresh ingredients. Nectarines, with their juicy, fragrant nature, are a star in this delightful concoction.
What I love about salsa is that it’s not just a condiment; it’s a celebration of flavors and textures. Whether you’re enjoying a backyard barbecue, hosting a picnic, or simply wanting to elevate your taco night, this Nectarine Salsa will bring smiles to your table. With a perfect balance of sweet, savory, and zesty notes, it’s a fantastic way to highlight seasonal produce and surprise your taste buds!
Now, let’s get our hands a little messy and create something special. You won’t need any fancy tools or hours in the kitchen; just some fresh ingredients and a dash of love!
A Nostalgic Memory
Growing up, summer meant family gatherings at my Aunt Molly’s house. Her backyard was a paradise, adorned with twinkling lights and the sweet scent of flowers. But the highlight of every gathering was her legendary salsa. While she often leaned on traditional ingredients like tomatoes and cilantro, one summer, she let me experiment with peaches and nectarines. I remember slicing the fuzzy fruits on her old wooden table, the juices running down my fingers as we laughed and danced to the music playing in the background.
That batch of nectarines and herbs sparked something magical. It was the perfect blend of textures and flavors, and my family devoured it in no time. I remember my uncle declaring it the "best salsa” he’d ever had, topped off with a crunchy tortilla chip. From that day on, nectarines became my go-to for salsa. They added a twist that made everyone smile. So, let’s recreate that magic today with my Nectarine Salsa recipe!
Ingredients
To whip up this delightful Nectarine Salsa, you’ll need the following ingredients:
-
4 ripe nectarines
Choose nectarines that yield slightly to pressure; they should be fragrant and vibrant in color! If you can’t find nectarines, peaches make a wonderful substitute, too—same flavor, slightly different texture. -
1 small red onion
This adds a bit of crunch and sharpness. If you prefer a milder flavor, try using green onions or shallots instead. -
1 jalapeño pepper (seeded and minced)
This adds just the right amount of heat. If heat isn’t your thing, feel free to omit it or use a green bell pepper for a sweeter version. -
1/4 cup fresh cilantro (chopped)
Cilantro adds a fresh burst of flavor. If you’re not a fan, basil or parsley can also work nicely! -
Juice of 1 lime
The acidity of lime juice brightens all the flavors. Lemon juice can be used in a pinch if you’re out of lime. -
Salt and pepper (to taste)
Don’t forget this! It’s essential to balance the sweetness. A sprinkle of smoked salt can add an interesting twist. -
Optional: 1/2 cup diced tomatoes
For those who want a more traditional salsa vibe, adding tomatoes creates a nice contrast in texture and flavor.
Step-by-Step Instructions
Now that we have our ingredients ready, it’s time to bring this salsa to life!
-
Prep Your Ingredients: Start by washing the nectarines thoroughly. Dry them and then cut them in half to remove the pit. Dice the nectarines into small, bite-sized pieces. You want them to be about the size of a grape—easy to scoop but still substantial enough to enjoy.
-
Dice the Red Onion: Peel your small red onion and chop it into tiny pieces. The finer the chop, the more integrated the flavor will be in the salsa. If you find you’re tearing up a bit while chopping onions, don’t worry; this is a common kitchen occurrence! You could chill the onion before chopping or even cut it under running water to help lessen the tear factor.
-
Mince the Jalapeño: If you’re using jalapeño, cut off the stem and slice it in half lengthwise. Use a spoon to scrape out the seeds (that’s where the heat lives!). Mince the pepper finely, and be sure to wash your hands after handling it—nobody wants jalapeño fingers!
-
Combine Ingredients: In a medium mixing bowl, add your diced nectarines, chopped red onion, minced jalapeño, and freshly chopped cilantro. Give this a gentle mix with a spatula—no need to over-mix, you want those nectarines to hold their integrity!
-
Season: Squeeze the juice of one lime over the mixture, and sprinkle with salt and pepper to taste. Here’s a little chef tip: start with a small amount of salt; you can always add more, but it’s hard to fix an over-salted dish!
-
Taste and Adjust: Before serving, taste your salsa. This is where you can get creative! If you like it a little spicier, throw in more jalapeño. Prefer it sweeter? Add an extra diced nectarine! Mix it up until it’s just right for your palate.
-
Let it Marinate: Allow the salsa to sit at room temperature for about 20-30 minutes. This helps all the flavors marry together beautifully—trust me, it’s worth the wait!
Serving Suggestions
Once your Nectarine Salsa is ready, you can serve it in various ways! I recommend plating it in a charming bowl surrounded by crispy tortilla chips for dipping. You could also use it as a vibrant topping for grilled chicken or fish. Feeling adventurous? Spoon it onto tacos or even a fresh salad for that extra zing. The color and aroma will wow your guests and make your meal feel extra festive!
Recipe Variations
Let your creativity shine with some fabulous variations on this delicious salsa:
-
Roasted Nectarine Salsa: Roast the nectarines briefly on a hot grill for a smoky flavor that adds depth to the salsa.
-
Tropical Twist: Add diced mango or pineapple for a tropical flair that pairs beautifully with everything from chips to grilled shrimp.
-
Mediterranean Style: Incorporate feta cheese and olives for a delicious Mediterranean twist that’s perfect on pita chips.
-
Spicy Kick: Add a dash of cayenne or crushed red pepper flakes for an extra jolt of heat.
-
Cucumber Salsa: Mix in chopped cucumbers for extra crunch and a refreshing finish.
Chef’s Notes
I absolutely love how this recipe has evolved over the years! Initially, I stuck to simple recipes based on what was available. But every summer, as I experiment with different fruits and spices, I find a new twist that makes me fall in love all over again. One memorable time, I added a splash of agave syrup to enhance the sweetness, and it completely changed the game! Cooking is all about exploration and adaptation. So, don’t hesitate to test your ideas; you might stumble upon your next favorite dish!
FAQs and Troubleshooting
1. Why is my salsa too watery?
Sometimes, nectarines can release too much juice, making your salsa watery. To fix this, strain the salsa with a fine mesh sieve or add some diced bell pepper to absorb moisture.
2. How can I store nectarines before using them?
If your nectarines are firm, store them at room temperature until they ripen. Once ripe, you can refrigerate them for a couple of days, but remember, they’re best enjoyed fresh!
3. Can I make this salsa in advance?
Yes! You can prepare the salsa a few hours ahead of time. However, for the best flavor, I recommend mixing in the cilantro and lime juice just before serving to keep things fresh and vibrant.
4. What if I don’t like cilantro?
No problem! Substitute cilantro for chopped mint, parsley, or even a sprinkle of dill, depending on your taste preferences. Each will give your salsa a distinct and fresh twist!
Nutritional Info
While exact nutritional values can vary, a serving of this Nectarine Salsa is typically low in calories, loaded with vitamins, and brimming with healthy ingredients. Feel free to adjust based on your ingredients for the healthiest options!
And there you have it—a delightful recipe for Nectarine Salsa that will brighten your meals and bring a splash of summer to your table year-round. Remember, cooking is all about love, experimentation, and joy. Don’t be afraid to make it your own! Happy cooking, friends!
Print
Nectarine Salsa
- Total Time: 30 minutes
- Yield: 4 servings 1x
- Diet: Vegan
Description
A vibrant and refreshing Nectarine Salsa, perfect for summer gatherings and elevating your meals.
Ingredients
- 4 ripe nectarines, diced
- 1 small red onion, finely chopped
- 1 jalapeño pepper, seeded and minced
- 1/4 cup fresh cilantro, chopped
- Juice of 1 lime
- Salt and pepper, to taste
- Optional: 1/2 cup diced tomatoes
Instructions
- Prep your ingredients by washing the nectarines thoroughly, drying them, and cutting them in half to remove the pit. Dice them into small pieces.
- Dice the small red onion into tiny pieces.
- Mince the jalapeño, removing the seeds to reduce heat if desired.
- Combine the diced nectarines, chopped red onion, minced jalapeño, and cilantro in a medium bowl.
- Season with lime juice, salt, and pepper to taste.
- Taste and adjust seasoning if necessary.
- Let it marinate at room temperature for 20-30 minutes before serving.
Notes
For a more traditional salsa vibe, add diced tomatoes. Experiment with different fruits and spices to find your favorite variation!
- Prep Time: 10 minutes
- Cook Time: 0 minutes
- Category: Side Dish
- Method: No Cook
- Cuisine: Mexican
Nutrition
- Serving Size: 1 serving
- Calories: 80
- Sugar: 8g
- Sodium: 5mg
- Fat: 0g
- Saturated Fat: 0g
- Unsaturated Fat: 0g
- Trans Fat: 0g
- Carbohydrates: 18g
- Fiber: 2g
- Protein: 1g
- Cholesterol: 0mg
Keywords: nectarine, salsa, summer, refreshing, easy recipe
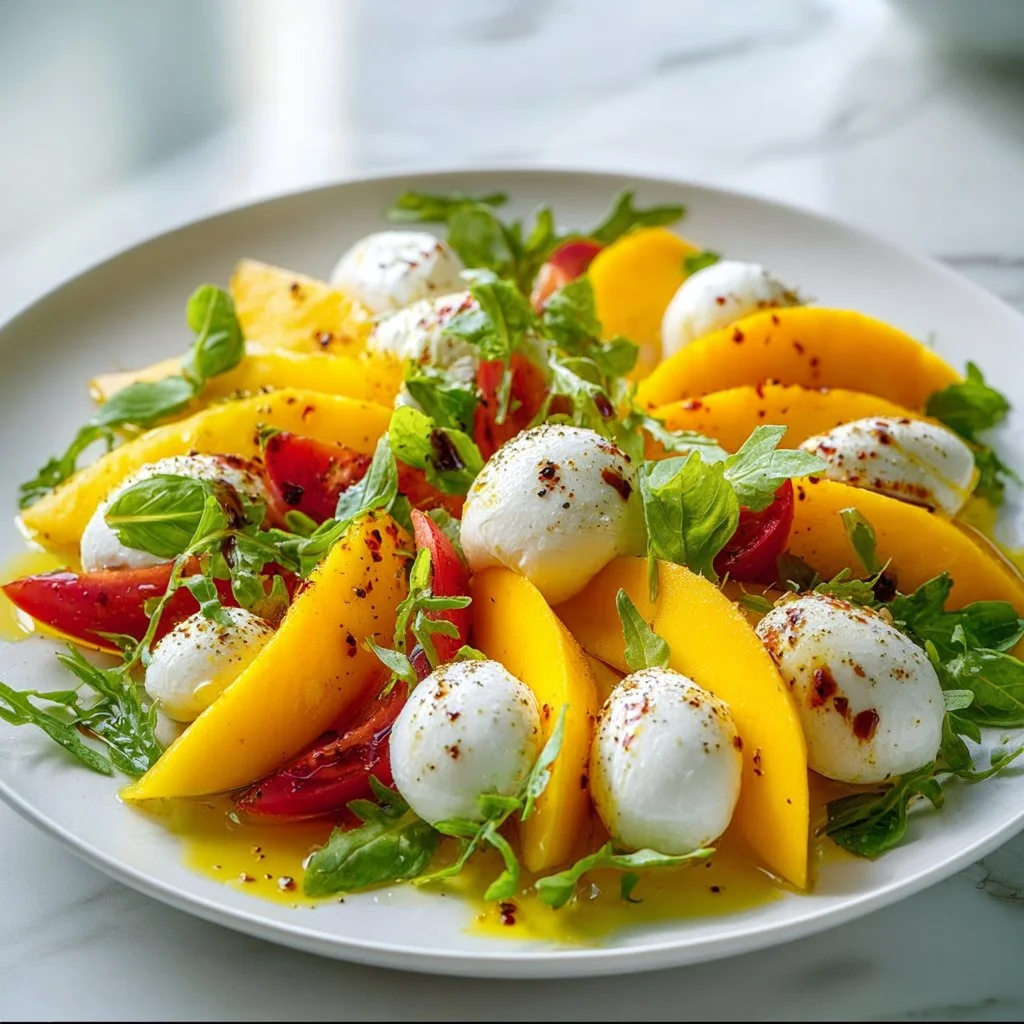
Mango-Mozzarella Salad
Refreshing Mango-Mozzarella Salad: A Burst of Flavors in Every Bite
Welcome back, my lovely food enthusiasts! Today, I’m excited to share a delightful recipe that will transport your taste buds straight to a sunny tropical paradise—Mango-Mozzarella Salad. Imagine this: ripe, juicy mangoes that drip with sweetness, perfectly paired with the creamy freshness of mozzarella, and balanced with vibrant herbs and a zesty dressing. It’s a harmony of flavors that feels like a sun-soaked picnic in your mouth!
This salad is one of those dishes that reminds me of carefree summer days spent outdoors, soaking in the sunshine and snacking on something light and refreshing. Whether you’re preparing a laid-back barbecue, a backyard gathering, or a light lunch, this Mango-Mozzarella Salad perfectly captures the essence of joy in cooking and sharing meals with loved ones.
Why is this recipe special to me? Well, it all started one summer afternoon when my dear friend Sarah and I decided to host a spontaneous picnic at the park. With a limited budget and a bit of creativity, we made this salad, using fresh produce from our local farmer’s market. The laughter, stories, and sandwiches we shared that day were dramatically enhanced by the sweet and savory notes of the salad. Ever since then, it’s been one of my go-to recipes for gatherings and potlucks.
So, grab your apron and let’s dive into this vibrant recipe that’s so easy to whip up, you might just find yourself making it every week!
Personal Story
I can still hear the sound of the birds chirping and the rustling leaves in the gentle breeze from that unforgettable summer day with Sarah. We had zero plans, but as true food lovers, we can never resist a trip to the farmer’s market. We filled our baskets with whatever caught our eyes—colorful bell peppers, fragrant herbs, and, of course, the most heavenly ripe mangoes we had ever laid our eyes on.
Back at my place, with only a few kitchen essentials, we decided to combine our treasures into a salad. As we sliced into the mango, the juicy aroma was intoxicating. We tossed together our offerings, and that first bite? Pure delight! The creaminess of mozzarella blending with the bursting sweetness of mango took me straight back to every joyful summer I had ever lived. It was a lightbulb moment; simplicity truly is the star of great cooking! Now, every time I make this salad, I’m reminded of that day, a celebration of friendship and the joy of home-cooked goodness.
Ingredients
Let’s get to the fun part—gathering our ingredients! Here’s what you’ll need to create this vibrant Mango-Mozzarella Salad:
-
2 ripe mangoes
Tip: Choose mangoes that yield slightly to gentle pressure; that means they’re ripe and juicy! If you can’t find ripe mangoes, you can substitute with peaches or nectarines. -
1 ball of fresh mozzarella
Chef Insight: Fresh mozzarella is soft, creamy, and a million times better than the pre-shredded kind. You can also use burrata for extra creaminess! -
1 cup cherry tomatoes
Substitution Tip: Feel free to use heirloom tomatoes or even sun-dried tomatoes if you’re in a pinch! -
1 small red onion
Chef Insight: Soak sliced onions in cold water for 10 minutes to mellow their flavor if they’re too pungent for your taste! -
Fresh basil leaves (about ¼ cup)
Recommendation: Use Thai basil for a slightly different flavor profile, or substitute with mint for a refreshing twist! -
Juice of 1 lime
Chef Hack: If you want more zing, add some lime zest too! -
3 tablespoons extra virgin olive oil
Tip: Choose a good quality olive oil—it makes a difference in flavor! -
Salt and pepper to taste
Suggestion: Sea salt or fleur de sel offers a delightful crunch—and don’t be shy with the pepper!
Step-by-Step Instructions
Let’s roll up those sleeves and get started on this mouthwatering salad! Follow these steps, and we’ll have a bowl of colorful flavor to enjoy in no time.
Step 1: Prepare the Mangoes
- Begin with your ripe mangoes. Stand each mango upright on a cutting board and carefully slice down the sides of the pit.
- Use a paring knife to score the flesh in a crisscross pattern, then scoop out the cube-shaped mango pieces with a spoon.
- Add the mango to a large mixing bowl, and let its juices mingle!
Tip: Rinse your hands after cutting mangoes to avoid sticky fingers!
Step 2: Slice the Cherry Tomatoes
- Grab your cherry tomatoes; slice them in half or quarters if they are on the larger side.
- Add those to the mixing bowl, allowing the juices from the tomatoes to play with the mango.
Chef Hack: If possible, choose a mix of colored cherry tomatoes for a stunning visual effect!
Step 3: Cut the Mozzarella
- Take your ball of fresh mozzarella and slice it into small bite-sized pieces or tear it into chunks for a rustic touch.
- Toss these delightful cheese bites into the bowl.
Pro Tip: Don’t throw away any of the liquid from the mozzarella! It’s delicious, so spoon it in for extra flavor!
Step 4: Red Onion Magic
- Slice the red onion thinly, as thick slices can overwhelm the salad.
- If you find the onion too pungent, soak the slices in cold water for about 10 minutes before adding them to the salad.
Tip: Methodically layering flavors is key! Add the onion right after the tomatoes to lock in flavors.
Step 5: Add Fresh Herbs
- Tear the fresh basil leaves and sprinkle them over the salad.
- Basil loves mango; trust me on this one!
Step 6: Dress It Up
- In a small bowl, whisk together the lime juice, olive oil, salt, and pepper until combined.
- Pour the dressing lovingly over the salad, ensuring everything gets a good, juicy bath.
Chef Hack: If you want an extra kick, add a pinch of chili flakes to the dressing for a subtle heat!
Step 7: Gently Toss and Serve
- Using a spatula, gently fold the mixture together to combine all those beautiful flavors.
- Serve immediately or let it sit for a few minutes to allow the ingredients to marinate!
Chef Note: If serving later, wait to dress the salad until just before serving to keep the ingredients fresh!
Serving Suggestions
This Mango-Mozzarella Salad is a splendid side dish for grilled meats or fish, or it can shine as a light main course. To plate, consider layering the salad ingredients in a clear serving bowl, showcasing the stunning colors. A light drizzle of balsamic reduction on top adds an elegant touch, and a sprinkle of additional basil can elevate the presentation. Don’t forget some crusty bread or tortilla chips for dipping!
Recipe Variations
Here are some creative twists to keep your Mango-Mozzarella Salad fresh and exciting:
- Add Avocado: For extra creaminess, toss in some ripe avocado cubes!
- Grill the Ingredients: Slightly char the mango and tomatoes on a grill for a smoky flair.
- Quinoa Base: To make it heartier, serve the salad over a mound of fluffy quinoa!
- Fiesta Style: Add black beans and corn for a fun South-of-the-Border vibe!
- Vegan Option: Substitute mozzarella with tofu or cashew cheese for a delicious plant-based version.
Chef’s Notes
Oh, the memories this salad brings back! I’ve experimented over the years, adding different ingredients to suit seasonal produce or my guests’ preferences. Sometimes, I even serve it with a spicy avocado dressing for a little twist! Cooking is about evolution; let your creativity run wild! And if a mess occurs, consider it a badge of honor—one of my favorite kitchen stories involved a mango explosion that had us giggling for days.
FAQs and Troubleshooting
-
How do I choose the perfect mango?
Look for mangoes that give slightly when you press them. They should have a fruity aroma near the stem area. If they’re overly firm, they may not be ripe yet. -
Can I make the salad ahead of time?
While the salad can be prepped in advance, I recommend adding the dressing just before serving to keep the freshness of the ingredients intact. -
What do I do if my mangoes are not sweet enough?
Drizzle a little honey or agave syrup over the salad to elevate the sweetness. You could also add a pinch of sugar to the dressing! -
How can I store leftovers?
Keep any leftover salad in an airtight container in the fridge for up to a day. Be aware that the ingredients may lose some texture, but the flavors will still be delicious!
Nutritional Info (Optional)
This Mango-Mozzarella Salad is not only delicious but offers nutritional benefits too! You’ll get:
- Rich vitamins from mangoes (Vitamin C, Vitamin A)
- Protein and calcium from mozzarella
- Healthy fats from olive oil
- Antioxidants and fiber from fresh vegetables
So there you have it: a refreshing Mango-Mozzarella Salad bursting with flavor and perfect for any occasion! I hope you enjoy making it as much as I do. Happy cooking, and let’s raise a toast to the simple joys of kitchen adventures! 🍽️
Print
Refreshing Mango-Mozzarella Salad
- Total Time: 15 minutes
- Yield: 4 servings 1x
- Diet: Vegetarian
Description
A delightful salad combining ripe mangoes and creamy mozzarella, perfect for summer gatherings.
Ingredients
- 2 ripe mangoes
- 1 ball of fresh mozzarella
- 1 cup cherry tomatoes
- 1 small red onion
- Fresh basil leaves (about ¼ cup)
- Juice of 1 lime
- 3 tablespoons extra virgin olive oil
- Salt and pepper to taste
Instructions
- Prepare the mangoes by slicing down the sides of the pit and scooping out cubes.
- Slice the cherry tomatoes in half and add them to the mixing bowl.
- Cut the fresh mozzarella into small bite-sized pieces and add them into the bowl.
- Slice the red onion thinly and soak in cold water if too pungent, then add to the salad.
- Add the fresh basil leaves over the salad.
- Dress the salad by whisking together lime juice, olive oil, salt, and pepper, then pour over the salad.
- Gently toss the mixture together to combine all the flavors.
Notes
Add avocado for creaminess, grill the ingredients for a smoky flavor, or serve over quinoa for a heartier dish.
- Prep Time: 15 minutes
- Cook Time: 0 minutes
- Category: Salad
- Method: Mixing
- Cuisine: Fusion
Nutrition
- Serving Size: 1 serving
- Calories: 250
- Sugar: 14g
- Sodium: 150mg
- Fat: 16g
- Saturated Fat: 4g
- Unsaturated Fat: 10g
- Trans Fat: 0g
- Carbohydrates: 24g
- Fiber: 3g
- Protein: 6g
- Cholesterol: 15mg
Keywords: mango, mozzarella, salad, summer recipe, vegetarian dish
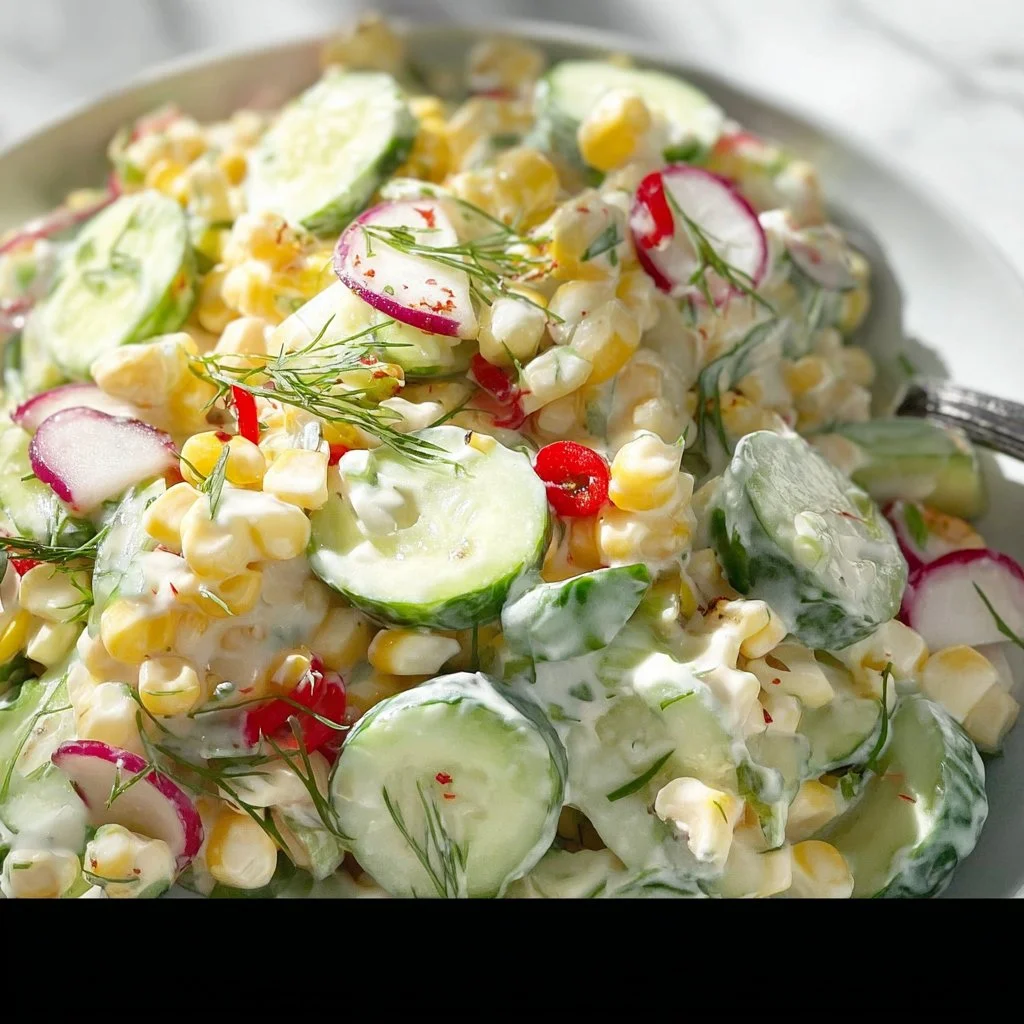
Creamy Corn Cucumber Salad
Creamy Corn Cucumber Salad: A Delightful Summer Dish
Introduction
Hello, all you wonderful food lovers! Welcome back to my cozy corner of the internet. Today, I’m thrilled to share a recipe that’s become a staple in my summer repertoire: Creamy Corn Cucumber Salad. With its crunchiness, creaminess, and a sprinkle of freshness, it’s truly a celebration of the season!
Is there anything better than the summer sun shining on your back while tossing together a vibrant dish? Just the thought of juicy corn and cool, crisp cucumbers mixing together brings a smile to my face. This salad captures the very essence of summer gatherings. It’s perfect for potlucks, spontaneous summer soirées, or a simple family dinner on the patio.
What I love most about this salad is how simple it is to throw together. The colorful ingredients not only please the eye but also offer a delightful textural contrast. They say we eat first with our eyes, and trust me, this dish will have everyone reaching for seconds (and thirds)!
Now, if you’ve ever felt like you needed a cooking degree to whip up something delicious, let me assure you: you don’t! The beauty of sharing meals is about creativity and love. Cooking brings people together, and I believe that anyone can create something magical in the kitchen, especially with a little guidance. So grab your apron, and let’s dive into this easy yet impressive Creamy Corn Cucumber Salad recipe!
Personal Story
Growing up, my family had a cherished tradition of gathering for summer picnics in our backyard. The scent of grilled burgers and the laughter of loved ones filled the air. Among all the scrumptious dishes, my aunt Claire would always bring her famous corn cucumber salad. It was fresh, crunchy, and its creamy dressing was the perfect complement—a symphony of flavors that danced on your palate.
One particular summer, I remember sitting on the grass with my cousins, each spoonful of that salad igniting bursts of joy as we swapped stories and made memories. Aunt Claire would always wince playfully as we dug in and fought over the last spoonful—her secret ingredient? A splash of her garden-fresh lemon juice. That day sparked my love for recipes that bring people together and set the stage for what would become my lifelong passion. Now, I share this recipe with friends, as it’s a delicious tribute to those cherished moments.
Ingredients
Here’s what you’ll need to bring this delightful salad to life:
-
Corn (fresh or canned):
- Using fresh corn? Grill or boil it for a sweet, crunchy texture. If canned, just make sure to rinse it thoroughly to wash away any excess salt!
-
Cucumbers:
- Opt for English cucumbers for their crispness and minimal seeds. If you prefer a stronger flavor, go for regular cucumbers, but be sure to peel them!
-
Greek Yogurt:
- This will form the creamy base of your salad, giving it a tangy kick and health benefits. If dairy-free, feel free to substitute with coconut yogurt or a cashew cream!
-
Mayonnaise:
- Adds an extra creamy element! You can use olive oil mayo for a lighter option.
-
Fresh Dill:
- A key herb that brightens up the dish. If you don’t have fresh dill, dried dill can work in a pinch (just use half the amount).
-
Lemon Juice:
- For that zesty freshness! You can substitute with lime juice for a slight twist.
-
Salt and Pepper:
- To taste. Use sea salt for a bit of crunch, and fresh cracked pepper for enhanced flavor.
Choosing the right ingredients can bring out the best in this salad, so trust your instincts and don’t hesitate to make it your own!
Step-by-Step Instructions
Ready to whip up this salad? Let’s break down those cooking steps, shall we?
-
Prepare the Corn:
- If you’re starting with fresh corn, bring a pot of water to a boil. Add the corn cobs and cook them for 5–7 minutes until tender. Let them cool before cutting the kernels off.
- Chef Tip: If you’re craving a smoky flavor, toss the corn cobs on a grill until charred and then slice off those kernels.
-
Chop the Cucumbers:
- Wash and slice your cucumbers. If you’re using regular cucumbers, I recommend peeling them since the skin can be a bit bitter.
- Chef Insight: For a more elegant presentation, create matchstick slices instead of regular bites—that way, each forkful looks fancy!
-
Mix the Dressing:
- In a large mixing bowl, combine 1 cup of Greek yogurt, 1/4 cup of mayonnaise, and the juice of one lemon. Stir until smooth and creamy.
- Little Hack: If you want to build deeper flavors, add in a teaspoon of Dijon mustard or a splash of apple cider vinegar for tartness.
-
Combine Ingredients:
- Add in the corn and cucumbers, gently folding them into the creamy dressing.
- Toss in a tablespoon of fresh dill, and sprinkle some salt and pepper over the top.
-
Chill and Serve:
- Let the salad chill in the refrigerator for at least 30 minutes. This allows the flavors to meld together beautifully.
- Chef Hack: If you’re in a hurry, you can skip the chilling step! Just make sure to serve it immediately for that fresh crunch.
Serving Suggestions
To serve this vibrant salad, scoop it into a beautiful serving bowl, or go rustic by using a wooden platter. Garnish with a few fresh dill sprigs on top for an extra touch of elegance and a pop of color. This Creamy Corn Cucumber Salad pairs beautifully with grilled meats or can stand alone as a light lunch. You can even serve it alongside crunchy pita chips or lettuce wraps for a refreshing snack.
Recipe Variations
- Add Protein: Toss in some shredded rotisserie chicken or chickpeas for a hearty meal.
- Spicy Kick: Mix in diced jalapeños or a sprinkle of cayenne pepper for a spicy twist.
- Vegan Option: Substitute Greek yogurt and mayonnaise with cashew cream and silken tofu to make this dish completely plant-based.
- Cheese Lover: Crumble some feta cheese or goat cheese on top for a creamy, tangy flavor.
- Seasonal Additions: In the fall, throw in some diced apples for a sweet crunch; in winter, roasted butternut squash!
Chef’s Notes
This recipe has evolved over time, but the heart of it remains the same: easy, colorful comfort. I can still hear the laughter from that backyard picnic as I make this salad, with everyone clamoring for just one more bite! It’s fun to experiment with different ingredients, or even dressing styles. One time, I substituted the dressing with a tahini-lemon sauce, and it gave the salad a unique, nutty flavor!
Every time I make this dish, it reminds me that food isn’t just about what’s on the plate; it’s about the stories we share and the joy we bring to those we love!
FAQs and Troubleshooting
-
Can I make this salad ahead of time?
- Yes! Just remember that the salad is best enjoyed fresh. To keep the cucumbers crunchy, add them right before serving.
-
What if my dressing is too thick?
- Don’t worry! If you find the dressing too thick, a splash of milk or water can help thin it out to your desired consistency.
-
How do I store leftovers?
- Store any leftovers in an airtight container in the refrigerator for up to 2 days. The salad may get a bit watery, so give it a good stir before serving again.
-
Can I use frozen corn?
- Absolutely! Just thaw it and pat it dry to remove excess moisture before mixing it with the other salad ingredients.
Nutritional Info (if applicable)
While I typically suggest enjoying food in moderation, here’s a quick glance at the nutritional components of this salad:
- Calories: 200 (per serving)
- Protein: 6g
- Carbs: 15g
- Fats: 12g
- Fiber: 3g
Feel free to adjust the recipe to suit your dietary needs or cravings.
So there you have it—a vibrant, flavorful Creamy Corn Cucumber Salad that’s perfect for any summer gathering. I hope this recipe inspires you to get cooking and create your kitchen magic. Don’t forget to drop a comment below; I’d love to hear about your own version or any memories you have attached to similar dishes. Until next time, happy cooking, and may your kitchen always be filled with love and laughter!
Print
Creamy Corn Cucumber Salad
- Total Time: 45 minutes
- Yield: 4 servings 1x
- Diet: Vegetarian
Description
A delightful summer salad featuring crunchy cucumbers and sweet corn in a creamy dressing.
Ingredients
- 2 cups Corn (fresh or canned, fresh cooked)
- 2 Cucumbers (preferably English, sliced)
- 1 cup Greek Yogurt (or coconut yogurt for dairy-free)
- 1/4 cup Mayonnaise (olive oil mayo for lighter option)
- 2 tablespoons Fresh Dill (or dried dill, half the amount)
- 2 tablespoons Lemon Juice (or lime juice)
- Salt and Pepper (to taste)
Instructions
- Prepare the Corn: Bring a pot of water to a boil, add corn cobs, and cook for 5–7 minutes until tender. Let cool and cut kernels off.
- Chop the Cucumbers: Wash and slice cucumbers. Peel if using regular cucumbers.
- Mix the Dressing: In a large bowl, combine Greek yogurt, mayonnaise, and lemon juice. Stir until smooth.
- Combine Ingredients: Add corn and cucumbers to the dressing, folding gently. Toss in dill, salt, and pepper.
- Chill and Serve: Let the salad chill in the refrigerator for at least 30 minutes before serving.
Notes
Best enjoyed fresh. Add cucumbers right before serving to maintain their crunch.
- Prep Time: 15 minutes
- Cook Time: 10 minutes
- Category: Salad
- Method: Mixing
- Cuisine: American
Nutrition
- Serving Size: 1 serving
- Calories: 200
- Sugar: 5g
- Sodium: 300mg
- Fat: 12g
- Saturated Fat: 2g
- Unsaturated Fat: 7g
- Trans Fat: 0g
- Carbohydrates: 15g
- Fiber: 3g
- Protein: 6g
- Cholesterol: 5mg
Keywords: salad, summer salad, corn, cucumber, creamy dressing
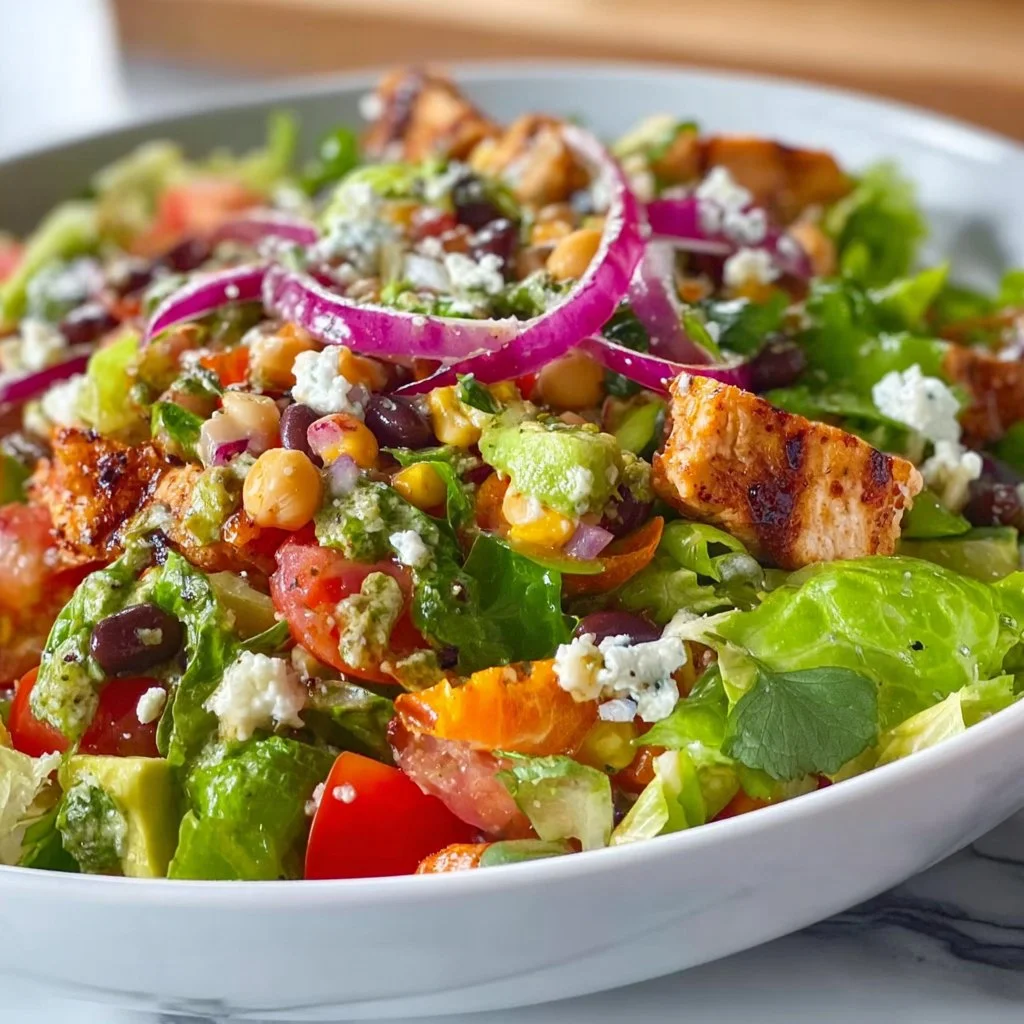
Santa Fe Salad
# Santa Fe Salad: A Flavorful Fiesta in Every Bite!

## Introduction

Welcome to my kitchen, food lovers! Today, we’re diving into a dish that’s as bright and vivacious as the sun-soaked vistas of New Mexico — the Santa Fe Salad. Picture this: the tantalizing aroma of spices wafting through the air, the vibrant colors of fresh veggies adorning your plate, and the undeniable joy of sharing a dish that embodies flavor and freshness.

Now, you might wonder, “What’s so special about a salad?” Well, let me tell you, this isn’t just any ordinary salad. The Santa Fe Salad encapsulates the spirit of community and celebration, where every bite bursts with the warmth of Southwest flavors and the crispness of garden-fresh ingredients. It’s all about that perfect mix of textures and tastes—crunchy, creamy, spicy, and zesty. Whether it’s a sunlit picnic, a cozy family dinner, or a festive gathering with friends, this salad shines as a star attraction on any table.

I’ve always believed that the best meals don’t just fill the belly; they nourish the soul and create connections. I remember the first time I encountered a Santa Fe Salad at a local eatery during my travels in New Mexico. I was immediately drawn in by the colors and aroma that danced in the air. With its lively ingredients, it wasn't just a dish—it was an experience! I knew then that I had to recreate that magic at home, and now, I’m thrilled to share it with you. Join me as we journey through the layers of flavors and memories that make this salad truly special!

## Personal Story

Let me take you back to a summer day in Santa Fe, where the sun is shining brightly, and the air is filled with the scent of roasting green chilies. I was visiting a quaint little café, eager to try something new. When the Santa Fe Salad arrived at my table, I was mesmerized by the burst of colors – bright reds, greens, yellows, and creamy whites all piled high, making it look like an edible work of art.

What caught my attention was not just the beautiful presentation, but the sensation of flavors when I took my first bite. The crispness of the lettuce met the sweetness of ripe corn, complemented by the smoky, spicy notes of black beans and avocados. It was a flavor explosion! I quickly learned that each ingredient played a vital role in crafting the experience. Instantly, I felt inspired. I wanted to recreate this vibrant plate at home, not just for myself, but for everyone I loved and wanted to share the joy of cooking with.

Ever since that day, my Santa Fe Salad has become a favorite dish in my own repertoire. It invites friends around my table, sparks laughter, and creates new memories — making it more than just a salad; it has evolved into a symbol of togetherness and the vibrant spirit of the Southwest.

## Ingredients

Here’s what you’ll need to whip up your very own Santa Fe Salad:

- **Mixed Greens** (e.g., Romaine, spinach, or arugula)
   - *Insight*: This is the base of your salad. Feel free to mix and match greens for flavor and texture. For a heartier option, use kale.

- **Black Beans** (canned or cooked)
   - *Substitution Tip*: If you’re looking for a different flavor, chickpeas or kidney beans work well too!

- **Corn** (fresh, frozen, or canned)
   - *Chef Insight*: Sweet corn adds a lovely crunch and sweetness; if you can, grill it for a smoky twist!

- **Cherry Tomatoes** (halved)
   - *Substitution Tip*: Grape tomatoes or heirloom varieties add a personalized touch!

- **Avocado** (diced)
   - *Chef Insight*: Always buy avocados that are slightly soft to the touch for a creamy addition. Use lime juice to keep them from browning.

- **Red Onion** (thinly sliced)
   - *Suggestion*: If you prefer a milder flavor, soak the slices in cold water for 10 minutes before adding.

- **Cilantro** (fresh, chopped)
   - *Substitution Tip*: If cilantro isn’t your thing, try fresh parsley for a different herbaceous flavor.

- **Lime Juice** (freshly squeezed)
   - *Chef Insight*: Fresh lime juice brightens everything! It’s worth skipping the bottled stuff for this one.

- **Olive Oil** (extra virgin)
   - *Insight*: A high-quality olive oil elevates the salad. Experiment with flavored oils, like garlic or chili-infused.

- **Feta Cheese** (crumbled)
   - *Substitution Tip*: For a vegan option, omit cheese or substitute with nutritional yeast for a cheesy flavor.

- **Chili Powder** or **Cumin**
   - *Chef Insight*: These spices will link your salad to the essence of Southwest cuisine—don’t hold back!

## Step-by-Step Instructions

### 1. Prepare Your Ingredients
Start by washing and prepping your mixed greens. Tear them into bite-sized pieces (no need to get fancy here; rustic is the name of the game!). Next, rinse the canned black beans and drain the corn. For fresh corn, you’ll want to cook it briefly if you prefer it warm or grill it for a tasty char.

### 2. Dice and Chop
Now it’s time to dice the avocado, chop the cilantro, slice the red onion, and halve those cherry tomatoes. Take your time here. This step is therapeutic, and it’s where the magic starts to come together.

### 3. Assemble the Salad
Grab a large bowl and toss in all your greens first, then layer on the black beans, corn, tomatoes, and avocado—feeling free to toss a little as you go to evenly distribute. Trust me, layering adds that special touch!

### 4. Make the Dressing
In a small bowl, whisk together the lime juice, olive oil, chili powder (or cumin), and a pinch of salt. If you want an added kick, throw in a dash of pepper or some finely minced jalapeño! Once combined, pour it over the salad and mix gently to coat everything evenly.

### 5. Add the Finishing Touches
Sprinkle the crumbled feta cheese and chopped cilantro on top. If you want to impress, save a few sprigs of cilantro for garnish. Presentation matters!

### 6. Serve Immediately
Salads are best enjoyed fresh, so dive in right away. If you’re making this for later, keep the dressing separate until serving to retain that crispness!

## Serving Suggestions

When serving your Santa Fe Salad, consider using large, vibrant bowls to showcase the colorful ingredients. You can also serve it alongside tortilla chips for added crunch or grilled chicken for a more filling option. Drizzling additional lime juice right before serving can brighten it up even more—fabulous!

## Recipe Variations

1. **Spicy Santa Fe Salad**: Add sliced jalapeños or a jalapeño-infused olive oil to bring the heat!
2. **Protein-Packed**: Toss in rotisserie chicken or grilled shrimp for a more hearty option.
3. **Vegan Delight**: Skip the cheese and replace it with marinated tofu or tempeh for a lovely plant-based protein boost.
4. **Seasonal Twist**: Bring in seasonal fruits, like sliced peaches or pomegranate seeds, to keep things fresh and exciting.
5. **Quinoa Addition**: For a tahini twist, mix in cooked quinoa for added texture and health benefits.

## Chef’s Notes

I can’t tell you how many times this recipe has evolved in my kitchen. At first, it was all about gathering random vegetables from my fridge and tossing them together. Over the years, I honed it into something that not only looks great but feels like a warm hug on a plate.

A funny kitchen story: I once mistakenly added a whole cup of chili powder instead of a teaspoon! Let me tell you, that salad was a fiery adventure that left me gasping for milk instead of enjoying the flavors. Remember, always taste as you go, and don’t be afraid to adjust seasonings to your liking!

## FAQs and Troubleshooting

**Q: How do I keep avocado from browning?**
A: The best trick is to toss diced avocado with lime juice. This natural acid helps prevent oxidation.

**Q: My salad isn’t flavorful. What should I do?**
A: Make sure to season properly! A pinch of salt and a squeeze of fresh lime can really elevate and bring out the flavors.

**Q: Can I prepare this salad ahead of time?**
A: You can prep all the ingredients ahead of time, but I recommend storing the dressing separately until right before serving for maximum freshness.

**Q: I don’t like cilantro. What can I use instead?**
A: No problem! Try using parsley or even fresh basil for a completely different flavor profile.

## Nutritional Info

This salad is not only flavorful but also nutritious! Packed with healthy fats, fiber, and a plethora of vitamins, it’s a great addition to any meal.

Calories: ~300 per serving (this will vary based on added ingredients)
Protein: ~10g
Carbohydrates: ~40g
Fat: ~15g

---

And there you have it — the Santa Fe Salad, a celebration of colors and flavors that’s perfect for any occasion! Don’t just take my word for it; roll up those sleeves and get cooking! Be sure to share your creations and let the kitchen adventures begin. Happy cooking!
Santa Fe Salad
- Total Time: 25 minutes
- Yield: 4 servings
- Diet: Vegetarian
Description
A vibrant and flavorful salad packed with fresh vegetables, black beans, and a zesty dressing that embodies the spirit of the Southwest.
Ingredients
- Mixed Greens (e.g., Romaine, spinach, or arugula)
- Black Beans (canned or cooked)
- Corn (fresh, frozen, or canned)
- Cherry Tomatoes (halved)
- Avocado (diced)
- Red Onion (thinly sliced)
- Cilantro (fresh, chopped)
- Lime Juice (freshly squeezed)
- Olive Oil (extra virgin)
- Feta Cheese (crumbled)
- Chili Powder or Cumin
Instructions
- Prepare your ingredients by washing and prepping your mixed greens. Tear them into bite-sized pieces. Rinse the canned black beans and drain the corn.
- Dice the avocado, chop the cilantro, slice the red onion, and halve the cherry tomatoes.
- Assemble the salad by tossing in all your greens first, then layering on the black beans, corn, tomatoes, and avocado.
- Make the dressing by whisking together lime juice, olive oil, chili powder (or cumin), and a pinch of salt in a small bowl.
- Add the crumbled feta cheese and chopped cilantro on top and garnish with sprigs of cilantro.
- Serve immediately for the best freshness.
Notes
For added flavor, consider using flavored olive oils and serving with tortilla chips or grilled chicken.
- Prep Time: 15 minutes
- Cook Time: 10 minutes
- Category: Salad
- Method: Tossing
- Cuisine: Southwestern
Nutrition
- Serving Size: 1 serving
- Calories: 300
- Sugar: 5g
- Sodium: 250mg
- Fat: 15g
- Saturated Fat: 3g
- Unsaturated Fat: 10g
- Trans Fat: 0g
- Carbohydrates: 40g
- Fiber: 12g
- Protein: 10g
- Cholesterol: 15mg
Keywords: salad, Santa Fe, Southwestern, healthy, fresh, vegetarian
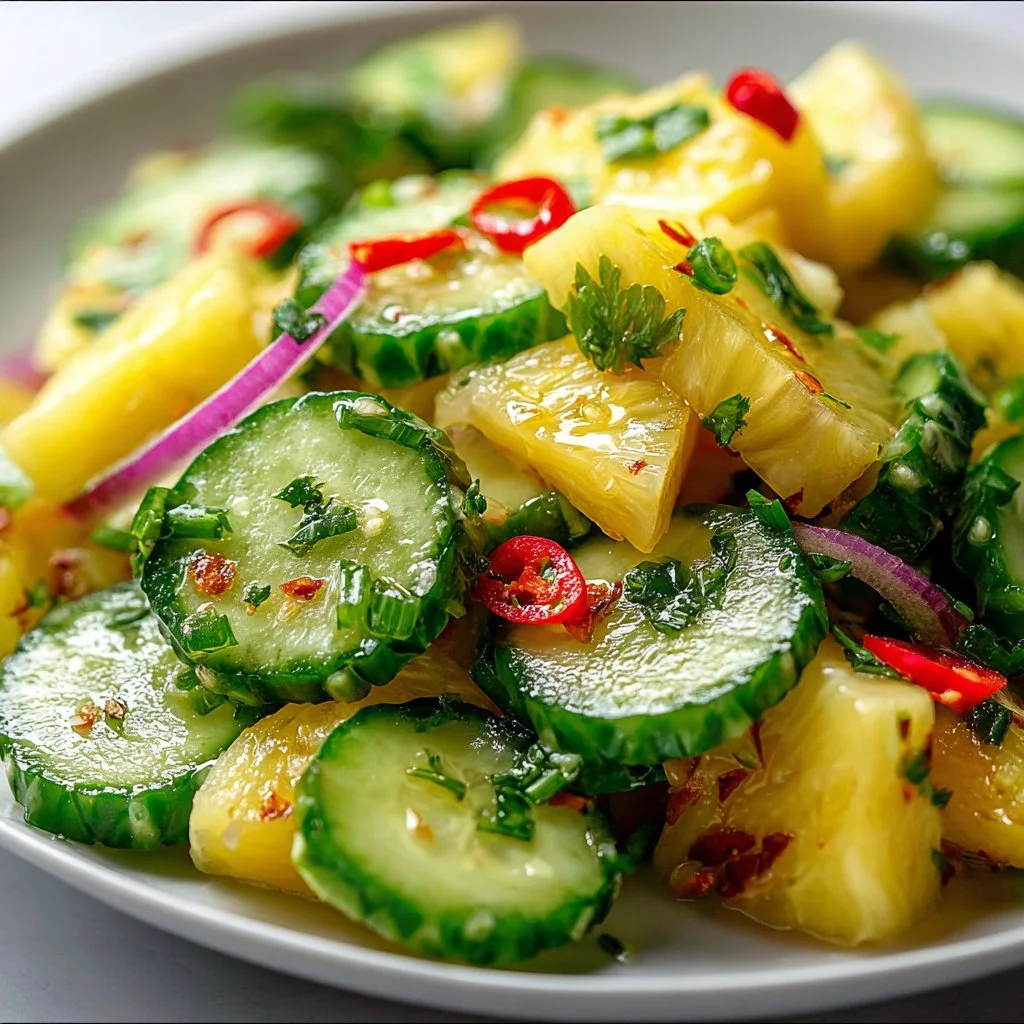
Pineapple Cucumber Salad
Pineapple Cucumber Salad: A Refreshing Twist on Summer Classics
Hey there, kitchen enthusiasts! Welcome back to my cozy corner of culinary creations. Today, we’re diving into a delightful dish that dances on your taste buds: Pineapple Cucumber Salad. As we embrace the sunny days of summer, this salad is the perfect companion for picnics, barbecues, or just a light, refreshing snack at home. With the crisp crunch of cucumber, the juicy sweetness of pineapple, and a zesty dressing, this salad is a celebration of flavors and textures.
What I love most about this recipe is its simplicity and vibrancy. It’s a dish that reminds me of lazy summer afternoons spent with family and friends, where laughter fills the air, and every bite brings a smile. Plus, it’s super versatile and easy to whip up in no time! Whether you’re a culinary whiz or a newbie in the kitchen, this recipe will have you feeling like a pro.
I still remember the first time I made this salad. It was a balmy August evening, and I was hosting a get-together for my closest pals. As I mixed the cucumbers and pineapple in a bowl, the colors were so bright and beautiful that they practically glowed against the backdrop of my kitchen. The moment everyone took their first bite, I was met with a chorus of “Wow!” and “This is amazing!” It reminded me that sometimes, the simplest ingredients can create the most unforgettable dishes.
So grab your apron, and let’s get chopping! This Pineapple Cucumber Salad is not just a recipe; it’s a ticket to a sunny escape right in your own home.
Personal Story
One of my favorite memories connected to this dish takes me back to last summer when I hosted a little gathering for my friends. We all decided to embrace the tropical vibe with a beach-themed party. I had just come back from a trip to the farmers’ market, where the cucumbers were crisp and vibrant, and the pineapples were juicy and sweet — just waiting to be transformed into something magical.
As I prepped the salad, my kitchen was filled with laughter, music, and the delightful aroma of fresh produce. When it was time to serve, my friends dove into the bowl like kids on Christmas morning, eagerly mixing and tasting. The joy on their faces as they savored that first bite is something I’ll never forget. The combination of flavors came together perfectly, and we spent the entire evening chatting, eating, and basking in the fun summer atmosphere. That night solidified my love for this salad and the way it brings people together. Every time I make it, I’m reminded of that pure joy and the importance of sharing meals with those we love.
Ingredients
Ready to gather your ingredients? Here’s what you’ll need for this fabulous Pineapple Cucumber Salad, complete with tips and insight from your friendly kitchen companion.
-
1 medium cucumber: Choose a firm, fresh cucumber for that satisfying crunch. If English cucumbers aren’t available, you can use regular ones. Remove the seeds for an even crunchier texture.
-
2 cups fresh pineapple, diced: Fresh is best for this salad, but canned pineapple works too (just drain it well to avoid excess liquid). The natural sweetness of the pineapple adds a lovely tropical flair.
-
1 bell pepper (red, yellow, or orange): This adds a pop of color and extra flavor. Feel free to substitute with chopped tomatoes or avocado for a creamier texture!
-
1/4 red onion, finely chopped: Red onions offer a milder taste compared to white onions. If you’re sensitive to raw onions, soak them in cold water before adding them to the salad.
-
1/4 cup fresh cilantro, chopped: This herb enhances the tropical vibe of the dish. Not a cilantro fan? Try fresh mint or basil instead for a different twist!
-
Juice of one lime: Lime juice brightens the flavors and adds that zing we all love. If limes are hard to come by, lemon juice can serve as a great substitute.
-
1-2 tablespoons olive oil: This brings everything together. For a different flavor, try avocado oil or even coconut oil for a slight tropical note.
-
Salt and pepper to taste: Simple seasonings make all the difference! Feel free to experiment with spices like chili powder or cumin for an extra kick.
Step-by-Step Instructions
Now that we have our ingredients ready, let’s get cooking! Follow these easy steps to whip up your Pineapple Cucumber Salad.
Step 1: Prep the Ingredients
Start by washing all your fresh produce thoroughly. Clean cucumbers, bell peppers, and cilantro under cold water. For the pineapple, you’ll want to cut away the skin and the eyes and then dice it into bite-sized pieces.
Step 2: Slice the Cucumber
Using a sharp knife, slice your cucumber in half lengthwise, then cut into half-moons. This shape adds great texture to the salad. Remember, if you’re using regular cucumbers, feel free to peel them if you prefer. Chef tip: Keep the skin for added nutrients!
Step 3: Dice the Pineapple
Take your fresh pineapple and cut it into small cubes. If your tropical fruit is a bit stubborn, sit it in the fridge for about 30 minutes before cutting – it will firm up, making it easier to handle!
Step 4: Chop the Bell Pepper and Onion
Dice your bell pepper and finely chop the red onion. For a more even distribution of flavor, try to keep the pieces about the same size as your cucumber and pineapple.
Step 5: Gather the Salad
In a large mixing bowl, combine the cucumber, pineapple, bell pepper, red onion, and cilantro. At this moment, your bowl will look like a vibrant rainbow of colors!
Step 6: Dress the Salad
In a small bowl, whisk together the lime juice and olive oil (add salt and pepper to taste). This dressing is the key to tying all the flavors together. Pour it over your salad mixture and toss gently to combine. Go easy on the stirring; you want to keep those lovely pineapple and cucumber pieces intact.
Step 7: Taste and Adjust
Here’s a little chef hack: always taste your dish as you go. Adjust the seasoning with extra lime juice, salt, or pepper according to your preference. This ensures that every bite is perfect!
Step 8: Chill (Optional)
For the best flavor, refrigerate the salad for about 30 minutes before serving. This allows the flavors to meld and brings a refreshing chill to the dish.
Serving Suggestions
When it comes time to serve, scoop generous portions of your Pineapple Cucumber Salad into colorful bowls or on individual plates. Garnish with extra cilantro or a slice of lime for a fun touch. This salad pairs beautifully with grilled meats, fish tacos, or can be enjoyed on its own as a light lunch. Trust me, it’s not only a feast for the taste buds but also a treat for the eyes!
Recipe Variations
Here are a few creative twists to keep things interesting:
-
Spicy Pineapple Cucumber Salad: Add chopped jalapeños for a little heat. It complements the sweetness of the pineapple beautifully!
-
Tropical Avocado Twist: Substitute half of the cucumbers with diced avocados for a creamy texture.
-
Coconut-Curry Flavor: Mix in a tablespoon of coconut milk and a dash of curry powder for a unique flavor profile.
-
Add Nuts: Toss in some toasted almonds or cashews for an extra crunch and a nutty flavor.
-
Quinoa Booster: Serve this salad over a bed of cooked quinoa for a heartier, protein-packed meal.
Chef’s Notes
This Pineapple Cucumber Salad has become a staple in my kitchen and among friends. Over time, I’ve discovered that the key to its success lies in the fresh ingredients—so I always try to use what’s in season. Plus, it’s been fun to witness the different variations my friends have created over the years, each adding a little personal touch. The memories are what truly make each recipe special!
And let’s be honest—the first time a friend tried to add watermelon to the mix, I was skeptical. But when it turned out to be a hit, I learned never to say never in the kitchen!
FAQs and Troubleshooting
Q1: What can I do if my salad is too soggy?
If your salad ends up too watery, try draining the excess liquid before serving. You can also:
- Add more cucumbers or use a thicker dressing to balance it out.
- Toss in some crushed nuts for extra crunch.
Q2: How can I store leftovers?
Store any leftovers in an airtight container in the refrigerator. It’s best enjoyed within 2 days. Just know that the cucumbers may release more water over time, so give it a quick stir when you’re ready to eat!
Q3: Can I use frozen pineapple?
While fresh is ideal, you can certainly use frozen pineapple – just let it thaw completely and drain any excess liquid before adding it to the salad.
Q4: What to do if I don’t like cilantro?
No problem! You can simply omit cilantro and replace it with fresh parsley or mint for a different herbaceous flavor.
Nutritional Info
While the exact nutritional info will depend on specific ingredient brands and amounts, here’s a general idea of what you might expect per serving (assuming 4 servings):
- Calories: 150
- Protein: 2g
- Fat: 7g
- Carbohydrates: 22g
- Fiber: 3g
- Sugar: 8g
And there you have it, food lovers! A refreshing, vibrant, and undeniably delicious Pineapple Cucumber Salad. I hope this recipe fills your kitchen with joy and inspires you to gather the people you love. Happy cooking! 🍍🥒
Print
Pineapple Cucumber Salad
- Total Time: 15 minutes
- Yield: 4 servings 1x
- Diet: Vegetarian
Description
A refreshing and vibrant salad combining the crispness of cucumber and the sweetness of pineapple, perfect for summer picnics and gatherings.
Ingredients
- 1 medium cucumber
- 2 cups fresh pineapple, diced
- 1 bell pepper (red, yellow, or orange)
- 1/4 red onion, finely chopped
- 1/4 cup fresh cilantro, chopped
- Juice of one lime
- 1–2 tablespoons olive oil
- Salt and pepper to taste
Instructions
- Prep the Ingredients: Wash all fresh produce thoroughly.
- Slice the Cucumber: Cut into half-moons for great texture.
- Dice the Pineapple: Cut into small cubes.
- Chop the Bell Pepper and Onion: Keep pieces similar in size.
- Gather the Salad: Combine all ingredients in a large mixing bowl.
- Dress the Salad: Whisk together lime juice and olive oil, add to salad and toss gently.
- Taste and Adjust: Modify seasoning as desired.
- Chill (Optional): Refrigerate for about 30 minutes before serving.
Notes
For added flavor, refrigerate the salad before serving to meld the flavors.
- Prep Time: 15 minutes
- Cook Time: 0 minutes
- Category: Salad
- Method: Mixing
- Cuisine: Tropical
Nutrition
- Serving Size: 1 serving
- Calories: 150
- Sugar: 8g
- Sodium: 150mg
- Fat: 7g
- Saturated Fat: 1g
- Unsaturated Fat: 5g
- Trans Fat: 0g
- Carbohydrates: 22g
- Fiber: 3g
- Protein: 2g
- Cholesterol: 0mg
Keywords: salad, pineapple, cucumber, summer, refreshing, healthy
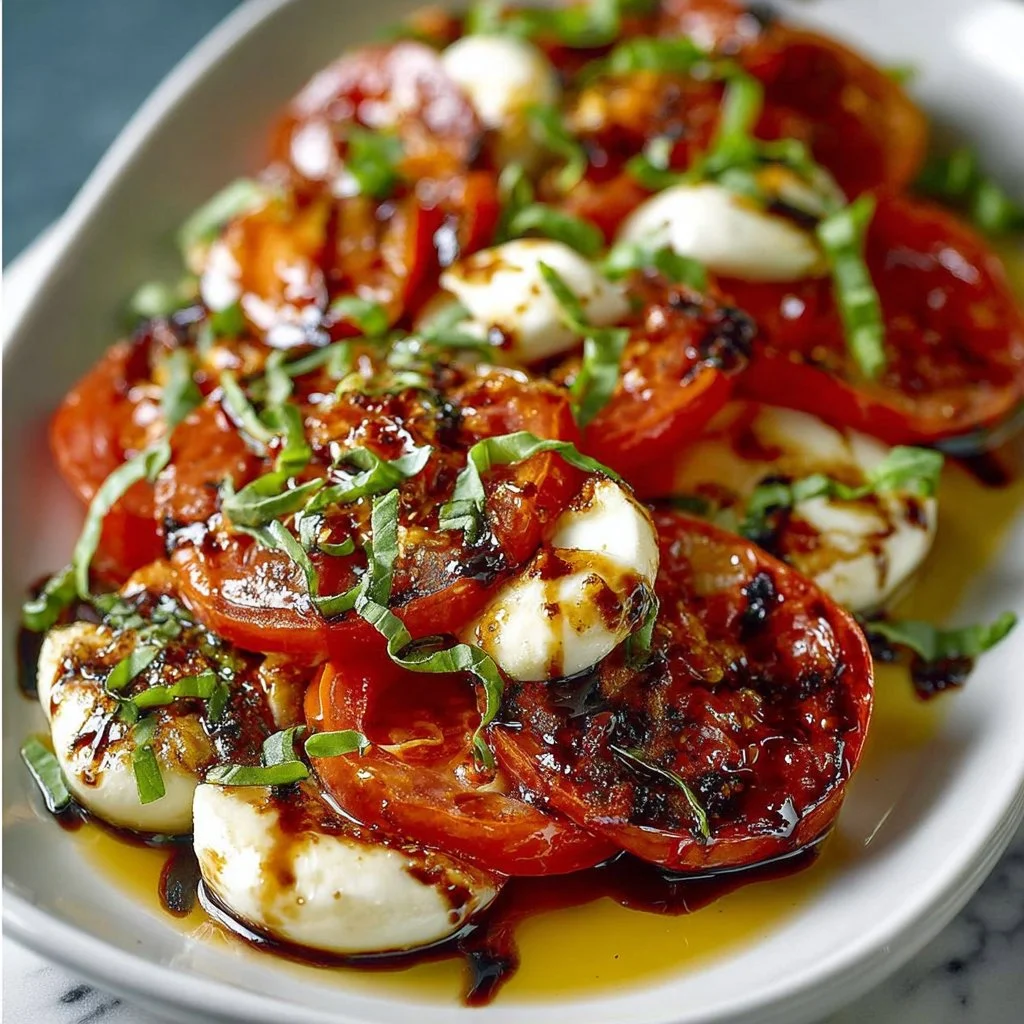
Vibrant Roasted Tomato Caprese Salad
Vibrant Roasted Tomato Caprese Salad: A Flavorful Ode to Simplicity
Welcome back to my kitchen, dear friends! Today, we’re diving into a dish that’s as vibrant as a summer garden—Roasted Tomato Caprese Salad. It’s a celebration of fresh ingredients that’ll make your taste buds dance with joy. Perfect for a simple weeknight dinner or as a showstopper at your next gathering, this salad is all about taking the classic Caprese to the next level by roasting those sweet tomatoes until they burst with flavor.
I remember the first time I indulged in a Caprese salad; it was a warm evening, and I found myself at a rustic Italian trattoria. The air was aromatic with herbs and fresh bread, not to mention the irresistible smell of tomatoes mingling with rich, creamy mozzarella. The dish arrived, and as I took my first bite, it felt like summer had arrived on my plate! Every layer—the juicy tomatoes, creamy mozzarella, fragrant basil, and drizzles of olive oil—sang in harmony.
As the seasons change, I find myself craving the comfort of roasted tomatoes—sweet, caramelized, and packed with flavor. Paired with fresh cheese and aromatic herbs, it creates a medley of textures and tastes that is sure to impress. Whether you’re looking to impress a date, feed a hungry family, or simply want to enjoy a bowl of sunshine, this Roasted Tomato Caprese Salad will not disappoint!
So, roll up those sleeves, preheat that oven, and let’s create something truly special together. Here’s a wonderful recipe that’s packed with flavor and love.
Personal Story
Growing up, my grandmother was the queen of tomatoes. Every year, we’d eagerly await the moment her garden produced those plump, juicy fruits. It was like a family tradition—the whole clan would gather to help with harvesting the tomatoes. I remember my grandmother’s delight, confidently guiding us on how to pick the ripest ones—“Pull with a gentle twist, Olivia!” she would say.
The best part? We’d always end the day with a delicious Caprese salad on her sun-drenched patio, where laughter and stories blended as beautifully as the ingredients on our plates. To her, cooking wasn’t just about feeding hungry bellies; it was about sharing love and memories. This Roasted Tomato Caprese Salad, then, is a tribute to those unforgettable summers spent in her garden, where the aroma of fresh basil and tomatoes lingered in the air and the spirit of family surrounded us.
Ingredients
To create this vibrant dish, you’ll need a few simple, high-quality ingredients. Here’s what to gather:
-
Ripe Tomatoes: About 2 pounds of your favorite tomatoes—heirlooms, Roma, or vine-ripened work beautifully. Tip: Look for tomatoes that feel heavy and smell fragrant; that’s how you know they’re ripe!
-
Fresh Mozzarella Cheese: 8 ounces. The creaminess of fresh mozzarella balances the acidity of the roasted tomatoes. Substitution: If you’re looking for something lighter, burrata or even a vegan mozzarella can work wonders!
-
Fresh Basil Leaves: A handful, roughly torn. Basil will add a fragrant kick that brightens everything up. Chef Insight: Use the leaves whole to release more flavor or chop finely for a more intense basil hit!
-
Extra Virgin Olive Oil: 3 tablespoons. A good-quality oil enhances the dish with its fruity, peppery notes. Tip: Don’t skimp on quality here; it truly makes a difference.
-
Balsamic Vinegar: 1 tablespoon (optional). It adds a tangy sweetness that pairs beautifully with the flavors. For a twist, try a balsamic glaze for a thicker, richer flavor!
-
Salt and Pepper: To taste. Simple yet essential for enhancing the flavors of the dish.
Step-by-Step Instructions
Step 1: Preheat the Oven
Start by preheating your oven to 400°F (200°C). This is crucial because we want those tomatoes to roast evenly, enhancing their natural sweetness.
Step 2: Prep the Tomatoes
While the oven is warming up, wash your tomatoes thoroughly. Slice them in half—if they’re larger, into quarters—and place them cut-side up on a baking sheet lined with parchment paper. Pro Tip: Spreading them out evenly will ensure they roast well and get that delicious caramelization!
Step 3: Season
Drizzle the cut tomatoes lightly with olive oil, and sprinkle them generously with salt and pepper. You want those flavors to seep into every nook and cranny! Don’t be shy—this is where the magic begins.
For added flavor, I sometimes toss in a few sprigs of fresh thyme or rosemary for an herby touch. Oven magic tip: If you have a little honey or sugar, a touch can help accentuate the tomatoes’ sweetness as they roast!
Step 4: Roast the Tomatoes
Place your baking sheet in the oven and roast for about 25-30 minutes, or until they’re soft, slightly caramelized, and exuding that lovely roasted scent. Keep an eye on them—the edges should get a little golden but should not turn into total mush. You want some structure left in them.
Step 5: Mix and Layer
Once the tomatoes are done, take them out and let them cool for just a few minutes. In the meantime, slice your fresh mozzarella into thick slices. Chef Hack: If you can get your hands on the ball of mozzarella, slice it in half for even thicker slices!
Now for the fun part! In a large serving bowl, layer the roasted tomatoes with slices of fresh mozzarella. Tear in those basil leaves, drizzling more olive oil and balsamic vinegar over everything. Visual tip: Don’t worry about being perfect—rustic is what we’re going for!
Step 6: Give it a Toss
Gently toss the salad so that all the flavors can blend together, but be careful; we want to keep our mozzarella intact! This is where you might want to give it another sprinkle of salt and fresh cracked pepper.
Step 7: Serve
Serve your Roasted Tomato Caprese Salad immediately, or let it sit for a few moments for the flavors to meld together. But trust me, it’s hard to resist digging in right away!
Serving Suggestions
For an inviting presentation, serve your Caprese salad on a beautiful platter. Arrange the layers artfully, sprinkle some extra torn basil leaves on top, and drizzle a beautiful swirl of balsamic glaze for added flair. Pair it with a fresh baguette or some crispy crostini on the side for a complete meal that everyone will love!
Recipe Variations
- Grilled Caprese: If you’re firing up the grill, try grilling the tomatoes and even the mozzarella for an extra smoky flavor!
- Add Avocado: For a creamy twist, slice in some ripe avocado for added richness and nutrients.
- Protein Boost: Add marinated grilled chicken or chickpeas to make it heartier, perfect as a main dish.
- Seasonal Twist: Swap out tomatoes for roasted peaches or pears in the summer for an exciting contrast of flavors.
- Pasta Salad Version: Toss in cooked pasta for a delightful pasta salad that takes you straight to Italy!
Chef’s Notes
This recipe has truly evolved over time in my kitchen. I originally started with plain tomatoes and cheese, but as I began to explore the world of flavors, each iteration brought me closer to today’s vibrant dish. One memorable mishap—during a dinner party, I mistakenly used sweet balsamic glaze instead of regular balsamic vinegar, and to my surprise, everyone absolutely loved it! So don’t be afraid to experiment and make this recipe your own. Cooking should be fun and creative!
FAQs and Troubleshooting
1. What type of tomatoes should I use?
For the best flavor, use ripe heirloom tomatoes or vine-ripened ones. Roma tomatoes are great for roasting too, but feel free to experiment with whatever you find fresh and appealing!
2. How do I know when my tomatoes are done roasting?
Look for a slight caramelization on the edges and a soft, juicy inside. They should smell heavenly! A little golden goes a long way in flavor.
3. Can I make this salad ahead of time?
While it’s best enjoyed fresh, you can prepare the roasted tomatoes and mozzarella in advance and toss everything together right before serving. Just be mindful that the basil may wilt a bit if left too long!
4. What if I don’t like fresh mozzarella?
No worries! You can substitute with feta for a tangy punch or even use vegan cheese for a dairy-free option. Whichever you choose, make sure it’s something that complements the roasted tomatoes!
Nutritional Info
Approximate Per Serving:
- Calories: 235
- Protein: 10g
- Fat: 20g
- Carbohydrates: 6g
- Fiber: 1g
So, dear foodies, ready to get cooking? I hope you enjoy making and sharing this Roasted Tomato Caprese Salad as much as I do! Each bite is a reminder that great food doesn’t have to be complicated; sometimes, it’s the simplest things that bring us together. Happy cooking!
Print
Vibrant Roasted Tomato Caprese Salad
- Total Time: 40 minutes
- Yield: 4 servings 1x
- Diet: Vegetarian
Description
A delicious and simple Roasted Tomato Caprese Salad that celebrates fresh ingredients and brings summer to your plate.
Ingredients
- 2 pounds ripe tomatoes (heirlooms, Roma, or vine-ripened)
- 8 ounces fresh mozzarella cheese
- A handful of fresh basil leaves, roughly torn
- 3 tablespoons extra virgin olive oil
- 1 tablespoon balsamic vinegar (optional)
- Salt and pepper to taste
Instructions
- Preheat the oven to 400°F (200°C).
- Wash the tomatoes thoroughly and slice in half.
- Drizzle cut tomatoes with olive oil, and sprinkle with salt and pepper.
- Roast in the oven for about 25-30 minutes until soft and caramelized.
- Slice the fresh mozzarella into thick slices.
- Layer roasted tomatoes, mozzarella, and basil in a serving bowl.
- Toss gently to combine all ingredients.
- Serve immediately or let sit for a few moments for flavors to meld.
Notes
Try adding grilled chicken or chickpeas for added protein. This salad can also be enjoyed by replacing tomatoes with grilled peaches or pears.
- Prep Time: 10 minutes
- Cook Time: 30 minutes
- Category: Salad
- Method: Baking
- Cuisine: Italian
Nutrition
- Serving Size: 1 serving
- Calories: 235
- Sugar: 3g
- Sodium: 200mg
- Fat: 20g
- Saturated Fat: 5g
- Unsaturated Fat: 15g
- Trans Fat: 0g
- Carbohydrates: 6g
- Fiber: 1g
- Protein: 10g
- Cholesterol: 30mg
Keywords: Roasted Tomato, Caprese Salad, Summer Salad, Vegetarian Recipe, Fresh Ingredients




