
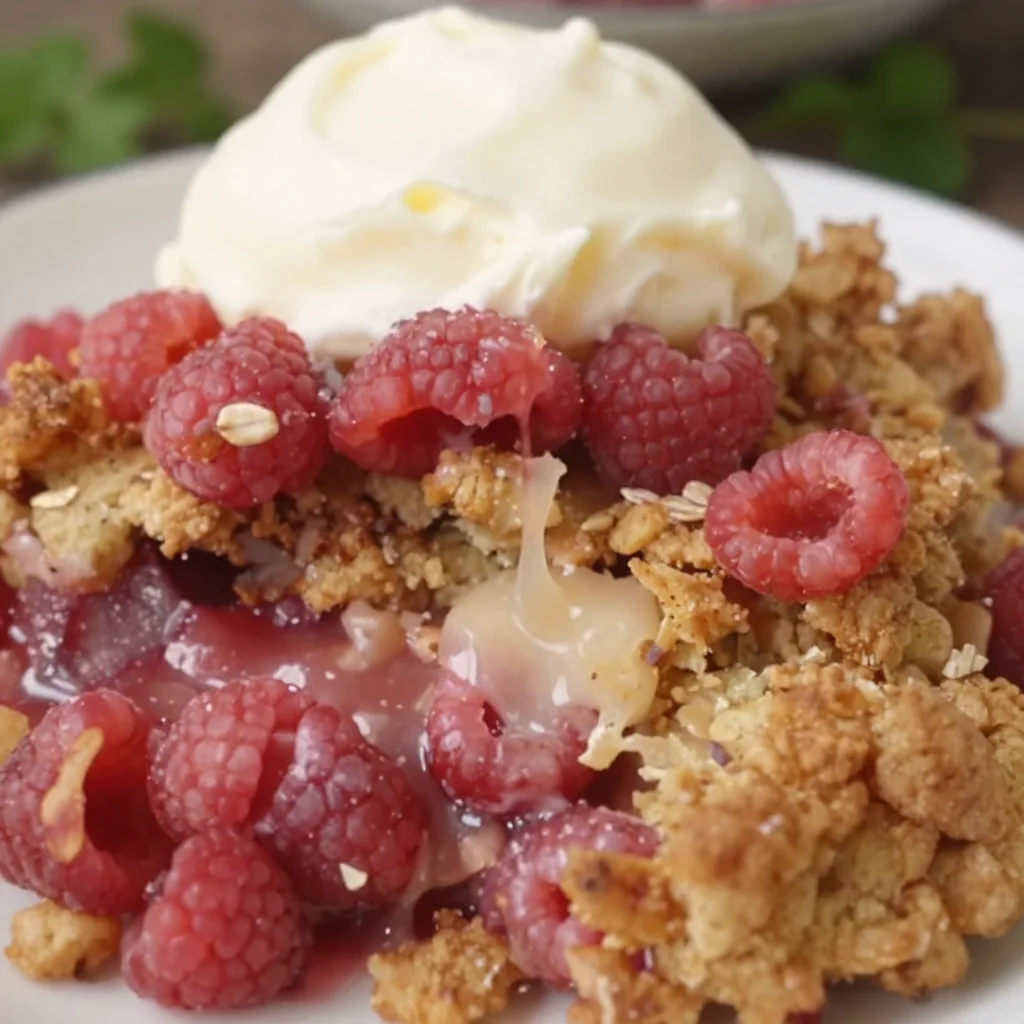
One-Pan Raspberry Crumble: 15-Minute Weeknight Dessert
Sweet Nostalgia: Raspberry Crumble Recipe
Welcome to my kitchen! Today, we’re diving into a delightful dish that sings of summer’s sweetness and brings back cherished memories: Raspberry Crumble. Picture this: the aroma of baked berries wafting through the air, golden and crumbly topping glistening under kitchen lights, and laughter echoing around the table as loved ones dig in. This dessert has a knack for creating cozy moments, sharing stories, and indulging our sweet tooth!
Raspberry crumble is the kind of recipe that feels familiar and welcoming. It’s not just a dish; it’s a story. Maybe it’s the warmth of a family gathering or a simple weekend treat. Whatever it is, when you make this recipe, you’re not just baking – you’re creating moments to savor. With juicy berries enveloped in a luscious topping, each bite transports you to a sun-kissed picnic or a Sunday afternoon spent with friends.
The beauty of this crumble is its versatility. You can whip it up for a casual dessert, take it to a potluck, or simply enjoy a cozy night in with a scoop of vanilla ice cream on the side. And the best part? It’s super easy to make. Whether you’re a seasoned chef or a kitchen newbie, I promise you’ll be able to create something that’s both stunning and delicious.
So, let’s roll up our sleeves, don our favorite aprons, and let the kitchen magic begin!
A Bite of Memory: My Raspberry Crumble Journey
I still remember the first time I made raspberry crumble. It was a sunny Saturday afternoon, and the local farmers’ market was bustling with vibrant colors and sweet aromas. The minute I laid eyes on those plump, juicy raspberries, I felt the tug of nostalgia. My grandmother used to make her famous berry crumbles during family gatherings, and the mere thought of it could make my stomach rumble.
After a bit of haggling (okay, maybe just a friendly chat) with the vendor, I carted home a basket bursting with raspberries, determined to recreate my grandmother’s magic. That Saturday turned into an afternoon of laughter and floury messiness as I stumbled through the steps, trying to remember her process.
As I pulled that first golden-brown crumble out of the oven, the smell wrapped around me like a warm hug. I felt transported back to my childhood, sitting around a long table filled with family, all eagerly waiting for a taste. When I finally took a bite, my heart swelled with joy – I had done it! That very first batch was imperfect but incredibly special; each bite echoed laughter, love, and cherished memories. And that’s the beauty of this raspberry crumble recipe – it’s not just about the dessert; it’s about the moments you create along the way.
Ingredients You’ll Need
To make this stunning raspberry crumble, gather these key ingredients:
-
Fresh Raspberries (2 cups): The star of the show! Look for plump, vibrant berries; they should be sweet and slightly tart. If you can’t find fresh ones, frozen raspberries work too; just make sure to thaw and drain them well.
-
Granulated Sugar (1/2 cup): This sweetener helps balance the tartness of the raspberries. If you prefer less sugar, feel free to reduce it to 1/4 cup. You can also use coconut sugar for a healthier twist!
-
Oats (1 cup): They add a delightful chewiness to the crumble topping. Use rolled oats for the best texture. If you’re aiming for gluten-free, ensure you use certified gluten-free oats.
-
All-Purpose Flour (1 cup): This will help bind your crumble topping together. For a gluten-free option, almond flour or a gluten-free blend works great.
-
Brown Sugar (1/2 cup): It gives depth and a lovely caramel note to the topping. Dark brown sugar imparts a richer flavor, but light brown works as well.
-
Butter (1/2 cup, cold): Cut into cubes; this adds richness to the crumble and helps achieve that desired flaky texture. You can substitute with coconut oil or a vegan butter alternative if you prefer.
-
Cinnamon (1 teaspoon): A warm spice that enhances the overall flavor. Don’t skip it! It’s what takes this crumble to the next level.
-
Salt (1/4 teaspoon): A pinch of salt elevates the sweetness of the crumble and balances the flavors beautifully.
Step-by-Step Instructions
Let’s get cooking! Follow these detailed steps to create your delicious raspberry crumble:
-
Preheat Your Oven: Preheat your oven to 350°F (175°C). This may seem simple, but starting with a hot oven ensures your crumble cooks evenly and becomes perfectly golden!
-
Prepare the Berries: In a medium bowl, gently toss the fresh raspberries with granulated sugar. Don’t squish them; you want to keep those juicy berries intact! Set this bowl aside to let the sugar work its magic and draw out the raspberry juices. It’ll enhance the overall flavor and create a lovely filling.
-
Make the Crumble Topping: In a separate mixing bowl, combine the oats, flour, brown sugar, cinnamon, and salt. Mix them well. Now, add the cold butter cubes. Using your fingers or a pastry cutter, work the butter into the dry ingredients until it resembles coarse crumbs. It’s okay if there are some larger chunks – they’ll create delicious crispy bits when baked!
-
Combine the Filling and Topping: Take your raspberry mixture and transfer it into an 8×8-inch (or similarly-sized dish). Spread it evenly. Then, sprinkle the crumble topping generously over the berries, making sure it’s well-covered. This is where the magic happens – every bite will be a blissful balance of tart and sweet!
-
Bake to Perfection: Pop the dish into your preheated oven and let it bake for about 30-35 minutes. You’ll know it’s ready when the topping is golden and crispy and the berries are bubbling around the edges. Don’t rush this process!
-
Cool and Serve: Allow the raspberry crumble to cool for at least 10 minutes before digging in. This will help the juices set a bit and make serving easier. You can serve it warm, at room temperature, or even chilled – it’s delicious any way you choose!
Serving Suggestions
When it comes to serving your raspberry crumble, think about how to elevate the experience! Consider a scoop of vanilla ice cream or a dollop of whipped cream on top for an extra layer of indulgence. If you’re feeling fancy, a sprinkle of fresh mint or a dusting of powdered sugar adds a nice touch of elegance and freshness. Serve it in charming bowls or a rustic baking dish for that homey feel, and watch as everyone digs in with joyful anticipation!
Recipe Variations: Get Creative!
This raspberry crumble recipe is wonderfully adaptable! Here are a few fun variations to inspire your inner chef:
-
Mixed Berry Crumble: Swap out raspberries for any combination of berries like blueberries, strawberries, or blackberries for a delightful twist!
-
Nutty Crumble: Add chopped nuts such as almonds or pecans to the topping mixture for an extra crunch and richness.
-
Spiced Up: Experiment by adding a pinch of nutmeg or cardamom in addition to cinnamon for a warm, aromatic flair.
-
Healthy Twist: Replace half the butter with applesauce for a lighter option without sacrificing flavor.
-
Gluten-Free Delight: Substitute all-purpose flour with a blend of oat flour and almond flour for a gluten-free version everyone can enjoy.
Chef’s Notes
Oh, have I had my share of raspberry crumble adventures! One time, as a novice baker, I forgot to add sugar to the raspberry filling. Can you imagine? I blew my family’s minds with what looked like a beautifully baked dessert but turned out to be completely tart! Lesson learned: sugar is essential in a dessert!
Over the years, I’ve refined this recipe, and I can assure you that it has become a staple at our family gatherings. Each new iteration brings a little twist, whether it’s an experimental spice or a new type of berry. My favorite? A mixture of raspberries and peaches—oh, the summer vibes!
FAQs and Troubleshooting
1. Why is my crumble topping soggy?
A soggy topping can happen if there’s too much moisture in the fruit filling or if it’s not baked long enough. Make sure to evenly distribute the topping and keep an eye on it as it bakes until it’s golden brown.
2. Can I use frozen raspberries?
Absolutely! Just make sure to thaw them first and drain any excess liquid to prevent your crumble from becoming too watery.
3. How do I store leftovers?
Store any leftover crumble in an airtight container in the refrigerator for up to 3 days. Just reheat in the oven before serving for that fresh-out-of-the-oven taste!
4. What can I pair with raspberry crumble?
This crumble goes beautifully with a scoop of vanilla ice cream, a dollop of whipped cream, or even a drizzle of chocolate sauce for those chocolate lovers out there!
Nutritional Info
(Note: Nutritional values may vary based on ingredient choices.)
- Serving size: 1/8 of an 8×8 dish
- Calories: Approximately 250-300
- Fat: 12g
- Carbohydrates: 36g
- Fiber: 4g
- Sugars: 14g
- Protein: 4g
So, there you have it, my friends! A delightful raspberry crumble that not only tastes incredible but also brings a little nostalgia, joy, and comfort to your table. Remember, cooking is all about love, creativity, and sharing with those you care about. Now, get out there and whip up some sweetness! Happy baking!
Print
Raspberry Crumble
- Total Time: 45 minutes
- Yield: 8 servings 1x
- Diet: Vegetarian
Description
A delightful dessert featuring juicy raspberries topped with a golden, crumbly mixture, perfect for cozy moments and gatherings.
Ingredients
- 2 cups Fresh Raspberries
- 1/2 cup Granulated Sugar
- 1 cup Oats
- 1 cup All-Purpose Flour
- 1/2 cup Brown Sugar
- 1/2 cup Butter, cold, cut into cubes
- 1 teaspoon Cinnamon
- 1/4 teaspoon Salt
Instructions
- Preheat your oven to 350°F (175°C).
- Prepare the berries by tossing raspberries with granulated sugar in a medium bowl.
- Make the crumble topping by combining oats, flour, brown sugar, cinnamon, and salt in a separate bowl.
- Add cold butter cubes to the crumble mixture and mix until it resembles coarse crumbs.
- Combine the raspberry mixture in a baking dish and spread evenly before topping with the crumble mixture.
- Bake for about 30-35 minutes until the topping is golden and crispy.
- Cool the crumble for at least 10 minutes before serving.
Notes
Serve warm with vanilla ice cream or whipped cream for a delightful treat.
- Prep Time: 15 minutes
- Cook Time: 30 minutes
- Category: Dessert
- Method: Baking
- Cuisine: American
Nutrition
- Serving Size: 1 serving
- Calories: 275
- Sugar: 14g
- Sodium: 100mg
- Fat: 12g
- Saturated Fat: 7g
- Unsaturated Fat: 4g
- Trans Fat: 0g
- Carbohydrates: 36g
- Fiber: 4g
- Protein: 4g
- Cholesterol: 30mg
Keywords: raspberry crumble, dessert, summer dessert, berry dessert, comfort food
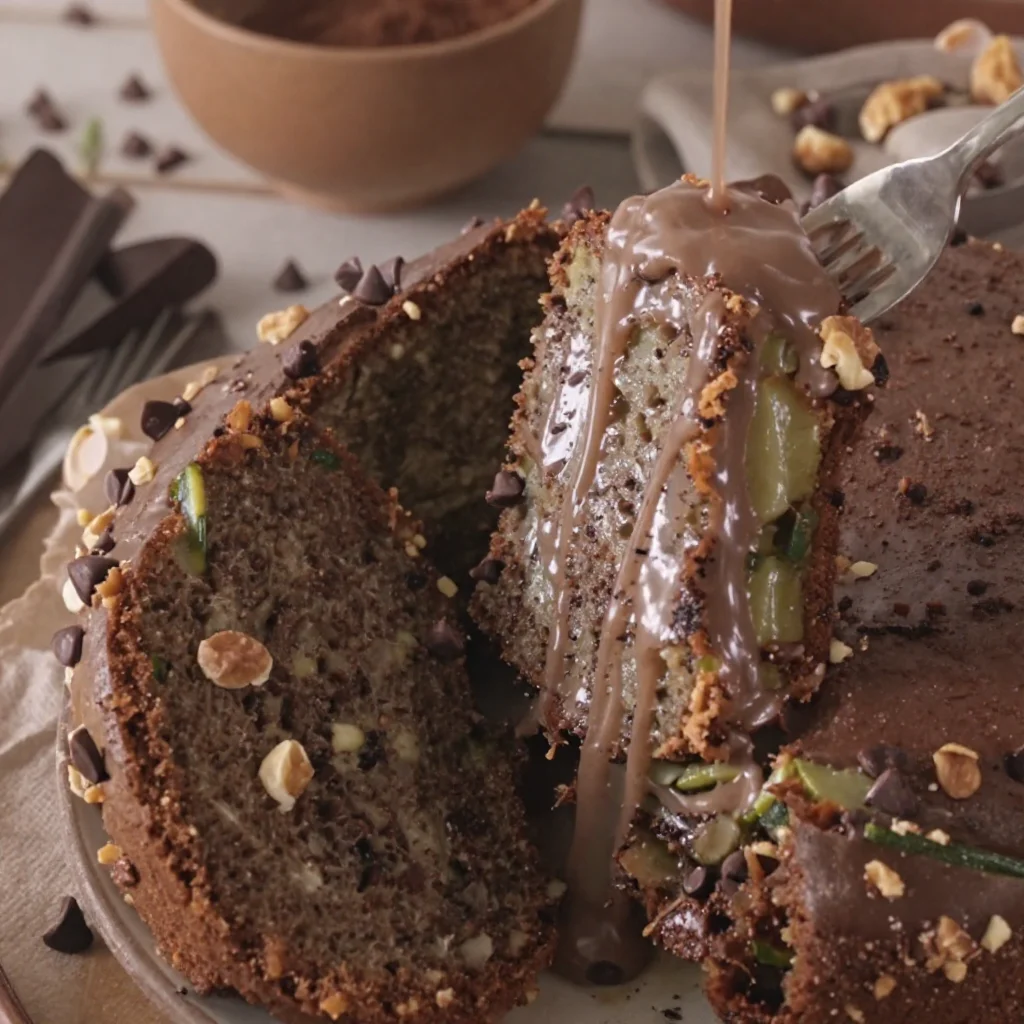
One-Bowl Chocolate Zucchini Cake: Easy Weeknight Treat
Chocolate Lover’s Zucchini Cake: A Slice of Heaven
Welcome to my kitchen, fellow food lover! Today, we’re diving into a delightful creation that mixes a little sweetness with a hint of nostalgia — Chocolate Lover’s Zucchini Cake. If you’ve ever tried to sneak some veggies into your desserts (or just found yourself with an abundance of zucchini during summer), this cake is your answer. It’s rich, moist, and utterly chocolatey, making it the perfect treat for kids and adults alike.
Now, you might be wondering why on earth one would add zucchini to a cake — it sounds a bit strange, doesn’t it? But trust me, this magical green vegetable adds moisture, which results in a cake that’s incredibly soft and tender. Plus, the chocolate! Oh, my goodness, the chocolate! It completely masks any veggie flavor and elevates the dish to a level that even the pickiest of eaters will adore.
So, grab a bowl, preheat your oven, and let’s embark on this delightful baking journey together! Just know that baking can be messy, but every speck of flour on your counter tells a story of love and joy in the kitchen. By the end of our time together, you’ll have a decadent chocolate cake that’s not only delicious but also a great conversation starter at your next gathering.
A Taste of Nostalgia: My Zucchini Cake Adventure
Let me take you back to sunny afternoons in my grandmother’s kitchen. On those warm days, her garden was bursting with zucchini, and she was always looking for inventive ways to use her bounty. One afternoon, she pulled out a handwritten recipe from a tattered old notebook — it was for a chocolate zucchini cake. Intrigued, I watched as she transformed a mountain of green squashes into a beautifully rich batter.
I can still picture the way her eyes twinkled when I took the first bite. “You’d never guess there’s zucchini in there!” I exclaimed. And I was right! The chocolate flavor was front and center, leaving no room for the zucchini to make its presence known. That warm, fudgy goodness topped with a sprinkle of powdered sugar changed the way I viewed vegetables forever.
Fast forward to today, and I’m here to pass on that culinary magic. This Chocolate Lover’s Zucchini Cake recipe has morphed into one of my family’s favorites, too. It’s perfect for birthday parties, cozy luncheons, or a sweet end to any meal. So, let’s gather our ingredients and get started!
Ingredients
Here’s what you’ll need for our Chocolate Lover’s Zucchini Cake:
-
2 cups grated zucchini
Fresh zucchini is ideal, but if you’re short on time, pre-packaged grated zucchini can work. Just be sure to remove excess moisture by squeezing it in a clean kitchen towel before adding it to the batter. -
1¾ cups all-purpose flour
This is your base for the cake! If you want a gluten-free version, swap out the flour for a 1:1 gluten-free mix. Just keep in mind that the texture may vary slightly. -
¾ cup unsweetened cocoa powder
Go for high-quality natural cocoa to get that deep chocolate flavor. You can use Dutch-processed cocoa too, but remember it will alter the color and richness slightly. -
1 tsp baking soda
This will help your cake rise! If you only have baking powder on hand, use three times as much and reduce the salt by half. -
1 tsp baking powder
A must! This complements the baking soda for a perfectly fluffy cake. Make sure to check the expiration date for the best results. -
½ tsp salt
A little salt balances out the sweetness beautifully. Don’t skip it! -
1 tsp vanilla extract
Homemade vanilla extract adds depth to your cake. If you’re in a pinch, pure flavored extracts will do too. -
¾ cup vegetable oil
Oil keeps the cake moist and is essential for texture. For a healthier option, you can substitute unsweetened applesauce or Greek yogurt (just use about ½ cup). -
1 cup granulated sugar
Feel free to reduce the sugar slightly if you are going for healthier ingredients—this cake can handle it! -
2 large eggs
These add moisture and help the cake rise beautifully. If you need to go egg-free, try flax eggs (1 tablespoon of flaxseed meal + 2.5 tablespoons water = 1 egg). -
1 cup semi-sweet chocolate chips
Because you can never have enough chocolate! Feel free to swap these for dark chocolate or even white chocolate chips for a unique twist.
With these ingredients at the ready, we’re one step closer to creating a cake that will leave everyone wanting more!
Step-by-Step Instructions
-
Preheat Your Oven: Preheat your oven to 350°F (175°C). This step is crucial, as a hot oven ensures even baking for our cake.
-
Prep the Pan: Grease and flour a 9×13 inch baking pan or line it with parchment paper for easy removal. Your future self will thank you for this when it’s time to serve!
-
Grate the Zucchini: Using a box grater, grate the zucchini into fine shreds. If you’re short on time, you can pulse it in a food processor for a few seconds. Just remember to squeeze out any excess moisture.
-
Mix Dry Ingredients: In a large mixing bowl, combine the flour, cocoa powder, baking soda, baking powder, and salt. Whisk them together until they’re well mixed — this helps distribute the leavening agents evenly throughout the batter.
-
Whisk Wet Ingredients: In a separate bowl, mix together the eggs, sugar, vegetable oil, and vanilla extract. Beat them lightly until they’re combined. The mixture should be slightly frothy, indicating that it’s well-mixed.
-
Combine: Gradually add the wet mixture to the dry mixture, stirring until just combined. Be careful not to overmix — a few lumps are perfectly okay.
-
Fold in Zucchini and Chocolate Chips: Gently fold in the grated zucchini and chocolate chips. You want these ingredients evenly distributed without overworking the batter.
-
Pour into the Pan: Pour the batter into your prepared baking pan, smoothing the top with a spatula.
-
Bake: Bake in your preheated oven for about 30-35 minutes, or until a toothpick inserted into the center comes out clean. Keep an eye on it toward the end to avoid overbaking!
-
Cool and Serve: Once baked, let the cake cool in the pan for about 10-15 minutes, then transfer it to a wire rack to cool completely.
And there you have it, a rich chocolate zucchini cake ready to be enjoyed with friends and family—yum!
Serving Suggestions
For the ultimate serving experience, cut a generous slice and transfer it to a plate. Dust it lightly with powdered sugar for a bit of elegance, or add a dollop of whipped cream on top for a touch of indulgence. You could even pair it with a scoop of vanilla ice cream for a nostalgic sundae spin!
Recipe Variations
-
Spicy Chocolate: Add a pinch of cayenne pepper or ground cinnamon to the batter for a warm, spicy kick.
-
Nutty Delight: Mix in a handful of chopped walnuts or pecans for added crunch.
-
Coconut Bliss: Stir in shredded coconut for a tropical twist that complements the chocolate perfectly.
-
Fruit Fusion: Add ½ cup of mini chocolate chips and ripe bananas into the mix for an extra layer of flavor.
-
Vegan Version: Substitute the eggs with flaxseed eggs and replace the oil with applesauce for a guilt-free treat.
Chef’s Notes
Over the years, this Chocolate Lover’s Zucchini Cake has become a staple in my kitchen, evolving into so many delightful variations. One time, I accidentally added a bit too much cocoa powder and was worried it would taste bitter. It turned out to be the most chocolate-laden cake I’d ever made! The guests couldn’t get enough of its rich flavor, and now I occasionally push the cocoa boundaries just to keep things exciting.
And let’s not even talk about the kitchen disasters — from flour clouds to spilled ingredients, each one is a funny memory! So embrace those little “oops” moments; they’re part of the fun!
FAQs and Troubleshooting
-
Why is my cake dense?
If your cake turns out dense, it could be due to overmixing the batter. Mixing too much develops the gluten in the flour, leading to a heavy texture. Mix until just combined! -
Can I use frozen zucchini?
Absolutely! Just remember to thaw it and drain any excess liquid. Frozen zucchini works great, especially when it’s off-season. -
How do I store leftovers?
Store leftover cake in an airtight container at room temperature for up to 3 days, or in the fridge for about a week. You can also freeze slices for later enjoyment! -
Can I add other flavors?
Of course! You can play around by adding orange zest or almond extract to give the cake a unique twist!
Nutritional Info
While I won’t bore you with numbers, I believe that homemade treats can be enjoyed in moderation. This cake is a delightful balance of ingredients, and when paired with a fresh salad or fruit, it makes a lovely meal!
So, there you have it, my lovely foodies! With every slice of this Chocolate Lover’s Zucchini Cake, you’re embracing flavors, memories, and the pure joy of baking. I hope you find as much happiness making this cake as I do sharing it! Happy Baking!
Print
Chocolate Lover’s Zucchini Cake
- Total Time: 50 minutes
- Yield: 12 servings 1x
- Diet: Vegetarian
Description
A rich, moist, and utterly chocolatey zucchini cake that masks any veggie flavor, perfect for kids and adults alike.
Ingredients
- 2 cups grated zucchini
- 1¾ cups all-purpose flour
- ¾ cup unsweetened cocoa powder
- 1 tsp baking soda
- 1 tsp baking powder
- ½ tsp salt
- 1 tsp vanilla extract
- ¾ cup vegetable oil
- 1 cup granulated sugar
- 2 large eggs
- 1 cup semi-sweet chocolate chips
Instructions
- Preheat your oven to 350°F (175°C).
- Prep the baking pan by greasing and flouring it or lining it with parchment paper.
- Grate the zucchini using a box grater or food processor, then squeeze out excess moisture.
- Mix the dry ingredients: flour, cocoa powder, baking soda, baking powder, and salt in a large bowl.
- Whisk the wet ingredients: eggs, sugar, vegetable oil, and vanilla extract in a separate bowl.
- Combine the wet mixture to the dry mixture, stirring until just combined.
- Fold in the grated zucchini and chocolate chips gently.
- Pour the batter into the prepared baking pan.
- Bake for about 30-35 minutes or until a toothpick inserted in the center comes out clean.
- Cool the cake in the pan for 10-15 minutes, then transfer to a wire rack to cool completely.
Notes
For extra indulgence, dust the cake with powdered sugar or serve with whipped cream or vanilla ice cream.
- Prep Time: 15 minutes
- Cook Time: 35 minutes
- Category: Dessert
- Method: Baking
- Cuisine: American
Nutrition
- Serving Size: 1 slice
- Calories: 350
- Sugar: 20g
- Sodium: 200mg
- Fat: 14g
- Saturated Fat: 2g
- Unsaturated Fat: 10g
- Trans Fat: 0g
- Carbohydrates: 45g
- Fiber: 3g
- Protein: 5g
- Cholesterol: 30mg
Keywords: zucchini cake, chocolate cake, dessert, baking, easy recipes
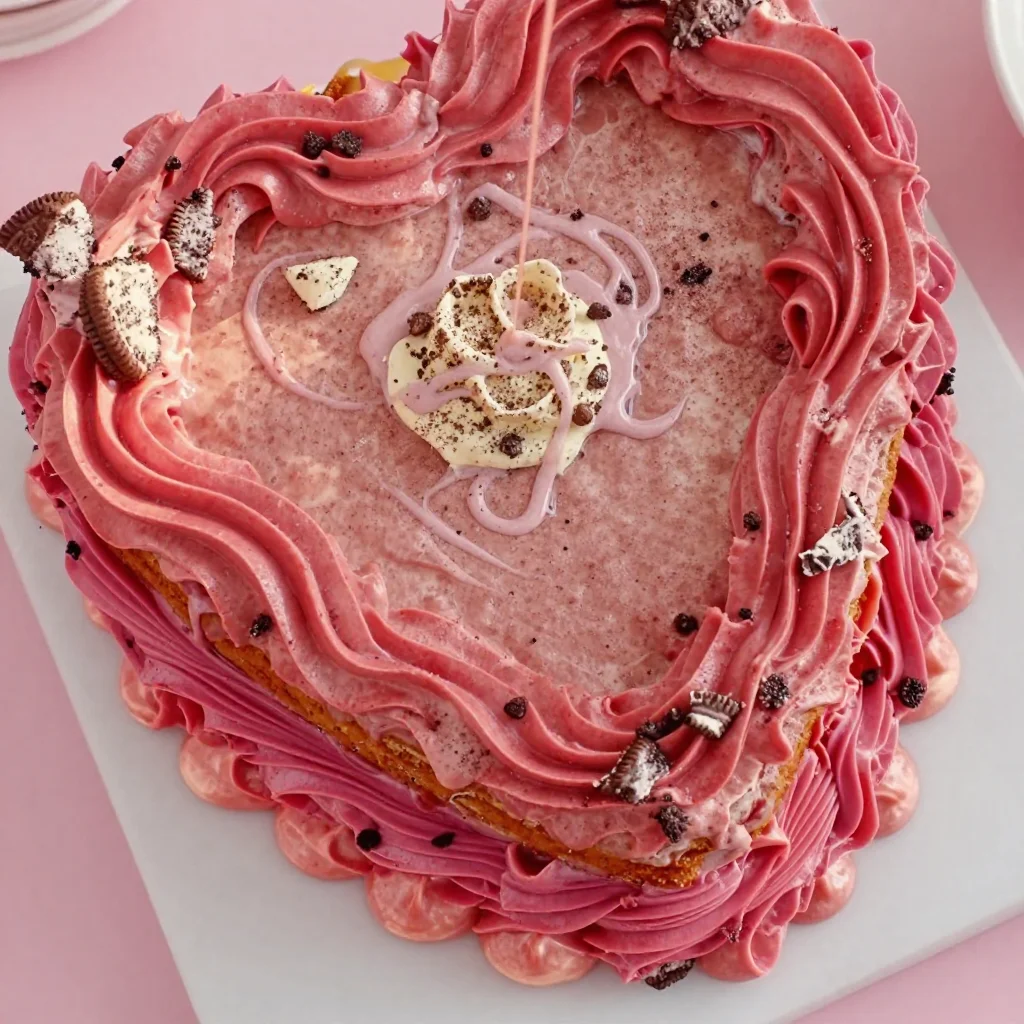
Budget-Friendly Chocolate Oreo Cake (Easy Weeknight Dessert)
Decadent Chocolate Oreo Cake: A Slice of Nostalgia and Happiness
Welcome to my kitchen! Today, I’m excited to share a beautiful creation that’s as rich in flavor as it is in fond memories: a Chocolate Oreo Cake that’s guaranteed to make your heart sing and your taste buds dance!
Imagine the fragrance of fresh-baked chocolate mingling with the nostalgic scent of crushed Oreos wafting through your home. This cake is more than just dessert; it’s an experience, a reason to gather friends and family and create lasting memories. Whether it’s a birthday celebration, a casual get-together, or a cozy night in, this cake invites everyone to indulge and relax.
Baking this Chocolate Oreo Cake takes me back to my childhood, spending lazy afternoons in my mom’s kitchen, where the walls were adorned with little doodles and flour marks. I remember my little brother and I fighting over who got to crush the Oreos as we constructed treat after treat. It was not just about the cake; it was the laughter and joy that surrounded it.
So, let’s roll up our sleeves, dust off that apron, and dive into this sweet adventure of baking a Chocolate Oreo Cake!
A Little Taste of Nostalgia
Whenever I make this Chocolate Oreo Cake, I can’t help but reminisce about a special summer when I was 10 years old. My family threw a backyard barbecue. I was in charge of dessert, and I decided to whip up an Oreo cake from a recipe I’d found in a magazine.
Things didn’t go quite as planned. I may have accidentally added twice the amount of sugar (who can resist that sweet allure?), which led to a delightfully sticky situation. But, that cake turned out to be the highlight of the day! Everyone devoured it, raving about how it was "the best cake ever!" Moments like that—filled with laughter, some chaos in the kitchen, and a delicious result—shaped my love for baking and my belief that the best recipes often come with a side of adventure.
Let’s recreate that charming chaos and make a cake that will bring as much joy to your loved ones as it did to mine!
Ingredients
For this Chocolate Oreo Cake, we’ll need the following ingredients. Don’t fret if you’re missing something; I’ve included a few tips for substitutions!
-
1 ¾ cups all-purpose flour
Essential for giving the cake structure. For a gluten-free option, use a 1:1 gluten-free flour blend. -
¾ cup unsweetened cocoa powder
Adds a deep chocolate flavor. Dutch-processed cocoa can give a smoother taste, while raw cocoa adds a more robust flavor. -
2 cups granulated sugar
This sweetener amplifies flavor and moisture. If you want a healthier option, consider coconut sugar or a sugar substitute like monk fruit. -
1 ½ teaspoons baking powder
Helps the cake rise. Make sure it’s fresh for the best results! -
1 ½ teaspoons baking soda
Also aids in leavening. Check the expiration date; you want it strong and effective! -
1 teaspoon salt
Balances sweetness and amplifies the overall flavor. Trust me, don’t skip this step! -
2 large eggs
Acts as a binding agent, providing moisture and richness. For vegan options, try flax eggs (1 tablespoon ground flaxseed mixed with 2.5 tablespoons water). -
1 cup whole milk
Gives a moist texture. You could substitute it with almond milk, oat milk, or even yogurt for a thicker batter. -
½ cup vegetable oil
Adds moisture and density. If you want a lighter feel, substitute with applesauce, but keep in mind—it might alter the flavor a touch. -
2 teaspoons vanilla extract
Enhances sweetness and flavor. Pure vanilla extract is best, but imitation works in a pinch! -
1 cup boiling water
This magical ingredient helps to bloom the cocoa and gives the cake a moist crumb. No substitutes here for best results! -
1 ½ cups crushed Oreos
The star of the show! Adds a delightful crunch and flavor to the cake. You can use any chocolate sandwich cookie if you don’t have Oreos. -
1 batch chocolate frosting
(You can make your own, but store-bought is okay too! Just ensure it’s creamy and delicious.)
Step-by-Step Instructions
-
Preheat Your Oven
Preheat your oven to 350°F (175°C). It’s essential to get the oven hot before putting the cake in! Trust me, your cake deserves that optimal baking environment. -
Prepare Your Pans
Grease and flour two 9-inch round cake pans. You can also line the bottoms with parchment paper for easy removal. A little tip: use cocoa powder instead of flour for dusting the pans if you want to avoid any white streaks. -
Combine Dry Ingredients
In a large mixing bowl, combine the flour, cocoa powder, sugar, baking powder, baking soda, and salt. Whisk them together to ensure they’re evenly mixed. When all your dry ingredients are well combined, you’ll end up with a light dusting of chocolate goodness ready to absorb the wet ingredients. -
Mix in the Wet Ingredients
Add the eggs, milk, vegetable oil, and vanilla extract to the dry ingredients. Mix on medium speed for about 2 minutes until everything is well combined. You want a lovely smooth batter with a rich chocolate hue! -
Boiling Water Time!
Now here’s where the magic happens. Carefully stir in the boiling water. (Yes, boiling!) The batter will become thinner — that’s normal and it’s what keeps the cake moist. -
Fold in the Oreos
Gently fold the crushed Oreos into the batter. This is the fun part! The chunks of Oreo add a delightful texture. Just remember not to overmix; a few swirls are enough. -
Bake the Cakes
Divide the batter equally between the prepared cake pans. Bake in the preheated oven for 30-35 minutes, or until a toothpick inserted into the center comes out clean (or with very few crumbs). -
Cool the Cakes
Once baked, remove the cakes from the oven and let them cool in the pans for about 10 minutes. Then, turn them out onto wire racks to cool completely. Do you smell that? That heavenly aroma is pure happiness!
Serving Suggestions
Once your Chocolate Oreo Cake has cooled down, it’s time to frost! Spread your chocolate frosting generously on top of one layer, add the other layer, and cover the top and sides with even more frosting. For a scrumptious finishing touch, decorate the top with extra crushed Oreos or even whole cookies for a rustic look. Slice it up, serve it on pretty plates, and you’ve got a showstopper that’s sure to impress!
Recipe Variations
Looking to mix things up? Here are a few creative twists to consider:
- Minty Oreos: Use mint-flavored Oreos for a refreshing twist.
- Peanut Butter: Add a layer of peanut butter frosting between the cake layers for a decadent treat!
- Dairy-Free Option: Substitute all dairy ingredients with plant-based alternatives such as almond milk or coconut cream.
- Chocolate Chip Add-in: Toss in some chocolate chips for an extra chocolatey experience.
- Layer It Up: Create a multi-layer cake by doubling the recipe and stacking three or four layers for a tower of chocolate bliss!
Chef’s Notes
This Chocolate Oreo Cake has a special place in my heart, and over the years, it has evolved beautifully. I once added a layer of raspberry jam because, well, chocolate and raspberry are a match made in heaven! Some families like to celebrate major milestones with this cake, and each time I see their smiles, I’m reminded of why I love baking. The joy of transforming simple ingredients into something spectacular keeps me inspired in the kitchen.
FAQs and Troubleshooting
1. My cake sunk in the middle! What happened?
This issue often arises from underbaking or opening the oven door too soon. Make sure your oven is properly preheated, and resist the urge to peek before the minimum baking time.
2. The frosting is too stiff; how can I fix it?
If your frosting is too thick, mix in a tablespoon of milk at a time until you reach the desired consistency. Adding a pinch of salt can also help balance sweetness!
3. Can I make this cake ahead of time?
Absolutely! This cake keeps well in an airtight container for 3-4 days at room temperature. You can also freeze it, wrapped tightly in plastic wrap, for up to three months. Just thaw and frost when you’re ready to serve!
4. What if I want a lighter cake?
For a lighter cake, try substituting half of the flour with cake flour, which gives a more delicate crumb. You could also reduce the amount of sugar and use applesauce as a partial fat replacement.
Nutritional Info
The nutritional values can fluctuate based on specific ingredients and portion sizes, but this cake per slice can typically include:
Calories: 400, Carbohydrates: 58g, Protein: 5g, Fat: 19g, Sugar: 38g.
There you have it! A delightful Chocolate Oreo Cake recipe that combines nostalgia with an irresistible flavor. Feel free to share your baking adventures and any twists you make to this recipe! Whether you’re whipping this up for a celebration or just because, I hope it adds a touch of sweetness to your day. Happy baking!
Print
Decadent Chocolate Oreo Cake
- Total Time: 50 minutes
- Yield: 8 servings 1x
- Diet: Vegetarian
Description
A rich chocolate cake infused with crushed Oreos, perfect for any celebration or cozy night in.
Ingredients
- 1 ¾ cups all-purpose flour
- ¾ cup unsweetened cocoa powder
- 2 cups granulated sugar
- 1 ½ teaspoons baking powder
- 1 ½ teaspoons baking soda
- 1 teaspoon salt
- 2 large eggs
- 1 cup whole milk
- ½ cup vegetable oil
- 2 teaspoons vanilla extract
- 1 cup boiling water
- 1 ½ cups crushed Oreos
- 1 batch chocolate frosting
Instructions
- Preheat your oven to 350°F (175°C).
- Prepare your pans by greasing and flouring two 9-inch round cake pans.
- Combine the dry ingredients in a large mixing bowl and whisk together.
- Mix in the wet ingredients using medium speed for about 2 minutes.
- Stir in the boiling water carefully.
- Fold in the crushed Oreos gently into the batter.
- Bake in the preheated oven for 30-35 minutes.
- Cool the cakes in pans for 10 minutes before transferring to wire racks.
Notes
For a lighter cake, consider using half cake flour and reducing sugar. This cake can be frozen for up to three months.
- Prep Time: 15 minutes
- Cook Time: 35 minutes
- Category: Dessert
- Method: Baking
- Cuisine: American
Nutrition
- Serving Size: 1 slice
- Calories: 400
- Sugar: 38g
- Sodium: 330mg
- Fat: 19g
- Saturated Fat: 3g
- Unsaturated Fat: 16g
- Trans Fat: 0g
- Carbohydrates: 58g
- Fiber: 2g
- Protein: 5g
- Cholesterol: 50mg
Keywords: chocolate cake, Oreo cake, dessert recipe, baking




