
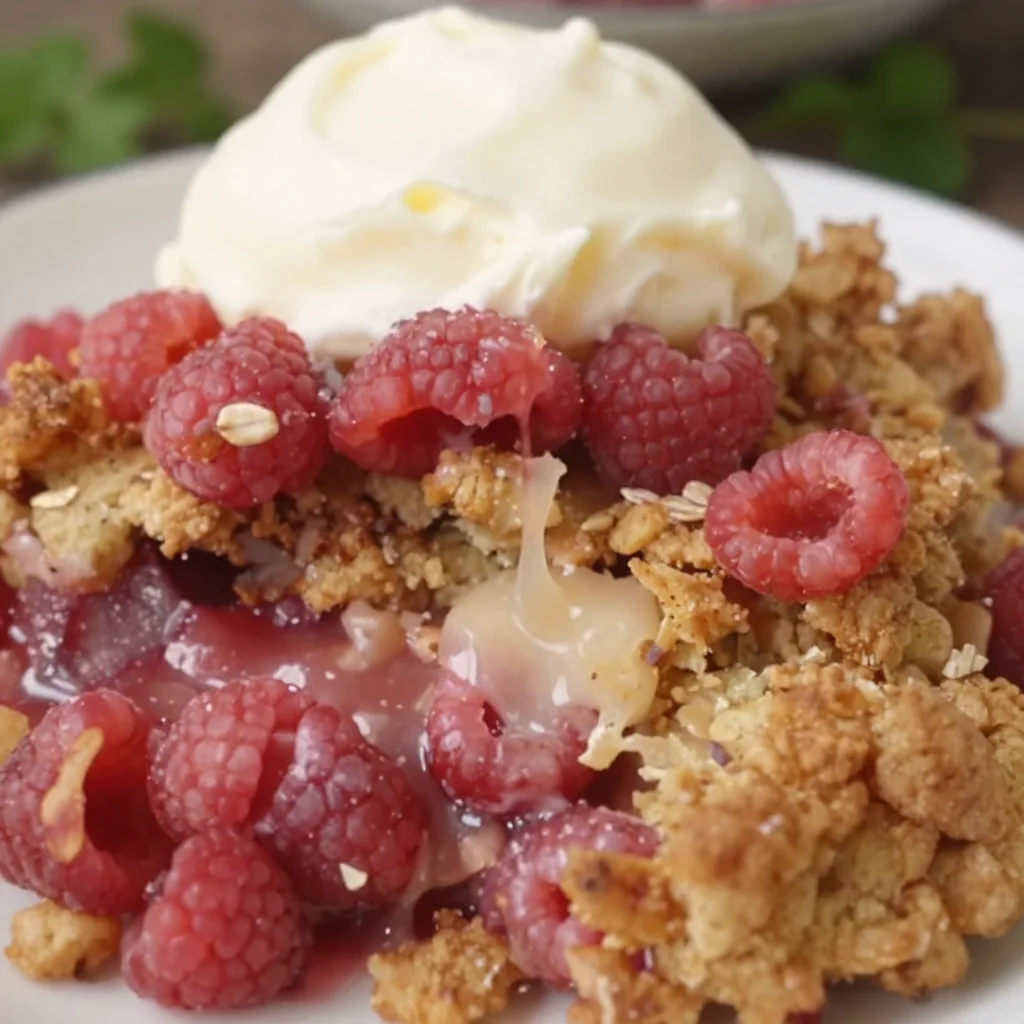
One-Pan Raspberry Crumble: 15-Minute Weeknight Dessert
Sweet Nostalgia: Raspberry Crumble Recipe
Welcome to my kitchen! Today, we’re diving into a delightful dish that sings of summer’s sweetness and brings back cherished memories: Raspberry Crumble. Picture this: the aroma of baked berries wafting through the air, golden and crumbly topping glistening under kitchen lights, and laughter echoing around the table as loved ones dig in. This dessert has a knack for creating cozy moments, sharing stories, and indulging our sweet tooth!
Raspberry crumble is the kind of recipe that feels familiar and welcoming. It’s not just a dish; it’s a story. Maybe it’s the warmth of a family gathering or a simple weekend treat. Whatever it is, when you make this recipe, you’re not just baking – you’re creating moments to savor. With juicy berries enveloped in a luscious topping, each bite transports you to a sun-kissed picnic or a Sunday afternoon spent with friends.
The beauty of this crumble is its versatility. You can whip it up for a casual dessert, take it to a potluck, or simply enjoy a cozy night in with a scoop of vanilla ice cream on the side. And the best part? It’s super easy to make. Whether you’re a seasoned chef or a kitchen newbie, I promise you’ll be able to create something that’s both stunning and delicious.
So, let’s roll up our sleeves, don our favorite aprons, and let the kitchen magic begin!
A Bite of Memory: My Raspberry Crumble Journey
I still remember the first time I made raspberry crumble. It was a sunny Saturday afternoon, and the local farmers’ market was bustling with vibrant colors and sweet aromas. The minute I laid eyes on those plump, juicy raspberries, I felt the tug of nostalgia. My grandmother used to make her famous berry crumbles during family gatherings, and the mere thought of it could make my stomach rumble.
After a bit of haggling (okay, maybe just a friendly chat) with the vendor, I carted home a basket bursting with raspberries, determined to recreate my grandmother’s magic. That Saturday turned into an afternoon of laughter and floury messiness as I stumbled through the steps, trying to remember her process.
As I pulled that first golden-brown crumble out of the oven, the smell wrapped around me like a warm hug. I felt transported back to my childhood, sitting around a long table filled with family, all eagerly waiting for a taste. When I finally took a bite, my heart swelled with joy – I had done it! That very first batch was imperfect but incredibly special; each bite echoed laughter, love, and cherished memories. And that’s the beauty of this raspberry crumble recipe – it’s not just about the dessert; it’s about the moments you create along the way.
Ingredients You’ll Need
To make this stunning raspberry crumble, gather these key ingredients:
-
Fresh Raspberries (2 cups): The star of the show! Look for plump, vibrant berries; they should be sweet and slightly tart. If you can’t find fresh ones, frozen raspberries work too; just make sure to thaw and drain them well.
-
Granulated Sugar (1/2 cup): This sweetener helps balance the tartness of the raspberries. If you prefer less sugar, feel free to reduce it to 1/4 cup. You can also use coconut sugar for a healthier twist!
-
Oats (1 cup): They add a delightful chewiness to the crumble topping. Use rolled oats for the best texture. If you’re aiming for gluten-free, ensure you use certified gluten-free oats.
-
All-Purpose Flour (1 cup): This will help bind your crumble topping together. For a gluten-free option, almond flour or a gluten-free blend works great.
-
Brown Sugar (1/2 cup): It gives depth and a lovely caramel note to the topping. Dark brown sugar imparts a richer flavor, but light brown works as well.
-
Butter (1/2 cup, cold): Cut into cubes; this adds richness to the crumble and helps achieve that desired flaky texture. You can substitute with coconut oil or a vegan butter alternative if you prefer.
-
Cinnamon (1 teaspoon): A warm spice that enhances the overall flavor. Don’t skip it! It’s what takes this crumble to the next level.
-
Salt (1/4 teaspoon): A pinch of salt elevates the sweetness of the crumble and balances the flavors beautifully.
Step-by-Step Instructions
Let’s get cooking! Follow these detailed steps to create your delicious raspberry crumble:
-
Preheat Your Oven: Preheat your oven to 350°F (175°C). This may seem simple, but starting with a hot oven ensures your crumble cooks evenly and becomes perfectly golden!
-
Prepare the Berries: In a medium bowl, gently toss the fresh raspberries with granulated sugar. Don’t squish them; you want to keep those juicy berries intact! Set this bowl aside to let the sugar work its magic and draw out the raspberry juices. It’ll enhance the overall flavor and create a lovely filling.
-
Make the Crumble Topping: In a separate mixing bowl, combine the oats, flour, brown sugar, cinnamon, and salt. Mix them well. Now, add the cold butter cubes. Using your fingers or a pastry cutter, work the butter into the dry ingredients until it resembles coarse crumbs. It’s okay if there are some larger chunks – they’ll create delicious crispy bits when baked!
-
Combine the Filling and Topping: Take your raspberry mixture and transfer it into an 8×8-inch (or similarly-sized dish). Spread it evenly. Then, sprinkle the crumble topping generously over the berries, making sure it’s well-covered. This is where the magic happens – every bite will be a blissful balance of tart and sweet!
-
Bake to Perfection: Pop the dish into your preheated oven and let it bake for about 30-35 minutes. You’ll know it’s ready when the topping is golden and crispy and the berries are bubbling around the edges. Don’t rush this process!
-
Cool and Serve: Allow the raspberry crumble to cool for at least 10 minutes before digging in. This will help the juices set a bit and make serving easier. You can serve it warm, at room temperature, or even chilled – it’s delicious any way you choose!
Serving Suggestions
When it comes to serving your raspberry crumble, think about how to elevate the experience! Consider a scoop of vanilla ice cream or a dollop of whipped cream on top for an extra layer of indulgence. If you’re feeling fancy, a sprinkle of fresh mint or a dusting of powdered sugar adds a nice touch of elegance and freshness. Serve it in charming bowls or a rustic baking dish for that homey feel, and watch as everyone digs in with joyful anticipation!
Recipe Variations: Get Creative!
This raspberry crumble recipe is wonderfully adaptable! Here are a few fun variations to inspire your inner chef:
-
Mixed Berry Crumble: Swap out raspberries for any combination of berries like blueberries, strawberries, or blackberries for a delightful twist!
-
Nutty Crumble: Add chopped nuts such as almonds or pecans to the topping mixture for an extra crunch and richness.
-
Spiced Up: Experiment by adding a pinch of nutmeg or cardamom in addition to cinnamon for a warm, aromatic flair.
-
Healthy Twist: Replace half the butter with applesauce for a lighter option without sacrificing flavor.
-
Gluten-Free Delight: Substitute all-purpose flour with a blend of oat flour and almond flour for a gluten-free version everyone can enjoy.
Chef’s Notes
Oh, have I had my share of raspberry crumble adventures! One time, as a novice baker, I forgot to add sugar to the raspberry filling. Can you imagine? I blew my family’s minds with what looked like a beautifully baked dessert but turned out to be completely tart! Lesson learned: sugar is essential in a dessert!
Over the years, I’ve refined this recipe, and I can assure you that it has become a staple at our family gatherings. Each new iteration brings a little twist, whether it’s an experimental spice or a new type of berry. My favorite? A mixture of raspberries and peaches—oh, the summer vibes!
FAQs and Troubleshooting
1. Why is my crumble topping soggy?
A soggy topping can happen if there’s too much moisture in the fruit filling or if it’s not baked long enough. Make sure to evenly distribute the topping and keep an eye on it as it bakes until it’s golden brown.
2. Can I use frozen raspberries?
Absolutely! Just make sure to thaw them first and drain any excess liquid to prevent your crumble from becoming too watery.
3. How do I store leftovers?
Store any leftover crumble in an airtight container in the refrigerator for up to 3 days. Just reheat in the oven before serving for that fresh-out-of-the-oven taste!
4. What can I pair with raspberry crumble?
This crumble goes beautifully with a scoop of vanilla ice cream, a dollop of whipped cream, or even a drizzle of chocolate sauce for those chocolate lovers out there!
Nutritional Info
(Note: Nutritional values may vary based on ingredient choices.)
- Serving size: 1/8 of an 8×8 dish
- Calories: Approximately 250-300
- Fat: 12g
- Carbohydrates: 36g
- Fiber: 4g
- Sugars: 14g
- Protein: 4g
So, there you have it, my friends! A delightful raspberry crumble that not only tastes incredible but also brings a little nostalgia, joy, and comfort to your table. Remember, cooking is all about love, creativity, and sharing with those you care about. Now, get out there and whip up some sweetness! Happy baking!
Print
Raspberry Crumble
- Total Time: 45 minutes
- Yield: 8 servings 1x
- Diet: Vegetarian
Description
A delightful dessert featuring juicy raspberries topped with a golden, crumbly mixture, perfect for cozy moments and gatherings.
Ingredients
- 2 cups Fresh Raspberries
- 1/2 cup Granulated Sugar
- 1 cup Oats
- 1 cup All-Purpose Flour
- 1/2 cup Brown Sugar
- 1/2 cup Butter, cold, cut into cubes
- 1 teaspoon Cinnamon
- 1/4 teaspoon Salt
Instructions
- Preheat your oven to 350°F (175°C).
- Prepare the berries by tossing raspberries with granulated sugar in a medium bowl.
- Make the crumble topping by combining oats, flour, brown sugar, cinnamon, and salt in a separate bowl.
- Add cold butter cubes to the crumble mixture and mix until it resembles coarse crumbs.
- Combine the raspberry mixture in a baking dish and spread evenly before topping with the crumble mixture.
- Bake for about 30-35 minutes until the topping is golden and crispy.
- Cool the crumble for at least 10 minutes before serving.
Notes
Serve warm with vanilla ice cream or whipped cream for a delightful treat.
- Prep Time: 15 minutes
- Cook Time: 30 minutes
- Category: Dessert
- Method: Baking
- Cuisine: American
Nutrition
- Serving Size: 1 serving
- Calories: 275
- Sugar: 14g
- Sodium: 100mg
- Fat: 12g
- Saturated Fat: 7g
- Unsaturated Fat: 4g
- Trans Fat: 0g
- Carbohydrates: 36g
- Fiber: 4g
- Protein: 4g
- Cholesterol: 30mg
Keywords: raspberry crumble, dessert, summer dessert, berry dessert, comfort food
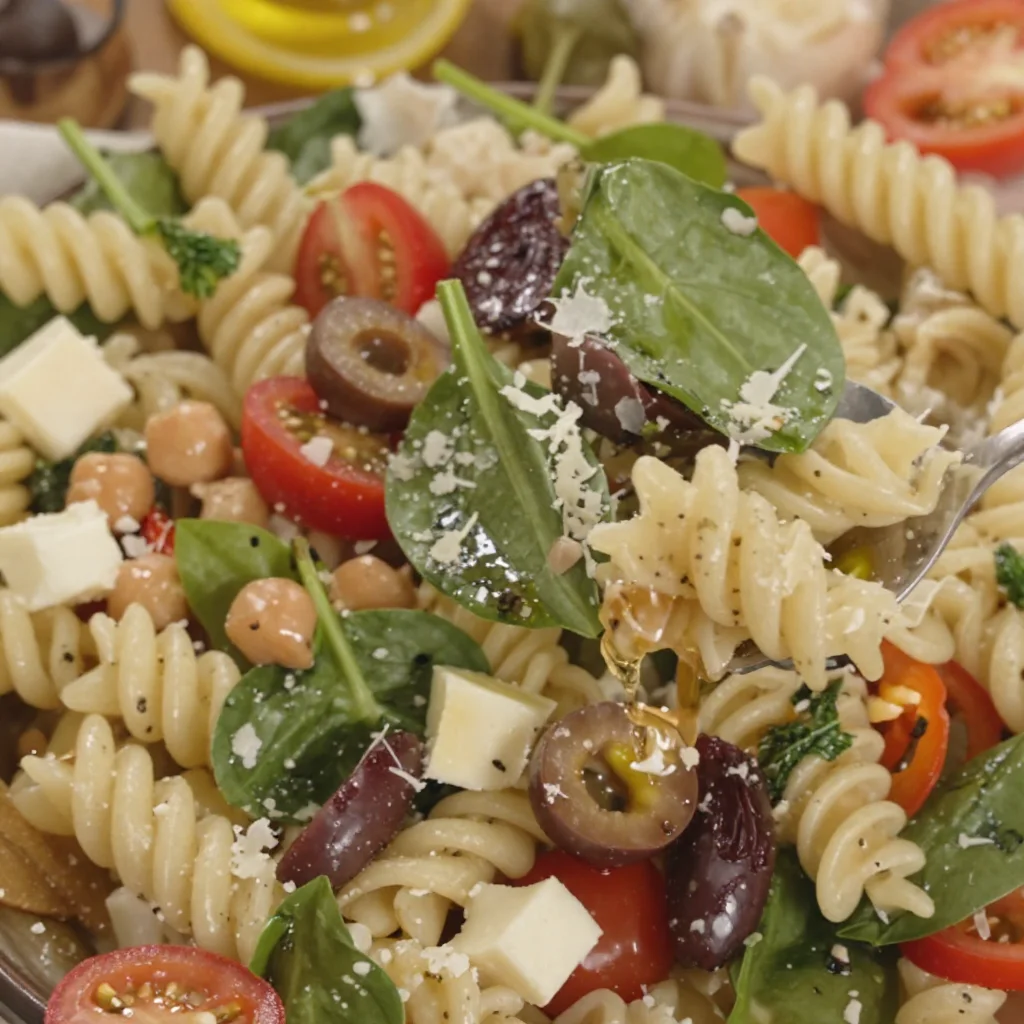
Meal-Prep Italian Pasta Salad: 15-Minute Weeknight Recipe
The Ultimate Italian Pasta Salad: A Flavorful Feast for All
Welcome to my kitchen, my fellow flavor enthusiasts! Today, I’m bubbling over with excitement to share one of my absolute favorite recipes that just screams summertime gatherings, potlucks, or even a cozy weeknight dinner at home. It’s none other than the classic Italian Pasta Salad!
Picture this: it’s a sunny afternoon, and the smell of fresh herbs mingles with the laughter of family and friends gathered around the picnic table. That’s the essence of Italian pasta salad. It’s a dish that brings people together, a mosaic of colors, textures, and tastes that practically dances on your palate. Not only is it incredibly delicious, but it’s also a breeze to prepare, making it perfect for any occasion.
I remember the first time I made this dish for a big family reunion. I was just a teenager, eager to impress my relatives with my culinary skills. I had seen my nonna whip up her version of pasta salad countless times. With a sprinkle of love and a dash of her secret spices, she turned simple ingredients into an elaborate feast. I decided to channel those family vibes, grabbed some ingredients from the pantry, and voilà! Instant hit! Everyone came back for seconds, and I felt like the kitchen rockstar I had always dreamed of being. That’s when I realized that cooking is not just about the food; it’s about the memories we create and the connections we build.
Now, let’s dive into this delightful recipe!
Ingredients
This is where the magic begins! Below are the key ingredients for your Italian Pasta Salad, along with some chef insights to help you along the way:
-
Pasta: 12 ounces of rotini, fusilli, or any pasta of your choice. Feel free to use whole grain for a healthier option. Cooking is about personal preferences, and pasta shapes capture flavors differently.
-
Cherry Tomatoes: 1 pint, halved. Sweet and juicy, they add vibrant color and freshness. Can’t find cherry tomatoes? Substitute with diced regular tomatoes.
-
Cucumber: 1 medium, diced. A crunchy component that balances the dish. If you prefer a Mediterranean flair, you can swap for Kalamata olives.
-
Red Onion: 1 small, finely chopped. This adds a zesty bite. If raw onion isn’t your thing, soak it in cold water for 10 minutes to mellow out the flavor.
-
Bell Peppers: 1 each of red, yellow, and green, diced. A colorful addition that makes the salad pop! Use roasted bell peppers for a smoky twist.
-
Black Olives: 1/2 cup, sliced. They bring a briny dimension to the salad. For a twist, try green olives or capers.
-
Feta Cheese: 1 cup, crumbled. Creamy and tangy, it elevates the pasta salad. For a dairy-free option, use cashew feta.
-
Fresh Basil: A handful, chopped. Aromatic and fresh, you can substitute dried basil if fresh isn’t available, but go easy—dried is more potent!
-
Olive Oil: 1/3 cup. The heart and soul of the dressing! Use extra virgin for the best flavor.
-
Red Wine Vinegar: 1/4 cup. Adds sharpness and brightness. You can swap it for white wine vinegar or lemon juice if needed.
-
Garlic: 2 cloves, minced. A little goes a long way in enhancing flavors. Substitute with garlic powder if that’s what you have.
-
Italian Seasoning: 1 tablespoon. A blend of herbs that gives that delicious Italian vibe. Or make your own mix using thyme, oregano, and rosemary!
-
Salt and Pepper: To taste. Essential for bringing out the flavors of all the ingredients!
Step-by-Step Instructions
Ready to dig in? Let’s get cooking! Follow these easy steps, and I promise you’ll be feeling like the culinary genius you are.
-
Cook the Pasta: Bring a large pot of salted water to a boil. Add your pasta and cook according to package instructions until al dente, usually around 8-10 minutes. Classic tip: be sure to stir occasionally to prevent sticking! When it’s done, drain it and rinse under cold water to halt the cooking process and keep your pasta firm.
-
Prepare the Vegetables: While your pasta is cooking, wash and chop all the veggies. Dice the cucumbers, halve the cherry tomatoes, chop the bell peppers, and finely slice the red onion. The more colorful your vegetables, the more inviting the salad will be!
-
Mix the Dressing: In a small bowl, whisk together olive oil, red wine vinegar, minced garlic, and Italian seasoning with a pinch of salt and pepper. A little tip: let the dressing sit for a few minutes so the flavors can meld beautifully.
-
Combine Ingredients: In a large mixing bowl, combine the cooled pasta with the chopped vegetables, feta cheese, and black olives. Drizzle the dressing over everything and toss gently to combine. The goal is to coat each ingredient, not to pulverize the delicate veggies!
-
Taste and Adjust: Now comes the fun part! Take a spoonful and taste. This is your masterpiece, so feel free to adjust the seasoning. More salt? Add it! Prefer it tangier? A splash more vinegar, and you’re golden.
-
Chill: Cover the bow with plastic wrap or a lid and let the salad chill in the refrigerator for at least 30 minutes. This allows the flavors to blend and creates that lovely, refreshing experience we crave on warm days.
-
Serve: When you’re ready to serve, give it another gentle toss and garnish with fresh basil on top. Bam! You’ve got a delightful Italian Pasta Salad ready to steal the show!
Serving Suggestions
When it comes to plating your pasta salad, presentation is key! Serve it in a large bowl or arrange it in individual serving cups for a fun touch. Add a sprinkle of extra feta and a basil leaf on top for that restaurant-worthy appearance. Pair it with some crusty Italian bread and a glass of chilled white wine, and you have a meal that looks as wonderful as it tastes.
Recipe Variations
Feeling a little adventurous? Here are a few creative twists to elevate your pasta salad game:
-
Protein Boost: Add diced grilled chicken, shrimp, or chickpeas for an extra protein punch.
-
Pesto Perfection: Swap out half of the dressing for prepared pesto for a rich, herbaceous flavor.
-
Mediterranean Style: Incorporate artichoke hearts, sun-dried tomatoes, and a sprinkle of pine nuts for something a little different.
-
Spicy Kick: Add sliced jalapeños or a dash of red pepper flakes to give your salad a subtle heat.
-
Vegan Delight: Replace the cheese with avocado or a sprinkle of nutritional yeast for a creamy texture without dairy.
Chef’s Notes
Italian Pasta Salad has evolved in my kitchen over the years. What began as a simple recipe from my nonna has morphed into a canvas for creativity. I remember one summer when my friends and I were experimenting with all kinds of ingredients, from pesto to roasted vegetables. The best part is that no two salads ever turn out the same, and they all come with a story or a laugh. Never hesitate to make it your own!
And let’s not forget about the oops moments—like the time I grabbed powdered sugar instead of salt for the dressing. Spoiler: it was not one of my proudest culinary achievements!
FAQs and Troubleshooting
1. My pasta salad is mushy. What happened?
It’s likely that the pasta was overcooked. Always check the cooking time and aim for al dente texture, as it will continue to soften while it chills.
2. Can I make this ahead of time?
Absolutely! Pasta salad is a great make-ahead dish. Just don’t add fresh herbs until you’re ready to serve so they stay vibrant.
3. How long does the salad last in the fridge?
Stored in an airtight container, your pasta salad should be good for 3-5 days in the refrigerator. The flavors will meld together even more deliciously!
4. What if I don’t like olives?
No problem! You can easily leave them out and substitute with capers, or even better, add some roasted bell peppers for a different zing.
And there you have it—my Ultimate Italian Pasta Salad recipe that’s not only easy to whip up but also bursting with flavor. I hope this dish brings as much joy to your table as it has to mine. So grab those ingredients and let’s create something unforgettable together! Happy cooking!
Print
Ultimate Italian Pasta Salad
- Total Time: 40 minutes
- Yield: 6 servings 1x
- Diet: Vegetarian
Description
A vibrant and delicious Italian Pasta Salad perfect for summer gatherings and weeknight dinners.
Ingredients
- 12 ounces rotini or fusilli pasta
- 1 pint cherry tomatoes, halved
- 1 medium cucumber, diced
- 1 small red onion, finely chopped
- 1 each red, yellow, and green bell pepper, diced
- 1/2 cup black olives, sliced
- 1 cup feta cheese, crumbled
- A handful of fresh basil, chopped
- 1/3 cup olive oil
- 1/4 cup red wine vinegar
- 2 cloves garlic, minced
- 1 tablespoon Italian seasoning
- Salt and pepper, to taste
Instructions
- Cook the pasta: Bring a large pot of salted water to a boil, add your pasta, and cook according to package instructions until al dente, about 8-10 minutes. Drain and rinse under cold water.
- Prepare the vegetables: Wash and chop all the veggies including cucumbers, cherry tomatoes, bell peppers, and red onion.
- Mix the dressing: In a small bowl, whisk together olive oil, red wine vinegar, minced garlic, and Italian seasoning with a pinch of salt and pepper.
- Combine ingredients: In a large mixing bowl, combine the cooled pasta, chopped vegetables, feta cheese, and black olives, and drizzle the dressing over everything.
- Taste and adjust: Take a spoonful and taste it, adjusting seasoning as needed.
- Chill: Cover the bowl with plastic wrap and let the salad chill in the refrigerator for at least 30 minutes.
- Serve: Toss the salad gently before serving and garnish with fresh basil on top.
Notes
Serve in a large bowl or individual cups, and pair with crusty Italian bread for a complete meal.
- Prep Time: 20 minutes
- Cook Time: 10 minutes
- Category: Salad
- Method: Mixing
- Cuisine: Italian
Nutrition
- Serving Size: 1 serving
- Calories: 320
- Sugar: 4g
- Sodium: 550mg
- Fat: 24g
- Saturated Fat: 8g
- Unsaturated Fat: 12g
- Trans Fat: 0g
- Carbohydrates: 30g
- Fiber: 4g
- Protein: 8g
- Cholesterol: 30mg
Keywords: pasta salad, Italian pasta, summer salad, vegetarian dish




