

High-Protein Cottage Cheese Brioche Rolls for Meal Prep
Protein Cottage Cheese Brioche Rolls: The Perfect Comfort Food
Welcome to my cozy corner of the culinary world! I’m thrilled you’re here, ready to dive into a delightful kitchen adventure with me. Today, we’re whipping up something special: Protein Cottage Cheese Brioche Rolls. Trust me, you’re going to want to keep this recipe close at hand, whether you’re hosting brunch, prepping for a snack, or looking to impress at your next family gathering. These rolls are soft, buttery, and packed with protein, making them not just a treat for your taste buds but also a wholesome addition to your week.
But let’s be real; what’s not to love about a warm roll straight out of the oven? The aroma wafting through your kitchen, the moment you pull those golden beauties out, and the satisfaction of breaking one open to reveal its fluffy interior. If you share my obsession with baked goods, you know exactly what I mean.
Personal Story
I’ll never forget the first time I attempted to bake brioche. I was a wide-eyed novice in my mom’s kitchen, filled with flour and questions. We were gearing up for our family Easter brunch, and my mom, ever the master baker, decided it was time for me to get my hands doughy and discover the magic of yeast. Alongside her, we tackled a classic brioche recipe, and I was absolutely captivated by how simple yet transformative this dough could be. It quickly became a cherished bonding moment between us—one filled with laughter, flour fights, and lots of taste-testing.
Fast forward to today, I’ve incorporated a healthy twist into that cherished recipe by using cottage cheese, adding a punch of protein and a deliciously unique texture. So, whenever I bake these rolls, it feels like I’m wrapping my memories in warm, fluffy layers of nostalgia.
Ingredients
Before we roll up our sleeves and get started, let’s talk ingredients! Here’s what you’ll need:
-
All-Purpose Flour (4 cups): The backbone of any bread recipe, this flour offers the right balance of protein for structure. If you’re looking for a whole grain option, feel free to substitute up to half with whole wheat flour for a nuttier flavor.
-
Cottage Cheese (1 cup): This creamy gem brings moisture and a protein boost to the rolls. Use low-fat or full-fat depending on your preference, and for a vegan option, try silken tofu blended until smooth.
-
Butter (1/2 cup): For that classic brioche richness, butter is key! You could substitute with coconut oil or a plant-based butter to make these dairy-free, but I recommend sticking with real butter for the ultimate flavor.
-
Sugar (1/4 cup): This sweetener helps activate the yeast and balances the flavors. You could swap it with honey or maple syrup; just remember to adjust your liquids accordingly.
-
Yeast (2 1/4 teaspoons, active dry): The magic that makes your rolls rise! Make sure your yeast is fresh for the best results. If you use instant yeast, you can toss it straight into the dry ingredients without proofing.
-
Salt (1 teaspoon): Essential for enhancing flavors. Don’t skip this step!
-
Eggs (2 large): These act as binding agents and add a beautiful golden color. For an egg-free alternative, try using flax eggs (1 tbsp ground flaxseed mixed with 2.5 tbsp water per egg) as a perfect replacer.
-
Milk (1/2 cup): This adds a lovely richness and helps the dough come together. Any milk—dairy or non-dairy—can work here!
Step-by-Step Instructions
Alright, let’s get on with the star of the show—baking those lovelies!
-
Activate Your Yeast: Start by combining the yeast, warm milk, and a teaspoon of sugar in a small bowl. Let this mixture sit for about 5-10 minutes until it bubbles and becomes frothy. This means your yeast is alive and kicking—get excited!
-
Make the Dough: In a large mixing bowl, combine the flour, remaining sugar, and salt. Give it a good whisk to blend everything together. Create a well in the center and add cottage cheese, butter, eggs, and the frothy yeast mixture.
-
Mix It Up: Use your hands or a spatula to mix everything until a shaggy dough forms. It’s okay if the dough seems sticky at first; that’s all part of the brioche magic.
-
Knead: Transfer the dough to a floured surface and knead for about 8-10 minutes until smooth and elastic. If it gets too sticky, sprinkle a little more flour as needed. An easy trick to know you’re done is to do the “windowpane test”—pull a small piece of dough; it should stretch without breaking!
-
First Rise: Place the kneaded dough into a greased bowl, cover it with plastic wrap or a damp cloth, and let it rise in a warm place for about 1-2 hours, or until it has doubled in size. This is when the real magic happens!
-
Shape the Rolls: Once risen, punch down the dough to release the air. Divide it into 12 equal pieces. Roll each piece into a ball and place them in a greased baking dish, leaving a little room for them to expand.
-
Second Rise: Cover the dish and let the rolls rise for another 30-60 minutes. They should puff up nicely, ready to bake!
-
Preheat and Prepare: Preheat your oven to 375°F (190°C). Brush the tops of the rolls with an egg wash (one egg beaten with a tablespoon of water) to give them that gorgeous golden finish.
-
Bake: Pop the rolls into the oven and bake for 20-25 minutes, or until they are golden brown and sound hollow when tapped on the bottom. Your kitchen is about to smell heavenly!
-
Cool and Serve: Remove the rolls from the oven and allow them to cool slightly before transferring them to a wire rack. These beauties are best served warm!
Serving Suggestions
To serve these Protein Cottage Cheese Brioche Rolls, simply place them on a rustic wooden board with a small dish of softened butter or your favorite jam for spreading. You can enjoy them fresh out of the oven as a side to your breakfast, or you can turn them into delightful sliders or sandwiches!
Recipe Variations
-
Herbed Cheese Rolls: Add a tablespoon of your favorite herbs like rosemary or thyme to the dough for a savory twist.
-
Sweet Cinnamon Rolls: Before shaping, sprinkle brown sugar and cinnamon over the dough, roll it up, and slice to create mouth-watering cinnamon rolls!
-
Cheddar & Chive Brioche Rolls: Mix in shredded sharp cheddar cheese and chopped chives for a tangy, flavorful addition.
-
Spiced Pumpkin Rolls: In the fall, stir in some pumpkin puree and spices like nutmeg and allspice for a seasonal delight that’s perfect for autumn gatherings.
-
Chocolate Chip Brioche Rolls: Fold in mini chocolate chips for a sweet treat that’ll please dessert lovers of all ages!
Chef’s Notes
Baking these rolls has become one of my favorite weekend rituals. There’s something so satisfying about watching them rise, and the best part? The opportunity to share them with friends and family, creating memories around the table. The recipe has evolved over time as I’ve incorporated different flavors, but the joy remains the same. Just promise me you’ll save a few rolls to enjoy with a cup of coffee or tea!
FAQs and Troubleshooting
-
What if my dough isn’t rising?
- If your dough isn’t rising, it could be that your yeast is no longer active. Check the expiration date and ensure your milk was warm (not hot) when you added it.
-
Can I make this dough ahead of time?
- Absolutely! You can make the dough the night before and let it rise in the fridge. Just remember to bring it back to room temperature before baking.
-
Why are my rolls dense?
- Dense rolls can come from over-kneading or not enough rising time. Pay attention to the texture of your dough, and allow it enough time to rise.
-
How do I store leftover rolls?
- Store any leftover rolls in an airtight container at room temperature for up to 2 days. They can also be frozen for longer shelf life; just wrap them tightly in plastic wrap and store in a freezer bag.
Nutritional Info
While exact nutritional information can vary, you can expect these Protein Cottage Cheese Brioche Rolls to be a wholesome addition to your meal. Each roll has approximately 150 calories, with a good amount of protein thanks to the cottage cheese and eggs, accompanied by healthy fats from butter.
So there you have it, food lovers! My journey with these Protein Cottage Cheese Brioche Rolls brings back fond memories while offering a tasty treat for everyone. I hope you enjoy baking (and eating) these as much as I do! Let me know in the comments how your rolls turned out or what delicious variations you’ve tried! Happy baking!
Print
Protein Cottage Cheese Brioche Rolls
- Total Time: 45 minutes
- Yield: 12 servings 1x
- Diet: Vegetarian
Description
Deliciously soft and buttery brioche rolls packed with protein from cottage cheese.
Ingredients
- 4 cups All-Purpose Flour
- 1 cup Cottage Cheese
- 1/2 cup Butter
- 1/4 cup Sugar
- 2 1/4 teaspoons Yeast (active dry)
- 1 teaspoon Salt
- 2 large Eggs
- 1/2 cup Milk
Instructions
- Activate your yeast: Combine the yeast, warm milk, and a teaspoon of sugar in a small bowl. Let it sit for about 5-10 minutes until frothy.
- Make the dough: In a large bowl, combine flour, remaining sugar, and salt. Create a well and add cottage cheese, butter, eggs, and the yeast mixture.
- Mix it up: Use your hands to mix everything until a shaggy dough forms.
- Knead: Transfer the dough to a floured surface and knead for 8-10 minutes until smooth and elastic.
- First rise: Place the dough in a greased bowl, cover, and let rise for 1-2 hours until doubled in size.
- Shape the rolls: Punch down the dough, divide into 12 pieces, and roll each into a ball.
- Second rise: Cover and let the rolls rise for another 30-60 minutes.
- Preheat the oven to 375°F (190°C) and prepare an egg wash.
- Bake: Bake for 20-25 minutes until golden brown.
- Cool and serve: Allow to cool slightly then transfer to a wire rack.
Notes
These rolls are best served warm with softened butter or jam. They can also be used for sliders or sandwiches.
- Prep Time: 15 minutes
- Cook Time: 25 minutes
- Category: Bread
- Method: Baking
- Cuisine: French
Nutrition
- Serving Size: 1 roll
- Calories: 150
- Sugar: 3g
- Sodium: 200mg
- Fat: 7g
- Saturated Fat: 4g
- Unsaturated Fat: 3g
- Trans Fat: 0g
- Carbohydrates: 18g
- Fiber: 1g
- Protein: 5g
- Cholesterol: 35mg
Keywords: brioche, rolls, protein, cottage cheese, baking

Protein Cottage Cheese Danish: Quick High-Protein Breakfast
Protein Cottage Cheese Danish: A Delightful Twist on a Classic
Welcome to the kitchen, my fellow food lovers! Today, we’re diving into a warm, inviting recipe that’s close to my heart: the Protein Cottage Cheese Cheese Danish. If you’ve ever been enchanted by the aroma of freshly baked pastries or found solace in the warm hug of a flaky pastry, you’re going to adore this healthier twist on a classic treat.
Picture this: a freshly baked Danish, golden-brown and flaky, filled with a creamy, protein-packed cottage cheese filling that’s sweetened just right. It’s a perfect companion for your morning coffee or a sweet treat in the afternoon. Not only is this Danish delicious, but it’s also a wonderful way to sneak in some protein into your day—no gym membership required!
I’ve always loved homemade pastries, but I remember a specific memory from my childhood that really set the stage for my love of baking. My grandmother, who I affectionately called “Nana,” would set out a rolling pin, flour, and a medley of ingredients each Saturday morning. The smell of her buttery pastries wafting through the house was like a warm embrace, one that made it impossible to resist diving into the kitchen.
One Saturday, she decided to teach me how to make her famous cheese Danishes. We spent hours rolling dough, mixing creamy fillings, and laughing at our flour-covered faces. Those moments were infused with love, laughter, and warmth—truly the ingredients for unforgettable memories. Today, I strive to recreate that same joy in my kitchen, and this Protein Cottage Cheese Cheese Danish is my modern-day homage to those Saturday mornings with Nana.
So grab your apron, roll up your sleeves, and let’s bake some delightful pastries together!
Ingredients
Here’s what you’ll need to create these delicious Protein Cottage Cheese Cheese Danishes:
-
Pre-made Puff Pastry
- About the ingredient: Puff pastry is a marvel of baking! It’s flaky, buttery, and layers beautifully. You can find it in the freezer section of your grocery store. If you’re feeling adventurous, you can make your own, but trust me, store-bought saves time.
- Substitution Tip: If you’re looking for a gluten-free option, check out gluten-free puff pastry brands.
-
Cottage Cheese (1 cup, preferably low-fat)
- About the ingredient: Cottage cheese is the heart of our filling and packs a protein punch! Its creamy texture is perfect for mixing with sweeteners and spices.
- Substitution Tip: Ricotta cheese can work as a substitute if you prefer a smoother texture.
-
Sugar (1/4 cup)
- About the ingredient: This is our sweetener, balancing the creamy cottage cheese. Adjust according to your taste.
- Substitution Tip: For a healthier option, use honey or maple syrup.
-
Vanilla Extract (1 tsp)
- About the ingredient: Vanilla adds warmth and depth to our filling. It’s like a hug for your taste buds!
- Chef Insight: Use pure vanilla extract for the best flavor; imitation can sometimes taste artificial.
-
Lemon Zest (1 tsp)
- About the ingredient: Brightens up the filling with a fresh zing! It transforms the otherwise creamy mixture into something a little more vibrant.
- Substitution Tip: If you don’t have lemon, try orange zest for a different, yet delightful, flavor.
-
Egg (1 egg, beaten)
- About the ingredient: The egg acts as a binder, holding our filling together while also giving the pastry a gorgeous golden color.
- Substitution Tip: For a vegan option, use flaxseed meal mixed with water as an egg substitute.
-
Optional Toppings
- Powdered Sugar: For dusting, because everything is better with a little sweetness!
- Fresh Berries: Strawberries or blueberries add a lovely fresh burst and can be included in the filling or as a topping.
Step-by-Step Instructions
Now that we have our ingredients ready, let’s get to the fun part—baking!
Step 1: Prepare Your Puff Pastry
Preheat your oven to 400°F (200°C). While it’s heating up, take your puff pastry out of the freezer. Allow it to thaw for about 30 minutes. If you have a rolling pin, lightly roll out the pastry on a floured surface to ensure it’s nice and flat. This will help create those beautiful layers.
Chef Hack: Keep your puff pastry in the fridge until you’re ready to use it. It’s much easier to work with when it’s cold!
Step 2: Make the Filling
In a large bowl, combine the cottage cheese, sugar, vanilla extract, and lemon zest. Mix until everything is well combined. If you want a smoother filling, consider using a blender or food processor for a creamy texture.
Tip: Taste the filling! Adjust sweetness if needed, and remember—this filling is where you can let your creativity shine!
Step 3: Cut the Pastry
Once your puff pastry is ready, cut it into squares (about 4×4 inches). You should be able to get 6-8 squares depending on how large your pastry sheet is.
Chef Tip: Use a sharp knife or pizza cutter for clean edges without squishing the layers.
Step 4: Fill the Pastry
Place about 1-2 tablespoons of the cottage cheese filling in the center of each pastry square. Be careful not to overfill—trust me, you don’t want an overflowing mess in your oven!
Pro Tip: You can create a little “well” in the center with the back of a spoon to help keep the filling from spilling out.
Step 5: Fold and Seal
Now, here’s where it gets fun and artistic! You can use two methods:
- For a classic Danish look, fold the corners of the pastry square toward the center, pinching them together to seal.
- Or, for a simpler approach, fold the pastry over like a triangle and seal the edges with a fork.
Tip: With the fork, press down gently to create a lovely design and ensure they are sealed tight.
Step 6: Apply Egg Wash
Brush each pastry with beaten egg on top to give them that golden, appetizing finish. This little touch makes a significant difference!
Chef Insight: If you want to go the extra mile, sprinkle some sugar on top before baking for a slight crunch.
Step 7: Bake
Place your pastries on a lined baking sheet, the trick is to leave some space between each of them; they’ll puff up! Bake in your preheated oven for about 15-20 minutes or until they are golden and flaky.
Important: Keep an eye on them; every oven is different, and you don’t want them to burn!
Step 8: Cool and Enjoy!
Once baked, remove them from the oven and let them cool slightly. Dust with powdered sugar if desired and serve with fresh berries on the side for an extra touch of sophistication.
Serving Suggestions
These delightful Protein Cottage Cheese Danishes can be enjoyed fresh from the oven or at room temperature. Plate them on a beautiful serving dish, dust with powdered sugar, and add a sprig of mint for a pop of color. Pair them with coffee, tea, or fresh fruit for a cozy morning treat!
Recipe Variations
Get creative with this recipe! Here are some fun variations to try:
- Fruit and Nut Filling: Add chopped walnuts or pecans to the cottage cheese filling for extra texture.
- Chocolate Chip Cheesy Delight: Fold in some mini chocolate chips for a dessert-like treat.
- Savory Spinach and Cheese: Substitute the sugar with herbs and add spinach for a savory twist.
- Pumpkin Spice: Blend canned pumpkin with your cottage cheese and add cinnamon for a seasonal flavor.
- Vegan Version: Swap cottage cheese for a vegan cream cheese alternative and use a flax egg!
Chef’s Notes
I can’t help but smile every time I bake these pastries. This recipe has evolved over the years—I remember the first iterations were a bit of a disaster, with overfilled pastries and yoga pants covered in flour! But hey, that’s the beauty of cooking, isn’t it? There’s joy in the journey, and every mishap adds character to your cooking story.
I’ve even had friends ask me to make these for their celebrations! It’s heartwarming to know that something made with love can bring people together.
FAQs and Troubleshooting
Q1: My pastries came out flat. What went wrong?
A: Chances are the puff pastry wasn’t cold enough before baking or your oven temperature was too low. Always keep the pastry chilled until you’re ready to bake!
Q2: Can I freeze these?
A: Absolutely! You can freeze the assembled, unbaked pastries. Just pop them in the oven frozen, adding a couple of extra minutes on the baking time.
Q3: What can I use instead of cottage cheese?
A: Cream cheese works well if you’re looking for something smooth; just remember to adjust the sugar as cream cheese can be richer!
Q4: How do I store leftovers?
A: Store them in an airtight container in the fridge for up to 3 days. Just reheat them in the oven for a few minutes to refresh their flaky texture!
Nutritional Info (Optional)
If you’re curious, here’s a rough breakdown:
- Calories: Approximately 150 per Danish
- Protein: About 8g thanks to the cottage cheese
- Fat: 7g (depends on the puff pastry used)
- Carbs: 18g (adjust based on the sugar used)
I hope you enjoy making the Protein Cottage Cheese Cheese Danish as much as I do! They’re not only a joy to eat, but they also embody all the warmth and love that comes from creating something from scratch. Happy baking, my friends!
Print
Protein Cottage Cheese Danish
- Total Time: 50 minutes
- Yield: 6-8 servings 1x
- Diet: Vegetarian
Description
A healthier twist on a classic cheese Danish filled with creamy, protein-packed cottage cheese.
Ingredients
- 1 sheet Pre-made Puff Pastry
- 1 cup Cottage Cheese (preferably low-fat)
- 1/4 cup Sugar
- 1 tsp Vanilla Extract
- 1 tsp Lemon Zest
- 1 egg, beaten
- Optional Toppings: Powdered Sugar, Fresh Berries
Instructions
- Preheat your oven to 400°F (200°C) and allow puff pastry to thaw for about 30 minutes.
- Combine cottage cheese, sugar, vanilla, and lemon zest in a large bowl and mix.
- Cut the puff pastry into squares (about 4×4 inches).
- Place 1-2 tablespoons of filling in the center of each pastry square.
- Fold the corners towards the center or fold over to create triangles and seal.
- Brush each pastry with beaten egg for a golden finish.
- Bake for about 15-20 minutes or until golden and flaky.
- Cool slightly, dust with powdered sugar, and enjoy!
Notes
You can freeze unbaked pastries and bake them directly from the freezer, adding a couple of minutes to baking time.
- Prep Time: 30 minutes
- Cook Time: 20 minutes
- Category: Dessert
- Method: Baking
- Cuisine: American
Nutrition
- Serving Size: 1 pastry
- Calories: 150
- Sugar: 9g
- Sodium: 240mg
- Fat: 7g
- Saturated Fat: 4g
- Unsaturated Fat: 2g
- Trans Fat: 0g
- Carbohydrates: 18g
- Fiber: 1g
- Protein: 8g
- Cholesterol: 60mg
Keywords: Cottage Cheese, Danish, Pastry, Healthy Dessert, Baking
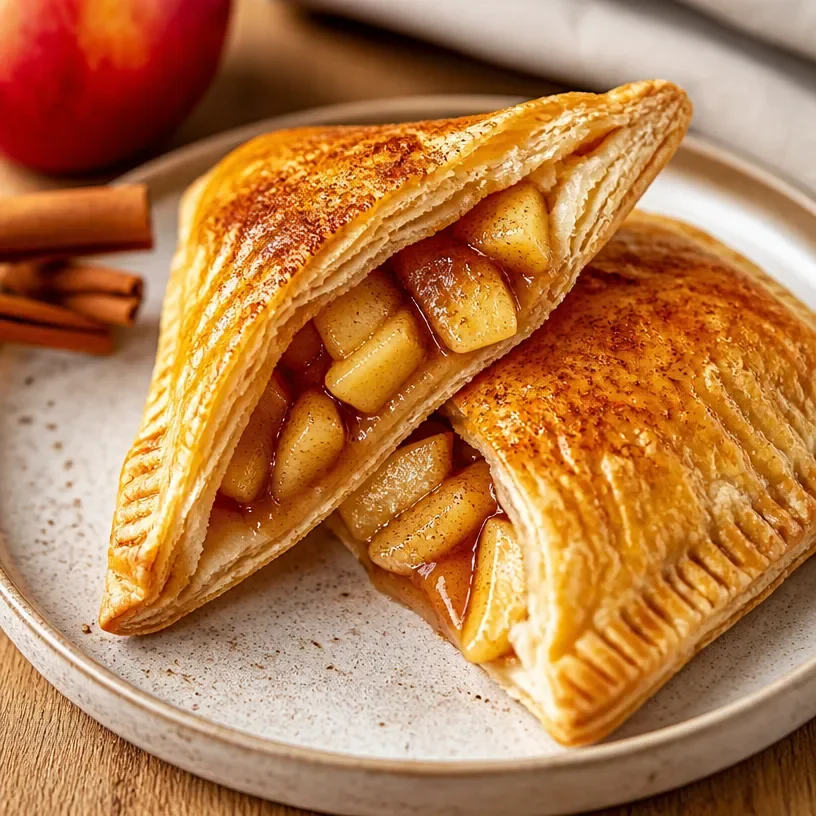
Minute Protein-Packed Apple Turnovers with Cottage Cheese
Deliciously Cozy: Protein Cottage Cheese Apple Turnovers
Welcome to my kitchen, dear foodies! Today, we’re diving into a delightful recipe that’s not only scrumptious but also packed with protein: Protein Cottage Cheese Apple Turnovers. These little pockets of goodness are the perfect blend of sweet, tangy, and creamy, all wrapped up in a flaky pastry that will have your taste buds doing a happy dance!
You know, there’s something truly magical about turnovers. They evoke a sense of nostalgia, reminding us of baking sessions with loved ones, warm afternoons spent in the kitchen, and special treats that are perfect for any occasion. Whether you’re creating a delicious breakfast, a fun snack, or a sweet dessert, these turnovers fit the bill. Plus, who doesn’t love that satisfying crunch followed by a warm, gooey filling? It’s like a hug for your taste buds!
In this blog post, I’ll walk you through my favorite recipe for protein-packed cottage cheese apple turnovers – and trust me, it’s easier than you might think! We’ll explore the ingredients, step-by-step instructions, and even some fun twists to make this dish your own. So, grab your apron and let’s get started on this cozy kitchen adventure!
A Sweet Memory
Before we dive into the recipe, let me share a sweet memory associated with apple turnovers. Growing up, every autumn my family would visit a quaint little apple orchard just a short drive from home. The air was crisp, and the vibrant colors of the apples were irresistible. Among the many apple-filled delights we enjoyed, turnovers were always my favorite.
I remember one chilly Saturday afternoon in particular when my mom and I decided to try making our own turnovers after returning from the orchard with a bushel of fresh apples. Flour flew around the kitchen, and laughter filled the air as we rolled out the dough. I can still picture the warm, sweet aroma wafting through the house as those turnovers baked in the oven. Each bite was like reliving that charming day at the orchard. It’s funny how food can become a vessel for cherished memories, isn’t it?
Now, fast forward to today, I’ve adapted that childhood recipe to incorporate healthy ingredients like cottage cheese, adding a protein boost without sacrificing flavor! Let’s make some magic in the kitchen together!
Ingredients
Here’s what you’ll need to whip up these delightful turnovers:
-
Puff pastry: The base of our turnover, puff pastry gives that airy, flaky texture that we all crave. You can buy store-bought to save time, but if you’re feeling adventurous, try making your own!
-
Cottage cheese (1 cup): This is where we add protein! Cottage cheese gives a lovely creamy texture and provides a great source of protein. You can substitute with ricotta or Greek yogurt for a creamier version.
-
Apples (2 medium): Choose your favorite variety! Sweet apples like Fuji or Honeycrisp work beautifully, but tart apples like Granny Smith add a nice balance. Feel free to mix types for a layered flavor!
-
Sugar (1/4 cup): Just enough to enhance the apples’ natural sweetness. You can replace white sugar with coconut sugar or a sugar alternative if you prefer a healthier touch.
-
Cinnamon (1 tsp): Cinnamon adds warmth and depth to our filling. If you’re feeling adventurous, you might try adding nutmeg or cardamom for a unique twist!
-
Vanilla extract (1 tsp): Vanilla elevates the flavor of the filling. For a unique spin, try almond extract instead!
-
Egg wash (1 egg beaten with 1 tbsp water): This will give your turnovers that beautiful golden color. If you’re vegan, a slurry of flour and water can work as a substitute.
-
Pinch of salt: Enhances the overall flavor of your turnovers – you don’t want to skip this!
Step-by-Step Instructions
Now, let’s get to the fun part – making these gorgeous turnovers! Follow these steps, and you’ll have golden, flaky pastries in no time.
-
Prepare Your Work Surface: Lightly flour a clean countertop or cutting board. This is important, as it helps avoid a sticky situation with your dough.
-
Roll Out the Puff Pastry: If you’re using frozen puff pastry, let it thaw according to the package instructions. Once it’s pliable but still cold, roll it out to smooth out any creases. Aim for about a 1/8-inch thickness. If you’re feeling fancy, you can use a floured rolling pin for this!
-
Make the Filling: In a mixing bowl, combine the cottage cheese, peeled and chopped apples, sugar, cinnamon, vanilla extract, and a pinch of salt. Mix until combined, but don’t overdo it! We want those apple chunks to stay intact for added texture.
-
Cut the Pastry: Using a sharp knife or pizza cutter, cut the pastry into squares (about 4-5 inches). This is your canvas! It doesn’t have to be perfect; a little rustic charm adds character.
-
Fill the Pastry: Place a generous tablespoon of the apple-cottage cheese mixture in the center of each pastry square. Be careful not to overfill – we want it to seal nicely!
-
Seal the Turnovers: Fold the pastry over the filling to create a triangle shape. Press the edges together firmly, and use a fork to crimp the edges for a pretty finish. This also ensures that no filling escapes during baking!
-
Egg Wash Your Turnovers: Brush the tops of your turnovers gently with the egg wash. This is crucial for that beautiful golden-brown sheen!
-
Bake: Preheat your oven to 400°F (200°C). Place the turnovers on a parchment-lined baking sheet and bake for about 20-25 minutes, or until they are puffed and golden. You might want to pop them in until they’re nearly bursting with deliciousness!
-
Cool and Enjoy: Let your turnovers cool on a wire rack for a few minutes before digging in. This is important; if you bite into them too soon, you might burn your tongue on that gooey filling (trust me, I’ve been there)!
Serving Suggestions
These protein cottage cheese apple turnovers are fantastic on their own, but why not elevate the experience? Serve them warm with a drizzle of honey or maple syrup for a sweet touch, or pair them with a scoop of vanilla ice cream for a dessert that’s just divine. They also make a lovely addition to your brunch spread—consider adding fresh fruit and yogurt on the side!
Recipe Variations
Feel free to get creative with these turnovers! Here are a few ideas to mix things up:
-
Berry Bliss: Substitute diced apples with a mixture of berries like blueberries and raspberries for a lovely summer twist. The flavors meld beautifully with cottage cheese!
-
Spiced Up: Add a pinch of ginger or nutmeg to the filling for an extra warm spice kick.
-
Nutty Delight: Mix in a handful of chopped nuts like walnuts or pecans for added crunch and nutrition.
-
Savory Switch: Try incorporating some sautéed onions and spinach with feta for a savory turnover option—who says turnovers can’t be savory?
-
Gluten-Free: If you’re looking for a gluten-free option, use gluten-free puff pastry and enjoy the same flaky goodness.
Chef’s Notes
When I first experimented with these turnovers, I was hesitant to use cottage cheese. I worried it might make the mixture too wet or unpredictable. However, after a few tries, I discovered that it adds not only protein but a creamy texture that pairs beautifully with sweet apples! My family and friends were surprised at the cottage cheese addition and loved it — now, it’s a staple in my turnover recipe! It’s always a joy to reveal the secret ingredient when I serve these at gatherings.
Another funny story: One time, I got so engrossed in a podcast while waiting for my turnovers to bake that I completely spaced on them and almost burned them! Just as I was realizing my mistake, the smell of baked apple goodness wafted through the house, reminding me that the oven was still on. Thankfully, they turned out fine, but it was a close call! Remember, always set a timer!
FAQs and Troubleshooting
Here are some common questions and potential troubleshooting tips to keep your turnover-making efforts a success:
-
Q: My turnovers are leaking filling while baking. What did I do wrong?
A: This usually happens if the turnovers are overfilled or if they weren’t sealed properly. Make sure to seal the edges well and be conservative with the filling. -
Q: Can I use fresh apples instead of cooked apples?
A: Yes! Fresh diced apples work beautifully, but cooking them slightly first can make them softer and less crunchy, especially if you prefer a gooier filling. -
Q: How do I know when my turnovers are done?
A: You’re looking for a beautifully golden brown color on the outside, and if you take one out and carefully cut it open, the filling should be bubbly and warm. -
Q: Can I freeze turnovers before baking?
A: Absolutely! You can freeze unbaked turnovers for up to three months. Just place them on a baking sheet to freeze them individually before transferring to a freezer bag. Bake them from frozen, adding an extra 5–10 minutes to the baking time.
Nutritional Info
(If you would like to include nutritional information, such as calories, protein, fat, carbs, etc., consider providing a standard breakdown based on the specific ingredients used. This is helpful for those tracking their intake!)
So there you have it, my lovely friends! A delightful journey to create protein cottage cheese apple turnovers that are sure to bring comfort and joy to your table. I can’t wait to hear how your turnovers turn out! Don’t forget to share your own kitchen stories and any funky twists you added—I always love to see where your creativity takes you. Happy cooking!
Print
Protein Cottage Cheese Apple Turnovers
- Total Time: 40 minutes
- Yield: 8 servings 1x
- Diet: Vegetarian
Description
Delicious apple turnovers filled with protein-rich cottage cheese, perfect for breakfast, snacks, or desserts.
Ingredients
- Puff pastry
- 1 cup cottage cheese
- 2 medium apples, peeled and chopped
- 1/4 cup sugar
- 1 tsp cinnamon
- 1 tsp vanilla extract
- 1 egg beaten with 1 tbsp water (for egg wash)
- Pinch of salt
Instructions
- Prepare your work surface: Lightly flour a countertop or cutting board.
- Roll out the puff pastry to about a 1/8-inch thickness.
- Make the filling by combining cottage cheese, apples, sugar, cinnamon, vanilla, and salt.
- Cut the pastry into 4-5 inch squares.
- Fill each square with a tablespoon of filling.
- Seal the turnovers by folding over and crimping the edges with a fork.
- Brush the tops with egg wash for a golden finish.
- Bake in a preheated oven at 400°F (200°C) for 20-25 minutes.
- Cool on a wire rack before serving.
Notes
Serve warm with honey or maple syrup, or pair with a scoop of vanilla ice cream.
- Prep Time: 15 minutes
- Cook Time: 25 minutes
- Category: Dessert
- Method: Baking
- Cuisine: American
Nutrition
- Serving Size: 1 turnover
- Calories: 250
- Sugar: 10g
- Sodium: 200mg
- Fat: 10g
- Saturated Fat: 3g
- Unsaturated Fat: 5g
- Trans Fat: 0g
- Carbohydrates: 32g
- Fiber: 2g
- Protein: 7g
- Cholesterol: 40mg
Keywords: apple turnovers, cottage cheese, protein snacks, desserts, fall recipes
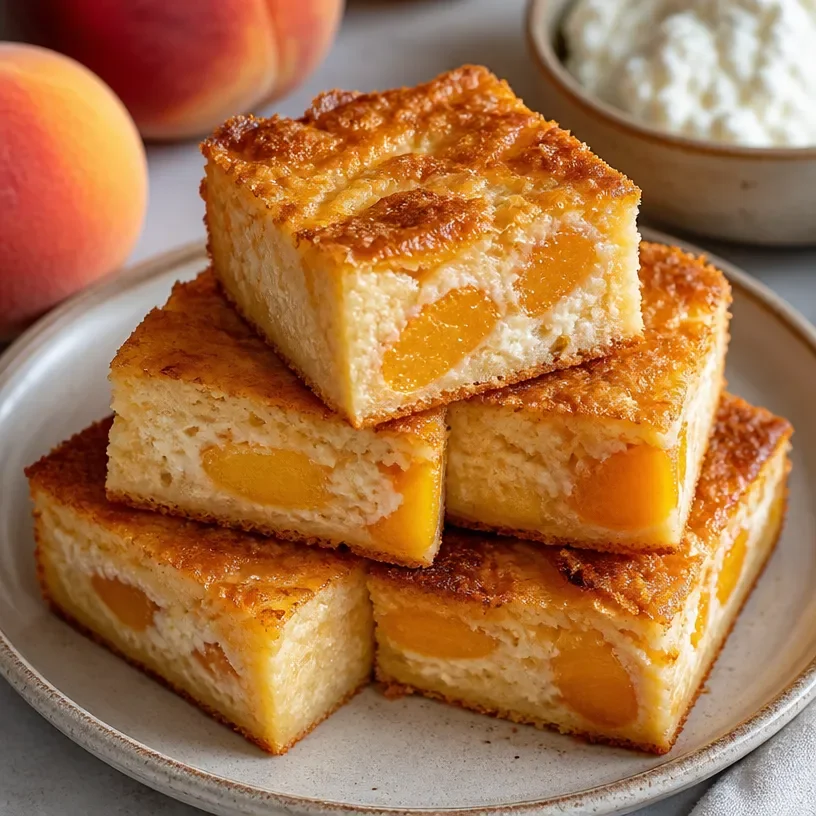
Protein Peach Cottage Cheese Bars: 5-Ingredient Meal Prep
Protein Cottage Cheese Peach Cobbler Bars: A Delicious Twist on a Classic
Welcome to my kitchen! Today, we’re diving into a delightful treat that will make your taste buds sing and help you enjoy the flavors of summer all year long: Protein Cottage Cheese Peach Cobbler Bars. If you’re a fan of the sweet, comforting taste of cobbler, but want something a little healthier and protein-packed, you’re in for a treat! These bars are easy to make, perfect for sharing, and loaded with the goodness of cottage cheese. They’re great for breakfast or as a post-workout snack, and I promise they won’t stick around for long once you share them with your friends and family. So, grab your apron and let’s get cooking!
A Trip Down Memory Lane
Growing up, summer meant one thing in my family: peach season. My grandmother had a lovely little orchard in her backyard, and every August, we would head over to her house to pick the juiciest, ripest peaches. The sweet aroma of sun-warmed fruit would fill the air, and we’d fill our baskets until they were brimming. After our adventures in the orchard, we would gather in the kitchen while Grandma whipped up her famous peach cobbler. I can still hear her laughter and the clinking of dishes as we shared stories over the bubbling dessert in the oven.
The cobbler was always slightly crispy on the top, with that perfect gooey filling, bursting with flavor. As I grew older and started experimenting in the kitchen, I wanted to capture that nostalgic flavor, but with a healthy twist. Enter the Protein Cottage Cheese Peach Cobbler Bars! These bars manage to deliver all the comforting vibes of the classic cobbler while packing in a serious punch of protein—perfect for a healthy lifestyle without sacrificing flavor.
Ingredients
Let’s gather our ingredients! Here’s what you’ll need to make these delicious bars:
-
Cottage Cheese (1 cup)
This is the star of our dish! Rich in protein and creamy in texture, it adds a wonderful depth to our bars. For a lactose-free option, look for lactose-free cottage cheese or use ricotta as a substitute. -
Peaches (2 cups, sliced or diced)
Fresh peaches are ideal, but you can use frozen or canned peaches if fresh ones aren’t available. Just be sure to drain any excess liquid if using canned! -
Oats (1 cup)
You can use rolled or quick oats here. For a gluten-free version, choose certified gluten-free oats. Oats provide a hearty base and together with protein, they make these bars filling! -
Almond Flour (½ cup)
This adds a lovely nuttiness to the base. If you don’t have almond flour, you can use regular flour or oat flour as an alternative. -
Honey or Maple Syrup (½ cup)
This natural sweetener gives the bars just the right amount of sweetness. If you’re vegan, go for maple syrup, or if you want to cut calories, opt for your favorite zero-calorie sweetener. -
Baking Powder (1 tsp)
This helps the bars rise a little. If you’re out of baking powder, you could use baking soda with a little vinegar to achieve a similar effect. -
Vanilla Extract (1 tsp)
A splash of this delicious extract enhances the flavors. Alternatively, you can use almond extract for a unique twist! -
Cinnamon (1 tsp)
This spice pairs wonderfully with peaches. If you like a spicier profile, feel free to add a pinch of nutmeg or pumpkin pie spice! -
Salt (a pinch)
Don’t forget about salt! It helps to balance the sweet flavors. You can use sea salt or Himalayan pink salt for a lovely touch!
Step-by-Step Instructions
Ready to whip up these yummy Protein Cottage Cheese Peach Cobbler Bars? Here’s how to do it step-by-step:
-
Preheat the oven: Start by preheating your oven to 350°F (175°C). This is essential for ensuring your bars bake evenly and get that beautiful golden brown color!
-
Prepare your baking dish: Lightly grease an 8×8-inch baking dish or line it with parchment paper for easy removal later. I love using parchment, as it helps in keeping my bars intact and makes cleanup a breeze.
-
Mix the wet ingredients: In a large bowl, combine the cottage cheese, honey (or maple syrup), and vanilla extract. Use a fork or a whisk to mix until creamy and well combined. You want that lovely smooth texture that will bind everything together.
-
In a separate bowl, combine the dry ingredients: In another bowl, stir together the oats, almond flour, baking powder, cinnamon, and a pinch of salt. Mixing the dry ingredients separately ensures an even distribution of the baking powder and spices.
-
Combine wet and dry ingredients: Gradually add the dry mixture into the wet ingredients. Stir until combined, but don’t over-mix or the bars could become tough! The batter should be thick and slightly sticky.
-
Fold in the peaches: Gently fold in your diced or sliced peaches. I like to reserve a few pieces to sprinkle on top for a beautiful presentation!
-
Pour the batter into your prepared dish: Spread the batter evenly with a spatula, smoothing the top. Make sure it’s evenly distributed, so it bakes nicely.
-
Bake the bars: Place the baking dish in the preheated oven and bake for 30-35 minutes, or until the edges are golden brown and a toothpick inserted in the center comes out clean. This might require patience, but trust me—it’s worth it!
-
Cool and slice: Once baked, remove the dish from the oven and let it cool for about 10 minutes. Then, transfer to a wire rack to cool completely. Once cooled, slice into bars and serve!
Serving Suggestions
How to present these beauties? I love serving these bars warm, either on their own or drizzled with a little extra honey or a dollop of yogurt on top. You could also top them with a scoop of vanilla ice cream for an indulgent treat! For a beautiful brunch display, plate up a few bars on a rustic wooden board, garnished with fresh peach slices and a dusting of powdered sugar. The bright colors and cozy vibes are sure to impress!
Recipe Variations
Here are a few fun twists and variations you can try to customize your Protein Cottage Cheese Peach Cobbler Bars:
-
Berry Medley: Swap out the peaches for a mix of fresh berries like blueberries, raspberries, or strawberries for a refreshing take!
-
Nutty Delight: Add in some chopped nuts like pecans or walnuts for a crunchy texture. They also add an extra kick of healthy fats!
-
Spicy Twist: Add some finely chopped jalapeños or a sprinkle of cayenne for a spicy kick that balances the sweetness of the peaches. Awesome if you’re feeling adventurous!
-
Coconut Cream: Mix in some unsweetened shredded coconut for a tropical vibe, or to use as a topping along with some sliced almonds.
-
Chocolate Chip Variation: For something sweeter, adding dark chocolate chips halfway through the mixing process transforms these into dessert bars kids will love!
Chef’s Notes
These Protein Cottage Cheese Peach Cobbler Bars have always been a labor of love. While my first few attempts ended up as a cobbler catastrophe (trust me, the kitchen was a glorious mess), I learned to embrace the process! Over the years, I’ve tweaked the ratios and added different flavors to create the perfect balance of sweet and savory. They have come to represent the joy of experimentation in the kitchen—a reminder that a little mess can lead to something beautiful. It’s also a great recipe to get the kids involved; they love folding in the peaches and adding their own twist!
FAQs and Troubleshooting
1. My bars are too crumbly—what did I do wrong?
This can happen if you overbake or don’t have enough moisture in your mixture. Reduce the baking time next time or add a little more cottage cheese or sweetener to keep them moist.
2. Can I use other fruits instead of peaches?
Absolutely! While peaches are delicious, you can use any seasonal fruit you love. Just be cautious if you’re using fruits with high water content, as they may change the texture.
3. What if I don’t have almond flour?
No problem! You can substitute with all-purpose flour or whole wheat flour if preferred. For gluten-free, opt for oat flour instead!
4. Can I store these bars? How long will they last?
You can store them in an airtight container in the fridge for about a week. For longer storage, these bars freeze well—just wrap them tightly and pop them in the freezer for up to 2 months. They make for an excellent grab-and-go snack!
Nutritional Info
These bars are a dream packed with protein! Each serving offers a healthy balance of carbs, protein, and just the right amount of sweetness. Feel free to adjust the ingredients based on your dietary preferences for a customized treat.
So there you have it, my dear foodie friends! Now you’re ready to bake up these Protein Cottage Cheese Peach Cobbler Bars and create some delicious memories in your own kitchen. Trust me, once you take that first bite, you’ll be transported back to those sunny days in the orchard. Happy baking!
Print
Protein Cottage Cheese Peach Cobbler Bars
- Total Time: 50 minutes
- Yield: 8 servings
- Diet: Vegetarian
Description
A delicious and healthy twist on classic peach cobbler bars, packed with protein from cottage cheese.
Ingredients
- Cottage Cheese (1 cup)
- Peaches (2 cups, sliced or diced)
- Oats (1 cup)
- Almond Flour (½ cup)
- Honey or Maple Syrup (½ cup)
- Baking Powder (1 tsp)
- Vanilla Extract (1 tsp)
- Cinnamon (1 tsp)
- Salt (a pinch)
Instructions
- Preheat the oven to 350°F (175°C).
- Prepare your baking dish by greasing it or lining with parchment paper.
- Mix the cottage cheese, honey (or maple syrup), and vanilla extract until creamy.
- Combine oats, almond flour, baking powder, cinnamon, and salt in a separate bowl.
- Combine the dry mixture into the wet ingredients until just mixed.
- Fold in the peaches gently, reserving some for topping.
- Pour the batter into the prepared baking dish and spread it evenly.
- Bake for 30-35 minutes until golden brown.
- Cool for 10 minutes, then transfer to a wire rack and slice into bars.
Notes
For a vegan option, use maple syrup instead of honey. Experiment with different fruits and nuts for variations.
- Prep Time: 15 minutes
- Cook Time: 35 minutes
- Category: Dessert
- Method: Baking
- Cuisine: American
Nutrition
- Serving Size: 1 bar
- Calories: 220
- Sugar: 14g
- Sodium: 180mg
- Fat: 6g
- Saturated Fat: 0.5g
- Unsaturated Fat: 5.5g
- Trans Fat: 0g
- Carbohydrates: 34g
- Fiber: 3g
- Protein: 7g
- Cholesterol: 10mg
Keywords: peach cobbler bars, protein bars, healthy dessert, cottage cheese dessert, easy baking
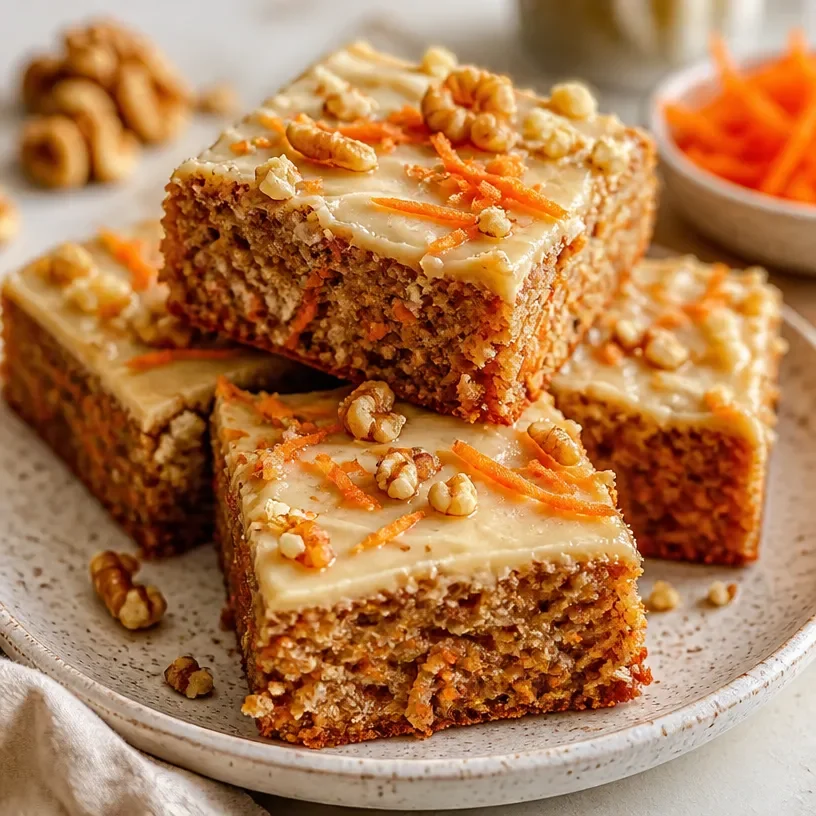
Protein Cottage Cheese Carrot Cake Bars
Protein-Packed Cottage Cheese Carrot Cake Bars: A Wholesome Twist on a Classic Favorite
Welcome to my kitchen! Today, I am excited to share a recipe that’s not only delightful but also packed with nutrition. It’s my Protein Cottage Cheese Carrot Cake Bars — a fun and wholesome twist on the classic carrot cake that you’ll love! Whether you’re looking for a healthy snack, a satisfying dessert, or even a post-workout treat, these bars check all the boxes. They’re moist, flavorful, and incredibly simple to make, perfect for busy weekdays or lazy weekends alike.
Carrot cake has always had a special place in my heart. It reminds me of my grandmother’s cozy kitchen, where warm smells mingled with hearty laughter. She would pull out her well-loved recipe box from the shelf and start hand-grating fresh carrots, the vibrant orange bits transforming into a cake batter that elicited eager anticipation. Those afternoons spent alongside her, sneaking bites of batter and smelling the intoxicating spices, ignited my love for cooking. Oh, the joy of turning simple ingredients into something magical – a memory I carry with me to this day.
So, let’s dive into creating these delightful Protein Cottage Cheese Carrot Cake Bars. They’re not only reminiscent of my grandmother’s classic recipe but also incorporate protein-packed cottage cheese that makes every bite deliciously nourishing!
Ingredients:
- 1 cup grated carrots: Freshly grated carrots bring moisture and sweetness to the bars. If you’re short on time, you can use pre-grated carrots.
- 1 cup cottage cheese: This creamy ingredient is packed with protein! For a dairy-free version, you could use silken tofu or vegan cream cheese as a substitute.
- 1/2 cup rolled oats: Adds texture and heartiness. Gluten-free oats can also be used for a gluten-free version.
- 1/2 cup applesauce: A fantastic natural sweetener and moisture booster! You can substitute it with mashed bananas for a different flavor.
- 1/4 cup honey or maple syrup: This gives sweetness to the bars. Adjust the sweetness to taste; you can even use stevia or coconut sugar for lower-calorie options.
- 2 large eggs: Eggs help bind the mixture. For a vegan swap, use flax eggs (1 tablespoon of ground flaxseed with 2.5 tablespoons of water = 1 egg).
- 1 tsp cinnamon: A warm spice that complements the flavors beautifully. Feel free to add nutmeg or ginger for an extra kick!
- 1/2 tsp baking powder: This helps the bars rise and lends a lovely fluffiness. Make sure it’s fresh for the best results.
- 1/4 cup chopped walnuts or pecans (optional): For those who love a crunchy texture, feel free to add these for an added nutty flavor. If you have nut allergies, seeds would also work great!
Step-by-Step Instructions:
-
Preheat Your Oven: Begin by preheating your oven to 350°F (175°C). This step is crucial because you want your bars to cook evenly!
-
Prep the Baking Dish: Line an 8×8 inch baking dish with parchment paper, leaving some overhang on the sides. This will make it super easy to lift the bars out once they’re baked—trust me, you’ll thank yourself later!
-
Mix the Wet Ingredients: In a large mixing bowl, combine the cottage cheese, applesauce, eggs, and honey (or maple syrup). Whisk them together until smooth. This is where you get that creamy texture we’re after!
-
Incorporate the Carrots: Fold in the grated carrots gently. The vibrant color will make you smile and bring back those nostalgic childhood memories I love talking about!
-
Combine the Dry Ingredients: In another bowl, mix together the rolled oats, cinnamon, baking powder, and nuts if using. Make sure they’re well combined; this helps with even distribution when mixed with the wet ingredients.
-
Blend Wet and Dry Ingredients: Slowly add the dry mixture to the wet mixture, stirring until just combined. Be careful not to overmix, or you might end up with dense bars instead of fluffy goodness!
-
Pour into the Baking Dish: Scrape the thick batter into the prepared baking dish and spread it out evenly. Don’t worry about perfection; these bars are meant to be rustic and homemade!
-
Bake: Place the dish in the preheated oven and bake for about 25-30 minutes, or until a toothpick inserted in the center comes out clean. The aroma will be irresistible!
-
Cool and Slice: Once baked, allow the bars to cool in the pan for about 10 minutes, then use those handy parchment edges to lift the entire thing out. Transfer to a wire rack to cool completely before slicing into bars.
-
Enjoy!: These bars can be eaten warm or cold, but I recommend letting them sit for a few hours in the fridge. They become even more flavorful and easier to cut!
Serving Suggestions:
When it comes to serving your Protein Cottage Cheese Carrot Cake Bars, a little presentation can go a long way! Consider dusting the tops with a light sprinkle of powdered sugar for a sweet touch. Pair them with a dollop of Greek yogurt or a scoop of your favorite nut butter for an extra layer of flavor. And don’t forget to slice them into fun shapes; bars, squares, or even triangles can make all the difference in making them look extra appealing!
Recipe Variations:
- Spice It Up: Feel free to add a dash of nutmeg or ginger to enhance the flavor profile!
- Fruity Twist: Toss in some raisins or dried cranberries for a sweet and chewy element.
- Chocolate Lover: Add chocolate chips or cocoa powder for a decadent version.
- Nut-Free: Omit the nuts or replace them with sunflower seeds or pepitas for crunch without the allergens.
- Zucchini Alternative: Swap out some or all of the carrots for grated zucchini for a slightly different taste but equally delicious bars!
Chef’s Notes:
Ah, the joy of creating something new in the kitchen! I remember the first time I tried to make a protein-packed version of my grandmother’s carrot cake—it was a trial and error journey, for sure! The first batch ended up a little too dense, and I learned the importance of balancing wet and dry ingredients. The secret is in the cottage cheese which not only adds protein but also helps keep the bars moist. Now, I always double the recipe, as these bars hardly last a day in the house!
FAQs and Troubleshooting:
1. My bars came out too dry! What did I do wrong?
This can happen if your baking time was too long or if you overmixed the batter. Every oven is different, so keep an eye on them towards the end of the baking time!
2. Can I substitute the cottage cheese?
Absolutely! Silken tofu or vegan cream cheese are excellent alternatives for a dairy-free version.
3. How do I store these bars?
Once cooled, you can store them in an airtight container in the fridge for up to a week. They also freeze well; just make sure to wrap them tightly!
4. What can I do if my batter is too thick?
If your batter feels too thick, add a tablespoon of milk (or a milk substitute) to loosen it up a bit. You want it to be thick but spreadable!
Nutritional Info (Optional):
Each Protein Cottage Cheese Carrot Cake Bar contains roughly:
- Calories: 150
- Protein: 6g
- Carbohydrates: 20g
- Fat: 5g
- Fiber: 2g
And there you have it! A cozy recipe that’s not just about satisfying your sweet tooth but also nourishing your body. I can’t wait for you to try these bars and experience the wonderful flavors and memories they evoke. Happy baking, my foodie friends, and don’t forget to share your creations with me!
Print
Protein-Packed Cottage Cheese Carrot Cake Bars
- Total Time: 45 minutes
- Yield: 12 servings 1x
- Diet: Vegetarian
Description
A wholesome twist on the classic carrot cake, packed with protein and deliciously moist.
Ingredients
- 1 cup grated carrots
- 1 cup cottage cheese
- 1/2 cup rolled oats
- 1/2 cup applesauce
- 1/4 cup honey or maple syrup
- 2 large eggs
- 1 tsp cinnamon
- 1/2 tsp baking powder
- 1/4 cup chopped walnuts or pecans (optional)
Instructions
- Preheat your oven to 350°F (175°C).
- Line an 8×8 inch baking dish with parchment paper.
- In a large mixing bowl, combine the cottage cheese, applesauce, eggs, and honey (or maple syrup). Whisk together until smooth.
- Fold in the grated carrots gently.
- In another bowl, mix together the rolled oats, cinnamon, baking powder, and optional nuts.
- Slowly add the dry mixture to the wet mixture, stirring until just combined.
- Scrape the batter into the prepared baking dish and spread it out evenly.
- Bake for about 25-30 minutes, or until a toothpick inserted comes out clean.
- Allow to cool in the pan for about 10 minutes, then lift out and transfer to a wire rack to cool completely before slicing.
Notes
These bars can be enjoyed warm or cold and become even more flavorful after a few hours in the fridge.
- Prep Time: 15 minutes
- Cook Time: 30 minutes
- Category: Dessert
- Method: Baking
- Cuisine: American
Nutrition
- Serving Size: 1 bar
- Calories: 150
- Sugar: 8g
- Sodium: 200mg
- Fat: 5g
- Saturated Fat: 1g
- Unsaturated Fat: 4g
- Trans Fat: 0g
- Carbohydrates: 20g
- Fiber: 2g
- Protein: 6g
- Cholesterol: 30mg
Keywords: carrot cake, protein bars, healthy dessert, cottage cheese, nutritious snacks
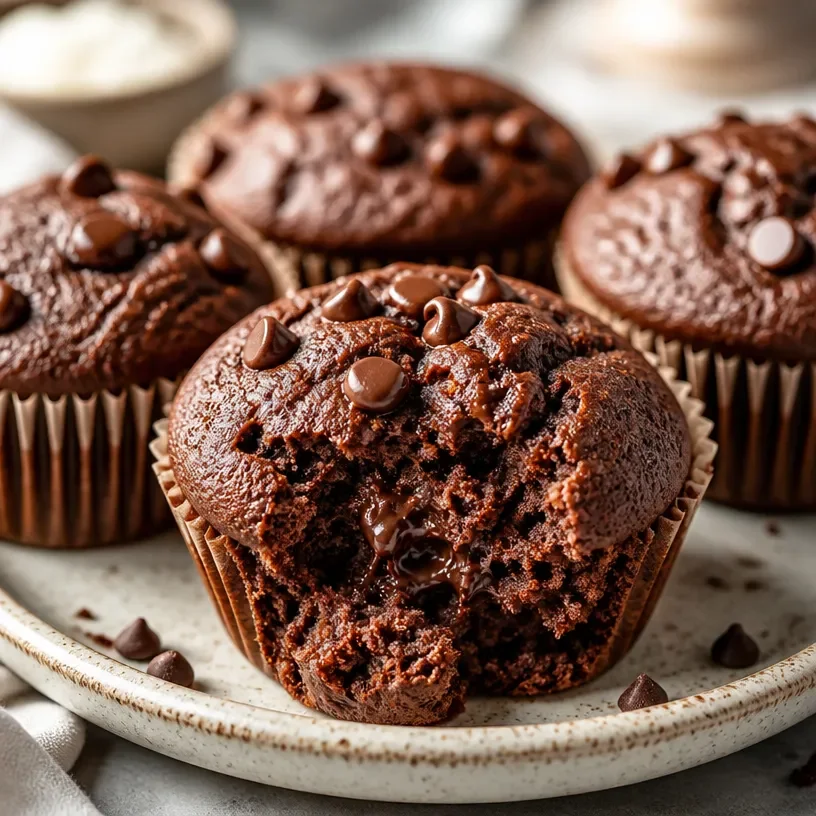
Protein Cottage Cheese Chocolate Muffins
Protein-Packed Cottage Cheese Chocolate Muffins: The Sweetest Way to Start Your Day
Welcome to my cozy corner of the kitchen! I’m Olivia Bennett, your friendly home cook, and today, we’re diving into a delightful recipe that will make your mornings a little sweeter: Protein Cottage Cheese Chocolate Muffins. These muffins are not just a treat for your taste buds; they’re also packed with protein, making them a perfect way to energize your day. Whether you’re rushing out the door or taking your time to enjoy a leisurely breakfast, these muffins are the ideal companion.
Imagine waking up to the irresistible aroma of chocolate wafting through your kitchen. You crack open the oven door, and there they are—golden-brown muffins that are fluffy yet decadent. Trust me, these aren’t your average chocolate muffins. With the incredible protein boost from cottage cheese, you’ll feel good about indulging in one (or two… who’s counting?).
Let’s be real; life can get busy, and finding time to cook can feel overwhelming. But that’s where my passion comes in! I believe that cooking should be an enjoyable experience, not a chore. These muffins are simple and quick to whip up, and the best part? They’re versatile! You can customize them to suit your favorite flavors or dietary needs.
So, grab your apron, and let’s make some kitchen magic together! Along the way, I’ll share tips, tricks, and a sprinkle of my personal stories that’ll make you feel right at home. Ready? Let’s jump into making these scrumptiously protein-packed muffins!
A Nostalgic Tale of Muffin Magic
Before we dive into the recipe, I want to share a sweet memory tied to chocolate muffins. Growing up, my mom used to bake an assortment of goodies every Sunday afternoon. The smell of rich chocolate would travel through our house, creating a cozy cocoon of warmth and love.
One memorable Sunday, I remember sneaking into the kitchen while the muffins were still cooling on the counter. I couldn’t resist—they were like little jewels waiting to be discovered. I grabbed a muffin, took a big bite, and swore I could hear angels singing in the background. That first taste of chocolatey goodness set the bar high, and I quickly learned the joy of baking.
Years later, here I am, sharing this cherished recipe with you! These Protein Cottage Cheese Chocolate Muffins are my homage to those Sunday afternoons. They carry the same warmth but come packed with a little nutritional twist. So, let’s keep this kitchen tradition alive!
Ingredients
To whip up these delightful muffins, you’ll need the following ingredients:
-
1 cup cottage cheese: This is where the protein magic happens! Cottage cheese adds moisture and a unique texture. For a dairy-free option, try silken tofu or dairy-free yogurt.
-
1/2 cup peanut butter (or nut butter of choice): Nut butter adds healthy fats and richness. If you’re allergic to nuts, sunflower seed butter is a great alternative.
-
1/2 cup honey or maple syrup: This natural sweetener carves the path for sweetness in these muffins. You can substitute it with agave syrup or a sugar-free sweetener if you prefer.
-
2 large eggs: Eggs provide structure and help bind the ingredients. If you’re looking for a vegan option, replace each egg with 1/4 cup applesauce or a flax egg (1 tablespoon ground flaxseed mixed with 2.5 tablespoons of water).
-
1 cup whole wheat flour: Whole wheat flour adds fiber and nutrients. You can substitute it with almond flour for a gluten-free option or all-purpose flour if you prefer a lighter texture.
-
1/4 cup unsweetened cocoa powder: This is the star of our chocolate show! Cocoa powder gives those deep chocolatey flavors. You can use carob powder as a caffeine-free substitute if desired.
-
1/2 teaspoon baking soda: Baking soda helps our muffins rise beautifully. Make sure it’s fresh for the best results!
-
1/2 teaspoon baking powder: Similar to baking soda, this adds extra fluffiness to your muffins.
-
1 teaspoon vanilla extract: Vanilla brings everything together and enhances the sweetness. Feel free to experiment with almond extract for a unique twist!
-
Pinch of salt: A small touch of salt balances sweetness and enhances flavors.
Have all your ingredients ready? Let’s get to the fun part—baking these delicious muffins!
Step-by-Step Instructions
Step 1: Preheat the Oven
Preheat your oven to 350°F (175°C). This allows your muffins to rise beautifully and evenly. Make sure to give it a good 10-15 minutes to heat up while you gather your ingredients.
Step 2: Prepare the Muffin Tin
Grab your muffin tin and either grease it with cooking spray or line it with muffin liners. This step is crucial to prevent those lovely muffins from sticking. Plus, the liners make for easy cleanup!
Step 3: Blend the Wet Ingredients
In a mixing bowl, combine the cottage cheese, peanut butter, honey (or maple syrup), eggs, and vanilla extract. I love using an immersion blender for this step; it creates a super-smooth mixture without extra dishes! Blend until you achieve a creamy consistency.
Chef Tip: If you’re finding it hard to blend the mixture, simply let your cottage cheese sit out for a few minutes to soften or microwave it for about 15 seconds.
Step 4: Mix the Dry Ingredients
In another bowl, combine the whole wheat flour, cocoa powder, baking soda, baking powder, and salt. Whisk these ingredients together to ensure they’re evenly distributed. The dry ingredients keep the texture light, and cocoa powder gives the muffins their rich, dark color.
Step 5: Combine and Stir
Pour the wet mixture into the dry ingredients. Gently fold them together using a spatula or wooden spoon until just combined. Be careful not to overmix; a few lumps are totally fine!
Step 6: Fill the Muffin Tin
Using a scoop or ladle, fill each muffin cup about 2/3 full with the batter. This allows space for the muffins to rise without spilling over. Plus, it keeps them perfectly portioned!
Step 7: Bake Away
Pop the muffin tray into the preheated oven and bake for 18-20 minutes. You’ll know they’re done when a toothpick inserted in the center comes out clean or with a few moist crumbs.
Chef Hack: If you notice the muffins puffing up unevenly, rotate the muffin tin halfway through baking. This ensures even cooking and browning.
Step 8: Cool and Enjoy
Once your muffins are done, remove them from the oven and let them cool in the tin for about 5 minutes. Then transfer them to a wire rack to cool completely. The aroma will have everyone in the house flocking to the kitchen!
Serving Suggestions
These Protein Cottage Cheese Chocolate Muffins are best enjoyed slightly warm, perhaps with a smear of almond butter or a drizzle of honey on top. Serve them with fresh fruit or a side of yogurt for a well-rounded breakfast. They also make fantastic mid-day snacks!
Recipe Variations
Feeling adventurous? Here are a few creative twists you can try:
- Add-Ins: Toss in chocolate chips, nuts, or dried fruit—get colorful with your mix-ins!
- Spiced Up: Add a teaspoon of cinnamon or a pinch of chili powder for a fun flavor kick.
- Coffee Lovers: Stir in a tablespoon of instant coffee granules for a mocha muffin experience.
- Fruit Fusion: Replace some of the cottage cheese with mashed bananas or applesauce for added sweetness and flavor.
- Gluten-Free Version: Swap the whole wheat flour for almond flour or any gluten-free blend.
Chef’s Notes
These muffins have become a staple in my home for their simplicity and deliciousness! The original recipe came from my attempts to find healthier treats, but over the years, it has evolved into this protein-packed delight. One time, I tried to add zucchini for a bit of extra moisture—it turned out surprisingly well! Now I make a batch just for my veggie-loving friends.
I have to let you in on a little secret, though: if you have any leftovers (which is rare!), they freeze beautifully. Just pop them in an airtight container, and you’ll have breakfast sorted for weeks!
FAQs and Troubleshooting
1. Why are my muffins dense?
If your muffins turn out dense, it could be due to overmixing the batter or using too much flour. Make sure you gently fold the ingredients and measure flour accurately with the spoon and level method.
2. Can I use low-fat cottage cheese?
Absolutely! Low-fat cottage cheese works just fine. You can also use Greek yogurt for a different flavor profile and even more protein!
3. My muffins are crumbly. What went wrong?
Crumbly muffins can be a sign of too much flour or not enough binding agents. Always ensure your measurements are on point and that you’re using the right number of eggs or substitutes.
4. How can I store these muffins?
These muffins can be stored in an airtight container at room temperature for 2-3 days. For longer storage, freeze them for up to 3 months. Just make sure they’re completely cooled before freezing!
Nutritional Info
Per muffin (using the original recipe):
- Calories: 180
- Protein: 7g
- Total Carbs: 20g
- Sugar: 6g
- Healthy Fats: 8g
And there you have it—delicious Protein Cottage Cheese Chocolate Muffins that are sure to brighten up your mornings! I hope you enjoy making and devouring these as much as I do. Happy baking, my fellow food enthusiasts!
Print
Protein-Packed Cottage Cheese Chocolate Muffins
- Total Time: 35 minutes
- Yield: 12 muffins 1x
- Diet: Vegetarian
Description
Delightful, protein-packed chocolate muffins made with cottage cheese, perfect for a quick breakfast or snack.
Ingredients
- 1 cup cottage cheese
- 1/2 cup peanut butter (or nut butter of choice)
- 1/2 cup honey or maple syrup
- 2 large eggs
- 1 cup whole wheat flour
- 1/4 cup unsweetened cocoa powder
- 1/2 teaspoon baking soda
- 1/2 teaspoon baking powder
- 1 teaspoon vanilla extract
- Pinch of salt
Instructions
- Preheat your oven to 350°F (175°C).
- Prepare the muffin tin—grease or line it with muffin liners.
- Blend the cottage cheese, peanut butter, honey, eggs, and vanilla extract until creamy.
- Mix the whole wheat flour, cocoa powder, baking soda, baking powder, and salt in another bowl.
- Combine the wet mixture into the dry ingredients; gently fold until just combined.
- Fill each muffin cup about 2/3 full with batter.
- Bake for 18-20 minutes until a toothpick comes out clean.
- Cool in the tin for 5 minutes, then transfer to a wire rack to cool completely.
Notes
These muffins are best enjoyed warm, and they freeze beautifully for convenient future breakfasts.
- Prep Time: 15 minutes
- Cook Time: 20 minutes
- Category: Breakfast
- Method: Baking
- Cuisine: American
Nutrition
- Serving Size: 1 muffin
- Calories: 180
- Sugar: 6g
- Sodium: 200mg
- Fat: 8g
- Saturated Fat: 2g
- Unsaturated Fat: 4g
- Trans Fat: 0g
- Carbohydrates: 20g
- Fiber: 2g
- Protein: 7g
- Cholesterol: 60mg
Keywords: muffins, protein muffins, chocolate muffins, healthy breakfast, cottage cheese, baking
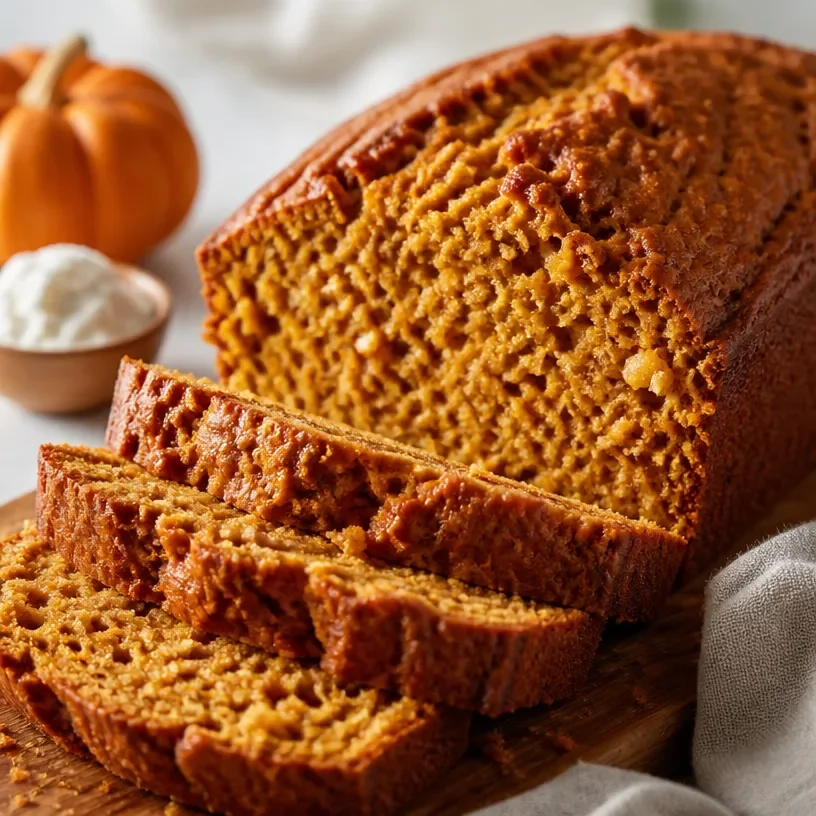
High-Protein Cottage Cheese Pumpkin Bread (Easy Recipe)
Protein Cottage Cheese Pumpkin Bread: A Cozy Delight for Every Kitchen
Welcome to my cozy corner of the kitchen! I’m so glad you’re here. Today, we’re diving into a beloved recipe that combines the warmth of home baking with the nourishing goodness of cottage cheese and pumpkin: Protein Cottage Cheese Pumpkin Bread. If you’ve ever had those crisp autumn days where the air is brisk and the leaves are crunching underfoot, this recipe is like a warm hug that draws you in, filling your kitchen with holiday aromas that make your heart sing.
Oh, pumpkin bread! It’s probably one of those recipes that any cozy home cook has tucked away, but this version is extra special. Not only does it use protein-rich cottage cheese to help you fuel your day, but it also captures the essence of fall in every bite. Picture this: you wake up on a Saturday morning, sunlight streaming through your kitchen window, and the delightful smell of cinnamon and nutmeg wafting through the air. You cut a thick slice of this loaf, butter melting on top, and enjoy it with a steaming cup of coffee. It’s heaven on a plate!
What I love most about this recipe is that it’s incredibly versatile. Whether you’re enjoying it as part of a weekend brunch spread, serving it to guests, or savoring a slice each morning for breakfast, it’s always a hit. And the best part? It’s easy! With just a few simple ingredients and steps, you’ll have a delicious loaf that’s perfect for any occasion—and the nutritional benefits make it even better.
Are you ready to step into the kitchen and whip up some magic? Let’s get baking!
A Bit of Nostalgia
I’ll never forget the first time I made pumpkin bread. It was a crisp October afternoon, and the air was filled with the scent of falling leaves. I was at my grandmother’s house, and she had a knack for creating the coziest atmosphere. She’d put on some classic jazz and bring out her well-loved cookbook. That day she decided to teach me her secret pumpkin bread recipe—her signature dish that would light up our entire family.
As we mixed the ingredients, flour dust settled everywhere, and we shared stories of our own kitchen failures and triumphs. I remember giggling over the flour-covered countertops and eagerly waiting for the timer to go off. When the bread finally emerged from the oven, perfectly golden brown and fragrant, it felt like we were holding a piece of home in our hands. This recipe has always reminded me that cooking is not just about food; it’s about weaving memories and celebrating life with the people we love. Now, I can’t help but share that warmth with you!
Ingredients You’ll Need
-
Cottage Cheese: The star of the show! It adds protein and a wonderfully moist texture. For a lighter option, you can use low-fat cottage cheese or even Greek yogurt for a creamier variation.
-
Canned Pumpkin: Make sure you use pure pumpkin puree, not pumpkin pie filling. It provides a delicious, earthy flavor. If you want to go fresh, you can roast your own pumpkin and puree it!
-
Whole Wheat Flour: I love using whole wheat flour for its nutty flavor and added fiber. You can also substitute it with all-purpose flour or a 1:1 gluten-free flour blend for those needing gluten-free options.
-
Baking Powder and Baking Soda: These leavening agents help the bread rise and create that perfect fluffy texture. Always make sure they are fresh for the best results.
-
Cinnamon and Nutmeg: These warm spices add an inviting aroma and seasonal flavor. Don’t skimp on them! You can also experiment with pumpkin pie spice for a fun twist.
-
Brown Sugar: For just the right amount of sweetness and depth. If you prefer, coconut sugar or maple syrup can serve as a lovely substitute.
-
Eggs: They bind everything together and provide moisture. For a vegan option, you can use flax eggs or applesauce instead.
-
Salt: Just a pinch! It balances flavors and enhances overall taste.
-
Chopped Nuts or Chocolate Chips: Optional but a great addition if you want some crunch or sweetness! You can also use dried fruit like cranberries for an extra chewy element.
Step-by-Step Instructions
1. Preheat Your Oven
Set your oven to preheat at 350°F (175°C). This step is crucial! A well-heated oven helps the bread rise evenly and develops a lovely crust.
2. Prepare Your Baking Pan
Grease a 9×5-inch loaf pan with cooking spray or butter. You can also line it with parchment paper for easier removal. I love using parchment paper—less hassle, more deliciousness!
3. Combine the Dry Ingredients
In a medium bowl, whisk together the whole wheat flour, baking powder, baking soda, cinnamon, nutmeg, and salt. This is your dry mix, and it’s essential to incorporate these ingredients evenly for a well-groomed loaf.
4. Mix the Wet Ingredients
In a large mixing bowl, combine the cottage cheese, pumpkin puree, brown sugar, and eggs. Use a spatula or a hand mixer to blend everything until it’s smooth and creamy. The cottage cheese can be a bit chunky, which adds a delightful texture to the bread, so don’t stress about perfectly blending every lump.
5. Combine Dry and Wet Ingredients
Gradually fold the dry mix into the wet mixture. It’s essential to do this gently! Overmixing can result in a dense loaf—nobody wants that. Just blend until everything is incorporated.
6. Add Optional Mix-Ins
If you’re throwing in nuts or chocolate chips, this is the time to fold them into the batter. It adds an exciting flavor and texture to each bite!
7. Pour the Batter Into the Pan
Spoon the batter into your prepared loaf pan and smooth the top with a spatula. You can also take a butter knife and swirl some chocolate chips or nuts on top for a decorative touch!
8. Bake
Pop the loaf in the oven, and depending on your oven, bake for about 50-60 minutes. The baking time can vary, so keep an eye on it! When a toothpick inserted into the center comes out clean, it’s ready.
9. Cool and Serve
Once baked, remove the loaf from the oven and let it cool in the pan for about 10 minutes. Then transfer it to a wire rack to cool completely—if you can resist!
Serving Suggestions
Slice up your delicious protein cottage cheese pumpkin bread and serve with a pat of butter, a drizzle of honey, or even a dollop of cream cheese frosting for a decadent treat. You can arrange the slices on a platter for a brunch spread, or simply enjoy it warm with your favorite hot beverage. Pair it with a chai latte or an herbal tea for that cozy autumn experience!
Recipe Variations
-
Chocolate Chip Pumpkin Bread: Fold in a cup of semi-sweet or dark chocolate chips to satisfy your sweet tooth.
-
Spiced Nut Addition: Mix in chopped pecans or walnuts for added crunch and nutty flavor.
-
Dried Fruit Surprise: Substitute some mix-ins with dried cranberries or raisins for a burst of fruity goodness.
-
Zest It Up: Add a teaspoon of orange or lemon zest for a fresh twist that complements the pumpkin beautifully.
-
Vegan Delight: Use flax eggs and swap the cottage cheese with silken tofu for a plant-based version that’s just as delicious!
Chef’s Notes
This recipe has a fun backstory! The originally simple pumpkin bread morphed into this protein-packed version after friends kept asking me for healthier options. After a few experiments (and a couple of fabulous kitchen failures that left flour everywhere!), I finally perfected this Protein Cottage Cheese Pumpkin Bread. Now, it’s not just the taste that fills me with joy; it’s the laughter and stories shared over meals made with love that brings a smile to my face.
I’ve also learned through the years that baking is truly a lesson in patience. It’s easy to be impatient, but let the magic unfold in its own time. Trust in the process, and the deliciousness will follow.
FAQs and Troubleshooting
1. Why is my bread dense?
This can happen if the flour is overmixed or if there’s too much liquid. Be gentle when folding the ingredients!
2. Can I freeze this bread?
Absolutely! Wrap it tightly in plastic wrap and then foil, or place it in an airtight container. It should keep well in the freezer for about 3 months.
3. Why didn’t my bread rise?
Be sure your baking powder and baking soda are fresh and active! Old leavening agents can flatline your loaf.
4. My bread cracked on top—why?
That can happen from the temperature difference. Ensure your oven is preheated well, and avoid opening the oven door too soon.
Nutritional Information (per slice, based on 12 servings)
- Calories: 180
- Protein: 6g
- Carbohydrates: 28g
- Fat: 5g
- Fiber: 3g
- Sugar: 8g
With a wholesome balance of flavors and enough protein to keep you fueled, this Protein Cottage Cheese Pumpkin Bread is sure to become a favorite in your household. So, roll up those sleeves, grab your apron, and let’s get baking! Remember, cooking is all about enjoyment, so don’t stress. Have fun in the kitchen, and share every delicious moment with those you love! Happy baking!
Print
Protein Cottage Cheese Pumpkin Bread
- Total Time: 75 minutes
- Yield: 12 servings 1x
- Diet: Vegetarian
Description
A cozy and nutritious pumpkin bread featuring cottage cheese for added protein and moisture.
Ingredients
- 1 cup cottage cheese
- 1 cup canned pumpkin puree
- 1 ½ cups whole wheat flour
- 1 tsp baking powder
- 1 tsp baking soda
- 1 tsp cinnamon
- ½ tsp nutmeg
- ½ cup brown sugar
- 2 large eggs
- ½ tsp salt
- ½ cup chopped nuts or chocolate chips (optional)
Instructions
- Preheat your oven to 350°F (175°C).
- Grease a 9×5-inch loaf pan with cooking spray or butter.
- Combine the dry ingredients: whisk together whole wheat flour, baking powder, baking soda, cinnamon, nutmeg, and salt in a medium bowl.
- Mix the wet ingredients: in a large mixing bowl, combine cottage cheese, pumpkin puree, brown sugar, and eggs until smooth.
- Combine the dry and wet ingredients gently to avoid overmixing.
- Add optional nuts or chocolate chips if desired.
- Pour the batter into the prepared loaf pan.
- Bake for 50-60 minutes or until a toothpick inserted into the center comes out clean.
- Cool in the pan for 10 minutes before transferring to a wire rack.
Notes
This bread can be frozen for up to 3 months. Be careful not to overmix the batter to avoid a dense loaf.
- Prep Time: 15 minutes
- Cook Time: 60 minutes
- Category: Dessert
- Method: Baking
- Cuisine: American
Nutrition
- Serving Size: 1 slice
- Calories: 180
- Sugar: 8g
- Sodium: 200mg
- Fat: 5g
- Saturated Fat: 2g
- Unsaturated Fat: 3g
- Trans Fat: 0g
- Carbohydrates: 28g
- Fiber: 3g
- Protein: 6g
- Cholesterol: 30mg
Keywords: pumpkin bread, cottage cheese, protein bread, fall baking, healthy dessert
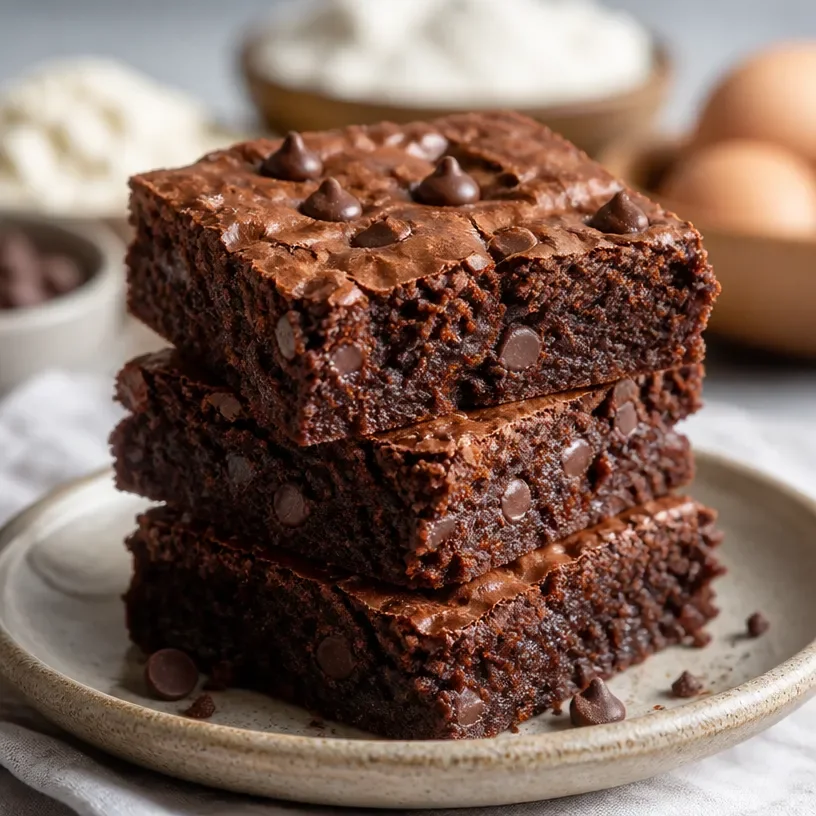
Protein-Packed Cottage Cheese Brownies (Meal-Prep Friendly)
Indulging Guilt-Free: Protein Cottage Cheese Brownies
Welcome to my cozy kitchen, dear friends! I’m Olivia Bennett, and today, I’m thrilled to share a delightful recipe that absolutely ticks all the boxes: Protein Cottage Cheese Brownies. Now, I know what you might be thinking: brownies and healthy cooking seem worlds apart. But let me assure you, these fudgy delights are here to redefine your dessert game! They’re profoundly satisfying, oh-so-chocolatey, and filled with the kind of goodness that leaves you feeling both indulgent and nourished.
Baking has always been my happy place—a way to unwind, create memories, and connect with the people I love. These Protein Cottage Cheese Brownies have become a staple in my home largely due to the warm occasions they inspire: movie nights with friends, cozy afternoons with a good book, or even the celebratory moments following a tough workout. Yes, you can relish dessert while also nourishing your body, and that’s what these brownies encapsulate!
Imagine taking your first bite, the rich chocolate melting in your mouth while knowing you’re also getting a boost of protein. These brownies are not only a hit with my friends and family, but they also appeal to all those health-conscious foodies out there! Together, we’ll whip up a batch of these delectable brownies, and I promise it’ll become one of your go-to recipes. Are you ready? Let’s dive in!
A Sweet Memory
When I first developed this recipe, I recall a fun cooking session I had with my younger brother. We were both on a health kick, trying to replace some of our favorite treats with nutritious versions. One rainy afternoon, we rummaged through the fridge, finding a tub of cottage cheese in the back—I had just used it in a savory dish, never thinking about its potential as a baking ingredient. I dared to explore, blending it into a chocolate batter. The laughter and joy we shared, trying to create something healthy yet tasty, made it one of my fondest kitchen memories.
We braced ourselves for the first bite; to our surprise, the brownies turned out utterly delicious! Our guilty pleasure became a wholesome treat that sparked many delightful conversations about healthier choices. That day, I learned that you need to embrace spontaneity in the kitchen because you never know where creativity might take you!
Ingredients
Here’s what you’ll need to make these scrumptious Protein Cottage Cheese Brownies:
- 1 cup cottage cheese: This is the star ingredient! It adds creaminess and protein to the brownies. If you’re looking for a dairy-free option, try using silken tofu or a plant-based cottage cheese alternative.
- 1/2 cup unsweetened cocoa powder: For that rich chocolate flavor! Unsweetened cocoa keeps the brownies from being overly sweet. If you prefer a sweeter touch, use Dutch-processed cocoa, which will give a smoother flavor.
- 1/2 cup honey or maple syrup: These natural sweeteners not only impart sweetness but also maintain moisture. If you prefer a lower glycemic option, agave syrup works well too.
- 1/4 cup almond flour: Adds a nutty flavor while also keeping the brownies nice and tender. You can swap it out for oat flour if you want a gluten-free variation.
- 2 large eggs: Help bind the brownies together. If you’re looking for a vegan alternative, use flaxseed meal mixed with water (1 tablespoon flaxseed + 2.5 tablespoons water per egg).
- 1 tsp vanilla extract: This delightful flavor brings everything together. Don’t skip it! For a twist, use almond extract for a unique aroma.
- 1/2 tsp baking powder: Gives the brownies that light, fluffy texture. Ensure it’s fresh for the best results!
- 1/4 tsp sea salt: Enhances the flavors magically. You could even use a flavored salt, like smoked salt, for an unexpected touch!
Step-by-Step Instructions
Now let’s get to baking these dreamy brownies! Follow these detailed steps to a perfect treat:
-
Preheat Your Oven: First things first—preheat your oven to 350°F (175°C). This ensures even baking, creating that lovely chewy texture you want in brownies.
-
Blend the Cottage Cheese: In a mixing bowl, add your cottage cheese and blend it using an immersion blender or food processor until it’s smooth and creamy. This is where the magic happens! Smooth cottage cheese means no lumps in your delicious brownies. A quick tip: If you prefer a slightly lighter texture, you can whip some air into it by blending a bit longer.
-
Mix in the Wet Ingredients: To your blended cottage cheese, add in the honey (or maple syrup) and vanilla extract. Mix until well combined. The sweet aroma starts here! Remember, blending everything helps the flavors marry beautifully.
-
Combine Dry Ingredients: In a separate bowl, whisk together cocoa powder, almond flour, baking powder, and sea salt. Make sure there are no dry clumps of cocoa; we want a beautifully mixed batter. Chef Hack: Sifting your dry ingredients can help break up clumps and incorporate air for fluffier brownies!
-
Combine Everything: Pour the dry mix into the wet mixture and thoroughly combine until you see no dry streaks. It’s okay if the batter is thick—that’s exactly what we want! If you’re feeling adventurous, fold in some chocolate chips or chopped nuts for extra texture.
-
Prepare Your Baking Dish: Line an 8×8 inch square baking dish with parchment paper or grease it lightly with coconut oil. This helps in easy removal, plus it adds a lovely hint of coconut flavor if you’re into that!
-
Pour and Spread: Spoon your brownie batter into the prepared dish, smoothing it out evenly with a spatula. Don’t forget to lick the spatula—chef’s privilege!
-
Bake: Pop your dish in the preheated oven and bake for 20-25 minutes. Keep an eye on them; you want them to be set but still fudgy in the middle. A toothpick inserted should come out with a few moist crumbs.
-
Cool and Slice: Once they’ve cooled for about 10-15 minutes, lift them out using the parchment paper and slice into squares. Enjoy the warm, chocolatey ribbons of joy!
Serving Suggestions
These brownies are delicious on their own, but you can elevate the experience with a scoop of your favorite ice cream or a dollop of Greek yogurt. For a little touch of elegance, dust with powdered sugar or drizzle melted dark chocolate on top. Serve with fresh berries for a perfect contrast—frooty, fancy, and fabulous!
Recipe Variations
Here are some fun ways to switch up this recipe:
- Nutty Cocoa Crunch: Add 1/2 cup of chopped nuts (like walnuts or pecans) to the batter for a delightful crunch.
- Mint Chocolate Dream: Stir in a few drops of peppermint extract right into the batter for a refreshing twist!
- Caramel Swirl: Drizzle in some salted caramel before baking for a sweet surprise.
- Mocha Magic: Mix in a tablespoon of instant coffee granules for that delightful coffee-chocolate combo.
- Dairy-Free Delight: Replace dairy ingredients with plant-based alternatives to create a vegan version.
Chef’s Notes
Throughout my kitchen adventures, I’ve learned that experimenting is half the fun! At first, I was skeptical about using cottage cheese in a brownie, but that first bite changed everything. It has not only become a hit among my health-conscious friends, but also at gatherings where everyone is left wondering what the secret ingredient is! The ooey-gooey texture and rich flavor have since led to many kitchen experiments—each better than the last. So don’t hesitate to play around with it; the kitchen is your playground!
FAQs and Troubleshooting
1. Why are my brownies dry?
If your brownies are dry, it may have been overbaked or the oven may have been too hot. Always keep an eye on them and do the toothpick test to check for doneness.
2. Can I store these brownies?
Absolutely! Store them in an airtight container at room temperature for up to 3 days. For longer storage, chill in the fridge or wrap them tightly in foil and freeze for up to a month.
3. Can I use a different sweetener?
Yes, you can use coconut sugar, stevia, or monk fruit sweetener. Just keep in mind that the sweetness level may vary, so adjust according to taste!
4. What if I don’t have almond flour?
No worries! You can easily substitute with whole wheat flour, or ground oats, keeping in mind that this may change the texture slightly.
Nutritional Info
While I usually focus on flavor and nutrition rather than strict numbers, these brownies are loaded with protein and cut down on sugar—making them a sweet treat you can feel good about. A standard square (when cut into 16 servings) has approximately 100 calories and provides around 5-6 grams of protein, thanks to the cottage cheese!
There you have it—a celebratory recipe that not only satisfies your chocolate cravings but also fits your wellness goals! I hope this fills your kitchen with as much joy as it brought me. Happy baking, my foodie friends! Remember, in the kitchen, the only limit is your creativity. Enjoy those brownies!
Print
Protein Cottage Cheese Brownies
- Total Time: 35 minutes
- Yield: 16 servings 1x
- Diet: Healthy
Description
Deliciously fudgy brownies made with cottage cheese, boasting a rich chocolate flavor and packed with protein for a guilt-free treat.
Ingredients
- 1 cup cottage cheese
- 1/2 cup unsweetened cocoa powder
- 1/2 cup honey or maple syrup
- 1/4 cup almond flour
- 2 large eggs
- 1 tsp vanilla extract
- 1/2 tsp baking powder
- 1/4 tsp sea salt
Instructions
- Preheat your oven to 350°F (175°C).
- Blend the cottage cheese until smooth and creamy.
- Mix in the honey (or maple syrup) and vanilla extract until well combined.
- Combine the cocoa powder, almond flour, baking powder, and sea salt in a separate bowl.
- Pour the dry mix into the wet mixture and stir until fully combined.
- Prepare an 8×8 inch baking dish by lining it with parchment paper or greasing it.
- Pour the batter into the prepared dish and spread it evenly.
- Bake for 20-25 minutes until set but fudgy.
- Cool for 10-15 minutes before slicing into squares.
Notes
Serve with a scoop of ice cream or a dollop of Greek yogurt for added indulgence.
- Prep Time: 10 minutes
- Cook Time: 25 minutes
- Category: Dessert
- Method: Baking
- Cuisine: American
Nutrition
- Serving Size: 1 brownie
- Calories: 100
- Sugar: 8g
- Sodium: 150mg
- Fat: 4g
- Saturated Fat: 1g
- Unsaturated Fat: 3g
- Trans Fat: 0g
- Carbohydrates: 12g
- Fiber: 2g
- Protein: 6g
- Cholesterol: 30mg
Keywords: brownies, healthy dessert, protein baked goods
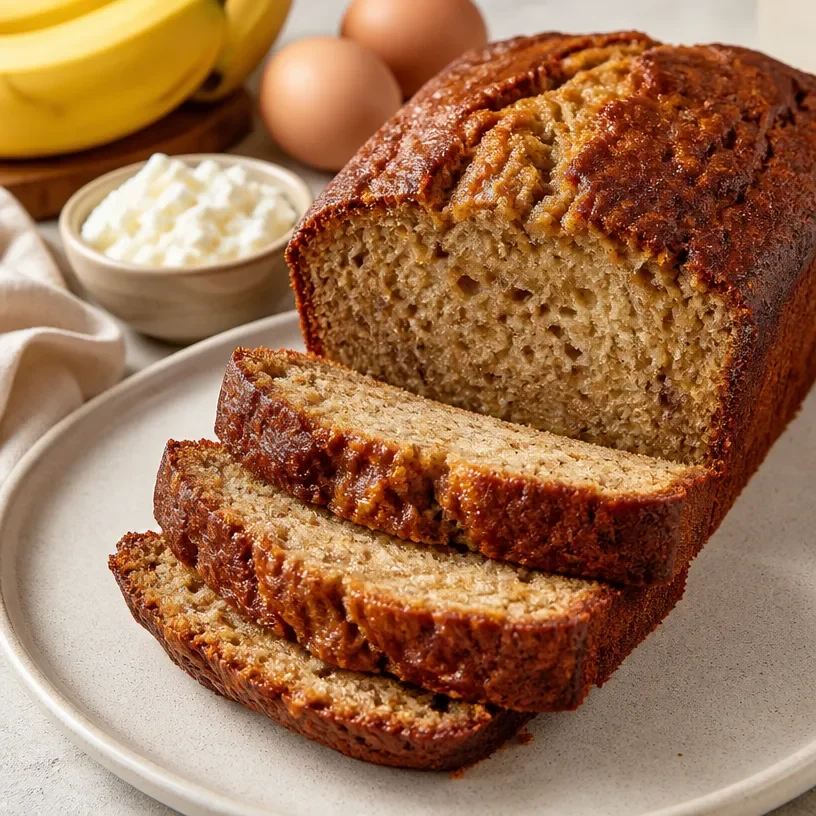
High-Protein Cottage Cheese Banana Bread (One-Bowl Recipe)
Protein Cottage Cheese Banana Bread: A Heartfelt Twist on a Classic Favorite
Welcome, fellow food lovers! I’m thrilled to have you here with me in my cozy kitchen where the sweet aroma of baked goods mingles with laughter and love. Today, I’m sharing a recipe that effortlessly blends nostalgia with nutrition: Protein Cottage Cheese Banana Bread. Now, I know what you might be thinking, “Cottage cheese in banana bread?” But trust me, this unique ingredient adds a moist texture and a protein boost that makes you feel fantastic, all while indulging in a slice of heaven.
Banana bread has a special place in my heart. It’s the quintessential comfort food that my mom used to whip up whenever our home was filled with overripe bananas. I can still picture her in the kitchen, her trusty wooden spoon in hand, energetically mixing the batter while I pretended to help (let’s be honest, I was mainly taste-testing!). The warm, sweet scent wafting through the house was pure magic, and the delight of enjoying that first slice fresh out of the oven was something truly special.
That’s the beauty of this protein-packed version of banana bread — it combines the traditional flavors we all adore with a healthier twist that fits seamlessly into today’s active lifestyles. You’ll get to enjoy the sweetness of ripe bananas, the richness of cottage cheese, and the warmth of cinnamon, all wrapped up in a delightful loaf that’s perfect for breakfast, snacks, or dessert. Join me as we embark on this delicious adventure together!
Personal Story
One treasured memory that comes to mind is a rainy Sunday afternoon spent baking with my best friend, Emily. We decided to tackle banana bread together, which was her favorite treat. As we mashed up the bananas, we laughed about our childhood baking mishaps and shared secrets about the best ways to sneak veggies into sweet treats. When we added cottage cheese to the batter, I remember Emily’s skeptical look. “Are you sure this will work?” she asked, raising an eyebrow. But oh, how those doubts turned into smiles when we pulled the loaf from the oven! Every bite was moist and delicious, proving that sometimes, the unexpected can lead to the best outcomes. It became a staple in our baking adventures, and I still think about that day every time I whip up this recipe.
Ingredients
Here’s what you’ll need to create this scrumptious Protein Cottage Cheese Banana Bread:
-
3 ripe bananas: The riper, the better! Look for bananas with lots of brown spots — they’re naturally sweeter and easier to mash. If you don’t have ripe bananas, you can speed up the ripening process by placing them in a paper bag for a day or two.
-
1 cup cottage cheese: This is the secret ingredient! It adds moisture, protein, and a lovely tang. If you’re not a fan of cottage cheese, Greek yogurt or ricotta cheese can serve as great substitutes.
-
2 eggs: They act as a binding agent. If you prefer a vegan version, you can replace each egg with 1/4 cup of unsweetened applesauce or a flaxseed egg (1 tablespoon ground flaxseed mixed with 2.5 tablespoons water).
-
1/4 cup honey or maple syrup: This will sweeten things up! Use honey for a classic flavor or maple syrup for a rich, earthy sweetness. To keep it sugar-free, consider using a sugar substitute like monk fruit sweetener.
-
1/2 teaspoon vanilla extract: A splash of vanilla enhances the overall flavor and adds warmth.
-
1 cup whole wheat flour: This gives your bread a nutritious boost and hearty texture. If you want a lighter loaf, feel free to use all-purpose flour, almond flour, or even gluten-free flour blends.
-
1 teaspoon baking powder: This will help your bread rise beautifully.
-
1/2 teaspoon baking soda: To give your bread that extra lift.
-
1/2 teaspoon ground cinnamon: Cinnamon adds warmth and depth of flavor. You can also experiment with nutmeg or pumpkin pie spice for a different twist.
-
Pinch of salt: Just a touch helps to enhance all the flavors in the bread.
Step-by-Step Instructions
Alright, let’s get our hands dirty and bring this delicious loaf to life!
-
Preheat the oven: Start by preheating your oven to 350°F (175°C). This is an essential step — you want your oven nice and warm to greet your batter as soon as it’s ready.
-
Mash the bananas: In a large mixing bowl, grab a fork or a potato masher and thoroughly mash those ripe bananas until they’re creamy. No lumps allowed! This is the foundation of your flavor, so take your time with this step. It’s kind of therapeutic, right?
-
Mix in the cottage cheese and eggs: Add the cup of cottage cheese and the 2 eggs to the mashed bananas. Whisk until everything is well combined. The cottage cheese will blend seamlessly into the batter, so don’t worry about it being lumpy. It’s going to taste amazing, trust me!
-
Sweeten the mixture: Pour in your honey or maple syrup and the vanilla extract. Stir until everything is just combined. This mixture will be your sweet, luscious base!
-
Combine dry ingredients: In a separate bowl, whisk together the flour, baking powder, baking soda, cinnamon, and salt. This is a crucial step because it ensures that the baking powder and baking soda are evenly distributed throughout the flour.
-
Merge the mixtures: Gradually add the dry mixture to the wet mixture, folding gently with a spatula. Be careful not to overmix! A few lumps are totally okay — we want a tender crumb, not rubbery bread.
-
Pour into a loaf pan: Grease a 9×5-inch loaf pan with cooking spray or line it with parchment paper. Pour the batter into the pan, spreading it evenly with your spatula.
-
Bake to perfection: Pop that beautiful loaf into the preheated oven. Bake for 50-60 minutes or until a toothpick inserted into the center comes out clean (a few crumbs are alright!). The house will smell absolutely divine during this time — it’s my favorite part!
-
Cool and slice: Once done, remove the loaf from the oven and let it cool in the pan for about 10 minutes. Then carefully transfer it to a wire rack to cool completely (or not; I’m all for stealing a warm slice straight from the pan!).
Serving Suggestions
When it’s finally time to enjoy your Protein Cottage Cheese Banana Bread, consider slicing thick pieces and serving them warm with a pat of butter or a drizzle of almond butter on top. You can also sprinkle a few chopped nuts, flaxseeds, or coconut flakes for added texture and flair. Or, serve it with a scoop of yogurt on the side for a delightful breakfast treat!
Recipe Variations
Feeling adventurous? Here are a few fun twists to try:
-
Nutty Banana Bread: Stir in 1/2 cup of chopped walnuts or pecans into the batter for a satisfying crunch.
-
Chocolate Chip Delight: Add 1/2 cup of dark chocolate chips to the batter for a touch of indulgence.
-
Fruit Fusion: Throw in a handful of blueberries, raspberries, or diced apples for a fruity variation.
-
Spiced Up: Experiment by adding a teaspoon of pumpkin pie spice alongside the cinnamon for a seasonal flair.
-
Chocolate Banana Bread: Swap 1/4 cup of the flour for unsweetened cocoa powder for a rich, chocolaty version.
Chef’s Notes
One of my fondest memories of this recipe was when I decided to bake a batch for a neighborhood gathering. I was so excited to share it with friends but almost forgot it in the oven! The smell wafting through the house was so mouth-watering that I had to remind myself that a little burnt wasn’t the end of the world. Fortunately, it turned out better than I expected, and everyone ended up loving it (even the slightly crispy edges!). It was a gentle reminder that cooking is about experimenting – even when mistakes happen, we can create something wonderful.
FAQs and Troubleshooting
1. My banana bread is too dense. What did I do wrong?
Overmixing can cause your bread to be dense. Make sure you only mix until just combined — it’s okay to have a few lumps!
2. Can I freeze this banana bread?
Absolutely! Once the banana bread is completely cooled, wrap it tightly in plastic wrap or aluminum foil. It can be frozen for up to three months. Just thaw it in the refrigerator overnight before enjoying!
3. What if I don’t have all the ingredients?
No problem! Substitute as needed, using options like Greek yogurt for cottage cheese or almond flour for whole wheat flour. Baking is about flexibility!
4. How do I know when my banana bread is done?
Insert a toothpick into the center of the loaf. If it comes out clean or with a few moist crumbs, it’s ready! If it’s wet, give it a few more minutes in the oven.
Nutritional Info
While specific nutritional values can vary based on exact ingredients and brands, this lovely loaf is generally packed with protein, fiber, and healthy fats when made with whole grains and natural sweeteners. It’s a nourishing snack or breakfast option that will fuel your day!
There you have it, lovely readers! Your chance to whip up this delightful Protein Cottage Cheese Banana Bread and fill your home with warmth and sweetness. I hope it brings as much joy to your kitchen as it has to mine. Happy baking!
Print
Protein Cottage Cheese Banana Bread
- Total Time: 75 minutes
- Yield: 8 servings 1x
- Diet: Vegetarian
Description
A nutritious twist on classic banana bread, packed with protein from cottage cheese and ripe bananas.
Ingredients
- 3 ripe bananas
- 1 cup cottage cheese
- 2 eggs
- 1/4 cup honey or maple syrup
- 1/2 teaspoon vanilla extract
- 1 cup whole wheat flour
- 1 teaspoon baking powder
- 1/2 teaspoon baking soda
- 1/2 teaspoon ground cinnamon
- Pinch of salt
Instructions
- Preheat the oven to 350°F (175°C).
- Mash the ripe bananas in a large mixing bowl until creamy.
- Mix in the cottage cheese and eggs, whisking until well combined.
- Sweeten the mixture with honey or maple syrup and vanilla extract.
- Combine the dry ingredients in a separate bowl and whisk together.
- Merge the dry mixture into the wet mixture, folding gently.
- Pour the batter into a greased 9×5-inch loaf pan.
- Bake for 50-60 minutes until a toothpick comes out clean.
- Cool in the pan for 10 minutes, then transfer to a wire rack.
Notes
Serve warm with butter or almond butter, and feel free to add nuts or chocolate chips for variations.
- Prep Time: 15 minutes
- Cook Time: 60 minutes
- Category: Snack
- Method: Baking
- Cuisine: American
Nutrition
- Serving Size: 1 slice
- Calories: 220
- Sugar: 12g
- Sodium: 250mg
- Fat: 5g
- Saturated Fat: 2g
- Unsaturated Fat: 3g
- Trans Fat: 0g
- Carbohydrates: 38g
- Fiber: 3g
- Protein: 8g
- Cholesterol: 70mg
Keywords: banana bread, protein bread, cottage cheese bread, healthy baking
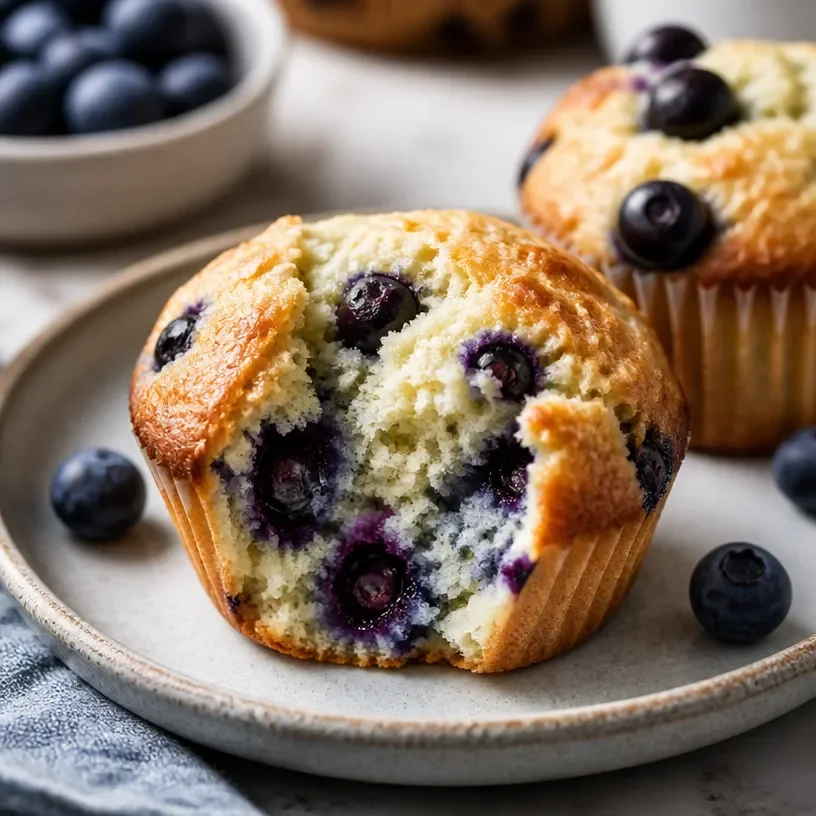
Minute High-Protein Cottage Cheese Blueberry Muffins
Protein Cottage Cheese Blueberry Muffins: A Deliciously Nutritious Treat
Welcome to my kitchen! If you’re anything like me, the moment you step into the kitchen, you’re greeted by the enticing scents of freshly baked goods, joyfully mingling in the air. The warmth of oven-baked delights has a unique magic, doesn’t it? Today, I’m excited to share my Protein Cottage Cheese Blueberry Muffins with you! These little gems are not only bursting with flavor but also packed with protein, making them perfect for a wholesome breakfast or a sweet snack any time of the day.
I remember the first time I decided to merge two seemingly contrasting ingredients: cottage cheese and muffins. It all started one rainy afternoon when a craving for a muffin hit me hard. I rummaged through my pantry and saw a lonely tub of cottage cheese sitting in the fridge. What if I give it a shot? I thought. And oh boy, did it change my muffin game forever! The results were deliciously moist muffins with a fluffy texture that were not only comforting but also wholesome.
These muffins quickly became a family favorite, and I often whip up a batch to enjoy during busy mornings or serve at casual weekend brunches with friends. With juicy blueberries providing little bursts of sweetness and protein-packed cottage cheese serving as a surprising hero, this recipe has a special place in my heart (and my recipe book). So, let’s dive into making these delightful muffins together!
Ingredients You’ll Need
Let’s gather our ingredients! Here’s what you’ll need to create these delightful muffins, along with some tips and insights:
-
1 cup cottage cheese
A protein powerhouse, cottage cheese keeps the muffins moist and tender. If you’re not a fan, Greek yogurt can be a great substitute for a similar texture and tang! -
2 large eggs
Eggs provide structure and moisture. For a vegan option, you can use flax or chia seeds (1 tablespoon of seeds with 2.5 tablespoons of water equals 1 egg when mixed!). -
½ cup honey or maple syrup
Sweetness is key! Honey lends a rich flavor, while maple syrup adds an earthy twist. You can also use stevia or agave nectar for a lower-calorie alternative. -
1 teaspoon vanilla extract
Always use pure vanilla extract for the best flavor! It’s like a warm hug in your muffins. -
1 ½ cups whole wheat flour
Whole wheat flour adds fiber and a nutty flavor. You could easily swap this out for all-purpose flour or gluten-free flour if you’re gluten-sensitive. -
1 tablespoon baking powder
This is your leavening agent that will help your muffins rise. Ensure it’s fresh; check the expiration date! -
½ teaspoon baking soda
Works harmoniously with baking powder to give your muffins that perfect lift. -
½ teaspoon salt
Balances flavors and enhances sweetness, so don’t skip on this ingredient! -
1 teaspoon cinnamon (optional)
A warm spice that adds depth, though feel free to substitute it with nutmeg or pumpkin spice if you’re feeling adventurous! -
1 ½ cups fresh or frozen blueberries
These berries are the stars of the show! Go for fresh if you can, but frozen will work perfectly. If using frozen, there’s no need to thaw; just fold them in gently!
Step-by-Step Instructions
Let’s get into the fun part: baking these scrumptious muffins! Follow these steps, and you’ll have a delicious treat in no time.
-
Preheat the Oven
Start by setting your oven to preheat at 350°F (175°C). This step is crucial — a hot oven helps your muffins rise beautifully! -
Prepare the Muffin Tin
While the oven is heating, line a 12-cup muffin tin with paper liners or spray it with non-stick cooking spray. This makes cleanup a breeze and keeps your muffins from sticking! -
Mix the Wet Ingredients
In a large mixing bowl, combine the cottage cheese, eggs, honey (or maple syrup), and vanilla extract. Whisk together until smooth. You want to break up the cottage cheese a bit, ensuring it’s well blended with the other ingredients. -
Combine Dry Ingredients
In a separate bowl, whisk together the whole wheat flour, baking powder, baking soda, salt, and cinnamon (if using). This ensures an even distribution of the leaveners and spices throughout the muffin batter. -
Combine Wet and Dry Ingredients
Gradually add the dry mixture to the wet mixture, stirring gently until just combined. Don’t overmix! A few lumps are okay; they’ll bake out. -
Fold in the Blueberries
Now comes the best part! Gently fold in the blueberries. If you’re using frozen berries, be extra careful not to overmix, as they can turn your batter a beautiful shade of blue, but we want lovely specks of juicy fruit! -
Scoop the Batter
Using a cookie scoop or a measuring cup, fill each muffin cup about ¾ full. This allows room for the muffins to rise without overflowing. I love using an ice cream scoop here—it makes it so easy! -
Bake
Pop the muffin tin into the preheated oven and bake for 18-22 minutes or until a toothpick inserted comes out clean. Your kitchen will smell like a cozy bakery—enjoy the aromatic experience! -
Cool Down
Once baked, remove the muffins from the oven and let them cool in the tin for about 5 minutes. Transfer them to a wire rack to cool completely. I always sneak a warm muffin before they cool completely; they’re just too good!
Serving Suggestions
These Protein Cottage Cheese Blueberry Muffins are perfect for breakfast, a snack, or even a dessert! Serve them warm (my favorite way!) with a little butter or coconut oil spread on top. They also pair beautifully with a dollop of Greek yogurt or a sprinkle of extra blueberries. For a fancy brunch presentation, consider serving them on a tiered cake stand with a side of fresh fruit or a light dusting of powdered sugar.
Recipe Variations
Get creative with your muffins! Here are a few variations you can try:
-
Zesty Lemon Blueberry Muffins: Add the zest of one lemon to the batter for a refreshing citrus twist.
-
Chocolate Chip Cottage Cheese Muffins: Swap half of the blueberries for chocolate chips for a fun and indulgent treat!
-
Nutty Banana Blueberry Muffins: Mash one ripe banana and incorporate it into the wet mixture along with the cottage cheese; it adds natural sweetness and moisture.
-
Vegan Coconut Blueberry Muffins: Use coconut yogurt instead of cottage cheese, and maple syrup as your sweetener for a tropical twist.
-
Swap Out the Flour: Experiment with almond flour or oat flour for a gluten-free version; just make sure to adjust the liquid ingredients slightly!
Chef’s Notes
Honestly, this recipe has gone through a little evolution over the years. I started with plain muffins, and it wasn’t until I stumbled upon cottage cheese as a secret ingredient that everything changed! Now it’s my go-to when I want to make breakfast a bit healthier while still satisfying my sweet tooth. I also enjoy tweaking it depending on what’s in my pantry or what’s fresh at the market. Cooking is about experimenting, sharing, and enjoying what you create!
FAQs and Troubleshooting
1. Why are my muffins dense?
That could be due to overmixing the batter. Be gentle when combining the wet and dry ingredients and only mix until combined!
2. How do I store these muffins?
These muffins are best stored in an airtight container at room temperature for up to 3 days. If you want to keep them longer, freeze individual muffins tightly wrapped in plastic wrapping for up to 3 months.
3. Can I use other fruits?
Absolutely! Raspberries, cherries, or diced peaches would work beautifully. Just make sure to adjust the sweetness as needed.
4. Why did my muffins stick to the pan?
Be sure to generously grease your muffin tin or use liners. If you’re using a non-stick tin, still consider greasing it; it’s better to be safe than sorry!
Nutritional Info (Optional)
While I like to focus on the joy of cooking, if you’re curious, here’s a basic nutritional breakdown for one muffin (based on the recipe using honey):
- Calories: 120
- Total Fat: 3g
- Protein: 5g
- Carbohydrates: 20g
- Fiber: 2g
- Sugar: 6g
With that, you’re well on your way to baking, sharing, and enjoying these delightful Protein Cottage Cheese Blueberry Muffins! I hope they warm your heart and your kitchen as much as they have for me. Happy baking, friends!
Print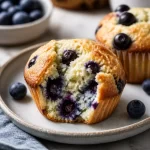
Protein Cottage Cheese Blueberry Muffins
- Total Time: 30 minutes
- Yield: 12 muffins 1x
- Diet: Vegetarian
Description
Deliciously nutritious muffins packed with protein, perfect for breakfast or a sweet snack.
Ingredients
- 1 cup cottage cheese
- 2 large eggs
- ½ cup honey or maple syrup
- 1 teaspoon vanilla extract
- 1 ½ cups whole wheat flour
- 1 tablespoon baking powder
- ½ teaspoon baking soda
- ½ teaspoon salt
- 1 teaspoon cinnamon (optional)
- 1 ½ cups fresh or frozen blueberries
Instructions
- Preheat the oven to 350°F (175°C).
- Prepare a 12-cup muffin tin by lining it with paper liners or spraying it with non-stick cooking spray.
- Mix the cottage cheese, eggs, honey (or maple syrup), and vanilla extract in a large mixing bowl until smooth.
- Combine the whole wheat flour, baking powder, baking soda, salt, and cinnamon (if using) in a separate bowl.
- Add the dry mixture to the wet mixture gradually, stirring gently until just combined.
- Fold in the blueberries gently.
- Scoop the batter into the muffin cups, filling each about ¾ full.
- Bake for 18-22 minutes or until a toothpick comes out clean.
- Cool the muffins for about 5 minutes in the tin, then transfer to a wire rack to cool completely.
Notes
Perfect for breakfast, snacks, or dessert! Serve warm with butter or Greek yogurt.
- Prep Time: 10 minutes
- Cook Time: 20 minutes
- Category: Muffins
- Method: Baking
- Cuisine: American
Nutrition
- Serving Size: 1 muffin
- Calories: 120
- Sugar: 6g
- Sodium: 180mg
- Fat: 3g
- Saturated Fat: 1g
- Unsaturated Fat: 2g
- Trans Fat: 0g
- Carbohydrates: 20g
- Fiber: 2g
- Protein: 5g
- Cholesterol: 50mg
Keywords: blueberry muffins, cottage cheese muffins, healthy muffins, protein muffins




