

Protein Cottage Cheese Danish: Quick High-Protein Breakfast
Protein Cottage Cheese Danish: A Delightful Twist on a Classic
Welcome to the kitchen, my fellow food lovers! Today, we’re diving into a warm, inviting recipe that’s close to my heart: the Protein Cottage Cheese Cheese Danish. If you’ve ever been enchanted by the aroma of freshly baked pastries or found solace in the warm hug of a flaky pastry, you’re going to adore this healthier twist on a classic treat.
Picture this: a freshly baked Danish, golden-brown and flaky, filled with a creamy, protein-packed cottage cheese filling that’s sweetened just right. It’s a perfect companion for your morning coffee or a sweet treat in the afternoon. Not only is this Danish delicious, but it’s also a wonderful way to sneak in some protein into your day—no gym membership required!
I’ve always loved homemade pastries, but I remember a specific memory from my childhood that really set the stage for my love of baking. My grandmother, who I affectionately called “Nana,” would set out a rolling pin, flour, and a medley of ingredients each Saturday morning. The smell of her buttery pastries wafting through the house was like a warm embrace, one that made it impossible to resist diving into the kitchen.
One Saturday, she decided to teach me how to make her famous cheese Danishes. We spent hours rolling dough, mixing creamy fillings, and laughing at our flour-covered faces. Those moments were infused with love, laughter, and warmth—truly the ingredients for unforgettable memories. Today, I strive to recreate that same joy in my kitchen, and this Protein Cottage Cheese Cheese Danish is my modern-day homage to those Saturday mornings with Nana.
So grab your apron, roll up your sleeves, and let’s bake some delightful pastries together!
Ingredients
Here’s what you’ll need to create these delicious Protein Cottage Cheese Cheese Danishes:
-
Pre-made Puff Pastry
- About the ingredient: Puff pastry is a marvel of baking! It’s flaky, buttery, and layers beautifully. You can find it in the freezer section of your grocery store. If you’re feeling adventurous, you can make your own, but trust me, store-bought saves time.
- Substitution Tip: If you’re looking for a gluten-free option, check out gluten-free puff pastry brands.
-
Cottage Cheese (1 cup, preferably low-fat)
- About the ingredient: Cottage cheese is the heart of our filling and packs a protein punch! Its creamy texture is perfect for mixing with sweeteners and spices.
- Substitution Tip: Ricotta cheese can work as a substitute if you prefer a smoother texture.
-
Sugar (1/4 cup)
- About the ingredient: This is our sweetener, balancing the creamy cottage cheese. Adjust according to your taste.
- Substitution Tip: For a healthier option, use honey or maple syrup.
-
Vanilla Extract (1 tsp)
- About the ingredient: Vanilla adds warmth and depth to our filling. It’s like a hug for your taste buds!
- Chef Insight: Use pure vanilla extract for the best flavor; imitation can sometimes taste artificial.
-
Lemon Zest (1 tsp)
- About the ingredient: Brightens up the filling with a fresh zing! It transforms the otherwise creamy mixture into something a little more vibrant.
- Substitution Tip: If you don’t have lemon, try orange zest for a different, yet delightful, flavor.
-
Egg (1 egg, beaten)
- About the ingredient: The egg acts as a binder, holding our filling together while also giving the pastry a gorgeous golden color.
- Substitution Tip: For a vegan option, use flaxseed meal mixed with water as an egg substitute.
-
Optional Toppings
- Powdered Sugar: For dusting, because everything is better with a little sweetness!
- Fresh Berries: Strawberries or blueberries add a lovely fresh burst and can be included in the filling or as a topping.
Step-by-Step Instructions
Now that we have our ingredients ready, let’s get to the fun part—baking!
Step 1: Prepare Your Puff Pastry
Preheat your oven to 400°F (200°C). While it’s heating up, take your puff pastry out of the freezer. Allow it to thaw for about 30 minutes. If you have a rolling pin, lightly roll out the pastry on a floured surface to ensure it’s nice and flat. This will help create those beautiful layers.
Chef Hack: Keep your puff pastry in the fridge until you’re ready to use it. It’s much easier to work with when it’s cold!
Step 2: Make the Filling
In a large bowl, combine the cottage cheese, sugar, vanilla extract, and lemon zest. Mix until everything is well combined. If you want a smoother filling, consider using a blender or food processor for a creamy texture.
Tip: Taste the filling! Adjust sweetness if needed, and remember—this filling is where you can let your creativity shine!
Step 3: Cut the Pastry
Once your puff pastry is ready, cut it into squares (about 4×4 inches). You should be able to get 6-8 squares depending on how large your pastry sheet is.
Chef Tip: Use a sharp knife or pizza cutter for clean edges without squishing the layers.
Step 4: Fill the Pastry
Place about 1-2 tablespoons of the cottage cheese filling in the center of each pastry square. Be careful not to overfill—trust me, you don’t want an overflowing mess in your oven!
Pro Tip: You can create a little “well” in the center with the back of a spoon to help keep the filling from spilling out.
Step 5: Fold and Seal
Now, here’s where it gets fun and artistic! You can use two methods:
- For a classic Danish look, fold the corners of the pastry square toward the center, pinching them together to seal.
- Or, for a simpler approach, fold the pastry over like a triangle and seal the edges with a fork.
Tip: With the fork, press down gently to create a lovely design and ensure they are sealed tight.
Step 6: Apply Egg Wash
Brush each pastry with beaten egg on top to give them that golden, appetizing finish. This little touch makes a significant difference!
Chef Insight: If you want to go the extra mile, sprinkle some sugar on top before baking for a slight crunch.
Step 7: Bake
Place your pastries on a lined baking sheet, the trick is to leave some space between each of them; they’ll puff up! Bake in your preheated oven for about 15-20 minutes or until they are golden and flaky.
Important: Keep an eye on them; every oven is different, and you don’t want them to burn!
Step 8: Cool and Enjoy!
Once baked, remove them from the oven and let them cool slightly. Dust with powdered sugar if desired and serve with fresh berries on the side for an extra touch of sophistication.
Serving Suggestions
These delightful Protein Cottage Cheese Danishes can be enjoyed fresh from the oven or at room temperature. Plate them on a beautiful serving dish, dust with powdered sugar, and add a sprig of mint for a pop of color. Pair them with coffee, tea, or fresh fruit for a cozy morning treat!
Recipe Variations
Get creative with this recipe! Here are some fun variations to try:
- Fruit and Nut Filling: Add chopped walnuts or pecans to the cottage cheese filling for extra texture.
- Chocolate Chip Cheesy Delight: Fold in some mini chocolate chips for a dessert-like treat.
- Savory Spinach and Cheese: Substitute the sugar with herbs and add spinach for a savory twist.
- Pumpkin Spice: Blend canned pumpkin with your cottage cheese and add cinnamon for a seasonal flavor.
- Vegan Version: Swap cottage cheese for a vegan cream cheese alternative and use a flax egg!
Chef’s Notes
I can’t help but smile every time I bake these pastries. This recipe has evolved over the years—I remember the first iterations were a bit of a disaster, with overfilled pastries and yoga pants covered in flour! But hey, that’s the beauty of cooking, isn’t it? There’s joy in the journey, and every mishap adds character to your cooking story.
I’ve even had friends ask me to make these for their celebrations! It’s heartwarming to know that something made with love can bring people together.
FAQs and Troubleshooting
Q1: My pastries came out flat. What went wrong?
A: Chances are the puff pastry wasn’t cold enough before baking or your oven temperature was too low. Always keep the pastry chilled until you’re ready to bake!
Q2: Can I freeze these?
A: Absolutely! You can freeze the assembled, unbaked pastries. Just pop them in the oven frozen, adding a couple of extra minutes on the baking time.
Q3: What can I use instead of cottage cheese?
A: Cream cheese works well if you’re looking for something smooth; just remember to adjust the sugar as cream cheese can be richer!
Q4: How do I store leftovers?
A: Store them in an airtight container in the fridge for up to 3 days. Just reheat them in the oven for a few minutes to refresh their flaky texture!
Nutritional Info (Optional)
If you’re curious, here’s a rough breakdown:
- Calories: Approximately 150 per Danish
- Protein: About 8g thanks to the cottage cheese
- Fat: 7g (depends on the puff pastry used)
- Carbs: 18g (adjust based on the sugar used)
I hope you enjoy making the Protein Cottage Cheese Cheese Danish as much as I do! They’re not only a joy to eat, but they also embody all the warmth and love that comes from creating something from scratch. Happy baking, my friends!
Print
Protein Cottage Cheese Danish
- Total Time: 50 minutes
- Yield: 6-8 servings 1x
- Diet: Vegetarian
Description
A healthier twist on a classic cheese Danish filled with creamy, protein-packed cottage cheese.
Ingredients
- 1 sheet Pre-made Puff Pastry
- 1 cup Cottage Cheese (preferably low-fat)
- 1/4 cup Sugar
- 1 tsp Vanilla Extract
- 1 tsp Lemon Zest
- 1 egg, beaten
- Optional Toppings: Powdered Sugar, Fresh Berries
Instructions
- Preheat your oven to 400°F (200°C) and allow puff pastry to thaw for about 30 minutes.
- Combine cottage cheese, sugar, vanilla, and lemon zest in a large bowl and mix.
- Cut the puff pastry into squares (about 4×4 inches).
- Place 1-2 tablespoons of filling in the center of each pastry square.
- Fold the corners towards the center or fold over to create triangles and seal.
- Brush each pastry with beaten egg for a golden finish.
- Bake for about 15-20 minutes or until golden and flaky.
- Cool slightly, dust with powdered sugar, and enjoy!
Notes
You can freeze unbaked pastries and bake them directly from the freezer, adding a couple of minutes to baking time.
- Prep Time: 30 minutes
- Cook Time: 20 minutes
- Category: Dessert
- Method: Baking
- Cuisine: American
Nutrition
- Serving Size: 1 pastry
- Calories: 150
- Sugar: 9g
- Sodium: 240mg
- Fat: 7g
- Saturated Fat: 4g
- Unsaturated Fat: 2g
- Trans Fat: 0g
- Carbohydrates: 18g
- Fiber: 1g
- Protein: 8g
- Cholesterol: 60mg
Keywords: Cottage Cheese, Danish, Pastry, Healthy Dessert, Baking
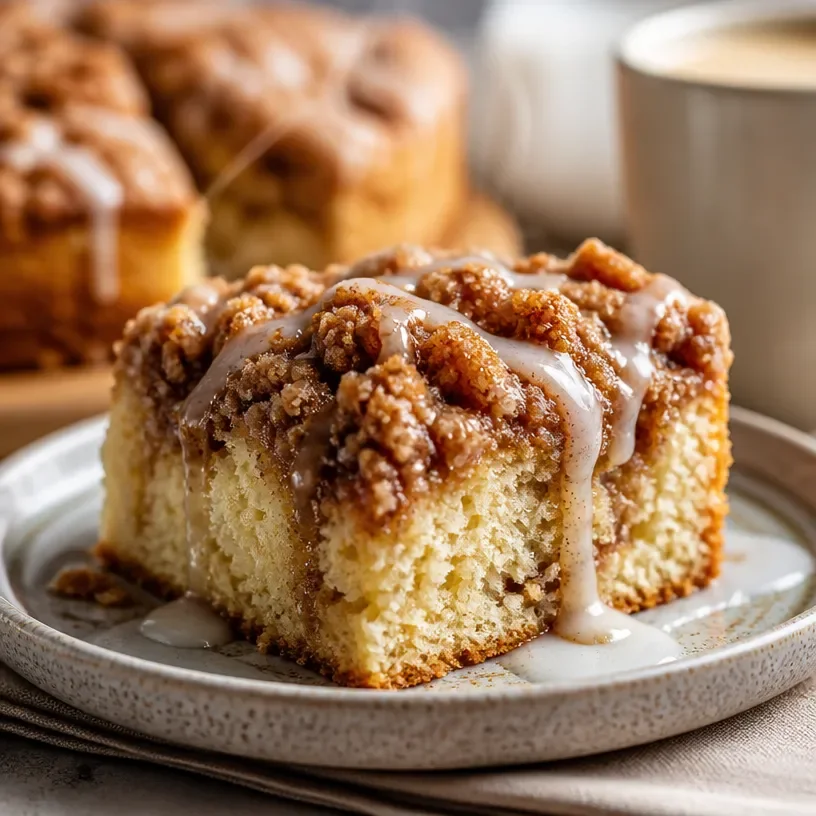
High-Protein Cottage Cheese Coffee Cake for Busy Mornings
Protein Cottage Cheese Coffee Cake: A Cozy Delight
Welcome to my kitchen! Today, we’re diving into a delightful recipe that marries comfort with nutrition — Protein Cottage Cheese Coffee Cake. Whether you’re a busy parent, a health-conscious foodie, or just someone who adores a slice of cake with your morning coffee, this recipe is for you. Imagine the warm aroma of sweet vanilla, nutty cinnamon, and a hint of lemon wafting through your home. Trust me, you’ll be tempted to grab second helpings, and who could blame you?
I can still remember the first time I encountered a cottage cheese coffee cake. It was during a family gathering, and my aunt Clara was known for her iconic baked goods. She pulled out a golden cake from the oven, its top sprinkled with a crisp layer of streusel. The secret ingredient? Cottage cheese! At the time, I was skeptical, but that first bite changed everything. The cake was moist, fluffy, and undeniably delicious. From that day forward, I’ve made it my mission to recreate and innovate upon her beloved recipe—adding a protein twist that makes it perfect for any time of the day!
This cake is not just any dessert. It’s a wellness-inspired treat packed with protein, making it ideal for a quick breakfast or a satisfying afternoon snack. Plus, it’s super easy to whip up with ingredients you likely have in your pantry. So grab your apron, pour yourself a cup of coffee, and let’s create a cozy haven in your kitchen!
Personal Story
I’ll never forget the smell of Aunt Clara’s kitchen on that Sunday afternoon. The combination of baking cake and brewing coffee mingled, creating a scent that was both inviting and nostalgic. As a child, I would dash into the kitchen, my mouth watering at the sight of that cake cooling on the counter. I remember being curious about how something so simple could taste so incredible. “What’s your secret, Clara?” I would ask, and she’d just wink and say, “It’s all in the cottage cheese, darling.”
Years later, during a quiet evening in my own kitchen, I decided to take a trip down memory lane. Inspired by her recipe and the spirit of creative cooking, I tinkered with the flavors and added protein powder. The result? A lightened-up, yet indulgent coffee cake that felt just as comforting as Aunt Clara’s, but with a nutritious spin. Every time I bake this cake, I feel her presence, and it serves as a beautiful reminder of family, love, and the joy of sharing food.
Ingredients
Let’s gather our ingredients! Here’s what you’ll need to make this delightful Protein Cottage Cheese Coffee Cake:
-
1 cup cottage cheese
The star of the show! Cottage cheese adds moisture and protein. For a lower-fat option, use low-fat cottage cheese. If you’re dairy-free, try using coconut yogurt as a substitute. -
1/2 cup Greek yogurt
Adds creaminess and tangy flavor. You can replace it with more cottage cheese if needed, or use a dairy-free yogurt for a vegan option. -
1/4 cup unsweetened applesauce
This keeps our cake moist while adding natural sweetness. You can substitute it with mashed bananas for a different flavor profile. -
1/2 cup sugar (or sweetener of choice)
For sweetness! Coconut sugar or honey can also work well, but adjust the amount depending on taste preference. -
2 large eggs
Eggs provide structure and richness. If you’re vegan or egg-free, you could use flax eggs (1 tablespoon of ground flaxseed mixed with 3 tablespoons of water equals one egg). -
1 1/2 cups whole wheat flour
This gives our cake a wonderful texture. For a gluten-free option, substitute with almond flour or a gluten-free all-purpose blend. -
1 scoop protein powder (vanilla or unflavored)
To amp up the protein content! If whey protein isn’t your thing, pea protein or hemp protein are great alternatives. -
1 teaspoon baking powder
Ensures our cake rises beautifully. If you don’t have baking powder, you can substitute it with a mixture of baking soda and cream of tartar (1/4 teaspoon baking soda + 1/2 teaspoon cream of tartar). -
1 teaspoon vanilla extract
Adds a lovely depth of flavor. Feel free to switch it with almond extract for a slight twist. -
1 teaspoon ground cinnamon
A classic flavor pairing with coffee cake! If you want a bit of spice, try adding nutmeg for additional flavor. -
Zest of 1 lemon
A touch of brightness! If you don’t have lemon on hand, orange zest could make a delightful substitution. -
1/2 cup chopped nuts or chocolate chips (optional)
Add-ins to elevate your cake! Walnuts, pecans, or dark chocolate chunks work wonderfully. For a nut-free option, simply skip this step.
Step-by-Step Instructions
Ready to bake? Let’s get this Protein Cottage Cheese Coffee Cake into your oven and fill your kitchen with that mouthwatering scent!
-
Preheat the oven: Preheat your oven to 350°F (175°C). Get your baking groove on by greasing a 9-inch round or square baking pan. If you want removable sides, consider lining the bottom with parchment paper for easy serving later on!
-
Mix the wet ingredients: In a large mixing bowl, combine the cottage cheese, Greek yogurt, applesauce, sugar, and eggs. Use a whisk or a hand mixer to blend until everything is well combined and creamy. This is where the magic begins, as the cottage cheese will dissolve, creating a luscious batter!
-
Prepare dry ingredients: In another bowl, combine the flour, protein powder, baking powder, cinnamon, and lemon zest. Whisk these together to incorporate all the dry elements fully. This step ensures even distribution of the baking powder and cinnamon throughout the cake.
-
Combine wet and dry mixtures: Slowly add the dry mixture to your wet mixture. Stir gently until just combined — don’t overmix! It’s okay if there are a few lumps; they’ll bake out beautifully and give your cake that delightful texture.
-
Add in extras: If you’re adding nuts or chocolate chips, fold them into the batter here. They’ll add a gorgeous crunch and flavor.
-
Pour and spread: Pour the batter into your prepared pan, spreading it evenly. Give it a gentle shake to level out the surface, then pop it in the oven.
-
Bake: Bake for 30-35 minutes or until the top is golden brown and a toothpick inserted into the center comes out clean. Keep an eye on it during the last few minutes to avoid overbaking.
-
Cool it down: Once baked, remove the cake from the oven and let it cool in the pan for about 10-15 minutes. Once cooled, you can gently slide it out and place it on a wire rack to cool completely. (Or, if you can’t resist, serve warm with a drizzle of honey or a sprinkle of powdered sugar!)
Serving Suggestions
To serve your Protein Cottage Cheese Coffee Cake, slice it into generous pieces and consider dusting the top with a light sprinkle of powdered sugar or cinnamon for a beautiful finish. Pair it with a steaming cup of coffee or tea, and maybe a dollop of Greek yogurt on the side for extra creaminess. It’s perfect for brunch gatherings or as an afternoon snack to satisfy your sweet tooth without feeling guilty!
Recipe Variations
Now, let’s talk about how you can get creative with this recipe! Here are some fun variations to personalize your cake:
-
Berry Blast: Fold in 1 cup of fresh or frozen mixed berries (blueberries, raspberries, or cranberries) into your batter for a fruity twist. You might want to reduce the sugar slightly to balance the natural sweetness.
-
Banana Nut: Substitute half the cottage cheese with mashed ripe bananas and add chopped walnuts for a banana nut flavor that’s irresistible.
-
Chocolate Chip Delight: For the chocolate lovers, add an extra scoop of protein powder and mix in dark chocolate chips instead of nuts. This adds another layer of indulgence!
-
Spiced Pumpkin: During the fall, swap out the applesauce with pumpkin puree and add 1 teaspoon of pumpkin spice for a seasonal twist.
-
Lemon Poppy Seed: Enhance the lemon flavor by adding 2 tablespoons of poppy seeds — it’s fresh, delightful, and perfect for a spring gathering!
Chef’s Notes
I love how this recipe has evolved over time. Each time I bake this coffee cake, I sprinkle a little more creativity into the mix, taking inspiration from seasonal ingredients or what I have on hand. Sometimes, I bake it in muffin tins for individual servings — it’s a great way to share with friends or to freeze for a quick breakfast option on busy mornings.
One of the funniest moments in my kitchen was when I accidentally mixed up salt and sugar. Let’s just say, a sweet and savory cake wasn’t my favorite, but we all had a good laugh! It’s these little mishaps that make cooking an adventure, so never take yourself too seriously.
FAQs and Troubleshooting
Here are some common questions I get about this recipe and a few troubleshooting tips:
-
Why did my cake not rise?
If your cake didn’t rise, double-check that your baking powder is fresh. Also, ensure you didn’t overmix your batter, as this can inhibit rise! -
Can I make this cake ahead of time?
Absolutely! This cake stays moist for up to three days when stored in an airtight container at room temperature. You can also freeze slices for up to 2 months — just thaw before enjoying! -
Is it possible to reduce the sugar?
Yes! You could reduce the sugar by up to half, especially if you’re adding sweet fruits or chocolate chips. Just keep in mind that altering sugar content may affect texture slightly. -
How can I make this cake gluten-free?
You can easily substitute the whole wheat flour with a gluten-free all-purpose flour blend. Ensure your protein powder is also gluten-free if that’s a concern.
Nutritional Info (optional)
This Protein Cottage Cheese Coffee Cake is a fantastic source of protein and can be a guilt-free indulgence! Each slice (with the ingredients listed) has approximately:
- Calories: 180
- Protein: 10g
- Carbohydrates: 25g
- Fat: 5g
- Fiber: 2g
Note: Nutritional values may vary based on specific ingredient brands and substitutions made.
Now that you’ve joined me in the kitchen for this cozy, protein-packed treat, I hope you feel inspired to whip it up for your own loved ones. Happy baking, and remember: the best ingredient in any recipe is the joy of creating and sharing. Enjoy every bite!
Print
Protein Cottage Cheese Coffee Cake
- Total Time: 45 minutes
- Yield: 8 servings 1x
- Diet: Vegetarian
Description
A delightful coffee cake packed with protein, perfect for breakfast or as a satisfying snack.
Ingredients
- 1 cup cottage cheese
- 1/2 cup Greek yogurt
- 1/4 cup unsweetened applesauce
- 1/2 cup sugar (or sweetener of choice)
- 2 large eggs
- 1 1/2 cups whole wheat flour
- 1 scoop protein powder (vanilla or unflavored)
- 1 teaspoon baking powder
- 1 teaspoon vanilla extract
- 1 teaspoon ground cinnamon
- Zest of 1 lemon
- 1/2 cup chopped nuts or chocolate chips (optional)
Instructions
- Preheat the oven: Preheat your oven to 350°F (175°C) and grease a baking pan.
- Mix the wet ingredients: In a bowl, combine the cottage cheese, Greek yogurt, applesauce, sugar, and eggs, and blend until creamy.
- Prepare dry ingredients: In another bowl, mix the flour, protein powder, baking powder, cinnamon, and lemon zest.
- Combine wet and dry mixtures: Gradually add the dry mixture to the wet mixture, stirring gently.
- Add in extras: Fold in nuts or chocolate chips if using.
- Pour and spread: Pour the batter into the prepared pan and smooth the top.
- Bake: Bake for 30-35 minutes until golden and a toothpick comes out clean.
- Cool it down: Let the cake cool for 10-15 minutes before transferring to a wire rack.
Notes
Serve warm for an indulgent treat, possibly with a sprinkle of powdered sugar or cinnamon.
- Prep Time: 10 minutes
- Cook Time: 35 minutes
- Category: Dessert
- Method: Baking
- Cuisine: American
Nutrition
- Serving Size: 1 slice
- Calories: 180
- Sugar: 10g
- Sodium: 160mg
- Fat: 5g
- Saturated Fat: 2g
- Unsaturated Fat: 3g
- Trans Fat: 0g
- Carbohydrates: 25g
- Fiber: 2g
- Protein: 10g
- Cholesterol: 60mg
Keywords: coffee cake, cottage cheese, protein, snack, dessert, healthy baking
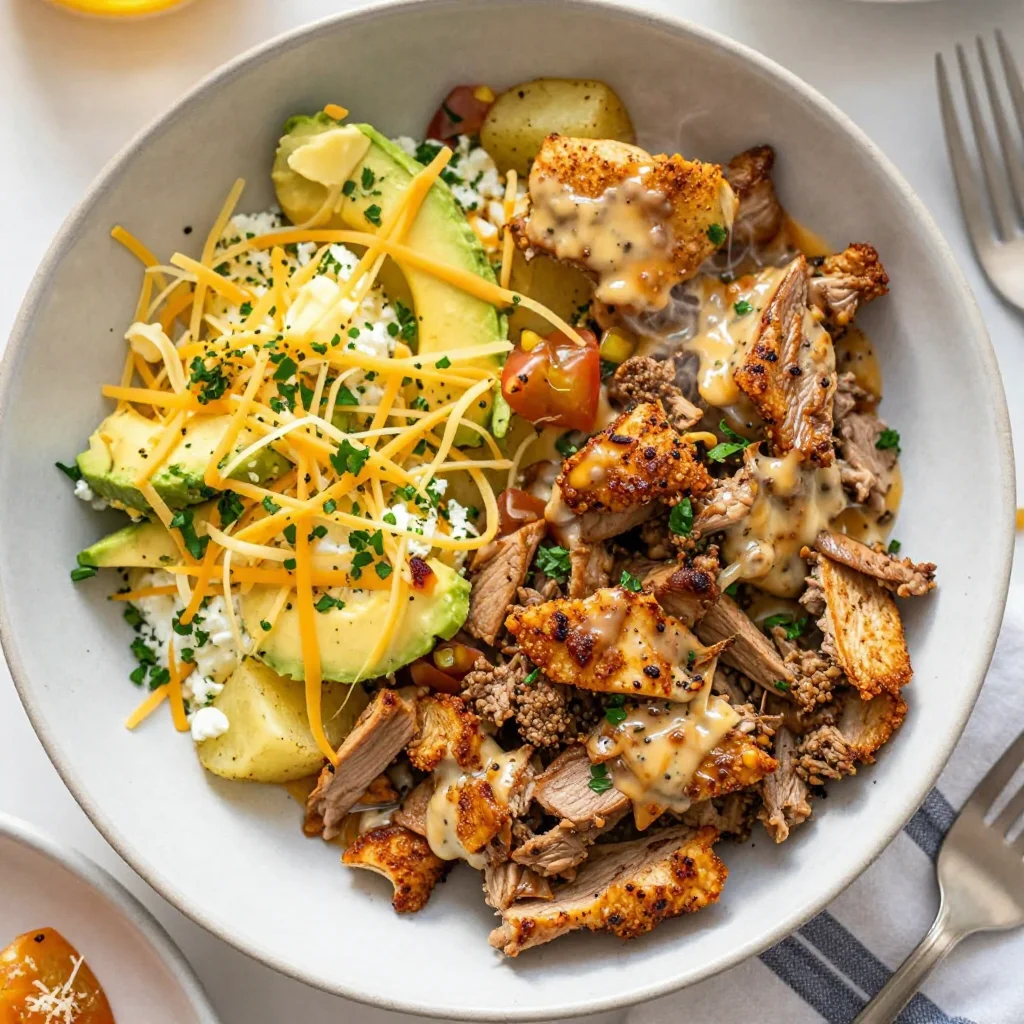
Minute High-Protein Breakfast Bowl for Busy Mornings
Rise and Shine with a High Protein Breakfast Bowl
Welcome to my cozy kitchen, foodies! I’m Olivia Bennett, your trusted guide on this culinary adventure. Today, we’re going to elevate your breakfast game with a delicious and nutritious High Protein Breakfast Bowl that’s as easy to make as it is tasty. Picture this: it’s a beautiful morning, the sun is shining through the kitchen window, and the aroma of fresh ingredients is wafting through the air. What better way to kickstart your day than a breakfast that not only fuels your body but also sparks joy?
Breakfast is often called the most important meal of the day, and for good reason! A hearty breakfast sets the tone, providing us with the energy we need to tackle the day ahead. This High Protein Breakfast Bowl combines wholesome ingredients, vibrant flavors, and plenty of protein to keep you feeling full and satisfied until your next meal. Whether you’re looking to power through your morning workout, have a busy day ahead, or simply want to treat yourself to something special, this bowl has got you covered.
In this recipe, we’ll layer up a delightful mix of eggs, quinoa, fresh vegetables, and a sprinkle of your favorite toppings. The beauty of this dish lies in its versatility. You can easily adapt it to suit your taste preferences or whatever you have on hand in your fridge. Best of all, making this breakfast bowl is a breeze, and I promise you’ll feel like a breakfast superstar by the time you’re done!
So, roll up your sleeves, grab that apron, and let’s dive into the kitchen to whip up a High Protein Breakfast Bowl that will not only fill your belly but also warm your heart!
A Taste of Nostalgia
Let me take you back to my childhood, where mornings were filled with the sound of sizzling eggs and the enticing smell of freshly brewed coffee. One of my favorite memories is waking up to my grandma’s kitchen filled with the warmth of laughter and delicious food. She had a magical ability to turn the simplest of ingredients into a symphony of flavors. Her breakfast bowls were legendary, always crafted with care and love.
We’d gather around the breakfast table as a family, and each bowl was special—topped to perfection with vibrant vegetables, herbs, and an array of spices. I remember how we would dive into them, sharing stories of dreams and plans for the day while adding our own unique touches. Grandma always encouraged creativity, inviting us to explore different flavors and combinations. It’s where my passion for cooking truly ignited, and the joy of sharing meals with loved ones became an essential part of my life.
Now, as I whip up this High Protein Breakfast Bowl, I can almost hear her voice encouraging me to be adventurous with my ingredients. Every bite takes me back to those cherished mornings, that warmth forever inspiring me to create heartwarming dishes to share with you all.
Ingredients
Here are the wholesome ingredients you’ll need to get started on our High Protein Breakfast Bowl:
-
2 Eggs
The stars of our breakfast bowl! Eggs are a fantastic source of protein and healthy fats. You can substitute them with tofu for a vegan option—just scramble it up with your favorite spices for a similar taste! -
1 Cup Cooked Quinoa
Quinoa is not just a trendy grain; it’s a complete protein packed with essential amino acids. You can swap quinoa with brown rice, farro, or even buckwheat if you’re feeling adventurous. -
1/2 Avocado
Creamy and rich, avocados bring healthy fats and a delightful texture. If avocados aren’t your thing or you need a swap, try Greek yogurt for creaminess or a dollop of hummus for added flavor. -
1/2 Cup Cherry Tomatoes (halved)
These little gems add brightness and acidity to the bowl. Feel free to use any seasonal vegetable like bell peppers, spinach, or even roasted sweet potatoes for a different twist! -
Handful of Spinach
Fresh spinach is a nutritional powerhouse, loaded with vitamins and minerals. If spinach isn’t available, kale or arugula would work beautifully as substitutes. -
1 Tablespoon Olive Oil
A splash of olive oil enhances the flavors and adds healthy fats. You could also use avocado oil or coconut oil. -
Salt and Pepper to Taste
Simple seasonings elevate the dish. Experiment with spices like paprika, garlic powder, or even a pinch of chili flakes for a kick! -
Fresh Herbs (optional)
A sprinkle of cilantro, parsley, or chives at the end can add a fresh pop of flavor. Use whatever herbs you love or have on hand!
Now that we’ve gathered our delicious ingredients, let’s get down to the cooking!
Step-by-Step Instructions
-
Cook Your Quinoa
Start by rinsing the quinoa under cold water to remove its natural coating, which can give it a bitter taste. Then, cook it according to package instructions (usually 1 cup of quinoa to 2 cups of water). Bring the water to a boil, then reduce to a simmer and cover until fluffy—about 15 minutes. While the quinoa cooks, you can prepare the rest of your bowl! -
Sauté the Vegetables
In a medium skillet, heat 1 tablespoon of olive oil over medium heat. Once it’s shimmering, add your halved cherry tomatoes and spinach. Sauté them for about 3-4 minutes until the spinach is wilted and the tomatoes are soft and bursting with flavor. This will not only add a yummy texture but also make your kitchen smell fantastic. -
Cook the Eggs
In another non-stick skillet, crack your eggs and cook them sunny-side up or scrambled, depending on your preference! For scrambled eggs, whisk in a pinch of salt and pepper before pouring them into the heated pan. Cook gently until fluffy and soft—remember, a little undercooking is okay since they’ll continue to cook off the heat. Chef tip: If you like a creamier scramble, add a splash of milk or cream while whisking. -
Assemble the Bowl
Once the quinoa is cooked and the veggies are sautéed, it’s assembly time! Start with a hearty scoop of quinoa as the base of your bowl. Next, carefully add the sautéed spinach and tomatoes. Top it off with your perfectly cooked eggs, and don’t forget a slice of creamy avocado! -
Final Touches
Drizzle with a little more olive oil, and season with salt, pepper, and your favorite fresh herbs. If you’re feeling adventurous, go ahead and sprinkle a bit of feta cheese or chili flakes for extra kick!
And voila! Your High Protein Breakfast Bowl is all set to be devoured.
Serving Suggestions
For a lovely presentation, serve your breakfast bowl in wide, shallow bowls to show off all those vibrant colors. You can arrange the eggs, veggies, and avocado artfully, creating a feast for the eyes as well as the belly. Pair it with a cup of herbal tea or freshly brewed coffee to complete this cozy breakfast experience.
Recipe Variations
The beauty of this bowl is its flexibility! Here are some variations to make it uniquely yours:
-
Mediterranean Twist: Incorporate feta cheese, olives, and swap spinach with arugula for an Italian-inspired breakfast. Drizzle with balsamic glaze for a nice zing!
-
Spicy South-of-the-Border: Add black beans, corn, and diced jalapeños. Top with salsa and a dollop of Greek yogurt for zesty vibes.
-
Sweet and Savory: Switch out the eggs for a dollop of Greek yogurt and add fresh berries and a sprinkle of granola for a refreshing twist.
-
Protein Boost: Mix in some cooked chicken or turkey to enhance your protein intake, making it an even more satisfying meal.
-
Vegan Delight: Replace eggs with scrambled tofu, use chickpeas instead of quinoa, and load up on your favorite vegetables for a protein-packed vegan bowl.
Chef’s Notes
I love how this High Protein Breakfast Bowl can easily evolve based on what’s in your pantry or what you’re craving! Over the years, it has become a blank canvas for my kitchen creativity. At first, I stuck to the original recipe, but soon found myself experimenting with different grains and toppings. It’s incredible how a simple meal can tell a thousand stories and adapt to your tastes and lifestyles.
One day, I even had leftovers from a taco night and tossed them in—let’s just say breakfast was a hit! And isn’t that the joy of cooking? Making it your own, one delicious bite at a time!
FAQs and Troubleshooting
-
What if my quinoa turns out mushy?
No worries! Mushy quinoa happens when you overcook it or add too much water. Next time, be sure to measure your water accurately, and try simmering for the recommended time—fluff it up with a fork afterward! -
Can I prepare this breakfast bowl in advance?
Absolutely! You can make the quinoa and sauté the veggies the night before. Just reheat them in the morning, and then quickly cook your eggs for a speedy breakfast! -
What can I use to enhance the flavor?
Experimenting with spices is a game-changer! Aromatic spices like paprika, cumin, or even a dash of nutritional yeast can elevate this dish. Fresh herbs can also make a grand impact—don’t be afraid to experiment! -
How can I make this meal more filling?
If you want to bulk it up, consider adding nuts or seeds, like pumpkin seeds or almonds, for extra protein and crunch! A slice of whole-grain toast on the side can also do the trick for a more satisfying breakfast.
Nutritional Info
While I don’t usually delve too deeply into nutritional breakdowns, a High Protein Breakfast Bowl generally provides a powerhouse of nutrients. Expect a hearty dose of protein, healthy fats, and fiber to keep you feeling satisfied. It’s a meal that nourishes the body and soul!
And there you have it, my lovely foodies! A comprehensive guide to making a High Protein Breakfast Bowl that not only enjoys the flavors of food but also honors the spirit of home cooking. I hope you find joy in creating this bowl and, as always, remember to share it with the ones you love! Happy cooking!
Print
High Protein Breakfast Bowl
- Total Time: 25 minutes
- Yield: 2 servings 1x
- Diet: Vegetarian
Description
Kickstart your day with a delicious High Protein Breakfast Bowl filled with eggs, quinoa, fresh vegetables, and healthy toppings.
Ingredients
- 2 Eggs
- 1 Cup Cooked Quinoa
- 1/2 Avocado
- 1/2 Cup Cherry Tomatoes (halved)
- Handful of Spinach
- 1 Tablespoon Olive Oil
- Salt and Pepper to Taste
- Fresh Herbs (optional)
Instructions
- Cook Your Quinoa: Rinse the quinoa under cold water, cook according to package instructions (1 cup quinoa to 2 cups water), about 15 minutes.
- Sauté the Vegetables: Heat olive oil in a skillet, add cherry tomatoes and spinach, and cook for 3-4 minutes until softened.
- Cook the Eggs: In a non-stick skillet, crack eggs and cook sunny-side up or scrambled until fluffy.
- Assemble the Bowl: Start with quinoa, add sautéed vegetables, top with eggs, and slice of avocado.
- Final Touches: Drizzle with olive oil, season, and add fresh herbs or toppings as desired.
Notes
Feel free to mix and match ingredients based on what’s available in your fridge. This recipe is a canvas for your creativity!
- Prep Time: 10 minutes
- Cook Time: 15 minutes
- Category: Breakfast
- Method: Sautéing
- Cuisine: American
Nutrition
- Serving Size: 1 serving
- Calories: 400
- Sugar: 3g
- Sodium: 500mg
- Fat: 20g
- Saturated Fat: 5g
- Unsaturated Fat: 10g
- Trans Fat: 0g
- Carbohydrates: 45g
- Fiber: 7g
- Protein: 18g
- Cholesterol: 370mg
Keywords: breakfast, high protein, healthy bowl, quinoa, eggs




