
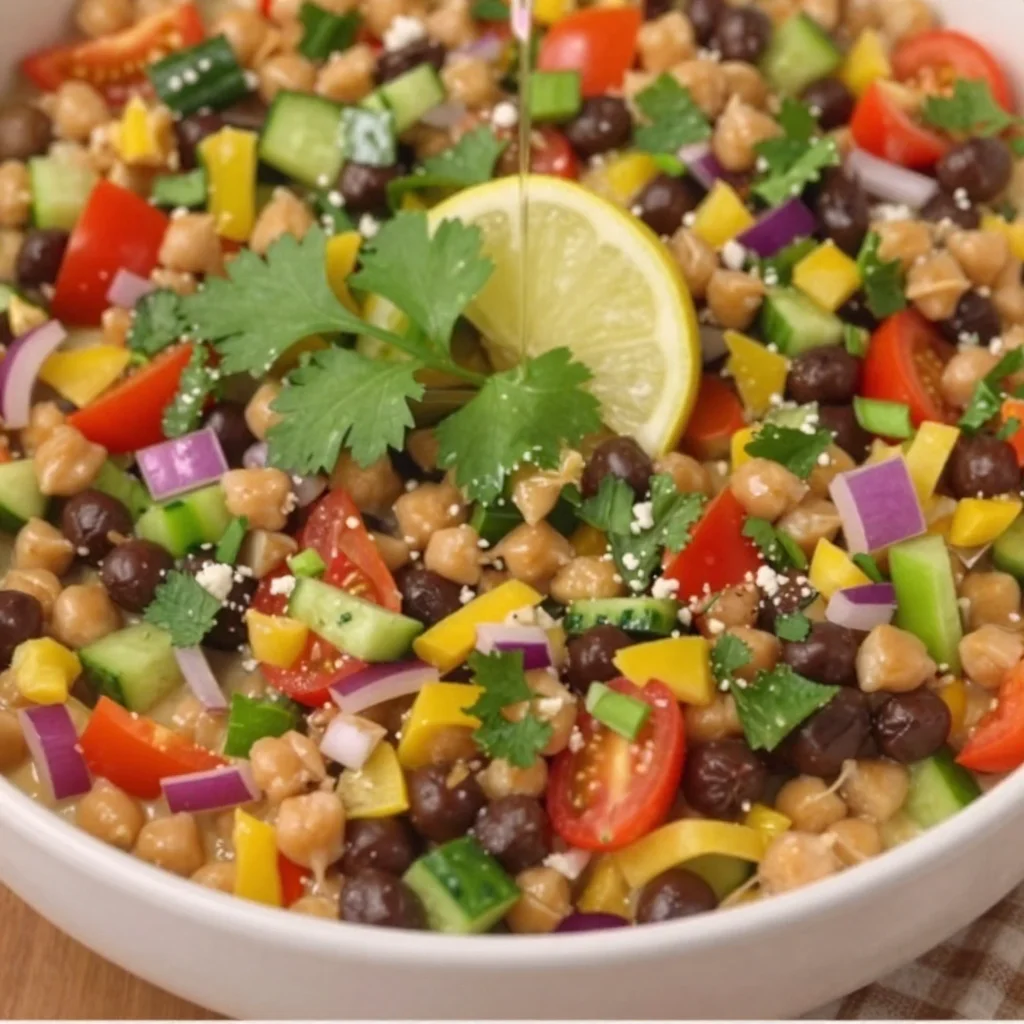
Minute Dip Salad: Fresh, Creamy Crunch in One Bowl
The Ultimate Dip Salad: A Flavor Celebration in a Bowl
Welcome to my kitchen, fellow food enthusiast! I’m thrilled you’re here, ready to dive into one of my all-time favorite recipes: the Ultimate Dip Salad. Imagine a colorful fusion of flavors and textures, where every bite transports you to a happy place filled with laughter, memories, and, of course, delicious food.
In today’s fast-paced world, we often forget how special a simple meal can be. This salad embraces the beauty of fresh ingredients and offers a delightful twist on a classic dip by turning it into a compelling salad experience. Whether you’re cooking for yourself or hosting friends, this dish is sure to impress and ignite heartfelt conversations around the table.
When I think back to my childhood, I remember summers spent at family gatherings where my aunt would whip up a delightful seven-layer dip. It would sit on the table, slowly disappearing as we gathered around, sharing stories and laughter. The creamy layers of avocados, beans, salsa, and cheese created a symphony of flavors, and I’d often sneak into the kitchen for just one more scoop. That nostalgia inspired me to create the Ultimate Dip Salad — a salad that encapsulates those joyful memories while packing a punch in terms of flavor and healthiness.
With its vibrant colors and satisfying crunch, this salad pays homage to the classic dip while bringing fresh ingredients into the spotlight. Let’s get started on this culinary adventure together!
Personal Story
The idea of creating the Ultimate Dip Salad sprang from my fondness for family gatherings, especially during summer. We’d often spend lazy afternoons lounging by the pool, full of laughter and good food. My Aunt Lucy was the queen of dips; her iconic seven-layer dip was always a hit. I can still remember the way she’d artfully layer each component, and the clinking sounds of chips dipping into creamy bliss.
One day, I decided to mix things up. While dreaming of a fresh salad for a potluck, I thought: Why not merge that tasty dip into a salad format? I wanted to capture the spirit of my aunt’s famous dish without the heaviness of traditional dips. The Ultimate Dip Salad was born, transforming a nostalgic delight into a delightful, health-forward meal that keeps the spirit alive while embracing freshness. I’ve made it countless times since, and each time it brings smiles to my loved ones’ faces, just as my aunt’s dip did for me.
Now that you’ve had a taste of my inspiration, let’s gather our ingredients and get cooking!
Ingredients
Here’s what you’ll need to make the Ultimate Dip Salad. Each ingredient has been thoughtfully chosen to bring a burst of flavor to your plate.
- Mixed Salad Greens (4 cups): I recommend using a combination of baby spinach, arugula, and romaine for a variety of textures. Feel free to substitute with kale if you’re feeling adventurous!
- Cherry Tomatoes (1 cup): These juicy little gems add a pop of color and sweetness. Substitute with diced bell peppers for a crunchier bite.
- Cucumbers (1 medium): Crisp cucumbers bring refreshing crunch. English cucumbers are great if you want fewer seeds.
- Black Beans (1 can, drained and rinsed): Packed with protein and fiber, they add a hearty element. If you’re in the mood for a different legume, chickpeas work wonderfully too.
- Avocado (1 large): The creamy texture balances out the crunch. Use a ripe avocado for the best flavor. If you’re allergic, consider using hummus in its place!
- Green Onions (3, chopped): These add a lovely oniony bite. Feel free to swap with red onions for a sharper taste, or leave them out if you prefer a milder flavor.
- Shredded Cheddar Cheese (1 cup): For that cheesy goodness! Go for sharp cheddar for more flavor, or switch to a dairy-free cheese alternative if you’re vegan.
- Sour Cream or Greek Yogurt (½ cup): This is the creamy dressing that ties everything together. For a healthier option, use natural Greek yogurt, or substitute with a dressing of your choice.
- Salsa (1 cup): A robust salsa adds a zesty kick. Choose your spice level! If salsa isn’t your thing, a homemade tomato vinaigrette could be delightful.
- Lime Juice (from 1 lime): Freshened up with a squeeze of lime juice to brighten the whole salad. You can use lemon juice if that’s what you have on hand!
Now that we have our ingredients ready, let’s move on to the fun part—cooking!
Step-by-Step Instructions
-
Prepare the Salad Base: Start by washing your mixed greens under cold water. Once they’re clean, spin them dry using a salad spinner or blot them gently with a clean kitchen towel. This step ensures your salad won’t be watery.
-
Chop the Vegetables: Next, chop the cherry tomatoes in half and slice the cucumbers into thin rounds or half-moons, depending on your preference. The key? Keeping the cucumbers and tomatoes uniform in size for even bites.
-
Make the Avocado Blend: Take your ripe avocado, slice it in half, and scoop it into a bowl. Mash it lightly using a fork but leave some chunkiness for texture. Add lime juice directly on top to keep it fresh and prevent browning.
-
Combine the Ingredients: In a large mixing bowl, start layering your salad. Begin with the mixed greens as your base, followed by the chopped cherry tomatoes, cucumbers, black beans, and shredded cheddar. Top it off with dollops of the avocado mixture.
-
Dress It Up: Spoon your salsa over the top. Remember, you can control how much you add based on personal preference! A trick here is to lightly toss the salad so that the salsa doesn’t sink to the bottom, ensuring each bite is flavorful.
-
Add a Creamy Kick: Finally, drizzle sour cream or Greek yogurt over the top. You can create fun designs or just blob it on like a pro! A sprinkle of chopped green onions over everything is the cherry on top.
-
Chill Before Serving: If you have time, let your salad sit in the fridge for about 15-20 minutes. This allows the flavors to meld beautifully together!
Isn’t it delightful how simple it is? Plus, clean-up is minimal, which we love!
Serving Suggestions
Now that your Ultimate Dip Salad is ready, it’s time to serve it up! Presentation matters, so feel free to get creative. Serve it family-style in a large bowl, allowing guests to dig in and take what they like. You can also plate individual servings in rustic, shallow bowls, making sure that each component is beautifully visible. A sprinkle of fresh herbs, like cilantro or parsley, will elevate your dish!
Consider serving it with tortilla chips on the side for some extra crunch, or even alongside grilled chicken or shrimp for a heartier meal.
Recipe Variations
The best part about the Ultimate Dip Salad is its versatility! Here are some fun twists to try next time:
-
Tex-Mex Twist: Swap out the cheddar for crumbled feta or cotija cheese, and add some jalapeños for a spicy kick!
-
Mediterranean Flair: Replace black beans with chickpeas, add diced cucumbers, sun-dried tomatoes, and finish it off with a drizzle of balsamic glaze.
-
Veggie Delight: Keep it vegan by substituting all dairy products with plant-based options, like cashew cream, and add roasted corn for extra sweetness.
-
Grilled Protein Addition: Add grilled chicken or shrimp on top for a complete meal. Perfect for summer BBQs!
-
Sweet & Spicy: Toss in diced mango or pineapple with some chili powder for a sweet context that dances alongside the tangy salsa.
The possibilities are endless, so feel free to get creative with what you have on hand!
Chef’s Notes
Cooking is all about experimentation and having fun in the kitchen! Sometimes, I like to add a splash of hot sauce for that extra zing, or even fresh herbs that I have lying around. My Ultimate Dip Salad has evolved over the years based on seasonal ingredients available at the farmer’s market and my whims — and that’s what makes it so special! Even if I stray from my original recipe, it always feels like home.
I remember one particular dinner party where I completely forgot about the avocado because I was so focused on impressing my guests with a homemade vinaigrette. It turned out great, but as soon as they took a bite, I could see the looks of joy when they found out the avocado was in the salad too. Lesson learned: It’s all about joy and surprises when cooking!
FAQs and Troubleshooting
1. What if my salad gets too soggy?
If your salad is soggy, it’s often a result of using wet greens or too much dressing. Always ensure greens are dried properly. To save a soggy salad, add more fresh lettuce and gently toss.
2. Can I make this salad ahead of time?
Absolutely! Prep the ingredients in advance but store the salad assemble separately. Put greens and beans together, and keep the toppings like avocado and salsa separate until serving.
3. Why did my avocado turn brown?
Oxygen exposure can cause browning. Always thank lime juice for halting this reaction! If you notice browning, a squeeze more of lime can freshen it up.
4. How can I make it more filling?
If you’re looking for extra protein, consider adding grilled chicken, chickpeas, or even quinoa. They’ll make it heartier without detracting from the fresh flavors!
Nutritional Info
While I’m not a nutritionist, it’s safe to say that the Ultimate Dip Salad is nutrient-rich and packed with vitamins thanks to the fresh greens, veggies, and healthy fats from the avocado. Each serving contains healthy fats, fiber, protein, and fantastic flavors — a perfect balance for a satisfying meal!
And there you have it — your guide to creating the Ultimate Dip Salad! I hope you enjoyed this journey through flavors and memories as much as I do. Now, go forth, unleash your inner chef, and share the joy of this salad with family and friends! Happy cooking!
Print
Ultimate Dip Salad
- Total Time: 20 minutes
- Yield: 4 servings 1x
- Diet: Vegetarian
Description
A colorful fusion of flavors and textures that transforms a classic dip into a delightful salad experience, perfect for gatherings.
Ingredients
- 4 cups Mixed Salad Greens (baby spinach, arugula, romaine)
- 1 cup Cherry Tomatoes (halved)
- 1 medium Cucumber (sliced)
- 1 can Black Beans (drained and rinsed)
- 1 large Avocado (mashed)
- 3 Green Onions (chopped)
- 1 cup Shredded Cheddar Cheese
- ½ cup Sour Cream or Greek Yogurt
- 1 cup Salsa
- Juice of 1 Lime
Instructions
- Prepare the Salad Base: Wash your mixed greens under cold water and dry them.
- Chop the Vegetables: Halve the cherry tomatoes and slice the cucumbers.
- Make the Avocado Blend: Mash the avocado with lime juice in a bowl.
- Combine the Ingredients: Layer mixed greens, tomatoes, cucumbers, black beans, cheddar, and the avocado mixture in a bowl.
- Dress It Up: Spoon salsa over the salad and lightly toss.
- Add a Creamy Kick: Drizzle sour cream or Greek yogurt over the top and add green onions.
- Chill Before Serving: Let the salad sit in the fridge for 15-20 minutes before serving.
Notes
Serve with tortilla chips on the side for extra crunch. You can also add grilled chicken or shrimp for a heartier meal.
- Prep Time: 15 minutes
- Cook Time: 5 minutes
- Category: Salad
- Method: No-Cook
- Cuisine: American
Nutrition
- Serving Size: 1 serving
- Calories: 350
- Sugar: 5g
- Sodium: 400mg
- Fat: 20g
- Saturated Fat: 8g
- Unsaturated Fat: 10g
- Trans Fat: 0g
- Carbohydrates: 35g
- Fiber: 10g
- Protein: 15g
- Cholesterol: 30mg
Keywords: Dip Salad, Healthy Salad, Quick Salad, Vegetarian Meal, Summer Salad
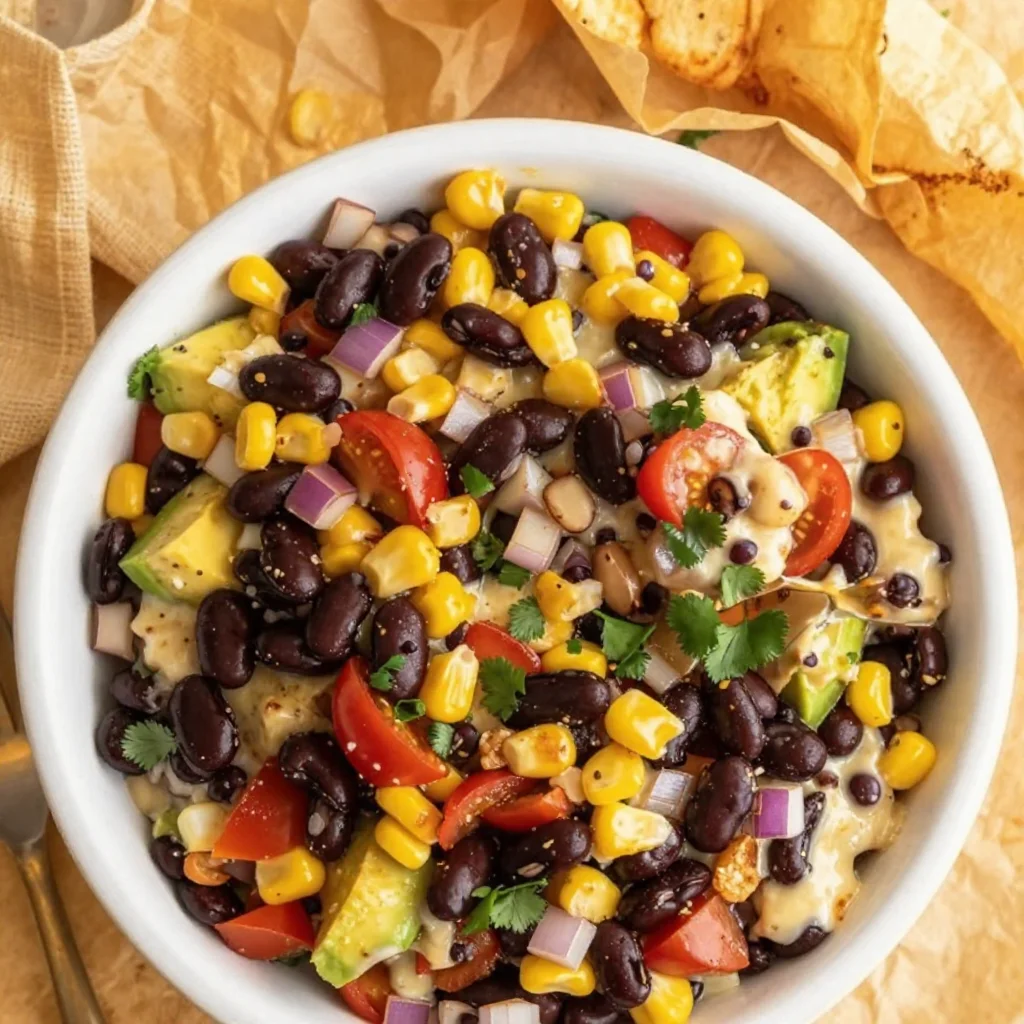
Cowboy Caviar
Cowboy Caviar: A Flavorful Fiesta in a Bowl
Welcome to my kitchen, food lovers! Today, we’re diving into a dish that’s as vibrant and exciting as a country music festival: Cowboy Caviar! If you’re looking for a fun, fresh, and colorful appetizer that sparks joy and conversation, you’ve stumbled upon the right recipe. Cowboy Caviar is a delightful mix of beans, corn, peppers, avocados, and spices, all harmonizing together in a zesty dressing that packs a flavorful punch. Perfect for game day, parties, or just a cozy night in, this dish is sure to be a hit.
When I first encountered Cowboy Caviar, I was at a summer barbecue hosted by a dear friend. The sun was shining, laughter filled the air, and as I took my first bite, I was instantly transported to culinary heaven! The combination of crunchy veggies and creamy avocado danced on my taste buds and paired so beautifully with tortilla chips. I can still see myself sitting on that picnic blanket, the gentle breeze rustling through the trees, and a plate of this cowboy concoction in my lap. That simple, vibrant dish ignited not only a love for this recipe but also the desire to share it with others.
So grab your apron, and let’s bring a little taste of that summer vibe into your kitchen!
Ingredients
Here’s what you’ll need to create your very own Cowboy Caviar:
-
Black Beans (1 can, drained and rinsed): These protein-packed legumes add heartiness to the dish. If you’re looking for a swap, navy beans or pinto beans also work beautifully!
-
Corn (1 can or 1 cup fresh): Sweet corn gives a lovely crunch. Canned corn is convenient, but fresh grilled corn adds a smoky flavor that’s irresistible!
-
Bell Peppers (1 red, 1 green, diced): The freshness and sweetness from the peppers are essential. Feel free to mix it up with yellow or orange peppers for a pop of color and flavor variety.
-
Red Onion (1 small, diced): Adding a zing to the mix, red onions provide the perfect bite. If you’re sensitive to raw onions, soak them in cold water for about 10 minutes to mellow their flavor.
-
Tomatoes (1-2 medium, diced): Juicy tomatoes bring everything together. Roma tomatoes are great for firmness, but you can also use cherry tomatoes if you want a sweeter, burst-in-your-mouth effect.
-
Avocado (1-2 ripe, diced): Creaminess at its finest! Make sure your avocados are perfectly ripe for that velvety texture. If you want to keep them green longer, toss them in lime juice.
-
Cilantro (1/2 cup, chopped): This herb not only brightens up the dish but also gives it that authentic flavor. If you’re not a cilantro fan (I know you exist!), try parsley or omit it altogether.
-
Lime (1-2, juiced): This zesty fruit ties all the flavors together. Fresh lime juice is a must, but you can use lemon juice as a substitute if you need.
-
Olive Oil (2 tablespoons): A drizzle of good olive oil adds richness. Feel free to experiment with flavored oils for a unique twist.
-
Salt and Pepper (to taste): Always essential! Seasoning is key, so don’t forget to taste as you go.
Step-by-Step Instructions
-
Prep Your Veggies: Start by gathering all your ingredients. Chop the bell peppers, red onion, and tomatoes, and dice the avocado. Trust me; the more colorful your bowl, the more inviting it will be!
-
Mix It Up: In a large mixing bowl, combine your black beans, corn, bell peppers, red onion, tomatoes, and cilantro. Gently stir everything together, being careful with the avocado—nobody wants mushy guacamole when they’re making Cowboy Caviar!
-
Dress the Party: In a small bowl, whisk together the lime juice and olive oil. Pour this dressing over the veggie mixture, adding salt and pepper to taste. Toss everything together gently until all the ingredients are well-coated. This is when that fresh, vibrant aroma fills your kitchen!
-
Let It Marinate: If you have time, let the Cowboy Caviar sit for about 30 minutes. This allows the flavors to meld beautifully. But if you’re hungry like I often am, you can dive right in!
-
Serve It Up: Grab a serving bowl or plate and scoop generous amounts of this colorful mix. My tip? Serve with crispy tortilla chips for that perfect crunch! You could also use it as a topping for grilled chicken or fish for a delightful dinner.
Serving Suggestions
Cowboy Caviar is all about that vibrant presentation. I love to serve it in a large, colorful bowl, surrounded by a mountain of tortilla chips, so guests can dive right in! Alternatively, you can arrange it on a platter, garnished with fresh cilantro and lime wedges for that added freshness. It’s not only delicious but also looks gorgeous on any table!
Recipe Variations
-
Spicy Cowboy Caviar: Add some diced jalapeños or a dash of cayenne pepper for an extra kick. If you’re a heat lover, this will definitely take your cowboy caviar to a whole new level!
-
Sweet and Spicy Variation: Throw in some diced mango or a touch of honey for a sweet twist that balances the savory flavors beautifully.
-
Protein-Packed Version: Mix in some diced grilled chicken or shrimp for added protein. This transforms the dish into a standalone meal that’s perfect for lunch or dinner.
-
Try a Bean Swap: Experiment with different beans such as chickpeas or black-eyed peas for a unique texture and flavor.
-
Keep It Vegan: This recipe is already vegan, but if you want to make it more filling, add quinoa or farro as a base before dressing.
Chef’s Notes
As I mentioned earlier, this recipe holds a special place in my heart, mainly because of the memories attached to it. I recall the time I accidentally spilled half a bowl on my friend’s lap while trying to show off my “fancy” serving skills. We all erupted in laughter! It was a great reminder that cooking is meant to be fun and casual. Since then, we’ve coined the phrase “Cowboy Caviar Disaster” for when food doesn’t quite make it to the table!
Over the years, I’ve played with variations of this recipe, introducing seasonal ingredients and experimenting with spices. This dish has a way of evolving with me and my kitchen journey. Each time I make it, I find myself reminiscing about that barbecue and all the laughter shared.
FAQs and Troubleshooting
Q: Can I make Cowboy Caviar ahead of time?
A: Absolutely! You can prepare it a day in advance. Just remember to add the avocado right before serving to prevent browning.
Q: What if my avocado isn’t ripe?
A: If your avocado isn’t quite ready, try placing it in a brown paper bag with an apple or banana. They’ll emit ethylene gas, helping it ripen quicker!
Q: How long will Cowboy Caviar last in the fridge?
A: It can last about 3 days in the fridge. But, it’s best enjoyed fresh, so gather your friends and dig in!
Q: Can I customize the ingredients?
A: Absolutely! Feel free to play around with different vegetables or dressings. The beauty of Cowboy Caviar is its versatility!
Nutritional Info
While full nutritional details can vary based on the specific ingredients used and portions, Cowboy Caviar is generally a fantastic source of fiber, protein, and healthy fats. Plus, it’s packed with vitamins and minerals from all those colorful veggies!
So there you have it—a fun, fresh, and colorful recipe that’s perfect for any gathering! Cowboy Caviar is more than just a dish; it’s an invitation to connect, celebrate, and share a moment with loved ones. I hope this becomes a staple in your kitchen as it has in mine. Happy cooking, and enjoy every bite!
Print
Cowboy Caviar
- Total Time: 15 minutes
- Yield: 4 servings 1x
- Diet: Vegan
Description
A vibrant and flavorful mix of beans, corn, and veggies, perfect for parties and gatherings.
Ingredients
- 1 can Black Beans, drained and rinsed
- 1 can or 1 cup fresh Corn
- 1 red Bell Pepper, diced
- 1 green Bell Pepper, diced
- 1 small Red Onion, diced
- 1–2 medium Tomatoes, diced
- 1–2 ripe Avocados, diced
- 1/2 cup Cilantro, chopped
- 1–2 Limes, juiced
- 2 tablespoons Olive Oil
- Salt and Pepper, to taste
Instructions
- Prep your veggies: Start by gathering all your ingredients. Chop the bell peppers, red onion, and tomatoes, and dice the avocado.
- Mix it up: In a large mixing bowl, combine your black beans, corn, bell peppers, red onion, tomatoes, and cilantro. Gently stir everything together.
- Dress the party: In a small bowl, whisk together the lime juice and olive oil. Pour this dressing over the veggie mixture, adding salt and pepper to taste.
- Let it marinate: If you have time, let the Cowboy Caviar sit for about 30 minutes to allow the flavors to meld.
- Serve it up: Grab a serving bowl or plate and scoop generous amounts of this colorful mix. Serve with crispy tortilla chips.
Notes
Can be made a day in advance; add avocado before serving to prevent browning.
- Prep Time: 15 minutes
- Cook Time: 0 minutes
- Category: Appetizer
- Method: Mixing
- Cuisine: American
Nutrition
- Serving Size: 1 serving
- Calories: 250
- Sugar: 3g
- Sodium: 300mg
- Fat: 10g
- Saturated Fat: 1g
- Unsaturated Fat: 8g
- Trans Fat: 0g
- Carbohydrates: 35g
- Fiber: 8g
- Protein: 7g
- Cholesterol: 0mg
Keywords: Cowboy Caviar, appetizer, bean salad, vegan, party food, fresh
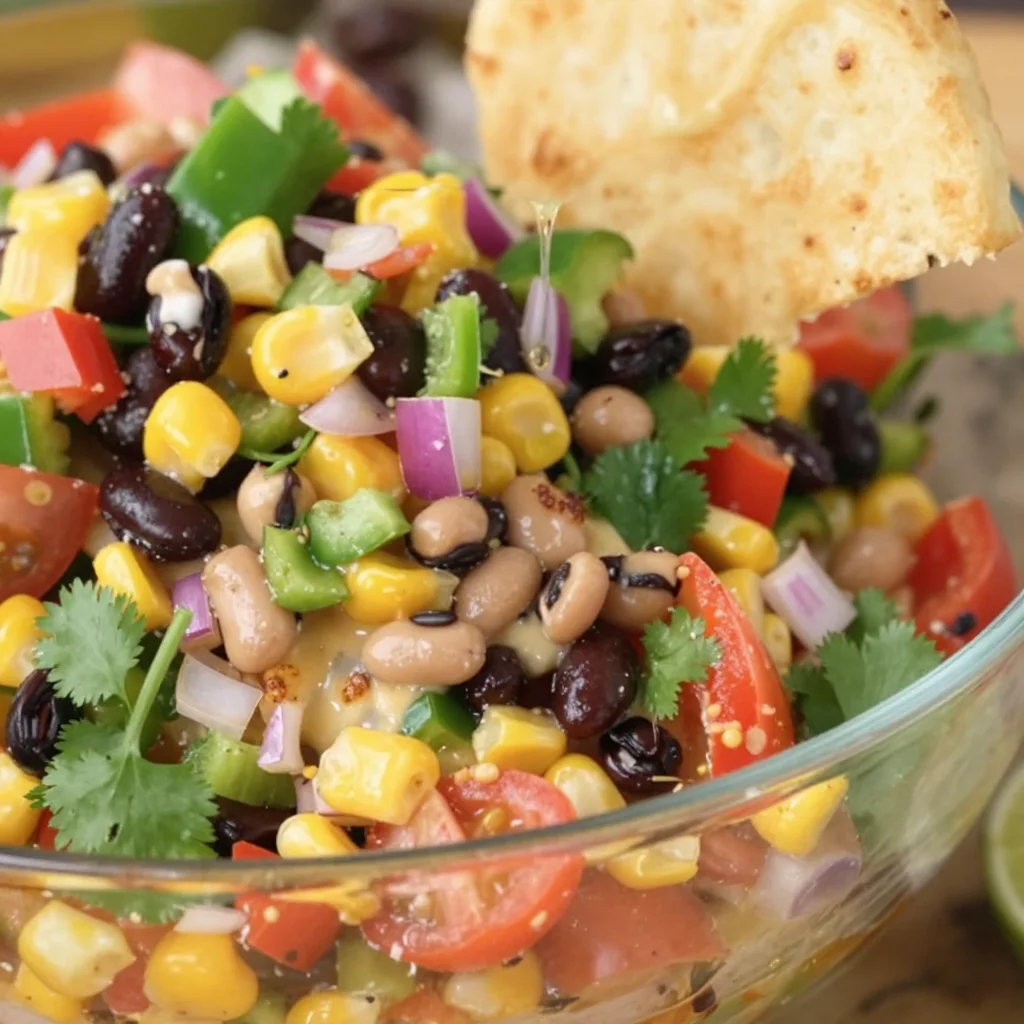
Cowboy Salsa
Discover the Bold Flavors of Cowboy Salsa: A Homestyle Recipe
Hey there, fellow food lover! Welcome back to my kitchen! Today, I’m excited to share a recipe that’s not only bursting with flavor but also brings back some fun memories of good times and great company. Grab your apron, and let’s dive into the hearty world of Cowboy Salsa!
Cowboy Salsa is more than just a dip; it’s a celebration of flavors! Imagine juicy tomatoes, refreshing cilantro, and zesty lime all mingling together in perfect harmony. This vibrant salsa is perfect for any occasion: a backyard BBQ, game day, or even a cozy movie night at home. The best part? It’s super easy to make, and you can get the entire family involved!
Now, let me take you on a little trip down memory lane. Picture this: summers spent in my grandmother’s backyard, surrounded by the sounds of laughter, sizzling grills, and the occasional bark from our beloved dog. My grandmother was a master at making this zesty Cowboy Salsa, and it was her secret weapon for bringing the family together. She’d whip up batch after batch, and we’d gather around the picnic table, tortilla chips in one hand and smiles plastered across our faces. There was something magical about the combination of fresh ingredients and the love that she poured into every scoop.
Fast-forward to today, and I find myself making this delightful salsa just as she did, with a few modern twists of my own. It’s not just a recipe; it’s a connection to my roots and a way to keep her spirit alive in my kitchen. So, let’s roll up our sleeves and create some happiness with this recipe that’s as vibrant as our memories!
Ingredients for Cowboy Salsa
Here’s what you’ll need to whip up this zesty Cowboy Salsa. Each ingredient plays a crucial role in creating that explosion of flavors.
-
Fresh Tomatoes (4 medium)
- Juicy and vibrant, tomatoes are the backbone of this salsa. Feel free to use any variety you prefer—Roma, vine-ripened, or even heirloom for a gourmet touch.
- Substitution Tip: If tomatoes aren’t in season, you can use canned diced tomatoes, but be sure to drain them well to avoid sogginess.
-
Red Onion (1 medium)
- Adds a sharp, sweet crunch that balances the acidity of the tomatoes. I love using red onion for its beautiful color too!
- Substitution Tip: You can also use green onions for a milder flavor.
-
Cilantro (1/4 cup, chopped)
- Fresh cilantro brings a burst of freshness and a herbal note that ties everything together.
- Chef Insight: If you’re not a fan of cilantro, fresh parsley works well as a substitute, though the flavor won’t be quite the same.
-
Jalapeño Pepper (1, diced)
- For a zesty kick! You can adjust the heat level by removing the seeds or adding more depending on your spice tolerance.
- Substitution Tip: Bell peppers can replace jalapeños for a milder version.
-
Lime (1, juiced)
- Fresh lime juice brightens the salsa and enhances all the flavors. It’s a must-have in this recipe.
- Chef Insight: If you’re short on fresh limes, lemon juice can do in a pinch, but the flavor will be slightly different.
-
Garlic (2 cloves, minced)
- Fresh garlic adds depth and a wonderful aroma that elevates your salsa.
- Substitution Tip: Garlic powder works too, though you’ll need to use less—about 1/4 teaspoon should suffice.
-
Salt (to taste)
- Just a pinch to enhance all the flavors! Remember, you can always add more, but you can’t take it out!
-
Olive Oil (1 tablespoon)
- While not traditional, a drizzle of olive oil can add richness and a lovely texture to your salsa.
- Substitution Tip: Avocado oil is a fantastic alternative if you’d like something lighter.
-
Black Beans (1 can, rinsed and drained)
- They add protein and texture and make this salsa hearty enough to stand on its own or even serve as a side dish.
- Substitution Tip: For a different twist, you could use corn instead or combine both for an even heartier salsa!
Let’s get cooking!
Step-by-Step Instructions for Cowboy Salsa
-
Prep the Produce
- Start by rinsing all your fresh veggies under cold water. Grab your cutting board and chop your tomatoes, red onion, jalapeño, and cilantro into bite-sized pieces. Pro tip: Use a sharp knife for clean cuts—you’ll thank yourself later!
-
Combine the Fresh Ingredients
- In a large mixing bowl, toss your chopped tomatoes, onion, jalapeño, and cilantro together. Don’t be shy—get in there with your hands! Feel free to dance a little while you mix; it makes the process more fun.
-
Add the Flavor Helpers
- Mince your garlic and toss it into the bowl, followed by a generous squeeze of lime juice and a drizzle of olive oil. Trust me, this is where the magic happens. The lime juice not only adds flavor but also helps to marry all your ingredients together.
-
Season to Taste
- Sprinkle in some salt, and stir everything until well combined. Sample a bite and adjust seasoning if needed. This is your creation, after all—make it uniquely yours!
-
Let It Marinate
- Cover the bowl with plastic wrap or a lid and let your Cowboy Salsa chill in the fridge for at least 30 minutes. This allows the flavors to deepen and meld. If you can wait longer, even better—let it sit for an hour or two!
-
Serve It Up
- When ready to serve, give the salsa a stir and taste one last time. Adjust the salt or lime juice if needed. Time to grab those tortilla chips!
Serving Suggestions
To plate your Cowboy Salsa, grab a clean bowl and transfer the salsa using a slotted spoon to avoid excess liquid. Serve it alongside a big bowl of crispy tortilla chips for that classic pairing. Alternatively, this salsa doubles as a fantastic topping for tacos, grilled chicken, or even a vibrant addition to any burrito!
Recipe Variations
Why not make this recipe your own? Here are a few creative twists to consider:
- Add Avocado: Diced avocado lends a creamy texture and richness that’s simply irresistible.
- Fruit Twist: Incorporate diced mango or pineapple for a refreshing sweetness that complements the spice.
- Spicy Version: Swap the jalapeño for serrano peppers, or even add chipotle in adobo for a smoky kick!
- Herb Switch-Up: Try adding fresh mint or basil for a unique flavor profile that will surprise your taste buds!
- Roasted Garlic: Instead of fresh garlic, roast it first for a sweeter, richer flavor.
Chef’s Notes
As I mentioned earlier, this Cowboy Salsa recipe has a special place in my heart. Over the years, I’ve tweaked it here and there—sometimes adding beans when I want it heartier or even experimenting with different herbs based on what’s in season. It’s such a versatile recipe that it can evolve with your cooking style and seasonal ingredients. A little drizzle of chili oil on top adds a fantastic flavor dimension too; don’t be afraid to get creative!
FAQs and Troubleshooting
-
Why is my salsa watery?
- If your salsa ends up watery, it’s likely that your tomatoes were too juicy. Try using firmer tomatoes or draining them before mixing.
-
How long will this salsa last?
- Stored in an airtight container in the fridge, your Cowboy Salsa can last about 3–5 days. Just give it a good stir before serving!
-
Can I freeze Cowboy Salsa?
- Yes, you can freeze it! Just make sure to portion it into freezer-safe bags, and keep in mind that the texture may change once thawed.
-
Can I add other vegetables?
- Absolutely! Bell peppers, corn, or even cucumber can add great texture and flavor. Feel free to experiment to find your perfect combination!
Nutritional Info
Although I love indulging in cuisine, I also like to be conscious of what I’m eating. Here’s a quick breakdown per serving (based on classic ingredients):
- Calories: 120
- Carbohydrates: 18g
- Protein: 3g
- Fat: 5g
- Fiber: 4g
Remember, nutrition can vary based on your ingredient selections and serving sizes.
So there you have it: a heartfelt recipe for Cowboy Salsa, brimming with flavor, nostalgia, and a modern twist! I hope you create this salsa in your kitchen, just like I do, and find joy in every bite. Happy cooking, and may your kitchen always be filled with laughter and love!
Print
Cowboy Salsa
- Total Time: 30 minutes
- Yield: 4 servings 1x
- Diet: Vegetarian
Description
A vibrant salsa bursting with fresh flavors, perfect for any occasion.
Ingredients
- 4 medium Fresh Tomatoes
- 1 medium Red Onion
- 1/4 cup chopped Cilantro
- 1 Jalapeño Pepper, diced
- Juice of 1 Lime
- 2 cloves Garlic, minced
- Salt to taste
- 1 tablespoon Olive Oil
- 1 can Black Beans, rinsed and drained
Instructions
- Prep the produce: rinse veggies and chop tomatoes, red onion, jalapeño, and cilantro.
- Combine the fresh ingredients in a large mixing bowl.
- Add the minced garlic, lime juice, and olive oil to the bowl.
- Season to taste with salt and stir until well combined.
- Let the salsa marinate in the fridge for at least 30 minutes.
- Serve with tortilla chips or as a topping for various dishes.
Notes
For a creamier texture, add diced avocado. For additional flavor, consider using roasted garlic or chipotle.
- Prep Time: 15 minutes
- Cook Time: 0 minutes
- Category: Appetizer
- Method: No-Cook
- Cuisine: American
Nutrition
- Serving Size: 1 serving
- Calories: 120
- Sugar: 3g
- Sodium: 200mg
- Fat: 5g
- Saturated Fat: 1g
- Unsaturated Fat: 4g
- Trans Fat: 0g
- Carbohydrates: 18g
- Fiber: 4g
- Protein: 3g
- Cholesterol: 0mg
Keywords: salsa, cowboy salsa, fresh dip, easy recipe, vegetarian salsa
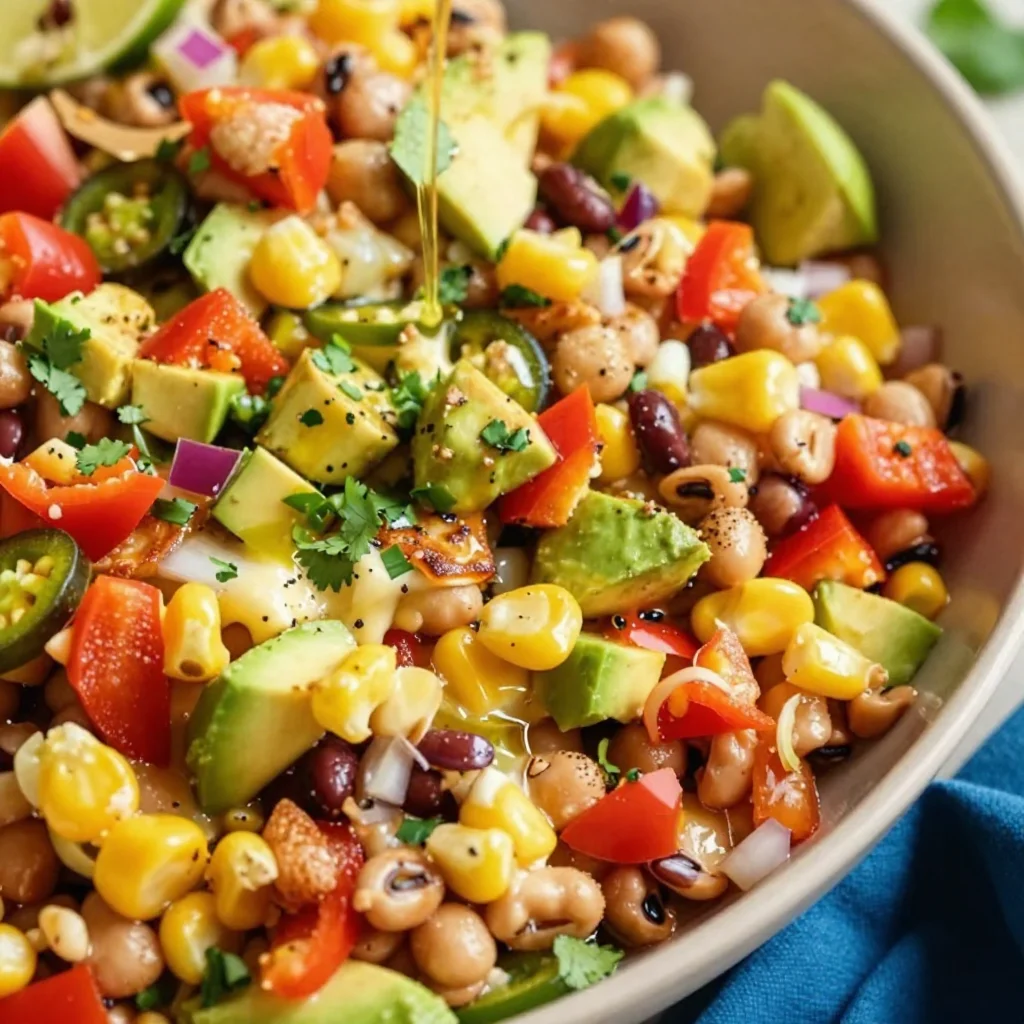
Cowboy Caviar
Cowboy Caviar: A Flavorful Fiesta in a Bowl
Welcome to my kitchen, where flavors dance, and aromas tell delicious stories! Today, we’re diving into a vibrant, hearty dish that has a knack for sparking joy and conversation: Cowboy Caviar. This catchy name might have you imagining a fancy dish straight from a top-end restaurant, but I assure you, this delightful blend of beans, corn, and fresh veggies is all about homey appeal and comfort.
Cowboy Caviar is often served as a dip, a salad, or a side dish, and it’s bursting with flavor and texture in every bite. Perfect for gatherings, BBQs, or simply when you’re craving something fresh and zesty, it’s a dish that invites everyone to dig in and enjoy. What I love most about Cowboy Caviar is how adaptable it is – you can tinker with the ingredients to make it your own!
Why Cowboy Caviar?
I find joy in simple recipes that bring people together. Imagine a warm summer day, friends lounging in the sun, laughter echoing in the air, and you have a big bowl of Cowboy Caviar at the center of the table, inviting everyone to take a scoop. This dish is not just about nourishment; it’s about connection. Each ingredient has a story, a taste that ties us all together.
A Trip Down Memory Lane
Let me take you back to my family’s annual summer cookout. The grill was sizzling, and the air was filled with the scent of marinated chicken and sweet corn on the cob. My Uncle Joe was the star chef in our family, known for his playful personality and knack for bringing people together with food. One summer, he introduced us to Cowboy Caviar, making it as colorful as a painter’s palette.
At first, I was a little skeptical. I mean, what’s up with caviar sounding so fancy? But as I took the first bite, I was instantly hooked. The burst of fresh corn, creamy avocado, and tangy lime was unlike anything I had tasted. Uncle Joe explained that this dish was a favorite in the West, serving as a hearty side or a total showstopper dip. From that moment on, it became a staple in my recipe collection—every time I make it, I’m reminded of those sunny afternoons, surrounded by the people I love.
Ingredients
Let’s gather our ingredients and create this vibrant dish together! Here’s what you’ll need:
-
Black Beans (1 can, drained and rinsed)
Rich in protein and fiber, black beans add a hearty texture. If you prefer, you can substitute with pinto beans or kidney beans. -
Corn (1 cup, fresh or canned)
Sweet corn pops with a delightful crunch. Fresh corn off the cob is best in summer, but canned or frozen works in a pinch. -
Cherry Tomatoes (1 cup, halved)
Juicy cherry tomatoes bring a burst of color and sweetness. Feel free to swap with diced regular tomatoes. -
Red Onion (½, diced)
A hint of sharpness balances the sweetness. You can use scallions for a milder taste. -
Bell Pepper (1, diced)
Choose any color you love—red, yellow, or green! They add great color and sweetness. -
Avocado (1, diced)
Creamy avocado gives a rich texture. Use lime juice to prevent browning or substitute with Greek yogurt for a different twist. -
Cilantro (½ cup, chopped)
Fresh cilantro brings brightness. If you’re not a fan, parsley or basil make great substitutions. -
Lime (2, juiced)
Fresh lime juice brightens the flavors. Lemon juice is a great alternative if you’re out of limes. -
Salt and Pepper (to taste)
Season to your preferences. A dash of smoked paprika can elevate the flavor profile!
These ingredients, combined with your creativity, will make a dish that sings with flavor!
Step-by-Step Instructions
-
Prepare the Ingredients:
Start by washing and prepping all your veggies. Cut the cherry tomatoes in half, dice the red onion and bell pepper, and chop the cilantro. Trust me; having everything ready makes cooking a breeze! -
Mixing the Base:
In a large bowl, combine the black beans, corn, diced cherry tomatoes, red onion, and bell pepper. Use a gentle folding motion to keep those colors intact! This is where the dish starts to come alive with texture. -
Add Avocado:
Gently fold in the diced avocado. This should be done carefully so that the avocado doesn’t mash into the mixture. That creamy texture is what makes Cowboy Caviar irresistible! -
Whisk the Dressing:
In a smaller bowl, combine the lime juice, salt, and pepper. If you want to amplify the flavor, feel free to add a pinch of cumin or a dash of hot sauce! Whisk it until combined, then pour this dressing over the mixed ingredients. -
Toss and Taste:
Carefully toss everything together until the dressing evenly coats the ingredients. Always taste at this stage! You may want to add more salt, lime juice, or a sprinkle of chili powder to kick things up! -
Let it Marinate:
Cover the bowl with plastic wrap or a lid and let it chill in the fridge for about 30 minutes. This time allows the flavors to meld together beautifully. -
Serve it Up:
When you’re ready to eat, give it a gentle toss one last time before serving. Scoop it into a beautiful bowl, and voila! You’re ready to share this crowd-pleaser.
Serving Suggestions
Cowboy Caviar is versatile! Serve it chilled as a dip with tortilla chips, or as a refreshing side on your BBQ platter. You can also use it as a topping for tacos or spooned over grilled chicken or fish for a fresh twist. The goal is to highlight its colorful appearance while inviting everyone to dive in.
Recipe Variations
Feel like getting creative? Here are a few fun twists on Cowboy Caviar:
- Spicy Kick: Add diced jalapeños or a splash of hot sauce for a fiery twist.
- Tropical Vibes: Mix in diced mango or pineapple for a sweet, tropical contrast.
- Zesty Feta: Crumble some feta cheese on top for a creamy, salty counterpoint.
- Quinoa Twist: Mix in cooked quinoa for added protein and a hearty texture.
- Vegan-Friendly: Substitute any dairy products for plant-based alternatives—this dish is naturally vegan!
Chef’s Notes
Cowboy Caviar has been a staple in my kitchen for years, and I love how it can change with the seasons! In the fall, I might add roasted sweet potatoes; in the winter, diced bell peppers are swapped for crunchier vegetables. One time, I even had friends sprinkle crushed tortilla chips over their servings, creating a crunchy topping that was an unexpected delight!
What really keeps this recipe in rotation is its adaptability—perfect for any occasion, and you can make it your own!
FAQs and Troubleshooting
1. Can I make Cowboy Caviar a day ahead?
Absolutely! In fact, letting it sit overnight allows the flavors to infuse even more. Just remember to keep the avocado covered to prevent browning.
2. Why is my Cowboy Caviar too soggy?
Make sure to drain your canned items and not over-mix everything. If it’s too wet, add a few more black beans or corn to balance it out.
3. My Cowboy Caviar tastes bland; what should I do?
Start by adding more lime juice or a bit of salt. Remember, fresh ingredients can sometimes vary in flavor. Always taste as you go!
4. Can I use frozen corn?
Yes! Just thaw and drain it before adding to your bowl; frozen corn can be a convenient option without sacrificing flavor.
Nutritional Info
While nutritional values can vary based on specific ingredients used, a serving of Cowboy Caviar generally contains:
- Calories: Approximately 150 per serving
- Protein: 6g
- Fiber: 8g
- Sugars: 3g
- Fats: 7g (mostly healthy fats from avocado)
This dish is a fantastic way to pack in veggies and nutrients while enjoying all the love of good food!
And there you have it—a vibrant, nourishing, and utterly delightful Cowboy Caviar recipe! Now, gather your ingredients, put on your favorite playlist, and get ready for some culinary fun. Let this creation be a cherished part of your story, just like it is in mine! Happy cooking!
Print
Cowboy Caviar
- Total Time: 45 minutes
- Yield: 4 servings 1x
- Diet: Vegan
Description
A vibrant blend of beans, corn, and fresh veggies, perfect for dips, salads, or side dishes.
Ingredients
- 1 can Black Beans, drained and rinsed
- 1 cup Corn, fresh or canned
- 1 cup Cherry Tomatoes, halved
- ½ Red Onion, diced
- 1 Bell Pepper, diced
- 1 Avocado, diced
- ½ cup Cilantro, chopped
- 2 Limes, juiced
- Salt and Pepper, to taste
Instructions
- Prepare the Ingredients: Start by washing and prepping all your veggies. Cut the cherry tomatoes in half, dice the red onion and bell pepper, and chop the cilantro.
- Mixing the Base: In a large bowl, combine the black beans, corn, diced cherry tomatoes, red onion, and bell pepper.
- Add Avocado: Gently fold in the diced avocado.
- Whisk the Dressing: In a smaller bowl, combine the lime juice, salt, and pepper. Whisk until combined, then pour over the mixed ingredients.
- Toss and Taste: Carefully toss everything until the dressing coats the ingredients.
- Let it Marinate: Cover and chill in the fridge for 30 minutes.
- Serve it Up: Give it a gentle toss before serving in a beautiful bowl.
Notes
Cowboy Caviar can be adapted with seasonal ingredients and pairs well with tortilla chips or as a topping for tacos.
- Prep Time: 15 minutes
- Cook Time: 0 minutes
- Category: Salad
- Method: Mixing
- Cuisine: American
Nutrition
- Serving Size: 1 serving
- Calories: 150
- Sugar: 3g
- Sodium: 180mg
- Fat: 7g
- Saturated Fat: 1g
- Unsaturated Fat: 6g
- Trans Fat: 0g
- Carbohydrates: 25g
- Fiber: 8g
- Protein: 6g
- Cholesterol: 0mg
Keywords: Cowboy Caviar, Dip, Salad, Vegan, Party Food
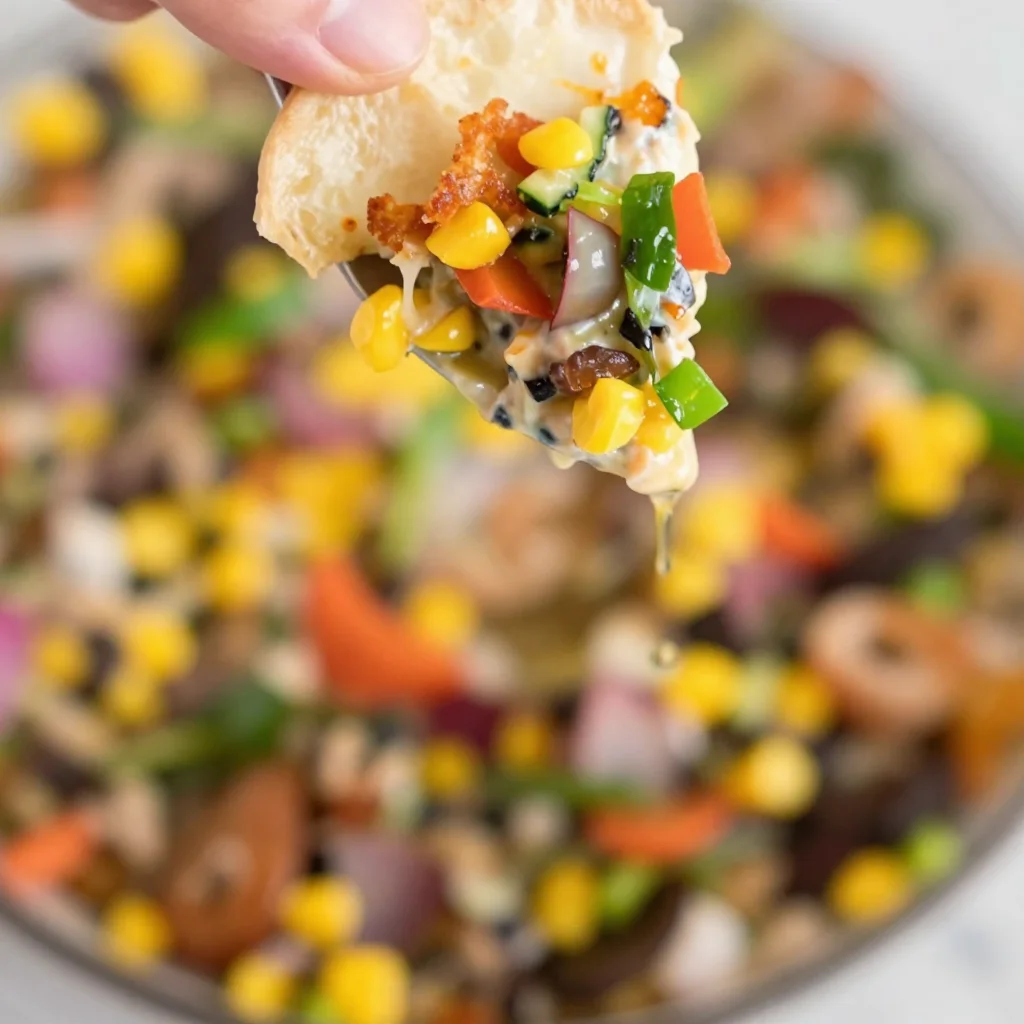
Minute Cowboy Caviar Dip for Quick, Fresh Entertaining
Tantalizing Cowboy Caviar: A Flavorful Journey
Welcome back to my kitchen! Today, I’m thrilled to share a recipe that is not just a dish; it’s a celebration in a bowl! I’m talking about Cowboy Caviar, a vibrant, zesty, and oh-so-delicious dip that will make any gathering feel like a fiesta. Whether you’re having friends over for a laid-back game day or just want a snack that feels like a party in your mouth, Cowboy Caviar is the way to go. It’s bursting with fresh veggies, beans, and a zingy dressing that ties it all together in a way that is both familiar and exciting.
What I love about Cowboy Caviar is its versatility. You can serve it as a dip with tortilla chips, pile it onto tacos, or enjoy it as a salad on its own. It’s perfect for those days when you want to enjoy something light yet satisfying. The best part? It comes together in no time at all, making it an ideal choice for even the busiest of home cooks. So grab your apron (yes, the one that might have a splash of last night’s sauce), and let’s dive into this flavor-packed creation!
A Little Heart and a Lot of Flavor: My Cowboy Caviar Story
Let me take you back to one of my fondest kitchen memories. I remember the first time I tasted Cowboy Caviar at a friend’s barbecue. It was one of those magical summer days when the sun was shining, laughter echoed, and the scent of grilled meats wafted through the air. My friend, letting her culinary creativity flow, placed a colorful bowl of Cowboy Caviar right in the middle of a table full of deliciousness.
I took one bite, and I was smitten. The vibrant colors, the snap of the fresh veggies, and that tangy dressing sent my taste buds dancing! I was amazed that something so simple could bring so much joy. I asked for the recipe on the spot, and ever since then, it’s become a beloved staple in my kitchen. I began to experiment and add my own twists, but every time I make it, I’m reminded of that delightful summer day and the joy of sharing good food with great friends.
Ingredients
To whip up this tantalizing Cowboy Caviar, you’ll need the following ingredients:
-
Black beans (1 can, drained and rinsed)
A hearty source of protein and fiber. If you’re not a fan of black beans, you can use kidney beans or pinto beans instead. -
Corn (1 cup, fresh or frozen)
Sweet and crunchy! Fresh corn is delightful during the summer, while frozen corn works just as well in cooler months. Just give it a quick thaw in warm water. -
Diced tomatoes (1 cup, fresh or canned)
Fresh tomatoes give a burst of flavor, but canned diced tomatoes with green chilies can add a nice kick too! -
Red onion (½ cup, finely chopped)
Adds a sharp bite and beautiful color. If red onion is too strong for your taste, try using green onions for a milder flavor. -
Bell pepper (1 cup, chopped – any color)
Feel free to mix it up! Use red, yellow, or orange for sweetness, or green for a more herbaceous flavor. -
Avocado (1 ripe, diced)
Creaminess galore! Make sure it’s ripe for the best texture. If you’re looking to save some calories, you can skip this or replace it with diced cucumber for crunch. -
Cilantro (¼ cup, chopped)
Fresh herbs bring brightness. If you’re not a fan of cilantro, parsley can be used instead. -
Lime (1, juiced)
A squeeze of fresh lime juice brightens everything up. Lemon juice in a pinch works too! -
Olive oil (2 tablespoons)
A drizzle adds richness. Alternatively, you can use avocados oil for a different profile. -
Salt and pepper (to taste)
Simple seasoning is key! Adjust according to your preference. -
Optional: Jalapeño (1, minced)
For a spicy kick, add minced jalapeño! If you prefer a mild flavor, leave it out or use a sprinkle of red pepper flakes instead.
Step-by-Step Instructions
Now that we have our ingredients lined up and ready to rock, let’s jump into the cooking process. You might think it’s hard to whip up something this lively, but I promise, it’s as easy as pie (or should I say, as easy as Cowboy Caviar?). Here’s how to do it:
-
Prep Your Veggies
Start by washing your vegetables thoroughly. For the tomatoes, bell pepper, and red onion, dice them into bite-sized pieces. The key here is uniform cuts, so they mix well. Pro tip: use a serrated knife for tomatoes for a clean cut. -
Rinse the Beans
Open the can of black beans and drain it in a colander. Rinse well under cold water to get rid of the excess sodium and that slimy coating. This helps keep your Cowboy Caviar fresh and light. -
Combine the Base Ingredients
In a large mixing bowl, combine the black beans, corn, diced tomatoes, red onion, bell pepper, and jalapeño (if using). Use your spoon to gently mix everything together, but be careful not to mash the beans. -
Add in the Creamy Touch
Next, toss in the diced avocado and chopped cilantro. Gently fold these in with the rest of the mixture. Avocados can be delicate, so treat them with love! A good big spatula works wonders for this. -
Whisk Up the Dressing
In a small bowl, whisk together lime juice, olive oil, salt, and pepper. If you love a little more flavor, add a pinch of cumin or a dash of chili powder for an extra kick. -
Pour the Dressing
Drizzle the dressing over the Cowboy Caviar mixture in the big bowl and give it one more gentle toss to coat everything. Use your judgment—if it looks a bit dry, add a tad more oil or lime juice. -
Taste and Adjust
This is my favorite part! Taste your Cowboy Caviar and adjust the seasoning if necessary. If it seems bland, don’t hesitate to add a bit more salt, lime, or spice. -
Let It Chill After Mixing
Let your Cowboy Caviar sit in the fridge for at least 30 minutes before serving. This helps the flavors meld together and tastes even better the next day—if there’s any left!
Serving Suggestions
When it comes to serving Cowboy Caviar, the possibilities are endless! For a classic approach, serve it with crisp tortilla chips piled high on a fun platter. You can also plate it atop a bed of leafy greens for a fresh salad. Feeling more adventurous? Try using it as a topping for grilled chicken or fish or mix it into tacos for that delightful crunch. Don’t forget to garnish with extra cilantro or slices of lime for a beautiful presentation!
Recipe Variations
Embrace your creative side with these fun twists on the basic Cowboy Caviar recipe:
-
Greek Twist: Replace black beans with chickpeas and add crumbled feta cheese and diced cucumber for a Mediterranean flair.
-
Spicy Southwest: Add diced mango or pineapple for a sweet touch, along with some chipotle powder for extra heat.
-
Vegan Delight: Swap the olive oil with a splash of liquid smoke for a grill-infused flavor while keeping everything plant-based.
Chef’s Notes
Cowboy Caviar has become a beloved favorite in my kitchen, and every time I make it, I find new ways to enjoy it. It can be a last-minute snack or turned into a stunning dish for a potluck. Once, I mistakenly grabbed a can of black olives instead of black beans during a late-night grocery run, and while it wasn’t the same, the result was surprisingly delicious! Life in the kitchen is all about being adaptable, experimenting, and most importantly, having fun.
FAQs and Troubleshooting
1. Can I make Cowboy Caviar ahead of time?
Absolutely! You can prepare it a day in advance. Just remember that the avocados might brown, so if you’re worried about that, consider adding them right before serving.
2. Why did my Cowboy Caviar turn out watery?
This can happen if the tomatoes are very juicy. To prevent this, use cherry tomatoes or Roma tomatoes, which tend to be less watery, or drain excess liquid before mixing.
3. How long does Cowboy Caviar last in the fridge?
If stored in an airtight container, it should last for about 3-5 days. The flavors will intensify over time, so it’s great as leftovers!
4. My Cowboy Caviar is too salty! What can I do?
If you find it too salty, try adding another diced avocado or more corn to balance it out. A bit of sugar can also help cut through the saltiness.
Now that you’ve got this delightful Cowboy Caviar recipe in your back pocket, it’s time to get cooking! I can’t wait for you to enjoy making this colorful dish that’s sure to impress your friends and family. Happy cooking!
Print
Cowboy Caviar
- Total Time: 45 minutes
- Yield: 4 servings 1x
- Diet: Vegetarian
Description
A colorful and zesty dip bursting with fresh veggies, beans, and a delightful dressing, perfect for any gathering.
Ingredients
- 1 can Black beans, drained and rinsed
- 1 cup Corn, fresh or frozen
- 1 cup Diced tomatoes, fresh or canned
- ½ cup Red onion, finely chopped
- 1 cup Bell pepper, chopped (any color)
- 1 ripe Avocado, diced
- ¼ cup Cilantro, chopped
- 1 Lime, juiced
- 2 tablespoons Olive oil
- Salt and pepper, to taste
- 1 Jalapeño, minced (optional)
Instructions
- Prep Your Veggies: Start by washing your vegetables thoroughly and dice them into uniform bite-sized pieces.
- Rinse the Beans: Open the can of black beans, drain, and rinse well under cold water.
- Combine the Base Ingredients: In a large bowl, mix together black beans, corn, diced tomatoes, red onion, bell pepper, and jalapeño.
- Add in the Creamy Touch: Gently fold in the diced avocado and chopped cilantro.
- Whisk Up the Dressing: In a small bowl, whisk together lime juice, olive oil, salt, and pepper.
- Pour the Dressing: Drizzle the dressing over the Cowboy Caviar mixture and toss gently.
- Taste and Adjust: Taste your Cowboy Caviar and adjust the seasoning as needed.
- Let It Chill: Refrigerate for at least 30 minutes before serving to allow flavors to meld.
Notes
Taste improves if allowed to sit for a while. Can be prepared a day in advance, but add avocado right before serving to prevent browning.
- Prep Time: 15 minutes
- Cook Time: 0 minutes
- Category: Appetizer
- Method: Mixing
- Cuisine: American
Nutrition
- Serving Size: 1 serving
- Calories: 250
- Sugar: 6g
- Sodium: 350mg
- Fat: 12g
- Saturated Fat: 2g
- Unsaturated Fat: 8g
- Trans Fat: 0g
- Carbohydrates: 35g
- Fiber: 9g
- Protein: 8g
- Cholesterol: 0mg
Keywords: cowboy caviar, dip, zesty, appetizer, party food, fresh vegetables, beans
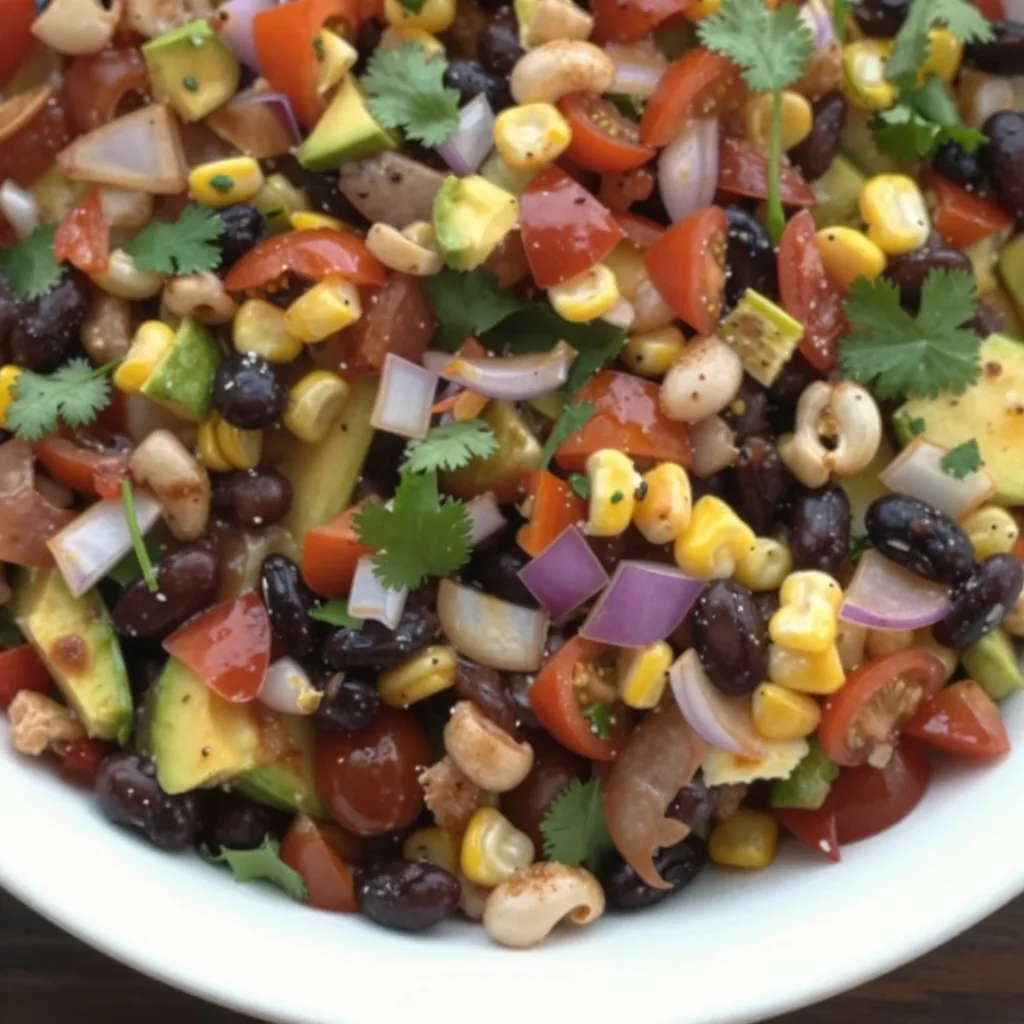
Cowboy Caviar
Cowboy Caviar: A Flavorful Dance of Ingredients
Welcome to my kitchen, my fellow flavor enthusiasts! Today, I’m thrilled to share a recipe that combines all the goodness of vibrant vegetables, zesty flavors, and a hint of that down-home charm we all love. Who knew that a simple dip could evoke such joy and satisfaction? Enter Cowboy Caviar, a dish that’s not only delicious but also perfect for every gathering, from cozy family dinners to festive summer barbecues.
Cowboy Caviar has become one of those staples in many homes, reminding us that food is an experience best shared. It’s simple, colorful, and packed with fresh ingredients that make your taste buds do a happy dance! Plus, making it is like throwing a mini fiesta right in your kitchen. Seriously, if you’ve never tried it before, get ready to fall head over heels.
In this post, I’ll guide you through how to whip up a fantastic batch of Cowboy Caviar, along with some fun personal anecdotes from my kitchen adventures. Let’s dive in and turn this simple gathering staple into something truly unforgettable.
A Nibble of Nostalgia: My Cowboy Caviar Journey
Let me take you back to a warm summer evening a few years ago. I was invited to my friend Lisa’s backyard barbecue, the kind where laughter wafts through the air like a sweet perfume and delicious smells tempt the senses. As guests mingled, the table was adorned with vibrant dishes, but it was Lisa’s Cowboy Caviar that stole the show.
I’ll never forget that first bite. The freshness of the black beans, the crunch of the bell peppers, and the zesty pop from the lime juice transported me to a sunny Texan ranch—complete with a fiddle playing in the background! It ignited something within me, a yearning to recreate that joyous moment in my own kitchen. And so, I did! This recipe is a tribute to the laughter, warmth, and connection that come from sharing good food. Cowboy Caviar not only fills your belly but also fills your heart, creating memories that linger long after the last scoop is gone.
Ingredients You’ll Need
Here’s what you’ll need to make this colorful Cowboy Caviar. Each ingredient adds its own unique flair and flavor, so let’s explore them together!
-
1 can black beans, drained and rinsed
- These protein-packed legumes are the backbone of your dish. If you’re looking for a different flavor profile, feel free to swap in pinto beans or chickpeas.
-
1 can corn, drained
- Sweet and crunchy, corn adds a delightful texture. You can use fresh corn if you’re in season—just grill or boil it briefly before adding.
-
1 red bell pepper, diced
- This adds a sweet crunch! You can substitute it with any color bell pepper or even diced zucchini for something a little different.
-
1 green bell pepper, diced
- A bit of extra crunch and slight bitterness to balance the sweet corn. Yellow or orange bell peppers work beautifully as substitutes, too!
-
1 medium red onion, finely chopped
- This brings a sharp bite that enhances the overall flavor. If red onion is too strong for you, a sweet onion or green onions can provide a milder alternative.
-
2 ripe avocados, diced
- Creamy and luxurious, they bind the ingredients beautifully. Be sure to use them right before serving to prevent browning, or substitute with diced mango for a fruity kick.
-
1/4 cup fresh cilantro, chopped
- A burst of freshness! If cilantro isn’t your thing, you can try parsley or just omit it.
-
2-3 medium tomatoes, diced
- Juicy and vibrant, they add that classic summery flavor. Feel free to swap with cherry tomatoes, as they tend to be sweeter!
-
Juice of 2 limes
- The zesty magic that brings all these flavors together. If you’re in a pinch, lemon juice can work too!
-
2 teaspoons chili powder
- For a robust spice kick. Go easy or crank it up! You can also use taco seasoning or smoked paprika for a smokier flavor.
-
1/2 teaspoon salt
- Always essential for enhancing those flavors! Adjust to taste based on your preferences or dietary needs.
-
1/4 teaspoon black pepper
- Adds a warm, earthly depth to your dish. You can also use cayenne for a bit more fire!
These ingredients create a medley of textures and flavors that sing summer in every bite. Now that we have our colorful cast ready, let’s dive into the exciting part!
Step-by-Step Instructions
-
Prep Your Ingredients
- First things first, grab all those fresh veggies and give them a good rinse. While you’re at it, dice your bell peppers, red onion, and tomatoes—and don’t forget to chop that cilantro! A sharp knife will be your best friend here, ensuring clean cuts and a beautiful presentation.
-
Combine the Beans and Corn in a Bowl
- In a large mixing bowl, toss together the rinsed black beans and drained corn. These two are the heartbeats of your Cowboy Caviar. If you want to experiment (and who wouldn’t?), this is a great time to season the beans with a pinch of salt and pepper for an amplified flavor.
-
Add the Chopped Veggies
- Next, toss in the diced bell peppers, onion, tomatoes, and cilantro. The colors should dance together beautifully! The key here is to mix gently, ensuring that you don’t mush the beans while distributing the vegetables evenly.
-
Incorporate the Avocados
- Time for that creamy goodness! Add the diced avocados last to avoid them getting mushy. Gently fold everything together so that each piece gets a little hug from the other flavors. Trust me, this step will make your Cowboy Caviar beautifully colorful.
-
Mix the Dressing
- In a small bowl, whisk together the lime juice, chili powder, salt, and black pepper. This dressing is where the zesty magic happens! Pour it over your salad and toss gently again, just until everything is coated and happy. Taste and adjust the seasonings as you like; don’t be afraid to add an extra squeeze of lime if you crave more tang.
-
Chill and Marinate
- If you have the time (and I recommend it!), cover the bowl with plastic wrap and pop it in the refrigerator for about 30-60 minutes. This allows the flavors to marry beautifully, creating that delicious harmony we’re all after.
-
Serve and Enjoy
- Once ready, scoop your Cowboy Caviar into a serving bowl. Pair it with crispy tortilla chips, crunchy vegetables, or even atop grilled chicken for a full meal. Dive in with friends, reminisce about those summer barbecues, and enjoy every bite!
Serving Suggestions
When it comes to serving Cowboy Caviar, think about vibrant colors and lovely textures. I recommend using a large, colorful bowl to let your creation shine. Use fresh, crunchy tortilla chips for scooping, or serve it with sliced cucumber, carrot sticks, or bell pepper strips for a healthier twist. If you want to level up your presentation even more, garnish with extra cilantro or lime wedges for those all-important pops of color!
Recipe Variations
- Spicy Kick: Add diced jalapeño or a dash of hot sauce for a fiery punch!
- Tropical Bliss: Swap in diced mango or pineapple for a fruity twist that takes your Cowboy Caviar to vacation-land.
- Southwestern Style: Toss in some grilled corn off the cob and add diced jalapeños for a smoky flavor.
- Quinoa Upgrade: Add cooked quinoa for added protein and fiber, making it more of a meal.
- Dairy Delight: Crumble queso fresco or feta on top just before serving for a creamy finish.
Chef’s Notes
Growing up, my family often held spontaneous gatherings, where the kitchen became a hub of laughter and shared stories. I remember once making Cowboy Caviar on a whim for a last-minute get-together. I had no idea how much everyone would love it! It has since evolved from a simple dip into a staple at every family and friend gathering. Each time I prepare it, I think about those moments. Cooking is an art, and our palettes can be a beautiful canvas for those cherished memories.
FAQs and Troubleshooting
1. What if my Cowboy Caviar is too acidic?
- If you find it too tart from the lime, balance the flavor by adding a bit of honey or agave syrup. Just a touch will do the trick!
2. Can I make it ahead of time?
- Absolutely! But I recommend adding the avocado right before serving to prevent browning. If you’ve made it without adding avocado, feel free to store it in the refrigerator for 2-3 days.
3. How can I keep my avocados from browning?
- If you’re preparing the Cowboy Caviar in advance, squeeze some extra lemon or lime juice over the avocado pieces, then cover tightly with plastic wrap to minimize air exposure.
4. I don’t have fresh cilantro. What can I use instead?
- If cilantro isn’t your thing, you can either omit it entirely or substitute with parsley, which adds a nice freshness without the distinct cilantro flavor.
Nutritional Info
While not extensively detailed, this Cowboy Caviar is a healthy choice, being rich in fiber, vitamins, and minerals. It’s low in calories while being high in protein and packed with nutrients from all the fresh vegetables, making it a delightful addition to any meal!
Now that you have your Cowboy Caviar recipe, I hope you take the time to gather your loved ones and enjoy this delightful creation together. Cooking is more than just following steps—it’s about bringing joy, sharing stories, and creating lasting memories. Happy cooking, and let that deliciousness roll!
Print
Cowboy Caviar
- Total Time: 15 minutes
- Yield: 4 servings 1x
- Diet: Vegan
Description
A colorful and flavorful dip combining vibrant vegetables, black beans, and zesty lime, perfect for any gathering.
Ingredients
- 1 can black beans, drained and rinsed
- 1 can corn, drained
- 1 red bell pepper, diced
- 1 green bell pepper, diced
- 1 medium red onion, finely chopped
- 2 ripe avocados, diced
- 1/4 cup fresh cilantro, chopped
- 2–3 medium tomatoes, diced
- Juice of 2 limes
- 2 teaspoons chili powder
- 1/2 teaspoon salt
- 1/4 teaspoon black pepper
Instructions
- Prep your ingredients: rinse and dice the veggies.
- Combine the beans and corn in a large bowl.
- Add the chopped veggies, mixing gently.
- Incorporate the avocados delicately.
- Mix the dressing in a small bowl and pour over the mixture.
- Chill in the refrigerator for 30-60 minutes.
- Serve with tortilla chips or fresh veggies.
Notes
Best enjoyed fresh, but can be made ahead. Add avocado before serving to prevent browning.
- Prep Time: 15 minutes
- Cook Time: 0 minutes
- Category: Appetizer
- Method: Mixing
- Cuisine: Mexican
Nutrition
- Serving Size: 1 serving
- Calories: 200
- Sugar: 4g
- Sodium: 300mg
- Fat: 9g
- Saturated Fat: 1g
- Unsaturated Fat: 8g
- Trans Fat: 0g
- Carbohydrates: 27g
- Fiber: 8g
- Protein: 6g
- Cholesterol: 0mg
Keywords: cowboy caviar, dip, healthy appetizer, summery dish
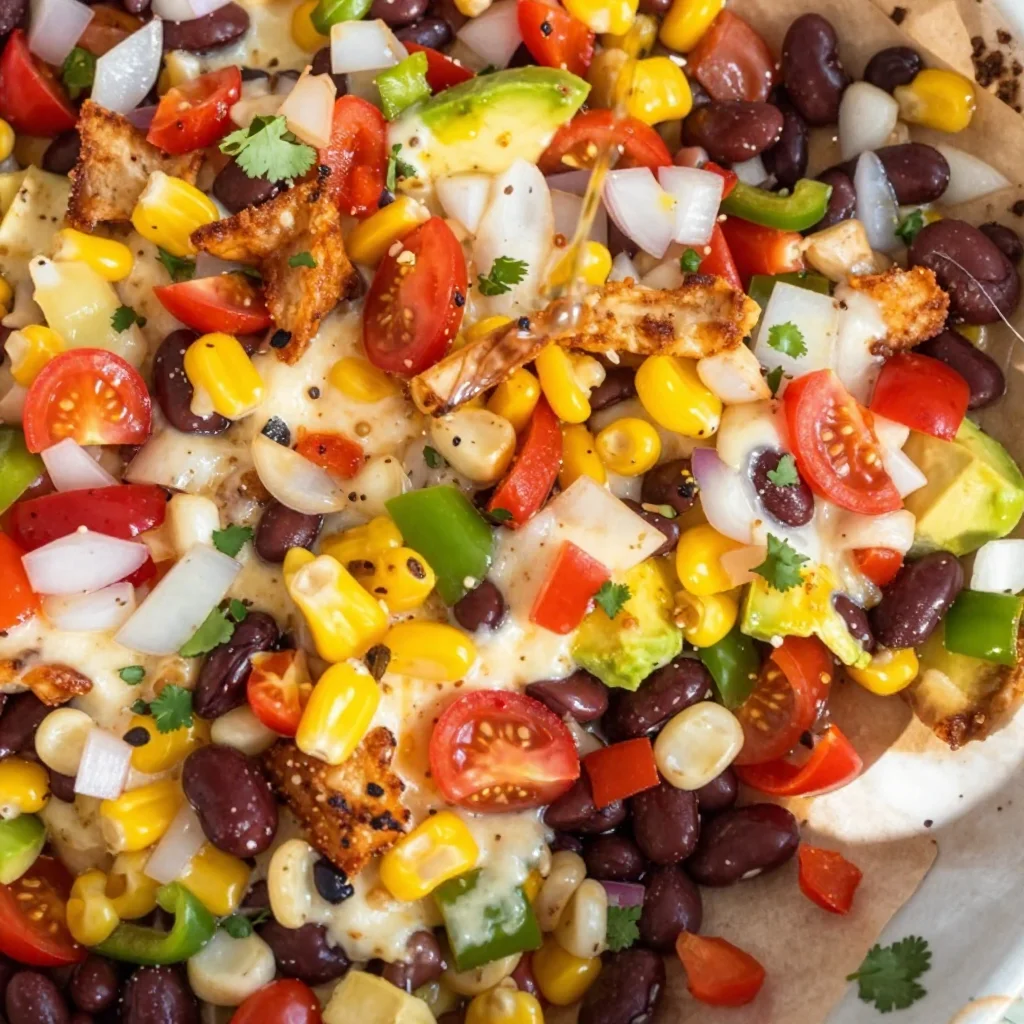
Cowboy Caviar
Cowboy Caviar: A Flavorful Fiesta in a Bowl!
Welcome to my kitchen, food lovers! Today, we’re diving into a vibrant and zesty dish that embodies everything I adore about cooking: it’s simple, colorful, and packed with flavor! Yes, we’re making Cowboy Caviar — the perfect party dip or side dish that shines with fresh ingredients and a little bit of Texas charm.
If you’ve ever been to a gathering where this dish has made an appearance, you know exactly how it feels to be drawn to it, mesmerized by the mix of vibrant ingredients. Imagine creamy avocados, succulent black beans, sweet corn, and a zesty dressing that makes your taste buds dance. You can serve it with tortilla chips, as a salad topping, or simply eat it by the spoonful (no judgment here; we’ve all been there!).
A Taste of Nostalgia
The first time I made Cowboy Caviar was during a summer barbecue at my best friend’s house. It was one of those unforgettable days where laughter filled the air, and the sun brought out the best of us. I remember watching her whip up this colorful concoction in a huge mixing bowl, tossing everything together as if it were the most magical spell.
After she served it, I saw everyone flock to the table, grabbing chips and scooping up the deliciousness without a second thought. The vibrant colors and fresh flavors created a joyful buzz, and I knew I had to recreate that moment in my own kitchen. It became a staple for my gatherings and family dinners—and I guarantee it will become a favorite for you, too!
Ingredients You’ll Need
Now, let’s gather our ingredients! Here’s what you’ll need to create your very own Cowboy Caviar:
-
Black Beans: The star of the show! They add protein and stay firm when mixed. If you’re short on time, canned beans work wonderfully—just rinse them to remove excess sodium.
-
Corn: Sweet corn brings a delightful crunch. You can use fresh, frozen, or canned corn—whatever you have on hand! If using canned, just drain and rinse it first.
-
Red Bell Pepper: For a pop of color and sweetness. Green bell peppers work if you prefer, but I love the sweetness of red.
-
Tomatoes: Diced fresh tomatoes add juiciness. Any tomatoes will do, but Roma or cherry tomatoes have fewer seeds and offer great flavor.
-
Red Onion: Adds a mild, sharp bite. Soaking chopped onion in water for 10 minutes can reduce its bite if you prefer milder flavors.
-
Avocado: Creamy goodness that ties everything together. Serve immediately after slicing, or toss with lime juice to prevent browning.
-
Cilantro: Provides freshness and depth. If you’re one of those who aren’t a fan of cilantro, you can substitute with parsley or simply omit it.
-
Lime Juice: Brightens everything up! Fresh lime juice is best, but bottled will do in a pinch.
-
Olive Oil: For richness and a little extra flavor. Feel free to swap it out for avocado oil or a flavored oil for a different twist.
-
Jalapeño: Adds a touch of heat. Adjust according to your spice preference. You can remove the seeds for a milder flavor!
-
Salt and Pepper: Essential for flavoring. Always taste as you go and adjust to your liking!
Step-by-Step Instructions
Ready to get cooking? Here’s how to whip up this mouthwatering Cowboy Caviar step by step!
-
Preparation is Key: Start by gathering all your ingredients together. Pro tip: chopping everything in advance makes the process smoother and more enjoyable!
-
Chop and Dice: Dice the red bell pepper, tomatoes, red onion, and jalapeño (if using). The size is up to you, but aim for bite-sized pieces so everything blends beautifully. A chef’s knife will save time and keep your cuts clean!
-
Rinse and Drain: Rinse the black beans in a colander to wash away any canned flavor and excess sodium. If you’re using canned corn, repeat this step.
-
Mix It Up: In a large mixing bowl, combine the black beans, corn, diced bell pepper, tomatoes, red onion, cilantro, and jalapeño. It’s like a colorful party in your bowl!
-
Prepare the Dressing: In a separate small bowl, whisk together the lime juice, olive oil, salt, and pepper. If you want a kick, add a pinch of cumin or a dash of hot sauce.
-
Combine Ingredients: Pour the dressing over the vegetable mixture and toss gently until everything is well-coated. Be careful not to mash the avocado if you added it at this stage!
-
Taste and Adjust: Take a moment to taste your Cowboy Caviar. Does it need more salt or lime juice? Adjust to your liking—this is your creation!
-
Chill: Let the dip sit for about 30 minutes in the fridge. This allows the flavors to meld beautifully. It will taste even better after some time!
-
Serve: Grab your favorite tortilla chips or serve it as a side to grilled meats or fish. You’ll be the star of the show!
Serving Suggestions
When it comes to serving your Cowboy Caviar, the options are endless! You can serve it in a fun, rustic bowl with a side of crispy tortilla chips for dipping. Alternatively, spoon it over grilled chicken or fish for a fresh, colorful dinner. If you want to get fancy, layer it in a glass jar to create a beautiful presentation, perfect for parties or potlucks!
Recipe Variations
Feel free to get creative! Here are some fun variations for your Cowboy Caviar:
-
Tropical Twist: Add diced mango or pineapple for a sweet, fruity version that brings a taste of the tropics.
-
Grain-Loaded: Add cooked quinoa or rice to make it a heartier dish—perfect for meal prep!
-
Southwestern Flair: Toss in some diced avocado and a sprinkle of smoked paprika for a smoky depth.
-
Vegan Delight: It’s already vegan, but you can amp it up with nutritional yeast for a cheesy flavor without dairy.
Chef’s Notes
Cowboy Caviar is one of those dishes that feels like a hug in a bowl. I remember the first time I made it for my family picnic; the kids couldn’t get enough, and my cousin asked for the recipe to impress his friends. It’s moments like these that remind me of what cooking is all about—creating memories through food.
Over the years, my recipe has adapted based on what’s in season and what I have on hand. If you have leftover ingredients in the fridge, don’t hesitate to toss them in! That’s the beauty of this dish; it’s wonderfully forgiving and celebrated for its versatility.
FAQs and Troubleshooting
1. Can I make Cowboy Caviar ahead of time?
Absolutely! It’s often better the next day once the flavors have had time to marry. Just add the avocado right before serving to keep it fresh.
2. It’s too salty! What can I do?
If you find your dish too salty, try adding a little more lime juice or fresh veggies to dilute the saltiness.
3. How can I prevent my avocado from browning?
You can gently toss the diced avocado with lime juice to slow down oxidation. Alternatively, add the avocado just before serving.
4. Can I make it spicier?
You bet! Add more jalapeño, or throw in some diced serrano peppers. You can also add a splash of hot sauce for a kick.
Nutritional Info
Each serving (1/2 cup) of Cowboy Caviar is low in calories, typically around 150-200, depending on the amount of oil and avocado used. Packed with fiber, vitamins, and healthy fats, it’s a guilt-free delight!
So, there you have it! Your new go-to dish has arrived, ready to become a staple in your kitchen. I can’t wait for you to try this Cowboy Caviar and enjoy it as much as I have. Happy cooking, friends!
Print
Cowboy Caviar
- Total Time: 15 minutes
- Yield: 4 servings 1x
- Diet: Vegan
Description
A vibrant and zesty dish that’s perfect as a dip or a side, packed with fresh ingredients like black beans, corn, and avocado.
Ingredients
- 1 can Black Beans, rinsed
- 1 cup Corn, fresh or canned
- 1 Red Bell Pepper, diced
- 2 Tomatoes, diced
- 1/2 Red Onion, diced
- 1 Avocado, diced
- 1/4 cup Cilantro, chopped
- 2 tablespoons Lime Juice
- 2 tablespoons Olive Oil
- 1 Jalapeño, diced (optional)
- Salt and Pepper, to taste
Instructions
- Gather all your ingredients together.
- Dice the red bell pepper, tomatoes, red onion, and jalapeño.
- Rinse the black beans and corn.
- Combine the black beans, corn, diced bell pepper, tomatoes, red onion, cilantro, and jalapeño in a large mixing bowl.
- Whisk together the lime juice, olive oil, salt, and pepper in a separate bowl.
- Pour the dressing over the vegetable mixture and toss gently.
- Taste and adjust seasoning as needed.
- Chill for about 30 minutes in the fridge.
- Serve with tortilla chips or as a side dish.
Notes
Allowing the dip to sit enhances the flavors. Add avocado right before serving to maintain freshness.
- Prep Time: 15 minutes
- Cook Time: 0 minutes
- Category: Appetizer
- Method: No Cook
- Cuisine: Tex-Mex
Nutrition
- Serving Size: 1/2 cup
- Calories: 175
- Sugar: 2g
- Sodium: 250mg
- Fat: 10g
- Saturated Fat: 1.5g
- Unsaturated Fat: 8.5g
- Trans Fat: 0g
- Carbohydrates: 22g
- Fiber: 7g
- Protein: 6g
- Cholesterol: 0mg
Keywords: cowboy caviar, party dip, vegan dip, Tex-Mex, healthy appetizer, easy recipe
Cowboy Caviar
Cowboy Caviar: A Flavorful Journey to the Heart of the Southwest
Welcome to my kitchen! Today, we’re diving into a vibrant dish that’s as colorful as a Texas sunset: Cowboy Caviar. Imagine a medley of fresh ingredients coming together in a joyful celebration of flavor, bringing a taste of the Southwest right into your home. This dish is packed with black beans, corn, tomatoes, and peppers, all tossed in a zesty lime vinaigrette, creating a party in your mouth with every single bite. Perfect as a dip, salad, or side dish, cowboy caviar has earned its place as a staple in my kitchen, and I can’t wait to share it with you!
Cowboy caviar isn’t just a recipe; it’s a metaphor for gathering and community. It reminds me of family barbecues and summer picnics, where laughter flows as freely as the drinks. I first stumbled upon this delightful dish at a friend’s get-together years ago. My good friend Carla whipped up a massive bowl of her version, and as I took my first scoop with a tortilla chip, a burst of flavors—sweet, spicy, tangy—exploded in my mouth. It was a revelation! I immediately asked for the recipe, ready to bring my own twist to the dish. These gatherings soon became a summer ritual for us, where we’d experiment with different ingredients and share stories around the table.
It’s this spirit of sharing that inspires me to introduce you to cowboy caviar. Whether you’re hosting a casual barbecue, planning game day snacks, or simply looking for a fresh and nutritious addition to your fridge, this recipe is sure to become a beloved part of your culinary repertoire. Now, let’s roll up our sleeves and get cooking!
Personal Story
I still remember that golden summer afternoon when Carla first introduced me to cowboy caviar. The sun was shining, the kids were running wild, and the air was filled with the delicious aroma of grilling burgers and smoky barbecue. As I dipped my chip into that glorious bowl of cowboy caviar, I felt that comforting warmth of friendship and the joy of food bringing people together. Each crunchy note of bell pepper mixed with the pop of fresh corn and the creaminess of the avocado took me straight to flavor paradise.
Fast forward to today, this dish feels like a warm hug whenever I make it. Whether I’m prepping for a casual family dinner or hosting friends for a festive gathering, cowboy caviar is my go-to crowd-pleaser. The best part? It’s a dish that transcends seasons and occasions. I’ve made it for everything from summer cookouts to cozy fall gatherings, always receiving compliments and requests for the recipe. Now, it’s your turn to create unforgettable memories around this delightful dish!
Ingredients
Here’s what you’ll need to whip up your very own cowboy caviar! Each ingredient adds a unique texture or flavor, and I’ll share some insights along the way:
-
1 can (15 oz) black beans: Rinsed and drained. Black beans are packed with protein and fiber. Feel free to substitute with pinto beans if you prefer a different texture.
-
1 can (15 oz) corn: Rinsed and drained. Whether you use canned sweet corn or frozen corn (thawed), both work wonderfully here!
-
1 cup cherry tomatoes: Halved for sweetness. You can use diced Roma tomatoes in a pinch. Just make sure to remove excess moisture!
-
1 bell pepper (red, yellow, or green): Diced. Choose a color you love! They all bring nice crunch, but red or yellow will add extra sweetness.
-
1 small red onion: Diced finely. If raw onion’s a bit much for you, soak it in cold water for a few minutes before adding to tone down the bite.
-
1 avocado: Diced. For creaminess and healthy fats! If you’re prepping ahead of time, toss it with a bit of lime juice to prevent browning.
-
1-2 jalapeños: Diced, seeds removed (optional). Adjust the heat level to your liking—more seeds mean more spice!
-
1/4 cup cilantro: Chopped. A fresh herb that adds brightness. If cilantro isn’t your thing, try fresh parsley or basil instead.
-
Juice of 2 limes: For tang and zest! Lime juice gives a refreshing kick. You can swap lemon juice if necessary.
-
2 tbsp olive oil: For richness. Feel free to replace it with avocado oil for a different flavor profile!
-
Salt and pepper: To taste. Always start small; you can adjust as you go!
Step-by-Step Instructions
Let’s make this cowboy caviar step by step! Trust me; it’s as easy as it is delicious.
-
Prepare your ingredients: Start by rinsing and draining your black beans and corn. This step is crucial as it keeps the dish from becoming watery. Chop your tomatoes, bell pepper, avocado, and onion to your desired sizes. Pro tip: using a sharp knife makes this process smoother!
-
Mix the veggies: In a large mixing bowl, combine the black beans, corn, tomatoes, bell pepper, red onion, jalapeños, and cilantro. This is where the colors really pop! Mix them gently—nobody wants to mush the avocado.
-
Make the dressing: In a small bowl, whisk together the lime juice, olive oil, salt, and pepper until nicely blended. This mixture brings all your ingredients together, enhancing their natural flavors. Give it a little taste—don’t be shy!
-
Combine everything: Pour your dressing over the veggie mixture and toss gently to combine. Take a moment here to admire how pretty it looks—isn’t it inviting? Let that mixture rest for about 15-20 minutes. This gives it some time to marinate, letting all the flavors mingle, a step you really don’t want to skip!
-
Serve and enjoy: Give it a final stir, adjust any seasonings if necessary, and serve immediately. You can present your cowboy caviar with your favorite tortilla chips, or even as a topping for grilled chicken or fish!
Serving Suggestions
When it comes to plating, keep it casual and fun! Serve cowboy caviar in your favorite bowl or dish and set it right in the center of the table, encouraging guests to dig in with colorful tortilla chips. You can also elevate your presentation by adding a lime wedge or sprig of cilantro for a pop of freshness.
For a heartier meal, consider serving it over a bed of quinoa or alongside grilled meats. The possibilities are endless!
Recipe Variations
Spice things up by trying one of these creative twists:
-
Tropical Cowboy Caviar: Add diced mango or pineapple for a sweet and savory flavor explosion.
-
Mediterranean Twist: Swap black beans for chickpeas and add crumbled feta for a fresh take on this dish.
-
Vegan Option: Leave out the avocado for a lighter version, or add nut-based cheese for creaminess.
-
Spicy Garlic Cowboy Caviar: Mix in minced garlic or a touch of your favorite hot sauce to intensify the heat!
-
Southwestern Flavor Bomb: Toss in diced grilled corn and a pinch of smoked paprika for that extra kick!
Chef’s Notes
Cowboy caviar has evolved in my kitchen over the years. Originally, I followed the traditional recipe, but with time and experimentation, I found so many fun ways to tweak it to my taste. Each version is simply a reflection of the flavors I’m craving or the season’s produce. I often find myself revisiting it after a long day, excited to whip up a batch for dinner or as a last-minute snack for unexpected guests.
And let me share a funny moment from a recent gathering! I forgot to add the avocado during our cookout, and while I was scrambling to get it in, my friend jokingly started calling it “cowboy caviar minus the magic.” Well, the guests loved it just the same, proving that great flavors come from the heart, not just the ingredients!
FAQs and Troubleshooting
Here are a few common questions you might have while making cowboy caviar:
-
Can I make it ahead of time?
Absolutely! However, it’s best to add the avocado just before serving to keep it fresh and vibrant. If prepared in advance, store it in the fridge for up to 3 days without the avocado. -
Can I reduce the spice level?
Of course! Simply omit the jalapeños or use a milder pepper, adjusting to your preference as you go. -
What if it becomes too watery?
If you notice excess liquid at the bottom of your bowl, you can strain the mixture before serving. Always be mindful to drain your beans and corn well. -
How can I store leftovers?
Store any leftovers in an airtight container in the refrigerator for 2-3 days. Just know that the avocado may brown a bit, but the flavors will still be delicious!
Nutritional Info
Cowboy caviar is not only bursting with flavor, but it’s also a nutritious option! Here’s a quick breakdown per serving (approx. 1/2 cup):
- Calories: 120
- Protein: 5g
- Carbohydrates: 20g
- Fiber: 7g
- Fat: 4g (from avocado and olive oil)
Cowboy caviar is a dish that not only celebrates the flavors of the Southwest but also fosters connections and creates lasting memories. So, grab your ingredients and toss together this delightful dish. I can’t wait to hear how it brings joy to your table just like it has to mine! Happy cooking, friends!
Print
Cowboy Caviar
- Total Time: 15 minutes
- Yield: 4 servings 1x
- Diet: Vegetarian
Description
A vibrant and flavorful dish from the Southwest, loaded with black beans, corn, tomatoes, and peppers, tossed in a zesty lime vinaigrette.
Ingredients
- 1 can (15 oz) black beans, rinsed and drained
- 1 can (15 oz) corn, rinsed and drained
- 1 cup cherry tomatoes, halved
- 1 bell pepper (red, yellow, or green), diced
- 1 small red onion, diced finely
- 1 avocado, diced
- 1–2 jalapeños, diced, seeds removed (optional)
- 1/4 cup cilantro, chopped
- Juice of 2 limes
- 2 tbsp olive oil
- Salt and pepper, to taste
Instructions
- Prepare your ingredients: Start by rinsing and draining your black beans and corn. Chop your tomatoes, bell pepper, avocado, and onion to your desired sizes.
- Mix the veggies: In a large mixing bowl, combine the black beans, corn, tomatoes, bell pepper, red onion, jalapeños, and cilantro.
- Make the dressing: In a small bowl, whisk together the lime juice, olive oil, salt, and pepper until nicely blended.
- Combine everything: Pour your dressing over the veggie mixture and toss gently to combine. Let it rest for about 15-20 minutes.
- Serve and enjoy: Give it a final stir, adjust any seasonings if necessary, and serve immediately with tortilla chips or as a topping for grilled chicken or fish!
Notes
For best results, add the avocado just before serving to keep it fresh. You can store leftovers in an airtight container for 2-3 days.
- Prep Time: 15 minutes
- Cook Time: 0 minutes
- Category: Appetizer
- Method: Mixing
- Cuisine: Southwestern
Nutrition
- Serving Size: 1 serving
- Calories: 120
- Sugar: 3g
- Sodium: 180mg
- Fat: 4g
- Saturated Fat: 1g
- Unsaturated Fat: 3g
- Trans Fat: 0g
- Carbohydrates: 20g
- Fiber: 7g
- Protein: 5g
- Cholesterol: 0mg
Keywords: Cowboy Caviar, Southwestern Dip, Healthy Appetizer, Vegetarian Salad
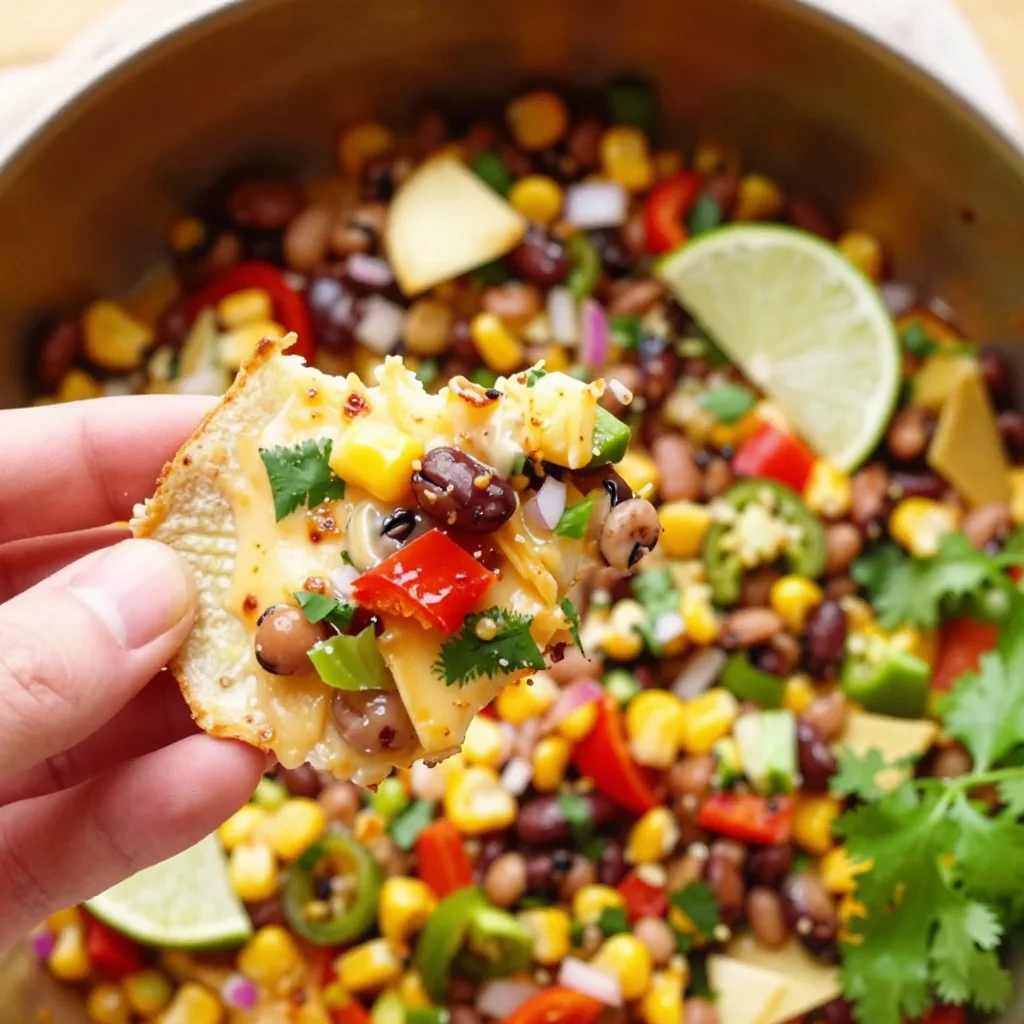
Texas Caviar
Texas Caviar: A Flavorful Dip with a Side of Southern Charm
Welcome to my kitchen, friends! Today, I’m excited to share a dish that captures the heart and soul of Texas — a vibrant, zesty creation known as Texas Caviar. If you’ve never tried this dish before, get ready for a treat! This isn’t your average dip; it’s a colorful blend of black-eyed peas, beans, and a medley of fresh vegetables, all tossed together in a tangy dressing that will leave your taste buds dancing.
You might be wondering, “What’s the story behind Texas Caviar?” Well, it all started in the 1940s in Texas (of course!). The dish was created to offer a fancy alternative to traditional caviar, using humble, everyday ingredients. Over time, Texas Caviar evolved from a simple side dish to a beloved staple at parties, potlucks, and summer cookouts. I love that it embodies the spirit of bringing people together, whether you’re enjoying it with tortilla chips on a sunny patio or serving it as a side to a backyard barbecue.
As we dive into this recipe, I want you to envision the vibrant colors of fresh veggies and the exhilarating aroma of spices wafting through your kitchen. Whether you’re making Texas Caviar for a casual afternoon snack or a special gathering with loved ones, it’s easy to whip up and always a crowd-pleaser. So without further ado, let’s grab our aprons and create a dish that’s as delightful as a Texas sunset!
A Taste of Nostalgia
One of my fondest memories associated with Texas Caviar dates back to my college days. My roommate, a proud Texan, would host Friday night gatherings where we would invite friends over to unwind after a long week of classes. She would always whip up a giant bowl of Texas Caviar, positioning it as the star of the show. The vibrant colors of the dish were captivating, and as soon as I took the first bite, I was hooked.
Each scoop was an explosion of flavors — the crunch of fresh peppers, the creaminess of avocado, and that tantalizing tang from lime juice. What I remember most is how it brought everyone together. We’d sit around our tiny kitchen table, laughter echoing off the walls, sharing stories while happily munching away on this tasty dip. That memory is forever etched in my mind, and since then, I’ve brought Texas Caviar to all my gatherings, passing down the tradition of good food and great company.
Ingredients
Here’s what you’ll need to make your own Texas Caviar:
-
1 can black-eyed peas: These little legumes are the backbone of the dish, packed with protein and flavor. If you can’t find canned black-eyed peas, you can use fresh or frozen ones. Just make sure they’re cooked and cooled before adding!
-
1 can black beans: Adds depth and richness. If you’re looking for a nutritional boost, consider using chickpeas instead!
-
1 cup corn: Fresh, frozen, or canned; corn adds sweetness and a lovely crunch. Don’t forget to drain and rinse canned corn to avoid extra sodium.
-
1 cup diced bell peppers (red, green, or yellow): These add color and crunch! Feel free to mix and match the colors for visual appeal.
-
1 cup diced tomatoes: Use fresh tomatoes for a summer vibe or canned diced tomatoes in a pinch. For a twist, try substituting sun-dried tomatoes for an extra kick!
-
1 small red onion, finely chopped: This brings a savory, bold flavor to the dish. If raw onion’s too strong for your taste, soak it in cold water for a few minutes to mellow it out.
-
1 avocado, diced: The star of the show for some! Its creaminess balances the crunch and tanginess of the other ingredients. If you’re looking for a lower-fat option, simply omit it.
-
1/4 cup fresh cilantro, chopped: For that fresh, herbal note! If you’re not a fan of cilantro, fresh parsley is a great substitute.
-
Juice of 2 limes: This crucial ingredient adds brightness and acidity. If you’re out of limes, lemon juice works well too.
-
1-2 jalapeños, finely chopped: This adds a lovely heat to the dish. Adjust to your spice tolerance! For a milder version, remove the seeds and membranes before chopping.
-
1/4 cup olive oil: Helps bring all the flavors together. For an extra zing, try infused oils like chili or garlic.
-
Salt and pepper to taste: A simple yet essential seasoning to elevate all the flavors!
Step-by-Step Instructions
Ready to bring this dish to life? Let’s get started!
-
Rinse and Drain the Beans: Open the cans of black-eyed peas and black beans. Rinse them well under cold water and drain. This step helps reduce sodium and keeps the dish from being too soggy-freshness is key!
-
Prepare the Veggies: While the beans drain, chop up your bell peppers, tomatoes, onion, jalapeños, and avocado. Aim for a uniform size so everything mixes nicely, and don’t be afraid to get colorful with your veggie choices. They’re the star of the show!
-
Mix It All Together: In a large mixing bowl, combine the drained beans, corn, bell peppers, tomatoes, onion, jalapeños, avocado, and cilantro. Use a spatula or wooden spoon to gently fold everything together. You want this step to be light — remember, you don’t want to mash the avocado!
-
Whisk the Dressing: In a small bowl, whisk together the lime juice, olive oil, and a pinch of salt and pepper. Whisking incorporates air, which helps to emulsify the dressing. Drizzle this over your veggie and bean mixture.
-
Toss, Toss, Toss!: Now for the fun part! Gently toss everything together until the dressing is well-distributed. Taste and adjust seasoning as needed. Want more zest? A dash of extra lime juice or salt can do wonders!
-
Chill: Cover the bowl with plastic wrap and let it sit in the fridge for at least 30 minutes. This resting time allows the flavors to meld beautifully. It’s tempting to dig in right away, but I promise the wait is worth it!
-
Serve It Up: After chilling, give it another light toss and serve with your favorite tortilla chips. I love using blue corn chips for a bit of extra flair, but any chip will do!
Serving Suggestions
Texas Caviar is incredibly versatile. You can serve it as a dip with crunchy tortilla chips or alongside grilled meats as a refreshing side. For something a little more fun, spoon it over soft tacos or use it to top a baked potato for a hearty, flavorful twist. Garnish with extra cilantro or lime wedges for that final touch of freshness!
Recipe Variations
Now, let’s shake things up a bit! Here are a few creative twists you can try with your Texas Caviar:
-
Add Fruits: For a sweet contrast, toss in some diced mango or pineapple. This pairs wonderfully with the heat of the jalapeños.
-
Go Vegan: Omit the avocado or try nutritional yeast for a creamy taste without dairy.
-
Zesty Pickle Relish: For a tangy twist, mix in a spoonful of pickle relish or chopped pickles. The extra zing is mouthwatering!
-
Smoky Touch: Add a dash of smoked paprika for a bit of smoky flavor that enhances the beans and corn beautifully.
-
Chipotle Kick: For even more heat, blend in a small amount of chipotle sauce or minced chipotle peppers. Your taste buds will thank you!
Chef’s Notes
Making Texas Caviar brings back the nostalgic feeling of gathering with friends. I’ll never forget one particular gathering where my friend accidentally added way too much jalapeño — we all took a bite and instantly burst into laughter! It sparked a friendly competition for the spiciest recipe version, and the stories from that night remain treasured.
Over the years, I’ve tweaked this recipe a bit — adding more citrus for brightness and swapping in seasonal veggies as they come into play. Remember, cooking is about experimenting and making the dish your own, so feel free to get creative!
FAQs and Troubleshooting
Q: How long will Texas Caviar keep?
A: If stored in an airtight container in the fridge, it can last about 3-5 days. Just keep in mind that the avocado may brown, so add it fresh if you can.
Q: Can I make Texas Caviar ahead of time?
A: Absolutely! In fact, it tastes even better after sitting for a while. Just mix everything except the avocado and add it right before serving.
Q: My dip turned out too salty. What can I do?
A: If your caviar is too salty, add a splash of lime juice or some extra diced tomatoes to balance it out.
Q: Can I use different beans?
A: Yes! Feel free to use whatever canned beans you have on hand. Pinto beans or kidney beans are great substitutes, too.
Nutritional Info
While exact nutritional values can vary, here’s a rough estimate for a serving of Texas Caviar (based on approximately 1/2 cup):
- Calories: 130
- Protein: 6g
- Carbohydrates: 22g
- Dietary Fiber: 6g
- Sugars: 2g
- Fat: 4g
Chock-full of plant-based goodness, Texas Caviar is more than just a fun dip; it’s a nutritious meal option that is as good for your heart as it is for your spirit.
So there you have it! Texas Caviar is delightful, versatile, and oh-so-easy to prepare. Whether you’re enjoying it solo or with friends, I can promise this dish will add a tasty splash of color and flavor to your gatherings! Happy cooking, and cheers to good food and great times!
Print
Texas Caviar
- Total Time: 15 minutes
- Yield: 4 servings 1x
- Diet: Vegan
Description
A vibrant and zesty dip made with black-eyed peas, beans, and fresh vegetables, perfect for parties and gatherings.
Ingredients
- 1 can black-eyed peas, rinsed and drained
- 1 can black beans, rinsed and drained
- 1 cup corn, fresh or canned
- 1 cup diced bell peppers (red, green, or yellow)
- 1 cup diced tomatoes
- 1 small red onion, finely chopped
- 1 avocado, diced
- 1/4 cup fresh cilantro, chopped
- Juice of 2 limes
- 1–2 jalapeños, finely chopped
- 1/4 cup olive oil
- Salt and pepper to taste
Instructions
- Rinse and drain the beans.
- Prepare the veggies by chopping bell peppers, tomatoes, onion, jalapeños, and avocado.
- Mix all the ingredients together in a large bowl.
- Whisk the lime juice, olive oil, salt, and pepper in a small bowl.
- Toss the dressing with the veggie mixture.
- Chill for at least 30 minutes in the fridge.
- Serve with tortilla chips.
Notes
Store in an airtight container in the fridge for 3-5 days. Add avocado just before serving to prevent browning.
- Prep Time: 15 minutes
- Cook Time: 0 minutes
- Category: Appetizer
- Method: Mixing
- Cuisine: American
Nutrition
- Serving Size: 1/2 cup
- Calories: 130
- Sugar: 2g
- Sodium: 250mg
- Fat: 4g
- Saturated Fat: 0.5g
- Unsaturated Fat: 3g
- Trans Fat: 0g
- Carbohydrates: 22g
- Fiber: 6g
- Protein: 6g
- Cholesterol: 0mg
Keywords: Texas Caviar, dip, appetizer, vegan, black-eyed peas, beans, vegetables
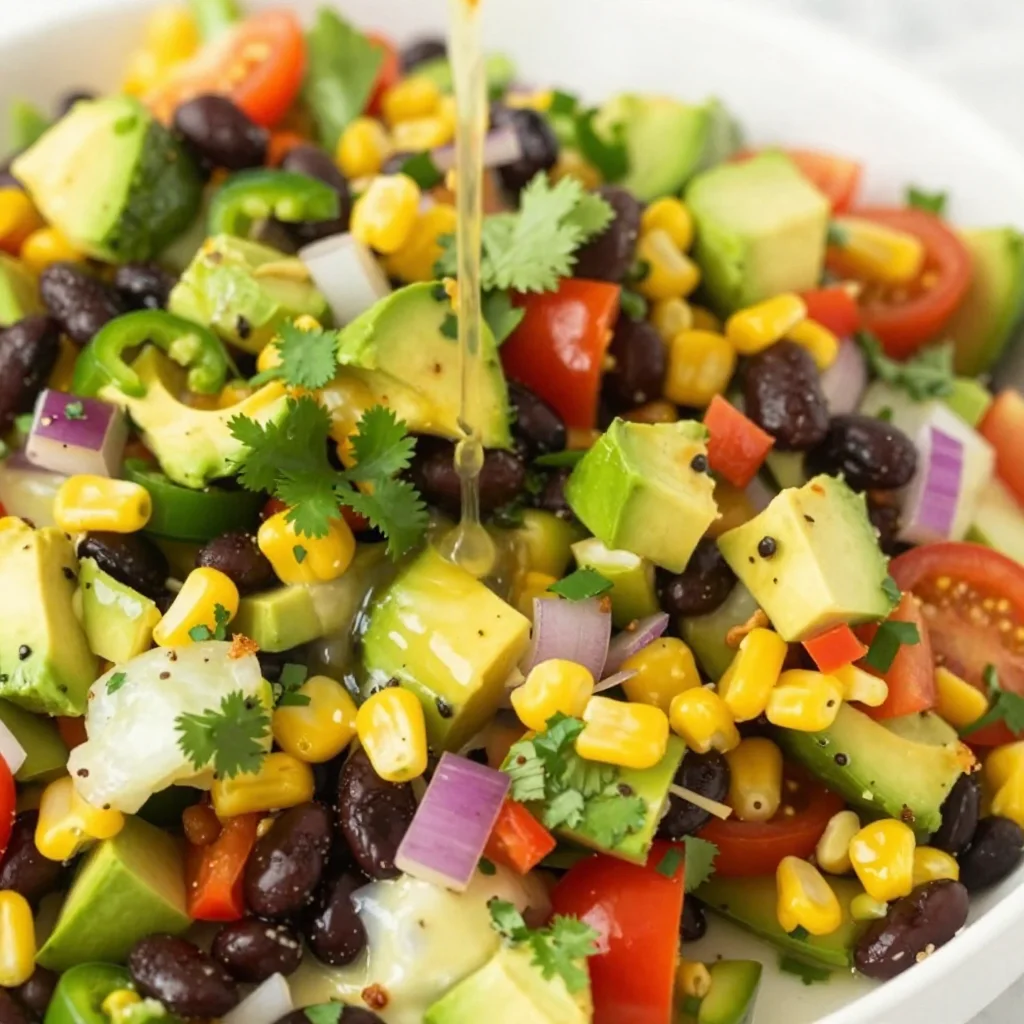
Cowboy Caviar
Cowboy Caviar: A Flavorful Fiesta in a Bowl
Welcome to my kitchen, fellow food enthusiasts! Today, we’re diving into a dish that’s not just a treat for the taste buds but an invitation to gather, laugh, and celebrate the joy of good food. If you’ve never experienced Cowboy Caviar, get ready for a game-changer! This vibrant, colorful dish is packed with flavors, textures, and a whole lot of love, making it perfect for parties, potlucks, or even a cozy night in.
Just imagine this: a warm summer evening, the sun setting, friends gathered around the table, chips in hand, and a big bowl of Cowboy Caviar sitting in the middle, waiting to be devoured. The first crunch of a tortilla chip dipped into that zesty mix of black beans, corn, tomatoes, and spices is pure euphoria. It’s more than just a snack; it’s a celebration!
Cowboy Caviar has its roots in Texas, where it’s often served at gatherings and festivities—like a flavorful little fiesta in a bowl. But it isn’t just Texas pride that makes this dish shine; it’s the way it brings everyone together. The lively colors and fresh ingredients make it not only delicious but also visually stunning. Plus, it’s super easy to whip up, which means more time for chatting and enjoying each other’s company rather than slaving in the kitchen.
So, gather your friends, have your favorite playlist ready, and let’s get cooking! I can’t wait to share this delightful recipe that will undoubtedly make its way into your go-to cooking repertoire.
A Taste of Home: My Cowboy Caviar Memory
Cowboy Caviar holds a special place in my heart, and it’s more than just a beloved recipe—it’s a bridge to cherished memories. One summer weekend, I remember gathering at my Grandma Edna’s house, where each of us would bring a dish for our annual family cookout. Grandma was famous for her dreamy pot roast and homemade pies, but it was her Cowboy Caviar that had everyone lining up.
The moment we walked in, the warmth of the kitchen enveloped us, filled with the sound of laughter and the smell of spices wafting through the air. I still vividly remember Grandma’s infectious laughter as she passed around the bowl, encouraging us to dig in. There’s something magical about the way certain dishes can invoke feelings of nostalgia and comfort, isn’t there? That Cowboy Caviar was a burst of colors and flavors so vibrant that it felt like a party in your mouth!
Years may have passed, but the images of Grandma smiling with her apron on, surrounded by family with chips in hand, remain etched in my memory. It’s those moments that inspire me to recreate this dish. I love sharing it with my friends and my little ones now, making sure they understand just how special food can be in bringing people together.
Ingredients
Here’s what you’ll need to create your own Cowboy Caviar masterpiece. Each of these ingredients contributes something unique, and I’ve included some tips on substitutions and insights to guide you along the way.
-
1 can (15 oz) black beans: Rinsed and drained. Black beans are not only hearty but also packed with protein. You can swap these for pinto beans or chickpeas if you prefer.
-
1 can (15 oz) corn kernels: Rinsed and drained. If you have fresh corn on the cob, feel free to use that as it brings a lovely crunch.
-
1 cup cherry tomatoes: Halved. These little gems add a sweet burst of flavor; grape tomatoes work too if that’s what you have on hand.
-
1 red bell pepper: Diced. Sweet and crunchy, but any color of bell pepper will work, or you could use jalapeños for some heat!
-
1 avocado: Diced. Creamy and luscious, avocados add a nice richness. If you want less fat, you can skip it or use a scoop of Greek yogurt.
-
1/4 red onion: Finely chopped. It gives a great zing! Soak the chopped onion in cold water for 10 minutes to mellow the flavor if you’re sensitive to raw onions.
-
1/4 cup fresh cilantro: Chopped. This herb brings brightness, but if you’re not a fan, parsley makes a good alternative.
-
2 tablespoons olive oil: For richness. A splash of lime or lemon juice can replace some of the oil—and add brightness too!
-
1-2 limes: Juiced. Fresh lime juice is essential for that zesty kick; you can also use lemon if limes are unavailable.
-
1 teaspoon garlic powder: For an extra layer of flavor. If you prefer fresh garlic, one minced clove will do the job!
-
1 teaspoon chili powder: For a touch of heat. You can amp up the spice with smoked paprika or cayenne.
-
Salt and pepper: To taste. Always essential in bringing out the flavors!
Make sure to prep your ingredients before getting started; it makes the cooking process so much smoother.
Step-By-Step Instructions
Ready to bring this dish to life? Grab your ingredients, put on your favorite tunes, and let’s get started!
-
Prep Your Ingredients: Start by rinsing and draining your black beans and corn. Next, chop your tomatoes, bell peppers, onion, and cilantro. Get everything ready to go—this step will make the rest of the cooking process effortless!
-
Mix It Up in a Large Bowl: In a large mixing bowl, combine the black beans, corn, cherry tomatoes, diced bell pepper, avocado, red onion, and cilantro. Just put all those colorful ingredients in there—you might even feel like an artist creating a masterpiece!
-
Prepare the Dressing: In a small bowl, whisk together the olive oil, lime juice, garlic powder, cumin, chili powder, salt, and pepper. This dressing is what brings everything together, so taste it and adjust the seasonings as needed. A little extra lime never hurts!
-
Combine Everything: Pour the dressing over the bean and veggie mixture, tossing everything gently to coat. Avoid mashing the avocado—you want those lovely chunks to shine!
-
Let It Chill: If you have the time, cover your bowl with plastic wrap and let it chill in the fridge for at least 30 minutes. This allows the flavors to mingle and marry, intensifying that Cowboy Caviar goodness. Trust me, it’s worth the wait!
-
Taste Before Serving: Right before serving, take a quick taste test. If it needs more lime, salt, or chili, adjust it now!
-
Serve: Scoop your Cowboy Caviar into a stunning serving bowl, and don’t forget to have a stack of tortilla chips ready for dipping!
Serving Suggestions
This Cowboy Caviar is incredibly versatile when it comes to serving. You can serve it up in a beautiful bowl with a heaping pile of tortilla chips on the side for casual enjoyment. For a more refined presentation, place it in individual cups or small bowls as an appetizer. It also works wonderfully as a topping for grilled fish or chicken, or even spooned onto a bed of greens for a vibrant salad! Don’t forget to garnish with additional cilantro or lime wedges for that extra pop!
Recipe Variations
Feeling creative? Here are some fun variations to put your own spin on this timeless recipe!
-
Spicy Cowboy Caviar: Add diced jalapeños or a dash of hot sauce for an extra kick!
-
Tropical Twist: Mix in some diced mango or pineapple for a sweet surprise.
-
Quinoa Cowboy Caviar: Toss in cooked quinoa for added protein and a heartier texture.
-
Mediterranean Style: Substitute the black beans with chickpeas, add in feta cheese, and a dash of oregano for a Mediterranean flair.
-
Vegan Creaminess: Swap out the avocado for cashew cream to keep it creamy while remaining plant-based.
Chef’s Notes
Cowboy Caviar has evolved over time in my kitchen. I love experimenting with different beans and vegetables based on what’s in season. Sometimes I throw in roasted corn for added sweetness or toss in a few radishes for an extra crunch! Food should always be fun, and cooking is about creating dishes that fit your style and taste.
A little funny story: the first time I made Cowboy Caviar for a BBQ, I was so eager to impress that I accidentally used salt instead of sugar in the dressing. Let’s just say my friends will never let me live that day down! But they loved the new spin, so sometimes even "mistakes" can turn into memorable moments.
FAQs and Troubleshooting
1. Can I make it ahead of time?
Absolutely! Cowboy Caviar tastes even better the next day after sitting in the fridge, so feel free to prep it a day in advance. Just remember to stir gently before serving to redistribute the dressing.
2. How long will it last in the fridge?
If stored in an airtight container, it will last about 3-5 days in the refrigerator. Just keep an eye on the avocado to ensure it doesn’t brown too much!
3. What do I do if it’s too salty?
If you find your Cowboy Caviar has become too salty, adding diced tomatoes or a bit more corn can help balance it out.
4. Can I freeze it?
While it’s not ideal to freeze, you can freeze the bean mixture (without the avocado) for later use. Just let it thaw in the fridge, and add fresh ingredients before serving.
Nutritional Info
(If you’re counting, here’s a brief overview!)
- Serving Size: 1/2 cup
- Calories: Approximately 150-200
- Protein: 6-8g
- Fiber: 5-7g
- Fat: 5-7g
Cowboy Caviar is not only a treat for your taste buds but also a nutritious option packed with fiber and protein.
Now that you have the recipe under your belt, I can’t wait to hear how it goes! Grab those chips and invite your friends over for a flavor explosion that’ll have everyone raving! Happy cooking, and may your kitchen always be filled with warmth and loved ones.
Print
Cowboy Caviar
- Total Time: 45 minutes
- Yield: 4 servings 1x
- Diet: Vegan
Description
A vibrant and flavorful bean and veggie dip perfect for parties and gatherings.
Ingredients
- 1 can (15 oz) black beans, rinsed and drained
- 1 can (15 oz) corn kernels, rinsed and drained
- 1 cup cherry tomatoes, halved
- 1 red bell pepper, diced
- 1 avocado, diced
- 1/4 red onion, finely chopped
- 1/4 cup fresh cilantro, chopped
- 2 tablespoons olive oil
- 1–2 limes, juiced
- 1 teaspoon garlic powder
- 1 teaspoon chili powder
- Salt and pepper, to taste
Instructions
- Prep your ingredients: Rinse and drain the beans and corn. Chop tomatoes, bell peppers, onion, and cilantro.
- Mix it up in a large bowl: Combine beans, corn, tomatoes, bell pepper, avocado, onion, and cilantro in a bowl.
- Prepare the dressing: Whisk olive oil, lime juice, garlic powder, chili powder, salt, and pepper in a small bowl.
- Combine everything: Pour dressing over the mixture and toss gently to coat.
- Let it chill: Cover and refrigerate for at least 30 minutes to allow flavors to meld.
- Taste before serving and adjust seasonings as needed.
- Serve: Enjoy with tortilla chips.
Notes
Can be made ahead of time, and it tastes even better the next day.
- Prep Time: 15 minutes
- Cook Time: 0 minutes
- Category: Appetizer
- Method: Mixing
- Cuisine: Tex-Mex
Nutrition
- Serving Size: 1/2 cup
- Calories: 175
- Sugar: 3g
- Sodium: 150mg
- Fat: 7g
- Saturated Fat: 1g
- Unsaturated Fat: 6g
- Trans Fat: 0g
- Carbohydrates: 25g
- Fiber: 6g
- Protein: 8g
- Cholesterol: 0mg
Keywords: Cowboy Caviar, Tex-Mex dip, bean salad, party appetizer




