
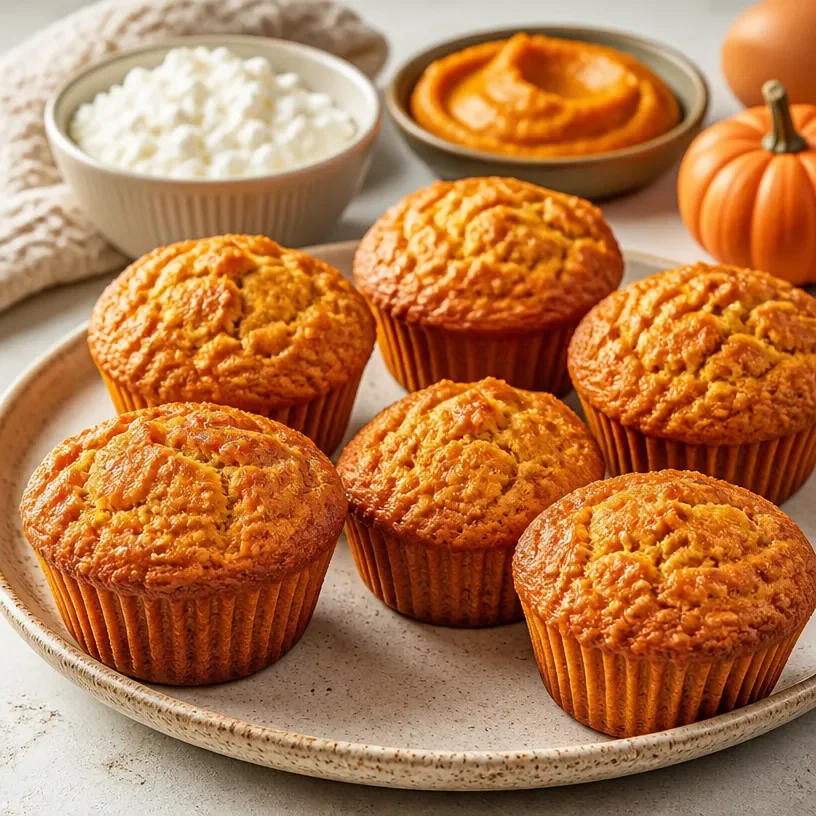
Protein Cottage Cheese Pumpkin Muffins
Embrace Fall with Protein-Packed Cottage Cheese Pumpkin Muffins
Welcome to my cozy kitchen, dear friends! As the leaves start to turn golden and the air carries that familiar crispness of fall, my heart does a little happy dance. There’s something so comforting about this season—the air gets cooler, sweaters come out of hiding, and baking becomes the top priority on my to-do list. Today, I’m thrilled to share a recipe that perfectly blends all the warm flavors of fall into portable, delectable bites: Protein Cottage Cheese Pumpkin Muffins.
These muffins are not just a treat for your taste buds—they’re also a satisfying way to fuel your day. Whether enjoyed as a post-workout snack, a hearty breakfast, or a cozy afternoon pick-me-up, they encapsulate everything I love about fall: warmth, comfort, and a sprinkle of nostalgia. Let’s dive in!
A Slice of Nostalgia
I still remember the first time I had a pumpkin muffin. It was during a family road trip to a cozy little town known for its autumn festivals. We stumbled into a quaint café, where the owner, an elderly lady with a heartwarming smile, served us the fluffiest pumpkin muffins with a dollop of cream cheese frosting. With every bite, I was transported to my grandmother’s kitchen, where the aroma of freshly baked goods mingled with the laughter of family gathered around the table. Those moments stayed with me, and since then, I’ve been on a quest to recreate that same feeling in my own kitchen.
Fast forward a few years, and I’ve learned to incorporate healthier ingredients into my baking. Enter cottage cheese—a protein powerhouse that transforms these muffins into a filling, nutritious treat. So gear up, fellow food lovers! Let’s make these Protein Cottage Cheese Pumpkin Muffins that are bound to bring smiles to all your loved ones.
Ingredients
-
1 cup pumpkin puree: The star of the show! Rich in vitamins and minerals, and adds moisture. For a twist, you can substitute it with sweet potato puree!
-
1 cup cottage cheese: Packed with protein, this dairy delight makes the muffins airy and rich. If you’re dairy-free, try silken tofu for a similar texture.
-
2 eggs: These help bind the ingredients together. If you’re vegan, a flaxseed meal or chia seed mixture (1 tablespoon of seeds with 2.5 tablespoons of water) works like magic!
-
1/3 cup honey or maple syrup: For natural sweetness! Replace with agave syrup or coconut sugar if you prefer.
-
1 cup whole wheat flour: For a healthy dose of fiber. You can also swap it for oat flour or almond flour for gluten-free options.
-
1 teaspoon baking powder: This gives our muffins that perfect rise. Make sure it’s fresh for the best results!
-
1/2 teaspoon baking soda: Works in conjunction with the baking powder for a fluffy texture.
-
1 teaspoon ground cinnamon: A warm spice that reminds me of cozy nights by the fire. Try adding nutmeg or pumpkin spice for a flavor twist!
-
1/2 teaspoon salt: Balances sweetness and enhances flavors.
-
1/2 cup walnuts or pecans (optional): For added crunch. Feel free to omit if you’re looking for a nut-free option!
Step-by-Step Instructions
-
Preheat your oven: First things first, let’s get that oven preheated to 350°F (175°C). A well-warmed oven ensures your muffins bake evenly with that delightful golden hue.
-
Combine wet ingredients: In a large mixing bowl, whisk together the pumpkin puree, cottage cheese, eggs, and honey/maple syrup. Take a moment to appreciate the beautiful colors—it’s like autumn in a bowl! Be sure to mix well until you achieve a smooth consistency. This is where the magic starts!
-
Mix dry ingredients: In a separate bowl, whisk the flour, baking powder, baking soda, cinnamon, and salt. Whisking ensures that the leavening agents are evenly distributed throughout the flour, leading to evenly risen muffins.
-
Combine wet and dry mixtures: Gently fold the dry ingredients into the wet mixture using a spatula. Be careful not to over-mix—just until it’s barely combined. A few lumps are perfectly fine; they will disappear during baking!
-
Add the nuts: If you’re opting for walnuts or pecans, now’s the time to fold them in. This adds a wonderful texture and nuttiness that contrasts beautifully with the soft muffin base.
-
Scoop into muffin tin: Line a muffin tin with paper liners or grease it lightly. Using a scoop or ladle, fill each muffin cup about three-quarters full. This gives them room to rise without overflowing—nobody likes muffin overflow!
-
Bake to perfection: Place your muffin tin in the preheated oven and bake for about 20-25 minutes. Your home will soon be filled with delightful pumpkin aromas that’ll have everyone flocking to the kitchen! Test doneness by inserting a toothpick into the center—if it comes out clean, they’re ready.
-
Cool and enjoy: Once baked, let the muffins cool in the tin for about 5 minutes before transferring them to a wire rack. Allowing them to cool prevents sogginess and preserves that lovely texture!
Serving Suggestions
These muffins are fabulous on their own, but if you want to elevate the experience, serve them warm with a smear of cream cheese or your favorite nut butter. Pair them with a cup of spiced chai tea or a warm latte for a cozy brunch vibe. You could even arrange them on a rustic wooden platter and sprinkle a little cinnamon on top for that Pinterest-perfect presentation!
Recipe Variations
- Chocolate Chip Cottage Cheese Pumpkin Muffins: Add a cup of dark chocolate chips to the batter for a sweet twist!
- Pumpkin Spice Latte Muffins: Add a shot of espresso or a tablespoon of instant coffee granules to the wet mix for a caffeinated kick!
- Banana-Pumpkin Hybrid: Swap half of the pumpkin puree for ripe mashed bananas for extra moistness and a buttery flavor.
- Nut-Free Version: Omit the nuts and add a handful of dried cranberries or chocolate pieces for a fruity bite!
- Savory Spin: Replace the cinnamon with savory spices like cumin and add shredded cheese for a delightful cheese muffin!
Chef’s Notes
Cooking is often a messy adventure in my kitchen, and that’s just how I like it! The best stories often come from kitchen mishaps. I once had a batch of pumpkin muffins that overflowed all over the oven—oh, what a sight! After a good cleanup, I learned to be more mindful about filling the muffin cups and now keep an eye on them in the oven, just in case. Every recipe has a personality of its own, and these muffins have taught me to embrace messiness with grace.
Over the years, I’ve also adjusted this recipe to suit the preferences of my friends and family. It has evolved from a simple treat to something that can accommodate a variety of dietary needs!
FAQs and Troubleshooting
Q: Why are my muffins dense?
A: Dense muffins can be a sign of overmixing the batter. Remember, mix just until combined for the fluffiest muffins!
Q: Can I use fresh pumpkin instead of canned puree?
A: Absolutely! Just make sure to roast or steam the pumpkin and then puree it until smooth.
Q: How do I store leftover muffins?
A: Let them cool completely, then store in an airtight container at room temperature for up to 3 days, or freeze for up to a month.
Q: Can I replace the flour with a gluten-free option?
A: Yes! You can use a 1:1 gluten-free flour blend to replace the whole wheat flour, and it should work just fine.
Nutritional Info (per muffin, approx.)
- Calories: 150
- Protein: 6g
- Carbohydrates: 22g
- Fat: 5g
- Fiber: 3g
- Sugar: 5g
These Protein Cottage Cheese Pumpkin Muffins are more than just a treat; they’re a cozy reminder that cooking can be a delightful journey filled with stories, creativity, and love. I hope you find joy in making them as much as I do! Happy baking, friends! 🍂🥯
Print
Protein Cottage Cheese Pumpkin Muffins
- Total Time: 40 minutes
- Yield: 12 muffins 1x
- Diet: Vegetarian
Description
These protein-packed pumpkin muffins are perfect for a hearty breakfast or snack, combining cozy fall flavors with nutritious ingredients.
Ingredients
- 1 cup pumpkin puree
- 1 cup cottage cheese
- 2 eggs
- 1/3 cup honey or maple syrup
- 1 cup whole wheat flour
- 1 teaspoon baking powder
- 1/2 teaspoon baking soda
- 1 teaspoon ground cinnamon
- 1/2 teaspoon salt
- 1/2 cup walnuts or pecans (optional)
Instructions
- Preheat your oven to 350°F (175°C).
- Combine the pumpkin puree, cottage cheese, eggs, and honey/maple syrup in a large mixing bowl.
- Mix the flour, baking powder, baking soda, cinnamon, and salt in a separate bowl.
- Combine the dry ingredients into the wet mixture gently.
- Add the nuts if using, folding them in carefully.
- Scoop the batter into muffin cups, filling each about three-quarters full.
- Bake for about 20-25 minutes until a toothpick comes out clean.
- Cool for 5 minutes in the tin before transferring to a wire rack.
Notes
Serve warm with cream cheese or nut butter. Great for brunch or as a snack!
- Prep Time: 15 minutes
- Cook Time: 25 minutes
- Category: Breakfast
- Method: Baking
- Cuisine: American
Nutrition
- Serving Size: 1 muffin
- Calories: 150
- Sugar: 5g
- Sodium: 200mg
- Fat: 5g
- Saturated Fat: 1g
- Unsaturated Fat: 4g
- Trans Fat: 0g
- Carbohydrates: 22g
- Fiber: 3g
- Protein: 6g
- Cholesterol: 30mg
Keywords: pumpkin muffins, healthy muffins, cottage cheese muffins
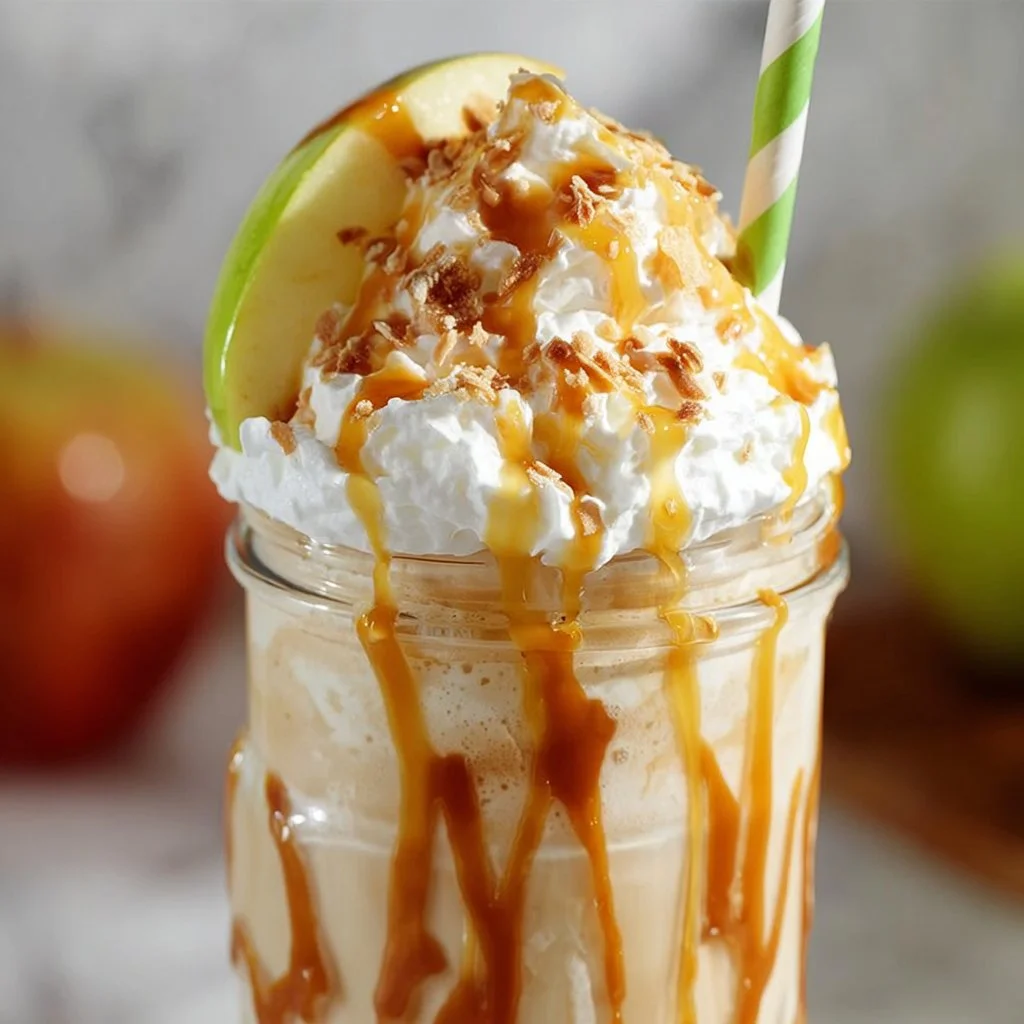
Caramel Apple Milkshake
Caramel Apple Milkshake: A Sweet Taste of Fall
Hello there, fellow food lovers! 🍏🍦 It’s Olivia Bennett here, and today, we’re diving into one of my all-time favorite treats — the Caramel Apple Milkshake! Imagine biting into a crisp, juicy apple drizzled with luscious caramel, but in shake form! This delight takes the essence of autumn and packs it into a glass, making it the perfect beverage to enjoy with friends or family during the cozy fall months, or really any time of the year when that sweet craving hits!
The thing I adore about this milkshake is the nostalgia it brings. Every sip reminds me of those carefree afternoons spent at the county fair, watching apple bobbing contests and enjoying all the caramel-coated goodies the vendors had to offer. This recipe is not only a fun twist on a classic milkshake, but also a fantastic way to make memories in the kitchen. It’s so simple yet delicious, perfect for anyone who wants to whip up something special without spending hours in the kitchen.
Now, whether you’re hunkering down after a long day or hosting a chilled-out movie night, this Caramel Apple Milkshake will surely bring everyone together. Plus, it’s a great opportunity to get creative! You can customize it to fit your tastes or dietary needs while still capturing that sweet caramel apple essence. So, let’s get our ingredients together and create something unforgettable!
Personal Story
Let me take you back to a fall day years ago. I was in high school, bursting with energy and a robust appetite. My friends and I saved up our allowances to hit up the annual apple festival. The sun was shining, leaves were falling, and the tantalizing aroma of baked goods filled the air. We made our first stop at the caramel apple booth, and boy, was it hard to resist! All of us traded bites of caramel apples, laughing and joking as we sweetened the day away.
That festival visit forever left a mark on my heart — not just for the sweets, but for the laughter and love we shared. Fast forward to me in my kitchen, reminiscing about those blissful days, and I decided to take that iconic combination of flavors and turn it into a milkshake! Blending nostalgia with culinary creativity is what it’s all about, isn’t it? Each sip tells a story, and I can’t wait for you to create your own!
Ingredients
Here’s what you’ll need to whip up this delightful treat. Each ingredient is chosen with love to help you create that authentic caramel apple flavor:
-
Vanilla Ice Cream: The base of our milkshake! For a dairy-free option, use coconut or almond milk ice cream instead. The creaminess is the secret to its luxurious texture.
-
Milk: We’re talking about whole milk for extra richness, but feel free to use almond milk, oat milk, or any plant-based milk for a lighter version.
-
Caramel Sauce: A must-have! You can use store-bought or homemade. To make it a bit healthier, try a date-based caramel for a natural sweetener.
-
Apples: Any variety will work, but Granny Smith or Honeycrisp provides the perfect balance of tartness and sweetness. If you want a different flavor profile, try using a flavored apple cider instead for a fruity twist.
-
Cinnamon: Just a pinch enhances the fall flavors! You can also use pumpkin spice if you want to amp up the autumn vibe.
-
Whipped Cream (optional): For that café-style finish, why not? Vegan whipped cream is widely available for a dairy-free version!
Remember, these ingredients can be adjusted based on your taste buds or pantry stock. Let your creativity flow!
Step-by-Step Instructions
Alright, it’s time to get blending! Grab your favorite blender (or immersion blender if you’re fancy), and let’s create something incredible.
-
Gather Your Ingredients: Make sure you have everything prepped and ready. Nothing worse than halfway through and realizing you’re missing a key component!
-
Slice the Apples: Take one or two apples (depending on how apple-y you want your shake) and slice them into small chunks. No need to peel; the skin adds a beautiful texture and nutrients. Bonus chef tip: squeeze a bit of lemon juice on the apple slices to help prevent browning!
-
Blend It Up: In your blender, combine 2 cups of vanilla ice cream, 1 cup of milk, ½ cup of caramel sauce, and the apple chunks. For a boost of flavor, sprinkle in a teaspoon of cinnamon.
-
Start Blending: Set your blender to high speed and blend until the mixture is smooth and creamy. If you prefer a thicker shake, add a bit more ice cream or decrease the milk; if you like it thinner, add more milk.
-
Taste Test Time: Once blended, take a little taste (make sure it’s safe to do so!) and see if you need more caramel or a sprinkle of cinnamon. Adjust according to your taste buds! It’s your masterpiece — make it count!
-
Chill, Baby, Chill: At this point, if you want, throw the milkshake in the freezer for about 10 minutes to thicken it even more. A perfect milkshake is creamy, but there’s something special about getting it extra chilly!
-
Serve: Grab your favorite tall glasses; I recommend a clear glass for that beautiful swirl of colors. Drizzle some caramel along the inside of the glasses before pouring in your milkshake — it’s all about presentation!
-
Top It Off: If you’re feeling fancy, dollop whipped cream generously on top, then drizzle on more caramel sauce, and maybe a sprinkle of cinnamon for good measure. Add some small apple slices for garnish if you want to wow your guests!
And voilà! You’ve made a delicious Caramel Apple Milkshake. How easy was that?
Serving Suggestions
This milkshake is best served immediately while it’s icy and fresh. You can serve it alongside some warm cinnamon donuts for a cozy treat or with a slice of apple pie as a delightful dessert duo! For a fun touch, consider using decorative straws or mixing in mini caramel candies for added texture. Don’t forget to snap a pic before diving in — it’s Instagram-worthy for sure!
Recipe Variations
-
Peanut Butter Lover: Swirl in some creamy peanut butter for a delightful caramel apple peanut butter milkshake!
-
Chocolate Twist: Add a couple of tablespoons of cocoa powder or blend in some chocolate ice cream for a chocolaty caramel apple delight.
-
Nutty Notes: Toss in crushed nuts like pecans or walnuts for a crunchy twist — hello, texture!
-
Spiced-Up Version: Substitute apple pie spice for the cinnamon for a more complex flavor profile, bringing in notes of nutmeg and clove!
-
Healthier Swap: Use Greek yogurt instead of ice cream for a lighter, protein-packed version; just blend in some extra honey to sweeten it up.
Chef’s Notes
This recipe has truly evolved over time! I remember the first time I tried making this milkshake; I ended up with a lumpy, overly sweet disaster — and it was the most fun disaster ever! Through experimentation, I honed in on the perfect balance of flavors and textures. The key is to have fun in the kitchen! Whether you make a mistake or create magic, it’s all part of the process!
Also, if you end up with extra caramel sauce (is there even such a thing?), it’s fantastic drizzled over pancakes, waffles, or even stirred into oatmeal for breakfast! That’s how we sustainably embrace our kitchen adventures with the leftovers!
FAQs and Troubleshooting
How can I make this milkshake vegan?
Simply substitute the milk and ice cream with plant-based alternatives, and ensure your caramel sauce is vegan-friendly!
Can I store leftovers?
While this milkshake is best enjoyed fresh, you can store it in a sealed container in the freezer for a little while. Just give it a good stir or re-blend it if it hardens too much.
My milkshake is too thin; what do I do?
If your shake ends up too runny, simply add a bit more ice cream and re-blend until you reach your desired consistency.
What’s the best apple for a milkshake?
Granny Smith or Honeycrisp apples work best for that perfect balance of sweet and tart! However, feel free to experiment with your favorites!
Nutritional Info
Serving Size: 1 milkshake
Calories: ~500 (depending on ingredients used)
Fat: 22g
Carbohydrates: 58g
Protein: 7g
Sugar: 45g
Note: Nutritional values will vary based on ingredient substitutions.
So, there you have it — a heavenly Caramel Apple Milkshake that’ll make your taste buds dance! I can’t wait for you to try this recipe and make it your own. Remember, cooking (and shake-making!) is all about joy, creativity, and love. Enjoy every sip, and happy cooking! 🍏❤️
Print
Caramel Apple Milkshake
- Total Time: 10 minutes
- Yield: 2 servings 1x
- Diet: Vegetarian
Description
A delightful milkshake capturing the essence of autumn with the flavors of caramel and apple.
Ingredients
- 2 cups vanilla ice cream
- 1 cup whole milk (or plant-based milk)
- ½ cup caramel sauce (store-bought or homemade)
- 1–2 apples (Granny Smith or Honeycrisp)
- 1 teaspoon cinnamon (or pumpkin spice)
- Whipped cream (optional, for topping)
Instructions
- Gather Your Ingredients: Make sure you have everything prepped and ready.
- Slice the Apples: Cut apples into small chunks, keeping the skin on for texture.
- Blend It Up: Combine ice cream, milk, caramel sauce, and apple chunks in the blender.
- Start Blending: Blend until smooth and creamy, adjusting thickness as desired.
- Taste Test Time: Adjust caramel or cinnamon to your preference.
- Chill, Baby, Chill: Optional, chill the milkshake in the freezer for 10 minutes.
- Serve: Pour into glasses and drizzle caramel along the inside before serving.
- Top It Off: Add whipped cream, more caramel, and optional apple slices for garnish.
Notes
This milkshake is best served immediately, but you can store leftovers in the freezer.
- Prep Time: 10 minutes
- Cook Time: 0 minutes
- Category: Beverage
- Method: Blending
- Cuisine: American
Nutrition
- Serving Size: 1 milkshake
- Calories: 500
- Sugar: 45g
- Sodium: 150mg
- Fat: 22g
- Saturated Fat: 14g
- Unsaturated Fat: 8g
- Trans Fat: 0g
- Carbohydrates: 58g
- Fiber: 2g
- Protein: 7g
- Cholesterol: 60mg
Keywords: caramel apple milkshake, fall treat, sweet beverage, dessert, milkshake recipe




